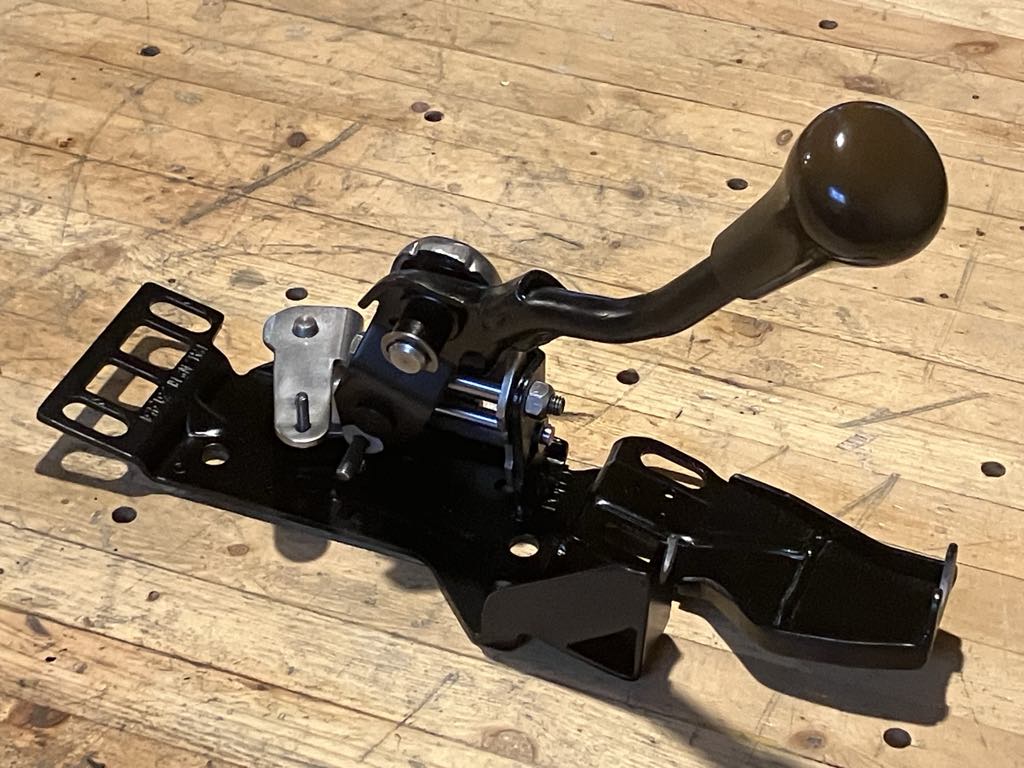
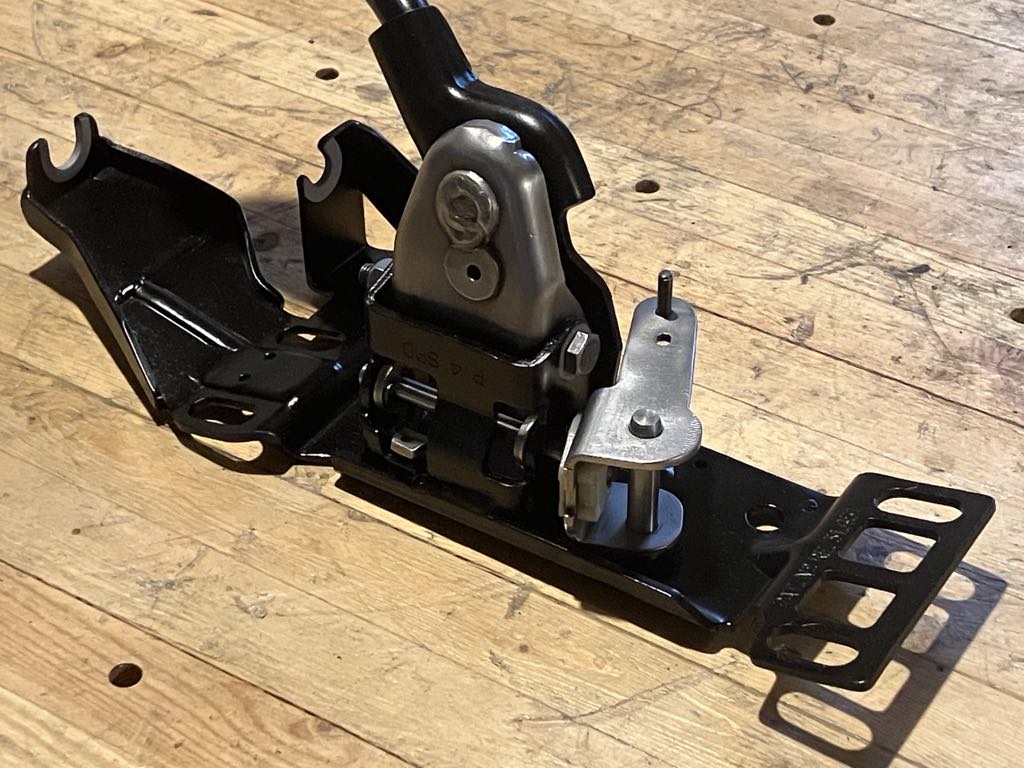
I put the shifter assembly onto the transmission today.
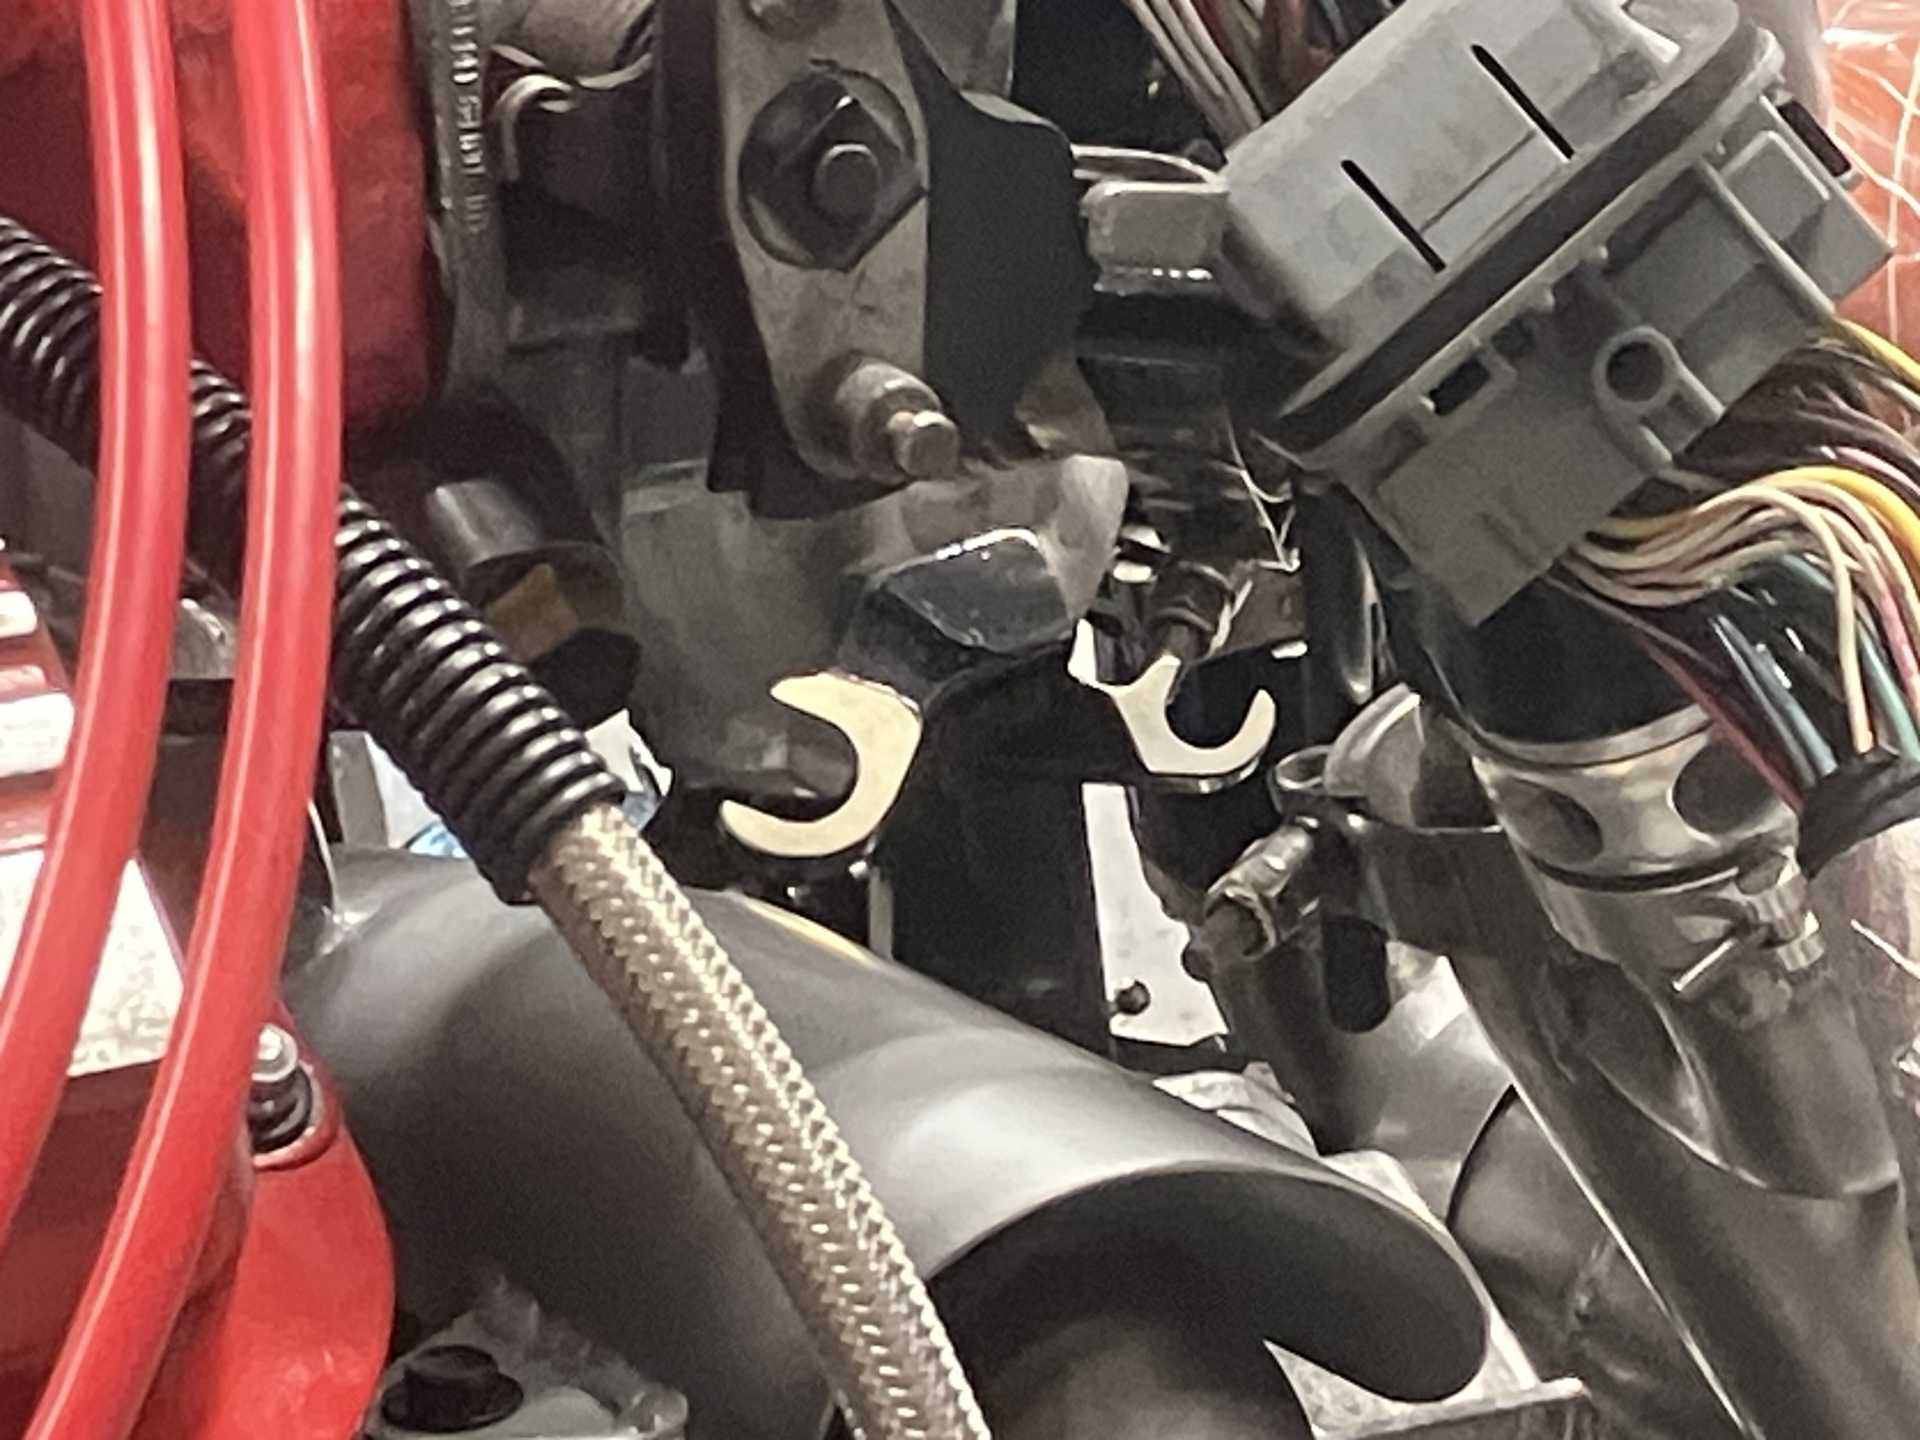
From the centre firewall area, there is a fairly straight shot to the cable mounts:
Unfortunately, it seems excessively hard (operating the levers manually) to shift into 1/2/5/R. 3/4 are normal.
I think the centering spring force is creating too much friction in the mechanism. I installed the mechanism dry (I didn’t pre-oil it), which could be a factor.
I might get springs that are in-between (in terms of stiffness) stock and the ones I have now.
[This message has been edited by pmbrunelle (edited 05-13-2025).]
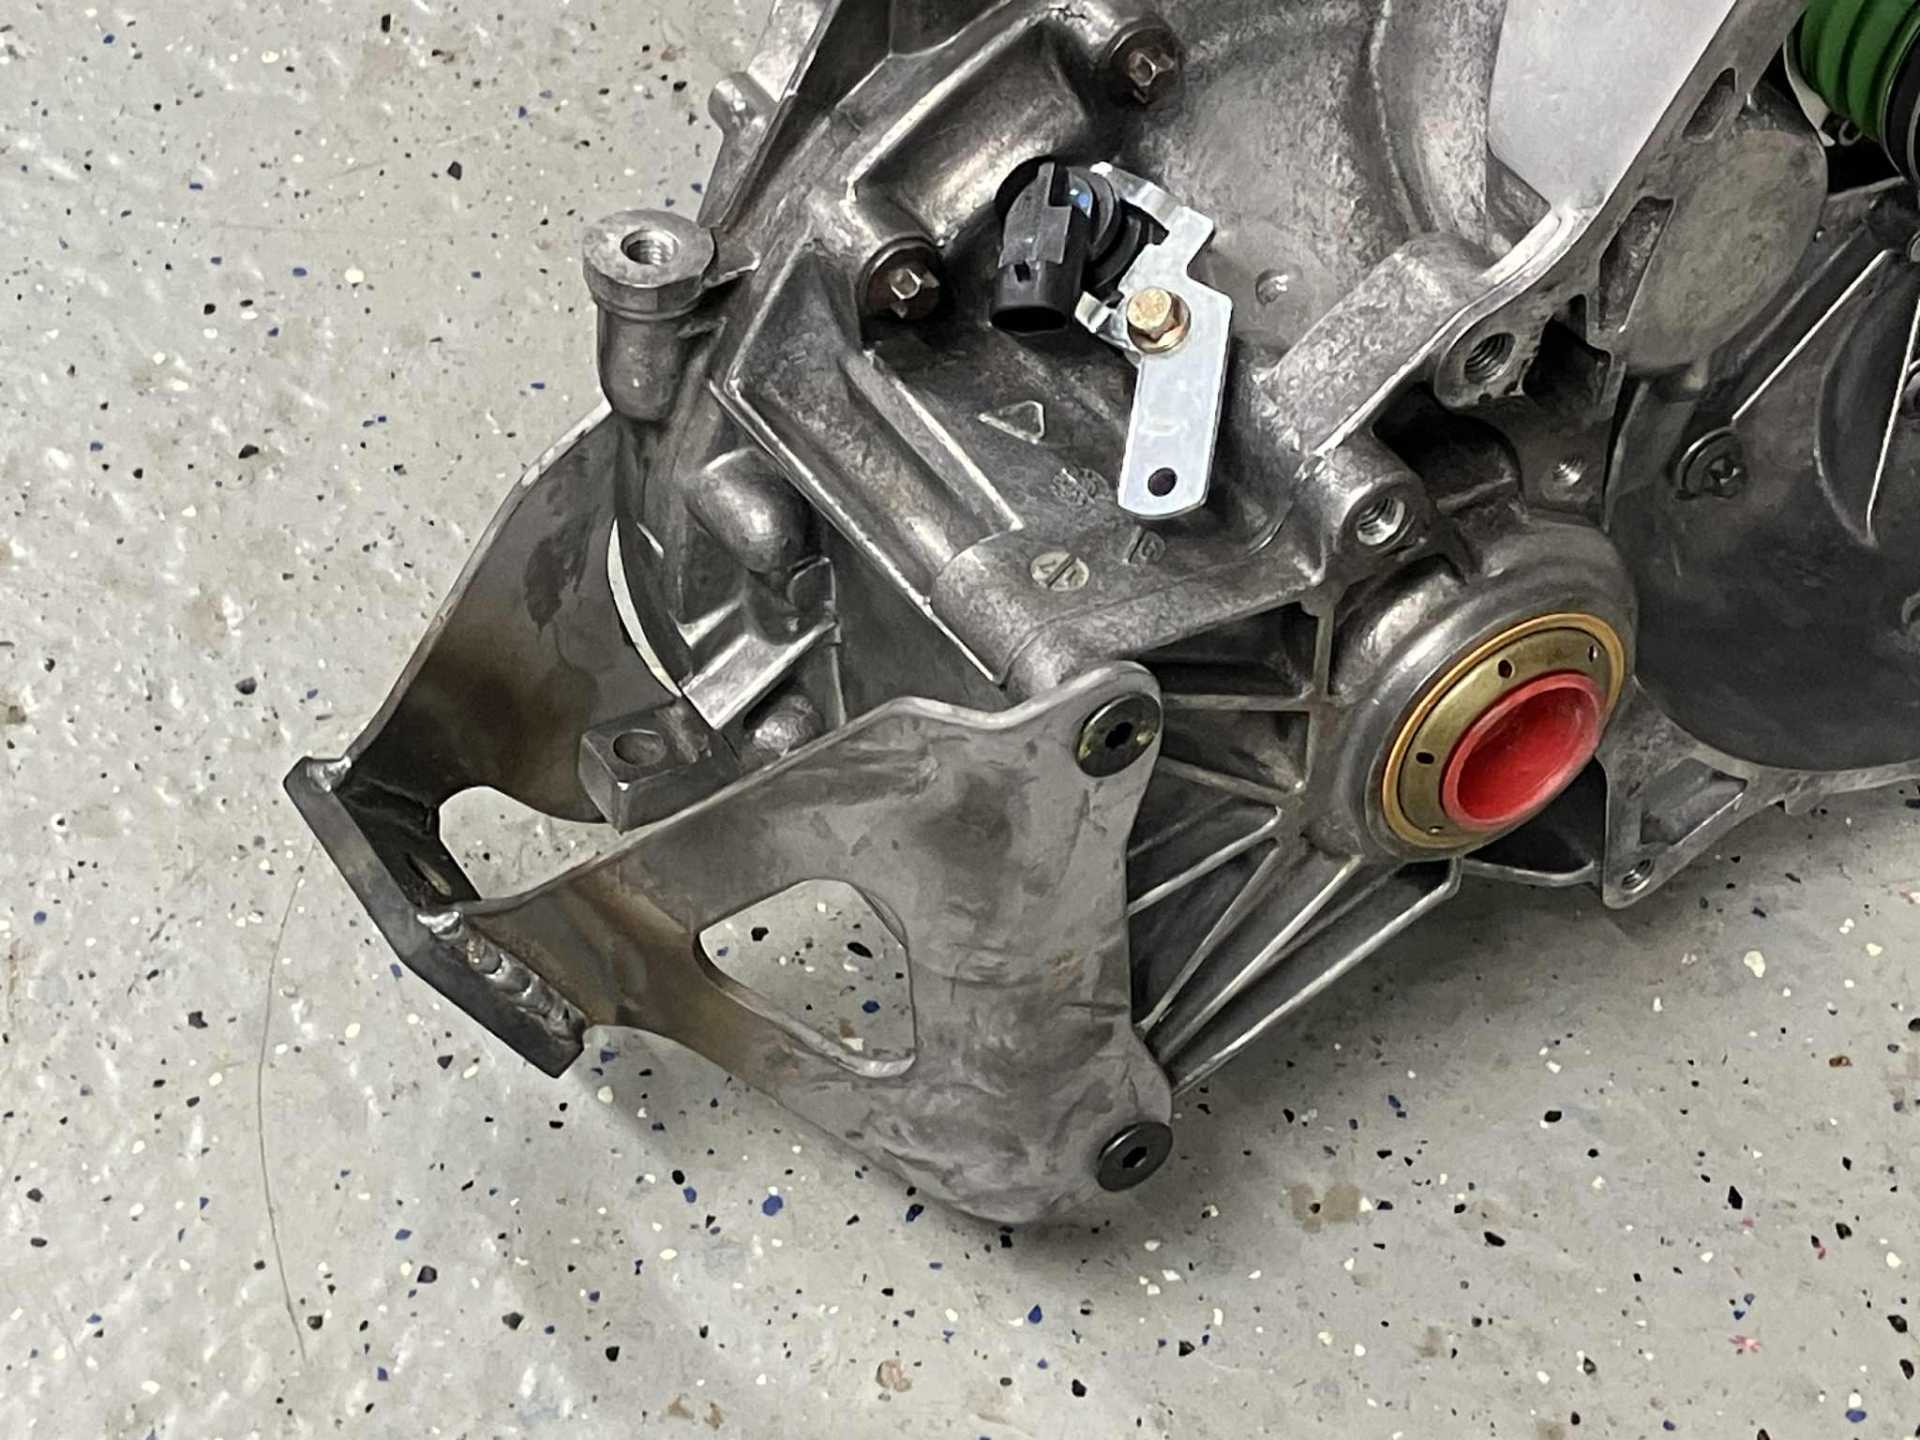
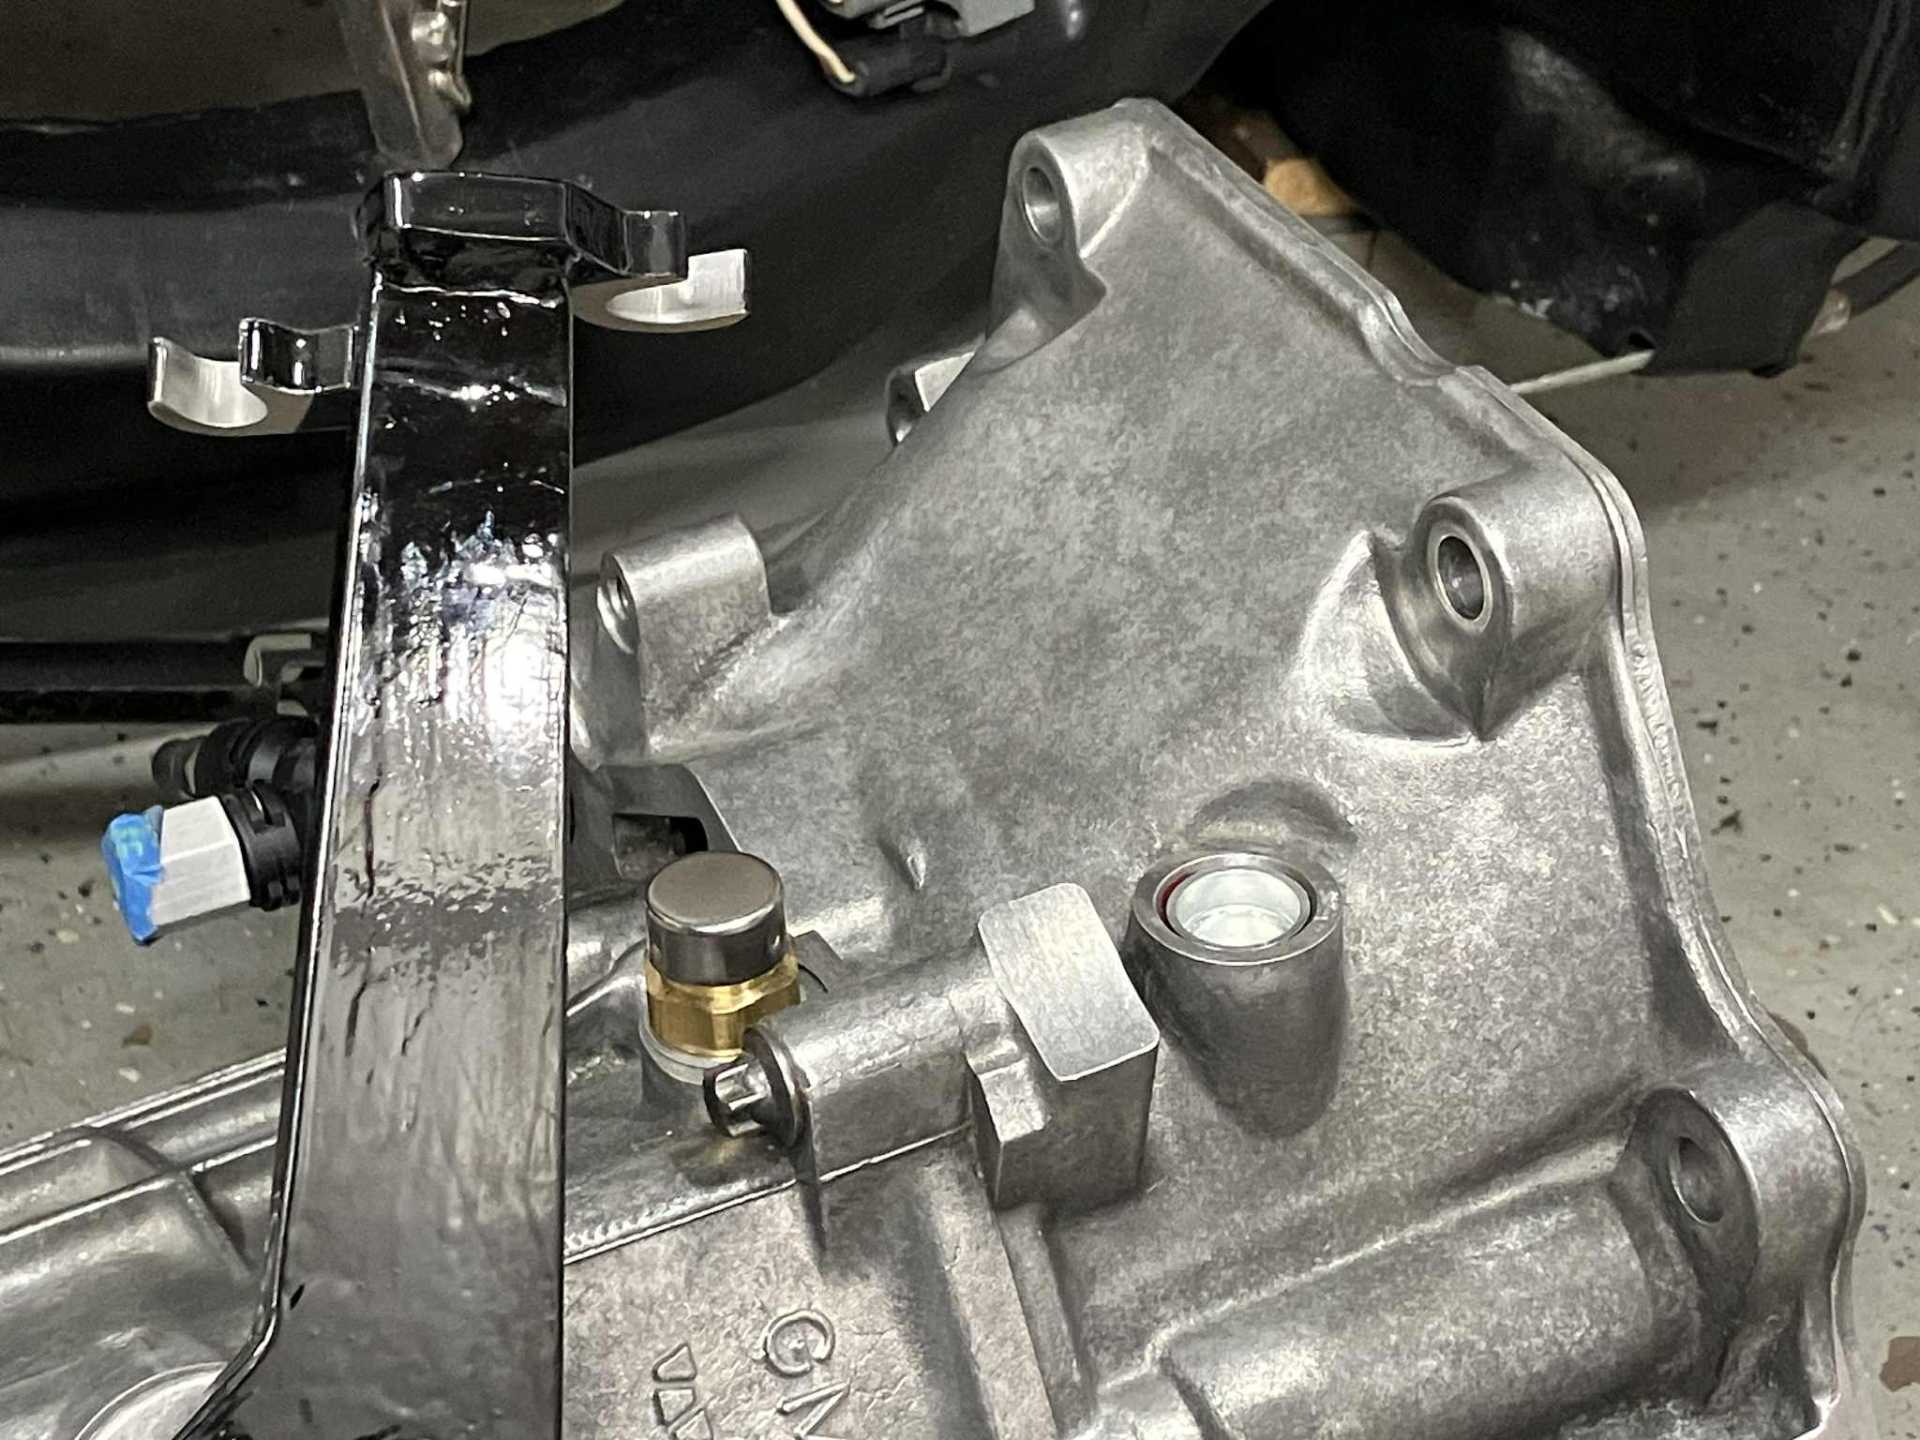
Modifications: 1. Removed Muncie Reverse cam and roller "interlock" hardware 2. Removed Muncie Reverse lamp switch hardware 3. Removed Muncie select spring 4. Welded on studs to use off-the-shelf rod ends as cable ends 5. Straightened the "dogleg" bend in the stock shift lever as the stock shift lever slightly interferes with the plastic shifter console trim piece 6. Added new cable mounts for the Cablecraft cables.
It looks like you added some gussets too, it looks great!
------------------ "I am not what you so glibly call to be a civilized man. I have broken with society for reasons which I alone am able to appreciate. I am therefore not subject to it's stupid laws, and I ask you to never allude to them in my presence again."
I invited Lou Dias to trash me in my own thread, he refused. sorry. if he trashes your thread going after me. I tried.
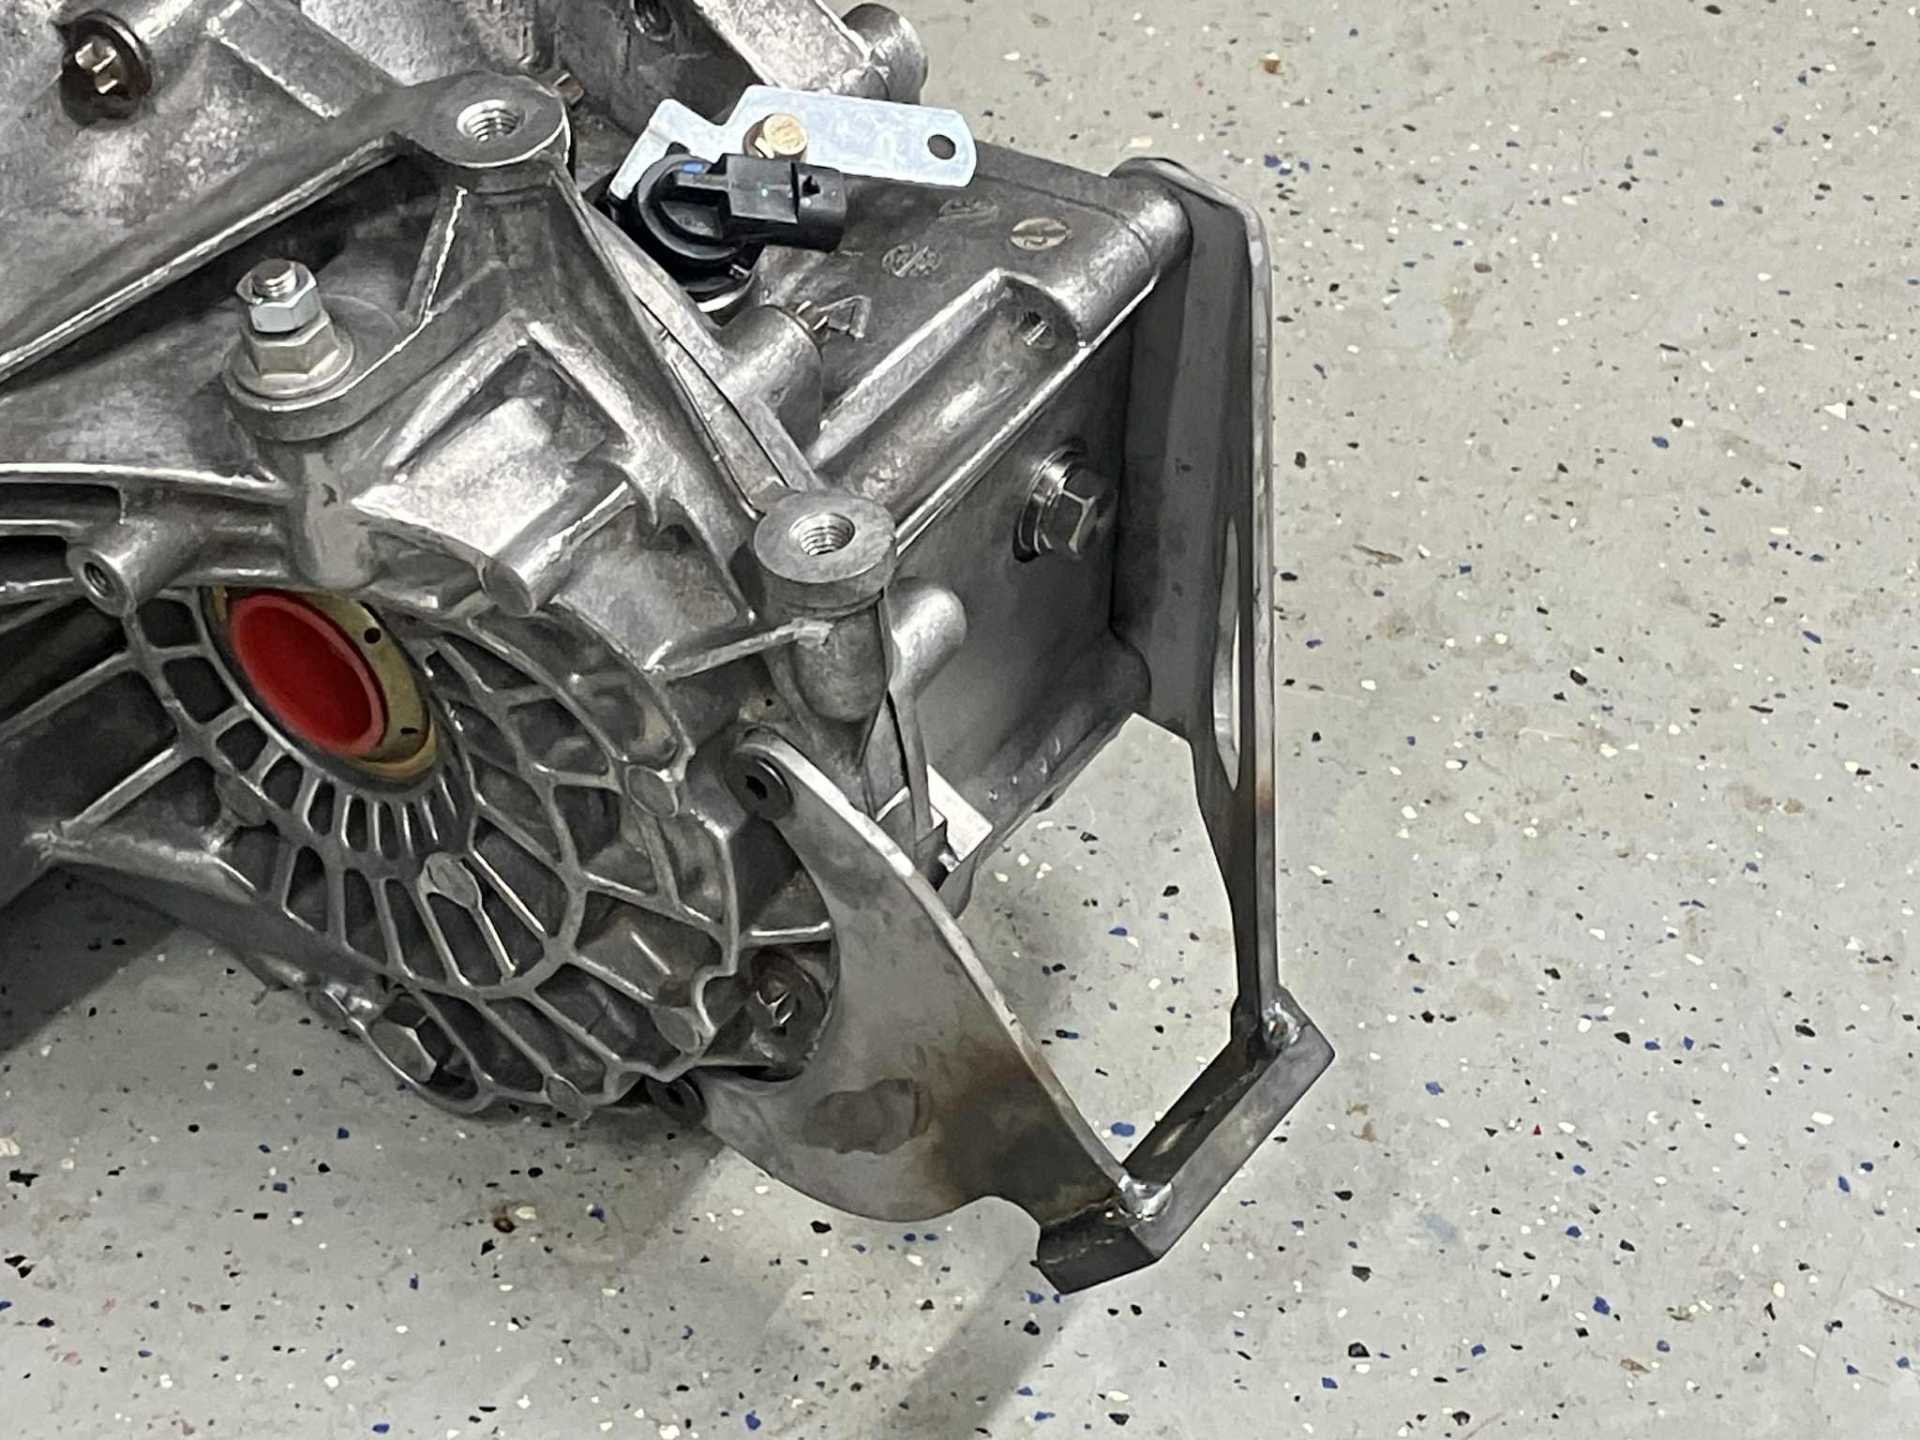
I was concerned about wrench clearance for the mechanic, but sometimes concessions need to be made for the engineer!
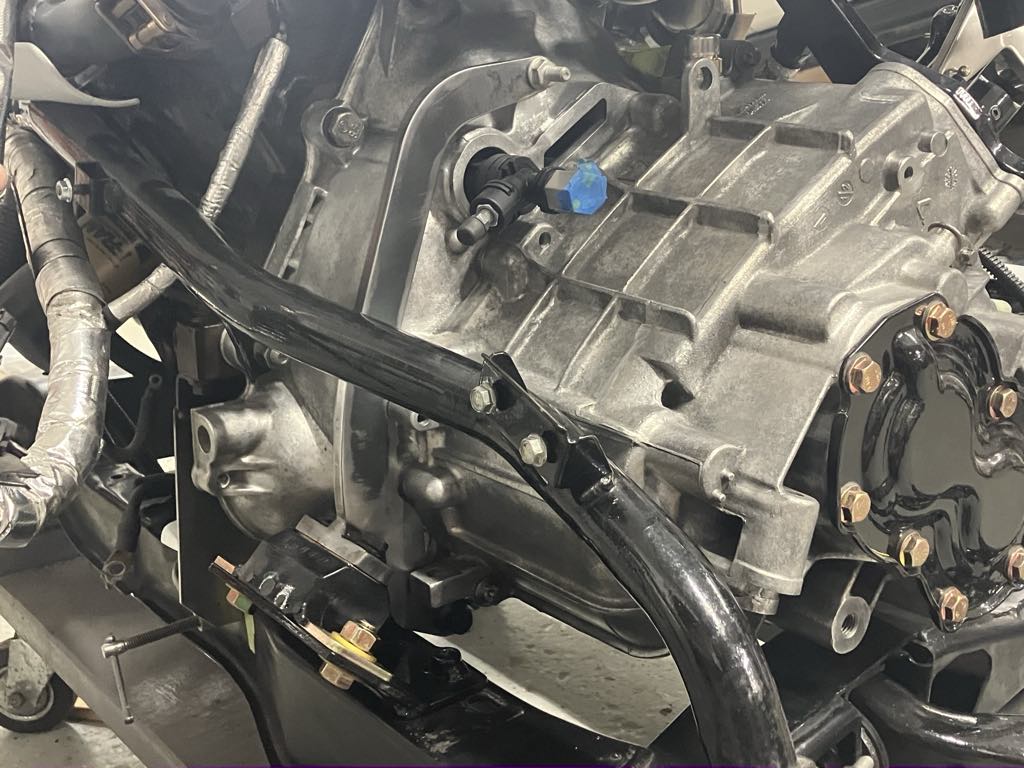
In the photo, many of the features are hidden with the darkness of the satin black paint. I'm not sure how I could easily enhance visibility of dark parts like this in photos.
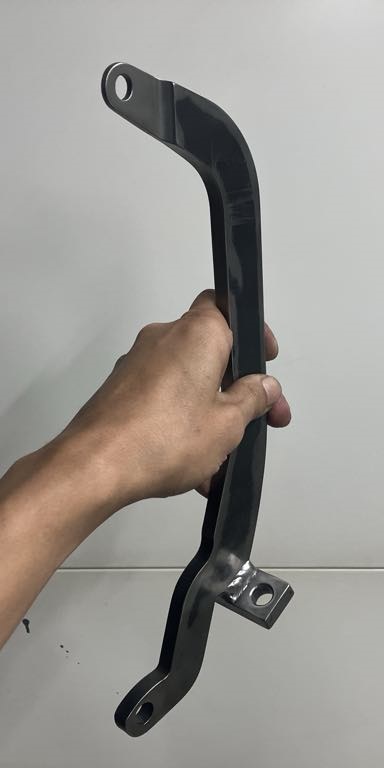
This is my "banana" style front mount bracket for my F23:
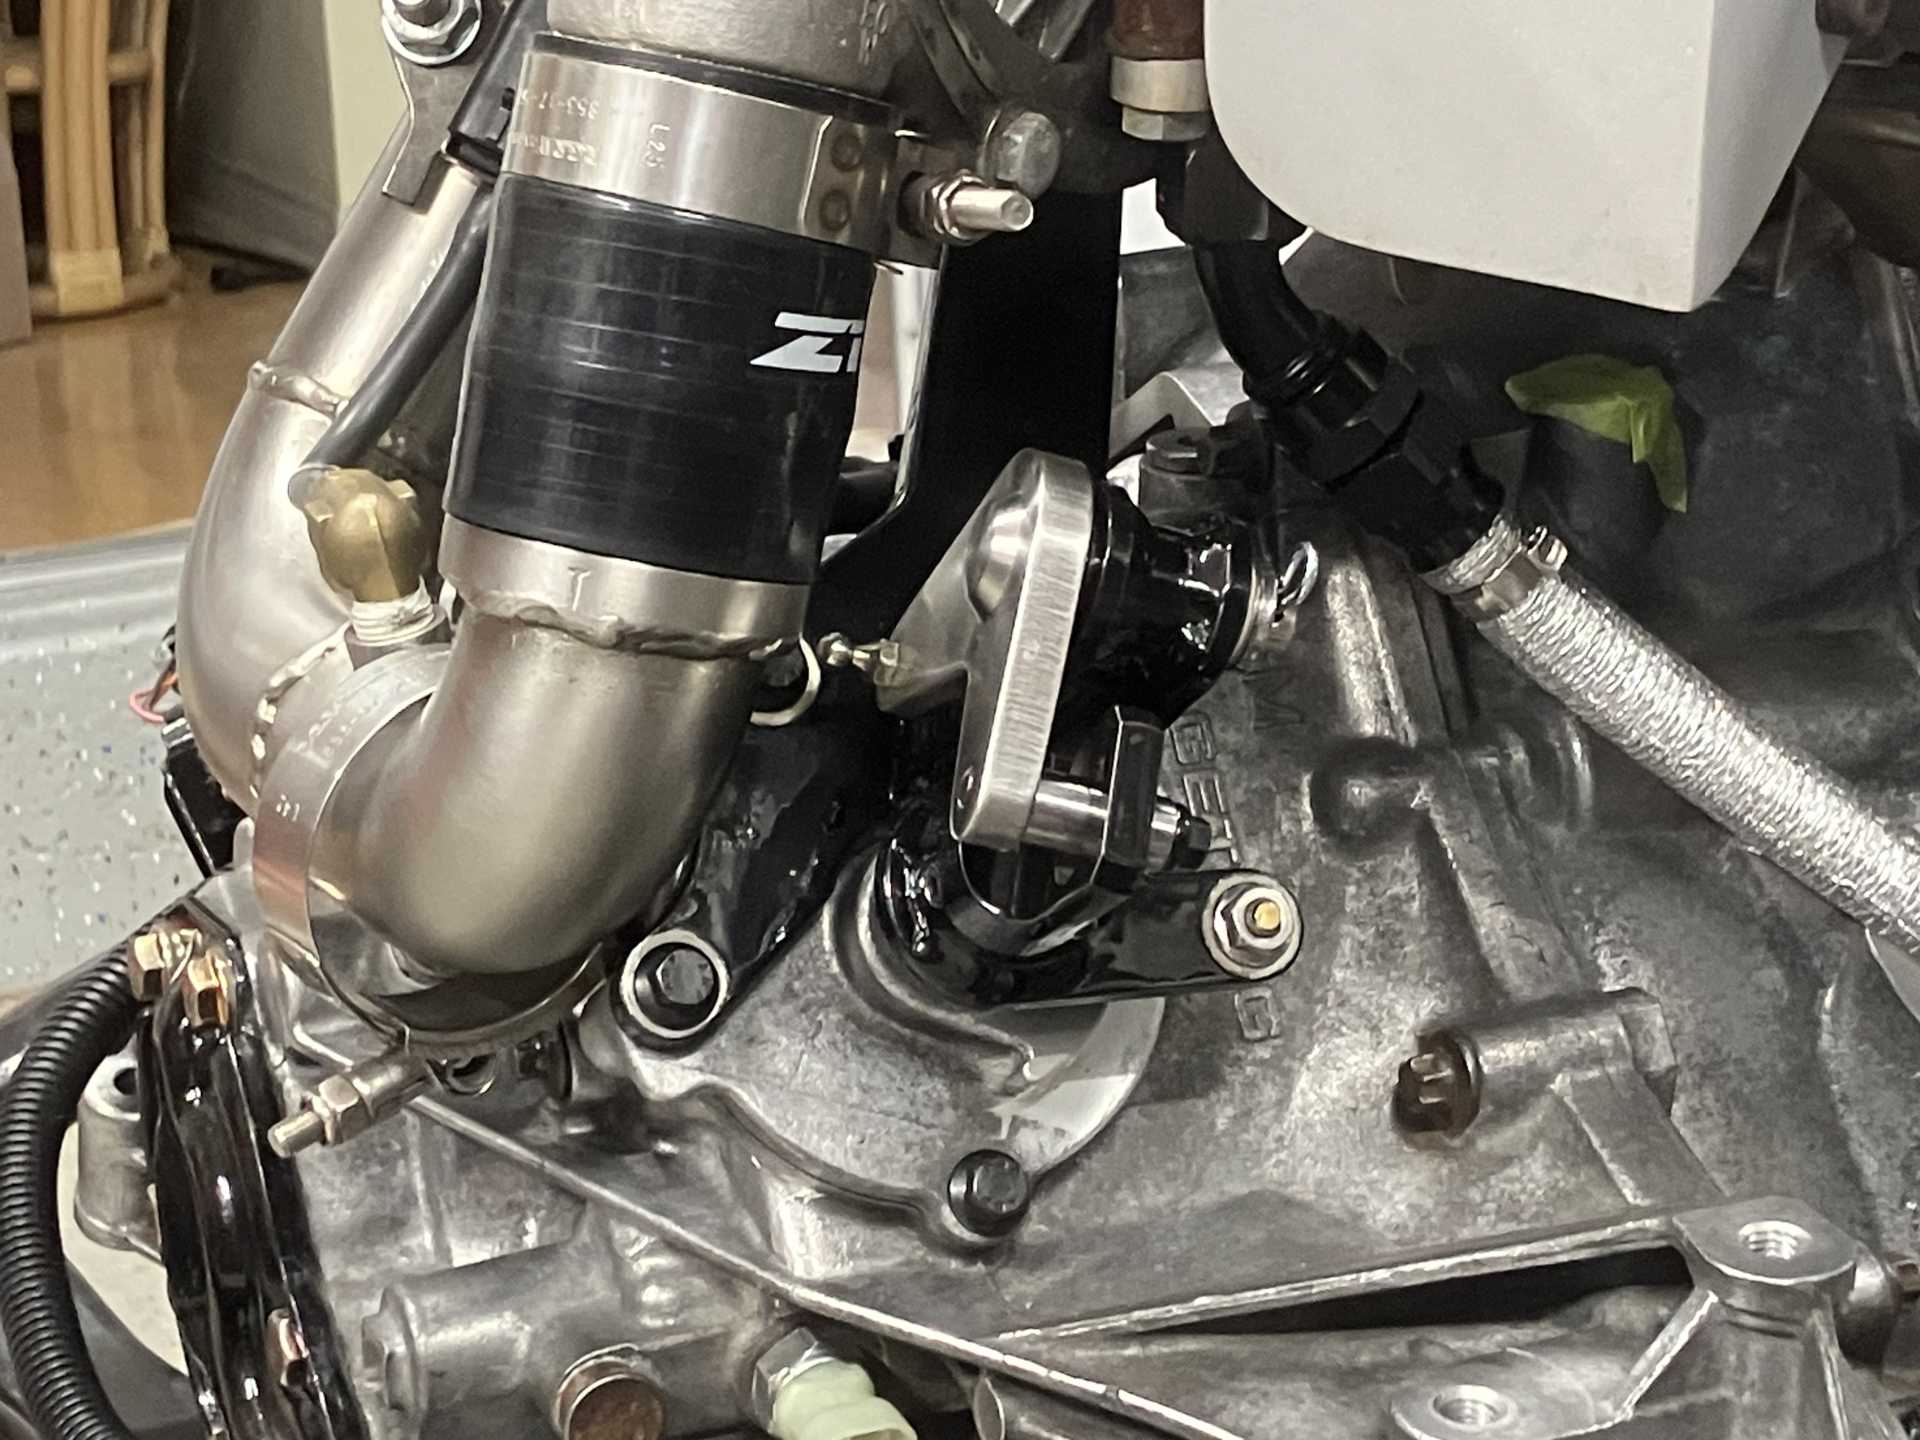
It's a tight fit, but it should work:
I'm using Rodney Dickman's poly transmission mounts, but I substituted the original Energy Suspension 3.1108 mounts for the shorter 3.1158.
The shorter poly mount made just enough room to have enough section thickness in the banana for strength. Also, the shorter poly mount left more space to easily install/remove the two mount-to-bracket bolts.
Next step is the rear mount...
I'm assuming you haven't driven it yet with the poly mounts in. Are you concerned about it being too rough? Or is the engine smooth enough that you don't notice it?
I remember back in the day when I went with a poly dog bone, and I noticed the vibration immediately. I ended up putting rubber washers between the seat track and the floor to help isolate some of the vibration... which seemed to work, but it might have just been placebo.
In the photo, many of the features are hidden with the darkness of the satin black paint. I'm not sure how I could easily enhance visibility of dark parts like this in photos.
I recently discovered SprayMax Clear Glamour and Headlight Clear... and now I'm clear coating ALL THE THINGS!
Originally posted by 82-T/A [At Work]: I'm assuming you haven't driven it yet with the poly mounts in. Are you concerned about it being too rough? Or is the engine smooth enough that you don't notice it?
I remember back in the day when I went with a poly dog bone, and I noticed the vibration immediately. I ended up putting rubber washers between the seat track and the floor to help isolate some of the vibration... which seemed to work, but it might have just been placebo.
I have three polyurethane mounts and a spherical bearing dogbone on the Storm Trooper's stock V6 powertrain. To me it's noticeable but not objectionable.
Originally posted by 82-T/A [At Work]: I'm assuming you haven't driven it yet with the poly mounts in. Are you concerned about it being too rough? Or is the engine smooth enough that you don't notice it?
I have always ran Rodney’s poly trans mounts, poly lower engine mount, and poly dogbone on this Fiero, as well as on my previous Fiero.
The aftermarket replacement rubber trans mounts would tear apart in no time (a 1-3 month timeframe) with a stock drivetrain, so it was a no-brainer to keep this setup. Rodney’s poly mounts have been reliable for me and never needed replacement.
Maybe there is NVH, but I’m not very aware of those things. I think I have a high tolerance for NVH.
If you look really carefully, I see a spec of dust near the mounting point.
quote
Originally posted by pmbrunelle: I have always ran Rodney’s poly trans mounts, poly lower engine mount, and poly dogbone on this Fiero, as well as on my previous Fiero.
The aftermarket replacement rubber trans mounts would tear apart in no time (a 1-3 month timeframe) with a stock drivetrain, so it was a no-brainer to keep this setup. Rodney’s poly mounts have been reliable for me and never needed replacement.
Maybe there is NVH, but I’m not very aware of those things. I think I have a high tolerance for NVH.
I'm willing to bet you've got the balance of the motor pretty awesome... but yeah... I'll have to consider how I go too when I put my engine back together. It's only going to be a 3.4 V6/60 (NA), but looking at the transmission mounts... it's just a hook in a hole with rubber formed around it. Really doesn't seem at all like it would last that long.
[This message has been edited by 82-T/A [At Work] (edited 07-01-2025).]