Pennock's Fiero Forum
  General Fiero Chat
  RCR's body mods... (Page 11)

Post New Topic  Post A Reply
Email This Page to Someone! | Printable Version

This topic is 17 pages long:  1   2   3   4   5   6   7   8   9   10   11   12   13   14   15   16   17 
Previous Page | Next Page
next newest topic | next oldest topic
RCR's body mods... by RCR
Started on: 06-15-2009 07:28 PM
Replies: 657 (38239 views)
Last post by: RCR on 11-17-2023 07:56 AM
dobie1
Member
Posts: 450
From: BC, Canada
Registered: Jun 2005


Feedback score: N/A
Leave feedback

Rate this member

Report this Post09-30-2016 08:51 PM Click Here to See the Profile for dobie1Send a Private Message to dobie1Edit/Delete MessageReply w/QuoteDirect Link to This Post
Nice mirror Bob what is it off of?
IP: Logged
RCR
Member
Posts: 4397
From: Shelby Twp Mi
Registered: Sep 2002


Feedback score:    (7)
Leave feedback


Total ratings: 102
Rate this member

Report this Post10-01-2016 09:34 AM Click Here to See the Profile for RCRSend a Private Message to RCREdit/Delete MessageReply w/QuoteDirect Link to This Post
 
quote
Originally posted by dobie1:

Nice mirror Bob what is it off of?


97(ish) Olds Aurora.

Bob

IP: Logged
Bozzie
Member
Posts: 1188
From: Plainville,Ct. U.S.A
Registered: Oct 2007


Feedback score: (1)
Leave feedback

Rate this member

Report this Post10-02-2016 05:19 PM Click Here to See the Profile for BozzieSend a Private Message to BozzieEdit/Delete MessageReply w/QuoteDirect Link to This Post
Bob, That mirror flows pretty nice with your body lines there. Good Choice. Thanks for the dimensions on those rear vents. My area is alittle smaller to work with but proportionally i'll adapt to your dimensions. Love the ingenuity with the curtain rod ! I look around my shop all the time for Mc'gyver stuff ! Keep it up, love looking at the updates !

Boz
IP: Logged
RCR
Member
Posts: 4397
From: Shelby Twp Mi
Registered: Sep 2002


Feedback score:    (7)
Leave feedback


Total ratings: 102
Rate this member

Report this Post10-12-2016 10:47 AM Click Here to See the Profile for RCRSend a Private Message to RCREdit/Delete MessageReply w/QuoteDirect Link to This Post
 
quote
Originally posted by Bozzie:

Bob, That mirror flows pretty nice with your body lines there. Good Choice. Thanks for the dimensions on those rear vents. My area is alittle smaller to work with but proportionally i'll adapt to your dimensions. Love the ingenuity with the curtain rod ! I look around my shop all the time for Mc'gyver stuff ! Keep it up, love looking at the updates !

Boz


Thanx Boz...and you're most welcome.

Bob
IP: Logged
RCR
Member
Posts: 4397
From: Shelby Twp Mi
Registered: Sep 2002


Feedback score:    (7)
Leave feedback


Total ratings: 102
Rate this member

Report this Post12-24-2016 02:57 PM Click Here to See the Profile for RCRSend a Private Message to RCREdit/Delete MessageReply w/QuoteDirect Link to This Post
Halloween and cold weather got in the way of further progress. So, nothin' happening here.

Pic of another hobby of mine:
This images is larger than 153600 bytes. Click to view.


Merry Christmas everyone, and have a great and safe holiday.

Bob

[This message has been edited by RCR (edited 12-24-2016).]

IP: Logged
RCR
Member
Posts: 4397
From: Shelby Twp Mi
Registered: Sep 2002


Feedback score:    (7)
Leave feedback


Total ratings: 102
Rate this member

Report this Post03-09-2017 07:37 AM Click Here to See the Profile for RCRSend a Private Message to RCREdit/Delete MessageReply w/QuoteDirect Link to This Post
Been a cold winter, but I'm ready to get out of hibernation. I've managed to do a couple of small things.

Started working on mounting pass seat. And, ordered lights for the front.

I'm going to try the lights amida looked at for his 512 nose, the Prelude fog and turn/marker lights.

I think the curve should fit well with the opening.


Hopefully it will be a productive year.

Bob
IP: Logged
Sage
Member
Posts: 2901
From: USA
Registered: Nov 1999


Feedback score:    (14)
Leave feedback


Total ratings: 69
Rate this member

Report this Post03-09-2017 09:30 AM Click Here to See the Profile for SageSend a Private Message to SageEdit/Delete MessageReply w/QuoteDirect Link to This Post
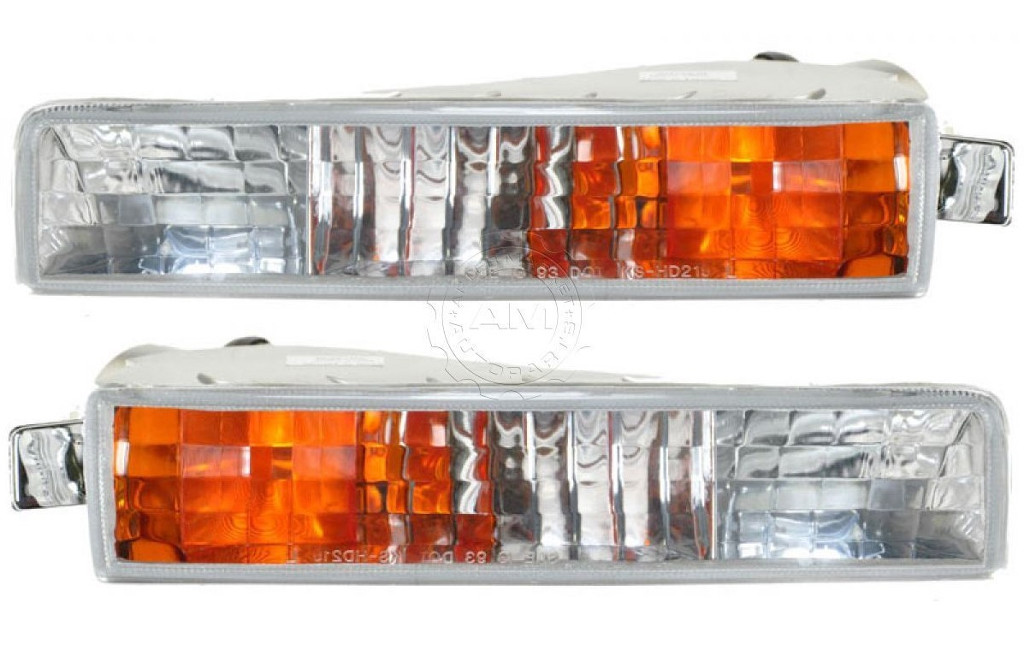
Lights look like a great choice to me. Anxious to see how they work out.

Also looking forward to seeing your car come together.

"Those who can...do..those who can't...watch!"


Man, you really went all out for halloween! Good lookin' props! I think you could probably be employed by a production company somewhere!.....You're not all that far from Disney......r ya?


HAGO!
IP: Logged
solotwo
Member
Posts: 5374
From: Grand Rapids, MI. USA
Registered: Jun 2002


Feedback score:    (9)
Leave feedback


Total ratings: 62
Rate this member

Report this Post03-09-2017 10:09 AM Click Here to See the Profile for solotwoSend a Private Message to solotwoEdit/Delete MessageReply w/QuoteDirect Link to This Post
Looks like you are progressing.
IP: Logged
Neils88
Member
Posts: 4045
From: Jeddore,Nova Scotia
Registered: Aug 2013


Feedback score: N/A
Leave feedback


Total ratings: 56
Rate this member

Report this Post03-09-2017 09:15 PM Click Here to See the Profile for Neils88Send a Private Message to Neils88Edit/Delete MessageReply w/QuoteDirect Link to This Post
Great looking lights, Bob! Can't wait to see them in place. Did they all come with wiring harnesses or are they going to be hard to install?
IP: Logged
RCR
Member
Posts: 4397
From: Shelby Twp Mi
Registered: Sep 2002


Feedback score:    (7)
Leave feedback


Total ratings: 102
Rate this member

Report this Post03-10-2017 09:32 AM Click Here to See the Profile for RCRSend a Private Message to RCREdit/Delete MessageReply w/QuoteDirect Link to This Post
Thanx for checking in, guys.

Neil: the fogs came with everything, harnesses, relays, and switch. The markers will have to be wired, no big deal.

Steve; thanx.

Sage: thanx. I do love Halloween and decorating. Disney? It's about 1500 miles away, but compared to the moon, it's close. It's all relative.

Bob
IP: Logged
RCR
Member
Posts: 4397
From: Shelby Twp Mi
Registered: Sep 2002


Feedback score:    (7)
Leave feedback


Total ratings: 102
Rate this member

Report this Post04-07-2017 07:59 PM Click Here to See the Profile for RCRSend a Private Message to RCREdit/Delete MessageReply w/QuoteDirect Link to This Post
Starting to look at the mods for the front so I can button that up. Still a little cold for glass, but CAD works.

Here's what I'm thinking. Any thoughts?


Also bought some HHR side markers for the front.


Last weekend, I also picked up an Subaru Impreza third brake light from the rear spoiler. Looks like it should fit the rear deck well. (no pic yet )

Might be able to get something done tomorrow, we'll see...

Bob
IP: Logged
PFF
System Bot
RCR
Member
Posts: 4397
From: Shelby Twp Mi
Registered: Sep 2002


Feedback score:    (7)
Leave feedback


Total ratings: 102
Rate this member

Report this Post04-08-2017 02:51 PM Click Here to See the Profile for RCRSend a Private Message to RCREdit/Delete MessageReply w/QuoteDirect Link to This Post
Playing with the CAD some more. May be changing up the hood and lights a bit.


And the possible view through the louvers.


I also had a few thoughts about the nose and valence.


That's it for now...
Bob
IP: Logged
motoracer838
Member
Posts: 3751
From: Edgewater Co. USofA
Registered: Jan 2006


Feedback score: (2)
Leave feedback


Total ratings: 83
Rate this member

Report this Post04-09-2017 08:08 AM Click Here to See the Profile for motoracer838Send a Private Message to motoracer838Edit/Delete MessageReply w/QuoteDirect Link to This Post
Cardboard Aided Design, one of my favorite tricks...

Recent example from my current bike project.
I like where your going with the front, I'm also going to take a couple of inches out of the nose. (Always thought that Ferrari's of that era had a big nose).

Joe
IP: Logged
RCR
Member
Posts: 4397
From: Shelby Twp Mi
Registered: Sep 2002


Feedback score:    (7)
Leave feedback


Total ratings: 102
Rate this member

Report this Post04-14-2017 07:00 PM Click Here to See the Profile for RCRSend a Private Message to RCREdit/Delete MessageReply w/QuoteDirect Link to This Post
Had some fun today.

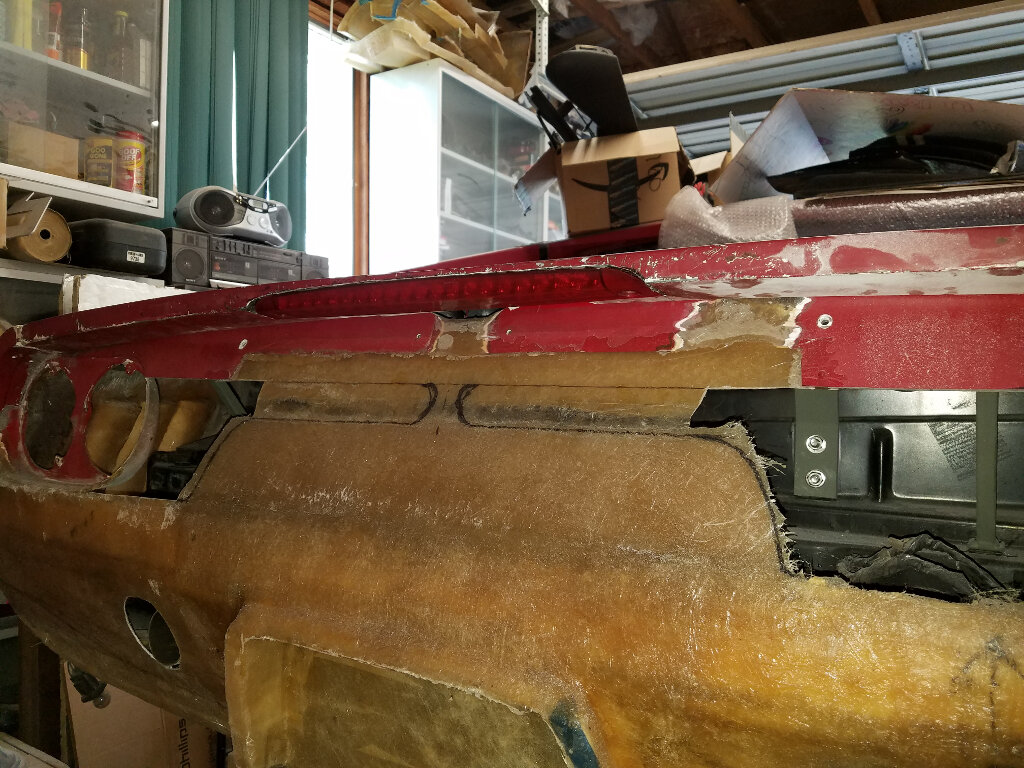
First off, I roughed in the third brake light. It's a Subaru piece, although I saw a Nissan piece that was identical.


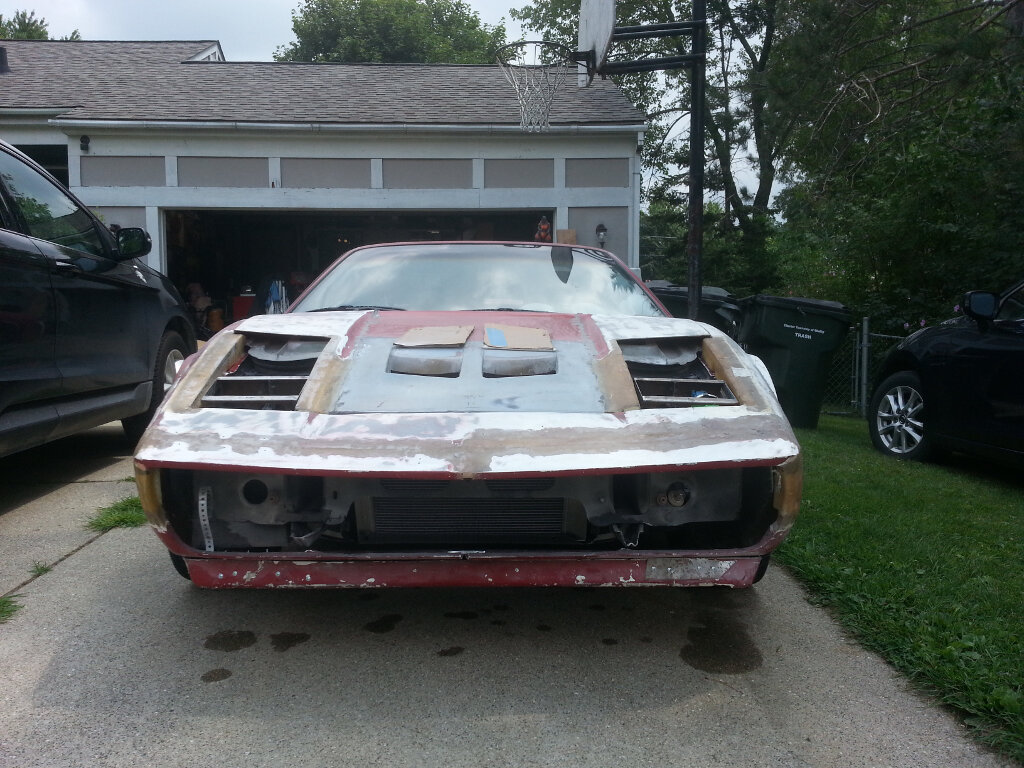
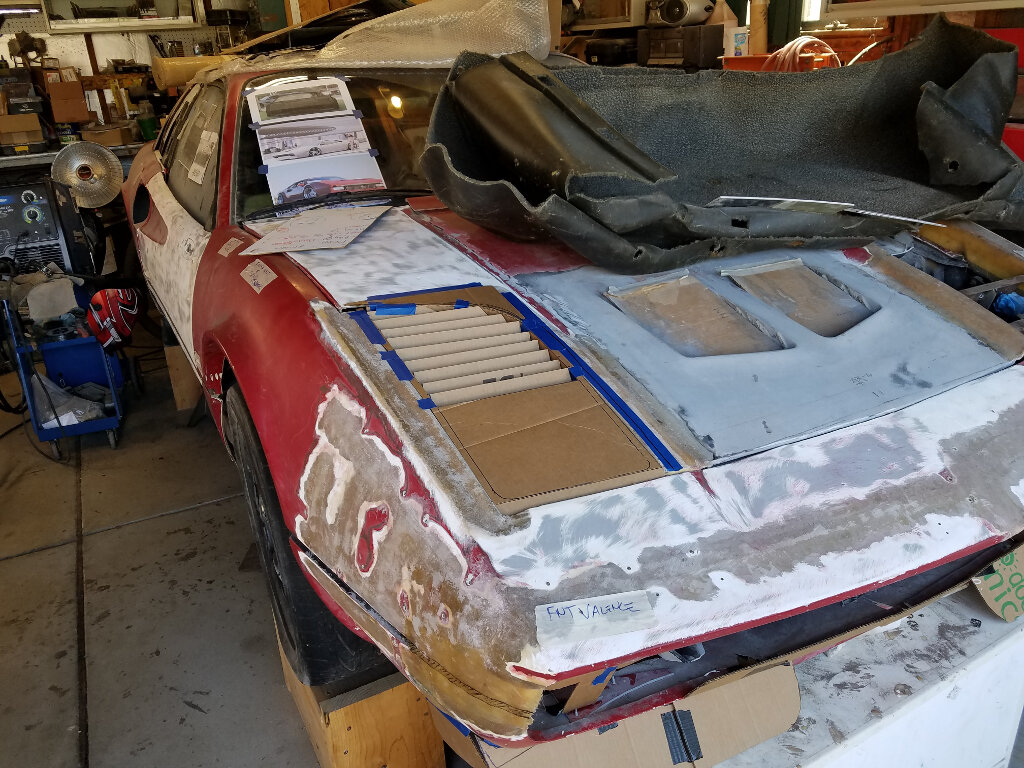
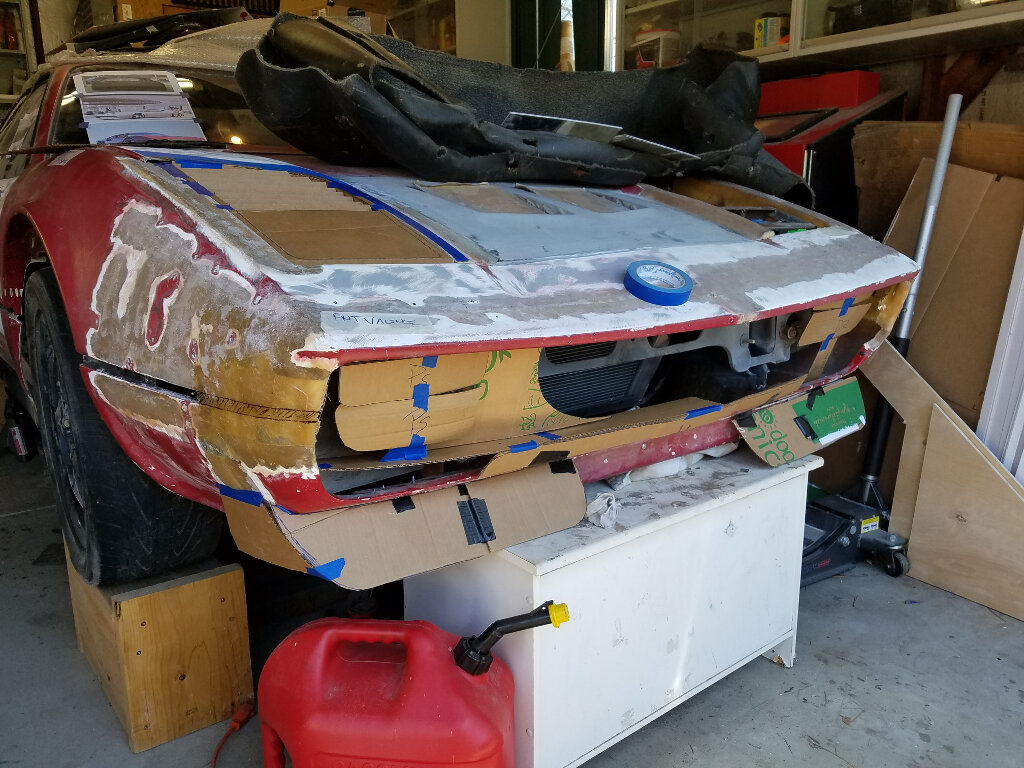
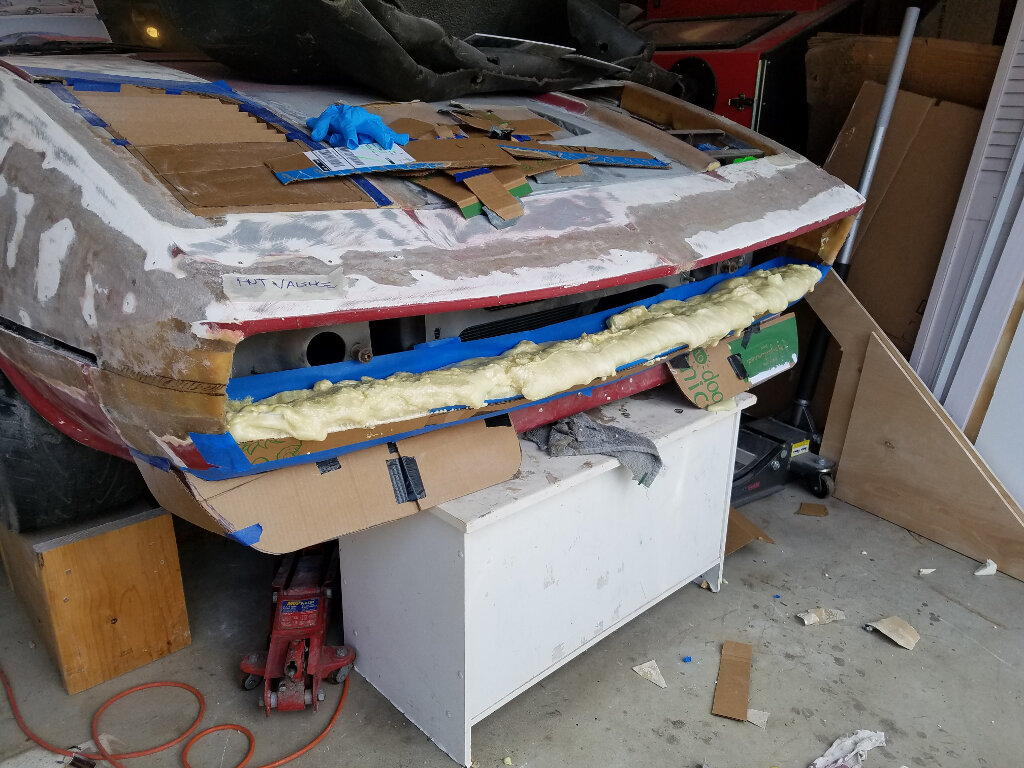
Then I started working on the front. I decided to break out the foam to create the shelf for the lower valence. Then a lot of sanding and measuring. Tomorrow I'll work on the profile and if the weather permits, break out the glass.


Bob
IP: Logged
Neils88
Member
Posts: 4045
From: Jeddore,Nova Scotia
Registered: Aug 2013


Feedback score: N/A
Leave feedback


Total ratings: 56
Rate this member

Report this Post04-15-2017 09:10 PM Click Here to See the Profile for Neils88Send a Private Message to Neils88Edit/Delete MessageReply w/QuoteDirect Link to This Post
That spoiler brake light looks great! Excellent job fitting it. :thumbsup

IP: Logged
RCR
Member
Posts: 4397
From: Shelby Twp Mi
Registered: Sep 2002


Feedback score:    (7)
Leave feedback


Total ratings: 102
Rate this member

Report this Post04-22-2017 07:24 PM Click Here to See the Profile for RCRSend a Private Message to RCREdit/Delete MessageReply w/QuoteDirect Link to This Post
Lots of work, small update.

The new shelf is glassed in as far as I can go on the outside. Once the front comes off, I'll pull the foam and reglass the inside. Now I'm working on the lights and re-configuring the front a little.


I think I'm going to center the lights on the head lights. This will move the brake vent from the bottom under the lights to the side of the lights.

We'll see. I change my mind often

The next challenge is figuring out how in the heck the lights mount. No Preludes in the local junkyard. Hmm???

Bob
IP: Logged
dobie1
Member
Posts: 450
From: BC, Canada
Registered: Jun 2005


Feedback score: N/A
Leave feedback

Rate this member

Report this Post04-22-2017 09:28 PM Click Here to See the Profile for dobie1Send a Private Message to dobie1Edit/Delete MessageReply w/QuoteDirect Link to This Post
Looking good Bob I like the new look!
IP: Logged
RCR
Member
Posts: 4397
From: Shelby Twp Mi
Registered: Sep 2002


Feedback score:    (7)
Leave feedback


Total ratings: 102
Rate this member

Report this Post04-30-2017 05:50 PM Click Here to See the Profile for RCRSend a Private Message to RCREdit/Delete MessageReply w/QuoteDirect Link to This Post
Well, a lot of work went into it the last couple weekends, without a whole lot to show for it. I think I'm on my 4th iteration of running/fog lamp mounts. What a PITA. I have no clue how Carlo and Amida have done this in the past. I'm just trying different things until it works.

More to come, I'm sure...

Bob
IP: Logged
Neils88
Member
Posts: 4045
From: Jeddore,Nova Scotia
Registered: Aug 2013


Feedback score: N/A
Leave feedback


Total ratings: 56
Rate this member

Report this Post04-30-2017 06:56 PM Click Here to See the Profile for Neils88Send a Private Message to Neils88Edit/Delete MessageReply w/QuoteDirect Link to This Post
 
quote
Originally posted by RCR:

Well, a lot of work went into it the last couple weekends, without a whole lot to show for it. I think I'm on my 4th iteration of running/fog lamp mounts. What a PITA. I have no clue how Carlo and Amida have done this in the past. I'm just trying different things until it works.

More to come, I'm sure...

Bob


Lol, I'm with you on that Bob! I've been stuck on a spoiler for the last 6 weeks I think... Even Carlo has pulled stuff apart many times when it just doesn't feel right. But then, once you're finished you'll be happier with the end result and you'll know you didn't just slap things together when they weren't what you envisioned. Keep at! It is all coming together and looking great!

Neil
IP: Logged
RCR
Member
Posts: 4397
From: Shelby Twp Mi
Registered: Sep 2002


Feedback score:    (7)
Leave feedback


Total ratings: 102
Rate this member

Report this Post04-30-2017 08:05 PM Click Here to See the Profile for RCRSend a Private Message to RCREdit/Delete MessageReply w/QuoteDirect Link to This Post
 
quote
Originally posted by Neils88:


Lol, I'm with you on that Bob! I've been stuck on a spoiler for the last 6 weeks I think... Even Carlo has pulled stuff apart many times when it just doesn't feel right. But then, once you're finished you'll be happier with the end result and you'll know you didn't just slap things together when they weren't what you envisioned. Keep at! It is all coming together and looking great!

Neil


Thanks for the encouragement. I've been watching your trials with that spoiler. I wish I had something to add, but a meager rear deck took three iterations. I told my wife about the lights and she sincerely said "no wonder it takes so long.". And she's absolutely right, because I (we) have to make it right.

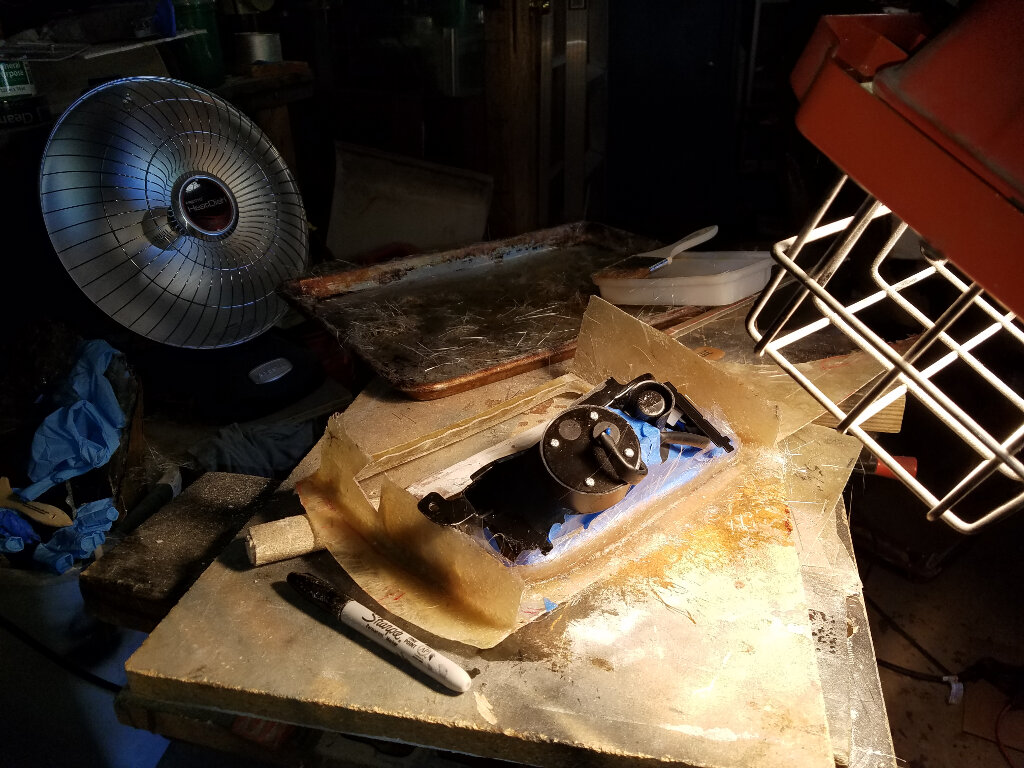
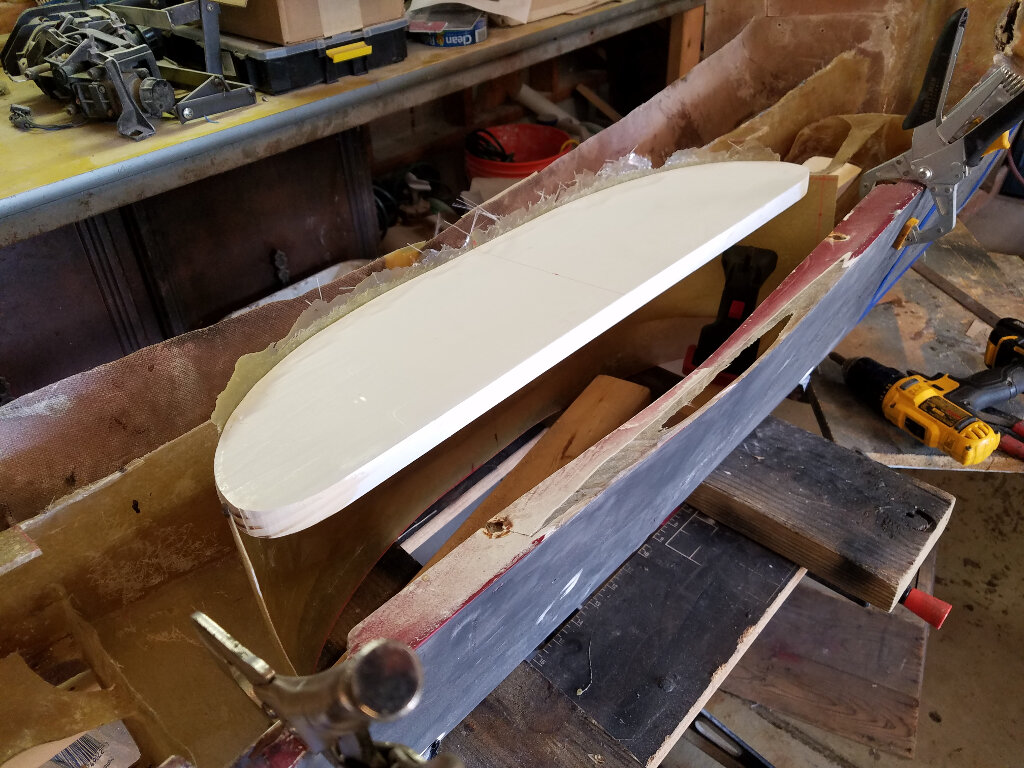
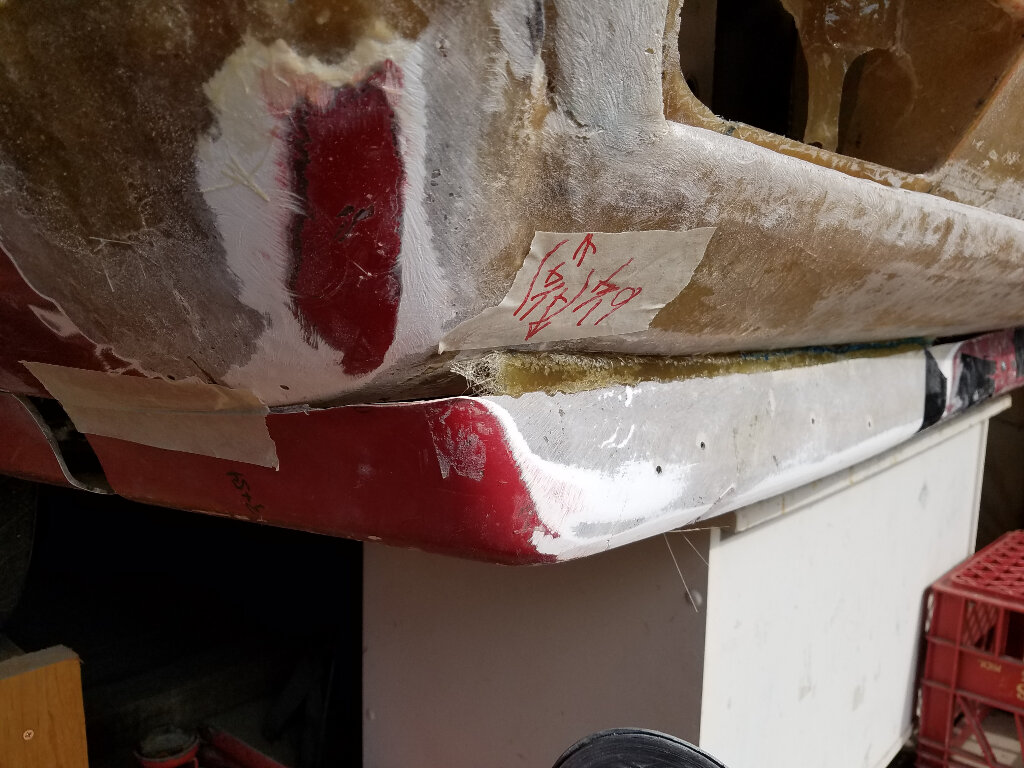
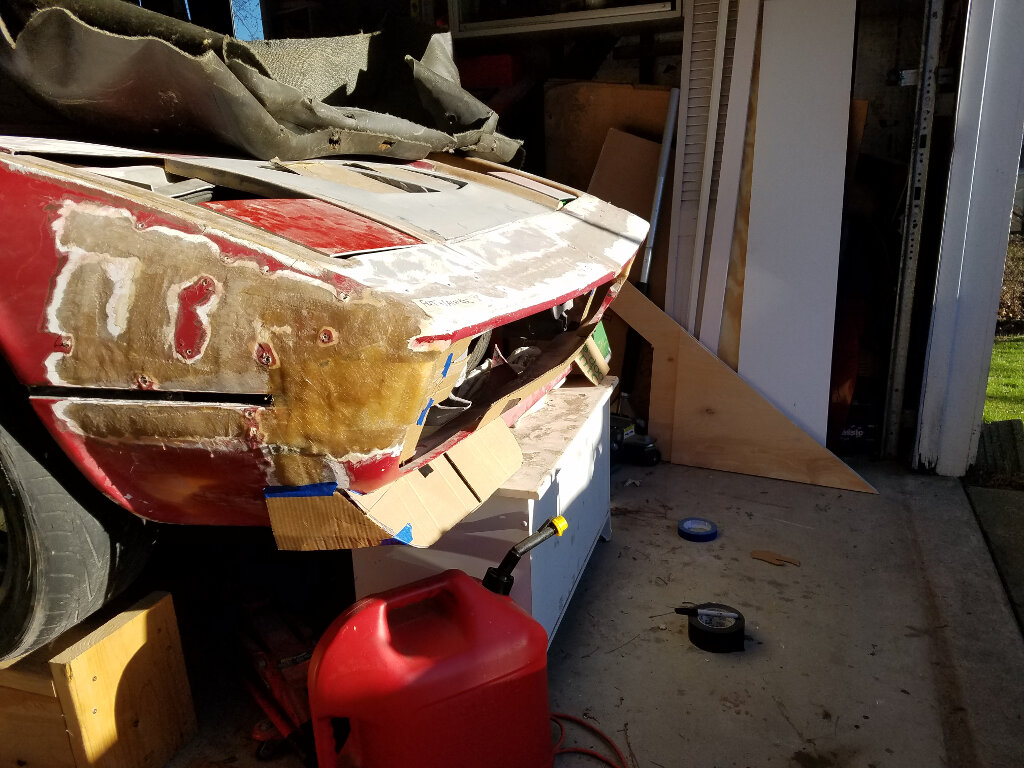
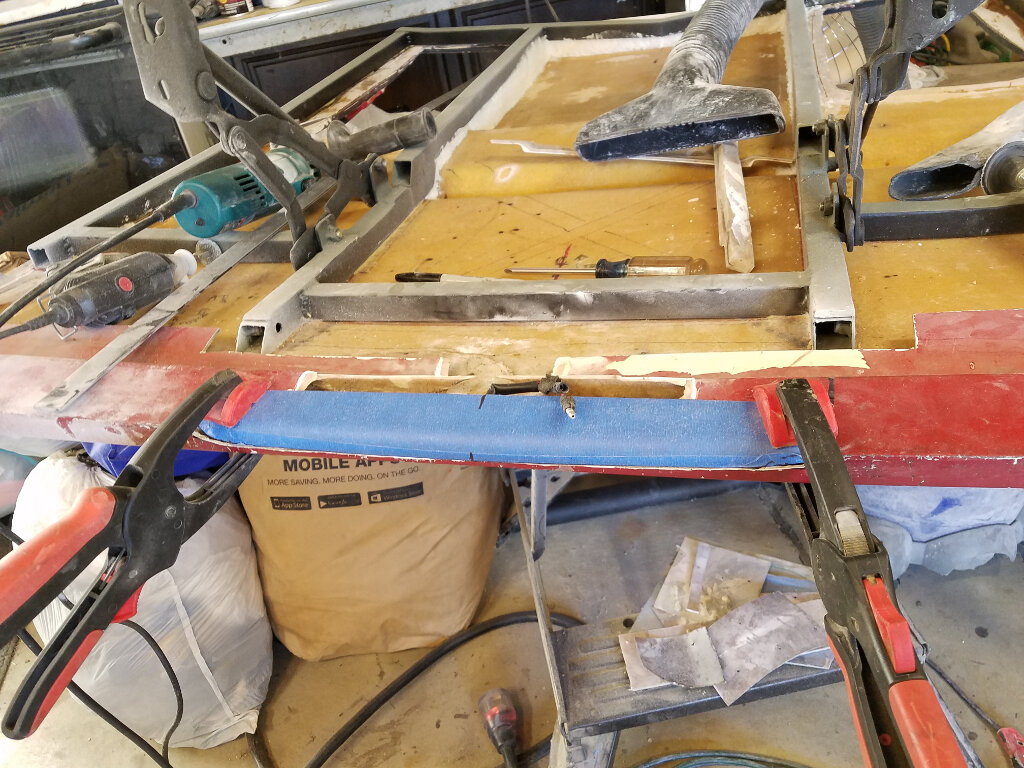
So, here's a couple pics...
Forming the front of the lamps/fascia to the right curve. My first use of wood for shaping something.


^^ note that panel was meant for the driver side until I realized the flange was in the wrong direction. Oops

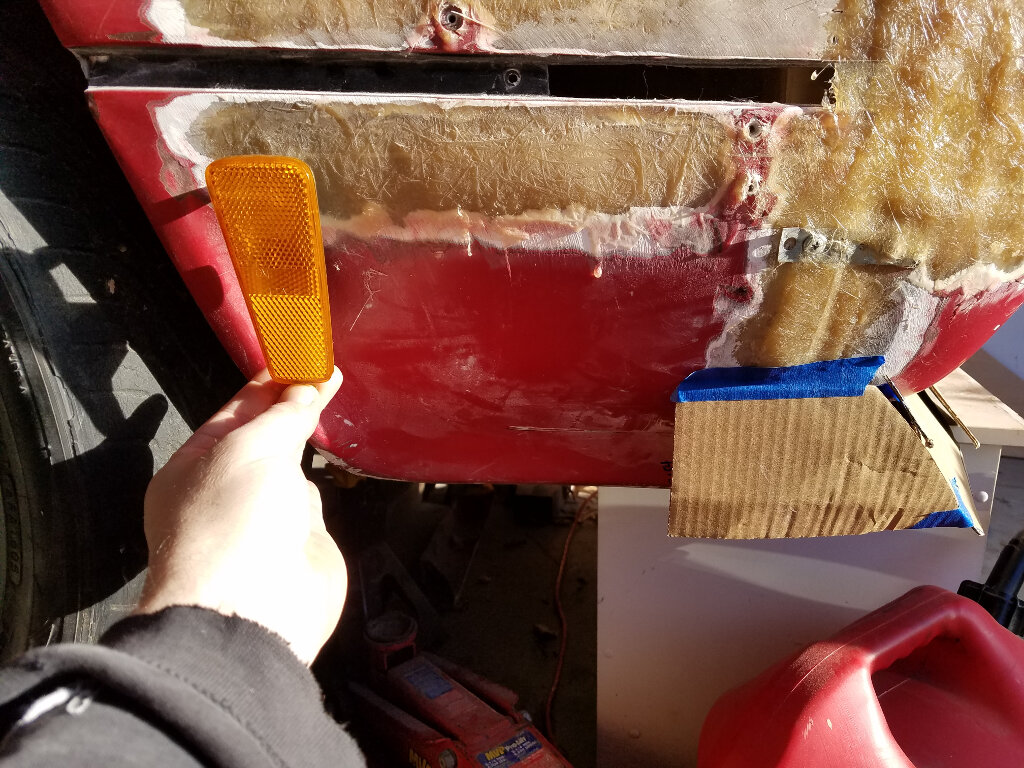
Here's the panel roughed in with the turn signal. I think I'm going to pull it back a little to give it a deeper look.


Bob

[This message has been edited by RCR (edited 05-01-2017).]

IP: Logged
RCR
Member
Posts: 4397
From: Shelby Twp Mi
Registered: Sep 2002


Feedback score:    (7)
Leave feedback


Total ratings: 102
Rate this member

Report this Post05-07-2017 05:22 PM Click Here to See the Profile for RCRSend a Private Message to RCREdit/Delete MessageReply w/QuoteDirect Link to This Post
Another weekend with no progress. Still stuck, and I broke my thinking chair (old plastic lawn chair). Then it went flying out of the garage.

Fighting whether to start over again.

oh well...That's what makes it fun and rewarding.

Bob

[This message has been edited by RCR (edited 05-07-2017).]

IP: Logged
PFF
System Bot
dobie1
Member
Posts: 450
From: BC, Canada
Registered: Jun 2005


Feedback score: N/A
Leave feedback

Rate this member

Report this Post05-07-2017 11:48 PM Click Here to See the Profile for dobie1Send a Private Message to dobie1Edit/Delete MessageReply w/QuoteDirect Link to This Post
Bob
I really like the direction you've been going Bob, I'd buy another chair sit down and write down what you like and don't like.

A little reflection with a cold beer I'm sure you're vision of the end will come to light.

Wayne
IP: Logged
RCR
Member
Posts: 4397
From: Shelby Twp Mi
Registered: Sep 2002


Feedback score:    (7)
Leave feedback


Total ratings: 102
Rate this member

Report this Post05-08-2017 06:40 AM Click Here to See the Profile for RCRSend a Private Message to RCREdit/Delete MessageReply w/QuoteDirect Link to This Post
Thanx Wayne. Don't get me wrong, I really like the direction it's going. I just cant figure out a way to mount the D@*&^*&^ lights. It'll come to me. Just too slow for my liking.

Thanx for the encouragement/

Bob

PS: When will we see progress on yours?

IP: Logged
Sage
Member
Posts: 2901
From: USA
Registered: Nov 1999


Feedback score:    (14)
Leave feedback


Total ratings: 69
Rate this member

Report this Post05-08-2017 09:49 AM Click Here to See the Profile for SageSend a Private Message to SageEdit/Delete MessageReply w/QuoteDirect Link to This Post
The chair's the way to go...

I remember when I was "apprenticing" at the shop of the guy that taught me fiberglass.

He spent much more time in that lawn chair...staring at the project in front of him than he did actually working on it. (course he had recovered from having broken his back a few earlier... ) He said it's like the measure twice and cut once principle....you have to be able to see it in your mind before you can make it real.

His motto:

"If you can conceive it..
And you can believe it..
You can achieve it."

Progress is progress...even if it's just on the drawing board.

What you've done is looking good. Almost looks like a 308/355 combo front end.

Even if you decide to change it down the road, it's another "brick in the wall"!

Keep up the good work....AND the updates!


HAGO!
IP: Logged
RCR
Member
Posts: 4397
From: Shelby Twp Mi
Registered: Sep 2002


Feedback score:    (7)
Leave feedback


Total ratings: 102
Rate this member

Report this Post05-11-2017 06:48 AM Click Here to See the Profile for RCRSend a Private Message to RCREdit/Delete MessageReply w/QuoteDirect Link to This Post
Thanx Ted. I'm still inching along. Pics to come.

I'm using a camp chair right now, but it's not the same. I need a deck chair.

peace out

Bob
IP: Logged
355Fiero
Member
Posts: 548
From: Victoria, BC Canada
Registered: Dec 2004


Feedback score: (2)
Leave feedback

Rate this member

Report this Post05-11-2017 03:28 PM Click Here to See the Profile for 355FieroSend a Private Message to 355FieroEdit/Delete MessageReply w/QuoteDirect Link to This Post
Bob;

Mods are looking good. How about gluing in some metal tabs to the back of the cowl you are putting in so that you can screw the light mount tabs to them? Archie did that a lot in his fiberglass mods. Biggest part will be putting the tabs in a location that you can get to once everything is in place in case you need to pull them out and change a bulb or something.

Keep it up as things are moving along.

I am a few days away from being able to put my drivetrain and cradle back together and get it into the project for hopefully the last time..... Just need to find a ceramic exhaust coater at a reasonable price for the exhaust system......

Cheers
Don
IP: Logged
RCR
Member
Posts: 4397
From: Shelby Twp Mi
Registered: Sep 2002


Feedback score:    (7)
Leave feedback


Total ratings: 102
Rate this member

Report this Post05-20-2017 06:05 PM Click Here to See the Profile for RCRSend a Private Message to RCREdit/Delete MessageReply w/QuoteDirect Link to This Post
Making baby steps...

Fabbing the bracketry and front pieces.


Two of them. It would have been nice if they actually matched, but I think it's close enough to make work.


Started to rain, so I'm taking a break.

Bob

IP: Logged
RCR
Member
Posts: 4397
From: Shelby Twp Mi
Registered: Sep 2002


Feedback score:    (7)
Leave feedback


Total ratings: 102
Rate this member

Report this Post06-11-2017 06:02 PM Click Here to See the Profile for RCRSend a Private Message to RCREdit/Delete MessageReply w/QuoteDirect Link to This Post
Well, it's been a while since last update. Still making progress, but it seems so slow. The 4 weeks between Michigan winter and summer are over. Now it's bloody hot as hell out in the garage. Still got a few hours in.

Nothing to really show for it. All the details behind the good stuff.

Back soon with better stuff.

Bob
IP: Logged
Bozzie
Member
Posts: 1188
From: Plainville,Ct. U.S.A
Registered: Oct 2007


Feedback score: (1)
Leave feedback

Rate this member

Report this Post06-12-2017 12:49 PM Click Here to See the Profile for BozzieSend a Private Message to BozzieEdit/Delete MessageReply w/QuoteDirect Link to This Post
Bob.......the nose is looking great ! I like your CAD ,, just wish glassing could be achieved as easy I hear ya on the heat......first to cold and then BAM ....to HOT ! Keep up the great work there, do yourself a favor and buy a few extra chairs


Boz
IP: Logged
RCR
Member
Posts: 4397
From: Shelby Twp Mi
Registered: Sep 2002


Feedback score:    (7)
Leave feedback


Total ratings: 102
Rate this member

Report this Post06-18-2017 06:47 PM Click Here to See the Profile for RCRSend a Private Message to RCREdit/Delete MessageReply w/QuoteDirect Link to This Post
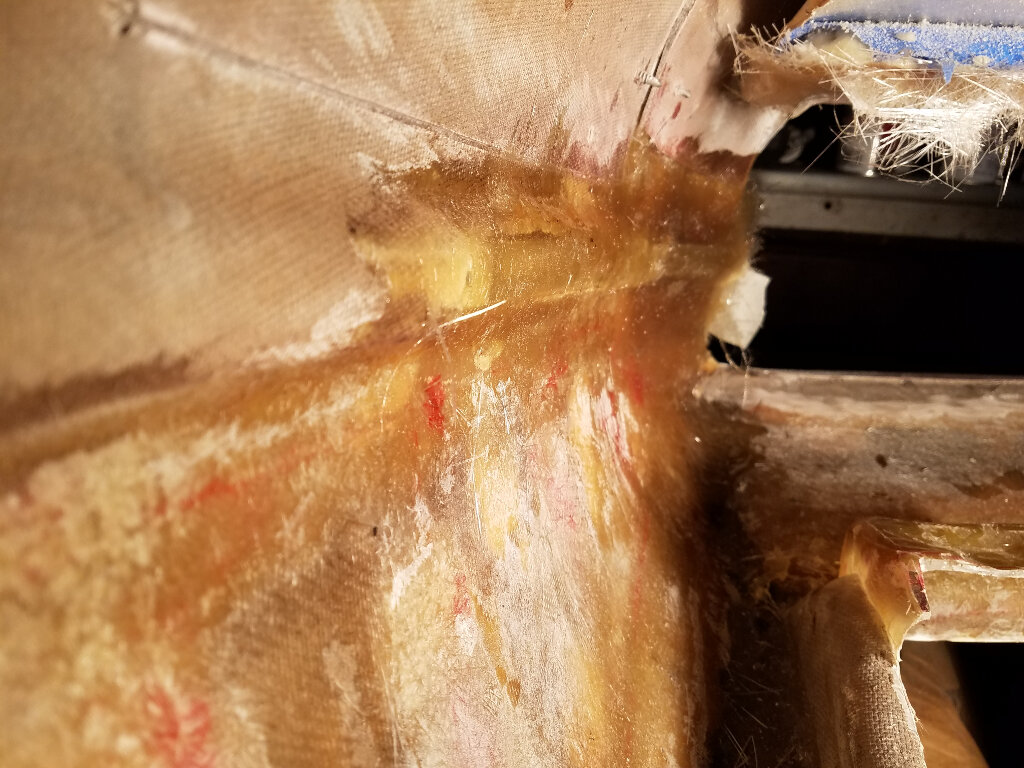
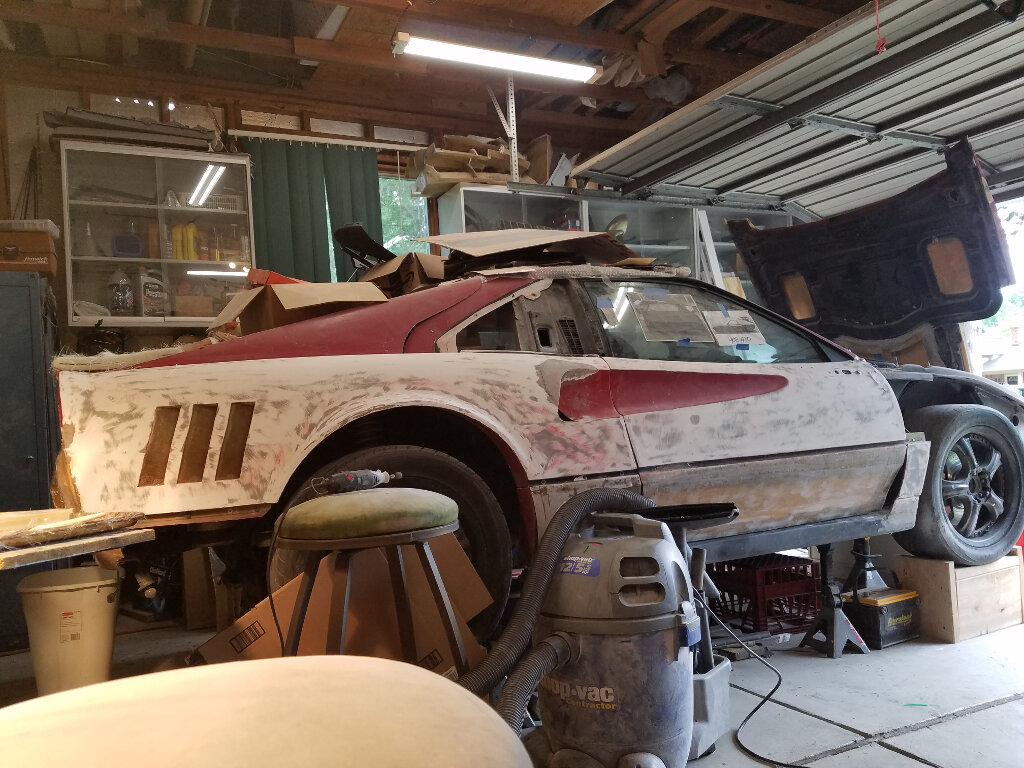
Another busy weekend. It's actually starting to look like something. So, I've been working on the front fenders. One of the first things that needed completion was reinforcing all of the mods and cuts that I made early on. That meant grinding and filling the inside. With that mostly done, I had to put the body lines back in, and fill the old turn signal holes. On to some pics.

Outside


Inside


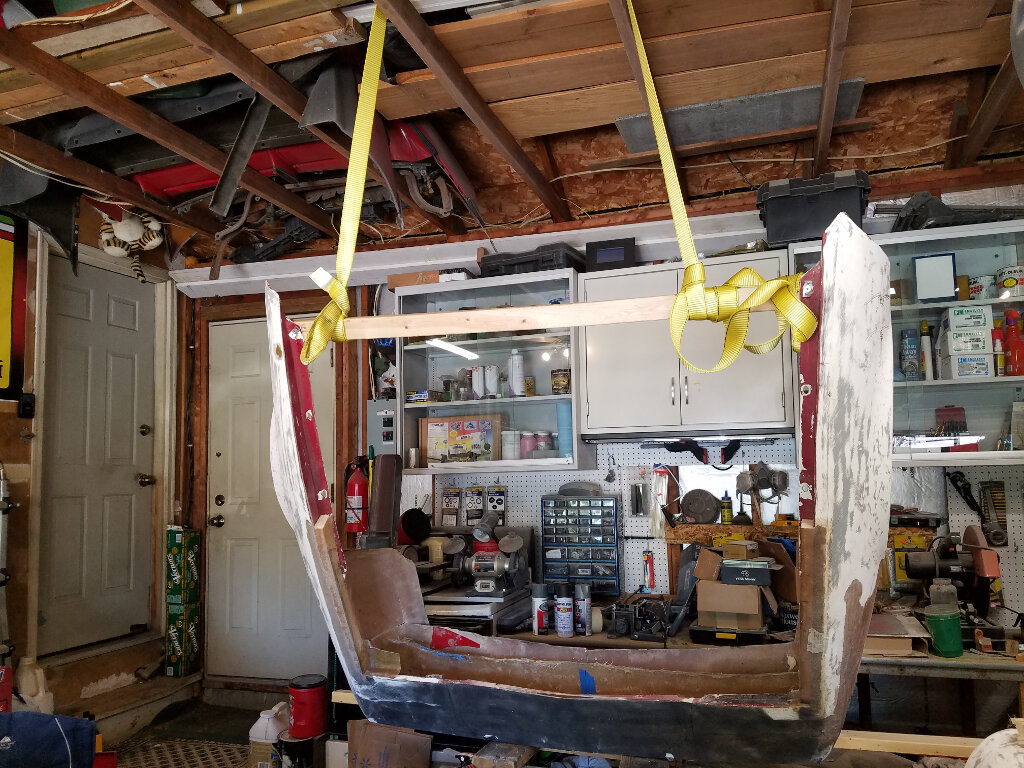
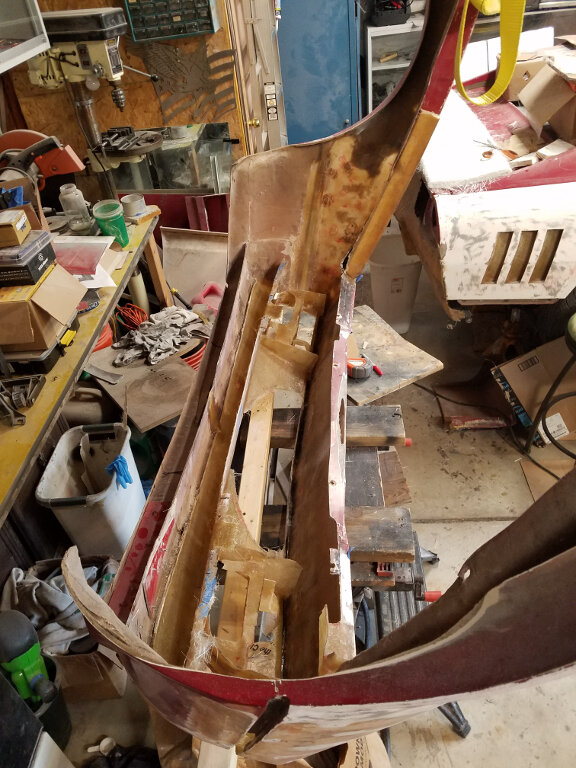
Then, making the most of my space and making it easier to reach the nose recesses.


The light sections molded in now...


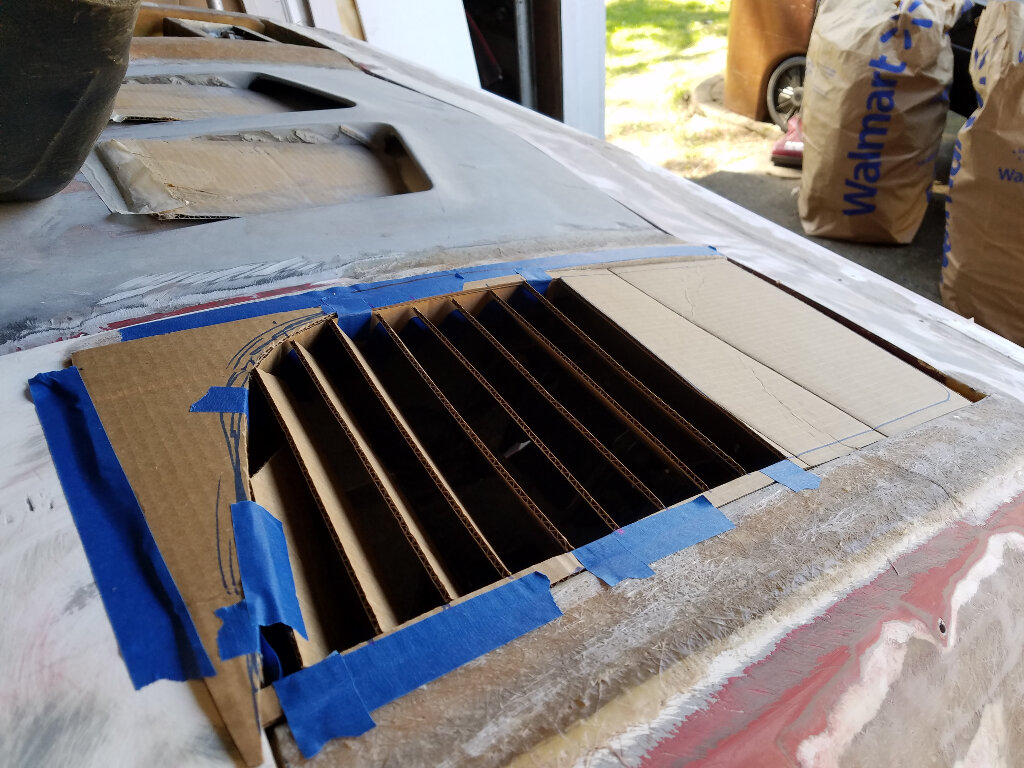
Starting to work on the air inlet.


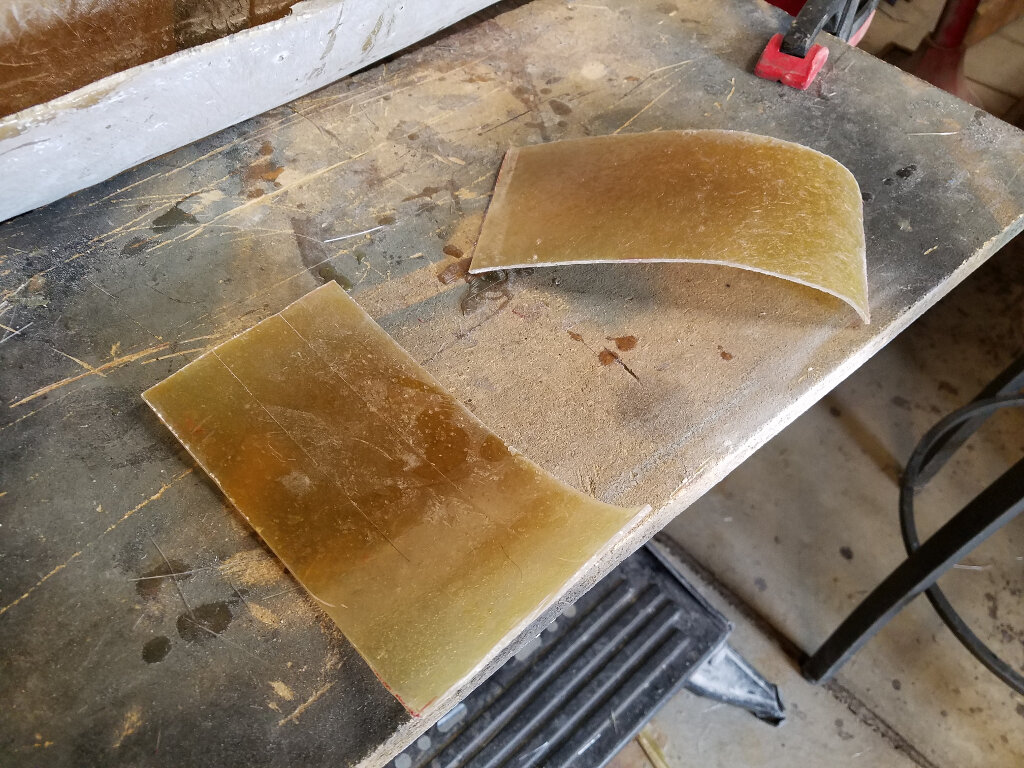
Here a single layer of glass is attached to a form to maintain the shape as it is glassed to the front.


And a pic as everything stands.


Hopefully I'll get some more done this week. Trying something new (to me) to make the bull's nose into the inlet.

later...

Bob
IP: Logged
RCR
Member
Posts: 4397
From: Shelby Twp Mi
Registered: Sep 2002


Feedback score:    (7)
Leave feedback


Total ratings: 102
Rate this member

Report this Post06-23-2017 08:53 PM Click Here to See the Profile for RCRSend a Private Message to RCREdit/Delete MessageReply w/QuoteDirect Link to This Post
A few more pics from the week.


Bob
IP: Logged
PFF
System Bot
Bozzie
Member
Posts: 1188
From: Plainville,Ct. U.S.A
Registered: Oct 2007


Feedback score: (1)
Leave feedback

Rate this member

Report this Post06-24-2017 09:52 AM Click Here to See the Profile for BozzieSend a Private Message to BozzieEdit/Delete MessageReply w/QuoteDirect Link to This Post
Hey Bob ! Love that Illuminated panel up there ^^^^^^^ ALLLLLL those lil pieces your putting together and bonding to the car is really looking GREAT. Very Tedious stuff but Im liking the outcome. Keep up the good work !


Boz
IP: Logged
RCR
Member
Posts: 4397
From: Shelby Twp Mi
Registered: Sep 2002


Feedback score:    (7)
Leave feedback


Total ratings: 102
Rate this member

Report this Post06-25-2017 07:13 PM Click Here to See the Profile for RCRSend a Private Message to RCREdit/Delete MessageReply w/QuoteDirect Link to This Post
Thanx for the comments, Boz. I hope you don't mind if I borrow your Sprint Car wing idea.

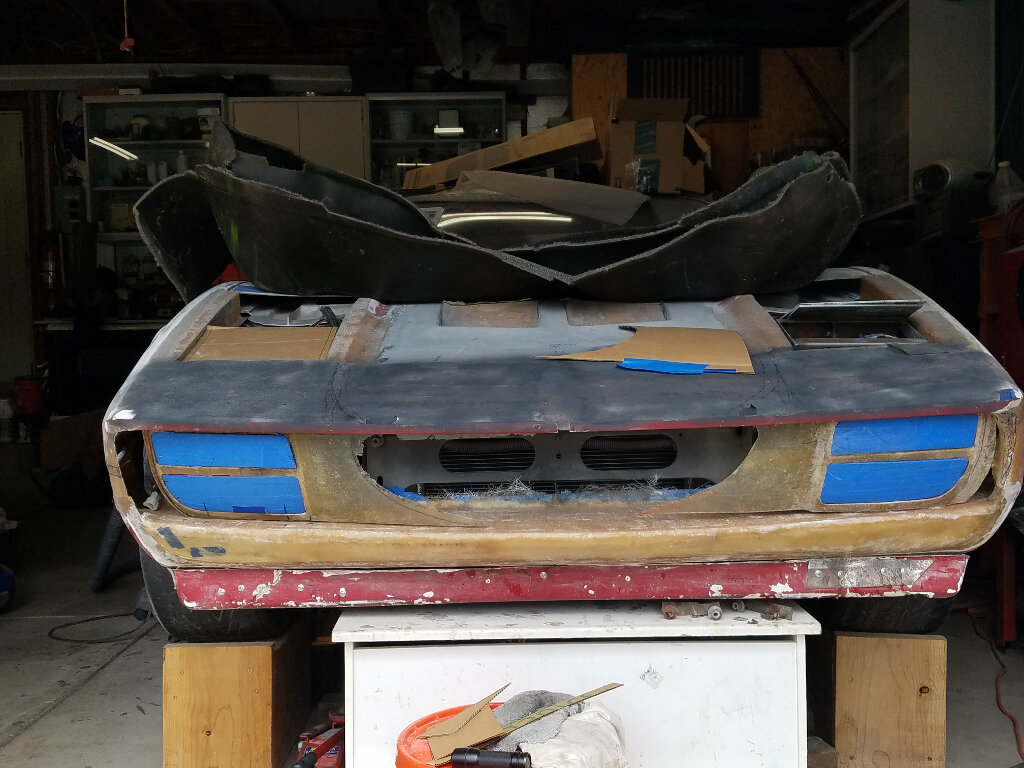
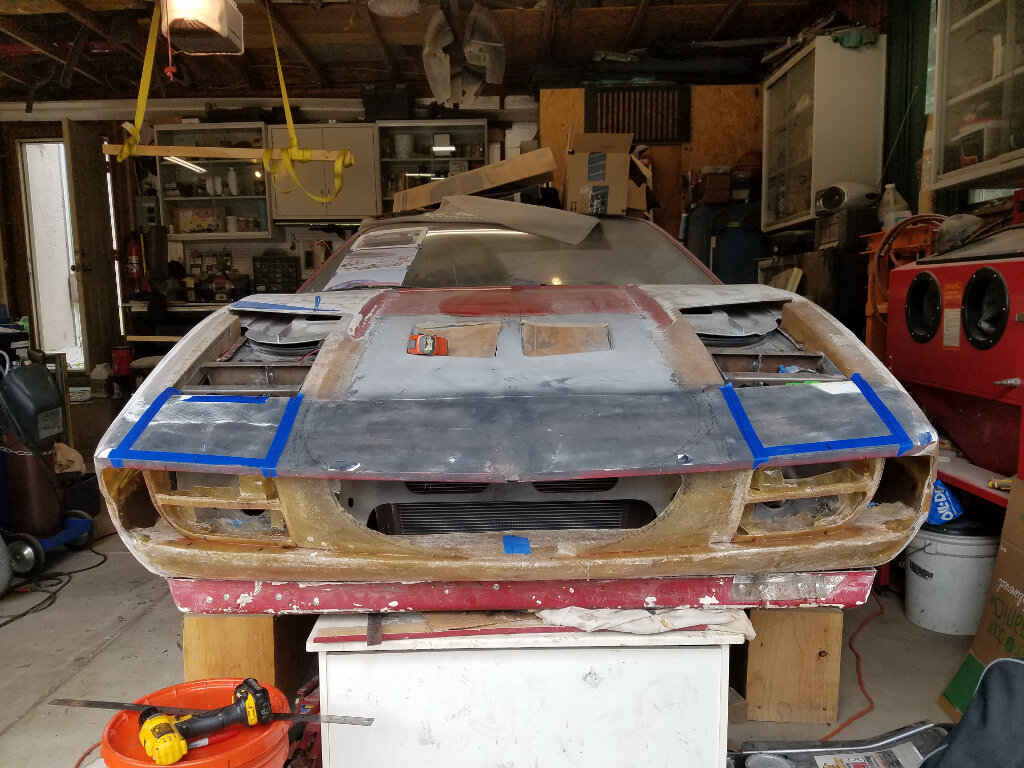
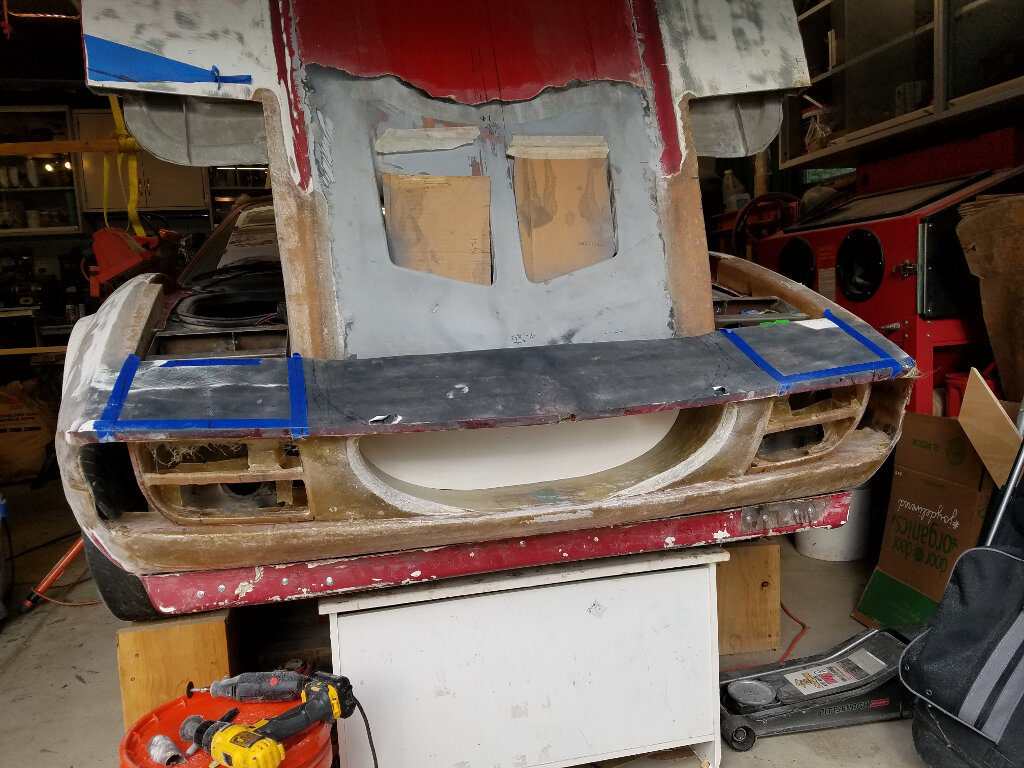
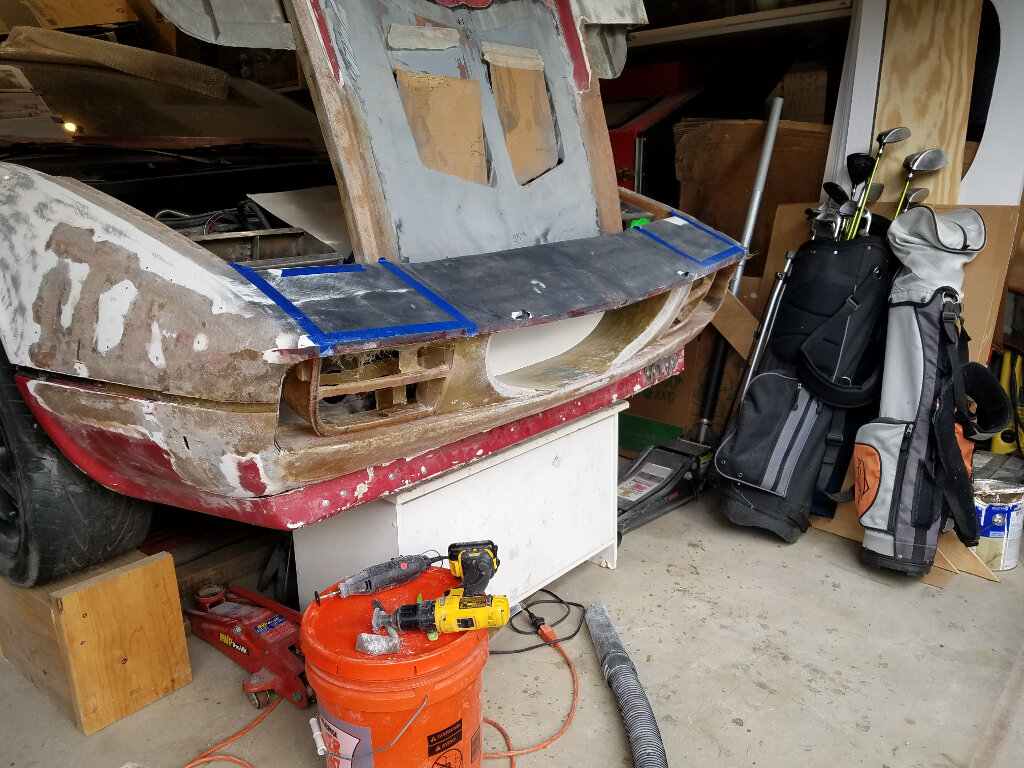
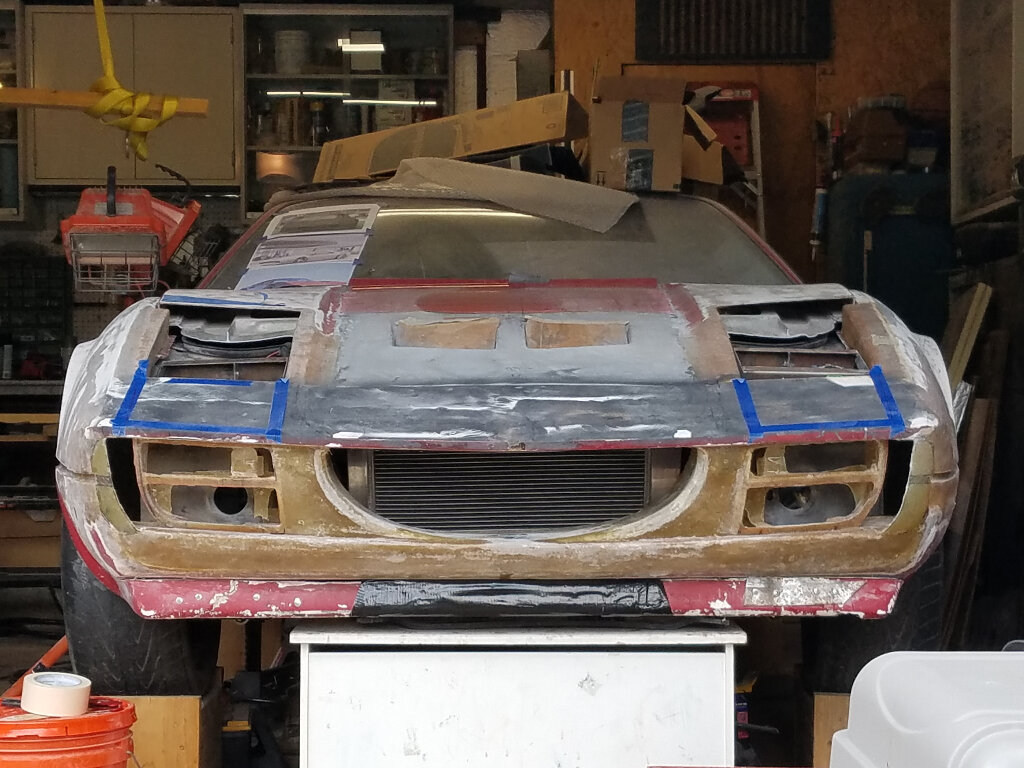
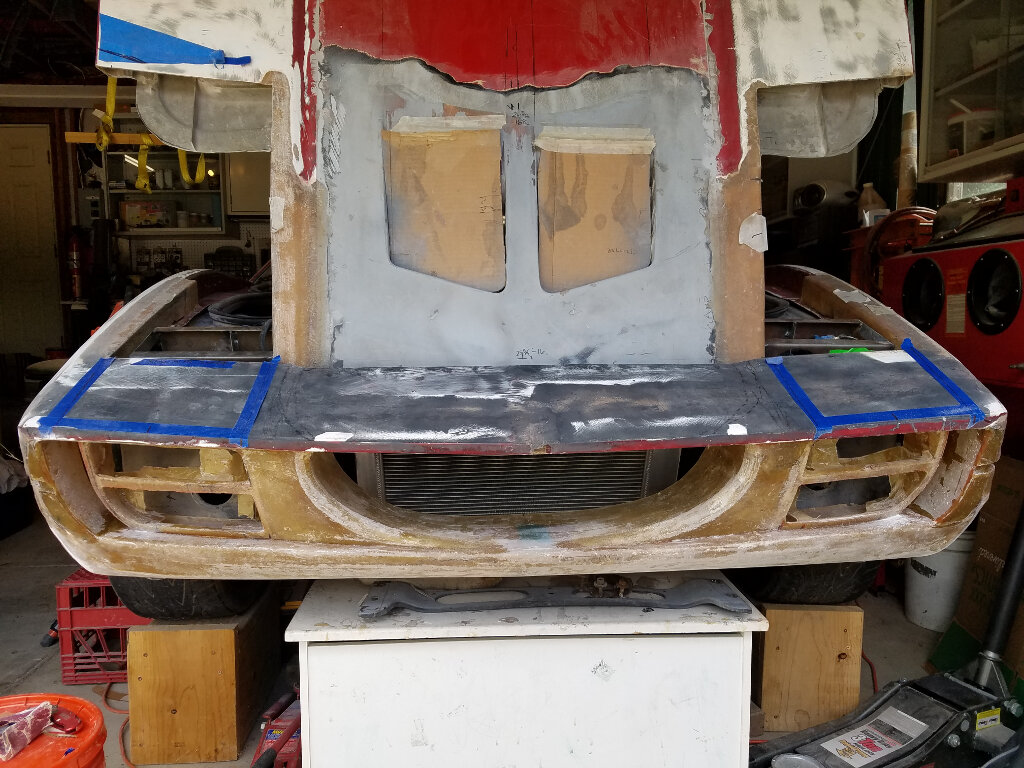
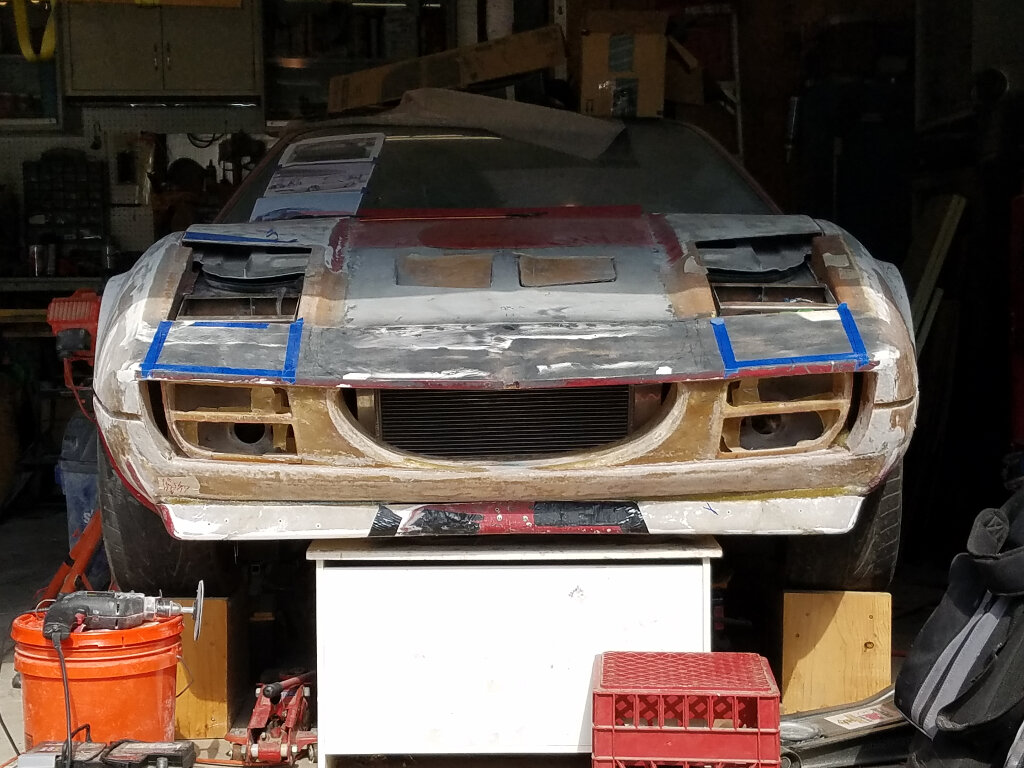
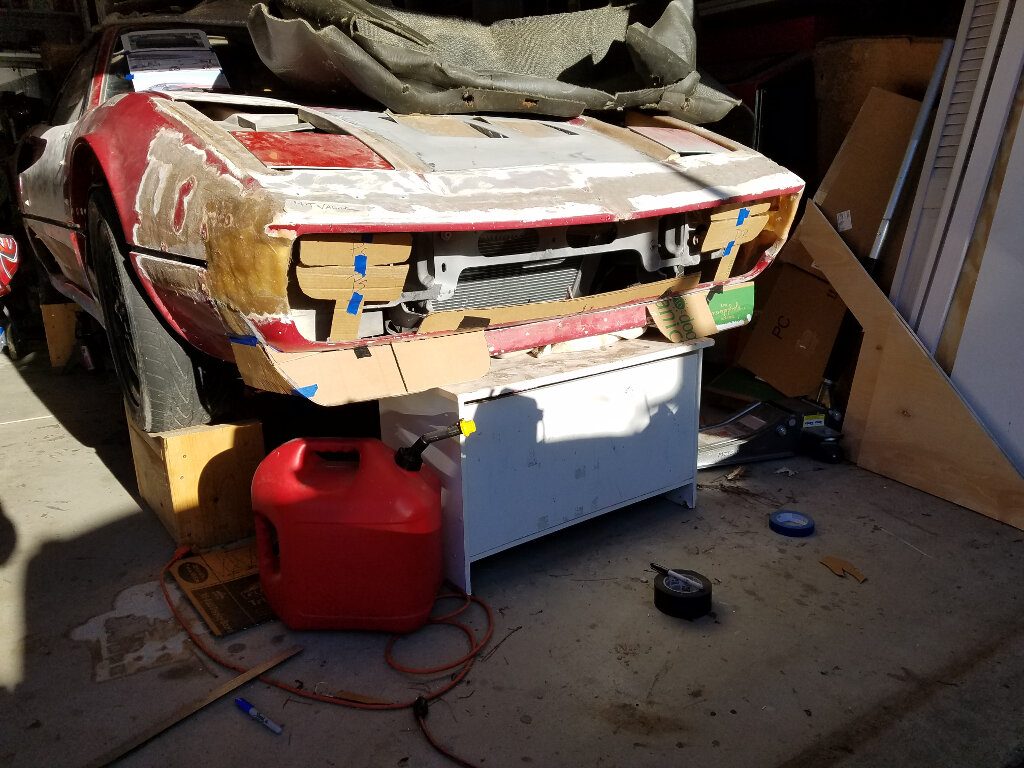
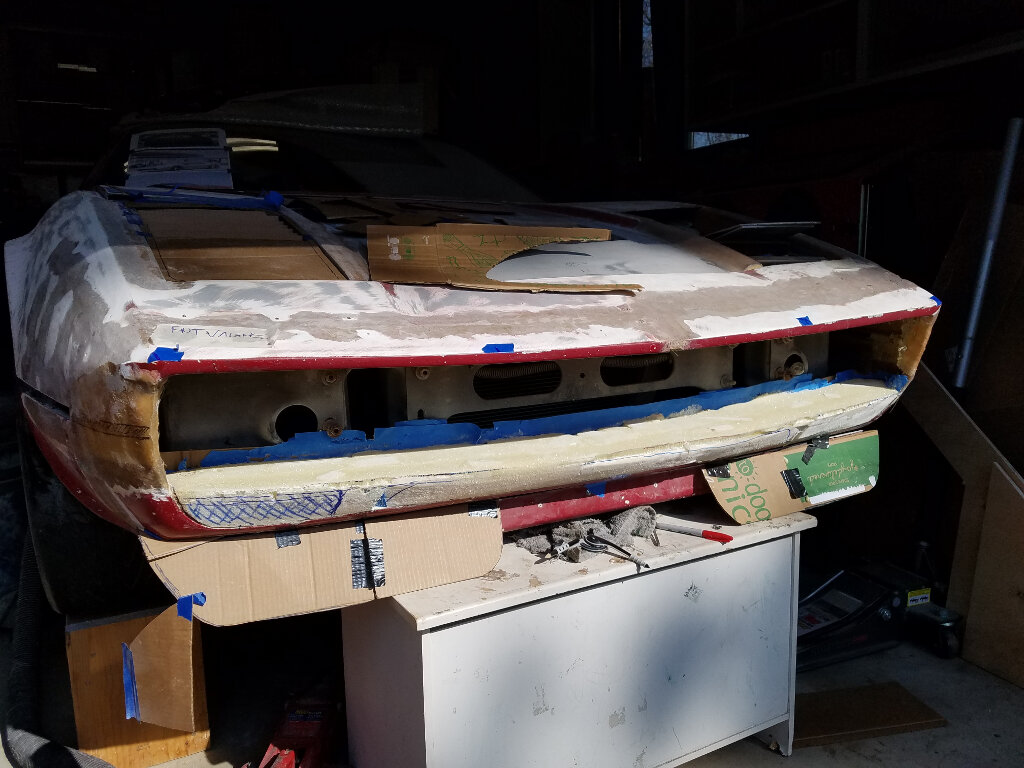
Speaking of ideas, I brought out the black duct tape and started playing. I saw this on a race inspired 458 and thought, doh, that would look cool, so I had to mock it up...


I think it flows better with the door inlet. I don't know if I will do it anytime soon do to the amount of work redoing the existing vents, but it will probably get done eventually.

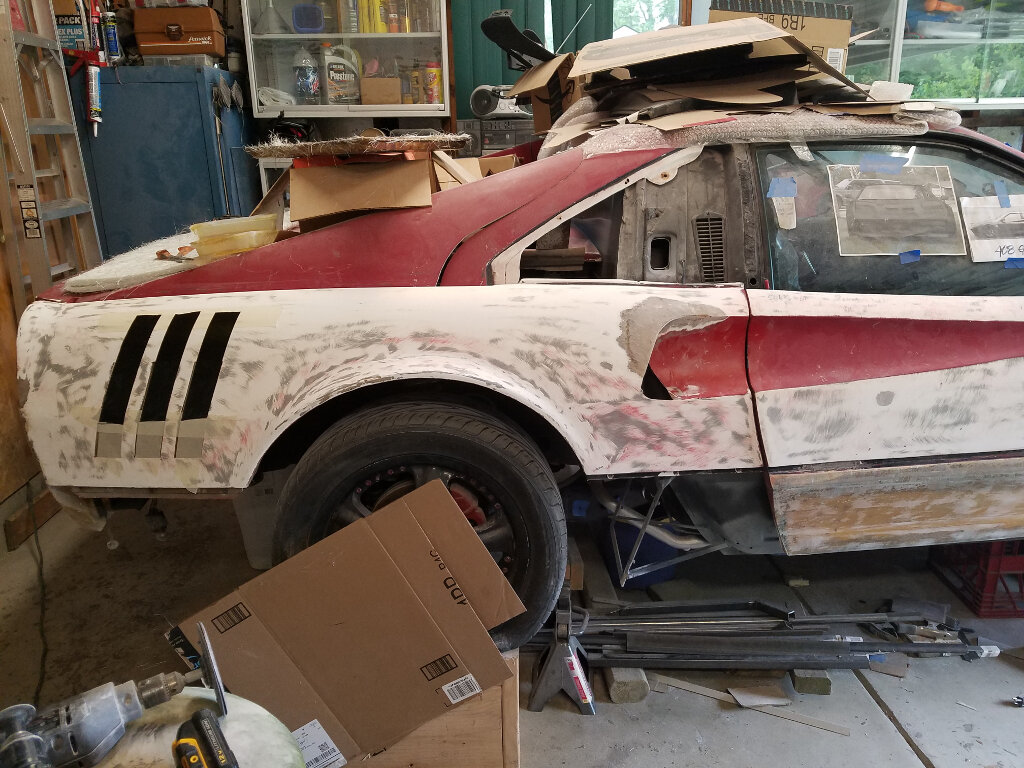
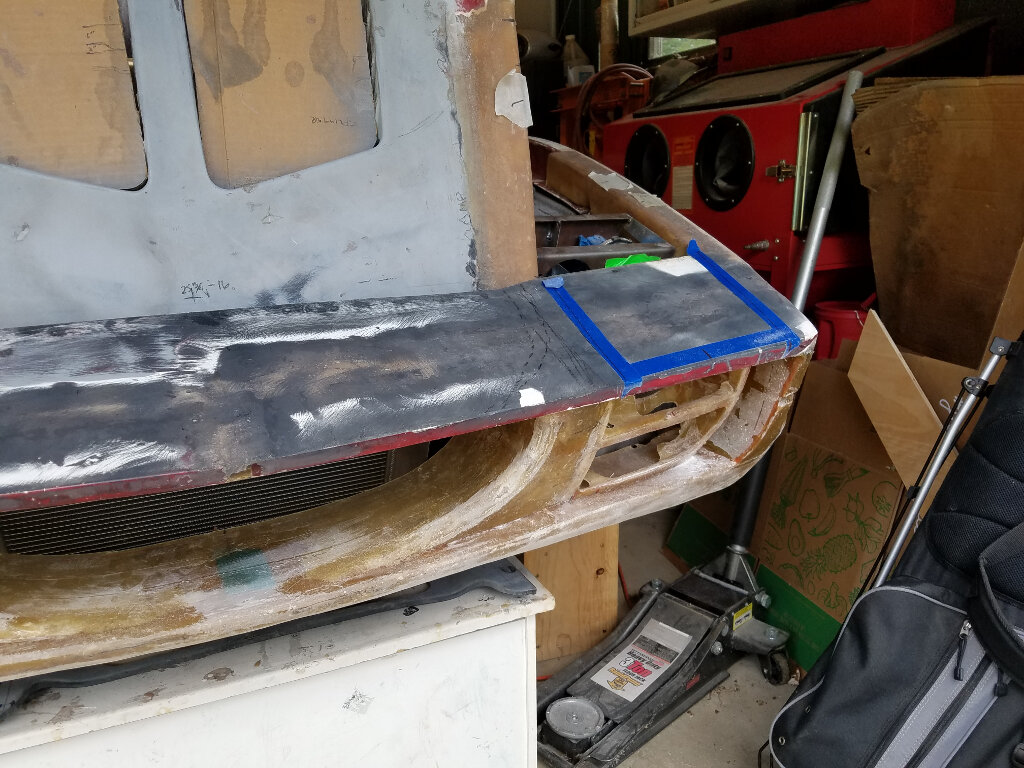
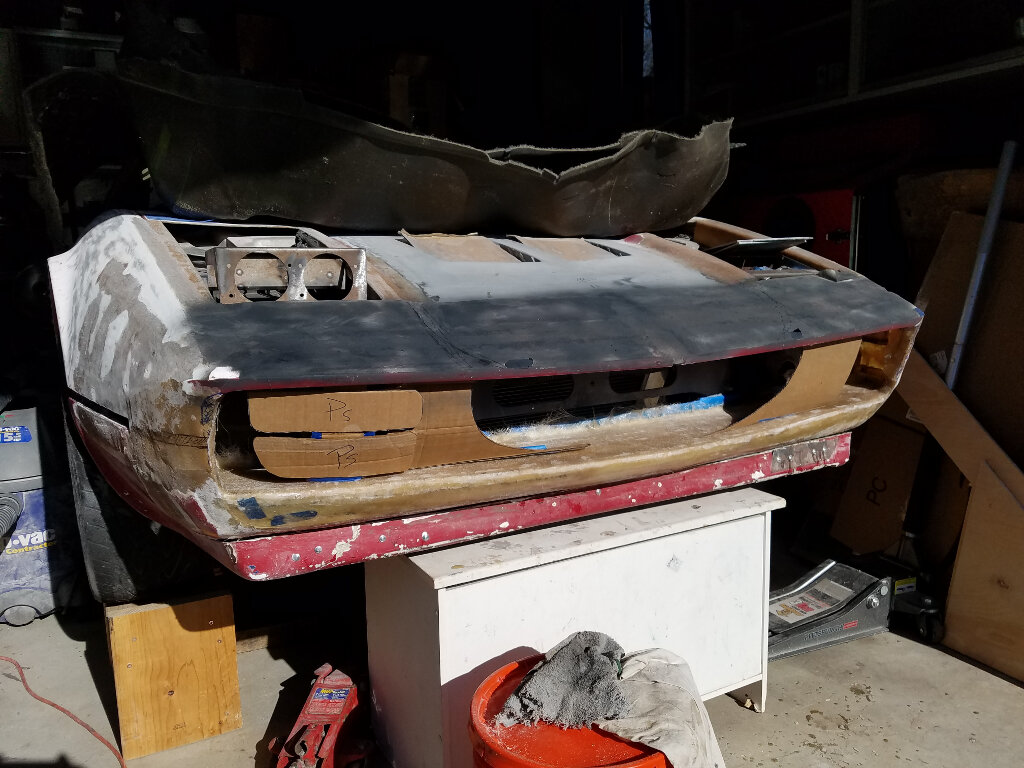
Then I taped up the front spoiler to get an idea on how I want to modify the spoiler.
The pic also shows the extensions added to the sides of the front nose to even things out with the lights. I still need to add the slots.


Bob
IP: Logged
dobie1
Member
Posts: 450
From: BC, Canada
Registered: Jun 2005


Feedback score: N/A
Leave feedback

Rate this member

Report this Post06-25-2017 10:20 PM Click Here to See the Profile for dobie1Send a Private Message to dobie1Edit/Delete MessageReply w/QuoteDirect Link to This Post
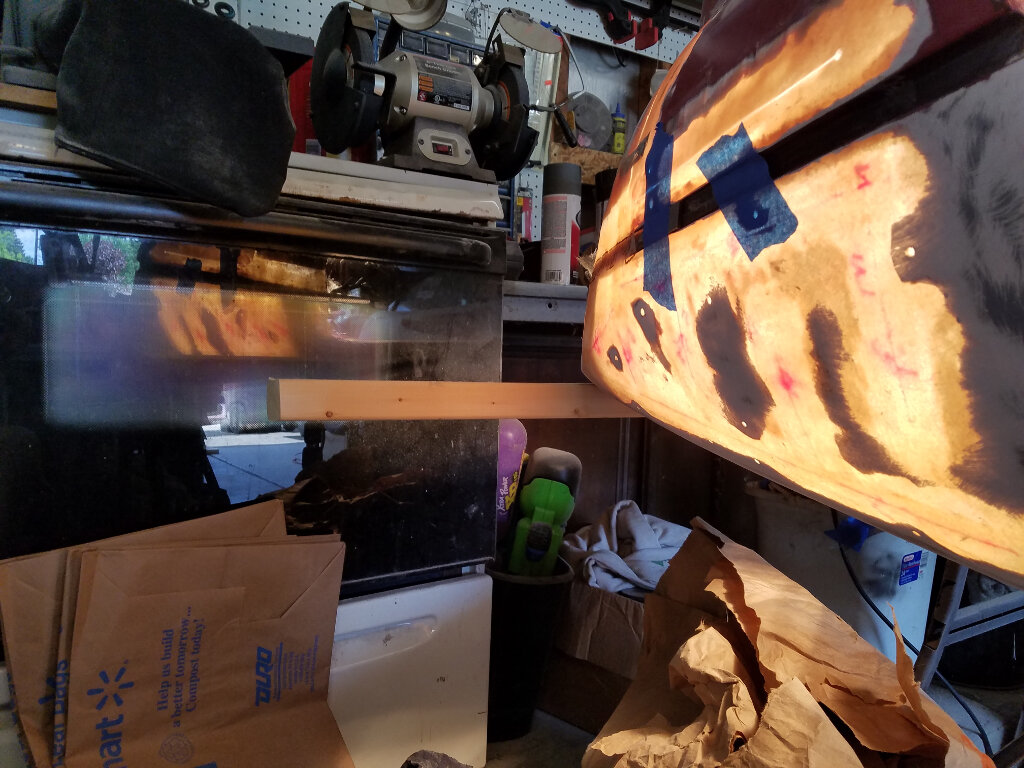
I like it!,
So question for you on the blue tape in front of the fender lights. Are you planing on opening up that area as well? And are you still do ting the pop up head lights?
That new thinking chair really seams to be have inspired you 😄😄
IP: Logged
Sage
Member
Posts: 2901
From: USA
Registered: Nov 1999


Feedback score:    (14)
Leave feedback


Total ratings: 69
Rate this member

Report this Post06-25-2017 10:25 PM Click Here to See the Profile for SageSend a Private Message to SageEdit/Delete MessageReply w/QuoteDirect Link to This Post
Another thumbsup from one of the "watchers".....


So good to see somebody actually moving forward on their project!


Keep up the good work.

HAGO!

[This message has been edited by Sage (edited 06-25-2017).]

IP: Logged
RCR
Member
Posts: 4397
From: Shelby Twp Mi
Registered: Sep 2002


Feedback score:    (7)
Leave feedback


Total ratings: 102
Rate this member

Report this Post06-26-2017 07:54 AM Click Here to See the Profile for RCRSend a Private Message to RCREdit/Delete MessageReply w/QuoteDirect Link to This Post
Hi Guys, Thanx for looking...

Wayne: The blue tape was there only to help line up the location of the turn/fog lights to the headlights. What's not visible is the lines drawn on the tape. I'm a little afraid that the sharpie will bleed through if I draw directly on the body. I had the same thought, though, when I saw it in the pics. I'll leave the integrated headlights to Boz, as I started down that path once before (Still have the bucket molds), unless some nice 458/488 or Corvette lights pop up.

Ted: Thanx for the encouragement. With your new undertaking, I'm sure what little time you had for yours is being eaten up. Hopefully between Boz, Wayne and others, we can inspire you to take up the sand paper.

Bob
IP: Logged
RCR
Member
Posts: 4397
From: Shelby Twp Mi
Registered: Sep 2002


Feedback score:    (7)
Leave feedback


Total ratings: 102
Rate this member

Report this Post07-16-2017 10:04 AM Click Here to See the Profile for RCRSend a Private Message to RCREdit/Delete MessageReply w/QuoteDirect Link to This Post
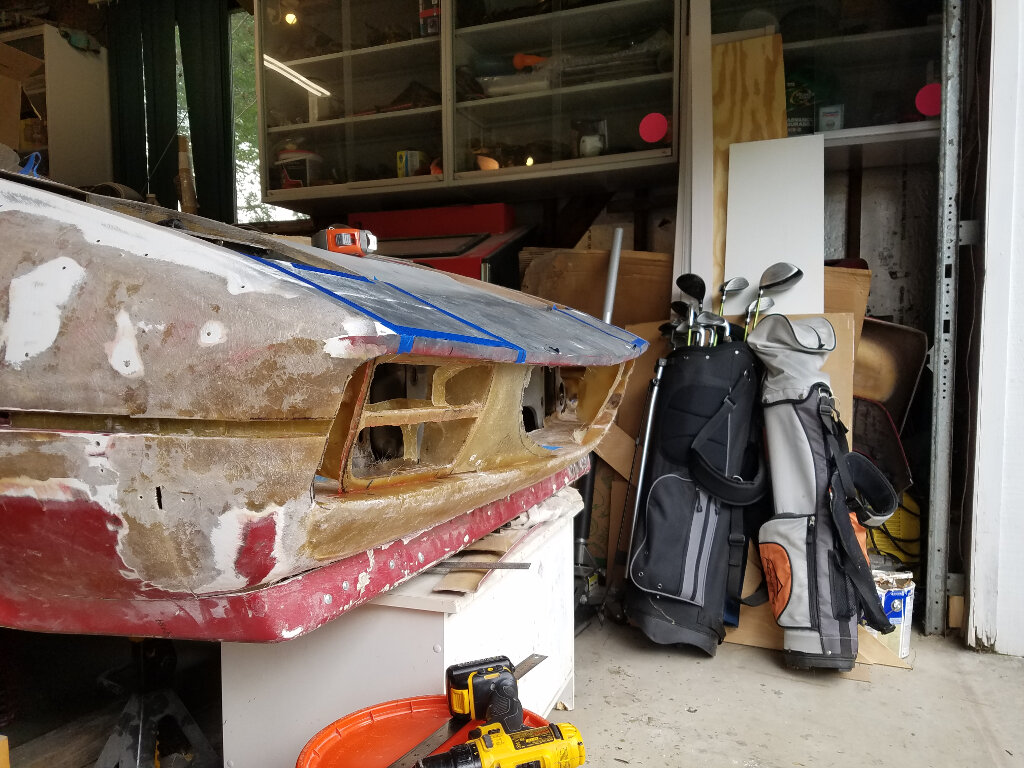
Time flies too quickly as it's been a couple weeks since last update. I did go on vacation for a week, but there has been a lot of work when I'm home. Again, it doesn't show well, but it is progress.

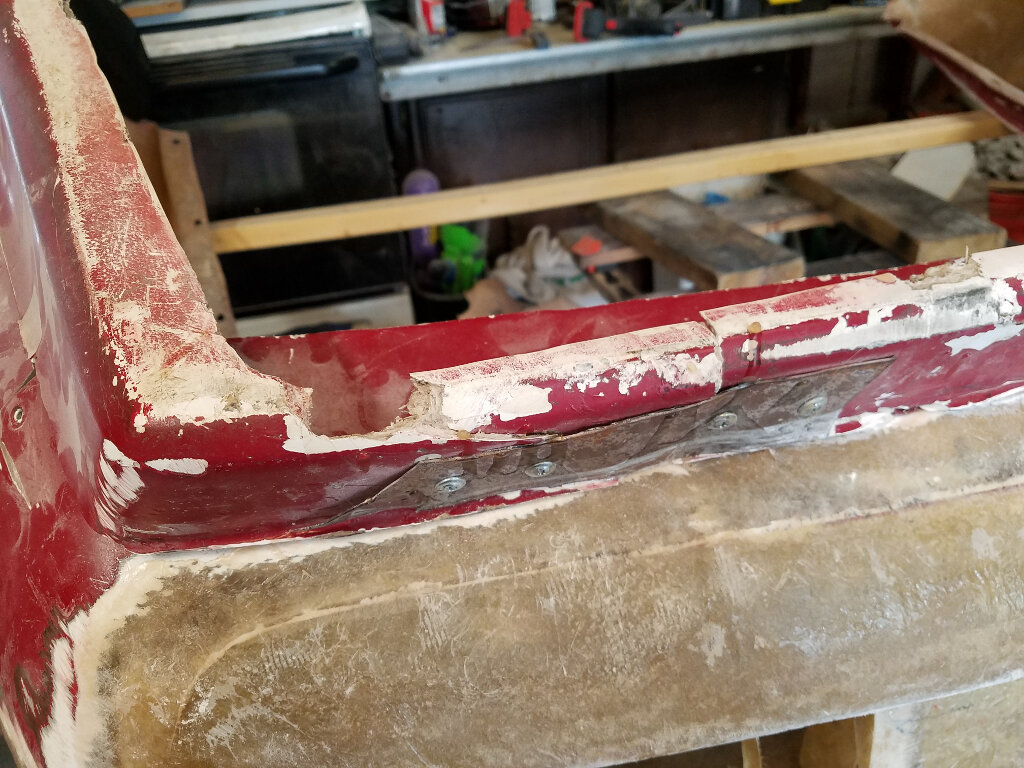
I've started looking at the front spoiler. It's a mess. It's broken in three spots and held together with sheet metal and screws. Looks like it met a few parking barriers. So, I lopped it off. I also fixed a crack in the lower fascia.


I'm going to ponder on how to replace it for a bit.

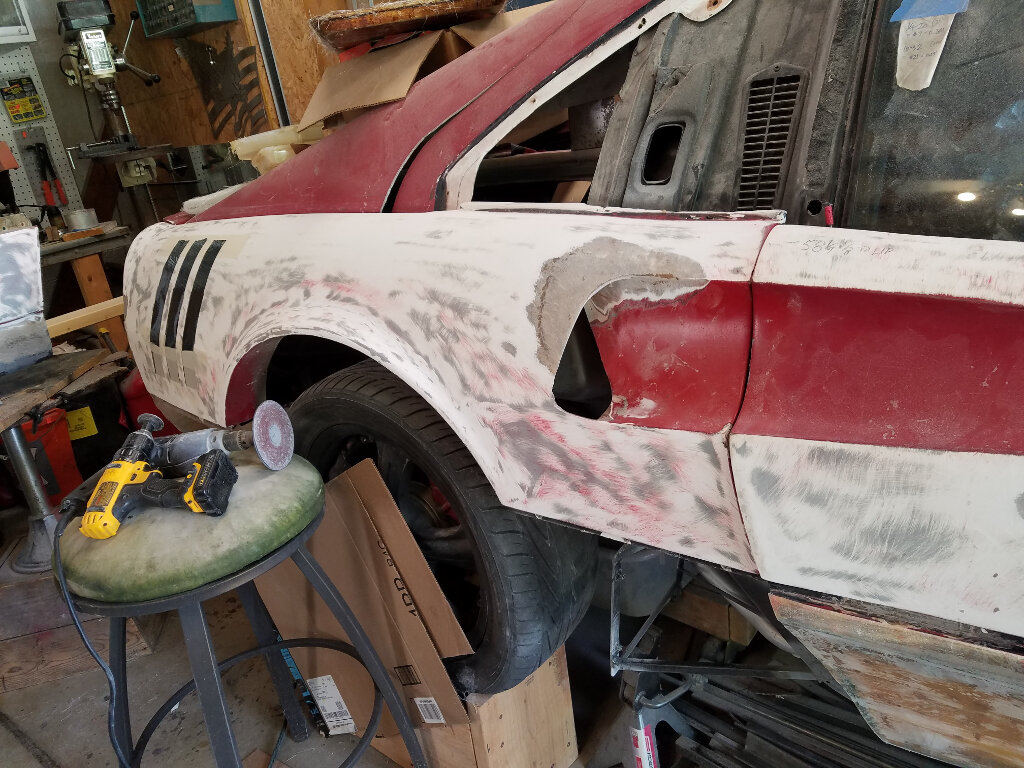
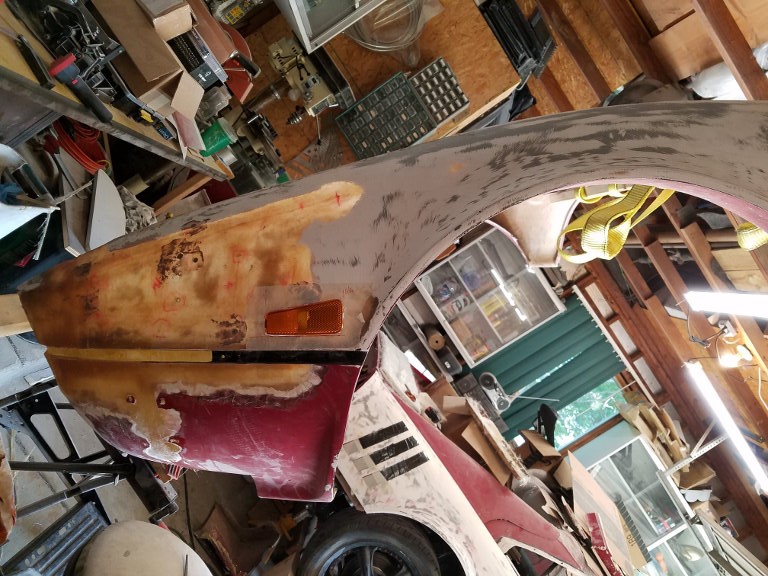
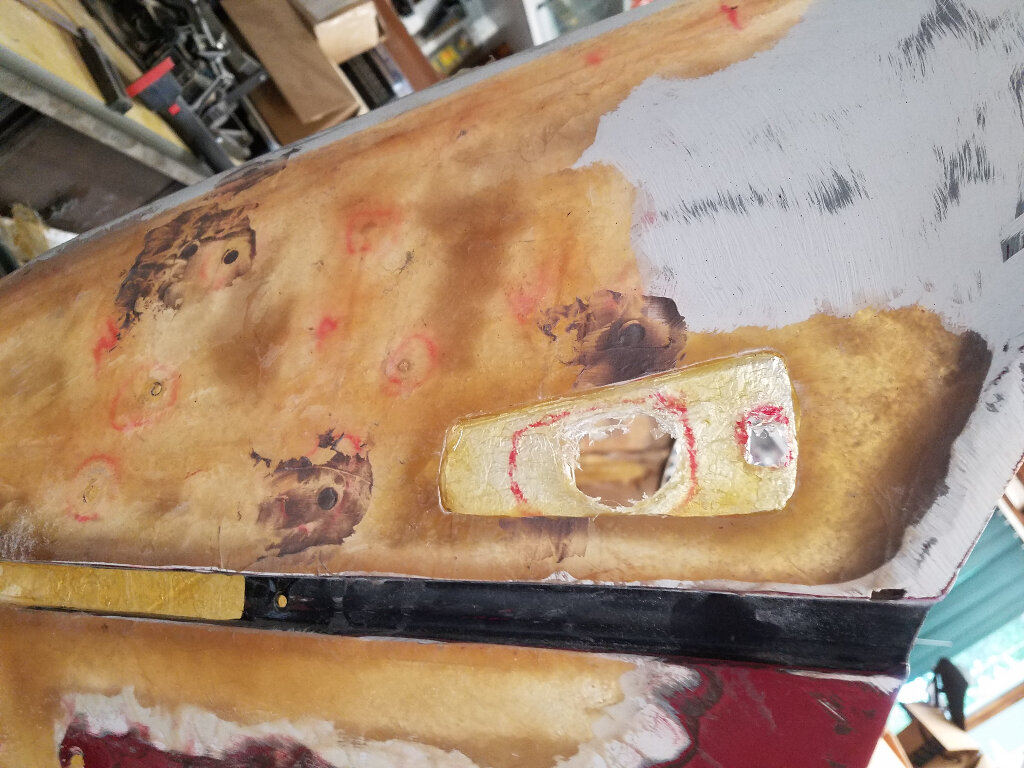
In the mean time, I chose some HHR running lights for the front, so I integrated them in. I moved the original location I chose from vertical below the belt line to horizontal above the line.

First I made a cardboard template of the lamp. Then traced it onto the fender. Then cut it out. A little fine shaping to fit the lights into the fender. Afterwards, I taped the lamps up and created the pockets in the fender.


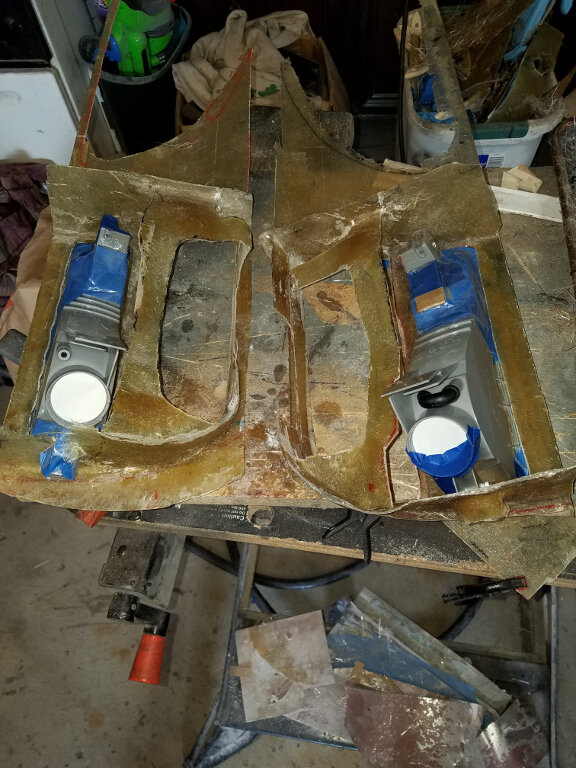
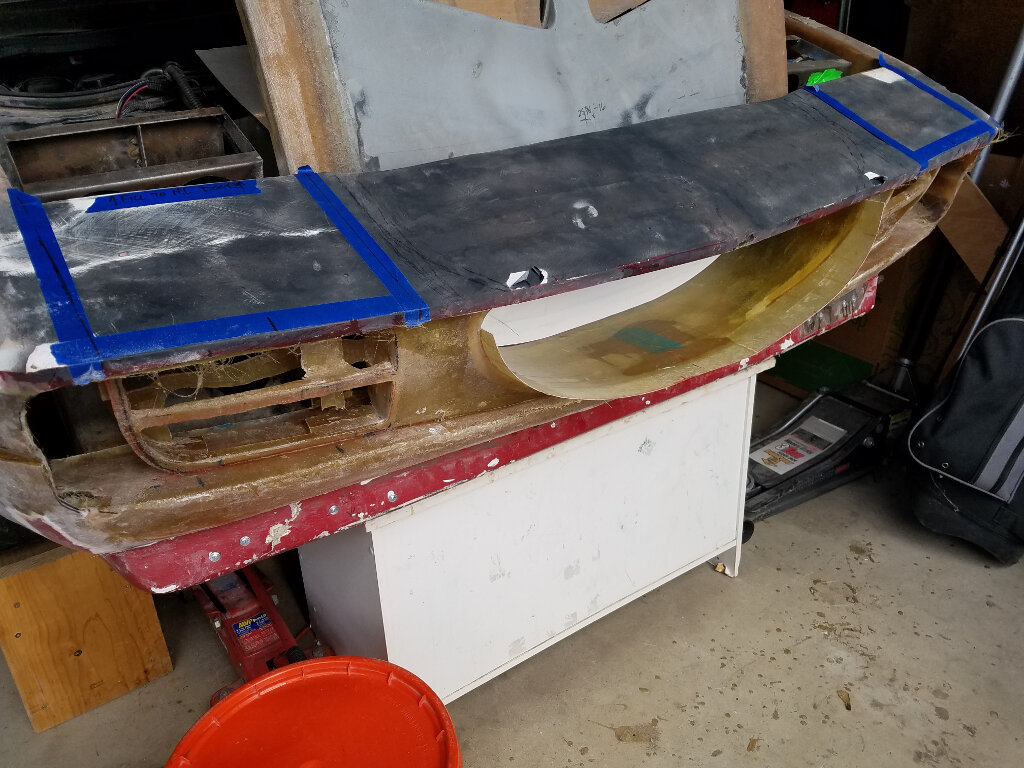
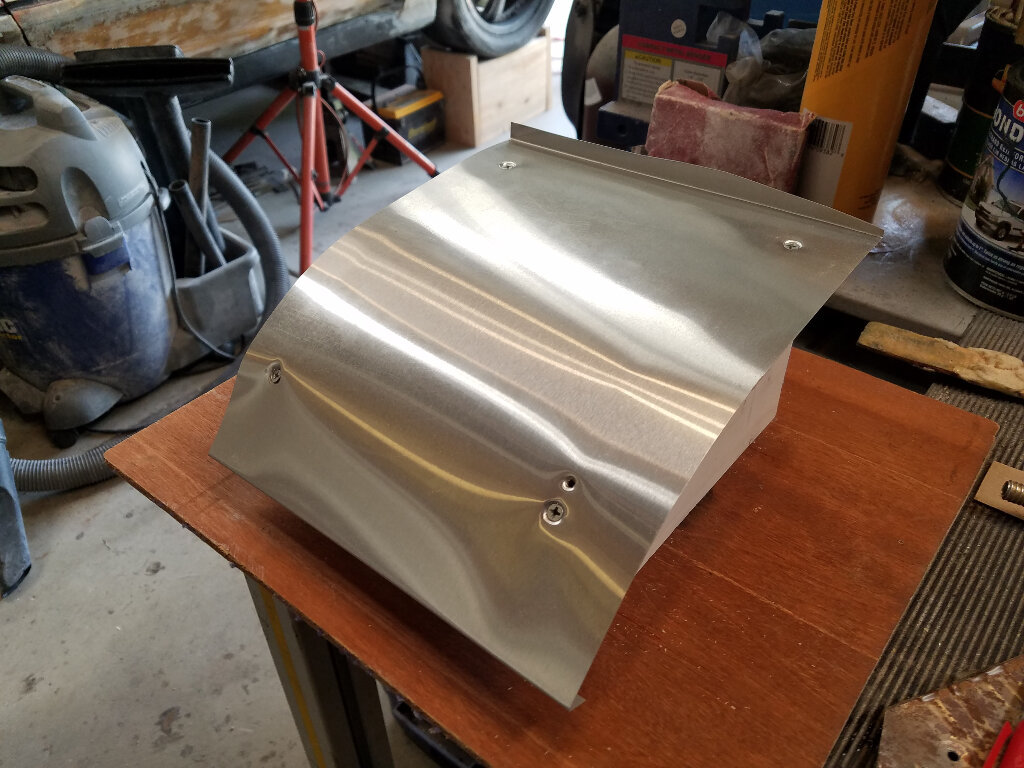
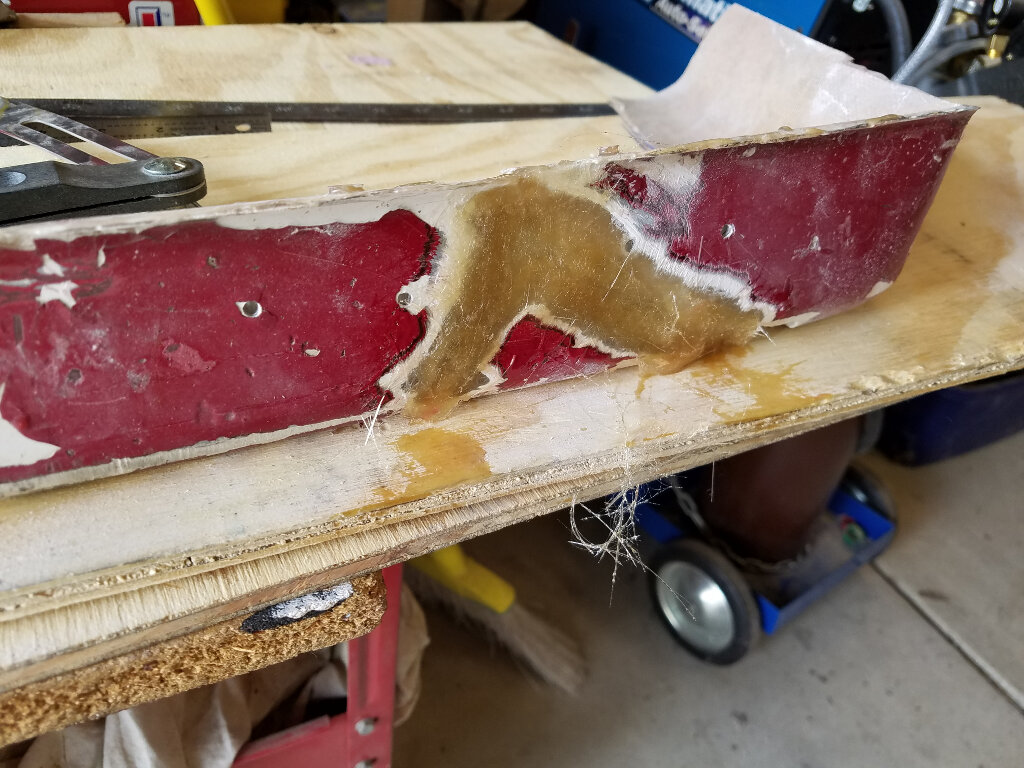
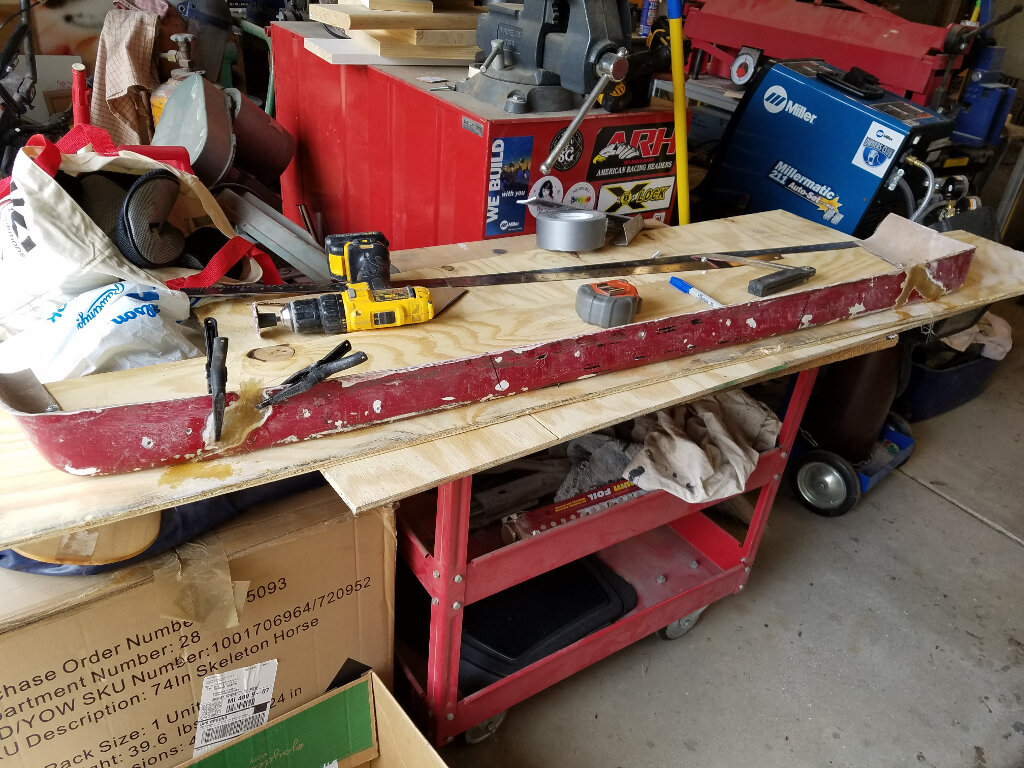
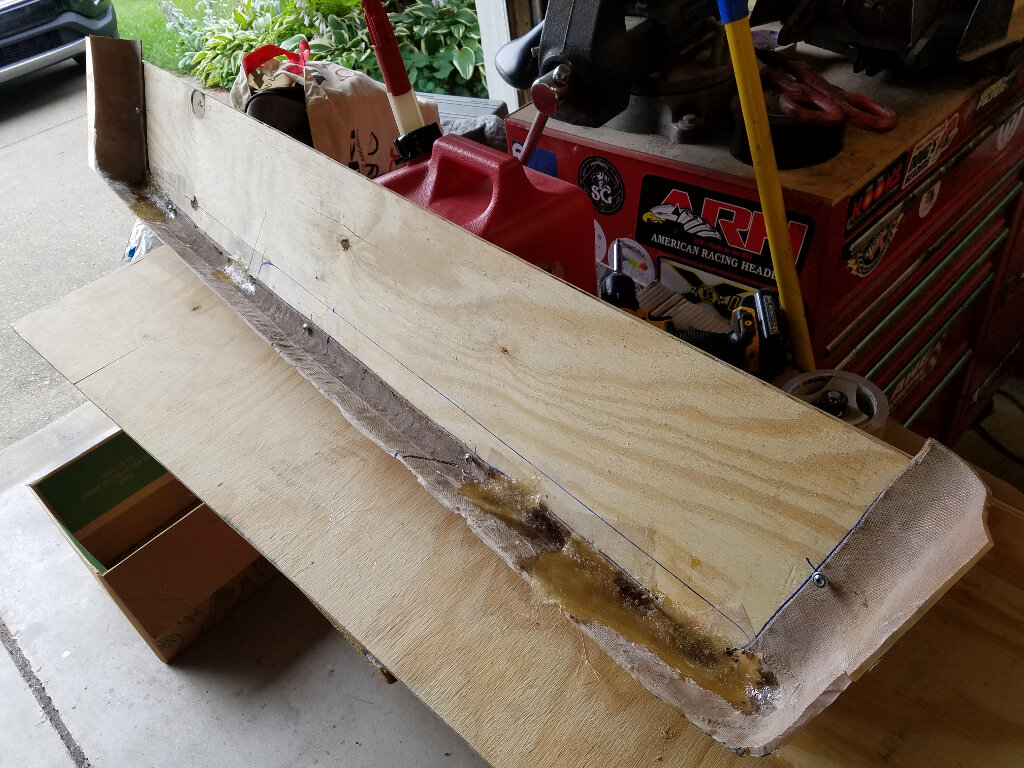
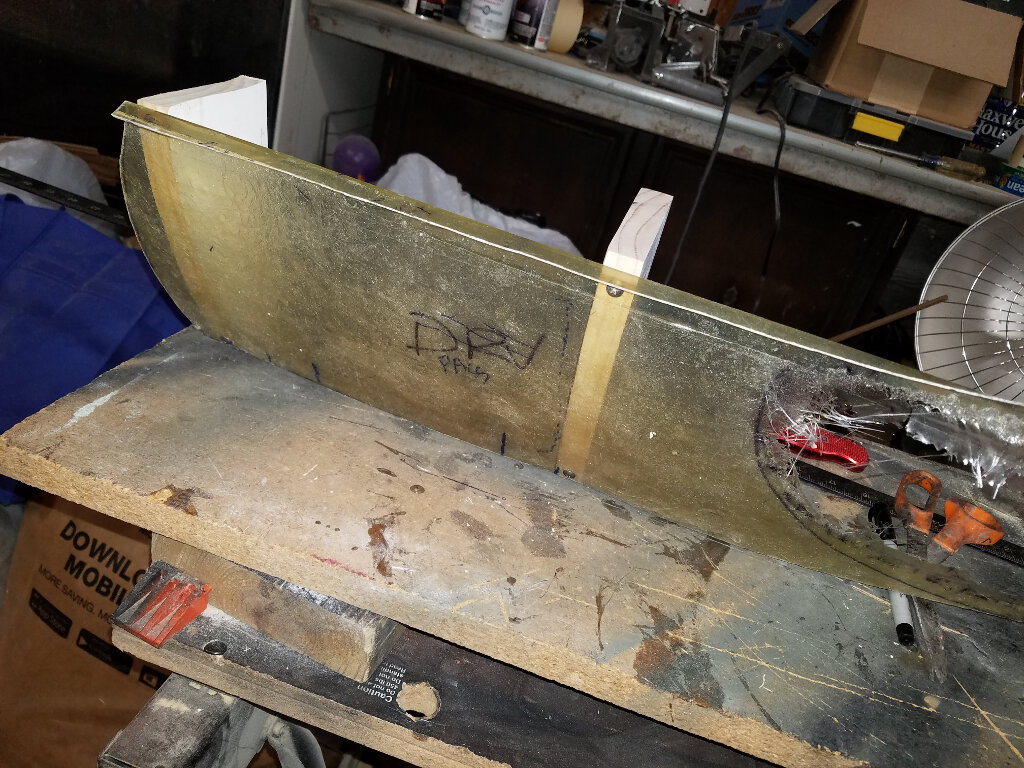
Then it was back on the nose. I needed to finish the air inlets to the side of the lights. This required a small panel to close out the inner fender. To make this and ensure both sides were the same, I made up a quick mold out of some scrap wood and aluminum flashing.


With matching pieces for both sides, I glassed them in.


Again, it doesn't look like much, but it was about 20 hours of work time. Next step I think will be tackling that spoiler. That's going to take a little while, I expect.

Til next time...

Bob
IP: Logged
RCR
Member
Posts: 4397
From: Shelby Twp Mi
Registered: Sep 2002


Feedback score:    (7)
Leave feedback


Total ratings: 102
Rate this member

Report this Post07-16-2017 06:11 PM Click Here to See the Profile for RCRSend a Private Message to RCREdit/Delete MessageReply w/QuoteDirect Link to This Post

RCR

4397 posts
Member since Sep 2002
My work weekend is over, so here's what I did today.

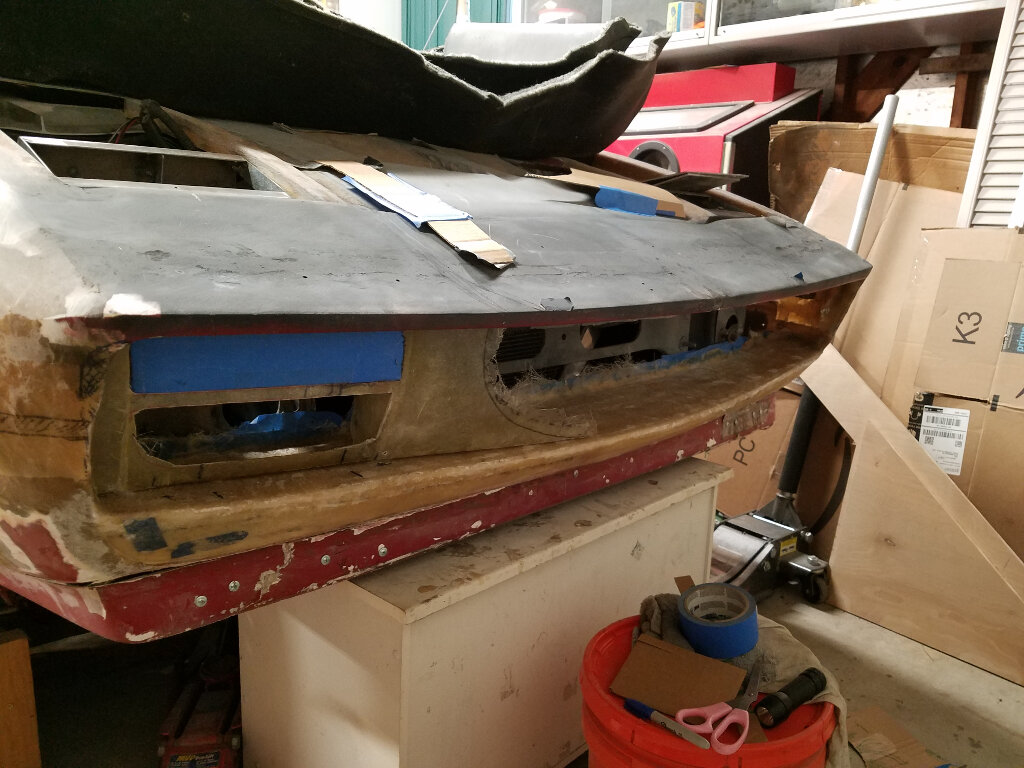
As mentioned previously, the spoiler was next. So after looking at it for a while, I thought I might use the existing pieces to use as a mold for a new piece. But, as things usually do, plans change.

Once I started piecing it back together, I didn't think it was too bad, so I decided to use it as is.

Here are the pieces glued back together, along with a couple of cracks fixed.


Exciting stuff.

Once it was solid again, I mounted it back on the fascia. I moved it forward about 1.5". In doing so, it became about 1/2" too wide to line up at the bottom of the fenders , so I cut 1/2" out of the middle. Once everything lined up, I glassed it in from the back. There's still a lot of work to do, but it's back as one piece.


On to GoT tonight.

Bob
IP: Logged
Neils88
Member
Posts: 4045
From: Jeddore,Nova Scotia
Registered: Aug 2013


Feedback score: N/A
Leave feedback


Total ratings: 56
Rate this member

Report this Post07-16-2017 08:01 PM Click Here to See the Profile for Neils88Send a Private Message to Neils88Edit/Delete MessageReply w/QuoteDirect Link to This Post
Looking awesome!
IP: Logged
355Fiero
Member
Posts: 548
From: Victoria, BC Canada
Registered: Dec 2004


Feedback score: (2)
Leave feedback

Rate this member

Report this Post07-17-2017 03:46 PM Click Here to See the Profile for 355FieroSend a Private Message to 355FieroEdit/Delete MessageReply w/QuoteDirect Link to This Post
Mods are looking really good Bob;

I remember having to piece my front air dam back together like that as well..... All looking really good.

Looking forward to more updates.
Don
IP: Logged
Previous Page | Next Page

This topic is 17 pages long:  1   2   3   4   5   6   7   8   9   10   11   12   13   14   15   16   17 
next newest topic | next oldest topic

All times are ET (US)

Post New Topic  Post A Reply
Hop to:

Contact Us | Back To Main Page

Advertizing on PFF | Fiero Parts Vendors
PFF Merchandise | Fiero Gallery | Ogre's Cave
Real-Time Chat | Fiero Related Auctions on eBay


Copyright (c) 1999, C. Pennock