Great looking dash! A "+" to you for a well documented swap.
Is it any easier to wire a newer dash with a newer engine, and have the gauges work properly? Or do you think it's just as much work as wiring a newer engine, and trying to have it operate the Fiero gauges?
IP: Logged
09:05 AM
Oct 14th, 2004
RCR Member
Posts: 4454 From: Shelby Twp Mi Registered: Sep 2002
It's probably about the same amount of work. Although since the engine is not running yet, I have no idea if the gauges work. It's all theory right now.
IP: Logged
11:43 AM
Deabionni Member
Posts: 4088 From: Kalkaska, MI Registered: Mar 2004
With the newer gauges like mine, you would need the newer engine because they work on the ALDL-can bus, even the tach and speedo. There's only a couple wires for turn signals, lights and such. The gauges for the F-body are all run from the sensors, except for the later fuel gauges. So it pretty much depends on the cluster.
Bob
PS If for some reason my setup doesn't work, I've lined up a VDO speedo and tach. Then I'll build my own cluster. (I hope not...)
[This message has been edited by RCR (edited 10-14-2004).]
IP: Logged
01:36 PM
Deabionni Member
Posts: 4088 From: Kalkaska, MI Registered: Mar 2004
Still not working on the interior, but the engine is now running.
That did present an interior problem though. I've worked on the premise that the GP computer would run the gauges. It doesn't seem to. The gauges go through the power up check, but are off when the engine is running. I'll have to look at it closer. Anyone have experience with the serial-type gauges??
Bob
IP: Logged
05:02 PM
Oct 24th, 2004
Riceburner98 Member
Posts: 2179 From: Natick, Ma, USA Registered: Apr 2002
Good to see you got the airbag cover worked out! Haven't seen this thread for a while.. Looks great to me! The 3000GT dash I'm doing has an airbag around there too, not sure what to use it for though.... Unfortunately I don't have any experience with the CAN stuff, maybe if I had stayed at GM for a while longer I would have gotten into it.. Oliver Scholz (fieros.de ?) may know something about it, he's very good with auto electronics and scan tools. (designer of the HUD, he's good! ) But he's also usually very busy.. There's got to be some good websites about the new CAN stuff though, good luck!!! If not going directly with a PCM that supports it though, you may be better off with the seperate VDO's or other earlier seperate-wired gauges. If you really like the *look* of the gauges, and assuming they use the same needle movements as earler direct-wired gauges, you could always use the circuit board / electronics of the earlier gauges to drive the movements of the newer one... Not sure if that will or will not work, but it's a thought! Good luck on the 3800 too, I just drove mine for the first time the other day, and WOW, I couldnt' believe I finally did it! Such a good feeling to have done it yourself, I must say. Now if only I can get my 3000GT gauges working with the 3800, so I can actually see how fast me and my crankshaft are going... lol
------------------ Bob Williams Multi-colored '86 Mutt, a work in progress! (3800SC installation in super-super-ssuuppeerr-slow-motion progress... Will I ever be done?? I doubt it! Sounds great revving in park though.. :( )
IP: Logged
06:14 PM
Oct 27th, 2004
RCR Member
Posts: 4454 From: Shelby Twp Mi Registered: Sep 2002
Well, I'm sorta back on the interior because of my gauge problems. I dissassembled the Fiero and Grand Am gauges to see what makes them tick. With the exception of the electronics, the gauges are remarkably similar. So, the current plan is to make the Fiero gauges work in the car, i.e. re-wire it for the analog gauges, then take the electronics driving the Fiero gauges and adapt them to the GA gauges. Sounds like a mess, but I'm up to the task...I think I'll keep you posted, as usual. Bob
IP: Logged
10:39 AM
Nov 17th, 2004
naskie18 Member
Posts: 6258 From: Commerce Twp, MI, USA Registered: Jun 2002
No, not really. I've found that I miss-wired the tach during the engine swap, so I'm in the process of fixing that. The other gauges seem to work, though, so that's progress. I've been sick for the week, so I'm trying to heal up so I can get back at it.Hopefully this weekend...
Nothing yet. Although I can add that the gauges are a mess. Nothing appears to be compatible. Holidays and cold have been in the way of any progress. I have some ideas cooking though
thanx for the bump...
Bob
IP: Logged
03:34 PM
Jan 18th, 2005
RCR Member
Posts: 4454 From: Shelby Twp Mi Registered: Sep 2002
I'm still having troubles with the gauges. I have the Fiero pots and lights mounted to the GA cluster, but I'm not too confident it will work. I also seem to be confused in that now I seem to be doing the Firebird dash....Just kidding, but it seems that way because I've added a Firebird cluster to my Firebird parts (2 complete door panels). I'm going to try using the Firebird parts in the GA cluster, since I know that cluster works. What a PITA. The only good thing about it is that I can work inside. Too da@# cold outside.
more later...
IP: Logged
03:55 PM
Feb 13th, 2005
RCR Member
Posts: 4454 From: Shelby Twp Mi Registered: Sep 2002
It's been a long time for areal update. If anyone is still interested, here we go....
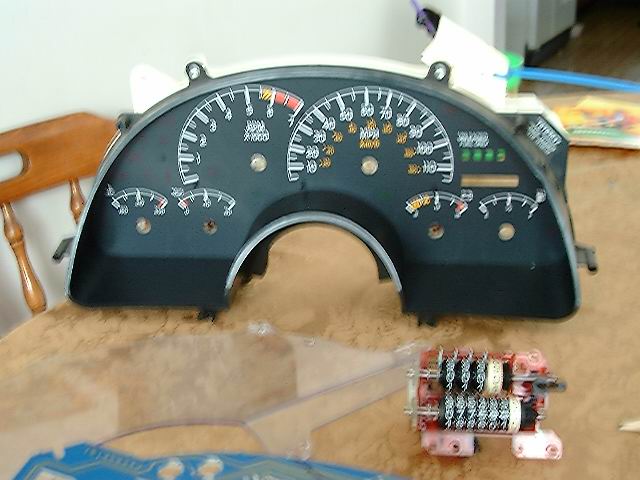
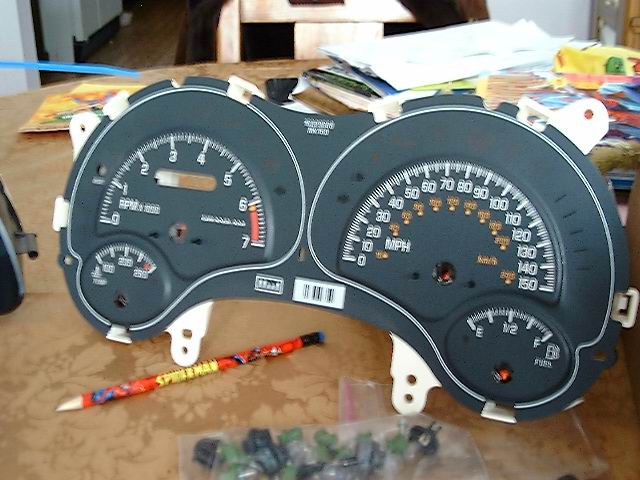
The Fiero gauge conversion was a bust. I just did not have confidence that it would work. So, I bought a '93 Firebird cluster. The plan was to take the gauge pots out of that, mount them to the GA face, then hand wire the pots to the Firebird electronics. Then use Jonathans (Jscott's) wiring diagram to adapt it to the Fiero. Peice of cake...
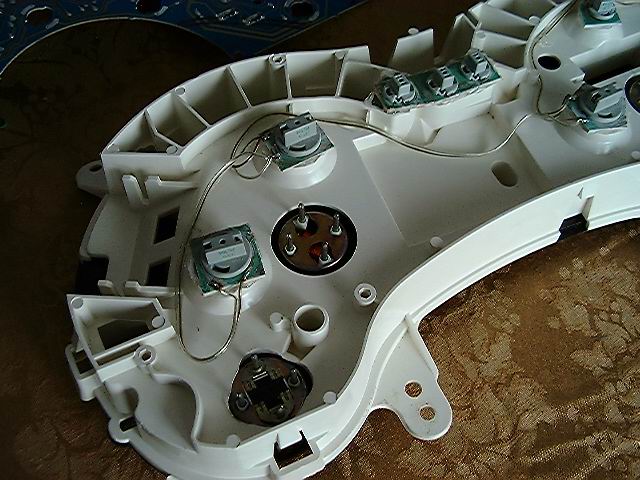
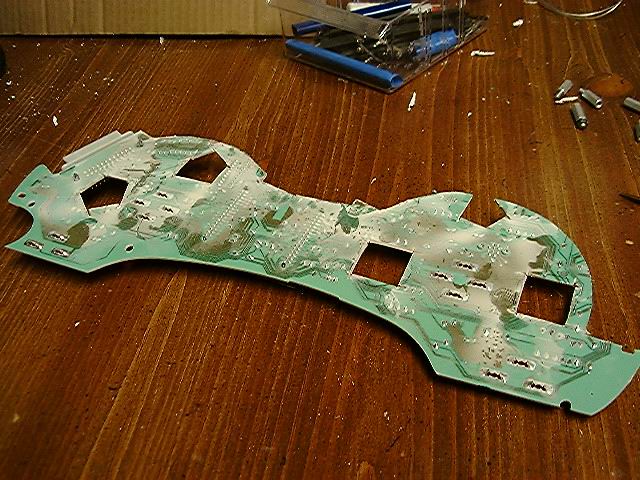
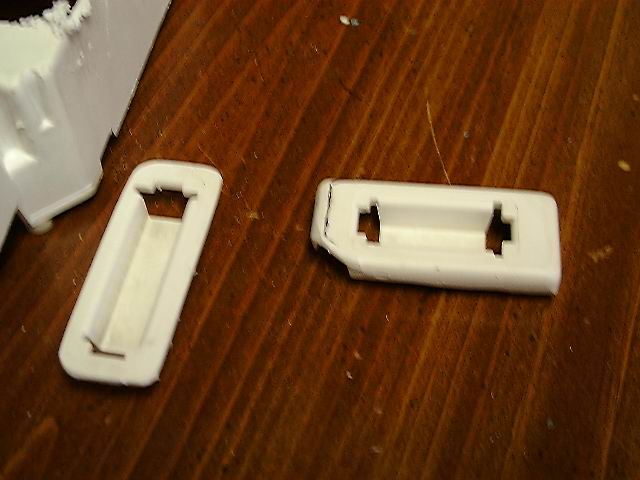
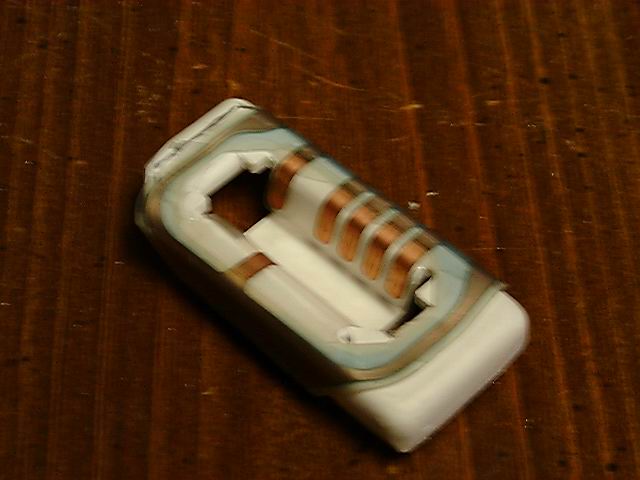
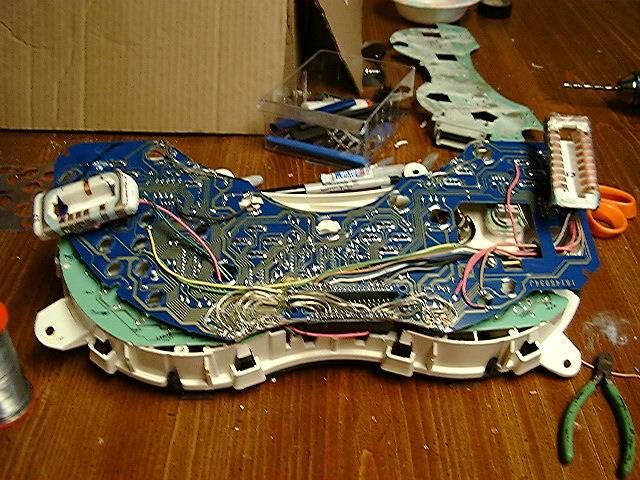
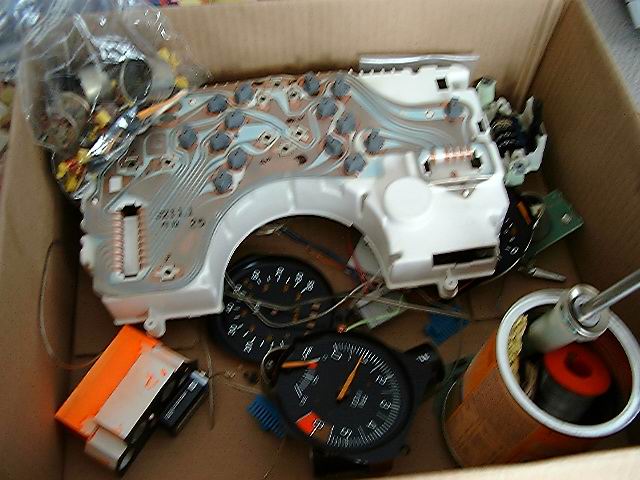
The easy part was the pots. They came off with a couple of screws and twist locked right into the GA face plate. Then I had to connect the GA lamps up. So I chopped up my spare circuit board and glued the lights into position. Here are some of the lights mounted, and what's left of my circuit board:
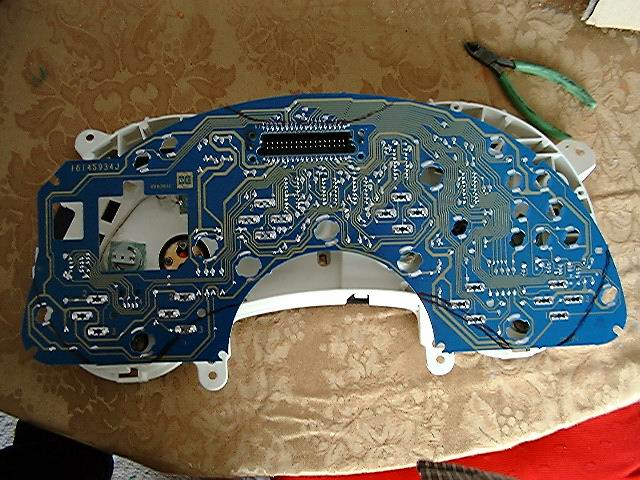
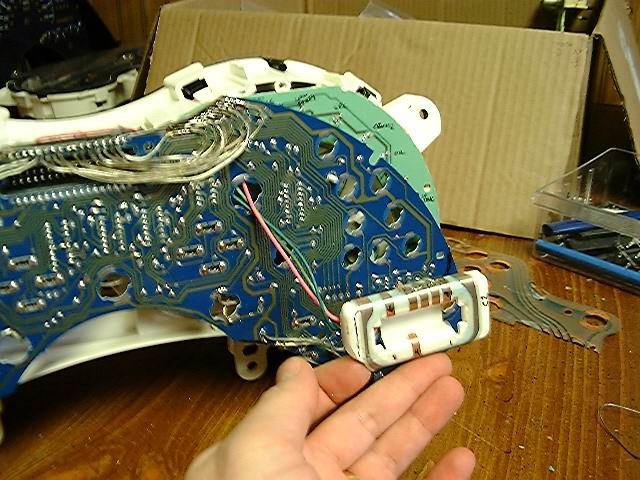
Once the lights were mounted, I layed the Firebird circuit board on the GA cluster, and marked off what needed to be trimed so it would fit.
Once cut, the circuit tracks needed to be repaired, so I ran seperate pieces of wire for each track cut:
...
[This message has been edited by RCR (edited 02-13-2005).]
IP: Logged
05:36 PM
RCR Member
Posts: 4454 From: Shelby Twp Mi Registered: Sep 2002
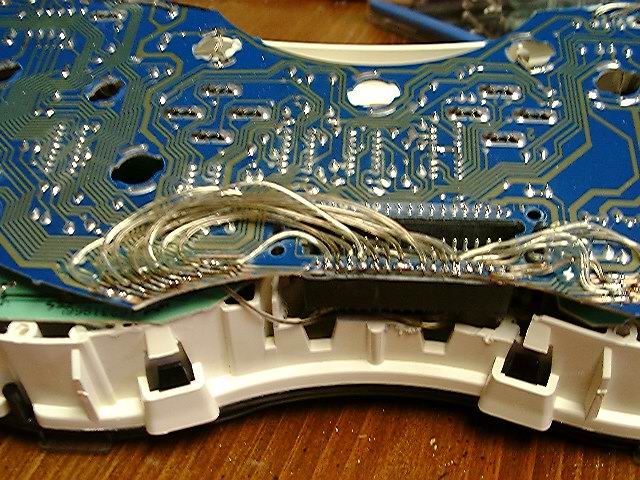
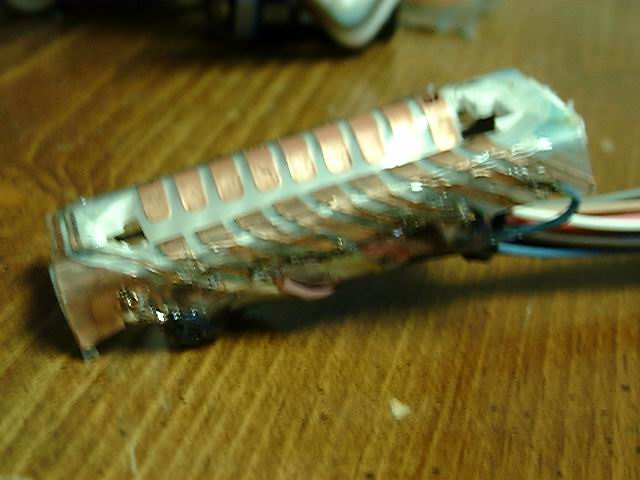
Now, it was time to wire the pots to the board. Normally they slide into contacts on the board, but since nothing lined up, I had to wire everything in. This is a pic from the side:
I permanently mounted the board to the cluster using 4 3/4" standoffs. Then I tackled the adapter harness. I cut the C2 and C3 connector bases from the Fiero cluster and cloeaned them up a bit.
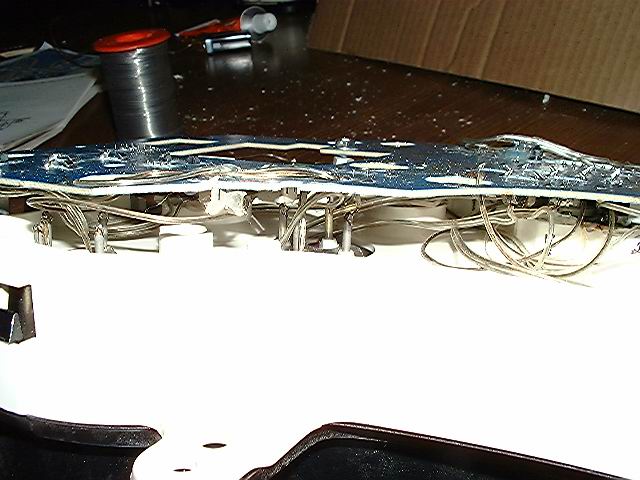
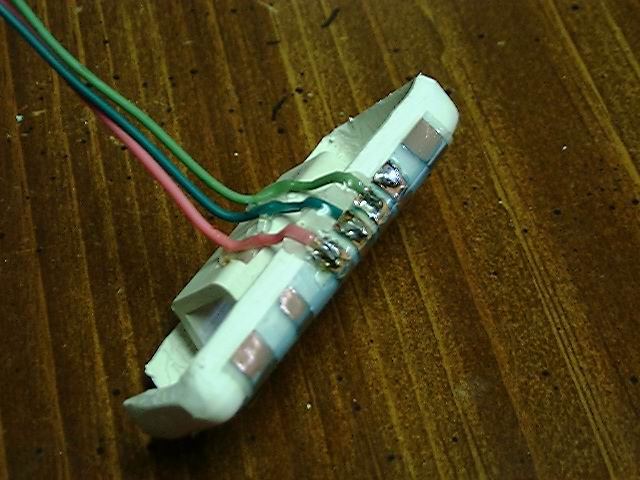
Then I cut the flex circuit from the Fiero cluster to fit. A little hot glue and it was ready for wiring.
I pealed the top layer of plastic off the contacts and soldered the wires directly to the copper. I wasn't too worried about melting the bottom layer of plastic, as I was planning on reinforcing it with glue once complete. I did run the each wire to the back and glued them individually for strain relief.
IP: Logged
05:48 PM
RCR Member
Posts: 4454 From: Shelby Twp Mi Registered: Sep 2002
With the added depth of the conglomeration, about an extra 1/2", I had some difficulty getting it in. It hit a flat portion on the inside of the dash, and part of the circuit board hit the AC ducts. So, out came the cutting disk and I modified the dash and circuit board. I still have some clearance issues, but it fits pretty close. The big question is whether it works or not. The first itme I fired it up and it did nothing. I forgot to rewire the Fiero harness after I had changed it originally for the GA, so with that fixed I fired it up again. The lights now worked, but that was it. I checked the wiring again and forgot a +12V feed for the new board. Fixed that and tried again. Still nothing. I noticed that when I put the needles back on, they were difficult to turn. Turns out when you pop the needles off, it locks the pots. If you don't push the needles on hard enough, they don't unlock. So with that fixed, I tried again. Eurika...Some working gauges. I connected the Fiero gauges (spare cluster) back up to check the idle RPM and the amount of fuel. I put the new cluster in and set the needles to the proper location. So far so good. I still need to verify speedo operation, but at least with a working tach and fuel gauge, it should be operational.
So that puts an end to todays saga. Tune back in to see if the speedo works, and if I can get this thing to fit properly without cutting more stuff
thanx for checking in....
Bob
IP: Logged
06:04 PM
RCR Member
Posts: 4454 From: Shelby Twp Mi Registered: Sep 2002
Fierodog... I can say that the tach, temp, and fuel gages are working. I don't have H2O or tranny fluid in the car, so I don't know if the speedo works. All the lights work, too. Last weekend I managed to shoehorn it in. I was having a clearance problem with the duct-work, but nothing re-routing wires and a Dremel cut-off wheel could not fix. I didn't bother taking pics because it looks like my other pics. The little time I have is concentrating on getting the car mobile (ie finish engine). You can modify your gages like I did, but pay particular attention to how far the second PCB stands up from the main board. For mine, it needs to be as low as possible to clear the duct work. Also, the pigtail for the connector on the right (C3?) needs to be about 6" from the board. Mine was about 4", so it made it a little more difficult to clear things.
As for my other little project that I mentioned, it seems to be back on hold. I was a breath away from aquiring the panels for this:
Which will take the car in a whole new direction Bob
[This message has been edited by RCR (edited 03-10-2005).]
IP: Logged
12:20 PM
Apr 13th, 2005
RCR Member
Posts: 4454 From: Shelby Twp Mi Registered: Sep 2002
Small update: Wiring issues. Blech. I was looking into why my temp gauge wasn't working and I discovered I screwed up the wiring. Somewhere. I found the actual feed from the sensor, but it was on the wrong connector, which leads me to the question, where is the wire that's supposed to be plugged into the spot where the temp wire is and why was it on the wrong connector? Still chugging along...
Bob
IP: Logged
08:22 AM
Apr 17th, 2005
RCR Member
Posts: 4454 From: Shelby Twp Mi Registered: Sep 2002
Got a good day of work in yesterday. I buttoned up the engine wiring, so I hope there are no more necessary changes. I fixed the temp gauge, or at least have it wired properly, and I fixed the speedometer. It turns out there are some differences in the '84 wiring, and the wiring of the later models. Things to note when doing a conversion is:
1) The alternator wire is connected to the ignition switch with a "sence" wire, not to C3-6 of the gauges. 2) The speed signal from the trans is on C1-S (purple) and C1-T(yellow), not C1-M. (The "not's" are from Jscott's schematic for the Firebird dash conversion)
I'm not sure this would work on other conversions without my ECM, but for the speedo, I had the typical conversion circuit (from Fiero addiction's site) but it didn't seem to be working. So I used the ECM Vss output on pin C1-65(?) of the ECM to control my speedo. From my circuit descriptions, this is a 4000 pulse/mile signal used for the cruise control. Seems to work, but until I pace traffic, I won't know if it's on or not.
One last nuicanse for me to fix...The chimes. Everytime I turn the key on, the chimes continue to ring. I've tried closing all the switch contacts (At the same time), doors, front deck, and rear deck, but it continues to chime. Anyone have an idea? Or maybe a schematic of the chime system? I don't think the schematics online http://home.t-online.de/home/u.moeller-objects/schaltp.html have the chime system listed.I'll have to double check.
thanx for tuning in. Hopefully I can have some pics of final assembly AND operation soon.
Bob
IP: Logged
08:04 AM
Apr 18th, 2005
RCR Member
Posts: 4454 From: Shelby Twp Mi Registered: Sep 2002
Well, I went over to the Ogre's Cave and found a link to a site that listed the pin-out of the chime box. I checked out the connector using a meter and found that the parking brake was on. ??? I had the brake down all the way, but the switch was still making contact, so I disconnected the switch. No more chimes.
And to think I wanted to swap in a Corvette dash. I don't have near the skill this takes, and it is truly amazing what all you have done. I'm shocked that people like you have normal jobs, instead of wiring shuttles to fly to Jupiter and crap.
Great job, it is amazing what all you have done!
------------------
IP: Logged
01:50 PM
RCR Member
Posts: 4454 From: Shelby Twp Mi Registered: Sep 2002
Gee...Thanx Aaron. I'm just learning as I go. I'm getting pretty stoked to get this thing on the road.
Linenoise: Did you figure out why it's doing that? Is the switch bad, or is it because I don't have the E-brake cables connected and there's no back tension from the springs?
[This message has been edited by RCR (edited 04-18-2005).]
IP: Logged
04:16 PM
May 3rd, 2005
RCR Member
Posts: 4454 From: Shelby Twp Mi Registered: Sep 2002
I have been doing some work on the interior. The ECM has been mounted and all wiring is dressed for the console area. There was some concern over how close the shifter was to the radio. I fixed that by heating the shifter arm up with a Oxy/Mapp torch (Home Depot $50). Once the metal was red hot, I bent the arm back about 1.5" at the top. Now I have plenty of clearance. I'll get a shot of it later. I'm going to fab up an entire console, but first I need a new shifter surround. I hope to pick one up in the junk yard. I've also been looking at door panels, and pending a trip to the fabric store, I've decided to redo the stock door panels in a similar fashion as to Roy's (Mr Fixit) Firebird dash swap. I figured it would be easier than cutting up the Firebird panels and trying to make them fit. I'll also look at fabric for replacing the head liner.
I'll have lots of pics once I get going on this again. (Mother's Day weekend will pretty much put a damper on this week )
til next time...
IP: Logged
08:29 PM
jscott1 Member
Posts: 21676 From: Houston, TX , USA Registered: Dec 2001
1) The alternator wire is connected to the ignition switch with a "sence" wire, not to C3-6 of the gauges. 2) The speed signal from the trans is on C1-S (purple) and C1-T(yellow), not C1-M. (The "not's" are from Jscott's schematic for the Firebird dash conversion)
Bob
I agree with your "Nots" My schematic is for an 88. The 84 does not have a charge indicator. The alternator gets excited through a resistor wired into the ignition switch. Also the C1-M is unique to the 88s as it is the output to the electrohydraulic power steering.
Your conversion is awesome... I'd be interested to see how your door panels come out. My first attempt at uphosltery didn't come out too good. I'l like to see how it's done.
IP: Logged
10:21 PM
May 4th, 2005
RCR Member
Posts: 4454 From: Shelby Twp Mi Registered: Sep 2002
Sorry for the lack of updates.... Just nothing going on. My daily driver died, so I was forced to stop working on the interior and get it on the road. I drove it for two weeks before buying a new car, but with the advent of lots of medical bills and a new car payment, I have not worked on the car at all. The last thing I was working on was designing and building new door panels. I was taking pics along the way for a new thread. Driving it for a while did help discover some issues. The gauges need more work: no fuel gauge, no temp gauge, and speedo is way off. Might be time to come up with something else...Don't know yet.
Thanx for checking in. I've enjoyed your dash thread too (4.9 PFI Fiero)
Have you considered aftermarket gauges (autometer, etc.) and placing them in the Grad Am cluster? It seems as though you can get full gauge sets from most of the these companies. Then, all you have to figure out the dummy lights (if you want them), turn signals, and ODO, or do without them. Good luck, with whatever you choose.
IP: Logged
02:54 PM
Dennis LaGrua Member
Posts: 16177 From: Hillsborough, NJ U.S.A. Registered: May 2000
Nice project and great install. If you wanted the 2000+ yr look, you've certainly achieved it. I might be amongst the few but I actually like the look of the original Fiero dash. Yes it's certainly 80's looking and not as sexy as your creation but it seems to impart a classic look to the interior. However, I am not a purist by any means. I did upgrade and added Mr Mikes upholstery , an aspect auto glove box and woodgrain dash inlays on everything.
LS1 Troy: Yeah...That's where I'm leaning. I had more sweat equity than cash, so I tried to keep it stock, but it's just not working out.
Dennis: I didn't like the stock look at all. That, and I couldn't leave well enough alone so it had to change. I've seen some write-ups on your car...yeah you've done some mods...Pretty awesome...
Bob
IP: Logged
07:35 AM
4.9 PFI FIERO Member
Posts: 189 From: new orleans louisiana Registered: Jul 2004
Hey I check out eveybody dash threads (there's no aborting, you must finish) lol. I use the info I've read to come up with ideas. I wish I had your skills at making shapes and stuff. Maybe I'll be finish by now . As far as wiring, aftermarket is way easier. Making it look nice and work with the setup, pain in the butt.
IP: Logged
05:39 PM
SLOWnSTEADY Member
Posts: 1706 From: Hiawatha, IA Registered: Jul 2005
Progress has been slow, and in this case, has taken a step backwards, but sometimes to move forwards, you have to move back. I have completely removed the dash...Yes, I said I didn't want to do that again, but I really had to. I decided it would be easier to fix my wiring issues, reroute the window switches, fix the heater controls, and get the mouse nest out of the heater without the dash in the way. I'm also going to reconfigure some of the bracketry for the cd changer so it's easier to get in and out. Also, I need to figure a way to get the glove box door on when everything is bolted in. There's also a clearance issue with the changer and the air duct. Whole lots of stuff to do. Oh, the headliner came back out, too. So, concidering lack of money has slowed overall progress on getting this thing back on the road, this list of fixes shouldn't cost more than time.
On a better noter, the door panel is moving along slowly, but it looks pretty good. But that's another story...
Bob
IP: Logged
07:50 AM
jscott1 Member
Posts: 21676 From: Houston, TX , USA Registered: Dec 2001
you have my admiration for cutting through so many traces on that Firebird cluster. I think I would have found another way to do it, but you make it look easy. My plug and play harness is like child's play compared to that. I would like to see some pics of your latest set-up.
Edit: Oh and my advise is to lose the CD changer, that is so 90s... the big thing now is PSP, just wire it up and you have all the tunes you need and movies and video games to boot.
[This message has been edited by jscott1 (edited 08-15-2005).]


 Unfortunately I don't have any experience with the CAN stuff, maybe if I had stayed at GM for a while longer I would have gotten into it.. Oliver Scholz (fieros.de ?) may know something about it, he's very good with auto electronics and scan tools. (designer of the HUD, he's good!


 )
)