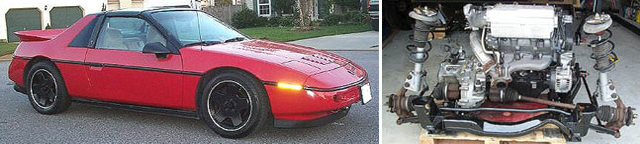
Embarking on yet another engine swap here at "Darth's Garage". This time, I will be swapping in a 91-95 version of the 3.4 TDC (DOHC) engine into an 86 Fiero GT that has a 4-speed muncie. I believe someone had parked this car in a field for a couple of years because I nearly filled up my shop vac with leaves, grass, and crap just cleaning some of this stuff out. Anyway, here is a pic of what I had to start with:
This engine appearantly blew a head gasket or has a cracked head/block because some of the coolant made it into the oil, and some of it on the ground. This thing was a mess, but on the bright side all the oil leaks it had preserved the cradle and the transmission should clean up nicely. I am going to try to pull this engine out thru the top so I disassembled most of it and it should be coming out early Monday. Here is where I am now:
After it is out, this car will be getting a brand new 3.4 TDC crate motor which I will install and hook up to comply with emissions standards per the owner's request.
All I have to do is transfer all the parts from a core motor we bought once it is in the car. I will keep my progress updated here with pictures as I complete each step of the swap progress.
------------------ power corrupts. absolute power corrupts absolutely. Custom GM Chip Burning | Fiero Engine Conversions | Turbocharging | dtcc.cz28.com
IP: Logged
09:31 PM
PFF
System Bot
twentyeight Member
Posts: 946 From: Grand Rapids, MI Registered: Aug 2003
Hey Darth, What part of Iowa are you at? Sounds like your doing pretty much what I've done with mine except the emisson part as I am not currently running a cat.
------------------
[This message has been edited by Erik (edited 03-01-2004).]
IP: Logged
01:14 AM
Darth Fiero Member
Posts: 5922 From: Waterloo, Indiana Registered: Oct 2002
Hey Darth, What part of Iowa are you at? Sounds like your doing pretty much what I've done with mine except the emisson part as I am not currently running a cat.
Davenport.
IP: Logged
01:35 AM
Erik Member
Posts: 5625 From: Des Moines, Iowa Registered: Jul 2002
Stock engine and tranny are out. The long cleanup period begins.
I think I found the crack in the block. It looks like the block has a crack that runs nearly the entire length of the deck surface just below the cylinder head. I will get some pics up Tuesday or so. Drained the oil too, chocolate milk anyone???
IP: Logged
01:34 AM
Erik Member
Posts: 5625 From: Des Moines, Iowa Registered: Jul 2002
Stock engine and tranny are out. The long cleanup period begins.
I think I found the crack in the block. It looks like the block has a crack that runs nearly the entire length of the deck surface just below the cylinder head. I will get some pics up Tuesday or so. Drained the oil too, chocolate milk anyone???
Ovaltine or Nestles?
IP: Logged
03:40 AM
LoW_KeY Member
Posts: 8081 From: Hastings, MI Registered: Oct 2001
I'm glad to see my transmission looking so nice! The project looks good so far. It's nice to know the car is in good hands 800 miles from home since I can't be there. I can't wait to get it home to start the body and interior transformation.
Thanks Darth for keeping me up to date.
BTW - Did you take everything out the top like you intended instead, or did you drop the cradle?
[This message has been edited by 2749 (edited 03-02-2004).]
IP: Logged
11:44 PM
Fierobsessed Member
Posts: 4782 From: Las Vegas, NV Registered: Dec 2001
I'm glad to see my transmission looking so nice! The project looks good so far. It's nice to know the car is in good hands 800 miles from home since I can't be there. I can't wait to get it home to start the body and interior transformation.
Thanks Darth for keeping me up to date.
Yea, no problem John. Sorry I forgot your PFF screen name, it is kinda hard to remember
IP: Logged
11:47 PM
Mar 5th, 2004
Darth Fiero Member
Posts: 5922 From: Waterloo, Indiana Registered: Oct 2002
Engine compartment cleaned and degreased, intake and cam covers from core motor are awaiting paint. Gathering other parts needed to continue with swap.
IP: Logged
01:27 AM
Mar 6th, 2004
YellowArtero Member
Posts: 256 From: Belle River, Ontario Canada Registered: Mar 2004
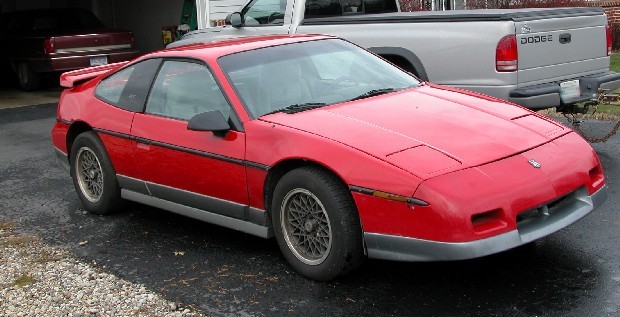
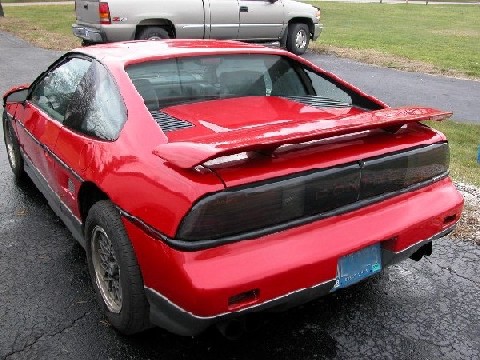
I thought I would post a few pictures of the Project 3.4 TDC and try out my new user name (2749 was really hard for people to remember). My Artero is a blast to drive but it attracts far too much attention and is a little much for a daily driver. I got a call from one of my Michigan buddies about an '86GT in a barn close to them for $500. What could I do? I sent the money and he bought the car for me. The pictures are of the car after we pulled it out of the barn.
There are a few body issues. There is a 'dent' in one door panel, a small crack in one fender, a mark in the ground effects and poorly painted fascia. There is a piece out of a dash corner but the carpets and seats are great.
The engine had a cracked block. I knew it had to be replaced but with what? I decided that I might as well upgrade but finding a reliable person to help out after the last time was a problem around here (especially after a disasterous turbo install on the Artero and a trip to DarthFiero's to get him to sort it out) . Since the car was still a few hundred miles from home, I called Darth for advice. He suggested the 3.4TDC as a good compromise. Good power, ease of installation, fuel economy, and the hi-rev fun factor to drive make it a great choice. I decided to let him do the whole swap and I would concentrate on the body and interior. After a search and another nighmare receiving damaged crate engines, he finally managed to get a good one and the swap began.
My job has now started. I'm getting the shop ready, cleaning the spray guns and acquiring the goodies to make the car special. Below is how I want it to look like, nice but not overdone. I'll also apply some of the Artero touches to this car as well.
------------------
IP: Logged
10:31 AM
Godson Member
Posts: 36 From: Raytown, MO, USA Registered: Feb 2004
Hey Erik are you ever around the KCMO area if so think I can get a ride in your Fiero, I just want to make sure that I am choosing the right motor for my Fiero when I get it this summer. :P
------------------ Don't judge me for how I talk, judge me for who I am.
IP: Logged
02:15 PM
Darth Fiero Member
Posts: 5922 From: Waterloo, Indiana Registered: Oct 2002
John, definately like the new name. I can't wait to see how this car is going to turn out after you get ahold of it. Your Artero is definately one of a kind which can be both good and bad .
IP: Logged
10:54 PM
Mar 7th, 2004
crzyone Member
Posts: 3571 From: Alberta, Canada Registered: Dec 2000
GM has discontinued using double-platinum tipped spark plugs, presumably because the platinum tips like to fall off and end up wedged between the piston and cylinder wall where they can cause some damage. GM has superseded these plugs with Iridium spark plugs which are also supposed to last 100,000 miles. Since plugs and wires are not very easy to change on the front of the 3.4 DOHC engine when it is installed in a Fiero, we will go with the long-lasting Iridium plugs.
I will probably get the pressure plate local since they are significantly cheaper here. I don't know if the GM part comes with a clutch kit and I can't use the clutch disc from the 3.4 DOHC on the 4-speed muncie trans because the spline is different. Besides that, the pressure plate gmpartsdirect sells is special ordered and cannot be returned. As far as the plug wires, GM has them the cheapest and they are superior quality compared to anything you can buy at AutoZone or most other parts stores, at least for this engine. If I was doing a 3800 swap I would probably just get a custom set of Crane FireWires or Accels but they don't make a set with the right ends for the 3.4 DOHC.
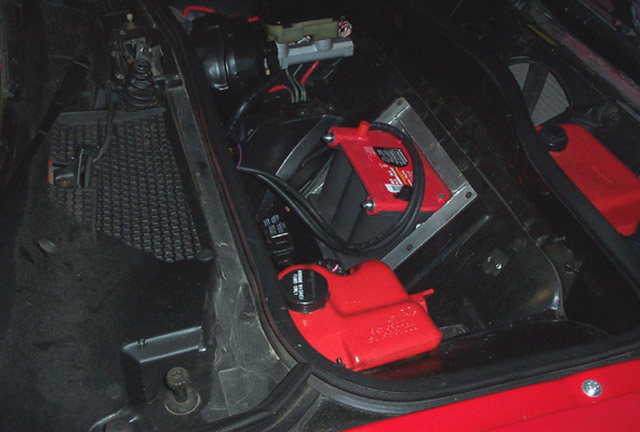
This project has been on hold for a couple of weeks while I was waiting on parts-ording funds but the money is here so it is back to work. Today I will notch the right hood hinge and rebuild the battery tray. Already bought an Optima Gel-Cell battery so I am good to go there. I will get some pictures posted of the notching and battery tray work later today or tomorrow.
[This message has been edited by Darth Fiero (edited 03-16-2004).]
IP: Logged
02:00 PM
Darth Fiero Member
Posts: 5922 From: Waterloo, Indiana Registered: Oct 2002
The stock battery tray was in bad shape so unfortuneately it cannot be salvaged. But the good news is I just saved 15% on my car insurance by switching to Geico.
Seriously tho GM still sells the Fiero battery tray and support. You can order them from GMpartsdirect for about $15 each plus shipping.
10071787 Tray ASM 20489129 Support
I cut out the old battery tray and am waiting on John's decision on if he wants to keep the stock location battery tray or 86 it and go with a front mounted battery.
[This message has been edited by Darth Fiero (edited 03-16-2004).]
IP: Logged
07:39 PM
Darth Fiero Member
Posts: 5922 From: Waterloo, Indiana Registered: Oct 2002
While I am waiting on John's battery location decision, there was the matter of the right lid hinge. The 3.4 TDC/DOHC engine will not clear the Fiero's right hinge assembly so some of it needs to be removed. The lid spring that supports the right side of the lid will also hit the cam cover on the engine when you try to close the lid so it needed to be removed as well. Here is the amount of trimming that needs to be done:
IP: Logged
07:55 PM
Darth Fiero Member
Posts: 5922 From: Waterloo, Indiana Registered: Oct 2002
After you remove the spring that supports the right side of the lid, the lid will no longer stay up on its own so a strut will need to be added. The best one I have found is from a mid-early 90's Park Avenue/ Olds Delta88/98 GM car.
However, before you can use this strut you will need to remove the clips on both ends and drill out the holes a bit. The rod end hole needs to be drilled out to 3/8" so it will work with the stock Fiero lid support torx-head bolt, and the strut end needs to be drilled out to 5/16" so a bolt can go thru it. The rod end will also need to be bent by approx 1/2" to clear the Fiero lid hinge bolt head when it closes as well.
Since this is a fastback car, the right grate support bracket assy is in the approx location of where the strut needs to be tied into the body. The problem is the grate bracket is not strong enough to support the weight of the hood or the pressure from the strut so a reinforcement bracket needs to be added. I used the grate bracket as a guide and then made a template of the bracket I needed using cardboard. Once the metal piece was cut out and trimmed, I welded it to the dog bone support, again using the grate bracket as a guide.
Once the metal piece is welded in place, all you need to do is drill a hole thru the metal piece and grate bracket, then you can bolt the strut end of the strut support to it using a 5/16" bolt and 2 nuts. The bolt is actually tightened to the body using the two nuts and then enough clearance is left between the outside nut and bolt head so the strut can pivot freely.
Here is the finished product:
With the lid closed, the strut tucks nicely between the lid and grate bracket, and up away from the engine.
Cheap, effective, and it looks good.
IP: Logged
07:56 PM
SplineZ Member
Posts: 952 From: Edmonton, Alberta, Canada Registered: Nov 2002
I really appreciate your updates on this. I can see that you know what your doing, and this really helps all 3.4 TDC swappers. I hope to do my swap this summer. Please keep up the documentation I would even give you money to keep doing this.
IP: Logged
10:41 PM
scrabblegod Member
Posts: 1014 From: Lexington, KY Registered: Jun 2003
I finished my 4.9 swap in the fall, and now that spring is here, it is time to do the 3.4TDC w/4T60E in my wifes car. I have started mounting the engine and trans on the cradle, and will install it in a week or two.
I would like some thoughts on a couple ideas.
I took the p/s pump apart and removed the pump vanes and resevoir. I then plugged the lower port and have a plug for the top port. This will allow me to retain the pump with enough fluid in it to keep the front bearing lubricated, but not cause a pumping load. With this setup, I will not have to make an idler, and it will still use the stock belt.
For mounts, I am using the stock trans mounts and the front mount and bracket from a 2.8. On the sides of the 3.4 block, there are brackets that the original motor mounts bolted to. The holes in the bracket point down at an angle. I want to weld a piece of angle to the cradle front and rear, then use a threaded rod with 4 rubber bushings and a sleeve ( as used on the ends of a swaybar ) to help prevent engine rock. Will these do the same job as a dog bone? Keep in mind, this is an automatic (the wife can't drive a stick) so it does not have the drivetrain shock of a stick.
Gene
4.9 87 Notchie 3.4 TDC 87 SE in progress soon to start 455 Longitudinal 87 Notchie
------------------
IP: Logged
11:34 PM
Mar 17th, 2004
Darth Fiero Member
Posts: 5922 From: Waterloo, Indiana Registered: Oct 2002
Gene, you can use the stock mount brackets for the threaded rod idea you have but you may not need to make it that complex. Go to your local auto parts store and have them pull a motor mount for a 75 Dodge 1/2 ton pickup truck 2WD with the 318 V8 engine and have a look at it and see if it would be easier to build something to accomidate that, rather than your threaded rod idea. The only thing that would worry me about the threaded rod is the threads wearing on the isolators. But yes, to answer your question you could use the front and back mounts on the engine to limit engine rock. Just make sure you use some pretty stiff mounting on those pieces.
IP: Logged
12:14 AM
gascarracer Member
Posts: 129 From: Batavia, Ohio, USA Registered: Apr 2003
Thanks Darth Fiero for all of your time and efford in posting all of the pictures and the write up. If you keep this up I will have a step by step procedure in swaping in a 3.4 TDC in a Fiero.
Thanks again.
------------------ Ernie
1988 Silver GT One owner 47000 miles. Soon to be a 3.4 DOHC powered.
IP: Logged
02:48 AM
PFF
System Bot
YellowArtero Member
Posts: 256 From: Belle River, Ontario Canada Registered: Mar 2004
Thanks for the update. I just had to find someplace to send this. The Florida sunshine feels so good. It's much nicer down here than back home in the snow. I'm off to the Daytona Show and I'll try to get back to see the updates. Go ahead and get the parts you need. I certainly trust your judgement. Keep up the good work Darth and I'll catch some rays for you!
John
IP: Logged
05:36 PM
Darth Fiero Member
Posts: 5922 From: Waterloo, Indiana Registered: Oct 2002
John gave me the go-ahead on the stock location battery tray so I bolted and welded the new one in place. The support is designed to be spot welded to the tray asm but since I don't have a spot welder, I just simply drilled some 1/4" holes in the support and then used my MIG welder to weld the support to the tray and fill up the holes. Be sure to grind down the welds if you do this so they don't wear holes in the battery.
Tomorrow I will install a new fuel pump since the stock 2.8 one is very sick sounding. Since this motor is going to stay pretty much stock I will be installing one for a 92 Lumina 3.4 DOHC. They retail for about $50 or so.
IP: Logged
08:31 PM
qwikgta Member
Posts: 4670 From: Virginia Beach, VA Registered: Jan 2001
Rob, I talked the battery placement over with John and he decided to go with the stock location because it was cheaper. Besides that, the 3.4 TDC engine does not interefere with the battery in the stock location so why put it up front? I know, you are thinking weight distribution but the optima only weighs what, 20-25lbs and that is not going to make that big of a difference for someone who is going to use this car as a daily driver.
IP: Logged
11:02 AM
DKOV Member
Posts: 1564 From: Portland, OR, USA Registered: Mar 2001
You're right, it doesn't interfere and that's good, but...
If you relocate the battery up front, you can then reloacte the Coil Packs into the stock Batter location for added cooling. Remember, when the engine was in the Grand Prix or whatever W-body it came out of, the airflow was right on the coils which are bolted to the block. They get hot. Heat is BAD
Here's what I mean...
That is looking into the stock battery location, from the left side of the car, over the top of the power steering (before I removed it) pump. They tuck back in there nicely and give you access to the wires, et all. Plus, it gets it away from the engine in a nice, cool place.
Somthing to think about.
By the way, the battery relocator kit is nice too... Once installed, you can put the spare tire over it, and never even SEE the battery again... which I like. I also used an Optima so I never NEED to see it again
Whatevere you do... is great
DKOV -
[This message has been edited by DKOV (edited 03-18-2004).]
IP: Logged
11:49 AM
Darth Fiero Member
Posts: 5922 From: Waterloo, Indiana Registered: Oct 2002
Actually, I am going to put the coil pack in the stock location for the 91-93 engine which is right around the oil filter and starter. In a Fiero, this will be easy to get to plus I can use the stock plug wires no problem.
IP: Logged
01:59 PM
Darth Fiero Member
Posts: 5922 From: Waterloo, Indiana Registered: Oct 2002
Since most of the parts are still in shipping, it was time to get around to some of the other stuff that still needs to be done, like the fuel pump. As I said earlier, the stock 2.8V6 pump sounded very sick when I was draining the tank so I decided to change it out. I opted for a stock pump that is for a 92 Lumina Z34 3.4 DOHC. However, I ran into a couple of problems when trying to put the new pump in. The 86 and earlier Fiero's had the old-style fuel pump wiring in which the individual wires were not part of a connector that plugs into the pump. If this tank was from a 87-up car, it should have the correct connector and the Lumina pump would be plug and play. Below is a pic of the stock pump/sender assy.
Before going any further, I would like you all to take notice of the plastic piece that connects the output of the fuel pump to the sender assy. This is what GM calls the "pulsator". Basically, it is nothing more than an open area inside that seals to the pump and sender line using 0-rings. This piece is supposed to silence the pump during normal operation. My suggestion to anyone doing a fuel pump is to not reuse, or even use a new one of these as they have been known to leak frequently. As a substitute, you can attach the fuel pump to the sender using a piece of 5/16" fuel injection hose and two hose clamps.
As I just mentioned, this Fiero's stock fuel pump wiring is not compatible with the new pump. Basically, you have two options. Some new pumps come with a wiring kit which should include a couple of wires with terminals already on them as well as a new connector.
If you are lucky enough to get one of these with your pump, then you are home free. Simply remove the old wires from the sender and install the new wires and connector, making sure to observe correct polarity to the pump. If you don't get a wiring kit with your pump, then you are going to need to track down the right connector for the newer style pump. Almost all 87-up GM cars and trucks used the new style connector:
If you have to go this route, you should use crimp connectors with the shrink tubing and glue in them to splice the new connector to the old sender harness:
In either case, make sure your connections are clean and tight, and make sure that the sender float will not hit the wiring at any range of its travel. Once the unit is assembled with a NEW STRAINER, carefully put it back into the tank and tighten the retainer collar.
Before I put the tank back in the car, I tested the fuel pump to verify that the pump was working. This can be done by grounding the black wire and supplying 12v + power to the tan/wht wire at the yellow tank harness connector. Something else I did at this point was to remove the old rubber fuel lines from the supply and return lines on the tank and put on some longer fuel injection hose because I have to reroute the fuel system on this car to be compatible with the 3.4 DOHC engine.
The 3.4 engine's fuel lines get their fuel from the driver's side of the car. Since this is an 86 2.8 car, the fuel lines are routed to the pass side stock. I moved the filter and hard lines to the driver's side. More pictures to come...
IP: Logged
07:03 PM
Formula88 Member
Posts: 53788 From: Raleigh NC Registered: Jan 2001


 .
.