Pennock's Fiero Forum
  The Construction Zone
  Ferrari 288GTO build (Page 1)

Post New Topic  Post A Reply
Email This Page to Someone! | Printable Version

This topic is 15 pages long:  1   2   3   4   5   6   7   8   9   10   11   12   13   14   15 
Previous Page | Next Page
next newest topic | next oldest topic
Ferrari 288GTO build by dobie1
Started on: 08-31-2014 11:18 PM
Replies: 597 (28630 views)
Last post by: zkhennings on 03-08-2024 01:55 PM
dobie1
Member
Posts: 450
From: BC, Canada
Registered: Jun 2005


Feedback score: N/A
Leave feedback

Rate this member

Report this Post08-31-2014 11:18 PM Click Here to See the Profile for dobie1Send a Private Message to dobie1Edit/Delete MessageReply w/QuoteDirect Link to This Post
I've been doing a build over on MM since Feb 2014, a few guys have told me I should post over on Pennock's, so I'll try to copy it over Enjoy! My modified Ferrari 288 GTO Project!


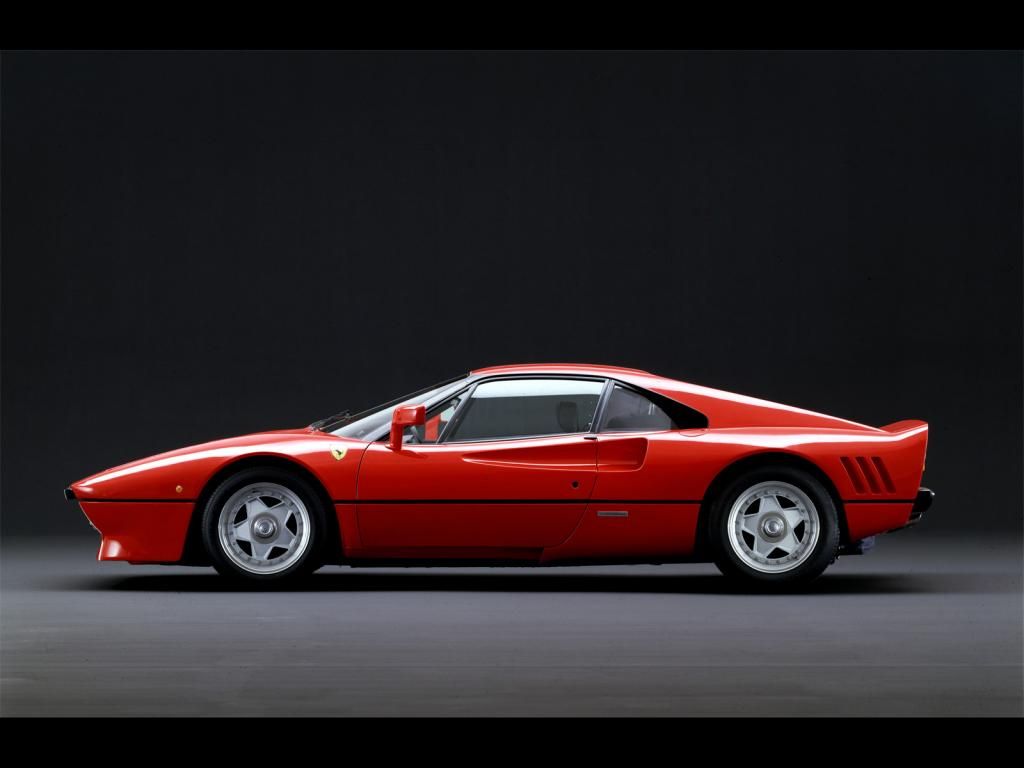
I went in a different direction in my 308 build. I finally had the kit attached to my Fiero frame lined up pretty good. But I have caught a bug from a fellow builder Don here in Victoria.
I think I'm going to modify it into a 288 GTO. as I just love the lines.!!
I really like the Koneig modded 308 lower duct and rocker/running boards so I'm going to try to add these to my 288GTO,

Now if I can just figure out how to post pics to this thread!!


Wayne

[This message has been edited by dobie1 (edited 09-06-2014).]

IP: Logged
PFF
System Bot
dobie1
Member
Posts: 450
From: BC, Canada
Registered: Jun 2005


Feedback score: N/A
Leave feedback

Rate this member

Report this Post08-31-2014 11:53 PM Click Here to See the Profile for dobie1Send a Private Message to dobie1Edit/Delete MessageReply w/QuoteDirect Link to This Post
IP: Logged
mrfred8
Member
Posts: 1719
From:
Registered: Oct 2011


Feedback score: (2)
Leave feedback

Rate this member

Report this Post09-01-2014 12:13 AM Click Here to See the Profile for mrfred8Click Here to visit mrfred8's HomePageSend a Private Message to mrfred8Edit/Delete MessageReply w/QuoteDirect Link to This Post
you have to post the actual image link not the photobucket page link

IP: Logged
RCR
Member
Posts: 4397
From: Shelby Twp Mi
Registered: Sep 2002


Feedback score:    (7)
Leave feedback


Total ratings: 102
Rate this member

Report this Post09-01-2014 08:40 AM Click Here to See the Profile for RCRSend a Private Message to RCREdit/Delete MessageReply w/QuoteDirect Link to This Post
Hi Wayne... Thanks for posting here too. Now get back to work.

Bob

And for those that cant wait for the pictures: http://www.madmechanics.com...288-gto-project.html
IP: Logged
dobie1
Member
Posts: 450
From: BC, Canada
Registered: Jun 2005


Feedback score: N/A
Leave feedback

Rate this member

Report this Post09-01-2014 08:44 PM Click Here to See the Profile for dobie1Send a Private Message to dobie1Edit/Delete MessageReply w/QuoteDirect Link to This Post
Thanks mrfred8 i'll try this again..... posting pics here


Bob I've been working my butt off on the car!! I was glassing all day tying the new and old together.

[img]/Users/dobie44/Pictures/iPhoto

I copied the link from my computer but it isn't showing up? What am I doing wrong?

[This message has been edited by dobie1 (edited 09-01-2014).]

IP: Logged
dobie1
Member
Posts: 450
From: BC, Canada
Registered: Jun 2005


Feedback score: N/A
Leave feedback

Rate this member

Report this Post09-01-2014 08:57 PM Click Here to See the Profile for dobie1Send a Private Message to dobie1Edit/Delete MessageReply w/QuoteDirect Link to This Post

dobie1

450 posts
Member since Jun 2005
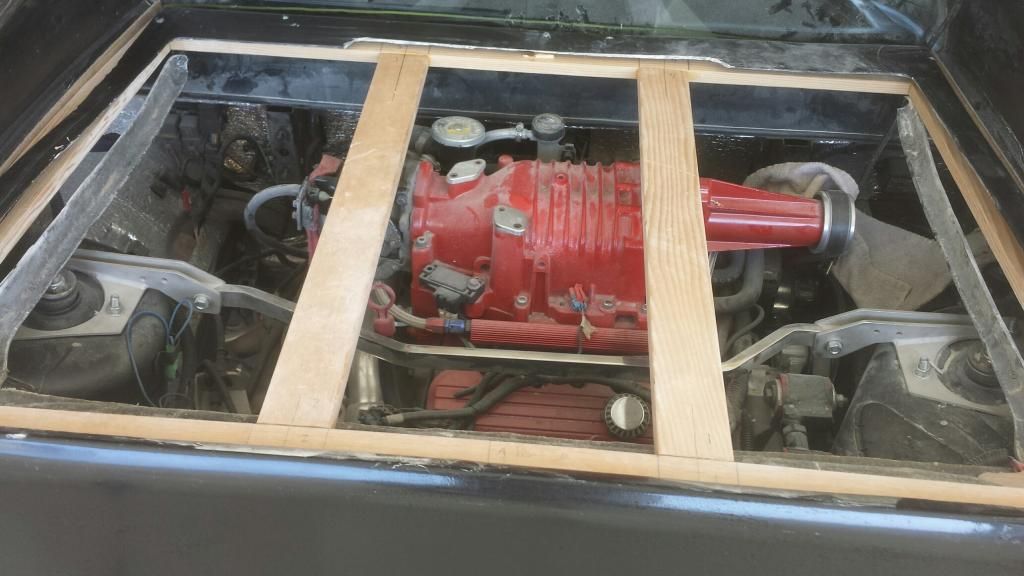
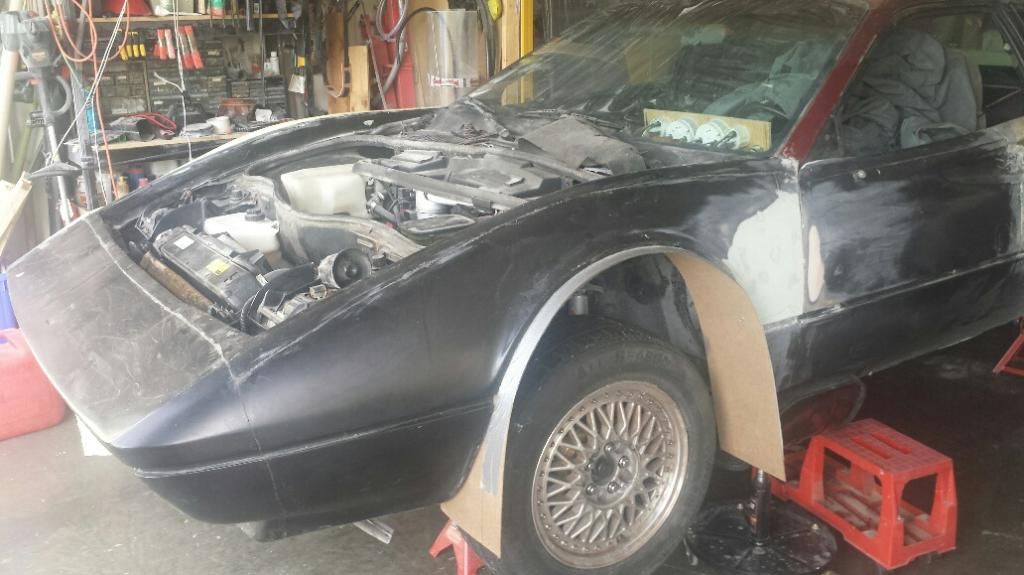
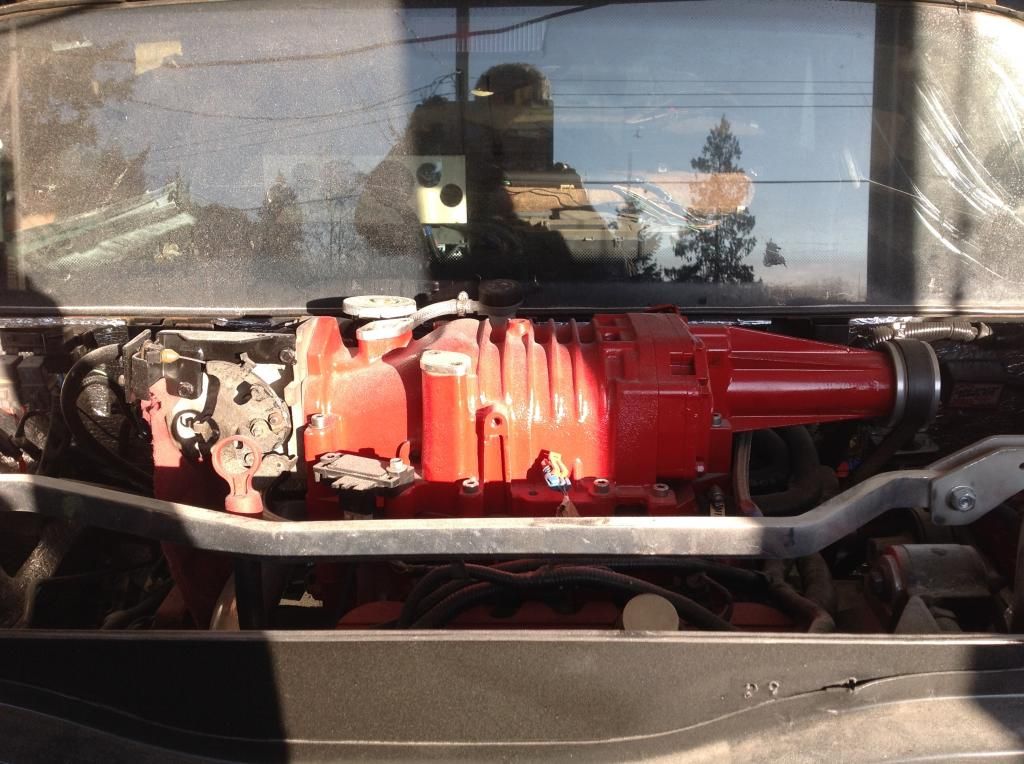
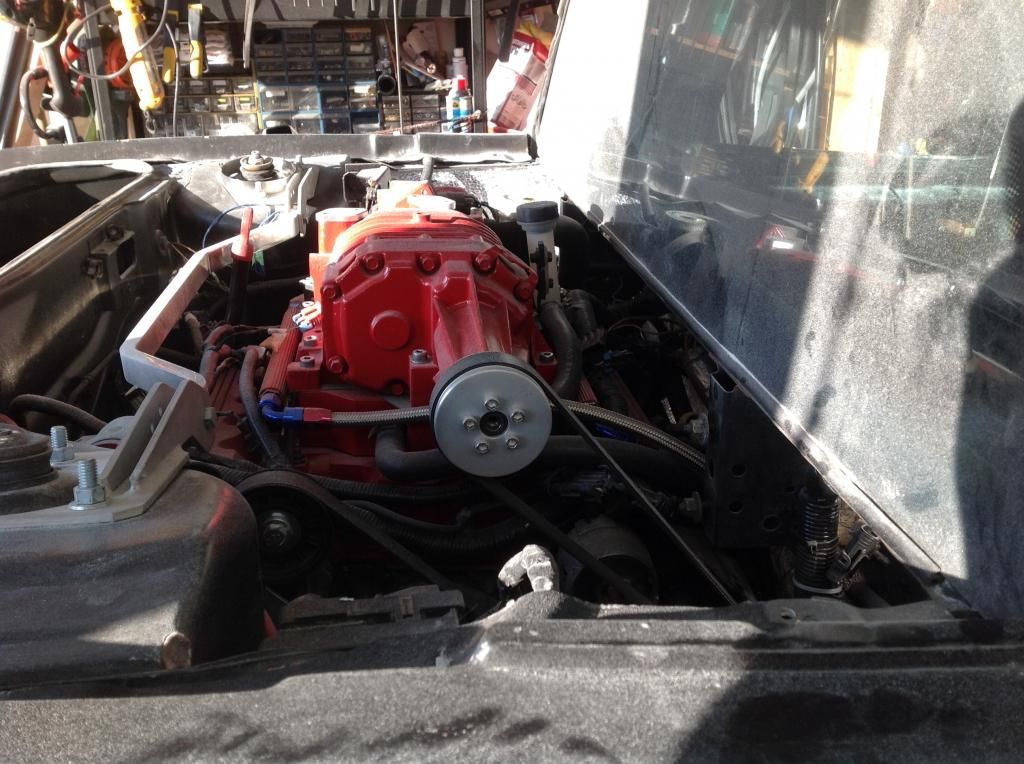
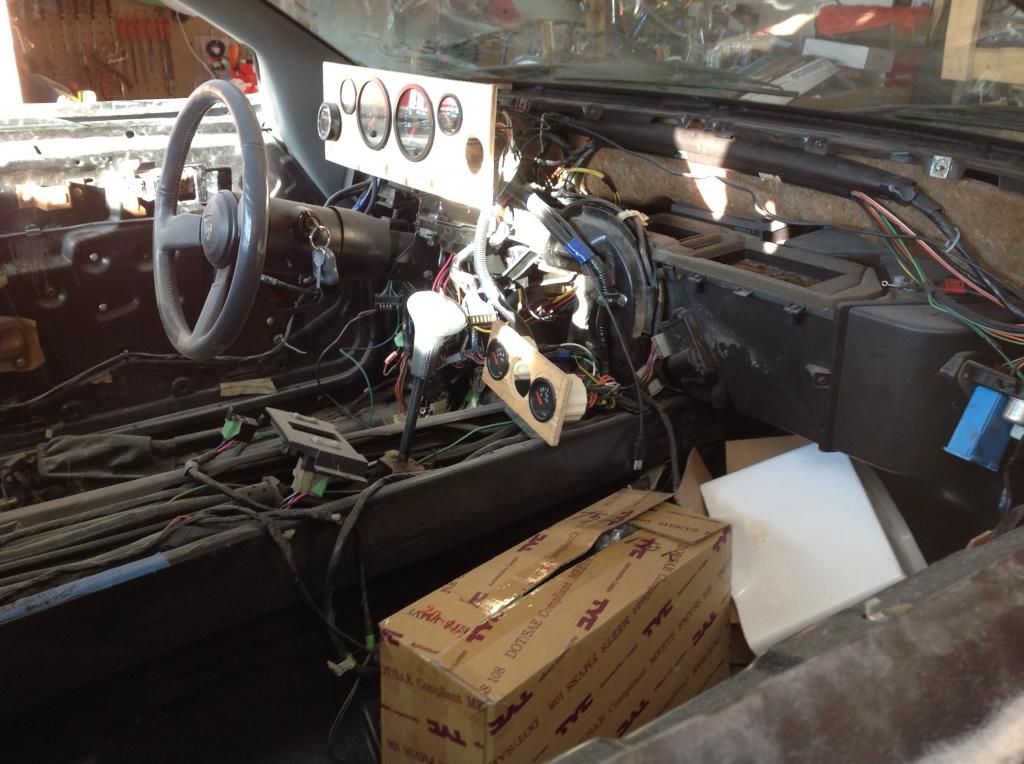
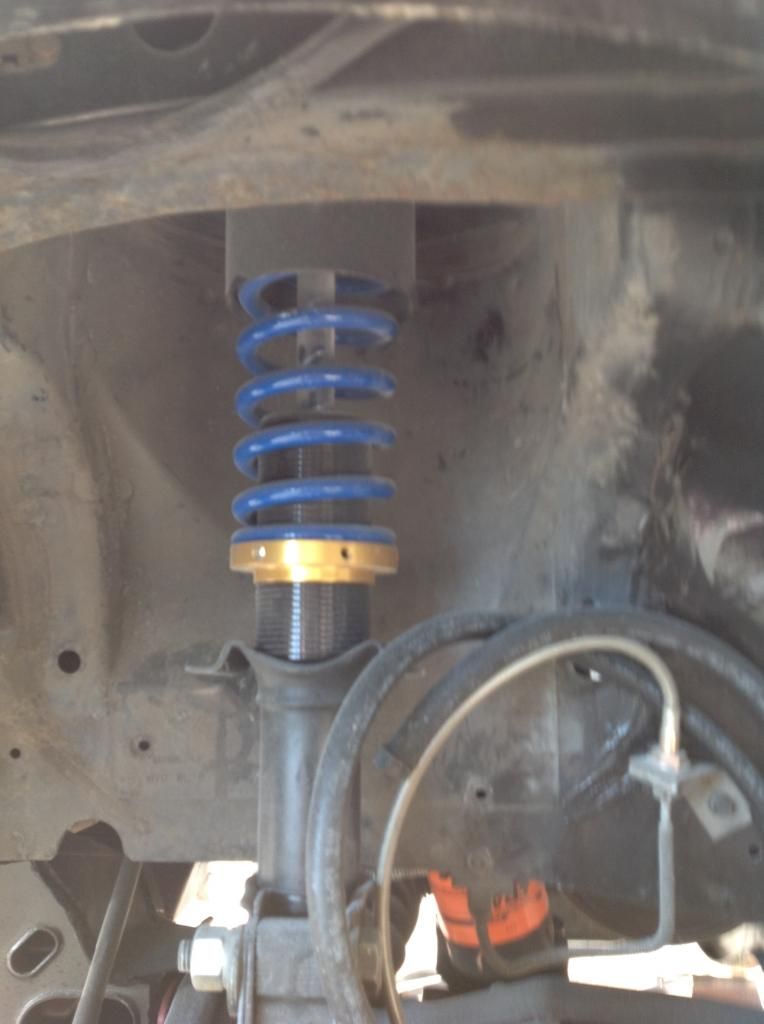
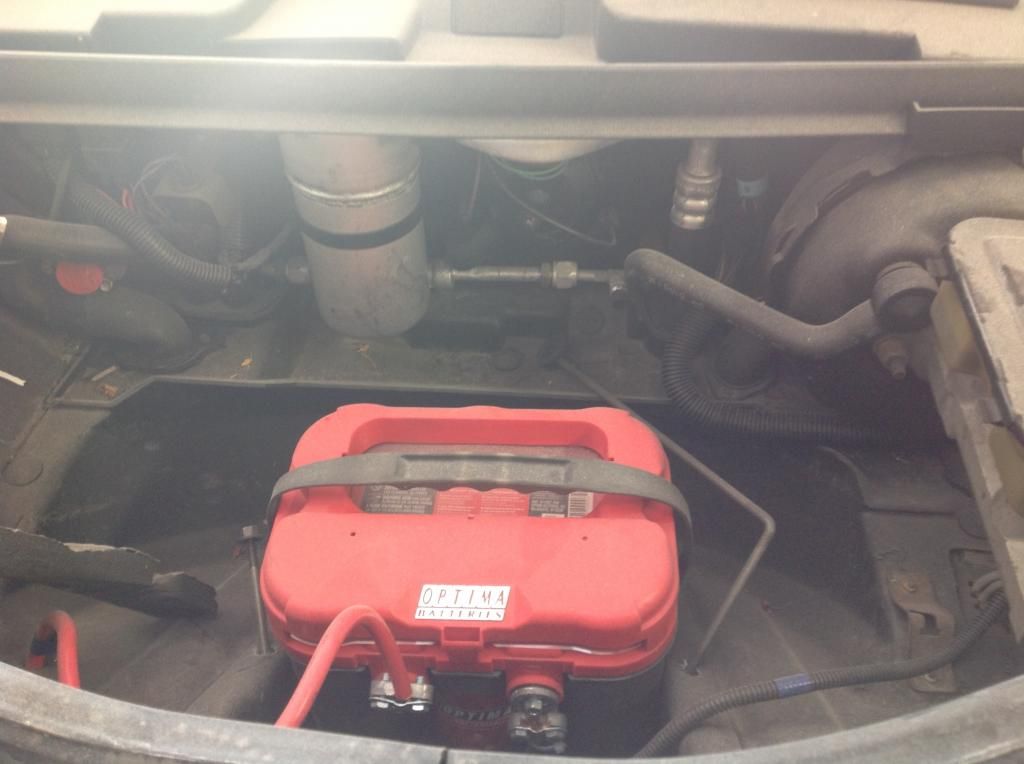
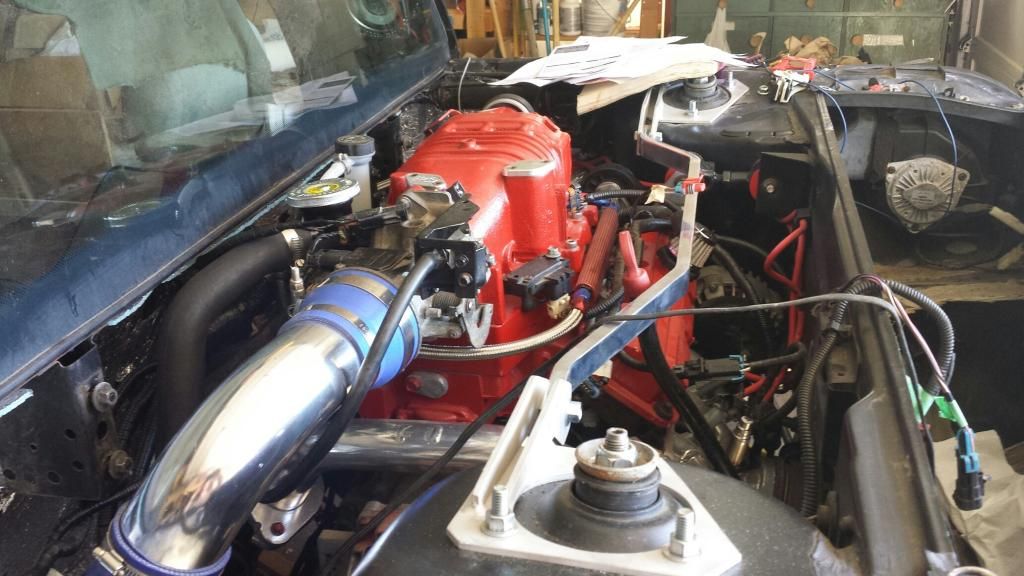
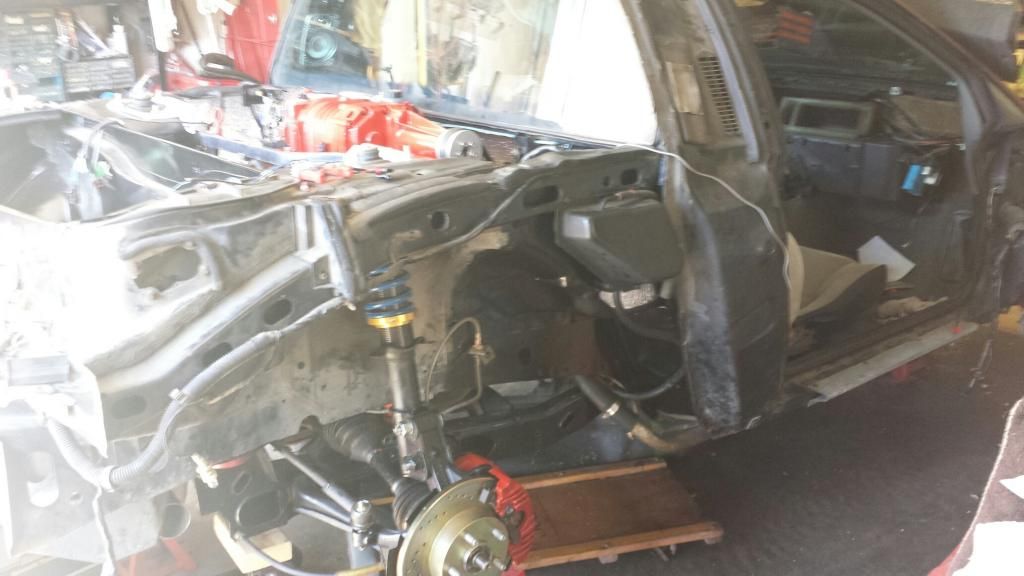
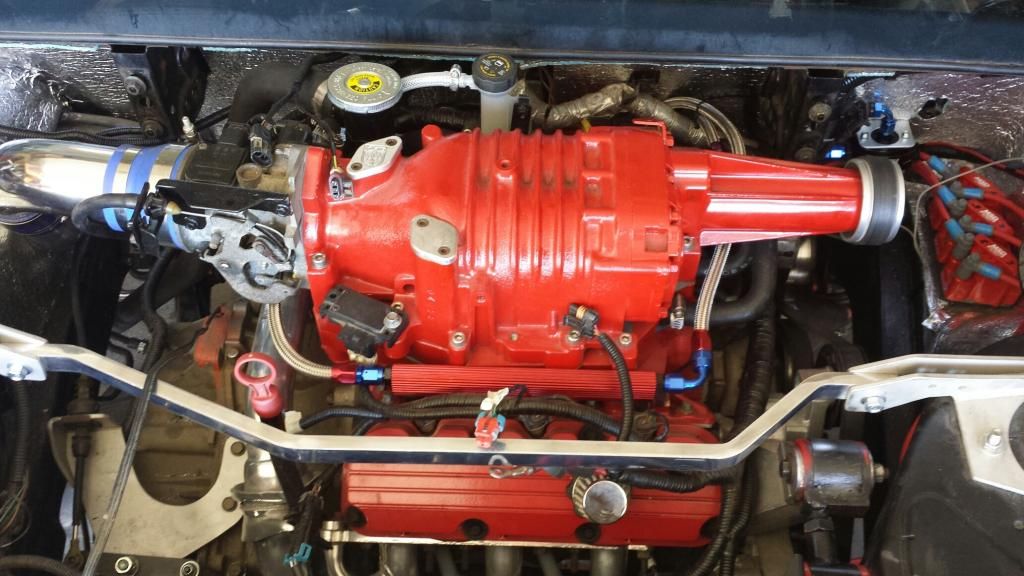
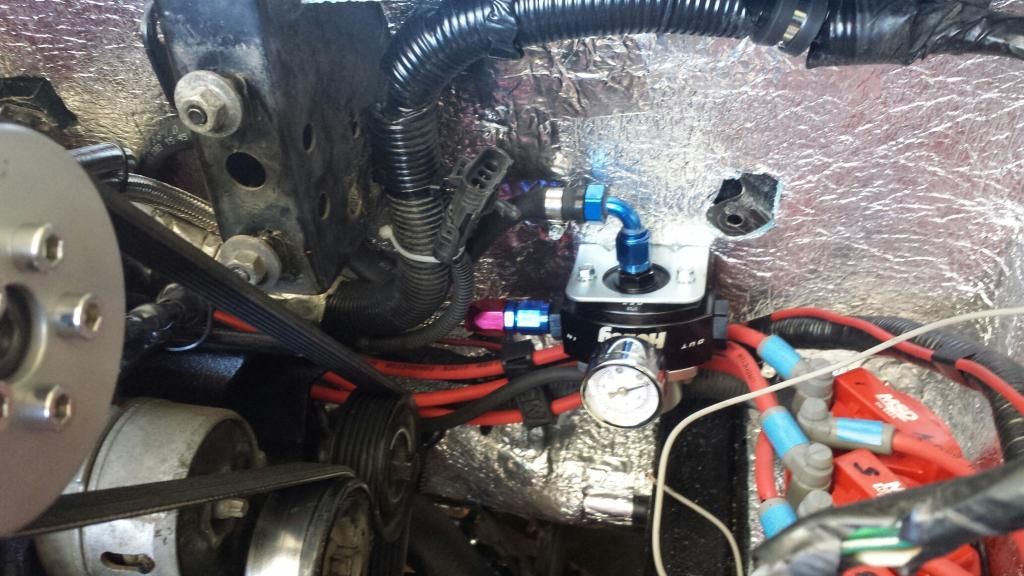
Ok figured it out, so this is where I started on the project, the kit was produced by EVM Rob one of the contributors on Pennock's
I mounted the body on a 87 Fiero GT that I totally rebuilt front to back. the 3800 SC is out of a 2002 Grand Prix GTP with 50000 Klm's on it trans is a 4t65HD from same donor. I dropped in a medium cam and added a 3.2 pulley with ZZP intercooler and billet fuel logs MDS Ignition module. Coil overs from West Coast Fiero's. The car is running so it can be moved around as needed.
Enjoy


[This message has been edited by dobie1 (edited 09-03-2014).]

IP: Logged
dobie1
Member
Posts: 450
From: BC, Canada
Registered: Jun 2005


Feedback score: N/A
Leave feedback

Rate this member

Report this Post09-01-2014 09:36 PM Click Here to See the Profile for dobie1Send a Private Message to dobie1Edit/Delete MessageReply w/QuoteDirect Link to This Post

dobie1

450 posts
Member since Jun 2005
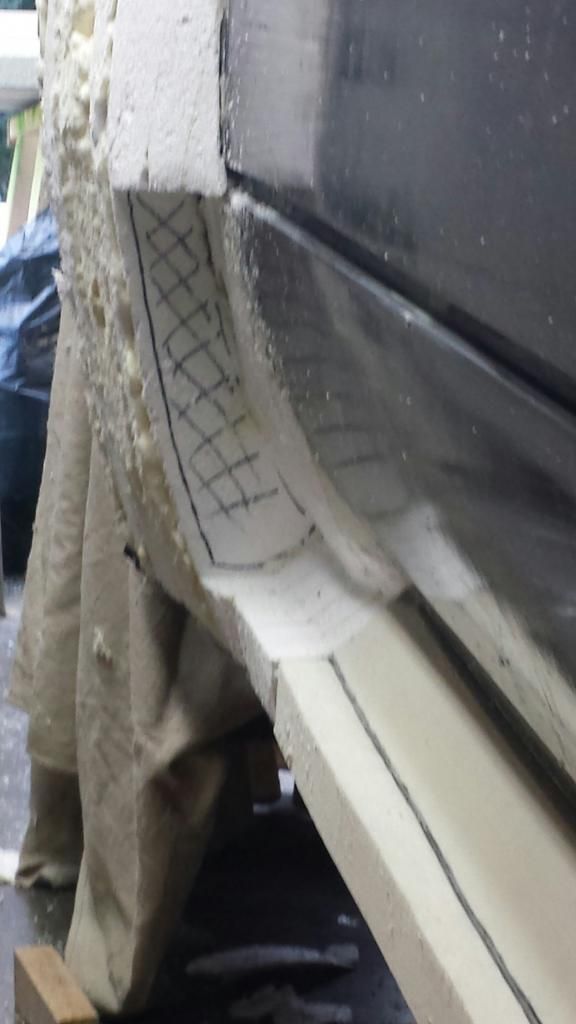
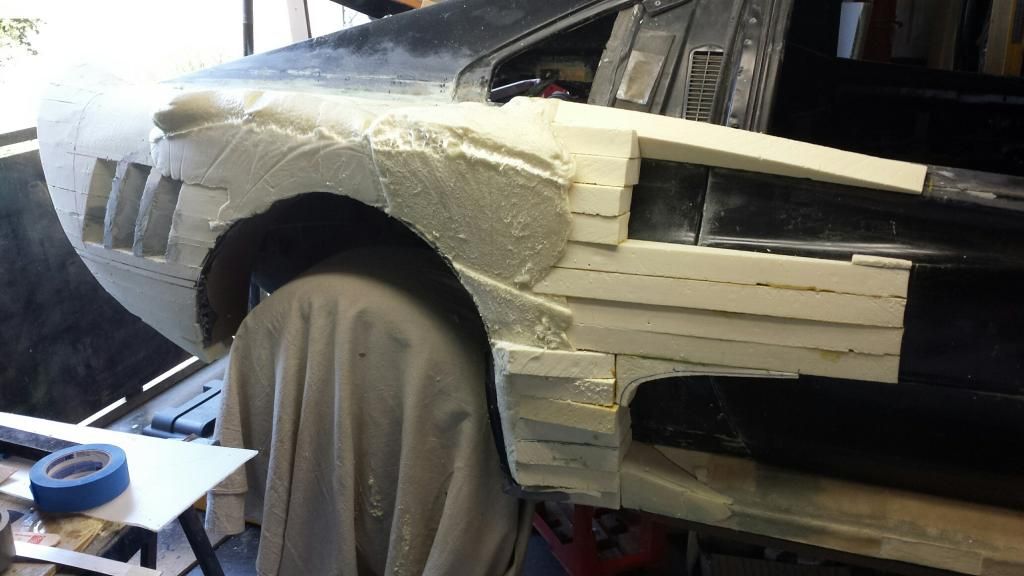
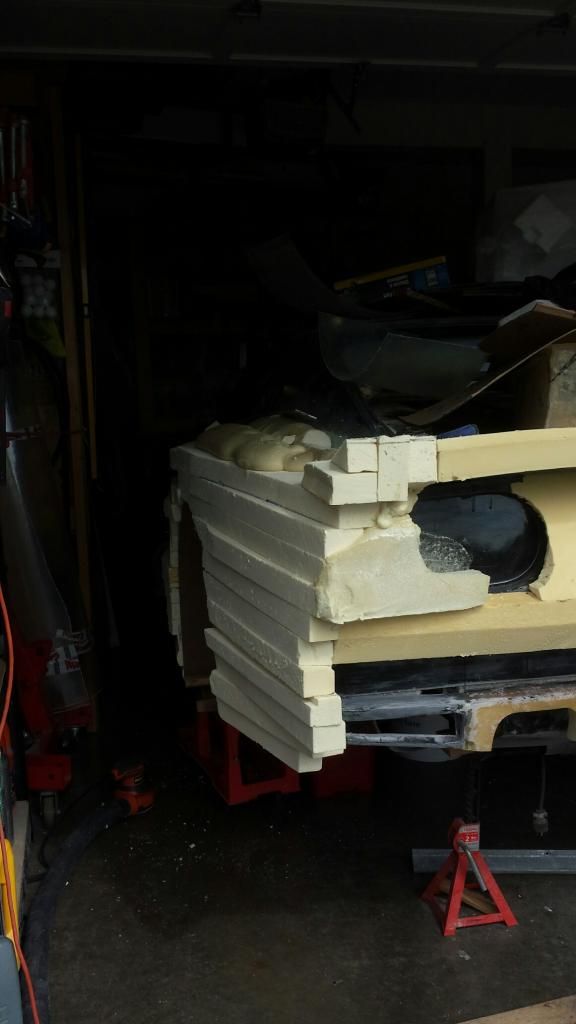
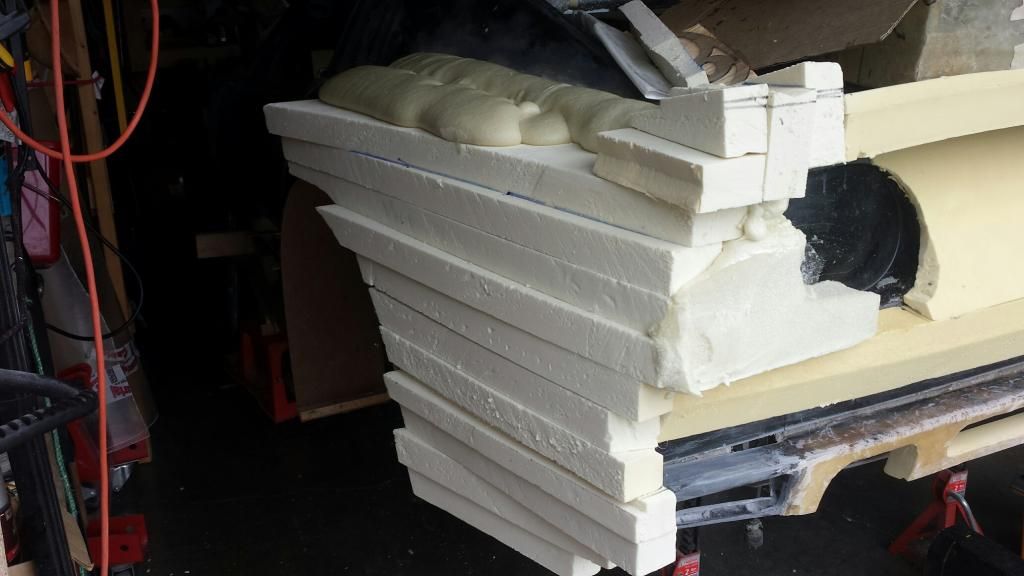
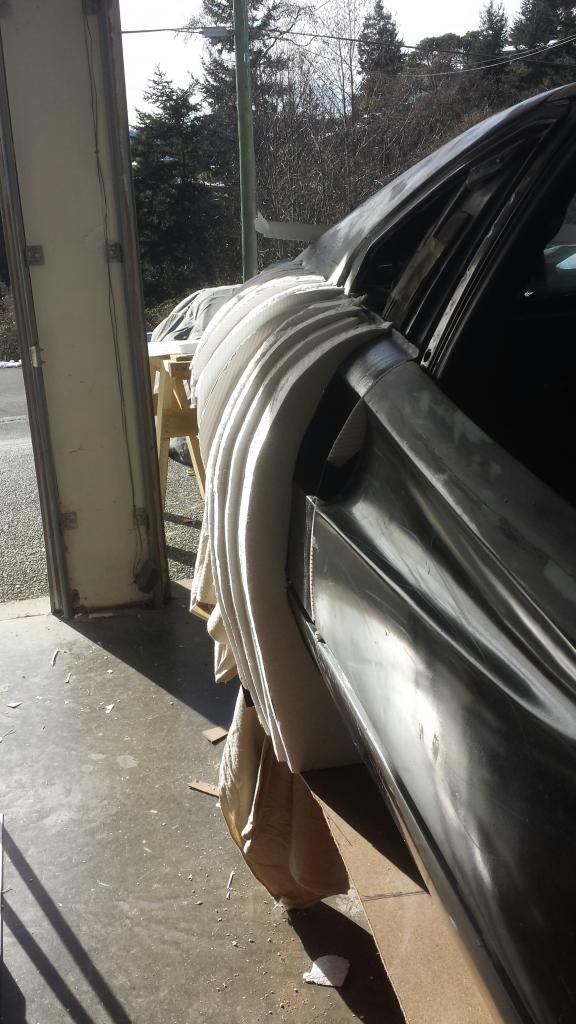
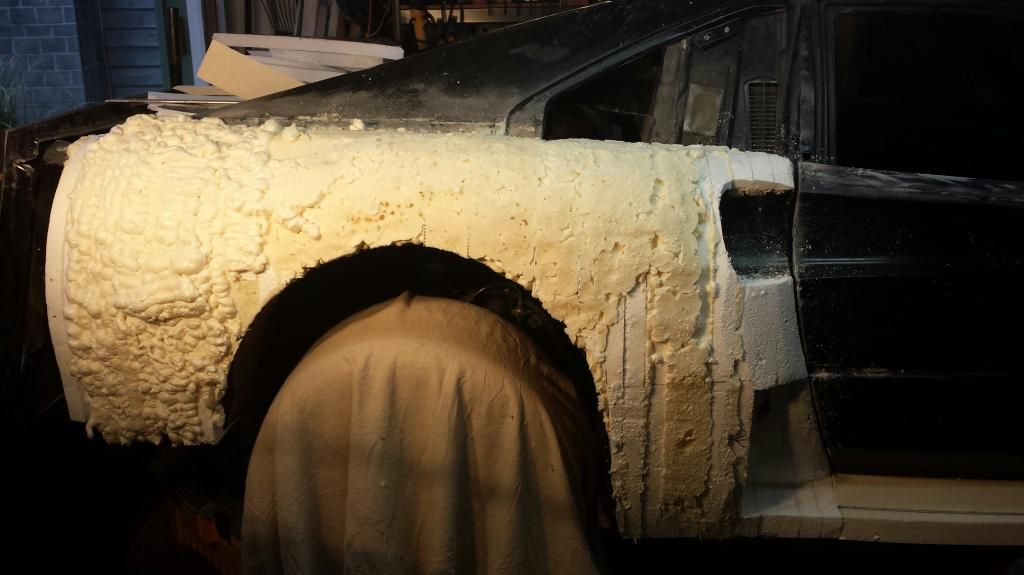
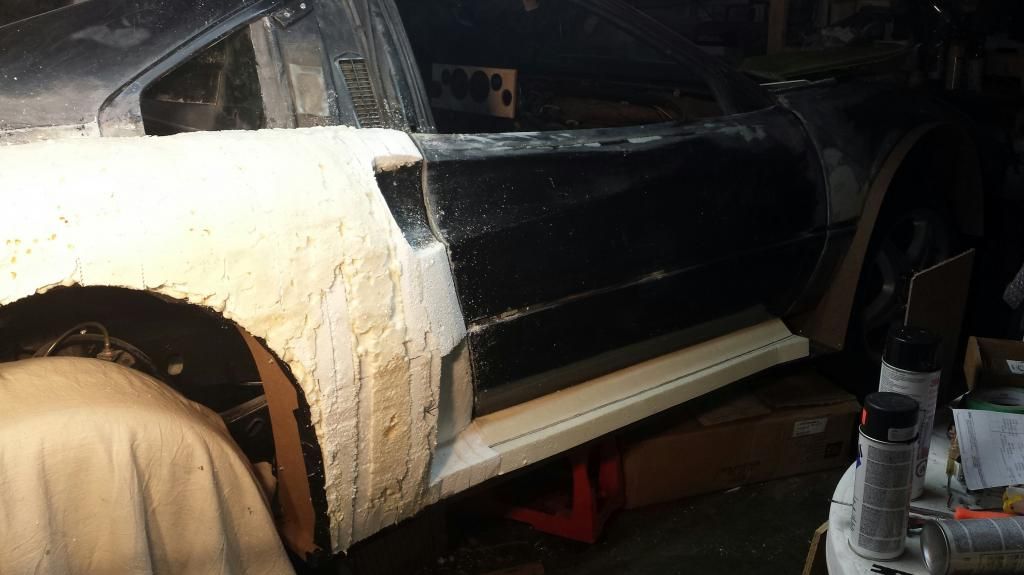
My work space is very limited so it has been a challenge to say the least. I started working on the passenger side of the car working from 3D and and pic's on the internet. when I initially started I was using white construction styro as I was unable to find the proper foam but very quickly I found what I needed and was off to the race.


I then decided I really liked the Koening 308 Ferrari lower scoop and running board so decider to incorporate that into my build.
[img]http://i36.photobucket.com/albums/e12/dobie44/2014022 6_1508110_resized3_zpsc2247f22.jpg[/img]

[This message has been edited by dobie1 (edited 09-03-2014).]

IP: Logged
dobie1
Member
Posts: 450
From: BC, Canada
Registered: Jun 2005


Feedback score: N/A
Leave feedback

Rate this member

Report this Post09-01-2014 10:00 PM Click Here to See the Profile for dobie1Send a Private Message to dobie1Edit/Delete MessageReply w/QuoteDirect Link to This Post

dobie1

450 posts
Member since Jun 2005
Then I discovered 2 part expanding foam!!! whoa great stuff but messy


Then the sanding and sculpting of the foam


[This message has been edited by dobie1 (edited 09-03-2014).]

IP: Logged
dobie1
Member
Posts: 450
From: BC, Canada
Registered: Jun 2005


Feedback score: N/A
Leave feedback

Rate this member

Report this Post09-01-2014 10:13 PM Click Here to See the Profile for dobie1Send a Private Message to dobie1Edit/Delete MessageReply w/QuoteDirect Link to This Post

dobie1

450 posts
Member since Jun 2005
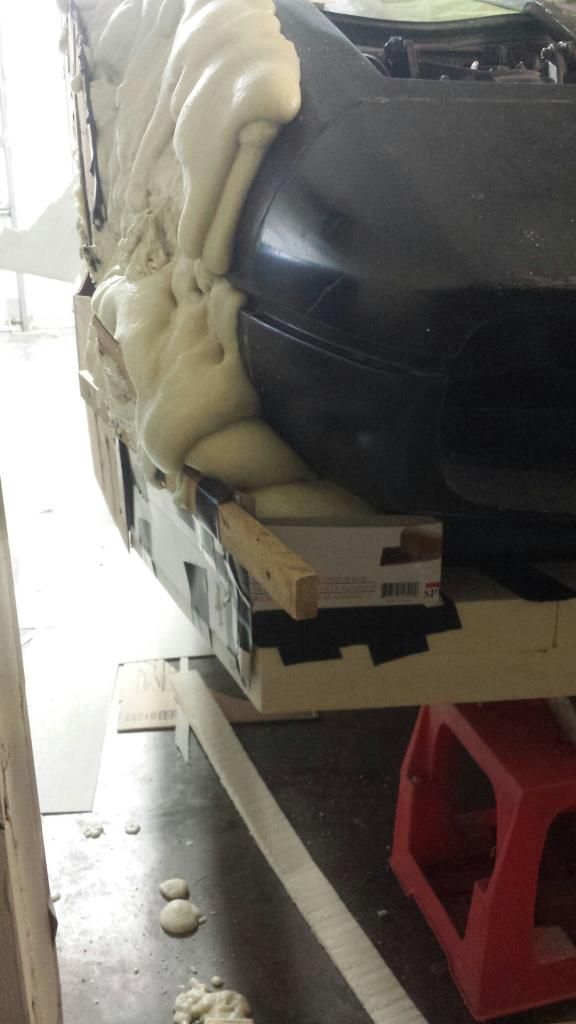
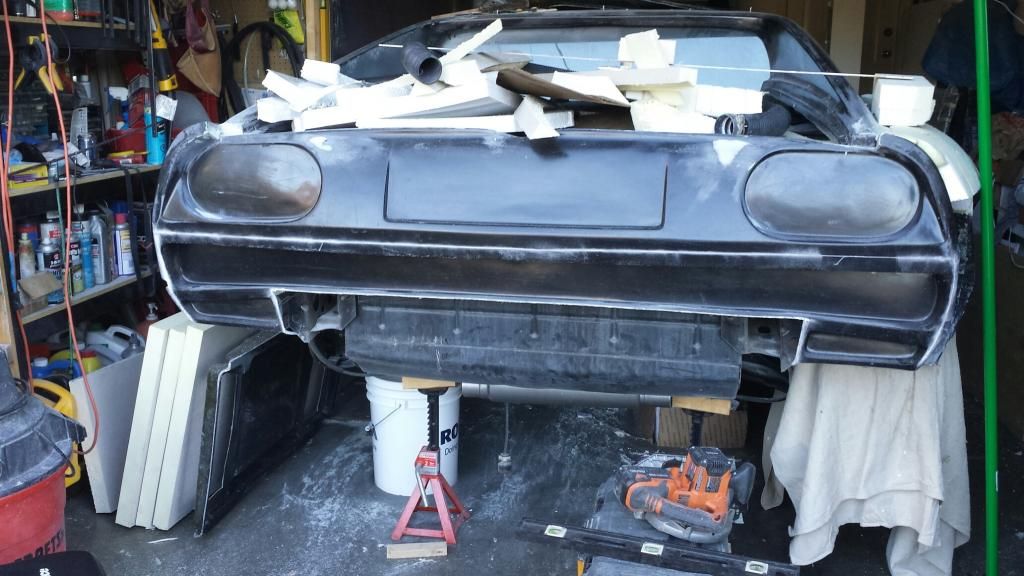
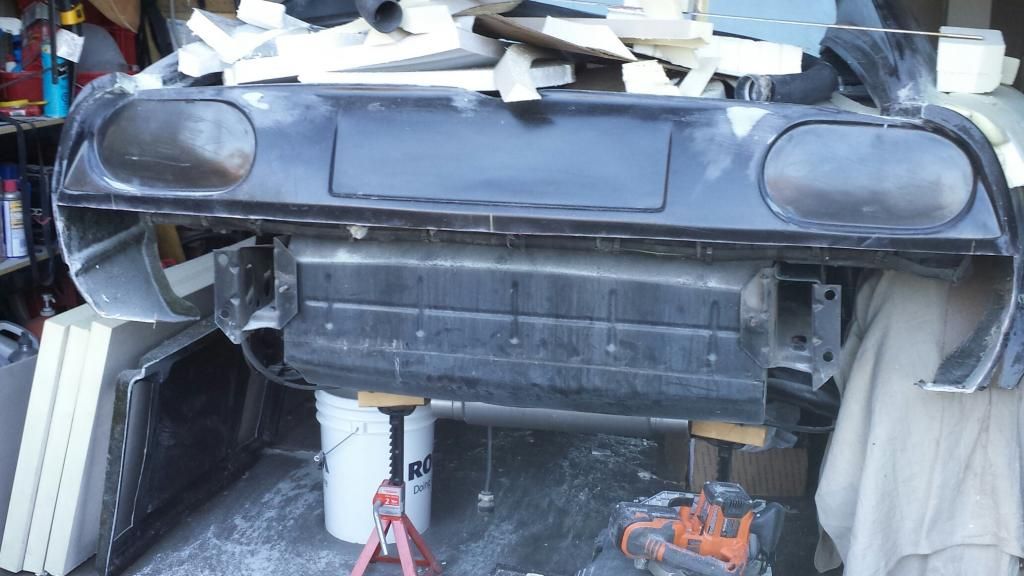
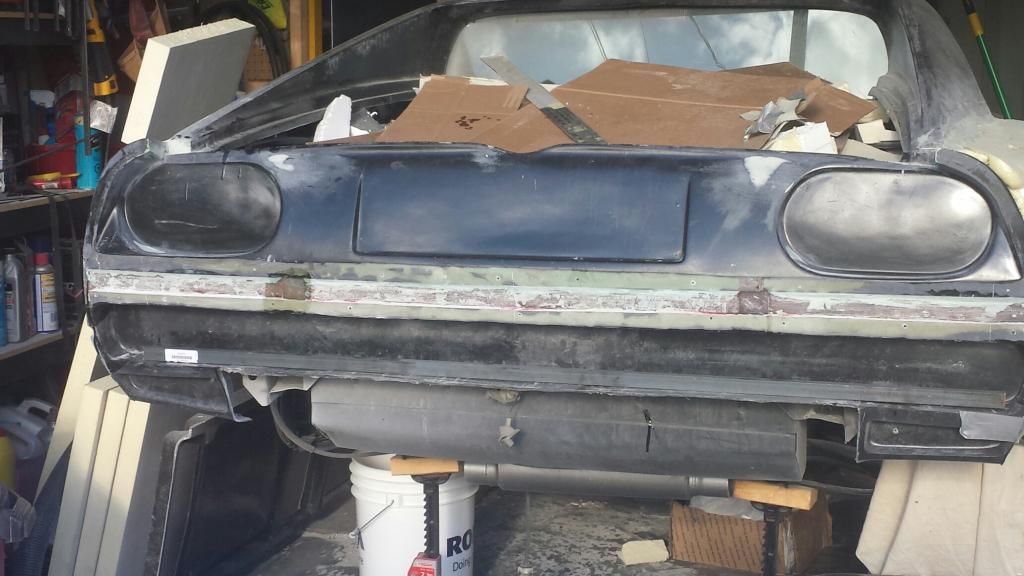
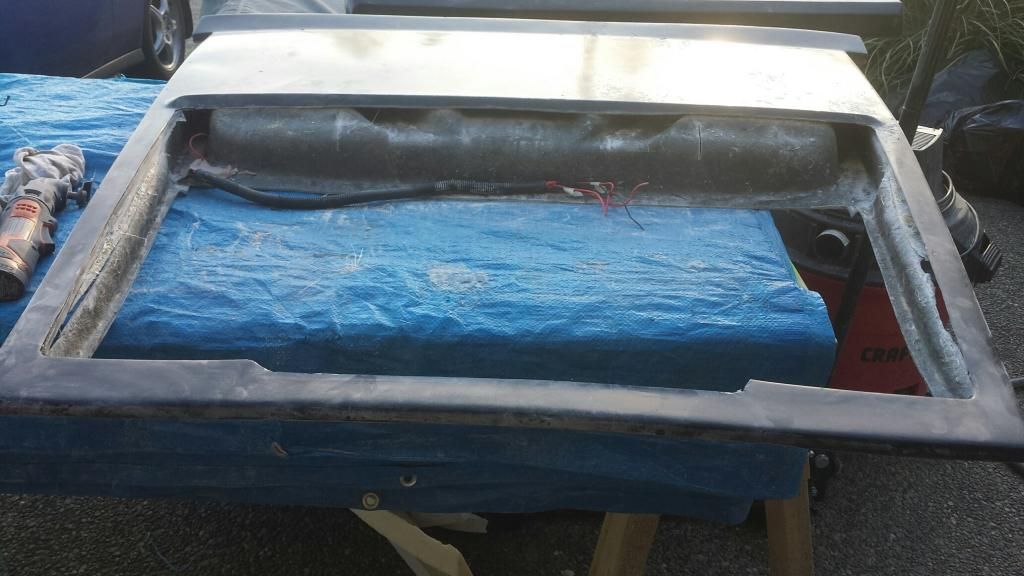
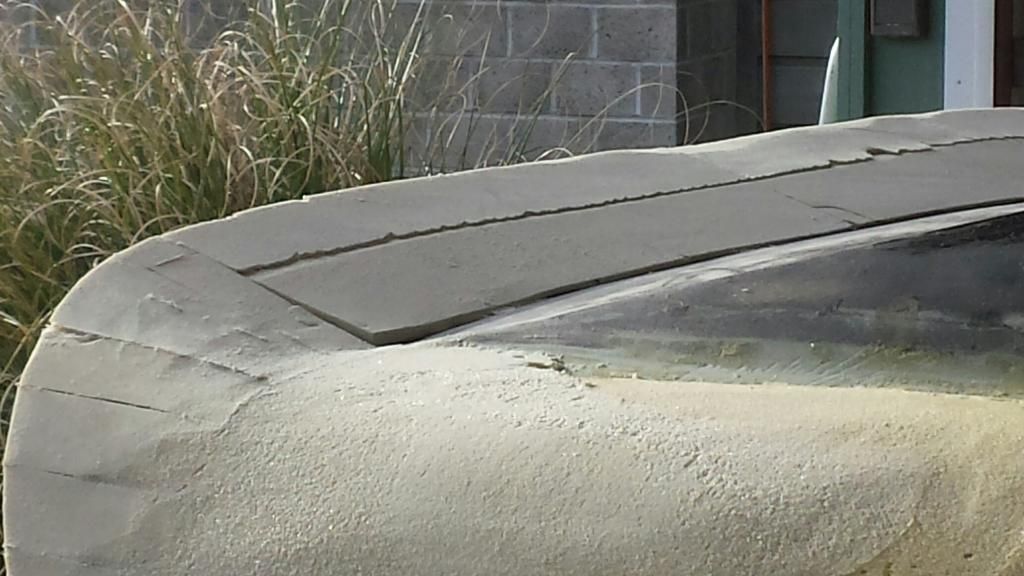
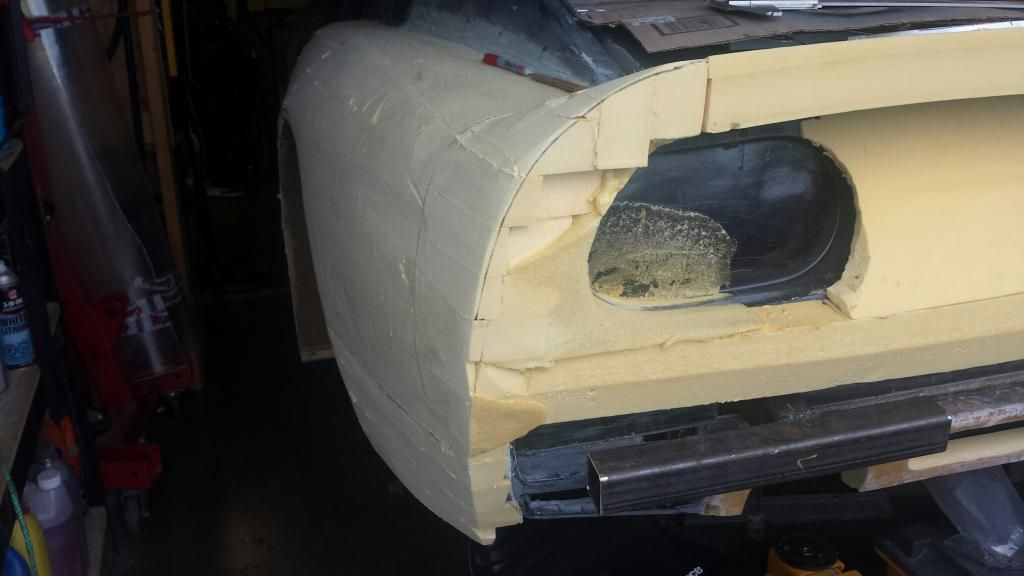
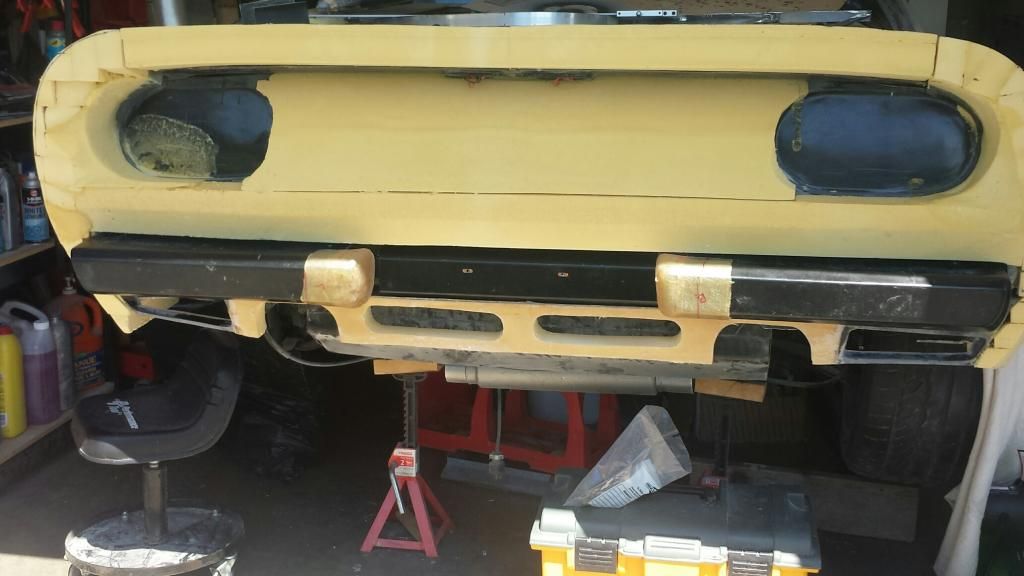
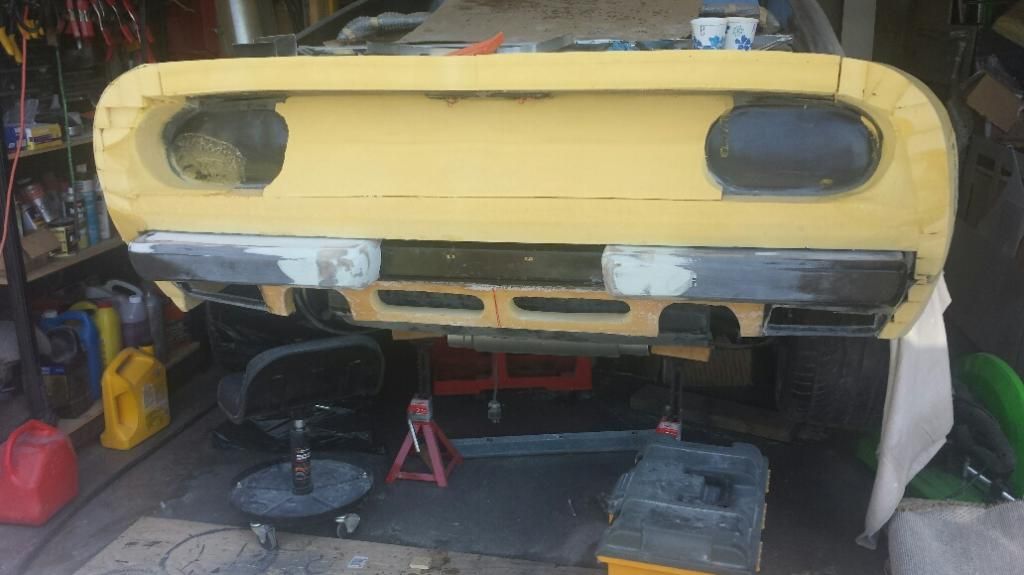
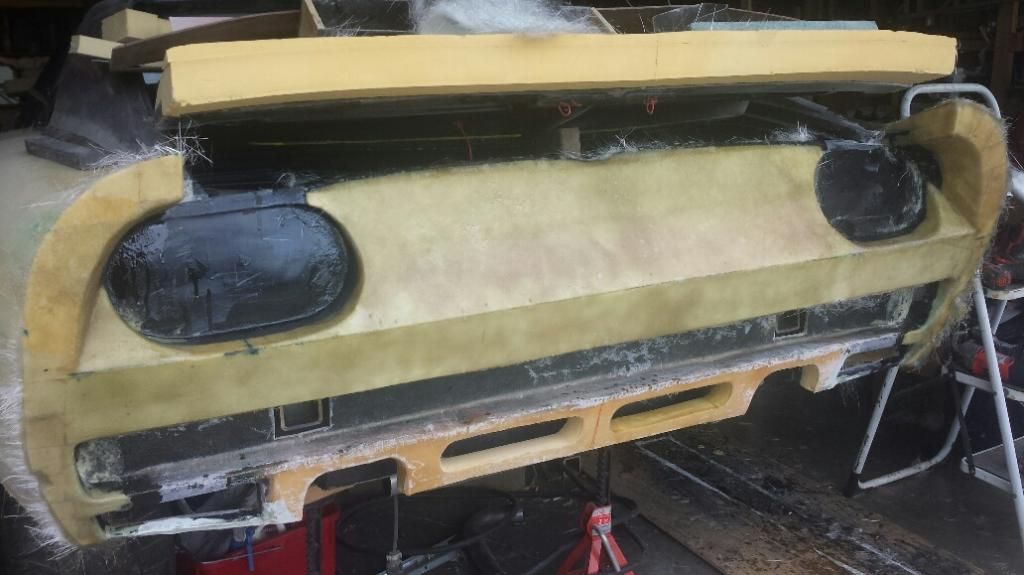
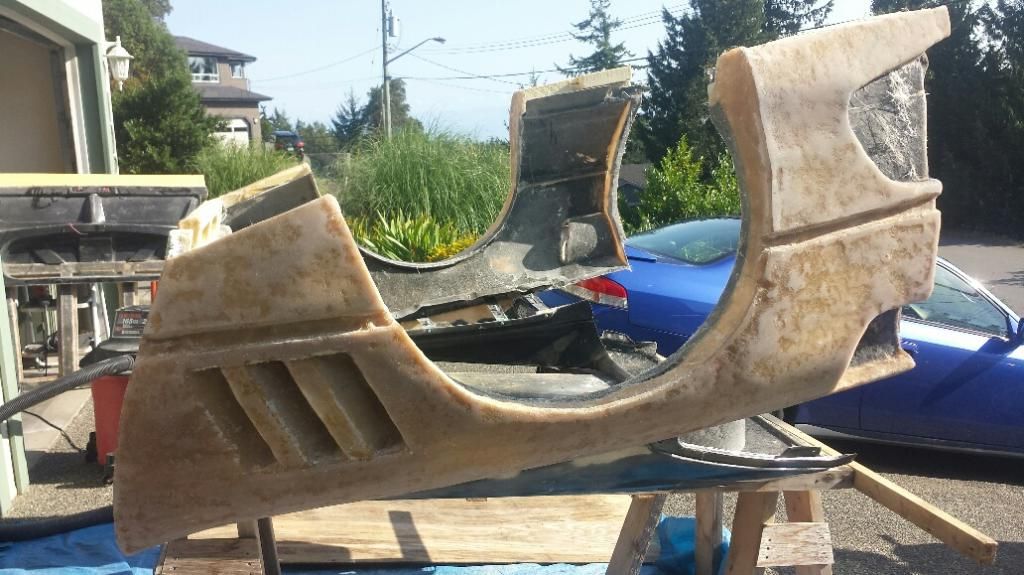
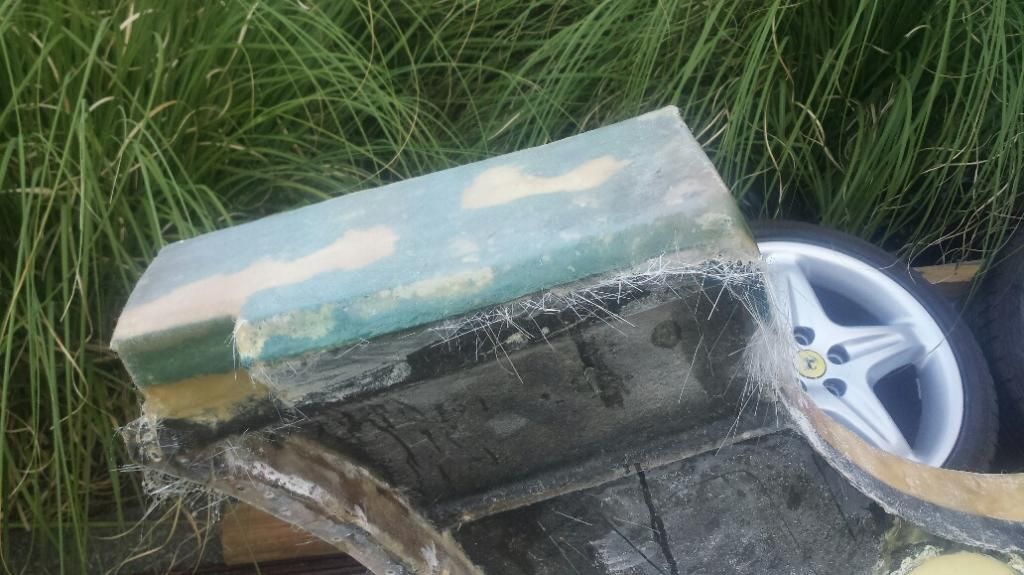
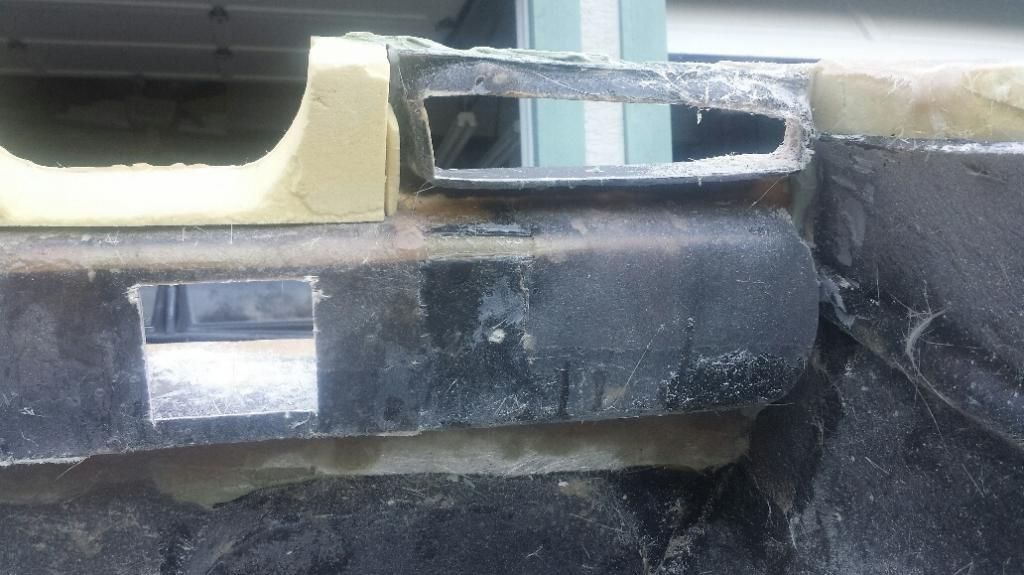
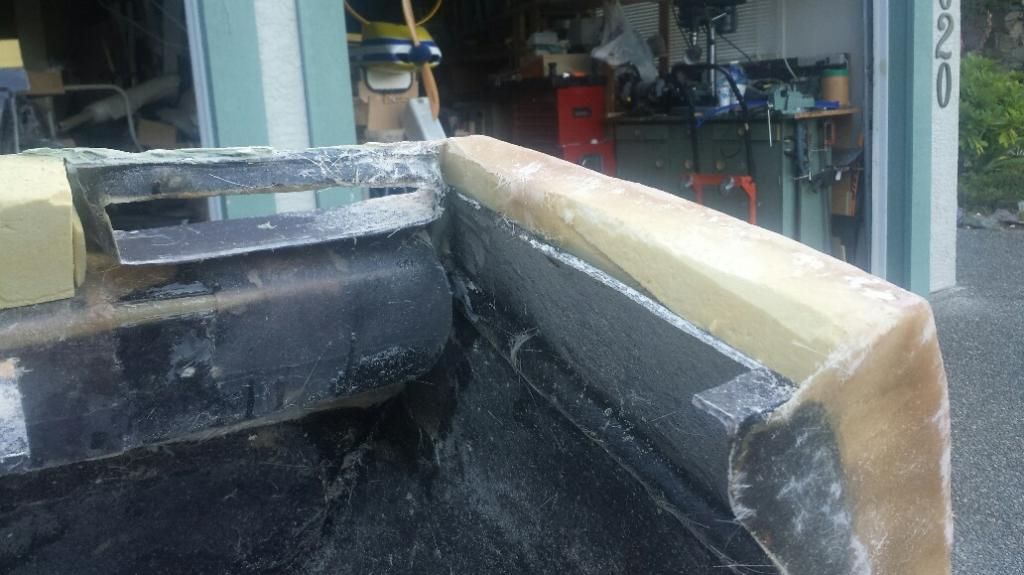
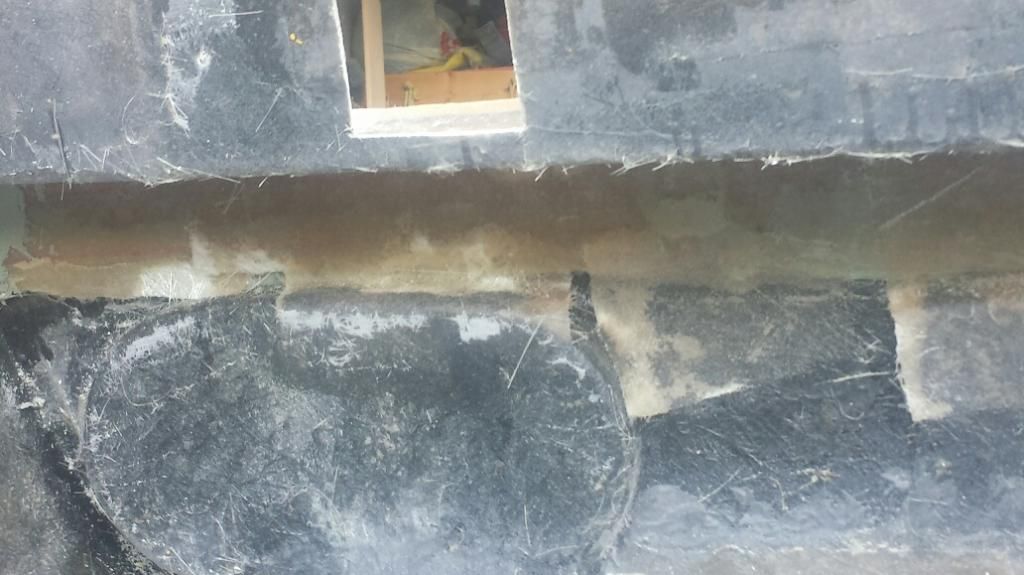
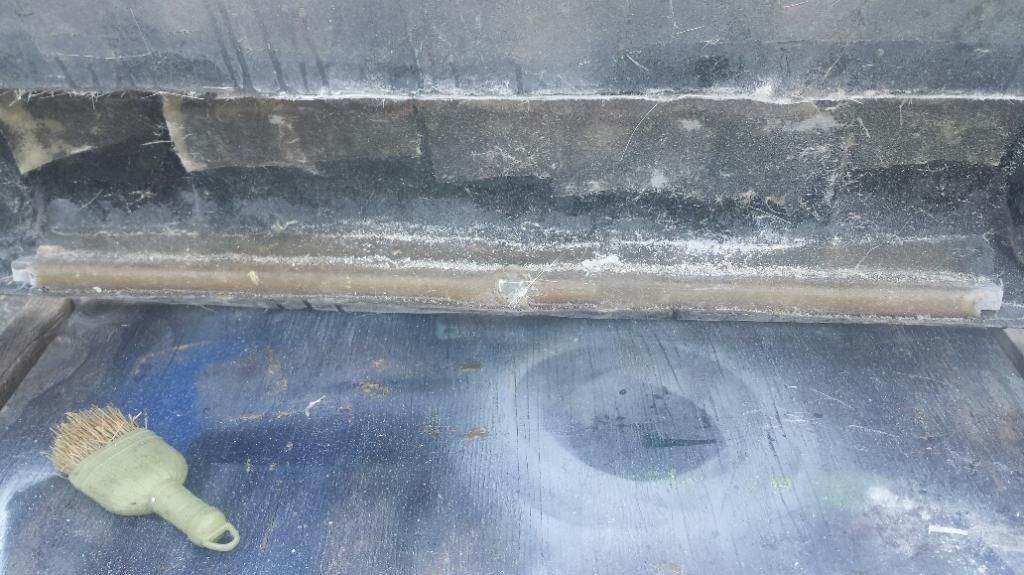
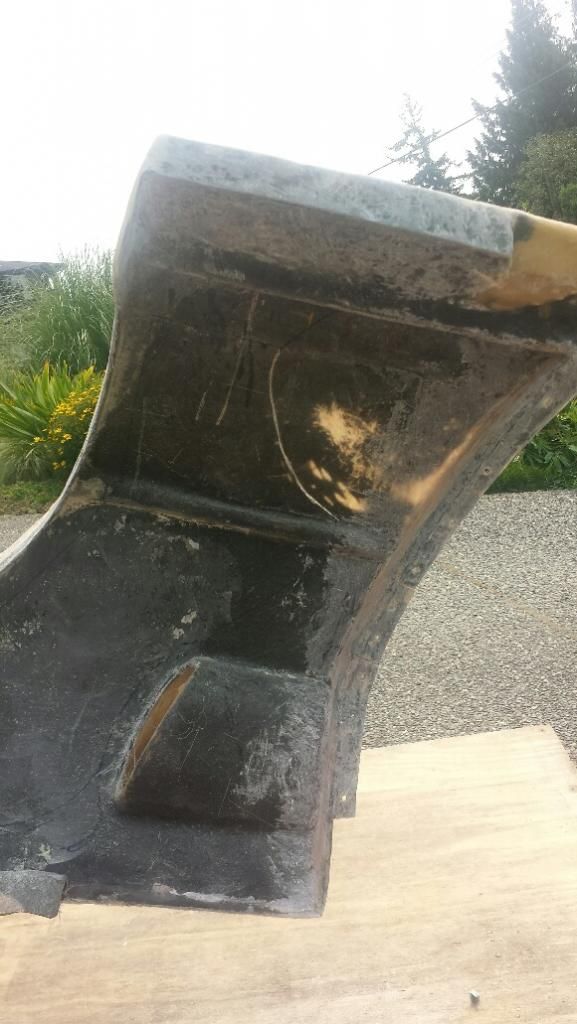
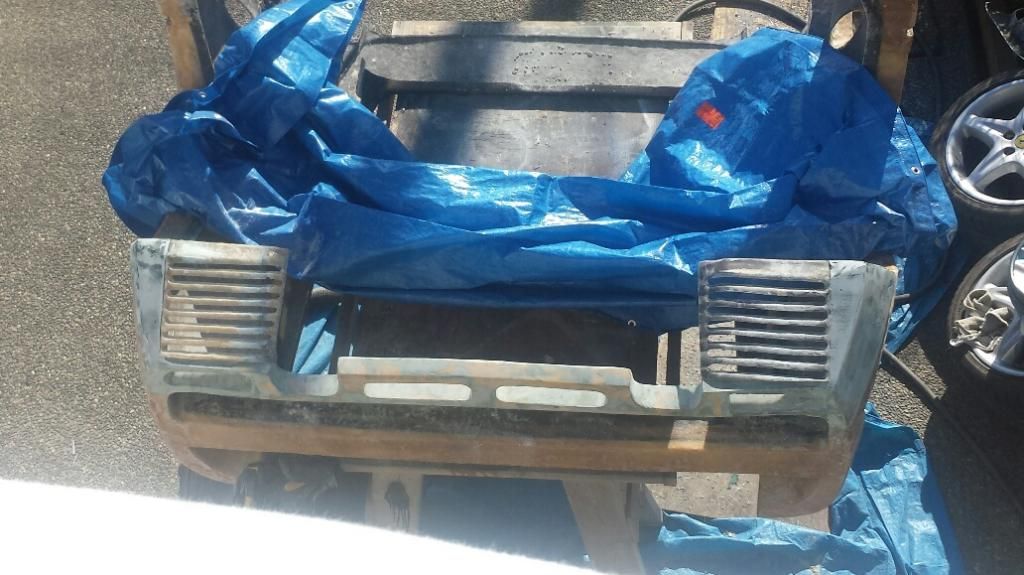
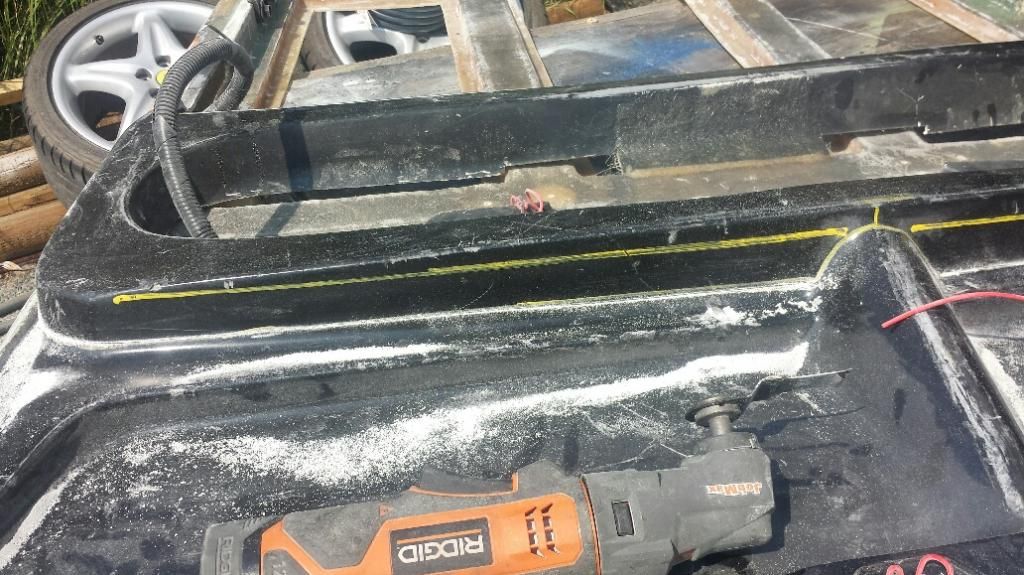
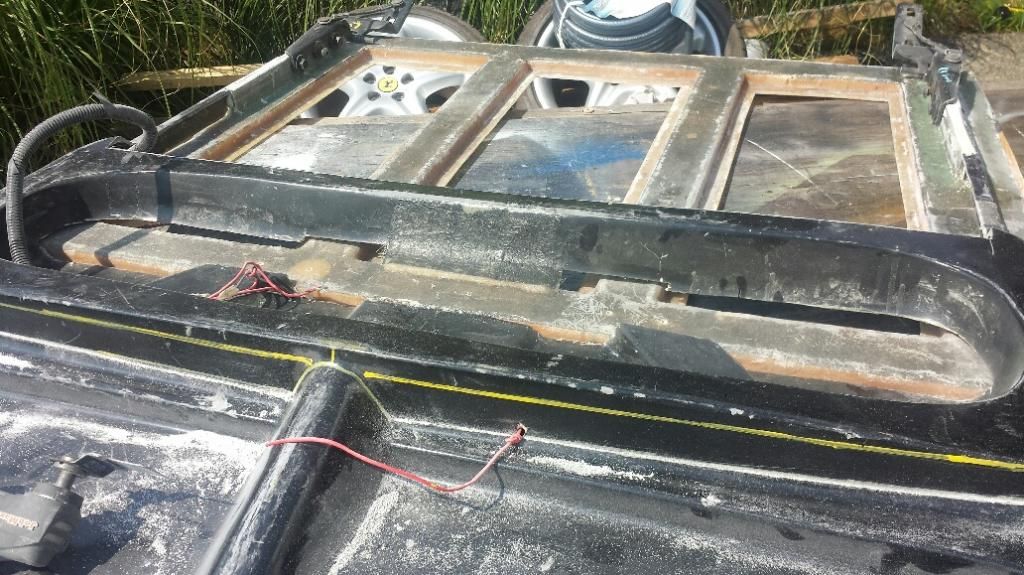
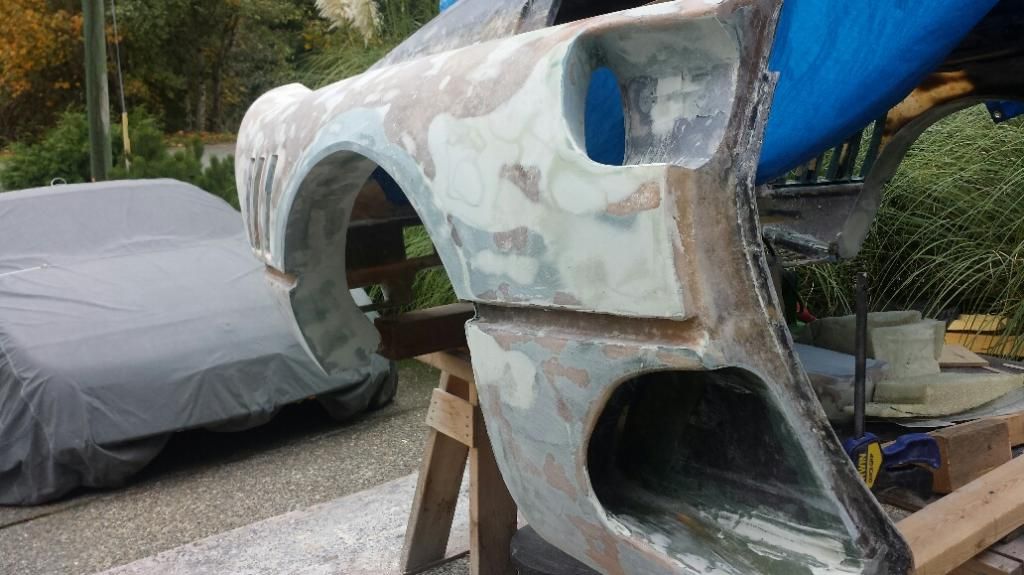
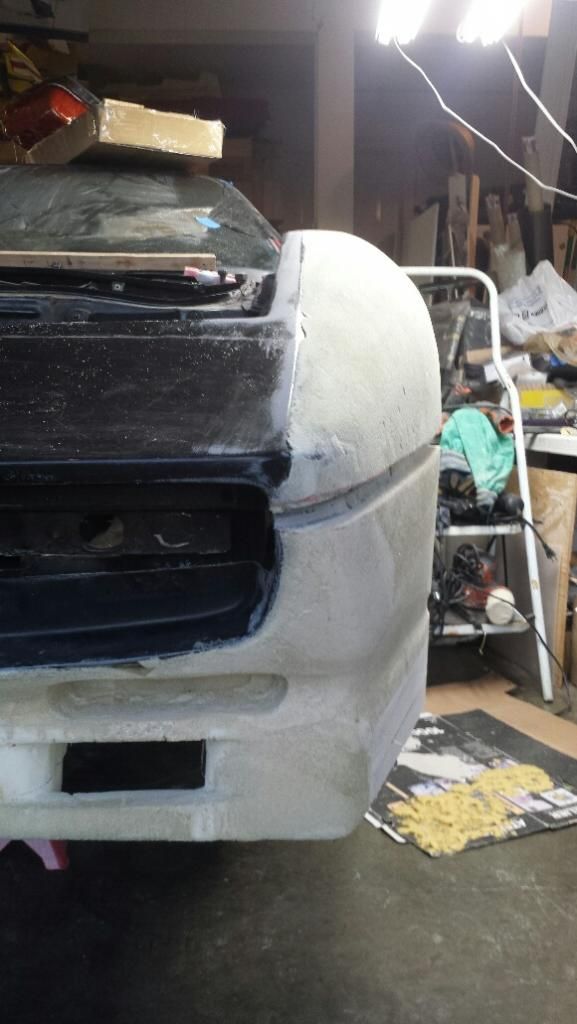
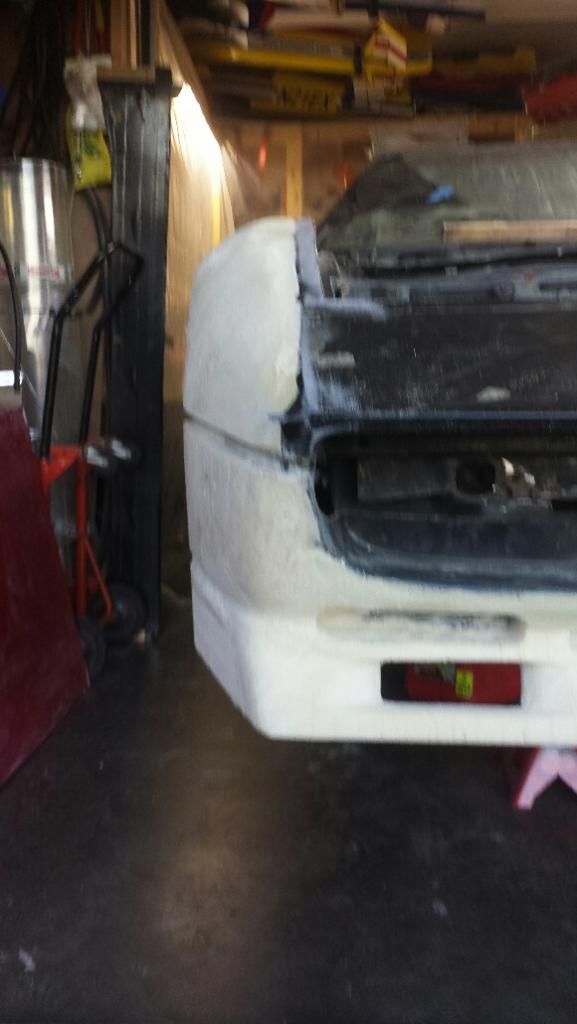
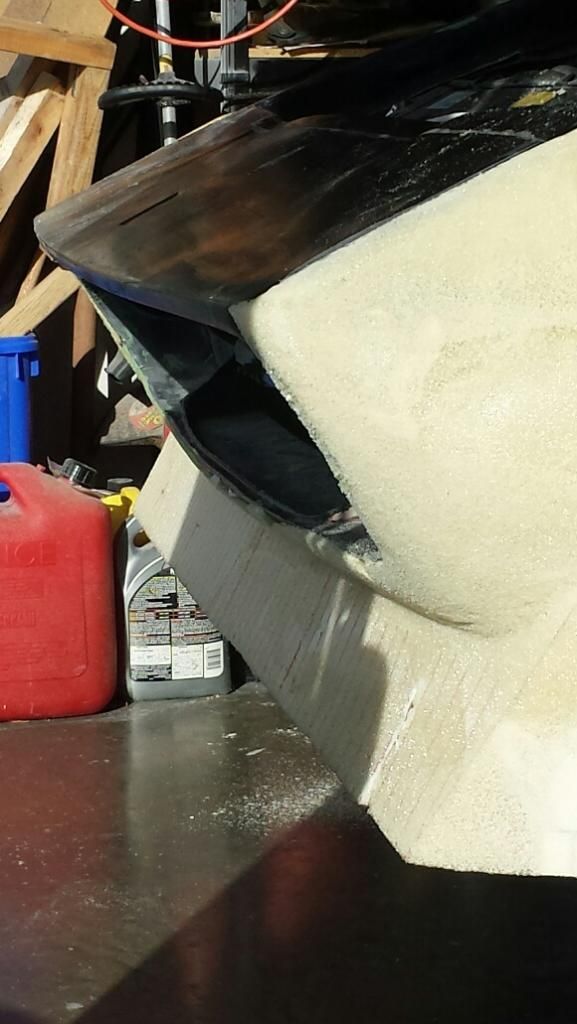
The 288 GTO's back end is quite abit different than the 308 and although Rob's 308 kit is similar looking it needed to be modified to make it work for the 288.
The following is the mod I did to the back to make it work for me putting in a 2" drop on the belt line and removing the exhaust area, and building in the new lower valance/ exhaust .There was a twist in the bumper area that also had to be fixed so I did this at at the same time.


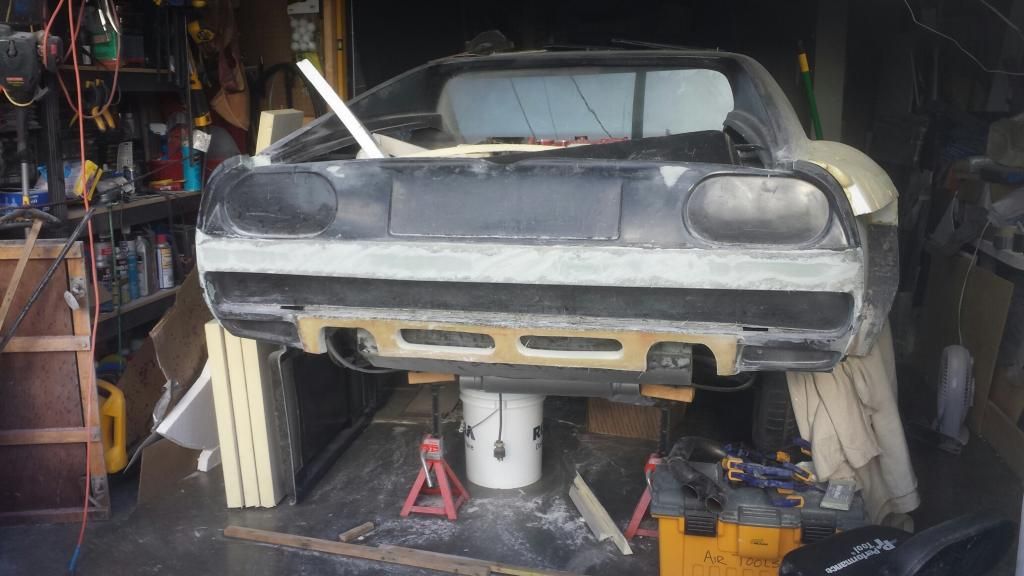
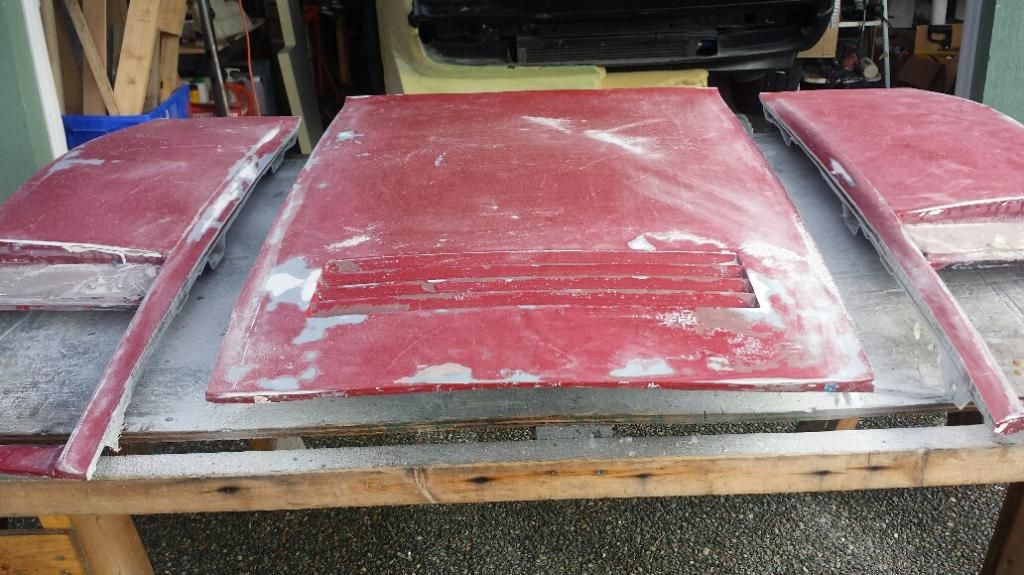
Then I had to come up with a new deck lid as again the 288 and 308 are different . The deck lid has not been completed but it will give you a rough idea of where I'm going with it. Later on in the build Aug 2014 I've had to do some other changes (I'll post some pics latter on those changes) as it wasn't fitting correctly.


[This message has been edited by dobie1 (edited 09-03-2014).]

IP: Logged
PaulJK
Member
Posts: 6638
From: Los Angeles
Registered: Oct 2001


Feedback score:    (25)
Leave feedback


Total ratings: 237
Rate this member

Report this Post09-02-2014 12:44 AM Click Here to See the Profile for PaulJKSend a Private Message to PaulJKEdit/Delete MessageReply w/QuoteDirect Link to This Post
Looks like at least half the radiator is blocked. If it was me, I'd open up the airflow.

IP: Logged
RCR
Member
Posts: 4397
From: Shelby Twp Mi
Registered: Sep 2002


Feedback score:    (7)
Leave feedback


Total ratings: 102
Rate this member

Report this Post09-02-2014 07:21 AM Click Here to See the Profile for RCRSend a Private Message to RCREdit/Delete MessageReply w/QuoteDirect Link to This Post
There's a few pics I haven't seen yet. Thanx for sharing, Wayne.

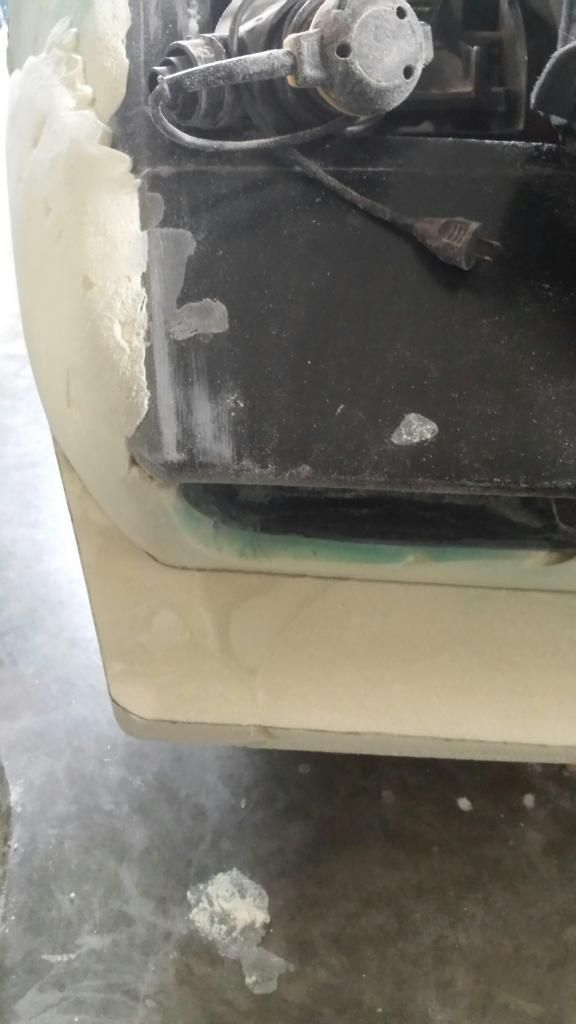
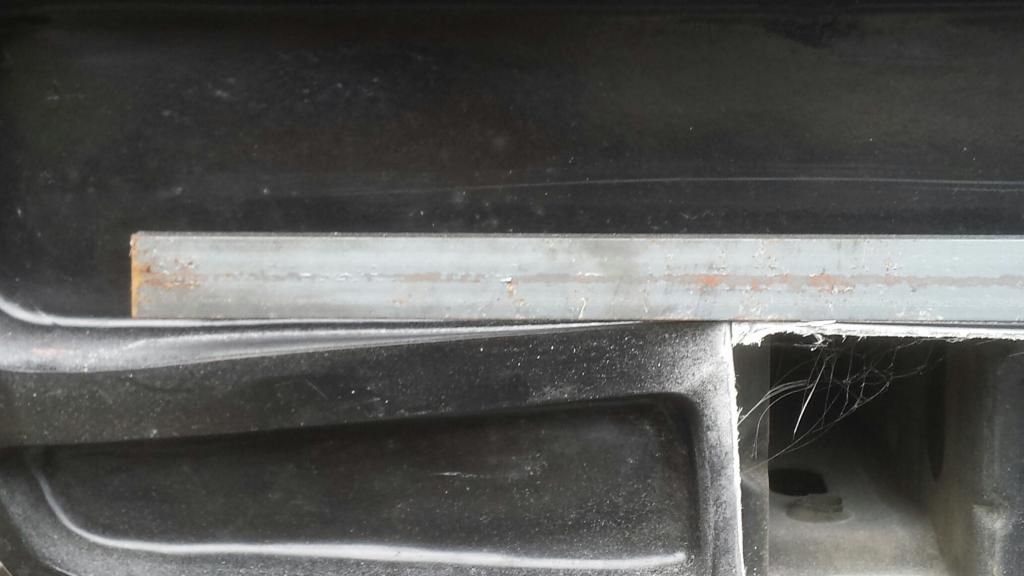
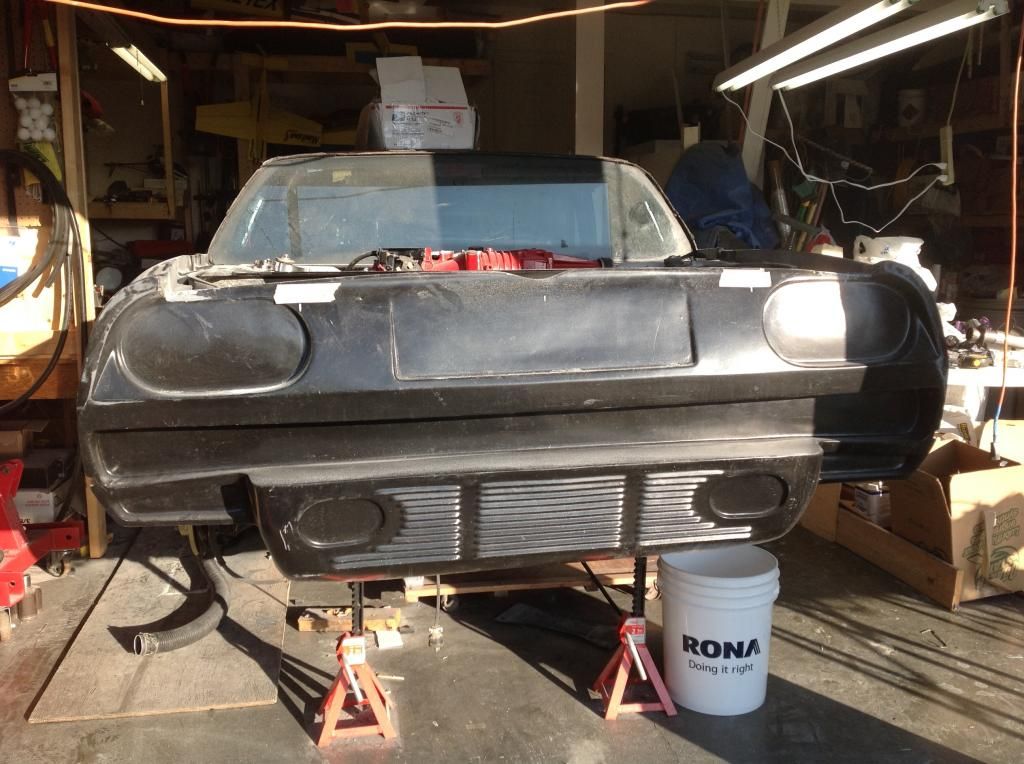
Paul, not speaking for Wayne, but that's the front bumper. I've removed it on mine for that very reason and will be replacing it with a bar/tube higher up under the nose.

Bob
IP: Logged
PFF
System Bot
dobie1
Member
Posts: 450
From: BC, Canada
Registered: Jun 2005


Feedback score: N/A
Leave feedback

Rate this member

Report this Post09-02-2014 11:55 AM Click Here to See the Profile for dobie1Send a Private Message to dobie1Edit/Delete MessageReply w/QuoteDirect Link to This Post
PaulJK
Thanks for looking ,actually the rad your looking at is the one for the inter cooler .But I will certainly be looking into what both you and Bob have done. I had thought that myself but As I eluded to I'm very limited in space in my garage so made the decision to work on the back clip first and then I plan on flipping the car around this winter and building out the front. I Plan on doing the mod that 355Fiero AKA Don has done on his making it more Ferrari like including the headlight conversion.
Hea Bob
Glad you like them!!
It looks like I still have a problem with posting my pics though, I'm put the links in, the first one worked but not the rest??
Back to the drawing board.
I hope to finish off the last of the fiberglass tie in today if the rain holds off.
Wayne

[This message has been edited by dobie1 (edited 09-17-2014).]

IP: Logged
RCR
Member
Posts: 4397
From: Shelby Twp Mi
Registered: Sep 2002


Feedback score:    (7)
Leave feedback


Total ratings: 102
Rate this member

Report this Post09-03-2014 06:55 AM Click Here to See the Profile for RCRSend a Private Message to RCREdit/Delete MessageReply w/QuoteDirect Link to This Post
...edit: I take that back. It did not work. Hmmm???

Bob

PS, I'm doing the same thing. I'm working on the back due to limited space. Once I'm happy with it, I will spin the car around and finish the front and start the passenger side.

[This message has been edited by RCR (edited 09-03-2014).]

IP: Logged
dobie1
Member
Posts: 450
From: BC, Canada
Registered: Jun 2005


Feedback score: N/A
Leave feedback

Rate this member

Report this Post09-03-2014 11:42 AM Click Here to See the Profile for dobie1Send a Private Message to dobie1Edit/Delete MessageReply w/QuoteDirect Link to This Post
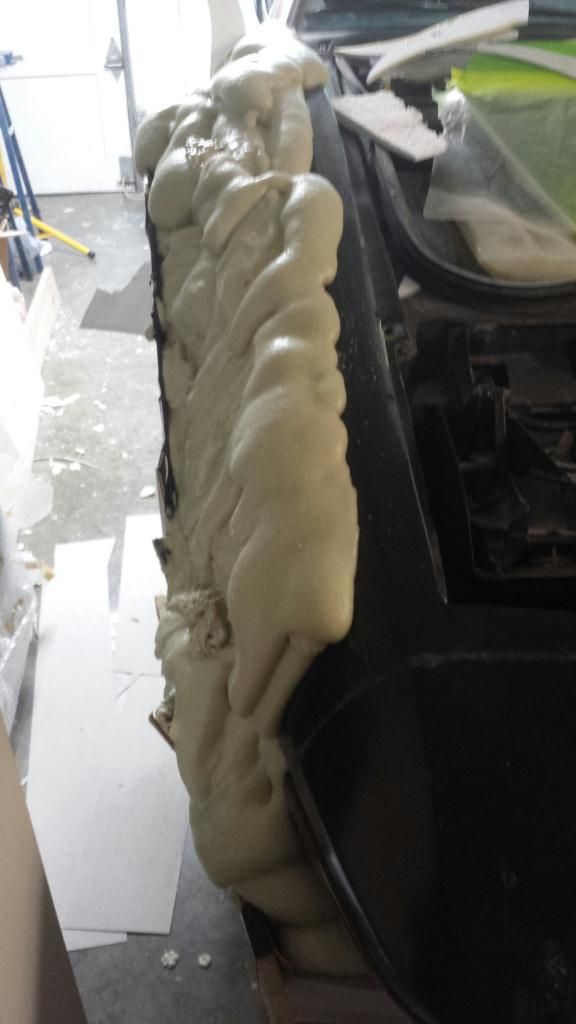
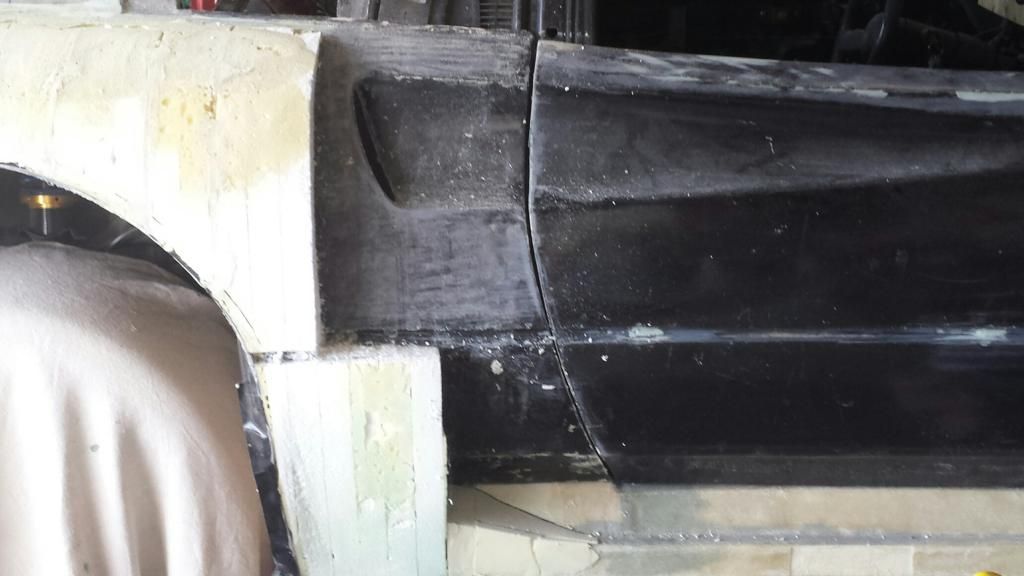
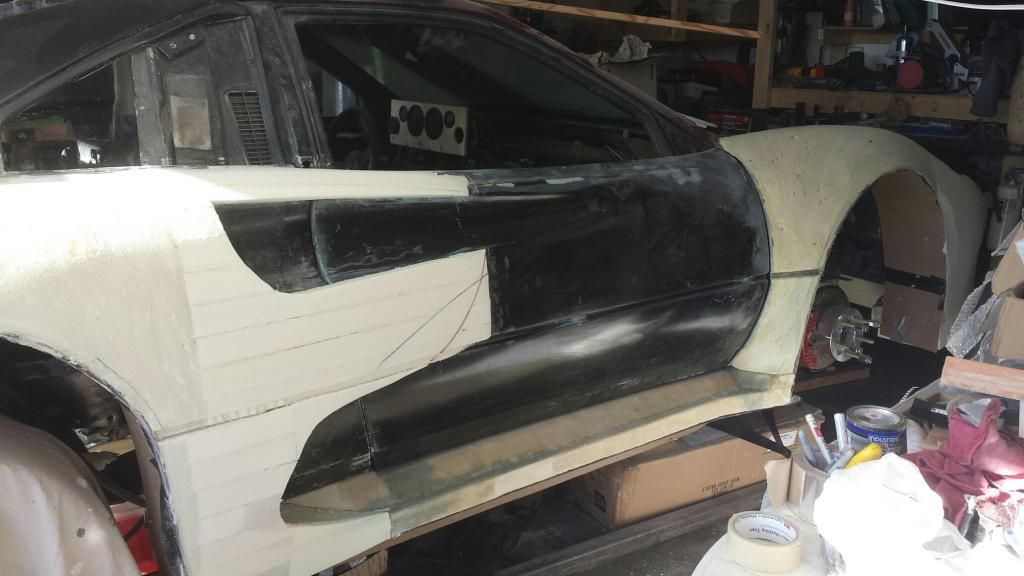
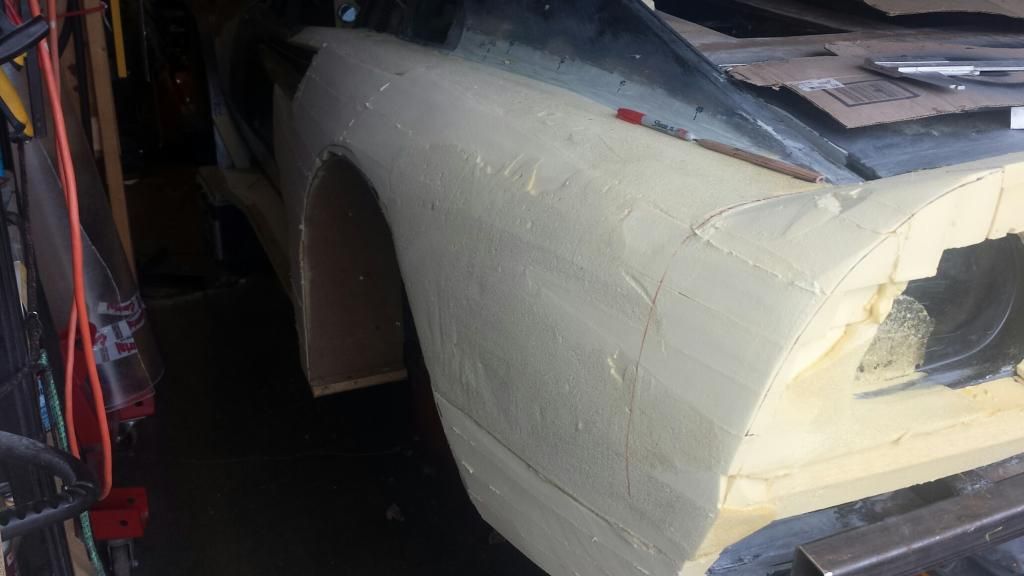
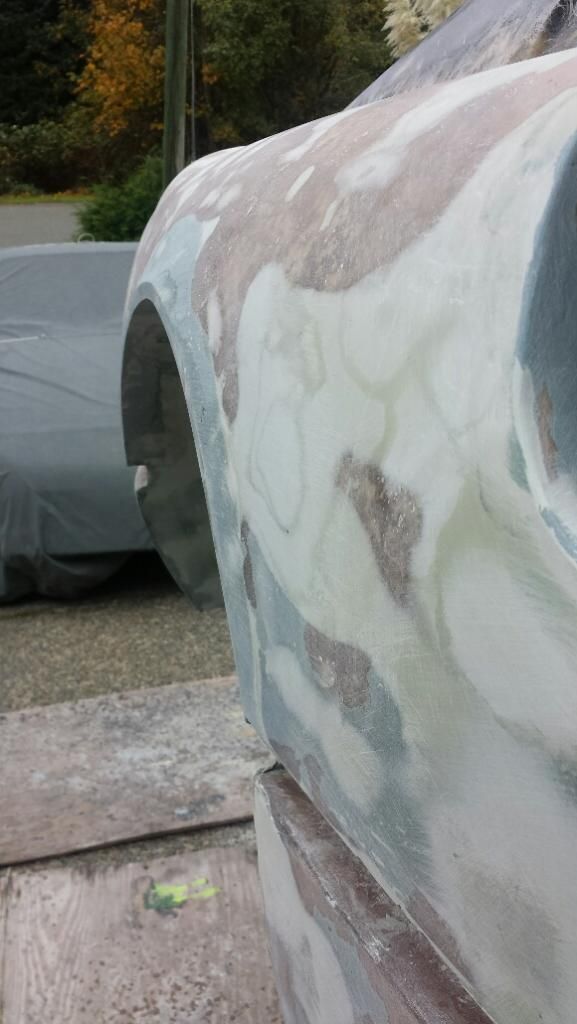
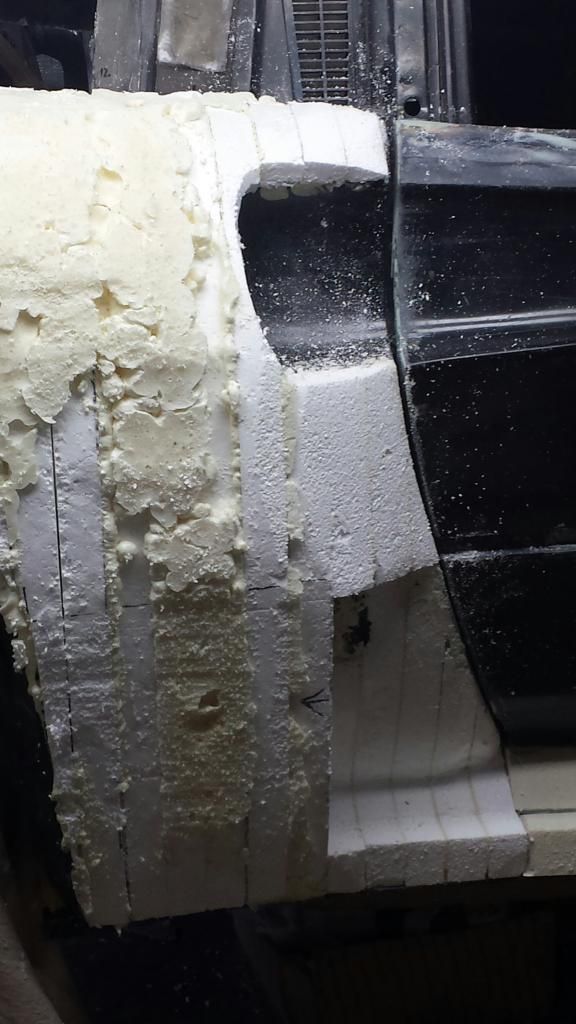
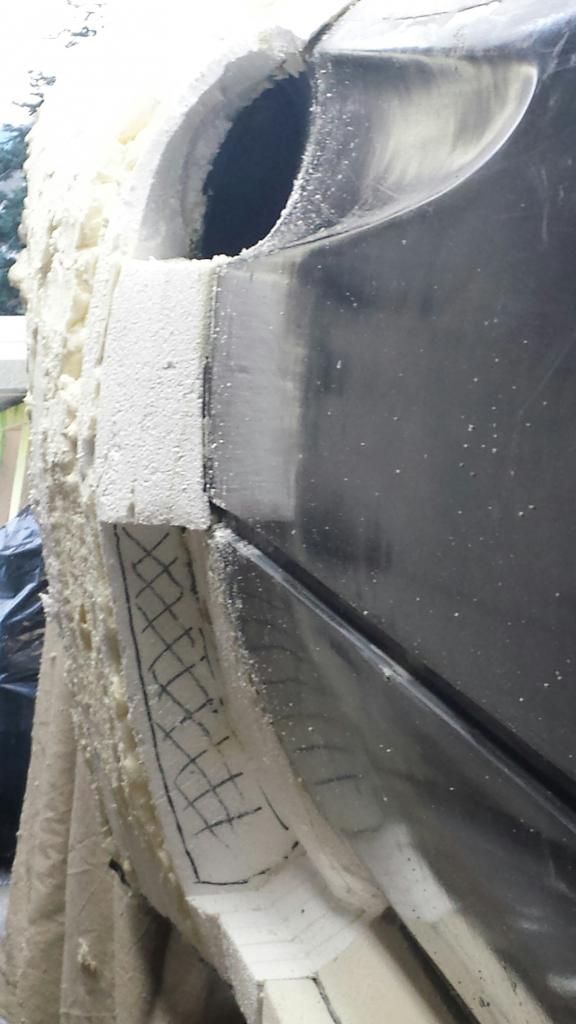
I was getting close to what I thought was the final design when a contributor MacGyver from MM's I suggest that I feather your wide body transition into the doors as well. he thought the steep curves I had were not flowing into the door skins and would give the appearance of pasted on panels. So after so deliberation I took out the tools and started back to work taking out the white foam and replacing it with resin compatible board foam extending it into the door. At the same time I carved out some more styro and replaced with expanding foam.
Enjoy. Wayne


Then the decision came on the lower scoop shape and design


Then a few changes to the upper scoop and voila`

[This message has been edited by dobie1 (edited 09-03-2014).]

IP: Logged
dobie1
Member
Posts: 450
From: BC, Canada
Registered: Jun 2005


Feedback score: N/A
Leave feedback

Rate this member

Report this Post09-03-2014 02:07 PM Click Here to See the Profile for dobie1Send a Private Message to dobie1Edit/Delete MessageReply w/QuoteDirect Link to This Post

dobie1

450 posts
Member since Jun 2005
Then it was time to do the back end of the car


But in order to complete the back end I had to build out the Drivers side of the car!! This time I was learning from the build on the left side and started at the belt line.


[This message has been edited by dobie1 (edited 09-03-2014).]

IP: Logged
dobie1
Member
Posts: 450
From: BC, Canada
Registered: Jun 2005


Feedback score: N/A
Leave feedback

Rate this member

Report this Post09-03-2014 02:16 PM Click Here to See the Profile for dobie1Send a Private Message to dobie1Edit/Delete MessageReply w/QuoteDirect Link to This Post

dobie1

450 posts
Member since Jun 2005
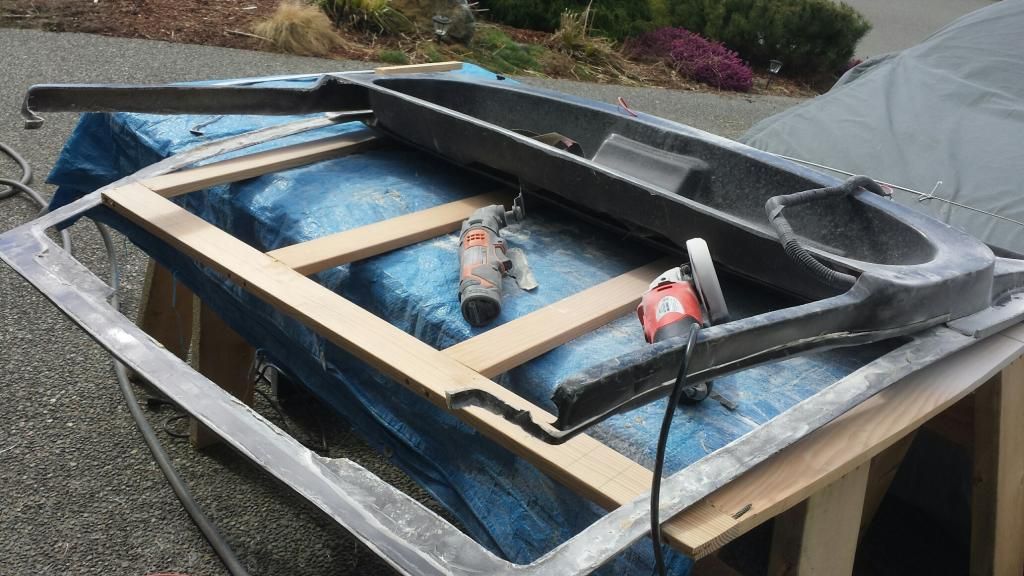
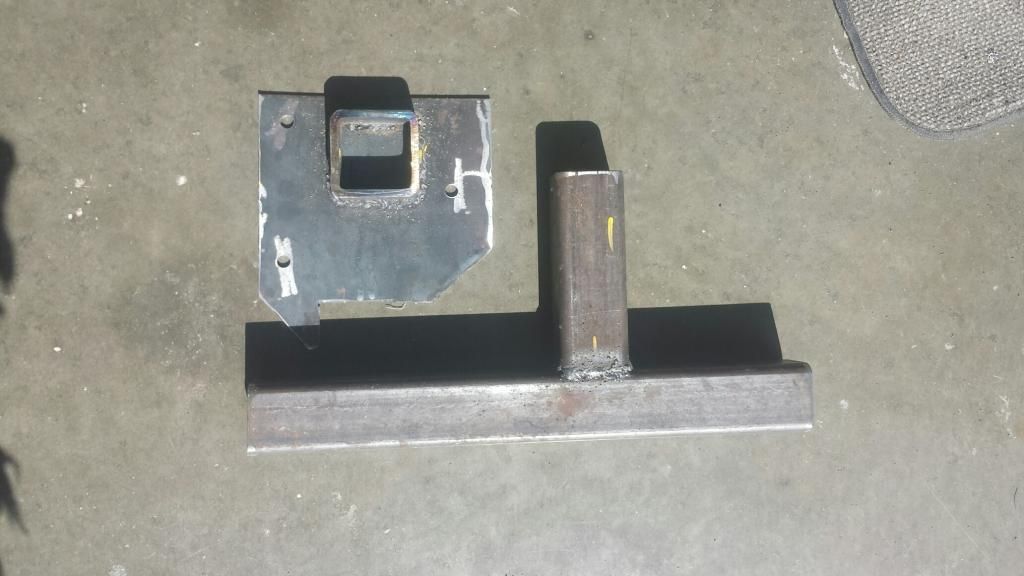
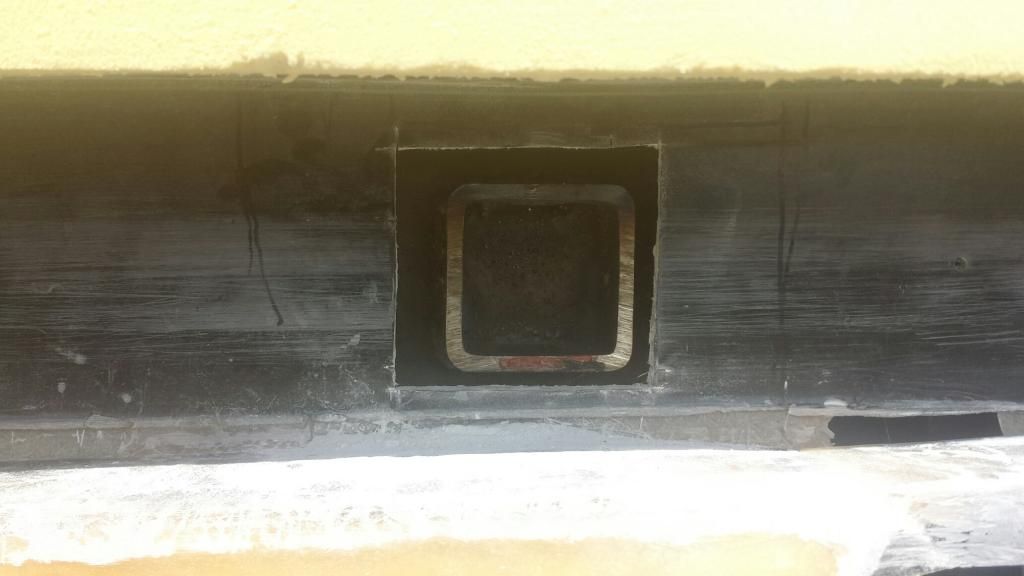
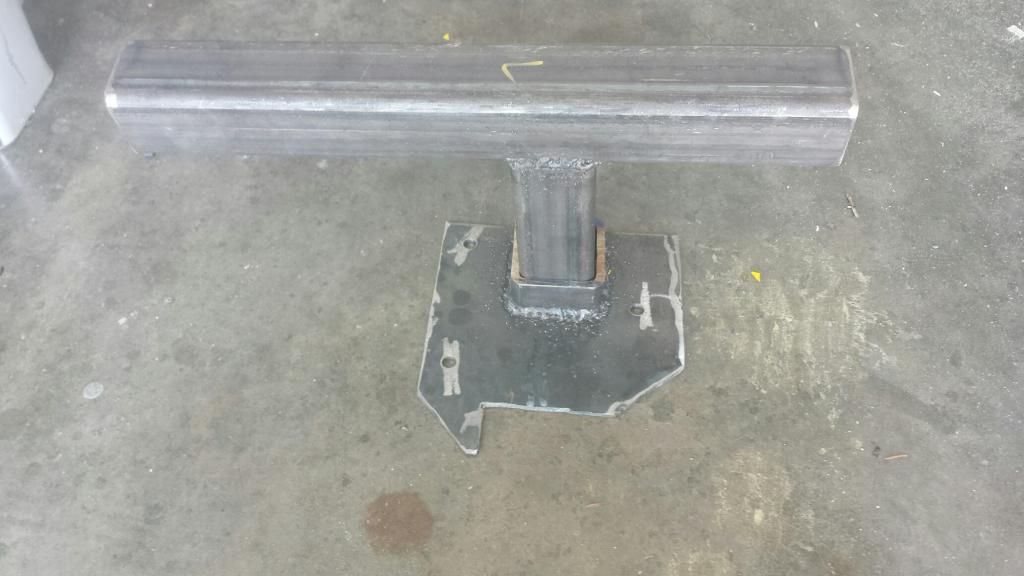
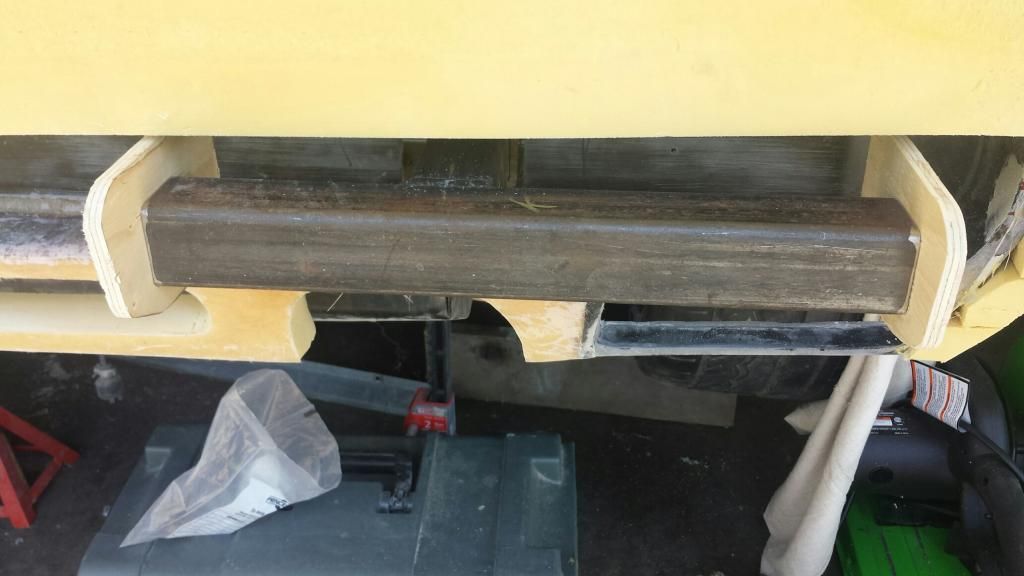
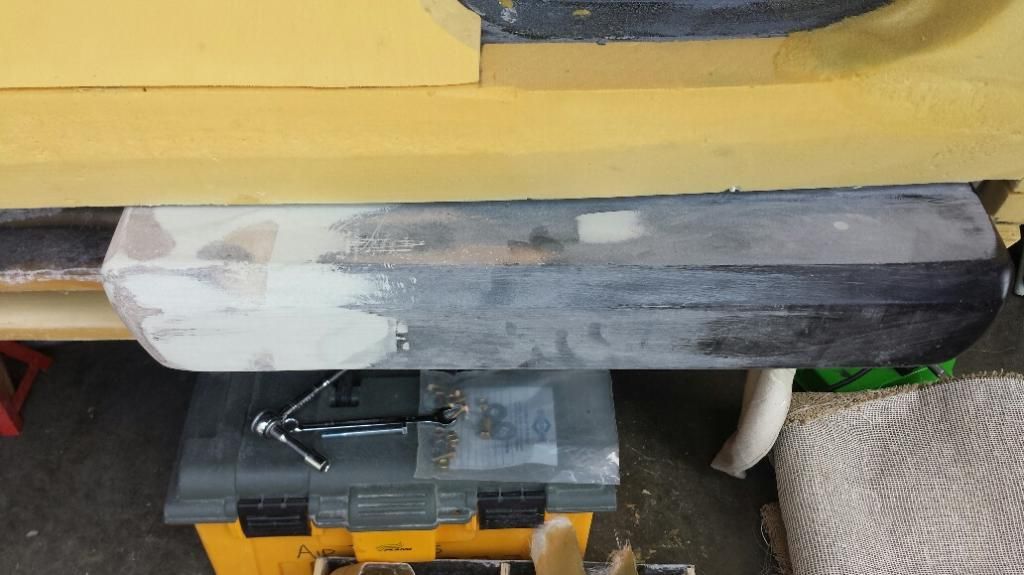
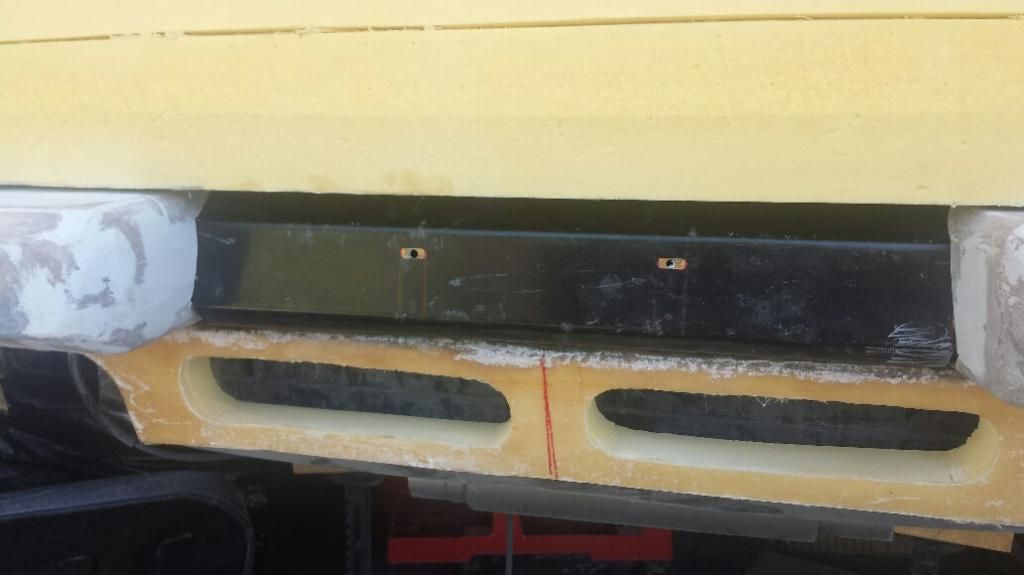
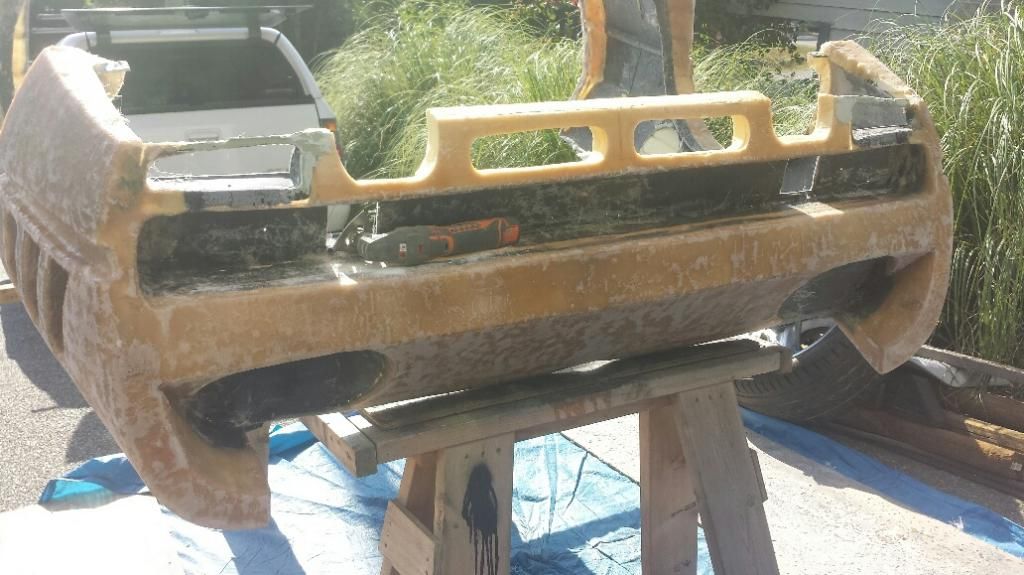
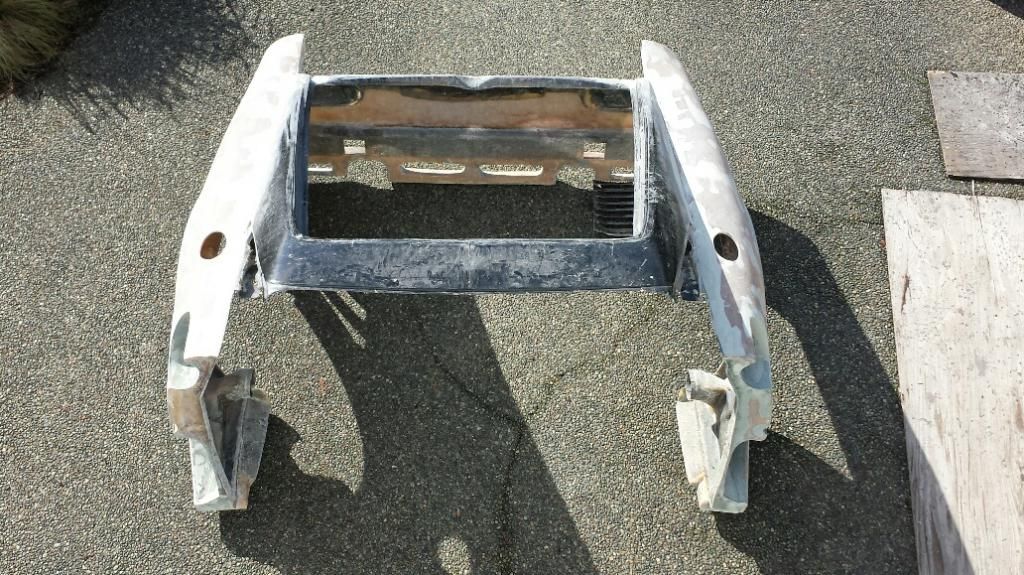
Then I needed to do the Rear bumpers up and they would have to be removable because the rear clip had to be removed for finishing (remove the old 308 panels and foam once I had glassed everything.


IP: Logged
dobie1
Member
Posts: 450
From: BC, Canada
Registered: Jun 2005


Feedback score: N/A
Leave feedback

Rate this member

Report this Post09-03-2014 02:34 PM Click Here to See the Profile for dobie1Send a Private Message to dobie1Edit/Delete MessageReply w/QuoteDirect Link to This Post

dobie1

450 posts
Member since Jun 2005
Then the day arrived with the help of my mentor MR355 (Don) we started to glass the rear clip of the car. The plan was to do 4 layers of 1 1/2 OZ glass matt on the out side then remove the clip and cut out the old panels and remove the foam and then 2 more layers of glass to tie it all together.


Once that was all completed Yea!!! Don helped me to remove the rear clip so I could start to finish the rear clip


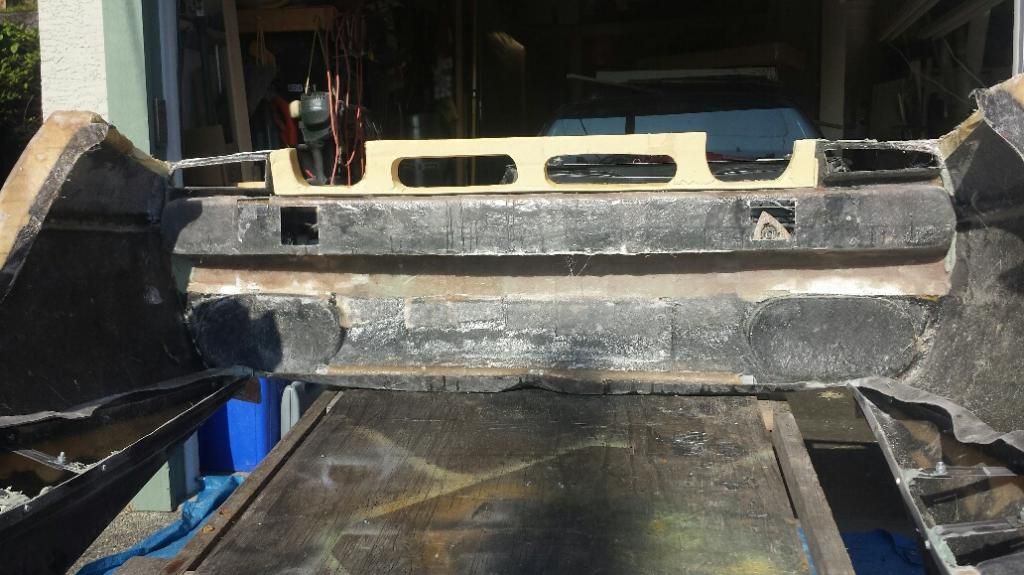
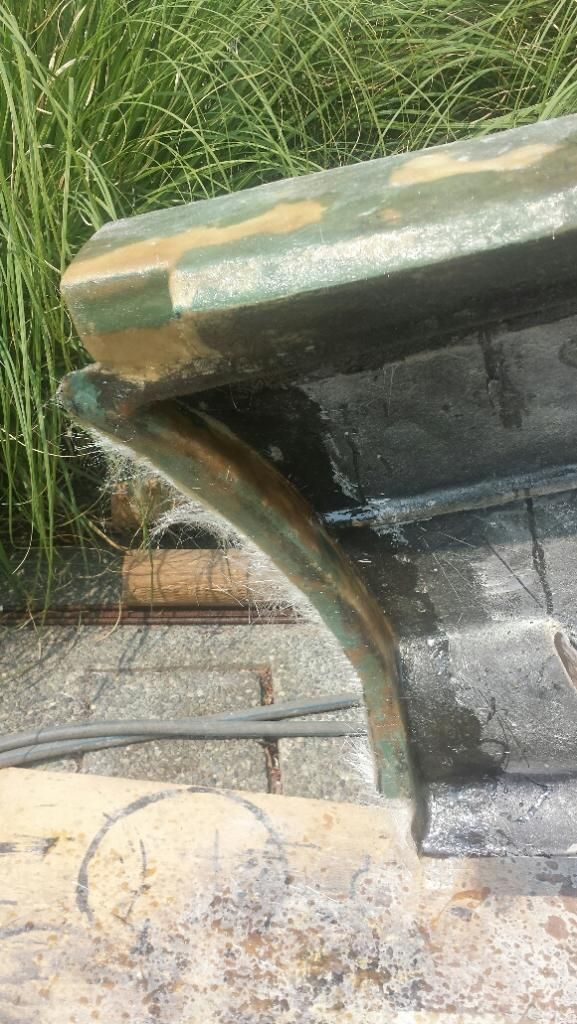
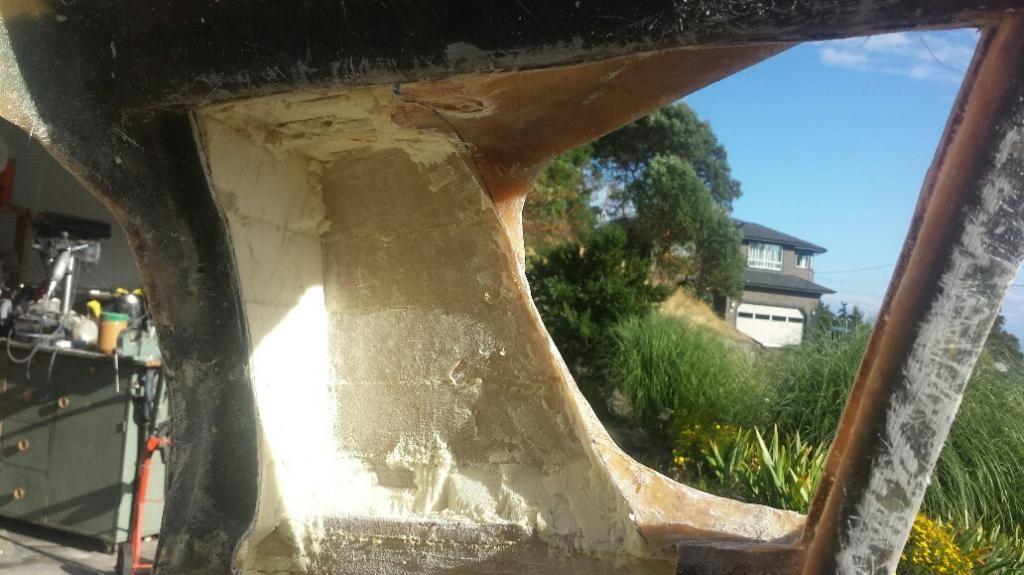
First I wanted to finish off the lower ducts


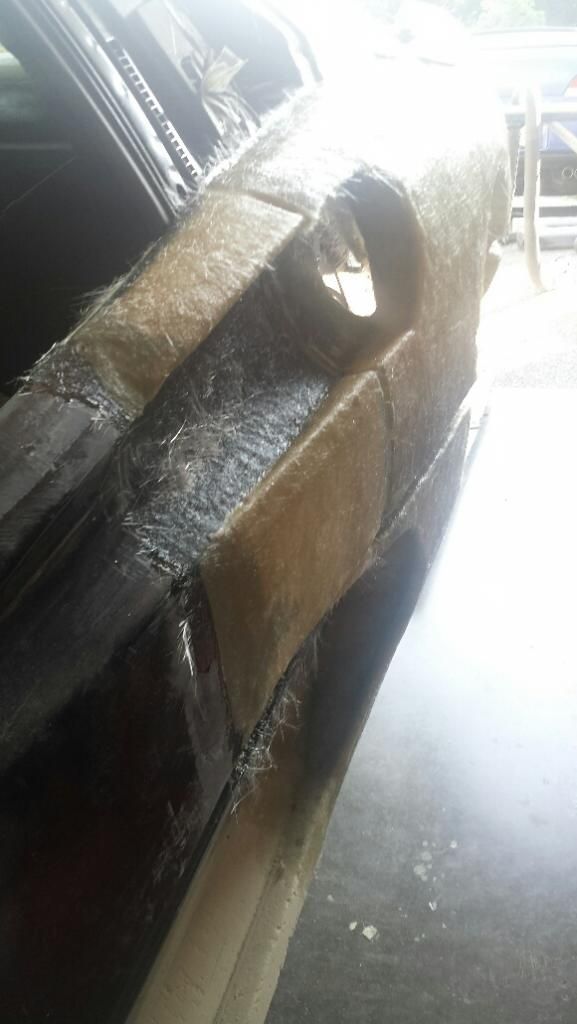
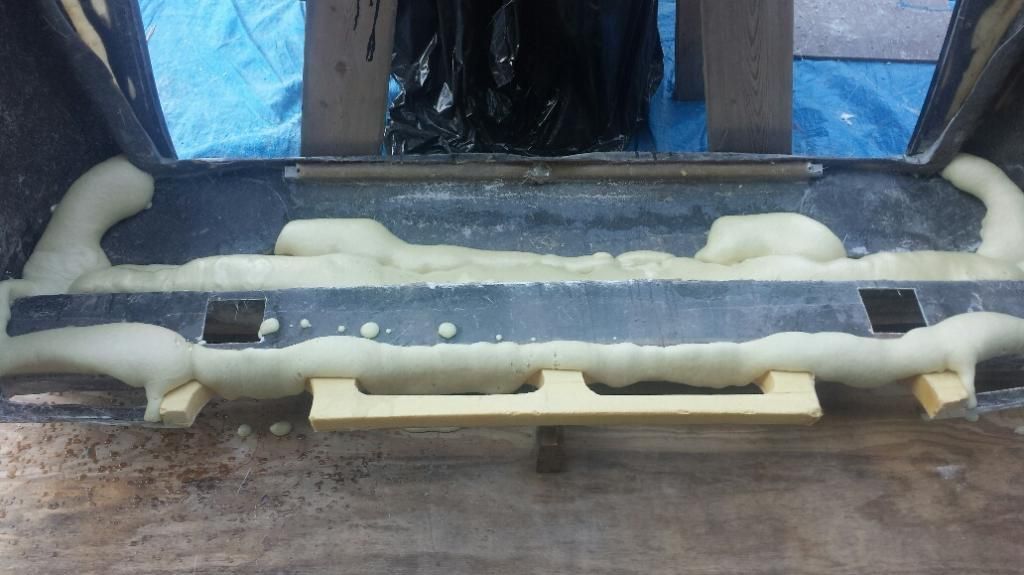
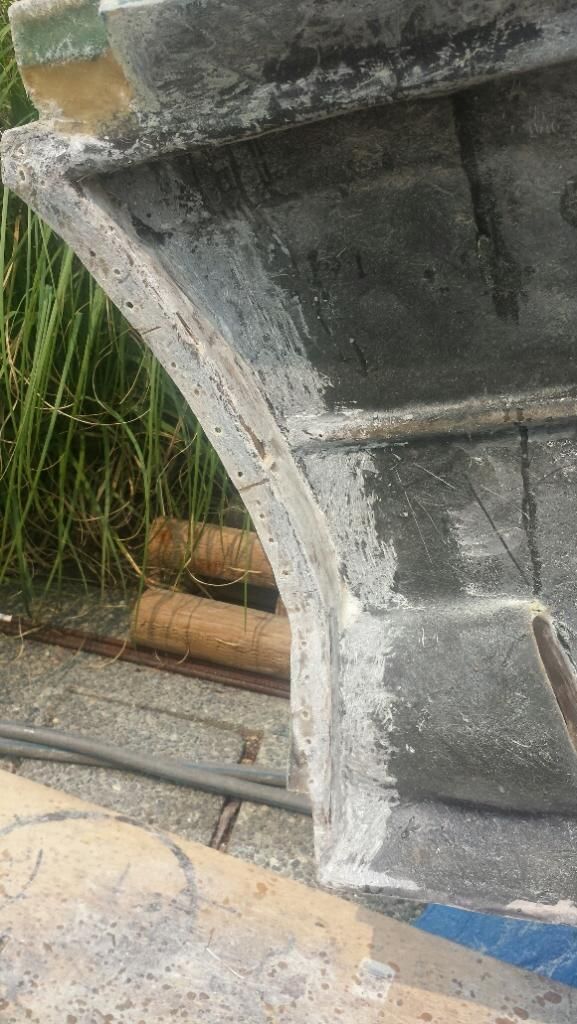
Then it was time to clean up the back end of the clip , I used expanding foam cleaned it up and then glassed the whole area. The plan is to paint it black to finish it off.


[This message has been edited by dobie1 (edited 09-03-2014).]

IP: Logged
dobie1
Member
Posts: 450
From: BC, Canada
Registered: Jun 2005


Feedback score: N/A
Leave feedback

Rate this member

Report this Post09-03-2014 02:49 PM Click Here to See the Profile for dobie1Send a Private Message to dobie1Edit/Delete MessageReply w/QuoteDirect Link to This Post

dobie1

450 posts
Member since Jun 2005
I needed to clean up and re-enforce the door jam area


[This message has been edited by dobie1 (edited 09-03-2014).]

IP: Logged
dobie1
Member
Posts: 450
From: BC, Canada
Registered: Jun 2005


Feedback score: N/A
Leave feedback

Rate this member

Report this Post09-04-2014 01:26 PM Click Here to See the Profile for dobie1Send a Private Message to dobie1Edit/Delete MessageReply w/QuoteDirect Link to This Post
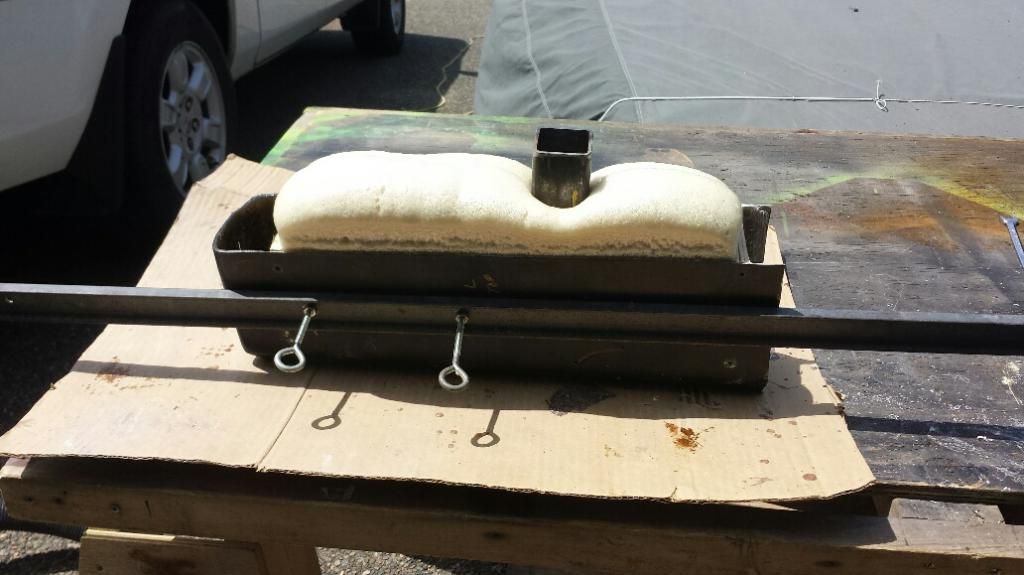
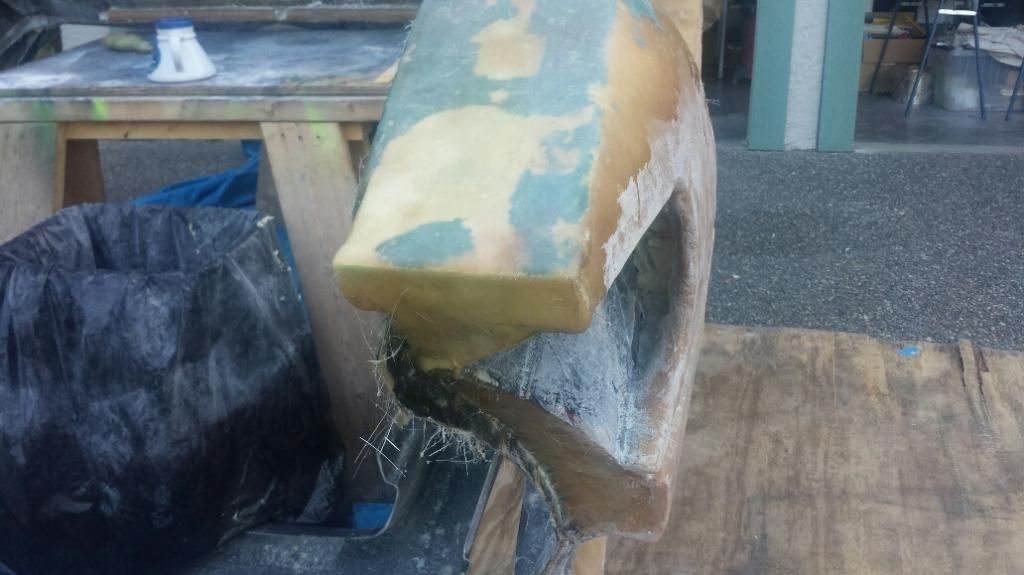
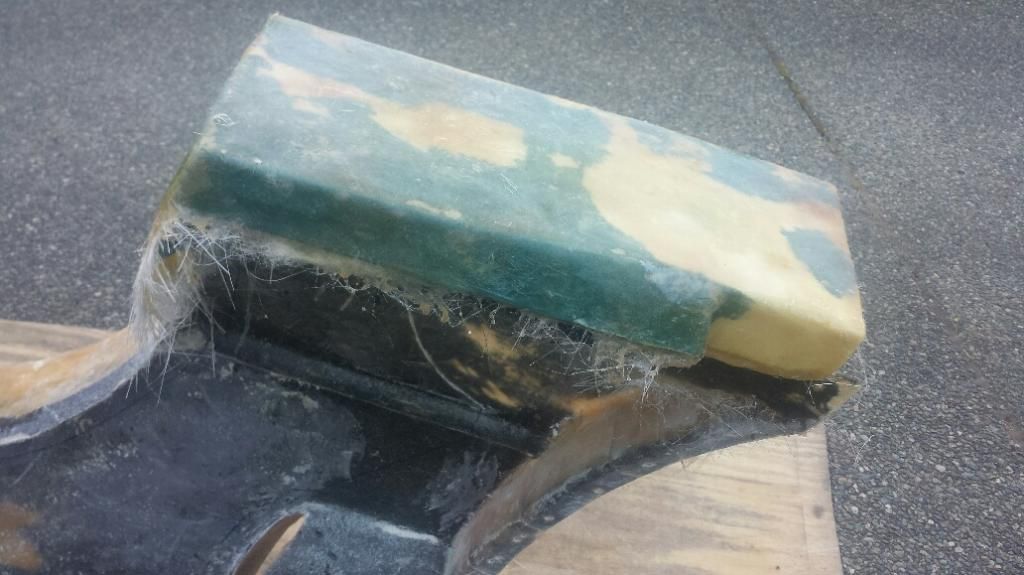
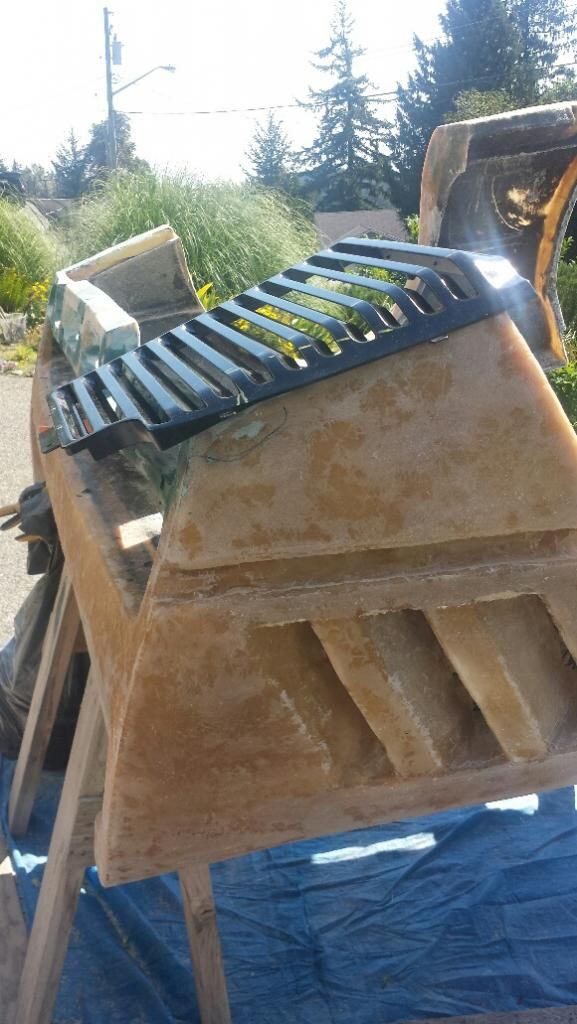
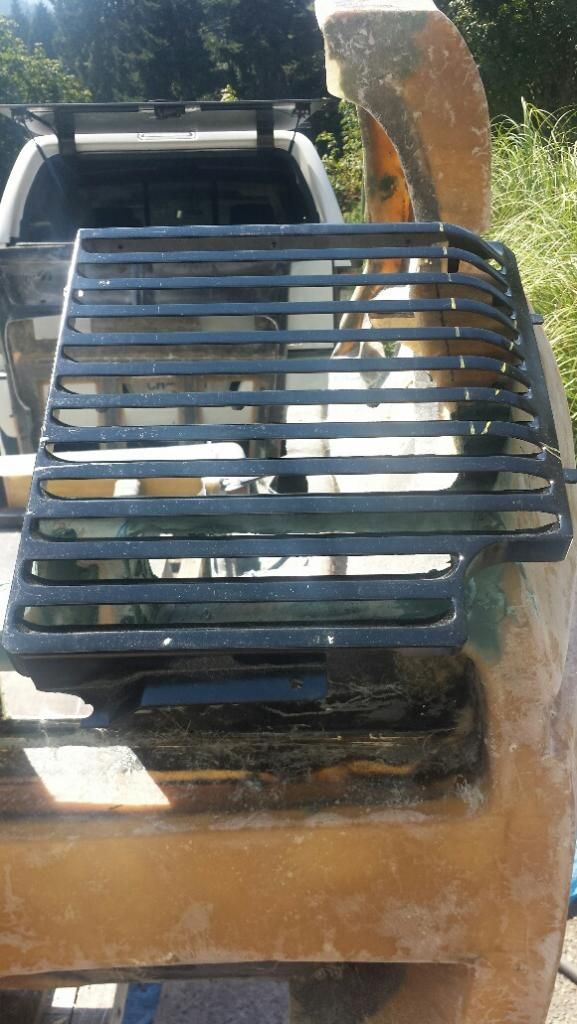
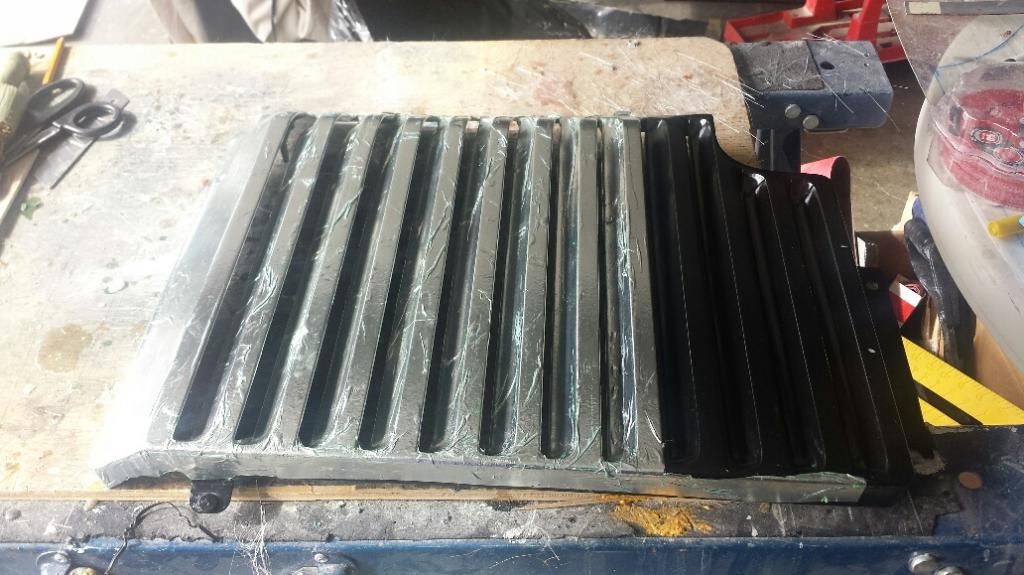
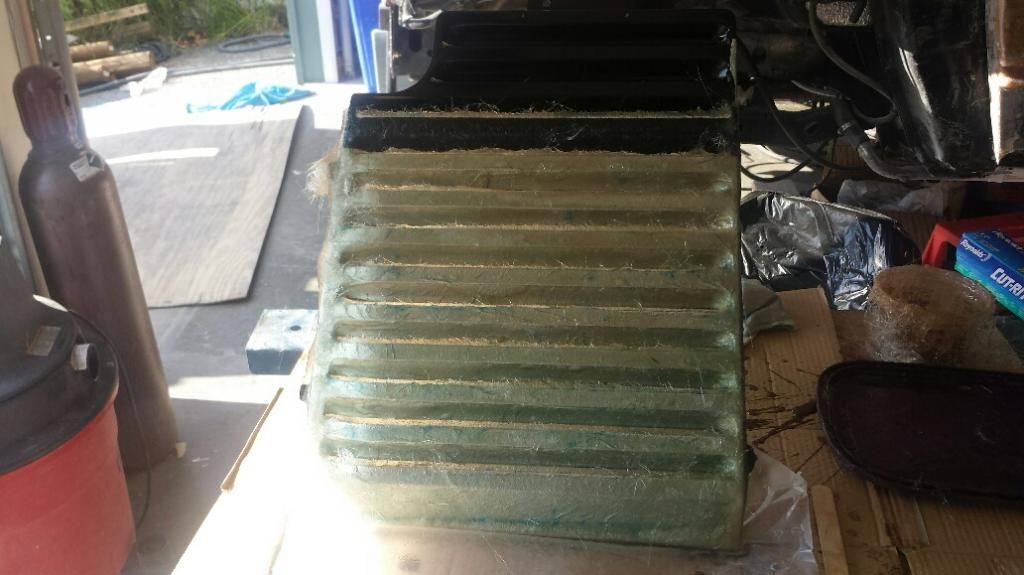
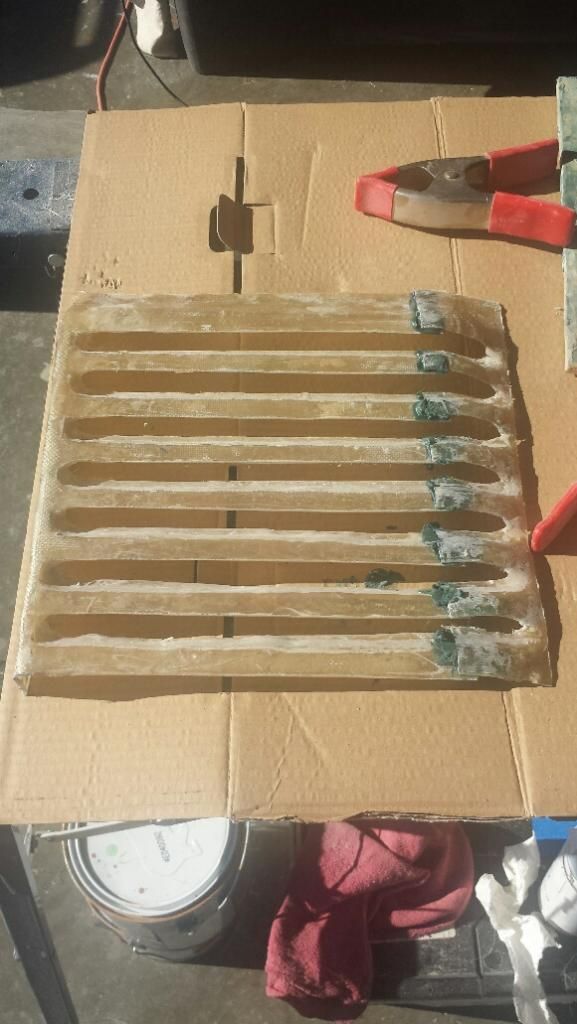
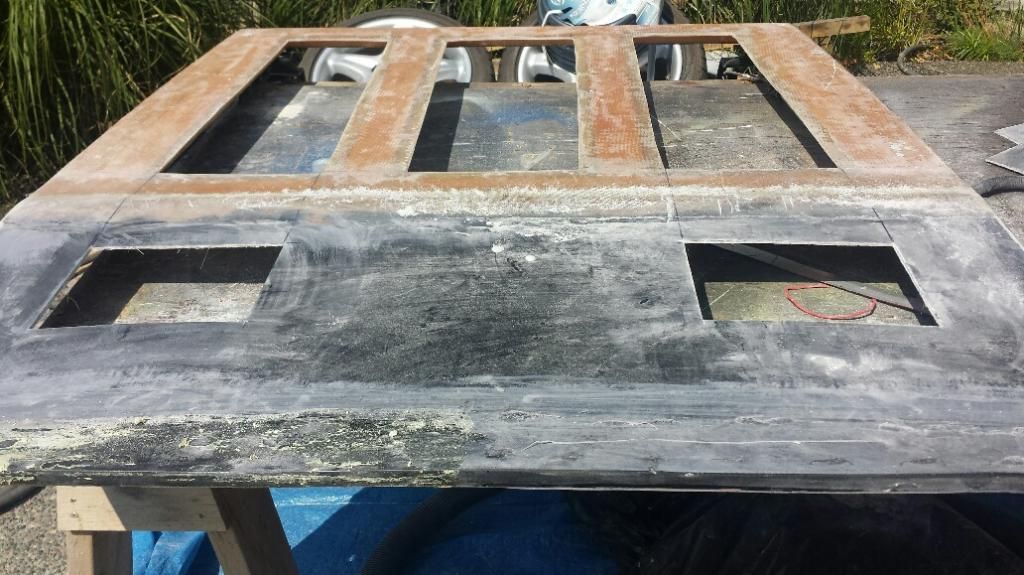
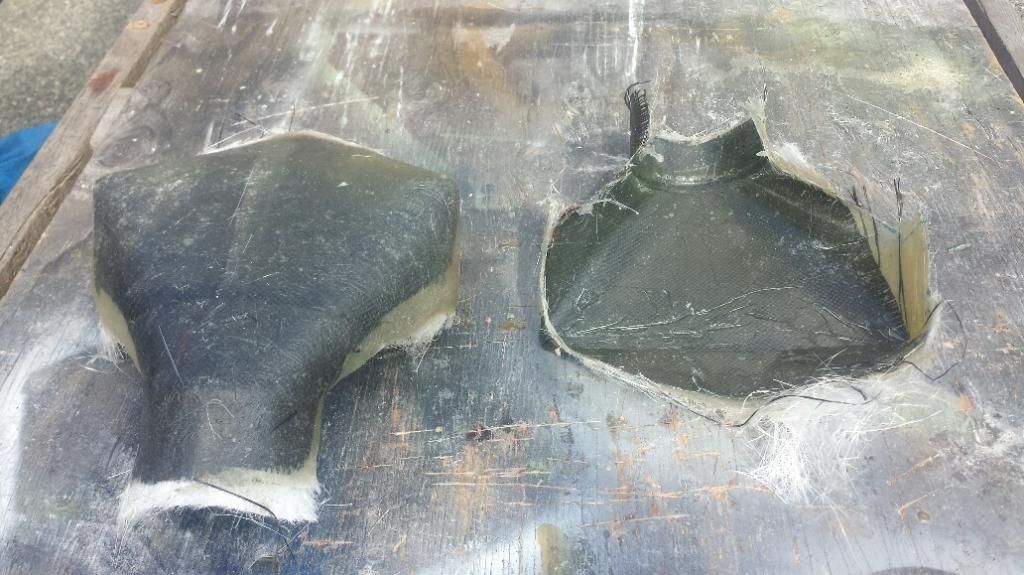
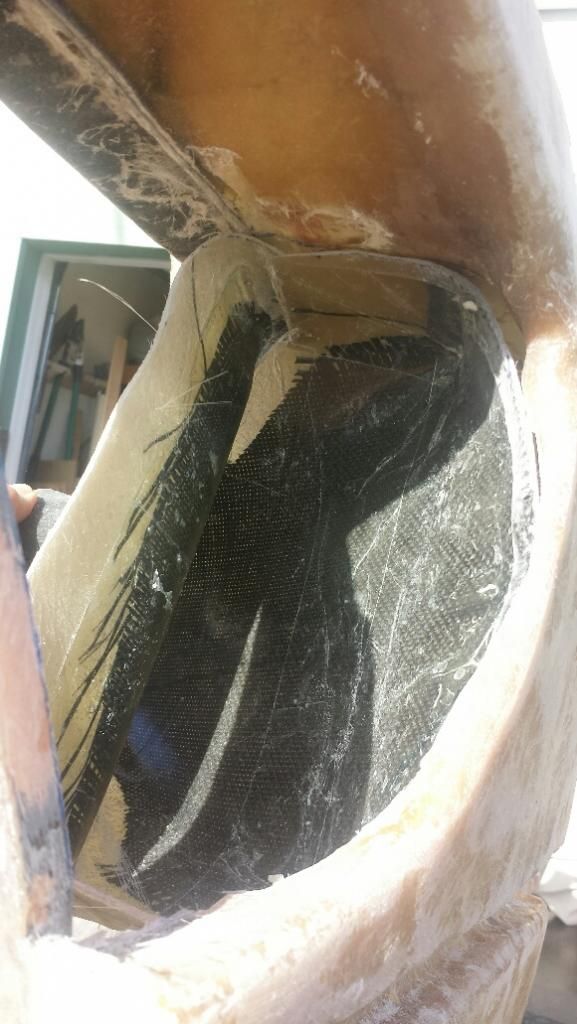
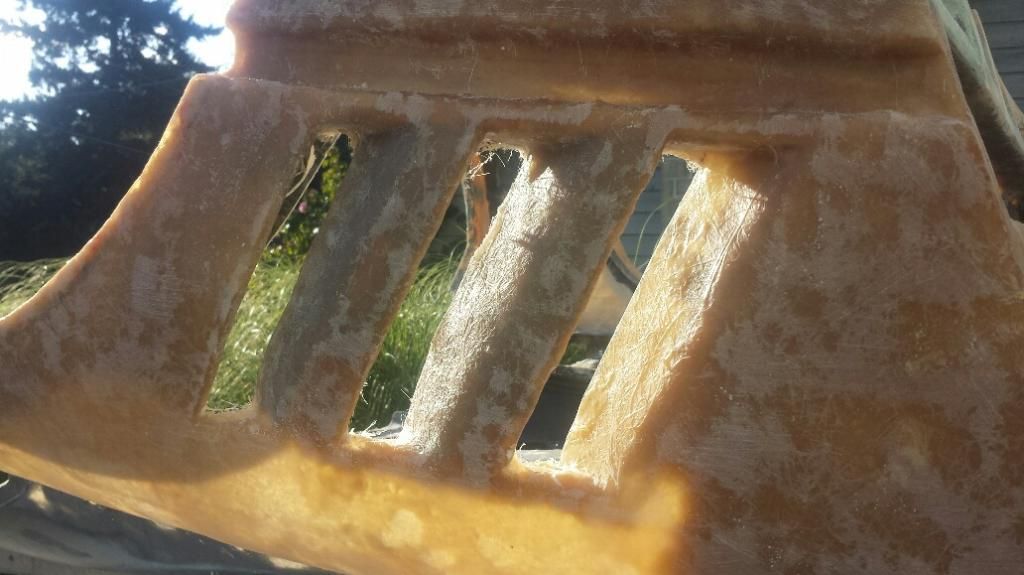
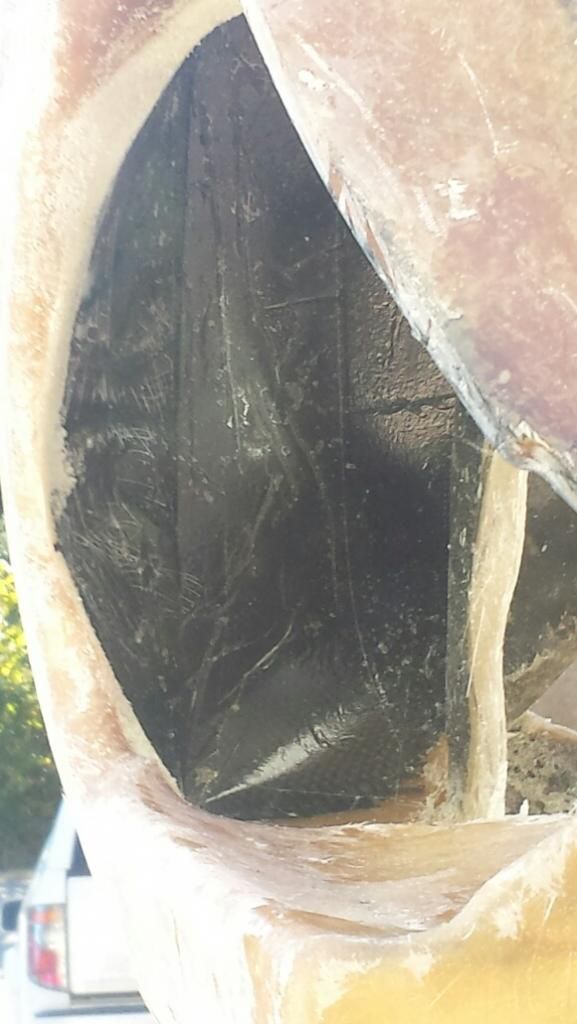
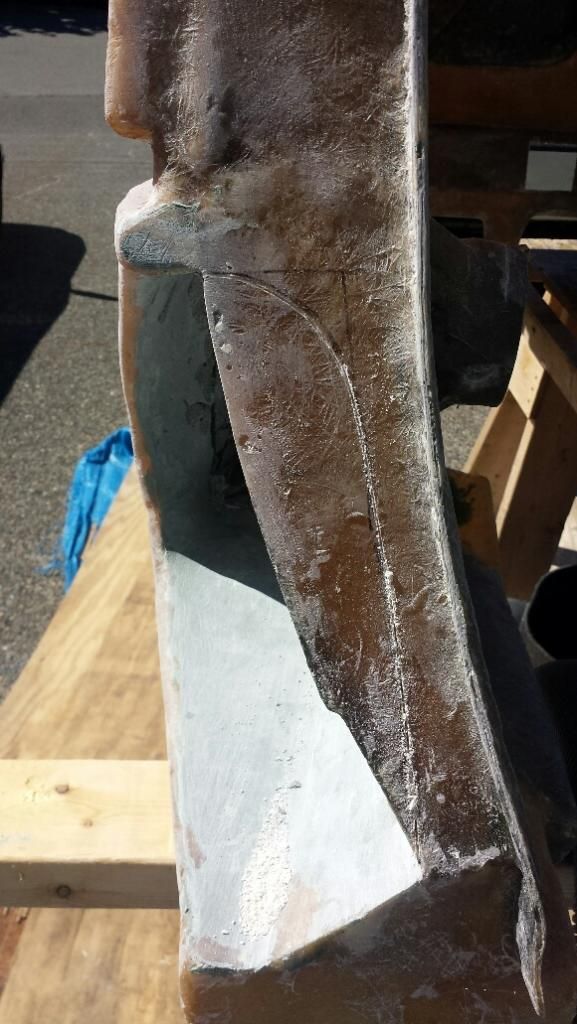
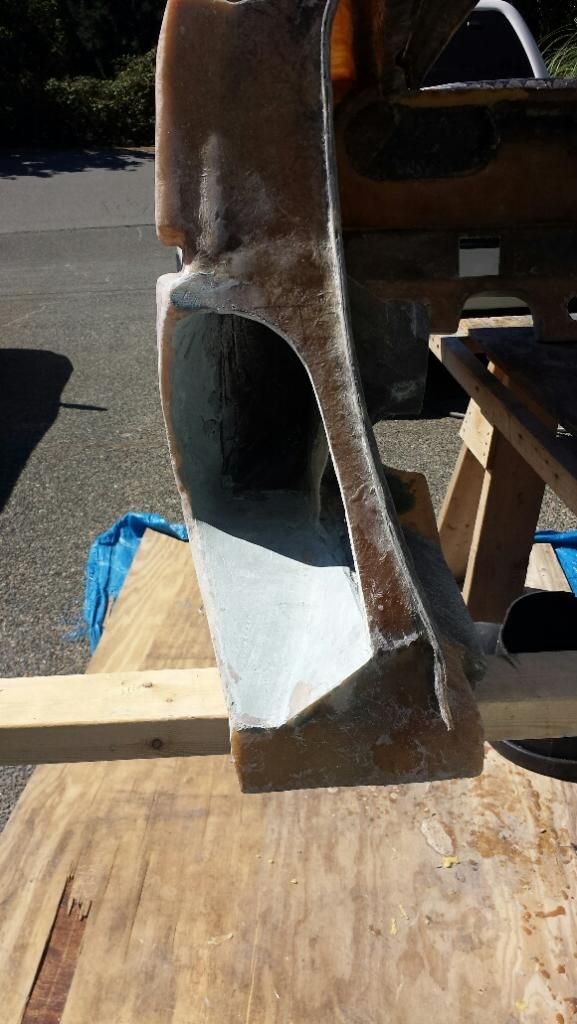
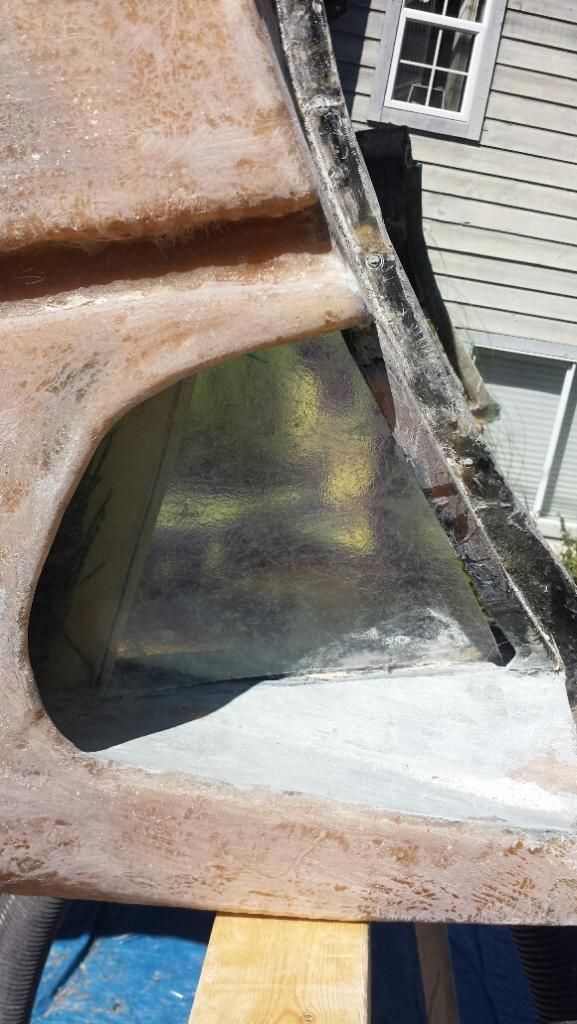
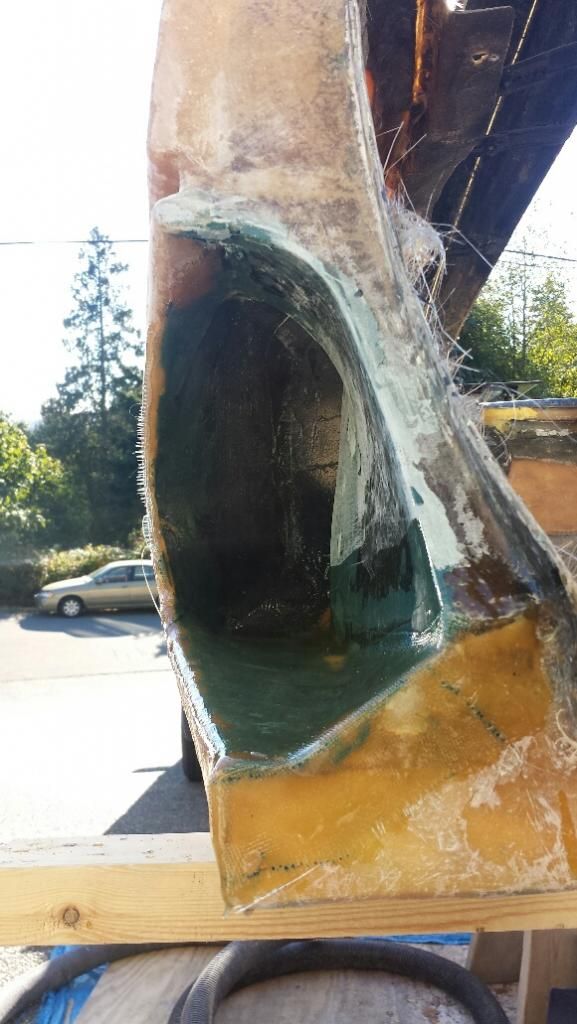
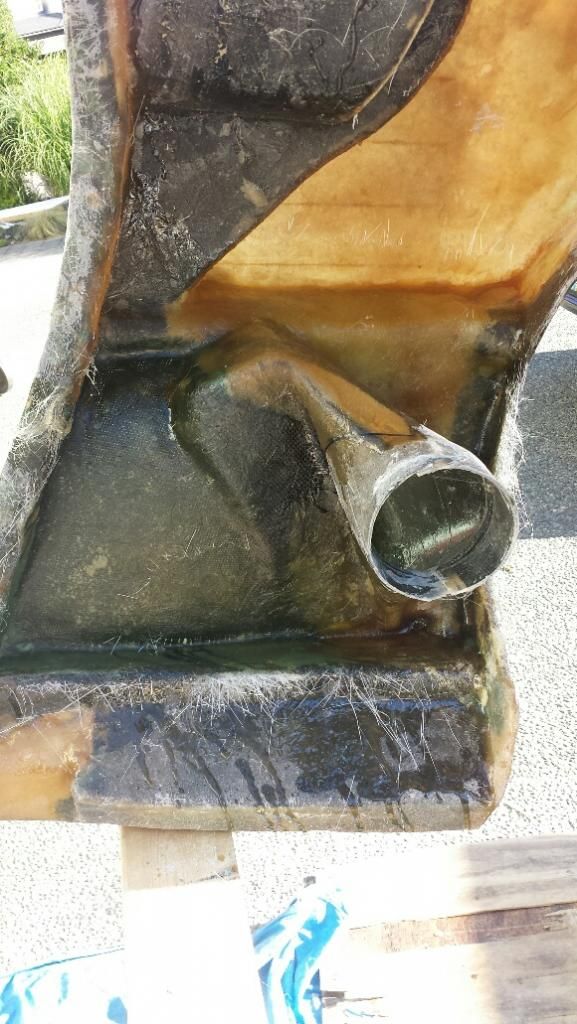
The 288 has a additional fill vents on the underside of the rear valence one on each side,so the next step was to try to come up with something that would look and work properly.
I happened to have a couple spare Fiero engine compartment vents that I though I could perhaps use as a mold so I cleaned them all up sanded and painted them so I had a clean surface. The first one I just used a few layers of 1 1/2 oz mat with a layer of finishing glass on top, it worked ok but I thought it needed more strength. So the next one I built using a layer of carbon fiber sandwiched between layers of matt with a layer of finishing cloth over top that was the answer very ridged and strong. SO I had to add some carbon fiber to the first one to give it some rigidity.
Enjoy


[This message has been edited by dobie1 (edited 09-04-2014).]

IP: Logged
dobie1
Member
Posts: 450
From: BC, Canada
Registered: Jun 2005


Feedback score: N/A
Leave feedback

Rate this member

Report this Post09-04-2014 01:45 PM Click Here to See the Profile for dobie1Send a Private Message to dobie1Edit/Delete MessageReply w/QuoteDirect Link to This Post

dobie1

450 posts
Member since Jun 2005
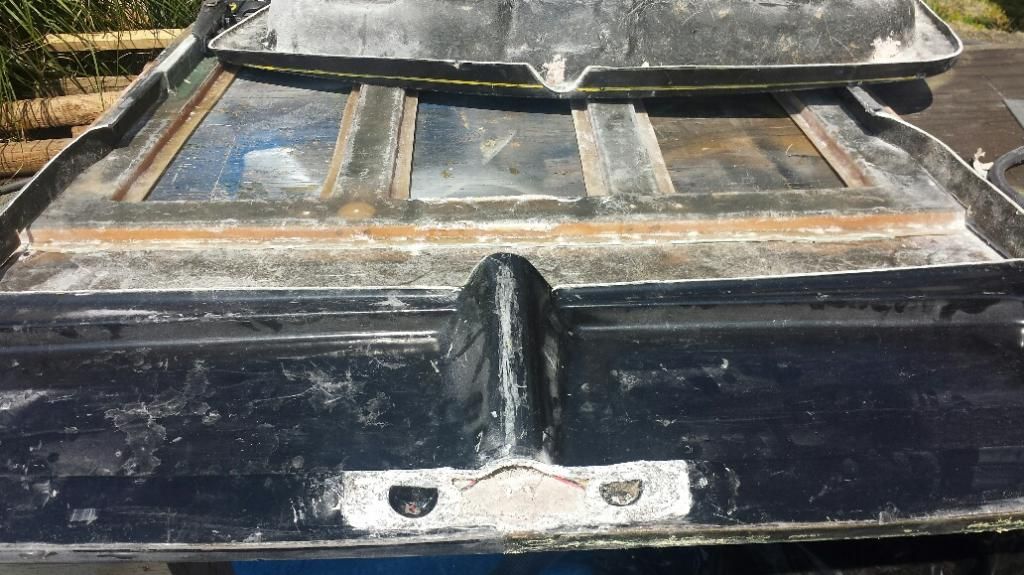
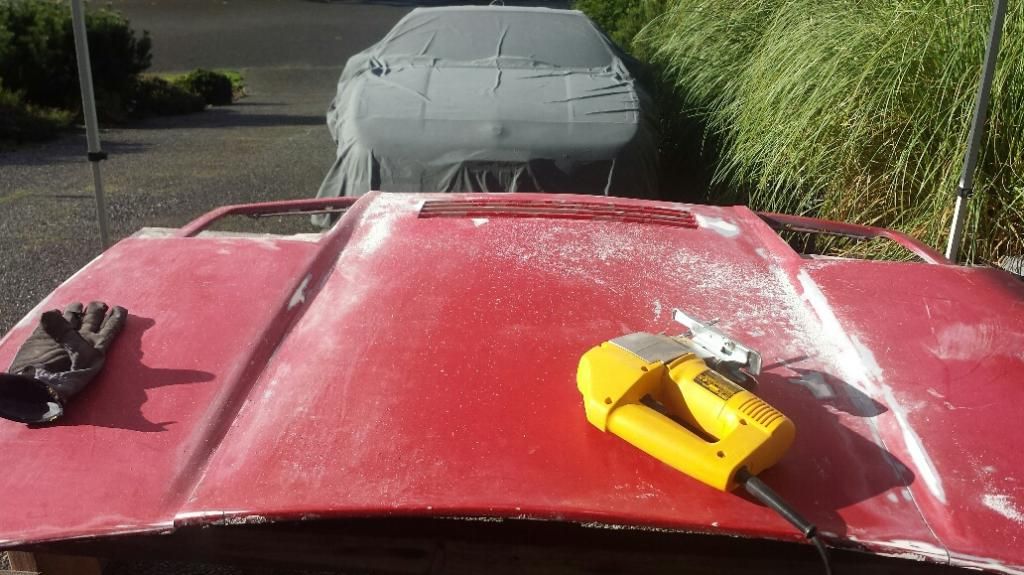
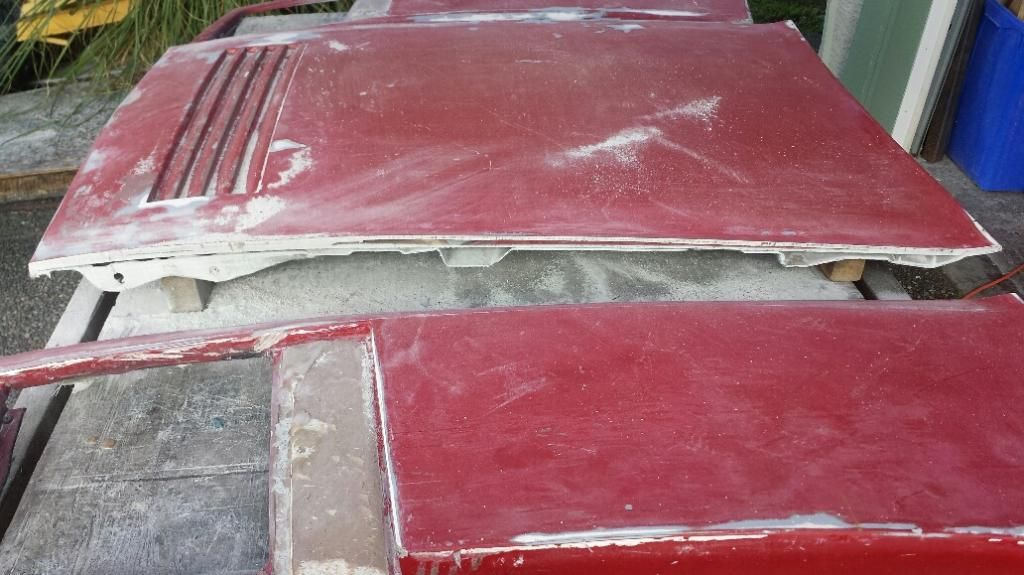
As I eluded to earlier I needed to modify the engine hood as it wasn't fitting correctly, first I needed to remove the licence plate lights holder as the 288's are mounted on the bumper sides.
Then I needed to cut the inside of the glass hood (the part that seals to the stock Fiero trunk) as it was touching without a rubber seal so I need to take at least a 1" off .
The 288 has additional vents where the turbo intakes are so taking the inside off allows me to work on the vents I have other priorities right now so this is still a work in progress.


[This message has been edited by dobie1 (edited 09-05-2014).]

IP: Logged
Mickey_Moose
Member
Posts: 7494
From: Edmonton, AB, Canada
Registered: May 2001


Feedback score: (3)
Leave feedback


Total ratings: 143
Rate this member

Report this Post09-04-2014 04:49 PM Click Here to See the Profile for Mickey_MooseClick Here to visit Mickey_Moose's HomePageSend a Private Message to Mickey_MooseEdit/Delete MessageReply w/QuoteDirect Link to This Post


...about all I have to say, keep up the good work...
IP: Logged
PFF
System Bot
dobie1
Member
Posts: 450
From: BC, Canada
Registered: Jun 2005


Feedback score: N/A
Leave feedback

Rate this member

Report this Post09-05-2014 12:15 AM Click Here to See the Profile for dobie1Send a Private Message to dobie1Edit/Delete MessageReply w/QuoteDirect Link to This Post
Thanks Mickey Moose
...about all I have to say, keep up the good work...

Thanks of looking Mickey M
I'm still amazed at how much time is takes to build a car, when I first started I figured it would be a year maybe maybe 15 months but when I see how much time it takes to move forward so little I'll be lucky to finish in 3 years. LOL
Wayne
IP: Logged
RCR
Member
Posts: 4397
From: Shelby Twp Mi
Registered: Sep 2002


Feedback score:    (7)
Leave feedback


Total ratings: 102
Rate this member

Report this Post09-05-2014 07:23 AM Click Here to See the Profile for RCRSend a Private Message to RCREdit/Delete MessageReply w/QuoteDirect Link to This Post
 
quote
Originally posted by dobie1:
I'm still amazed at how much time is takes to build a car, when I first started I figured it would be a year maybe maybe 15 months but when I see how much time it takes to move forward so little I'll be lucky to finish in 3 years. LOL
Wayne


Tell me about it

Bob
IP: Logged
dobie1
Member
Posts: 450
From: BC, Canada
Registered: Jun 2005


Feedback score: N/A
Leave feedback

Rate this member

Report this Post09-05-2014 04:43 PM Click Here to See the Profile for dobie1Send a Private Message to dobie1Edit/Delete MessageReply w/QuoteDirect Link to This Post
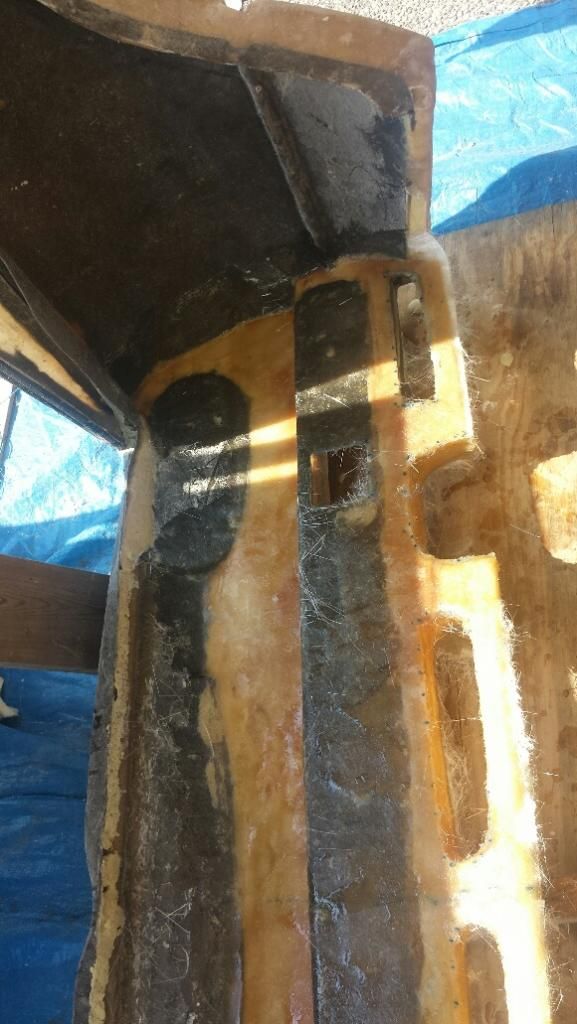
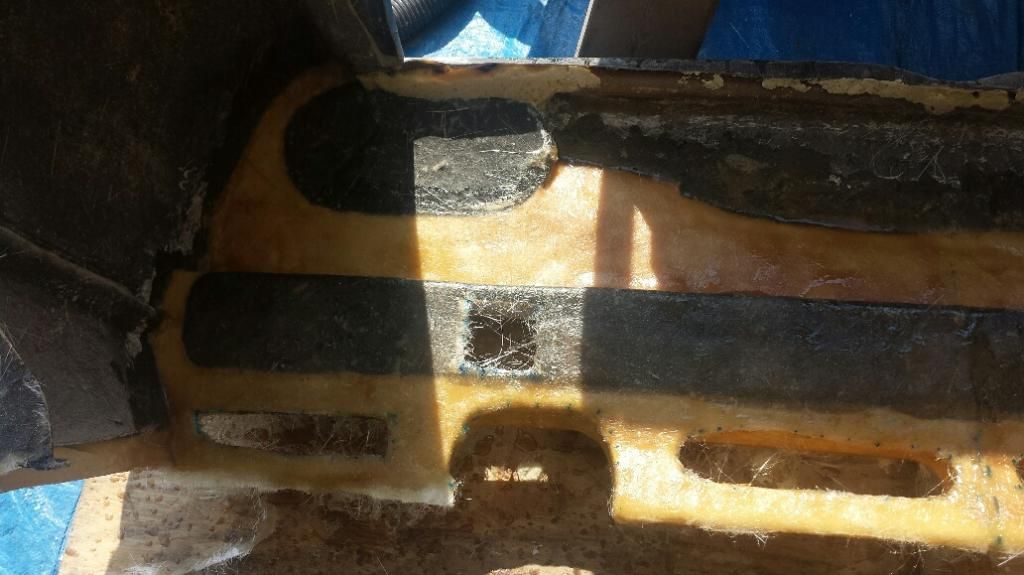
Well for those of you that have read my build you are almost up to date!!!
I competed cutting out of the old panels and removing the foam, I then added two more layers of 1 1/2 oz mat to seal the old and new so that is now 6 layers of glass mat!!


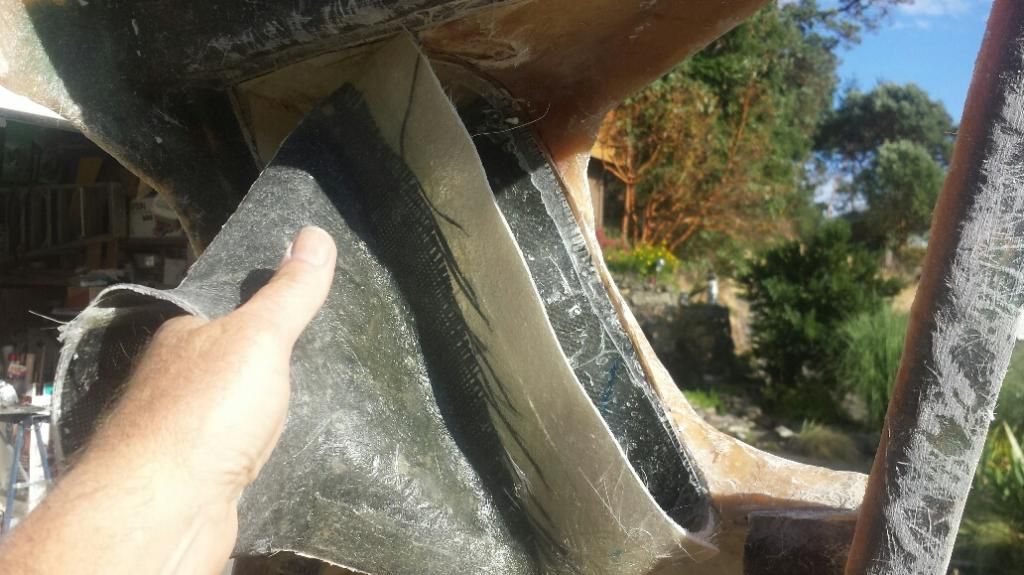
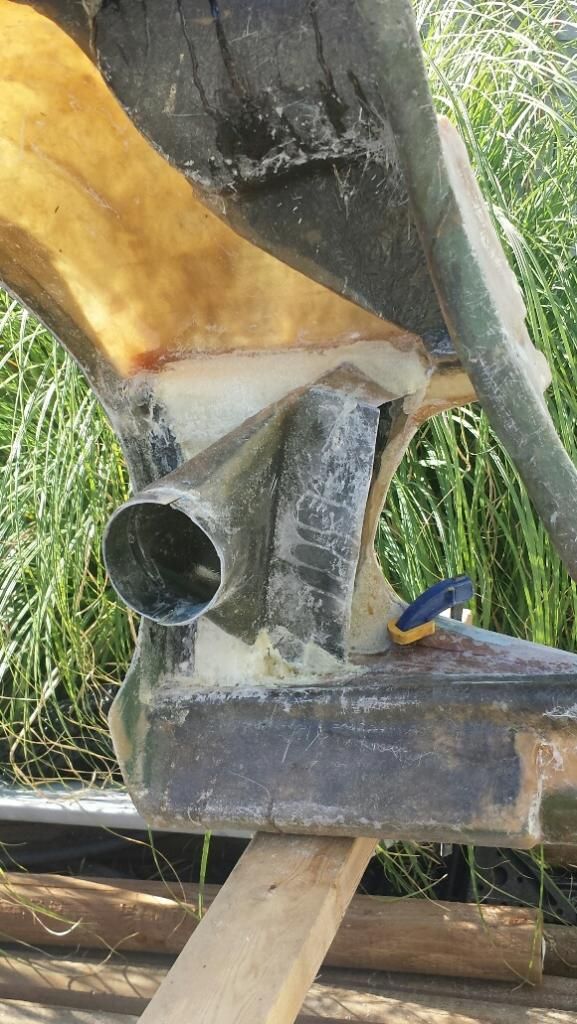
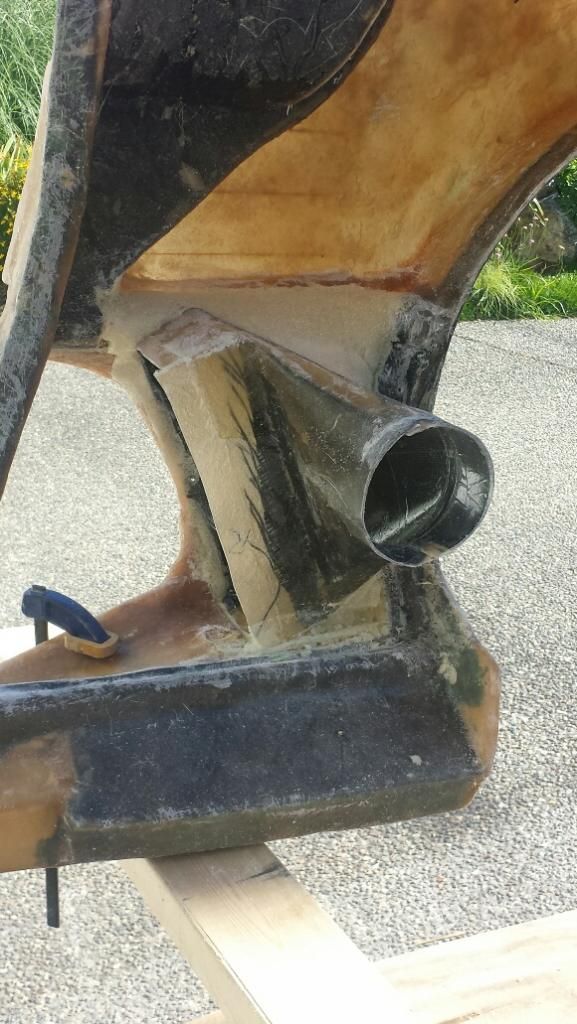
I am currently building and installing the scoops for the lower duct ,I sandwiched carbon finer in-between 1 1/2 oz matt


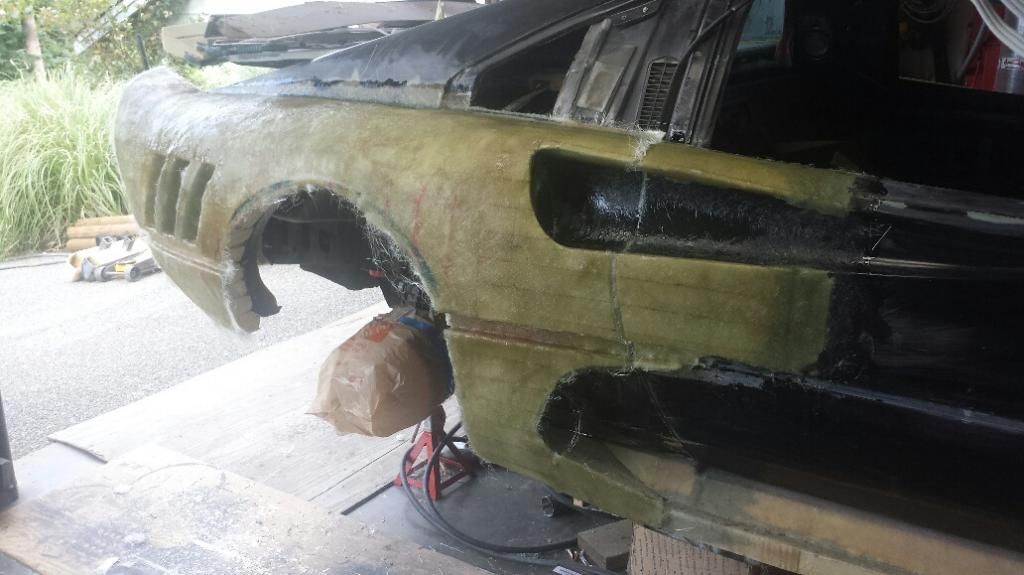
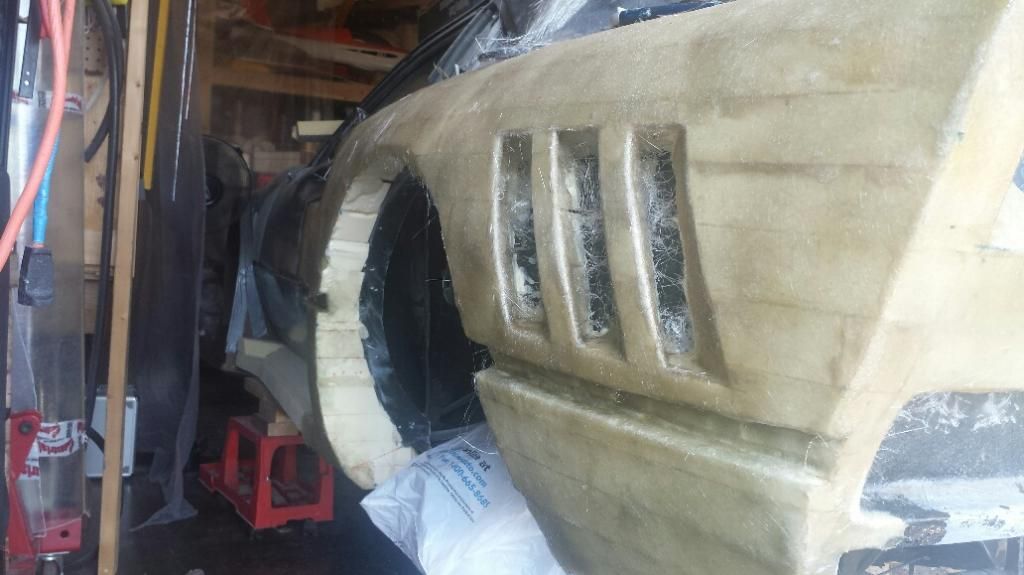
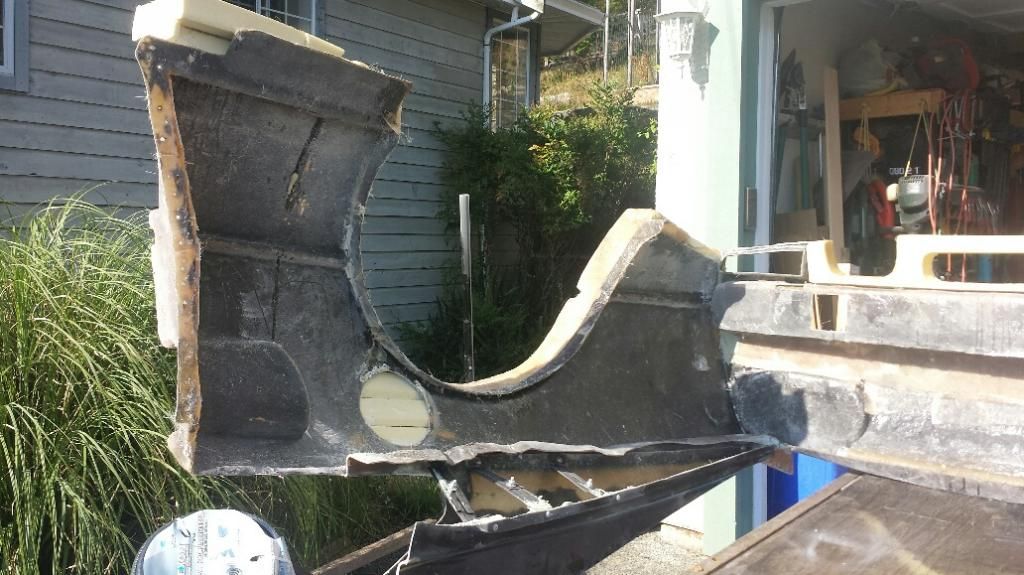
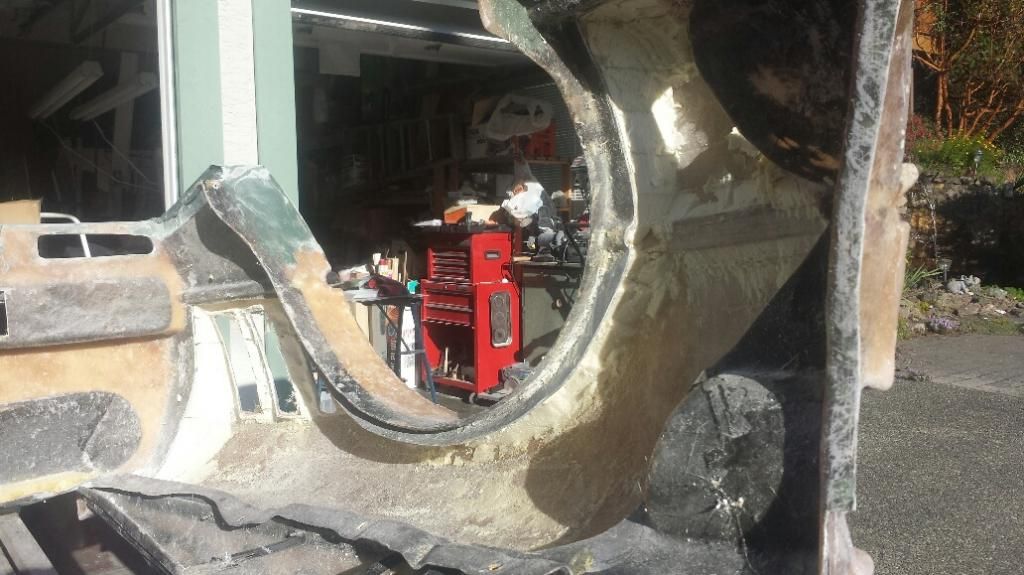
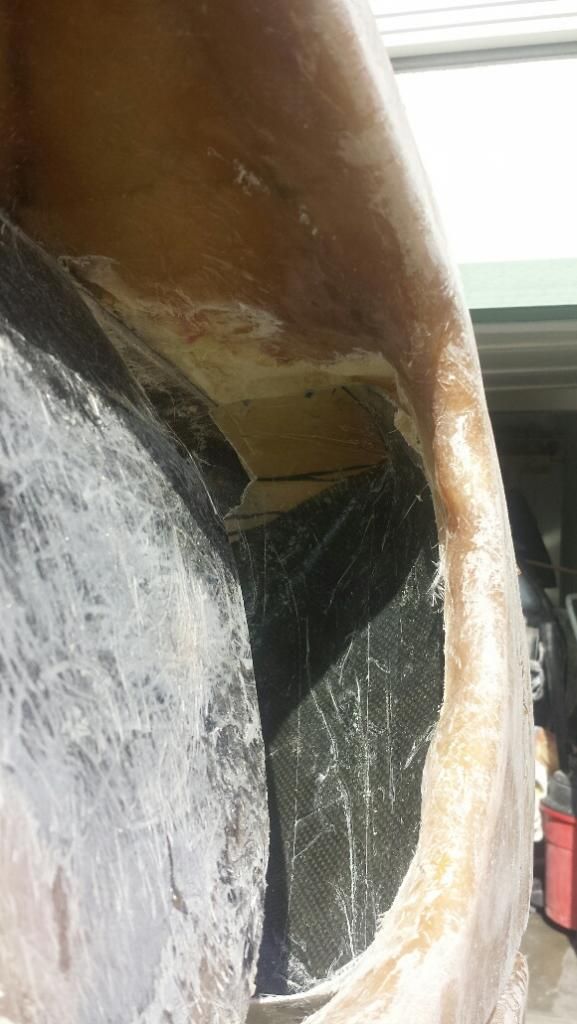
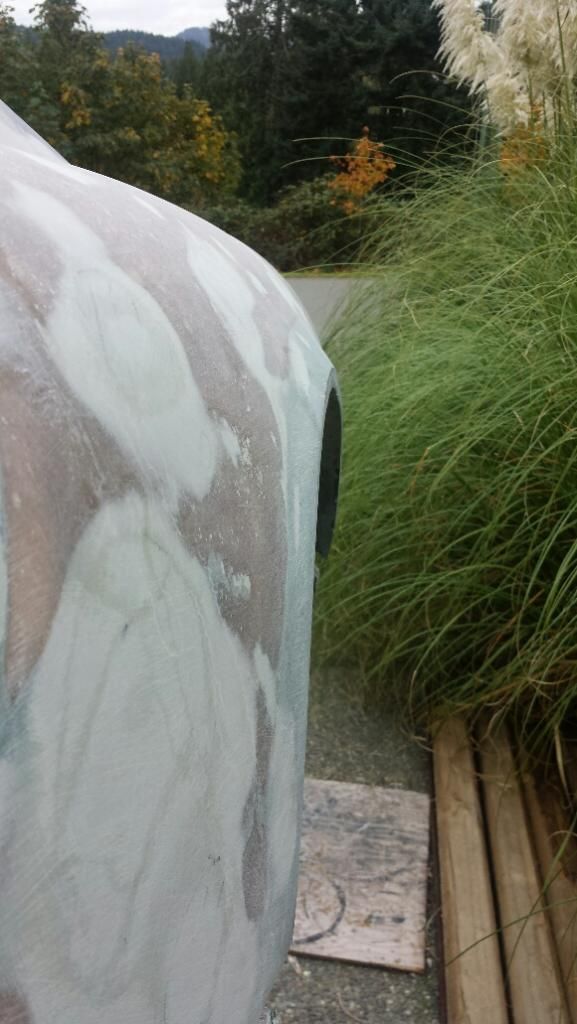
Having the rear clip off really makes it easier to work on areas like the rear sharks vents!!


IP: Logged
dobie1
Member
Posts: 450
From: BC, Canada
Registered: Jun 2005


Feedback score: N/A
Leave feedback

Rate this member

Report this Post09-05-2014 09:17 PM Click Here to See the Profile for dobie1Send a Private Message to dobie1Edit/Delete MessageReply w/QuoteDirect Link to This Post

dobie1

450 posts
Member since Jun 2005
I was able to get the ducts assembled and installed today, I hope to get them glassed in tomorrow. I still need to extend the inside edge of the ducts to close it in.
So then I will need to finish off the rear fender vents do some body work and I can reinstall the rear clip on the car. That will be a milestone I'll be able to fire up the car and turn it around to star on the front Yea!!! winter project here we come...


IP: Logged
MinnGreenGT
Member
Posts: 11545
From: Lakeville, MN 55044
Registered: Jul 2001


Feedback score: (1)
Leave feedback


Total ratings: 274
Rate this member

Report this Post09-07-2014 12:24 PM Click Here to See the Profile for MinnGreenGTClick Here to visit MinnGreenGT's HomePageSend a Private Message to MinnGreenGTEdit/Delete MessageReply w/QuoteDirect Link to This Post
Nice work... I love following threads like this!

------------------

Looking for Fiero posters?

IP: Logged
dobie1
Member
Posts: 450
From: BC, Canada
Registered: Jun 2005


Feedback score: N/A
Leave feedback

Rate this member

Report this Post09-12-2014 09:41 PM Click Here to See the Profile for dobie1Send a Private Message to dobie1Edit/Delete MessageReply w/QuoteDirect Link to This Post
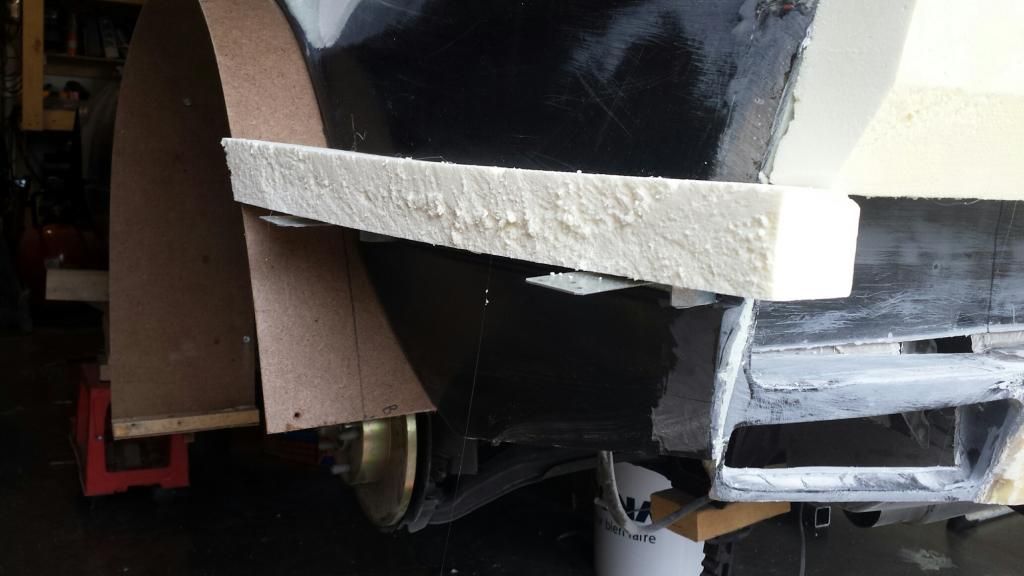
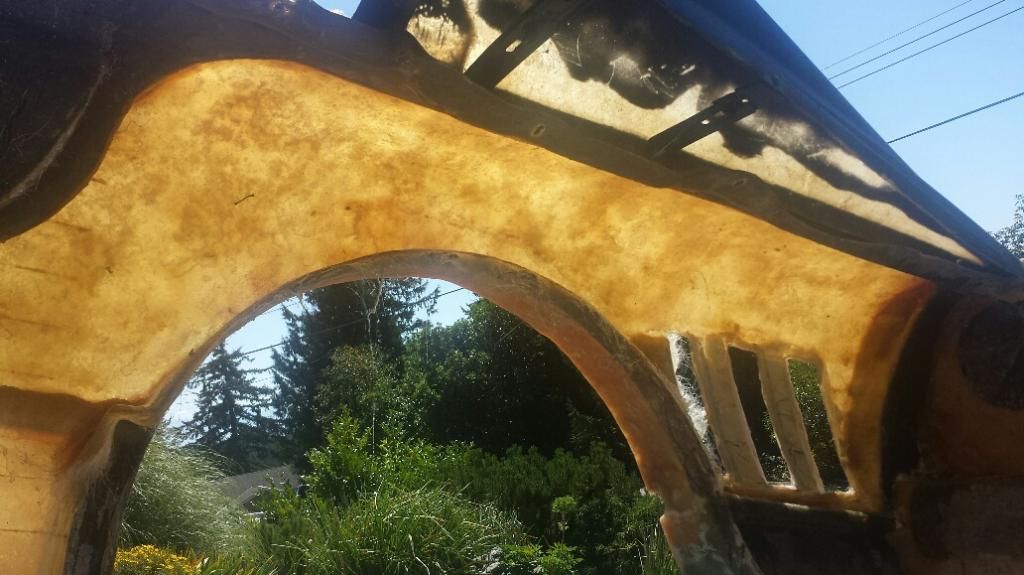
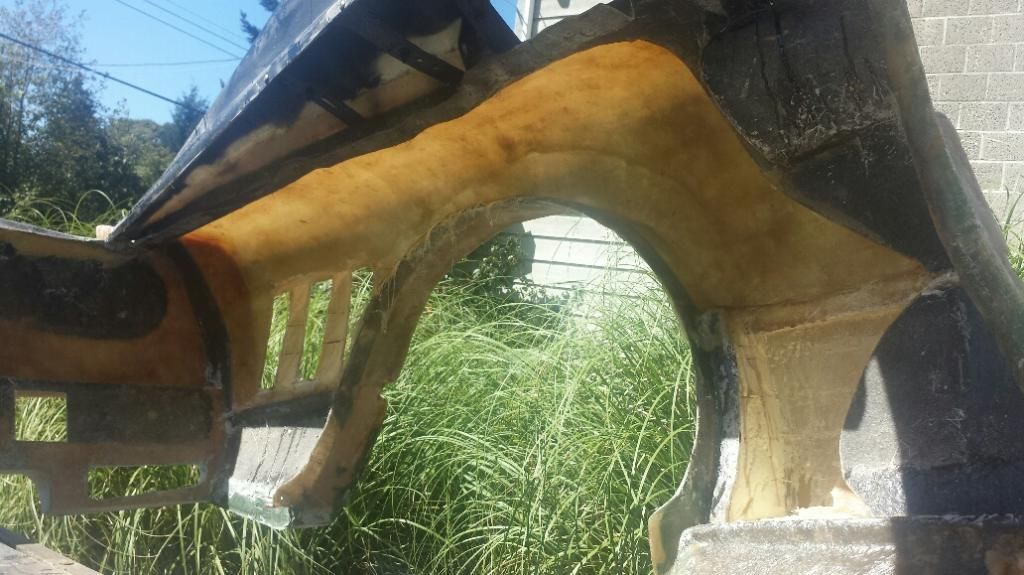
Well I'm back at it ,my wife and I took a quick trip down to Vegas for 4 days, it was a nice break but I was eager to get back to the project.
I decided I wanted to make the lower intake have a longer flow which takes it into the door, so I need to cut out a bit of the lower door jam. I then need to finish the lower intake side panel. I think it turned out pretty good makes the intake look big and meaty. I hope to finish the drivers side tomorrow.


[This message has been edited by dobie1 (edited 09-12-2014).]

IP: Logged
dobie1
Member
Posts: 450
From: BC, Canada
Registered: Jun 2005


Feedback score: N/A
Leave feedback

Rate this member

Report this Post09-30-2014 01:24 AM Click Here to See the Profile for dobie1Send a Private Message to dobie1Edit/Delete MessageReply w/QuoteDirect Link to This Post
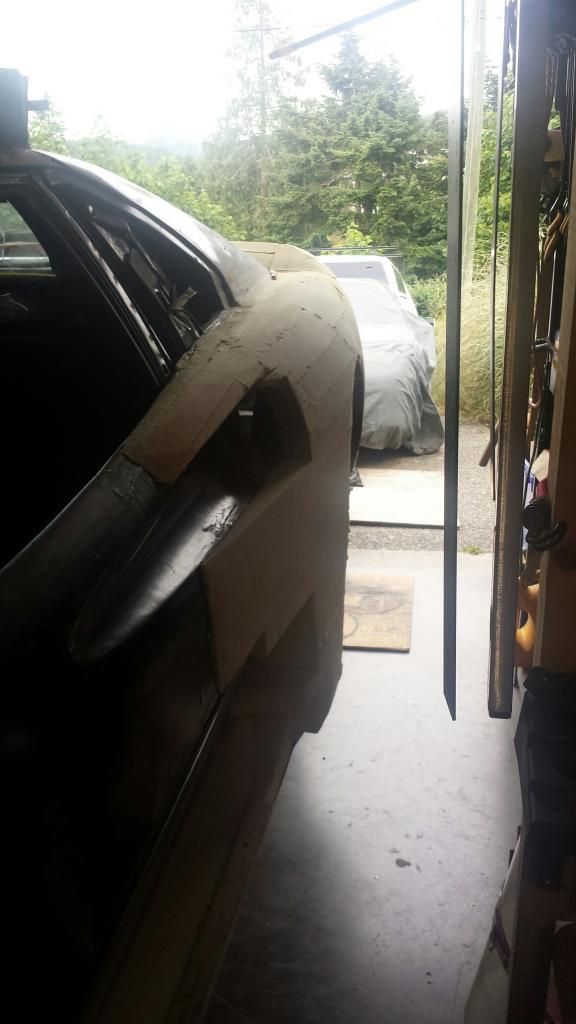
It is getting a bit harder to work on the car with the unsettled weather and the need to keep things dry. I built a small shelter to work under but have a 10x10 one with sides coming. It is progressing but I may have to leave it out side for the winter as I still need to finish it off before it is installed permitaly. I't is really a lot easier to work on when it is off the car and I want to get it right. I need to get the car flipped around so I can work on the front end over the winter. Here are a few pic for a update.


[This message has been edited by dobie1 (edited 09-30-2014).]

IP: Logged
dobie1
Member
Posts: 450
From: BC, Canada
Registered: Jun 2005


Feedback score: N/A
Leave feedback

Rate this member

Report this Post10-21-2014 09:27 PM Click Here to See the Profile for dobie1Send a Private Message to dobie1Edit/Delete MessageReply w/QuoteDirect Link to This Post
Bump
IP: Logged
Khw
Member
Posts: 11139
From: South Weber, UT. U.S.A.
Registered: Jun 2008


Feedback score: (1)
Leave feedback


Total ratings: 134
Rate this member

Report this Post10-22-2014 12:37 AM Click Here to See the Profile for KhwSend a Private Message to KhwEdit/Delete MessageReply w/QuoteDirect Link to This Post
I like it!
IP: Logged
dobie1
Member
Posts: 450
From: BC, Canada
Registered: Jun 2005


Feedback score: N/A
Leave feedback

Rate this member

Report this Post10-22-2014 11:30 AM Click Here to See the Profile for dobie1Send a Private Message to dobie1Edit/Delete MessageReply w/QuoteDirect Link to This Post
Thanks man, lots of work!!! the only good thing right now is I still get to drive my 88 3800SC until this one is finished or it sells LOL.
IP: Logged
PFF
System Bot
Car-Lo
Member
Posts: 623
From: Vancouver, BC Canada
Registered: Jun 2006


Feedback score: N/A
Leave feedback

Rate this member

Report this Post11-23-2014 02:36 PM Click Here to See the Profile for Car-LoSend a Private Message to Car-LoEdit/Delete MessageReply w/QuoteDirect Link to This Post


WOW, Wayne you have one exciting project going on there check your PM !
IP: Logged
PatrickTRoof
Member
Posts: 605
From: Baltimore, MD, USA
Registered: May 2013


Feedback score: N/A
Leave feedback

Rate this member

Report this Post11-23-2014 02:49 PM Click Here to See the Profile for PatrickTRoofSend a Private Message to PatrickTRoofEdit/Delete MessageReply w/QuoteDirect Link to This Post
Wow! Amazing work! Along with the F40 and the 308, the 288 GTO is my favorite Ferrari. Those three are basically from the same body style. I'll be following this thread. Keep it up!
IP: Logged
mental floss
Member
Posts: 362
From: CSA
Registered: Aug 2014


Feedback score: (2)
Leave feedback

User Banned

Report this Post11-23-2014 07:36 PM Click Here to See the Profile for mental flossSend a Private Message to mental flossEdit/Delete MessageReply w/QuoteDirect Link to This Post
I don't know that I've ever noticed the 288 before, but it has really stood up better over time, IMO, than the 308. The rear is so much more refined looking. The side profile is more aggressive too.

[This message has been edited by mental floss (edited 11-23-2014).]

IP: Logged
LorenBateman
Member
Posts: 156
From: Troy , Mo USA
Registered: Sep 2014


Feedback score: N/A
Leave feedback

Rate this member

Report this Post11-23-2014 09:09 PM Click Here to See the Profile for LorenBatemanSend a Private Message to LorenBatemanEdit/Delete MessageReply w/QuoteDirect Link to This Post
all i can say is incredible work sir..OMG BITCHEN WOW HOLY COOL..your very talented and a patient person,,great job
IP: Logged
dobie1
Member
Posts: 450
From: BC, Canada
Registered: Jun 2005


Feedback score: N/A
Leave feedback

Rate this member

Report this Post11-23-2014 10:59 PM Click Here to See the Profile for dobie1Send a Private Message to dobie1Edit/Delete MessageReply w/QuoteDirect Link to This Post
Thanks Guys, it has been a lot of work but I'm having a blast, luckily I'm retired and can put time into the project.
I have a bunch more pics of the front end build which I'm working on now, I hope to post a update soon.
IP: Logged
rogergarrison
Member
Posts: 49601
From: A Western Caribbean Island/ Columbus, Ohio
Registered: Apr 99


Feedback score: N/A
Leave feedback


Total ratings: 551
Rate this member

Report this Post11-24-2014 02:52 PM Click Here to See the Profile for rogergarrisonSend a Private Message to rogergarrisonEdit/Delete MessageReply w/QuoteDirect Link to This Post
I didnt have time to look thru all your pics. 288 is one of my fav Ferraris. I considered modifying my 308 at one time. I did actually make a panel for the quarters with the 3 big louvers. I still have them in the attic, but see you already did yours. Looking good.
IP: Logged
rogergarrison
Member
Posts: 49601
From: A Western Caribbean Island/ Columbus, Ohio
Registered: Apr 99


Feedback score: N/A
Leave feedback


Total ratings: 551
Rate this member

Report this Post11-24-2014 02:54 PM Click Here to See the Profile for rogergarrisonSend a Private Message to rogergarrisonEdit/Delete MessageReply w/QuoteDirect Link to This Post

rogergarrison

49601 posts
Member since Apr 99
I didnt have time to look thru all your pics. 288 is one of my fav Ferraris. I considered modifying my 308 at one time. I did actually make a panel for the quarters with the 3 big louvers. I still have them in the attic, but see you already did yours. Looking good.
IP: Logged
dobie1
Member
Posts: 450
From: BC, Canada
Registered: Jun 2005


Feedback score: N/A
Leave feedback

Rate this member

Report this Post11-24-2014 04:44 PM Click Here to See the Profile for dobie1Send a Private Message to dobie1Edit/Delete MessageReply w/QuoteDirect Link to This Post
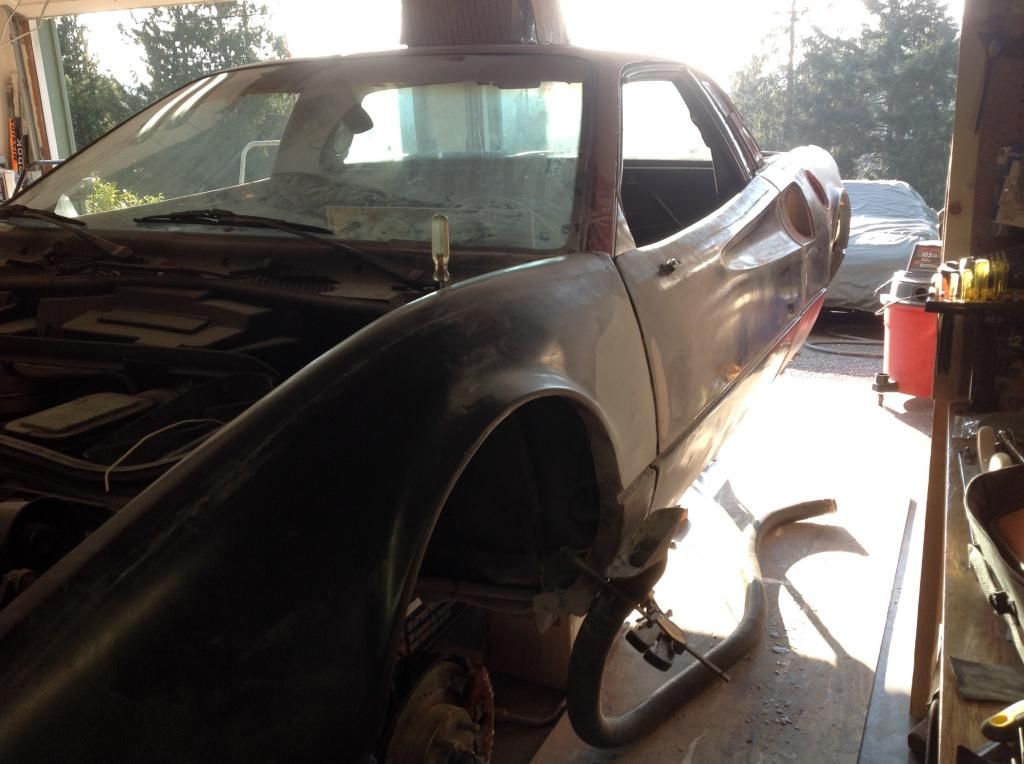
Here is a update to bring those of you that are interested.
I finally got the rear clip completed to a point that would allow me to do a high solids epoxy finish to seal the fibreglass, but the weather just won't co-operate. Luckily Don offered up some storage to me so it is in storage for the winter. Giving me some room to work on the front clip.


IP: Logged
dobie1
Member
Posts: 450
From: BC, Canada
Registered: Jun 2005


Feedback score: N/A
Leave feedback

Rate this member

Report this Post11-24-2014 05:08 PM Click Here to See the Profile for dobie1Send a Private Message to dobie1Edit/Delete MessageReply w/QuoteDirect Link to This Post

dobie1

450 posts
Member since Jun 2005
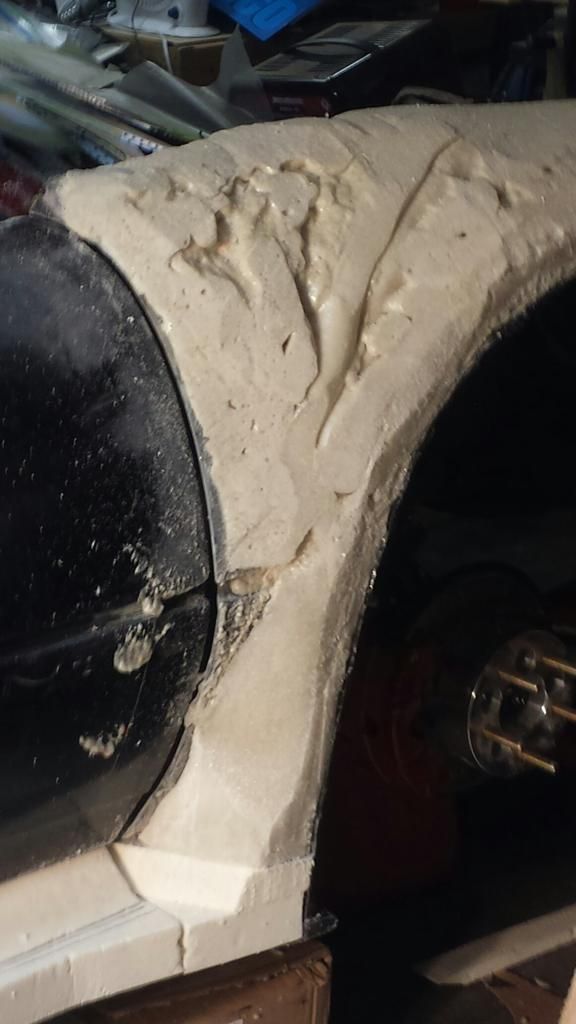
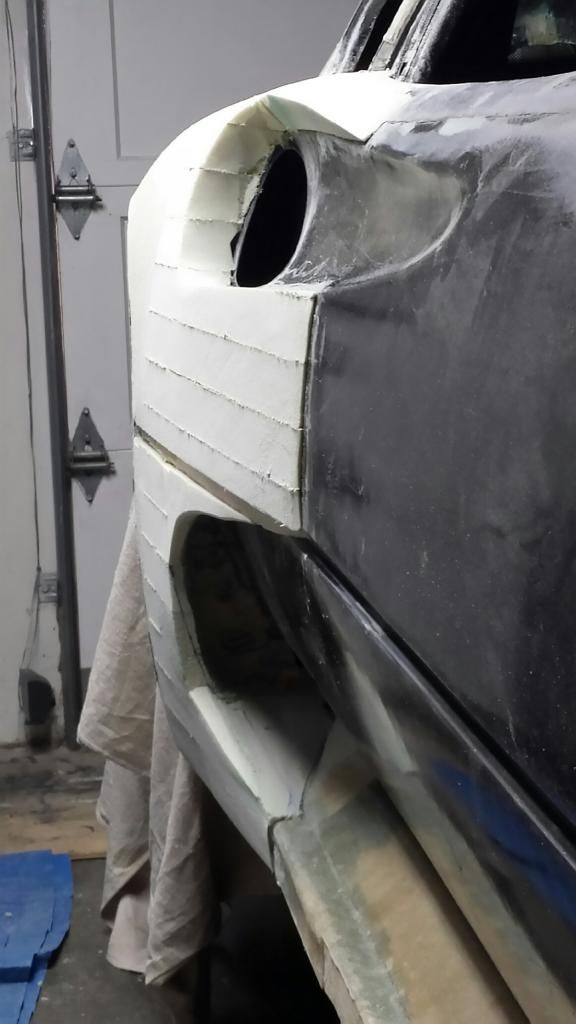
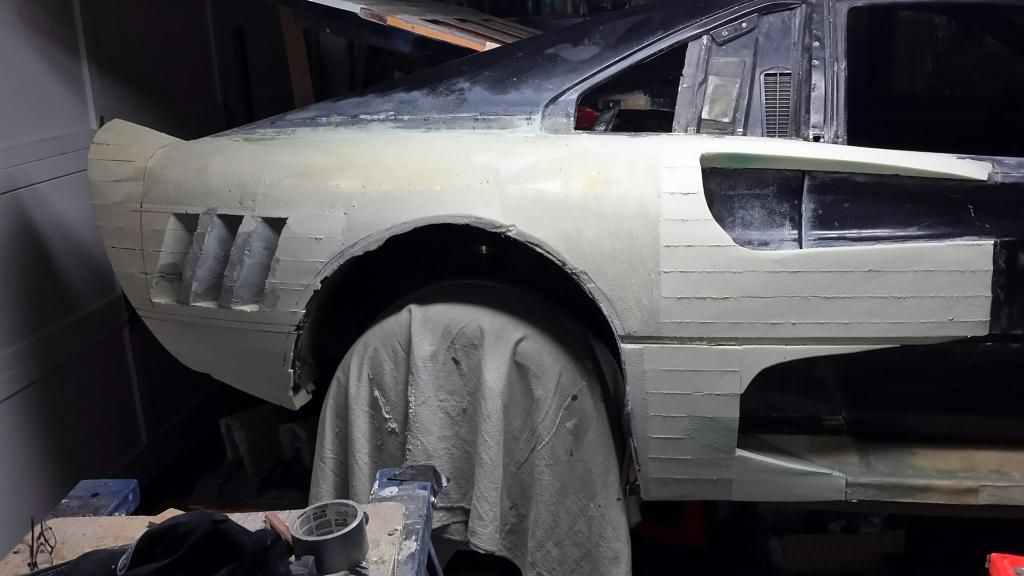
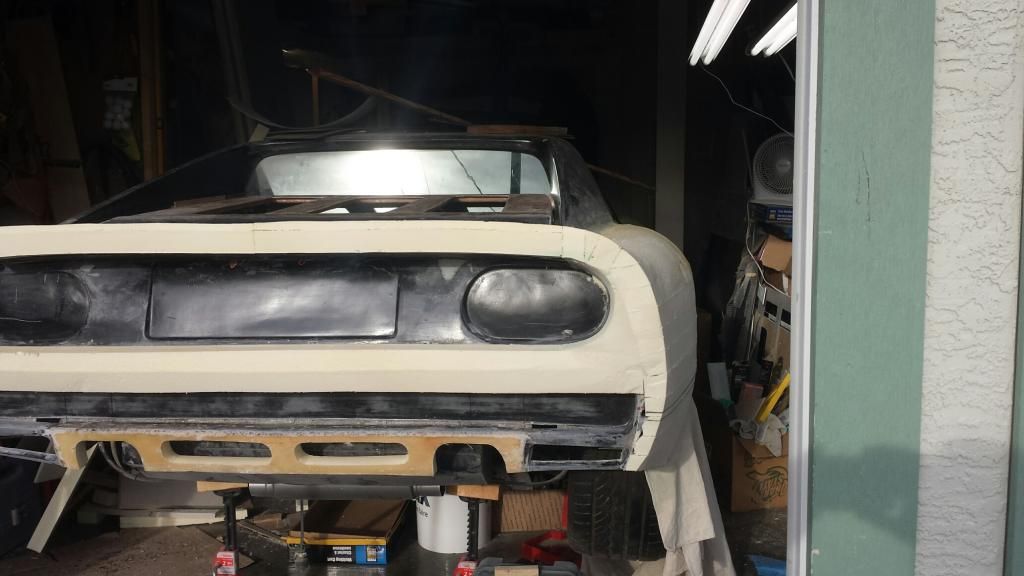
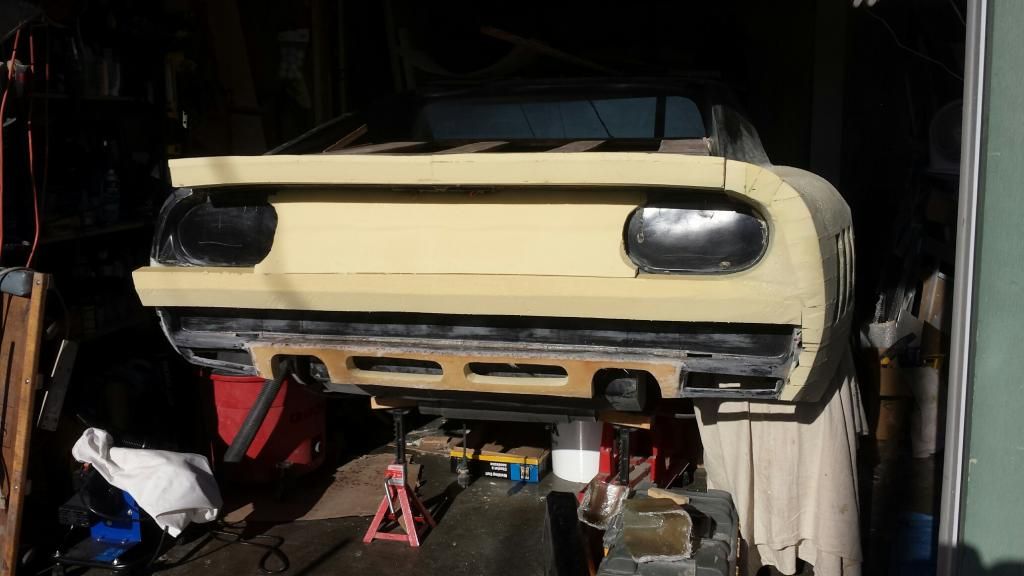
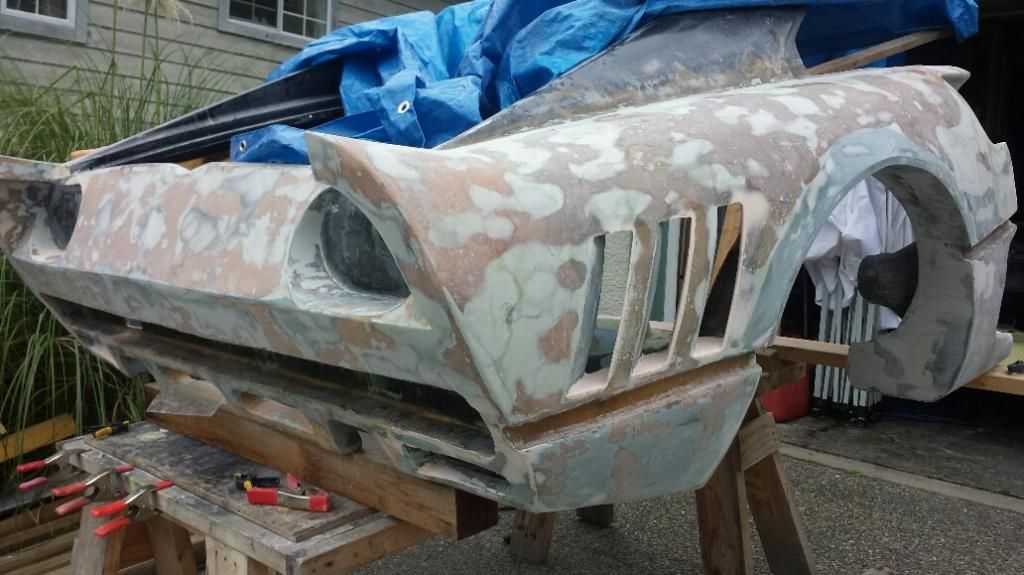
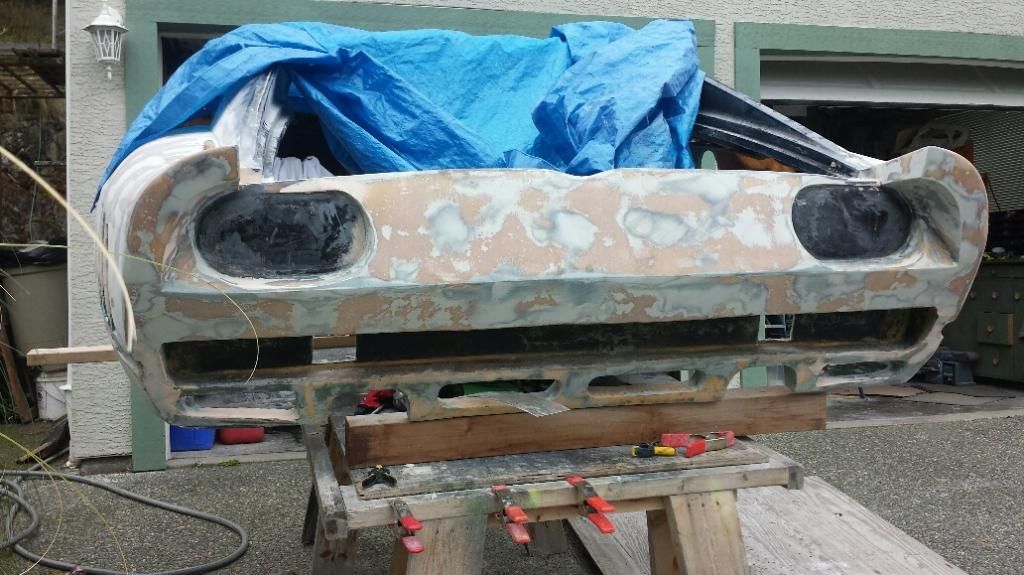
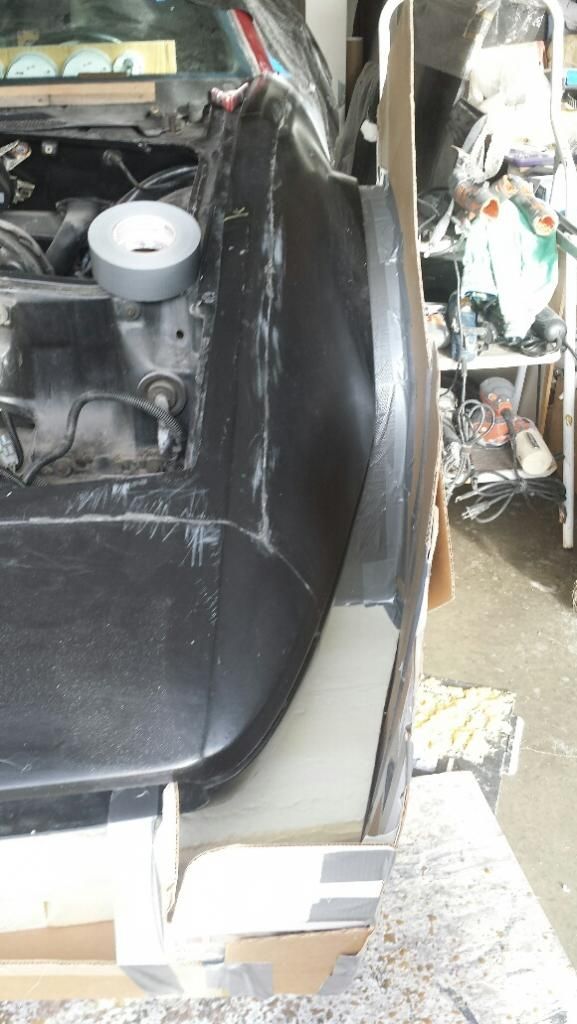
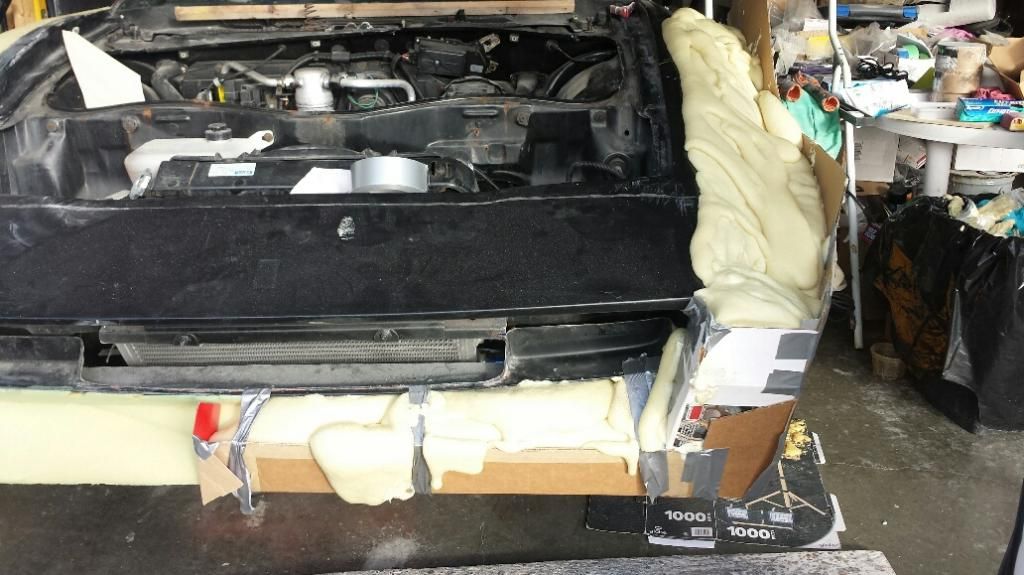
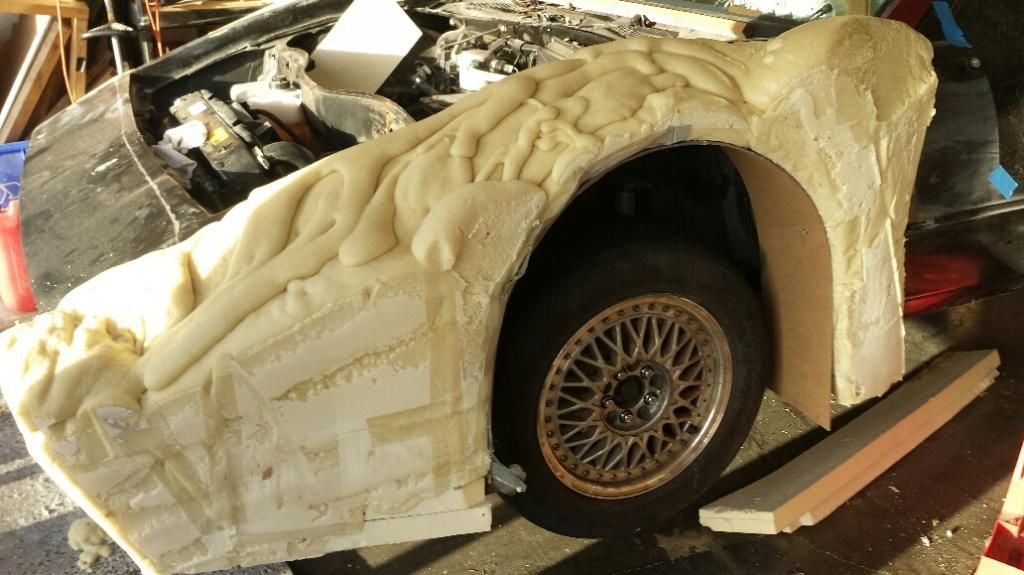
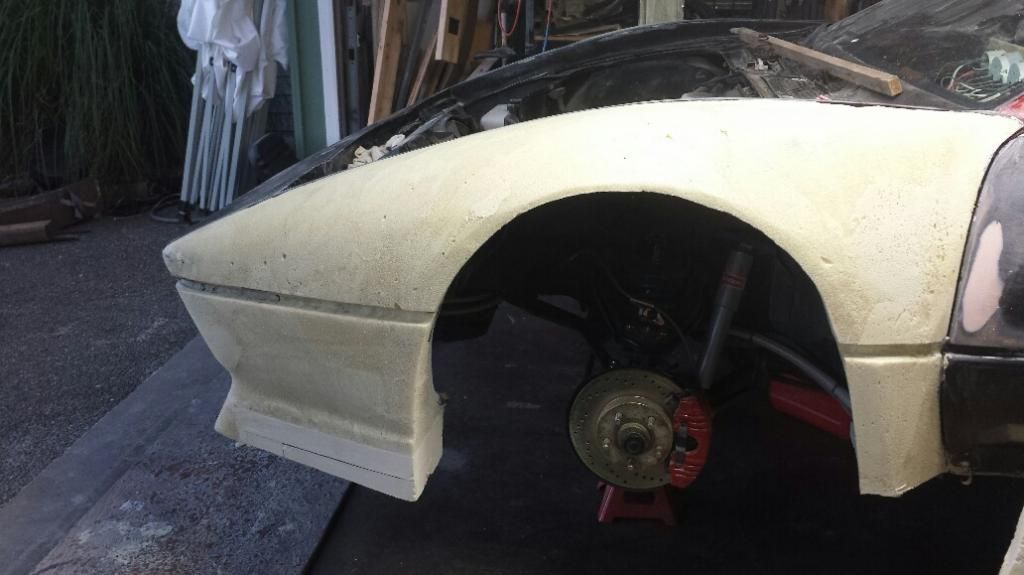
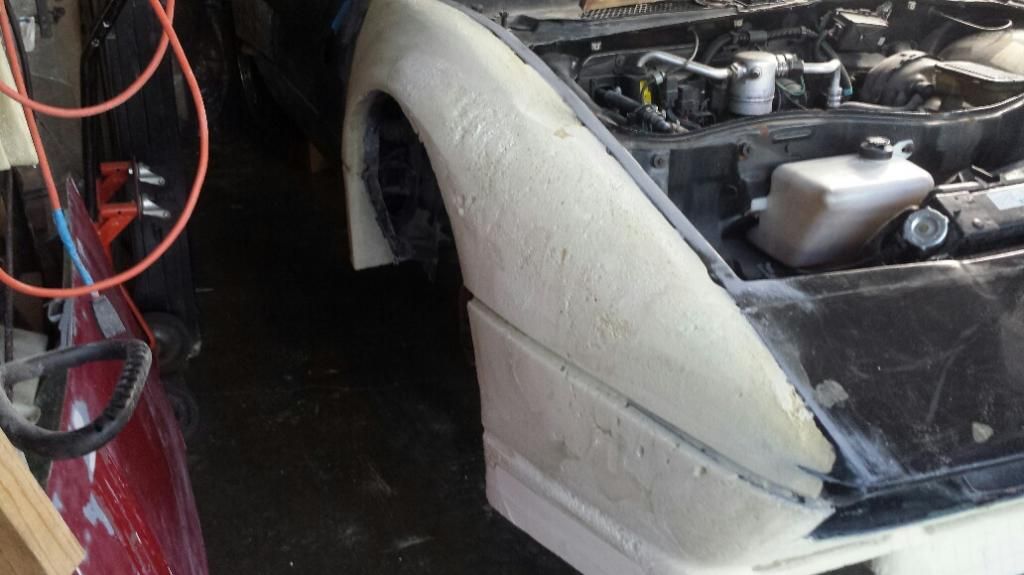
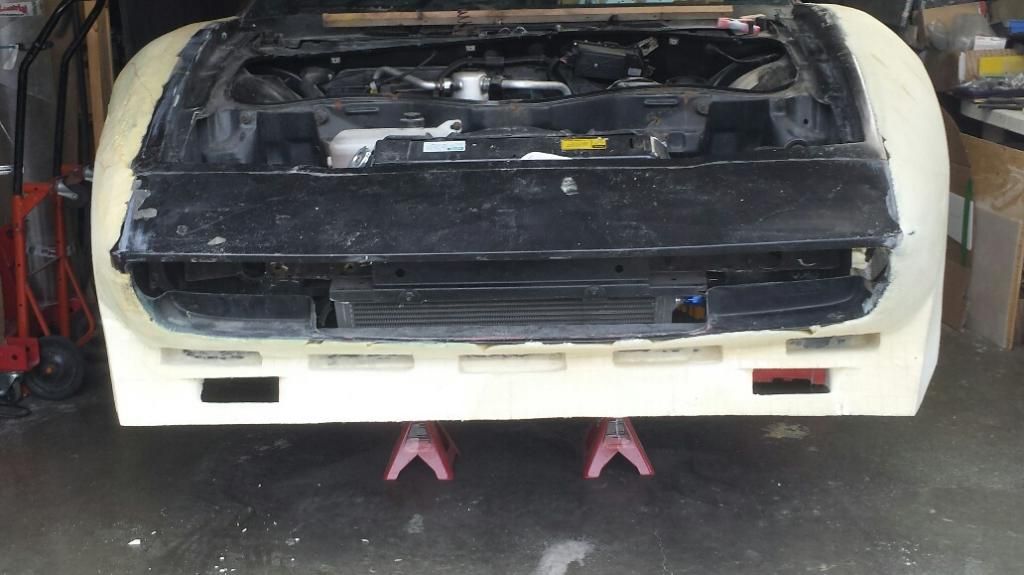
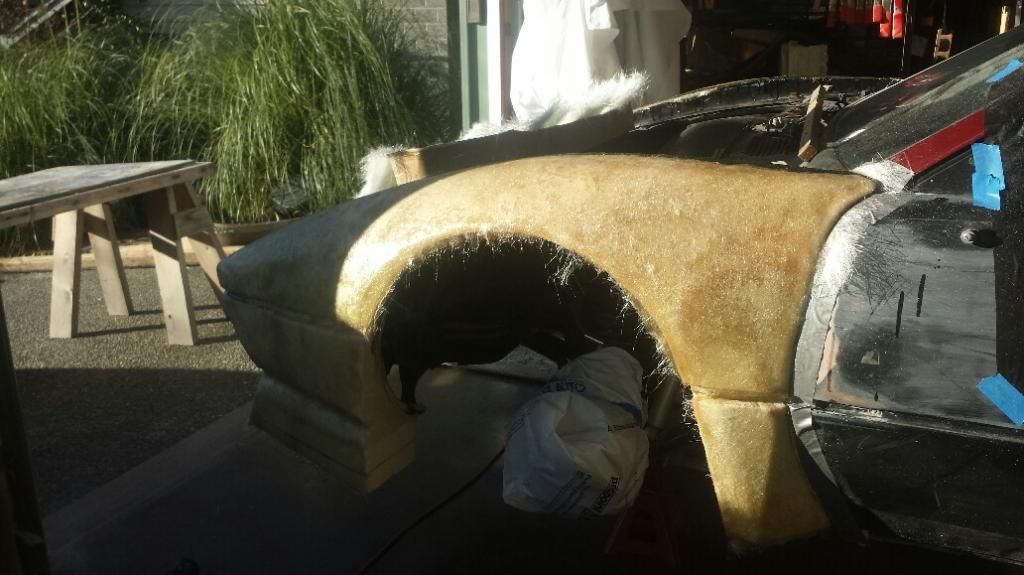
With the car turned around and the rear clip gone I actually have room to work on the front!!!
So having done the rear I learned a lot about working with expanding foam the stuff stick to just about anything and once it has finished its chemical reaction is very workable.
I had already done most of the passengers side front previously so I only had to do the left (drivers side) and finish both sides to match. I initially cut the vent holes along the chin into the foam but decided to fill them back in for the fibreglassing and then cut them back out and finish off the chin vents.
Here are a few pics of the process, enjoy.


Then on to fiberglassing the the finished foam


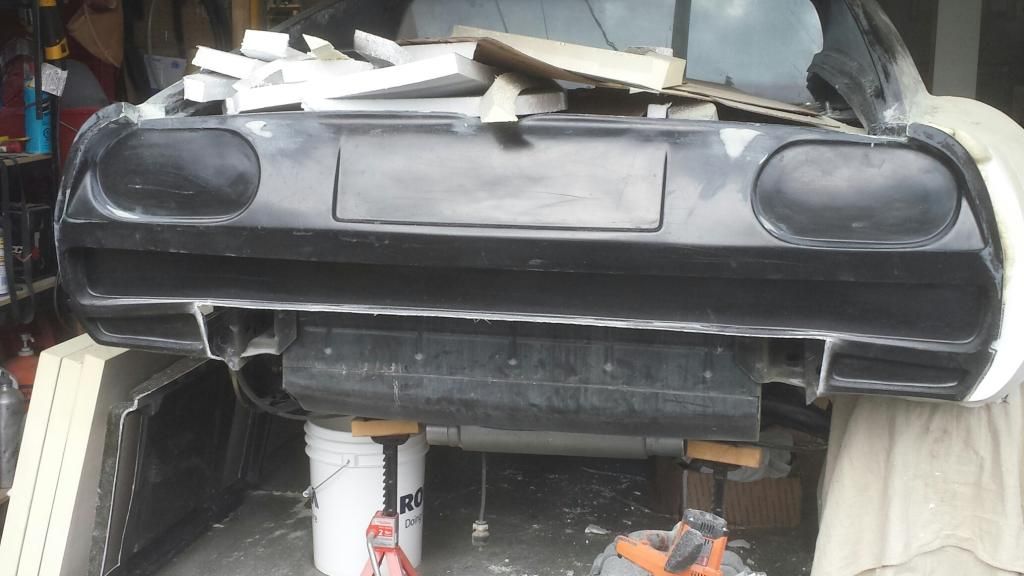
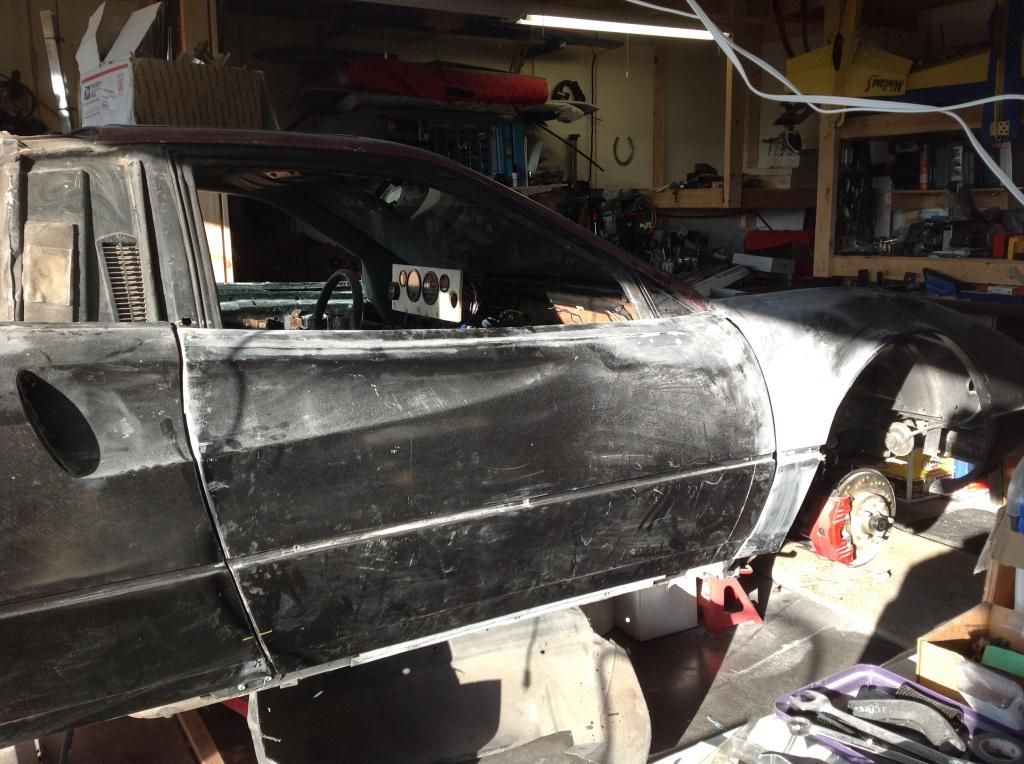
I have finished the glassing now and am currently finishing off the front spoiler vents and chin vents, I hope to have some pictures to post in a day or two.
I did spend a bit of time preparing the front hood, as I'm doing the modified Ferrari hood and head lights.
Here are a couple shots to give you a idea of how it will go, the side panel will be glassed into the fenders.


IP: Logged
Previous Page | Next Page

This topic is 15 pages long:  1   2   3   4   5   6   7   8   9   10   11   12   13   14   15 
next newest topic | next oldest topic

All times are ET (US)

Post New Topic  Post A Reply
Hop to:

Contact Us | Back To Main Page

Advertizing on PFF | Fiero Parts Vendors
PFF Merchandise | Fiero Gallery | Ogre's Cave
Real-Time Chat | Fiero Related Auctions on eBay


Copyright (c) 1999, C. Pennock