Thanks for stopping by Bob , somedays it seams like Im spinning my wheels but the build is moving forward.
Don it's always good to talking about our builds. I really appreciate your suggestions and help.
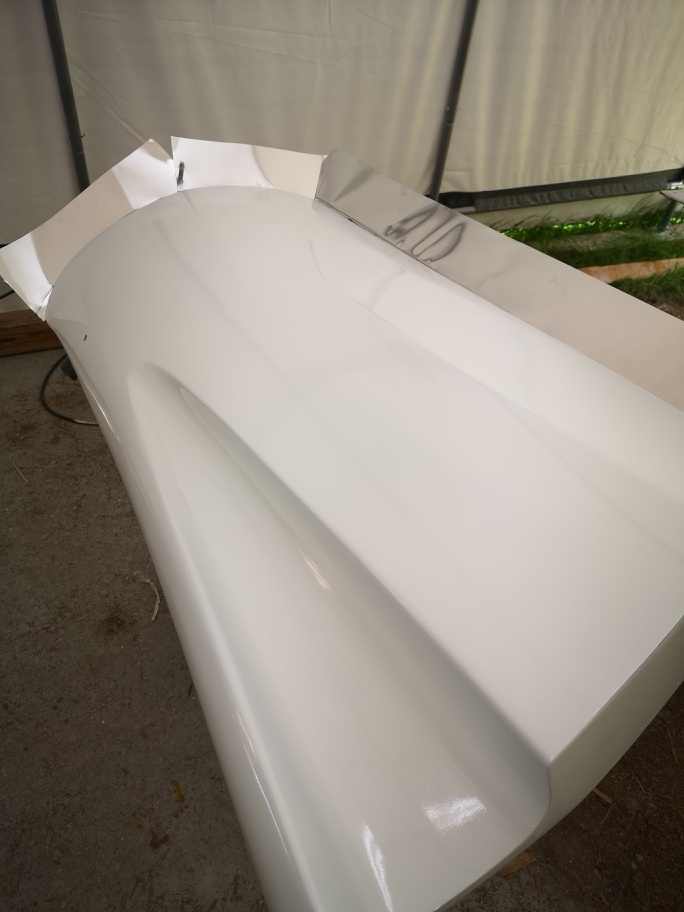
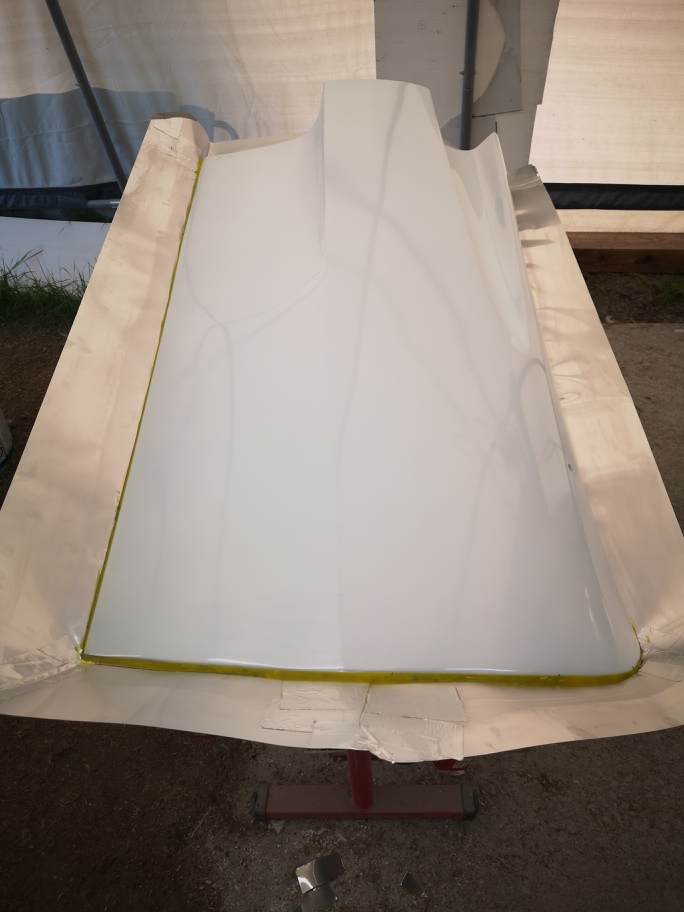
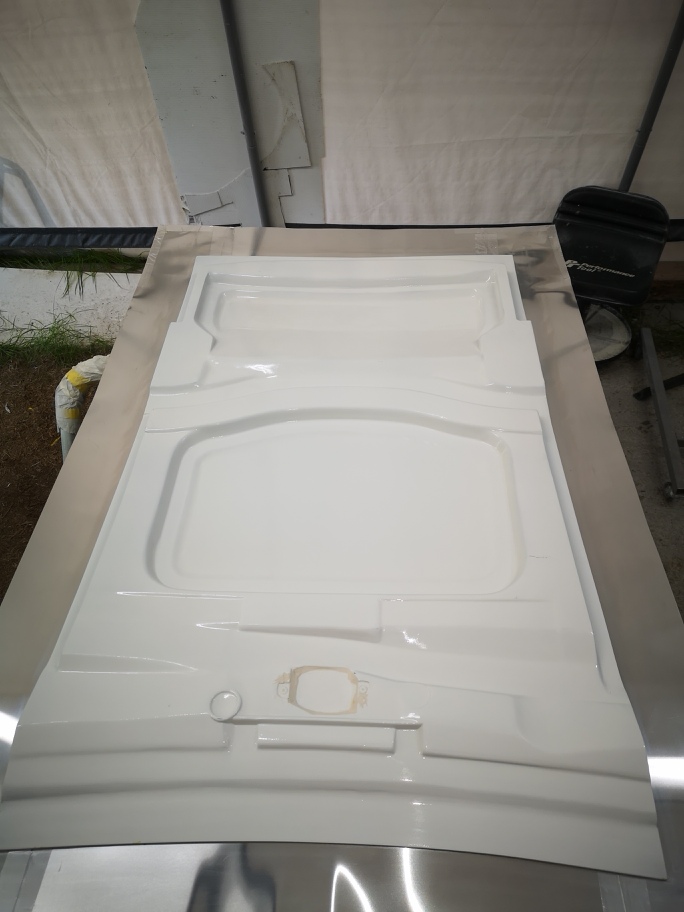
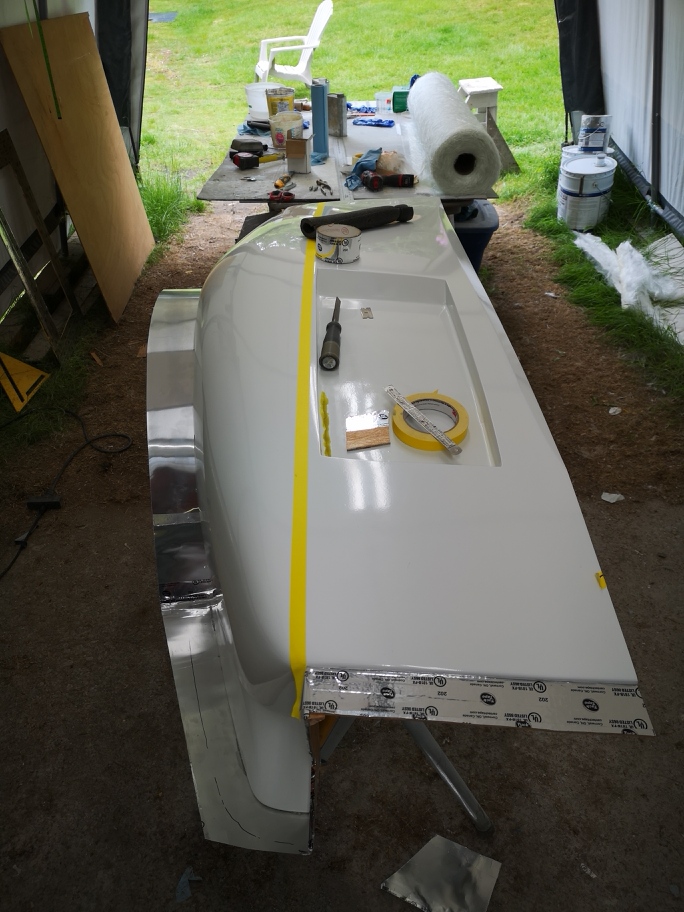
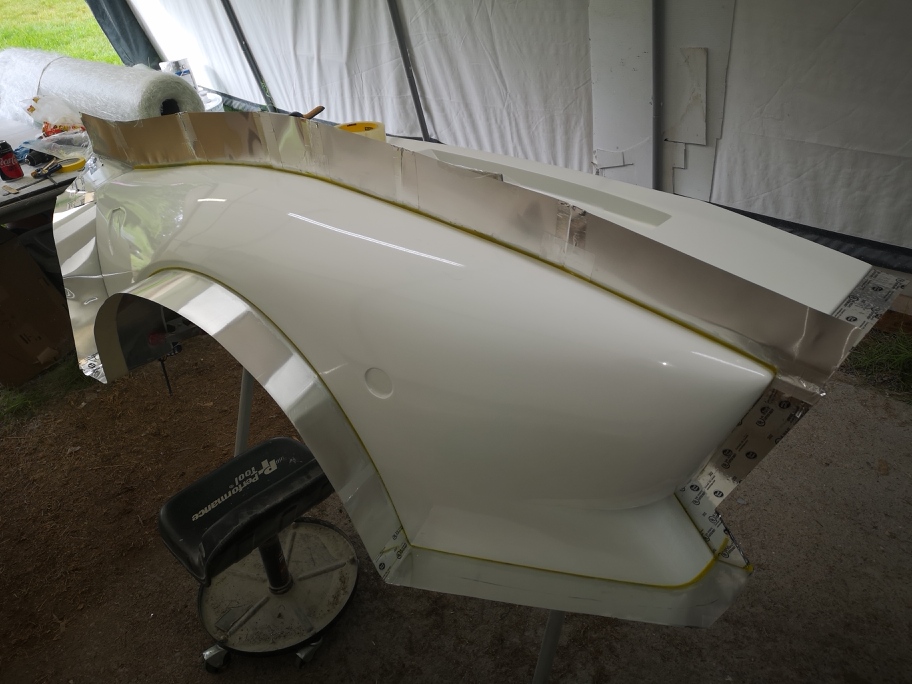
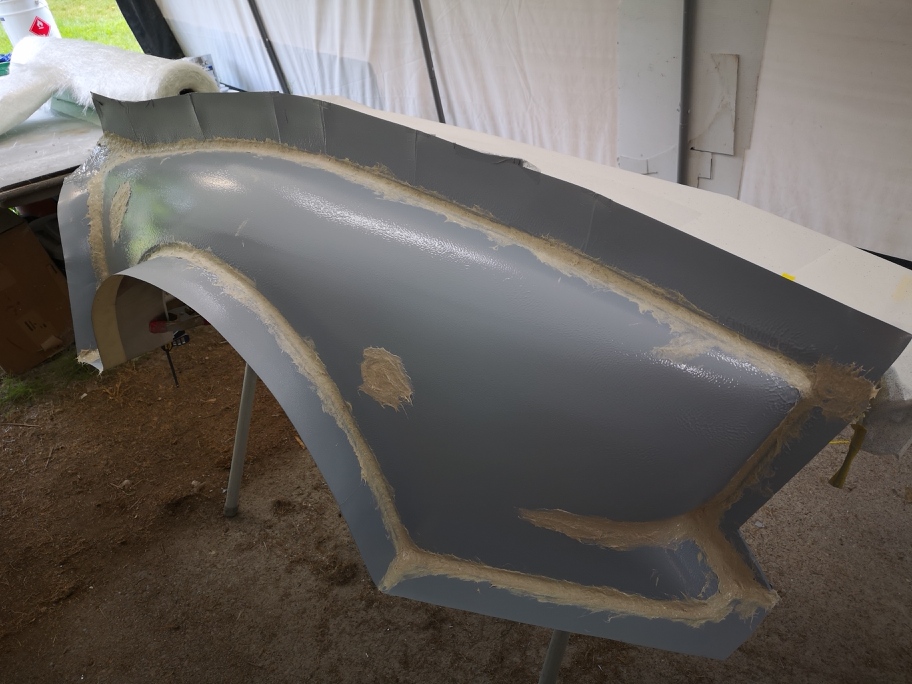
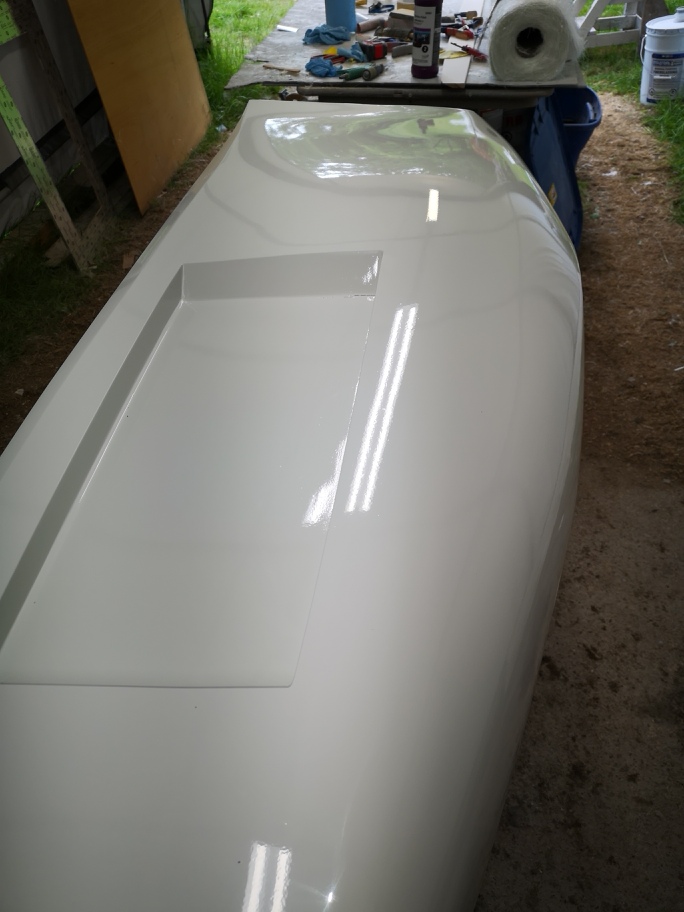
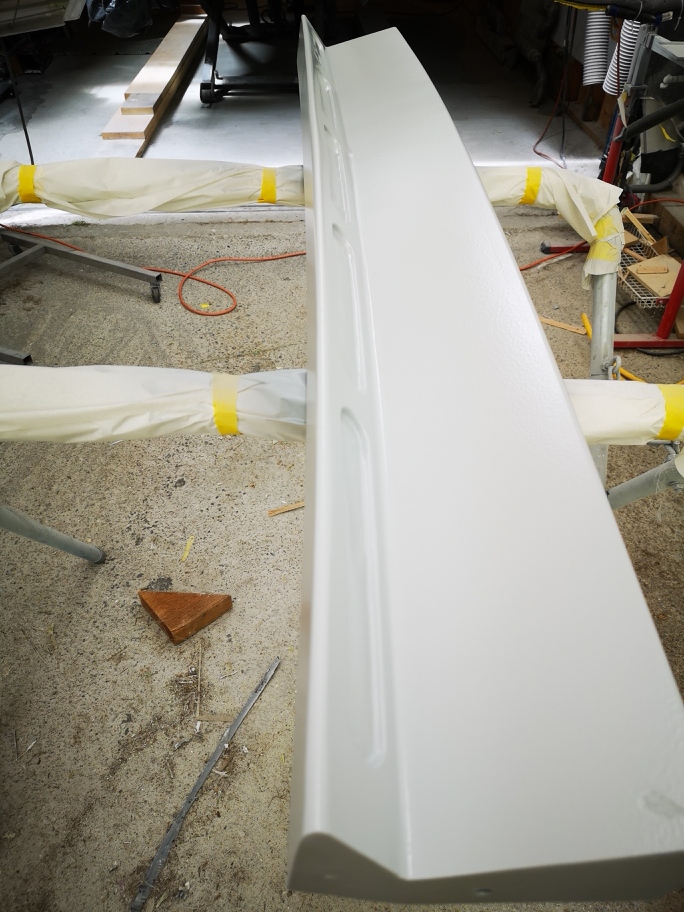
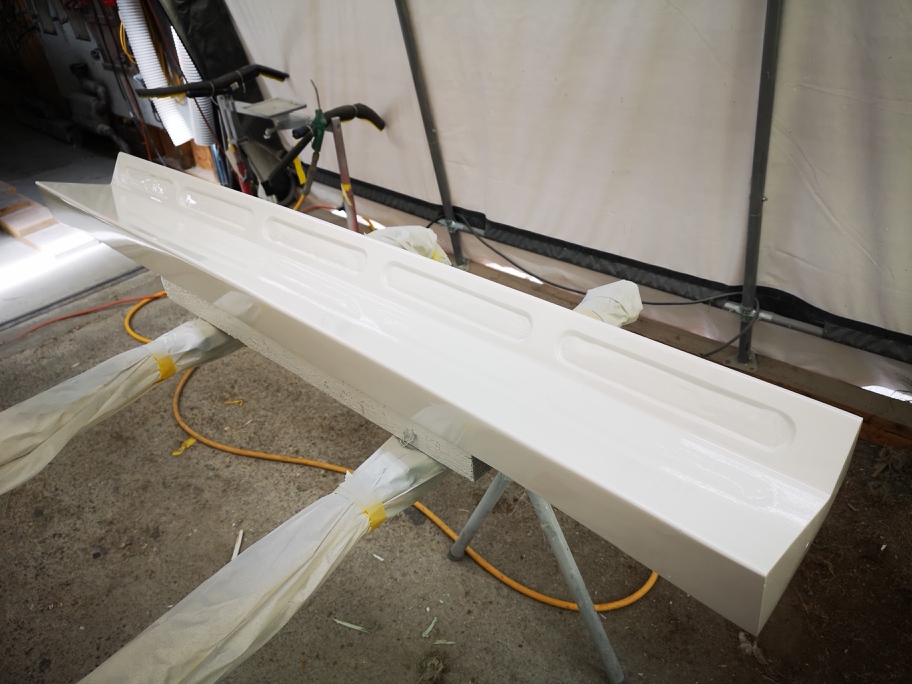
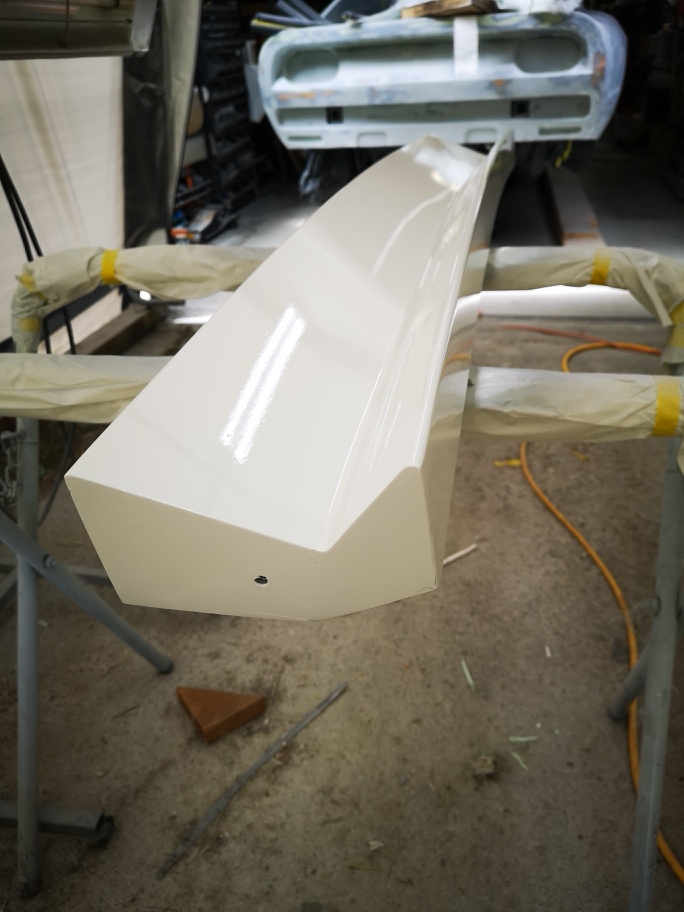
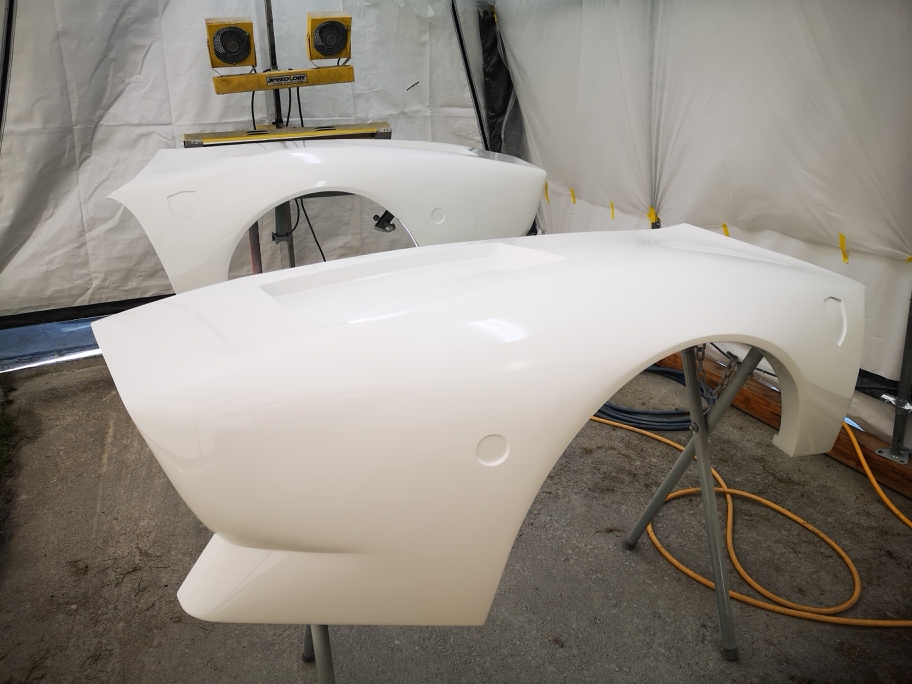
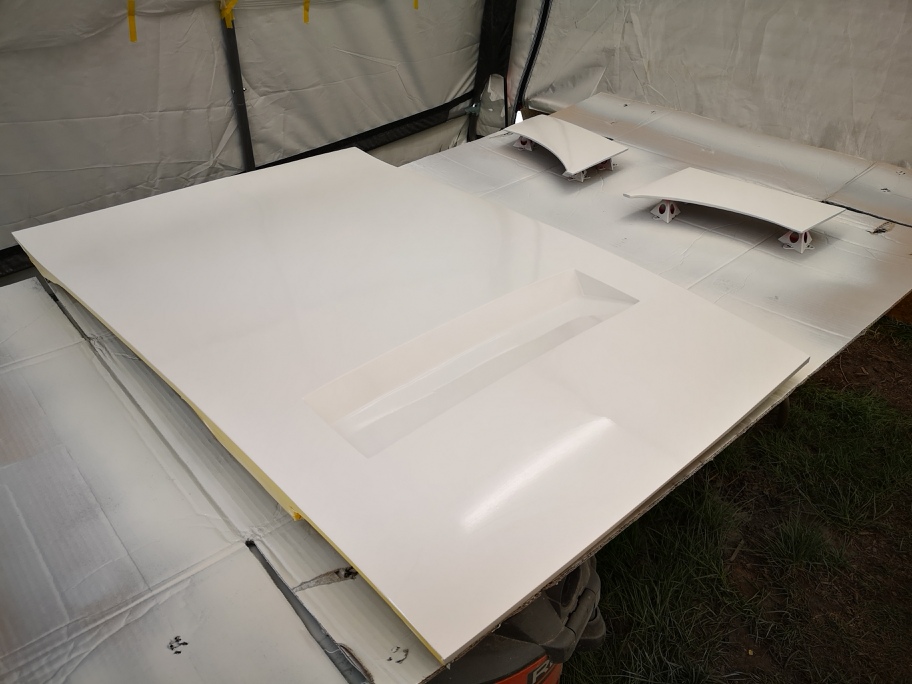
For those following the build Here are the final shots of the front fenders and the front hood top painted. I'm very happy with the overall paint on the parts, only a couple mistakes. I'm hoping they wet sand and polish to a perfect finish to mold.
Thanks for looking Wayne
[This message has been edited by dobie1 (edited 04-20-2020).]
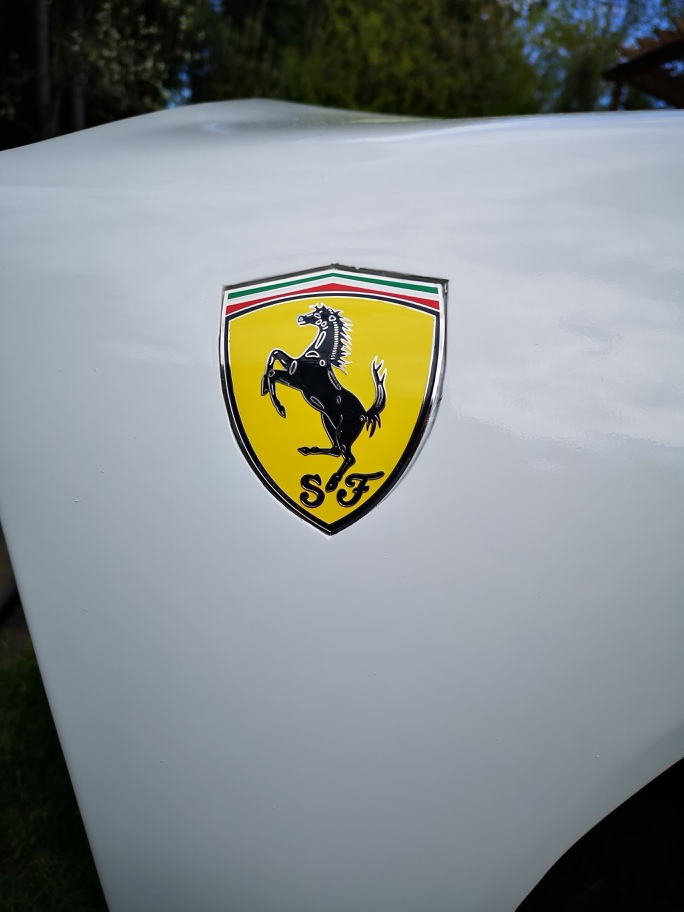
Thanks Sage I will for sure use PVA , if I do the carbon fibre body panels down the road I'll be using a chemical release with the epoxy resins. for those interested in a money shot
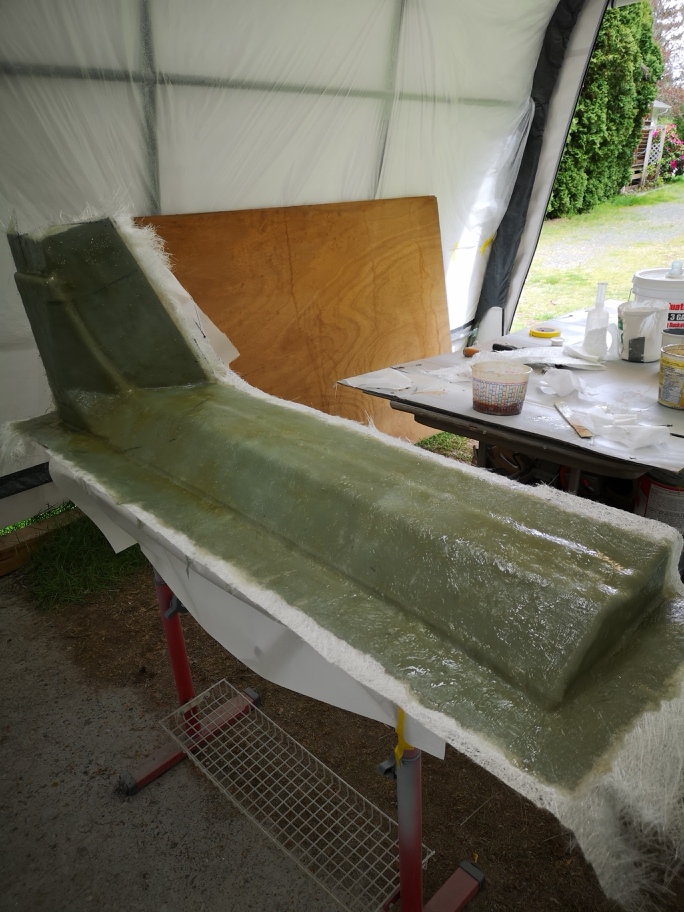
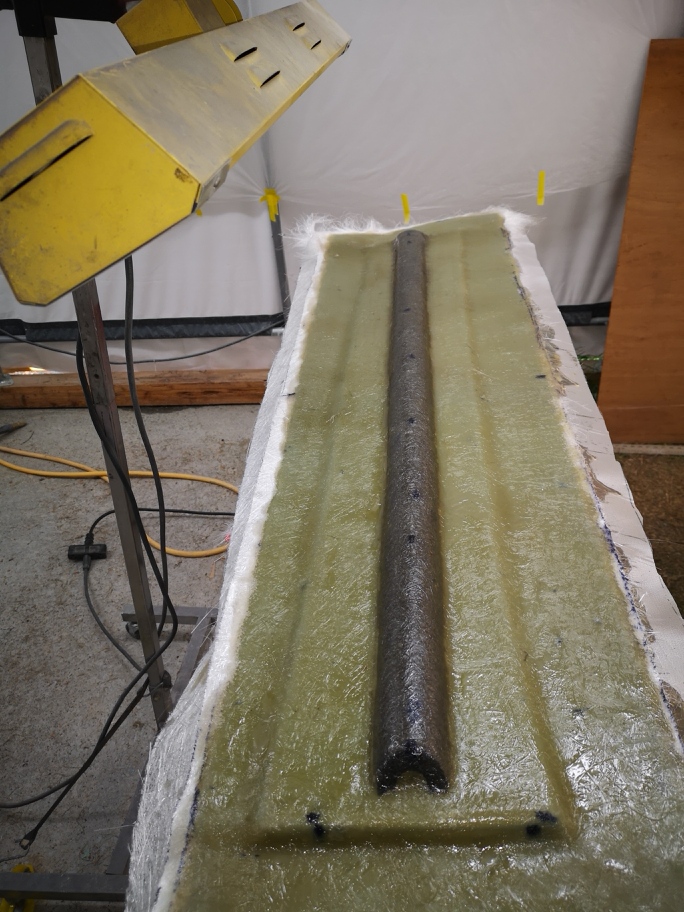
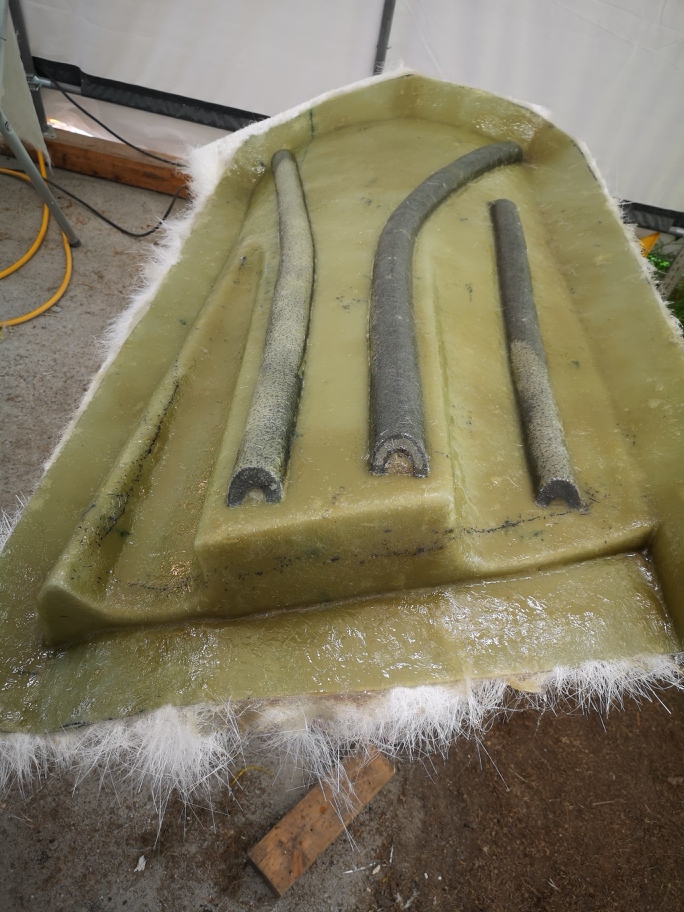
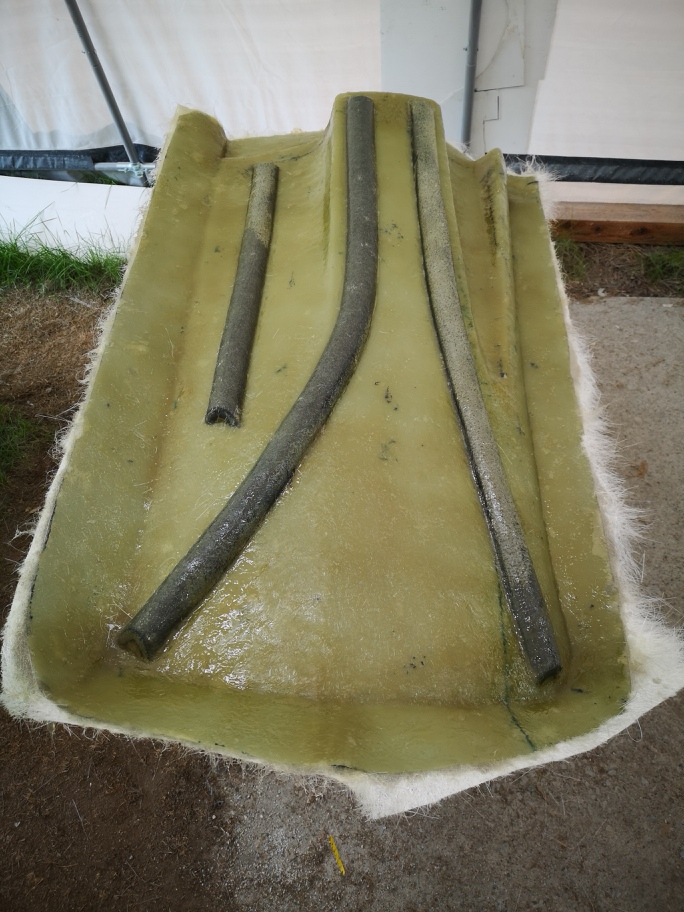
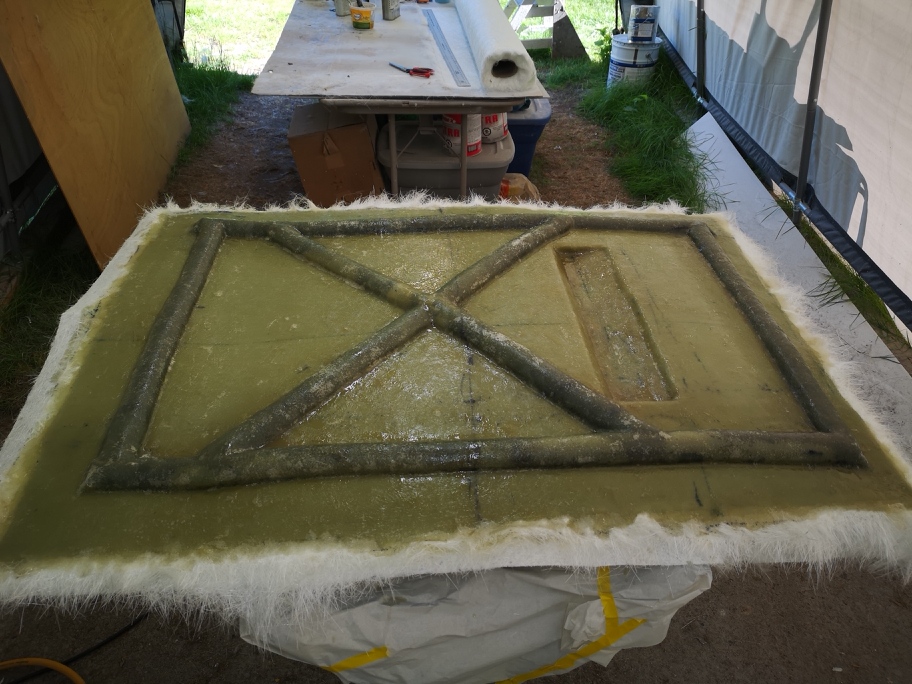
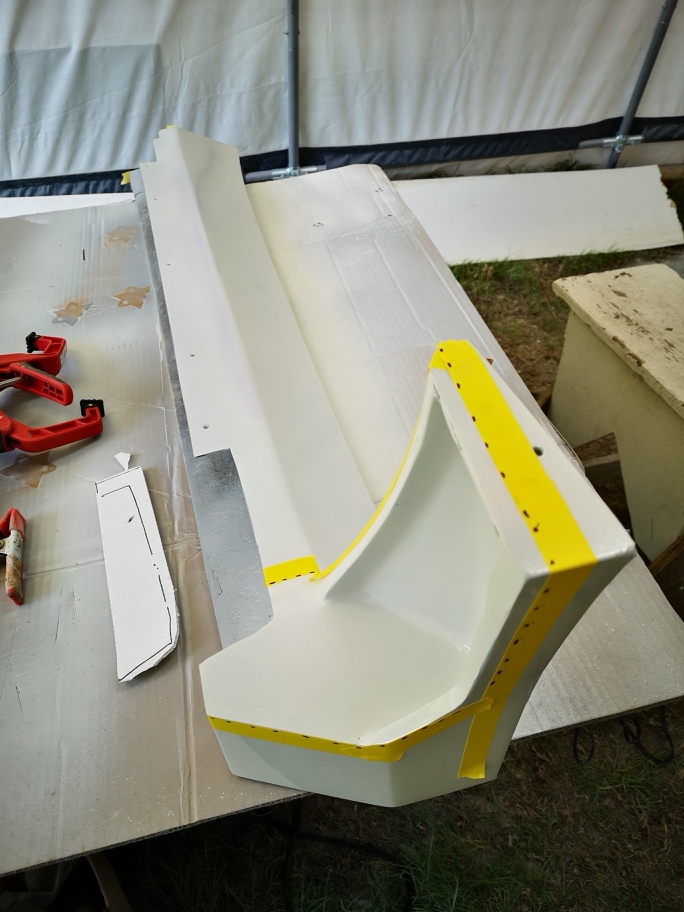
Due to the fragile nature of using foam in constrution ( very strong overall but breaks like a egg if dropped) and as Murphy's Law will happen both running boards were dropped. There is lots of fibreglass and bondo in the construction but a couple cracks did emerge in the flattop surface which was made and shaped using polyurethan foam. I repaired best I could wet sanding and filling , so hopefully I will not need to do too much sanding on the mold. I'm doing the two running boards first just because I do not want to have anything else happen before the molds are done. Each running board is made up of 3 separate removable flanged sections. The following photos show the upper and lower mold build. I'll do the third today.
this shows the planning of where the parting lines are.
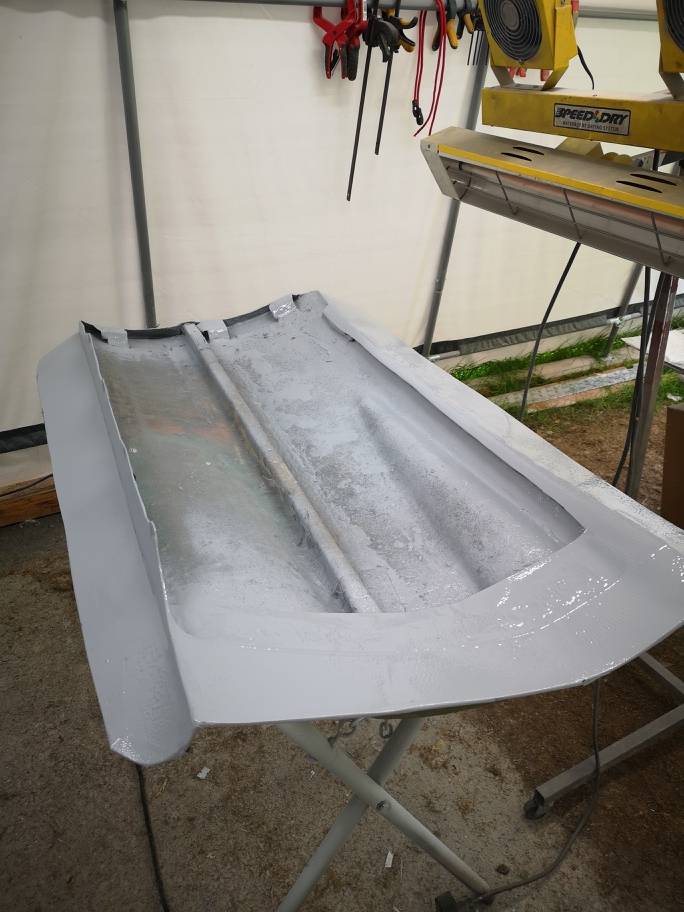
this is with the flanges being attached
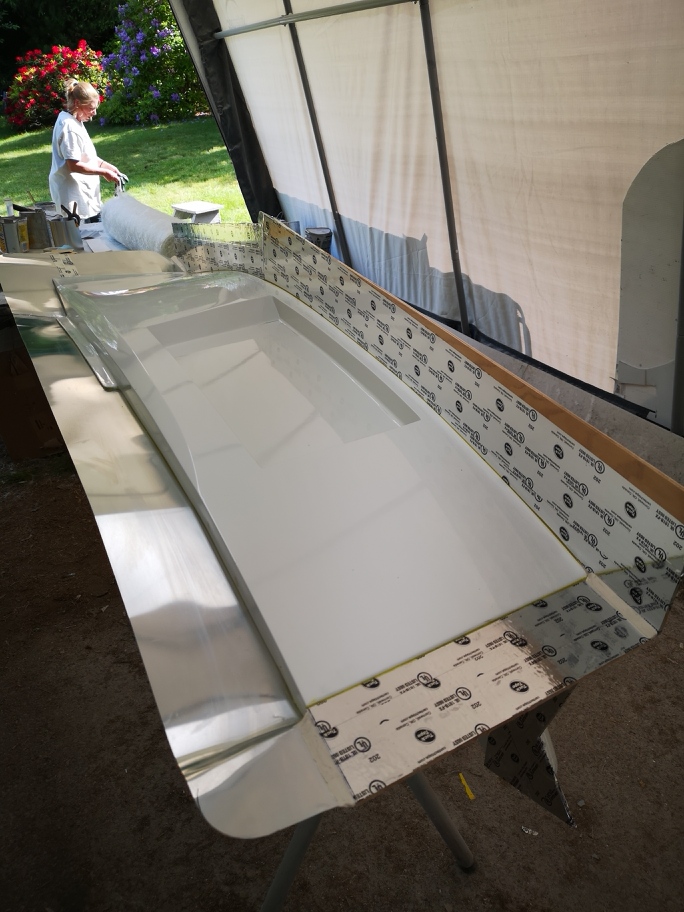
This is with the gelcoat applied , I use a silica additive to the gelcoat around the edges to ensure of hard and detailed edges. [img][/img]
top mold 3 layers of 1 1/2" mat I added reenforcement after this shot and 2 more layers of mat.
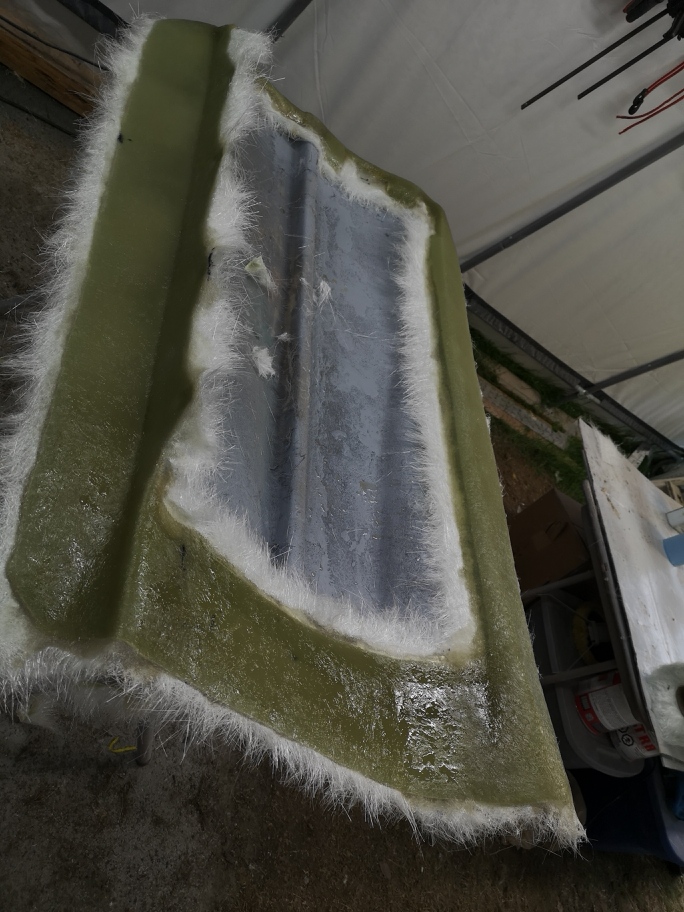
this shot is the bottom mold fab with the flange removed from the upper mold preping I used clay and molding wax to ensure sharp parting lines.
this shot is with gelcoat added as before.
this is with 3 layers
this is the finished bottom mold with reenforcement added and 2 more layers of mat.
I hope to finish this mold today enjoy and stay safe. Wayne
I've been busy finishing off the first running board mold.
I had to do a bit of a repair to a flange as there was a couple flaws that were easy enough to repair and would give me a better seal if I decide to do a vacuum bag.
then I applied the thickened gelcoat in the 90 deg corners to help the matt lay tight, after it kicked I applied a full coat of gelcoat.
I completed all the fibreglassing on the area so that mold is now completed, one down 7 to go.
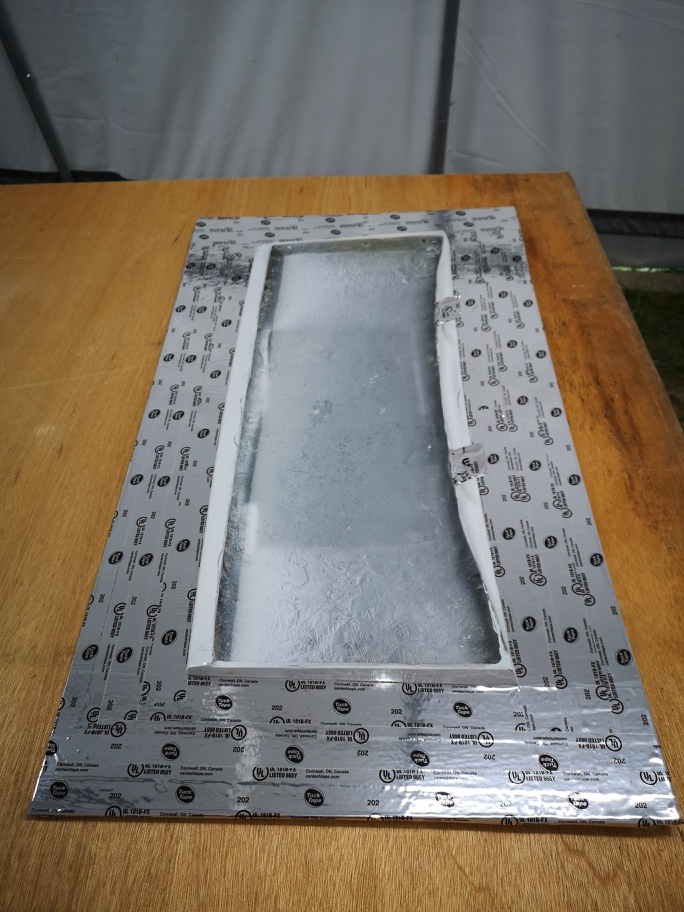
I started the second running board finishing the top first. I changed up the flanges this time I covering them in aluminum tape. I found on the first mold even though the wood flanges were sealed that the wood grain came through more prevalent than I wanted.
Thanks for looking Wayne stay safe
[This message has been edited by dobie1 (edited 05-02-2020).]
First off thanks Shem ,lots of work but rewarding.
I got the second running board mold finished , I spent some time finishing all the parting lines then sealing and polishing the surfaces. They are now all buttoned up and put away to finish curing for a couple weeks.
I moved onto the next set of molds , there was foam used in the construction of the door and to avoid any damage I'm onto door molds.
I'm using a new material in the flange construction , 8" aluminum flashing. It gives me enough material to attach to the part and still leave a wide flange surface for vacuum bagging.
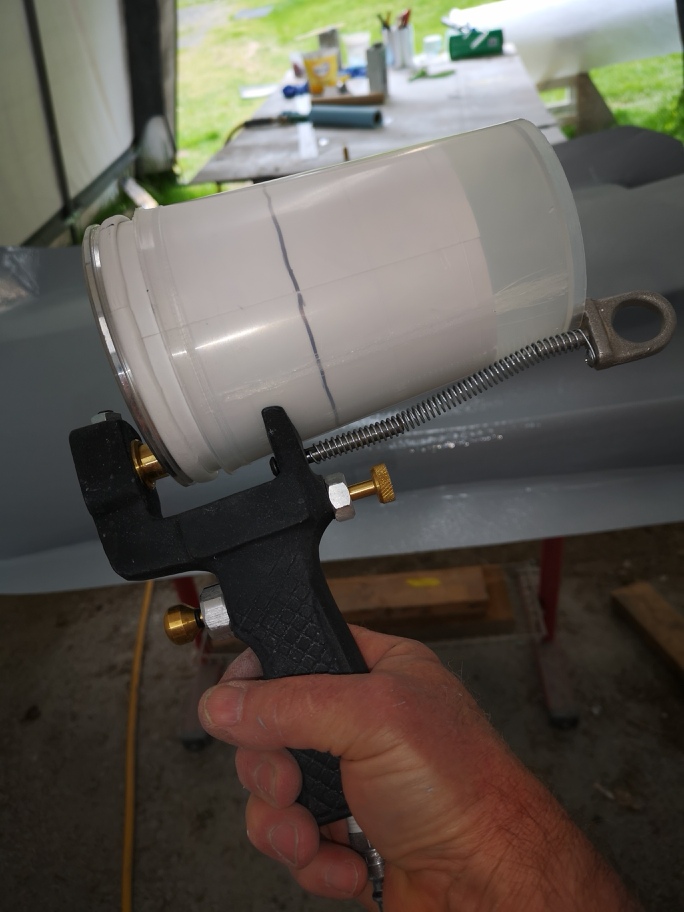
I got to use my gel coat cup gun for the first time
works pretty good and is way faster, it possibly uses a bit more gel coat but hopefully has a better finish.
this is with 2 layers of 1 1/2oz mat . reenforcement tomorrow and 3 more layers.
A bit of a update for those interested in the molding process. I got the first of the door molds finished today the build came together pretty quickly 3 days from start to finish. I'll leave the plug in for a couple days for the fibreglass to cure a bit more. I liked using the aluminum flashing for the flanges, it made forming some of the complicated transitions easier to build. It requires a bit more caution until you get to shooting the gelcoat, the release is very easy. I also really enjoyed how fast and easy it was using the cup gun to lay the gelcoat down in a uniform layer.
This is with the reenforcement glassed in , I'm using water pipe foam insulation attached with hot melt glue to make the reenforcement works best working with the different contours and angles.
This shows the nice wide flange area for vacuum bagging.
Gel coat shot and ready to lay the glass
This is the completed mold , i'll trim it up tomorrow.
On to the next one!!
stay safe everyone Wayne
[This message has been edited by dobie1 (edited 05-13-2020).]
Again, keeping in mind that I'm sort of "old school"...and really don't keep up with modern day methods/techniques/materials much at all, but when doing "production" molds, we generally made them about 10 1/2 layers of ounce and half matt, over at least two coats of tooling gel as the actual mold "pulling" surface, backed by a coat or two of "tracer" gel, which could also be and usually was, tooling gel also. Used tooling resin to do the layup, but only did about 3 1/2 layers at a time.
If you are doing the molds, just so you'll have a source for replacement parts for your own car, what you've indicated using here will be more than sufficient, in my opinion, but if you are wanting to get multiple pulls from the molds, you might consider making them a little thicker. You could use some core matt over what you've already got, then a few more layers of regular matt on top of that, that's what IRM did with some of the molds they made back in the 90's, and they are still usable today. Most of what determines how well, and how long a mold lasts, is how well they are maintained and that proper prep steps are used with each pull from them.
The aluminum flashing & furnace tape I've used with great success many times. What you've got looks impressive!
Not trying to give "advice" here, you certainly have things well under control and don't need any comments from the peanut gallery, just trying to share a little of what I was taught, and learned through experience.
As I said, what you've got looks fantastic and should serve your purpose for as long as you need them to. Outstanding work, and thank you for sharing your progress, it's much appreciated by all, I'm sure.
Keep up the stellar work and keep plugging away at it! I, for one, am looking forward to watching you take the first parts out of your new molds...that is always a very satisfying experience for me. I'm relatively certain, it will be for you as well.
Thanks Bob, never started out as a teacher I'm learning all the time from builders like you and Don O . Sage and many others. IF someone can pick up something new to try the hobby will grow.
Thanks for the positive comments wftb ,as you have probably read from the post by Sage whom I respect and agree with unless I put a lot more money into my molds there will only be a limited number of bodies I could produce " possibly 10 " if I look after the molds properly.
Sage , I agree the they should be beefed up but I calculated I would need to invest a bunch more money and I'm getting some real blow back from my wife on the money I've spent recently. When I started this project I was still working making a good income as a Pilot but I've been fully retired now for 5 years and money is running out for my project. I never started this project to sell kits ,I just wanted my own car , the project has morphed over the last 4 years with the possibility of building a kit ,I have been contacted by a few guys' I do have one guy in Oklahoma that wants one but I think he is on the fence now as I haven't heard from him, probably too do with the pandemic and money flow from his business. So my focus is now to build and finish my own car , I'd like to get it done sooner than later . Having said that I really do appreciate your mentoring and passing on your experience, its very much appreciated.
I've started building the mold for the hood, I'm planning on doing a resin infusion carbon fibre hood to cut the weight down.
stay safe everyone
wayne
[This message has been edited by dobie1 (edited 05-15-2020).]
The molds look great! You could always beef them up later if you wanted to make more bodies, cant wait to see some parts coming out. Looks insanely good man!
The molds look great! You could always beef them up later if you wanted to make more bodies, cant wait to see some parts coming out. Looks insanely good man!
shem
Thanks Shem, that's the direction I have elected to go.
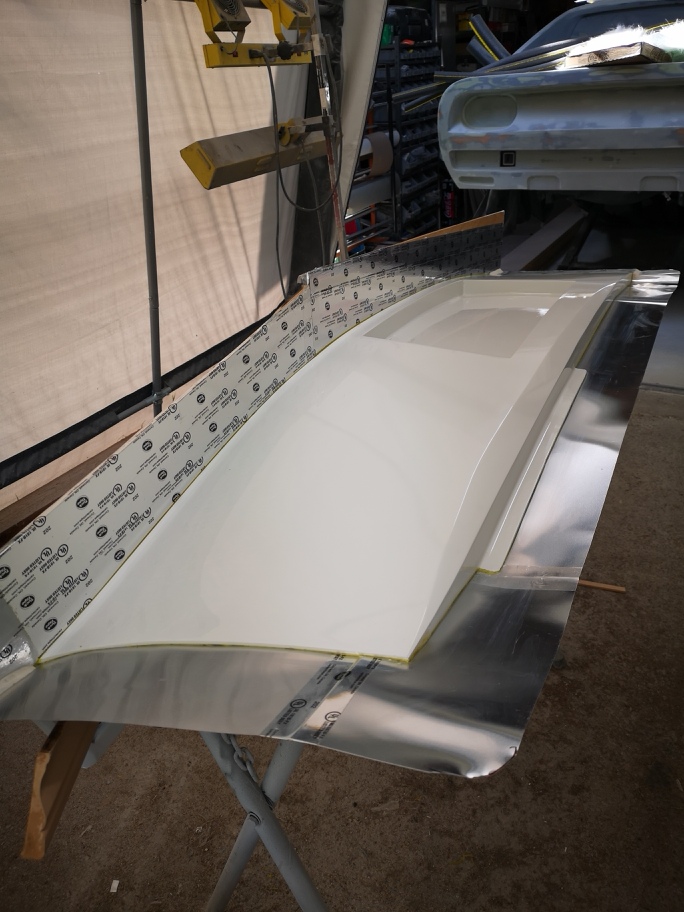
I have got the hood mold finished, 4th of 9 for the complete front end including skirts and doors.
I used the metal flashing again worked great
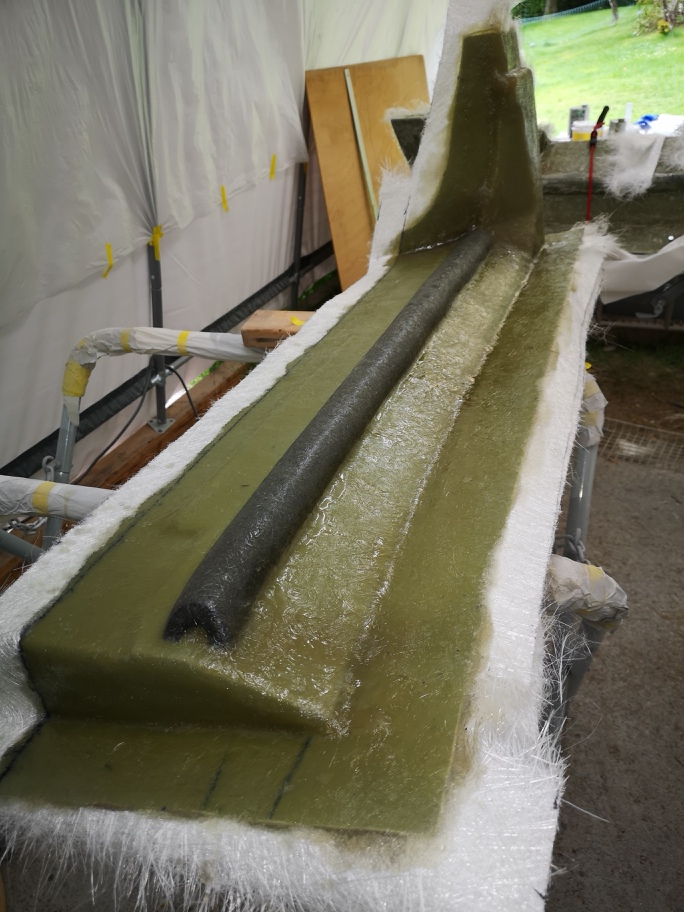
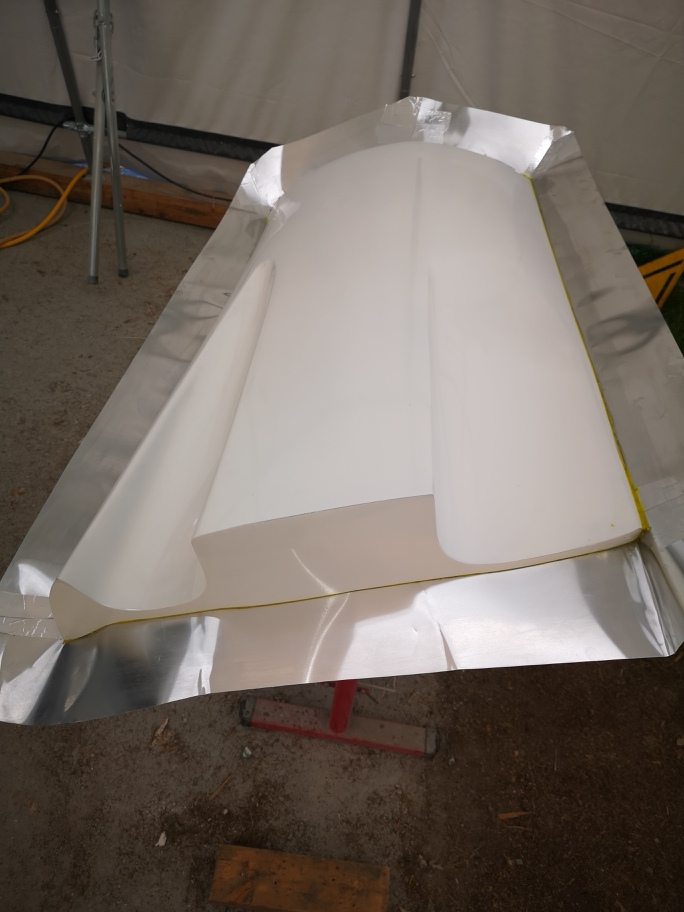
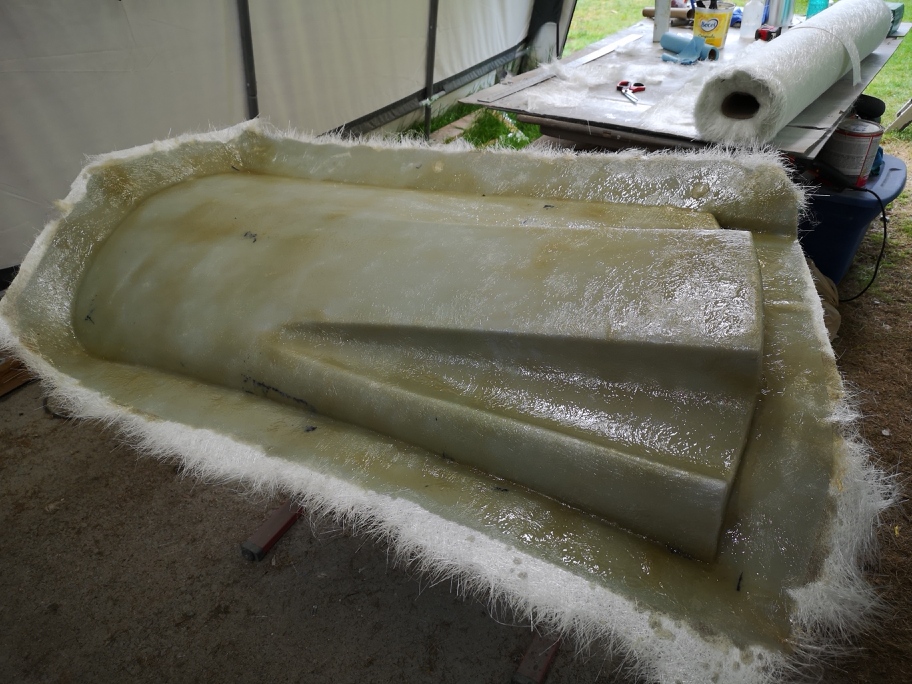
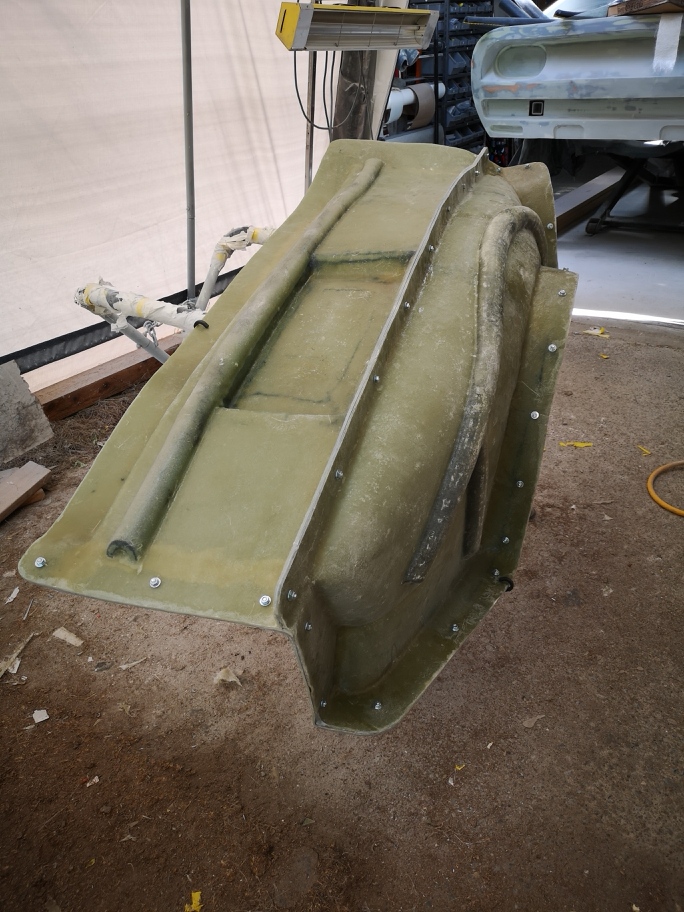
the underside of the hood was first up , I didn't need to use any extra support as I felt the structure was stiff enough to give all the support I needed.
This shot is with the underside done and the aluminum flashings removed showing the gelcoat finished flange. I cleaned up all the slag ,polished everything and proceeded to mold the top.
next was the top which I did use ribbing to support and ensure it remains true through the cure.
onto the centre fill next.
Stay safe Wayne
[This message has been edited by dobie1 (edited 05-22-2020).]
It's been a busy 10 days both working on the car as well as work on installing solar panels on my roof for the pool.
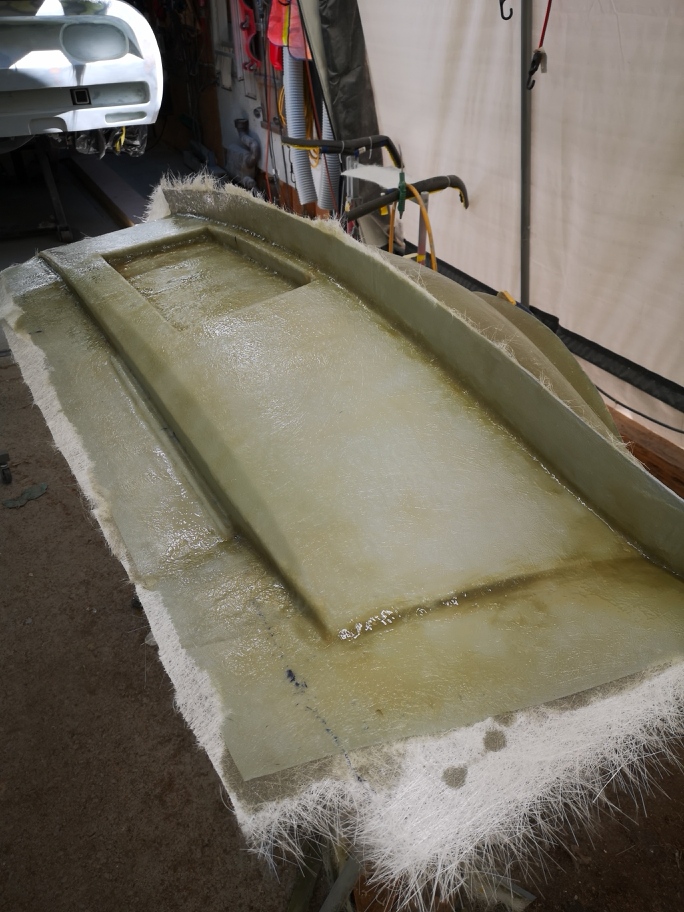
I completed the centre fill for the fenders ,it worked out great nice doing a small mold.
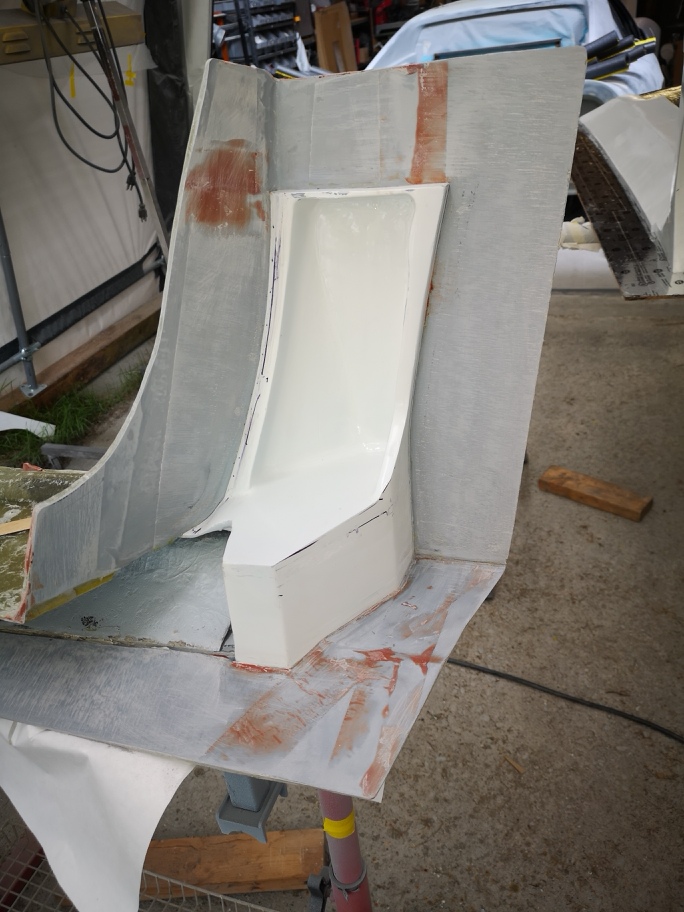
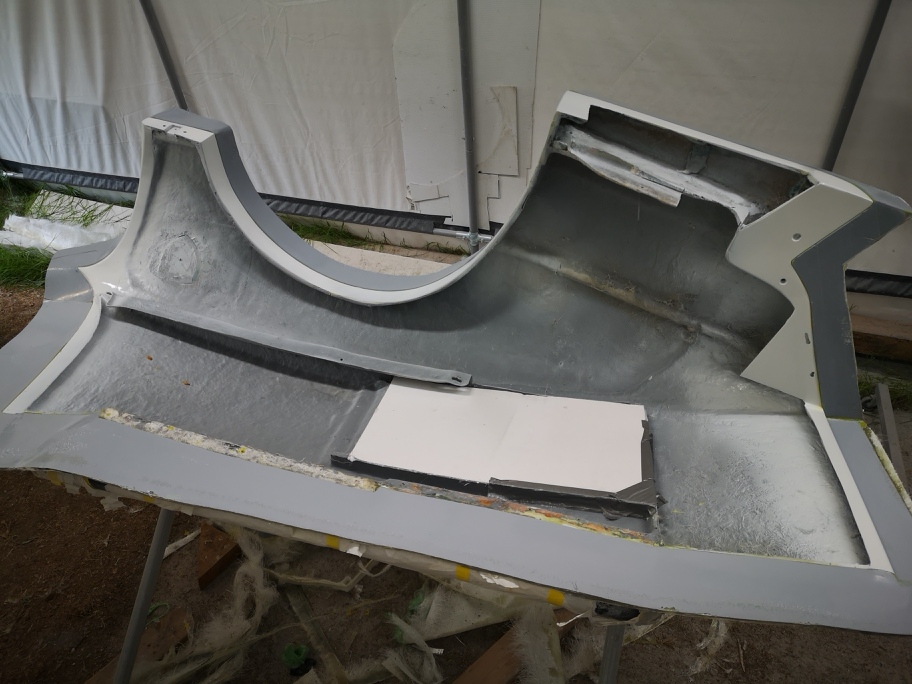
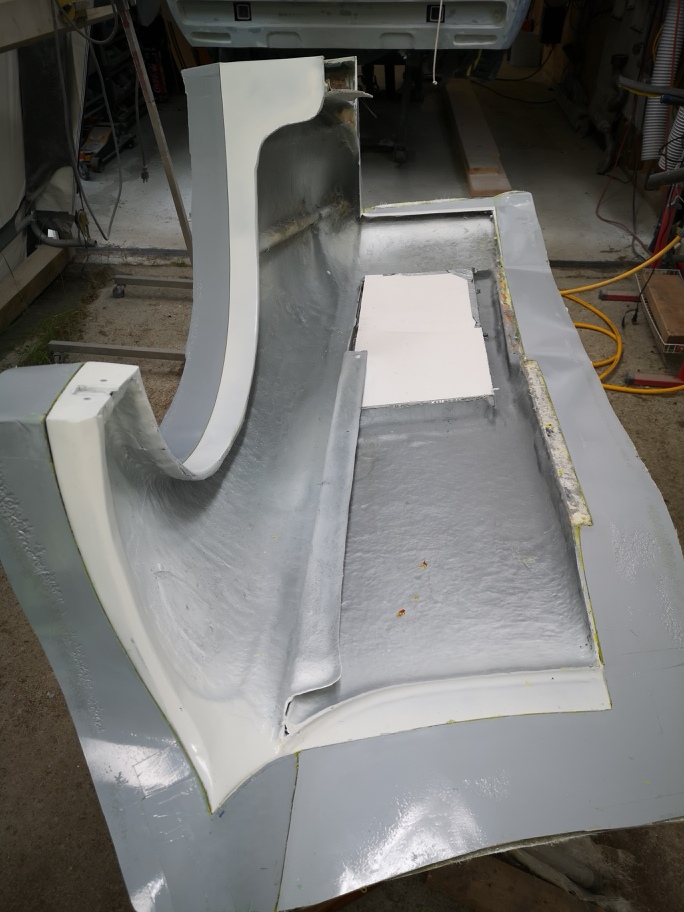
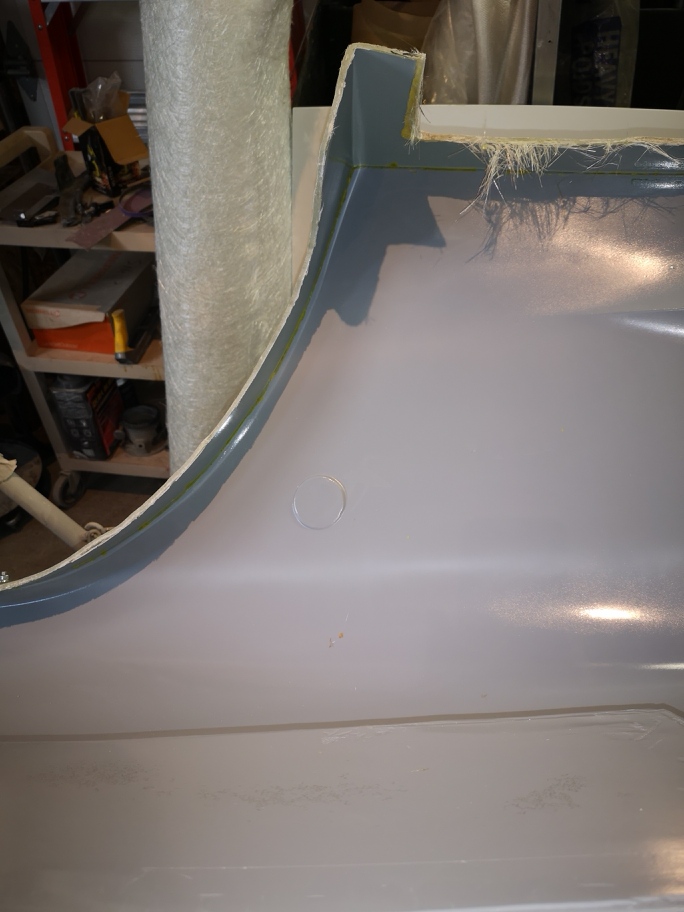
I then moved onto the passenger fender ,after a lot of studying the contours and angles I decided I needed multiple parts to the mold ,a seam down the middle of the fender to ensure I would not have problems pulling the parts.
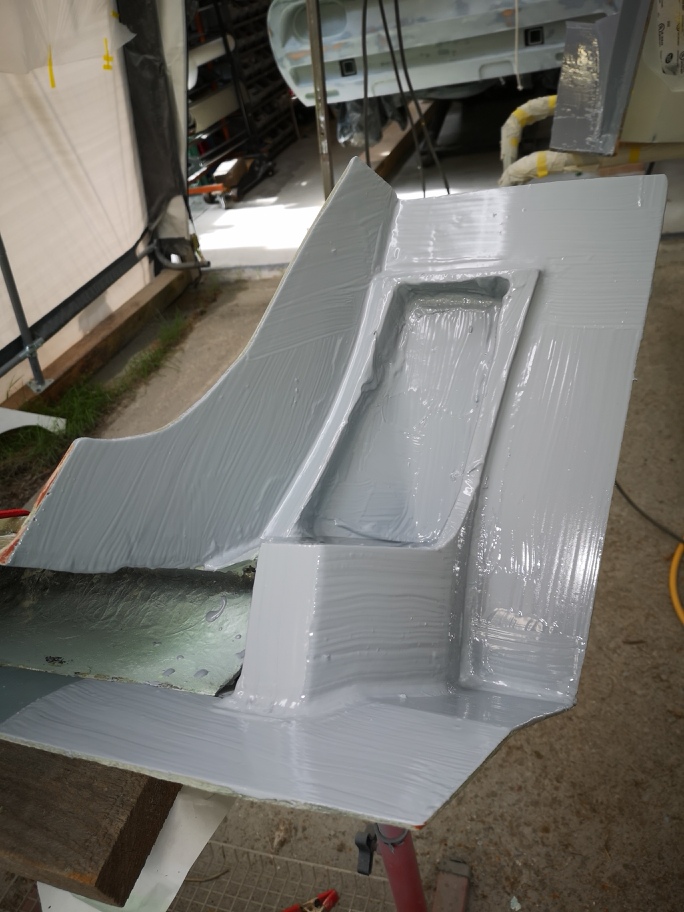
these show the fairing compound into the tight corners to help the fibreglass transition the right angles.
Gelcoat sprayed on next step to apply the fairing to the corners.
Thanks for stopping by stay safe Wayne
[This message has been edited by dobie1 (edited 05-31-2020).]
That one appears it was a little extra challenge. I get analysis paralysis doing things like that. Every step is one more closer and some more.
Hi Sourmash Yea it was bit of a challenge only 3 more molds and the front will be finished. Leaving only the rear half , I'm working on a plan to build a rotisserie type setup to be able to mold at different angles.
these shots show the fender top done and reenforcement added, I'll flip it over tomorrow and do the wheel wells and and underside parts. This will weight a lot so it going to be a bi__ch to move around by myself.
Looking great as always! Got me tossing around making molds for mine, just dont know how to do it. Learning a lot watching you -good stuff!
shem
Hea Shem ,glad your thinking about doing molds even if you don’t You can use molds for lots of parts and extras, I’m still learning .
Hi Bob
Retirement has it’s good and bad side to it lots of time to work on the project but the down side is a definite reduction in funds to work with. I can’t believe how much resin these molds take , the 2oz mat is taking 40 oz of resin per layer 1 oz 32oz . If I had known How much it takes I’d should have got a 45 gal drum ...... Wayne
[This message has been edited by dobie1 (edited 06-02-2020).]
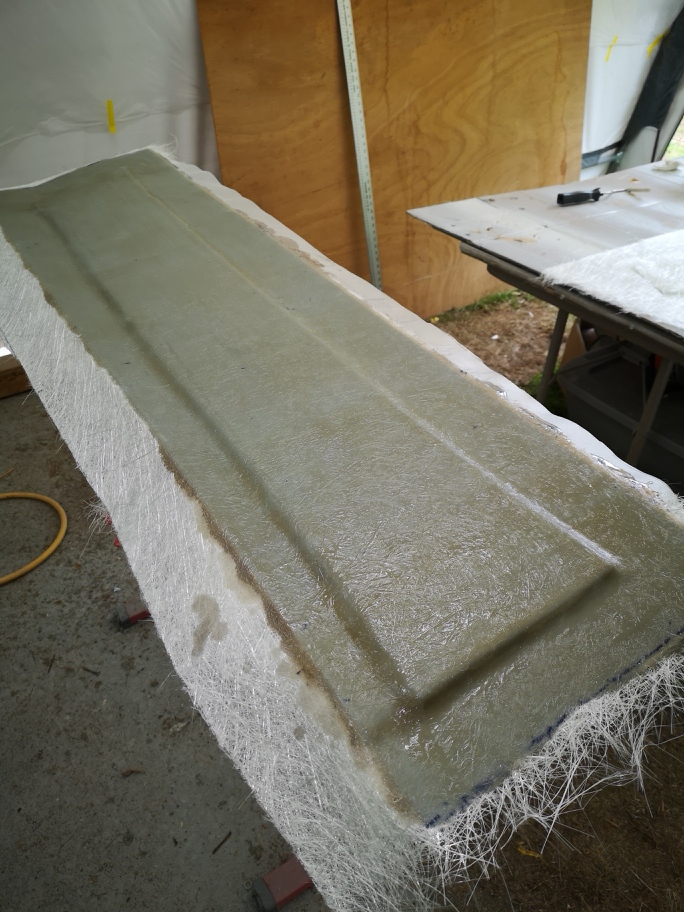
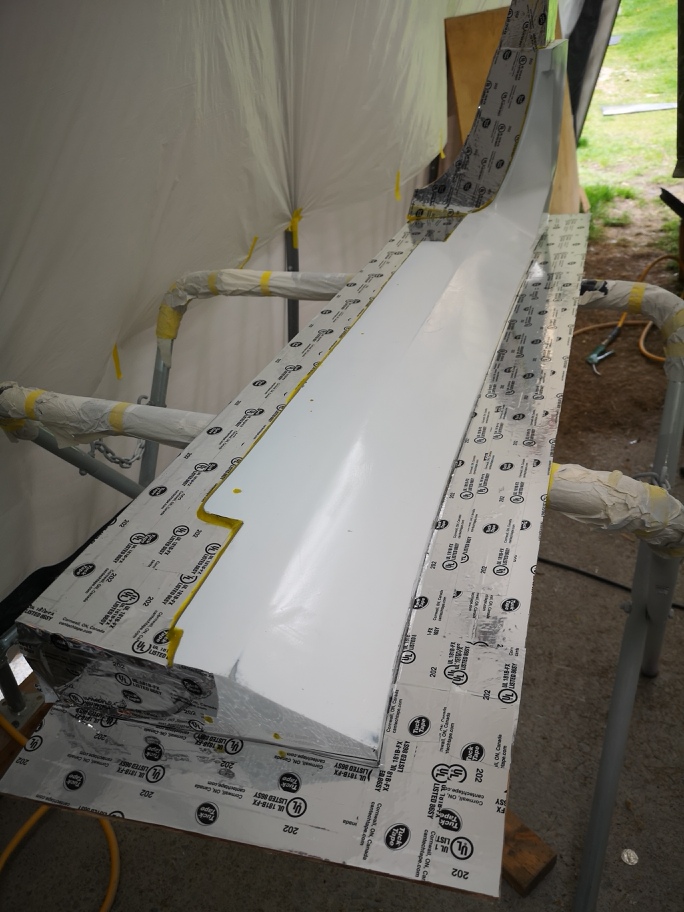
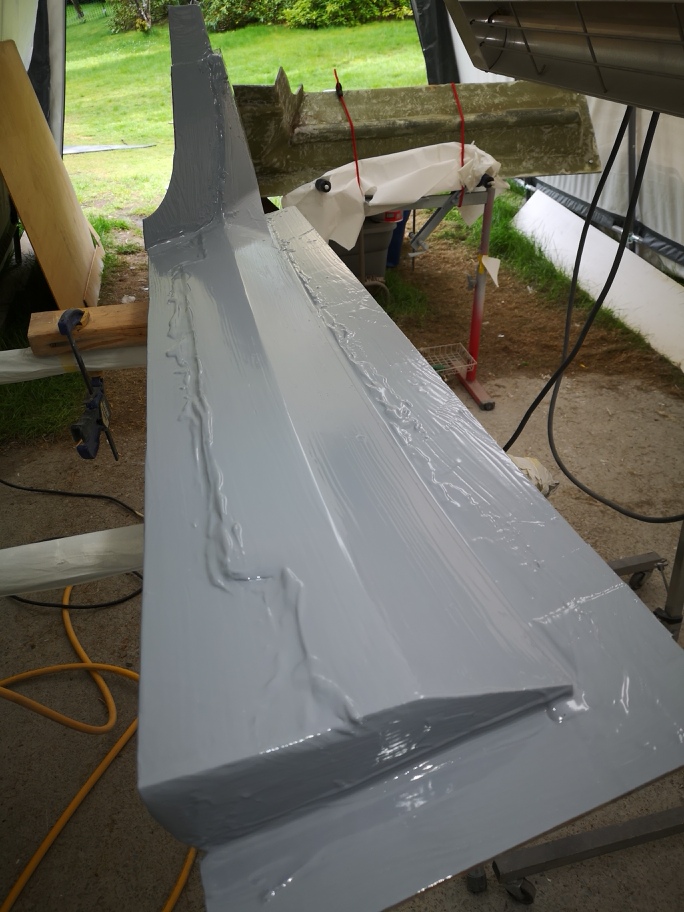
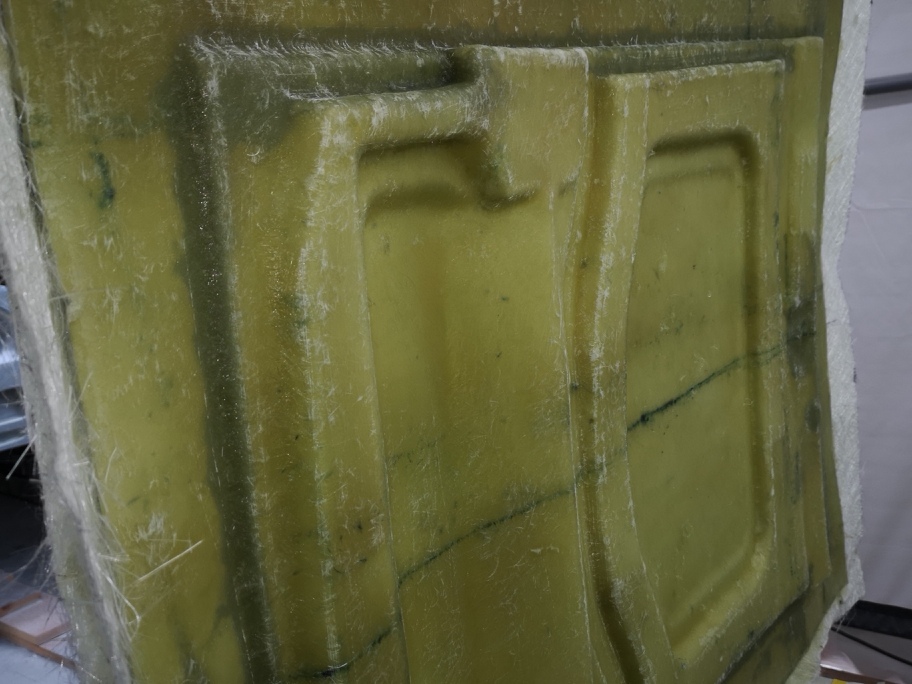
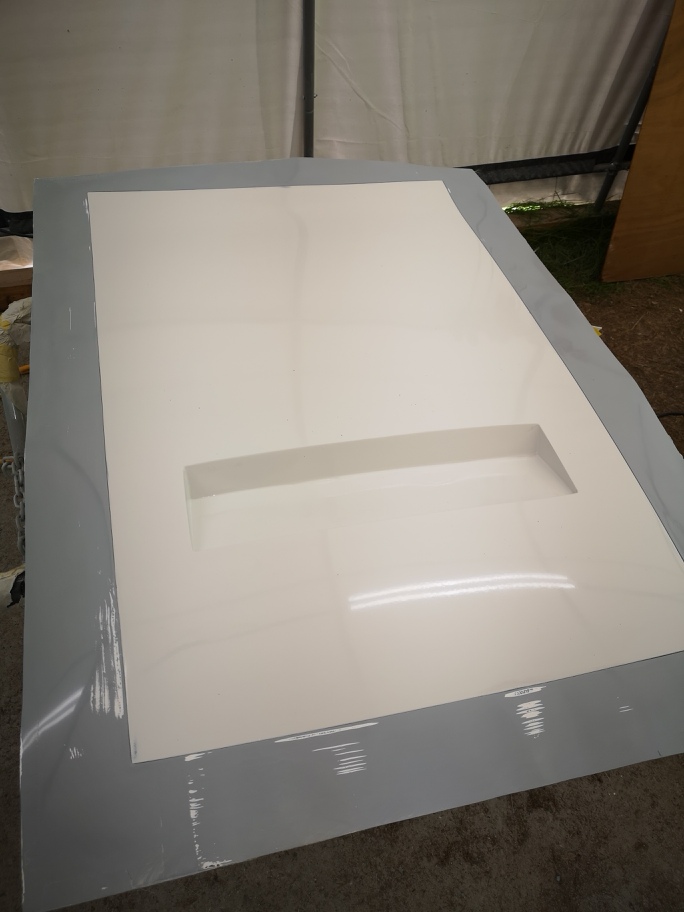
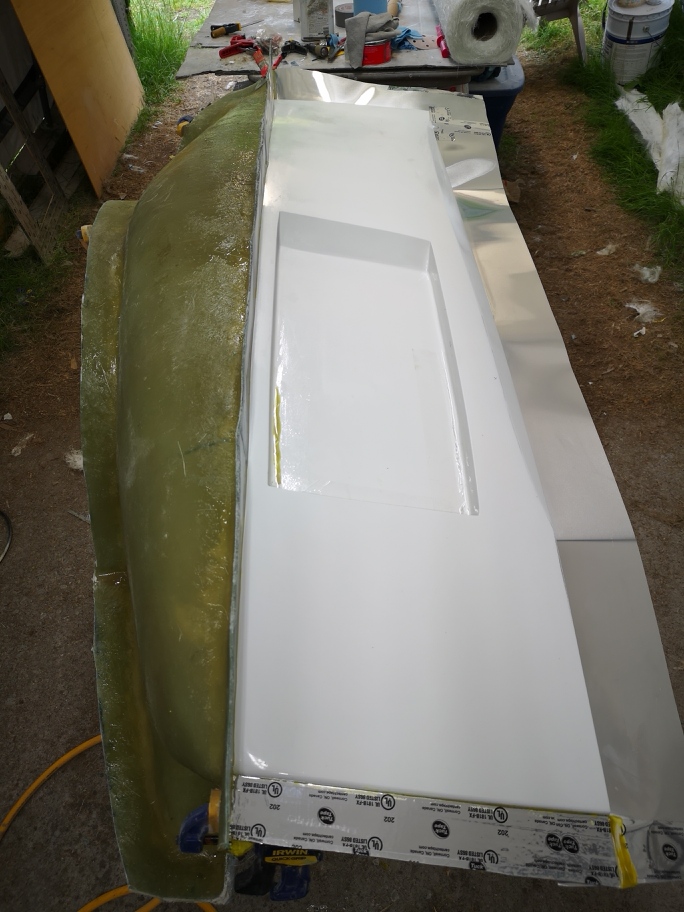
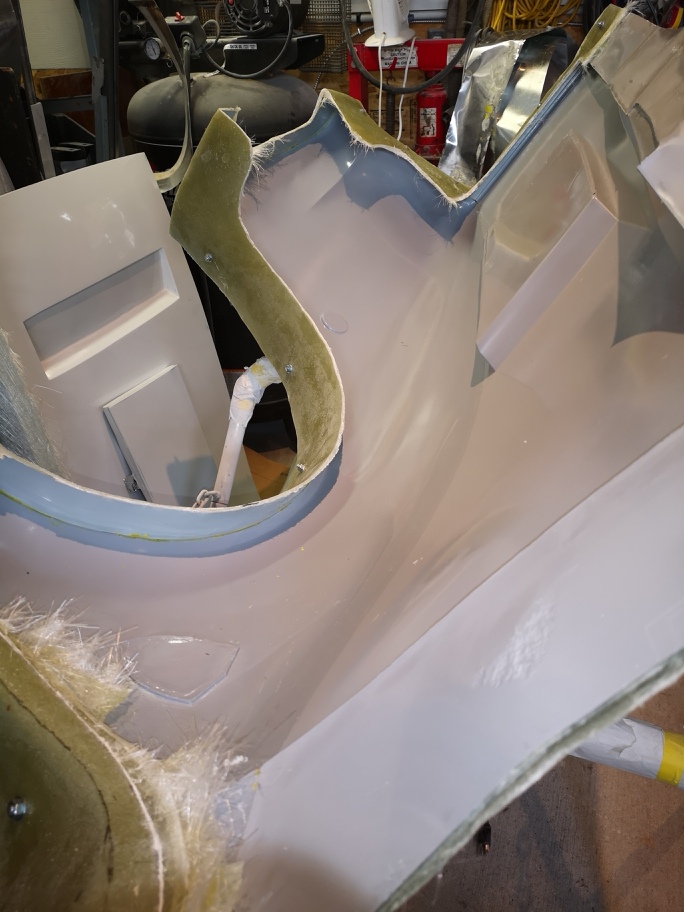
Just finished the fender mold today and pulled the plug fender from it . I'm really happy with the result ,I had a bit of a problem with some alligatoring of the gelcoat on the flanges but thankfully the actual molding surface came out perfect and the alligatoring doesn't effect molding in anyway. This mold turns out to be a 3 piece mold the last part is all along the bottom it includes the wheel arche, the lip at the front fender as well as the fender lip along the door.
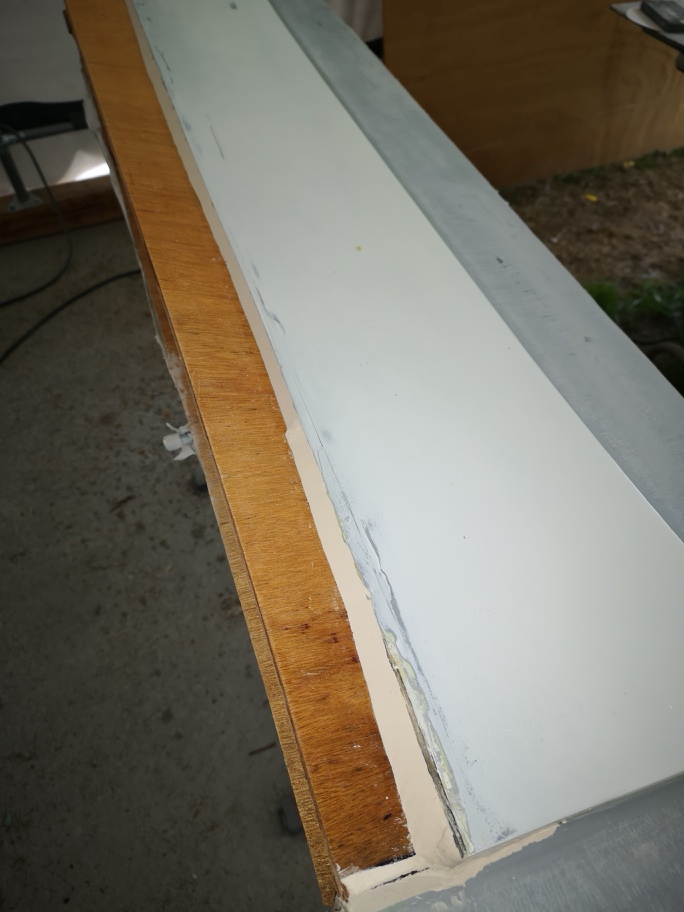
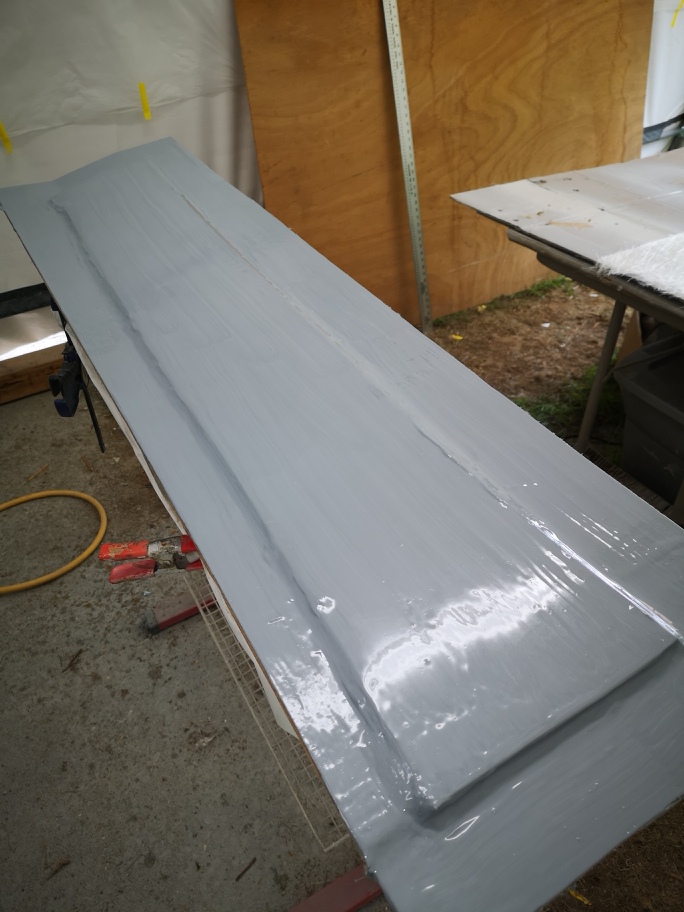
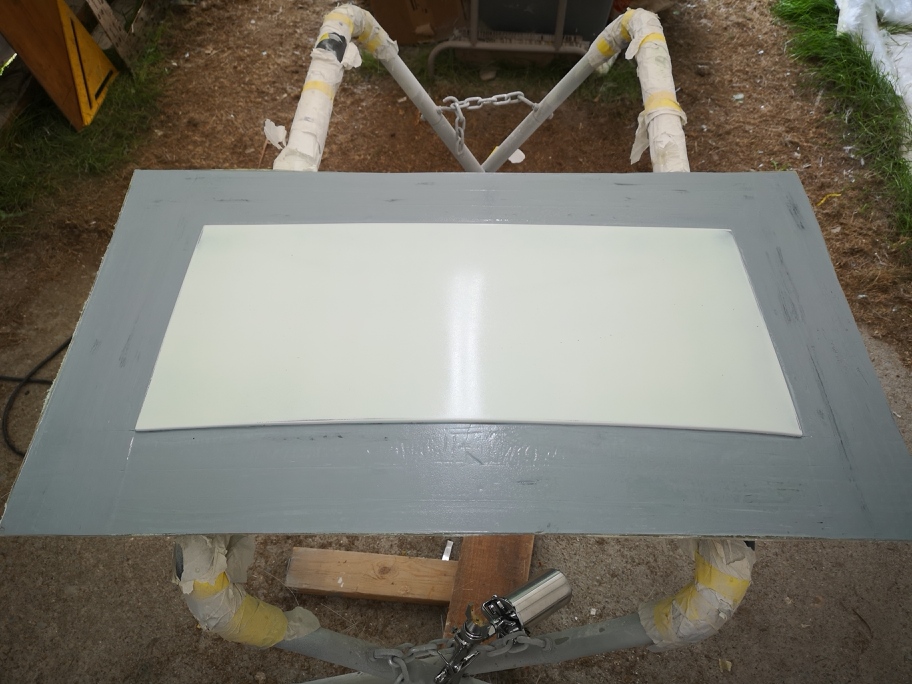
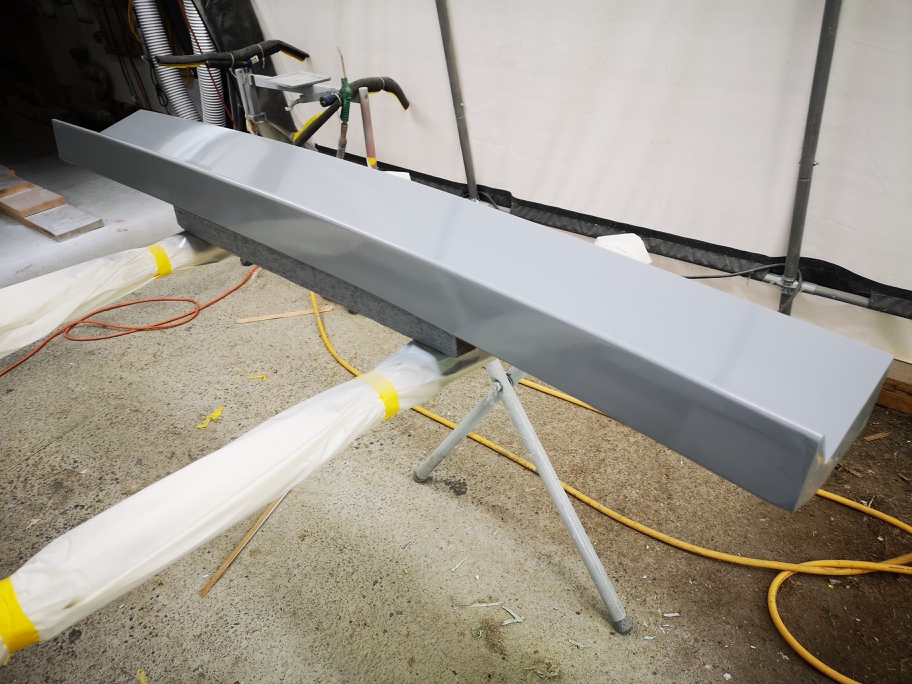
These two pic show two colours the white is the plug Fender that I'm molding , and the grey are the Mold flanges that’s I’m molding to.
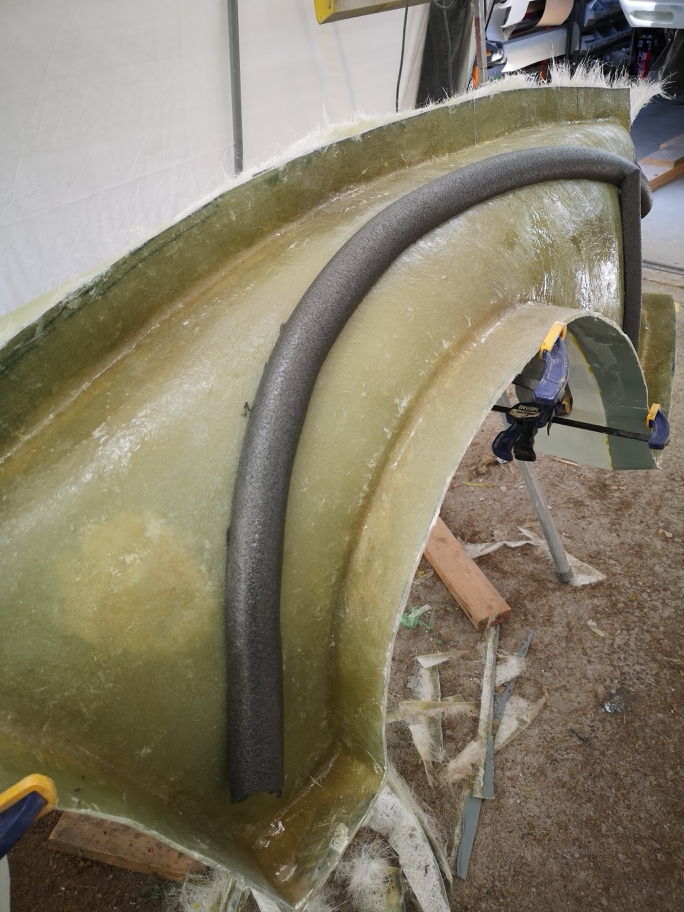
This shows the mold Green , flange attached with 1/4 20 nut and bolts. A fairly narrow Mold piece is only 6-7” wide. I may have to put some reinforcement along the length to protect it .
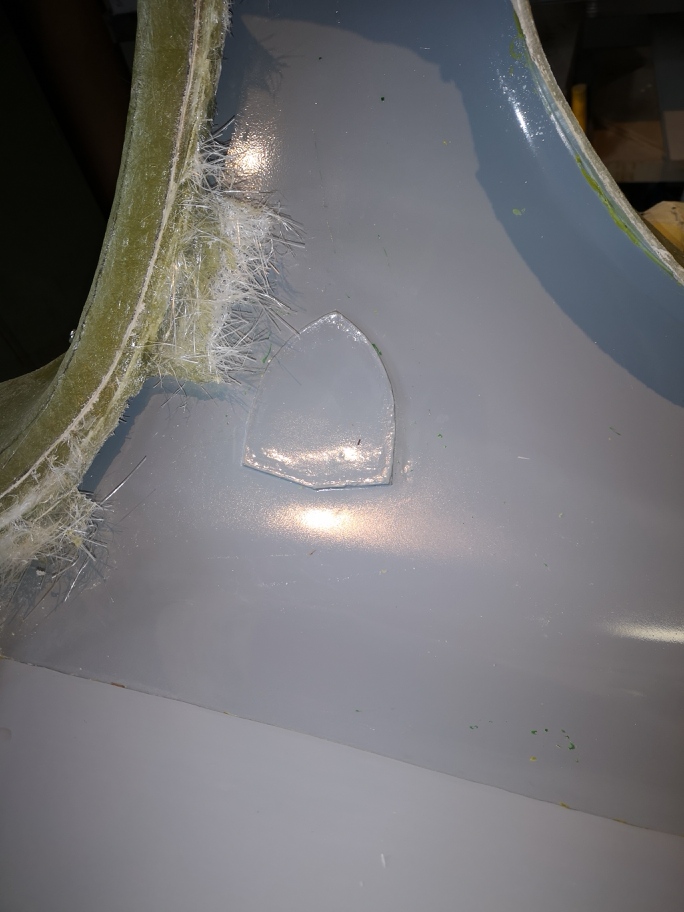
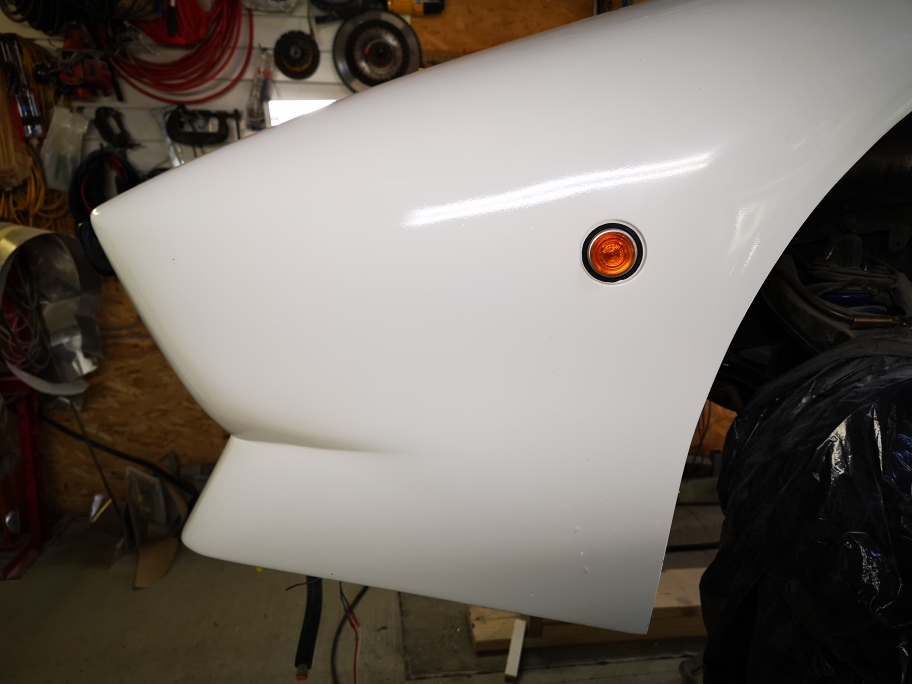
these show the detail for the marker light and fender badge areas that are recessed in the actual part.
Still a bit of clean Up And trimming but very happy with the surface finish.
Thanks for stopping by stay safe Wayne
[This message has been edited by dobie1 (edited 06-05-2020).]
The build is moving along , I finished the Drivers side fender mold I'm very happy with how the mold Turned out perfect mold finish and no alligatoring . I used reenforcement along the bottom part of the mold it made a huge difference to the rigidity of the piece, so I’ll go back and do the same to the passenger side part to give it the same rigidity.
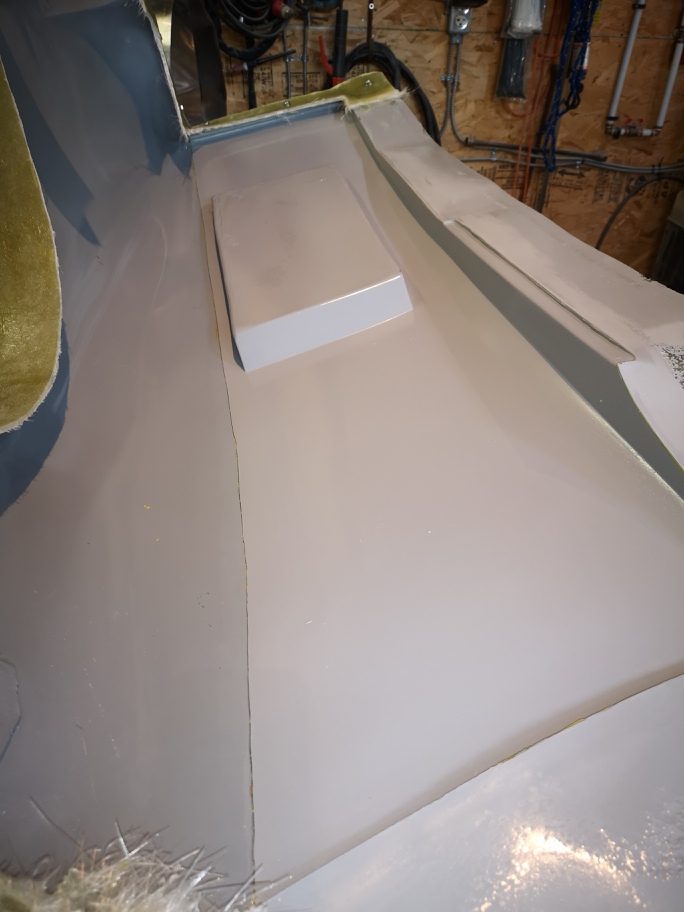
Now that the last part is molded I'm working on completing the spoiler ,I wanted to add a piece along the Top of the spoiler that the front grill will attach to and give It a more finished look. The Spoiler is still in the pre finished state as I need to take some finishing bondo and finish All the parts radiusing especially all the vent holes in preparation of spraying Slick Sand , then block sand and paint before molding.
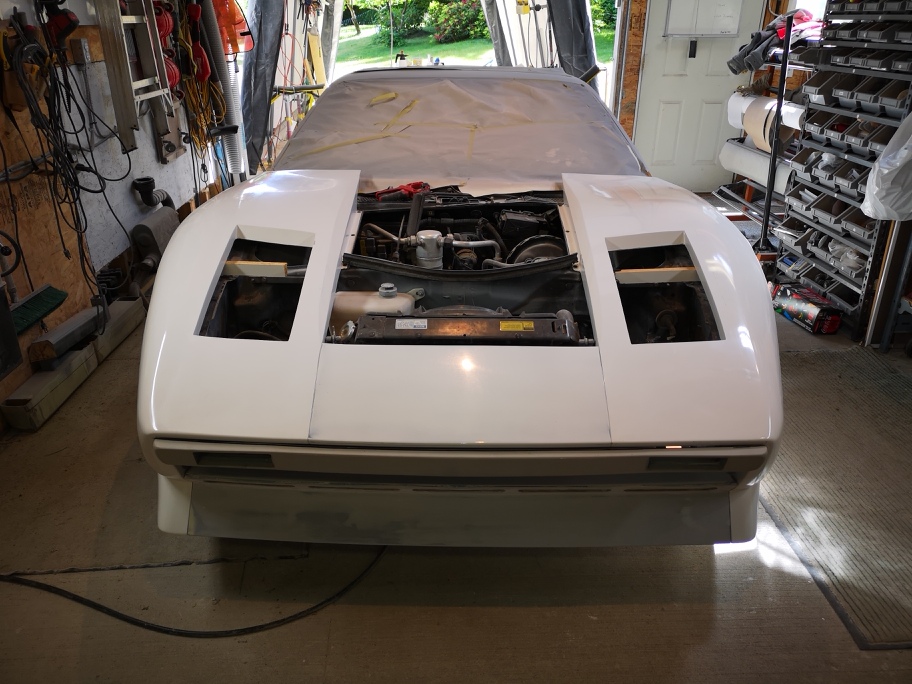
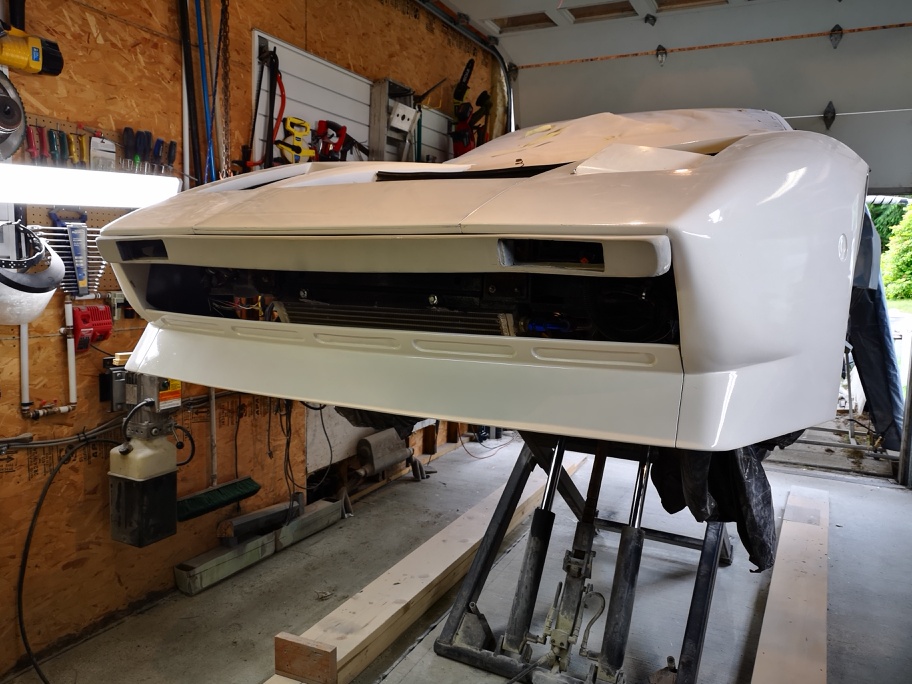
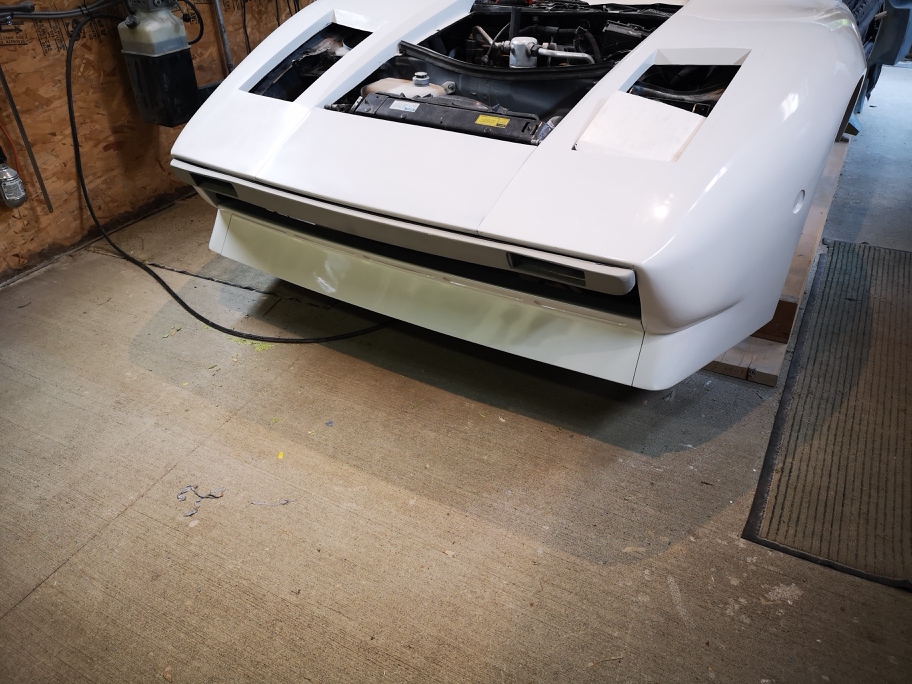
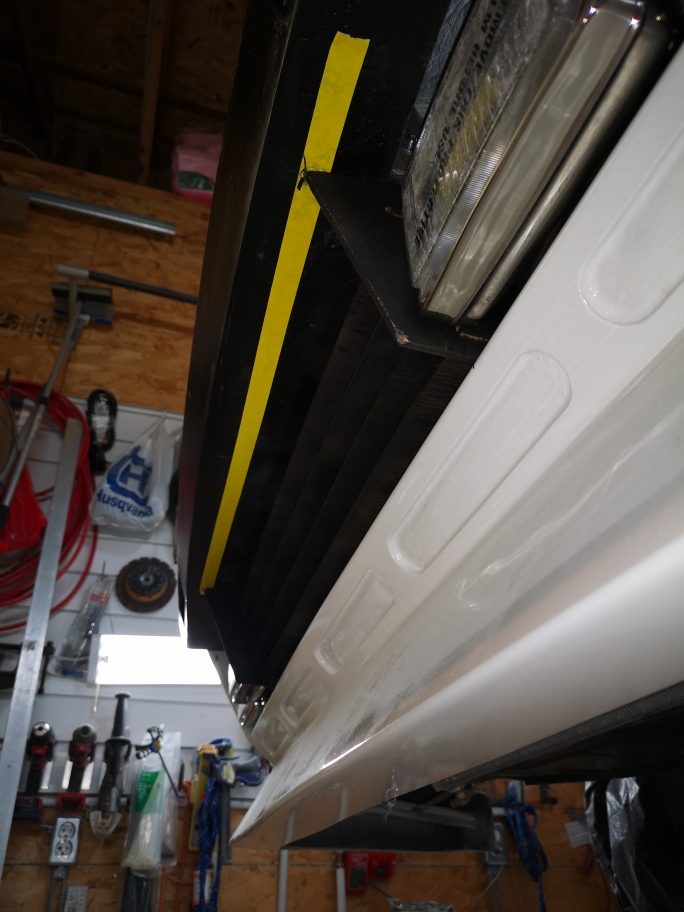
I attach the fenders, centre fill and bumper to give me the final dimensions and angles I need. It gives me a good idea of the finished look in “white” if I wanted to go that route. The first new piece I’ll mold will be the hood , planning on doing a carbon fibre infusion layup.
I've cut out and cut back the fender headlight area in preparation for the fender vents. I’ll need to install the head lights and work out the angles to build a template for welding the vents.
Thanks for looking stay safe Wayne
[This message has been edited by dobie1 (edited 06-19-2020).]
Beautiful job !!! Just a thought though ..... careful with the chin spoiler or the first speed bump it meets will take it off. Seen lots of cars going sideways into parking lots because of low chin spoilers ....
Thanks Paul glad your enjoying the build ,I believe that I have 5"s of clearance but will not know for sure until I get it finished mounted wheels on and down on the ground . Fingers are crossed!!!
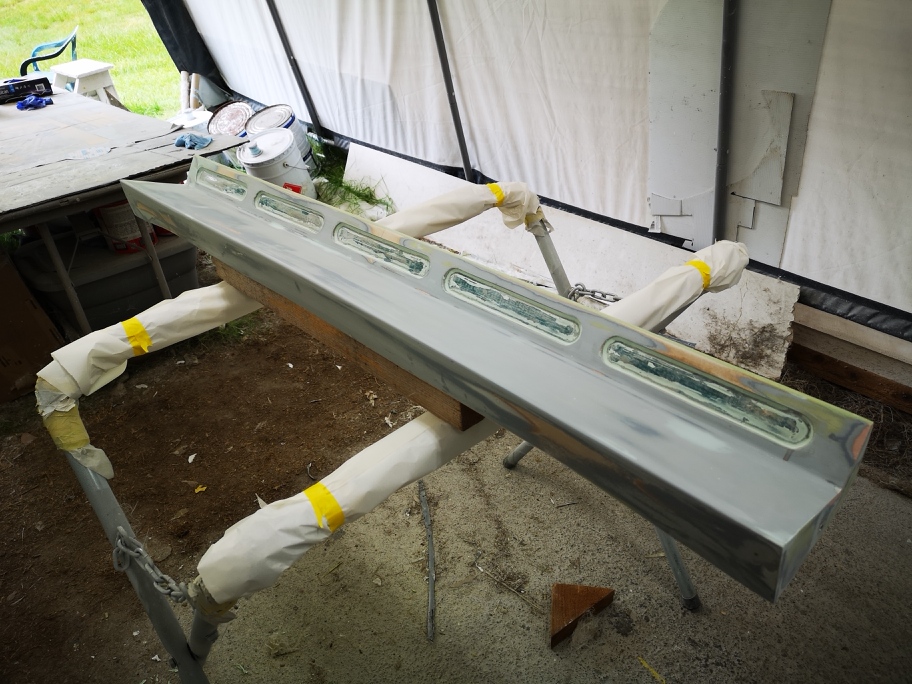
I was busy today finishing off the front spoiler ,I completed the filling and sanding to get the contours I wanted.
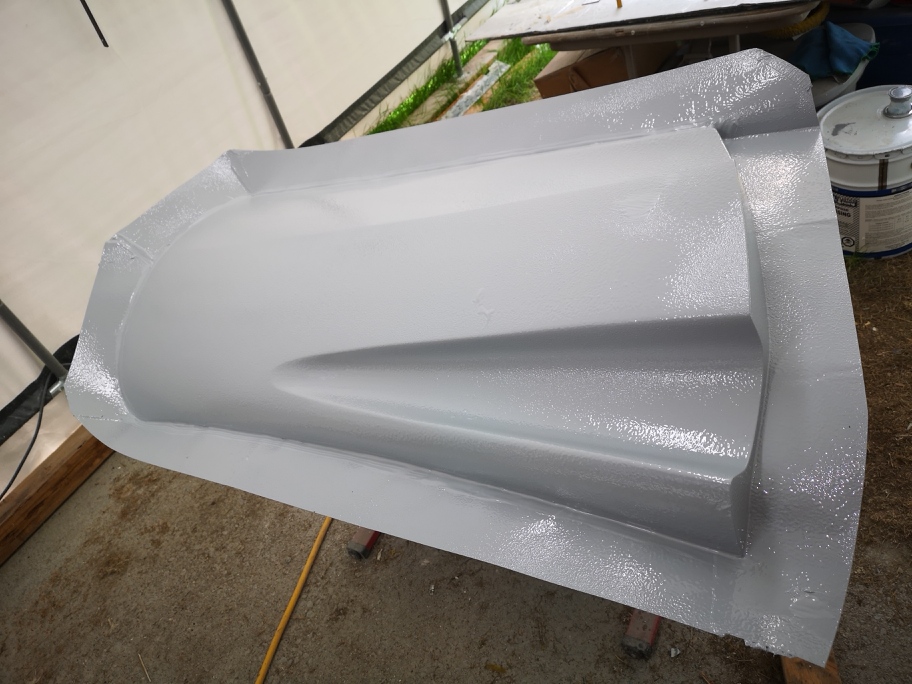
Then I sprayed it with Epoxy Primer came out great.
30 minutes later and heavy coat of Slick Sand
Tomorrow I'll block sand and hope to spray it with the white paint in a couple days. It's tough right now trying to find all the nuts bolts etc. that have now disappeared some where in the shop. Dam!!
Gotta admit, Wayne. Starting to feel real lazy every time I check in. You're moving so well. Keep it up.
I'm going back in the garage to do some sanding, and filling, and sanding...
take care...
Bob[/QUOTE]
Bob nothing to feel bad about your one of my inspirations to keep going!!! retirement does help
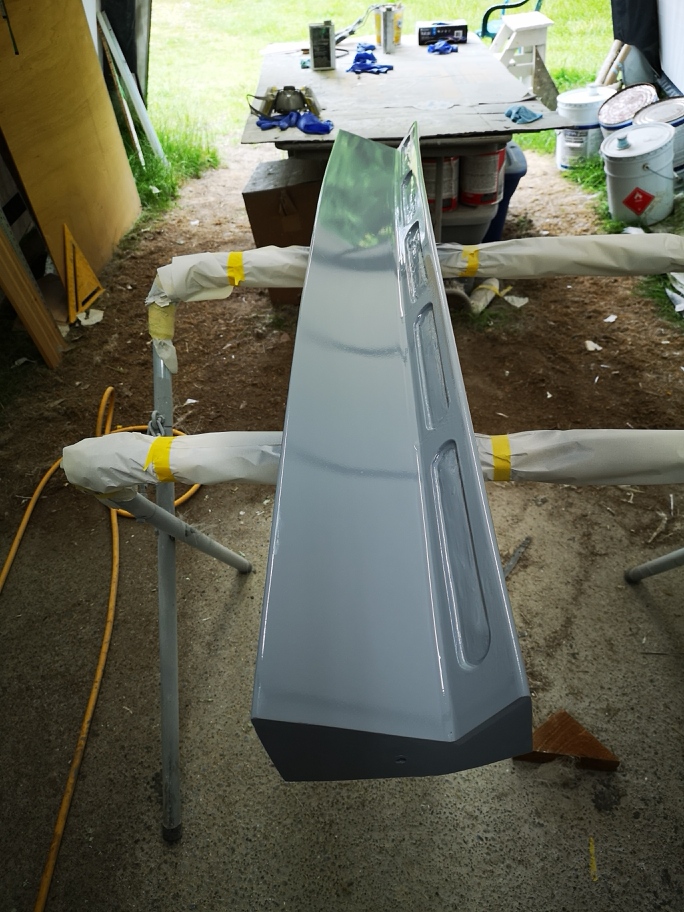
I took yesterday off to spend with my grandkids and daughter for fathers day, I got back at it today and got the spoiler painted and finished its now ready to make the mold once my 45 gallon drum of resin arrives. in the mean time Im working at getting the headlight buckets cleaned up and ready to install.
stay safe Wayne
[This message has been edited by dobie1 (edited 06-23-2020).]
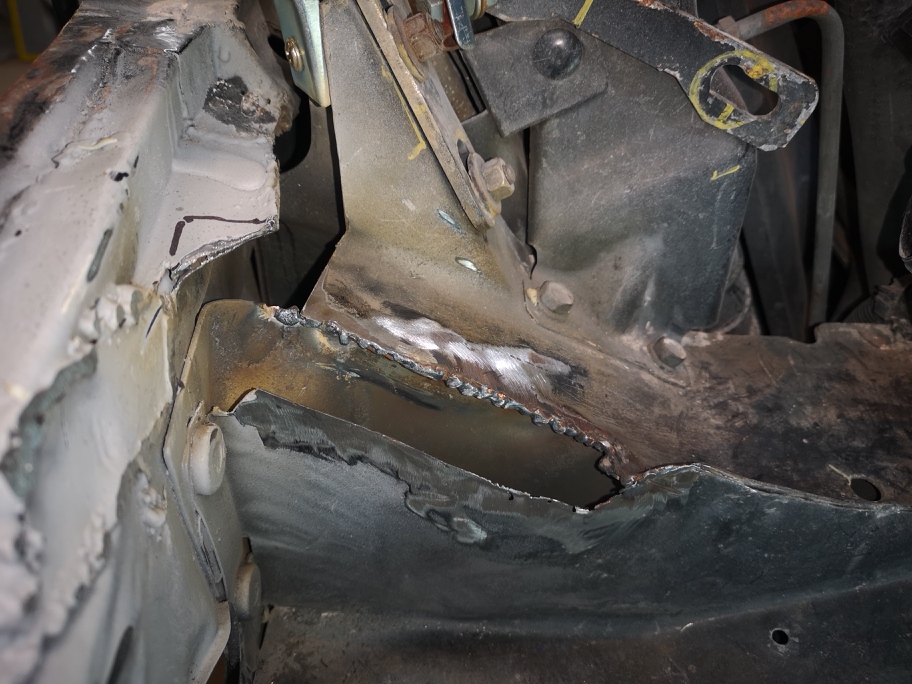
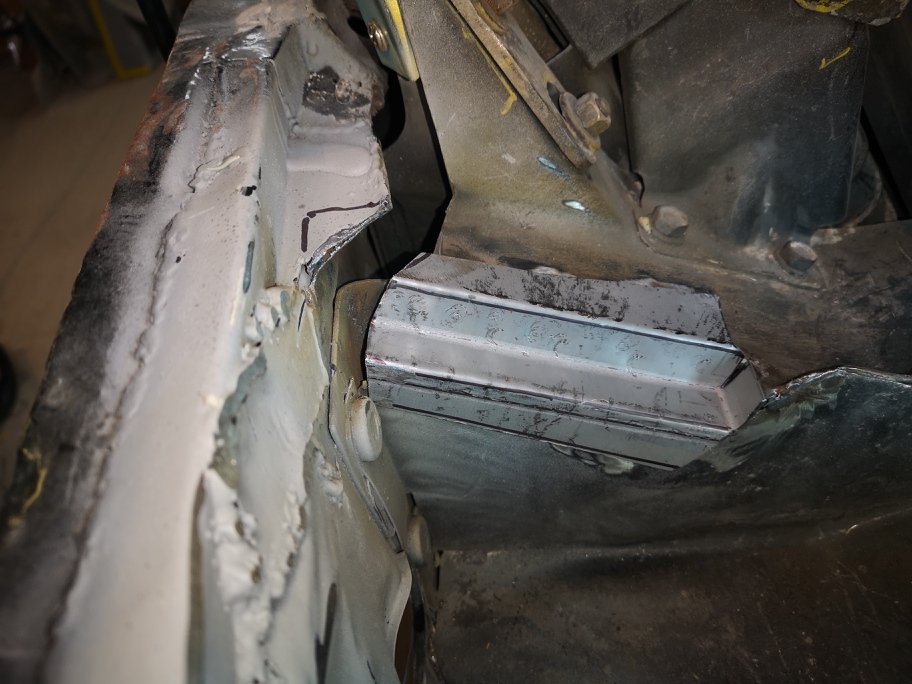
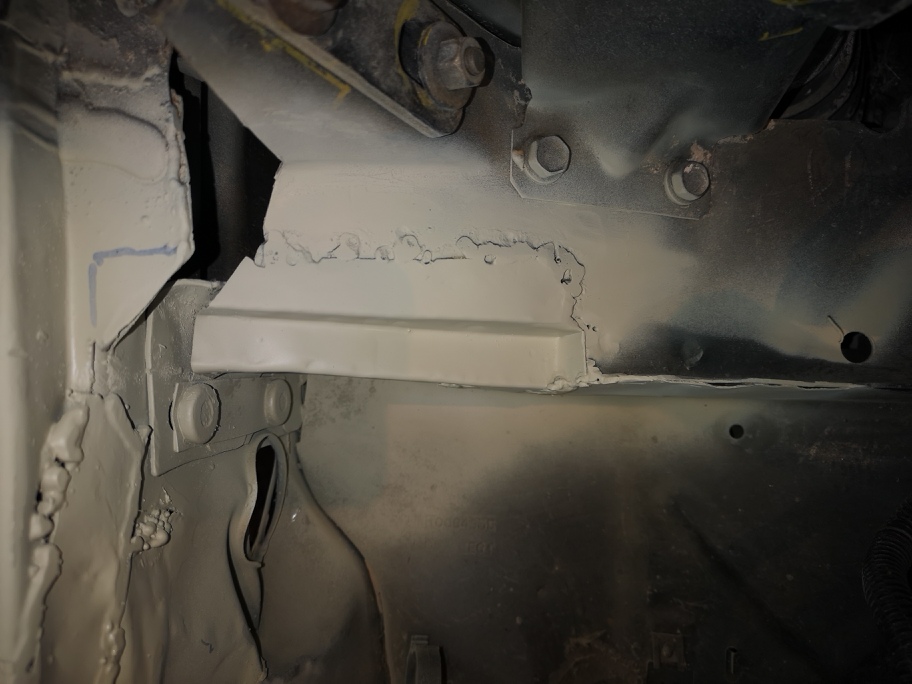
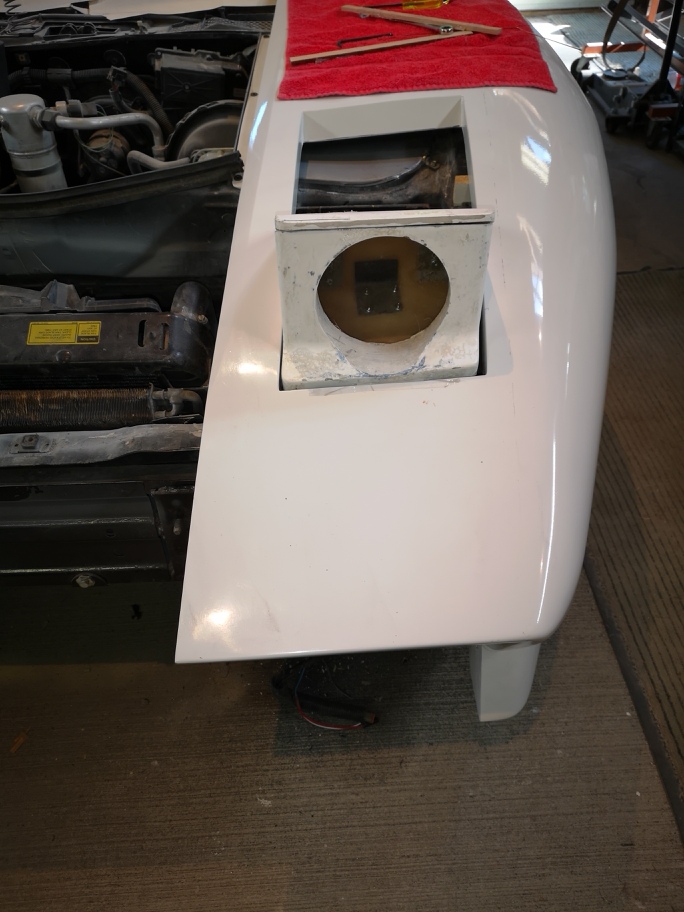
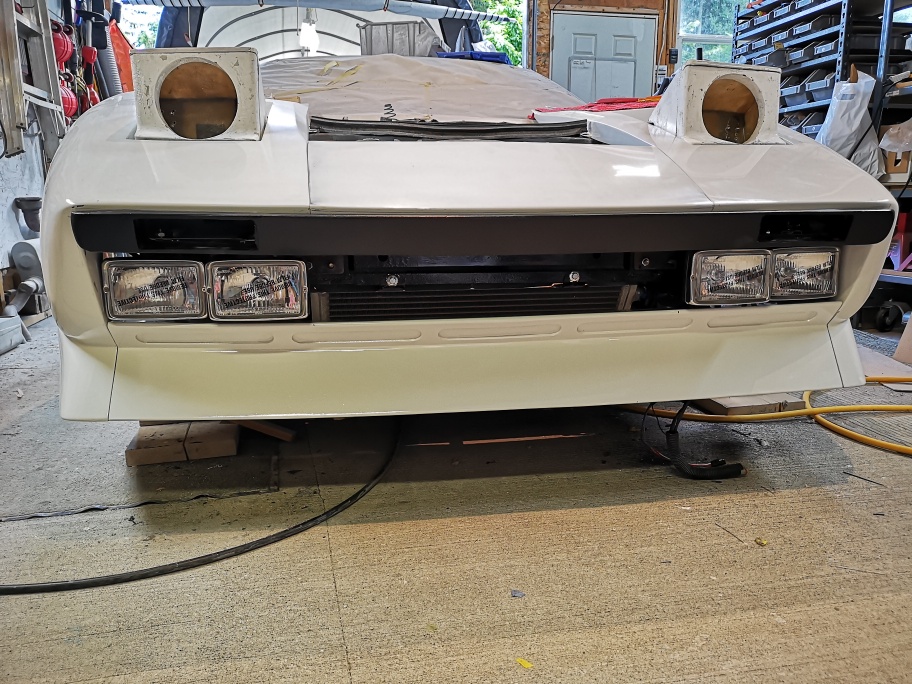
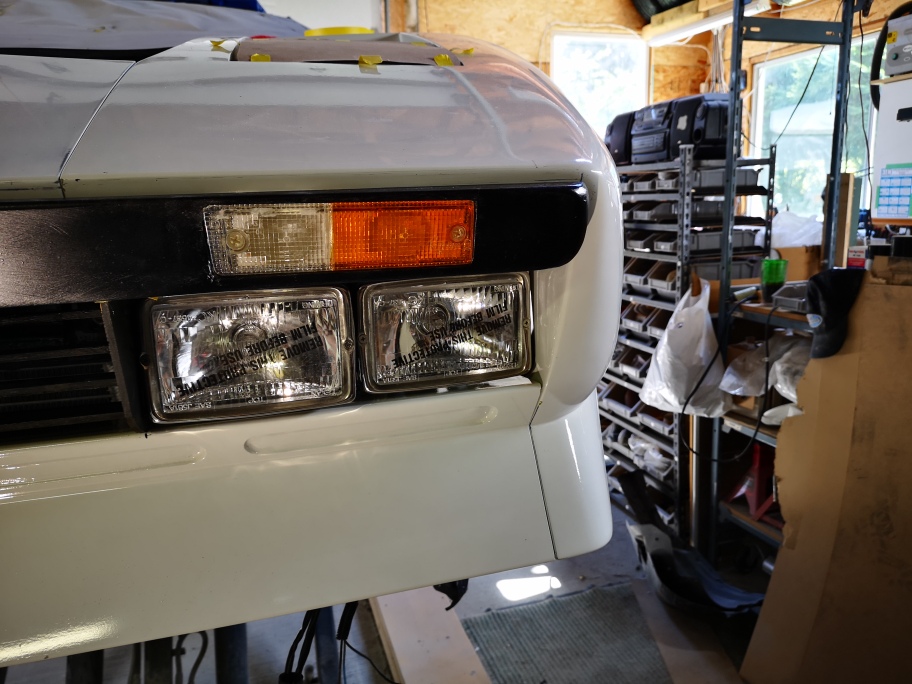
The last update was awhile ago So this will bring everyone up to date. I have been working on getting the headlight buckets cleaned up and installed. The problem I ran into is the build has been going on for so long now I'm starting to forget how things go back together , or is that old age starting to creep up on me So I ended up having to get ahold of Don O. and take look at his setup That he designed and built . This was the first time I've had a opportunity to actually work with the headlight buckets. “Don and I calculated that it’s been 6 years with a 3 year hiatuses during my move since I started the original 308 kit that morphed into a custom 288 GTO. THAT’S a long time WOW!” They were the first molds I actually made ,having made quite a few over the last while I have to say they are not the best, once I get the buckets cleaned up I'll have to make new molds. As this was the first time Installing the buckets I found I needed to make a couple more mods to the inner headlight area to accommodate the Front facias of the buckets. So out came the plasma cutter and welder. As I am cutting into the back structure of the bumpers I needed to make sure the inner welds were strong before welding in a fabricated plate.
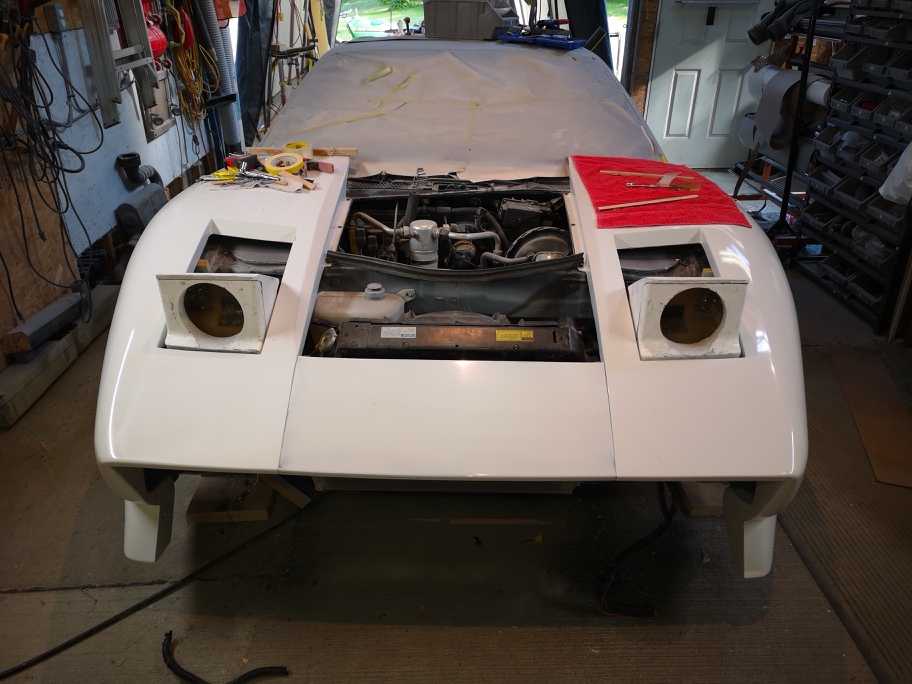
I finished the plate welds and work on installing the buckets ,they still need to be cleaned up but turned out ok. the real GTO look will come with the dual driving lights in the grill
Thanks for stopping by , stay safe
Wayne
[This message has been edited by dobie1 (edited 07-05-2020).]
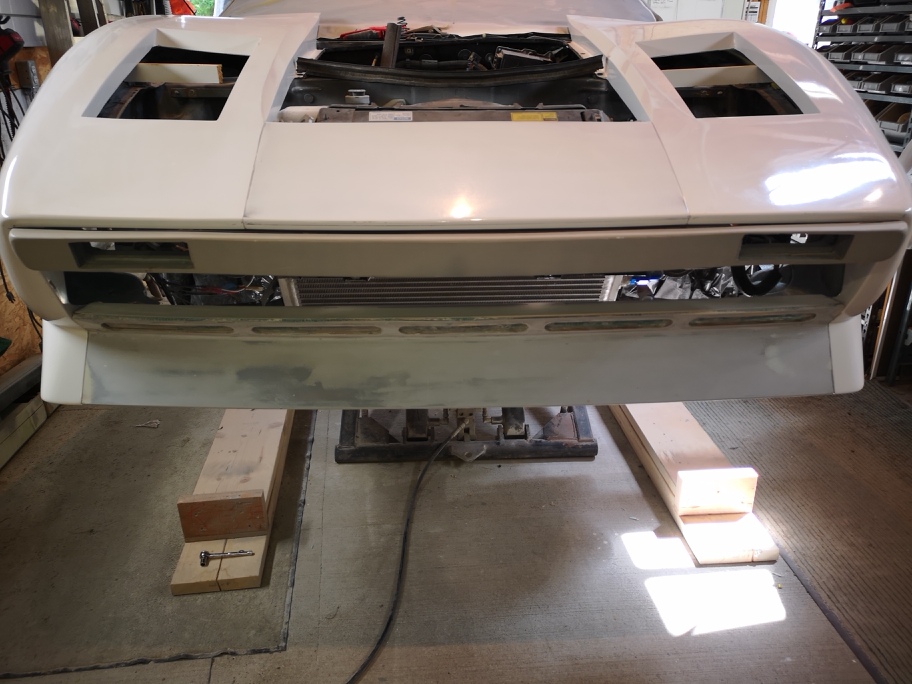
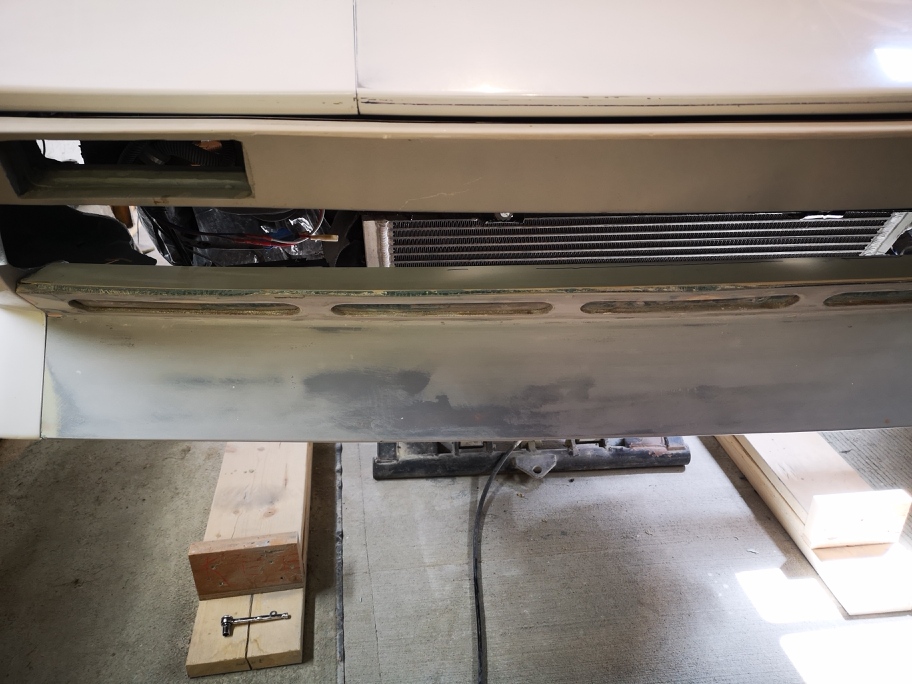
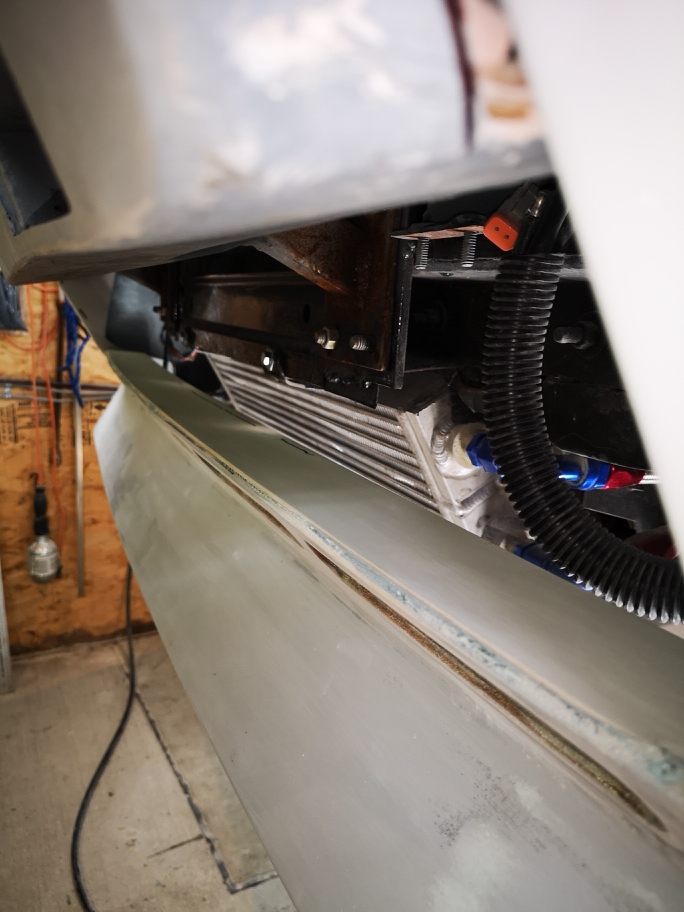
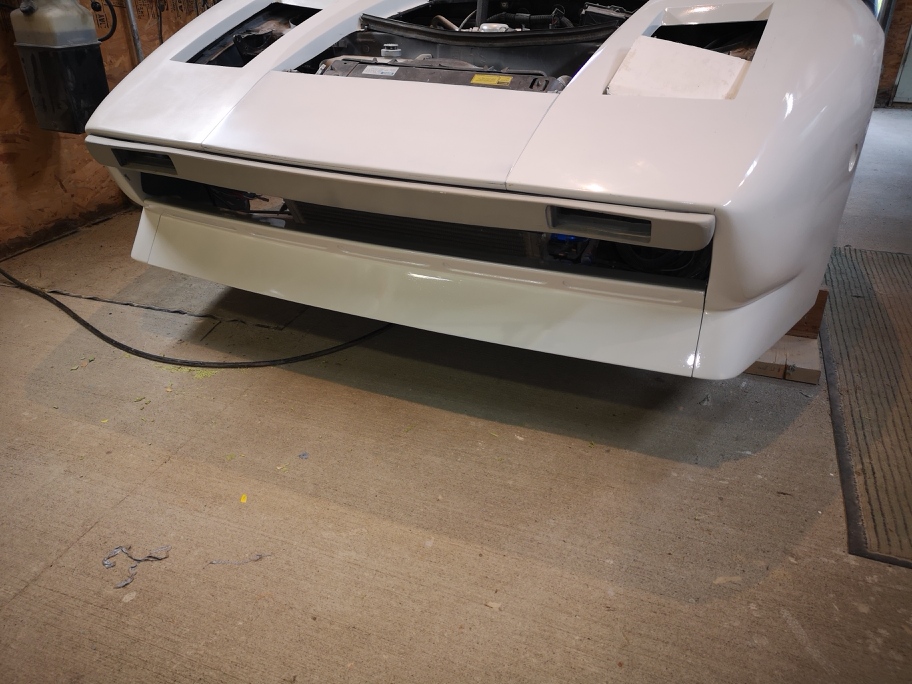
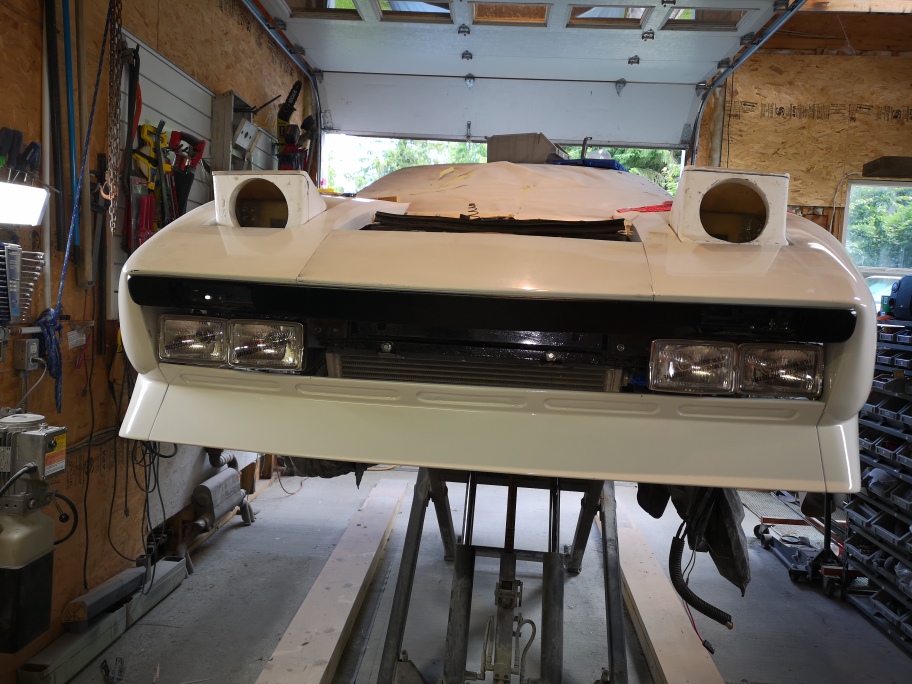
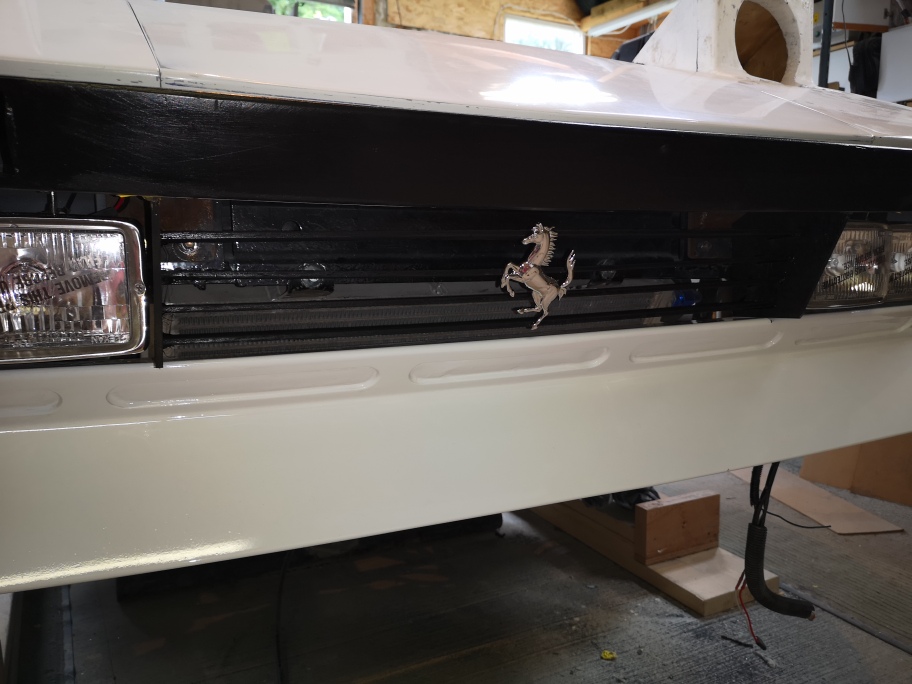
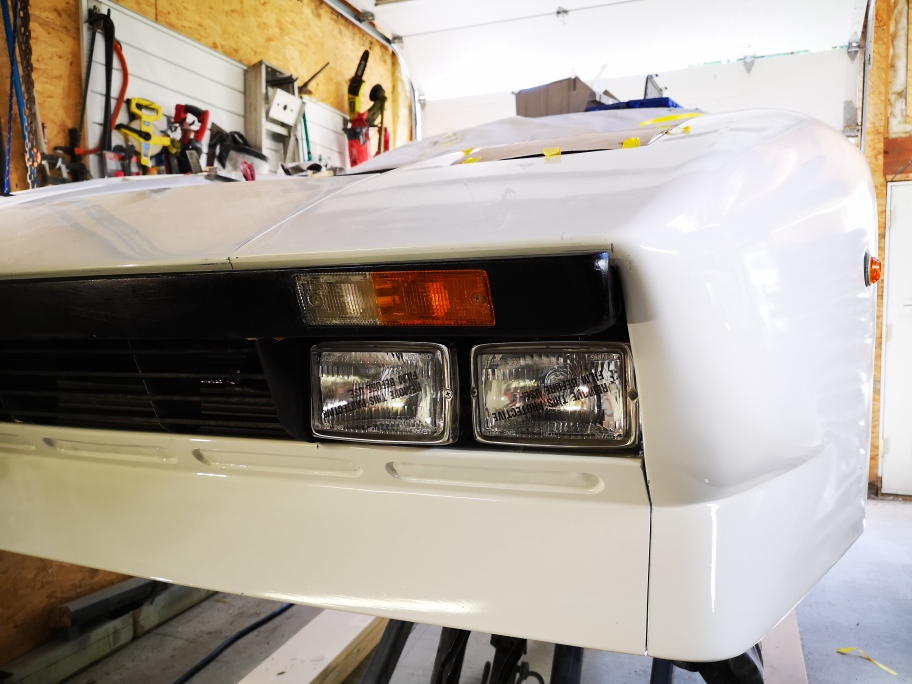
I worked on the bumper today to get all the lines and fit finished , I also installed the driving lights to get the measurements to fabricate the front grill. The driving lights are polished stainless steel but I'm thinking I am going to paint them flat or satin black.
Whats everyone think black or chrome?
stay safe Wayne
[This message has been edited by dobie1 (edited 07-06-2020).]
Well, I just read every page of your build here, I get to be the first response.....about the headlights, if the car will be white, or yellow, keep them chrome,(polished stainless) if the car is red, or a dark color like gunmetal, go black. This is an awesome looking body. Any ideas yet on what one of these body kits would cost someone to purchase? I have a Fiero on the way, it's either an 88 Mera(don't think so) or a kit with a 328 GTB body, with emblems. I am not getting it for a while, because I have too many non running cars on the property already, and the guy selling it just lost his father, he's a friend, and I don't want to talk to him with car questions when he is hurting. Glad to see you haven't given up, this is a long haul. makes me think I have too many projects, I may have to narrow my focus. Frank
Well, I just read every page of your build here, I get to be the first response.....about the headlights, if the car will be white, or yellow, keep them chrome,(polished stainless) if the car is red, or a dark color like gunmetal, go black. This is an awesome looking body. Any ideas yet on what one of these body kits would cost someone to purchase? I have a Fiero on the way, it's either an 88 Mera(don't think so) or a kit with a 328 GTB body, with emblems. I am not getting it for a while, because I have too many non running cars on the property already, and the guy selling it just lost his father, he's a friend, and I don't want to talk to him with car questions when he is hurting. Glad to see you haven't given up, this is a long haul. makes me think I have too many projects, I may have to narrow my focus. Frank
Hi Frank thanks for taking the time to catch up on the build and I'm glad you like it. I appreciate your input on the chrome driving lights.
send me a PM with your email address and we can chat About the kits.
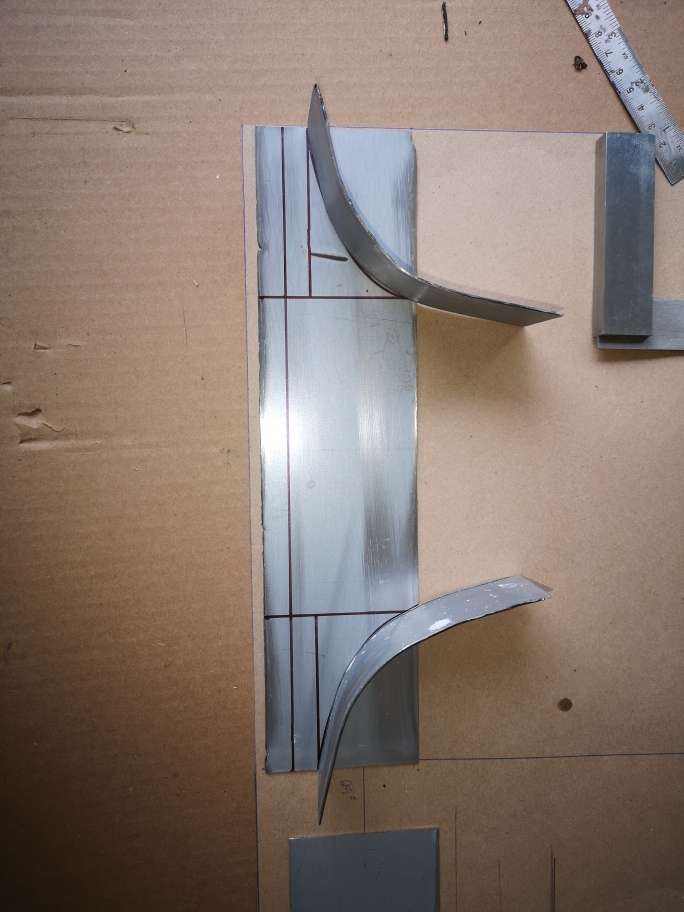
A bit of a update , I got the final dimensions for the front grill and built one from wood to check everything before building one from aluminum. I have the patterns now so will start cutting the parts out. and tig them up.
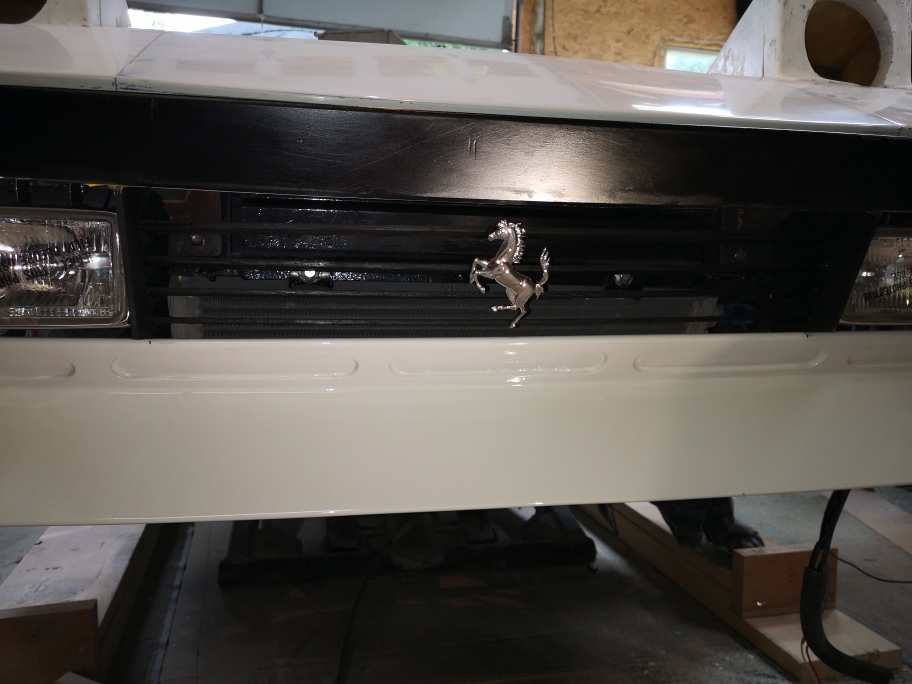
The car is definitely going to be red! White is ok but just doesn’t Do it for me. I spoke with my Auto body painter Neighbour and now have the process and product to paint the black pieces on the car . I find the existing pieces I’ve painted in POR 15 although very strong is to shiny I don’t want the radiator shroud and bumper steel showing through the Grill. I could go flat black but he recommends hot rod black with has a satin finish.
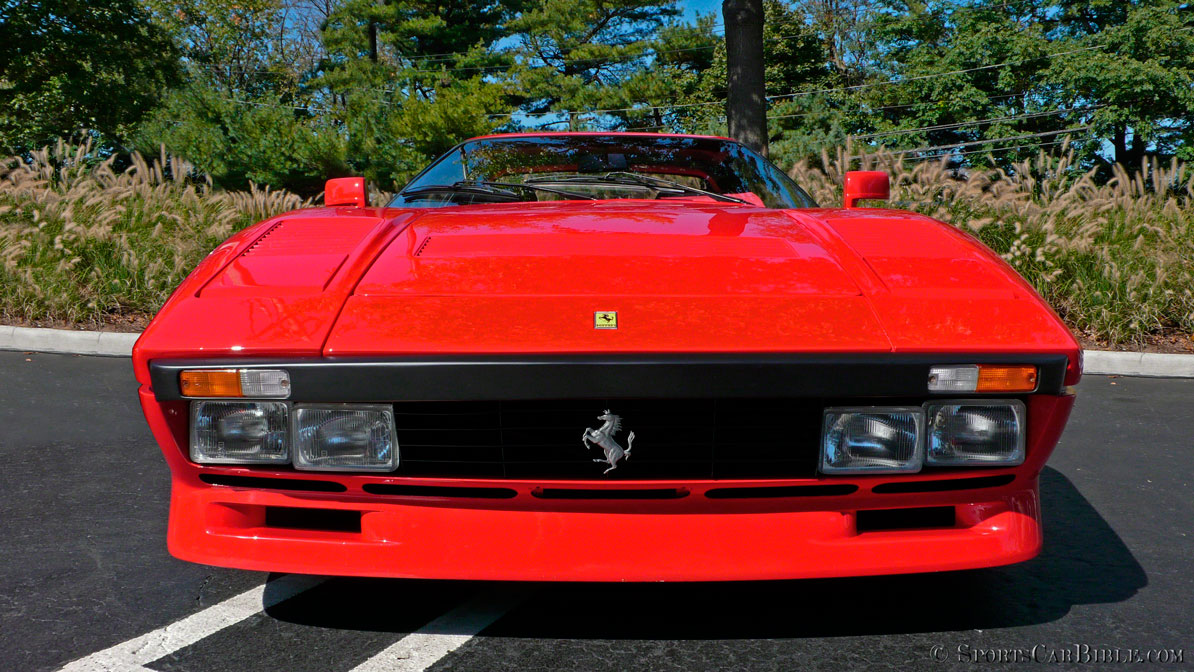
Here is the final look we are going for ,I'll cut the spoiler/brake vents in after molding.
Here is the grill in wood
making sure the forward protrusion of the grill matches the spoiler curve.
Its difficult to actually see the grill
thanks for visiting Wayne
[This message has been edited by dobie1 (edited 07-10-2020).]
I been going in a few different directions over the last few days , I got the fender marker lights installed the recess worked out great gives a nice finished look.
I also rechecked the fitment of the bumper lights I need to make a couple adjustments but worked out great.
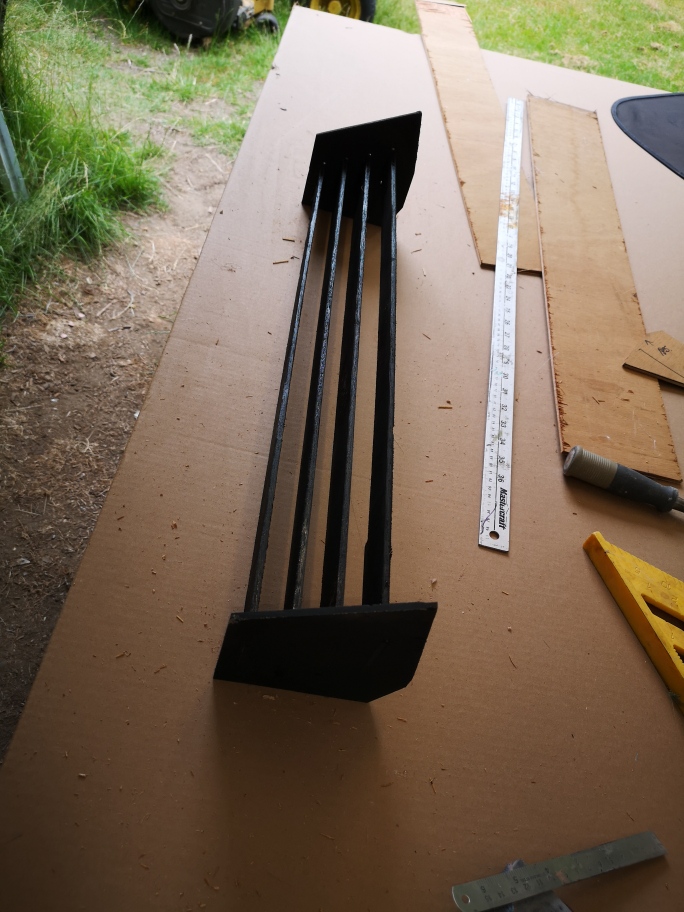
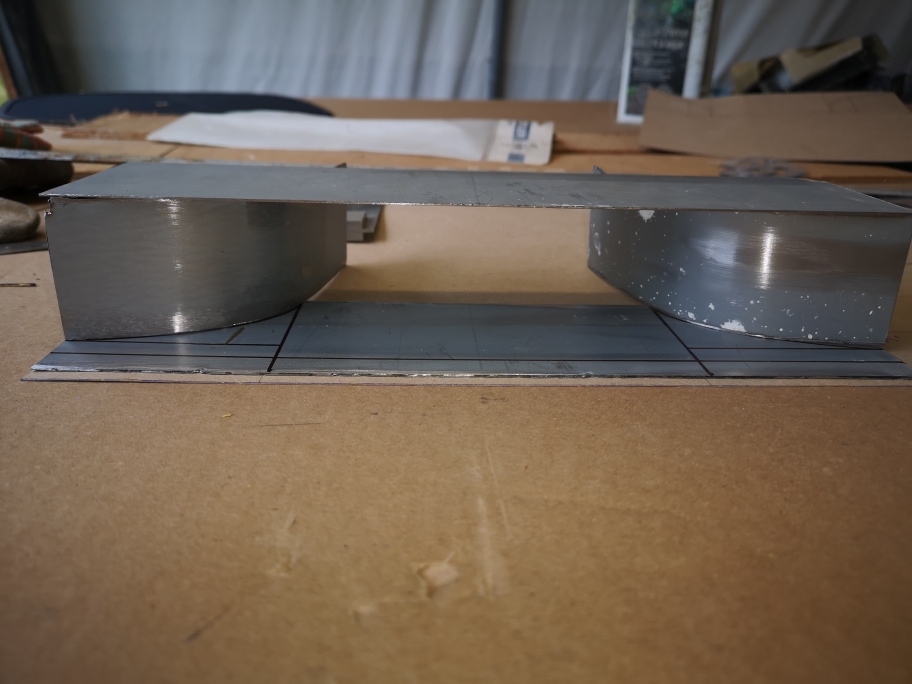
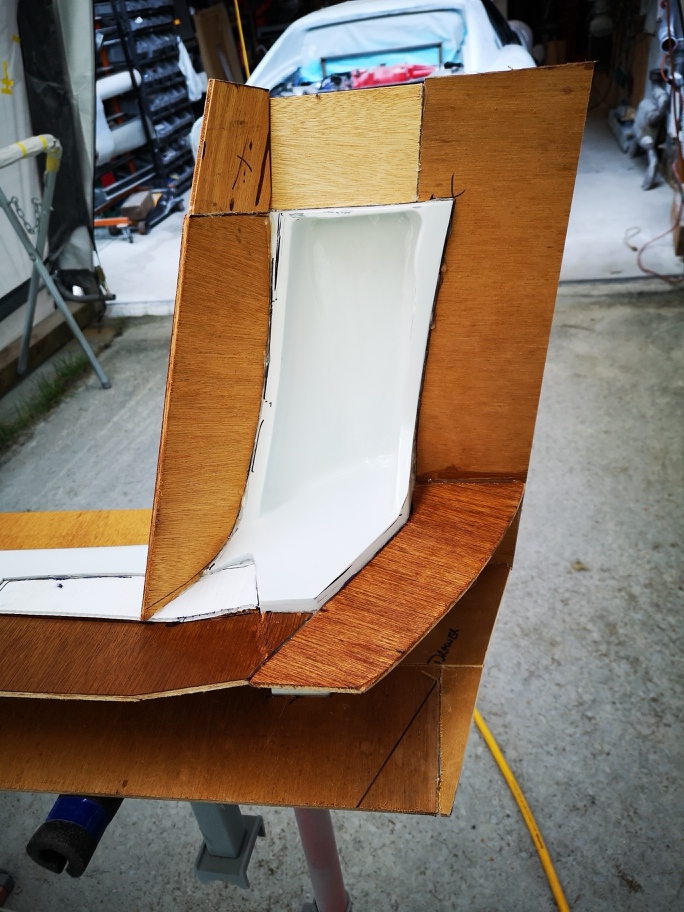
I started to build the spoiler brake vent mold for the part that will be installed into the spoiler once they come out of the mold. a lot of compound curves and working with a 29 degree angle As well as maintaining the parallel of the spoiler really makes the designing a challenge . Don O.came over today with his bead roller and the shrinker / stretcher I’ll use them to finish off a couple trunk covers I built a couple weeks ago as well as work on the compound curves on the spoiler brake vent.
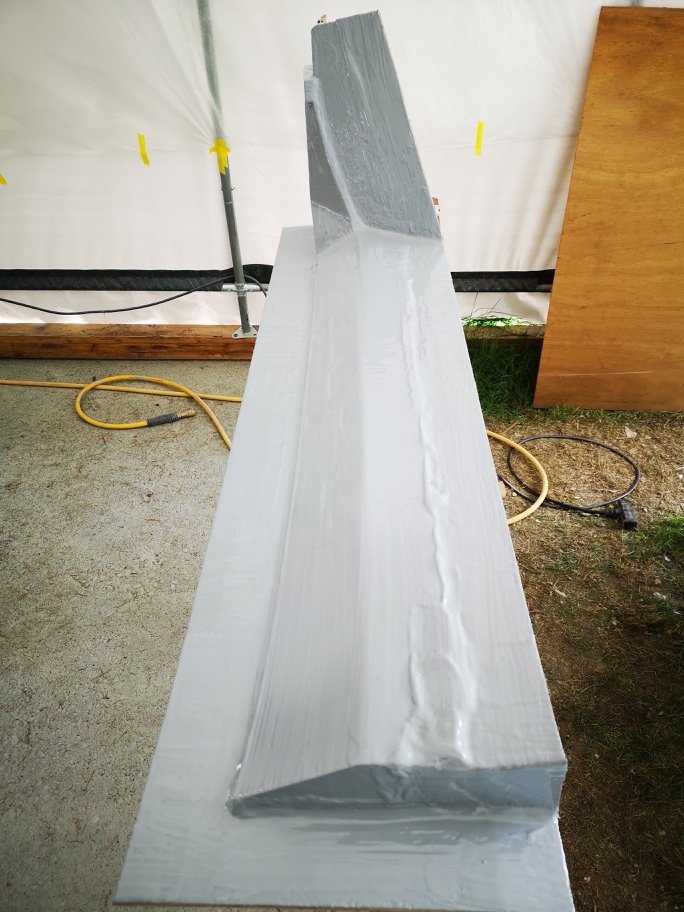
this shows bit of the designing challenge. this doesn't have it yet but there is a 29 degree rake in the 2 inside parts of the vent.
Stay safe everyone Wayne
[This message has been edited by dobie1 (edited 07-14-2020).]
"Real" or not, the 288GTO is one of the sexiest cars EVER built (short of maybe the Miura). I wish I had a fraction of your skill and patience. Dude, you ROCK.


 [/img]