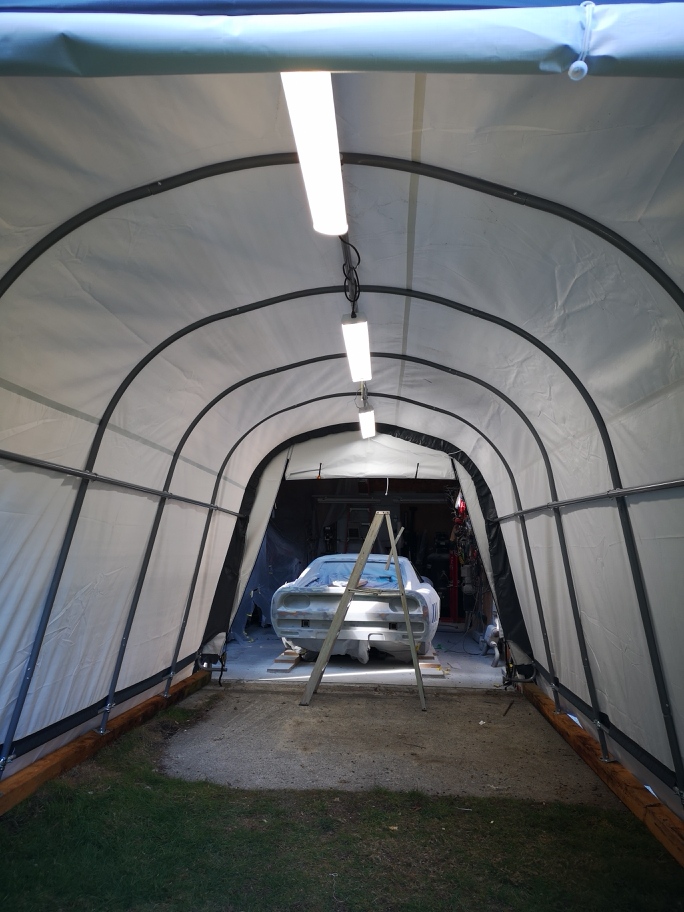
I have had a busy 10 days , my daughter had her second child a baby girl which makes for our second grandchild. We looked after my grandsons and their two dogs for 4 days so no work on the car. I got back to finishing the front spoiler which Im happy to say turned out great. A lot of what I'm doing is removing all the foam that was buried in the fibreglass shell. Everything I'm doing right now is preparing the parts for molding, and how there will attach to each other and the Fiero car frame. Hopefully you can follow my process with my pictures.
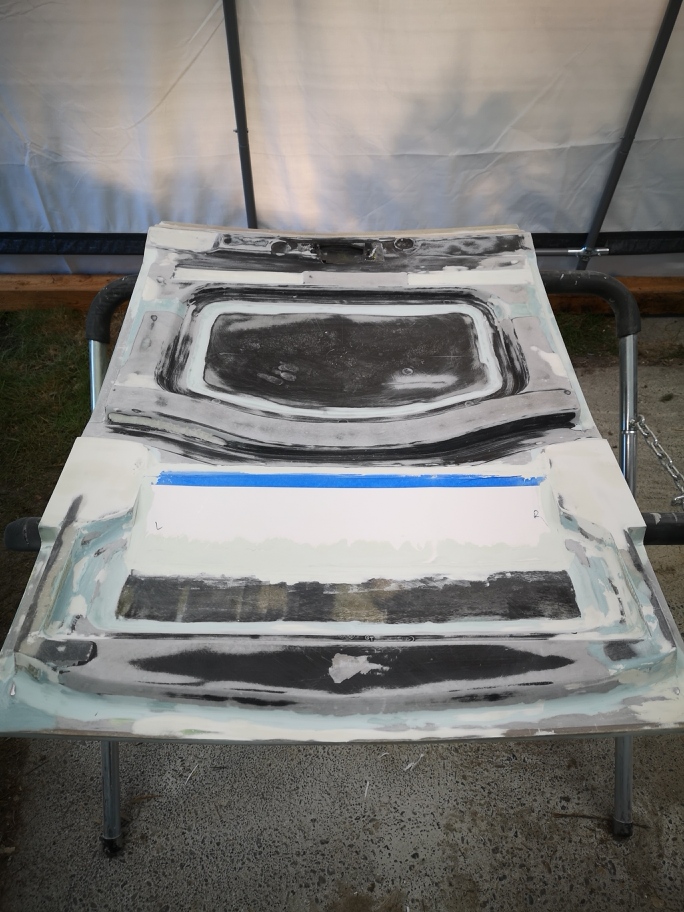
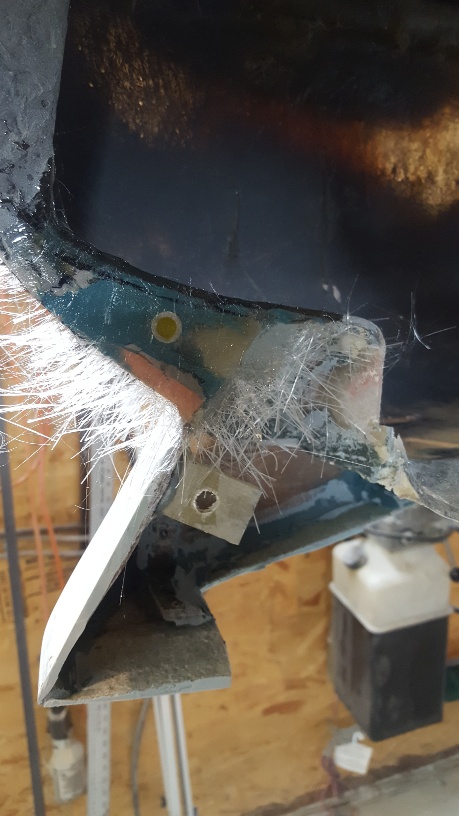
Here I'm filling in the area with core board the tape holds it in position while I bondo from behind
Once its all set I put a scim of bondo over it to flatten the piece ,I then put a layer of fibreglass to seal it. This will be a molded piece in the part.
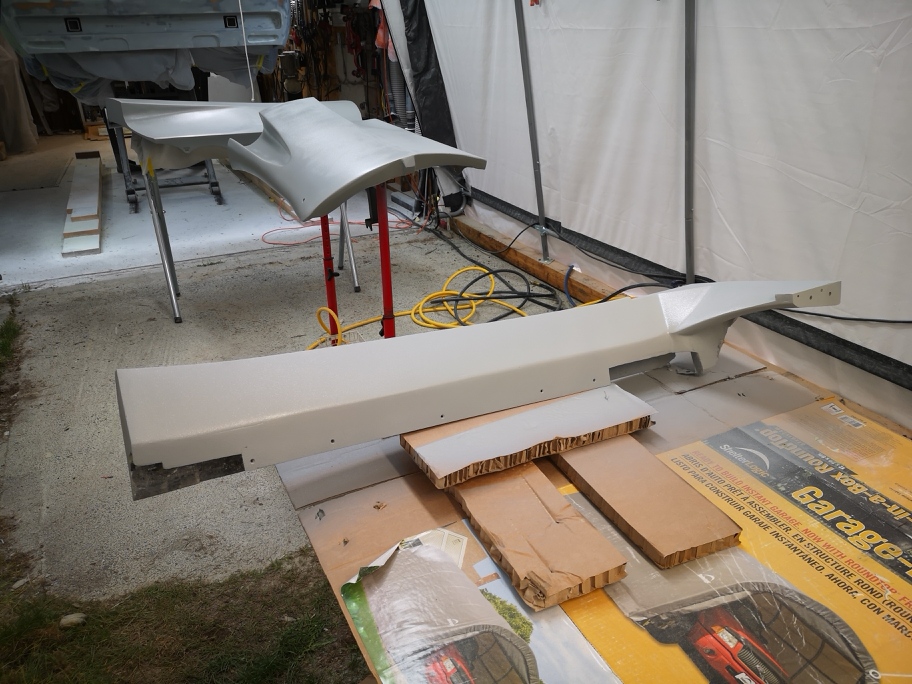
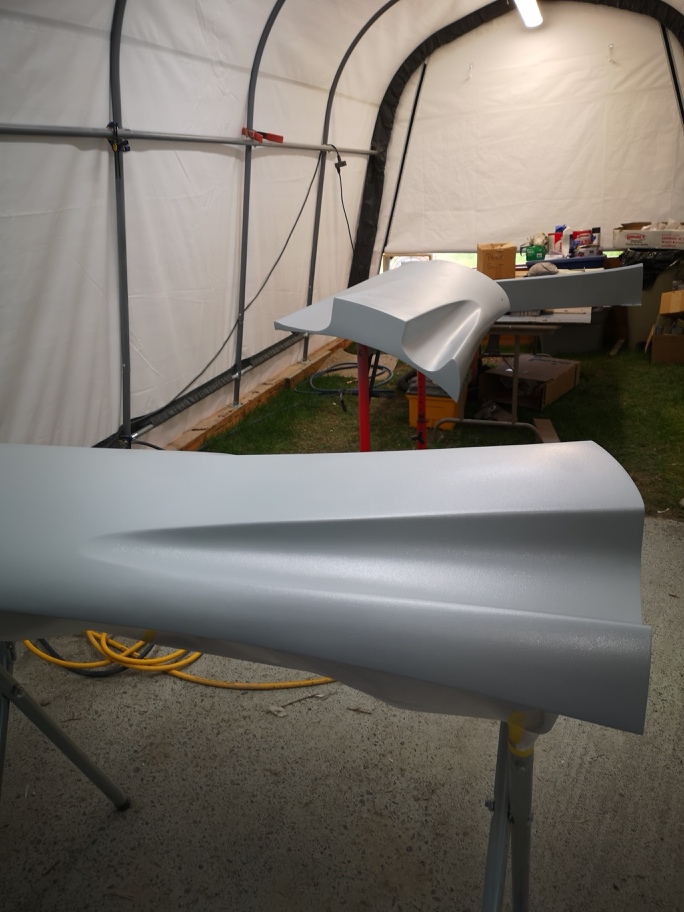
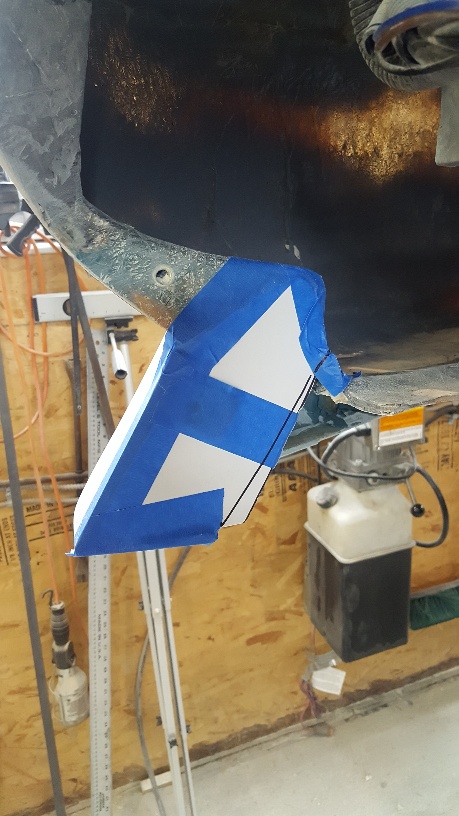
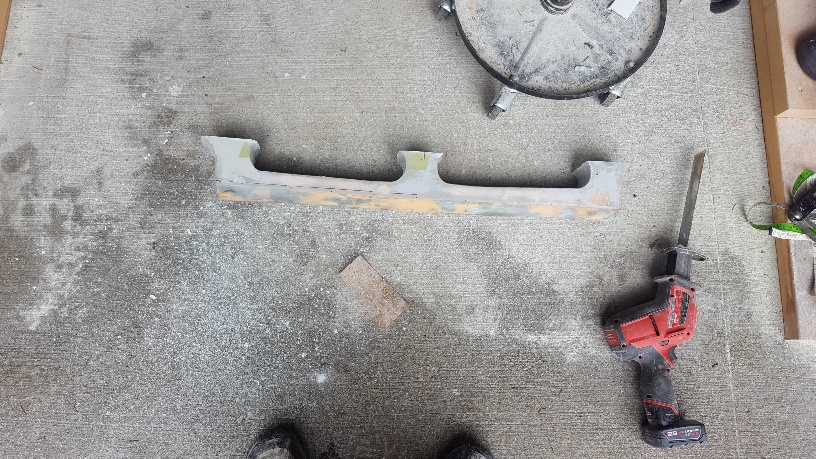
I also cut away a lot of the front spoiler getting it to what it really needs to look like and how it will attach to the fenders
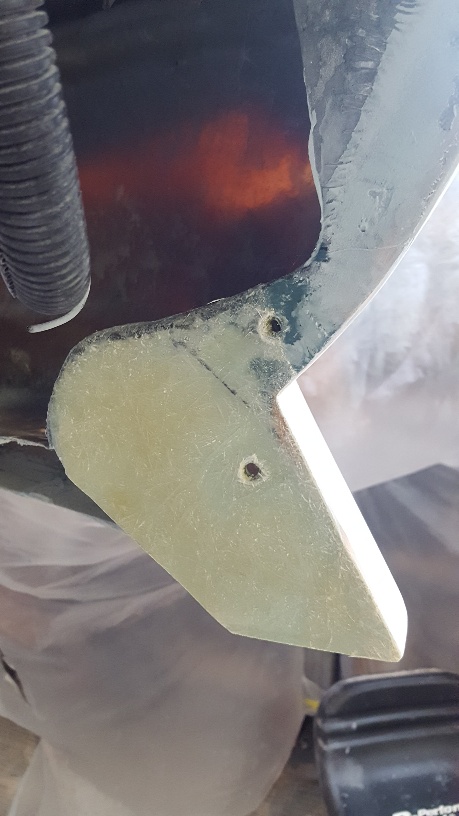
doing a similar fill as I did on the fenders with core board on the end caps
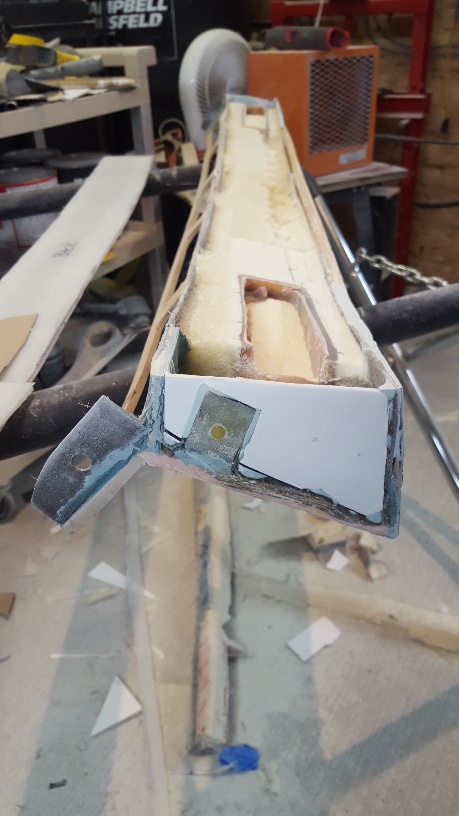
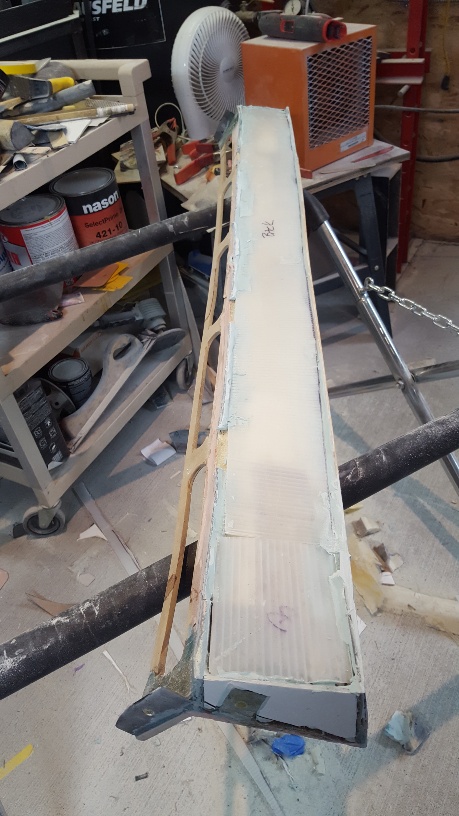
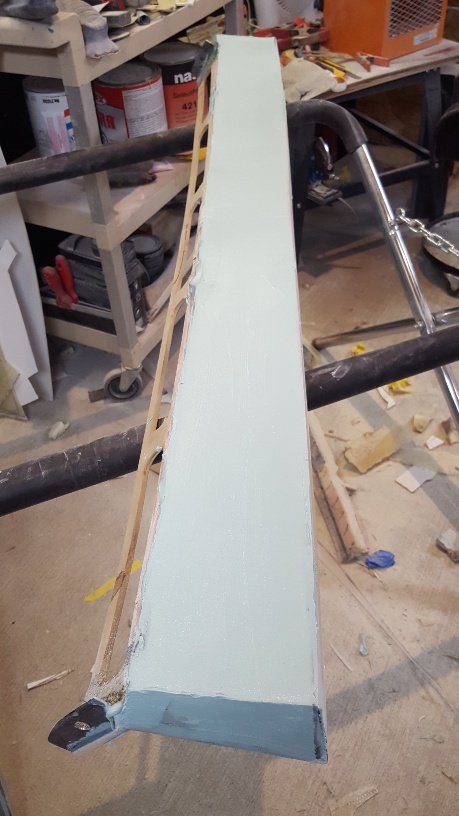
This shows the underside of the fenders and spoiler with the 2" lip that will be in the final part.
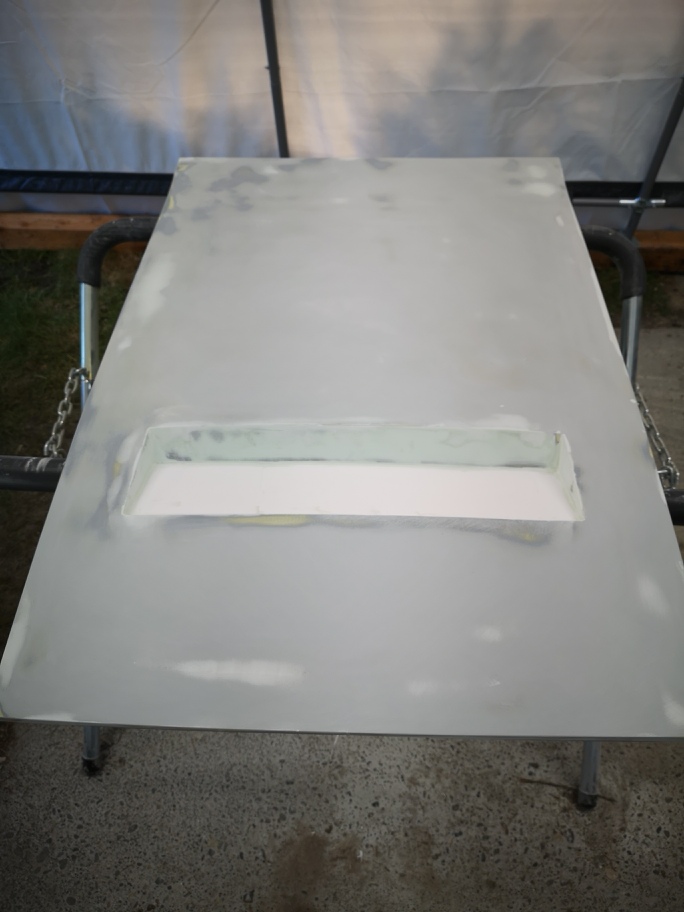
And this is the finished look
Thanks for looking. Wayne
[This message has been edited by dobie1 (edited 01-23-2020).]
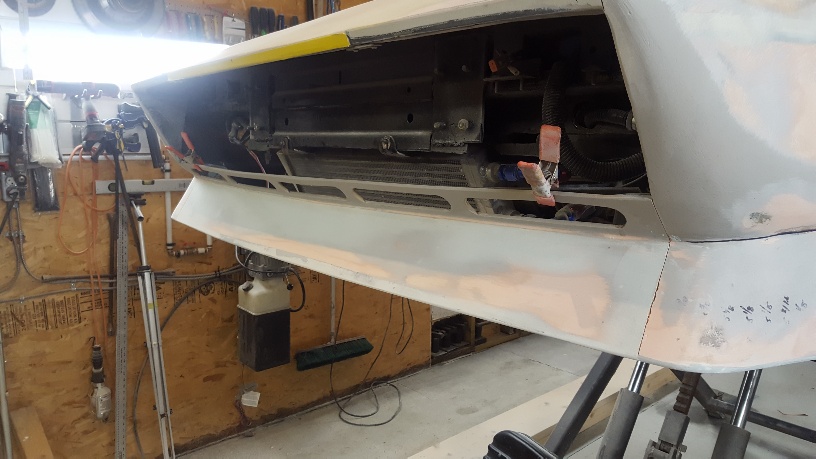
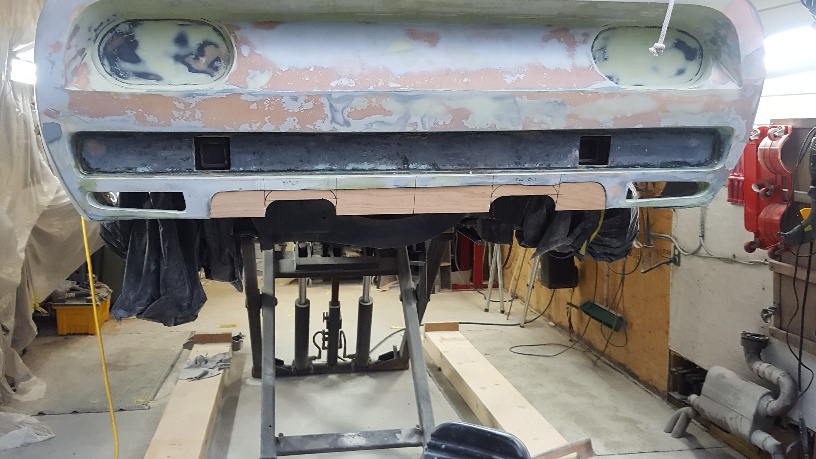
I was back at it again today moving onto the back end to do a mod for the new exhaust I want to install to quiet the 3800 down. I picked up a high performance BMW stainless steel muffler that I'm going to modify to fit my application.
I had to cut away some more of the trunk to make room for the muffler , I got to use my plasma cutter I got last year sure cuts like butter.
There is a difference between what I had originally built and the exit of the new exhaust so I needed to modify the rear valance to accommodate the narrower exhaust.
I'll finish it up tomorrow, I'm hoping that once the muffler is installed I will design a diffuser along the back to totally hide the muffler and engine cradle.
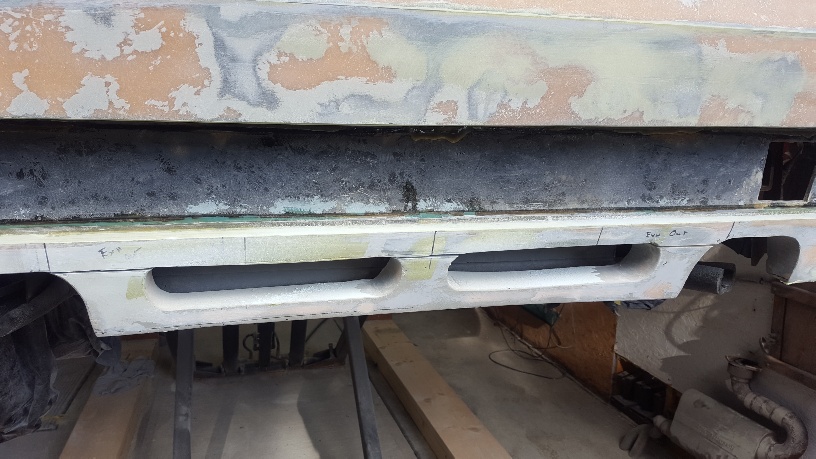
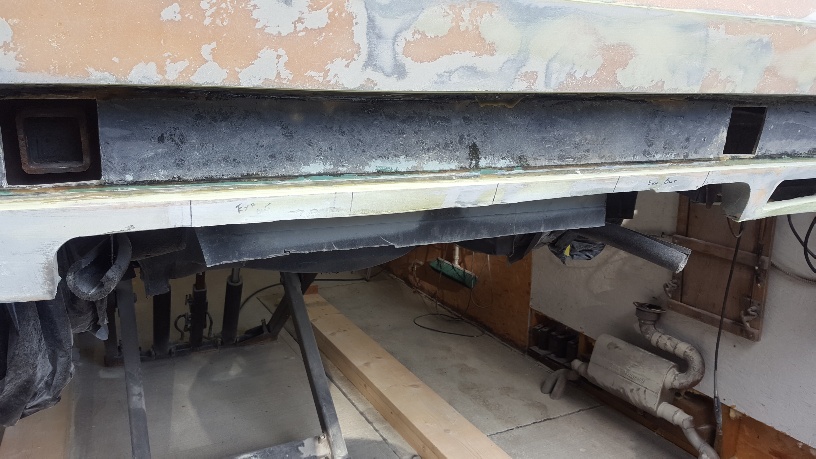
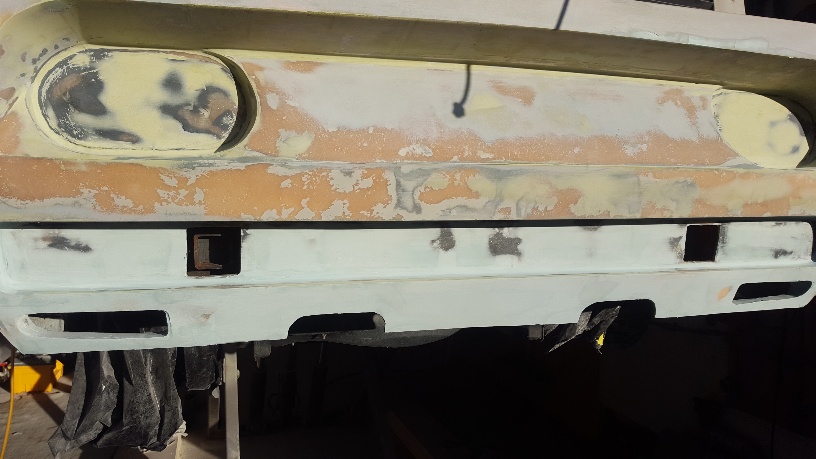
I finished up the modification to the lower rear valance , I also made a deeper cut for the exhaust tips after taking some further measurements. I still need to come up with a lower diffuser design , It will come to me just taking bit longer than normal.
Anyone have any ideas??
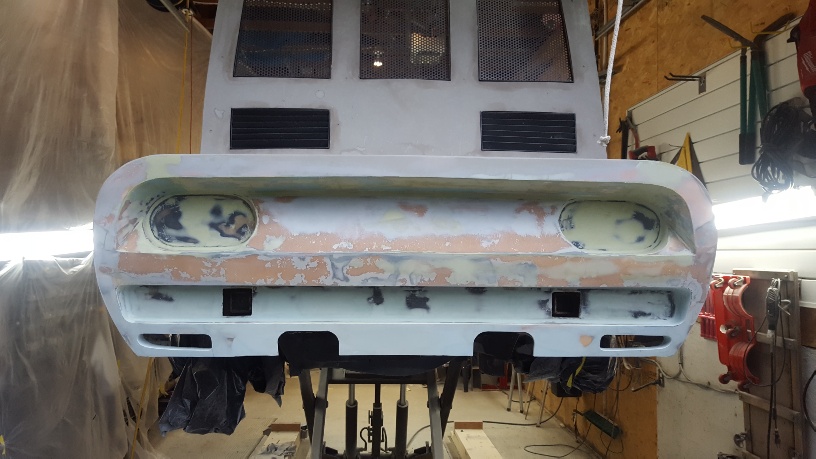
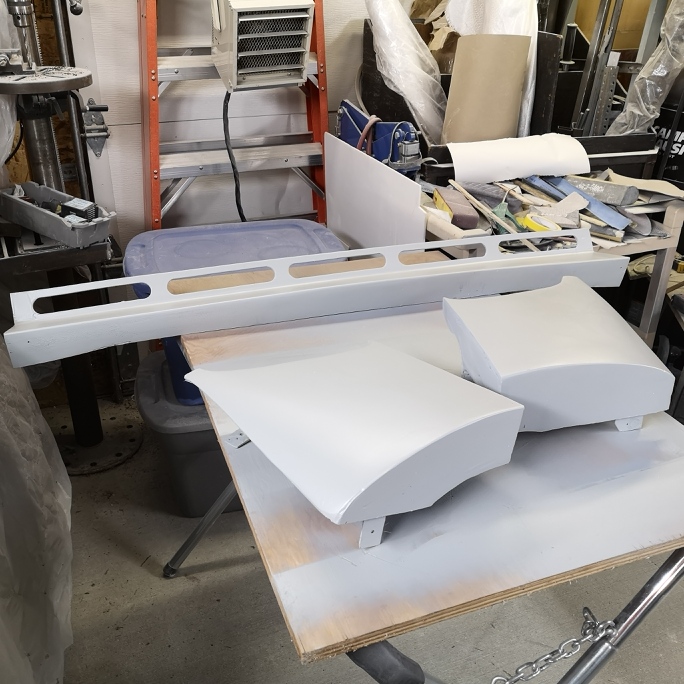
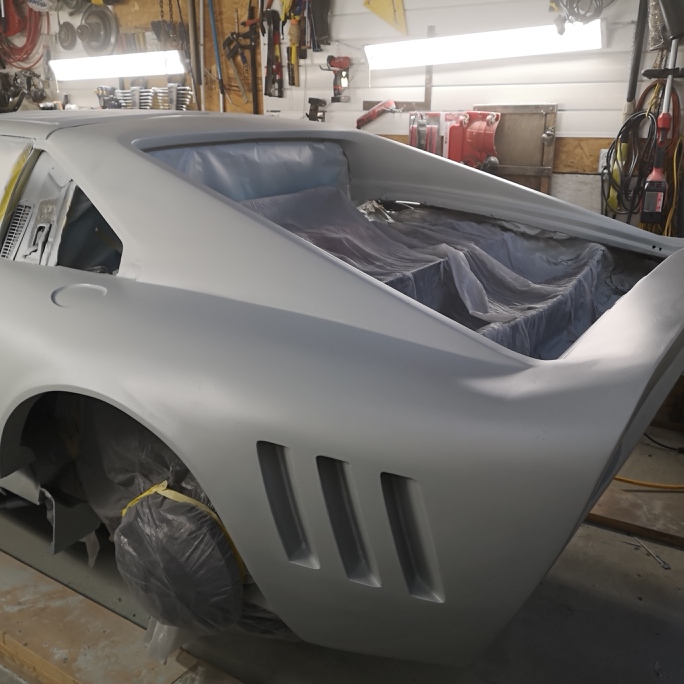
I never posted to a previous modification I made to the bumper area. I found the recess to be too deep almost 5"s making molding much more problematic to release. I cut the area out and moved it forward 3 "s and reattached it, I rounded out all the seams to make mold release easier. Its all hidden behind the the bumpers but it's just one more area completed.
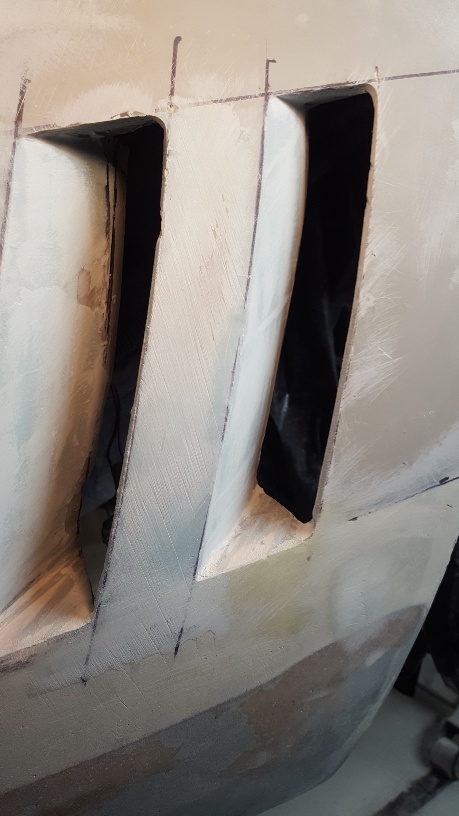
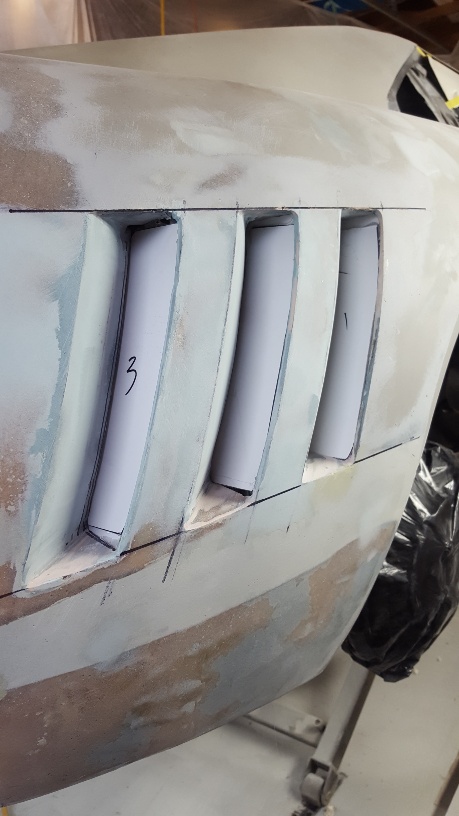
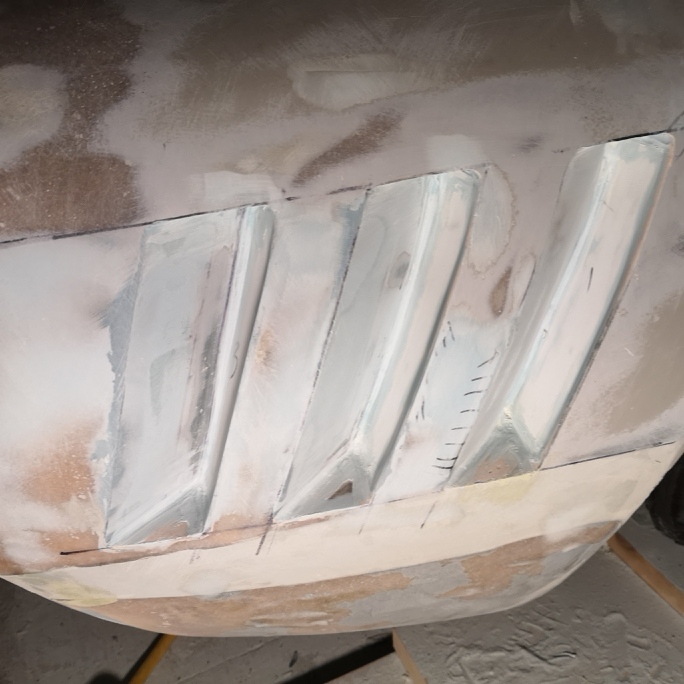
Excitement builds !!! I'm at last onto the last part of the car finishing the rear quarters, the Gills I think may take a bit of work to finish but it's probably one of the most iconic designs built into the car so needs to be done right.
Thanks for looking. Wayne
[This message has been edited by dobie1 (edited 01-29-2020).]
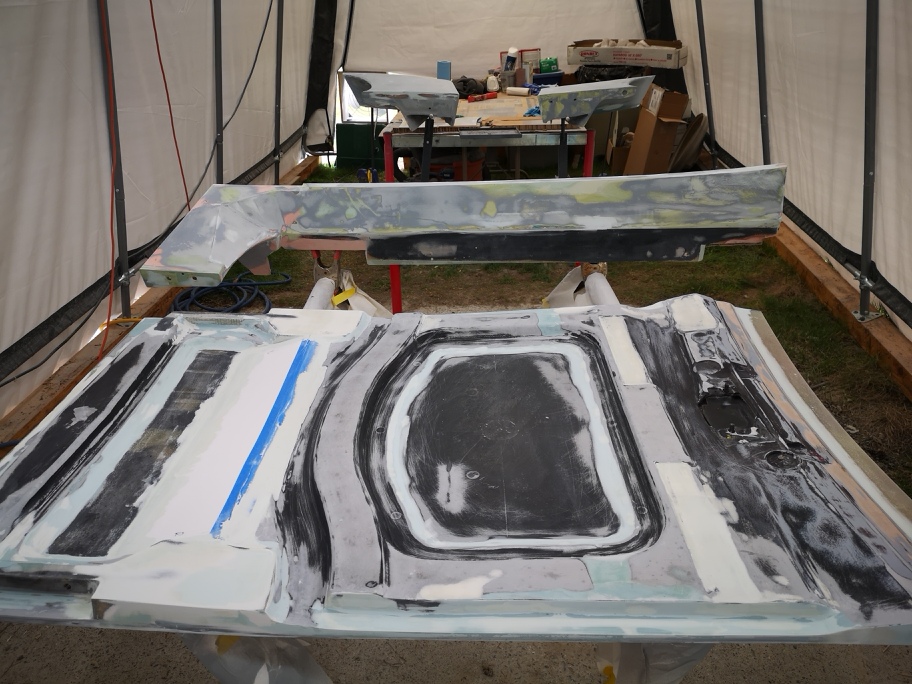
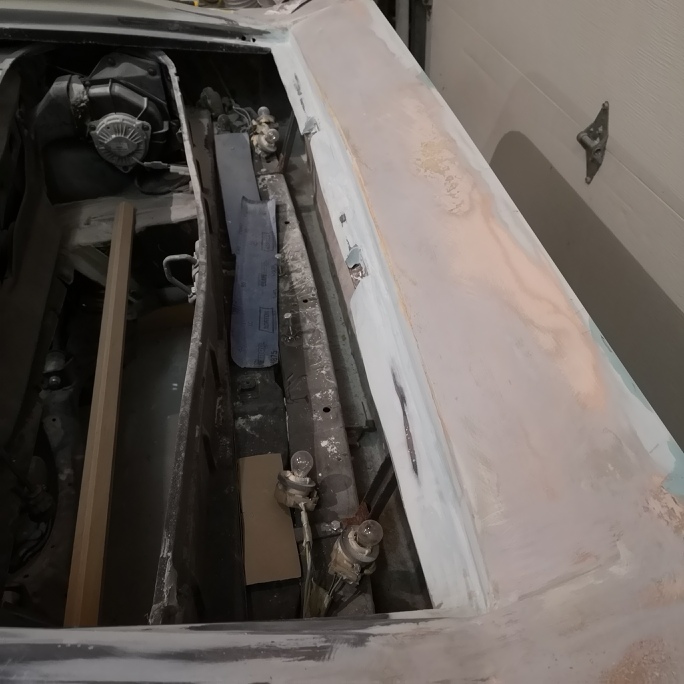
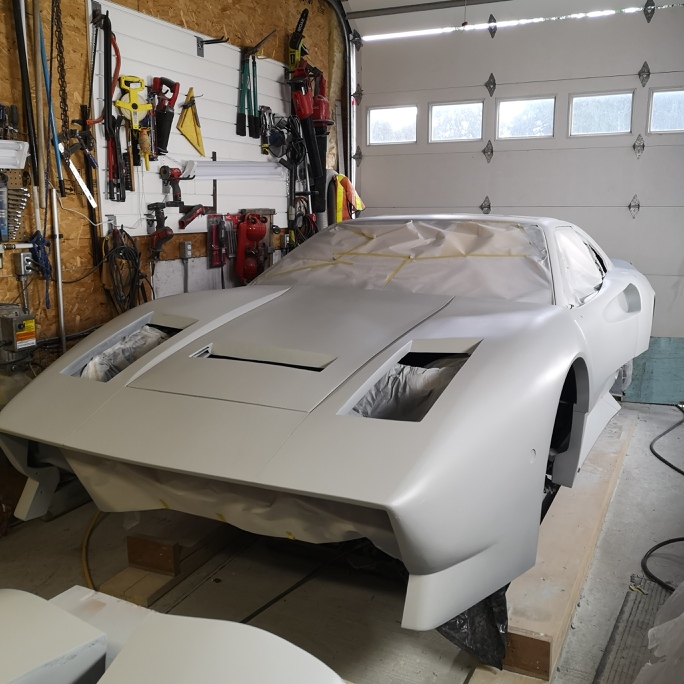
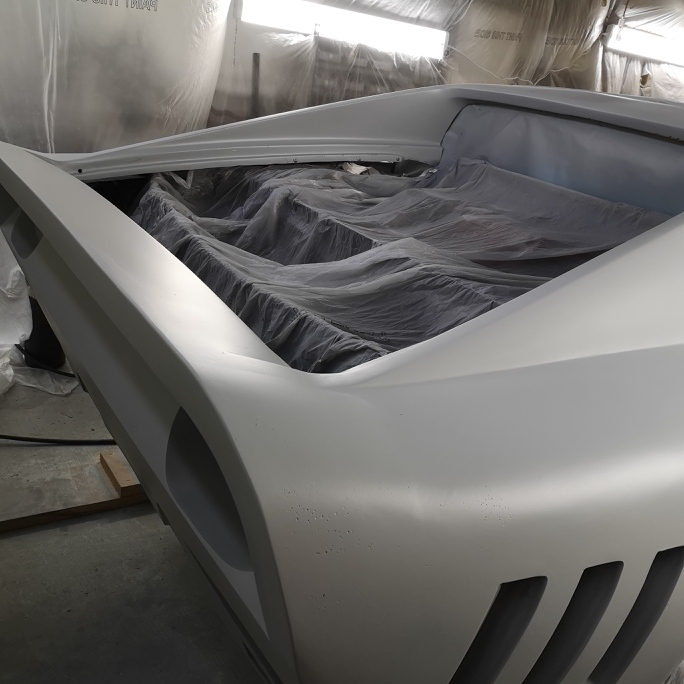
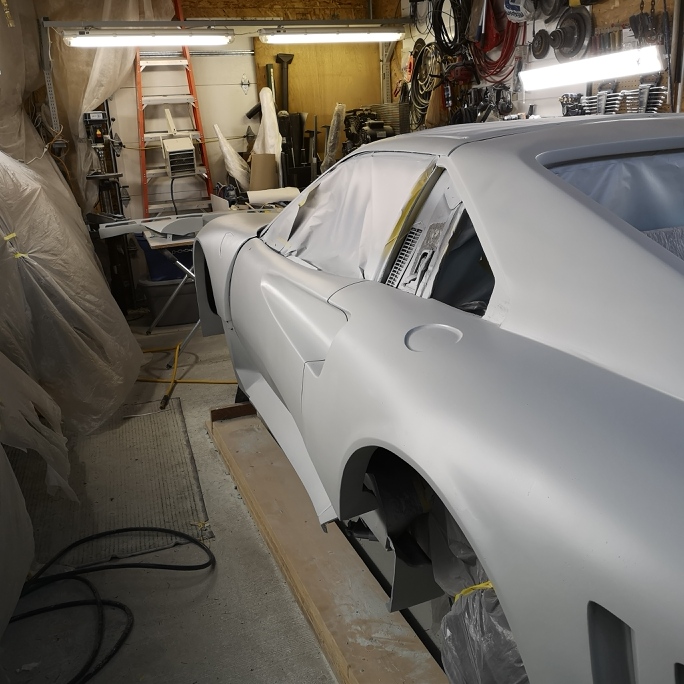
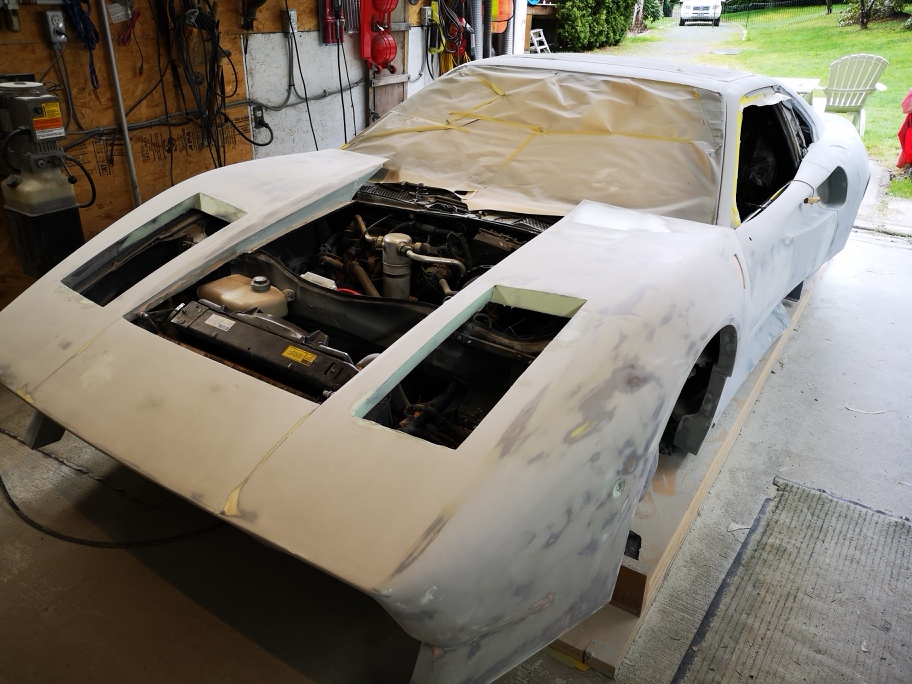
The build is moving along even with the weather and temps doing their best to slow everything to a crawl. I've been putting a lot of time into the side Gills , I found that I had made a mistake in my design. After some research I have now corrected both sides to match the OEM 288. I also have closed off the openings now to allow for building the molds. I also cleaned up the rear spoiler tradition from the engine compartment to the beginning of the spoiler. I have probably a weeks worth of finish sanding and I'll spray the entire car with epoxy sealer primer and then a heavy coat of slick sand to do final sand to 600 grit preparing for paint. enjoy
Wayne
[This message has been edited by dobie1 (edited 02-05-2020).]
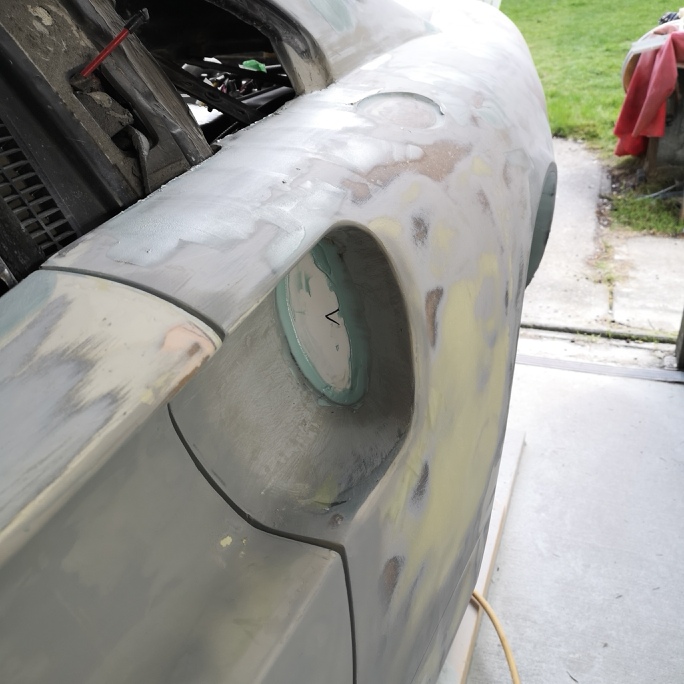
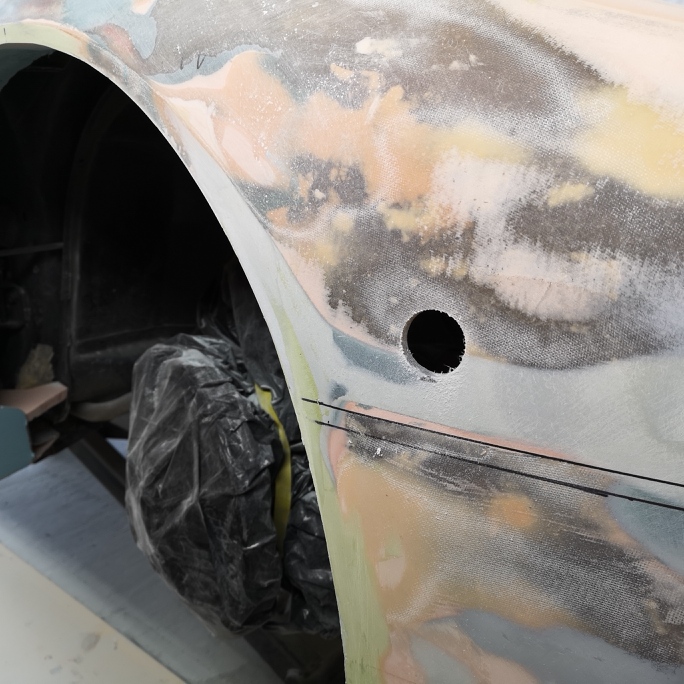
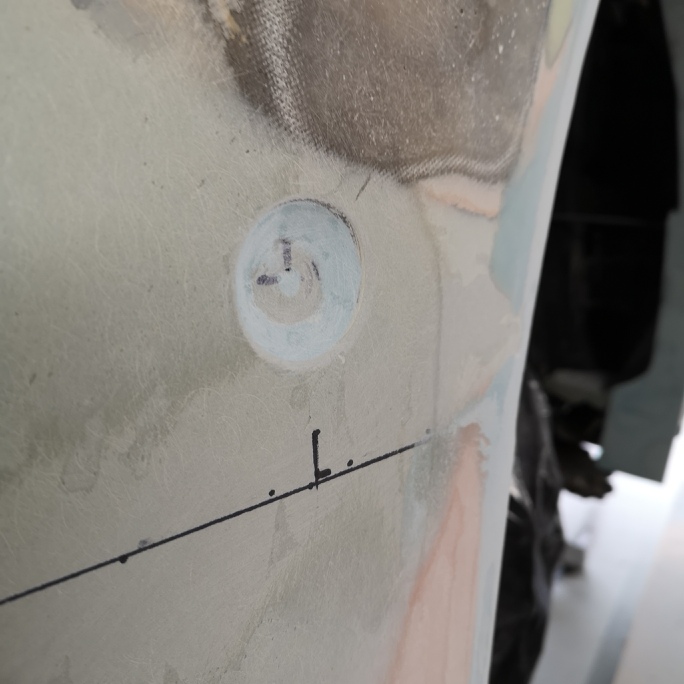
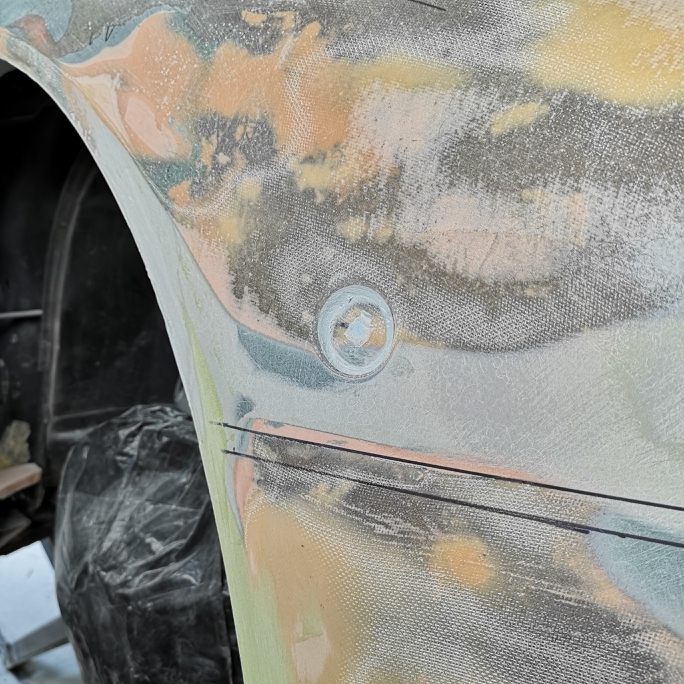
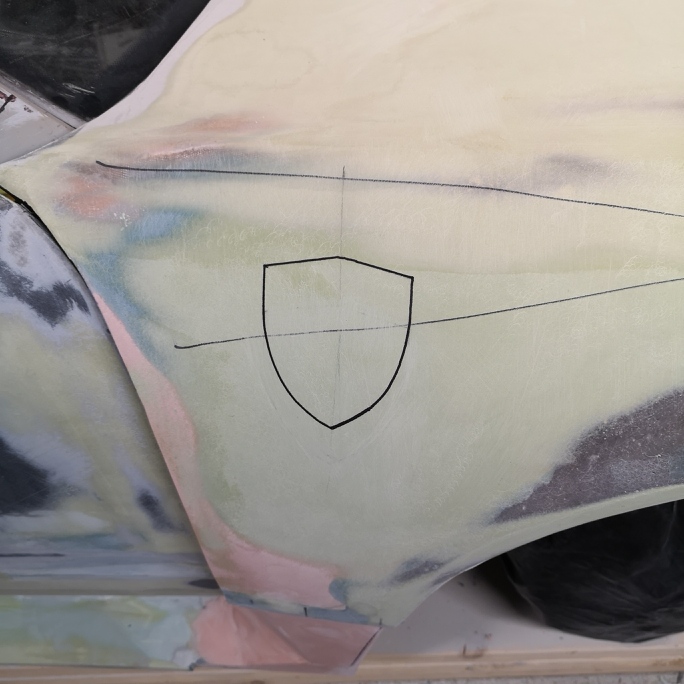
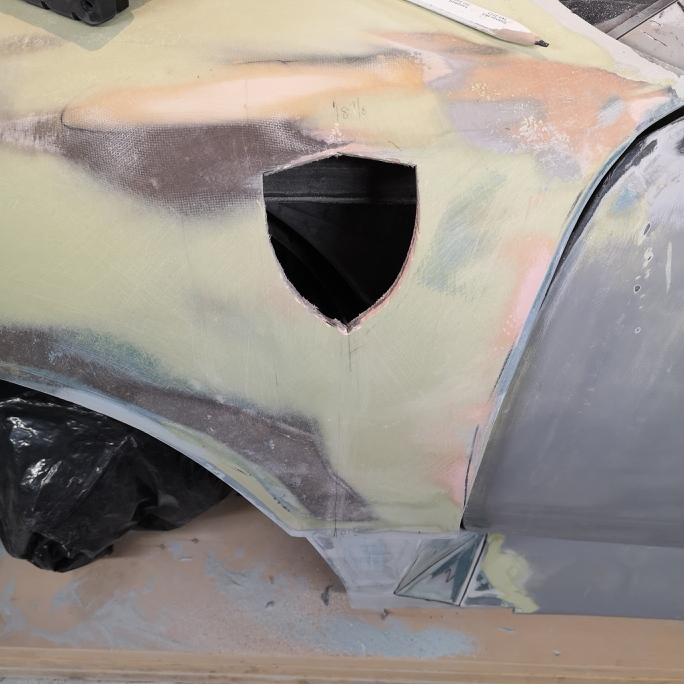
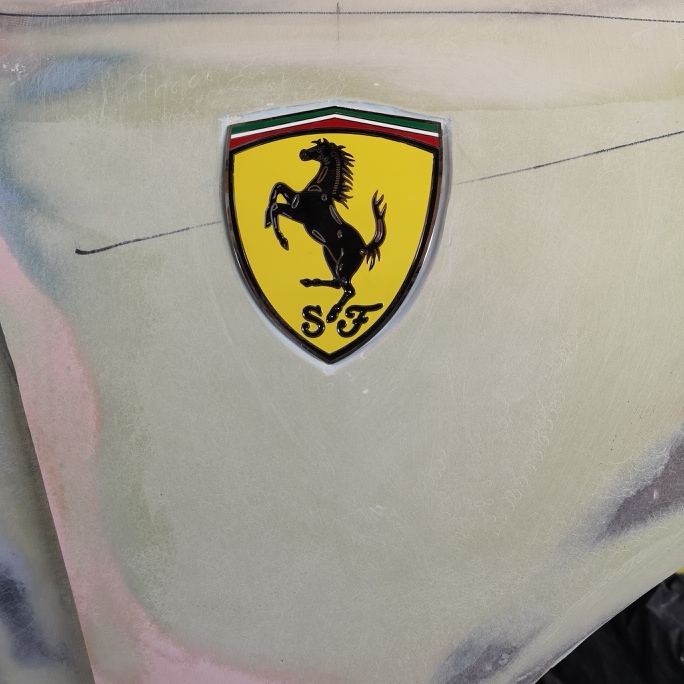
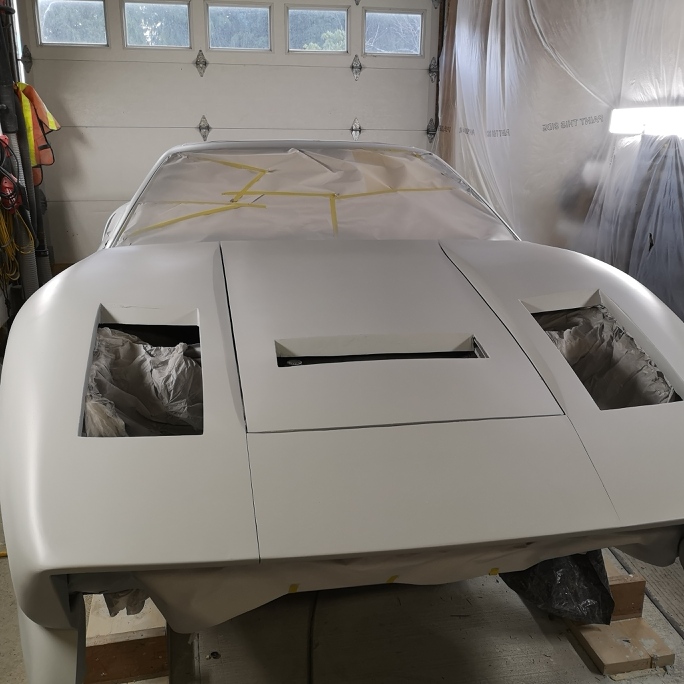
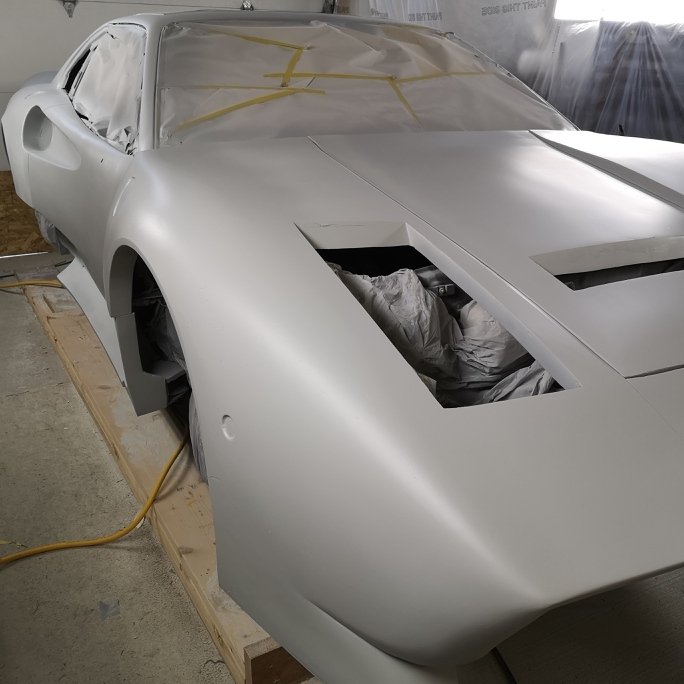
I've been busy finishing up all the final details to the body before I spray the final finish before paint. I've closed off all the scoops ,and finished all the wheel lips. The final detail is the front fender turn signal locations , I elected to cut them out and re-attached them in a flat plane to the car, due to the coke bottel fenders I felt they would look wrong. The filler is just for rounding the lip for the molding process , I'll do bit more sanding the area around the edges to make it a bit cleaner. I also cut out the fender badge locations, on the OEM car they badges are recessed into the fender . I'll reattach them similarly the same as the turn signals using a 3/16" spacer held in place and bonded from behind, then finish with some light filler around the perimeter. I'll post some pics of the finished areas.
Enjoy Wayne
[This message has been edited by dobie1 (edited 02-12-2020).]
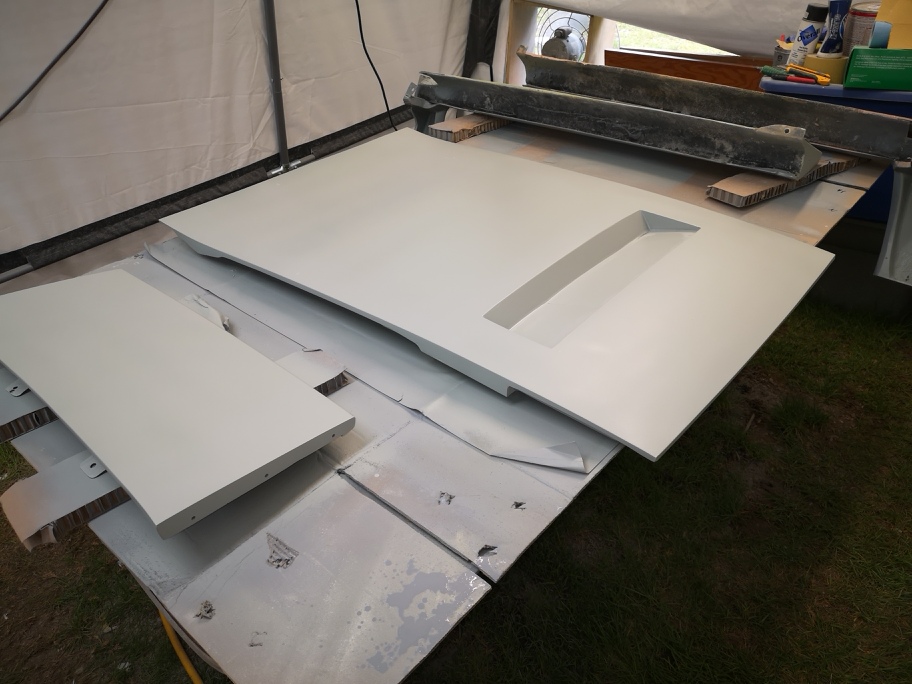
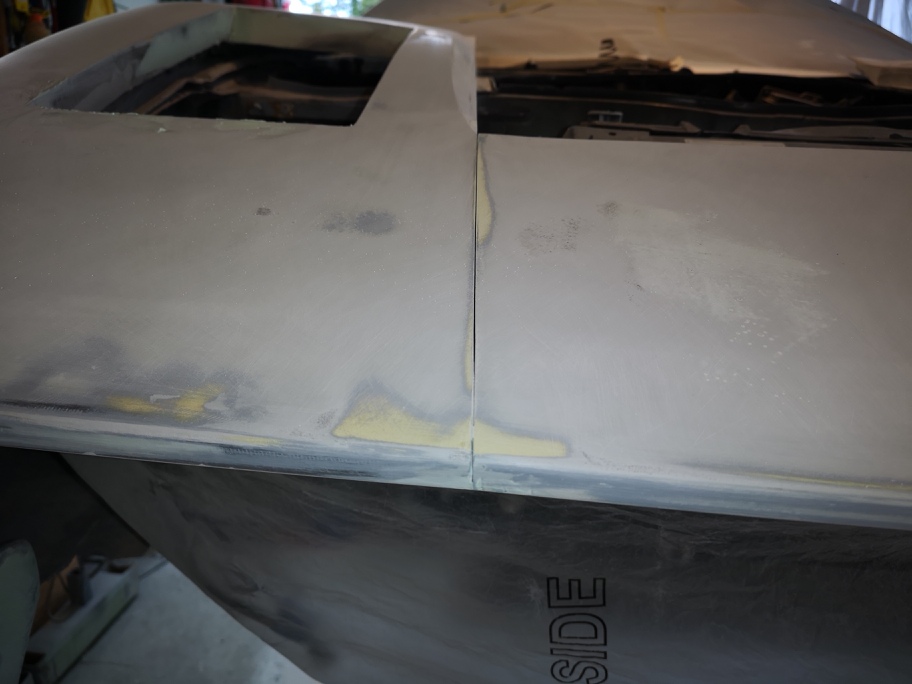
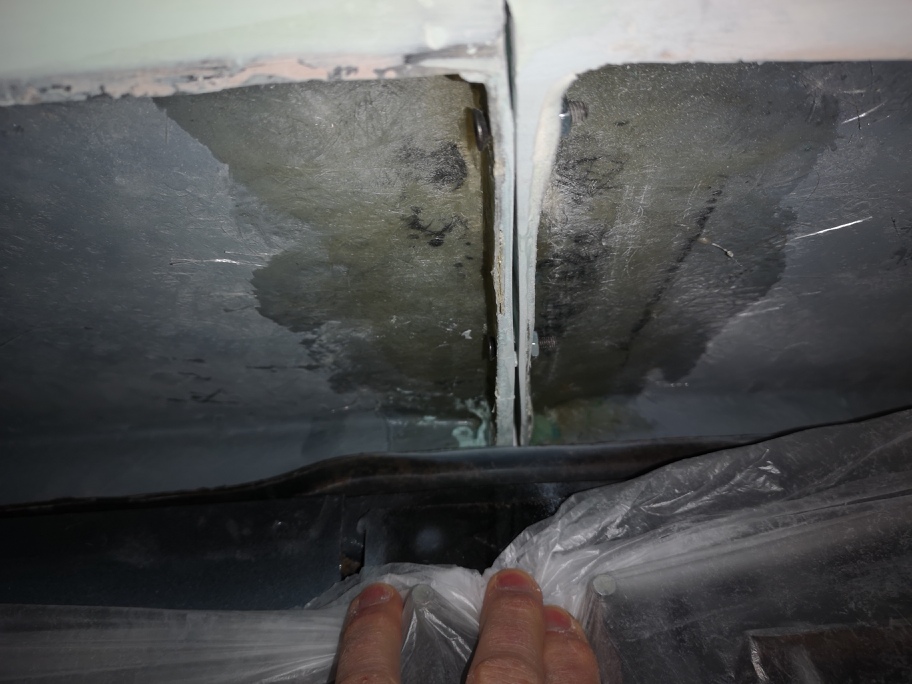
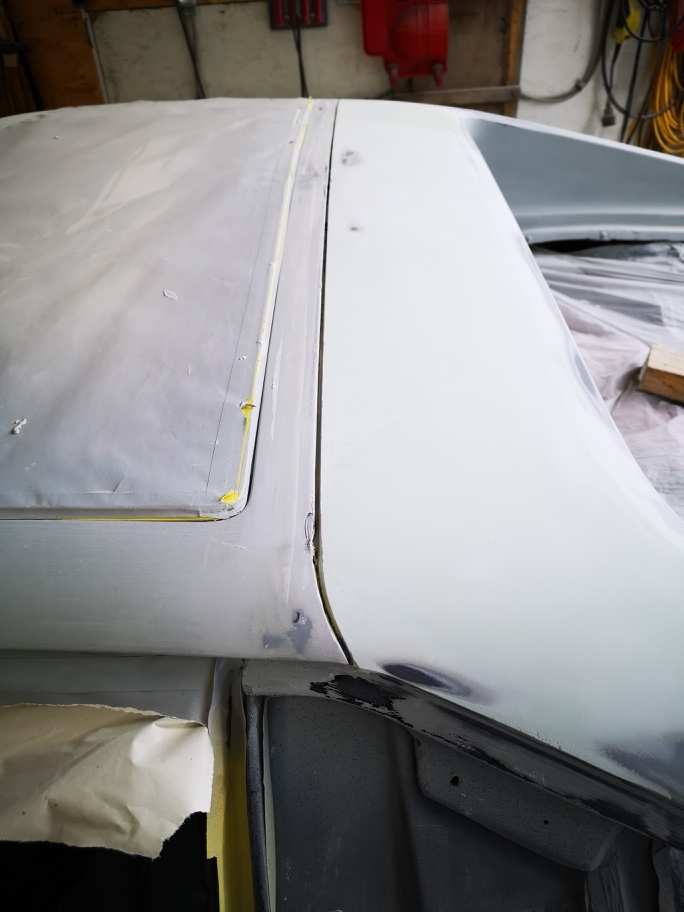
For those following the build it’s been a lot of Block sanding !!!! To 120 grit. Since the last Post I Ended up adding some end caps to the fender and center fill , I found there was to much flex between the pieces making it difficult to block sand . The parts now are attached with riv nuts and 10-32 bolts very solid now. Don O. Also felt I needed to narrow the gap along the roof where the rear sail plane attaches. I’m hoping to spray it again this weekend with thinned slick sand in preparation for the final sand to 600 before painting. I’ll post some pics later.
This is after the flanges are secure with the flanges installed
This one shows the flanges I glassed in for attachment between the fenders and center fill.
the next one shows the 1/8" seam between the rear sail plain at the roof line.
and the last one shows all the block sanding completed. The dark areas are the epoxy seal primer I sprayed first , the gray is the slick sand I sprayed second. There are a few areas that I went through to the bondo under the primers. But its all smooth and level and sanded to 120 grit the next step is to respray slick sand and block to 600 for painting.
Thanks for looking wayne
[This message has been edited by dobie1 (edited 02-29-2020).]
Unless you get yourself a chopper gun, or find a glass shop to take on the orders, I predict, you will not be able to keep up with people wanting their own out of your molds! (You're still gonna do molds....right? )
Have you decided on what paint/final finish you'll be using, keeping in mind, it will be the surface your molds are made on? Just curious, As I'm sure you're aware, the molding process does really "test" the integrity of the surface used to create the pulling surface of the molds formed on it.
Ever use Duratec? When I'm doing a new mold, I generally coat the plug with gel coat, thinned 50/50 with acetone and catalyzed and shot with an HVLP gun, then soap sanded with up to about 1000 or 1200 grit wet, 3 stage buffed, then about 10 coats of mold release wax, and PVA as a final release agent . Never had one stick or "marry" a plug that way. But you're talking an entire BODY! The Duratec performs like gel coat, but works sort of like paint. Old school method always used laquer paint, but you can't even get the "real" stuff anymore. That's when we started using gel coat. Anyway, just curious, I'm sure you've got this covered, just wondering what your plan was. Hate to see you paint it all pretty like, then have that nice paint job messed up during the mold process. Guess I should mind my own business?LOL
Car looks great Wayne....I still say, you will have potential customers clammering at your door to get one!
HAGO!
Good to hear from you Sage!! I always appreciate your input and the knowledge you have from building ,molds parts etc.
Yes I’m going to build molds of the entire car . I think along time ago you told me this was going to be a plug and that I would be building molds!! It came down to the car is a one of a kind and if I’m ever involved in a accident or mishap it will be nice to just make a new piece part.
I was planning on painting the car in a single stage polyurethane car paint, a neighbor had a body shop up until last year ended up with lots of product left over and is giving me a gallon. No I haven’t used Duratec yet however I do have a gallon of Duratec sunblock that I was going to use to spray on my carbon fiber body that I plan on building.
I’m intrigued by the 50/50 gel coat and acetone , so are you using waxed or unwaxed gelcoat. I’m assuming waxed to get a fully hardened surface. Does the acetone not break down the gelcoat?
What Duratec do you use.
I do have a cup gun for doing the gelcoat I have been looking at a hand held chopper gun but not for the time being. I understand from reading that you can layer the two and then consolidate between layers. I’ll probably do a hand layup on the first body and if I get more than the first kit that is tentatively spoken for I’ll look at getting a chopper gun.
Wayne: The thinned gel coat can be sprayed through an HVLP gun. Couple of things to remember.....you have to use about 5 times as much MEKP (catalyst) as you would normally with just gel coat alone.
You don't have all the time in the world to shoot it, and the gun has to be thoroughly cleaned immediately, for obvious reasons. I don't use gel coat with wax in it, but you DO have to spray a coat of PVA on the gel coat after you put it on your plug.
You know that it cures in the absence of air, so it has to be sealed (which is what the wax would do if it was in there) and the PVA does that just fine. If you don't put the PVA coat on after the last coat of gel, it's not going to cure and will remain a gooey mess.
After putting the PVA on and letting it kick, (I usually give it at least overnight), you can start sanding.....if it went on pretty smooth you can start with #400 and work up to as fine/smooth as you want the surface to be. I usually go up to at least #800, but have gone as much as #1500.
The plug surface is going to determine your mold pulling surface, at least the start of it.
When you get finished sanding, then you start buffing. I usually go 3 stages up to machine glaze finishing compound. There are many products out there that will do the same thing, but I generally use McGuires. You can order specific mold polishing compound from most fiberglass supply houses too. Buffing can be an "art". The method I use combines the compound with clean water, never let your surface get "dry"...when you get to the point you're almost done, you're using mostly just water....and a GOOD buffing pad. I like wool, but I'm old school, I guess. There are foam pads now, that will pretty much do the same job, but to me, they are harder to use. I guess it's a matter of what you're used to.
The same process is followed on the mold pulling surface, (I use tooling gel coat, and I'd think you should too...it withstands much higher curing temps, that you encounter when parts you put IN the mold are kicking..), i.e., sand, sand, sand, buff, buff, buff.
Also, I generally do the orange (or black) tooling gel coat as the pulling surface, after building that up sufficiently, (15 -20 mils), I put a "tracer" coat of white gel coat on about half that thick, but only because that's the way I was taught to do it. If you ever sand through to the tracer coat, you know you might be making a new mold soon, or doing some mold repair!
Anyway, there's lots of vids out there walking you through mold making, everybody has their own little "tricks" they like to use, and you can always look the process up on some of the supply house sites, like Fiberglast.com...their stuff is expensive, but they do have more than a few tutorials and lots of info on doing all sorts of composite work, including mold making.
So, there's another cent and a half worth of trivia. Hope some of it helps you a little.
You might just be ok with your original plan using the polyurethane single stage. Its mostly a matter of creating an effective barrier coat between the plug and the mold. Parting wax is what I count on 99% of the time and it generally works, but when MAKING a mold, or using a new mold (less than 10 pulls) I will also use the PVA, or Fibrelease, usually PVA. Some of the old timers used to use Johnson's Floor Wax and it worked too!
Doing the gel coat finish is very labor intensive and time consuming....and you are doing an entire body! You might be another year just prepping to lay the mold up!LOL I think I'd probably figure out a way to use the paint! You have to basically do the same process with the Duratec, but it IS cheaper than gel coat, but not by a lot.Duratec
Given the caliber of your work on this project, there's no doubt you will produce stellar molds, which will produce stellar parts!
Keep the updates coming.
HAGO!
P.S. Don't forget the 10 coats of wax on the plug, after the sanding/buffing, before the PVA.
Same thing on the mold before using it for the first time.....and oh yea....it should probably cure for at least 10 days or so.
Not "Hard and Fast" rules, but ones that I've always followed with good results.
[This message has been edited by Sage (edited 03-02-2020).]
First off Saga , thank you for all the great info.... I've printed off your suggestions and instructions to have on hand as I go forward. I'm going to start cleaning up the shop blowing everything down to help remove all the dust that has been produced over that last few months in preparation for painting. I got the single stage urethan paint today along with the harder and reducer , I'm hoping to start painting in the next week or two.
I have been busy working on the car, I have been doing a few chores needed around the property. I installed a 12" x 20' x8' garage in a box to give me some more room as I go forward , the weather is getting better !
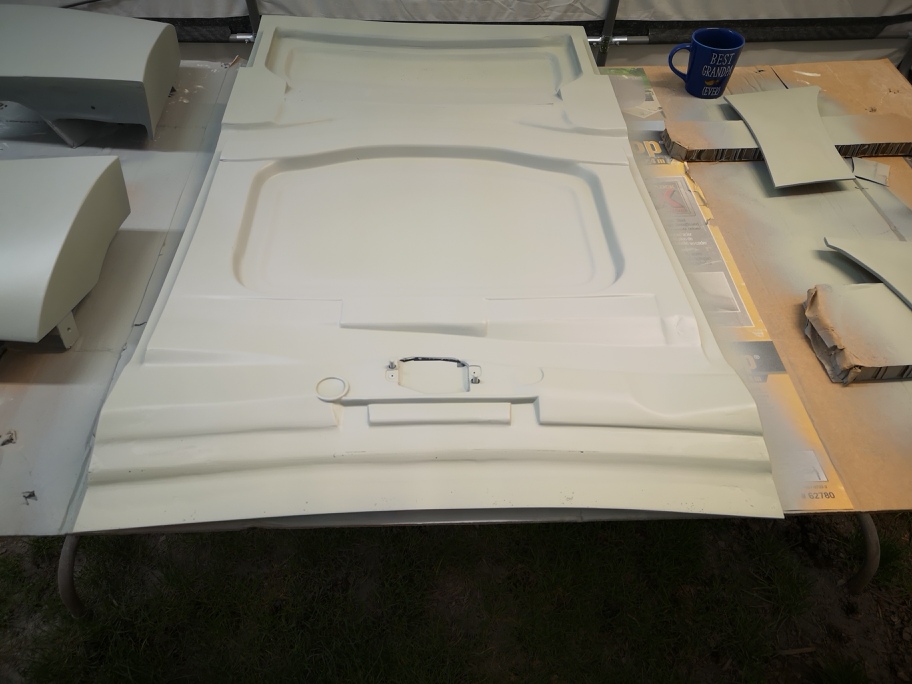
I also have been finishing off the underside of the hood getting the it ready grinding down all the sharp edges and closing off the openings to make the mold. Its a pretty complicated design but it will mold fine.
More to come Wayne
[This message has been edited by dobie1 (edited 03-09-2020).]
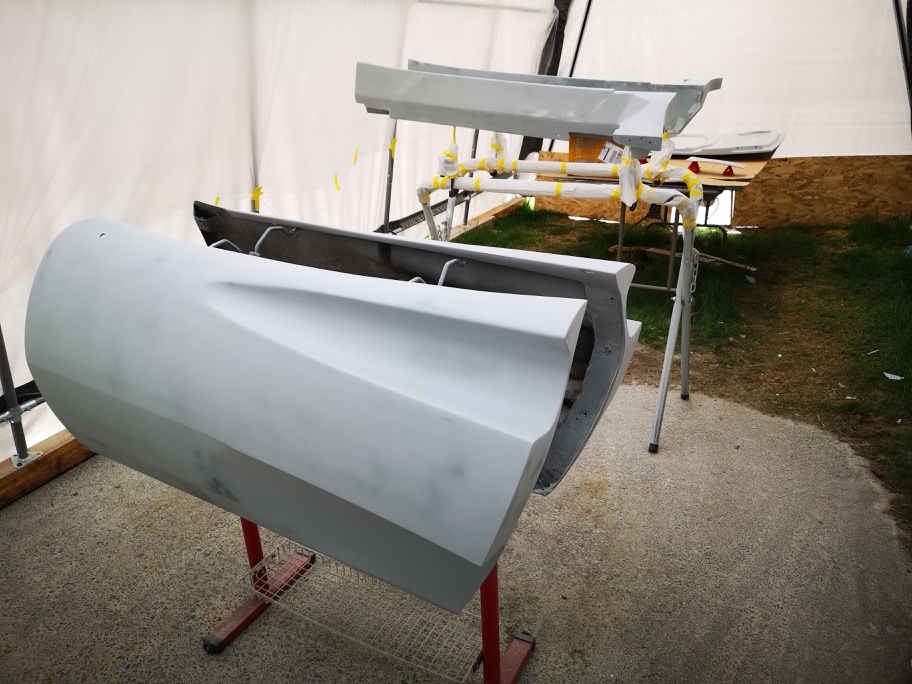
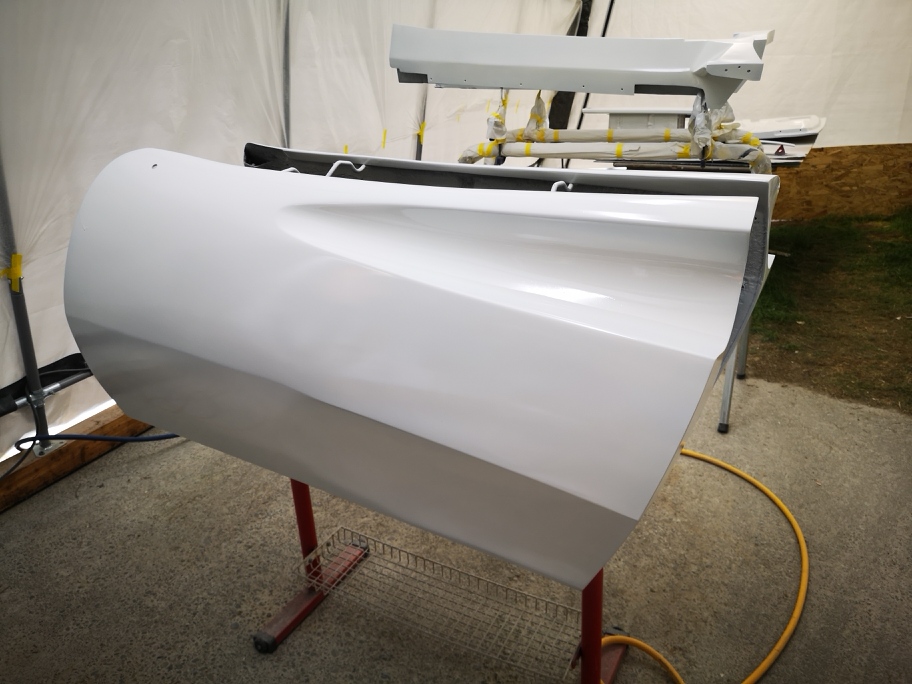
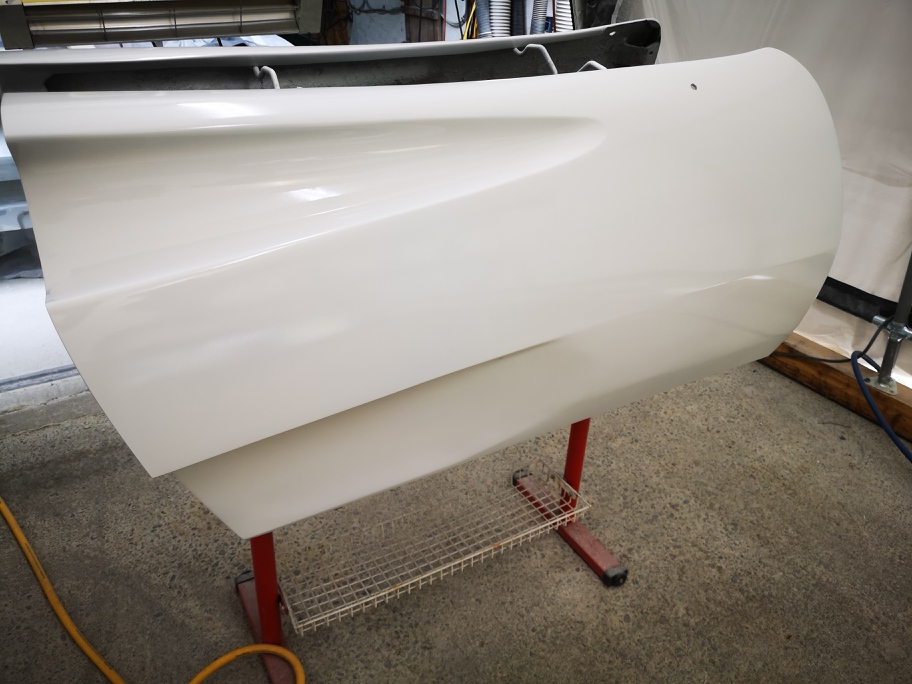
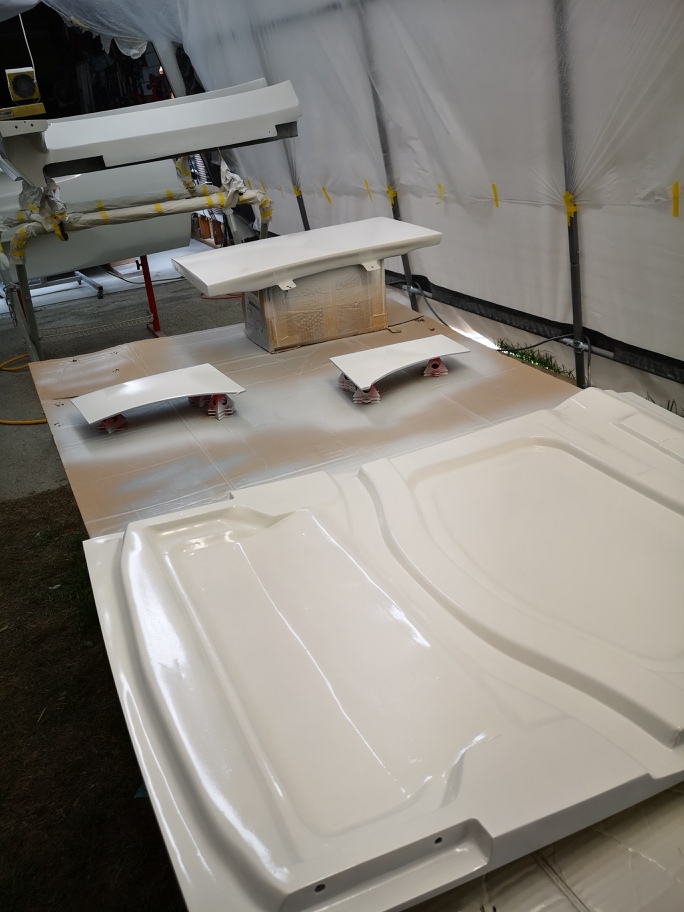
Well I hope everyone is safe and not infected with Covid 19. I have been in isolation working on the build, Luckily I am retired so no real reason to leave our home other than for food. I have been busy I've taken all the panels off the car and finished them all individually and then remount each piece to ensure they all fit perfectly, very time consuming. My hope is by taking these extra final steps before painting , the parts I produce will fit Exactly as the originals. There was a lot more sanding and finishing than I thought was needed. But when your going to make molds its has to be close to perfect, what ever isn't perfect will end up in the parts. Here are a few shots of the door panels and one of the fender running boards.
The weather is still bit cool so it is taking a bit longer for the parts to dry, so it will be a few days to get everything done.
Thanks for looking and please be safe and social distance in these times. Wayne
[This message has been edited by dobie1 (edited 03-27-2020).]
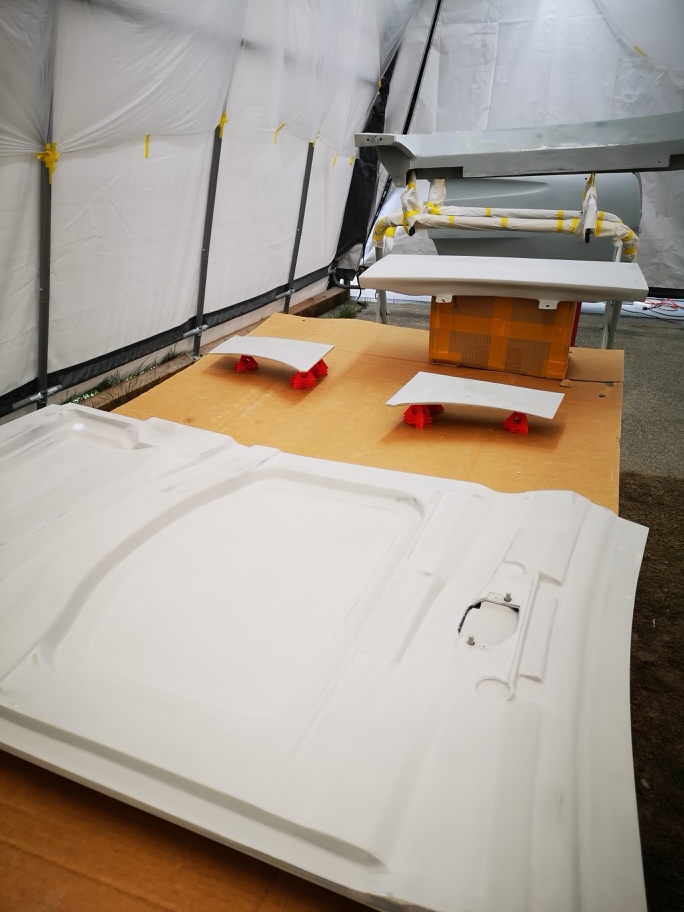
A bit of a update. The weather isn't really cooperating ,it's really cool and moist from the rain. The parts I primed the other day although chemically dry hadn't really dryed to a point I could sand yet. So switched it up and setup and Primed a few more pieces.
I'set up for the fenders and center fill today so will spray tomorrow. On a side note I finally got my DeCups spray system, thanks to Amazon during this uncertain time. I'm looking forward to a easier clean up with the ability to paint at all angles.
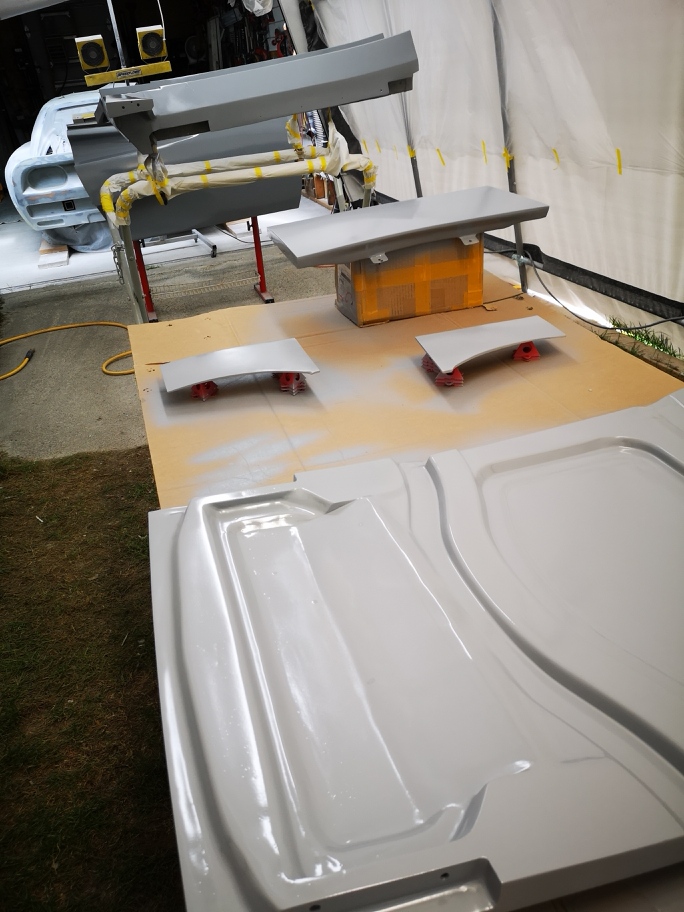
I got to use the DeKups today , I really like the system!! The cleanup went really fast only needed to clean the gun, there are consumable waste but I'll continue using the system going forward. I was given a bit of insider technic from a neighbour for spraying Slick Sand which is very thick to spray adding 10% full poxy reducer to the mix thins it down and lays it very flat.
It sure is nice having it back in one colour again ,i'll start to sand tomorrow the previous parts I sprayed the other day. Starting at 320 grit then to 400, If everything goes according to plan the next will be spraying paint. It's not the colour I'd like to see the car in (White) but free paint makes it a easy decision. Here are a few shots
LOL, yes when I was typing that in I wondered if someone would go there!! Stay safe Sourmash! Wayne
I waffled for a minute but It's the easy ones that I can't resist. Sorry, man. That's easily the most excellently done Ferrari body I've seen. Insurance, insurance, insurance.
A lot Of labour ,money and too many years Have gone into the build. I have no regrets it has driven me to produce And build a car that I’ll truly enjoy and ultimately be proud of Designing , producing and hopefully A production of a hand made a body of a beautiful classic Having said all this without the mentoring from Don O. And others on the forums I’m sure I would have struggled and probably given up as 80% of those that start projects never finish them.
Thanks for your positive comments always appreciated. Wayne
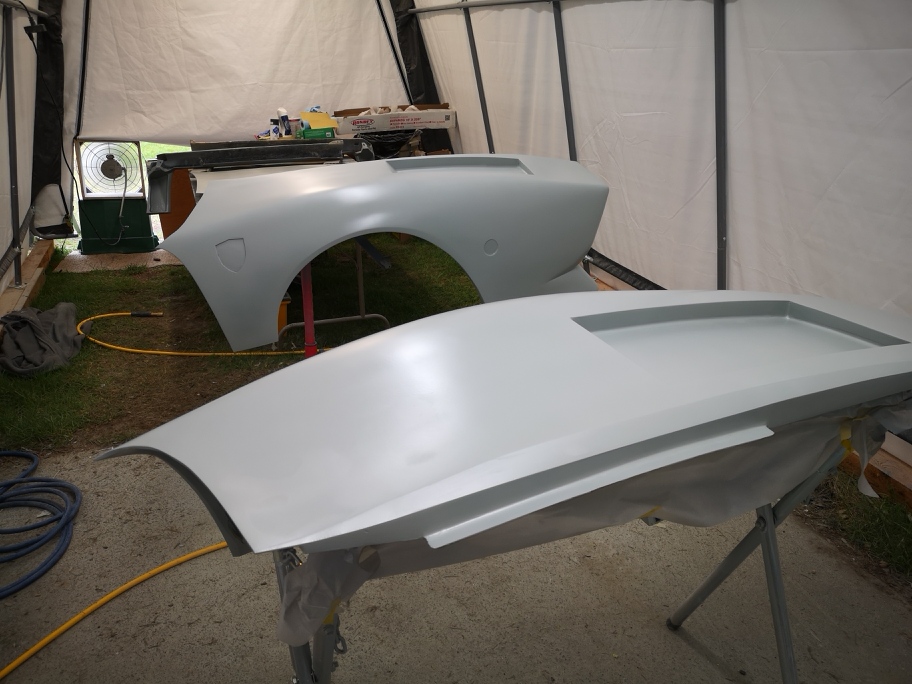
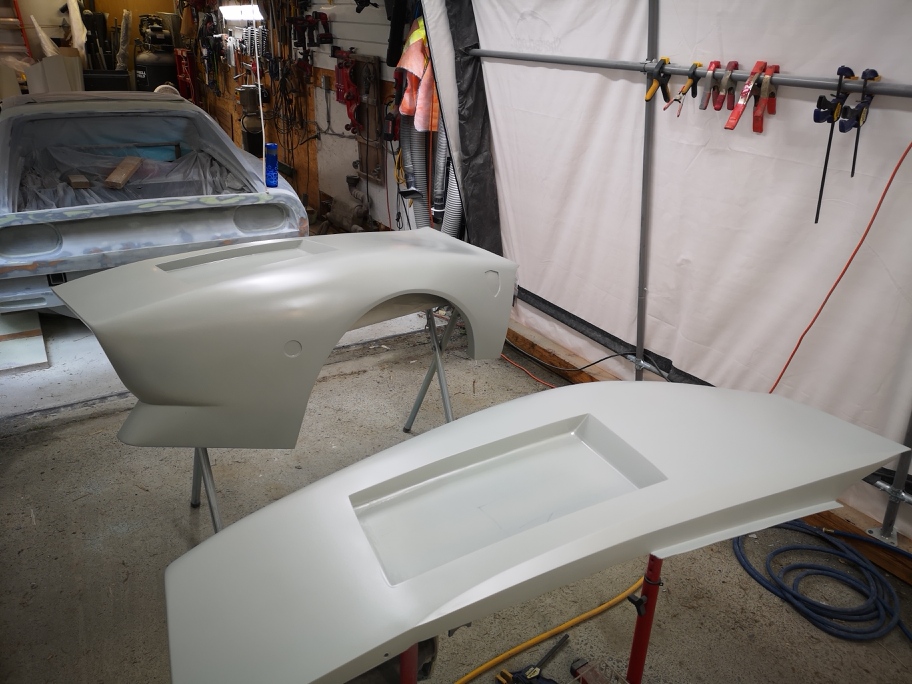
Time for a bit of a celebration , Woo Hoo I now have parts in color!!! It's been a lot of filling, sanding, filling and more sanding since the last post I finally got all the front end sanded to 400 grit and finally got to where today I sprayed the final seal coat and then 3 coats of GM White. I'll let the pieces fully dry then do the fenders.. hopefully tomorrow. I'll then wet sand and polish everything. Don O came over the other day to pick up my cement mixer. While we were social distancing we talked over where the flanges should go and how he would make the molds, we are both on the same page so now starts the real work making molds. Here are a few pictures of the parts set up for spraying then with the sealer on and then the white paint, thanks for looking.
Good chatting again today Wayne. (brought his cement mixer back... ) Car looks great in paint. Some final cut polish and bunch of wax and you are ready to start molding.


 )
)