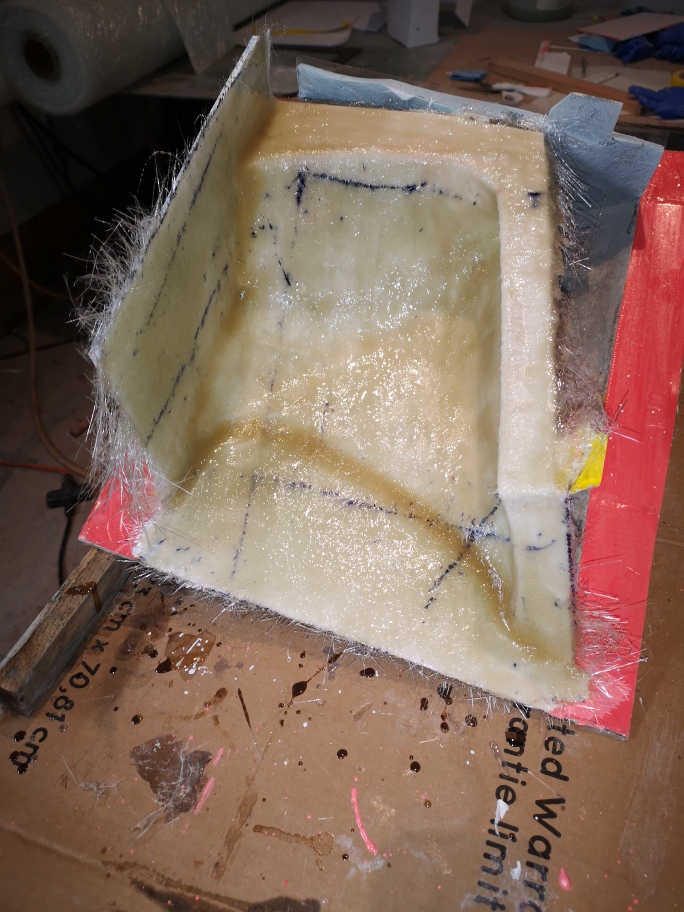
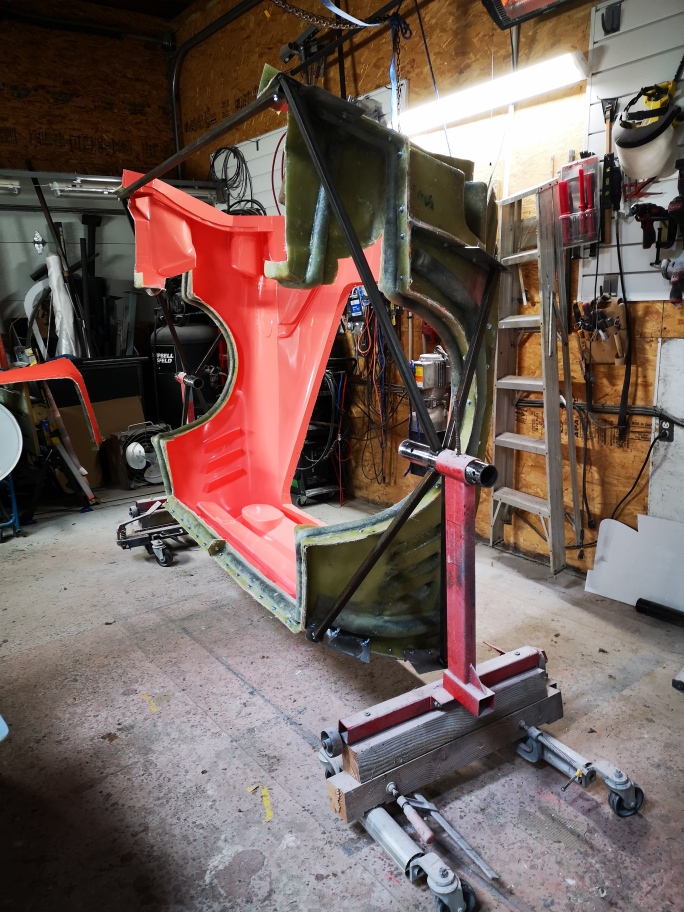
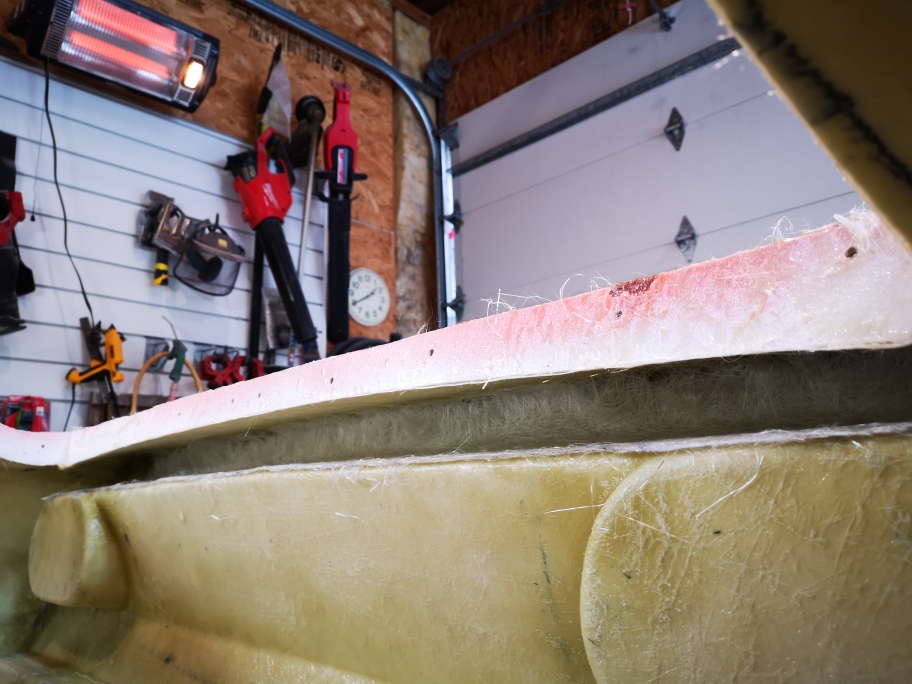
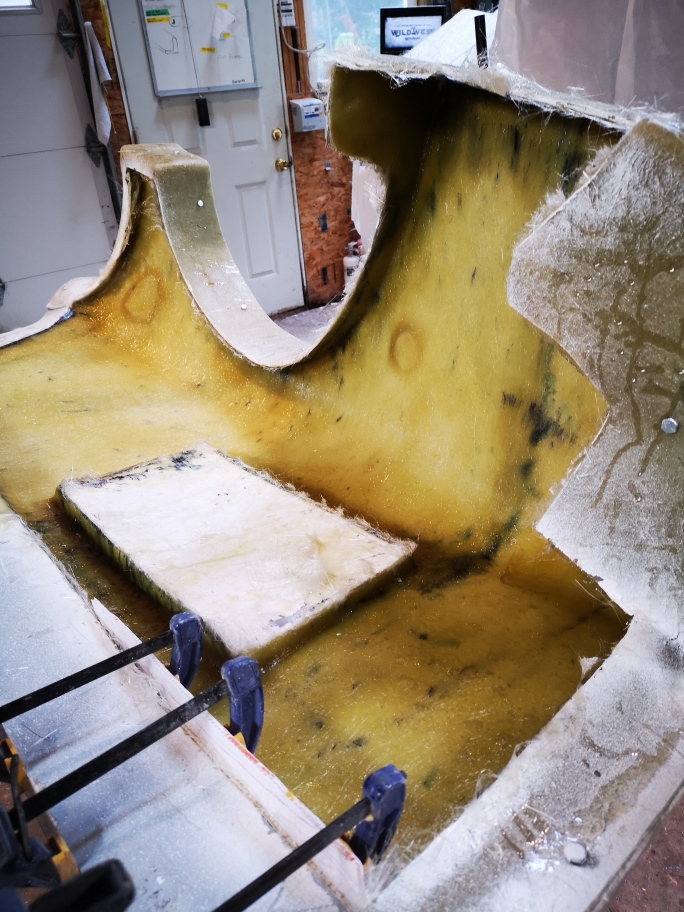
Well the first of eleven parts to the rear mold is basically finished (I still have to laminate the reenforcement onto the mold). It went pretty good after attaching the flange to the rear I put 4 coats of wax on then a heavy layer of PVA this is a fairly detailed complex piece so do not want anything to stick!! After the PVA dried I thought I would try something Sage does using two differant color gelcoats the first coat orange then after it tacked up a second coat using white . This will be like a witness coating as I sand and polish between body panels pulls letting me know when I'm into the final layer of gelcoat. Then laying the first layer of in my case 1 Oz. fiberglass mat. this is probably the most important layer to ensure it is fully attached with resin as anywhere it isn't will become a void under the gelcoat and will need to be repaired prior to making a part. I calculate if everything goes with out a hitch I should be finished the mold for the rear in a month.
thanks for stopping by stay safe Wayne
[This message has been edited by dobie1 (edited 10-09-2020).]
I LOVE IT. If I haven't said it before, one of my favorite Ferraris is the 288. I wish I could build an exact clone with a modern more powerful drive train. Even better is a kit that was added to the original 288 that flares the wheel wells out 3" each side. Chop the Fiero roof 1.5" and install a curved rear window..ohhhh yah, money well spent. Never mind me, I am just daydreaming.....
Keep up the good work. This is some high class stuff.
Thanks for the comments Rick ,I'd love to see a fellow hobbiest build one. I've thought about doing a second build and doing a longitudinal engine install something along the lines of Bloozeberry's 355 build.
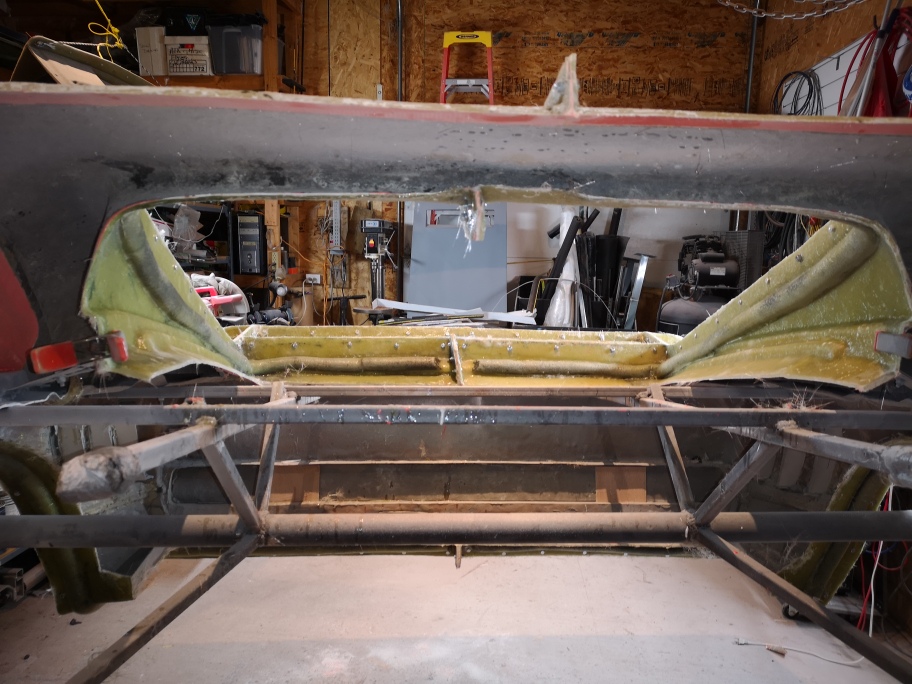
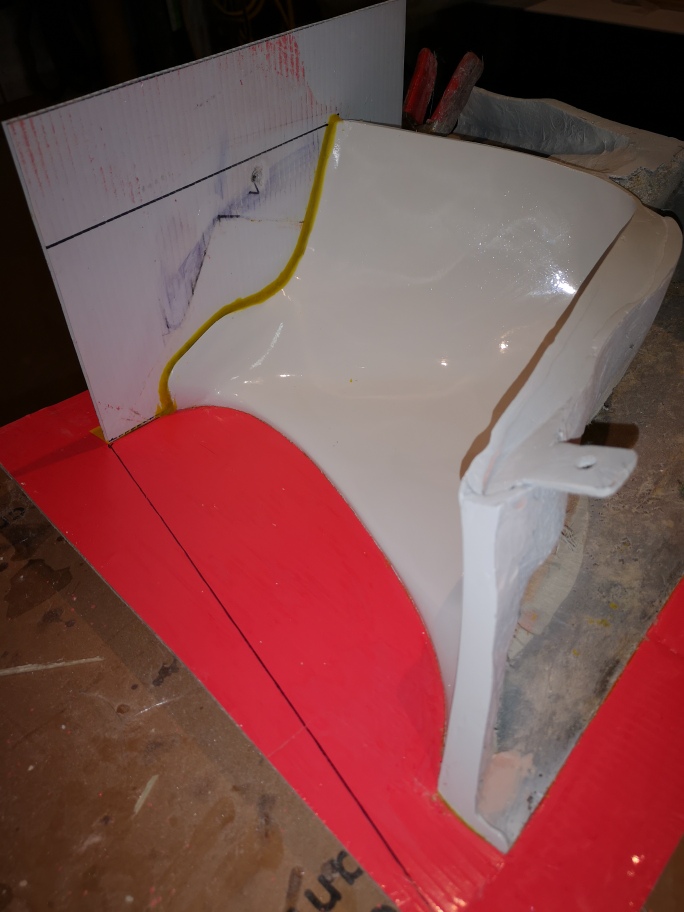
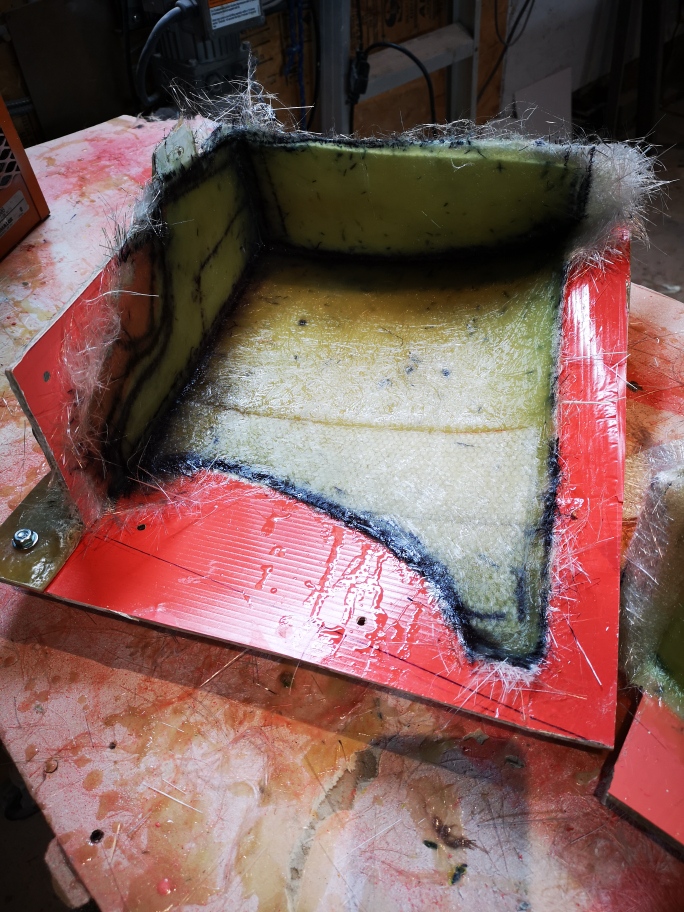
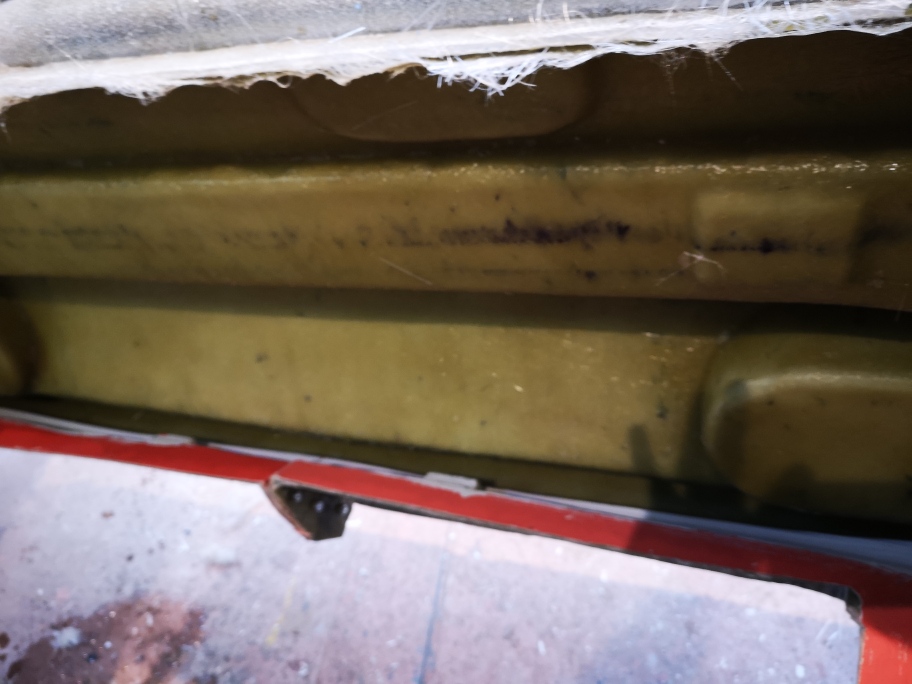
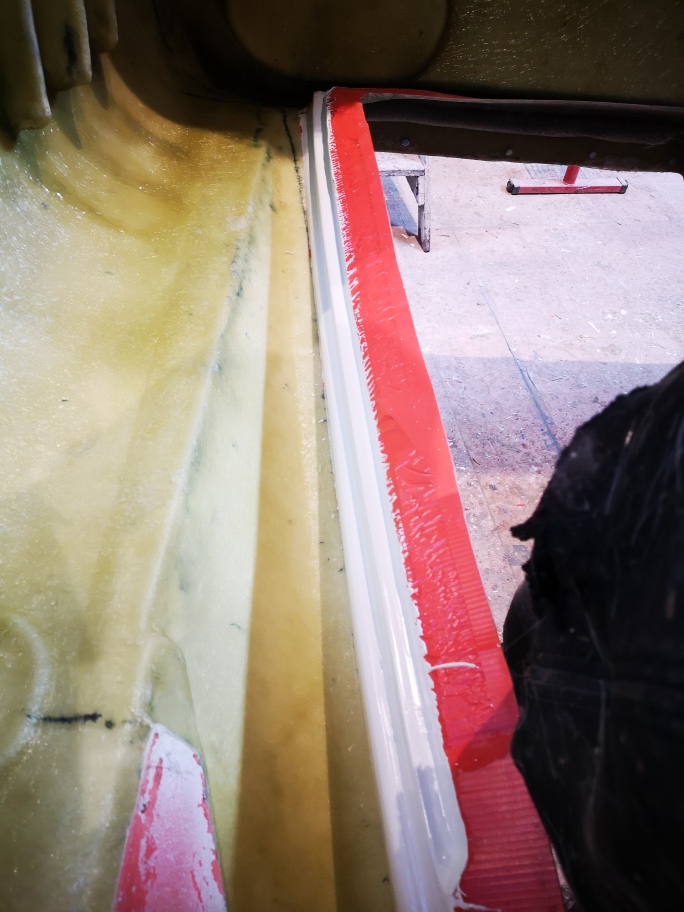
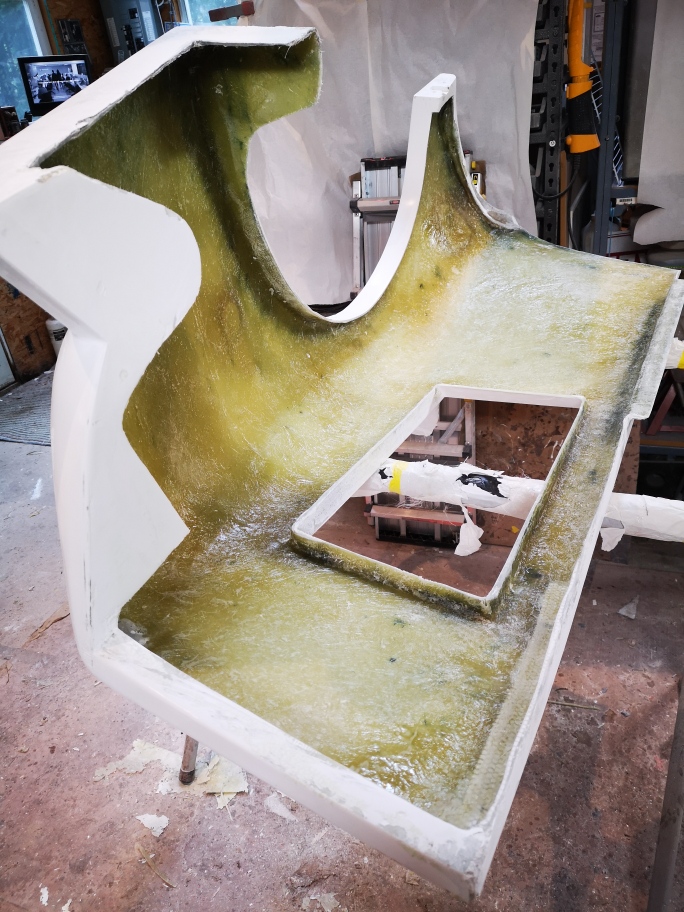
I do have a bit of a update , things are moving along fairly well .I completed the rear two piece mold and am now onto the first of the side molds after some input from Don I added an additional flange along the fender to help facilitate a easier pull with the rear side vents.
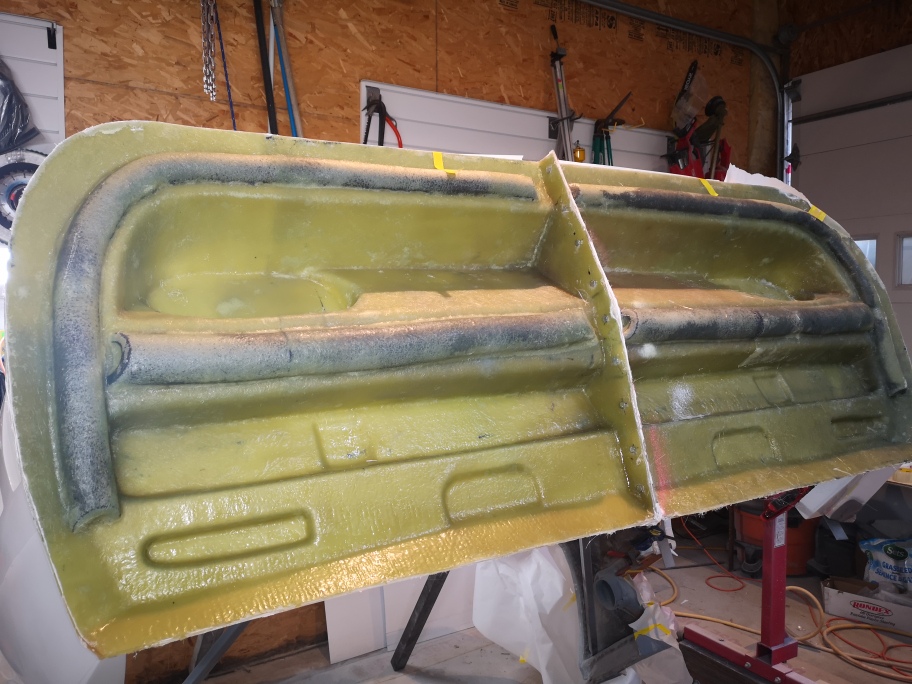
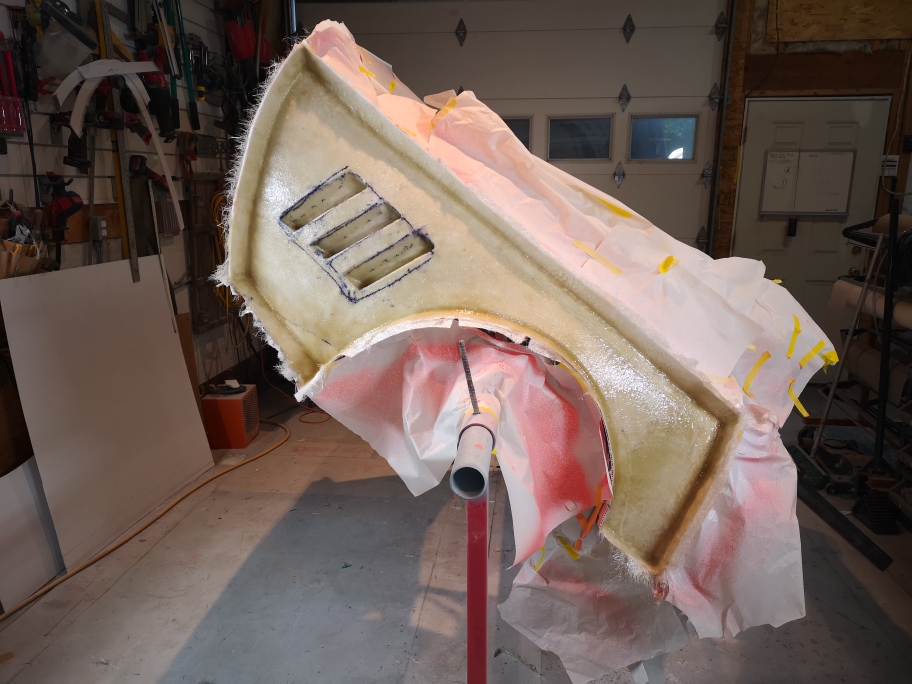
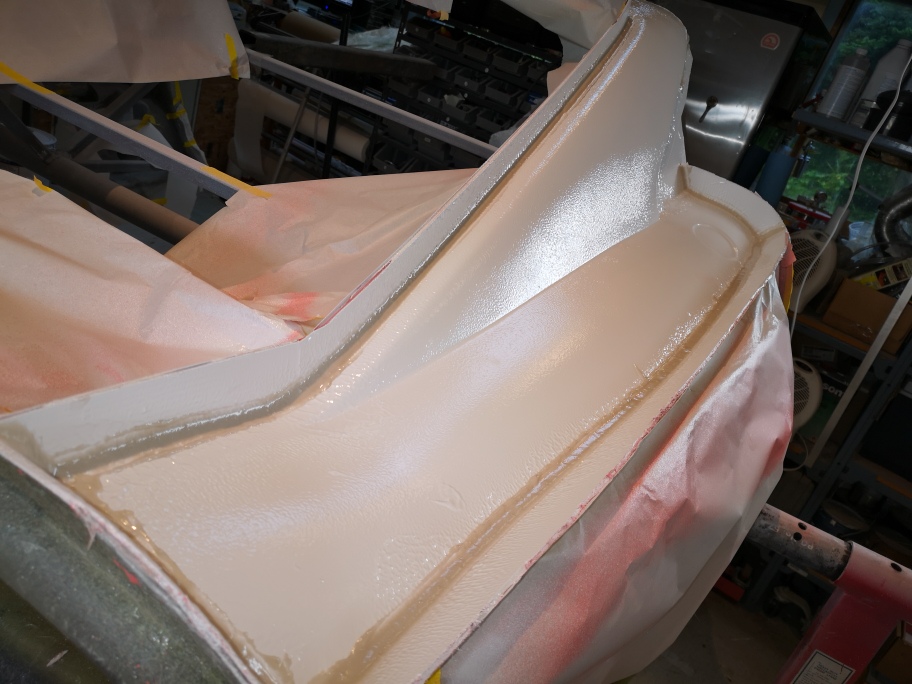
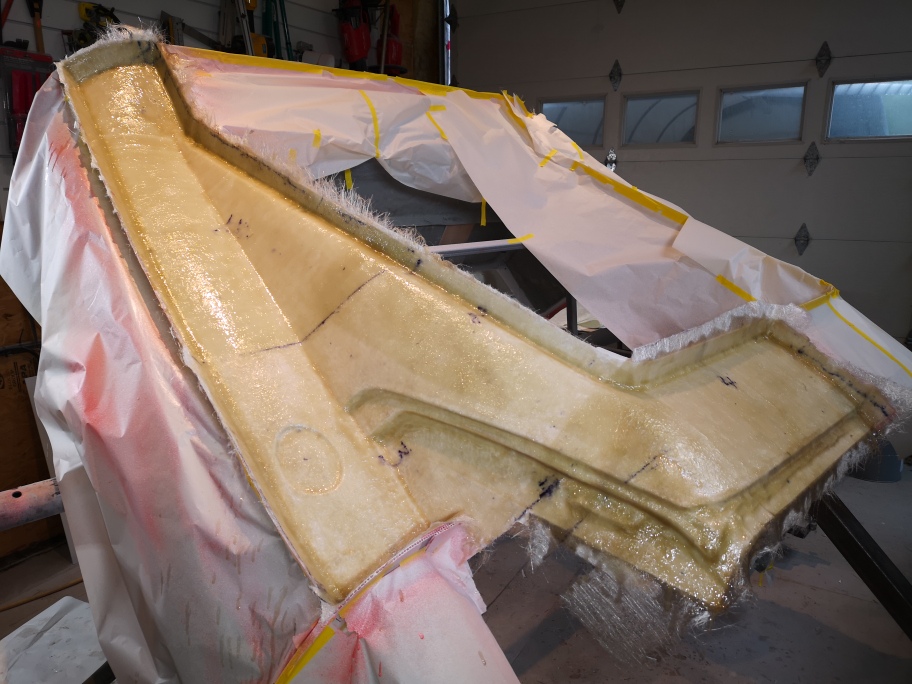
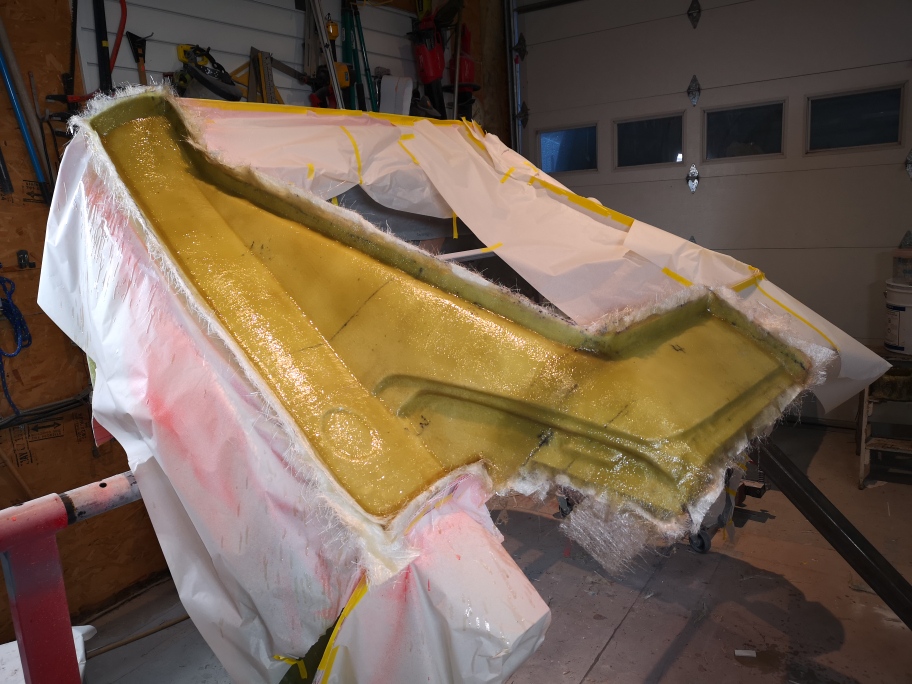
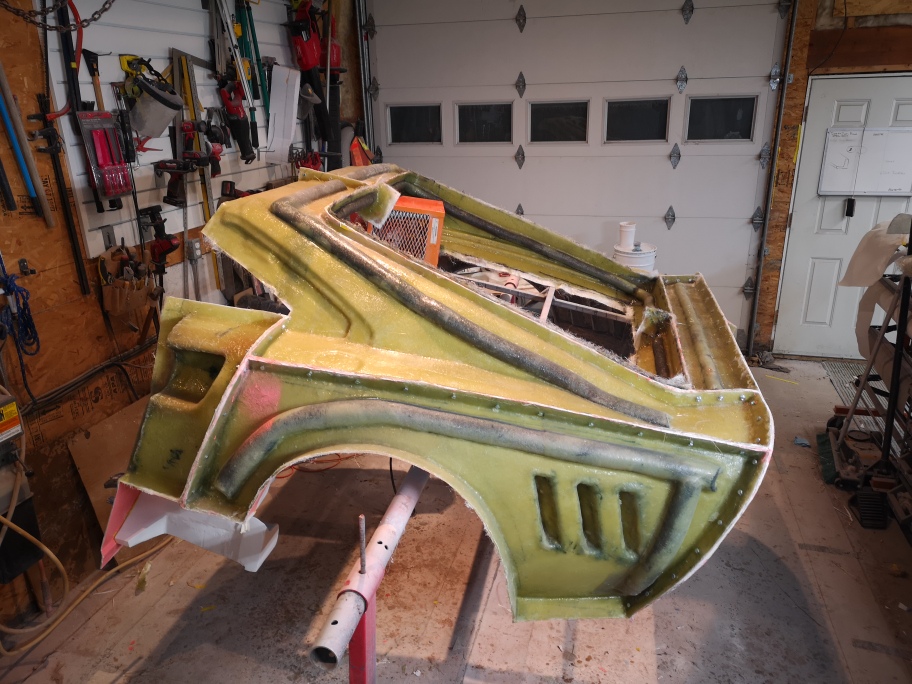
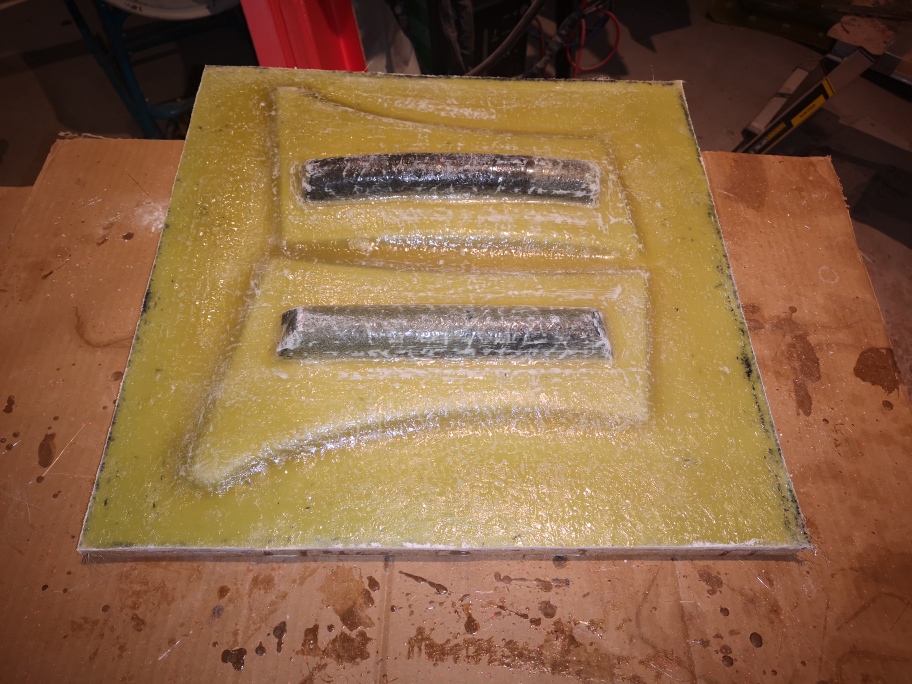
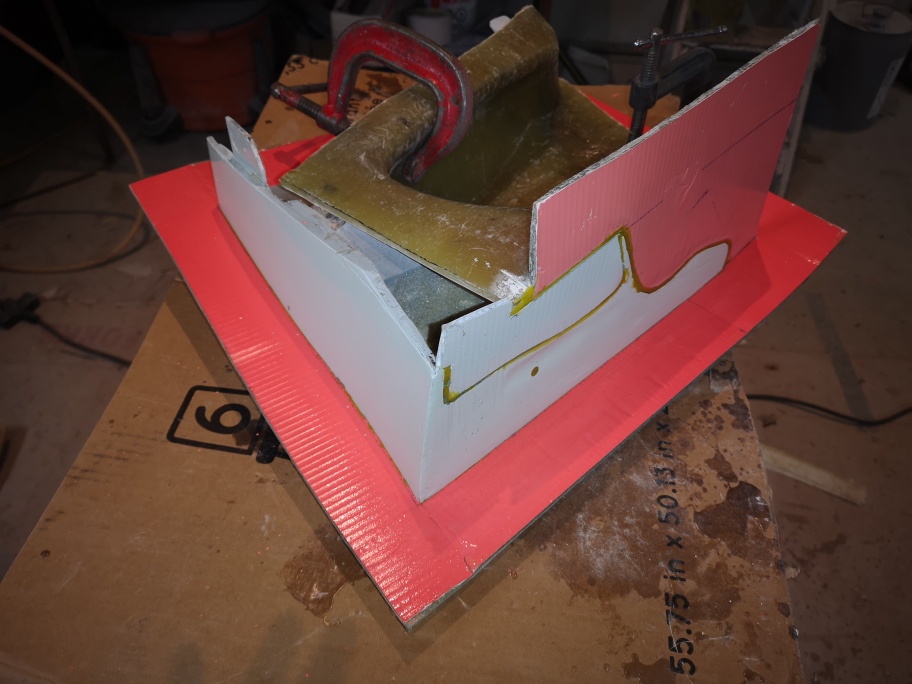
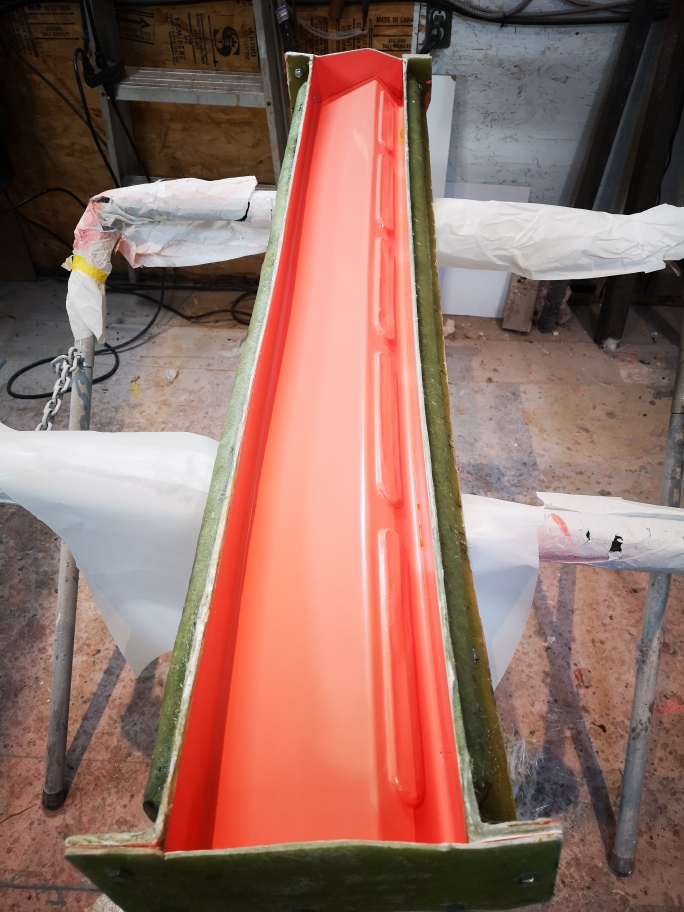
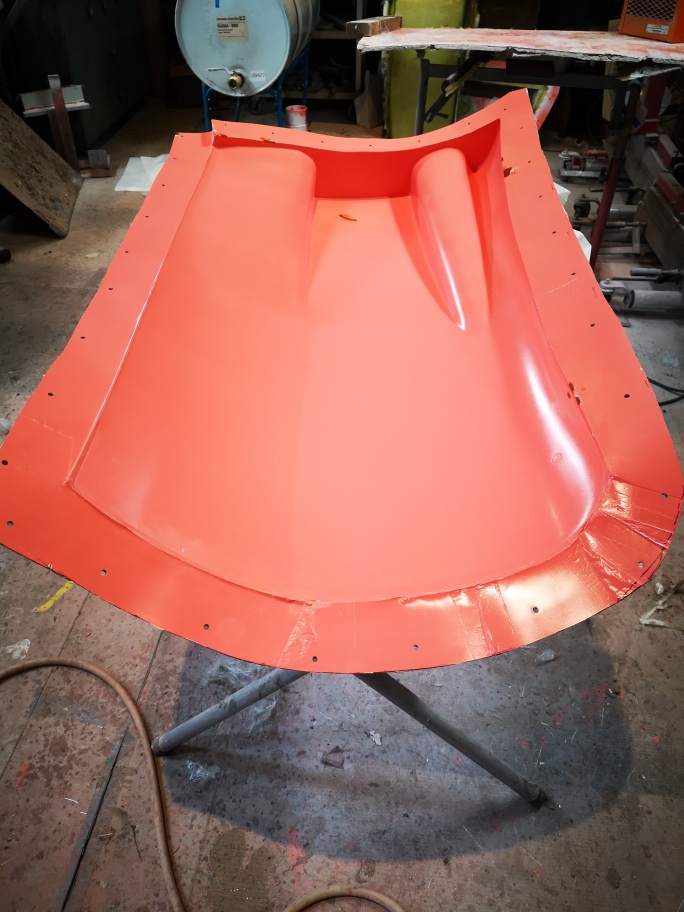
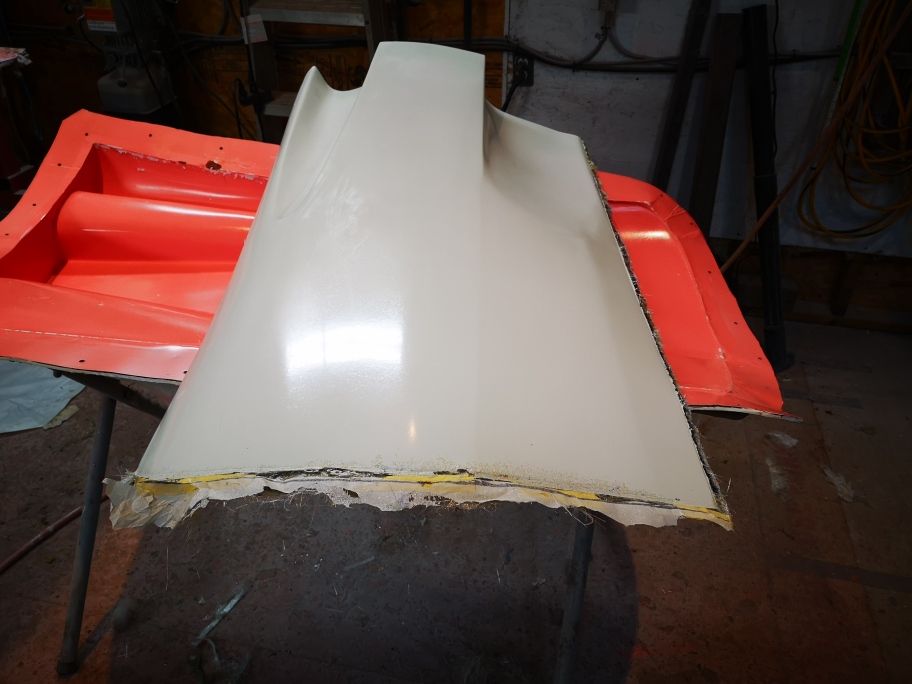
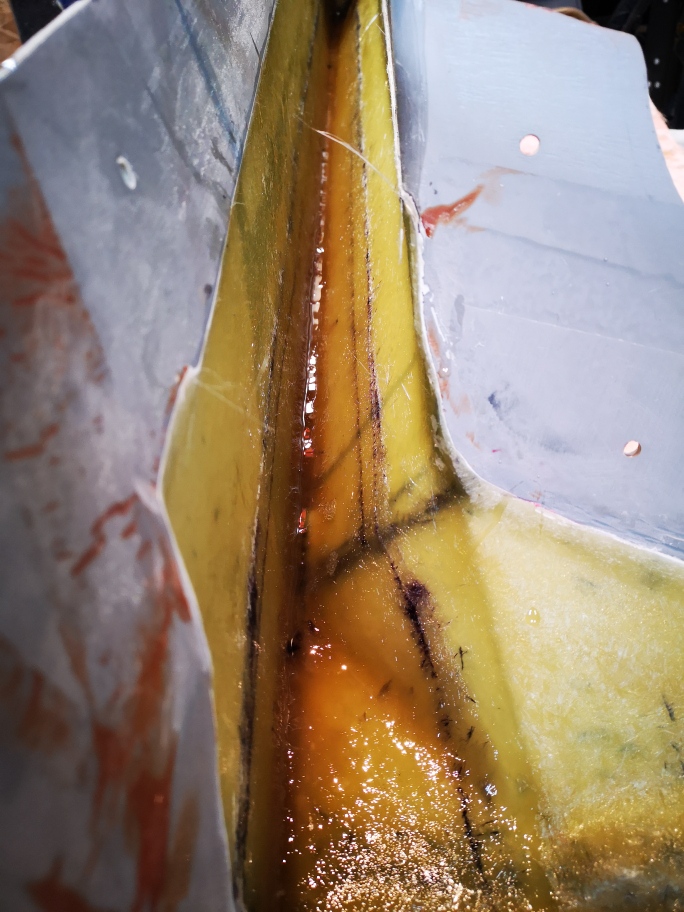
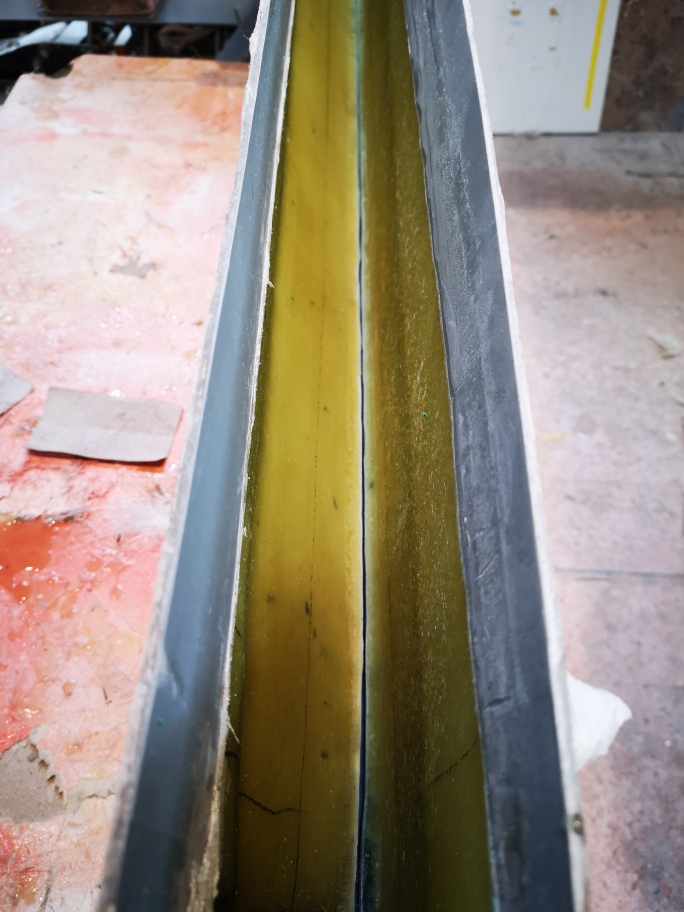
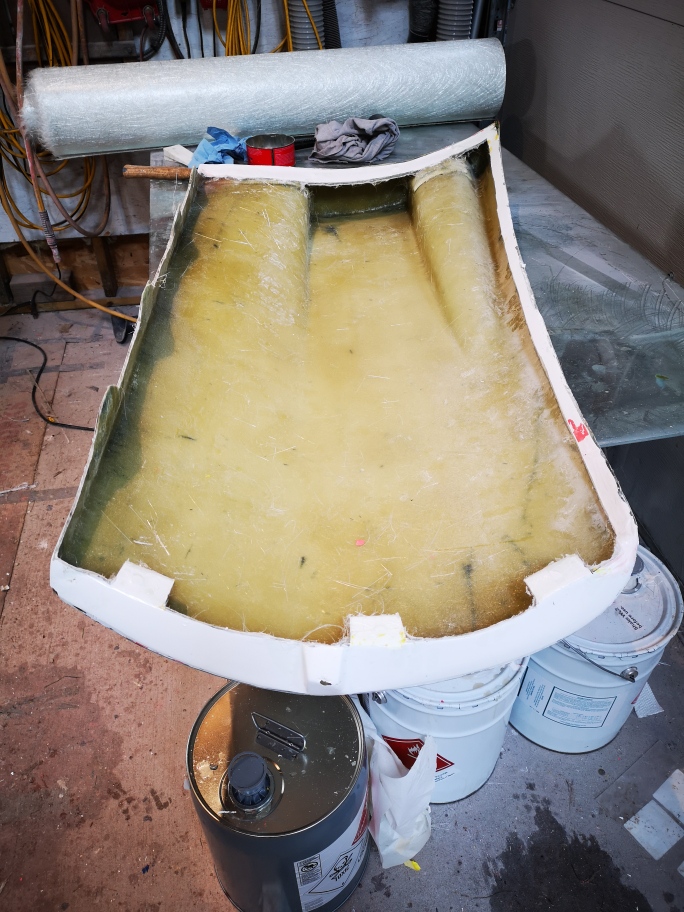
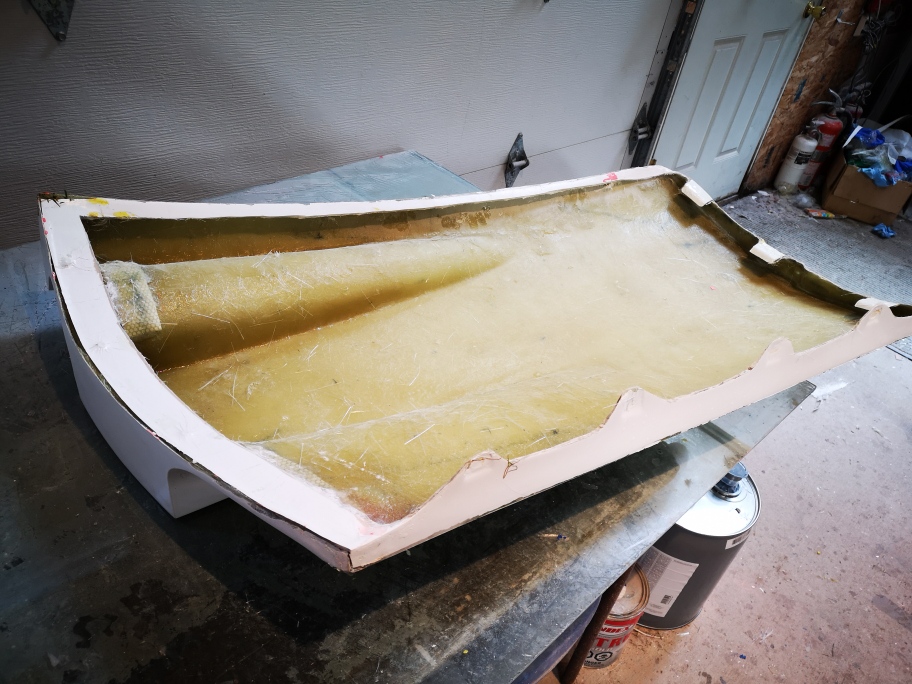
first picture of the finished rear mold
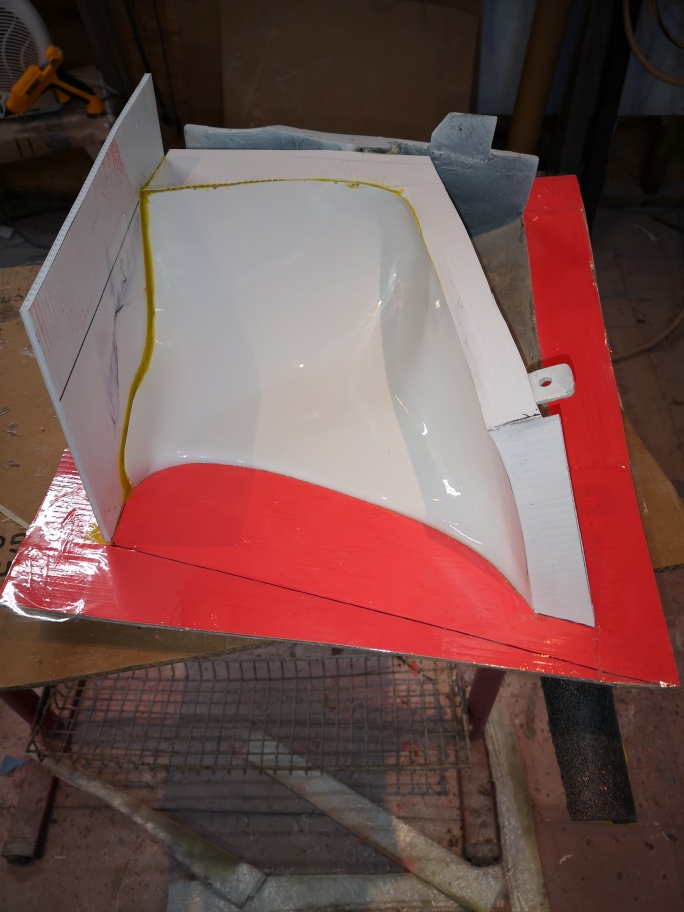
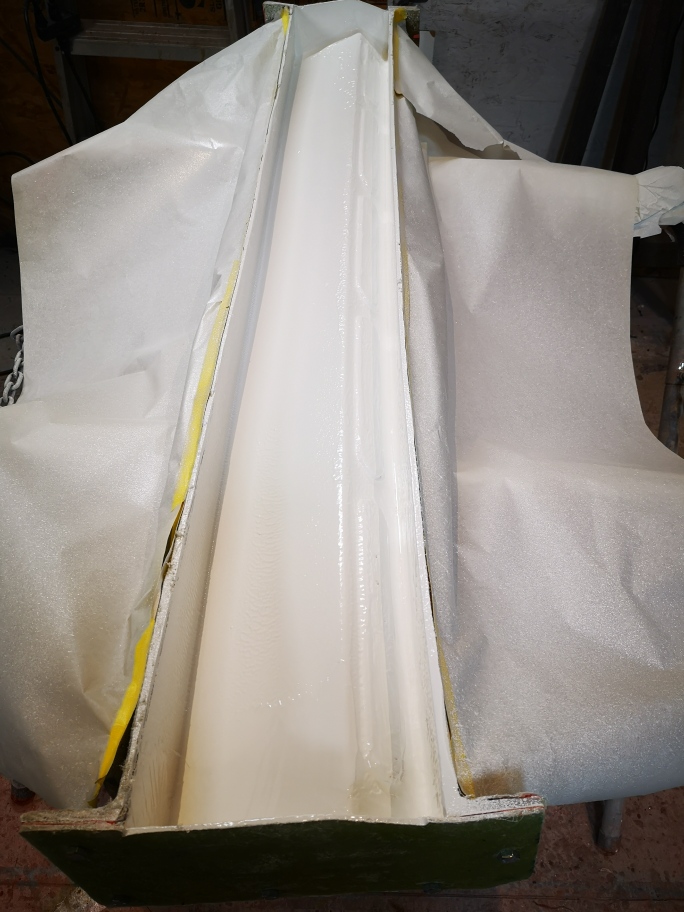
The next are with the final flanging installed and waxed and PVA on
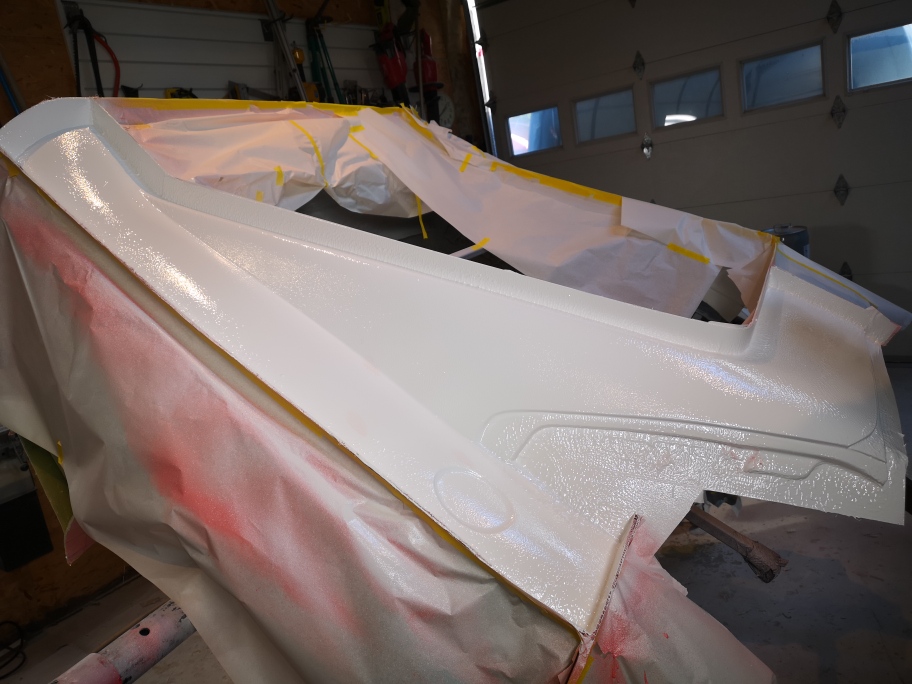
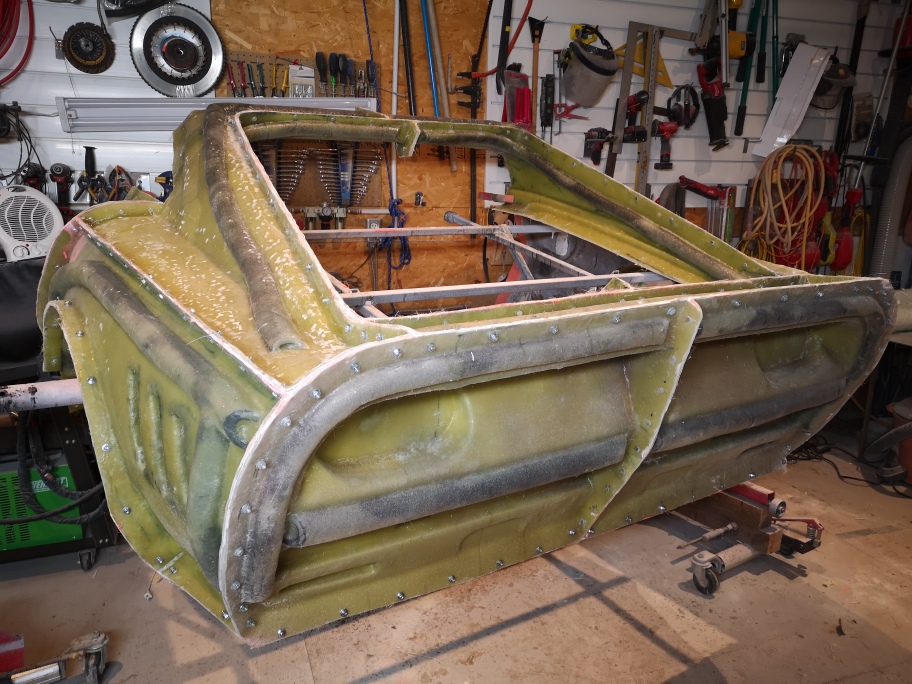
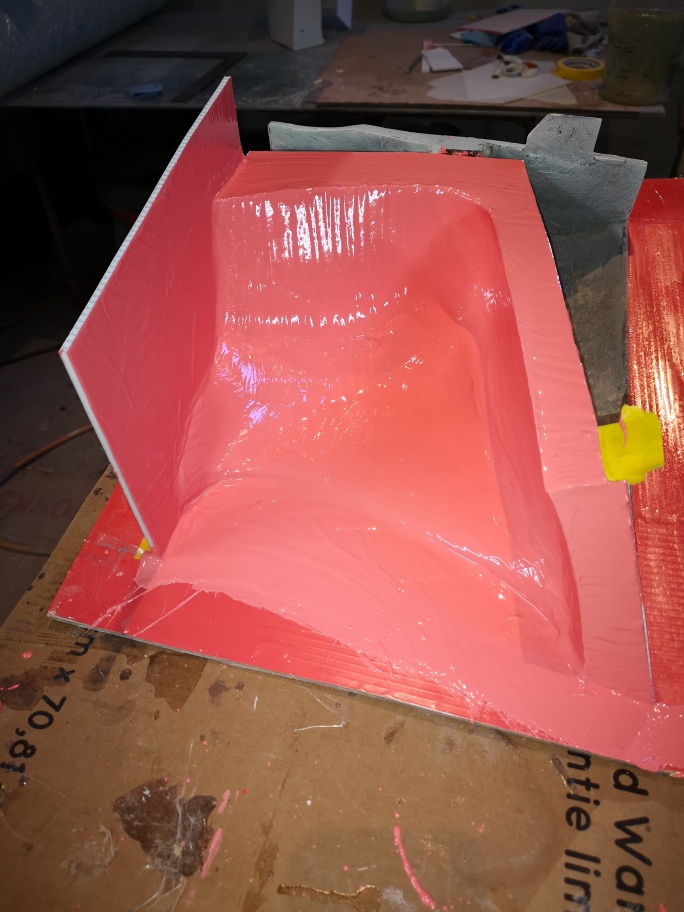
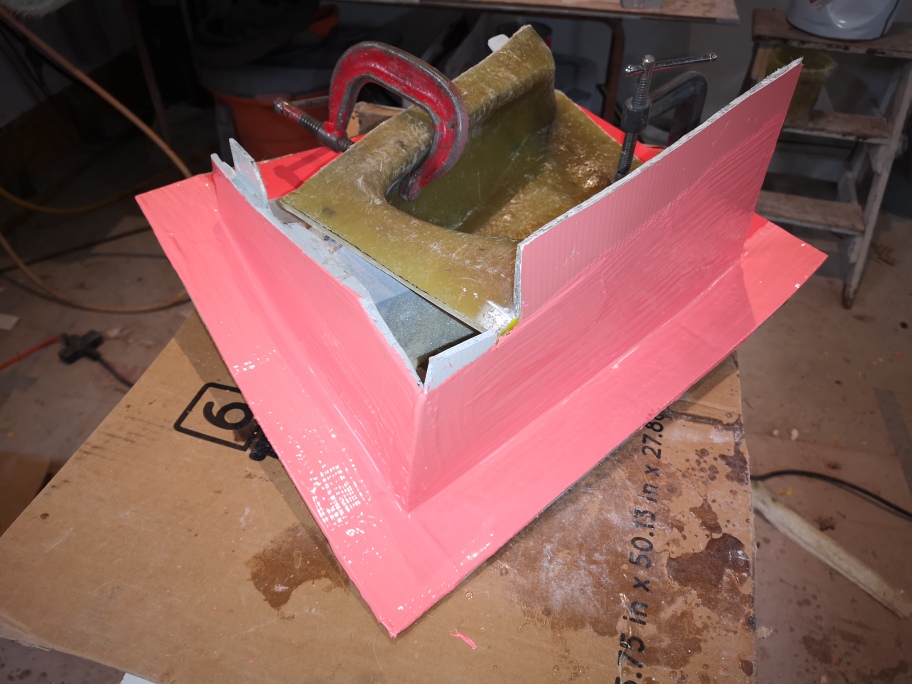
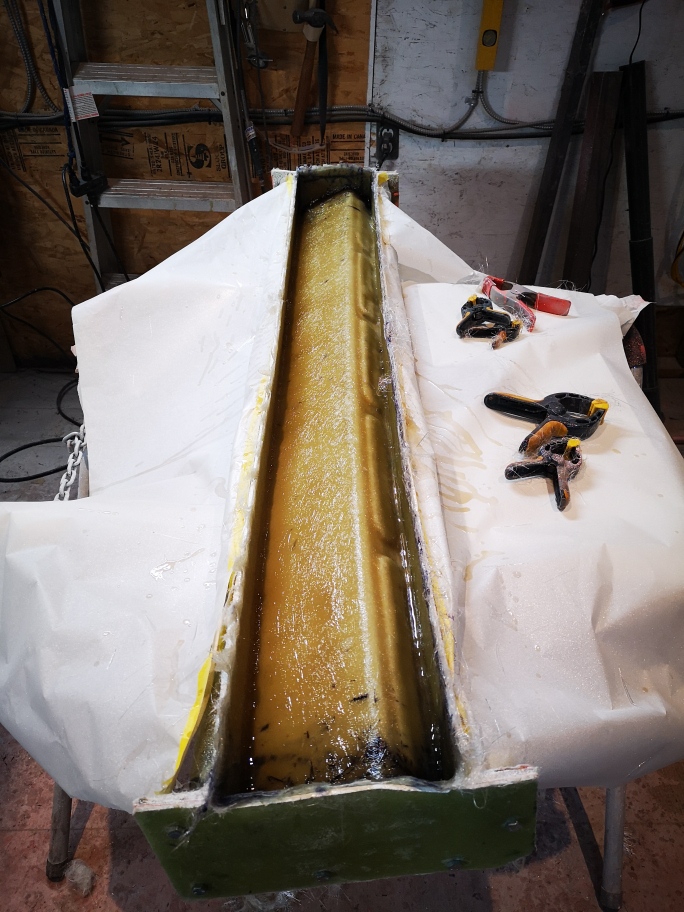
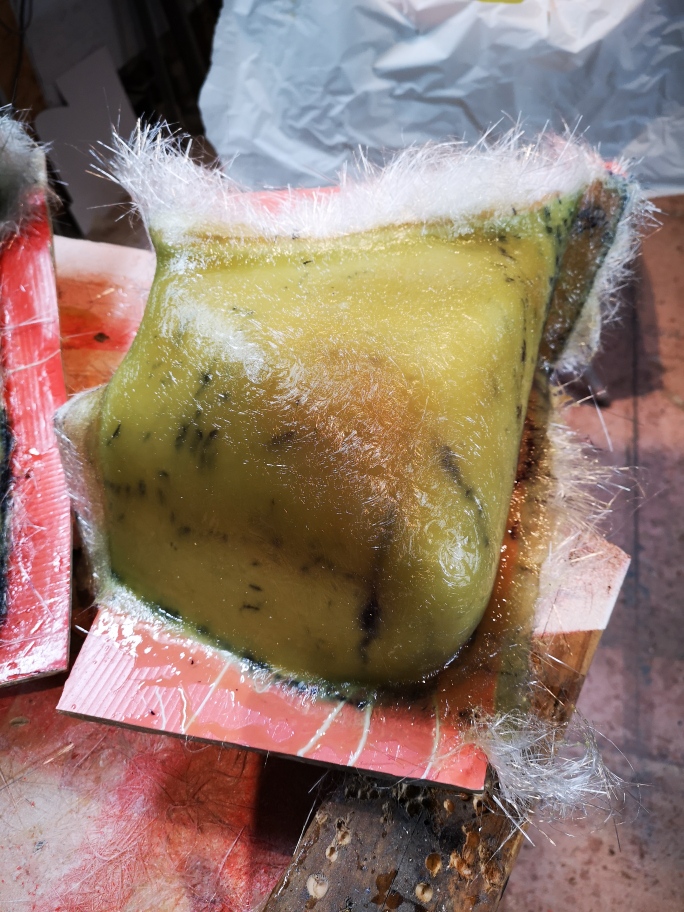
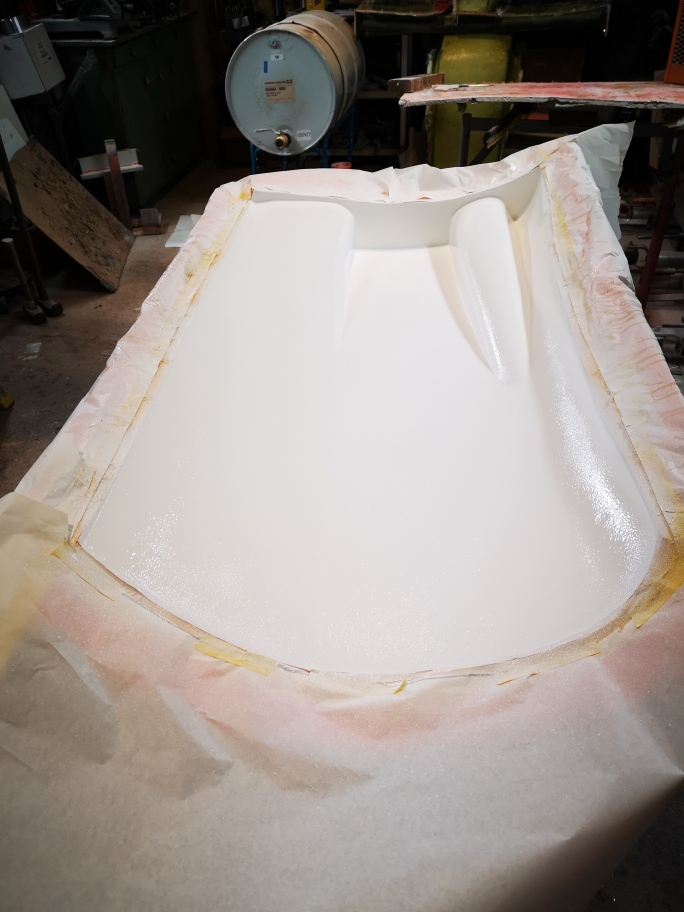
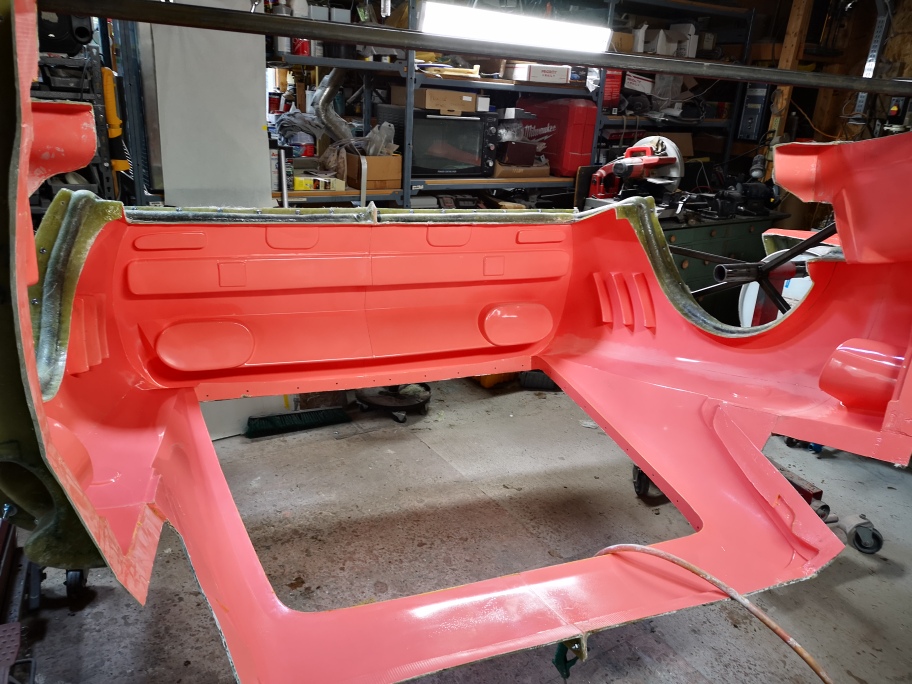
Gelcoat was applied and this is with the first layer of fibreglass matt laid.
Stay safe everyone Wayne
[This message has been edited by dobie1 (edited 10-18-2020).]
The build is moving along nicely, I completed the 4 largest pieces both back halves and both sides. I now moved onto the first of the two sailplane molds .
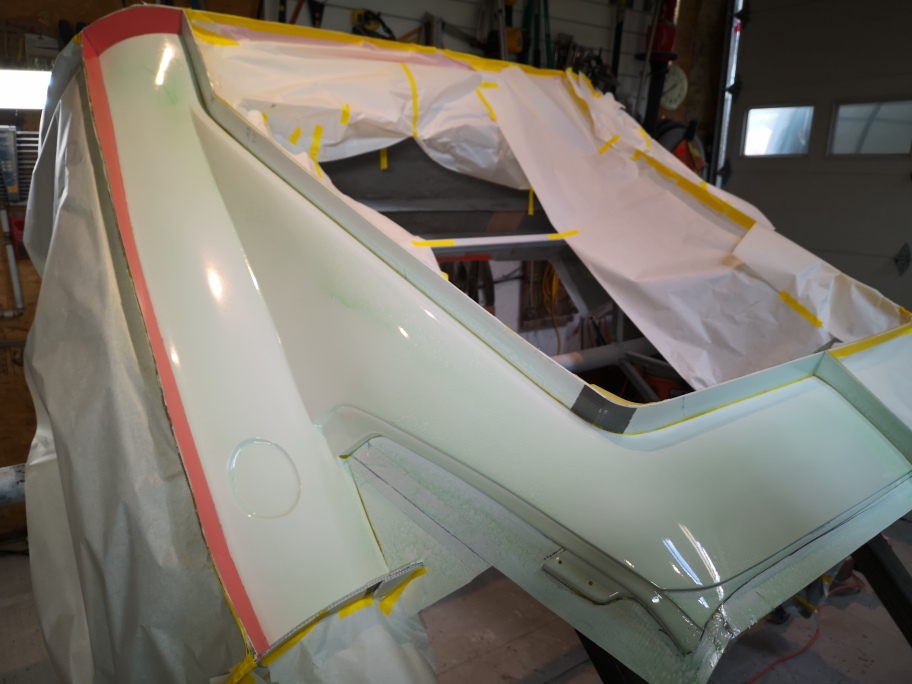
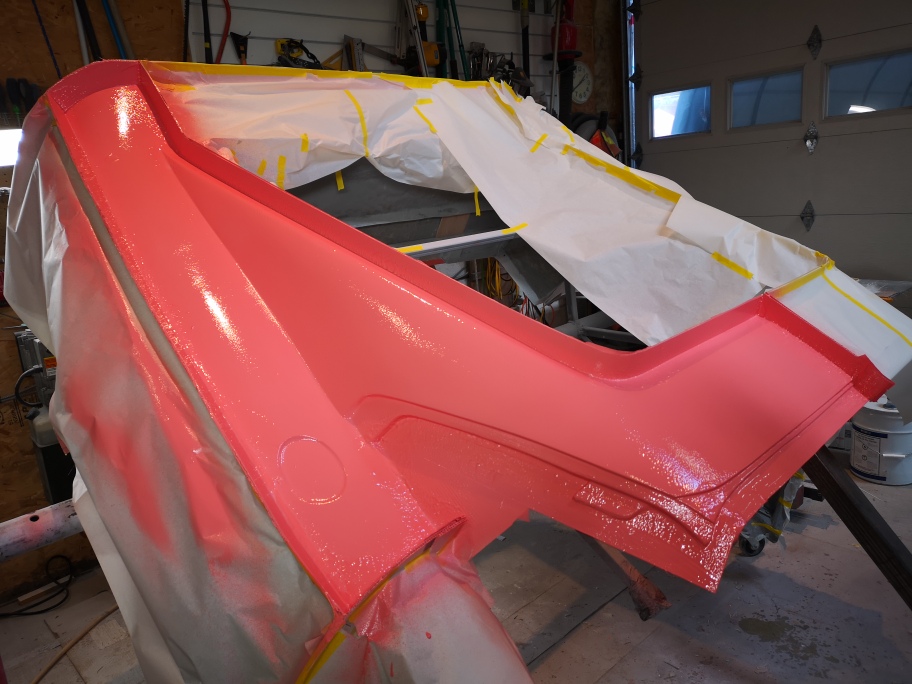
I've worked it out that it is taking about three days to finish each of the mold panels. First day to install the flanges that make up the mold part, then wax and spray the PVA mold release. then the two layers of gelcoat and fillet To round out the tight corners and edges.
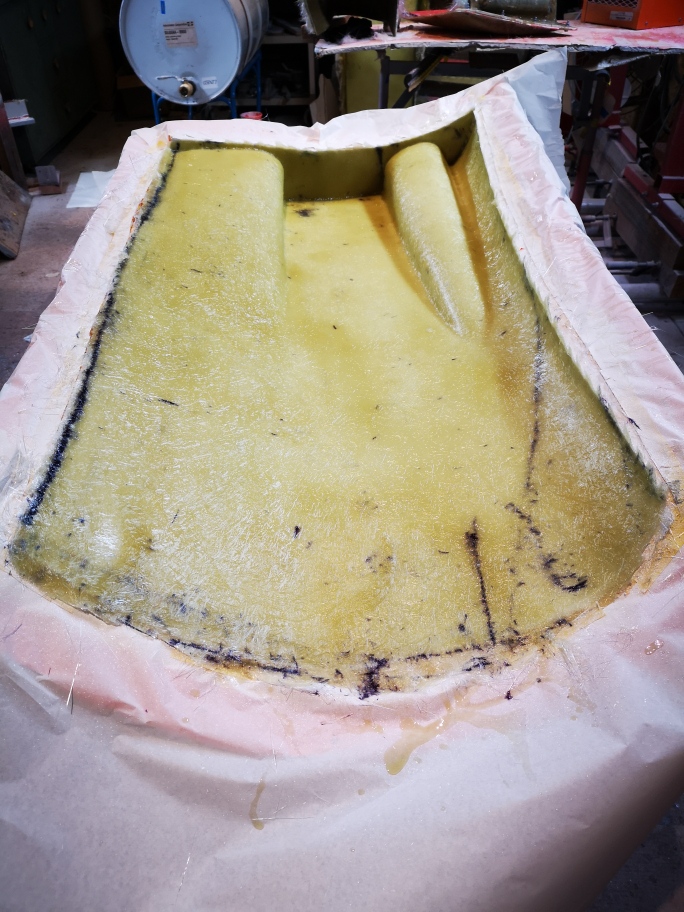
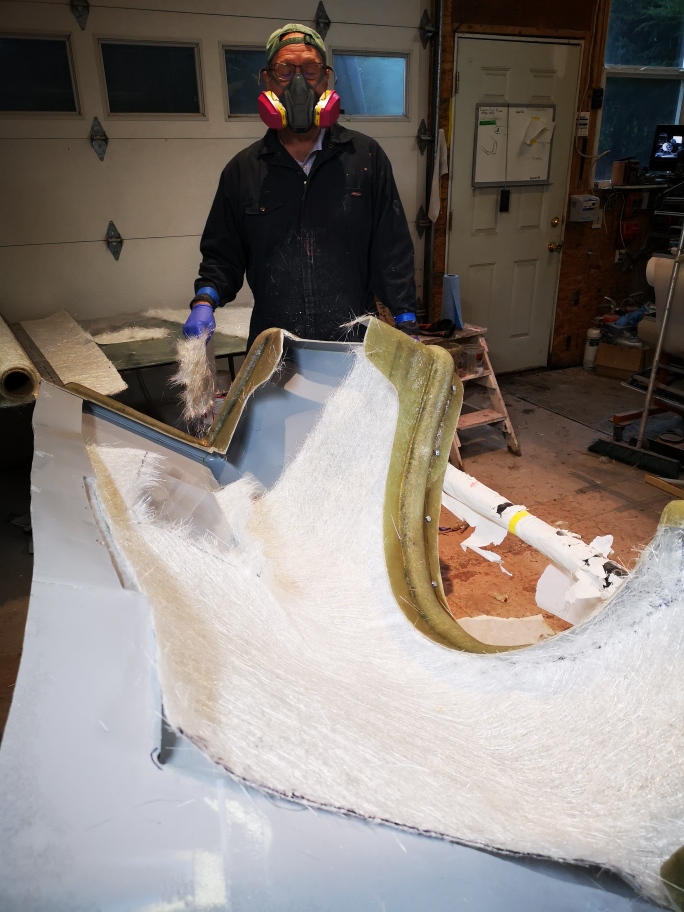
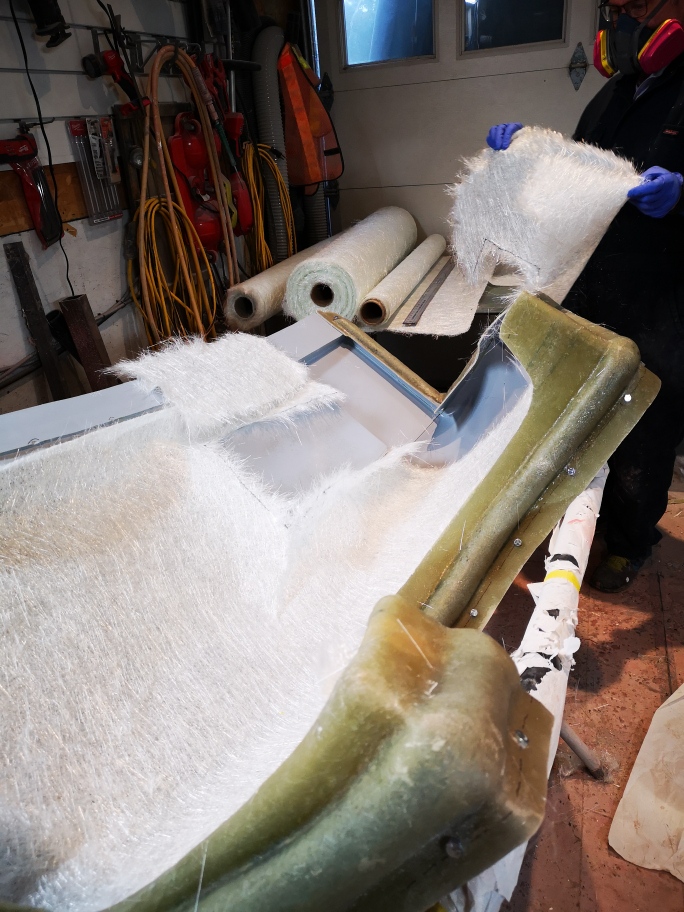
Then the next day I get the first layer of 1oz mat on And after the first layer of 1oz mat has partially setup I add the first and second layer of 2oz mat. It’s not a good idea to add more layers as the exotherm (heat) generated can cause problems.
that's where it is as of today ,i'll add the next two layers of mat tomorrow along with the reenforcement .
thanks for stopping by, stay safe.
Wayne
[This message has been edited by dobie1 (edited 10-24-2020).]
Thanks for the comments Rick ,I'd love to see a fellow hobbiest build one. I've thought about doing a second build and doing a longitudinal engine install something along the lines of Bloozeberry's 355 build.
I do have a bit of a update , things are moving along fairly well .I completed the rear two piece mold and am now onto the first of the side molds after some input from Don I added an additional flange along the fender to help facilitate a easier pull with the rear side vents.
first picture of the finished rear mold
The next are with the final flanging installed and waxed and PVA on
Gelcoat was applied and this is with the first layer of fibreglass matt laid.
Stay safe everyone Wayne
My idea of the "best" v8 swap in a Fiero is longitudinal. A 6 speed manual and some tricky Vette type suspension. Or even an S10 type differential oil pan assembly and a Vdrive 6 speed ZF. I LOVE this body you are doing. great job.
Thanks Guys I really appreciate all the positive comments, it does keep me going.
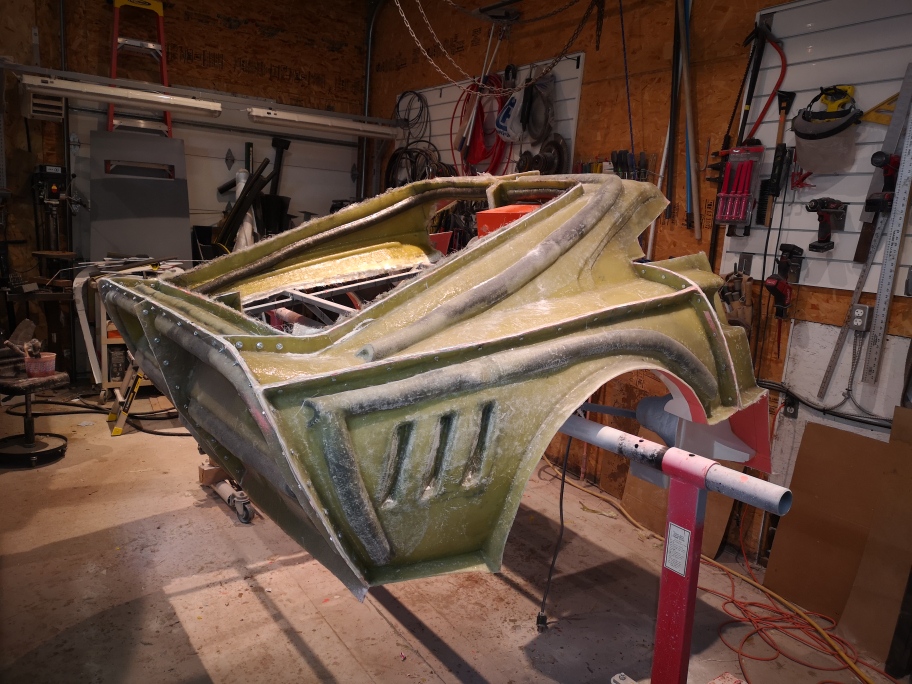
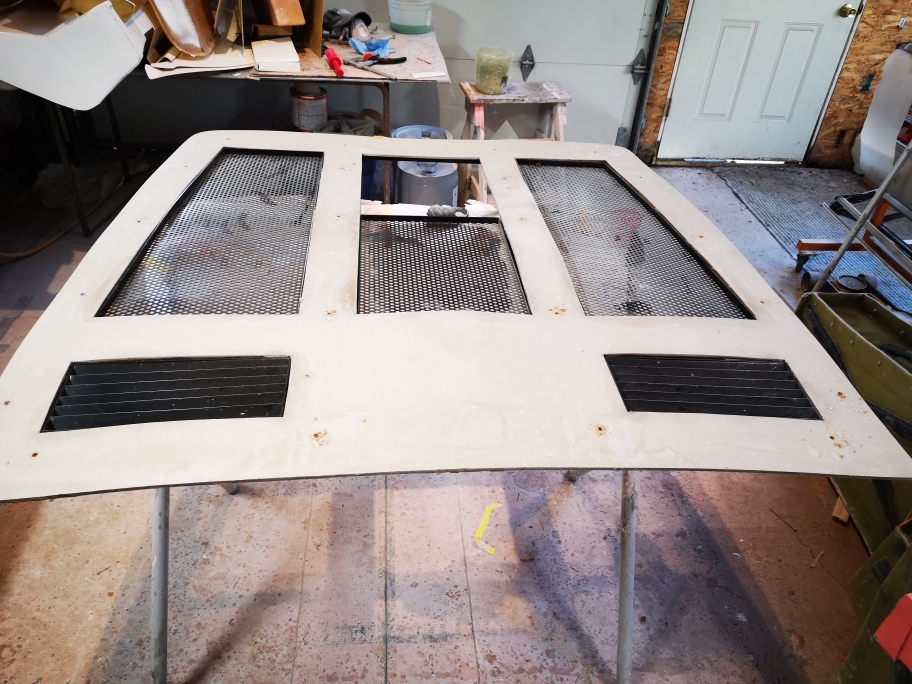
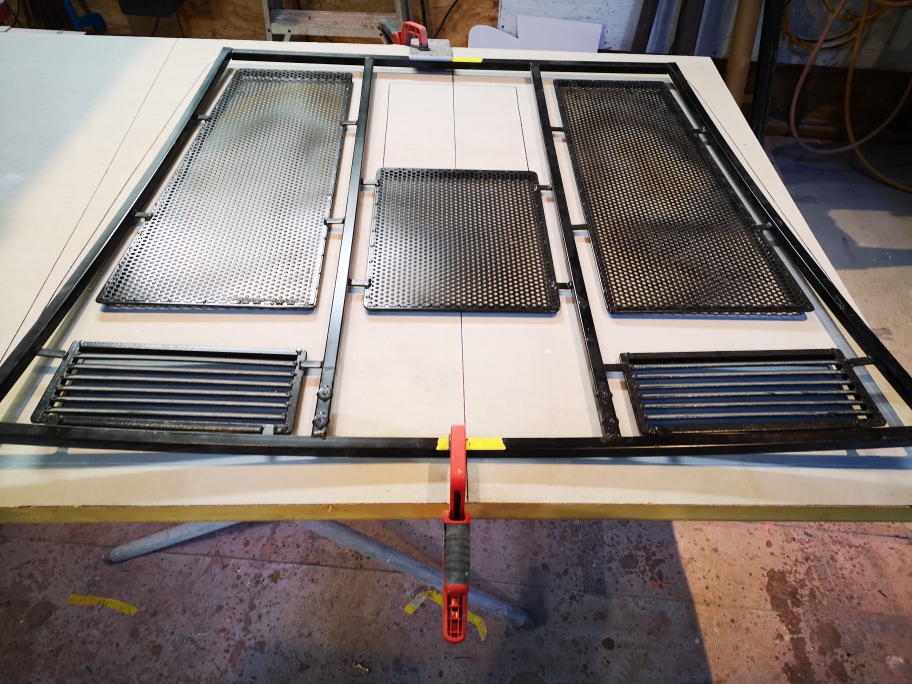
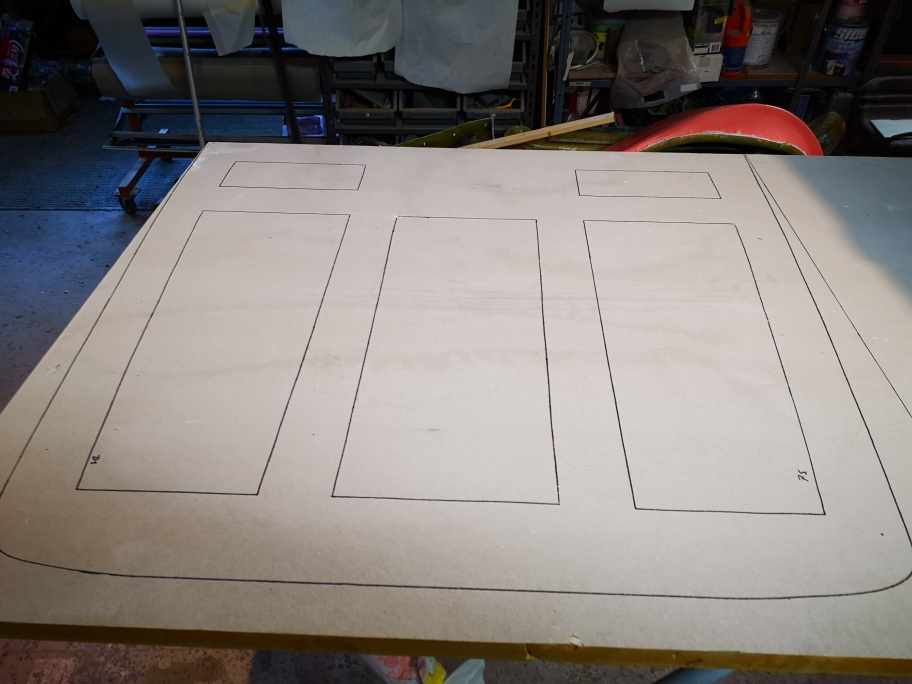
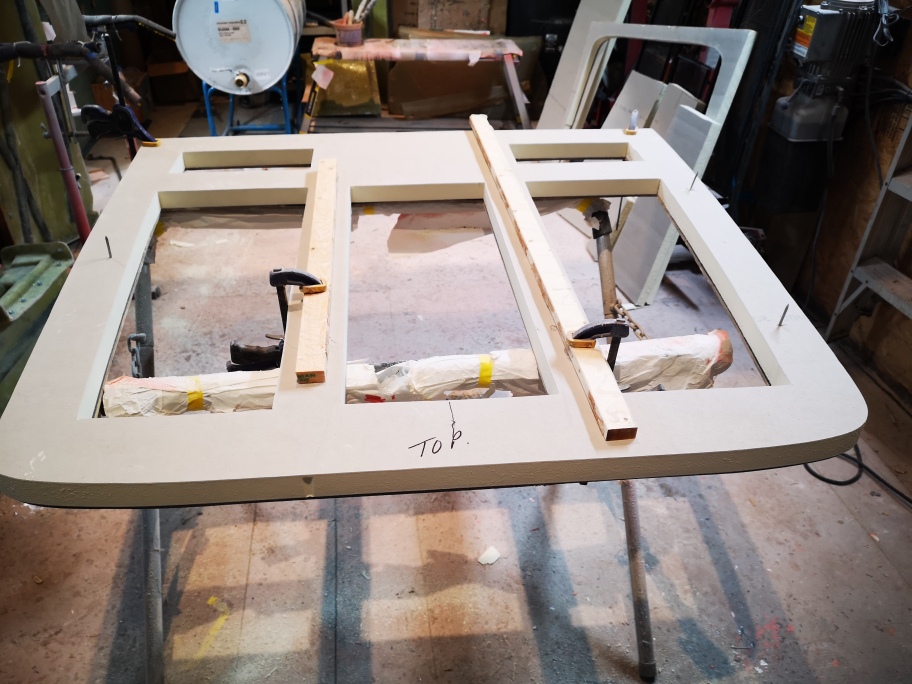
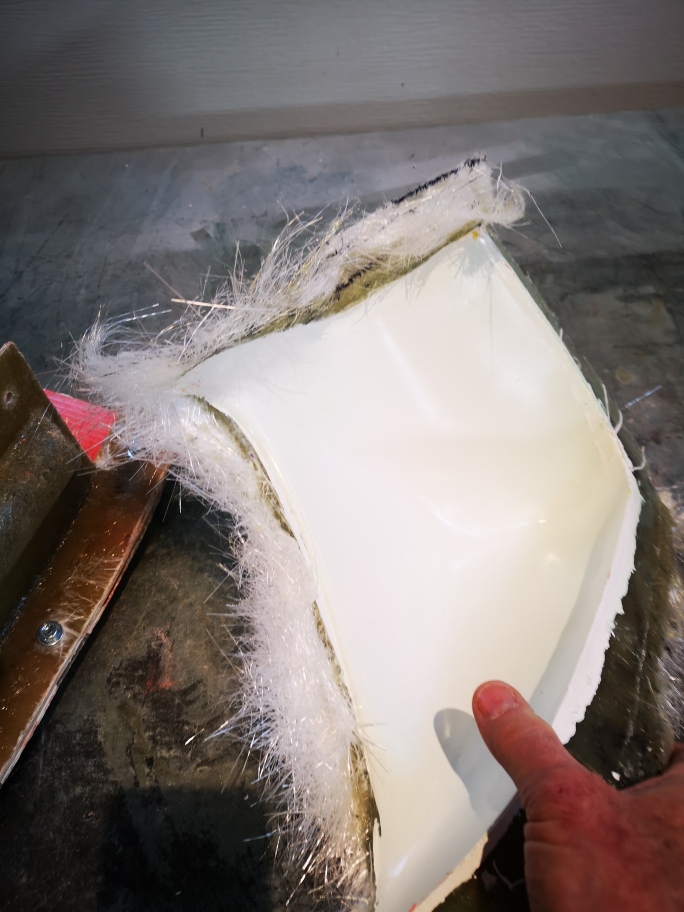
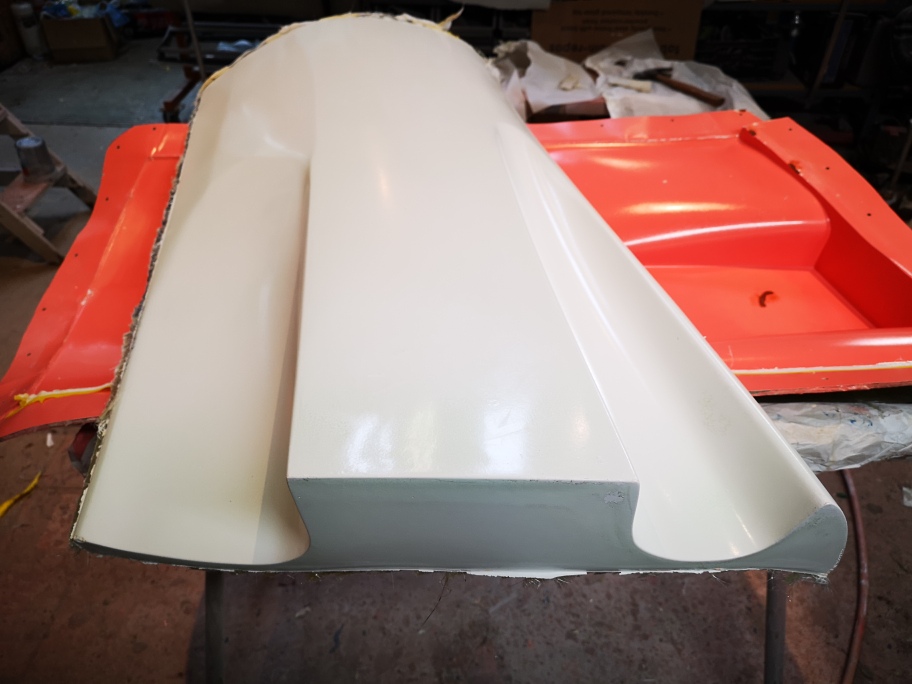
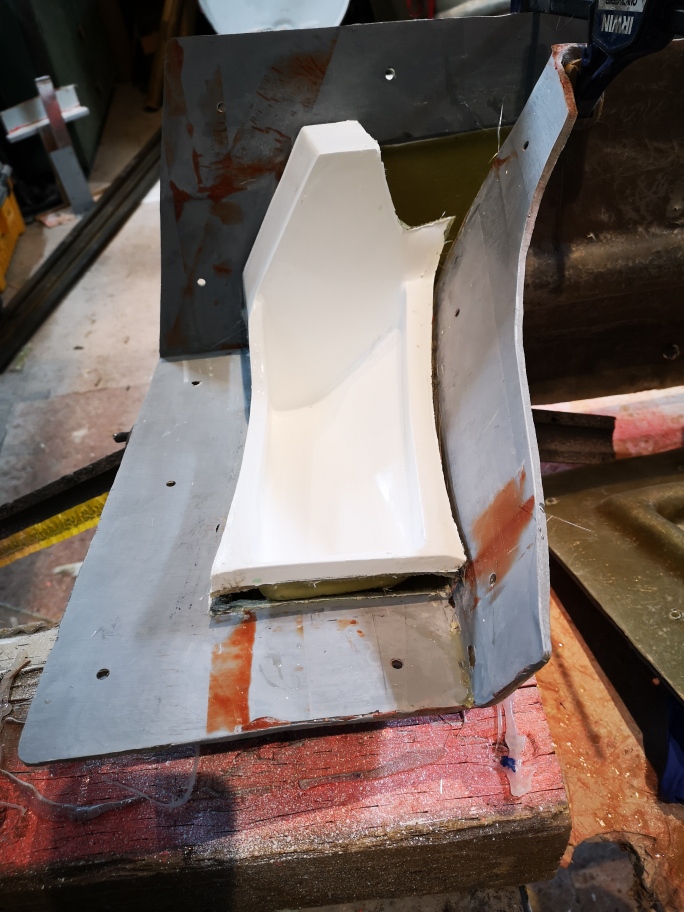
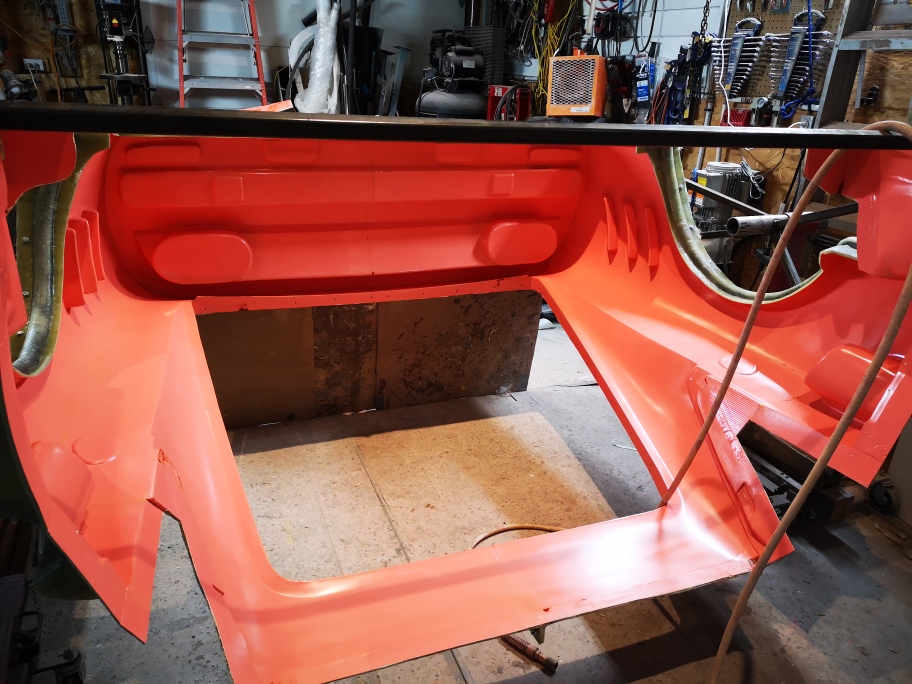
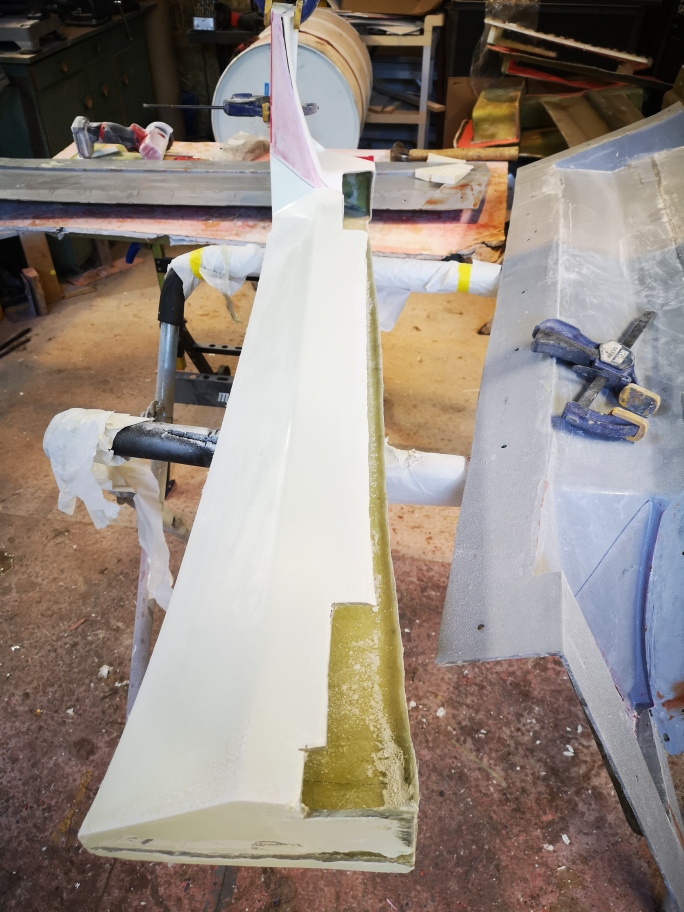
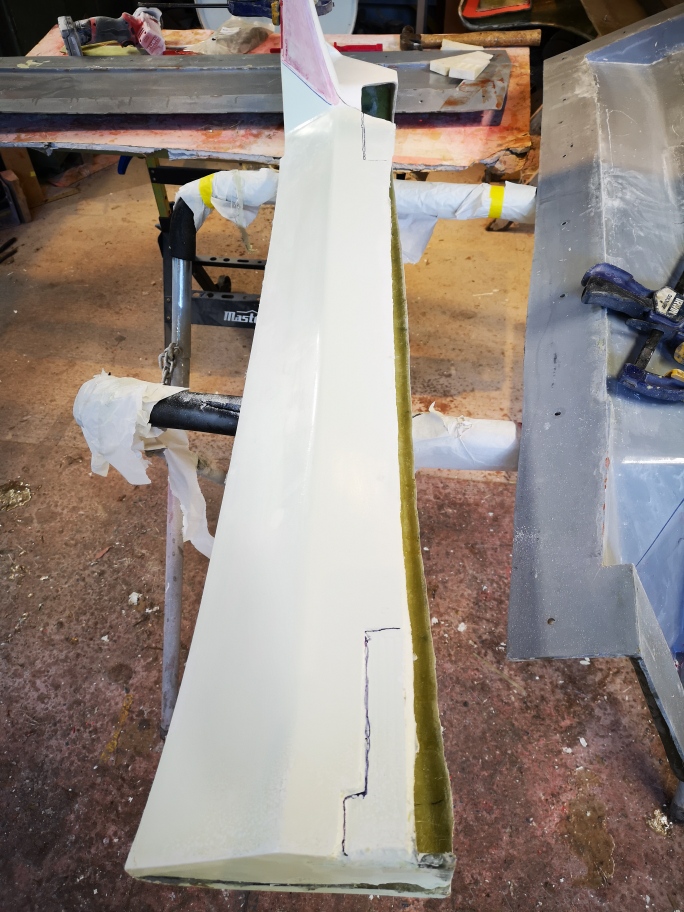
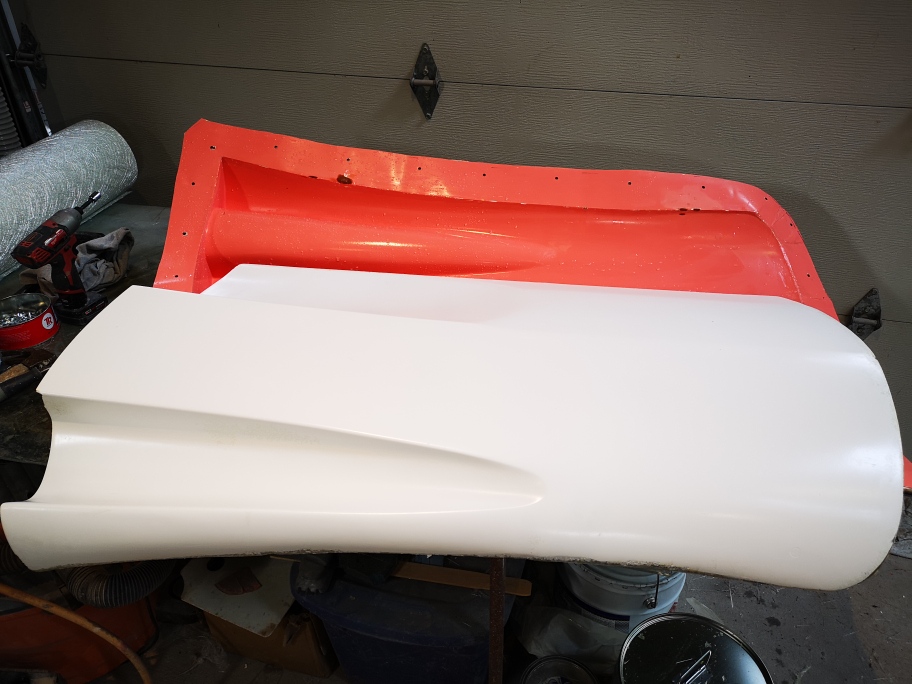
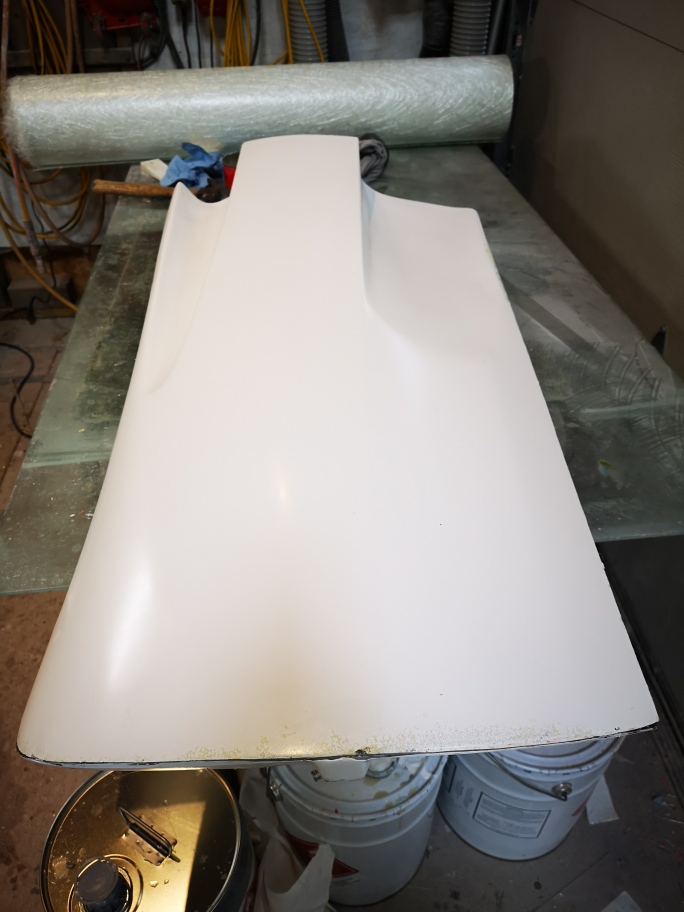
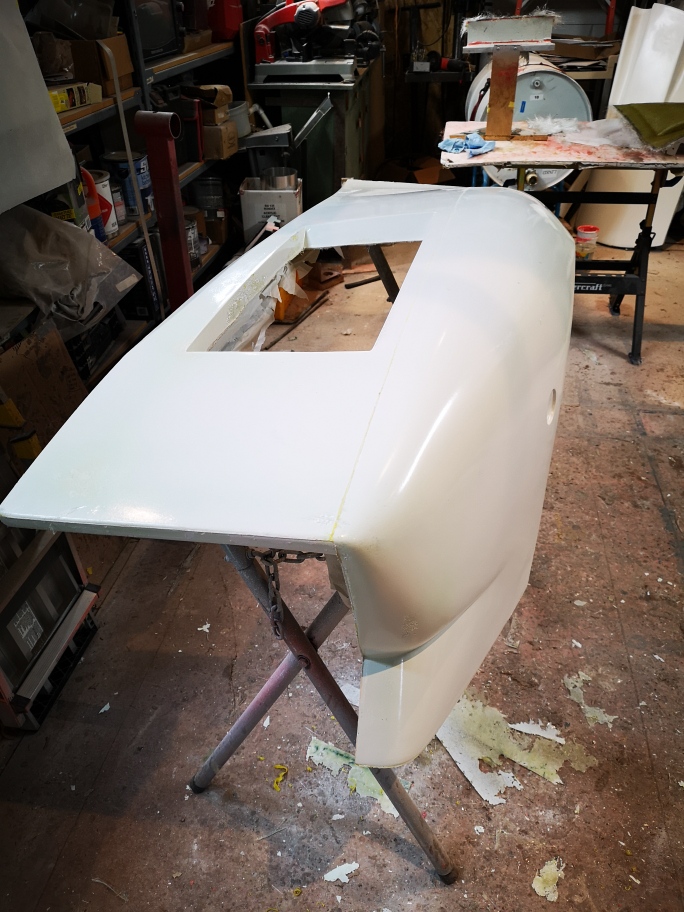
I have been very busy on the build. I am almost finished the rear mold for the car, its taken longer than I originally estimated due to the extra pieces I built into the mold. The top part is completed, I now need to rotate it upside down to do the last parts both inner scopes and both wheel lips then it will finally be ready for the first parts to be pulled. The journey has been long but I'm down to the last parts of the mold build, then I can actually finish the build.
That is the most beautiful plug I've ever seen...and I've seen a few!
Mold is looking great, do you mind my asking how thick you made it? (How many layers did you end up putting on altogether)
I've not used the foam "noodles" before for reinforcement/stiffeners, but looks like they should work ok, as the glass makes them "rigid" but light. I'll have to try that!
I'd love to be able to come up there and help you lay up the first body out of those molds. You've done soooo much work over such a long period of time, don't scrimp on the mold curing, finishing!LOL Yea...I know..."preaching to the choir"!LOL
It just looks fantastic to me at this point.
Make sure to take some pics as you pull the plug from the molds, or pull the molds off the plug...er...well...you know what I mean!
Great job on everything from where I'm lookn'.
Keep up the good work and keep the updates/pics comin'!
Thanks Sage As always thanks for your thoughts and input ,if covid wasn't around I would love your help!!!
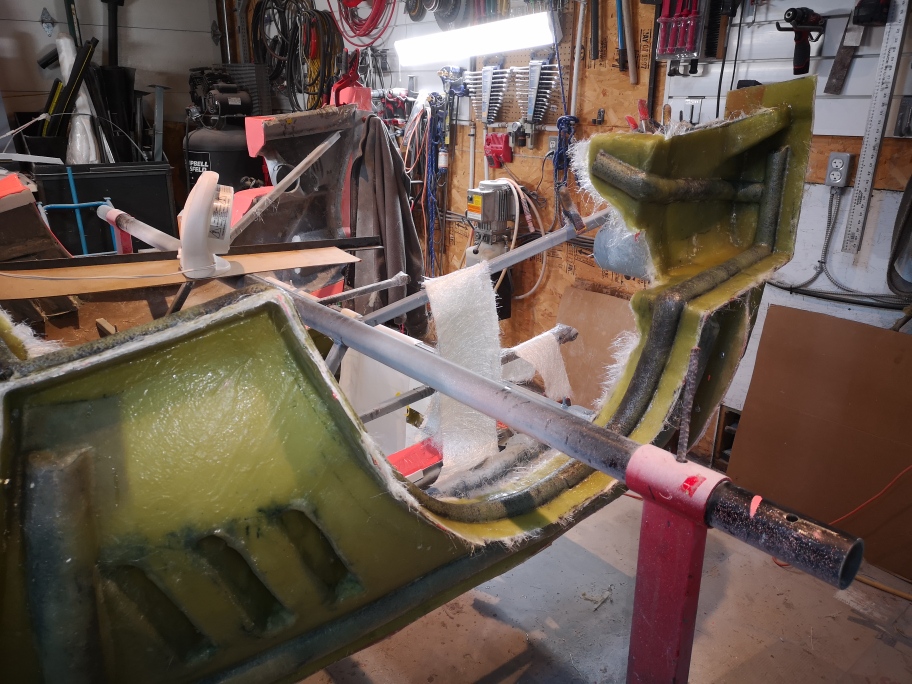
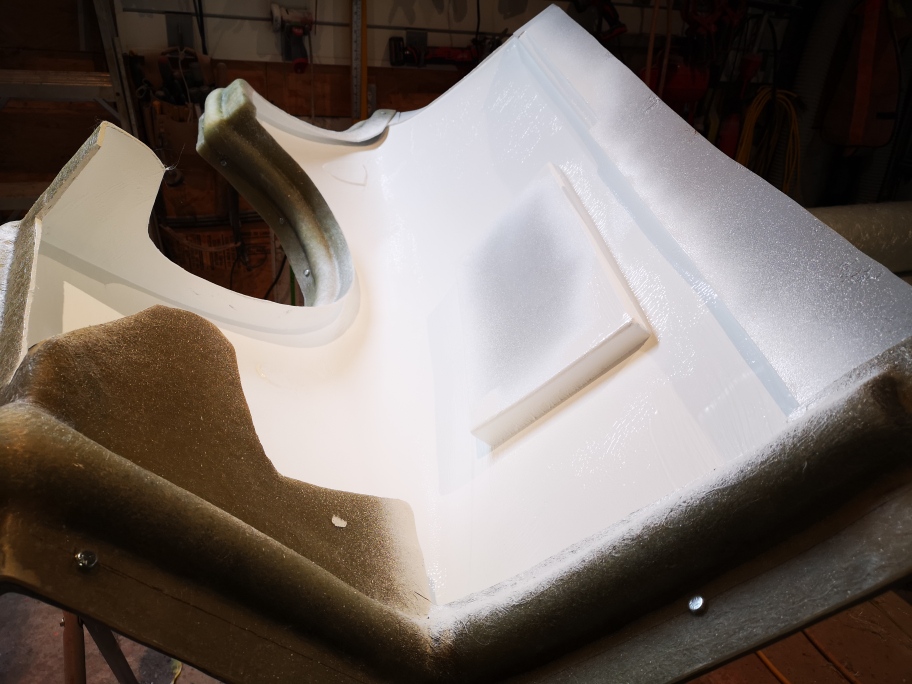
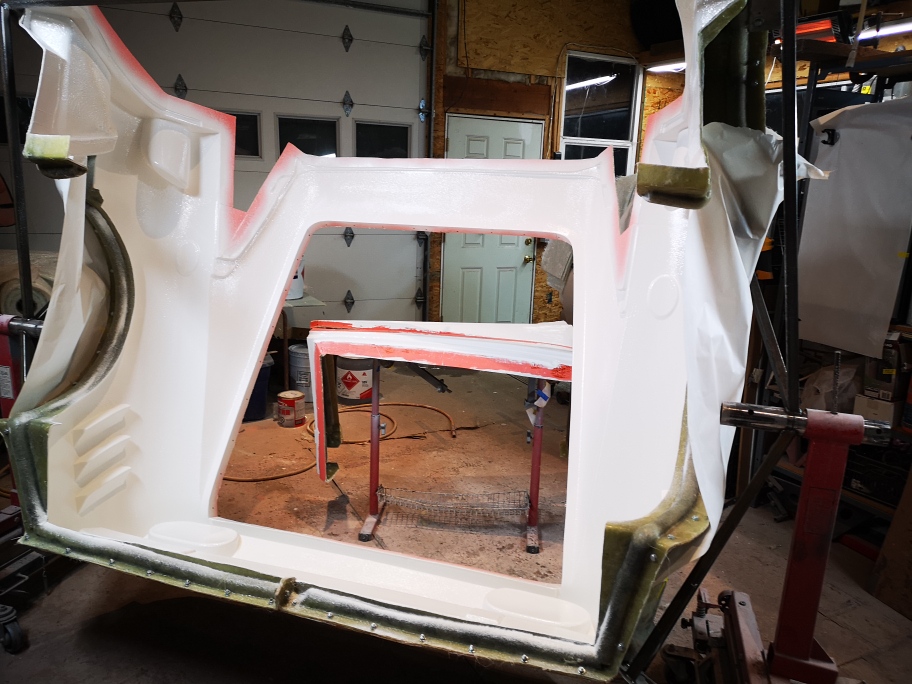
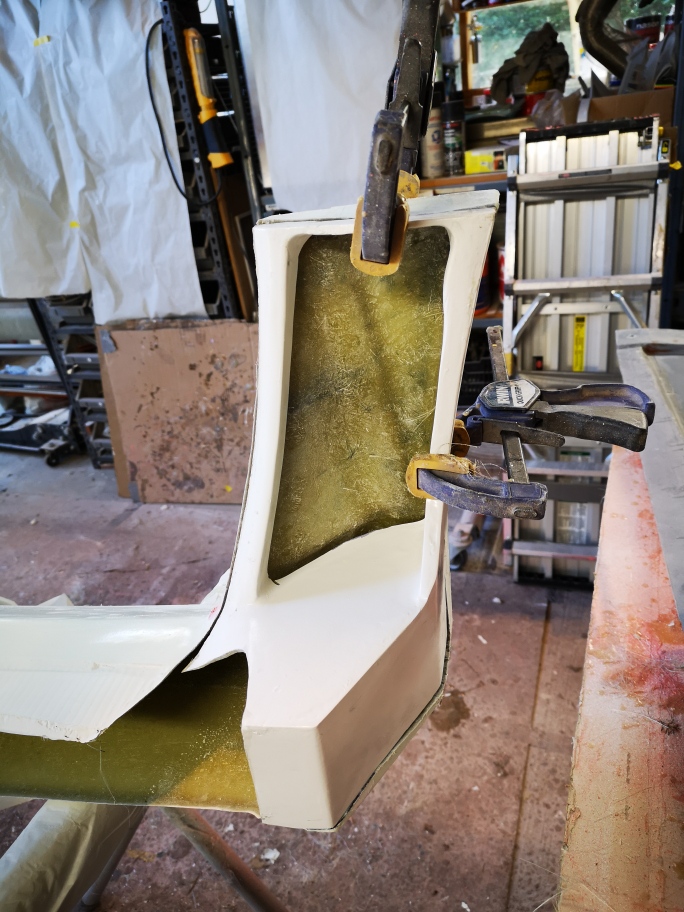
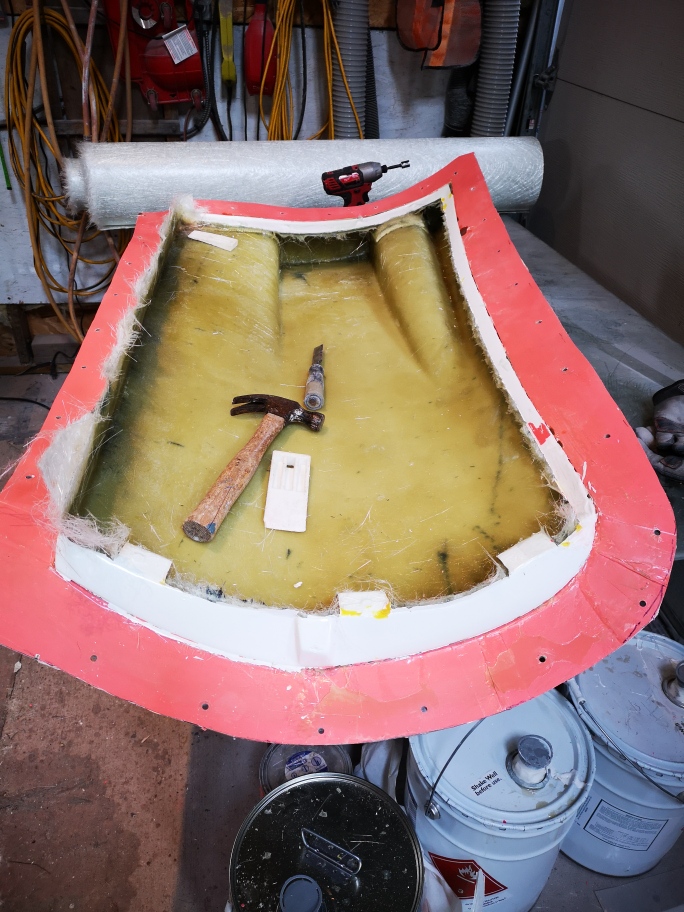
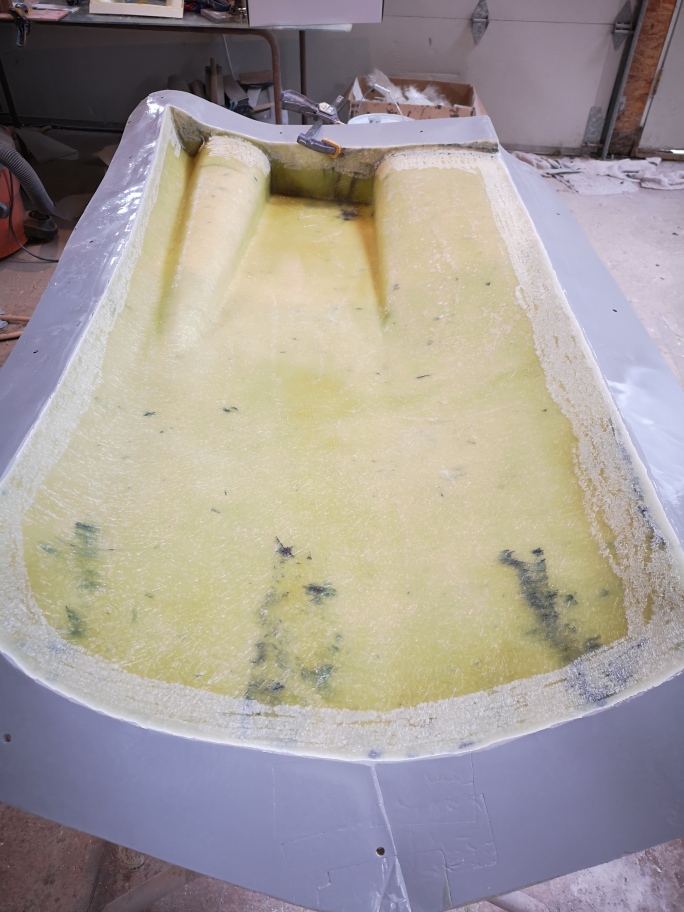
I have been laying up the mold using 1 oz mat followed by 4 layers of 2oz mat the foam reenforcement is added before the last layer. not to your standard layup thickness but will work for my purposes.
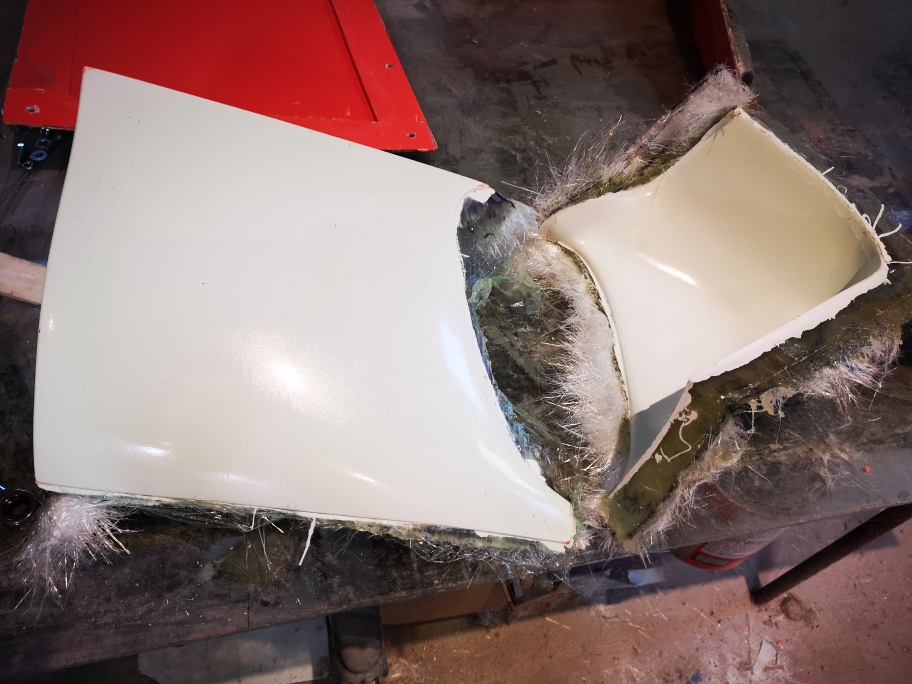
I cleaned up the top side and flipped the mold over to do the last pieces. after looking at it I think I can get away with finishing the intake ,wheel well and bottom of the back (all the orange areas) in two pieces.
Thanks for stopping by "Rick" , I appreciate your comments.
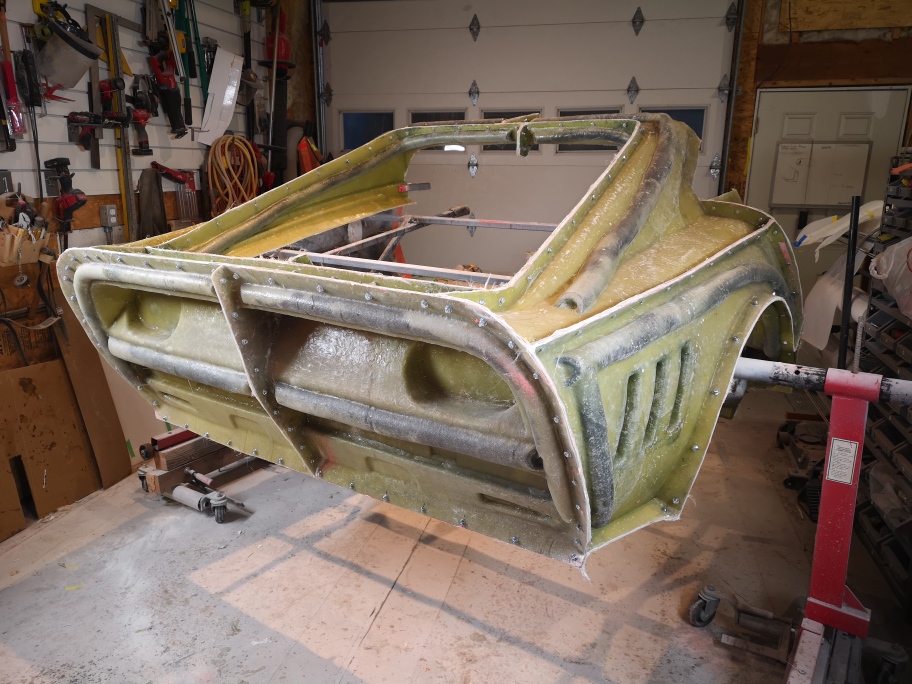
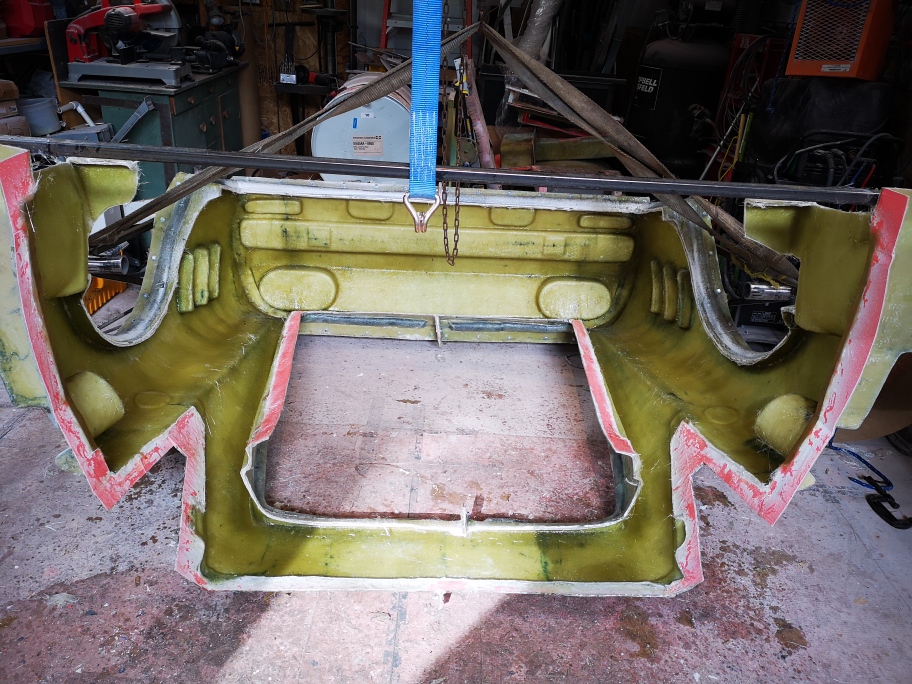
Well the molds are finally finished!!! I'll have to leave the rear mold some time to fully cure probably 3 weeks, before I pull everything apart to pull the plug out and start to layup the body. I need to get a bunch more supplies resin, mat and gelcoat, my supplier is waiting for a shipment to arrive hopefully in the next 3 weeks. Covid is now creating a supply problem waiting for shipments to arrive.
I'm thinking of possibly molding the dash I built earlier, I'm not sure if there is any interest in it from anyone else I'll take a look and see how much work it will be and if I have enough resin and mat left .
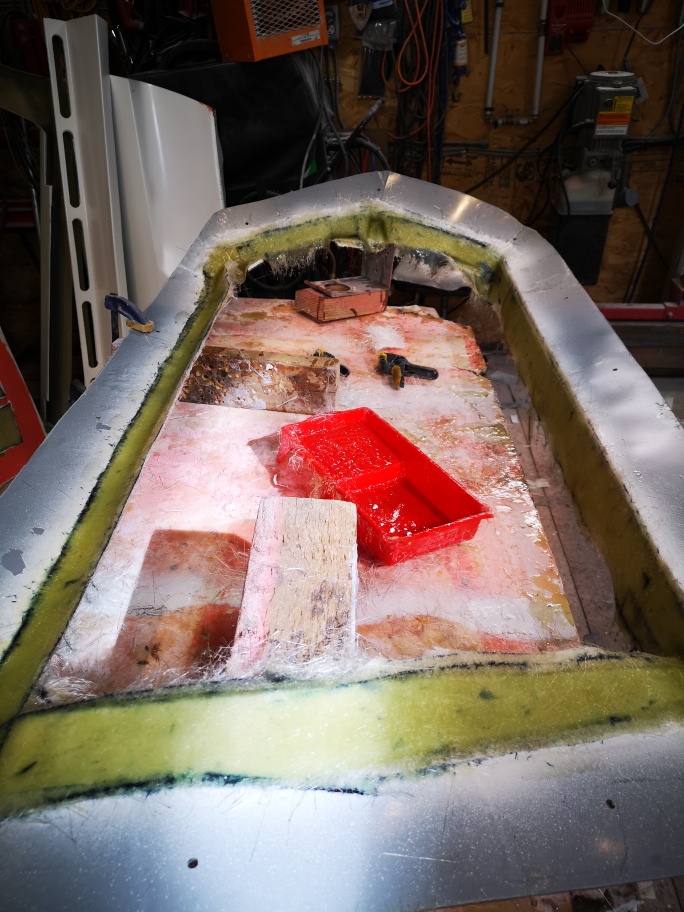
I have to say having the rotisserie to do the underside sure was nice ,I'm trying to figure out how to modify it to mount and use when making the parts from the mold.
Good idea on re-using the rotisserie to mount the molds for layup.
I generally make a "stand" for the plug I'm working on to keep it where it's easy to work on, and solidly based.
Then after the mold layup is complete, I cut the plug loose, flip it over and mount the mold to the same stand, then pull the plug out.
I have enough 1/4 panel molds now, that instead of having an individual stand for each one, (which I already have) I'm brain storming a mounting "system" that will utilize just one set of stands, and a mount affixed to each mold that can be plugged and unplugged from that one set of stands. Since you have the front and rear clips to layup, maybe a similar setup would be beneficial in your case? Just a thought!
Those molds look Sooooooo Goooood! Congrats on a job very well done!
Looking forward to seeing the plug removed, and the first part being taken out.....nothing compares! (JMHO!)
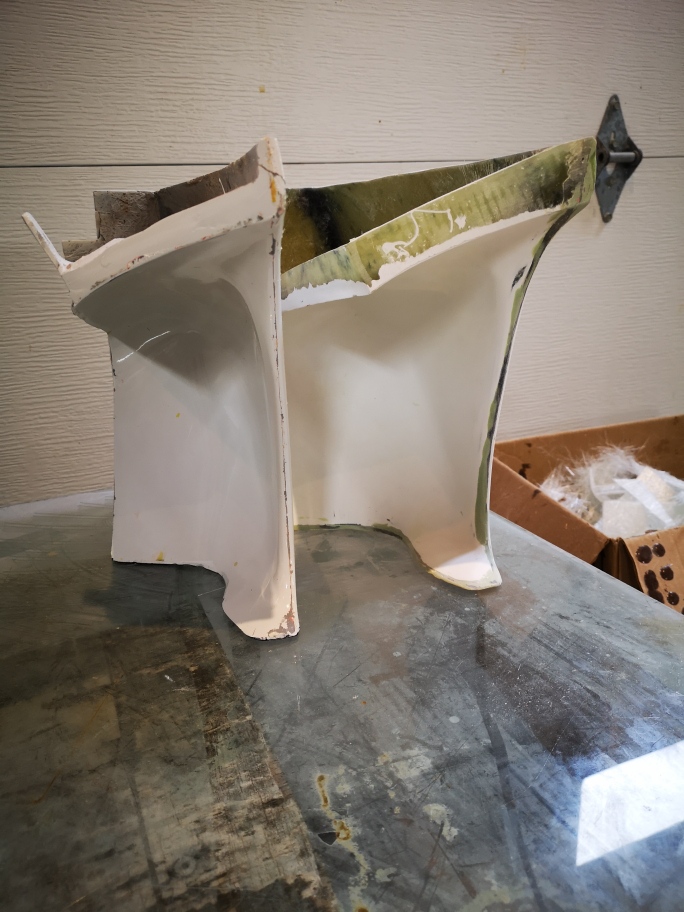
I gotta addmit when I saw the first pics on the page, I thought you were making a huge rear spoiler and fender lips! Looks awesome! Then I saw it was for the mold. It too looks awesome! It looks kinda mad max w the bolts and tube reinforcements. The work is awesome too. Its just all around awesome, good stuff!
Good idea on re-using the rotisserie to mount the molds for layup.
I generally make a "stand" for the plug I'm working on to keep it where it's easy to work on, and solidly based.
Then after the mold layup is complete, I cut the plug loose, flip it over and mount the mold to the same stand, then pull the plug out.
I have enough 1/4 panel molds now, that instead of having an individual stand for each one, (which I already have) I'm brain storming a mounting "system" that will utilize just one set of stands, and a mount affixed to each mold that can be plugged and unplugged from that one set of stands. Since you have the front and rear clips to layup, maybe a similar setup would be beneficial in your case? Just a thought!
Those molds look Sooooooo Goooood! Congrats on a job very well done!
Looking forward to seeing the plug removed, and the first part being taken out.....nothing compares! (JMHO!)
Keep the updates (& pics...) coming.
HAGO!
Thanks Sage for you input and info always appreciated. I’m looking at perhaps building a exoskeleton frame as having the round pipe running though the middle will make it more difficult to do the layup inside. I have looked at attaching adjustable legs at all 4 corners so that if I flip the mold over to layup it uses the same Leg attachments points. I’m still working on a plan... I’ll post pics as I progress.
I gotta addmit when I saw the first pics on the page, I thought you were making a huge rear spoiler and fender lips! Looks awesome! Then I saw it was for the mold. It too looks awesome! It looks kinda mad max w the bolts and tube reinforcements. The work is awesome too. Its just all around awesome, good stuff!
shem
Thanks for stopping by Shem , I had to look back on the pics you were referring to , and Yes the flang does kinda look like a spoiler mod. Probably should have given a better description in hindsight. Wasn’t until the exoskeleton is installed and it will be a mad max creation. 😆
Hi Alan Thanks for stopping by, oh I have been working away at the project. I had to wait for a resupply of resin ,mat and gelcoat. I’ve also been waiting for the rear mold to fully cure” it’s been 3 weeks now”. Before I can demold the plug and start to build bodies. While I’ve waiting I’ve been building the smaller piece molds ,I didn’t take a lot of pics but will post what I have soon. I still have the two mirrors and lower scoops to mold ,these will probably be the most complex ones I’ll be doing so I will take lots of pics to post of that process. Once they are finished the entirer car will have been molded and be ready to produce complete bodies. I’m going to be helping my mentor-and friend Don O. Mold a OEM interior for a Lamborghini Countach before I get into laying the body for my build.
I've been busy looking after the grandkids for a few days so haven't had chance to post any pics.
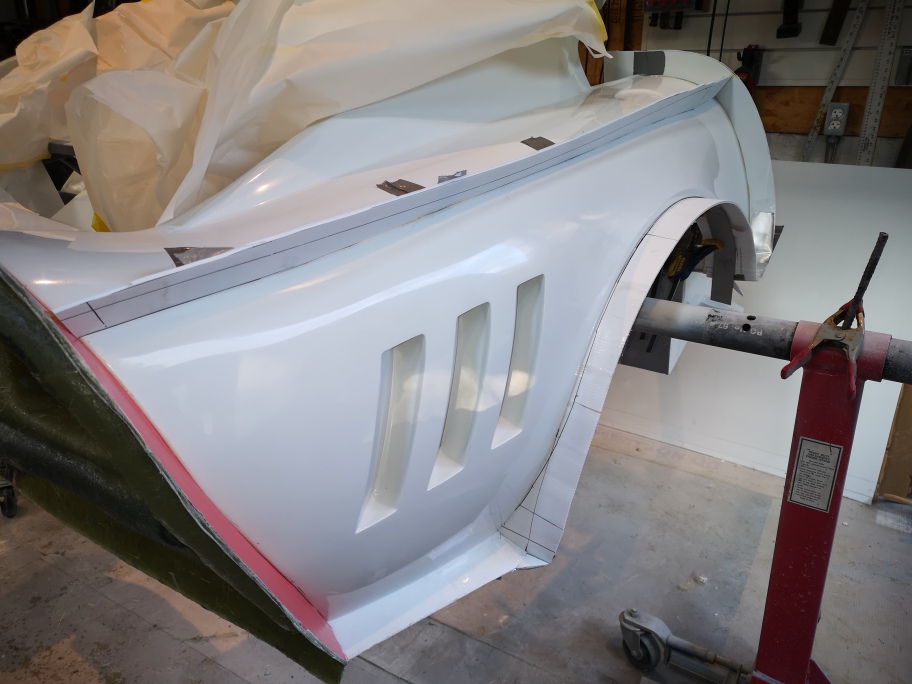
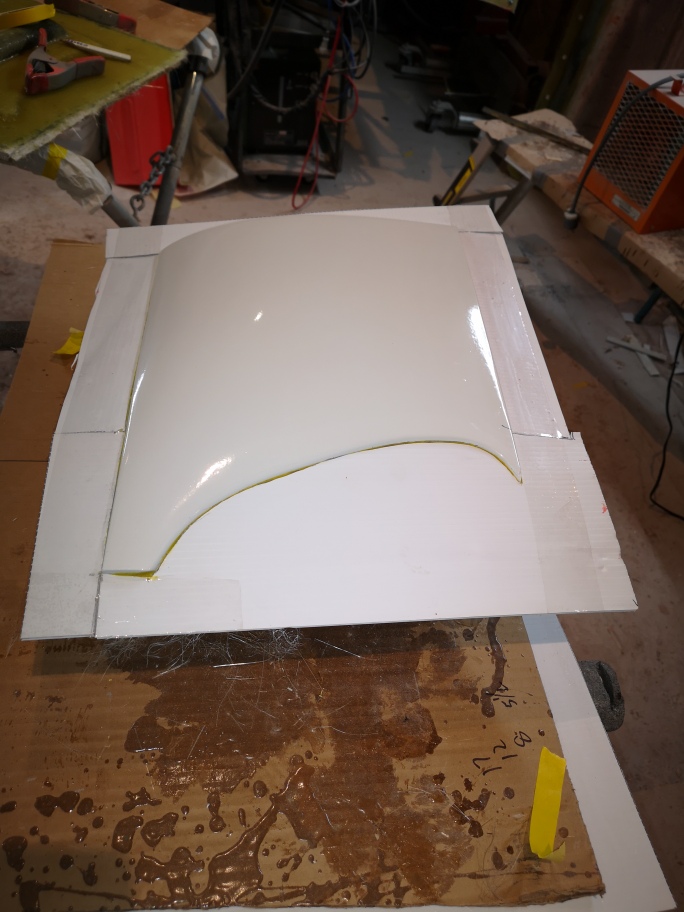
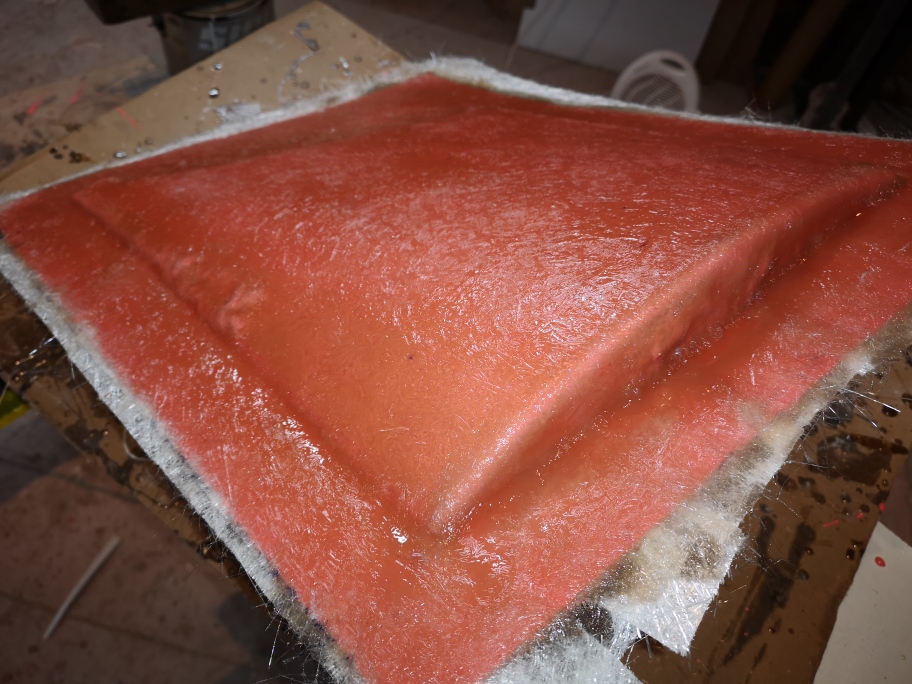
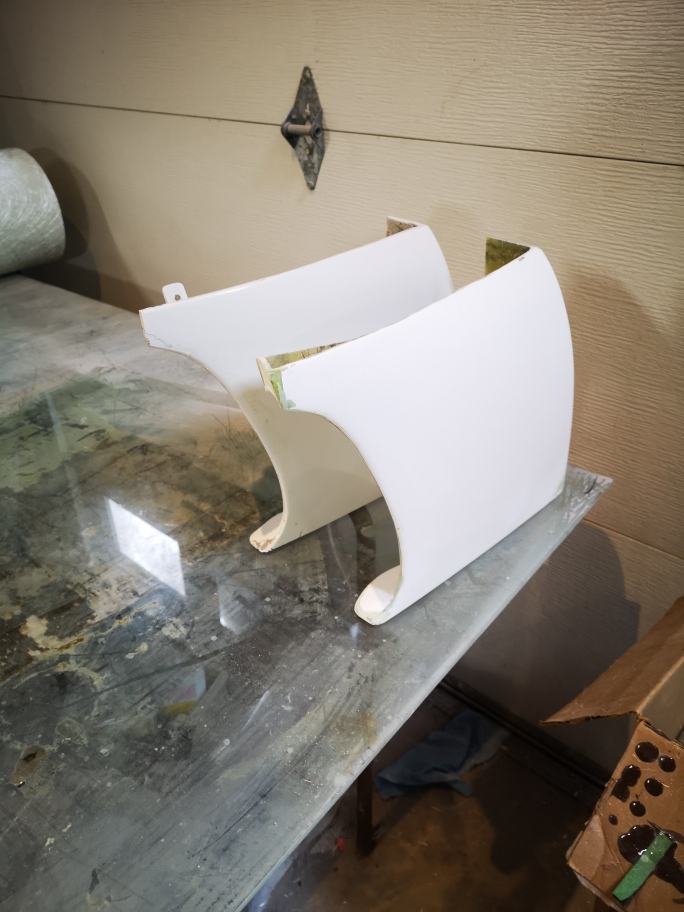
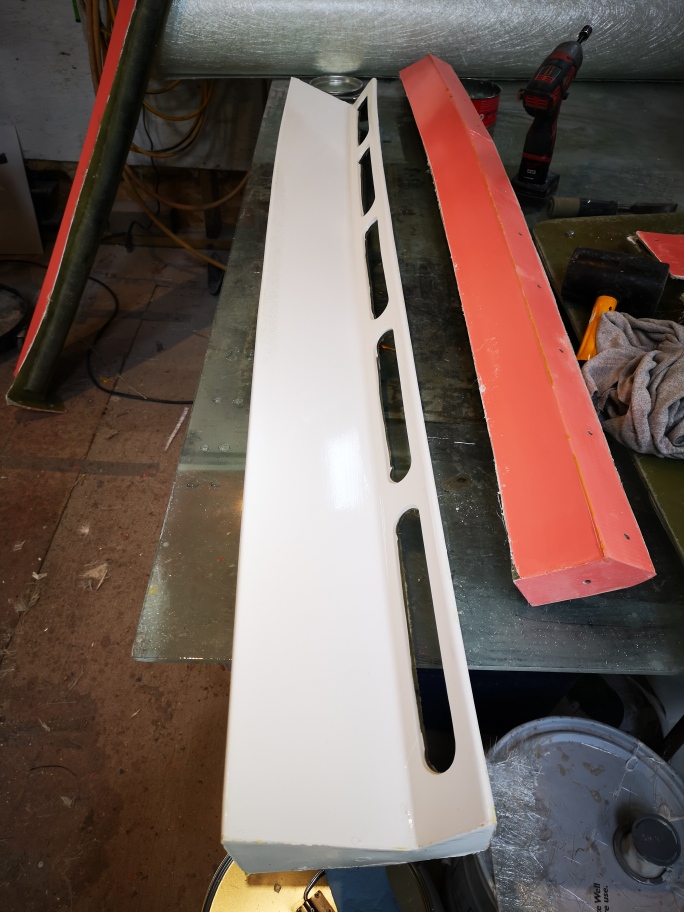
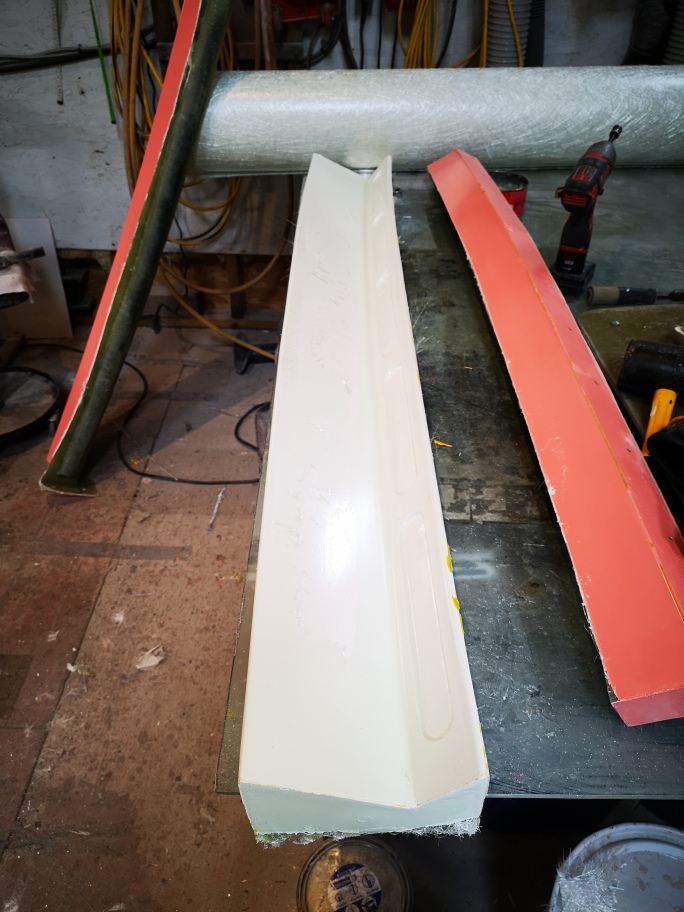
Here are a few to show some of the smaller pieces the first series are of the fender/running board outer covers one per side . I had made the decision to make these separate parts as I felt it was impossible for me to try to mold the part with any success because of the deep cutback for the fender screens.
there are two on the same flat mold, this is with first layer of gelcoat
this shot is with the first layer of 1 oz glass mat the witness layer of white gelcoat shows thru the glass
This shot is the completed mold with reenforcement
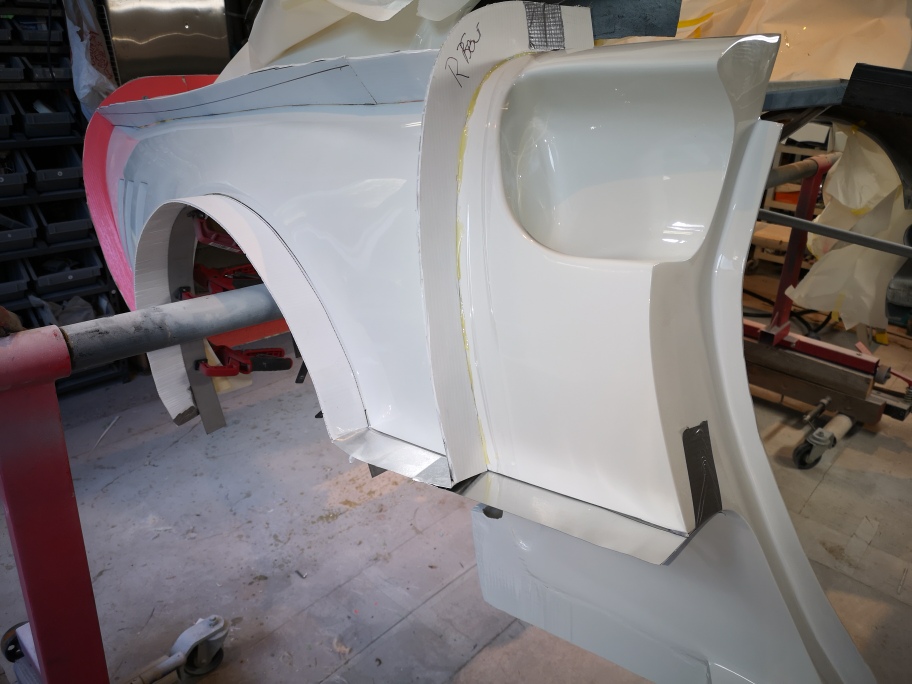
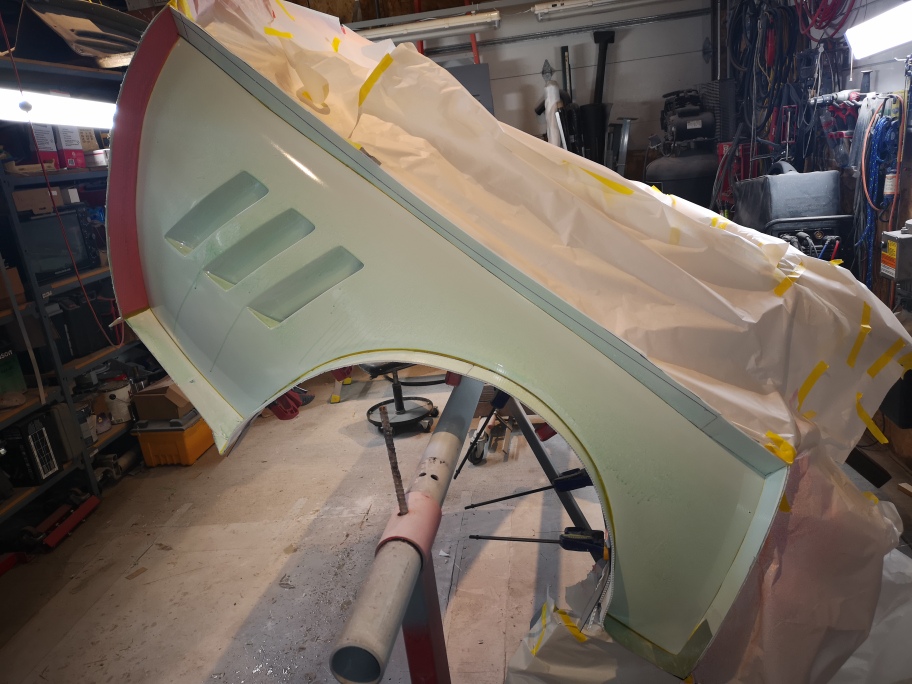
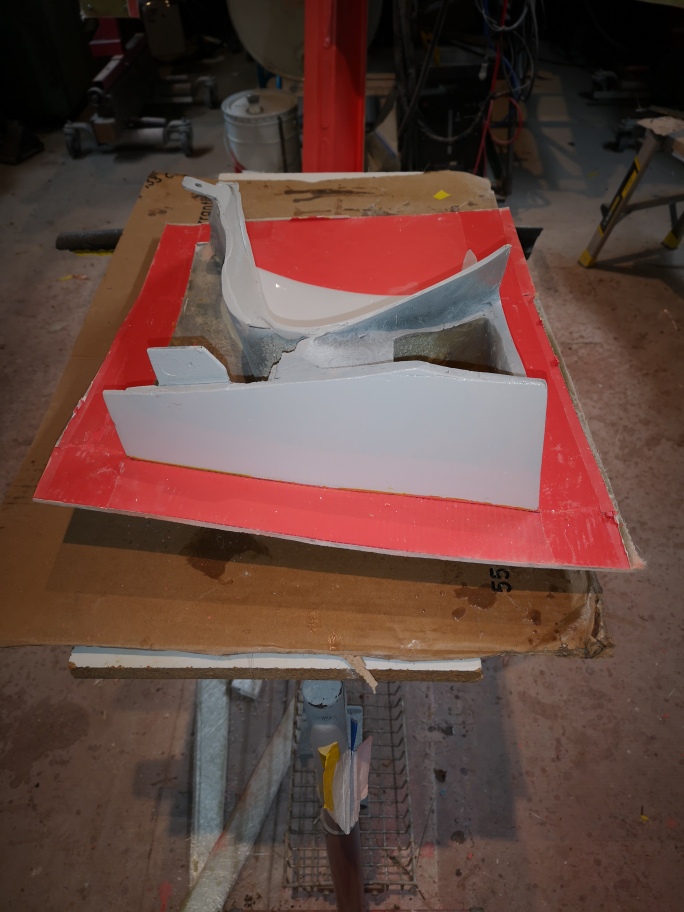
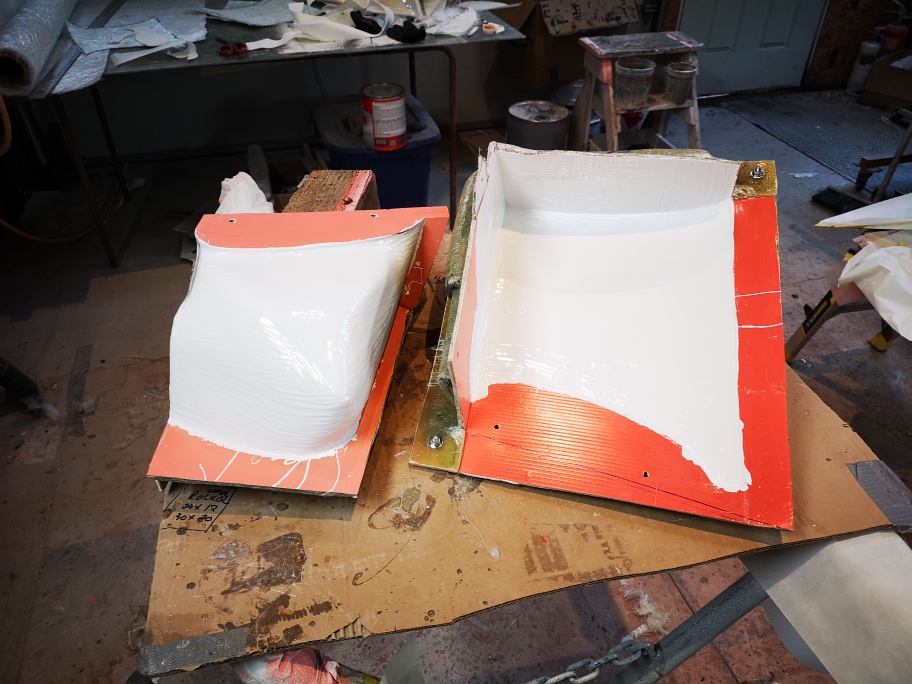
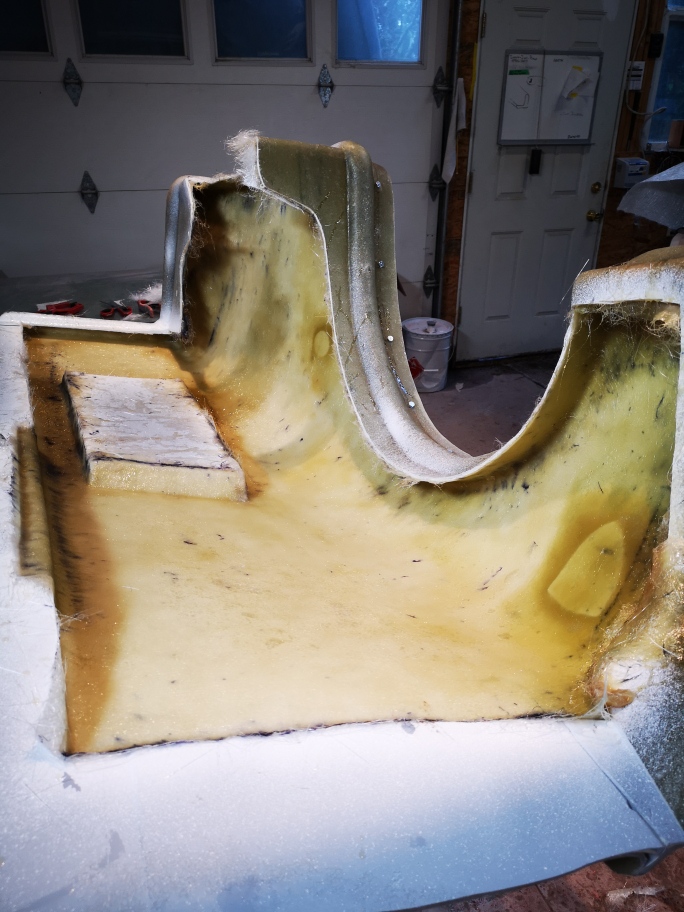
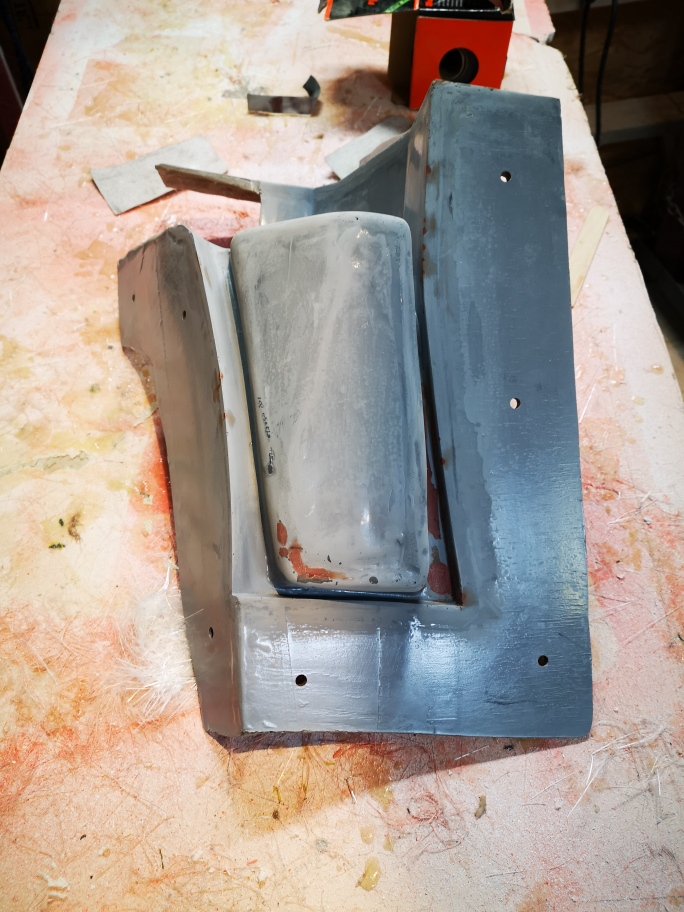
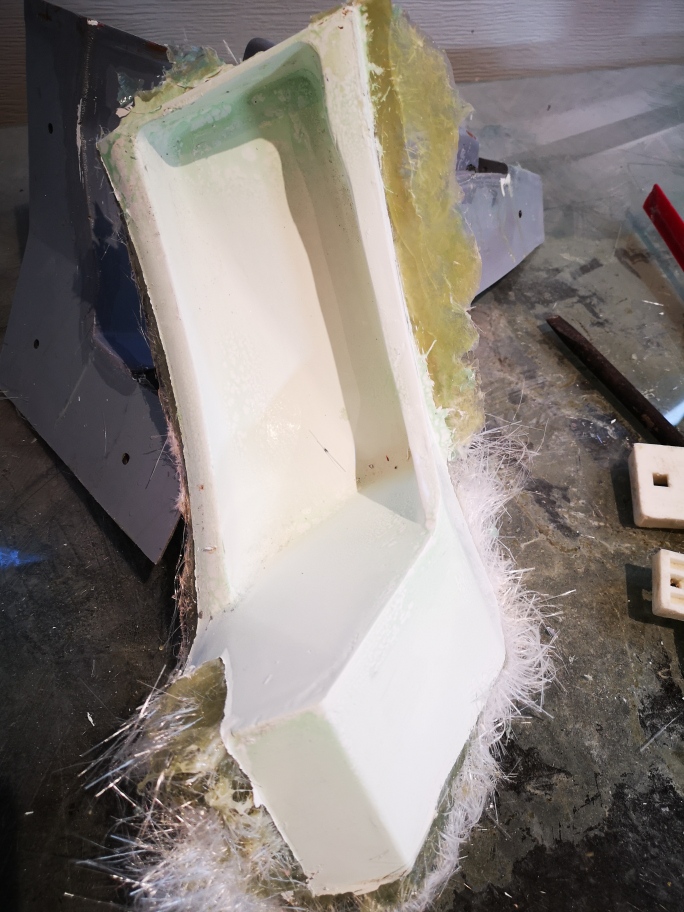
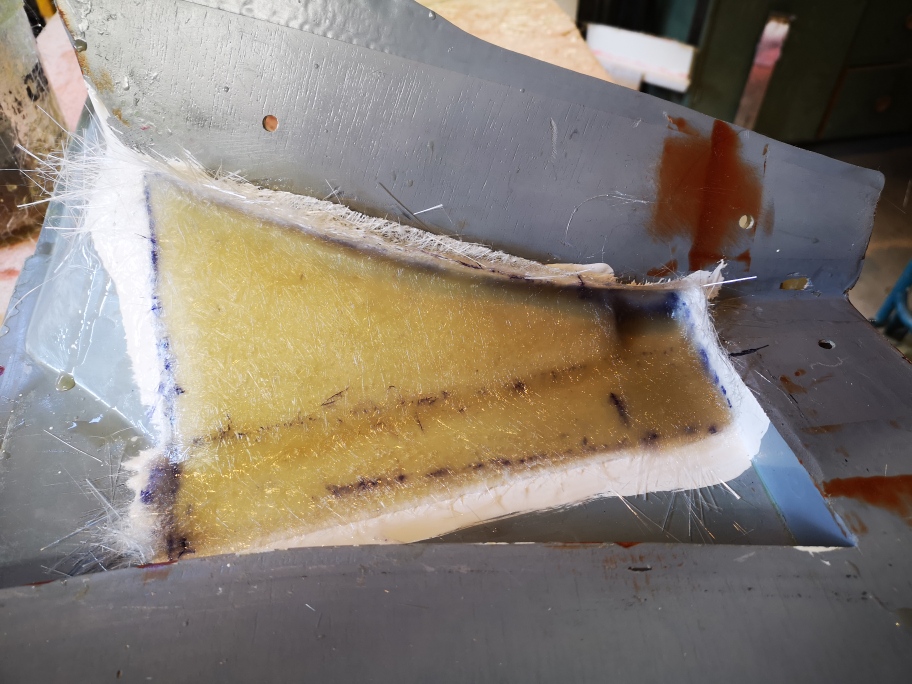
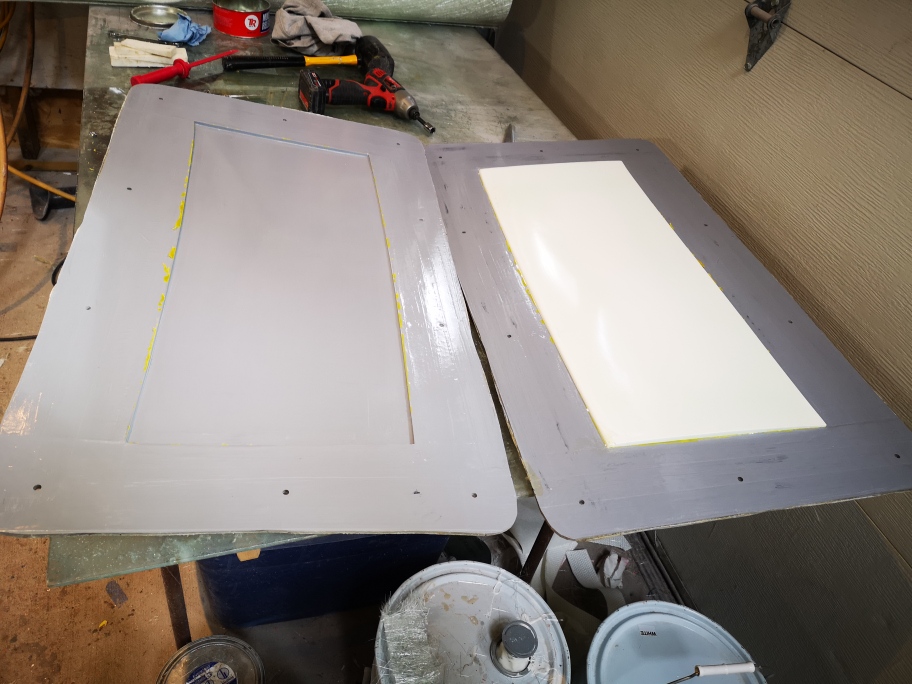
The next series is of the first of the lower side scoops, again this is a complex mold. There is the outside (body side) then the inner scoop ,it possibly could have been molded as one but I'm just not there yet so the inner will been molded as a separate piece that will be attached to the outer once the piece are finished.
this is with the flanges around the outer edge (out side of body showing)
same part gelcoat applied
this is a shot of the inner scoop area to be molded
this shot shows the complex internals most of it will not be in the final part.
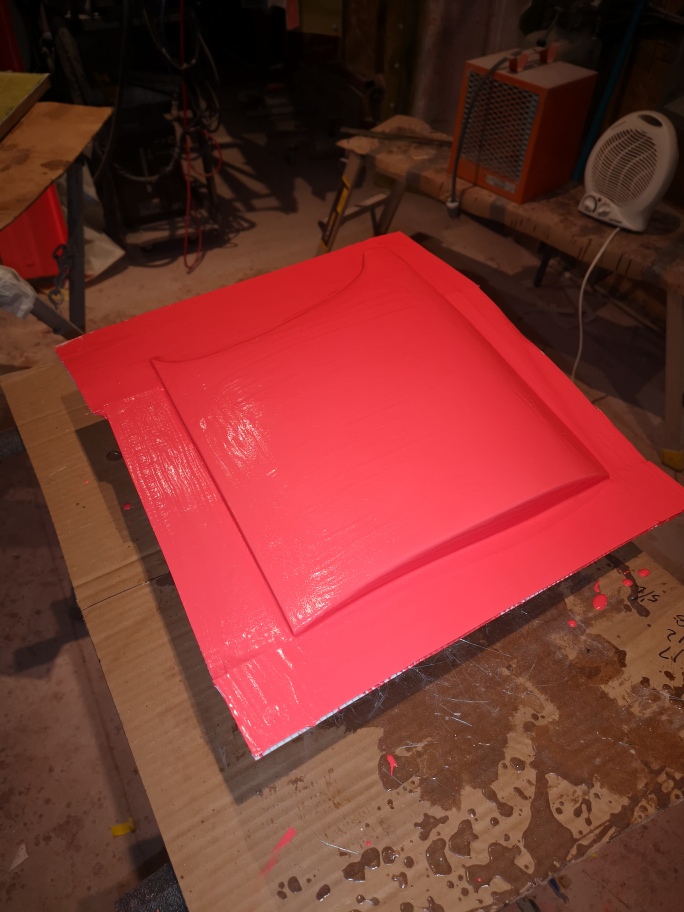
this is with the flanges attach and filets (yellow wax) applied
Gelcoat applied
first layers of glass mat
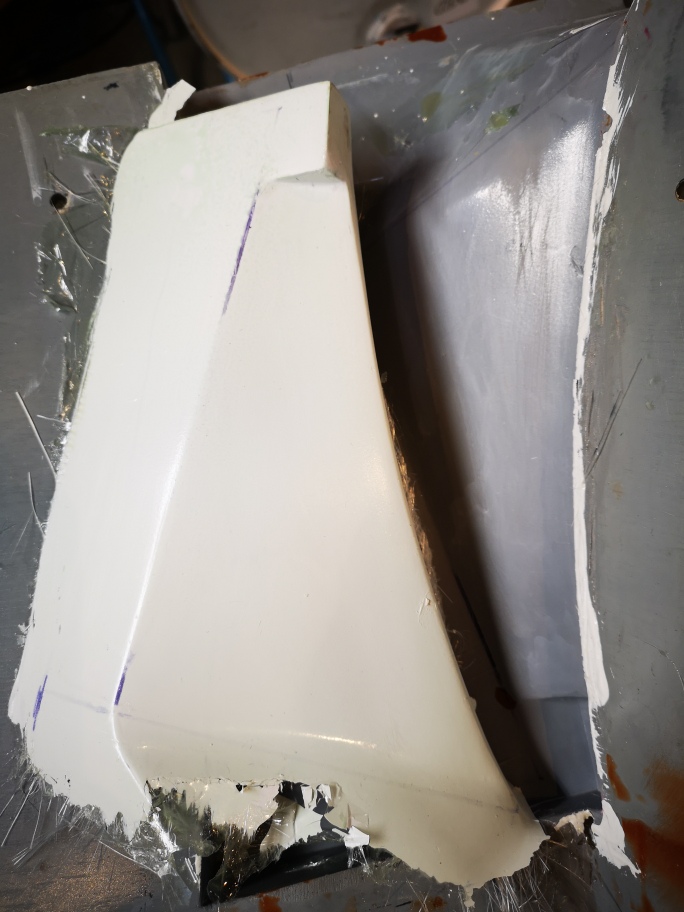
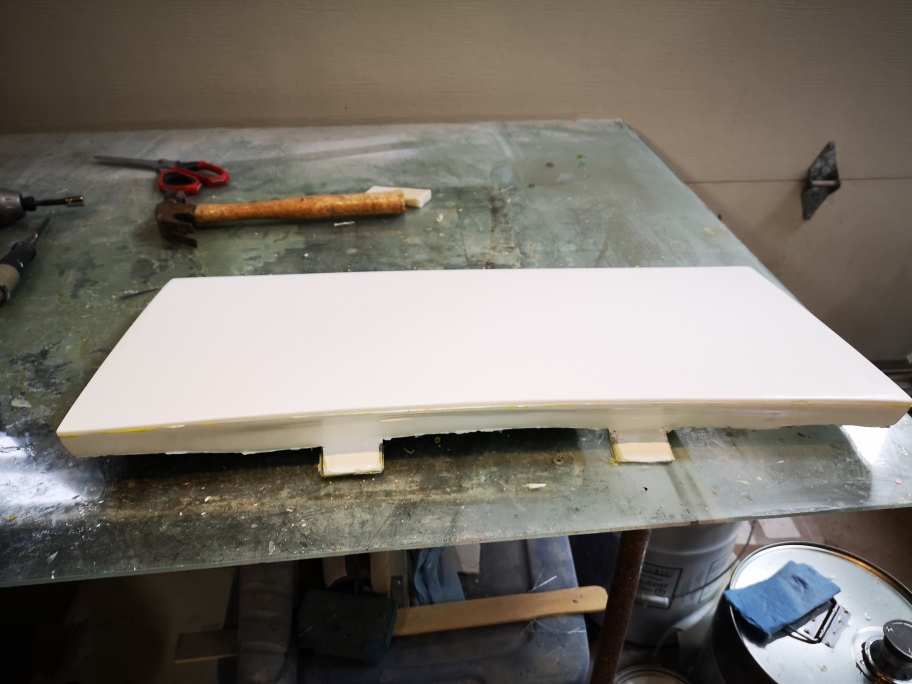
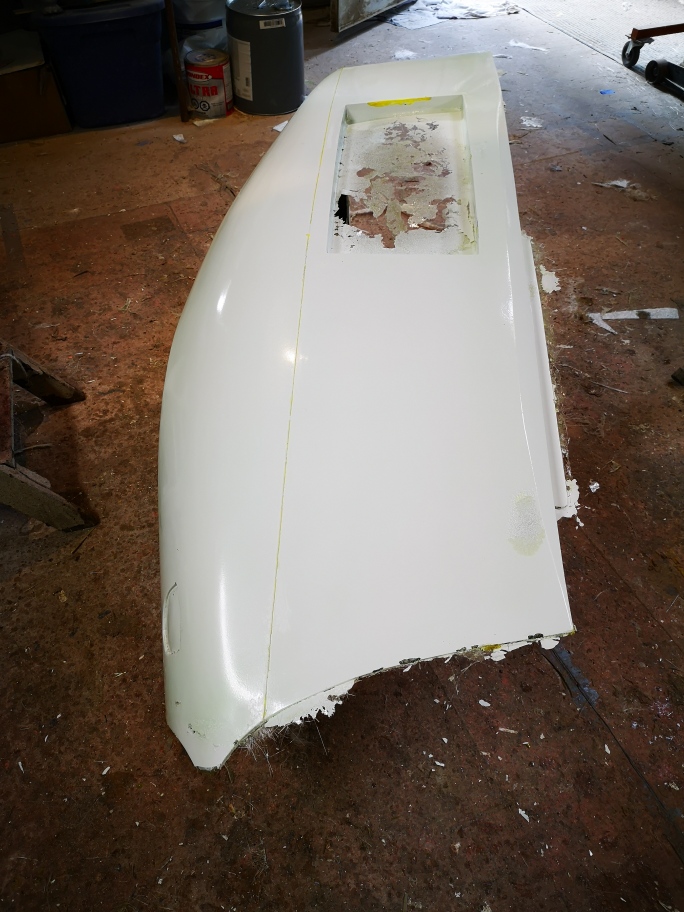
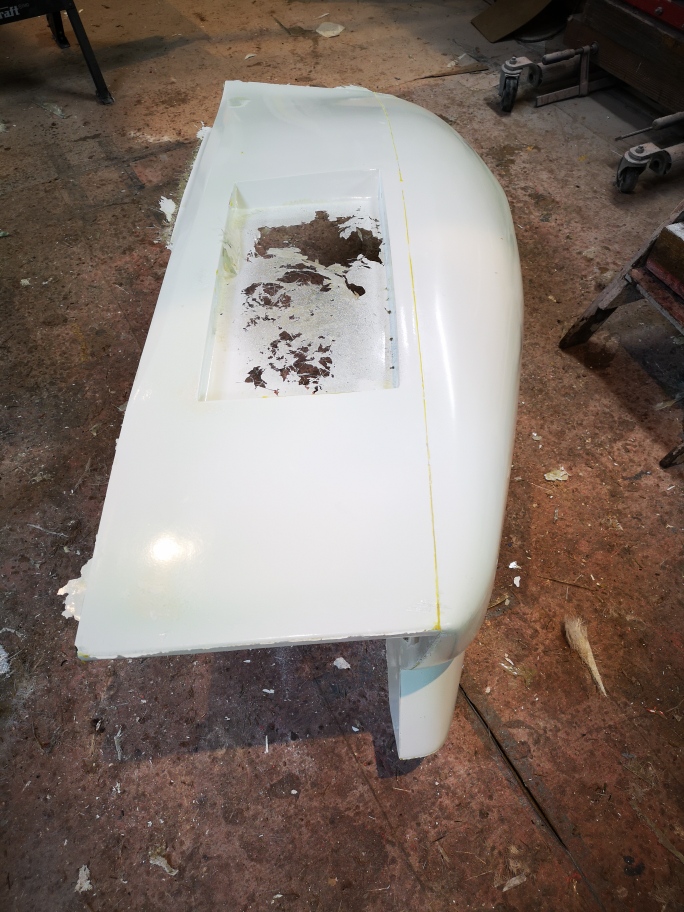
next is to install flanges for the second part of the front mold (lower part of the wheel arch)
and this is with gelcoat applied.
Im hoping to get back out to finish of this mold tomorrow.
Well this will be the last update for the year, going to take a couple weeks off for the holiday season.
Here is the latest update, I ran into a setback dammmmmm!
I started the second lower scoop having the first one finished and happy with the results I figured it would be a fairly uneventful mold build ,boy was I wrong.
I attached the flanges as before.
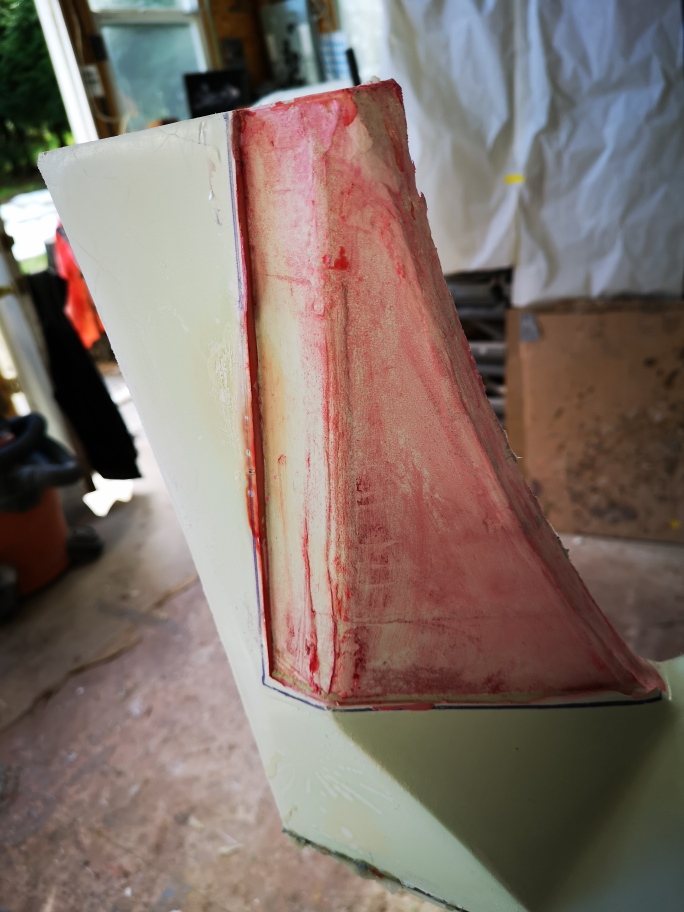
Applied the wax and PVA as before then applied the Gelcoat nothing out of the ordinary. I left it overnight then came back to complete it and found several areas that had failed and "alligatored" meaning I had to remove the gelcoat and start again .
I'd thought about this before and thought that If I laid a couple layers of fibreglass down on top it would come off without destroying the flanges or damage the part . "WRONG"
It took the paint off down to the primer not sure exactly what happened some sort of contamination but definitely a setback, had to resand and do a bit of bondo repair ,I'll paint it soon and retry the mold build.
I also started to prepare the spoiler for the first part layup, hopefully I'll be at it in January
Stay Safe everyone , all the best of the Season .
Wayne
[This message has been edited by dobie1 (edited 12-19-2020).]
Sorry everyone for the long delay on a update, I've been very busy over the last few weeks helping a couple buddies Don O. and another friend with their projects. I was helping Don mold a Lambourgini Countach OEM interior for a future project for him, It all went very well molding the15 pieces. Once it was finished I started up laying mat into my molds to build my body, the molds have fully cured and are ready.... I started on the front spoiler as it was already handy and a good starting point.
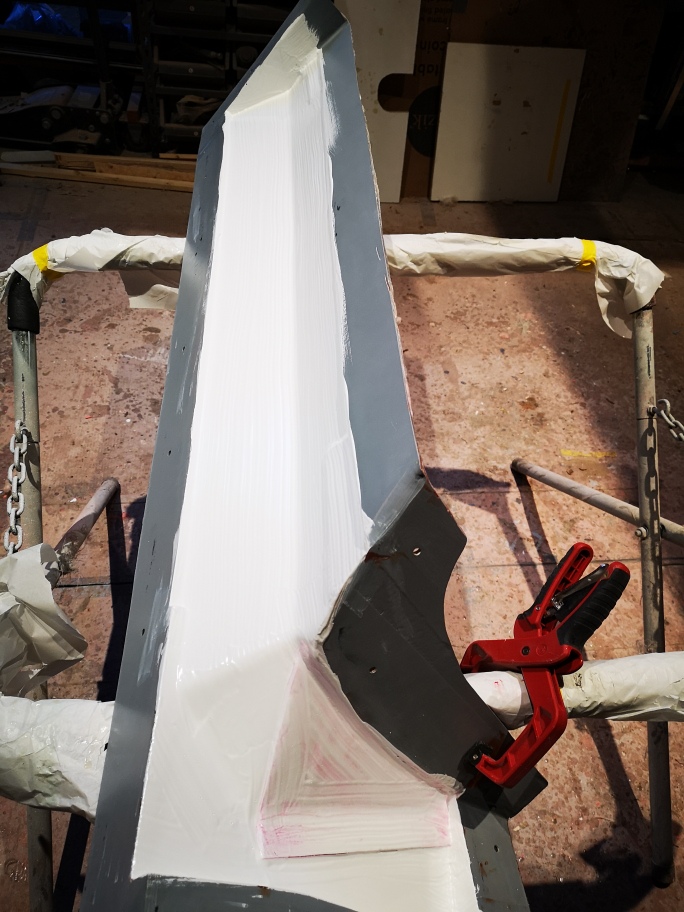
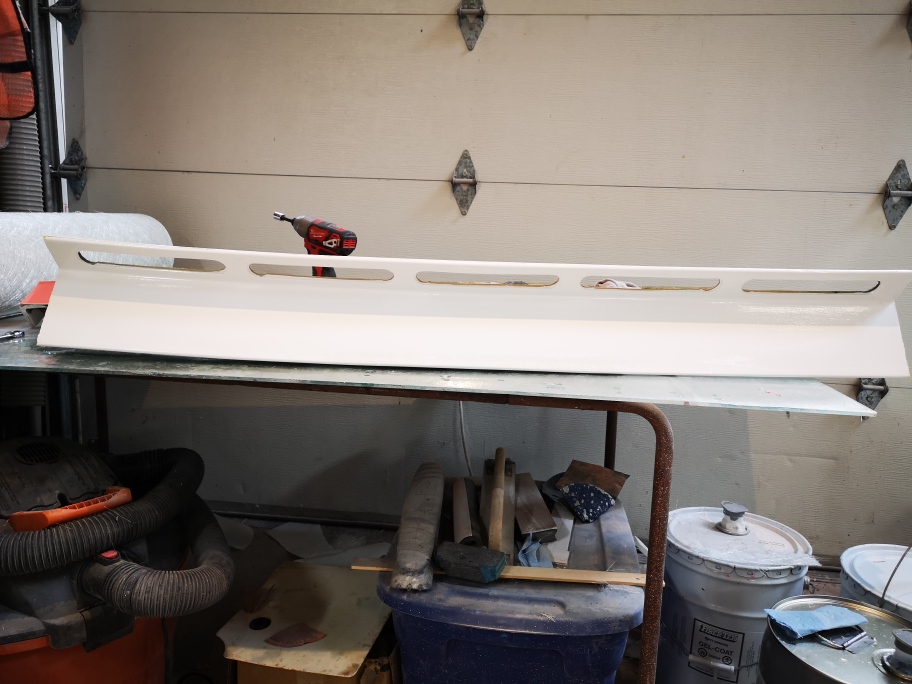
I used 4 layers of 1 1/2oz mat with a extra layer on the top and the ends for attachment points.
then I moved onto the first lower air duct ,it needs to be built in two pieces then i'll reattached the parts in the mold to ensure correct alignment crossing my fingers on this as I haven't done this before. I am fairly confident though in the concept ,we'll see.
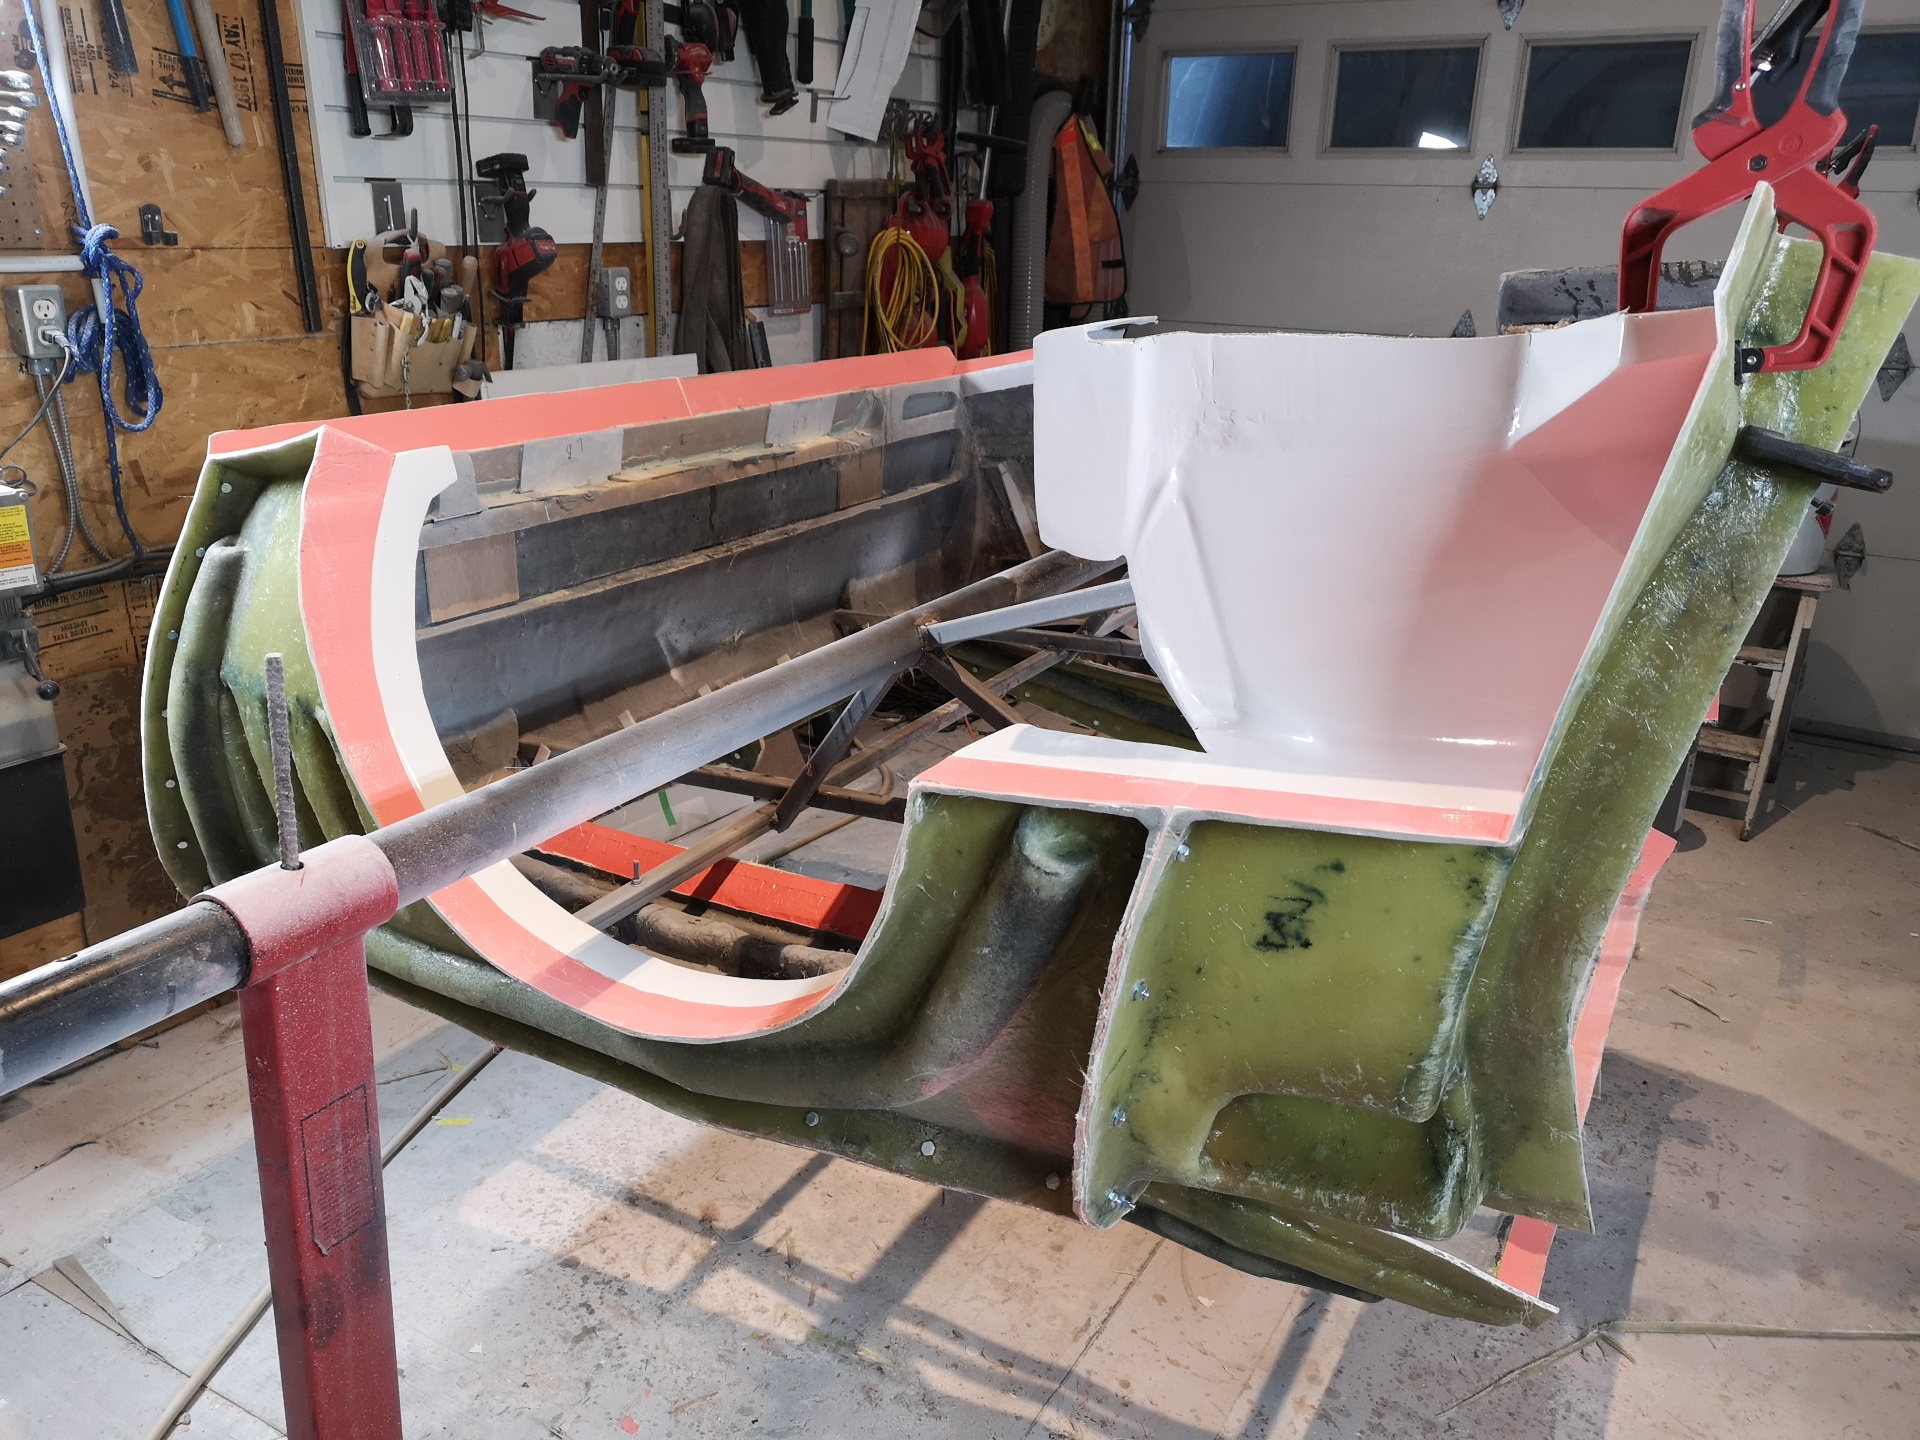
Although the rear engine hood works and is functional it isn't correct looking ,and with the steel frame I feel is too heavy. So I've decided to design and build a new one that will use the frame of the hood itself as at the structure and the vents will attach to the side walls of the openings. just as the OEM car uses. There are compound curves in two directions front to back as well as left to right at the back by the spoiler. I've cut it all out but can't continue until I have the rear body out of the mold. ( coming soon)
this is the one I'm replacing
this is the steel frame removed
this is the cut out piece of 1 1/2" urethane foam ready to sand into shape, once that is completed I'll go through the process to make a top and bottom mold
I've been busy the last couple days ,I pulled the lower scoop parts from their molds and started the process of attaching them together. I first needed to clean the slag off the edges as there is zero tolerance when it comes to putting them back in the molds to hold them together for the adhesive mixture of resin,1/4" chopped glass and milled fibreglass as well as a micro balloon to thicken so it doesn't run.
I'll post some pics of the piece once it has cured
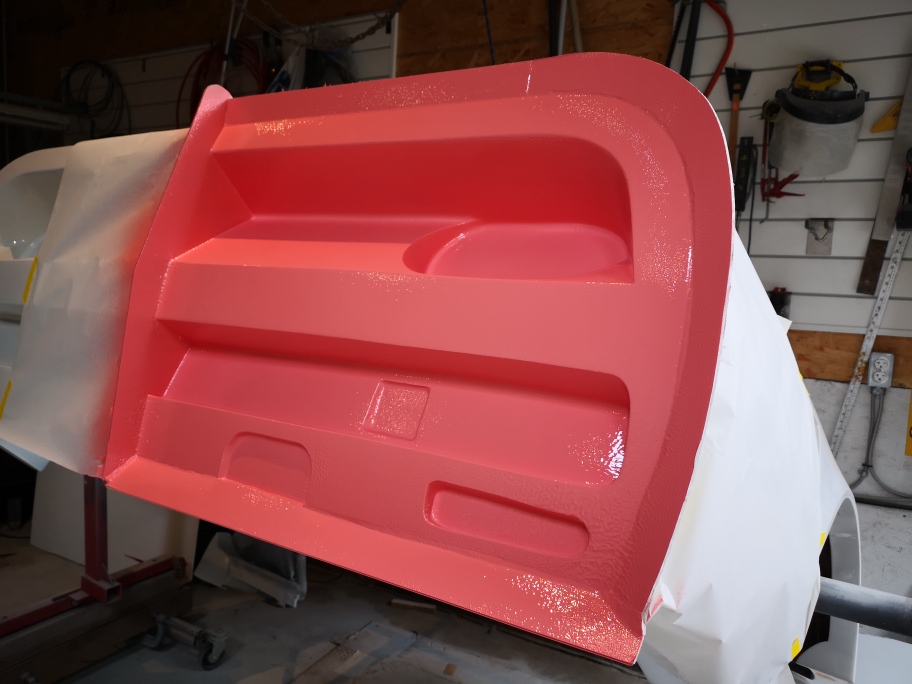
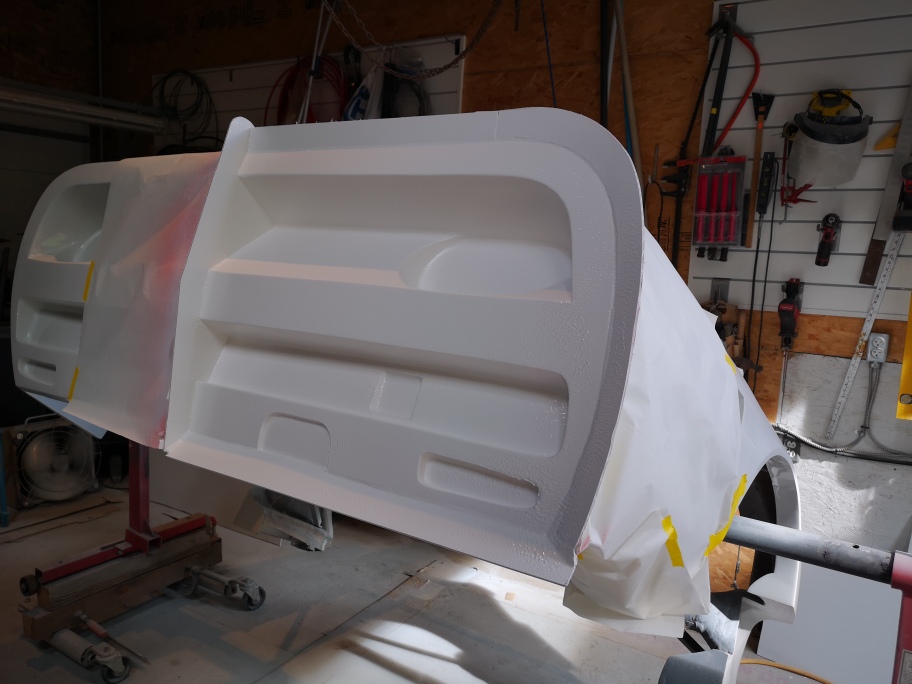
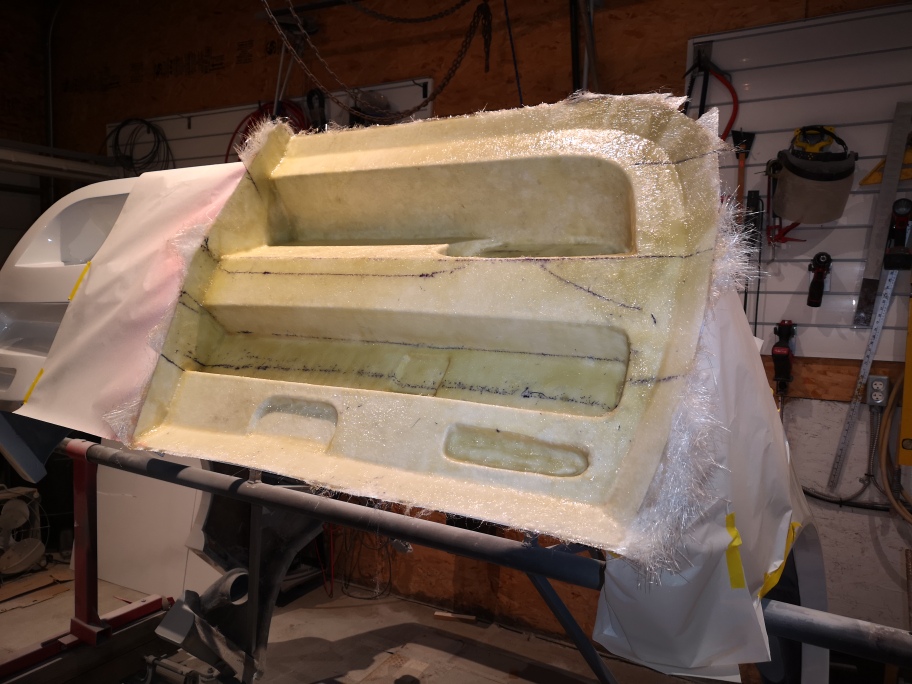
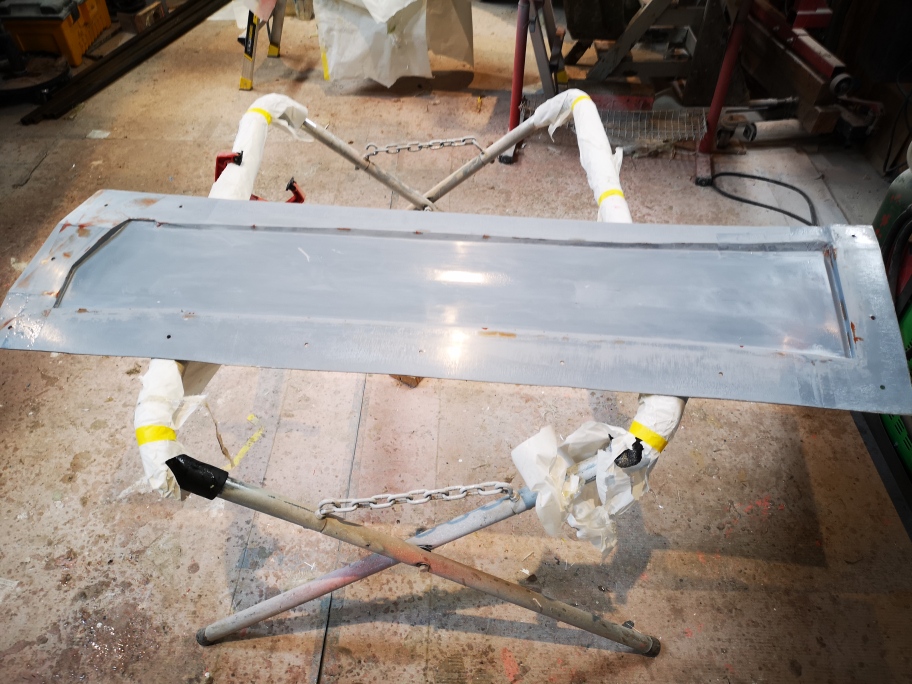
The second part I was busy working on was one of the door panels. It is also a complicated part due to a attachment points I made to secure the panel to the steel of the door. There is very little clearance between the top and bottom of the door, making it difficult to fiberglass. So I molded two halves to allow the attachment points on one half then flip the mold over and attach to the other half . I hope this makes a bit of sense. I layed up the out side half first trimming it to the flange edge and then layed 4 layers glass between both half to make them one.
I was really happy when I pulled the panel from the outside mold as the panel came out perfect , soooo happy with the finish. I trimmed it all up and reinstalled for the second half of the panel build .
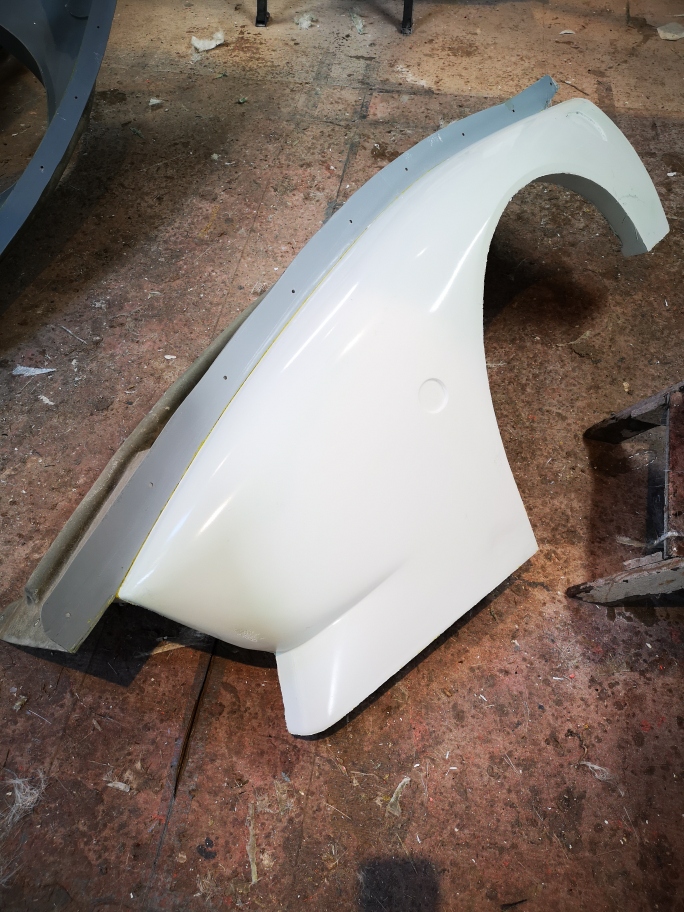
My buddy Don O. came over to give me a hand today after finishing the door panel we pulled down one of the front fenders and prepped it for laying up the panel. we measured up and prepared all the fiberglass matt for the part. Polished all the surfaces and shot the PVA and Gelcoat. There will be some acrobatics involve it laying it up tomorrow but I'm looking forward to getting another part finished.
I'll post some more soon stay safe Wayne
[This message has been edited by dobie1 (edited 02-01-2021).]
Thanks for stopping by Ted and Bob always appreciate it.
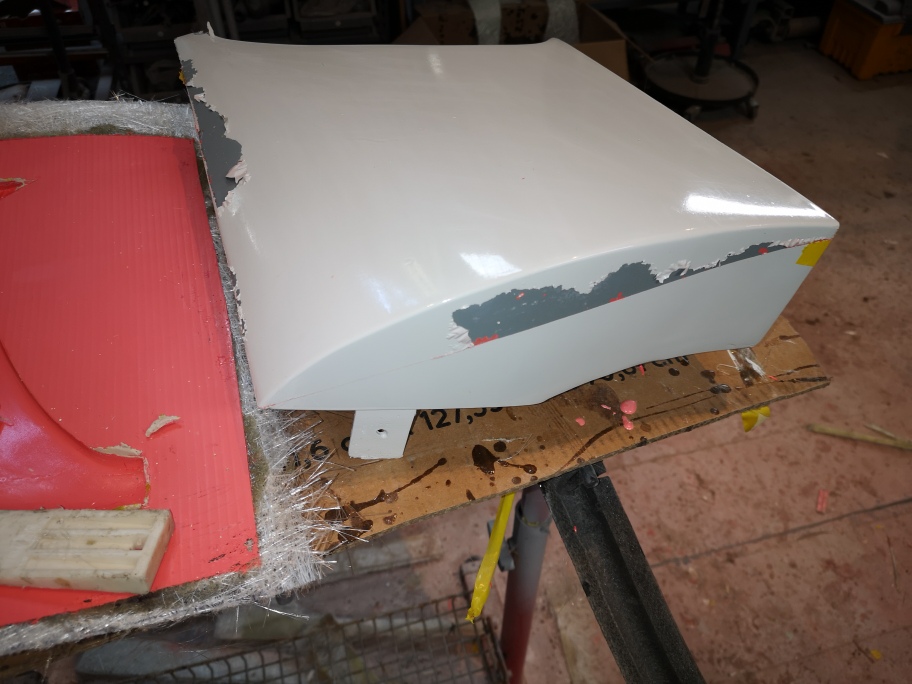
I got the lower duct cleaned up and am quite happy with the result , I weighed them both and new one on the right is 1 lb lighter so that's win... the new one has a glue flange for attaching the duct scoop to the car.
I got the fender finished it was a bit of a challenge getting at some of the areas but all turned out good.
I have been busy cleaning up the molds preparing them for molding. I started on one of the running board fender arches.
they are a very complicated part with a 3 piece mold , a upper , a lower and a back ( inside wheel arch area) the back side has really tight areas.
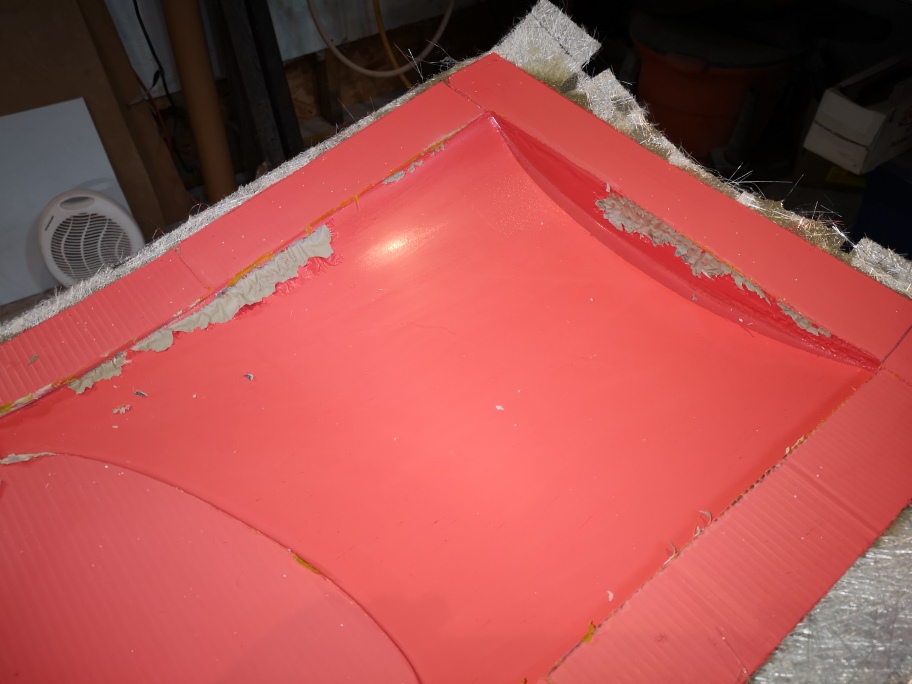
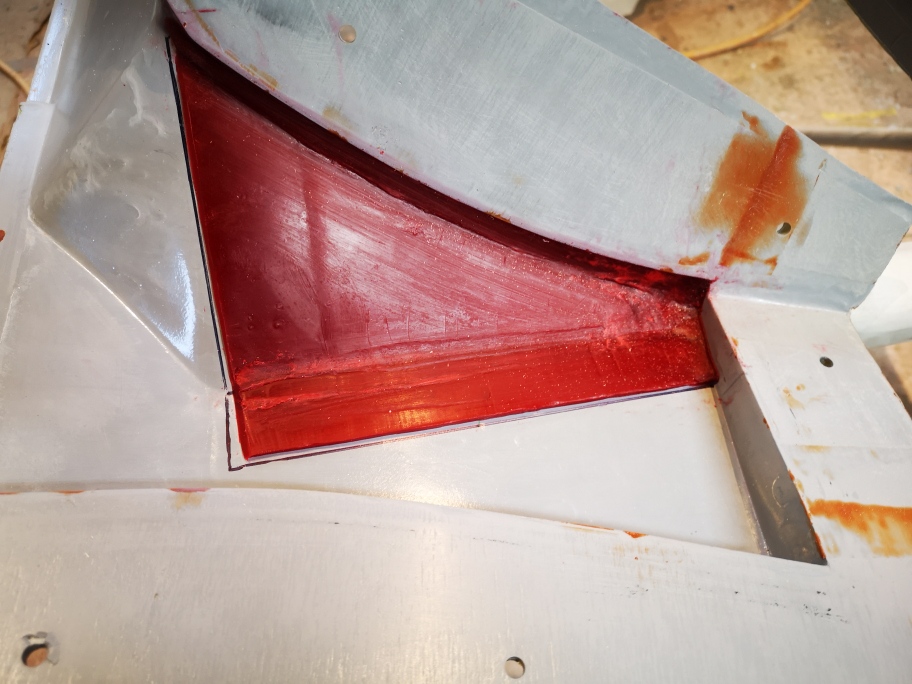
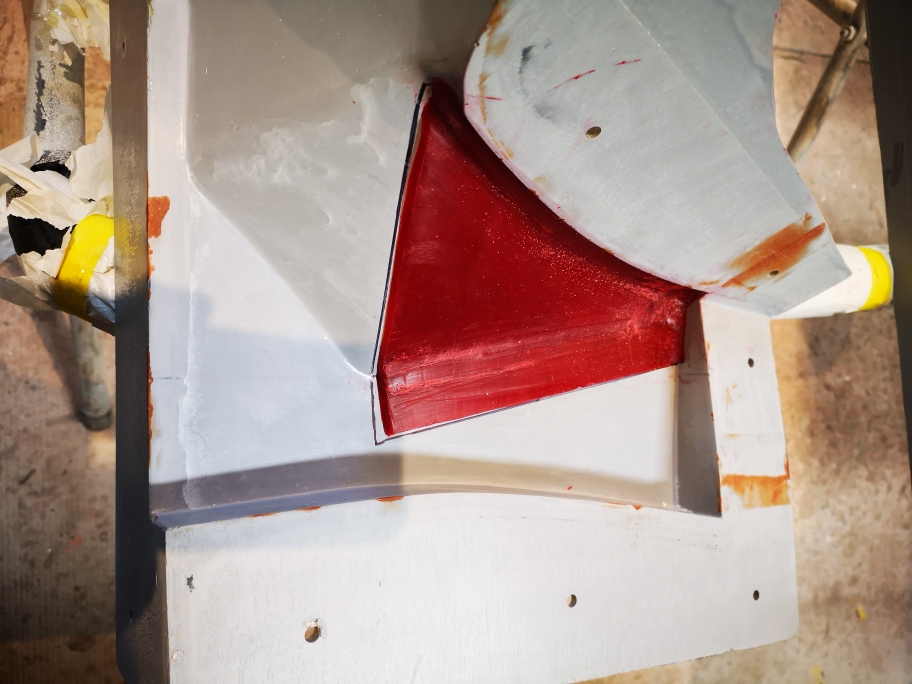
One big problem I discovered was I made a mistake molding one area, I ended up building a hook that locked the part into the mold. I found this out when was removing the original plug from the mold ,ended up destroying the part. I had to come up with a work around to allow the part to be made yet unmold the part. So I created a doggle into the part, the process i'm using is to create two parts into one. the red is wax that is 1/8" thick creating a low in the part. once I pull the part I'll lay up another the size of the red wax, then i'll permanently attach that to the part filling the doggle with the hook.
These are the three parts laid up ,I'll attach them tomorrow into one while the molds are secured together.
Don O is coming over on Saturday to help me build the exoskeleton rotisserie before I pull the plug from the mold and start to build the new body stay safe everyone
Wayne
[This message has been edited by dobie1 (edited 02-04-2021).]
I'm hoping someone can help me , I've been using the Pennock's PIP to post pics but its not letting me , it's saying it can't find the server. Am I doing something wrong, any help would be appreciated . Regards Wayne
[This message has been edited by dobie1 (edited 02-08-2021).]
The rear body is demolded and it turned out great , Don O came by and we welded up a exoskeleton frame to the mold ,I moved the 3” pipe 3”s to the the rear to give me a better balance during the rotation. I’m busy getting all the glass Matt cut and ripped to size to facilitate a quick layup, fingers crossed
I also worked on laying up the fender running boards , another complicated part. I found this out when I molded the originals as one area protruding Into a area locked the part in so the bucks were destroyed when I tried to remove them. Because of this I had to come up with a solution to enable the new parts to come out once they were produced. The solution I came up with is to lay a area of 1/8” wax (red) area into the mold creating a doggel laying up the fiberglass over the whole thing hiding the protruding area with the wax. When the part is removed I’ll lay up just the red area in glass and bond the two together creating the part. The other complicated area is the backside of the fender part of the running board it was supper complicated, it came out great but will also need to be bonded in after .
I got the scoop finished and was really happy as it came out a full pound lighter than the one It replaces!!
Stay safe everyone
Wayne
[This message has been edited by dobie1 (edited 02-09-2021).]
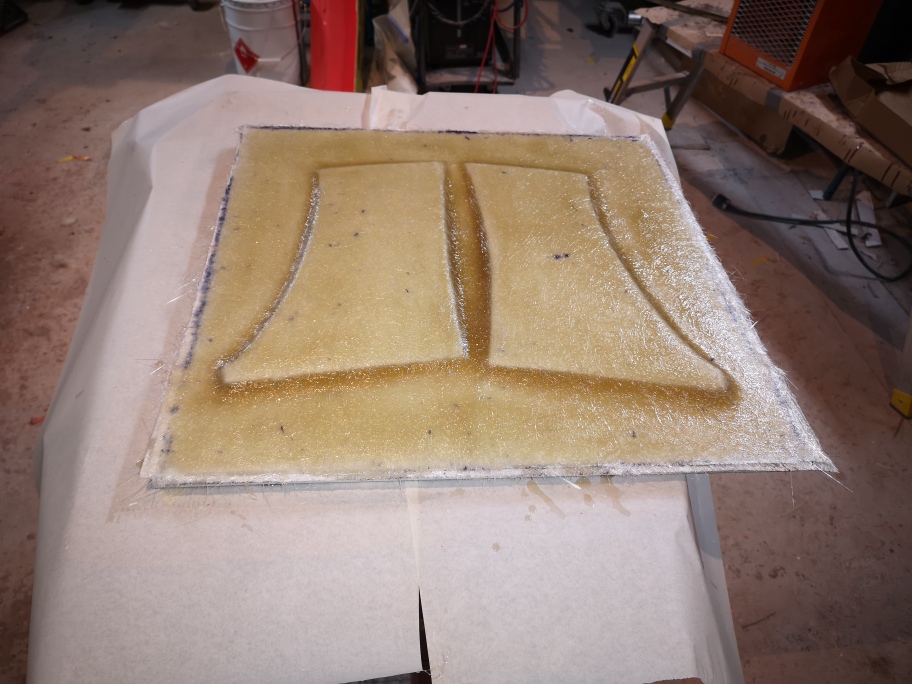
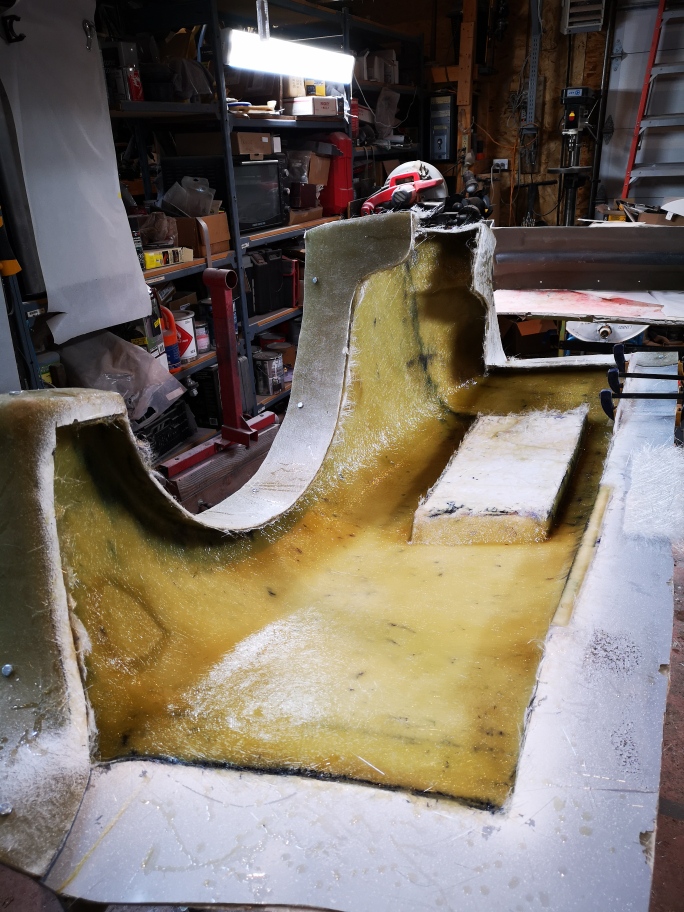
I got the first layer of 1oz mat landed down today 6 1/2 hours no stopping for one layer, 😳 It took me 3 days to clean up the parting lines between sections taking as much time as needed as I would like to eliminate any and all line s on the finished part. I know it’s impossible but will save time in the end when preparing for finishing and paint. Polishing the mold took 1 day 1 day and 3/4’s of a gallon of gelcoat and today1 day so total time todate 6 days. I’m figuring each layer will be 1 day barring any problems.
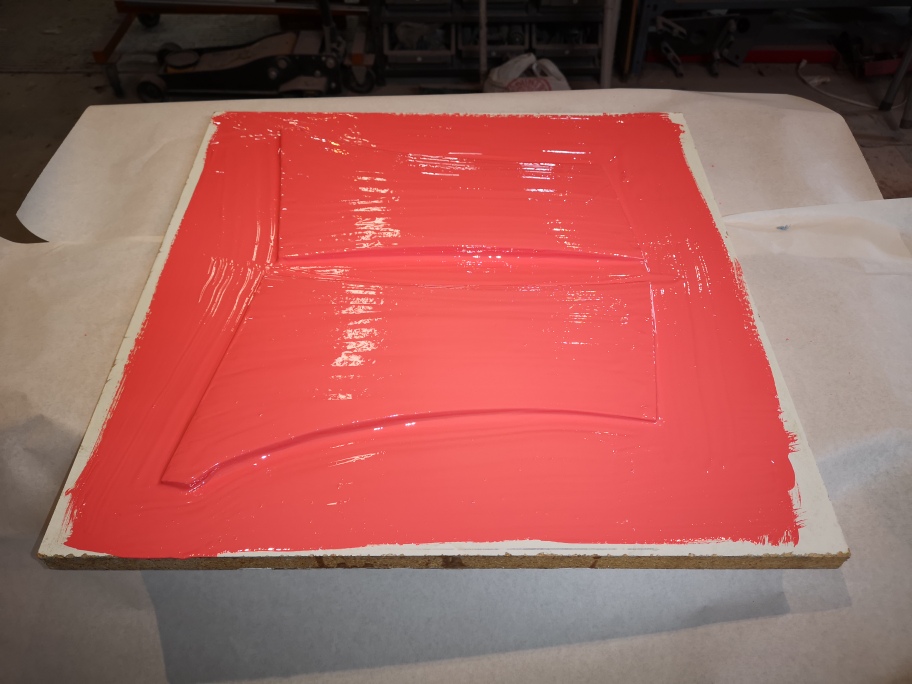
First pic is the mold waxed and ready for gelcoat
Next picture is gelcoat completed
Next shot is first layer of 1 oz mat as of today so 3 more layer of 1 1/2oz mat to go.
Stay safe everyone Wayne
[This message has been edited by dobie1 (edited 02-19-2021).]
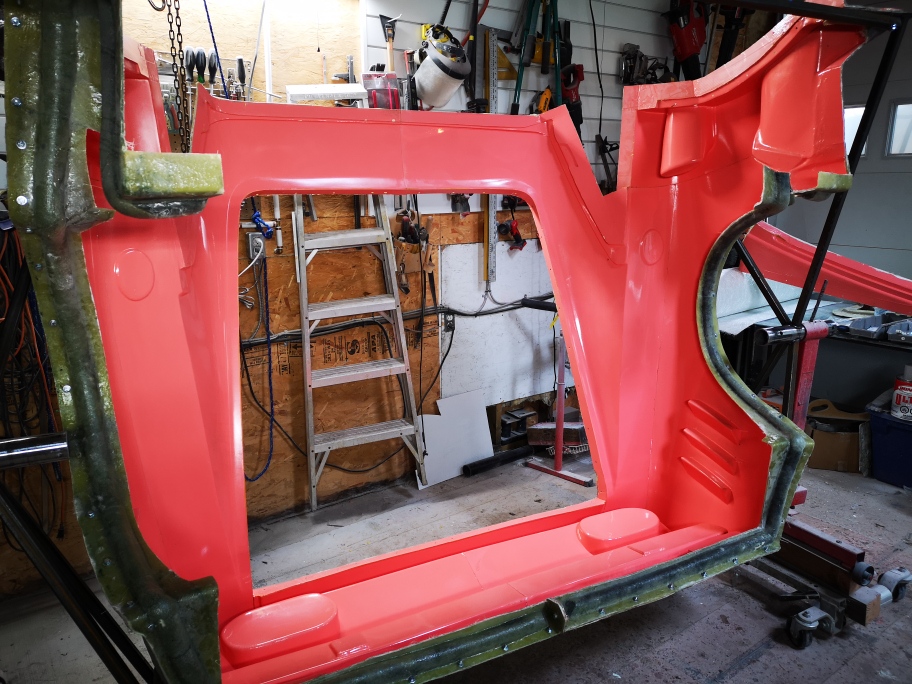
Well I suppose a celebration is in order 🎉 the back half of the car has now been laid up and is going through is full cure
I’ll leave it for 3 weeks giving me time to finish the other pieces. 1 fender , remaining rocker ,door panel and remaining lower scoop.
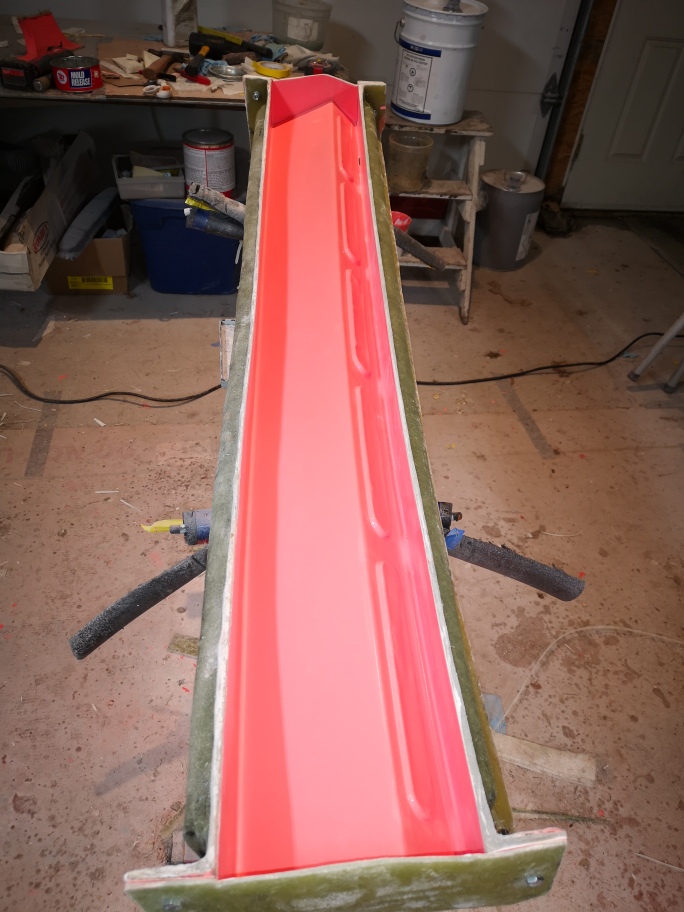
As I indicated previously there were a couple areas on the back lay up that gave me some concern due to the space confinement’s around the rear spoiler. This caused me to have to do a two part layup the first part was the actual spoiler.
This is show’s the spoiler area at the bottom with the final mold pieces are added.
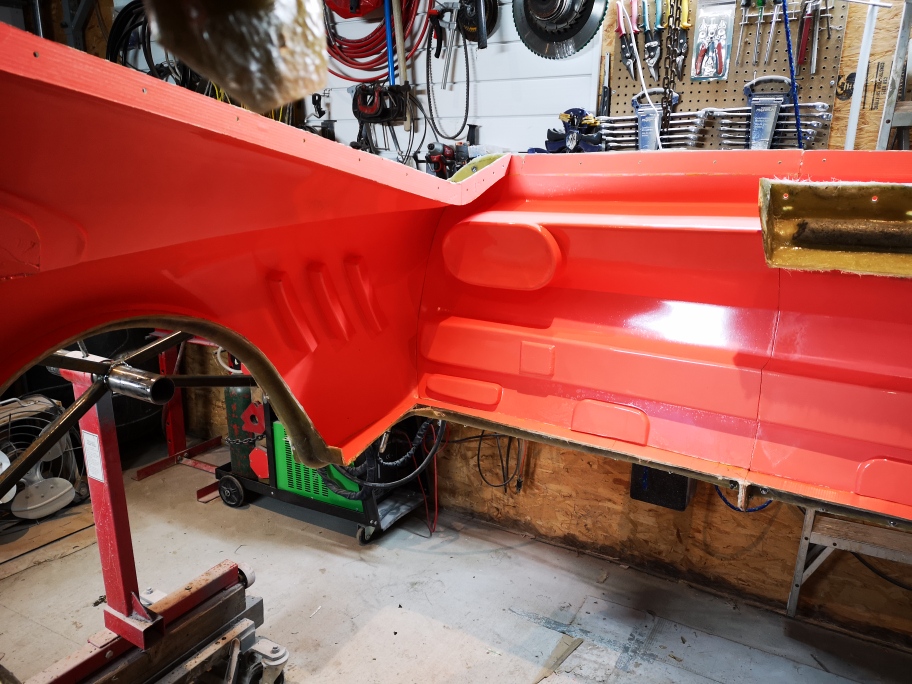
once that was completed then I added the final part of the mold which when in place is the hinge bumps for the rear hood , this layup is for that piece as well as attaching the parts together. I found using a mini paint roller extended handle enabled me to roll the resin into the area followed up with a consolidation roller.
I also finally pulled the fender/rocker that I laminated , it turned out very nice no alligatoring just a bit of cleanup from the two halves being glued.
Next I need to make up the part that will cover the reddish area where the wax left the joggle as I wrote about in a previous post this is due to the horn area that locks into the mold.
And attach the back inner fender
Stay safe everyone
Wayne
[This message has been edited by dobie1 (edited 02-28-2021).]
I’ve had a busy week I finished up laying the passenger side fender. It took the normal 3 days to do the layup. It is a fairly awkward part to work with with so many different angles to work but in the end it worked out.
I also started on the last fender/running board getting it to the gelcoat stage and planning on completing the layup tomorrow. As with the previous running board it is done in three stages. I completed the layup of the cover part for the goggle I had created came out great
0nly 3 more parts to finish and I can finally get to the place everyone is waiting for mounting everything for the final figment before I paint the car And move to finishing the interior and start driving fingers crossed for this summer.
The 288 GTO is my all time favorite prancing horse and when the Alden-Thomas GTO appeared on the cover of KIT CAR magazine, I knew the body kits I was going to fit to my Fiero once I got one. Well Enzo stepped in and forced Alden-Thomas to make changes to the kit that just ruined it in my opinion. I heard A-T produced 5 or so of the kits before they were stopped by the lawsuit. (I believe Captain Midnight here on the forum owns one of the original A-T GTO's)
Keep up the good work and am enjoying watching your progress!
First off thanks Sage , Steel, JOE 4RE and Sourmash for stopping and taking the time to comment I appreciate it.
Family duties with the grandchildren took a few days of my time. I have to say as I turn 70 this year two infants two and under are the most exhausting humans for a grandpa and grandma. Not sure how my daughter does it.
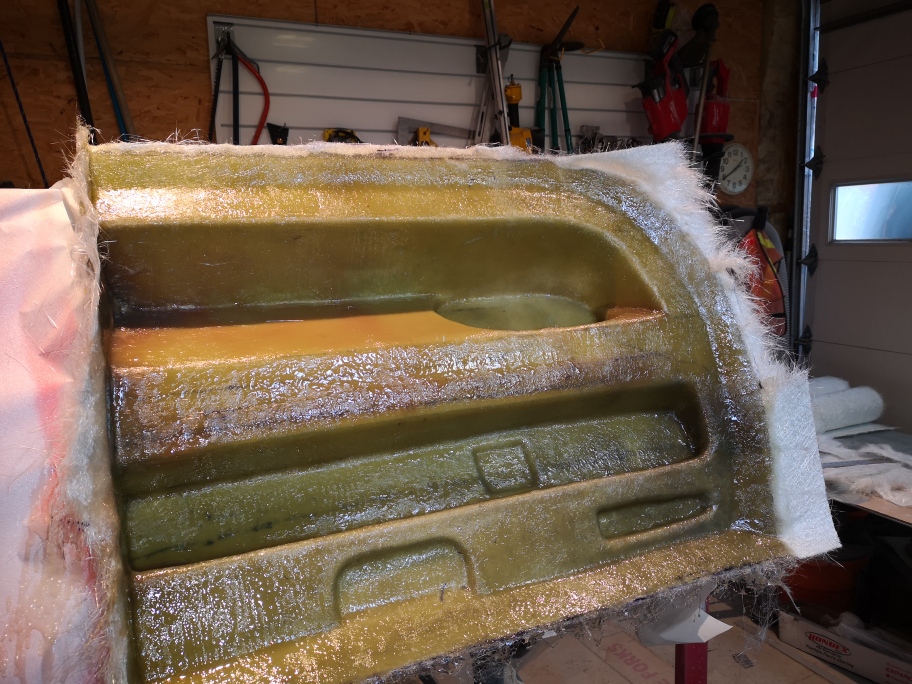
I was able to layup the last major component for the build. Still working on the best way to join the two panels parts together, this part is the door panel , I’ll know how it worked out once It fully cures and I pull it from the mold. I trimmed up all the edges.
Then using a slurry mixture attached the second half and secured the two halves of the mold together.
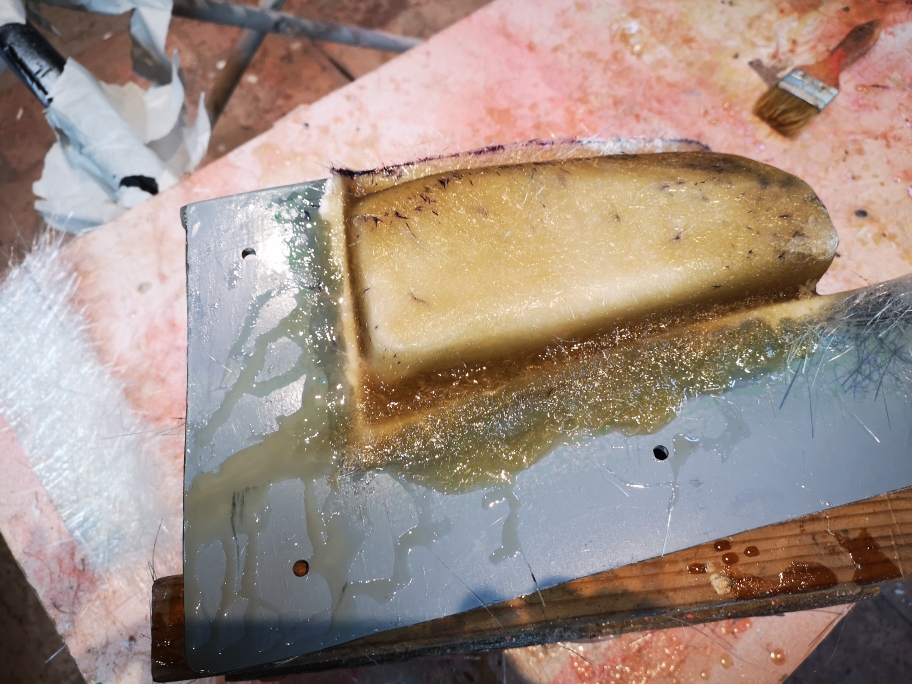
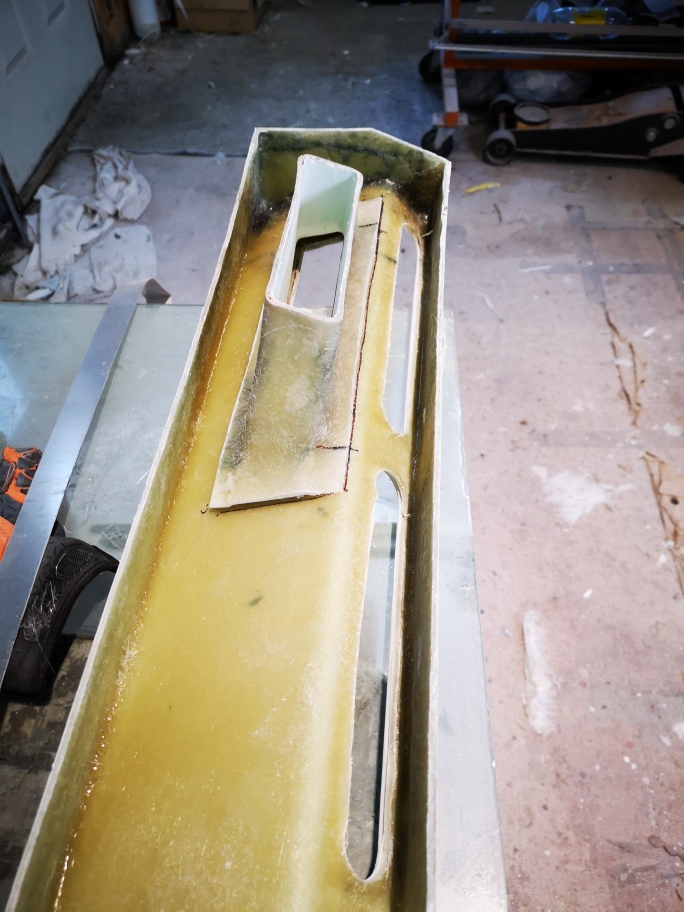
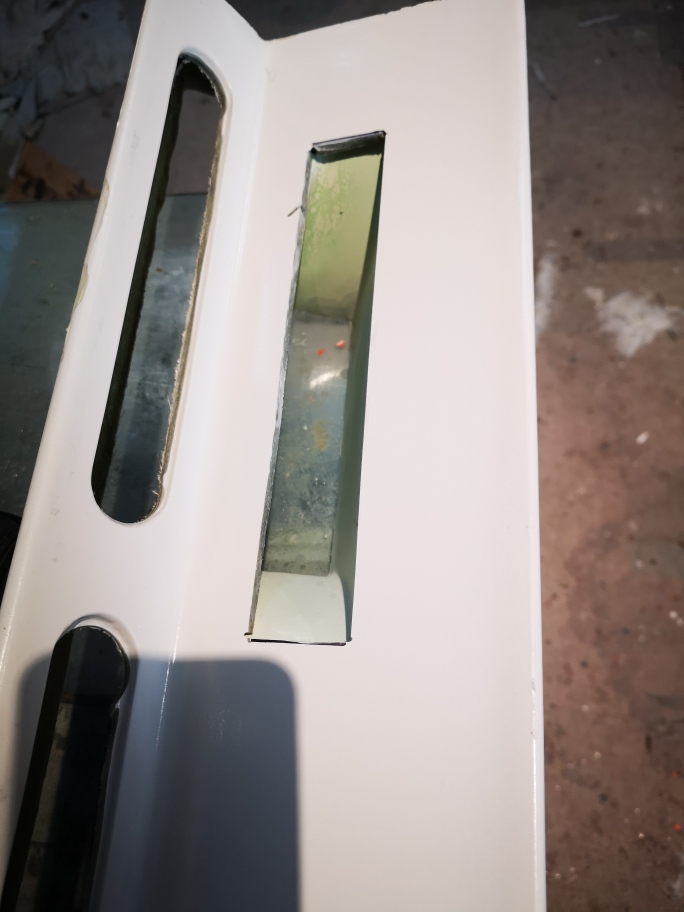
I also pulled the spoiler brake vent from its mold and started to install it into the spoiler ,sure hopes it turns out the way I’ve visualized this. Taking the and grinding it totally flat.
I measured and cut a parallel slot
I then attached it to the back with a slurry adhesive
I’ll grind down the edges and finish it up tomorrow. But all in all I think this will work.
Stay safe Wayne
[This message has been edited by dobie1 (edited 03-09-2021).]