Okay, I'm moving onto the C6 side marker lamps. 4.9 kindly made me a photo'd version of what I wanted. Due to budget restraints and impending weather in IL I felt it was best to post-pone all activities until 2009.
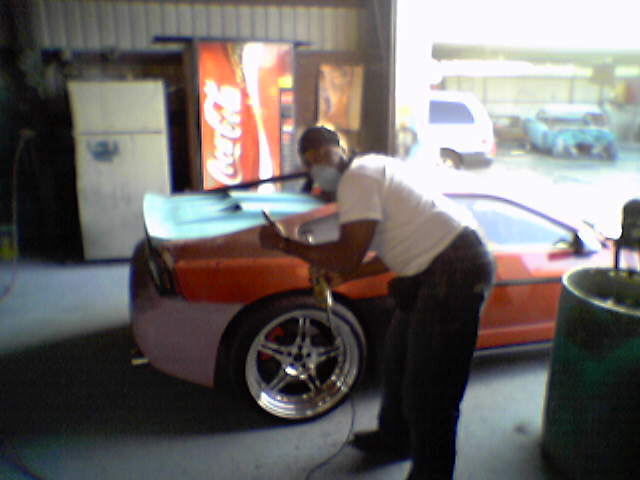
First off; my car is demanding blood from me today. Oh well, since the car and I have bonded I wanted to avoid the fiberglass particles so I cut a few holes in some old socks. Right now, I don't have that prickly feeling after a shower.
Now the area has been surgically opened and part removed, I feel much better about the side profile matching the rear C6 side markers.
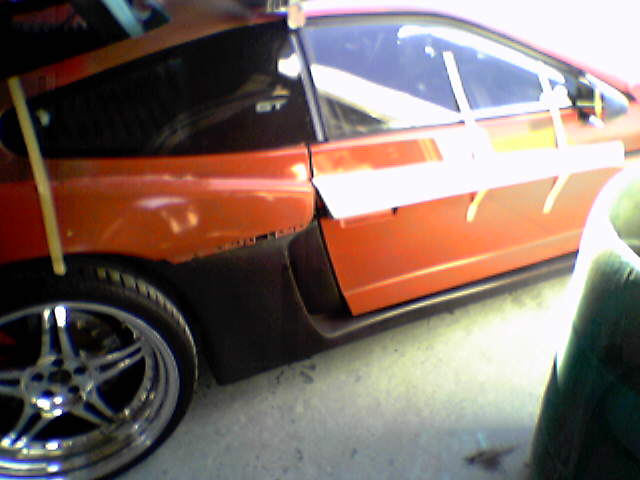
Rough draft, but you get the idea of where I'm headed.
Basically, Archie and The Crew made my work here pretty easy. It's only a matter of rearranging items and then glassing the parts back in. I used the upper lip, cut it out, moved higher and cut out the C6 maker and reposition lower.
[This message has been edited by madcurl (edited 03-31-2009).]
The idea for the front side vent came during my visit to North Hollywood where several F430s and other exotic cars were being tweaked. I peeped the F430 and I wanted something "similar" but yet unique to #020.
The place:
F430 front side vents...nice!
The re-tweaking serves several functions; a. flows with the entire side vents. b. enhances the area (pop!) c. it's unique, but yet not a exact copy of a Ferrari. d. it was bugging the heck out of me and I doubt I'd let it go.
[This message has been edited by madcurl (edited 03-31-2009).]
Originally posted by madcurl: This the second time this area has been changed, but as one person said to me regarding his change, "I wasn't married to the part, so I changed it."
HaHa, Tweaking a spouse is much more difficult. Looking good,
Madcurl, You guys make me sick with all your fiberglassing skills, snazzy rides and proficienardshipness. You should all just drive your awesome rides down to my house and help me! That would go a long way into making me not hate you guys so much!
Hey we all missed you at D9... But since I liked better what you have done to your car is all good now. Maybe next year you will be there!
JG
Yes. I remember those days mostly I was multi-tasking; going to D3, D5 and getting one of the choppers worked on. I loved the trip to Sarasota where Mr. Mike installed my interior (good memories indeed). However, heading there (3,200 miles) and back alone is boring! More fun riding with the super friends and with others that are in FL ( but #004, and #025 cars aren't working). Maybe in the future once Whodeanni, Godfather, Tony, David, & Jscott get rolling.
Madcurl, You guys make me sick with all your fiberglassing skills, snazzy rides and proficienardshipness. You should all just drive your awesome rides down to my house and help me! That would go a long way into making me not hate you guys so much!
You're living in the heart of Fiberglass country! Whodeannie can't be that far from you and Jimmy is in FL. Those guys have mad-fiberglass skills! I'm just a wannabe pipe dreamer.
Madcurl, You guys make me sick with all your fiberglassing skills, snazzy rides and proficienardshipness. You should all just drive your awesome rides down to my house and help me! That would go a long way into making me not hate you guys so much!
Curly, I was just going to say that! anyone that wants to learn fiberglass can come over and help on my car anytime they want. in doing so I can show you some things and my car would get done sooner with help. just an offer.
Curly, I was just going to say that! anyone that wants to learn fiberglass can come over and help on my car anytime they want. in doing so I can show you some things and my car would get done sooner with help. just an offer.
Curly, nice job on the tweak
Dean if i lived closer you would probably have to kick me out of your garage.
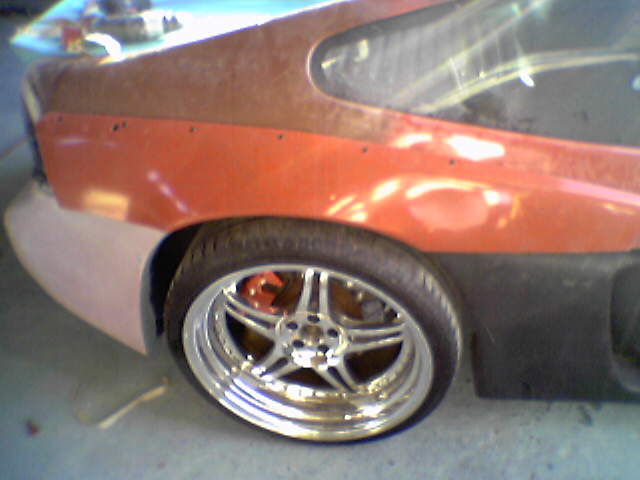
I got around to laying a few layers of fiberglass on the back and front side (only a 1 1/2 days off from work). I still need two additional layers, but the part is coming out pretty good and it now matches the rear vents/marker. I'm happy.
The temp inside the garage is/was 64 degrees, so I only had enough sun to lay down (2) layers. I still need to smooth out the rough areas and fade the leading edge back towards the fender wheel. Once done, I need to go back and bridge in where the new opening space is.
The C6 side marker now curves into the vent and the area now has depth and pop!
I have a idea for the inside area. I might have the upper area vent trapped air from inside thus making it a dual vent
[This message has been edited by madcurl (edited 04-09-2009).]
I know very little about fiberglass work, but when you cut into an area like that that gets a lot of wind action, how can you make sure it won't crack or flex too much and damage either the paint or the integrity of the area?
I know very little about fiberglass work, but when you cut into an area like that that gets a lot of wind action, how can you make sure it won't crack or flex too much and damage either the paint or the integrity of the area?
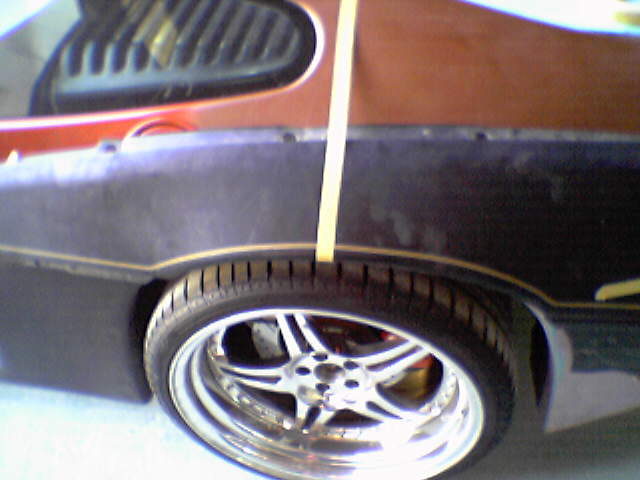
Agreed. For some who like the air vented in for front brakes, this area however, (by default) was designed to flow air in and out while going around the C6 fog lamps. The original L=brace remains in the same location; only the trailing end is moved upward and side marker moved. Therefore no air is trapped and by adding another vent (created by default) will aid in pulling trapped air behind the fascia. Granted, I've only reached 100 mph or so and nothing beyond, but the area will be tested prior to paint.
The L-brace that was removed, granted the continued piece was moved higher.
As you can see, air flow in and out of the original vent.
From pic you can see the original L-brace (only the trailing end was moved). The upper area (hole) will aid trapped air to escape.
Sorry for crappy cell phone pics, but I misplace my camera.
[This message has been edited by madcurl (edited 04-09-2009).]
Interesting, thanks for explaining. I recently got a Norm's fiberglass rear facia for my Solstice and I know it gets hit with all of the air from under the car. I bet it's hard to come up with the right mixture of rigidity and flex to be able to stand up structurally and for paint.
It looks great!
[This message has been edited by Falcon Fiero (edited 04-09-2009).]
Originally posted by Archie: On the left side we had to remove the aircleaner for access (it will remount right back where it was. We also had to remove the charcoal canister, it will have to re-mount in a slightly different position. After reinstalling the aircleaner & relocating the canister, this is what it looked like.....
Archie
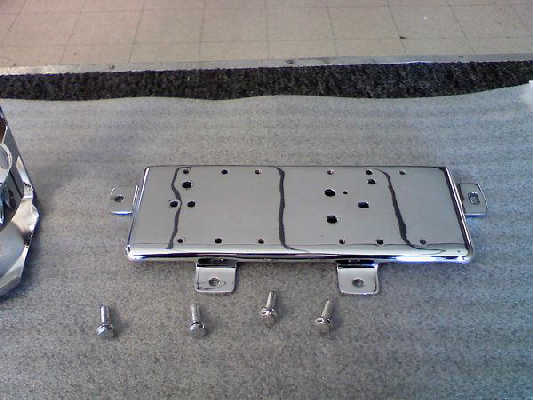
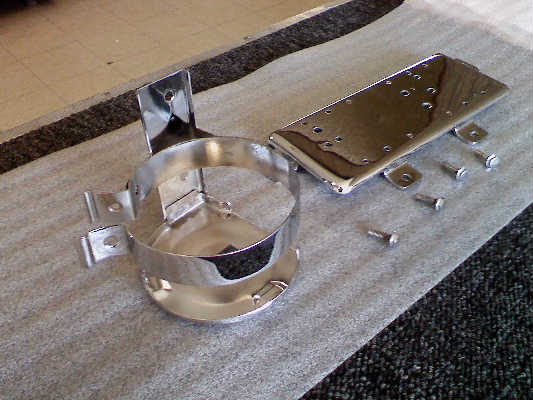
As some of us recall, Archie relocated the air carcoal canister, so I decided to have a few parts chromed. I sent the pics to Tony (new email so I don't know if it worked?). Anyway, nothing new to report until next week.
Thanks Tony for posting the pics. I hope to install the chrome parts this week (if I can get time off from work). I decided to use AC Plating instead of Unique Chrome since the parts are metal and not plastic. I still need to order the intake system from Jegs (similar to Fiero bobos & Troyboy's).
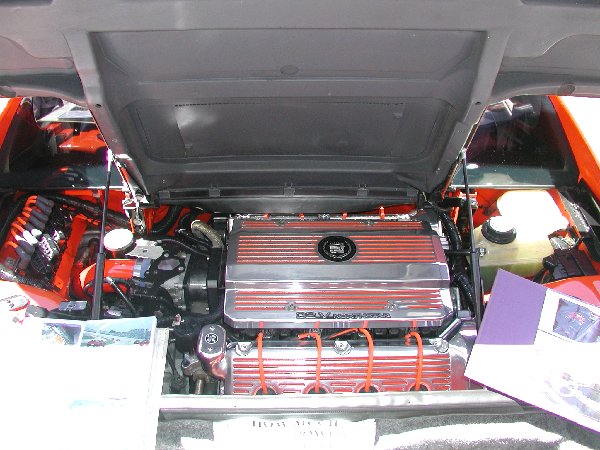
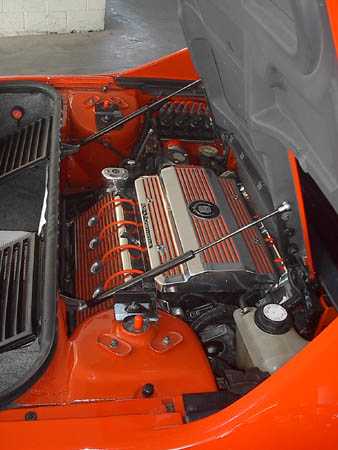
I purchased a CHRF's N* billet cast valve cover for my 87 Pont Fiero (freaking 3-yrs ago and I'm finally installing it. ) After (1) attempt by my engine guy, we've found that the valve cover is a bit too big for the engine compartment. I called CHRF today regarding plan A; re-modify the cover. Well that's out of the question since the valve cover is a complete cast and re-shaping the part might crack it resulting in a $300 lost. Plan B: re-modify the right strut tower and maybe notch out some of the trunk place.
I've seen WCF in Tehacapi, CA re-modify the right strut tower to house a V8 in the back (but it isn't a N* motor) so I'm asking those who have used CHRF's billet valve cover as-to what they did to make the part fit in the engine compartment. Also, Doc John (a guy here in CA.NV with a N*) used CHRF's covers, but different installation kit from WFC, but at the time I was too busy eye balling the bling.
Here's a pic of the part in question;
and the area that's in question;
I will no doubt need to have a portion of the strut tower removed and re-shaped.
Trunk area that is in question; Any advise would be helpful.
Also. I'm ordering extended red spark plug wire from CHRF.
Side note: freaking snow on the ground and it's April, oh well that's TEH for yeah... the land of four seasons.
Thanks. Madcurl
[This message has been edited by madcurl (edited 04-15-2009).]
Originally posted by madcurl: ...I called CHRF today regarding plan A; re-modify the cover. Well that's out of the question since the valve cover is a complete cast and re-shaping the part might crack it resulting in a $300 lost....Any advise would be helpful...
I wish I was there I could do that. It's just technique, and reshaping even cast aluminum is not that hard.
Since I am not there, and of the reshaping is indeed to radical for the stock aluminum form, I suggest a plan "C". Cut the offending section out of the valve cover and form a new piece out of a grade of aluminum you or your shop of choice is comfortable with forming, and have it TIG'd in. A good TIG guy can weld dissimilar grades of aluminum and leave you with not much work to do to grind it down and finish it off. A fixture to maintain the shape and trueness of the mounting surface is recommended.
You game? Otherwise it's;
As mentioned it isn't a easy task, but if possible I would save me the headache of cutting into the strut tower. Pm me for discussion.
Additional under belly pics;
the area to be re-trimmed;
[This message has been edited by madcurl (edited 04-16-2009).]
What was the outcome of the chromed paint on the coils? I notice all of them are black now... Please do tell I really want to know. Leak spark? Waiting for the others to arrive so they don't age differently.... come on what.... When I looked here today I noticed some golden photos of covers that really made me have to read who's paintjob that was... Then I find out it's a reflection. WOW. can't wait to see the sunshine pics. Now a simple hint about the valve cover clearance issue. Before you cut get some modeler's clay put it on anything under or near the to be cut section then put the cover in place. Make sure the clay is high enough to touch the cover. If the area is quite large pull up some spikes of clay to bridge the gap. once you put the cover in place you can then see how much room you have. Ok Ok I know the cover won't fit and that's why it needs to be notched. Use the cover that's on there now to get a baseline. Then pull the cover back off turn the cover over and set the clay into the cover. measure from the lowest part of the lip down to the clay. Now make a spacer to fill this gap. Take the clay out and set it into the inverted or stood on end cover. Line up the new bottom edge of the clay with the same reference lowest lip on the new cover. Now see how much bigger the cover is. This will tell you how much room you have to play with before you get into the internals. Neat huh. If you already knew this or are taking this step then maybe Joe blow didn't know until now.
Originally posted by DIY_Stu: ...Before you cut get some modeler's clay put it on anything under or near the to be cut section then put the cover in place. Make sure the clay is high enough to touch the cover. If the area is quite large pull up some spikes of clay to bridge the gap. once you put the cover in place you can then see how much room you have. Ok Ok I know the cover won't fit and that's why it needs to be notched. Use the cover that's on there now to get a baseline. Then pull the cover back off turn the cover over and set the clay into the cover. measure from the lowest part of the lip down to the clay. Now make a spacer to fill this gap. Take the clay out and set it into the inverted or stood on end cover. Line up the new bottom edge of the clay with the same reference lowest lip on the new cover. Now see how much bigger the cover is. This will tell you how much room you have to play with before you get into the internals. Neat huh. If you already knew this or are taking this step then maybe Joe blow didn't know until now.
Depending on what type of modification is needed I have a similar clay trick that I wanted him use to give me the specs I would need for the modification. It uses a different type of clay. The mod, done right, won't intefere with the cams, sprockets, or chain though or the factory cover wouldn't fit. However, DIY's trick is definitely a nice way to figure out what needs to be moved or removed on the CHRF cover.
What was the outcome of the chromed paint on the coils? I notice all of them are black now... Please do tell I really want to know. Leak spark? Waiting for the others to arrive so they don't age differently.... come on what.... When I looked here today I noticed some golden photos of covers that really made me have to read who's paintjob that was... Then I find out it's a reflection. WOW. can't wait to see the sunshine pics. Now a simple hint about the valve cover clearance issue.
Sorry about that. After mounting the chromed back plating-- I was so consumed at my dilemma (cutting the strut tower or modifying the valve cover) I forgot to mount the chrome coil. Right now, the chrome coil is sitting inside the trunk and I'm patiently waiting the 2nd chromed painted coil from Unique (it should be here this Friday). So far (last time I checked) the first chrome coil is still working.
[This message has been edited by madcurl (edited 04-17-2009).]
If you don't mind me asking, why do you want to chrome plate your coils if they are just going to be covered by a cover? Or will they be visible? I noticed that the Perfect Union had that, at least if a mechanic ever has to work on it they'll be like "Wow, there's chrome under this chrome."
If you don't mind me asking, why do you want to chrome plate your coils if they are just going to be covered by a cover? Or will they be visible? I noticed that the Perfect Union had that, at least if a mechanic ever has to work on it they'll be like "Wow, there's chrome under this chrome."
quote
Originally posted by Archie:
Bolted on the Chrome valve covers & coil holders today.....
Archie
No problem. The LS engine for Corvettes (or in this case LS7) dress up the engine bay whereas your normal Camero or Firebirds dont. The same can be said regarding N* engines (94-99) they don't have the addtional covering, granted the newer N* engine may have them now? In my case the coil pack sits on top of the valve cover. As in the case of Keith Huffs, he mounted the coil pack near the intake tube.
Besides, you don't have a choice when using valve covers from CHRF for it's a totally different valve cover thus no holes or brackets to mount a coil pack ( I think it's better cause it smooths out the area for a cleaner look) allowing for those to mount the coil pack either covered or uncovered.
[This message has been edited by madcurl (edited 04-17-2009).]
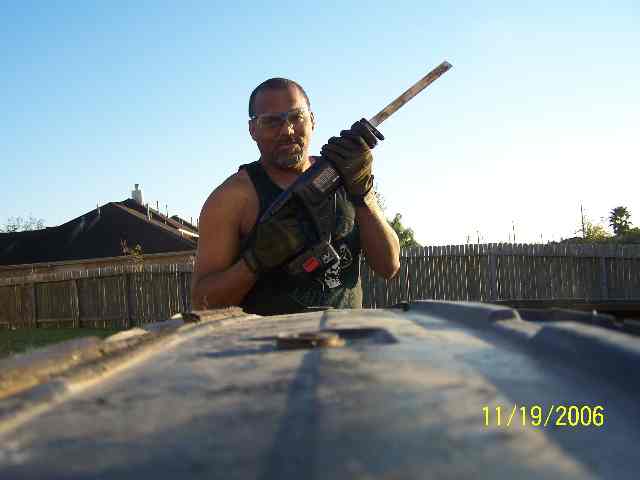
Glad to see you doing your own work Curly. No more B$!
Yeah, I've been known to pick up a tool every now and then, hehe. Here I am... back in 2005 prior to D5. Granted, I had help, but this is what you are now enjoying years later on #025.... the inital makings of the MadArch kit; otherwise I'd thought highly that nobody would've made a kit, but rather the typical rebodies (Ferrari's, Lamborghini's... God can't anybody think for themselves??? )
quote
Originally posted by exoticse:
The pace is heating up as the clock ticks down toward Daytona so madcurl has rolled up his sleeves and started slinging glass in the race to get his car ready !
Madcurl is using fiero fender panels, some ausie door rocker trim, and a soon to be modified Archie IRM style rocker to create a side vent molding (similair to the one seen on Alex's plazma car, but different):
A simple fiero fender panel added to the rear provides a much needed beefier wide body effect to offset the large wheels and compliment the new side vent treatment:
Once everything is glassed into place and smoothed over this will be one simple super mod !
Don't know about you but i can't wait to see this car at Daytona !
[This message has been edited by madcurl (edited 04-17-2009).]
If you don't mind me asking, why do you want to chrome plate your coils if they are just going to be covered by a cover? Or will they be visible? I noticed that the Perfect Union had that, at least if a mechanic ever has to work on it they'll be like "Wow, there's chrome under this chrome."
Some of us feel that beauty shouldn't just be skin deep . It's like wearing clean draws, You just never know who's going to take a look under your hood.


.JPG)


_1.JPG) Archie
Archie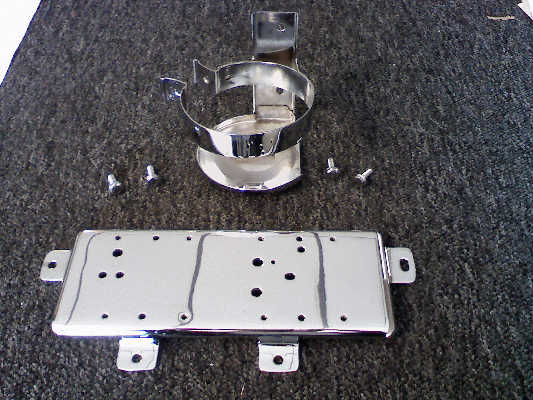

 ). I decided to use AC Plating instead of Unique Chrome since the parts are metal and not plastic. I still need to order the intake system from Jegs (similar to Fiero bobos & Troyboy's).
 ) After (1) attempt by my engine guy, we've found that the valve cover is a bit too big for the engine compartment. I called CHRF today regarding plan A; re-modify the cover. Well that's out of the question since the valve cover is a complete cast and re-shaping the part might crack it resulting in a $300 lost.
  Plan B: re-modify the right strut tower and maybe notch out some of the trunk place.


.JPG)
.JPG)