Pennock's Fiero Forum
  The Construction Zone
  Aurora 4.0l / Izuzu 5 speed swap into 88 coupe (Page 18)

Post New Topic  Post A Reply
Email This Page to Someone! | Printable Version

This topic is 26 pages long:  1   2   3   4   5   6   7   8   9   10   11   12   13   14   15   16   17   18   19   20   21   22   23   24   25   26 
Previous Page | Next Page
next newest topic | next oldest topic
Aurora 4.0l / Izuzu 5 speed swap into 88 coupe by cptsnoopy
Started on: 04-27-2004 07:21 PM
Replies: 1012 (72861 views)
Last post by: cptsnoopy on 11-05-2023 09:50 PM
Will
Member
Posts: 14226
From: Where you least expect me
Registered: Jun 2000


Feedback score: (1)
Leave feedback


Total ratings: 237
Rate this member

Report this Post02-02-2011 09:33 AM Click Here to See the Profile for WillSend a Private Message to WillEdit/Delete MessageReply w/QuoteDirect Link to This Post
 
quote
Originally posted by cptsnoopy:

Not completely idle: I thought it would be nice to have a return spring on the clutch arm to help prevent premature throwout bearing wear.

Painted:

http://images.fieroforum.co...10/clutch_mod_02.jpg

Installed:

http://images.fieroforum.co...10/clutch_mod_03.jpg

Charlie


I assume you haven't driven it yet to test, but this doesn't look like a good idea to me. Modern TOB's are made for continuous rotation. In fact the Fiero slave cylinders have contact springs inside them to maintain constant contact of the TOB to the throw out fingers on the clutch. If you forcibly pull the TOB back with a return spring, you will have excess free play in the system and may not have enough travel in the hydraulics to fully release the clutch.
IP: Logged
cptsnoopy
Member
Posts: 2585
From: phoenix, AZ, USA
Registered: Jul 2003


Feedback score:    (8)
Leave feedback


Total ratings: 60
Rate this member

Report this Post02-02-2011 01:20 PM Click Here to See the Profile for cptsnoopySend a Private Message to cptsnoopyEdit/Delete MessageReply w/QuoteDirect Link to This Post
 
quote
Originally posted by Bloozberry:

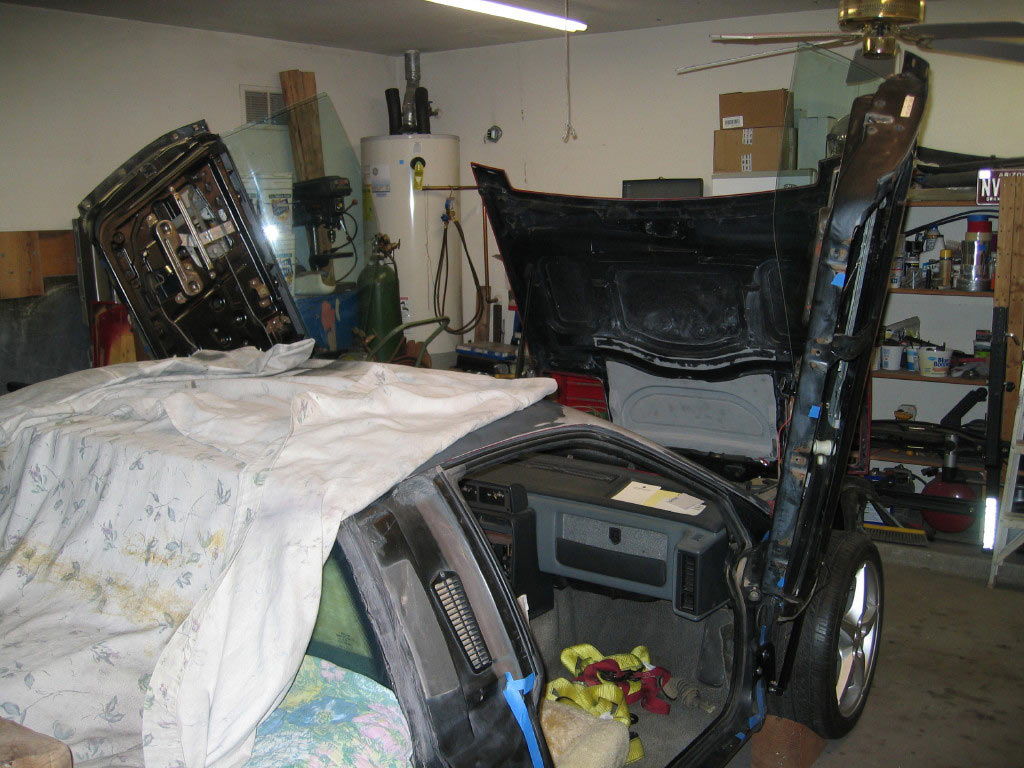
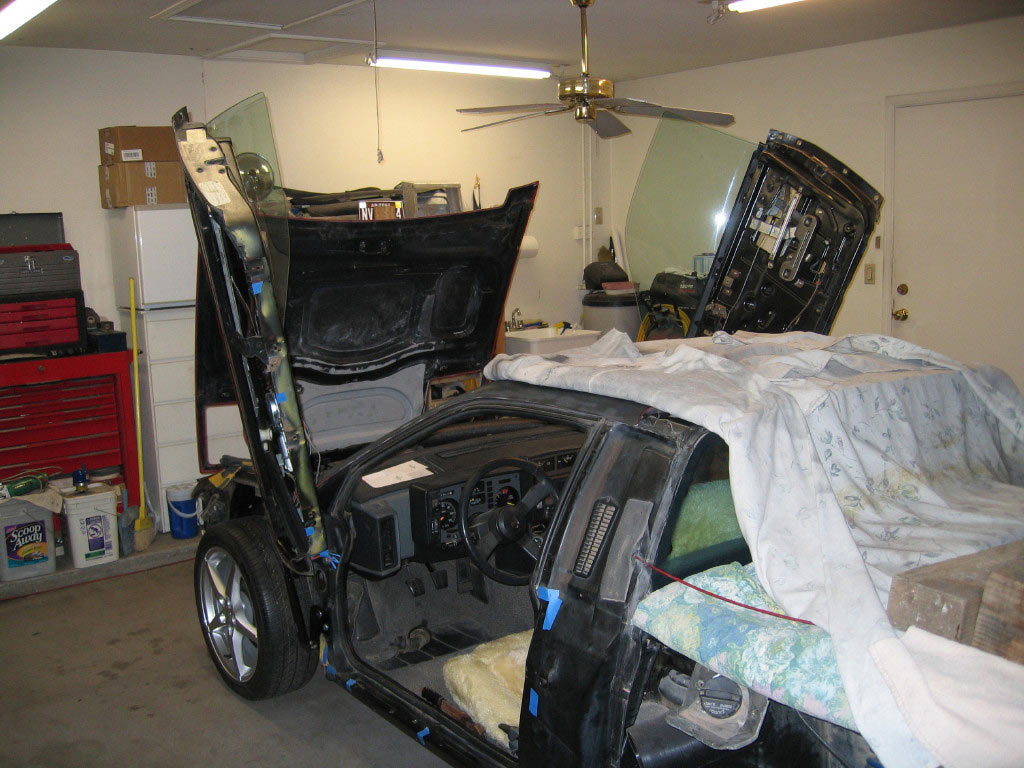
Ooooooo.... I'm jealous! Watch out for that overhead fan!

I wonder if Lambo hinges would work on the F355 rebodies... being a bunch wider and all, or if the added thickness between the hinge mounting location and the outer skin would cause interference problems? Anybody know?


Good question. I have not seen the F355 body up close so I cant even start to guess...?

Hi Will,

I did not know that the TOB's were now made for continuous contact. I was back in the late 60's when you would wear it out if you let it run against the PP. I have driven it a little and it seems fine. By this I mean engaging and disengaging the clutch about 20 times moving the car back and forth. The clutch seems smooth and the pedal "feels" normal.

Charlie

IP: Logged
cptsnoopy
Member
Posts: 2585
From: phoenix, AZ, USA
Registered: Jul 2003


Feedback score:    (8)
Leave feedback


Total ratings: 60
Rate this member

Report this Post02-04-2011 02:51 AM Click Here to See the Profile for cptsnoopySend a Private Message to cptsnoopyEdit/Delete MessageReply w/QuoteDirect Link to This Post
A friend of mine told me some exciting news the other day and after checking into it, it appears to be true.

Apparently here in Maricopa County, AZ cars that are 15 years or older and covered under collectors insurance are exempt from emissions testing. A quick quote from Grundy's Worldwide for a declared value of $18000 costs 288 per year and includes 500,000 liability with comp and collision (zero deductible). As usual the comp and collision is the major portion of the premium. The story goes that you take your policy info to the DMV and they show you exempt from emissions. There have been some reports of needing to insist as some DMV agents are not aware of the current law. This became effective sometime in 2006. Under collector insurance there will be restrictions on use but since I have several daily drivers this should not be an issue. Yipee!

Charlie

IP: Logged
Will
Member
Posts: 14226
From: Where you least expect me
Registered: Jun 2000


Feedback score: (1)
Leave feedback


Total ratings: 237
Rate this member

Report this Post02-04-2011 08:22 AM Click Here to See the Profile for WillSend a Private Message to WillEdit/Delete MessageReply w/QuoteDirect Link to This Post
Get the code citation (for your own knowledge too) to bolster your argument.
IP: Logged
cptsnoopy
Member
Posts: 2585
From: phoenix, AZ, USA
Registered: Jul 2003


Feedback score:    (8)
Leave feedback


Total ratings: 60
Rate this member

Report this Post02-04-2011 01:13 PM Click Here to See the Profile for cptsnoopySend a Private Message to cptsnoopyEdit/Delete MessageReply w/QuoteDirect Link to This Post
 
quote
Originally posted by Will:

Get the code citation (for your own knowledge too) to bolster your argument.


Posting some media links:

Arizona Republic

Arizona Department of Environmental Quality (Bottom of the webpage)

The quote posted below I got from here.

 
quote
HB 2357 amends Arizona Revised Statutes (ARS) Section 49-542 by
exempting vehicles that are at least 15 years old or are of a unique
and rare design and that carry collectible vehicle insurance that
restricts the mileage and/or use of the vehicle (``collectible
vehicles'') from emission testing in both Area A (i.e., the Phoenix
area) and Area B (i.e., the Tucson area).


I did not find an actual code citation but will look further for it.

Thanks for the tip.

Charlie

IP: Logged
Will
Member
Posts: 14226
From: Where you least expect me
Registered: Jun 2000


Feedback score: (1)
Leave feedback


Total ratings: 237
Rate this member

Report this Post02-04-2011 01:38 PM Click Here to See the Profile for WillSend a Private Message to WillEdit/Delete MessageReply w/QuoteDirect Link to This Post
 
quote
HB 2357 amends Arizona Revised Statutes (ARS) Section 49-542 by
exempting vehicles that are at least 15 years old or are of a unique
and rare design and that carry collectible vehicle insurance that
restricts the mileage and/or use of the vehicle (``collectible
vehicles'') from emission testing in both Area A (i.e., the Phoenix
area) and Area B (i.e., the Tucson area).


quote
Originally posted by cptsnoopy:

I did not find an actual code citation but will look further for it.

Thanks for the tip.

Charlie


Lol...How about the Arizona Revised Statutes section 49-542?
http://www.azleg.state.az.u...tatutes.asp?title=49
http://www.azleg.state.az.u...Title=49&DocType=ARS

Don't EVER hesitate to call for a manager at the DMV... The drones are not paid to think.

[This message has been edited by Will (edited 02-04-2011).]

IP: Logged
cptsnoopy
Member
Posts: 2585
From: phoenix, AZ, USA
Registered: Jul 2003


Feedback score:    (8)
Leave feedback


Total ratings: 60
Rate this member

Report this Post02-14-2011 02:13 AM Click Here to See the Profile for cptsnoopySend a Private Message to cptsnoopyEdit/Delete MessageReply w/QuoteDirect Link to This Post
Got the other side mounted.

Charlie


IP: Logged
cptsnoopy
Member
Posts: 2585
From: phoenix, AZ, USA
Registered: Jul 2003


Feedback score:    (8)
Leave feedback


Total ratings: 60
Rate this member

Report this Post03-10-2011 08:37 PM Click Here to See the Profile for cptsnoopySend a Private Message to cptsnoopyEdit/Delete MessageReply w/QuoteDirect Link to This Post
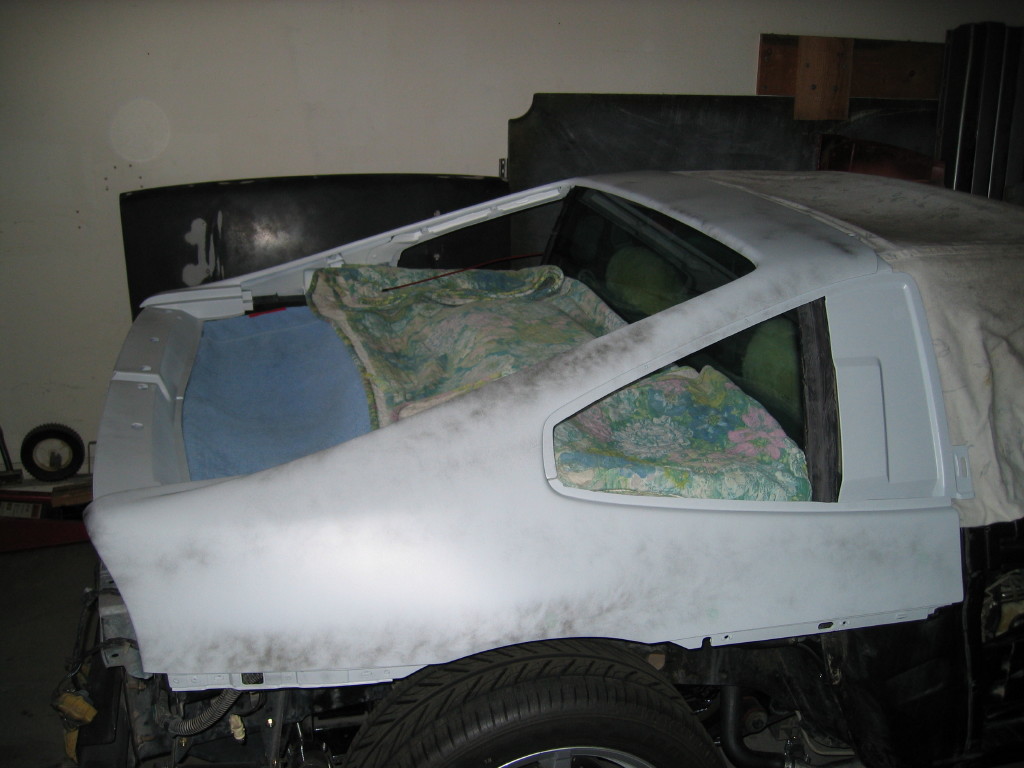
The rear upper body clip went to the painter today. He will try hitting it with PPG epoxy primer to see if the edges of the adhesion promoter will cause any problems. If not then I can get to work on getting the rest of the body parts sanded and sent to him.

Charlie

IP: Logged
motoracer838
Member
Posts: 3751
From: Edgewater Co. USofA
Registered: Jan 2006


Feedback score: (2)
Leave feedback


Total ratings: 83
Rate this member

Report this Post03-12-2011 09:43 AM Click Here to See the Profile for motoracer838Send a Private Message to motoracer838Edit/Delete MessageReply w/QuoteDirect Link to This Post
Charlie, its about time ( LOL I'm one to talk )

Joe
IP: Logged
cptsnoopy
Member
Posts: 2585
From: phoenix, AZ, USA
Registered: Jul 2003


Feedback score:    (8)
Leave feedback


Total ratings: 60
Rate this member

Report this Post03-14-2011 10:02 PM Click Here to See the Profile for cptsnoopySend a Private Message to cptsnoopyEdit/Delete MessageReply w/QuoteDirect Link to This Post
 
quote
Originally posted by motoracer838:

Charlie, its about time ( LOL I'm one to talk )

Joe


Lol, I know just what you mean...

Charlie

IP: Logged
cptsnoopy
Member
Posts: 2585
From: phoenix, AZ, USA
Registered: Jul 2003


Feedback score:    (8)
Leave feedback


Total ratings: 60
Rate this member

Report this Post03-26-2011 06:28 PM Click Here to See the Profile for cptsnoopySend a Private Message to cptsnoopyEdit/Delete MessageReply w/QuoteDirect Link to This Post
I'm stoked! The painter said that the ppg epoxy primer and the high build stuff he added looked great. As soon as I get past my current back issues I will get going on the rest of the body...

Charlie

IP: Logged
PFF
System Bot
Bloozberry
Member
Posts: 7760
From:
Registered: Jan 2009


Feedback score: N/A
Leave feedback


Total ratings: 311
Rate this member

Report this Post03-26-2011 09:08 PM Click Here to See the Profile for BloozberrySend a Private Message to BloozberryEdit/Delete MessageReply w/QuoteDirect Link to This Post
 
quote
Originally posted by cptsnoopy:

As soon as I get past my current back issues I will get going on the rest of the body...


Yours, or the car's?
IP: Logged
cptsnoopy
Member
Posts: 2585
From: phoenix, AZ, USA
Registered: Jul 2003


Feedback score:    (8)
Leave feedback


Total ratings: 60
Rate this member

Report this Post03-27-2011 03:50 AM Click Here to See the Profile for cptsnoopySend a Private Message to cptsnoopyEdit/Delete MessageReply w/QuoteDirect Link to This Post
 
quote
Originally posted by Bloozberry:


Yours, or the car's?


Ouch!

Would you believe both???

Had something strange happen Saturday morning that has me going in for an MRI of the lower back... Need to see what I have done this time.

Charlie

IP: Logged
Fiero2m8
Member
Posts: 1928
From: Niagara, Ontario, Canada
Registered: Feb 2006


Feedback score:    (10)
Leave feedback

Rate this member

Report this Post03-31-2011 01:00 AM Click Here to See the Profile for Fiero2m8Click Here to visit Fiero2m8's HomePageSend a Private Message to Fiero2m8Edit/Delete MessageReply w/QuoteDirect Link to This Post
Take care of yourself Charlie, we will try not to bump for updates

------------------

Indy Northstar-Stretch ~ LT1-NOS Roadster

IP: Logged
cptsnoopy
Member
Posts: 2585
From: phoenix, AZ, USA
Registered: Jul 2003


Feedback score:    (8)
Leave feedback


Total ratings: 60
Rate this member

Report this Post03-31-2011 01:50 AM Click Here to See the Profile for cptsnoopySend a Private Message to cptsnoopyEdit/Delete MessageReply w/QuoteDirect Link to This Post
 
quote
Originally posted by Fiero2m8:

Take care of yourself Charlie, we will try not to bump for updates


Lol, ok!

What's amazing to me is how you can feel so helpless for a couple of days and then as things get even a little better you think there's no stopping you...?? I went in for the MRI and the doc said he would try some injections from T6 down through S1 and if that did not do the trick then we will pull the trigger on the MRI. I suspect that is good news meaning he did not see anything terribly wrong during the poking/prodding part of the exam... (don't take that wrong!)

I am almost ashamed that I let my now yellow coupe 86GT get away from me tonight. Now I have to finish this project car and soon or else I will be worse than a crack head needing a Fiero fix...

Charlie

IP: Logged
cptsnoopy
Member
Posts: 2585
From: phoenix, AZ, USA
Registered: Jul 2003


Feedback score:    (8)
Leave feedback


Total ratings: 60
Rate this member

Report this Post05-04-2011 10:38 PM Click Here to See the Profile for cptsnoopySend a Private Message to cptsnoopyEdit/Delete MessageReply w/QuoteDirect Link to This Post
Bump-date:

I have had some medial branch block injections and so far they work great for at least a week. I felt good enough today to go over and pickup my rear clip so I can sand it for base-coat. (if I said that right...?) Slow progress but some progress none the less.

Charlie


IP: Logged
RCR
Member
Posts: 4397
From: Shelby Twp Mi
Registered: Sep 2002


Feedback score:    (7)
Leave feedback


Total ratings: 102
Rate this member

Report this Post05-05-2011 08:09 PM Click Here to See the Profile for RCRSend a Private Message to RCREdit/Delete MessageReply w/QuoteDirect Link to This Post
Hope you're feeling better, Charlie...The car's looking great.

Bob
IP: Logged
cptsnoopy
Member
Posts: 2585
From: phoenix, AZ, USA
Registered: Jul 2003


Feedback score:    (8)
Leave feedback


Total ratings: 60
Rate this member

Report this Post05-06-2011 05:37 PM Click Here to See the Profile for cptsnoopySend a Private Message to cptsnoopyEdit/Delete MessageReply w/QuoteDirect Link to This Post
Thanks Bob!

I am feeling much better this month compared to last month. Now if I don't do anything too stupid I should be ok. I am looking forward to Paul's hood scoop so I can get more of the parts ready for primer...

Charlie

IP: Logged
cptsnoopy
Member
Posts: 2585
From: phoenix, AZ, USA
Registered: Jul 2003


Feedback score:    (8)
Leave feedback


Total ratings: 60
Rate this member

Report this Post05-12-2011 06:15 PM Click Here to See the Profile for cptsnoopySend a Private Message to cptsnoopyEdit/Delete MessageReply w/QuoteDirect Link to This Post
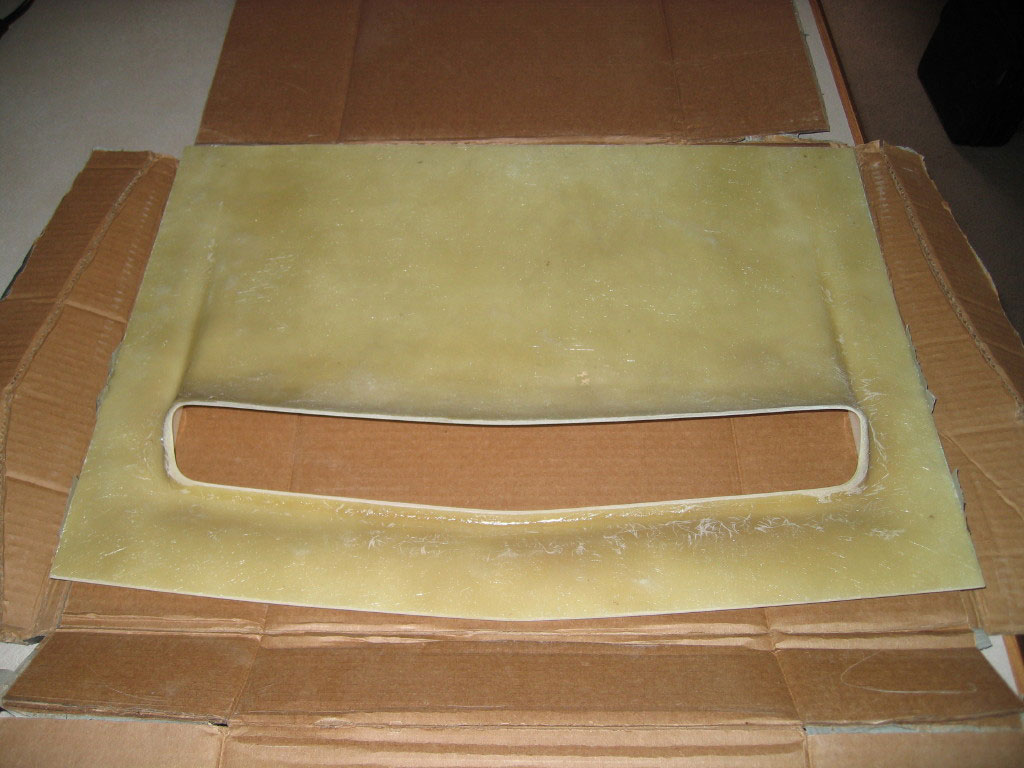
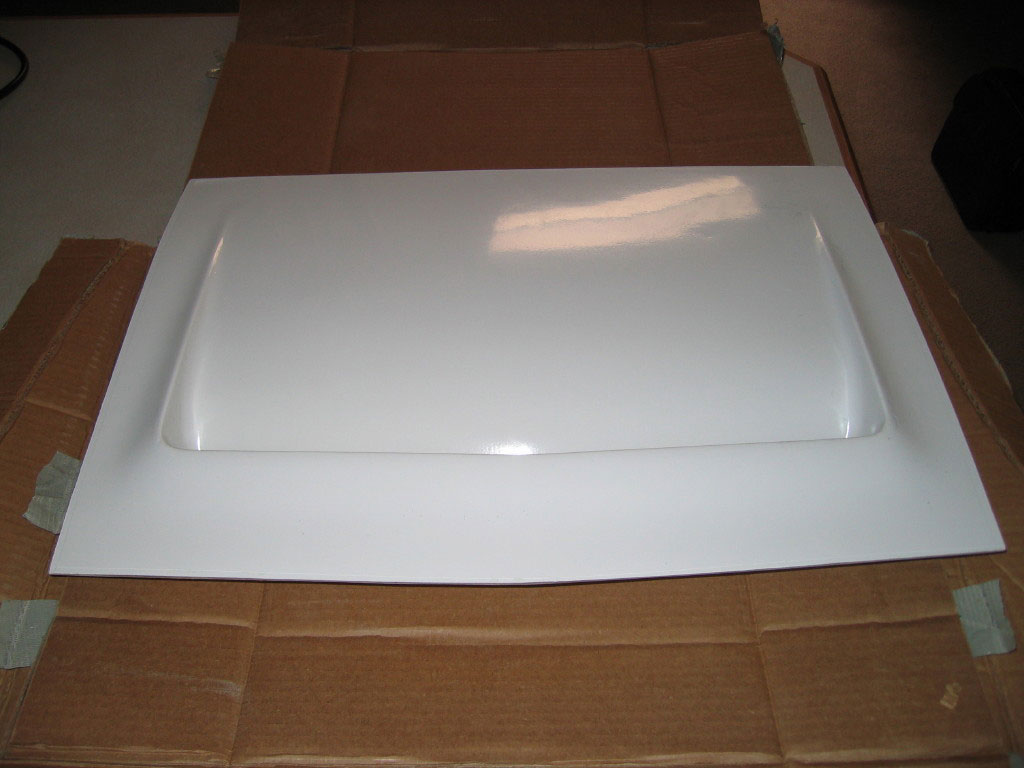
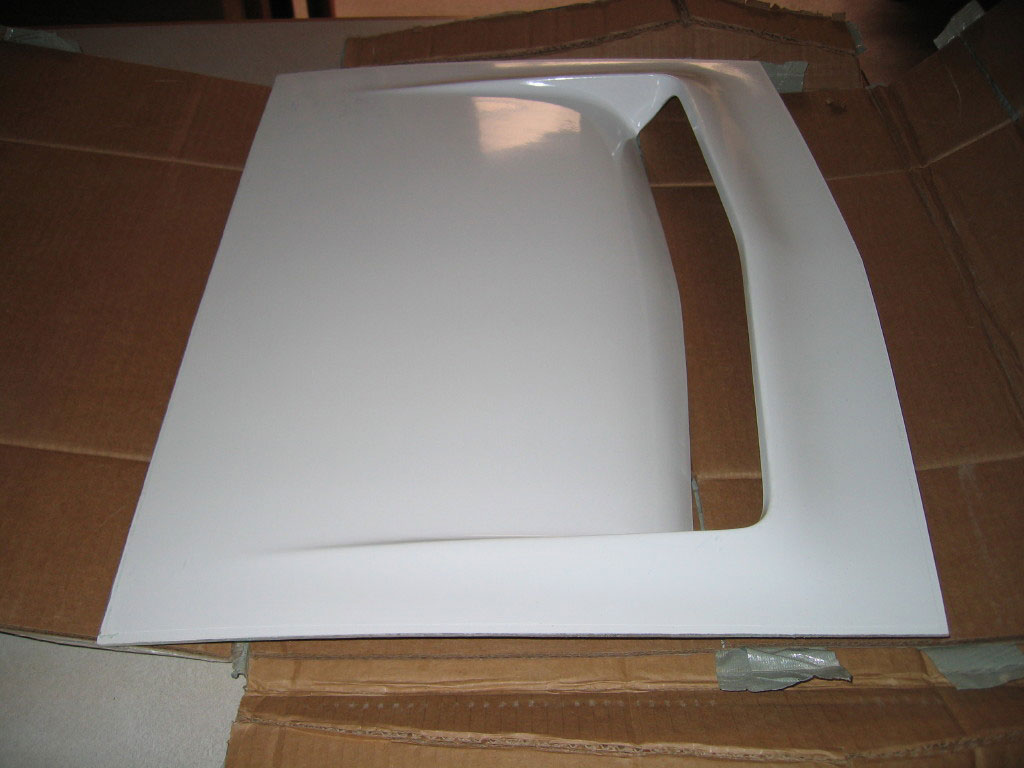
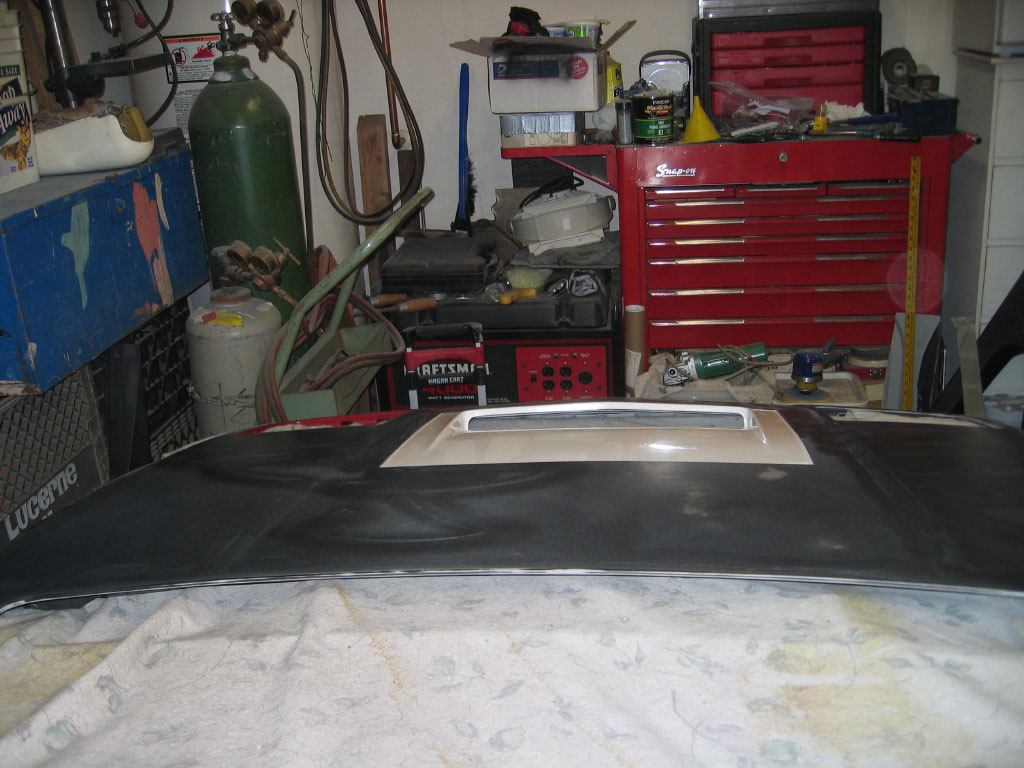
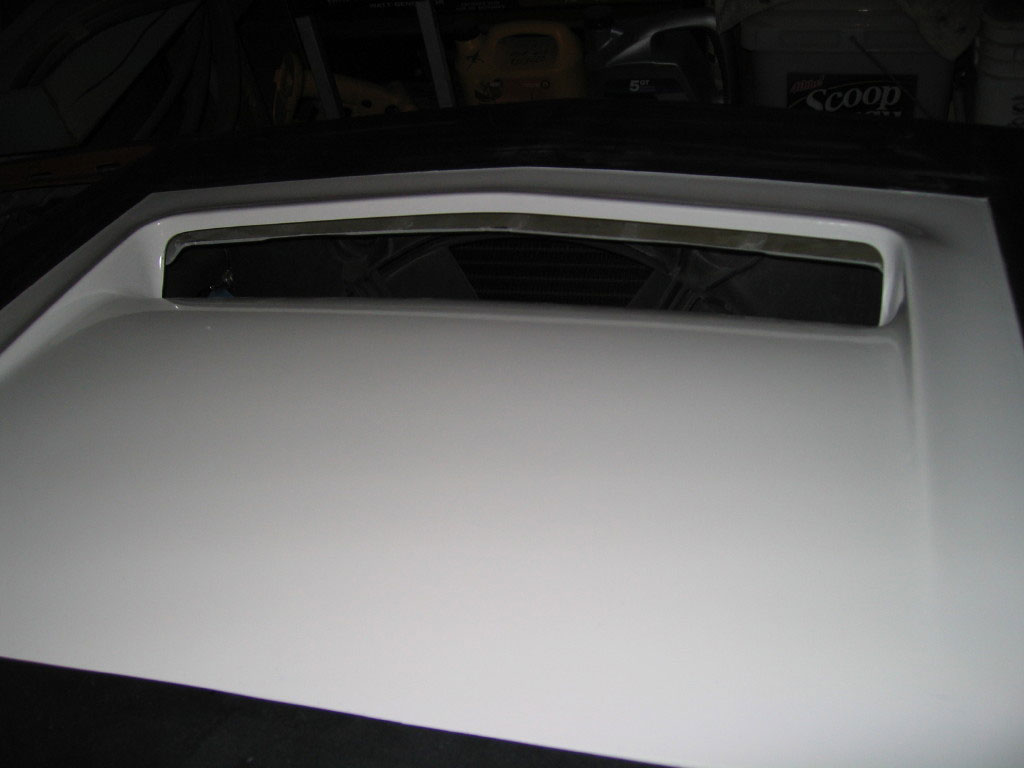
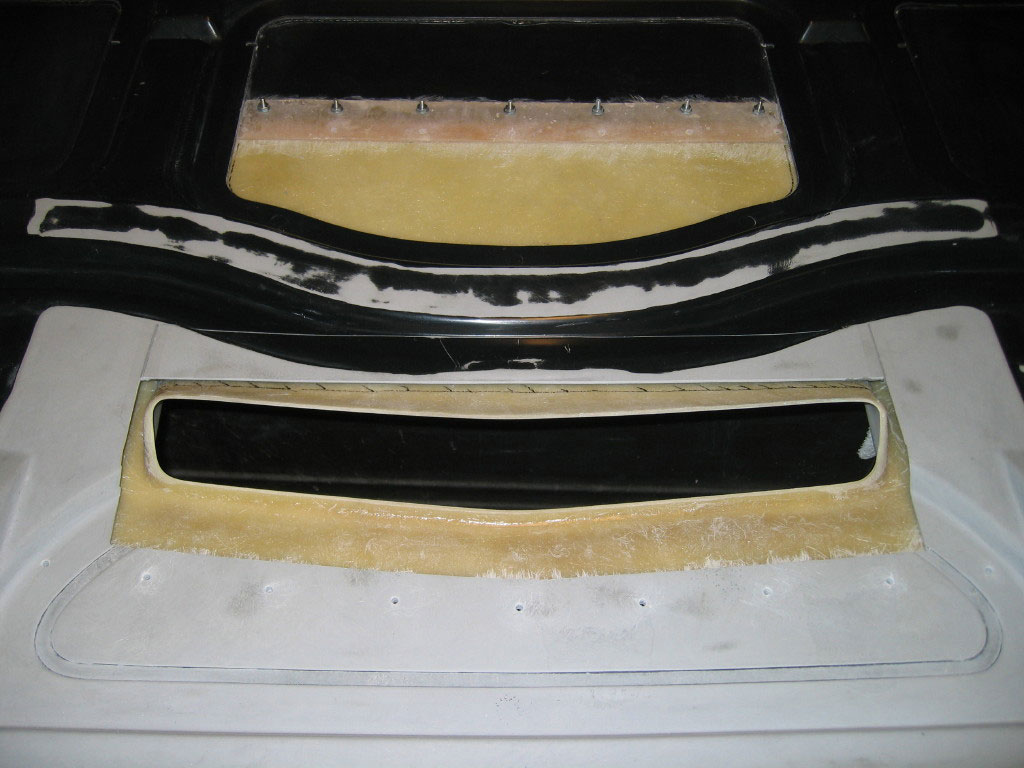
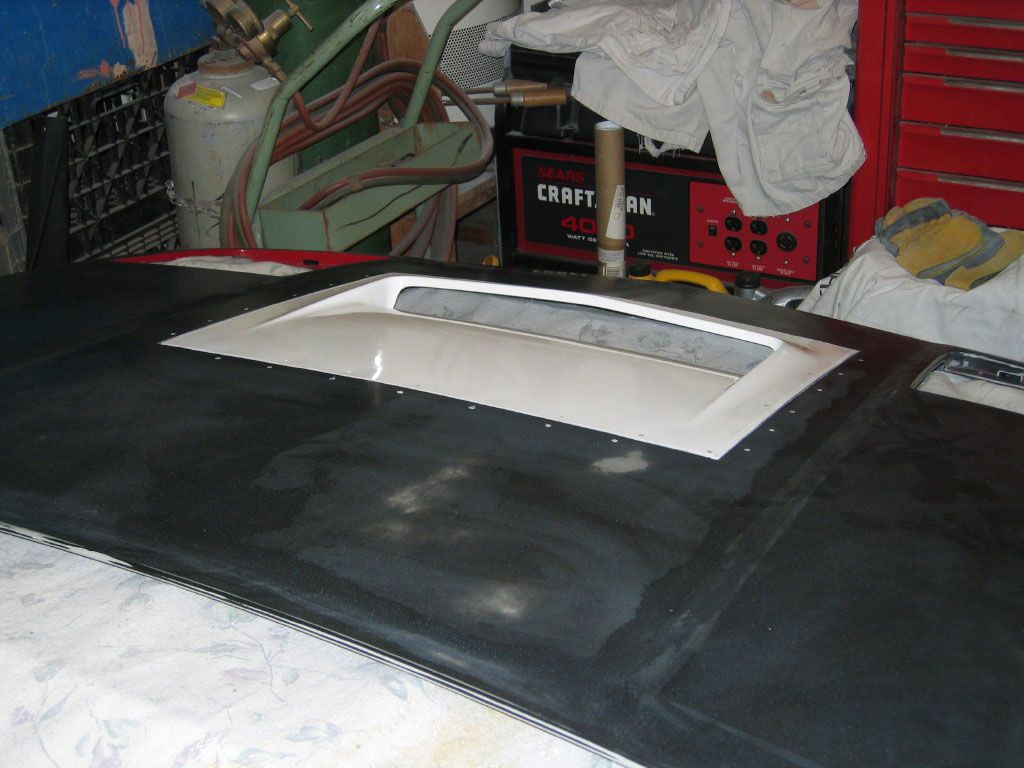
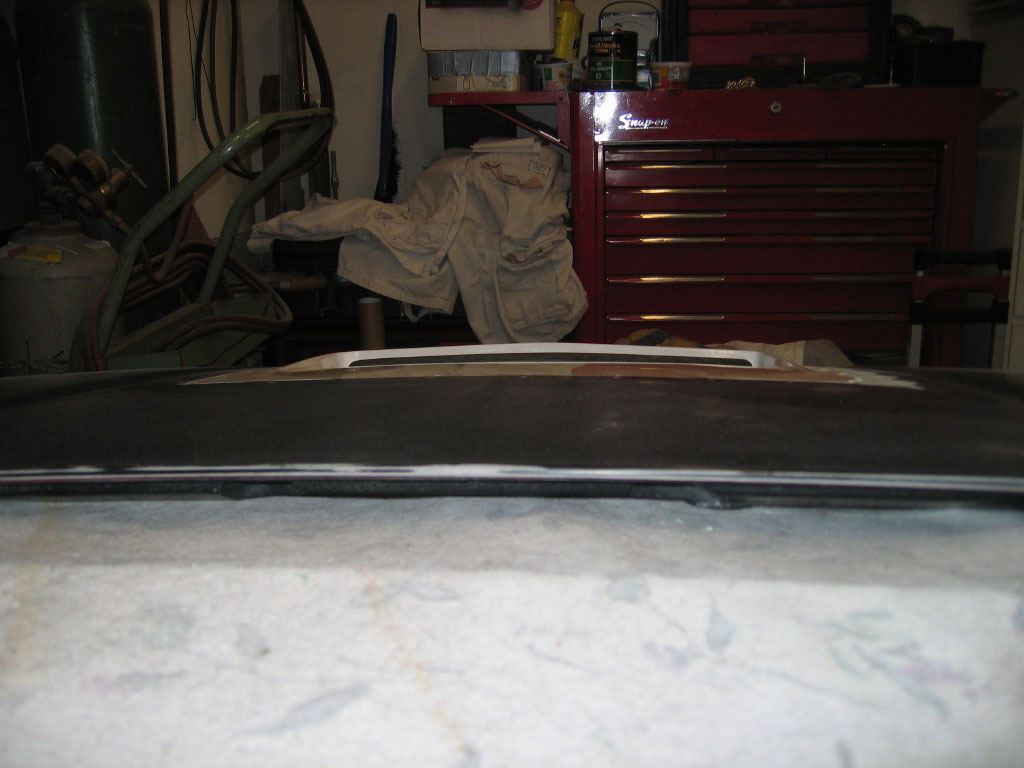
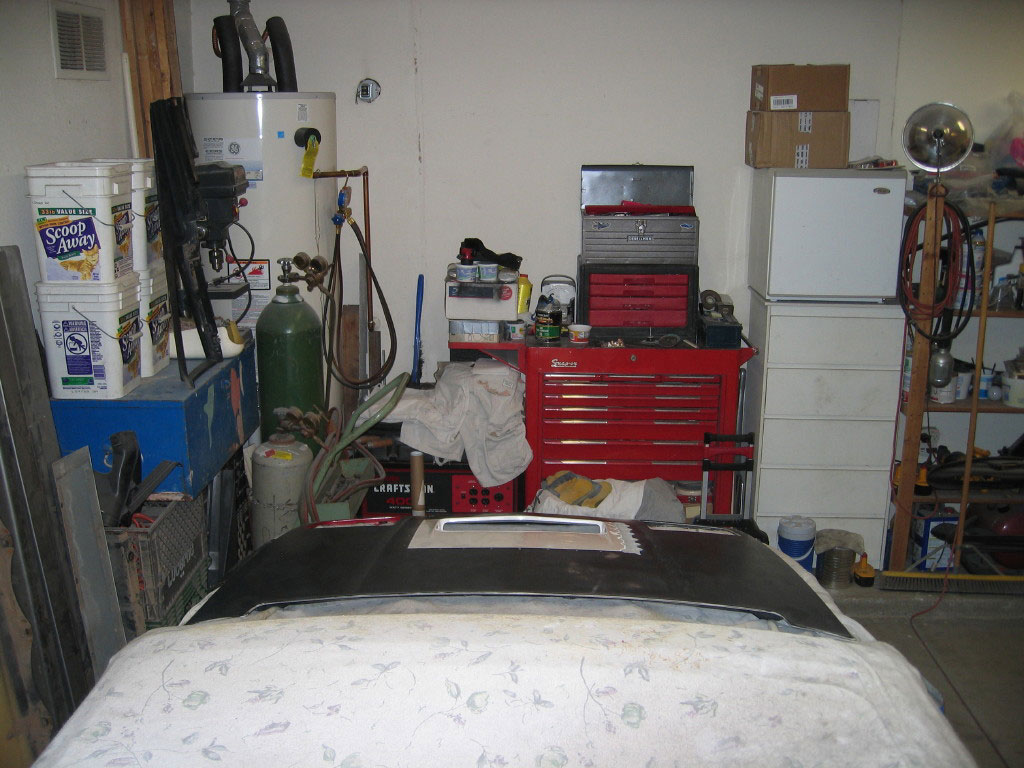
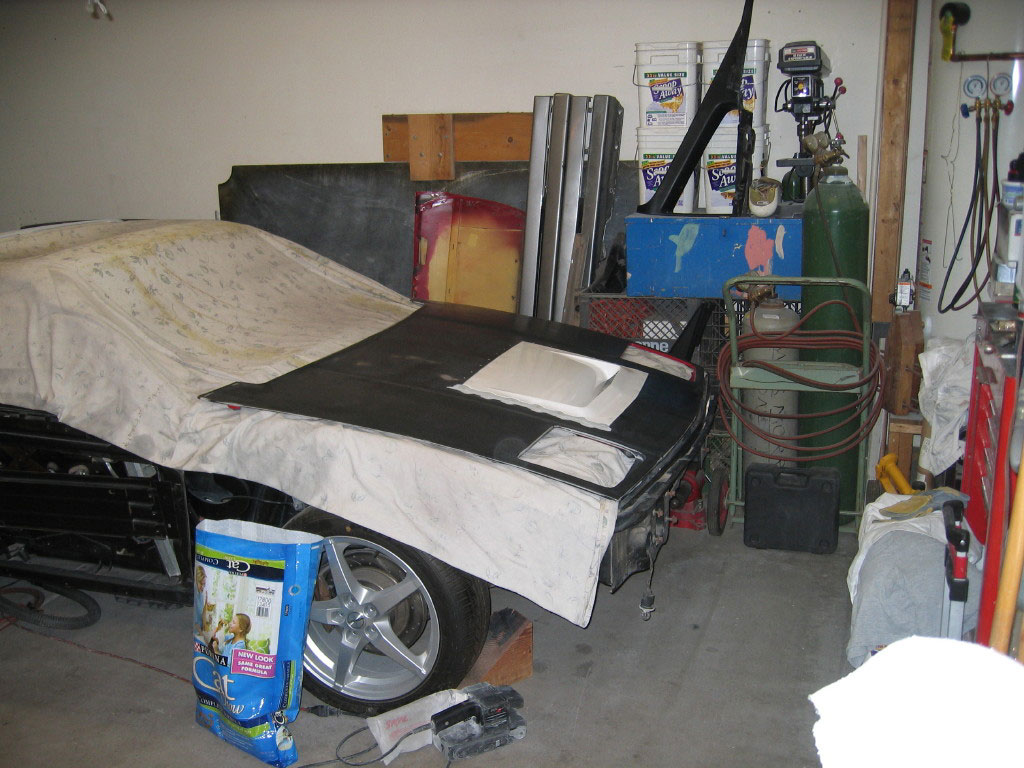
I just received Paul's hood scoop (Angel Vent v2). Here are a couple of pics. Great workmanship! I wanted to keep the body as close as possible to stock but venting the radiator area air seemed more important and this should do that in style.

For this and other products, look here.

Charlie


IP: Logged
cptsnoopy
Member
Posts: 2585
From: phoenix, AZ, USA
Registered: Jul 2003


Feedback score:    (8)
Leave feedback


Total ratings: 60
Rate this member

Report this Post05-14-2011 11:52 PM Click Here to See the Profile for cptsnoopySend a Private Message to cptsnoopyEdit/Delete MessageReply w/QuoteDirect Link to This Post
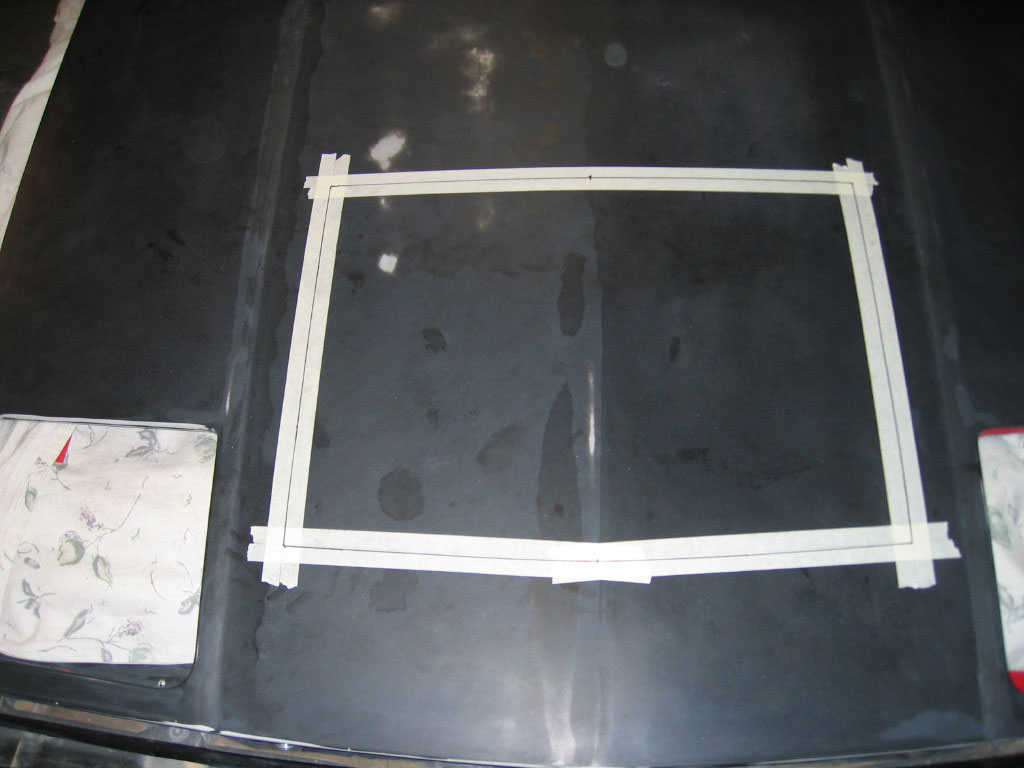
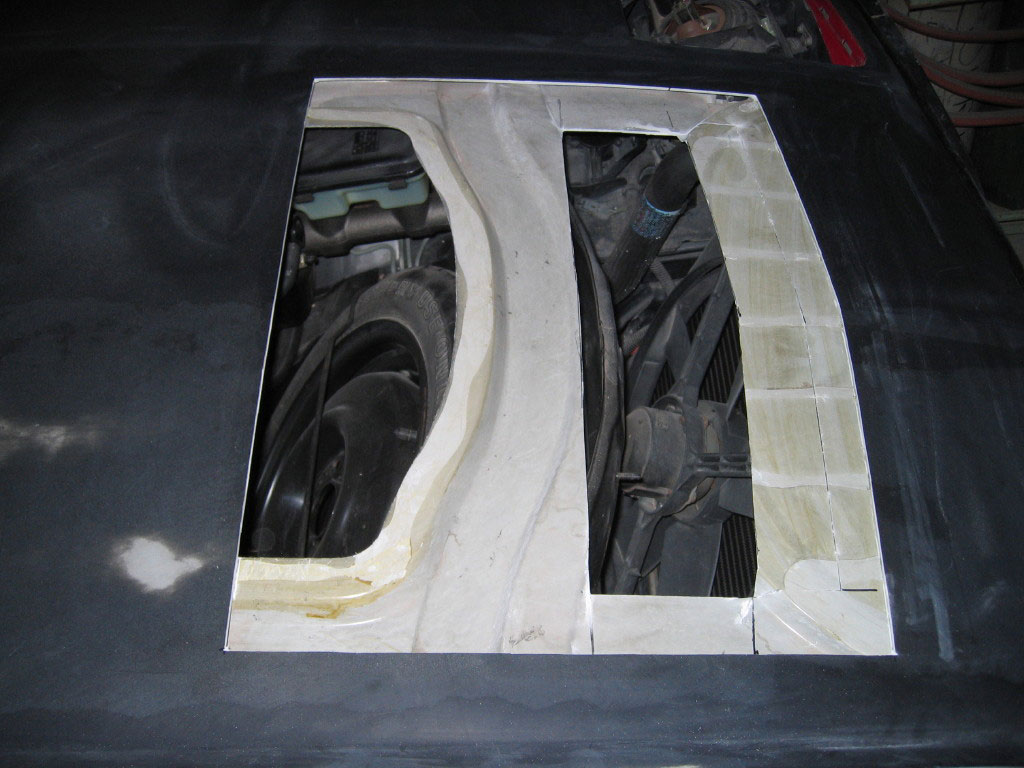
I used the trusty Dremel Tool with a cutoff disk to cut the hole in the hood. There is plenty more to do before it will be ready to paint but for now it is looking like it will turn out nicely.

Charlie


IP: Logged
88GTS
Member
Posts: 104
From: North Vancouver, BC Canada
Registered: Oct 2004


Feedback score: N/A
Leave feedback

Rate this member

Report this Post05-15-2011 11:16 AM Click Here to See the Profile for 88GTSSend a Private Message to 88GTSEdit/Delete MessageReply w/QuoteDirect Link to This Post
Hey Charlie, can you please post pictures of the cut without the vent installed. Also, with the version 2 vent, do you also have to cut the sheet metal in front of the spare?
IP: Logged
PFF
System Bot
cptsnoopy
Member
Posts: 2585
From: phoenix, AZ, USA
Registered: Jul 2003


Feedback score:    (8)
Leave feedback


Total ratings: 60
Rate this member

Report this Post05-15-2011 05:33 PM Click Here to See the Profile for cptsnoopySend a Private Message to cptsnoopyEdit/Delete MessageReply w/QuoteDirect Link to This Post
 
quote
Originally posted by 88GTS:

Hey Charlie, can you please post pictures of the cut without the vent installed. Also, with the version 2 vent, do you also have to cut the sheet metal in front of the spare?


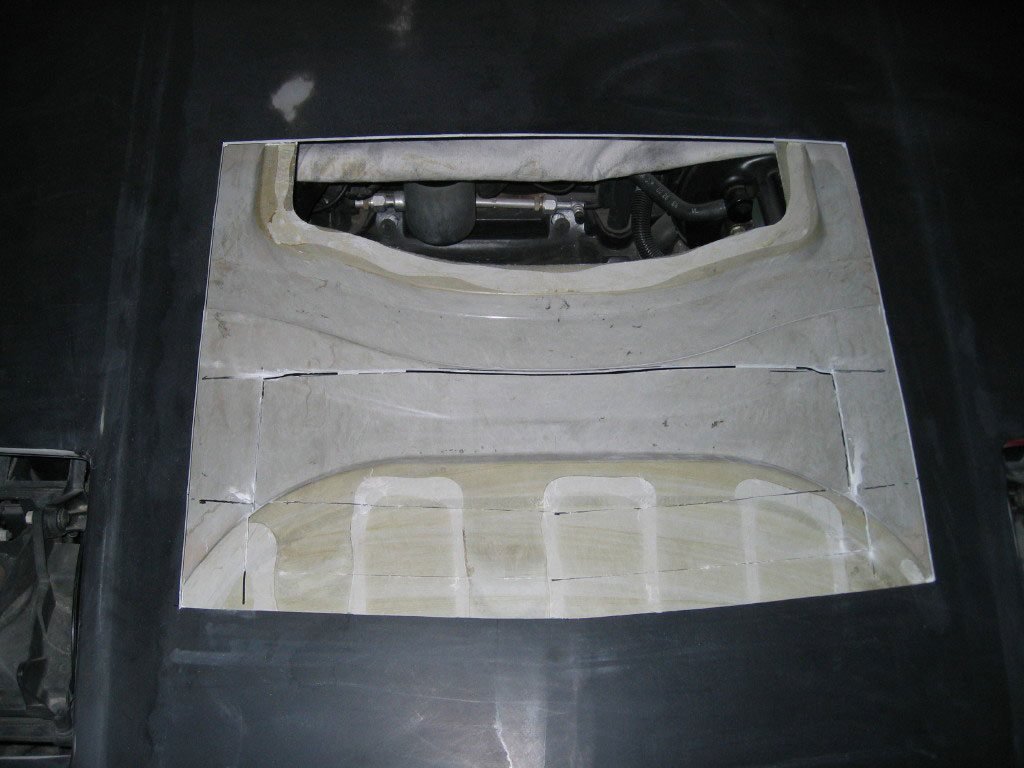
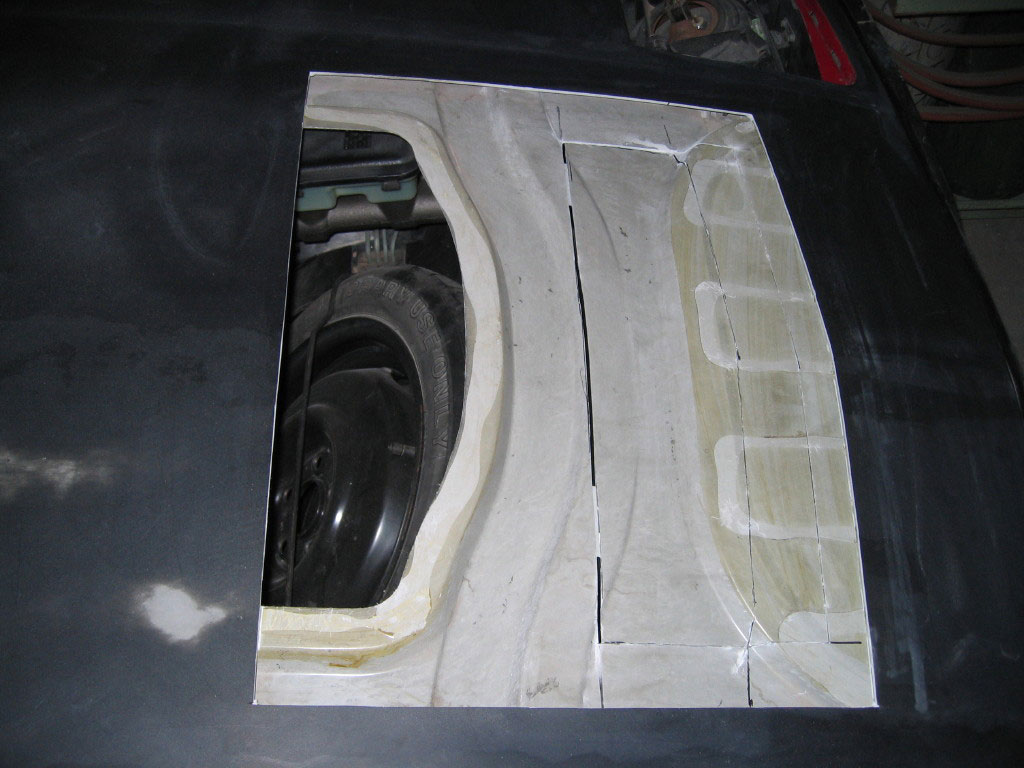
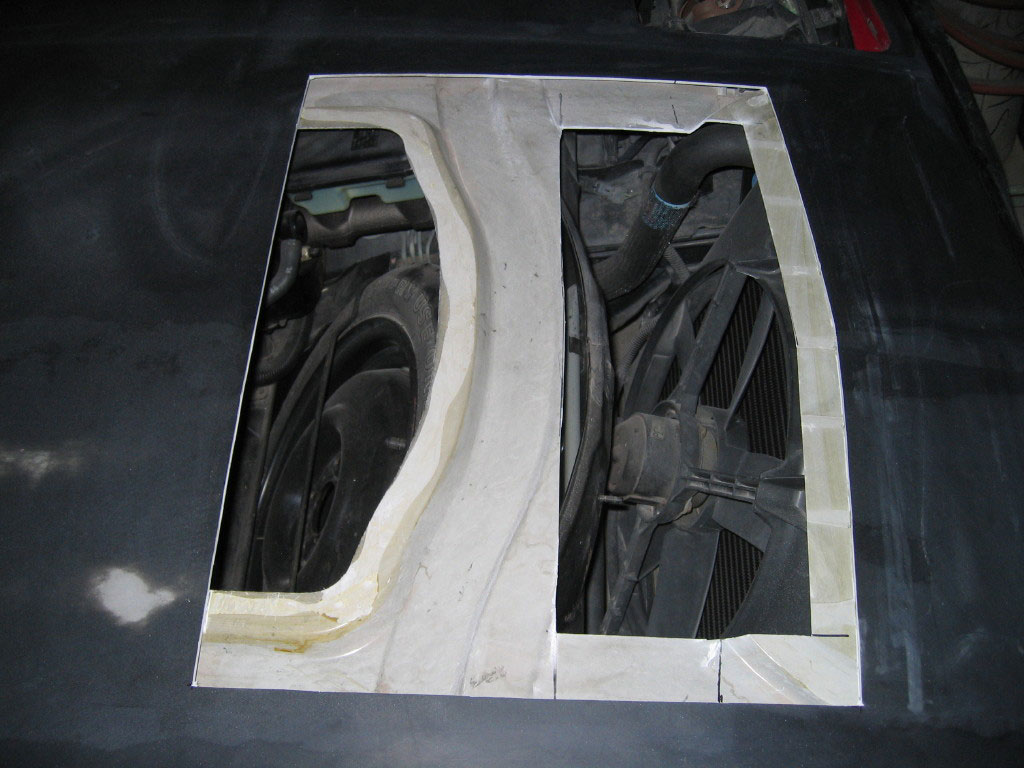
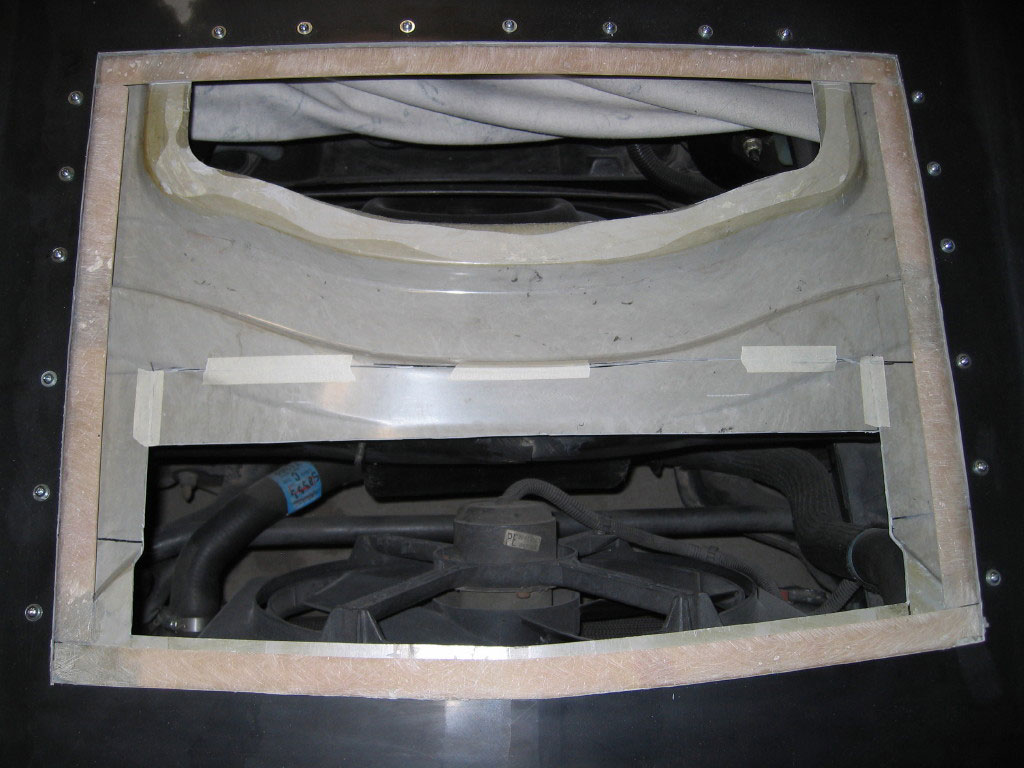
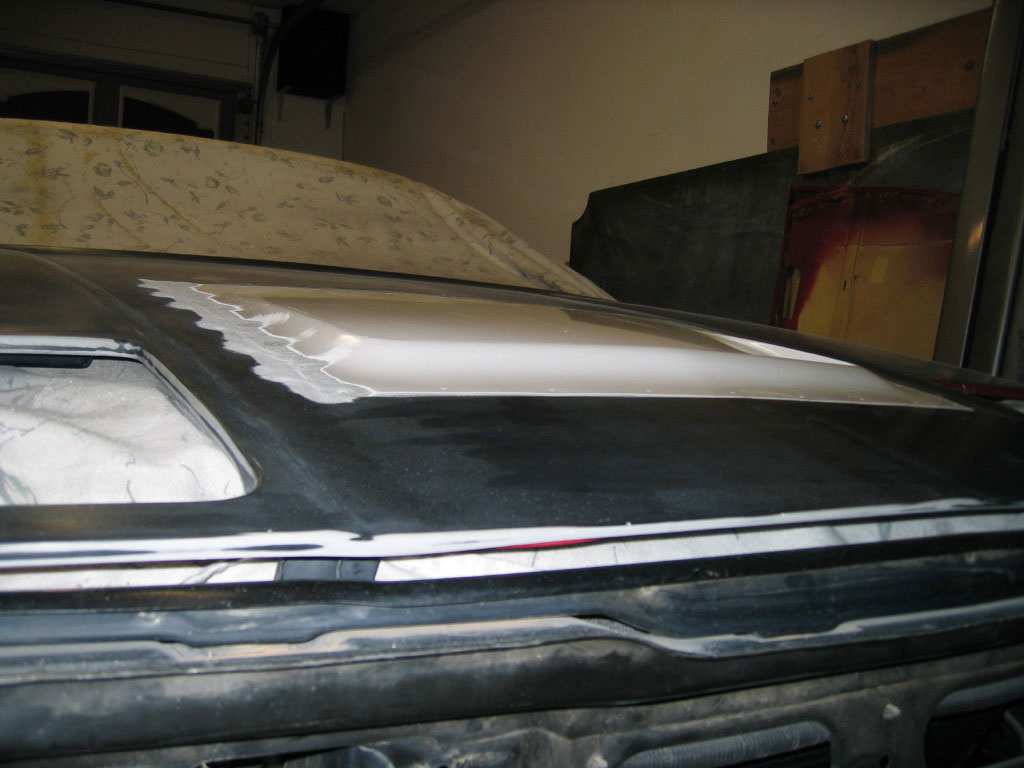
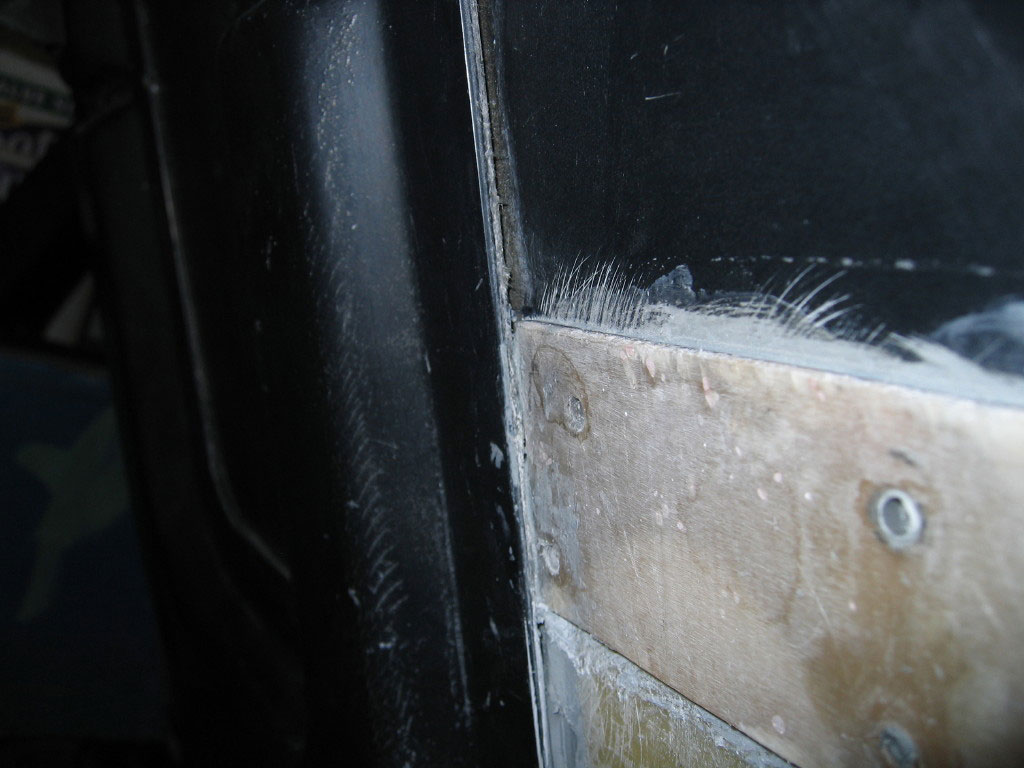
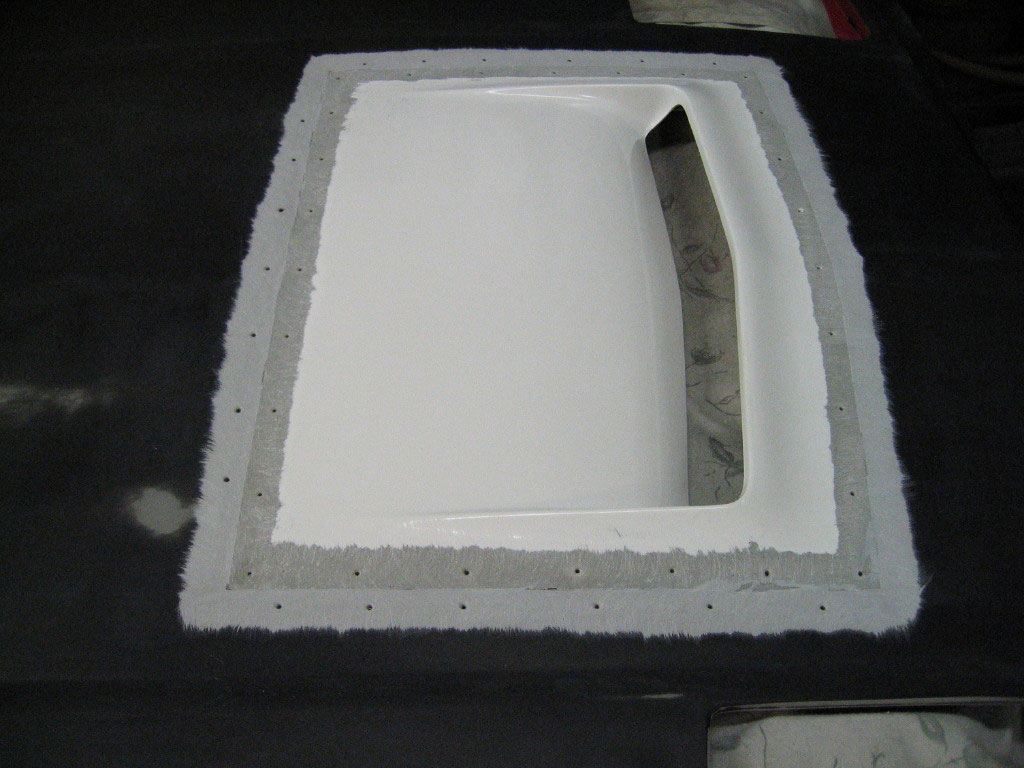
I put the pieces that I cut out back in for the first of these photos. I wanted to show how it looked before I screwed up... The first cut took out the part of the lower skin that would seal the spare tire area by mistake. I should have spent more time figuring out which part of the skin could be left in place. It would be a close fit but I think the vent would have fit with that part of the lower skin intact. The second cut was to remove more of the lower skin because it was visible through the vent from the top. If I had to do it over again I would make sure that I left all of the lower skin that touches the seal when the hood is closed.
The version 2 vent does not need any sheet metal cut out. It also allows for putting the sun-roof glass in it's stock location over the spare tire.

Charlie


IP: Logged
88GTS
Member
Posts: 104
From: North Vancouver, BC Canada
Registered: Oct 2004


Feedback score: N/A
Leave feedback

Rate this member

Report this Post05-15-2011 07:20 PM Click Here to See the Profile for 88GTSSend a Private Message to 88GTSEdit/Delete MessageReply w/QuoteDirect Link to This Post
Thanks Charlie!

Is the version 2 vent hole also 2.5" x 16"? Paul only list the dimensions of the original one on his site.
IP: Logged
cptsnoopy
Member
Posts: 2585
From: phoenix, AZ, USA
Registered: Jul 2003


Feedback score:    (8)
Leave feedback


Total ratings: 60
Rate this member

Report this Post05-15-2011 07:36 PM Click Here to See the Profile for cptsnoopySend a Private Message to cptsnoopyEdit/Delete MessageReply w/QuoteDirect Link to This Post
 
quote
Originally posted by 88GTS:

Thanks Charlie!

Is the version 2 vent hole also 2.5" x 16"? Paul only list the dimensions of the original one on his site.


Your welcome. The hole in this vent is ~ 2.5" X 18.5"

Charlie

IP: Logged
cptsnoopy
Member
Posts: 2585
From: phoenix, AZ, USA
Registered: Jul 2003


Feedback score:    (8)
Leave feedback


Total ratings: 60
Rate this member

Report this Post05-18-2011 03:41 AM Click Here to See the Profile for cptsnoopySend a Private Message to cptsnoopyEdit/Delete MessageReply w/QuoteDirect Link to This Post
Taped in place is the piece that I should not have cut out. The vent fits fine over this and allows the bottom skin of the hood to contact the weather seal as it normally would. I will be bonding this piece back on..

Charlie


IP: Logged
cptsnoopy
Member
Posts: 2585
From: phoenix, AZ, USA
Registered: Jul 2003


Feedback score:    (8)
Leave feedback


Total ratings: 60
Rate this member

Report this Post05-19-2011 01:24 AM Click Here to See the Profile for cptsnoopySend a Private Message to cptsnoopyEdit/Delete MessageReply w/QuoteDirect Link to This Post
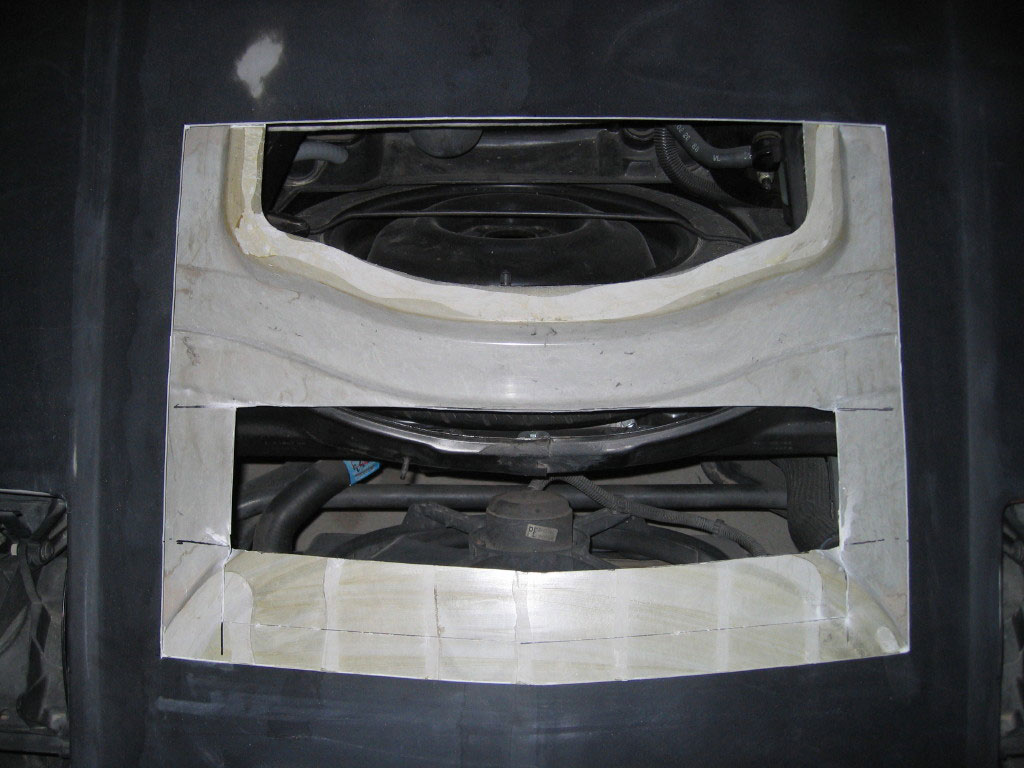
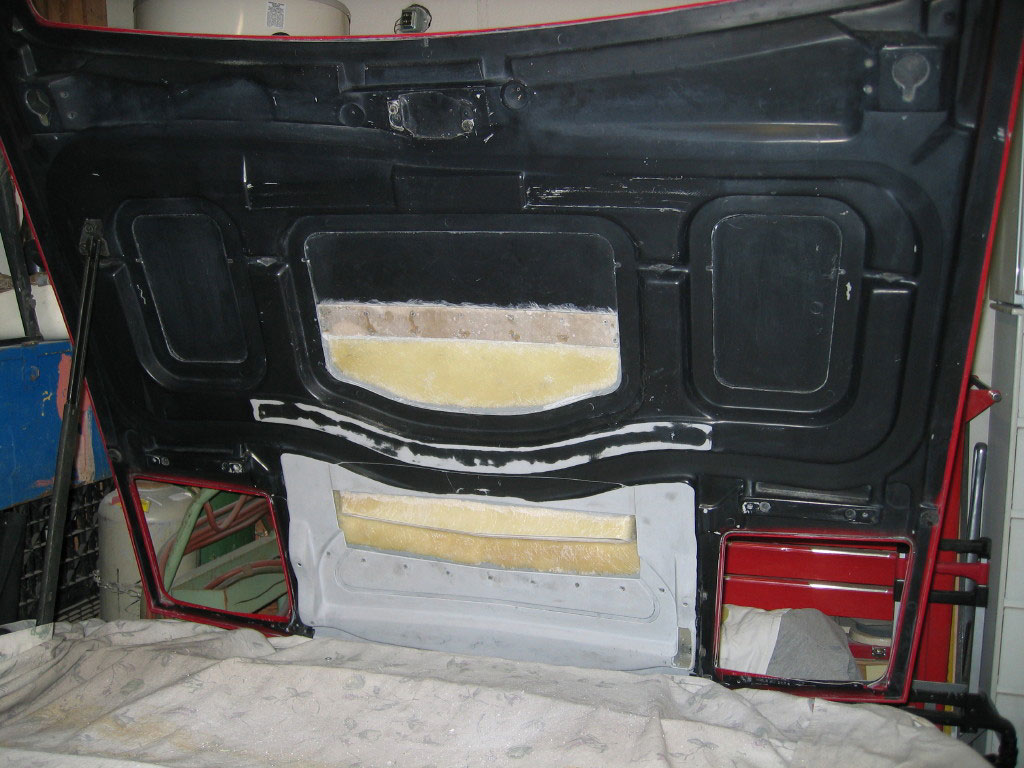
Pictures of the underside after bonding the lower skin piece back on. I am certainly doing this the hard way. (Paul would have had 10 of these done, filled, blocked and ready for paint in the time I am doing this one... ) I have a number of screws that you cannot get nuts on by hand when bonding down the vent. So I took the time to glue nuts and washers in place so I wont have to drill access holes or cut away any more lower skin.

When I get some time I will diagram dimensions of the hole I cut out. Others may decide to do it differently.

Charlie


IP: Logged
cptsnoopy
Member
Posts: 2585
From: phoenix, AZ, USA
Registered: Jul 2003


Feedback score:    (8)
Leave feedback


Total ratings: 60
Rate this member

Report this Post05-20-2011 02:18 AM Click Here to See the Profile for cptsnoopySend a Private Message to cptsnoopyEdit/Delete MessageReply w/QuoteDirect Link to This Post
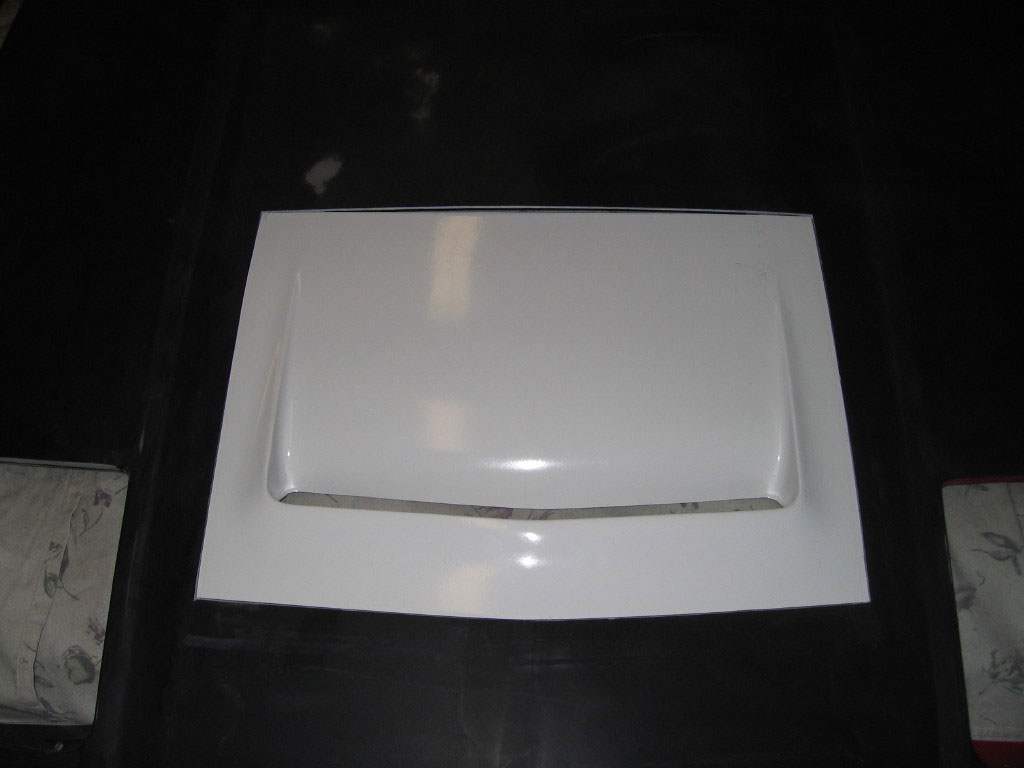
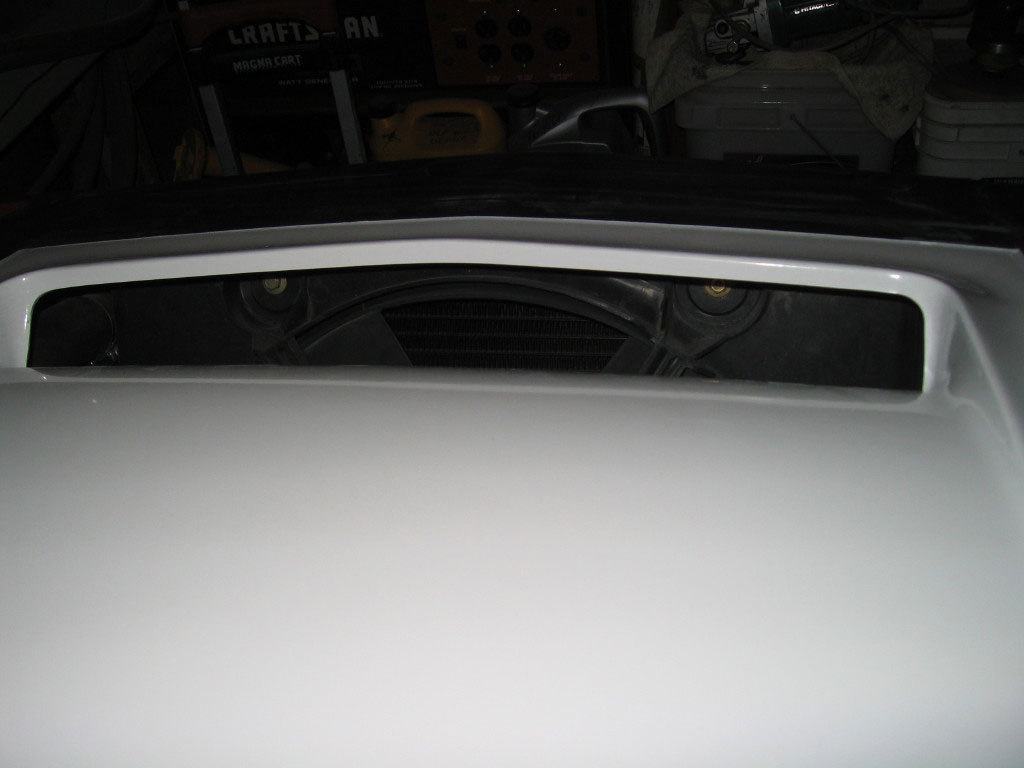
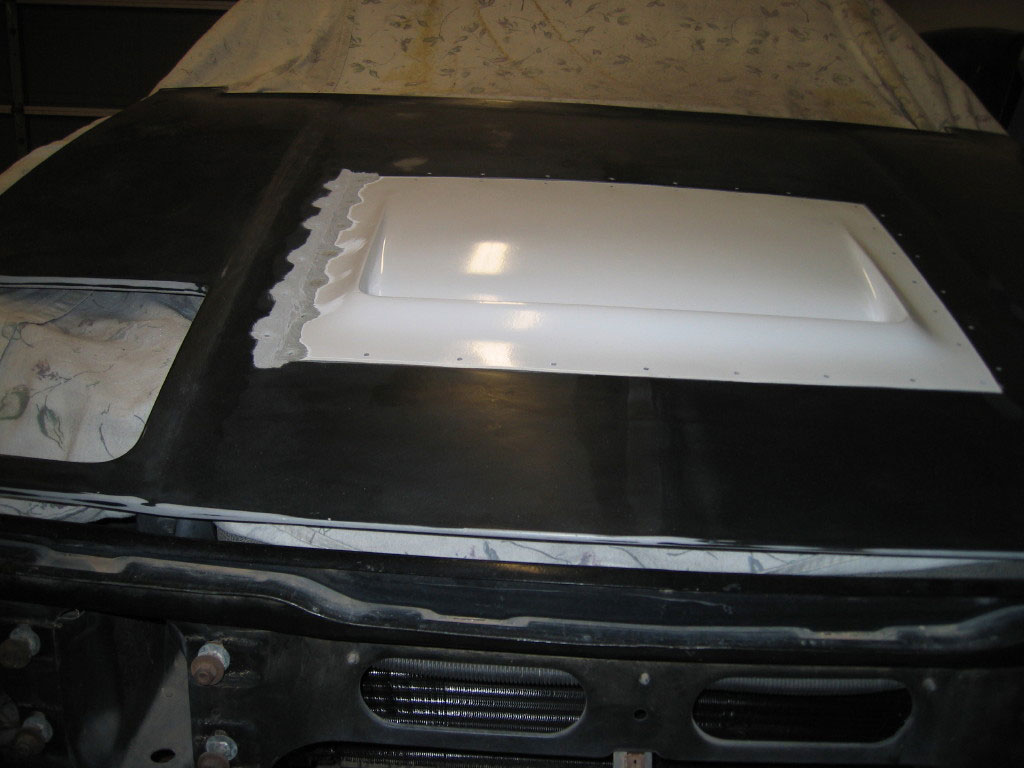
Angel Vent-v2 is bonded in. Notice the small amount of lower skin material that needs to be cut out. This works great if you don't mind taking the time to glue a bunch of nuts to the backside of the bonding strips before bonding the vent in place. It does look great though, just what I was after.

Charlie


IP: Logged
qwikgta
Member
Posts: 4659
From: Virginia Beach, VA
Registered: Jan 2001


Feedback score:    (21)
Leave feedback


Total ratings: 84
Rate this member

Report this Post05-21-2011 11:55 PM Click Here to See the Profile for qwikgtaSend a Private Message to qwikgtaEdit/Delete MessageReply w/QuoteDirect Link to This Post
looks good, I am looking at purchasing this scoop too. I dont understand the screws? Is the top portion of the skin removed, leaving the bottom portion of the hood intact? If so, doesn't the scoop just rest on top of the lower skin? if so, don't you just bond the scoop to the lower panel? I have read the instruction, but they also don't make sense. The pictures show the lower hood intact, so I don't understand the screws.

thanks

rob
IP: Logged
RCR
Member
Posts: 4397
From: Shelby Twp Mi
Registered: Sep 2002


Feedback score:    (7)
Leave feedback


Total ratings: 102
Rate this member

Report this Post05-22-2011 07:03 AM Click Here to See the Profile for RCRSend a Private Message to RCREdit/Delete MessageReply w/QuoteDirect Link to This Post
@ Rob: The screws are there to hold it in position while the adhesive dries. Once set, the screws come out and the holes are filled.


@ Charlie: Looking good.

Bob
IP: Logged
qwikgta
Member
Posts: 4659
From: Virginia Beach, VA
Registered: Jan 2001


Feedback score:    (21)
Leave feedback


Total ratings: 84
Rate this member

Report this Post05-22-2011 01:24 PM Click Here to See the Profile for qwikgtaSend a Private Message to qwikgtaEdit/Delete MessageReply w/QuoteDirect Link to This Post
 
quote
Originally posted by cptsnoopy:


OK, I get that they will do a great job in securing the scoop as the adhesive drys. I had assumed that when you place the scoop in the hole, it fits flush and all you need to do is put some weight on top of it so that is does not move. I noticed from this pic it looks like a fiberglass strip was added all around the lower panel. I get why you need the stip on the back portion, because when the upper portion is removed, there is no lower there to attach the scoop and it could flex in that area causing a lot of extra glass work, but what is the rest of the fiberglass all around the lower panel? Or is it just that im looking at it wrong. Again, thanks for all the anwers to this, I want to make sure I ask all the questions before I buy the scoop.

//

It looks like you have to move/relocate the overflow bottle. If so, what are your plans, and/or what did you do. Any others also move their bottles?

Rob

[This message has been edited by qwikgta (edited 05-22-2011).]

IP: Logged
cptsnoopy
Member
Posts: 2585
From: phoenix, AZ, USA
Registered: Jul 2003


Feedback score:    (8)
Leave feedback


Total ratings: 60
Rate this member

Report this Post05-22-2011 07:42 PM Click Here to See the Profile for cptsnoopySend a Private Message to cptsnoopyEdit/Delete MessageReply w/QuoteDirect Link to This Post
Thanks Bob!

Hi Rob,

I am not sure that Paul recommends leaving as much of the substructure or "lower skin" as I call it in place. The one other build thread that I looked at here shows that Scott cut away all the lower support except for a little at the front edge. I decided to keep the lower structure intact to retain as much strength as possible and also because this new version of the vent lets you do that. Also, it already matches the weather seal (if you don't accidentally cut that piece out) and should help keep the spare tire bay free of debris and moisture. What I did not think of was the possibility of using wood screws instead of machine screws. By using wood screws you might be able to have them "self" tap through a pilot hole in the bonding strips and allow for not using glued on nuts. The down side to that is you would not have the option of large fender washers on the bottom side to spread the clamping load. Another thing that you are confused about (because you cannot see it in the pictures) is that there is a layer of adhesive between the top and bottom skin that is ~ 1/16" to 3/32" thick most of the way around. If you were to lay in the vent on the lower skin it would sit about that much too low relative to the top skin. I sanded my bonding strips to the correct thickness to act as a spacer for the adhesive. Also you need the bonding strips to hold the vent skin and hood skin in alignment all along the perimeter of the vent. Once you have it in hand you will see what I mean. So far I like how this v2 vent looks over the v1 vent but I am biased of course. I highly recommend it. I believe you would have to relocate your coolant overflow bottle but on my car the bottle has been eliminated in favor of a coolant expansion tank in the rear engine compartment. I run a 21lb radiator cap in the front on the radiator and a 16lb cap in the rear on the expansion tank. I am not sure what you would do with a stock setup. I suspect you may be able to just lower it as necessary.

Charlie

[This message has been edited by cptsnoopy (edited 05-22-2011).]

IP: Logged
PFF
System Bot
qwikgta
Member
Posts: 4659
From: Virginia Beach, VA
Registered: Jan 2001


Feedback score:    (21)
Leave feedback


Total ratings: 84
Rate this member

Report this Post05-24-2011 04:19 PM Click Here to See the Profile for qwikgtaSend a Private Message to qwikgtaEdit/Delete MessageReply w/QuoteDirect Link to This Post
Charlie,
Thanks for the info. I think I get it now. I was unaware of the bonding strips, and I get that you need them because of the diff in the thickness of the upper and the scoop. That makes sense. Do you just place them in between the two skins? Do you have to force them in, or do they just fit in between them? Is it the screws that hold them in place too, or do they just sit there until the scoop is bonded, and then they cant move. Sorry for the dumb questions, I just have not seen this in person, and I know it makes so much more sence to you because you have done it already. I'll be in the same boat someday explaining it to someone else.

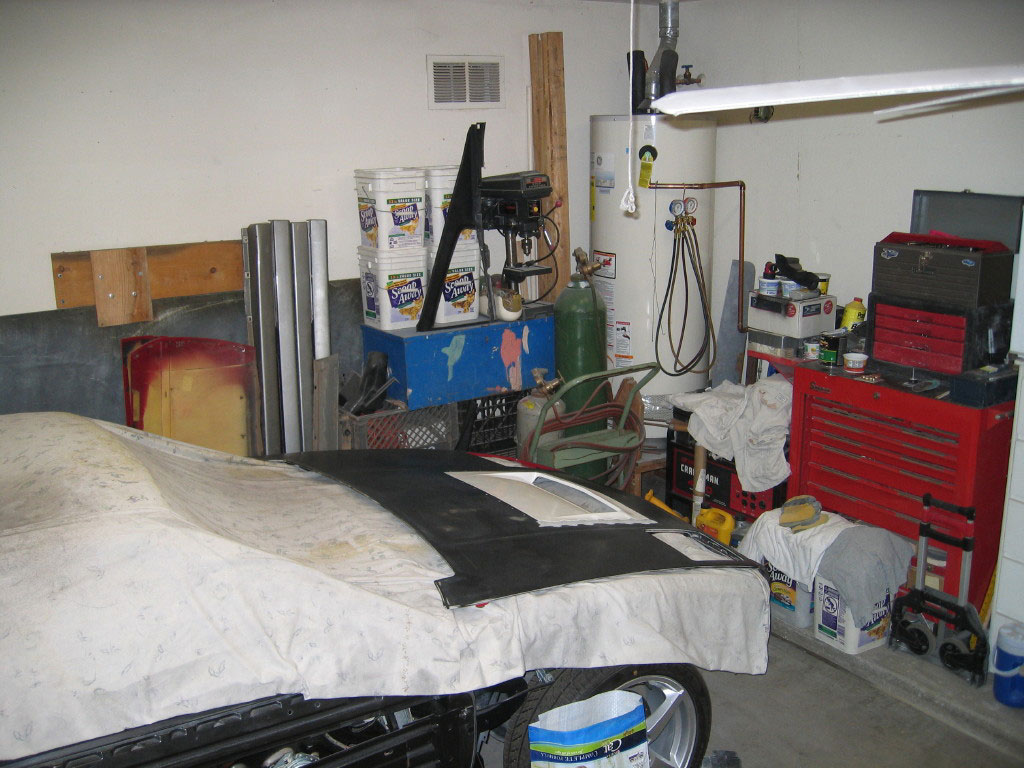
Can I ask one more thing. Can you get a pic of it from the front looking at the car from the drivers front quarter, I want to see how much the front edge of the scoop rises up. I love the look but I want to be sure the scoop looks wide enough, I have seen some "home jobs" that are too narrow and it just does nto look right onthe hood.


Thanks again and I can't wait to see it all done.

Rob

[This message has been edited by qwikgta (edited 05-24-2011).]

IP: Logged
cptsnoopy
Member
Posts: 2585
From: phoenix, AZ, USA
Registered: Jul 2003


Feedback score:    (8)
Leave feedback


Total ratings: 60
Rate this member

Report this Post05-25-2011 03:26 AM Click Here to See the Profile for cptsnoopySend a Private Message to cptsnoopyEdit/Delete MessageReply w/QuoteDirect Link to This Post
Hi Rob,

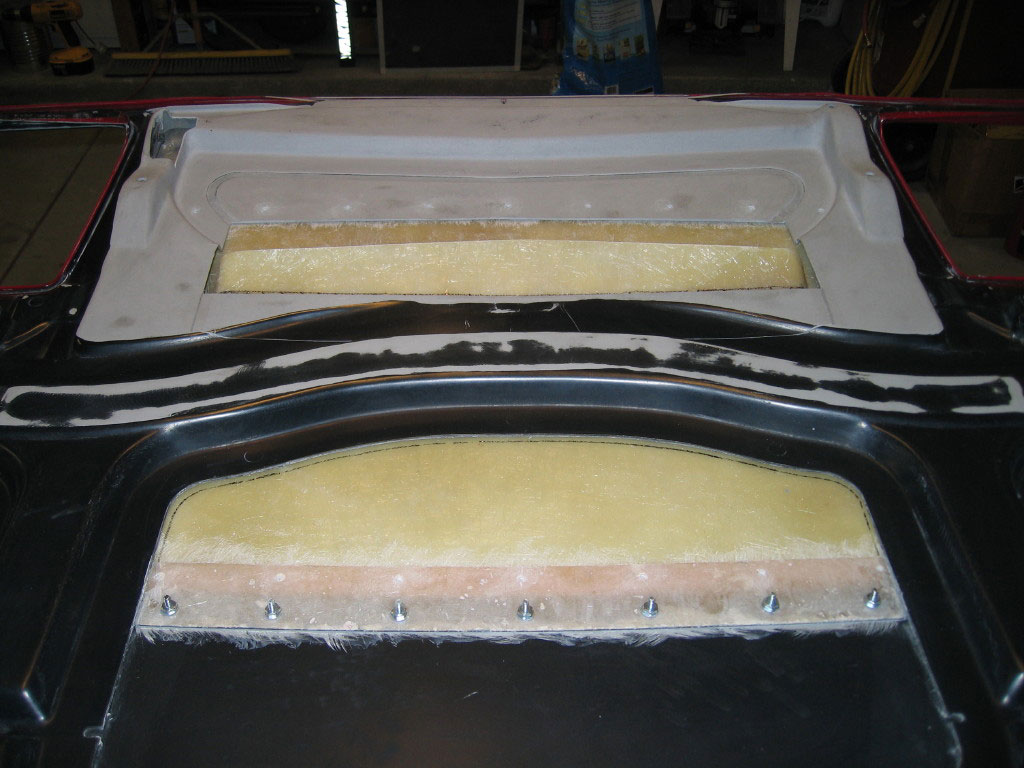
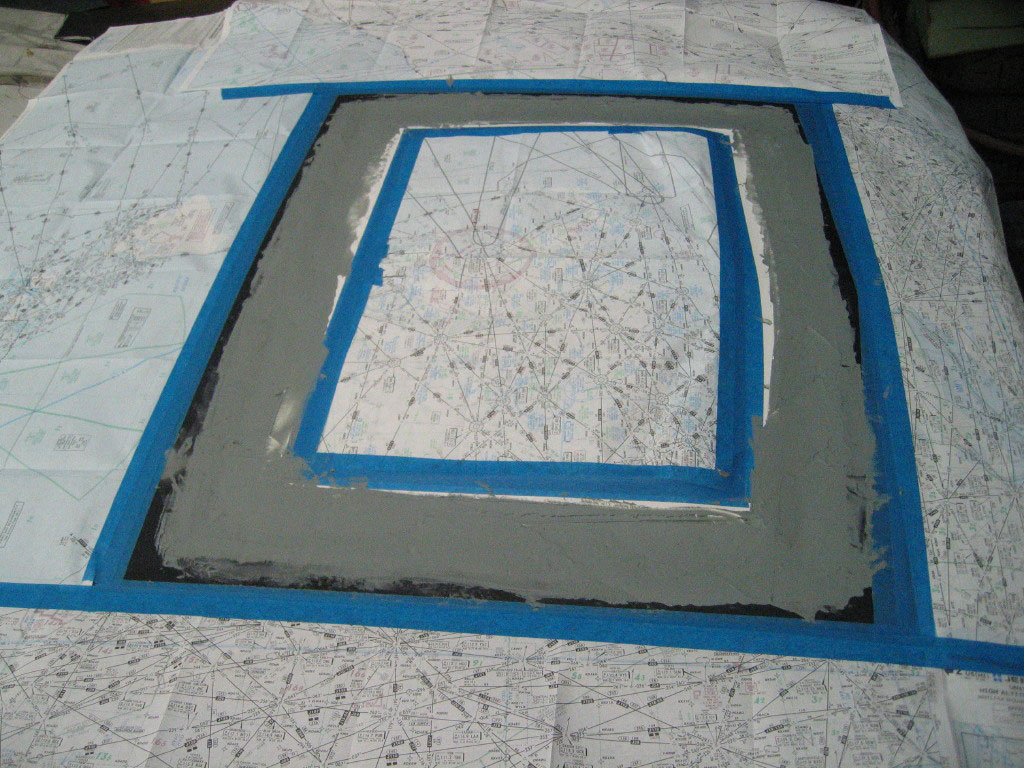
The thickness of the hood vent is roughly the same as the upper skin of the hood. There is a gap between the bottom of the upper skin and the top of the lower skin (or sub structure). The gap is about 1/16" to 3/32" thick and has factory bonding cement holding the top and bottom of the hood together. The cement is not spread across both surfaces 100% but it was squeezed out of a nozzle in a semi random pattern. If you look at the picture below you can see that the cement was run front to rear in the area I am placing the bonding strip. I did not want to try and dig out the cement to put in the bonding strip so I just notched the bonding strip to fit around the areas of cement. I did put the bonding strips between the top and bottom skin where the bottom skin was along the edge of the cutout. However along the sides and rear of the cutout there is mostly just top skin and not much substructure up tight near the top skin. In those areas the bonding strips are very important to keep the edge of the hood vent and the upper hood skin aligned properly. I used screws with nuts to clamp the bonding strips to both the hood and the scoop. I took my time and bonded one strip at a time. The most time consuming was gluing nuts to the underside of the bonding strips for the screws that needed to be installed after I could not get to the bottom of the hood vent. (those nuts that had no access after the vent was in place) I received a message back from Paul that he normally just uses wood type screws that do not need a nut. All screws are removed after the hood vent is bonded in place and allowed to cure fully. I am now in the process of grinding away the hood and vent skin along the seam so I can fill it and start sanding. I cannot get a picture from the driver's side as there is no room in the garage for that right now. I will take some pics from the passenger side and hopefully it will help you see what you are looking for.

The belt sander is not being used on the car...

Charlie


IP: Logged
qwikgta
Member
Posts: 4659
From: Virginia Beach, VA
Registered: Jan 2001


Feedback score:    (21)
Leave feedback


Total ratings: 84
Rate this member

Report this Post05-25-2011 11:16 AM Click Here to See the Profile for qwikgtaSend a Private Message to qwikgtaEdit/Delete MessageReply w/QuoteDirect Link to This Post
Yep, thats what I needed. I just contacted Paul and started the process of getting one. Thanks again for the time, can't wait to see it all done.

Rob
IP: Logged
Tha Driver
Member
Posts: 4559
From: S.E. USA
Registered: Sep 2006


Feedback score:    (46)
Leave feedback


Total ratings: 204
Rate this member

Report this Post06-07-2011 12:47 AM Click Here to See the Profile for Tha DriverClick Here to visit Tha Driver's HomePageSend a Private Message to Tha DriverEdit/Delete MessageReply w/QuoteDirect Link to This Post
 
quote
Originally posted by qwikgta:

Charlie,
Thanks for the info. I think I get it now. I was unaware of the bonding strips, and I get that you need them because of the diff in the thickness of the upper and the scoop. That makes sense. Do you just place them in between the two skins? Do you have to force them in, or do they just fit in between them? Is it the screws that hold them in place too, or do they just sit there until the scoop is bonded, and then they cant move. Sorry for the dumb questions, I just have not seen this in person, and I know it makes so much more sence to you because you have done it already. I'll be in the same boat someday explaining it to someone else.
Rob


Hi all,
I was just made aware of my hood scoop added as progress in this thread. Looks good Charlie.
What I use is sheetrock screws or sometimes sheetmetal screws (when I need shorter ones). I drill 1/8" holes in the top skin & scoop, & let the sheetrock screws make their own threads in the bonding strips - and yes you want bonding strips all the way around the scoop. As Charlie mentioned, there is usually a space between the original inner & skin pieces that allow you to slide the bonding strips between them. I use a cutoff wheel on a die grinder to rough up the areas (& cut out some of the original bonding glue if needed) I can't get to to grind with the 24 grit.
And yes I recommend cutting ONLY the area needed to drop the scoop in. With the original scoop, that was a pretty large area. With this one, just the small area in front of the "trunk" seal area.
~ Paul
aka "Tha Driver"

Custom Fiberglass Parts
IP: Logged
88GTS
Member
Posts: 104
From: North Vancouver, BC Canada
Registered: Oct 2004


Feedback score: N/A
Leave feedback

Rate this member

Report this Post06-07-2011 07:53 PM Click Here to See the Profile for 88GTSSend a Private Message to 88GTSEdit/Delete MessageReply w/QuoteDirect Link to This Post
Hey Charlie or Paul,

Just to make this write-up of the hood vent install complete, can you please list the glue and filler that you should use for this job.

Thanks, André
IP: Logged
Tha Driver
Member
Posts: 4559
From: S.E. USA
Registered: Sep 2006


Feedback score:    (46)
Leave feedback


Total ratings: 204
Rate this member

Report this Post06-07-2011 10:37 PM Click Here to See the Profile for Tha DriverClick Here to visit Tha Driver's HomePageSend a Private Message to Tha DriverEdit/Delete MessageReply w/QuoteDirect Link to This Post
'Vette panel adhesive/filler.
http://gafieroclub.org/bbs/index.php?topic=469.0
~ Paul
aka "Tha Driver"

Custom Fiberglass Parts
IP: Logged
cptsnoopy
Member
Posts: 2585
From: phoenix, AZ, USA
Registered: Jul 2003


Feedback score:    (8)
Leave feedback


Total ratings: 60
Rate this member

Report this Post06-17-2011 01:16 AM Click Here to See the Profile for cptsnoopySend a Private Message to cptsnoopyEdit/Delete MessageReply w/QuoteDirect Link to This Post
Got a lot of other things tugging at me right now but I was able to get out to the garage tonight and do some more sanding. I think it is ready to start applying the SMC panel adhesive/filler. I will be doing it in several layers to see if I can catch any bubbles before they become a problem...

Charlie


IP: Logged
cptsnoopy
Member
Posts: 2585
From: phoenix, AZ, USA
Registered: Jul 2003


Feedback score:    (8)
Leave feedback


Total ratings: 60
Rate this member

Report this Post06-17-2011 02:07 AM Click Here to See the Profile for cptsnoopySend a Private Message to cptsnoopyEdit/Delete MessageReply w/QuoteDirect Link to This Post

cptsnoopy

2585 posts
Member since Jul 2003
A little while later...

IP: Logged
qwikgta
Member
Posts: 4659
From: Virginia Beach, VA
Registered: Jan 2001


Feedback score:    (21)
Leave feedback


Total ratings: 84
Rate this member

Report this Post06-18-2011 10:48 PM Click Here to See the Profile for qwikgtaSend a Private Message to qwikgtaEdit/Delete MessageReply w/QuoteDirect Link to This Post
sent payment off last week, should have mine next week. Can't wait to start. Have the hood already prep'd in the garage.

Rob
IP: Logged
Previous Page | Next Page

This topic is 26 pages long:  1   2   3   4   5   6   7   8   9   10   11   12   13   14   15   16   17   18   19   20   21   22   23   24   25   26 
next newest topic | next oldest topic

All times are ET (US)

Post New Topic  Post A Reply
Hop to:

Contact Us | Back To Main Page

Advertizing on PFF | Fiero Parts Vendors
PFF Merchandise | Fiero Gallery | Ogre's Cave
Real-Time Chat | Fiero Related Auctions on eBay


Copyright (c) 1999, C. Pennock