Looks like allot of hard work is about to pay off, good luck with the first go. How did you end up wiring the positive cable?
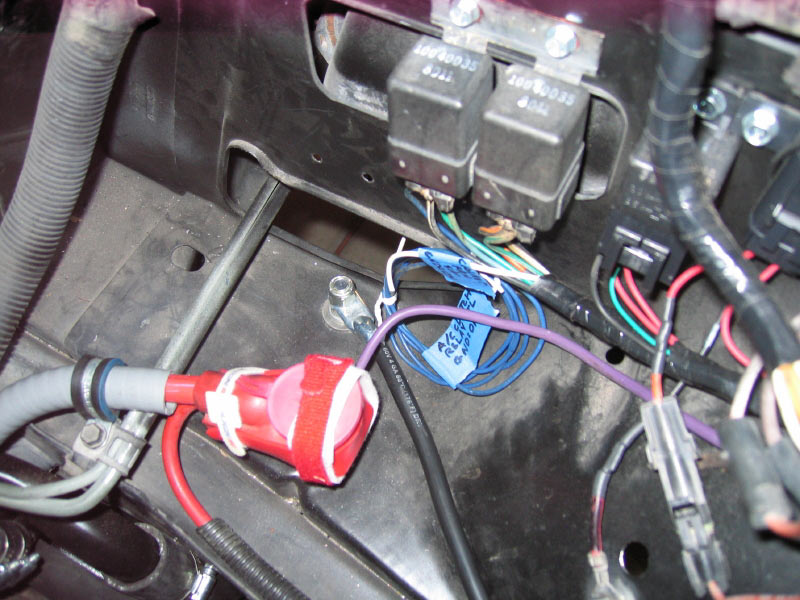
I used 00 welding cable very similar to yours and bought connector ends at the welding supply store that are copper and solder onto the big welding cable. Then I hooked the positive straight to the starter. No messing with the old positive cable trying to figure out how to connect those cables together. For charging I ran #4 welding cable from the power block by the C500 to the starter. I also ran #4 welding cable from the alternator to the power block.
One end of the cable already had a side mount terminal swedged on and the other was bare. I purchased an 01 gauge 3/8" terminal and borrowed a swedging tool to install it. The end of the starter cable from the starter (original Olds or Caddy part) had a side mount terminal on it so I put a bolt between the two plus a 10 gauge wire that went to the terminal block under C500. I found a couple pieces of unused terminal protectors and used some Velcro straps to hold them in place over the joint. The 01 gauge wire is supported so the joint cannot flop around. this gives me a place to charge the battery and also for a jump start if needed. It looks hokey and later I plan to make a better looking cover that is easy to remove and put back on. The alternator has the stock Fiero wiring going to it. I hope that the alternator has the same type of regulator that the 88 did. The stock wiring plugs directly into the regulator so I have at least a 50-50 chance it will work ok. I have not tried starting the car yet, I believe it will be loud so I am waiting a few more minutes to let the neighbors finish with lunch. I will have the fire extinguisher handy...
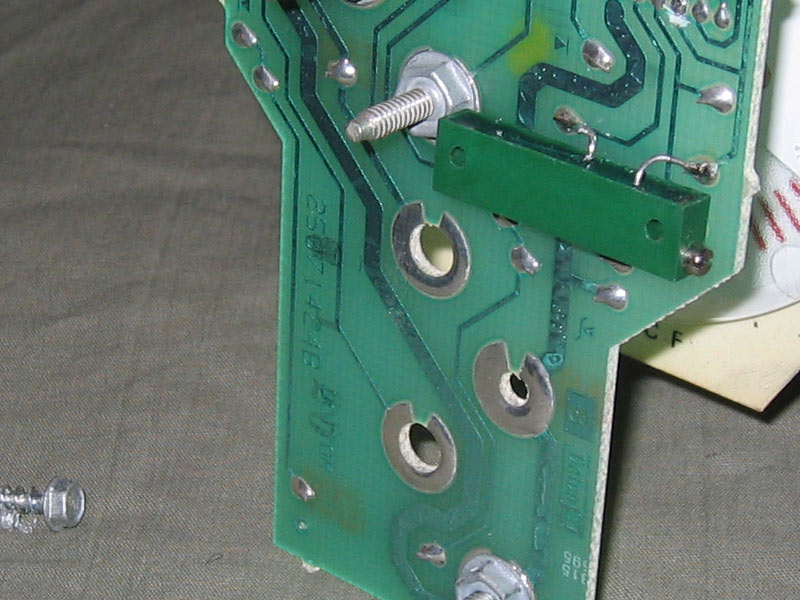
picture of the 01 gauge wire to starter cable junction:
Ok, so it has been just over 4 1/2 years since I started on this little project.
(Thanks Cliff for keeping the thread alive! )
Here is the "YouTube.com" video of the first start attempt.
I forgot to locate the oil pressure gauge before I tried it so I had to stop everything and figure out where to look and then go again. Several breaks in the video to weed out watching me in a confused state and or the the camera jiggling so much you would get sick watching it.
Well........ IT'S ABOUT FREEKING TIME !! Great job Charley. if that was truely the "first start" then you deffinetly deserve grand kudos. sounded like it fired right up. No need to explain you're video to me BTW. I know exactly what you were feeling as you repetidly check the gauges, tweek this.... tweek that.... walk around and check the gauges again. all the wile your head is racing in the excitement of the moment, as you try to act cool and calm pretty cool isn't it?
[pat on the back] way to go. you can crack that Corona now !
cheers, Russ
Thanks Russ! It actually was the first start... It did well because I was using your ITB and your fuel map.
Thanks Russ! It actually was the first start... It did well because I was using your ITB and your fuel map.
Yes, I was a bit hyper...
PS: I expected a lot more smoke...
I was watching the pipes also. looks like you have that problem whipped now. cool. BTW. I have a nice low mile Aurora motor sitting in my carport for when you decide to do your next swap. I'll be waiting to hear from you soon.
I can't wait to see this thing in person! So when are you going to be bringing that puppy to a AZ Fieros meet?
Hi Brandon!,
I have a family friend who has painted cars for a living coming to look at it tomorrow to decide if it should be painted with the body on or off the car. After he is done I should be able to bring it out on our outings if it drives ok. I expect there will be some clearance issues that may take some adjusting (anywhere from minor to major depending on what it is...) so I will have to test it out a couple of times before going on longer drives. Most likely next spring sometime.
I still need to pick up a set of shoes for this thing. I will be looking into 17" 5 spoke rims to fit over the 12" brakes that GSXRBOBBY hooked me up with.
Lol, Russ, I don't know how soon I could start on another Aurora project. I will need at least a week off after this one is street legal... (if I can get it to pass inspection... ) Besides, aren't you going to put that Aurora in your Corvair?
Thanks for the Cudo's Erik and Bob! (more and more N*'s hitting the streets soon... )
Charlie
[This message has been edited by cptsnoopy (edited 11-19-2008).]
Lol, Russ, I don't know how soon I could start on another Aurora project. I will need at least a week off after this one is street legal... (if I can get it to pass inspection... ) Besides, aren't you going to put that Aurora in your Corvair?
Charlie
I did have that in mind when I bought the first car, but since I've been around the late model vairs (1 coupe, 1 vert now) I'm really LOVING the fact that they have NO computer, NO injection, NO power brakes (but still stop vastly better than the P cars), NO electronic ignition, NO power stearing, ..... need I go on? . I'm keeping them just the way they are and DRIVING them : D . so what color are you painting your car?
I did have that in mind when I bought the first car, but since I've been around the late model vairs (1 coupe, 1 vert now) I'm really LOVING the fact that they have NO computer, NO injection, NO power brakes (but still stop vastly better than the P cars), NO electronic ignition, NO power stearing, ..... need I go on? . I'm keeping them just the way they are and DRIVING them : D . so what color are you painting your car?
Russ
I can't blame you for enjoying the ways of the past. They seemed so much simpler.
Since the summer heat is an issue I am painting the car white with either a red (my wife's favorite color) or blue rally stripe. Close to what Rickady88GT has on his Blue car. It may or may not get painted soon depending on how the guy painting it wants to go about it.
I have been messing with the idle tune since I got it running and so far I have not been able to get the rpm low enough to equal what I have programmed into the Holley 950. I am beginning to think that I messed up installing the ITB setup and have some serious vacuum leaks. I will have to pull it and check it out...
So in the meantime I went ahead and put the NOS dew wipes on the car. (had to get something done.)
Does anyone know if bead blasting or media blasting the paint off the body will work without harming the surface of the plastic/fiberglass?
bead blasting will deffinetly take the paint off.......... it should also take the skin off the car . get the sandpaper and elbow grease out and get to work . 600 wet should be all you need to do. I've easily idled the ITB down below 600 rpm with a Holly, so I know it can be done. I suspect an air leak at the mounting flange. did you use new gaskets? are they GM, Fel-Pro, or flea-bay? When you remove the ITB unit remember to remove the small brackets between the banks of tb so the two sides can be pulled together slightly. that way the whole unit can be removed as and assy without disturbing the linkage sinc.
I saw a car at PISA that he bought from someone who did the media blast. The car looked like a little fuzz ball. The body panels were not in good shape after that.
I saw a car at PISA that he bought from someone who did the media blast. The car looked like a little fuzz ball. The body panels were not in good shape after that.
Thanks for that little tid-bit! Ok, I'll have to learn how to prep a car for paint. It should be worth the several thousand I will save...
Yes, you can save a ton of money by doing a lot yourself. it takes time, which is why they charge so much, but i't's not rocket science. buy a can of wax and grease remover and wipe the car down with that first. you don't want to be sanding wax into the existing paint. our cars don't "dent", so traditional bodywork usually isn't required. what you do need is to scuff the paint so the new stuff will bond properly, and feather out any rock chips in the old paint. I like to use a rubber block to sand with as it will follow the contours of the car better (get them at automotive paint supply store). 600 grit overall. 400 on the rock chips and then 600 over those areas. a good days work should put you in pretty good shape. just remember that if you can feel "it" as you run your hand over the surface of the car, it WILL show up in the finished paint job. you will learn to feel for low spots, but may not even be able to see them [edit to add] until the gloss of the finished paint job shows them to you .
have fun,
Russ
[This message has been edited by Russ544 (edited 12-02-2008).]
I just got off the phone with my friend the painter and he is having me take an old part to a guy that thinks he can do the job. I figure it is worth the dime to see what he can do. The part was destined for the trash anyway... I do not have a lot of confidence that it will work so I am preparing for the manual labor part...
I dropped off the parts car panels to see if the media blaster guy can remove the old paint without tearing into the plastic/fiberglass. I looked at some work that he has done and it looks promising.
On a sad note, the front bank of the Aurora just developed a smoking issue. In my limited knowledge of the subject, I suspect it to either be oil getting pulled through the intake valve seals or water is somehow getting into one of the front cylinders. More likely oil though since I have been idling the engine at high vacuum pressure for a long time. No smoke at all for at least an hour of on and off engine run time since I first started it and then suddenly quite a lot of smoke. Hmmm, what to do?...
I ran the engine again today for about 30 minutes. It does not smoke at all until it is warmed up and I "blip" the throttle. After looking at the front bank intake valves, I noticed that the suspect #8 cylinder seemed to have a little moisture (possibly oil) on the intake valve. It would make since that this is why this engine was pulled for warranty and eventually I ended up with it.
Can the valve seals be changed without removing the heads? If so can anyone in the know explain the process? I may wait until the car is driving before tearing into it just to make sure the rest of the drive train is working and there are no clearance issues.
You can. I've done it. You need to pull the cams, though.
Thanks for the info Will. I will be pulling the engine out after a quick road test to see if there are any other issues. Then I can repeat what I had to do to spike the valves...
Will, I was just looking at a bare N* head I have here at the shop. it looks like vlv seals could be swapped out with the head on the block alright, but it would require that you buy or build some pretty tricky tools to do it with. what did you use to compress the valve spring and remove/reinstall the keepers? and how about the stem seal and spring seat/cap? looks like a small slide hammer with a hook on the end could be used to snag the hole in the side of the seat/seal cap to remove them off the vlv guide?
I talked to Alan for about 15 minutes concerning the possibilities. He felt pretty sure that I will need to pull the head to have a valve guide repaired/replaced. That may end up being easier than trying to figure out a system to replace a valve seal with the head still on. I am hoping that since the engine has so few miles on it the head bolt threads may survive. The only other "trick" will be to find a N* mechanic that can look at the head and determine what the problem really is and fix it correctly.
The seals can be replaced with the heads on the engine... remove cams and lifters, pressurize each cylinder, then R&R the seals. I used a cotter pin puller and "custom" thick wire hooks, as I recall. I had a thin wall polyethylene tube whipped up to protect the lifter bores and milled a slot in the side of a piece of 3/4" pipe to use to remove the retainers & valvesprings.
Allen Cline has some advice on how to add some RTV to eliminate a potential leak path... I'll try to pull that later.
The seals themselves are unlikely to fail as they are top-of-the-line models with spring retention.
Alan thought it most likely to be a problem with a valve guide. But as Russ mentioned, he allowed for the possibility of a damaged seal during assembly. It would be nice if I could remove the seals before pulling the head bolts and examine them. Alan also mentioned that he had one head with similar problems that had a casting imperfection. It was a small hole in the head near the seal that would only pass oil when the engine was up to running temp. I hope that is not the case here.
Thank you guys for the help and support.
charlie
On a side note, do either of you know the difference between the factory L47 and the "massaged" version made specifically for the Shelby Series 1? The Shelby engine can be purchased new for about $3K. I have heard it has different cams and can rev higher. But, I have also heard it was used with a supercharger so they may have lowered the compression ratio a tad. I have no idea if it would be plug and play in my car.
Alan thought it most likely to be a problem with a valve guide. But as Russ mentioned, he allowed for the possibility of a damaged seal during assembly. It would be nice if I could remove the seals before pulling the head bolts and examine them. Alan also mentioned that he had one head with similar problems that had a casting imperfection. It was a small hole in the head near the seal that would only pass oil when the engine was up to running temp. I hope that is not the case here.
it's not a problem to remove the springs with the head on. just remove the intake cam and offending lifter, set a deep 5/8 or 3/4" socket on the spring retainer and give the socket a modest smack with a hammer. this compresses the spring long enough that the retainers just fall out. I always remove the retainers this way. _replacing_ the retainers will be the harder part however . you alread know which cylinder is the problem, so just pop those springs off and you'll be able to check the seals as well as checking for excess clearance in the valve guide. I can make you a tool to replace the springs and keepers without too much trouble if you like.
Russ
[This message has been edited by Russ544 (edited 12-16-2008).]
On a side note, do either of you know the difference between the factory L47 and the "massaged" version made specifically for the Shelby Series 1? The Shelby engine can be purchased new for about $3K. I have heard it has different cams and can rev higher. But, I have also heard it was used with a supercharger so they may have lowered the compression ratio a tad. I have no idea if it would be plug and play in my car.
They did not have superchargers on them from Shelby. None of them. They did have superchargers, but they were dealer installed. I am 98% sure. I read the Snake Bit book, but it was awhile back
They didn't have different Compression ratios either. I hope that helps you.
[This message has been edited by AJxtcman (edited 12-16-2008).]
They did not have superchargers on them from Shelby. None of them. They did have superchargers, but they were dealer installed. I am 98% sure. I read the Snake Bit book, but it was awhile back
They didn't have different Compression ratios either. I hope that helps you.
Thank you AJ, from what little I found, the only difference is the Cams. I only saw one reported redline of 6500 so they may still have the stock springs and retainers.
it's not a problem to remove the springs with the head on. just remove the intake cam and offending lifter, set a deep 5/8 or 3/4" socket on the spring retainer and give the socket a modest smack with a hammer. this compresses the spring long enough that the retainers just fall out. I always remove the retainers this way. _replacing_ the retainers will be the harder part however . you alread know which cylinder is the problem, so just pop those springs off and you'll be able to check the seals as well as checking for excess clearance in the valve guide. I can make you a tool to replace the springs and keepers without too much trouble if you like.
Russ
Thank you Russ,
That will work nicely for what I need to do. I will let you know what I find out about the seal before you make a tool... If I need to pull the head, I'll have the shop install the springs.
Thank you AJ, from what little I found, the only difference is the Cams. I only saw one reported redline of 6500 so they may still have the stock springs and retainers.
I thought I'd read that the redline was 7200... That would, however, require a host of new internals.
What do you mean? Significantly upping the redline of a production engine takes quite a few hard parts. Upping the limiter is totally dependent on what engine management you use.
Speaking of RPM. I received several 500K Ohm trimmers in the mail. Since they were only a couple of dollars each I thought I would get various styles and pick the one that fit the best. I started with a 6 cylinder tachometer having a factory trimmed resistor value of 312K Ohms, so I set the trimmer to 234K Ohms. (314 X .75 = 234) Hopefully that will be close enough. If not then I will get a 60hz signal from something and calibrate the tachometer.
Impatiently waiting on the new shoes! I wanted something in 5 spoke that would be easy to keep clean. These have been around a while and others have already used them so I decided to jump on the bandwagon and get a set. Borbet Type FS 17x7 w/38mm offset front and 17x8 w/35mm offset rear.
The tires will be Bridgestone Potenza RE960AS Pole Position 215/45R17 front and 245/45R17 rear. I hope they are good, I just went with the tire that got the best overall survey results. They did not have them both in stock in Nevada so I will get either the front two or the rear two tomorrow and the other two later next week. I guess I can install the 12" brakes now...


 Great job Charley. if that was truely the "first start" then you deffinetly deserve grand kudos. sounded like it fired right up.


 . get the sandpaper and elbow grease out and get to work