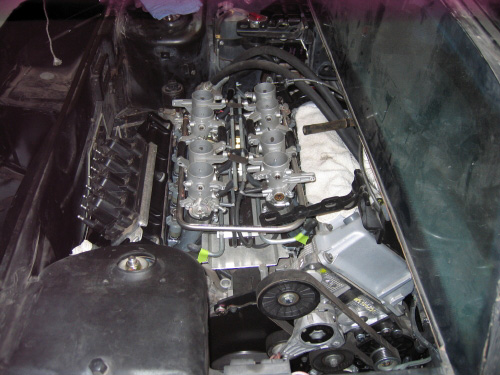
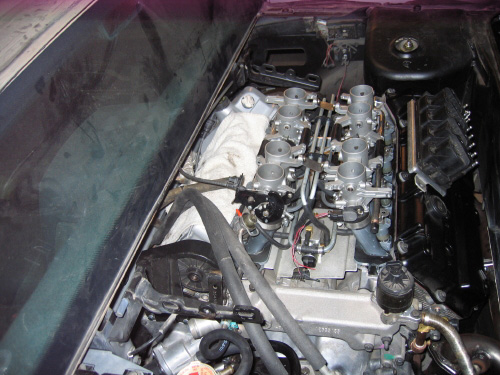
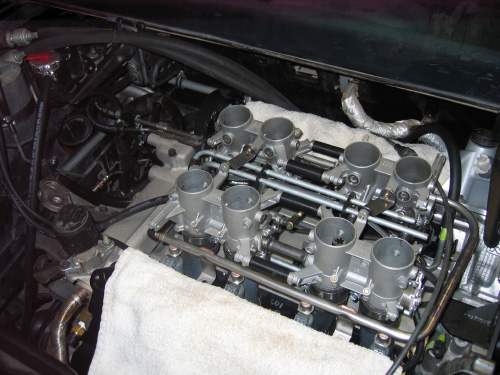
Been doing a little puttering around with the plumbing and also looking at how Russ's ITB setup will work in the engine bay.
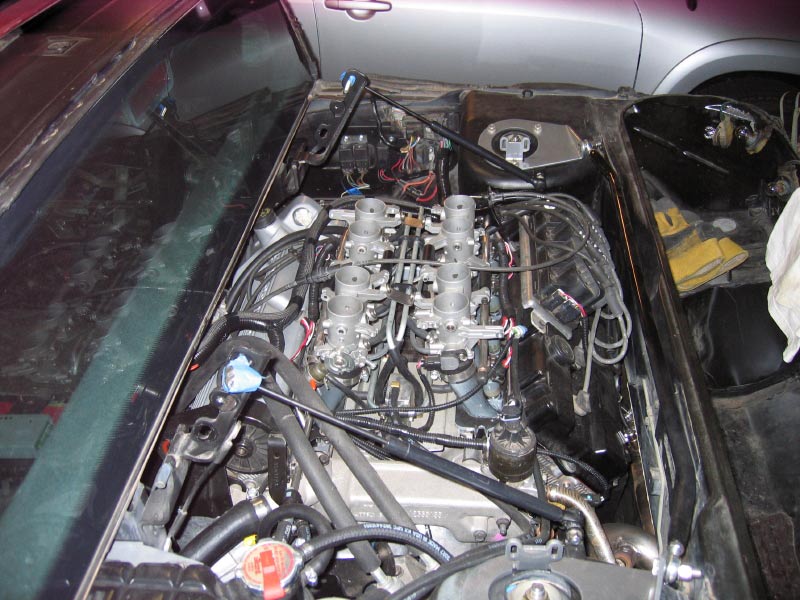
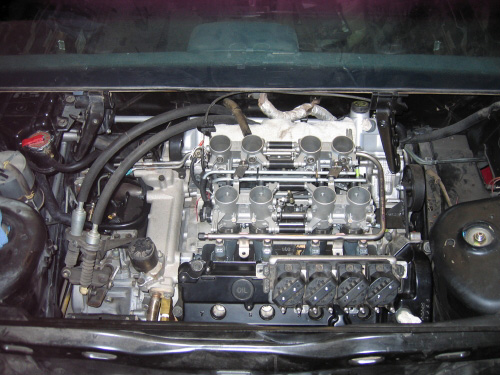
Just some teaser shots of the ITB setup.
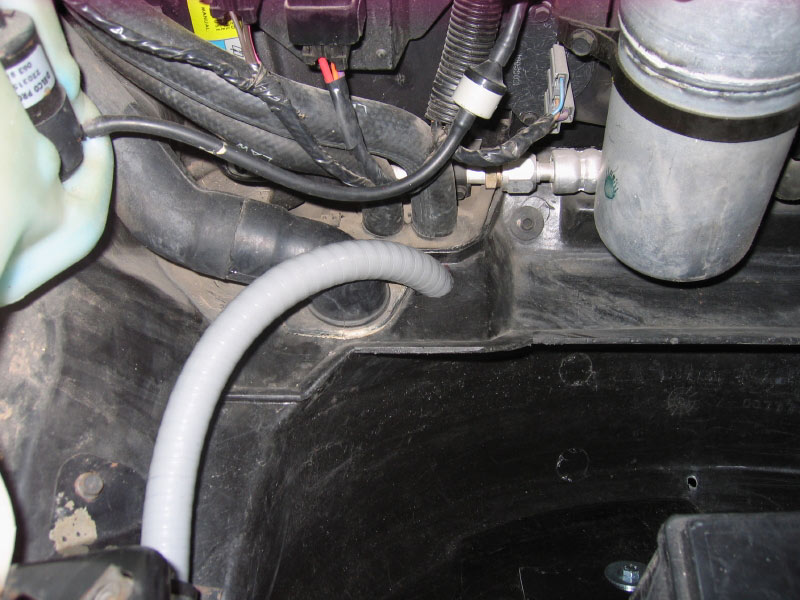
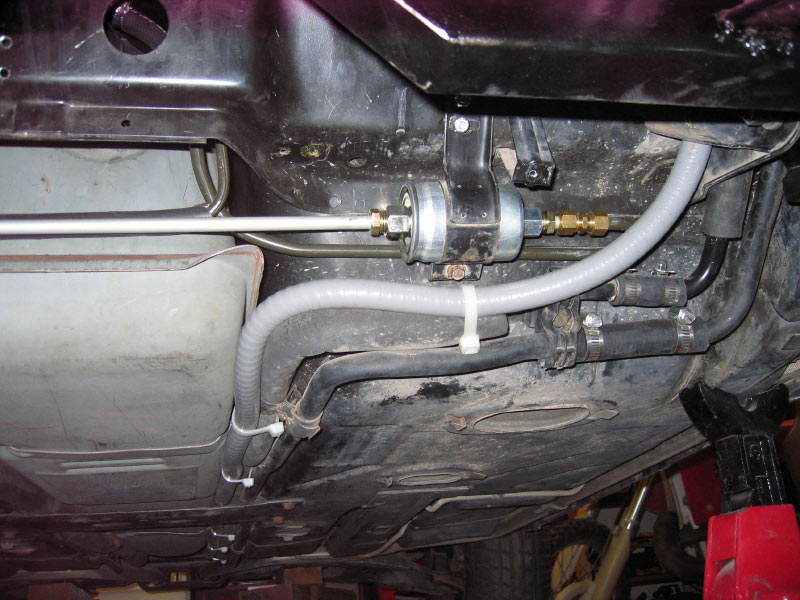
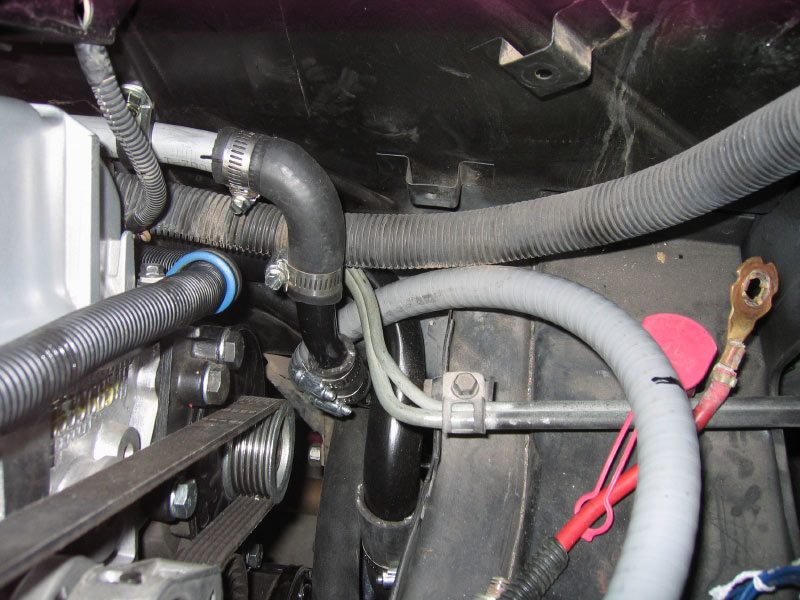
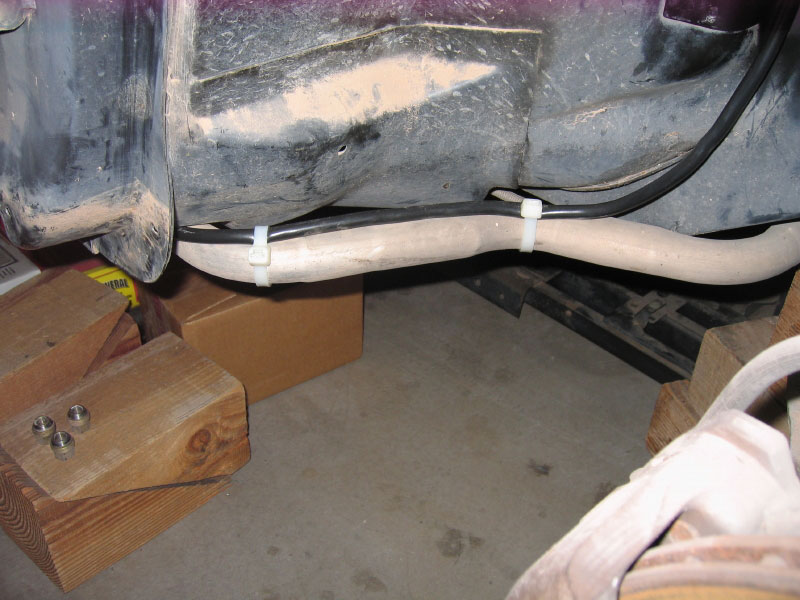
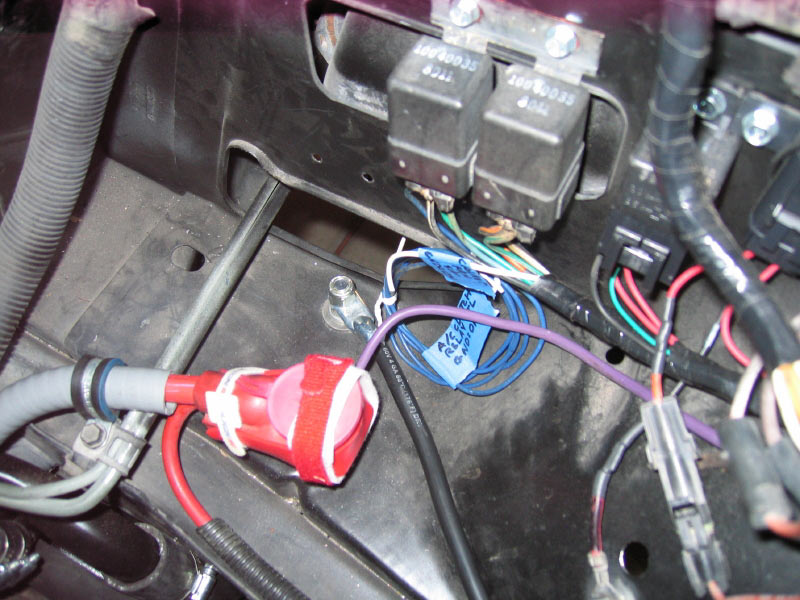
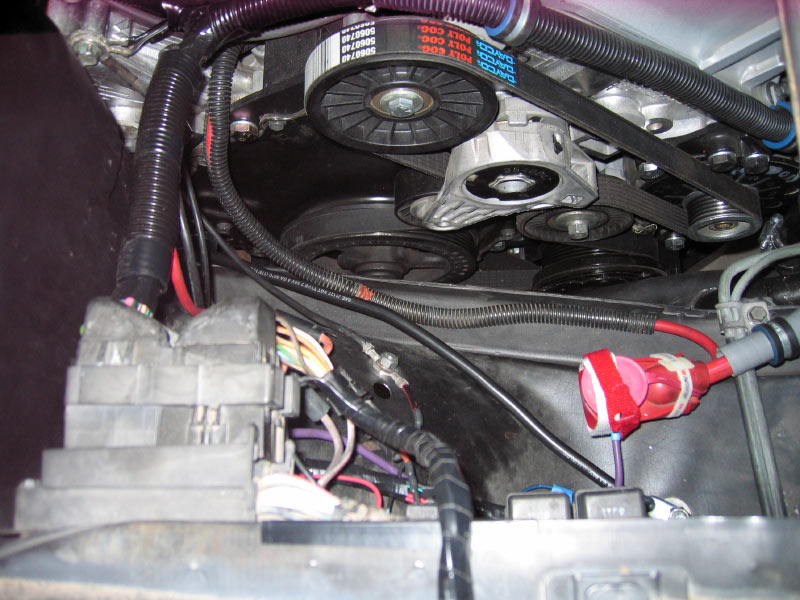
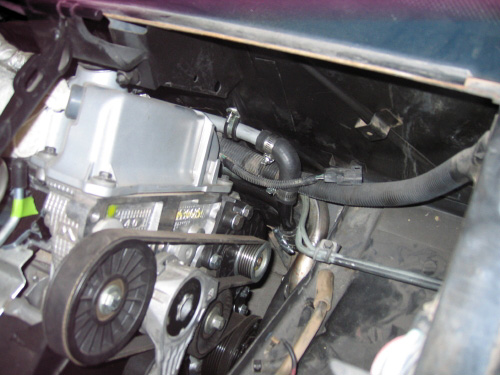
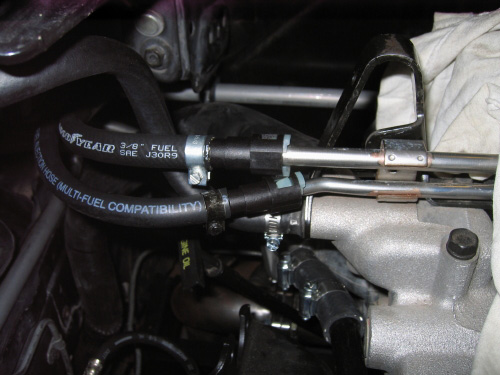
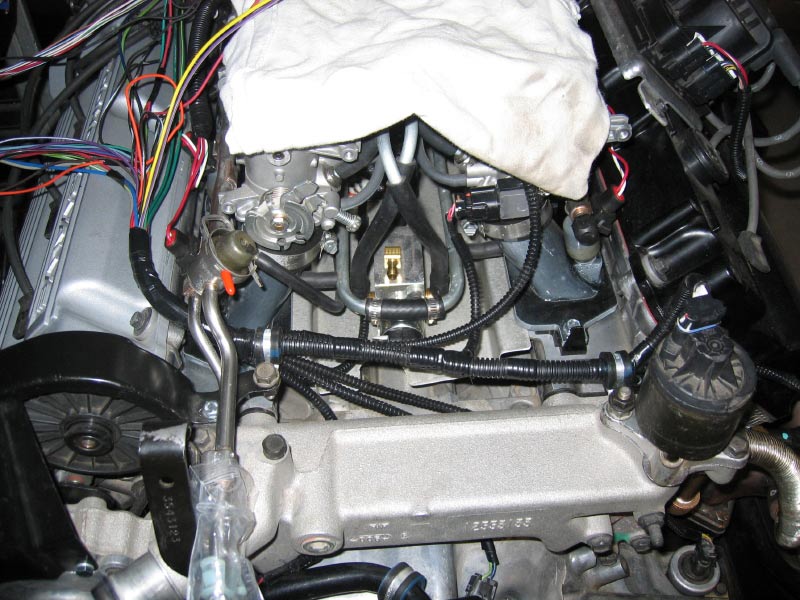
Here is a picture of how the 3/4" line is running along the firewall. It seems to be out of the way of everything.
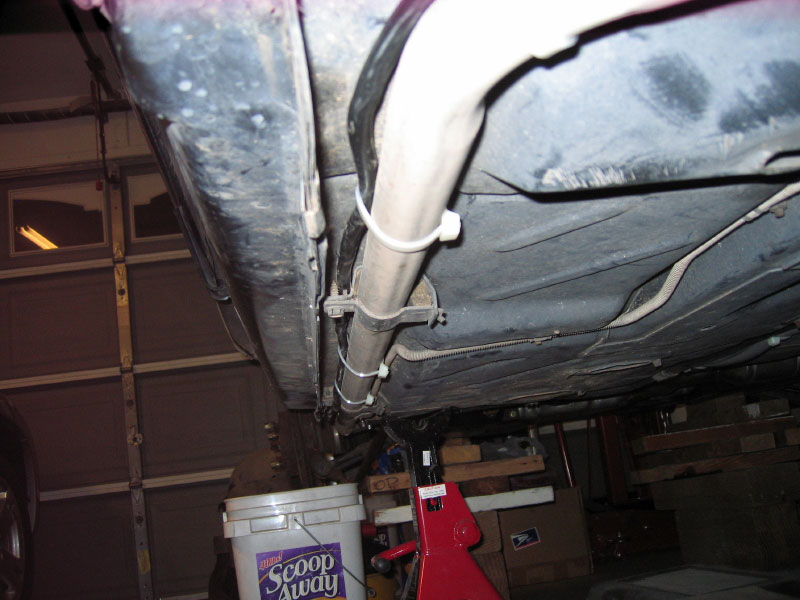
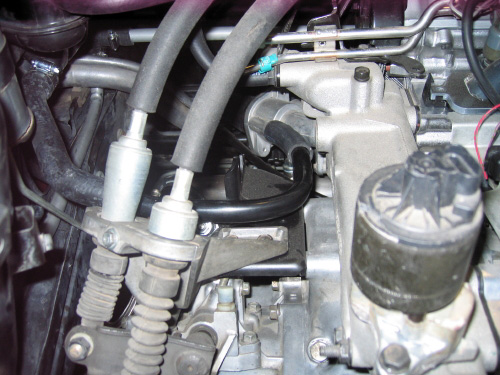
This is the lower 3/4" line from the surge tank to the engine.
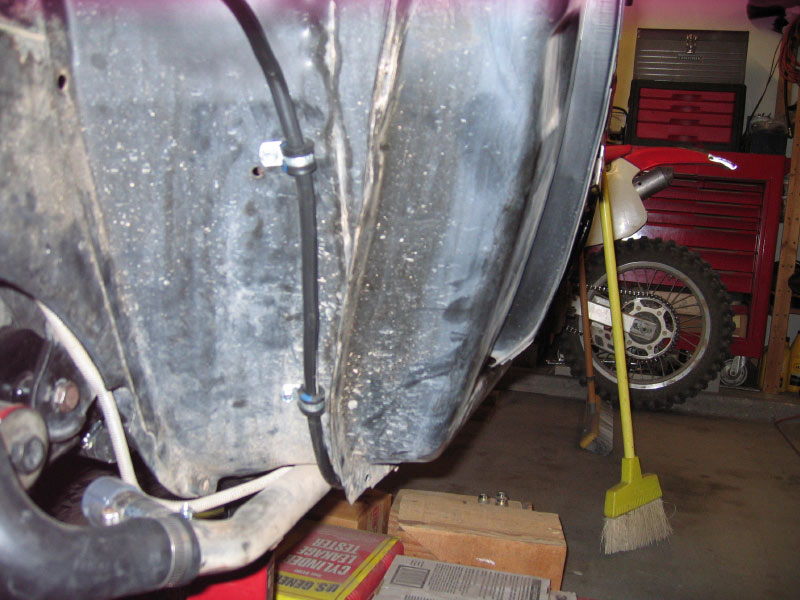
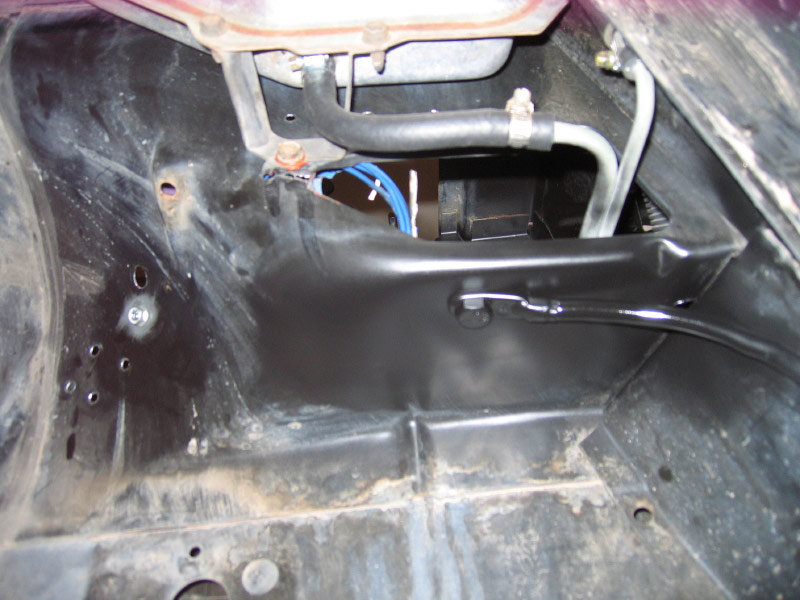
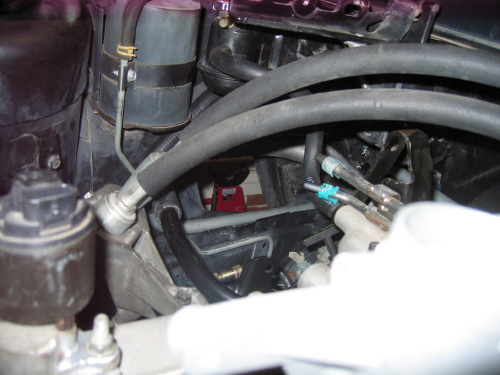
This is a look at how little space is left over for the cold air intake... You can see the 3/8" line from the engine to the surge tank in this picture too.
Does anyone know if these Dorman Quick Disconnect fittings are considered safe to use?
I think it's a different brand that I use, but they look the same. they do feel funky when you clip them on, but I've never had one leak or break, and it sure is nice to be able to just clip them on (or off) as needed.
quote
Getting closer to electrical.
so you'll be pulling the engine out again??? I thought you had the harness on the engine already. Wile I was working on my itb air box the other day I noticed that the oil dipstick is going to become VERY hard to get at pretty soon so next time I have the engine out I plan to either look at the possibility of drilling for oil (for the tube) on the other side of the block or building a long honkin extension for the existing one. that's something you might want to look at also.
Originally posted by Russ544: so you'll be pulling the engine out again??? I thought you had the harness on the engine already. Wile I was working on my itb air box the other day I noticed that the oil dipstick is going to become VERY hard to get at pretty soon so next time I have the engine out I plan to either look at the possibility of drilling for oil (for the tube) on the other side of the block or building a long honkin extension for the existing one. that's something you might want to look at also.
Russ
Hi Russ, thanks for the input.
Yes I will be raising the car yet again... I had the engine out between the last two posts but after some work I had to lower the car to check clearances. The holley harness looks pretty nice but I have a ways to go in figuring out how to setup the electrical.
I may have to do the same as you with the oil dipstick but for now it is reachable. It is not in the stock location as this is not the stock dipstick. I had to bend it around and remove the original mounting tab to get it to fit. So it most likely is not where it normally would be. I did put the required amount of oil in the engine and the dipstick reflected the correct level. I hope it will work out ok. I am more worried about it leaking than anything. Glad to hear things are starting to relax for the season.
Charlie
[This message has been edited by cptsnoopy (edited 07-20-2008).]
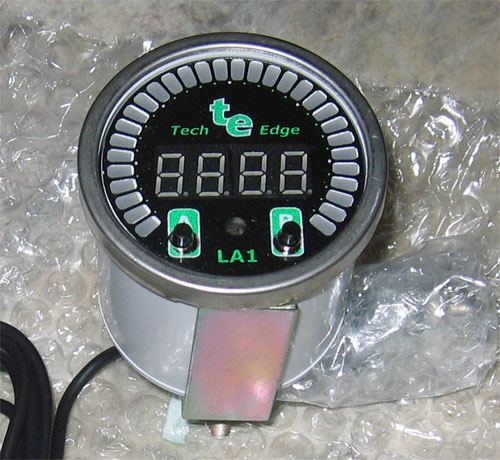
so you'll be using two wideband O-2 sensors then? one for the Holly ECM and one for the guage? or can you run them parallell? It would be nice to have the guage to keep tabs on things. sure a lot easier than having the laptop sitting on the seat andf trying to read it wile driving
I could use two wide band sensors and controllers, (they even have a dual sensor controller) and I may end up doing that so I can have the more modern wide band controller hooked up to the Holley. For now though, I bought a splitter along with this indicator to have both running off of the same wb02 sensor. I think the indicator actually uses a different output from the wb controller than the Holley but they are both using the same RJ-45 (same as ethernet cable?) connection. The splitter does some magic so it all works correctly. Hopefully the indicator will show the exact same info as the Holley does on the computer screen or I am hosed with this system.
I did not know which intake air temp sensor to get so I called chrfab.com today and ordered the Holley sensor from them. Allen took the time to chat about the project and the condition of the motor. For now all seems positive.
I did not know which intake air temp sensor to get so I called chrfab.com today and ordered the Holley sensor from them. Allen took the time to chat about the project and the condition of the motor. For now all seems positive.
Just use the stock caddy sensor. the Holly/CHRF harness is already wired for it with the correct plug etc. huummmm.
Just use the stock caddy sensor. the Holly/CHRF harness is already wired for it with the correct plug etc. huummmm.
Russ
I was going to do that but when I started looking at the caddy, olds and different years I saw several different options. I called to see what would be correct as I am not sure that they all are calibrated the same. He suggested just using the Holley unit (its for the 950 and is universal). I decided that would be best considering I have not made a fresh air duct/filter yet. The price was just a little more than the stock units. $24 for the Holley unit vs $15 to $23 for the OEM units. I did not have an old one so I had to get one anyway.
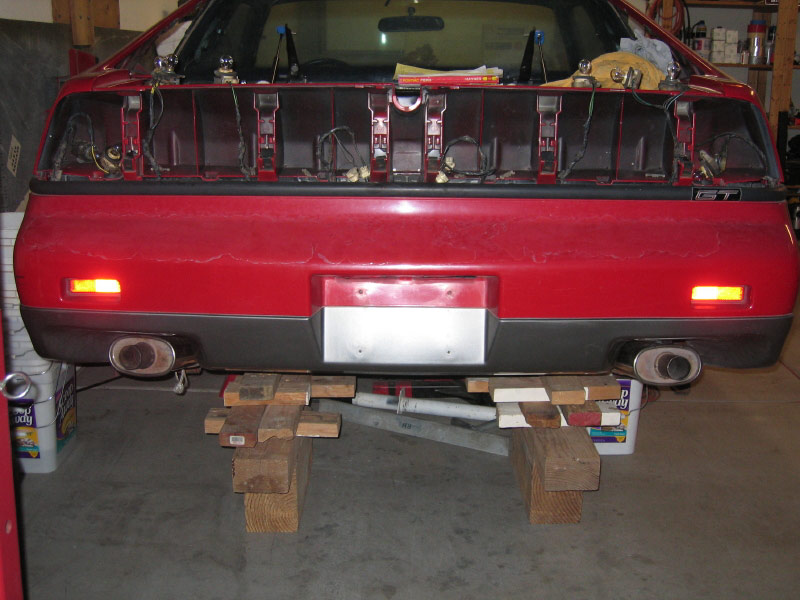
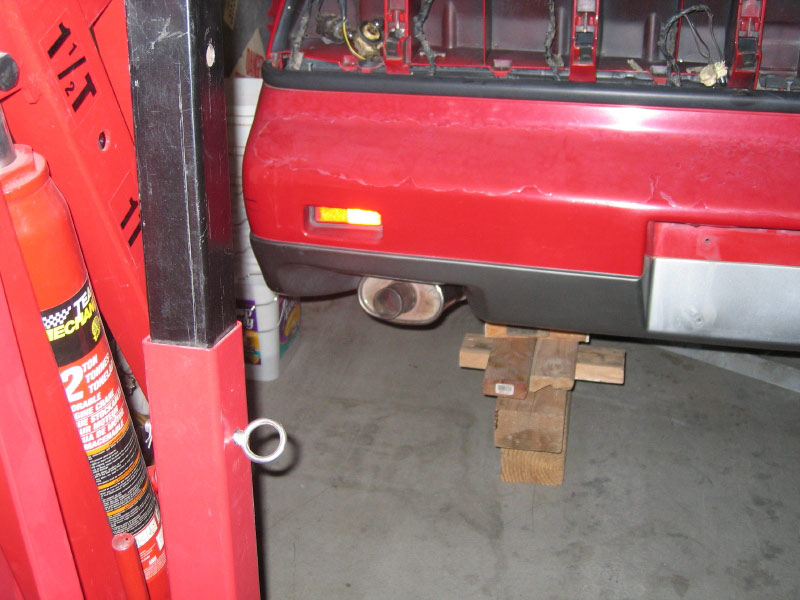
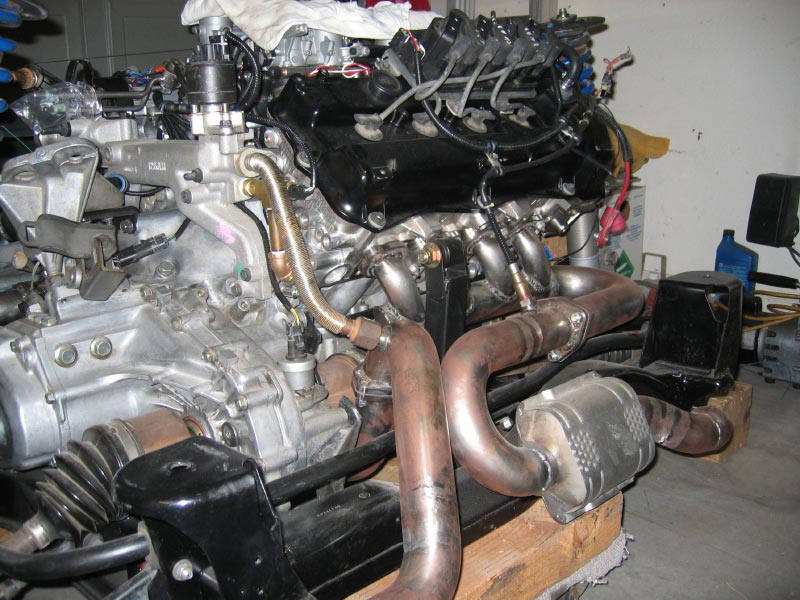
A little progress is being made. However the humidity has been rather high this summer...
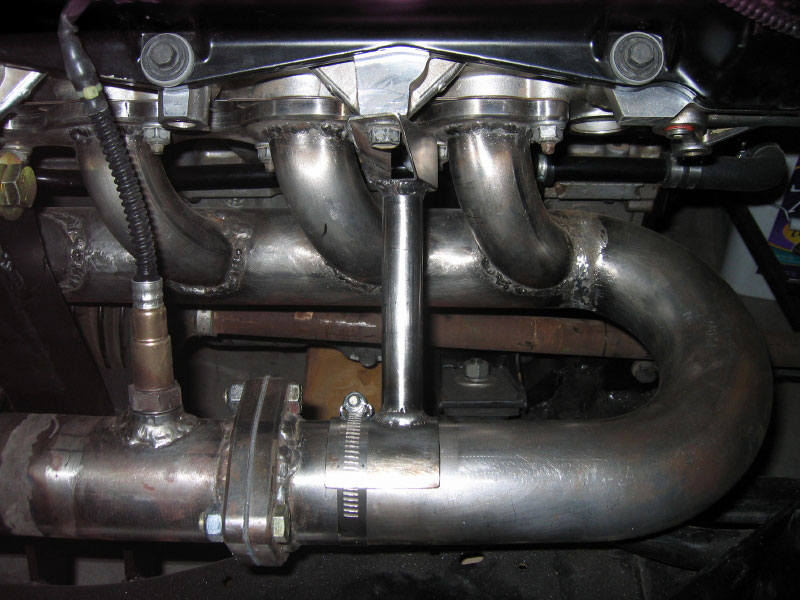
Notice the exhaust is starting to rust.
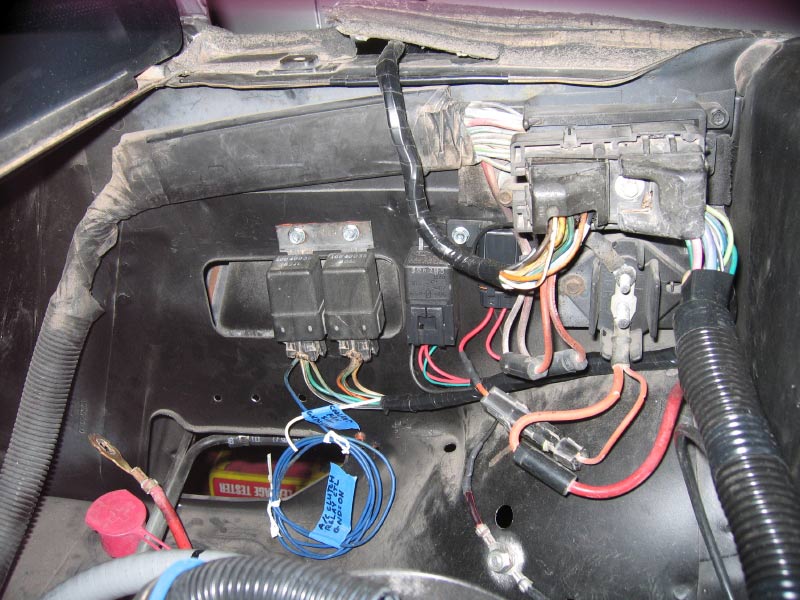
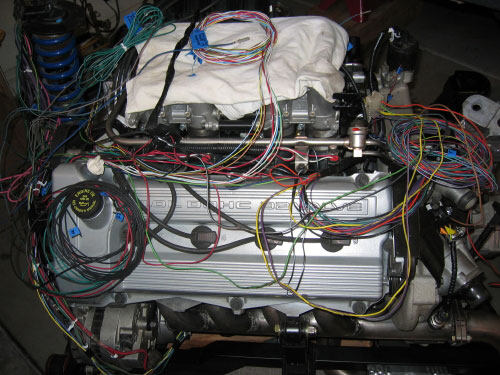
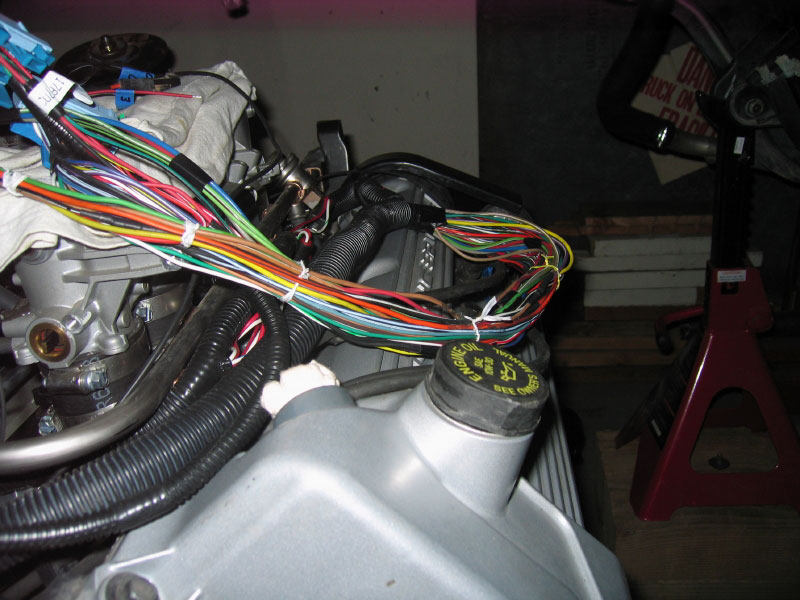
The wiring on the trans side of the engine is nearly complete.
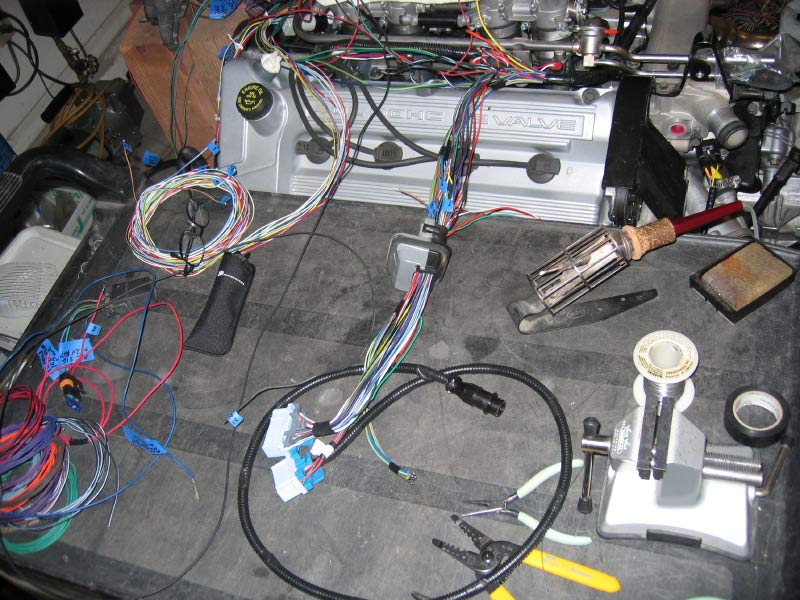
I finally got around to shortening the wires and soldering them (splicing) together the right length. Still have quite a few more to do. Some of the wires were over 6' too long.
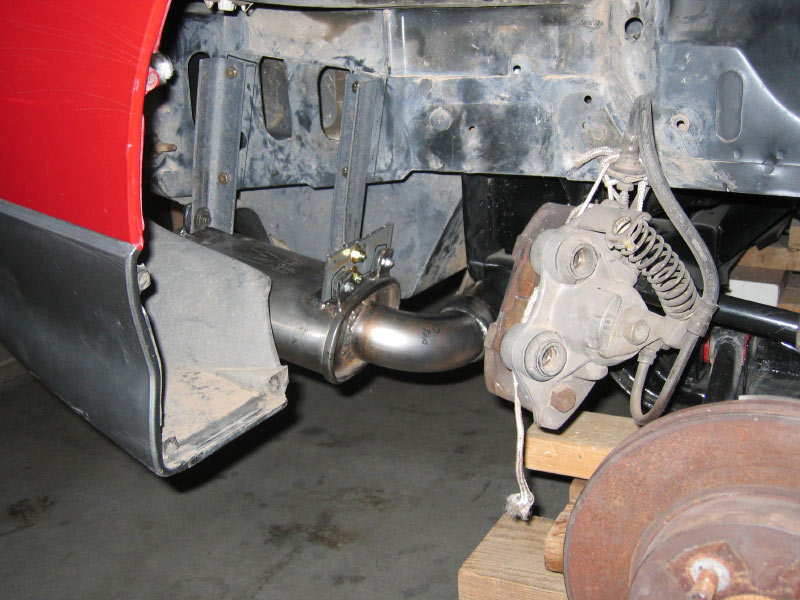
I have been working on the electrical quite a lot but not getting much done for all the time spent. The good news is that most of it is done. I pressure tested the crossover tube I made and all three welds were weeping under 25lbs pressure. I took it out and laid more metal over the joints and now it is holding water fine. Since I had the welder out, I went ahead and fabbed up an exhaust support for the rear. Nothing special but it should help a little bit.
Some of the wires bundled up and the rest of the exposed is waiting for the engine to go in so I can get the wire length correct for the pass-through fitting
Got most of the wiring done. I put power to the system and starting putting plugs together. No smoke so far... I noticed a .45amp draw and found it to be from the headlight system. A quick wiggle of the headlight switch towards off seemed to clear up that minor drain. I probably need to get a new switch so I don't get stuck somewhere with a dead battery.
I got the 86GT rear lights/cruise wiring harness modified and plugged in. All lights are working correctly and no funny stuff going on up front so it should be good. (I removed all the blower motor and cruise control wires plus I re-located one of the wires on the C500 to G7)
I do have a question for the more knowledgeable folks. With power applied to the system but no computer installed, should the tach sense wire coming from the instrument cluster (tach gauge) be approx +12v ? It makes sense that it would be and then the spark system would ground the wire at the appropriate times to create a pulse. Not sure about these newer cars though...
Things left to do before a start attempt. Install the battery box under the spare tire and run the cables rearward. Setup a pigtail so I can plug in either a wide band or narrow band O2 sensor from inside the car. (near the computer) Put the rear body on and mount the mufflers centered in the exhaust tip cutouts. (I found out that the notchie has a slightly different position for the dual exhaust than the GT)
With power applied to the system but no computer installed, should the tach sense wire coming from the instrument cluster (tach gauge) be approx +12v ?
Yes.
If you pull whatever fuse you're using to power the ICM, the voltage on the tach wire should go away.
Cool Charlie. Almost there. What are you using for the exaust/muffler? I used a Flowmaster 45 series and it's louder than hell. I was looking for a little lower tone. ,<shrug>
Thank you Will. I was hoping that was a correct reading. (I don't want to cook the computer before I get a chance to try it. )
Hi Bob,
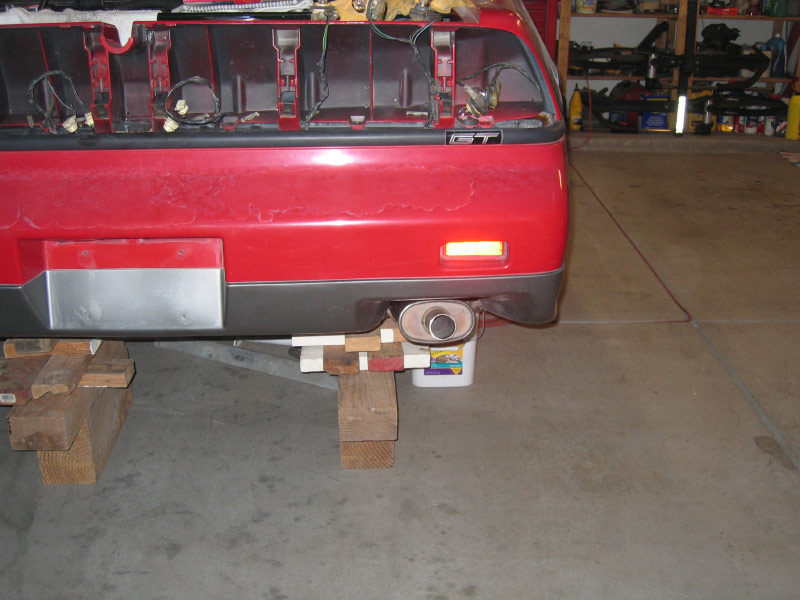
Here is a picture of the small mufflers I will try first. These are most likely not going to do much. I was contemplating using resonator tips like the supertrapp but I don't know how that will work out either.
Tonight I worked on the Battery box and the positive cable (1 Gauge stranded welding cable) The Cable actually came with the car when I bought it. The previous owner was getting ready to do the battery relocate himself and had already bought the cable. It was 10' 3" long and it looks like it will work precisely. I bought 10' of non-metallic flexible conduit and it looks like it will work well to prevent chafing of the cable. I will be using 2 Gauge stranded cable to wire the ground. The plan for now is to use several lengths bolted to the frame and to themselves (daisy-chain) to create several grounding points along the way back to the engine.
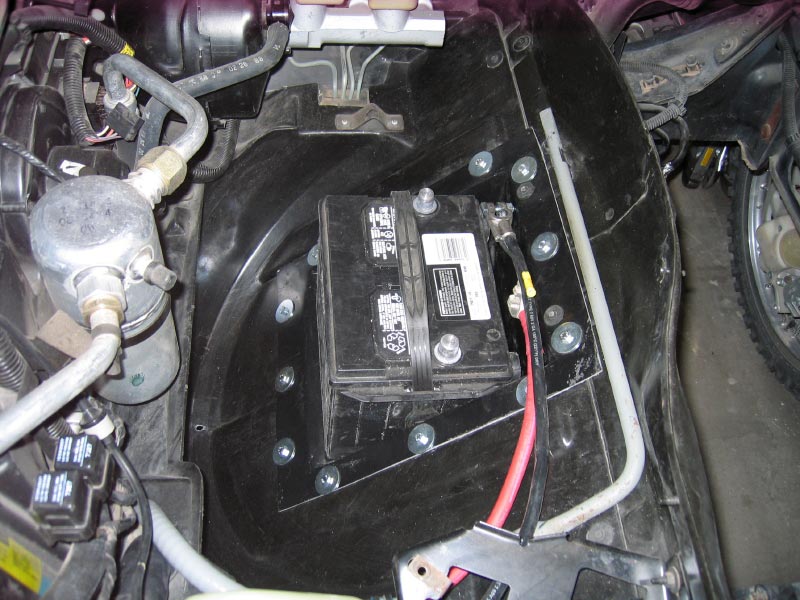
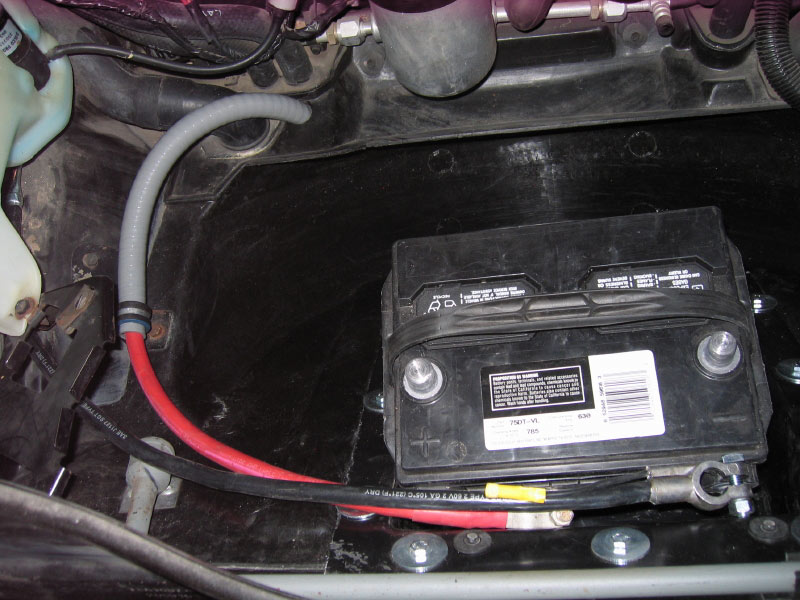
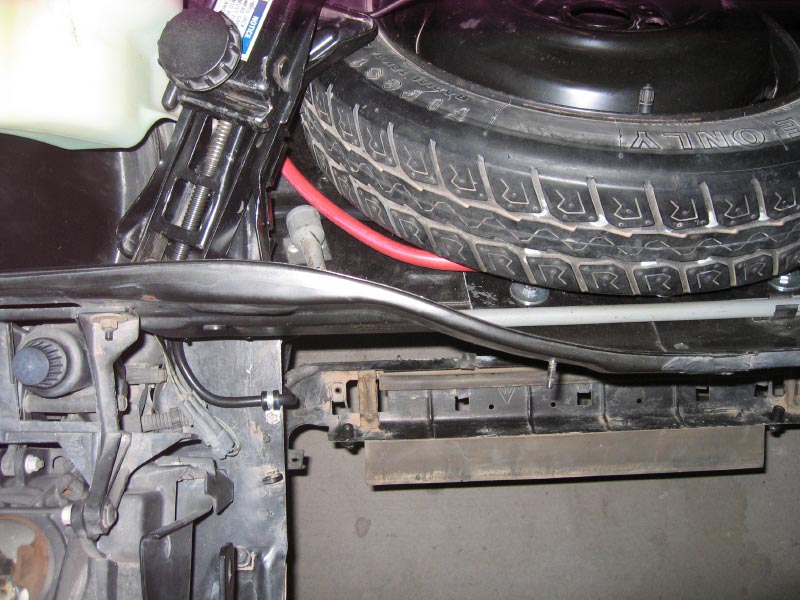
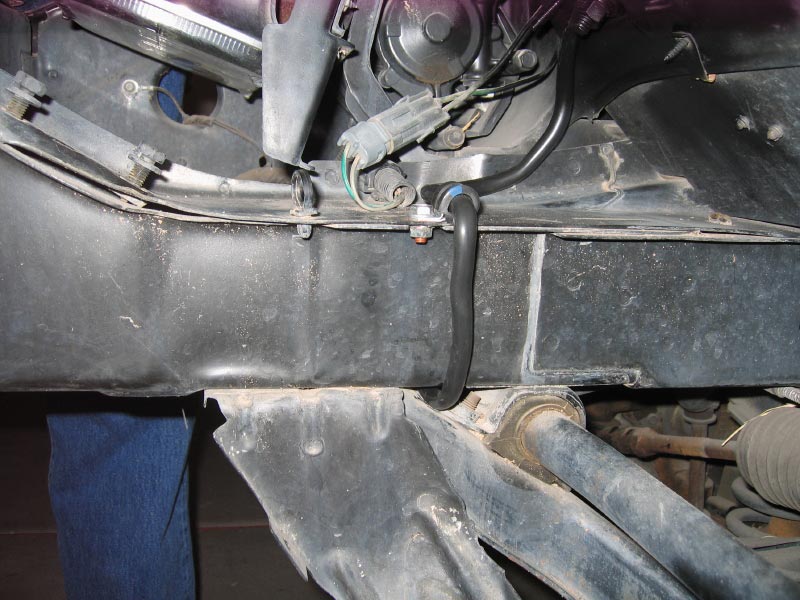
Picture sequence from front to rear of the battery and positive cable routing:
The black mark on the conduit is where the cable ends. I still need to cut the conduit the correct length and secure it to the frame. At this point I do not have a connector figured out to connect the starter wire to this wire...
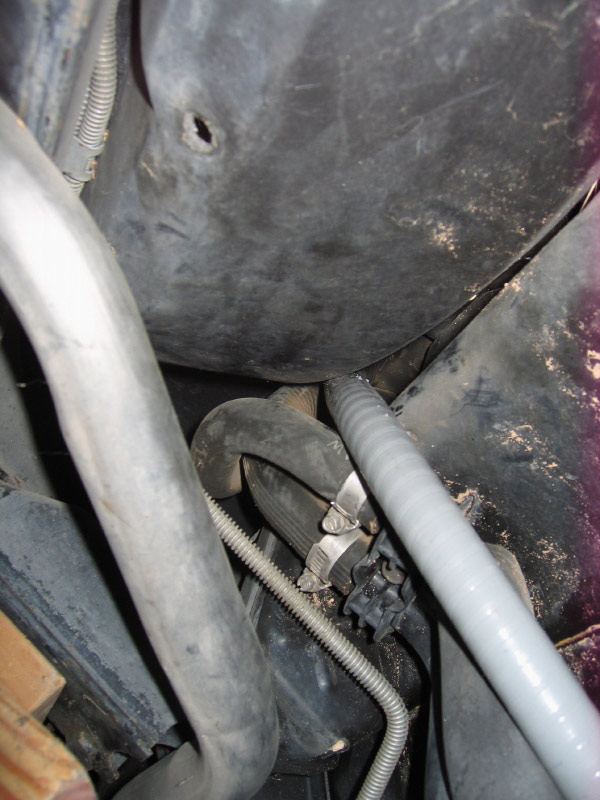
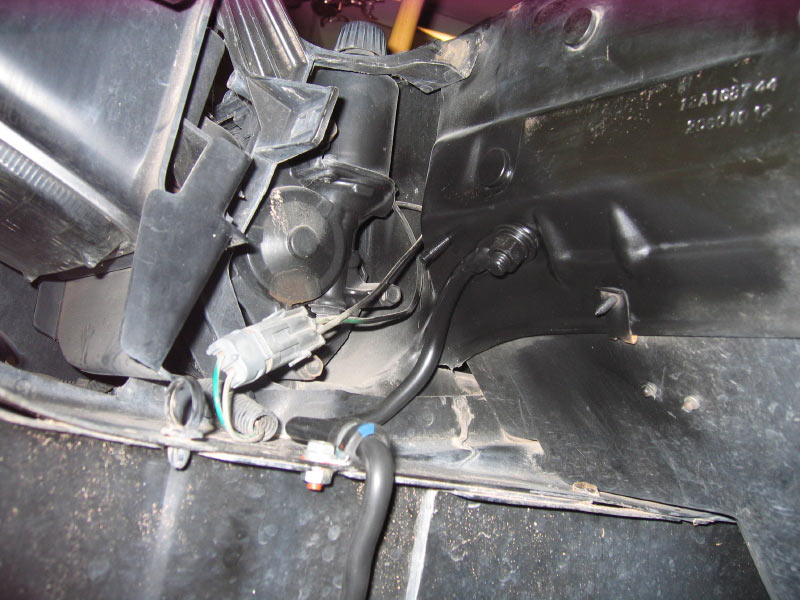
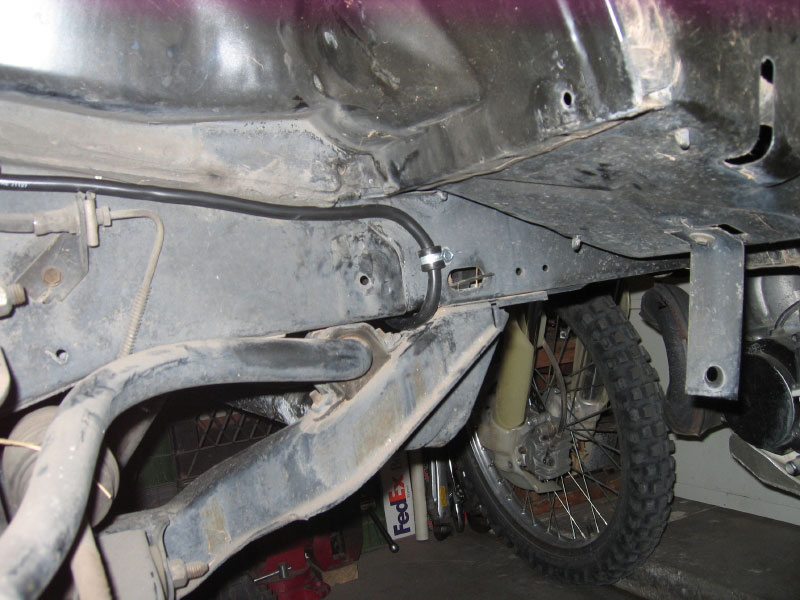
More pictures of the negative cable routing with integrated grounds.
You can't see the neg cable in this picture but it runs just under the jack handle (lug end) and up under the jack perch near the front passenger side of the wheel tub.
Here, another cable is bolted on the front side of the sheet metal divider (first ground location) and it runs downward and under the frame towards the wheel well.
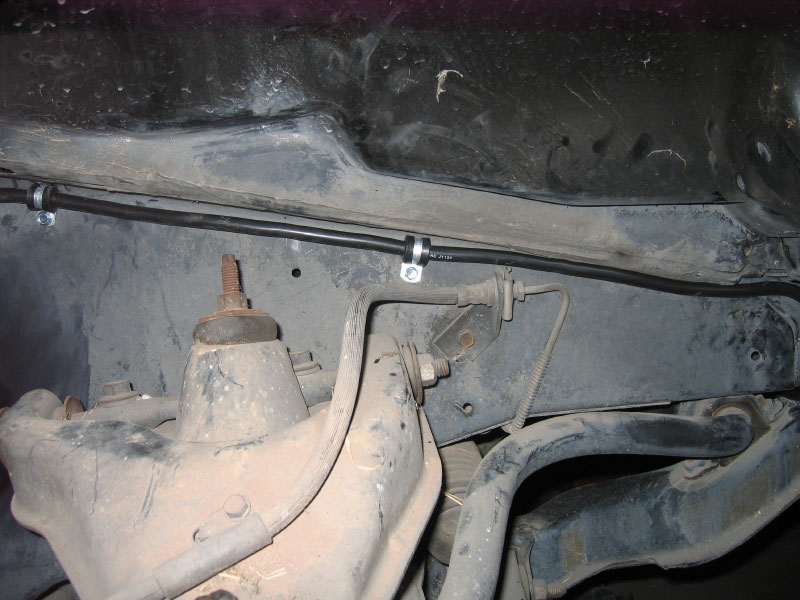
Back up and along the inner top of the wheel well.
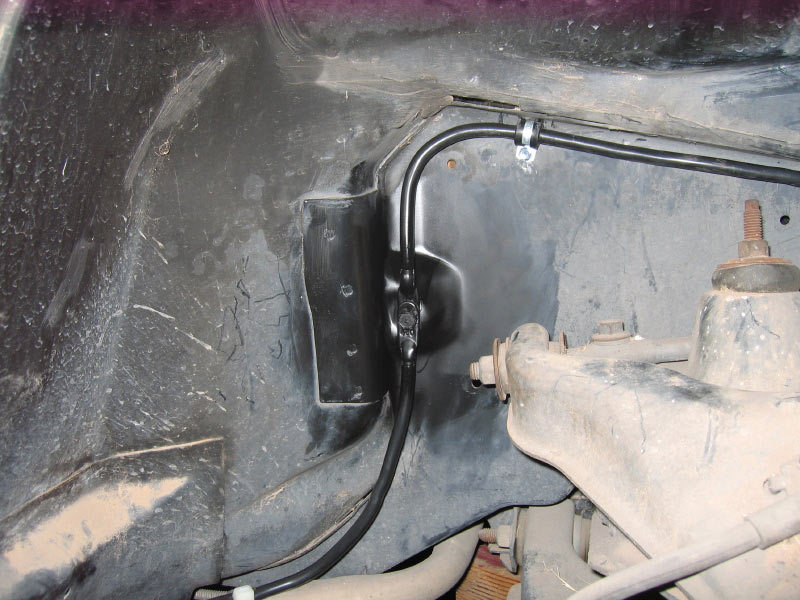
Then it bends down and is bolted to the third negative cable and into the body for the second ground location.
From here it gets zip-tied to the return coolant pipe as it goes rearward towards the back of the car.
Not shown (bad picture) is the end of this cable and the beginning of the fourth cable bolted to the rear bolt of the return coolant tube protector/jack point. This is not a ground for lack of a good connection to the body.
Now the cable comes up the frame just in front of the right rear wheel well and is bolted to the bottom of the sheet metal that is in the area of the original battery location. This is the third frame ground point.
Here is the fifth cable that actually goes from the cable/frame to the engine.
I don't remember the length of the 2ga cable that goes from the battery to the frame in front but the rest are as follows:
2nd cable = 49"
3rd cable = 60"
4th cable = 24"
5th cable = 24"
Other than the 2ga cable that clamps onto the battery the rest are 4ga.
I forgot to mention that I tried turning the motor over with the key after getting the wires all bolted up and nothing...??? The headlights went up and down fast and powerful so I was thinking I messed up the starter wire routing then it hit me... The manual shift cars need the clutch pushed in to get a start signal to the starter!!!
It turned over really well with the plugs in and full compression. The noise it made give me the impression that it may be loud as I don't have the baby mufflers installed yet.
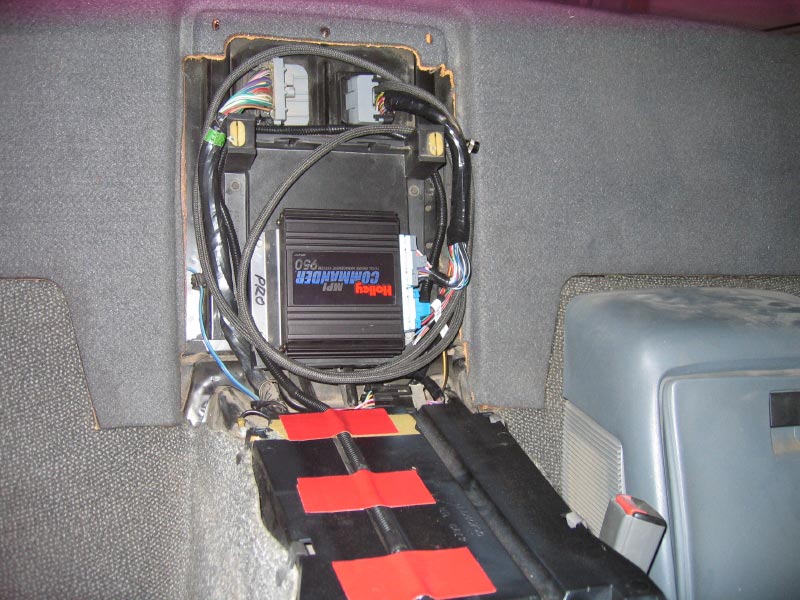
I wired in the WBo2 setup using small connectors so I can change from the Holley supplied narrow band sensor to the WBo2 sensor in a few seconds. (once the center armrest is removed)
I then hooked up the laptop and turned the ignition on. It all looks to be working ok. The "lean" voltage from the WBo2 presented on the Holley software is showing 4.98 which is pretty close to what it should be reading as a max lean. It will be interesting to see if the WBo2 and the Holley agree on the A/F ratio. If they do and the WBo2 is working correctly it should run the engine ok. (I hope.) The only odd thing I noticed was a MAP value of zero. Looking into the middle of Russ544's ITB found the cause. After the final wire harness redo, I had left the connector off the MAP sensor. It now shows a value of 92. Someday I will figure out what it should show for ambient pressure. (approx)
The only thing holding this back from a trial run is gas, a fuel pump relay and the mufflers.
[This message has been edited by cptsnoopy (edited 10-22-2008).]
Nice to hear your almost ready to hear it.....I've been driving mine all week and I tell ya these motors are a great match for the fiero.....Pulls like a mo fo...
Thanks for the support guys. There is still plenty to do before it is road worthy but it will be very nice to here it run for a few moments. (assuming it will.) I will have to post a video and I am expecting plenty of smoke...
quote
Originally posted by motoracer838: I spy in the background, a Honda CR and it looks looks it has a street plate on it. That's gotta be a hoot!!!
Joe, you spy correctly. It is an 01 CR500 made street legal to satisfy the park rangers when riding down the "improved" roads around 4-peaks. (a local mountain with plenty of fun riding around it.) The only other changes were to replace the stock 14t front sprocket with a 15t and add a Scott's Steering damper. Almost all of our riding is desert trail/mountain with sand washes, hard pack dirt and rocky trails. Only when I get too old to kick this thing over will I consider a KTM 300, 2 stroke with electric start.
I have been busy doing other mandatory things so it has been a little slow getting anything done on the car. I managed to figure out a way to mount the mufflers to the rear of the frame. I think this may work but the only way I see to find that out is to try it. I mounted the mufflers using some angle iron and some rubber mounts. They seem to be pretty secure. Both mufflers looked even when looking at them from the rear of the car but the left muffler looks higher than the right muffler in the pictures I took. I will have to check that and adjust it when the body is being secured onto the car. I hope to find an oval exhaust tip that will be about the same size and shape as the end plate of the muffler. There is about 6" of room to add a tip that will make them look nice.
Thanks for the support guys. There is still plenty to do before it is road worthy but it will be very nice to here it run for a few moments. (assuming it will.) I will have to post a video and I am expecting plenty of smoke...
Joe, you spy correctly. It is an 01 CR500 made street legal to satisfy the park rangers when riding down the "improved" roads around 4-peaks. (a local mountain with plenty of fun riding around it.) The only other changes were to replace the stock 14t front sprocket with a 15t and add a Scott's Steering damper. Almost all of our riding is desert trail/mountain with sand washes, hard pack dirt and rocky trails. Only when I get too old to kick this thing over will I consider a KTM 300, 2 stroke with electric start.
Capt. I'm going to be down in the Phoenix area at Speed world for a vintage race the last weekend of January, I'd like to see how your car is coming along.
Capt. I'm going to be down in the Phoenix area at Speed world for a vintage race the last weekend of January, I'd like to see how your car is coming along.
Cheers Beers n Gearz. Joe
Sounds great Joe! You are welcome to come over to have a look and help me drink some of these corona's I have in the fridge.
The only issue may be that I am on the other end of town. (next to Firebird raceway)
Looks like allot of hard work is about to pay off, good luck with the first go. How did you end up wiring the positive cable?
I used 00 welding cable very similar to yours and bought connector ends at the welding supply store that are copper and solder onto the big welding cable. Then I hooked the positive straight to the starter. No messing with the old positive cable trying to figure out how to connect those cables together. For charging I ran #4 welding cable from the power block by the C500 to the starter. I also ran #4 welding cable from the alternator to the power block.


 so next time I have the engine out I plan to either look at the possibility of drilling for oil (for the tube) on the other side of the block or building a long honkin extension for the existing one. that's something you might want to look at also.
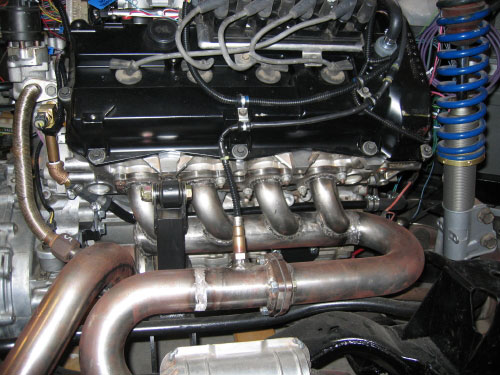


 and give it a try...