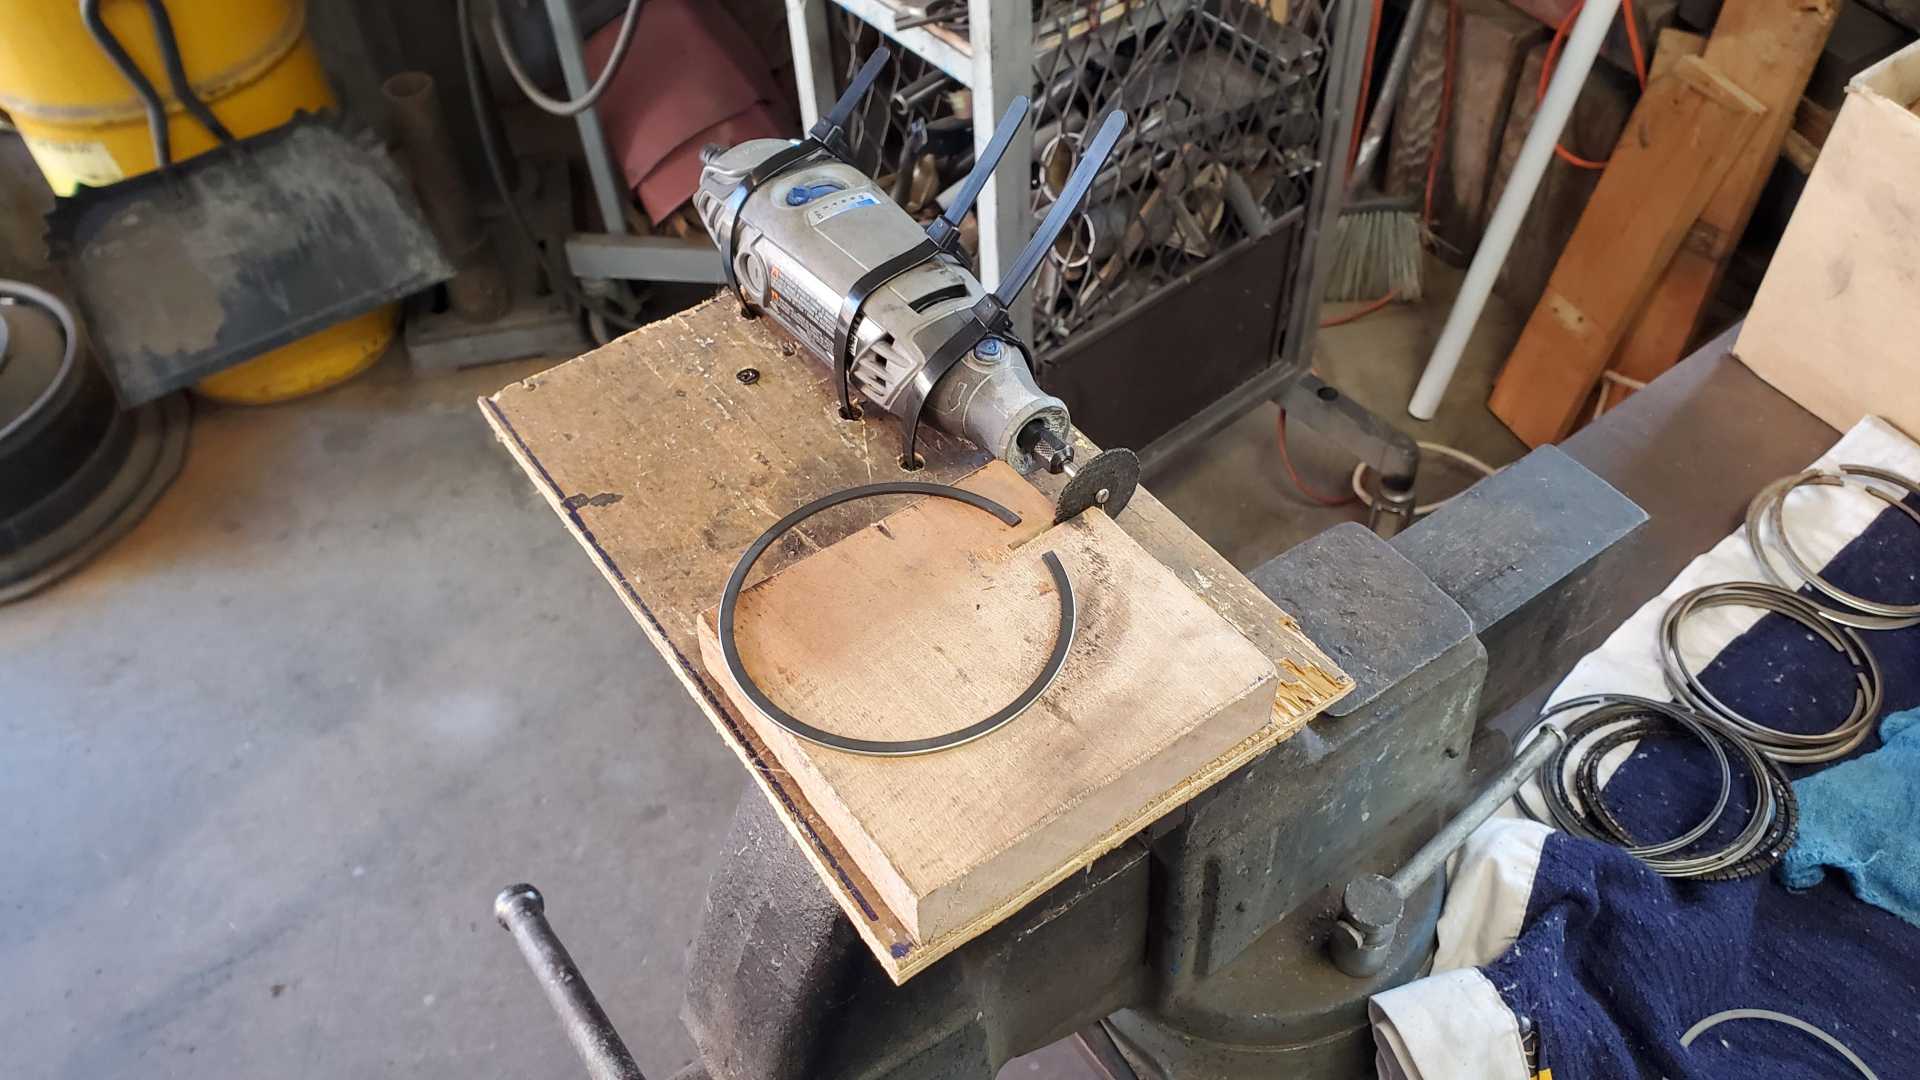
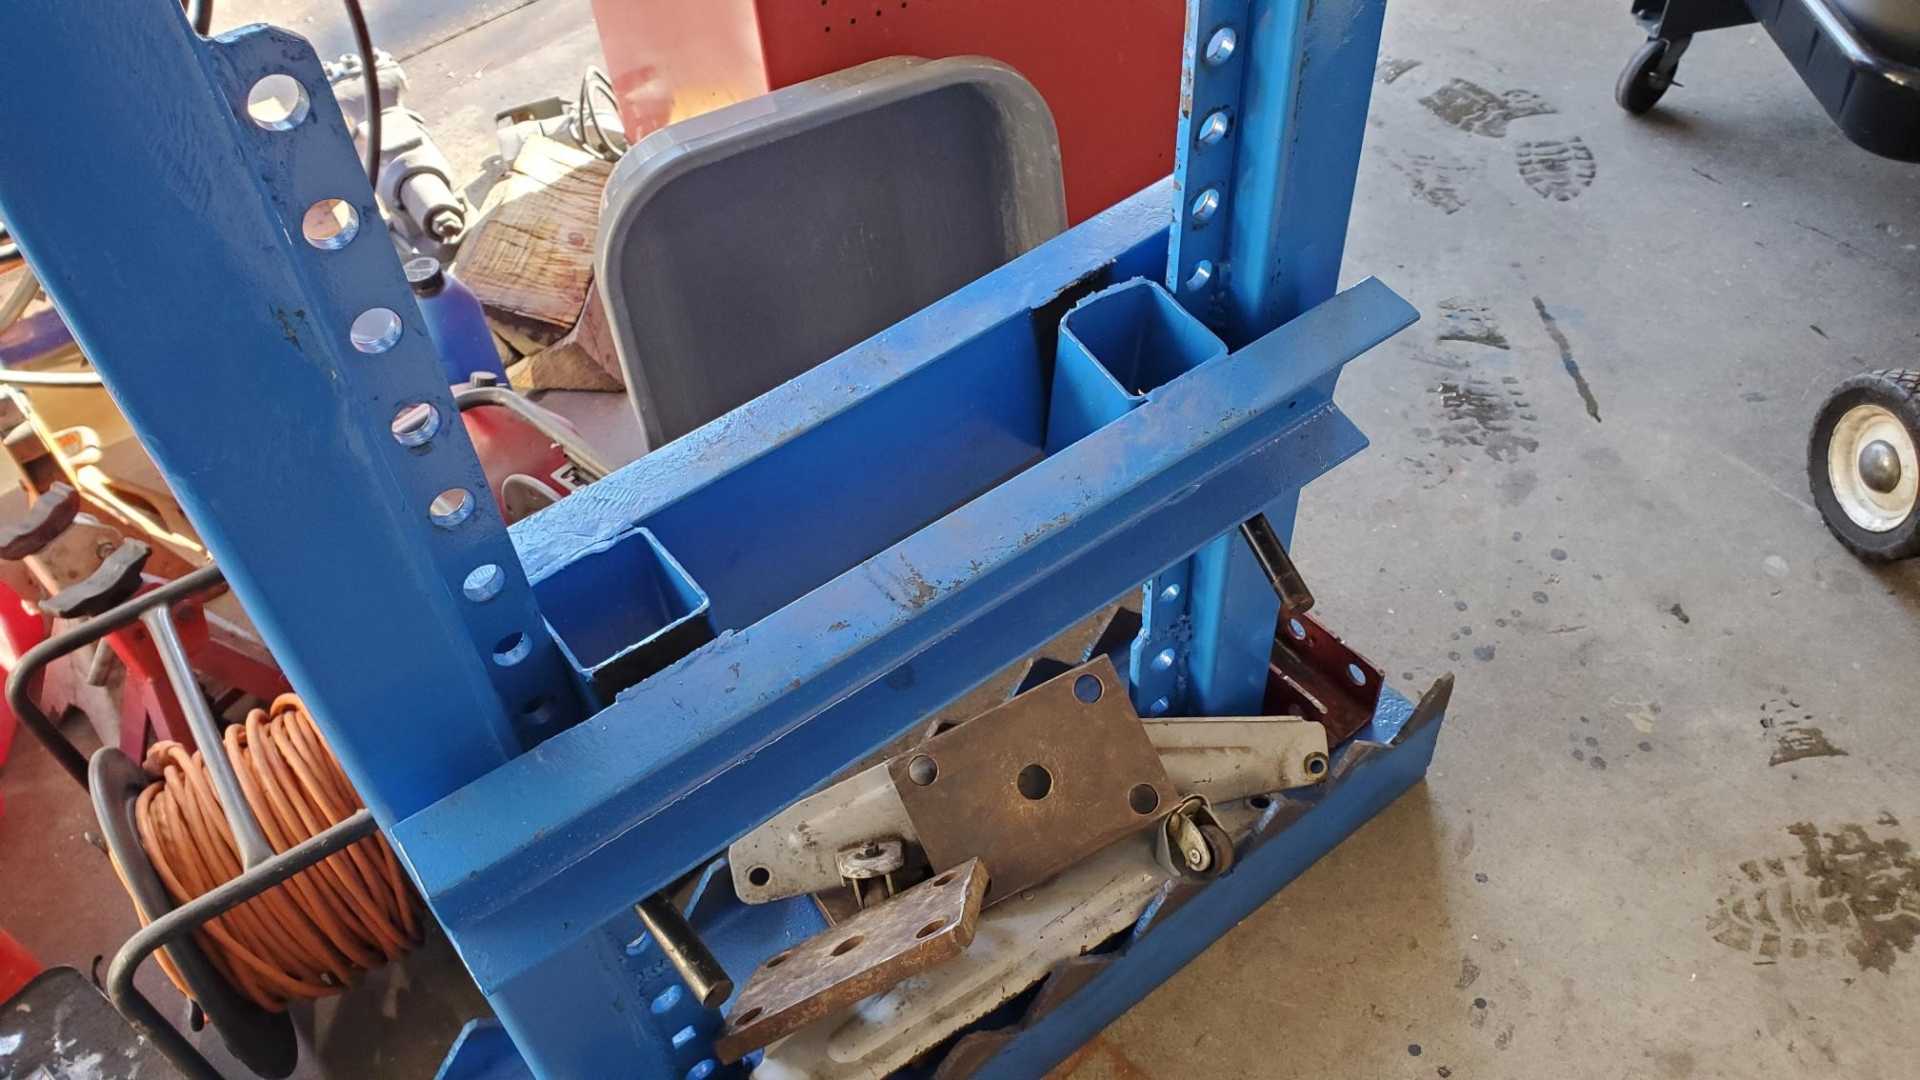
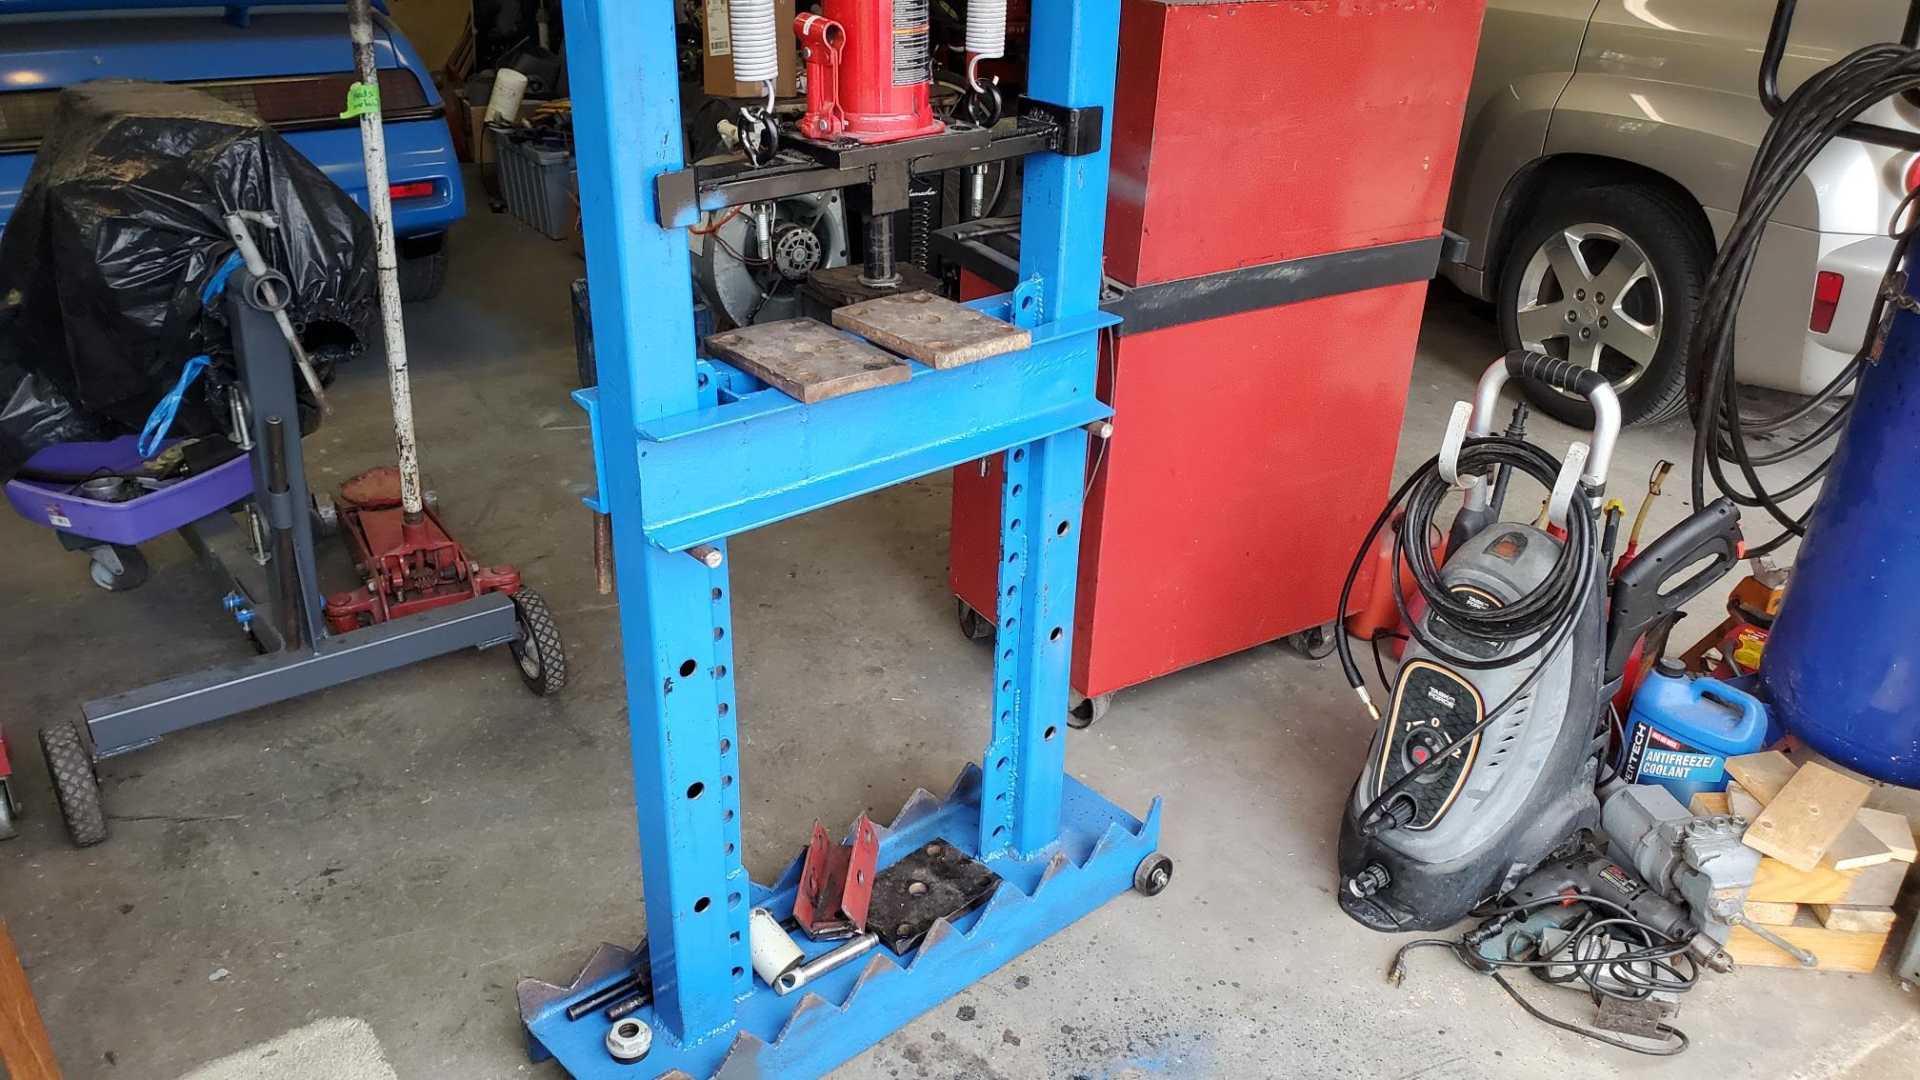
The set of bigger rings arrived in the mail and they’re so oversized they’ll have to be filed to fit in the bores. Just couldn’t talk myself into messing with them this weekend, so instead I cleaned engine parts and put my new press to work.
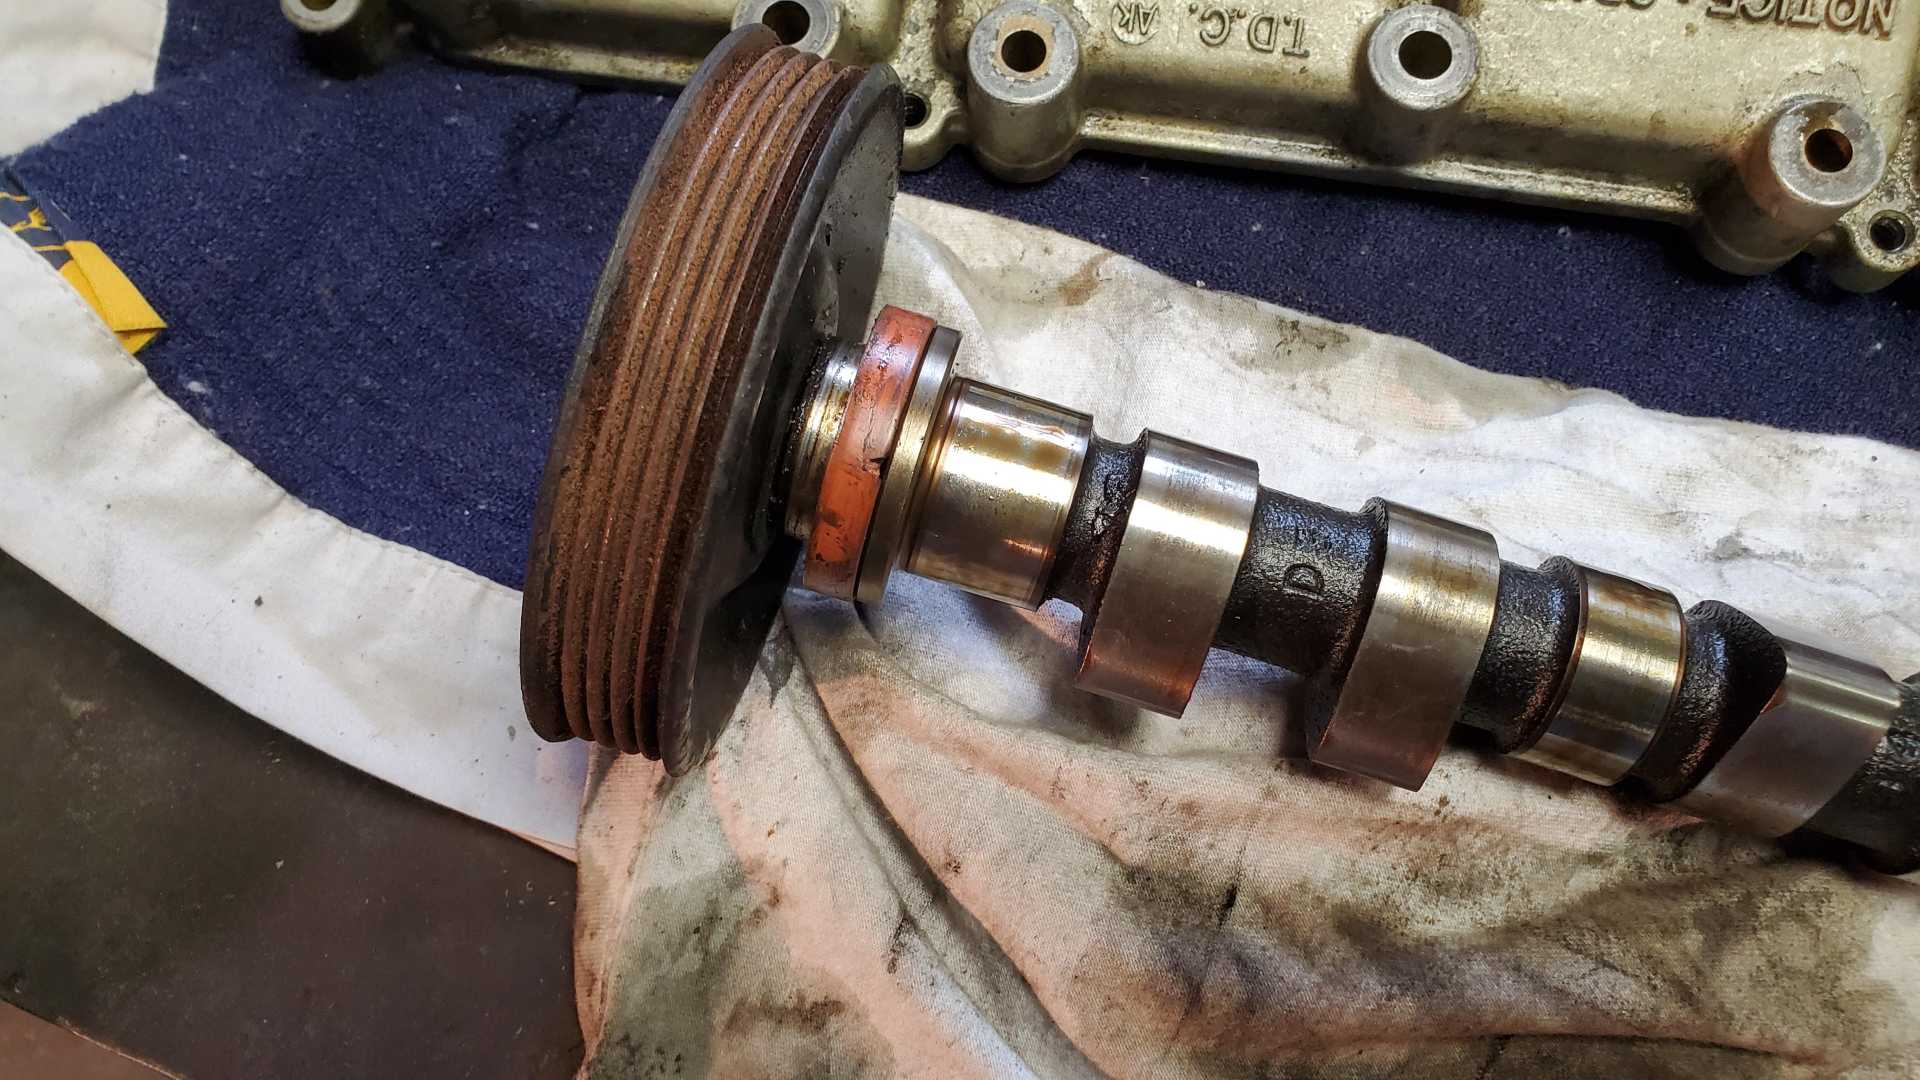
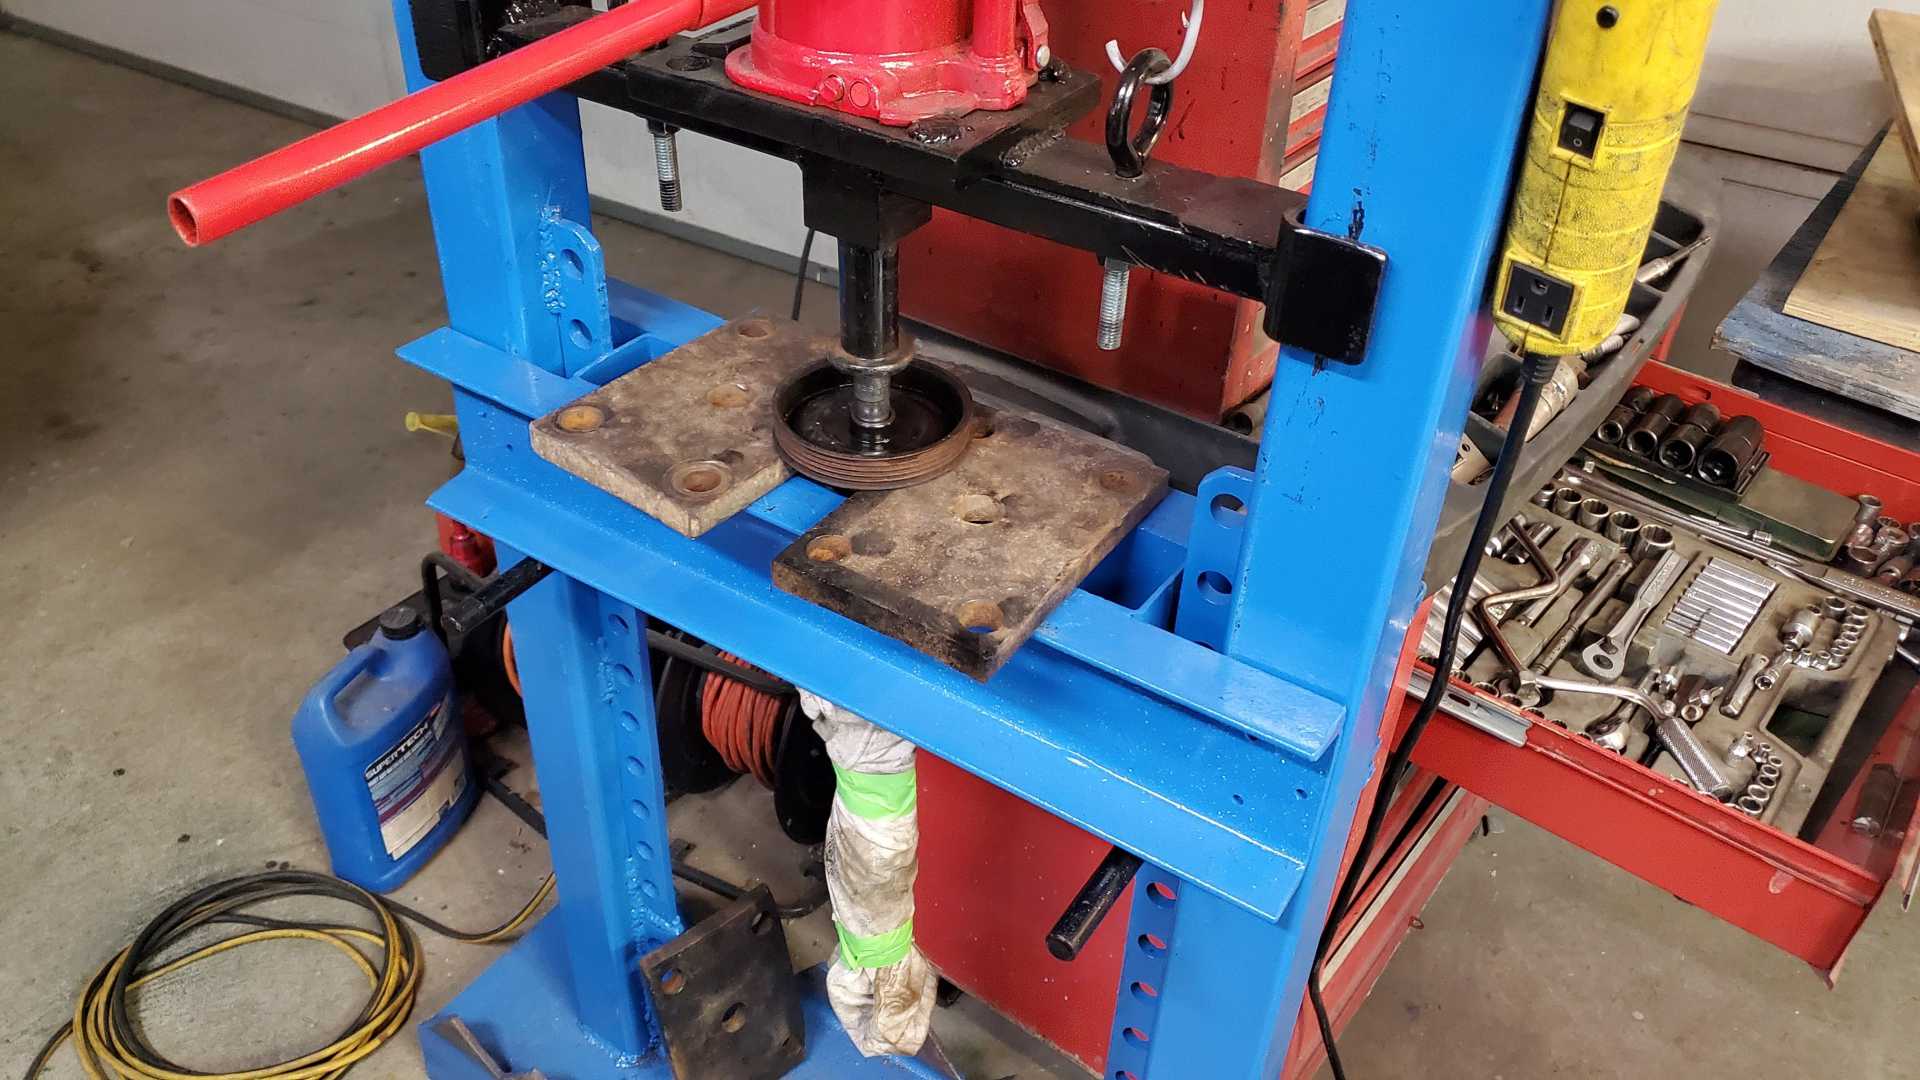
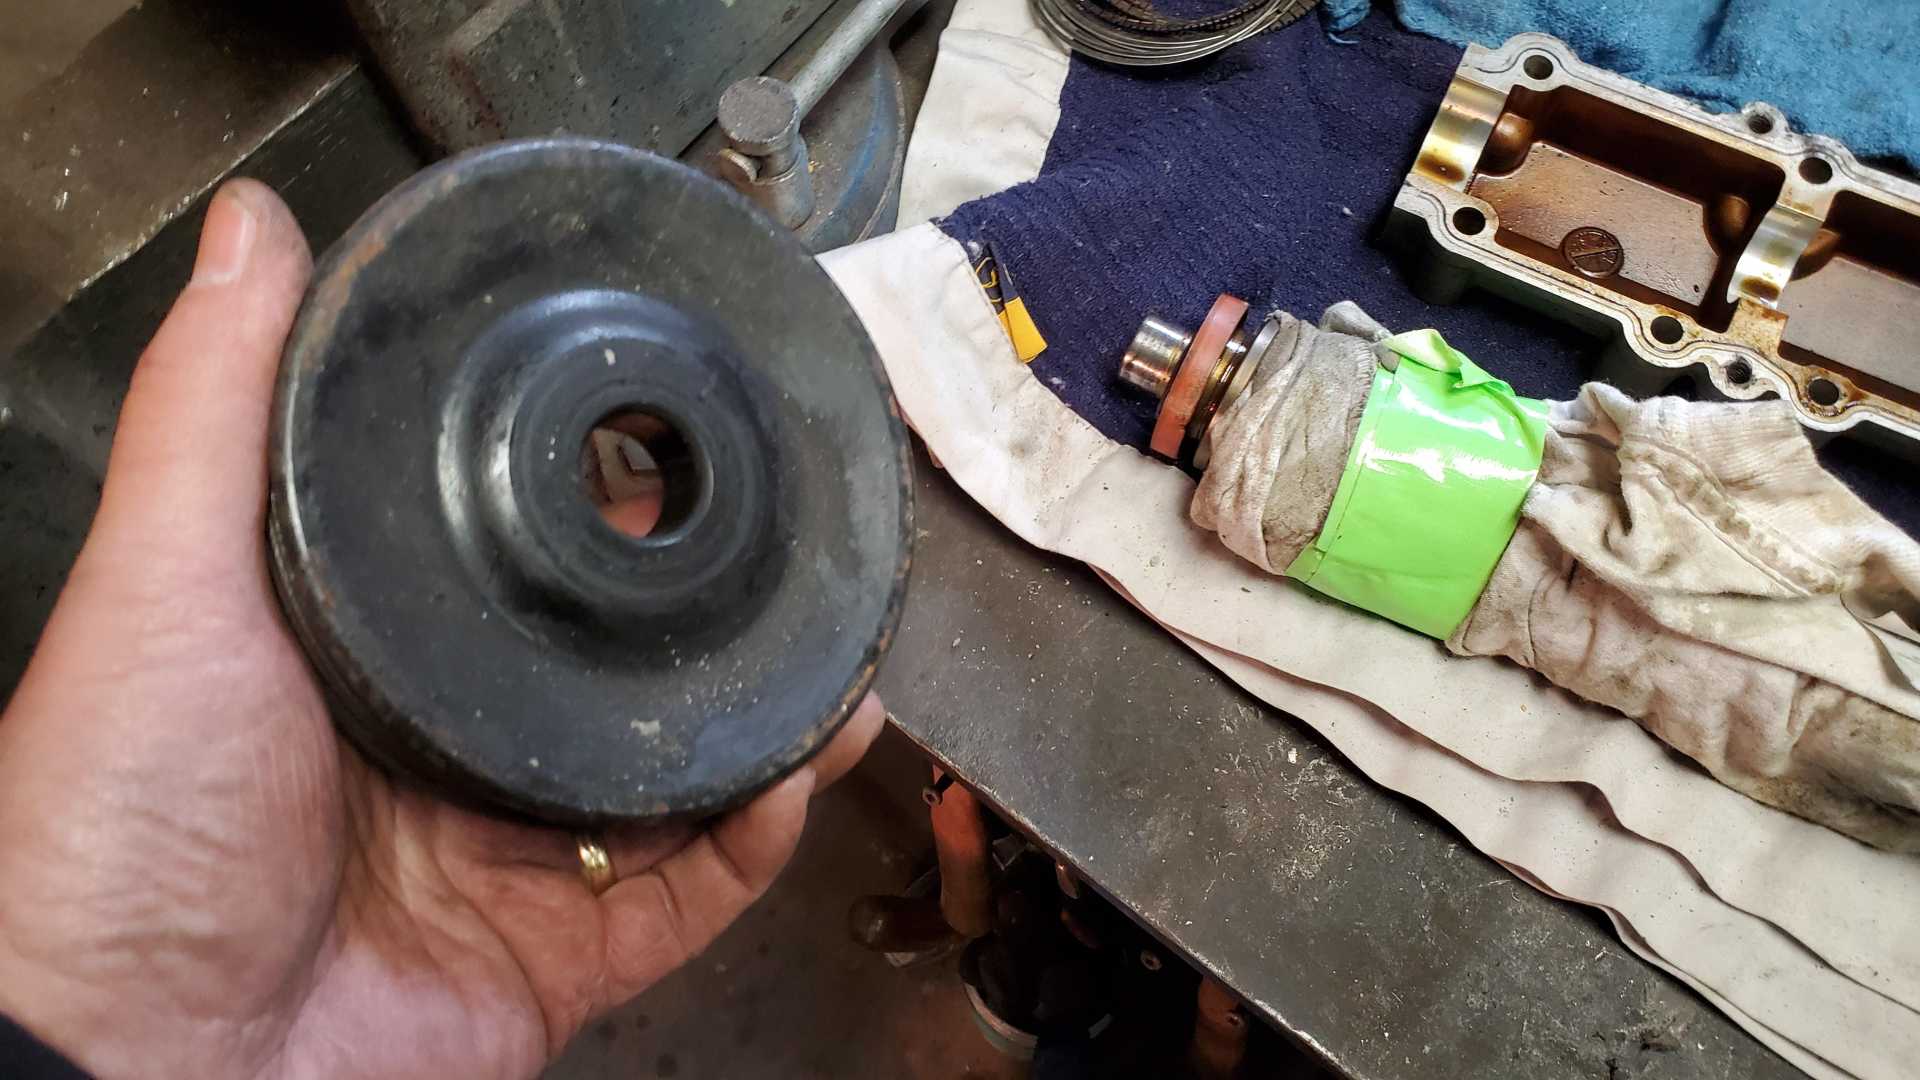
The Quad has a power steering pulley on the intake cam shaft. I’ve read that it’s a real bear to try to remove with a gear puller, so I tried using my DIY press and it worked great. Should’ve built this thing long ago.
[This message has been edited by Quadfather (edited 01-11-2021).]
Today I learned how easy it is to grind too much material off oversized piston rings.
I watched a bunch of YouTube videos about making a DIY ring grinder and came up with this rig that worked great.
Unfortunately, I took too much material off the first couple of rings and the gap is too big, so tonight I ordered yet another set.
The internet says it’s ok to have gaps that are a little too big, but these are so cheap I might as well get another set and get the gaps just right. Loads of other work to do while I’m waiting for the new set.
[This message has been edited by Quadfather (edited 01-16-2021).]
Finally got back to the shop. The deep freeze/ice/snowfalls are finally over here in Oklahoma.
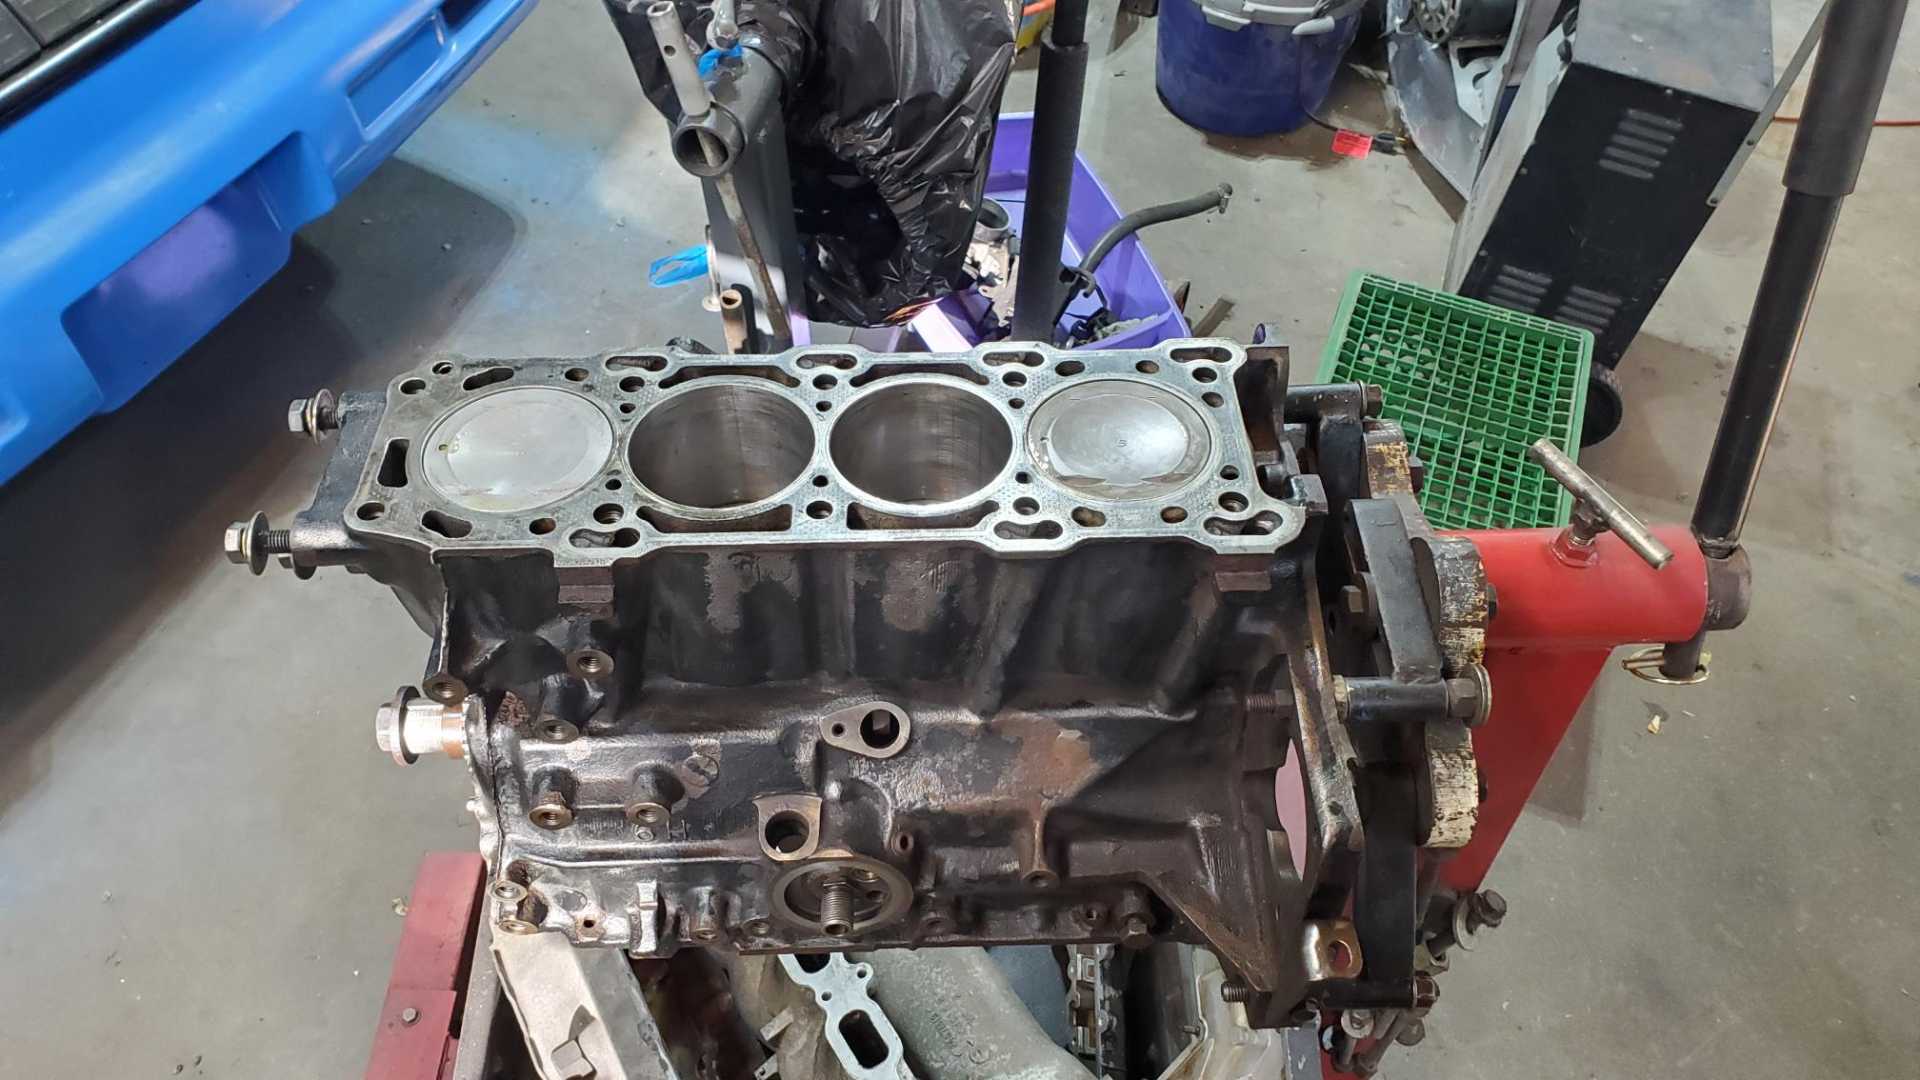
The pistons in my reman engine are .5 mm oversized. I know this because each one has “.5” stamped in the face. That means I needed rings that are .020” oversized. I ordered a set of Mahle rings through Summit and they fit. Only had to file a couple out of the whole set.
I had trouble installing the pistons in the cylinders and keeping the rings compressed, but I think I got them to go ok.
[This message has been edited by Quadfather (edited 09-13-2021).]
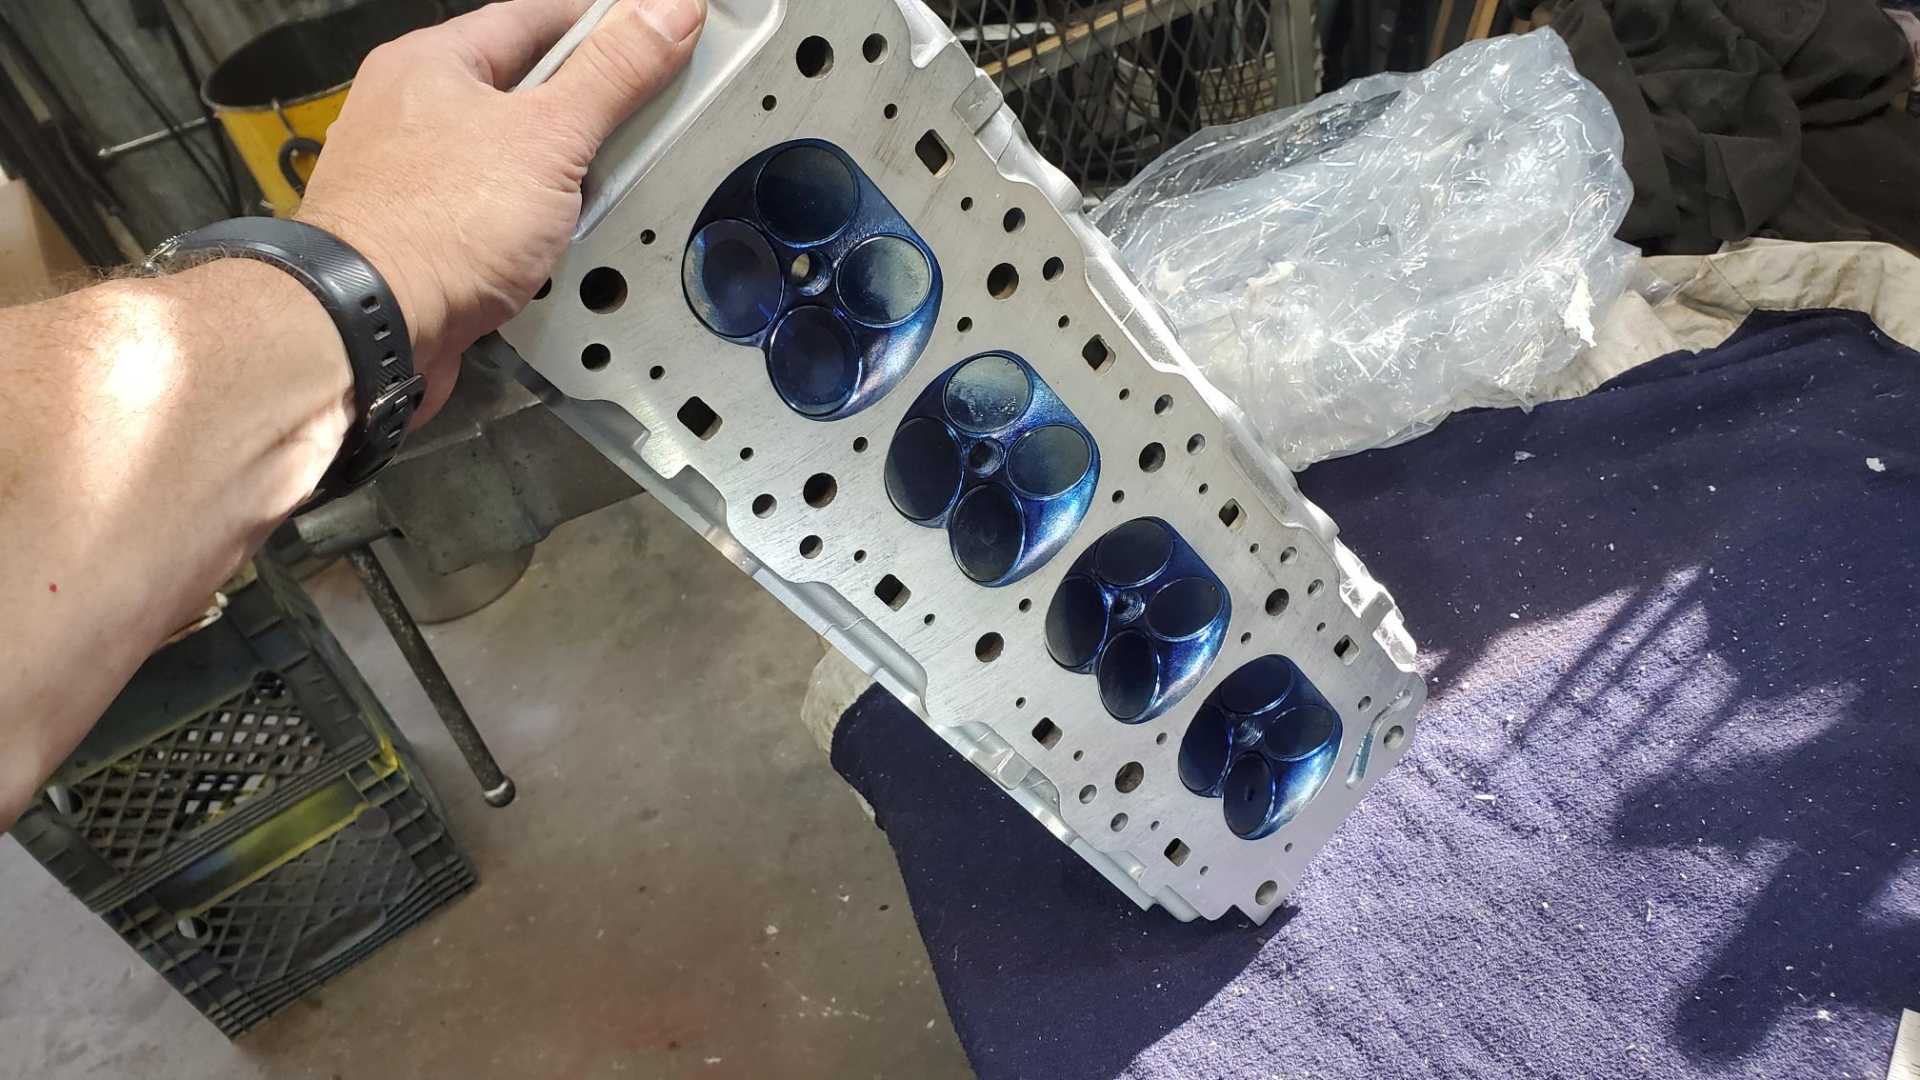
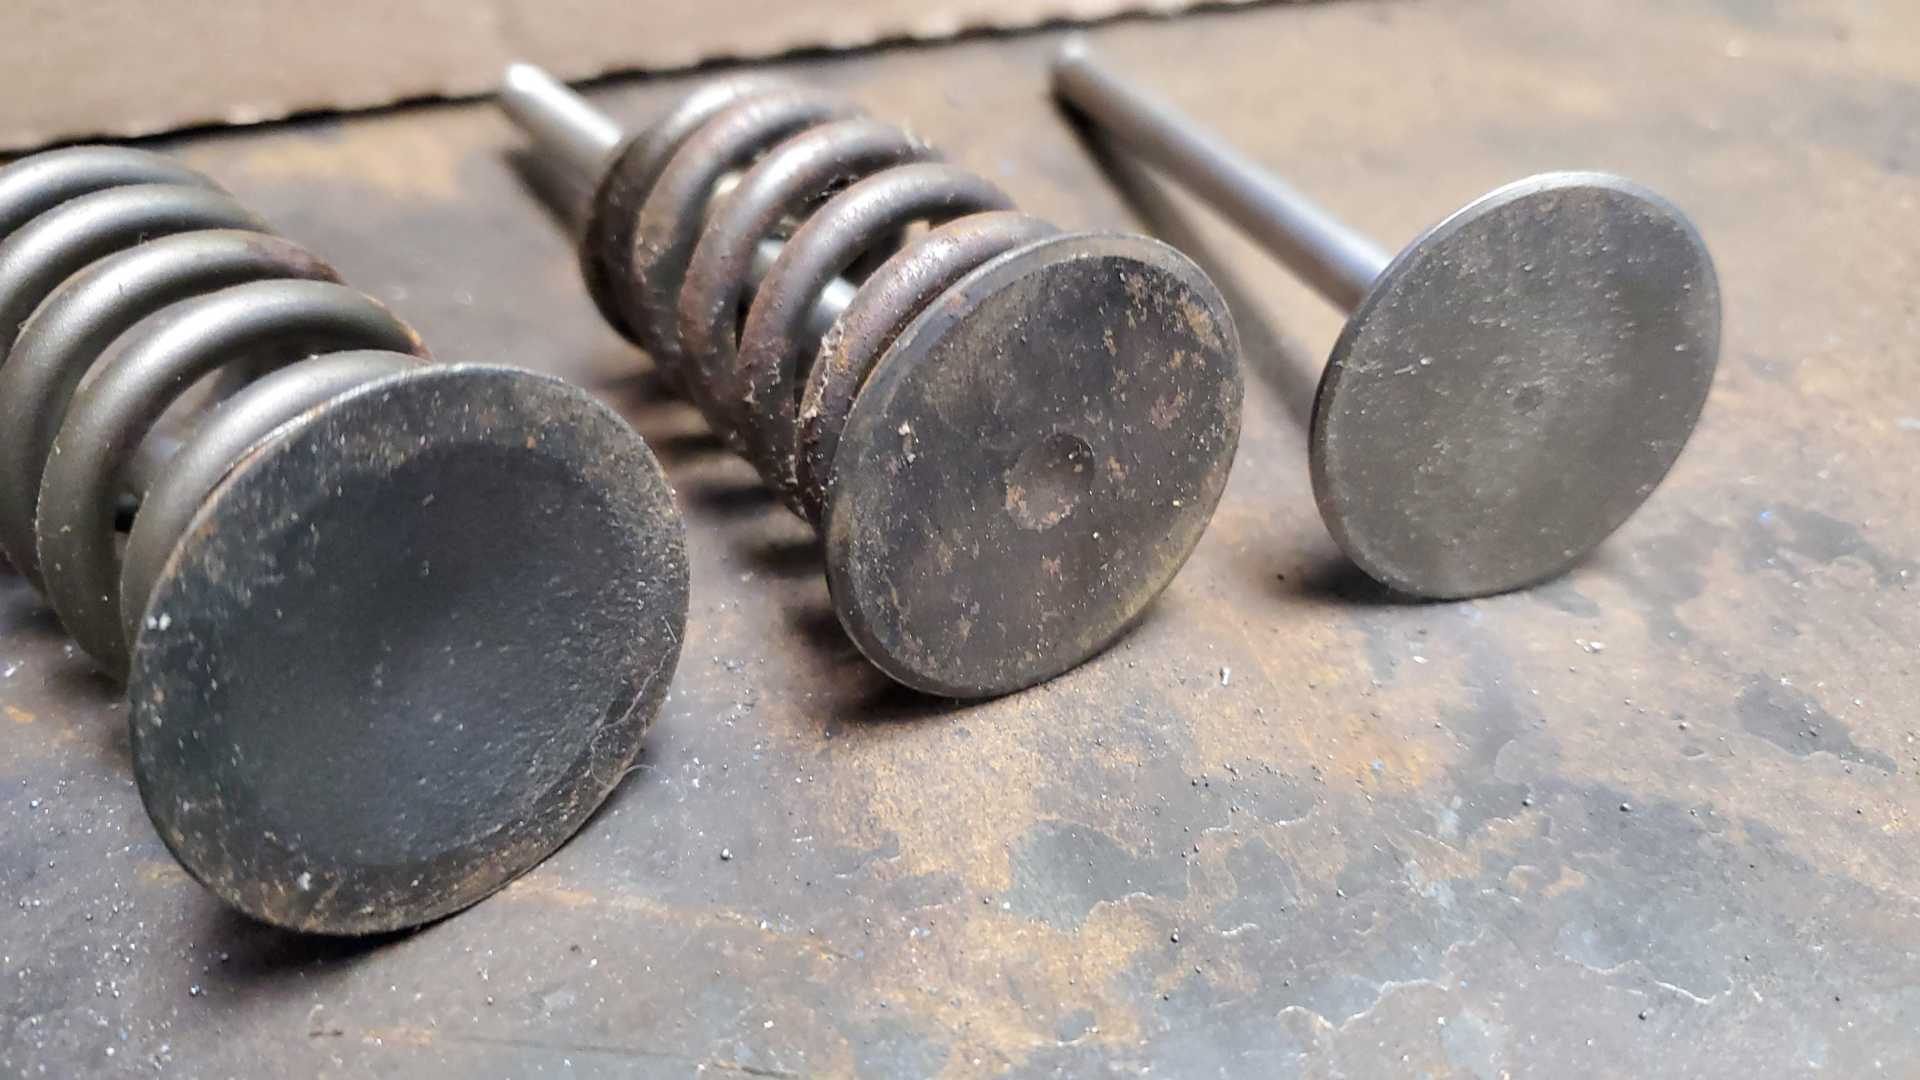
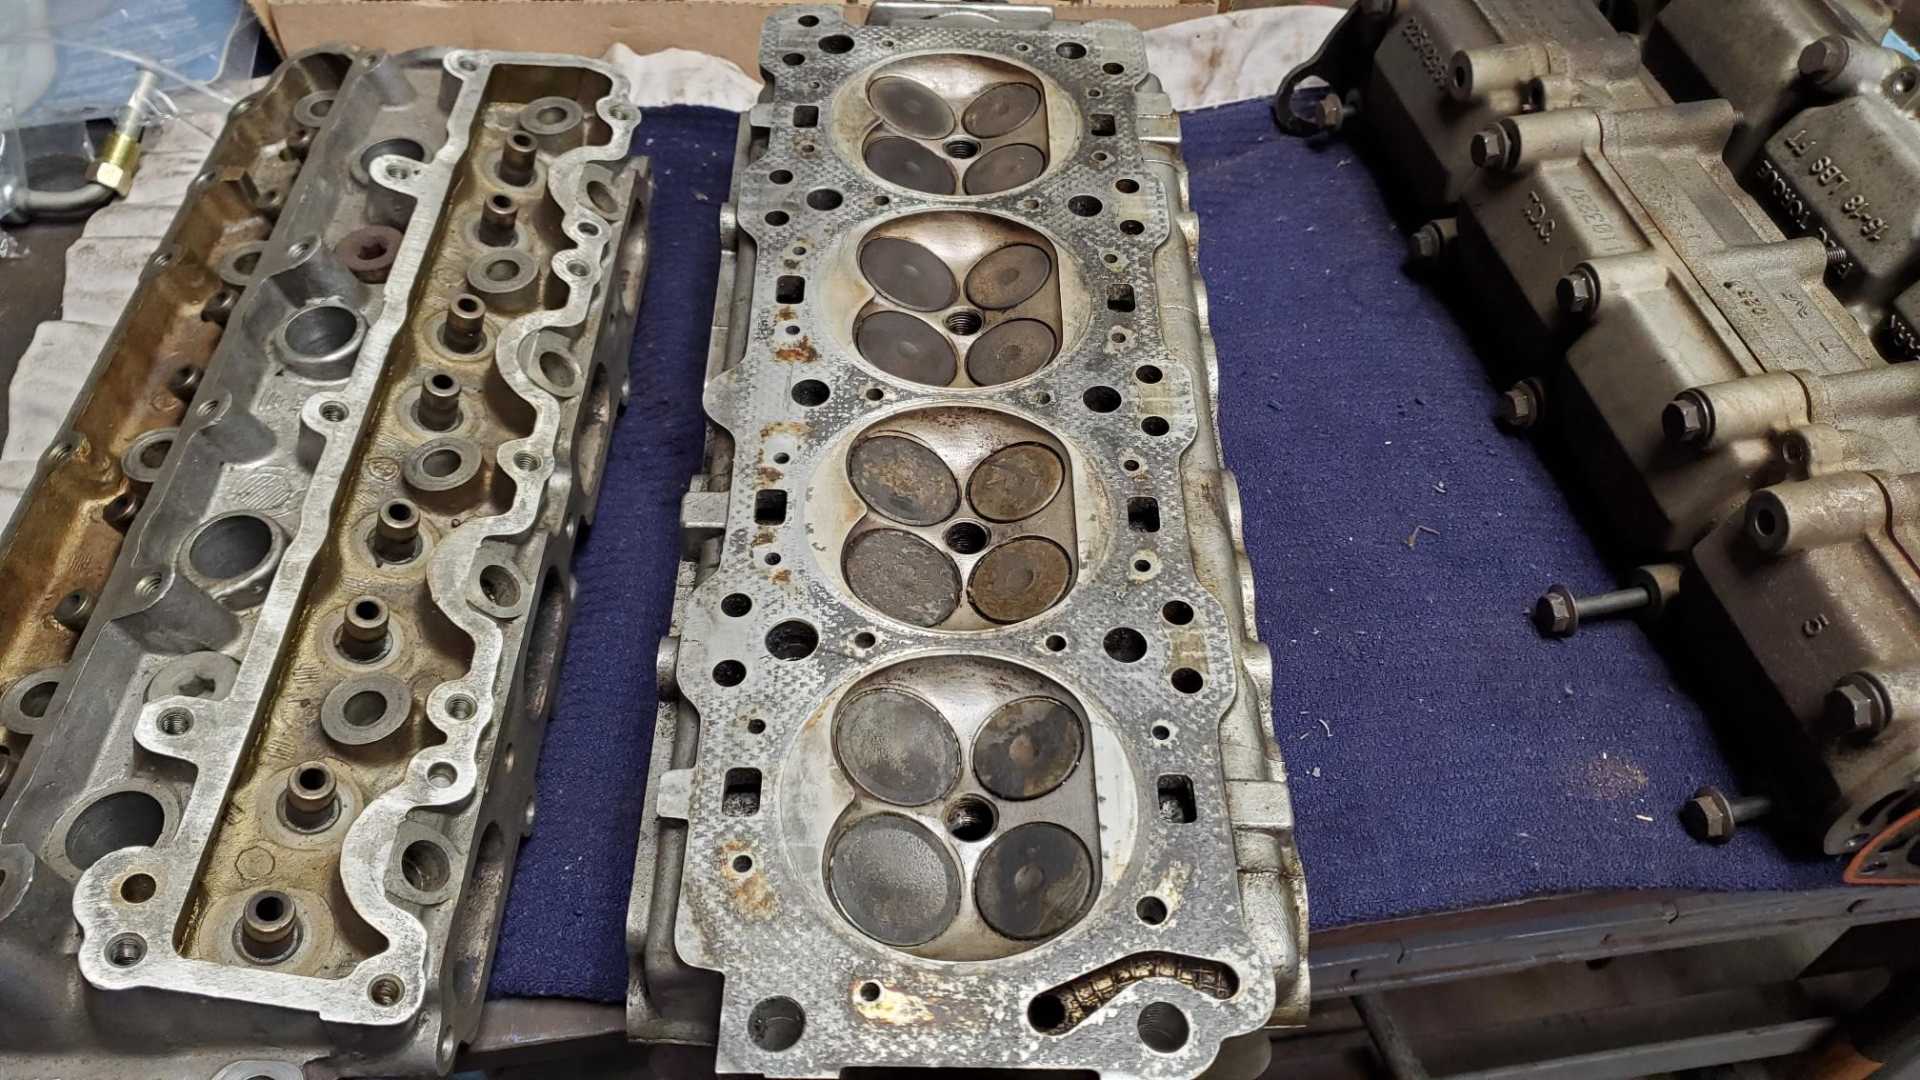
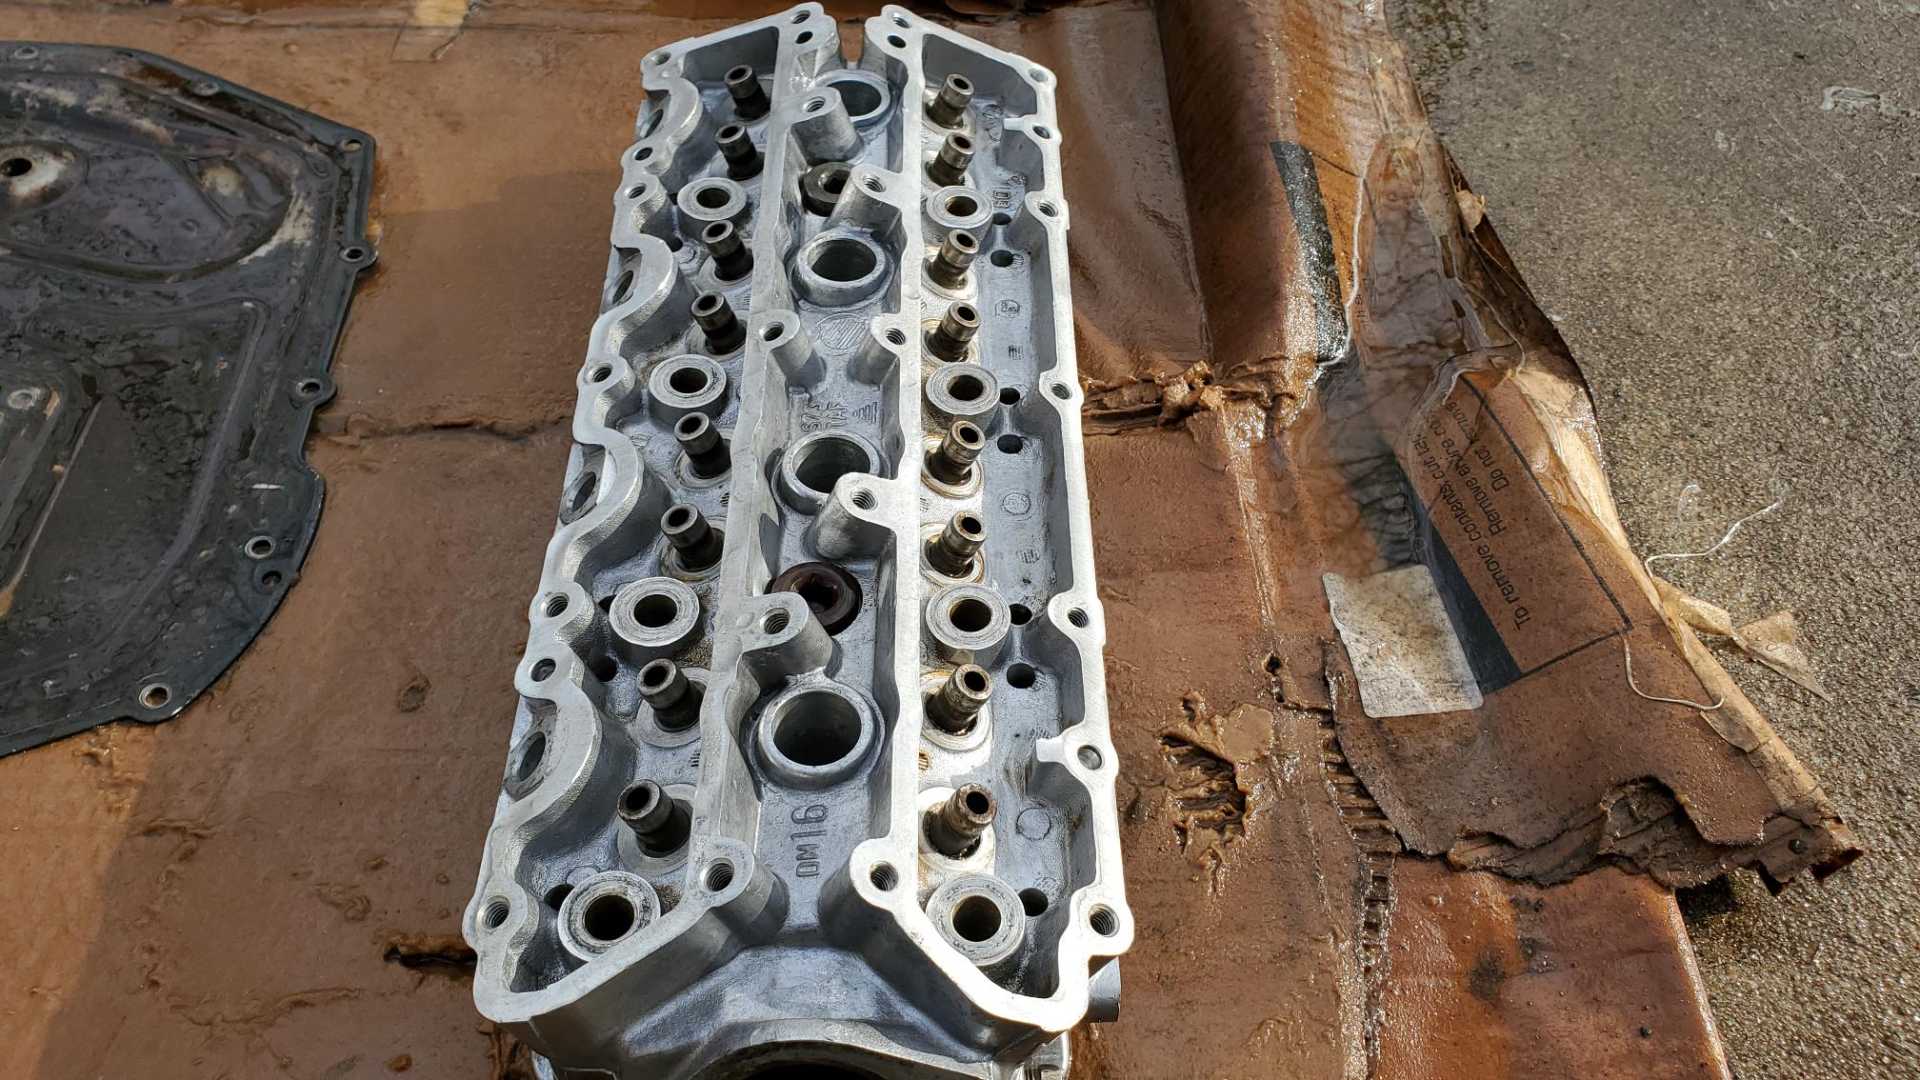
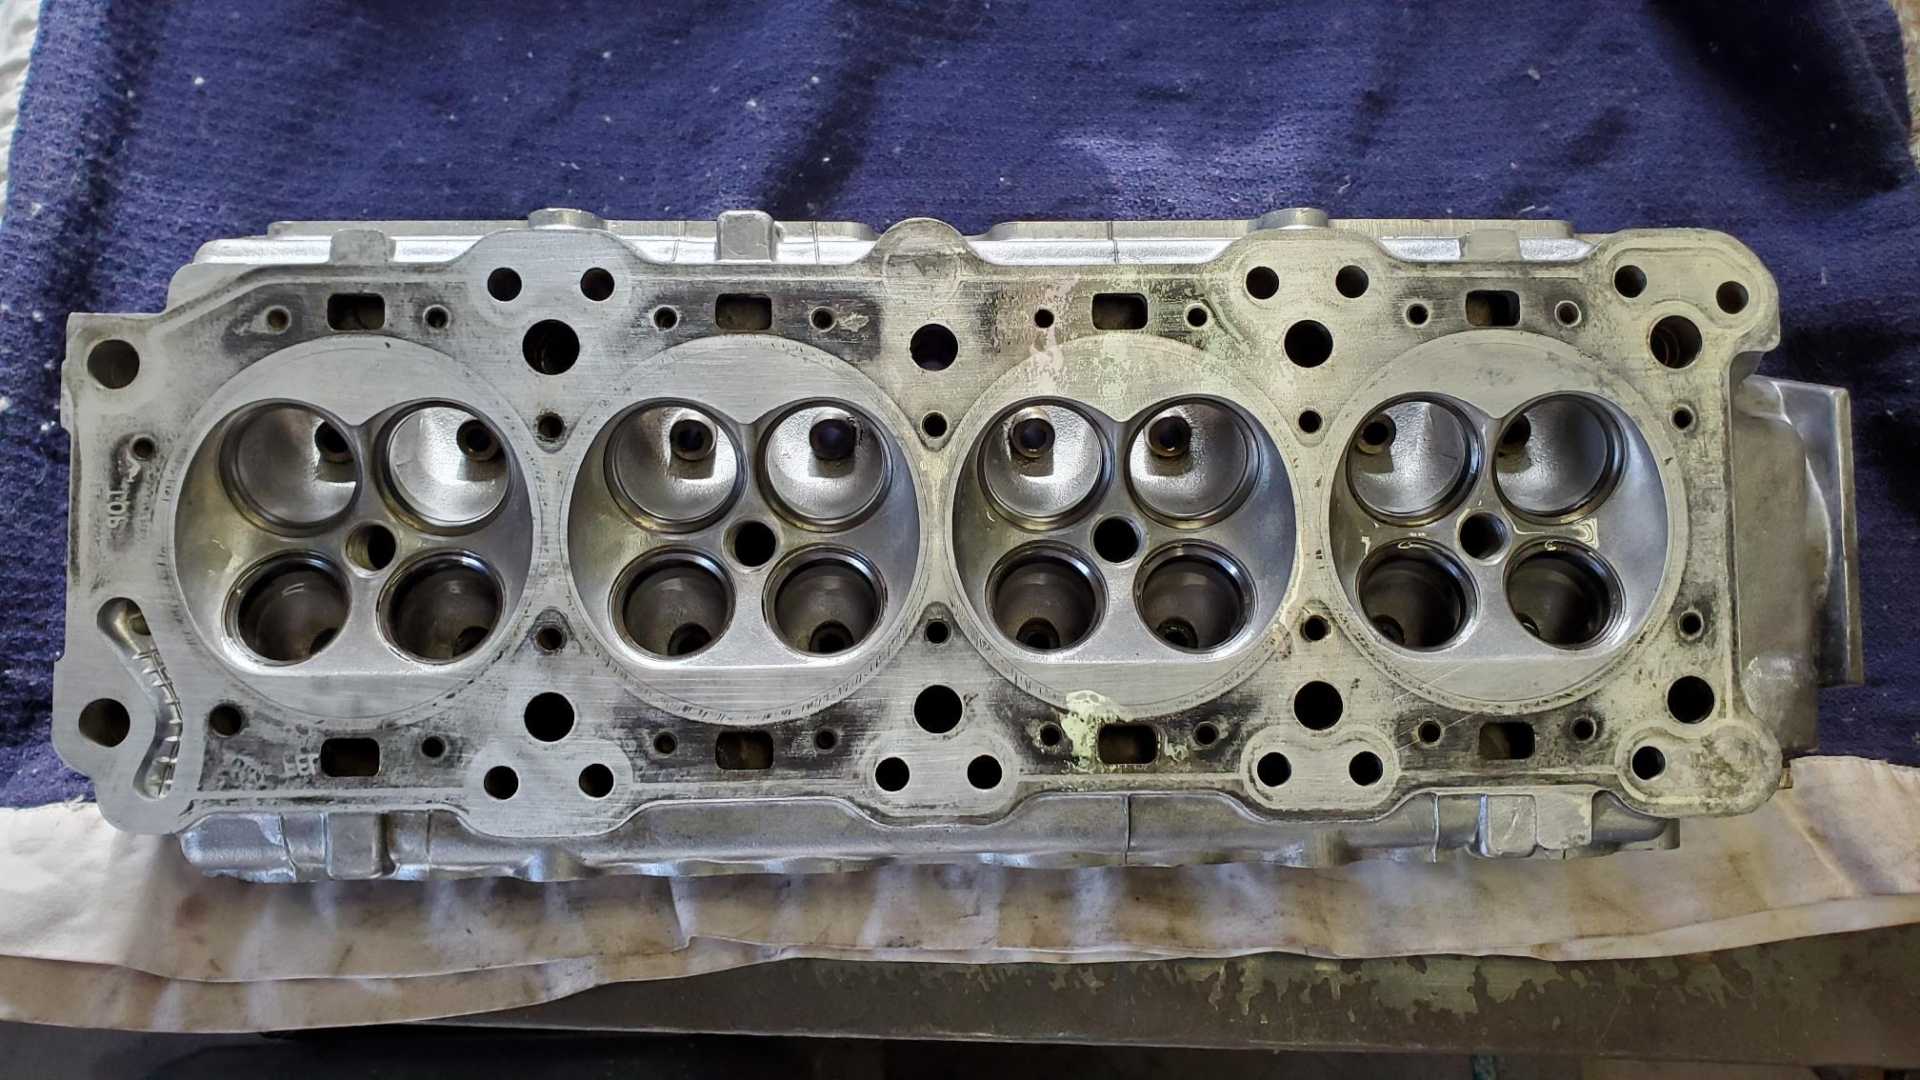
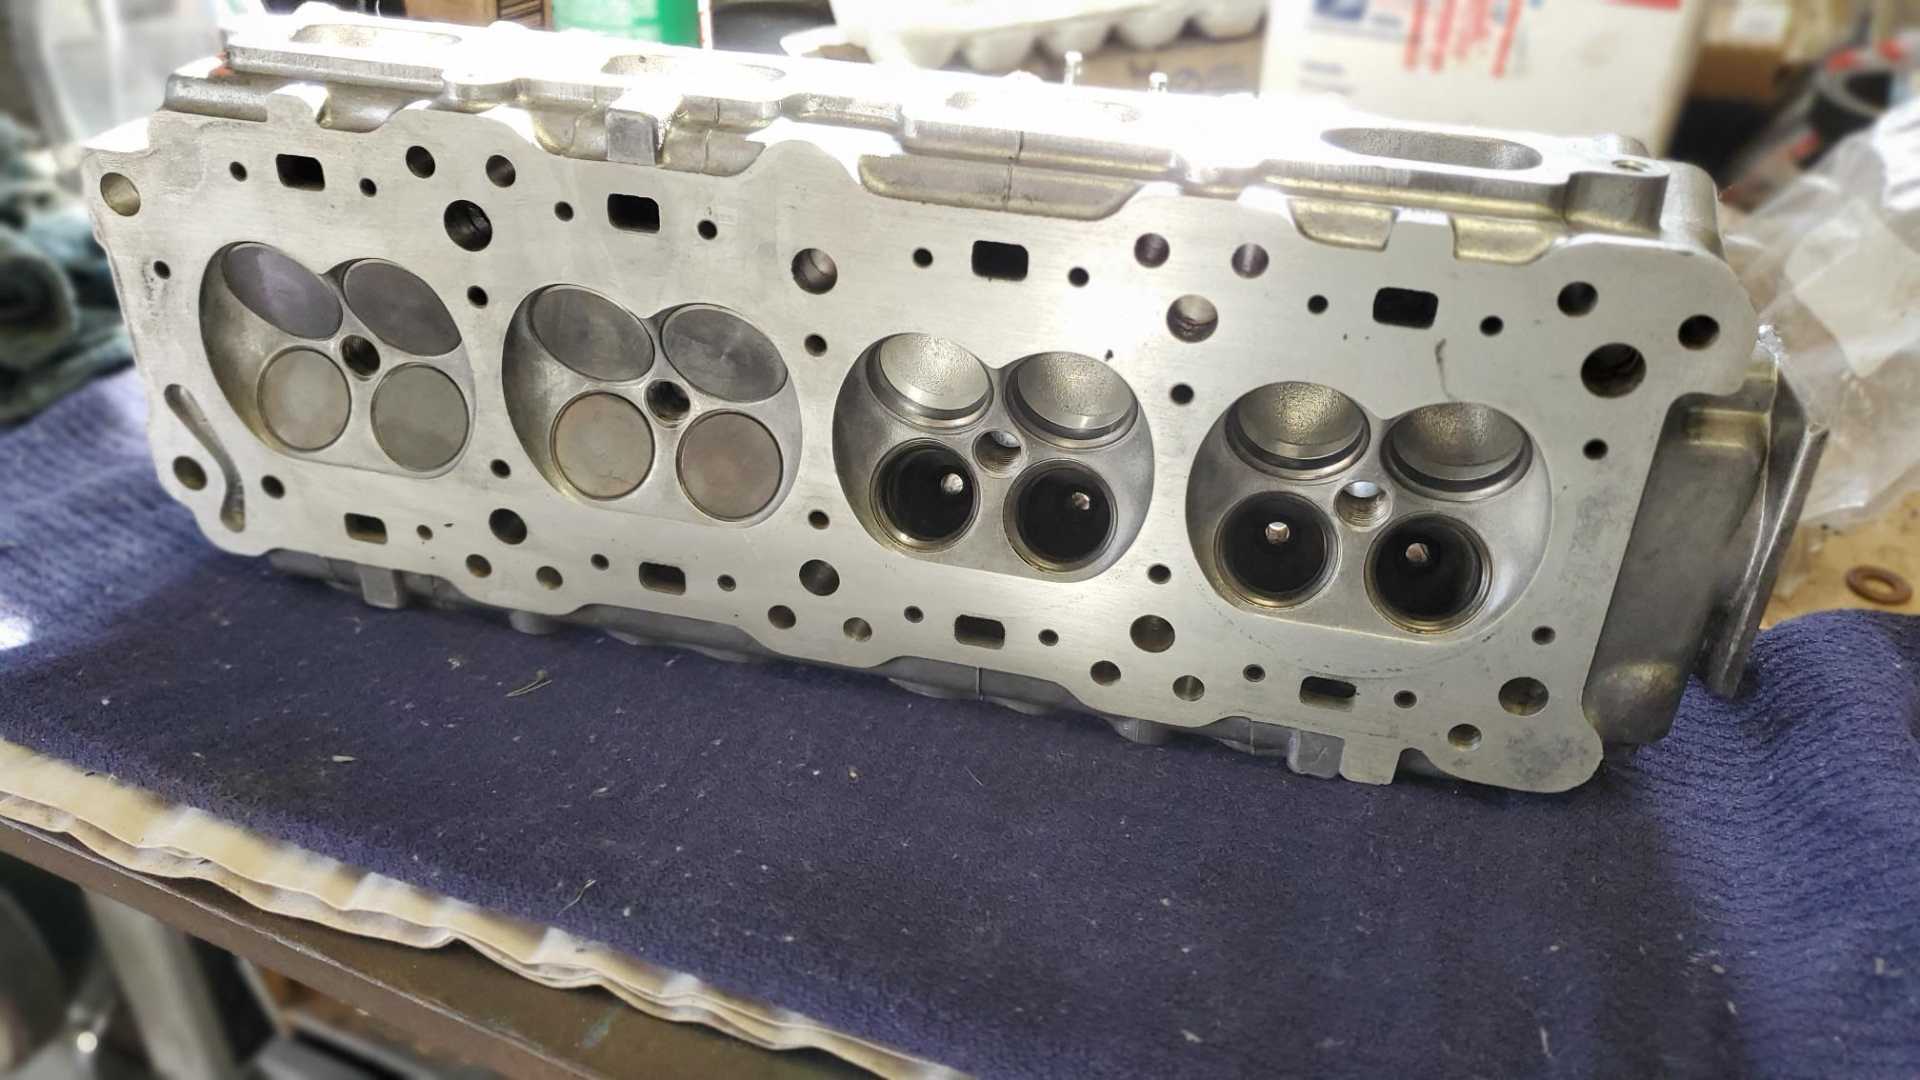
Next up is cleaning up the head. As I’ve mentioned, this engine bent four intake valves when the timing chain tensioner broke. Years ago I ordered four new ones, but take a look at how they compare with the valves that came out of the head.
This head had two different shaped intake valves installed in it. One type has a dimple in the middle, the other is domed. The four new valves I bought are flat. As long as the two valves are the same in each cylinder, does it matter?
I bought the four new valves so long ago, there’s no guarantee that if I buy four more, they’ll all be flat, too.
[This message has been edited by Quadfather (edited 02-21-2021).]
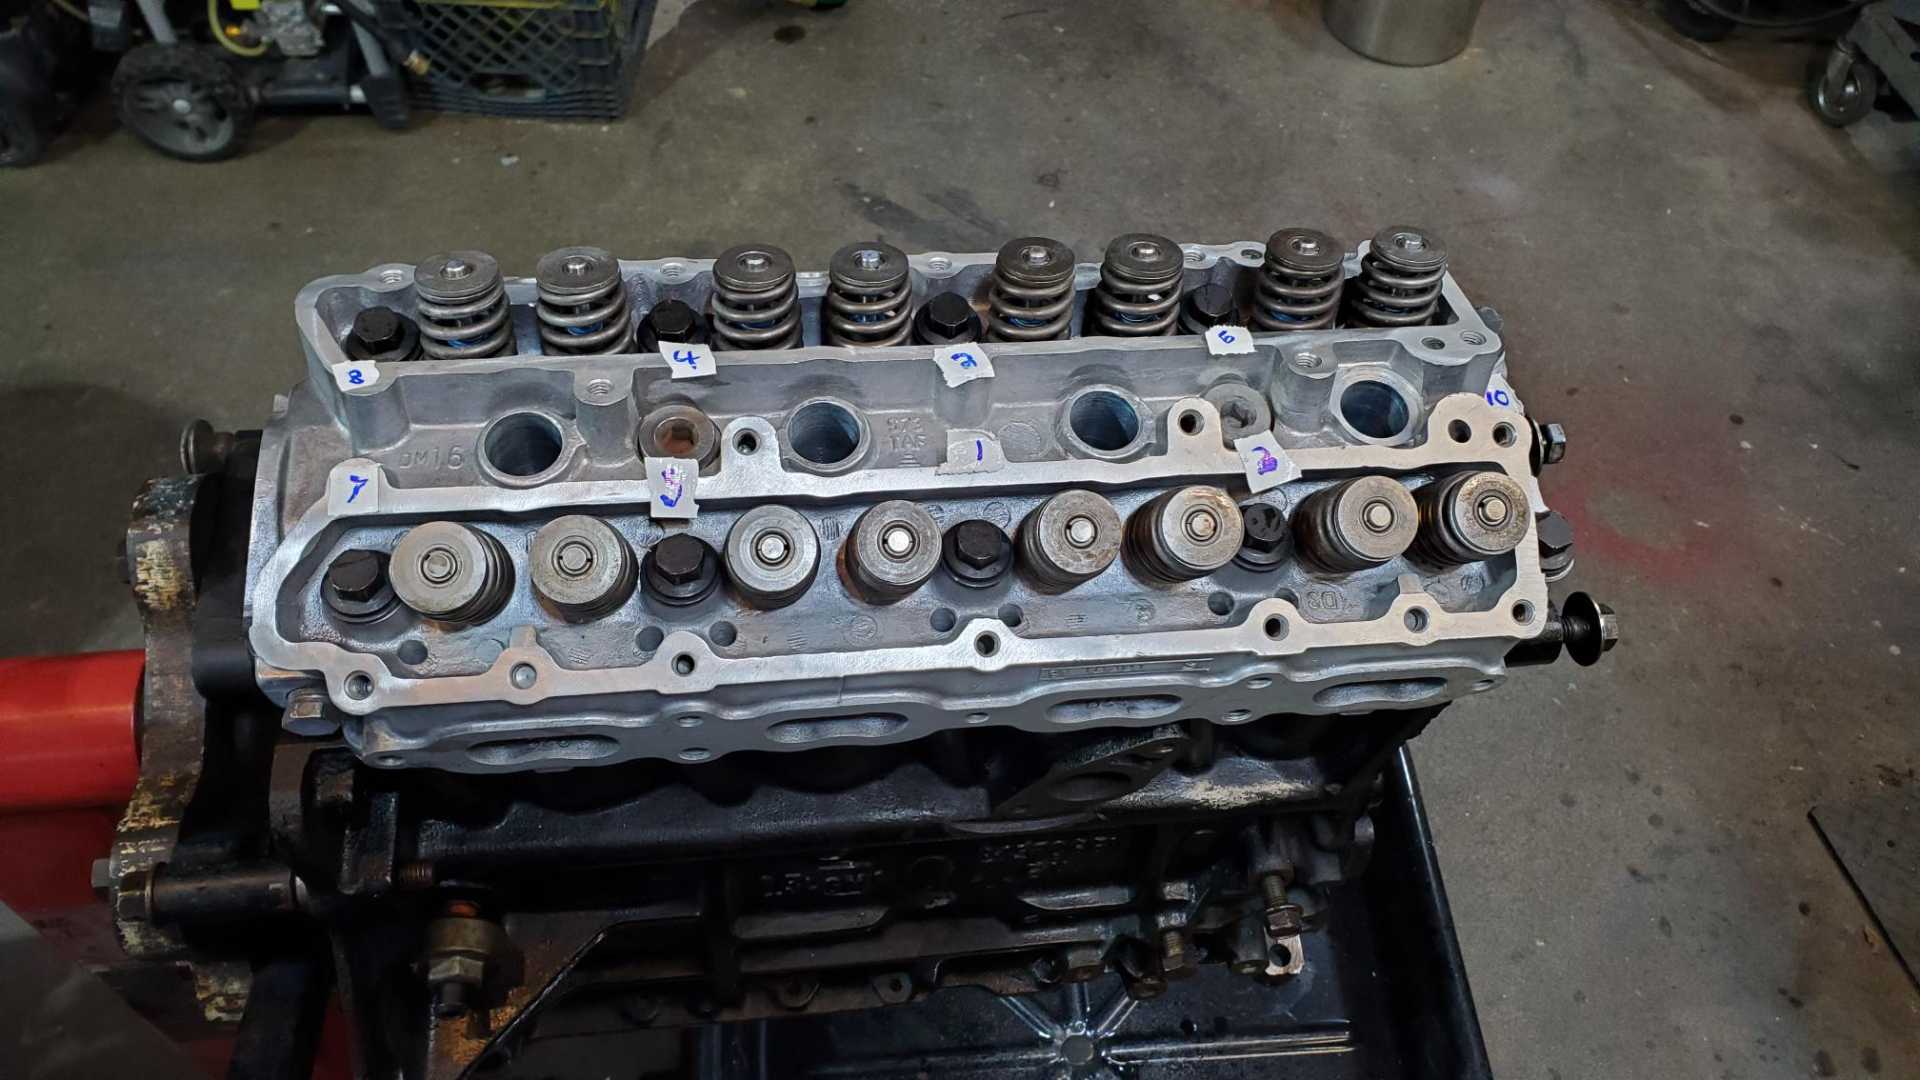
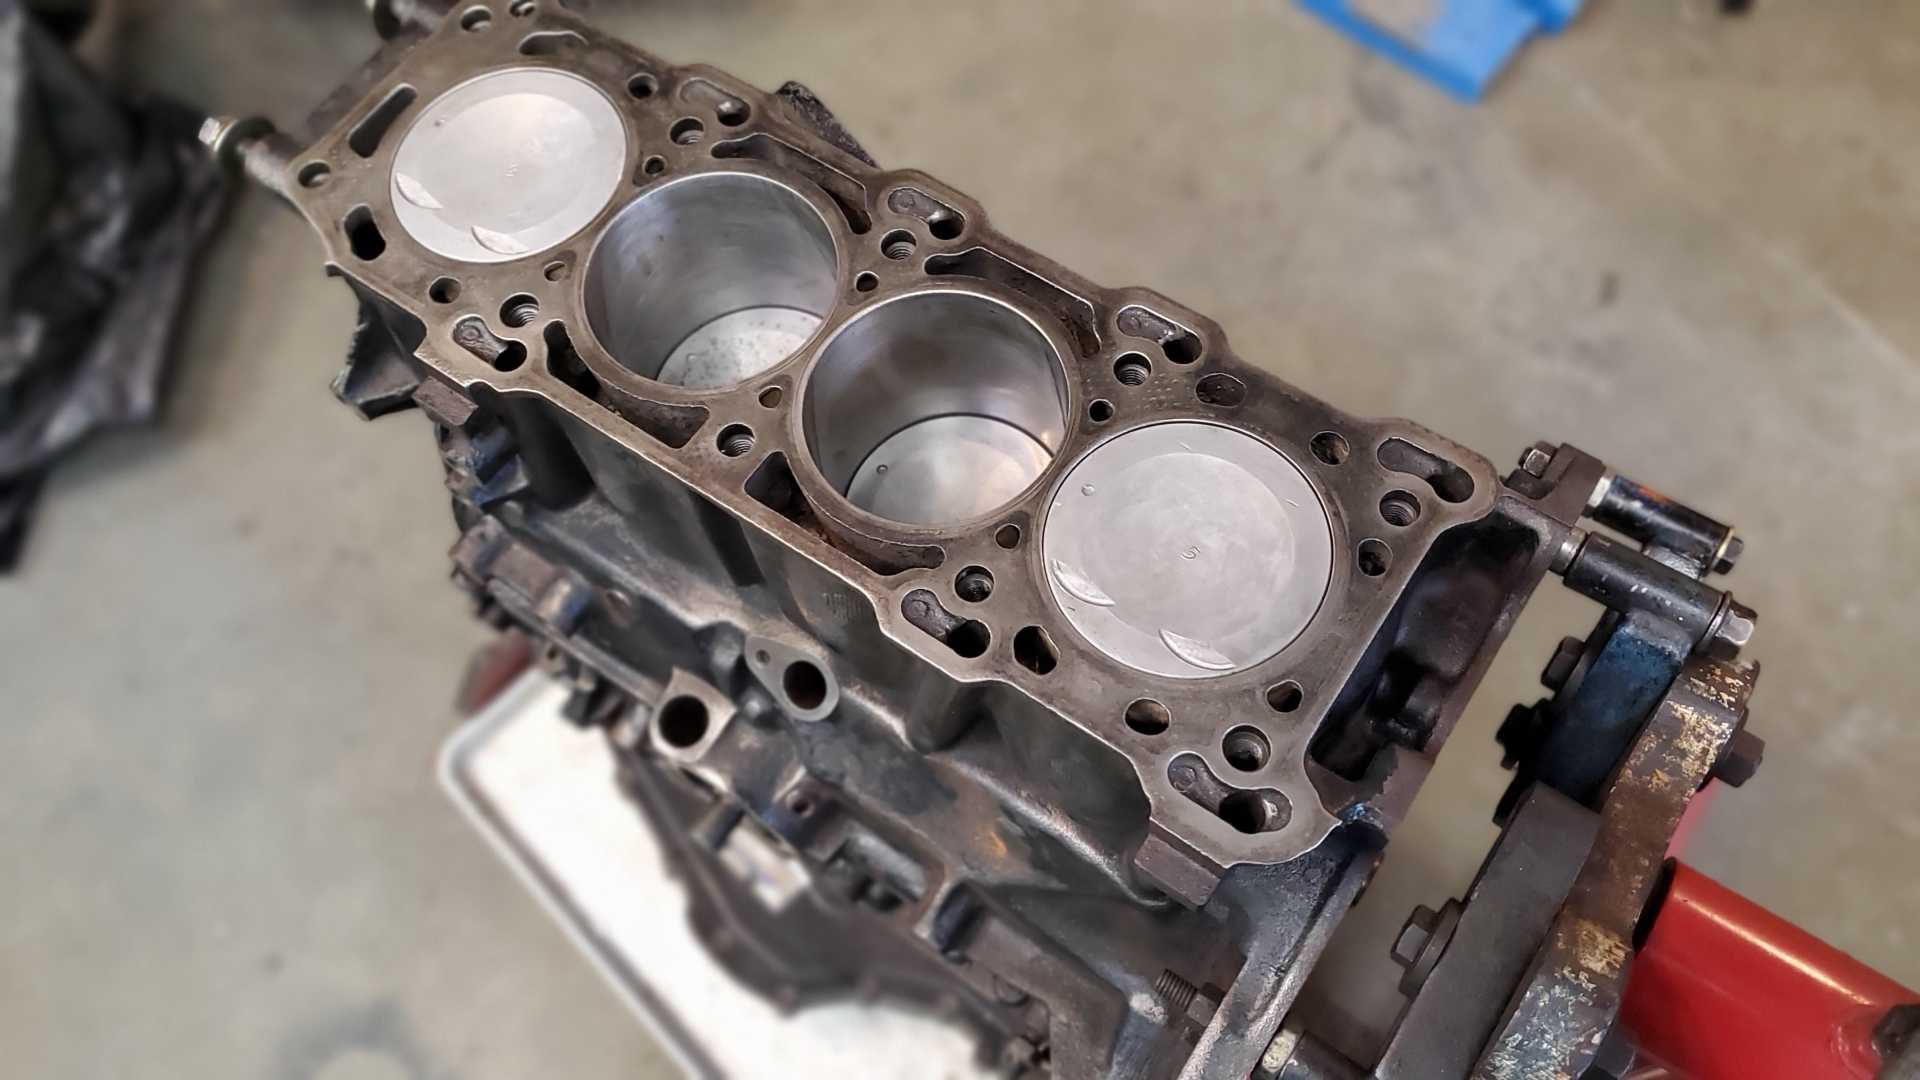
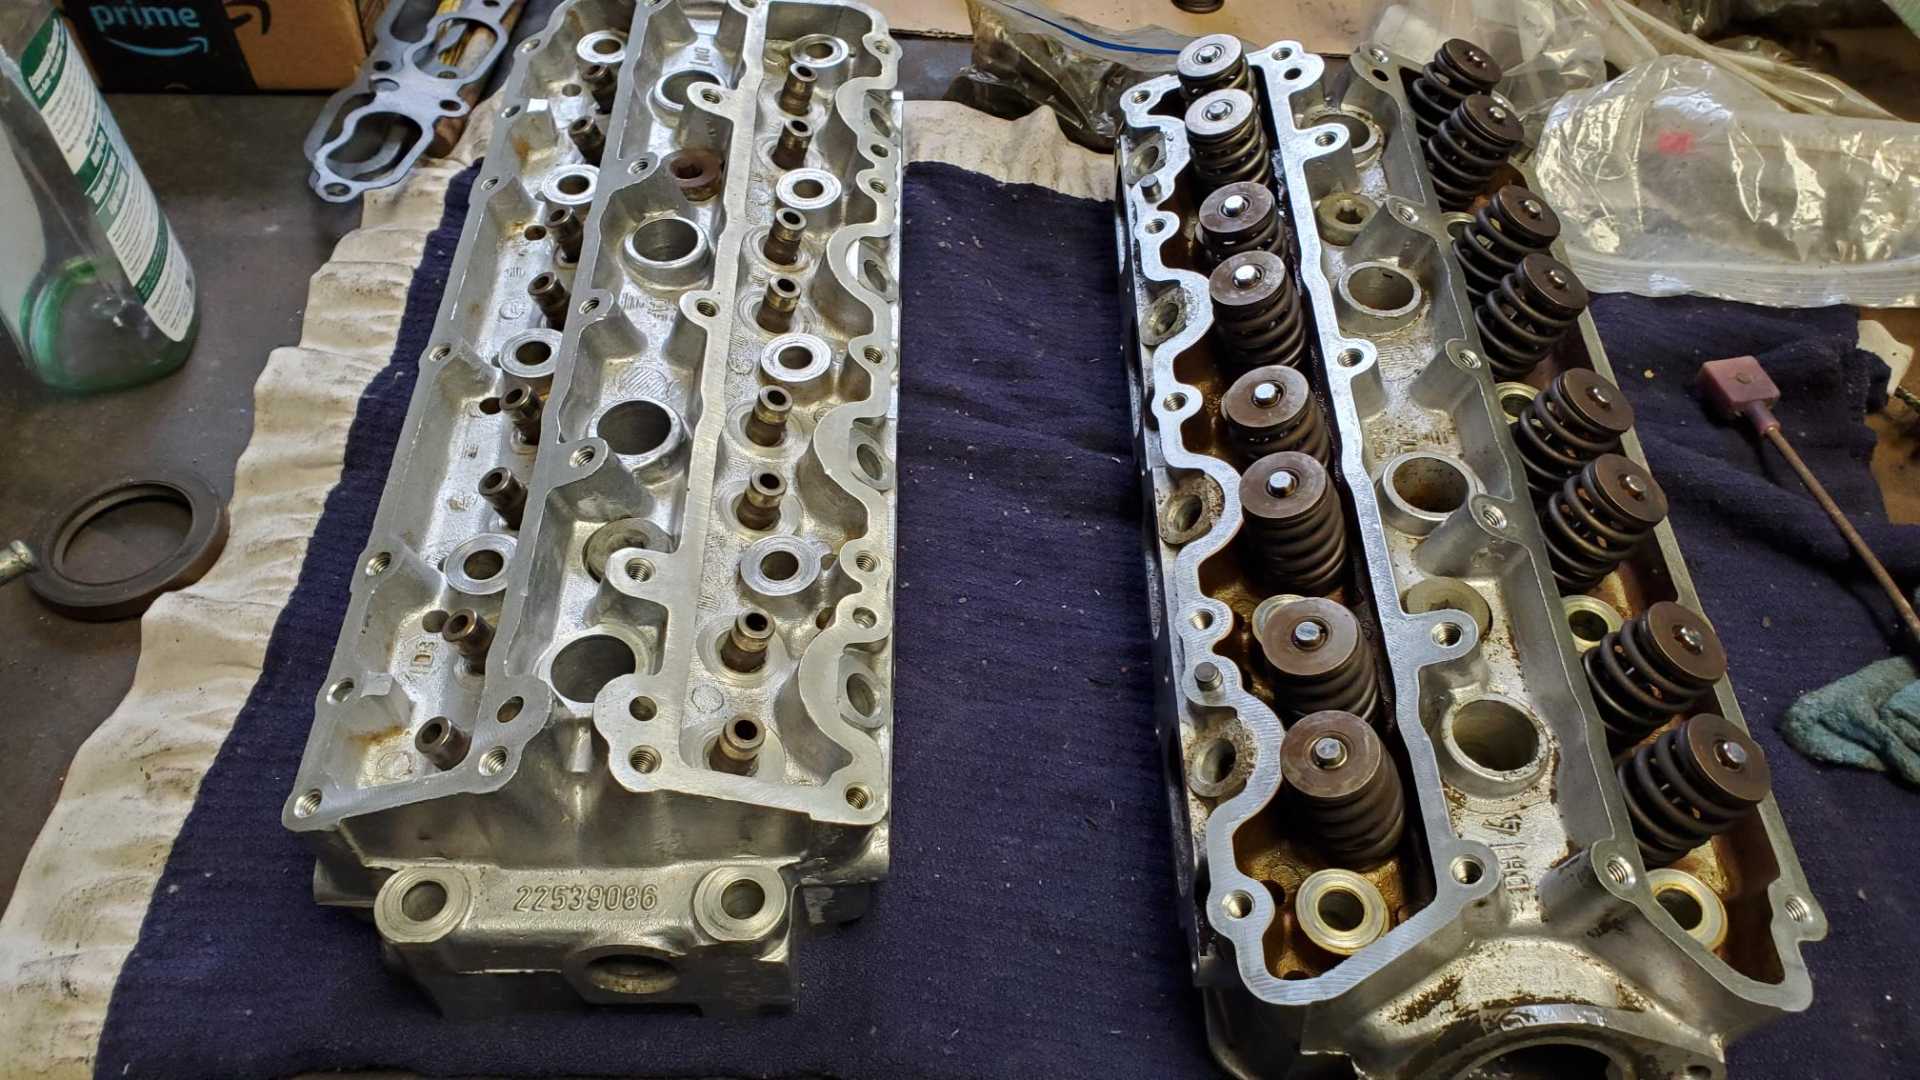
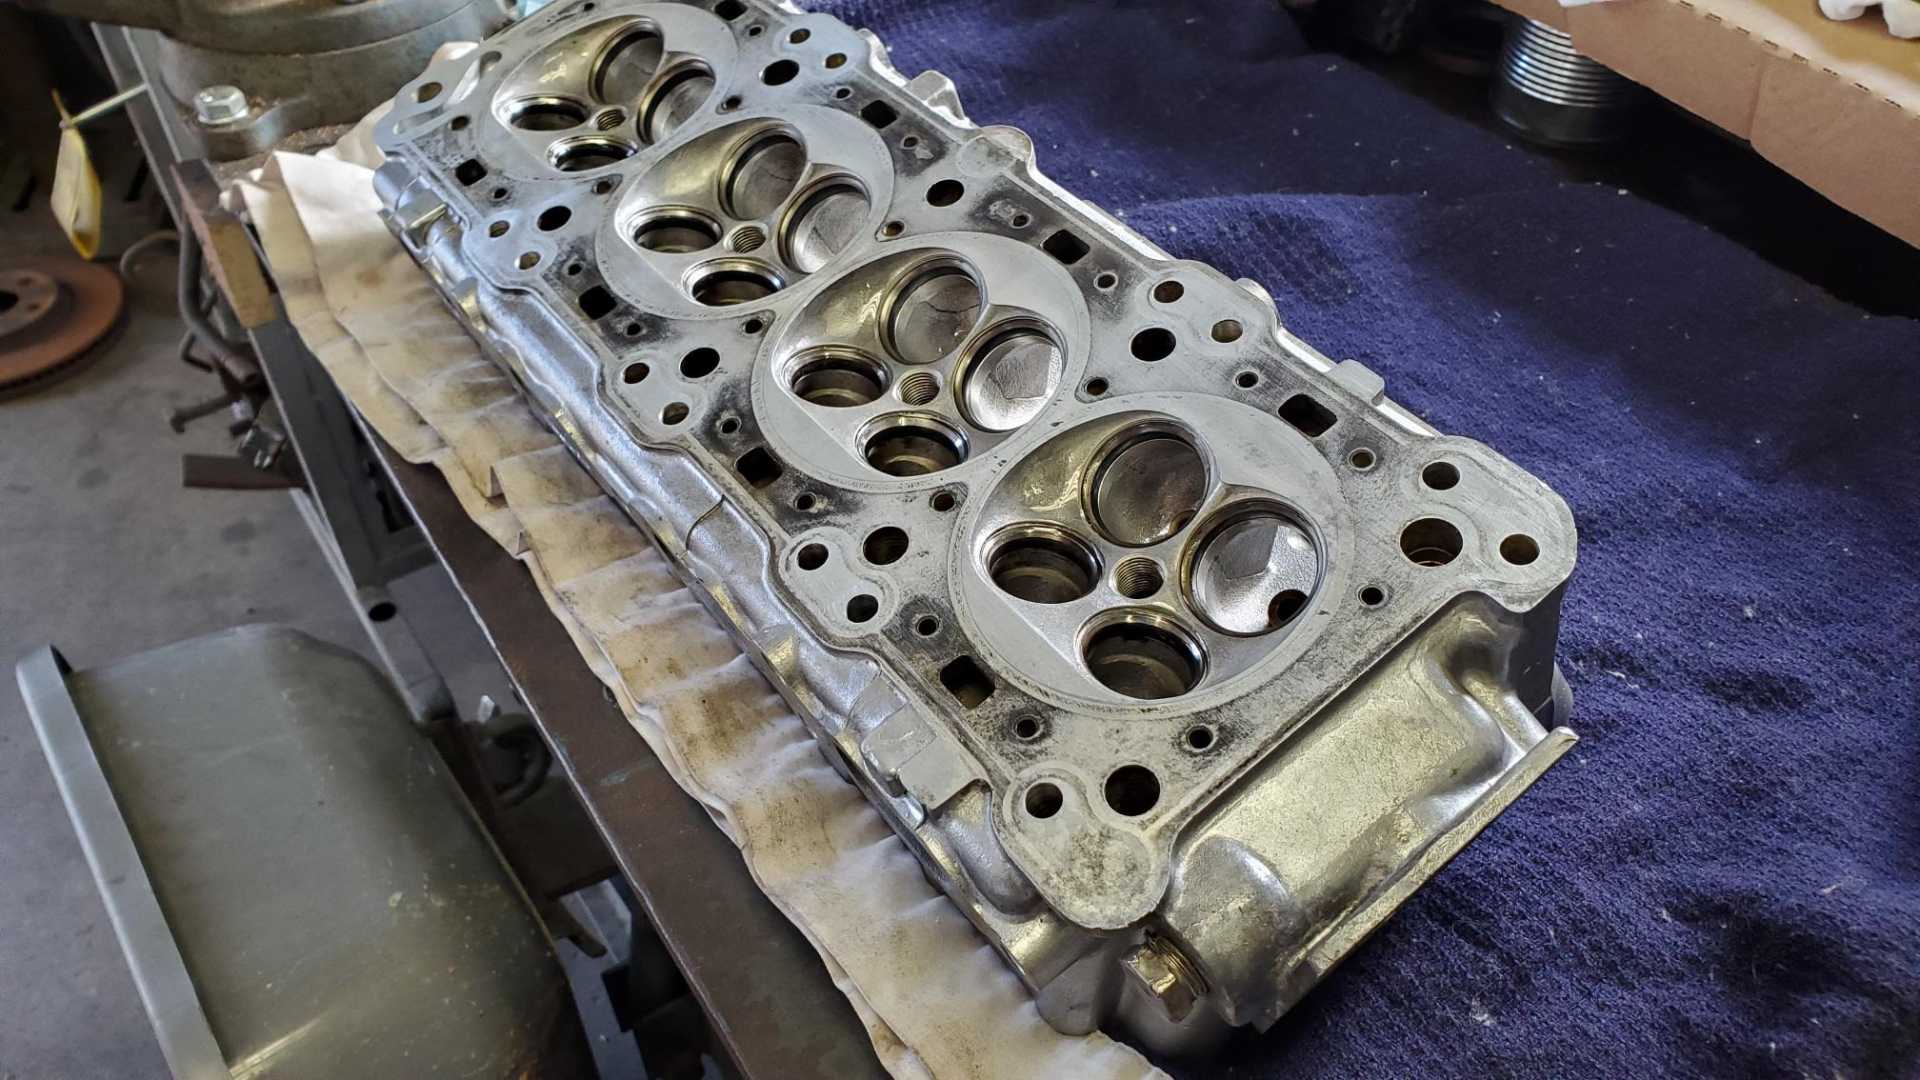
I checked the head from one of my spare Quads and was surprised to see different types of intake valves. This head is also an 086 head, though the engine itself is not an HO.
The intake valves for the cylinder closest to the camera are domed, while the rest are dimpled. Probably means that this is an aftermarket head, but who knows, maybe it came from the factory that way.
This head looks like it's in very good shape. I'm thinking about using it instead of the one that was in my GTZ. The head that was in my GTZ was bought from Cylinder Head International in DFW, so it was perfect when I installed it in the Beretta in 2008. The downside is I put 100,000 miles on it and bent four intake valves when the timing tensioner broke in 2012.
This head is from a salvage yard 1989 Grand Am. The engine had a blown head gasket, but everything else looked fine. So do I reuse the head whose history I know or one that looks good but whose history is a mystery?
[This message has been edited by Quadfather (edited 02-24-2021).]
This is what happens when your brother uses your hydraulic press to split firewood.
I told him it was designed so that the force is focused on a small area right in the middle of the cross piece, not a piece of wood that spreads the force in a wide area.
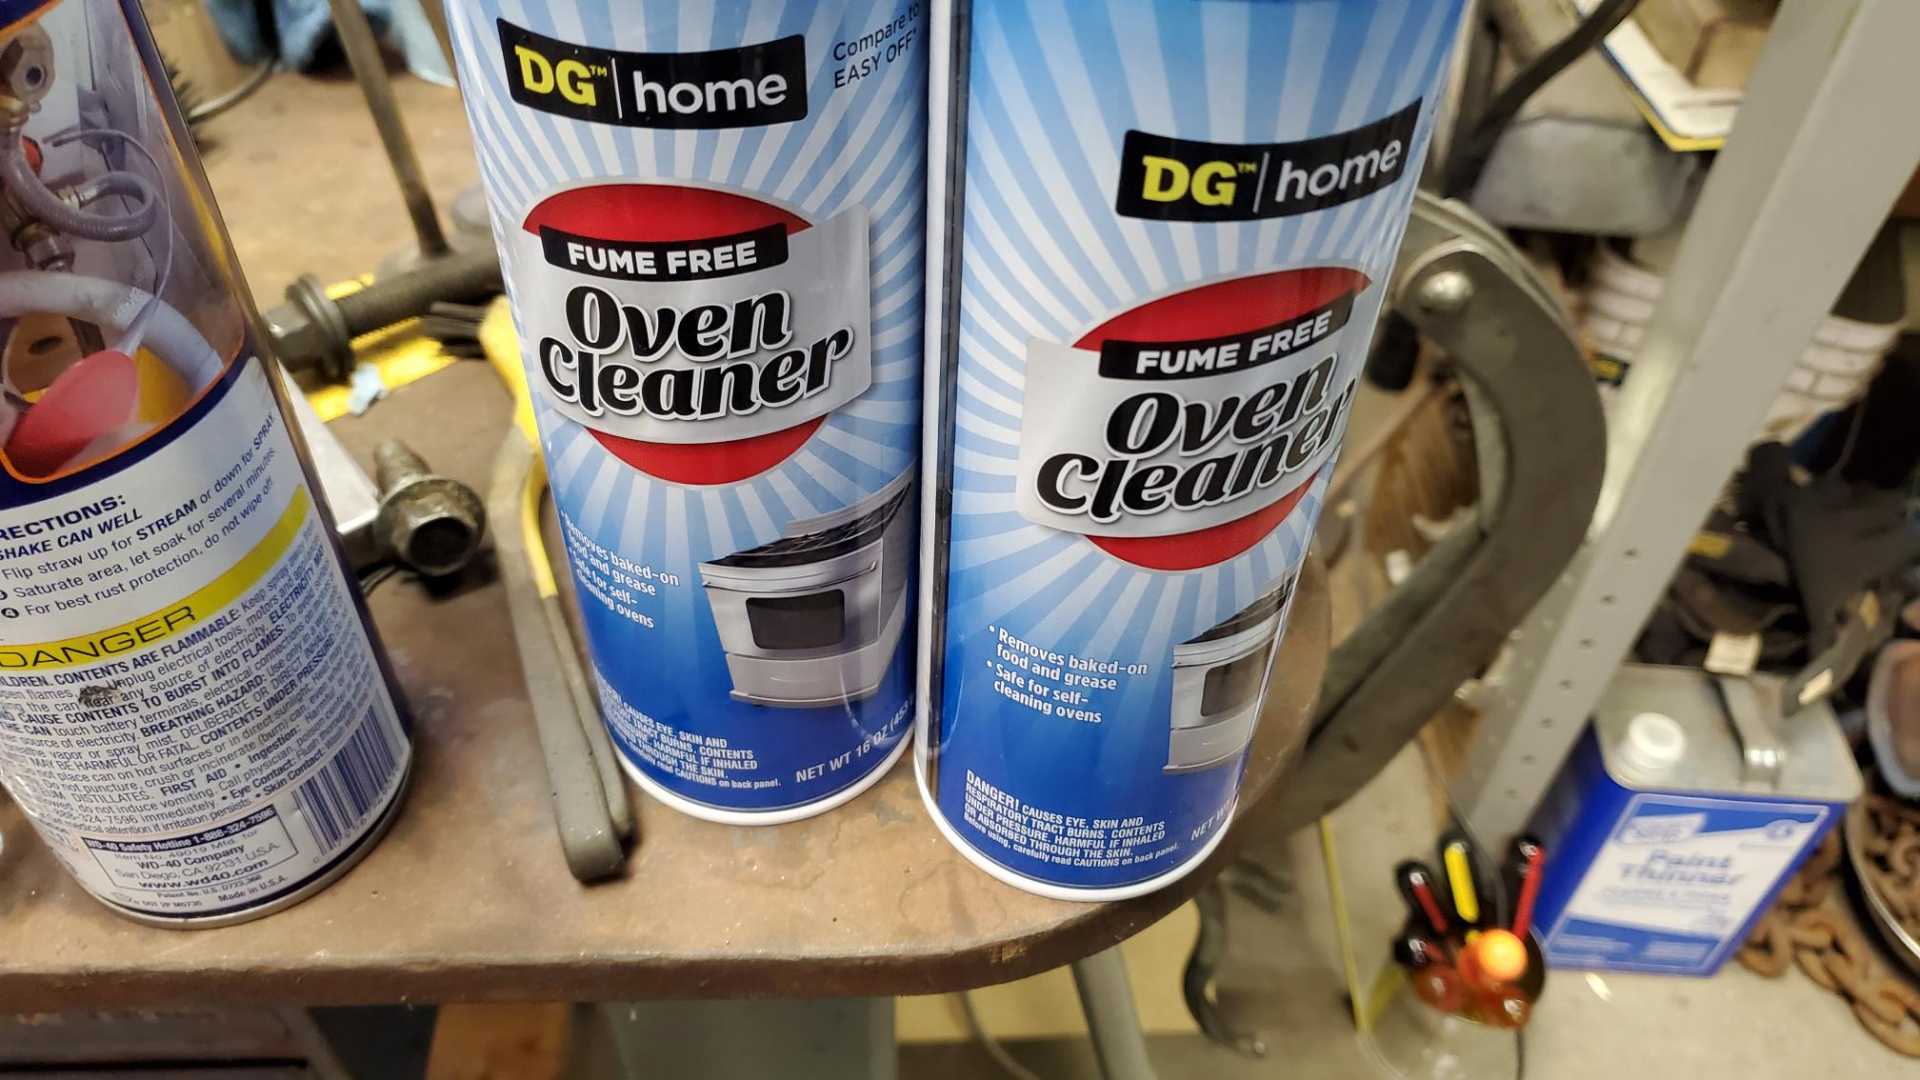
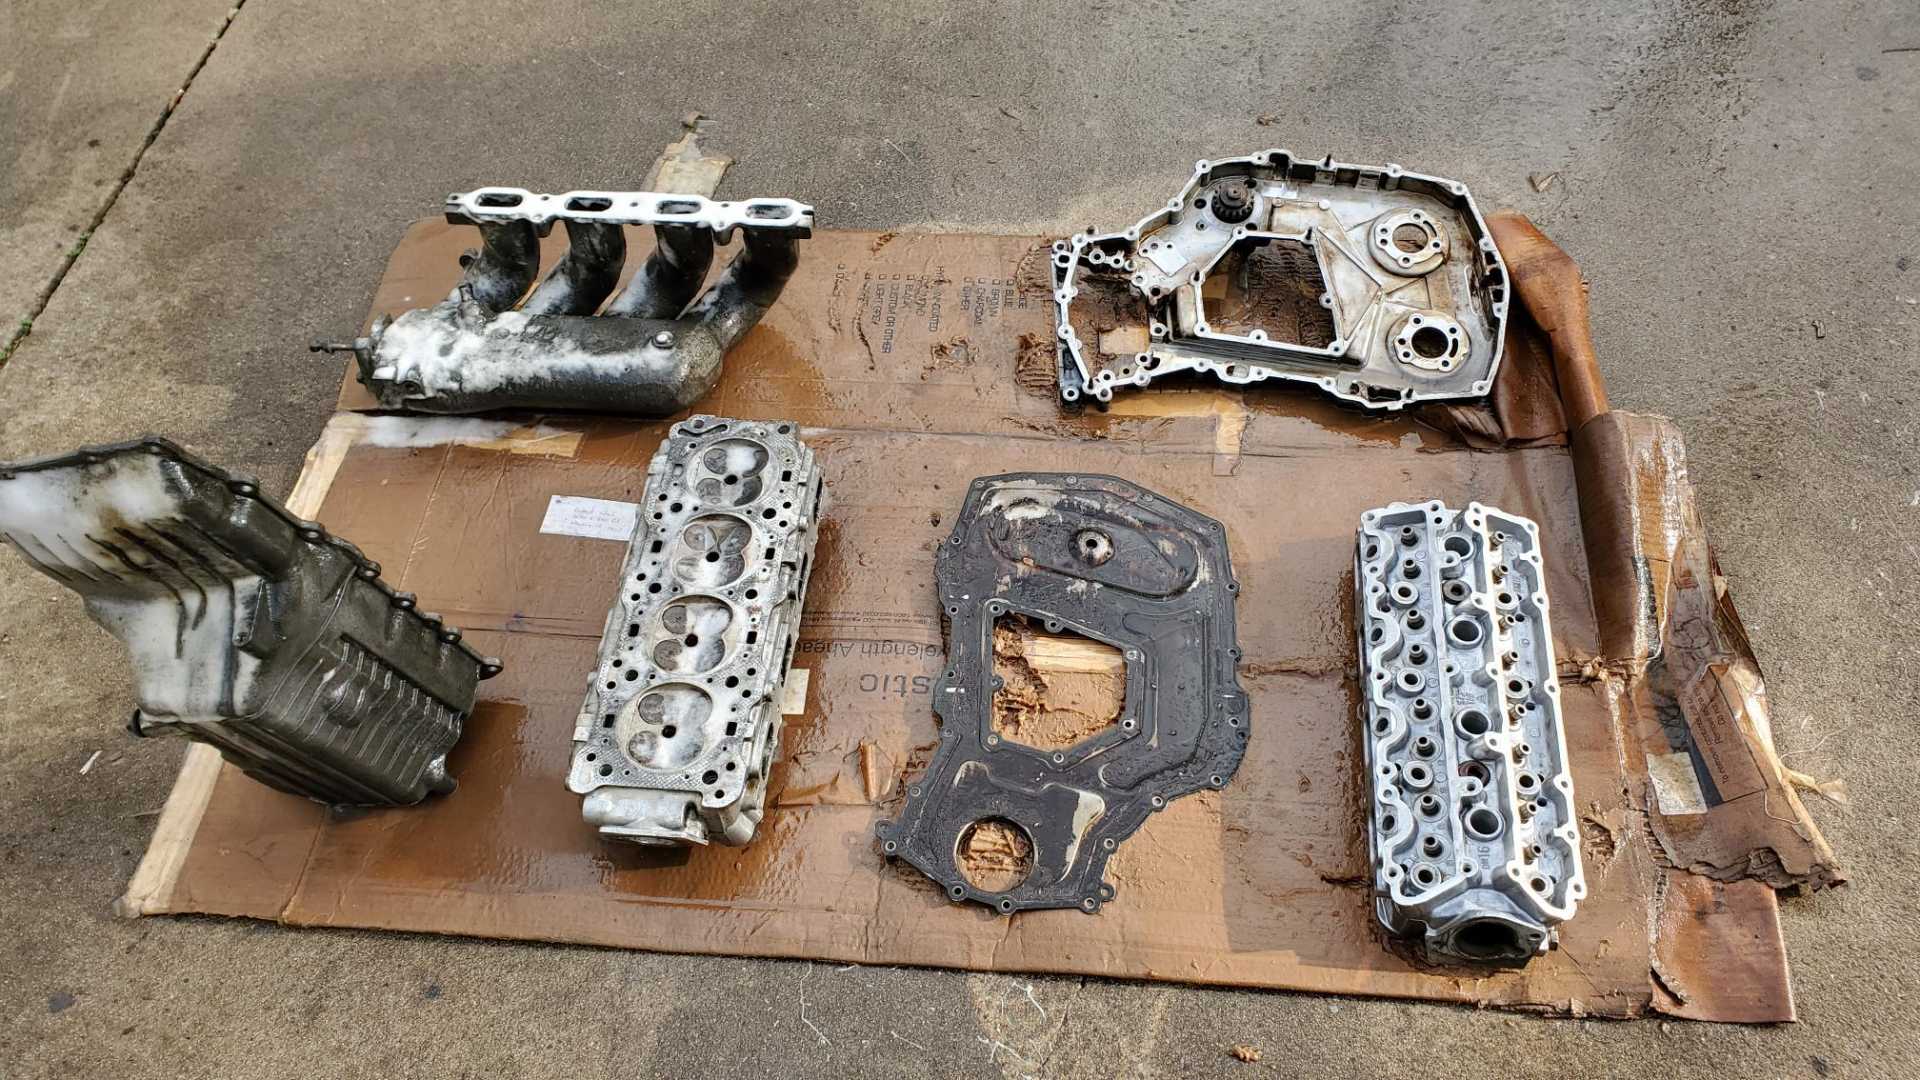
Spent time in the shop cleaning engine parts this weekend. Took me about two hours using small brushes and brake cleaner to get the head mostly clean. Then I spent time on YouTube looking for a better way and decided to try the cheap oven cleaner route.
I heeded the warnings not to leave the cleaner on the aluminum too long, and used a pressure washer to blast it off
The head came out great, though there's still some carbon in the exhaust ports. I also cleaned the spare head just to see how it would look and it's pretty clean considering the valves and springs are still installed.
For the intake manifold and the timing cover the cleaner would need to stay on for two or three hours to get the oil and dirt off, and I just didn' have that kind of time today.
[This message has been edited by Quadfather (edited 02-28-2021).]
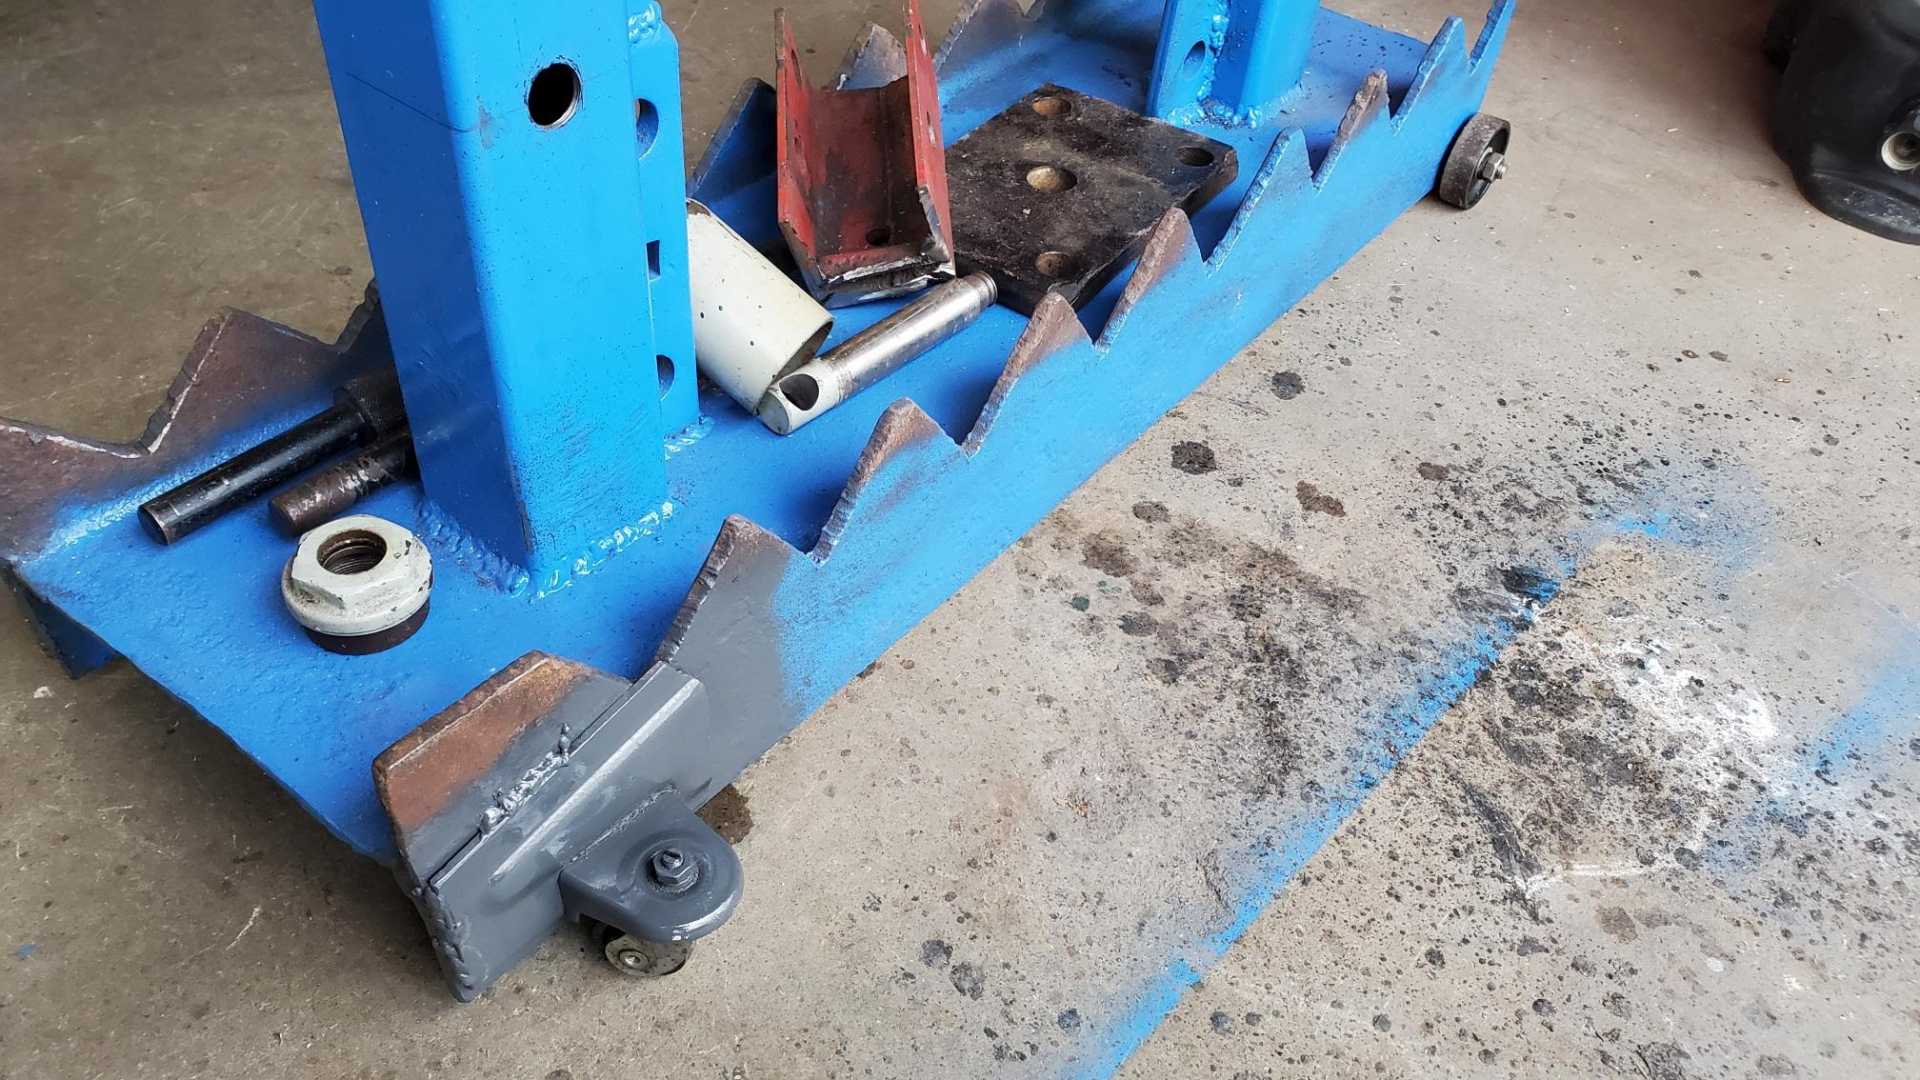
More progress. But first, the last update about my press. I ended up drilling holes through the uprights, instead of using the holes from the Soloflex pieces. Also, parts of a broken floor jack worked great to make it possible to roll it around the shop.
[This message has been edited by Quadfather (edited 03-29-2021).]
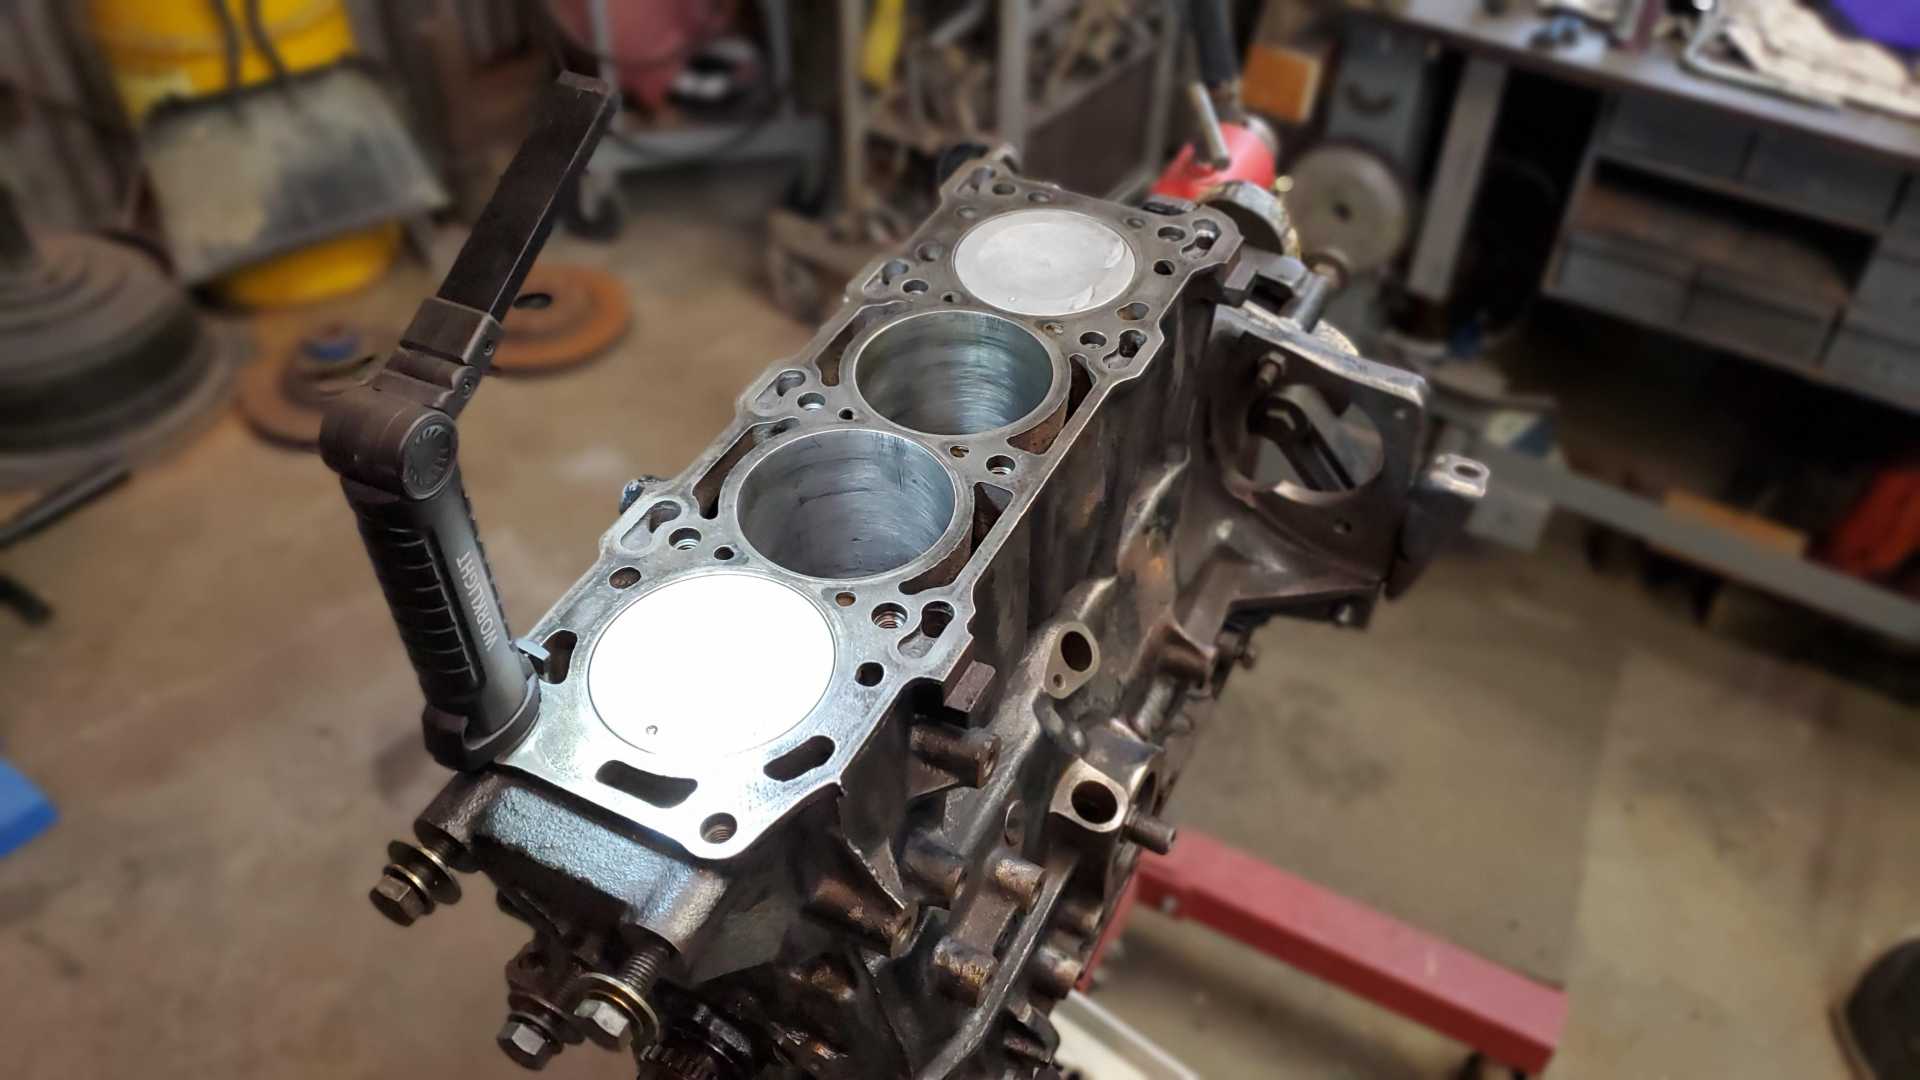
Now that the cleaning is finished, the process of reassembling the head has begun. As I mentioned, this head was a reman bought from Texas. I put 100,000 miles on it but it still looks pretty good.
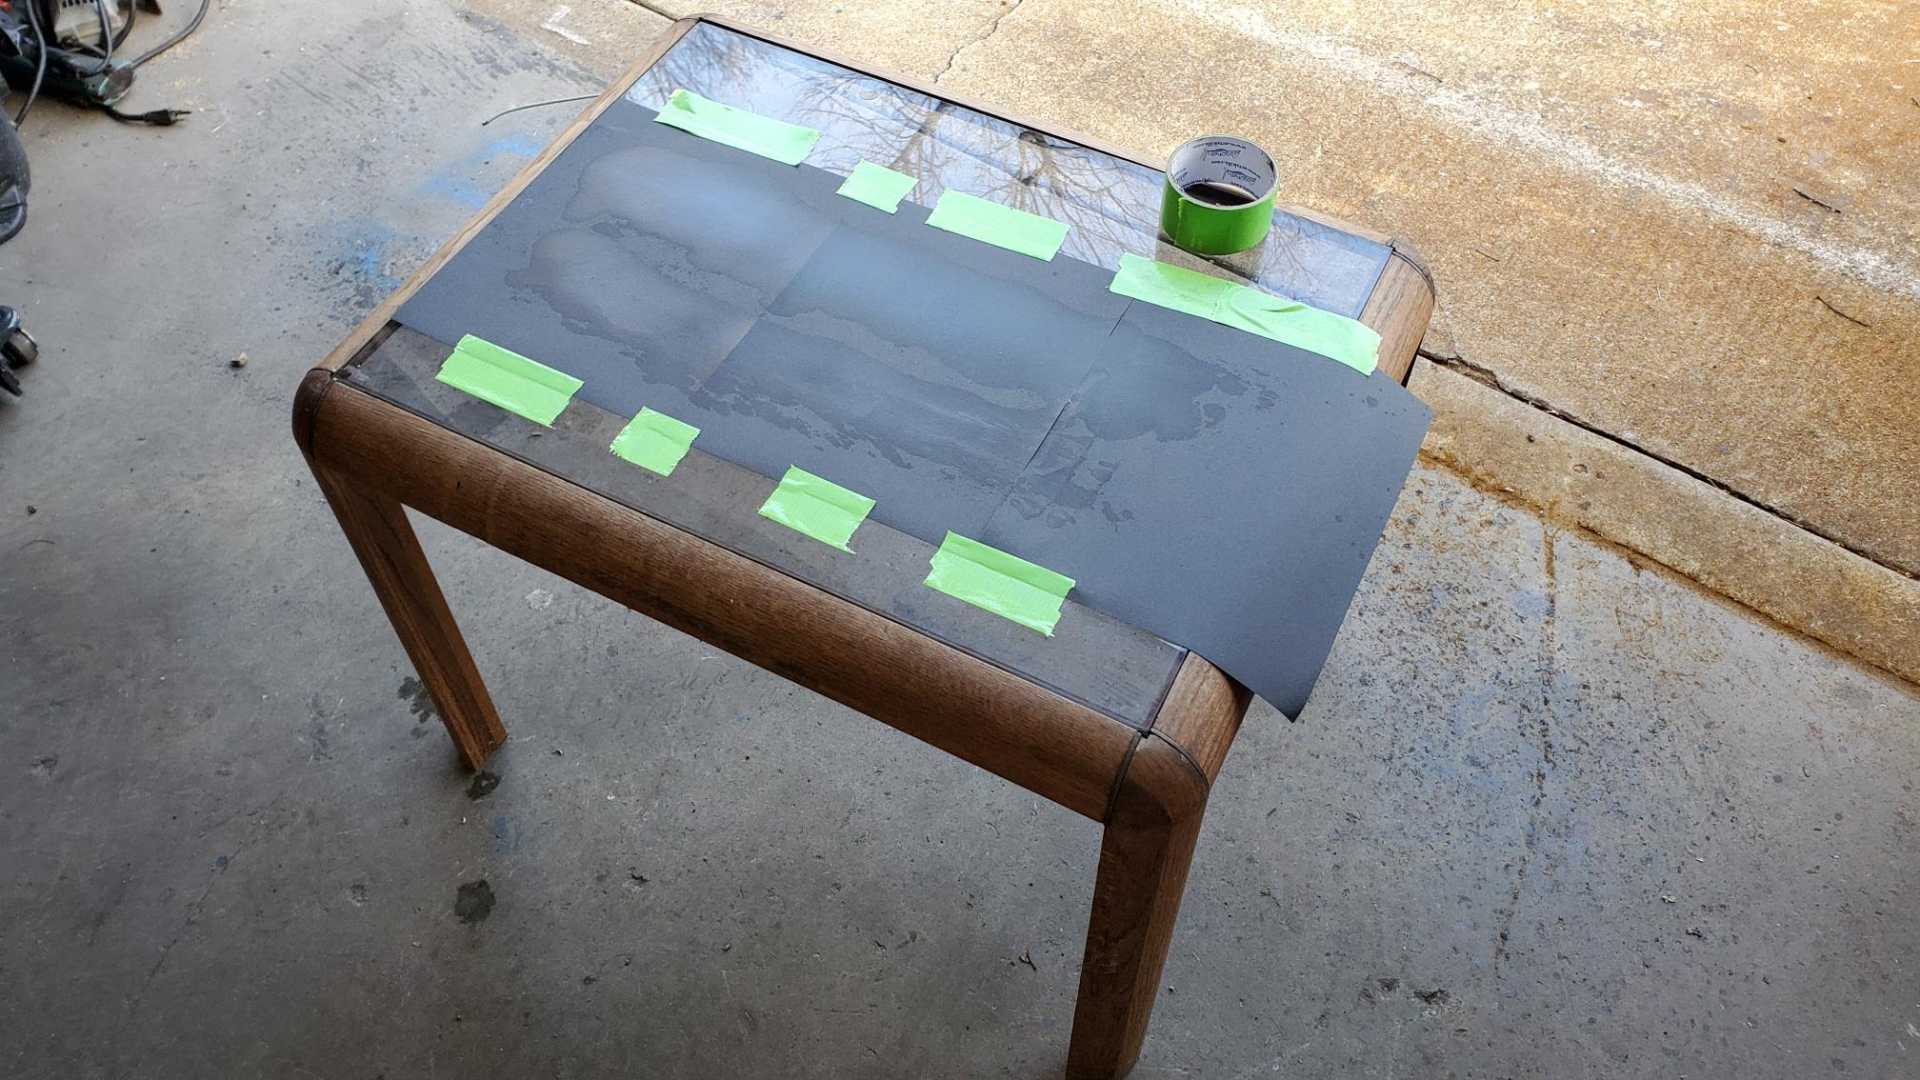
It was also pretty flat, less than .003” out of true, if I measured correctly. Knowing how finicky the Quad 4 head/block relationship is I wanted to get it as clean and flat as possible, so I did the right thing and watched some YouTube videos on how to resurface it myself.
I bought a glass table at a garage sale Saturday for $5. The glass is a quarter inch thick, so I taped some 225 grit sand paper to it and got to work.
Turns out just two pieces of sand paper worked best. Overall I spent a total of about 5 minutes actually sanding the head. Here’s video I shot of myself.
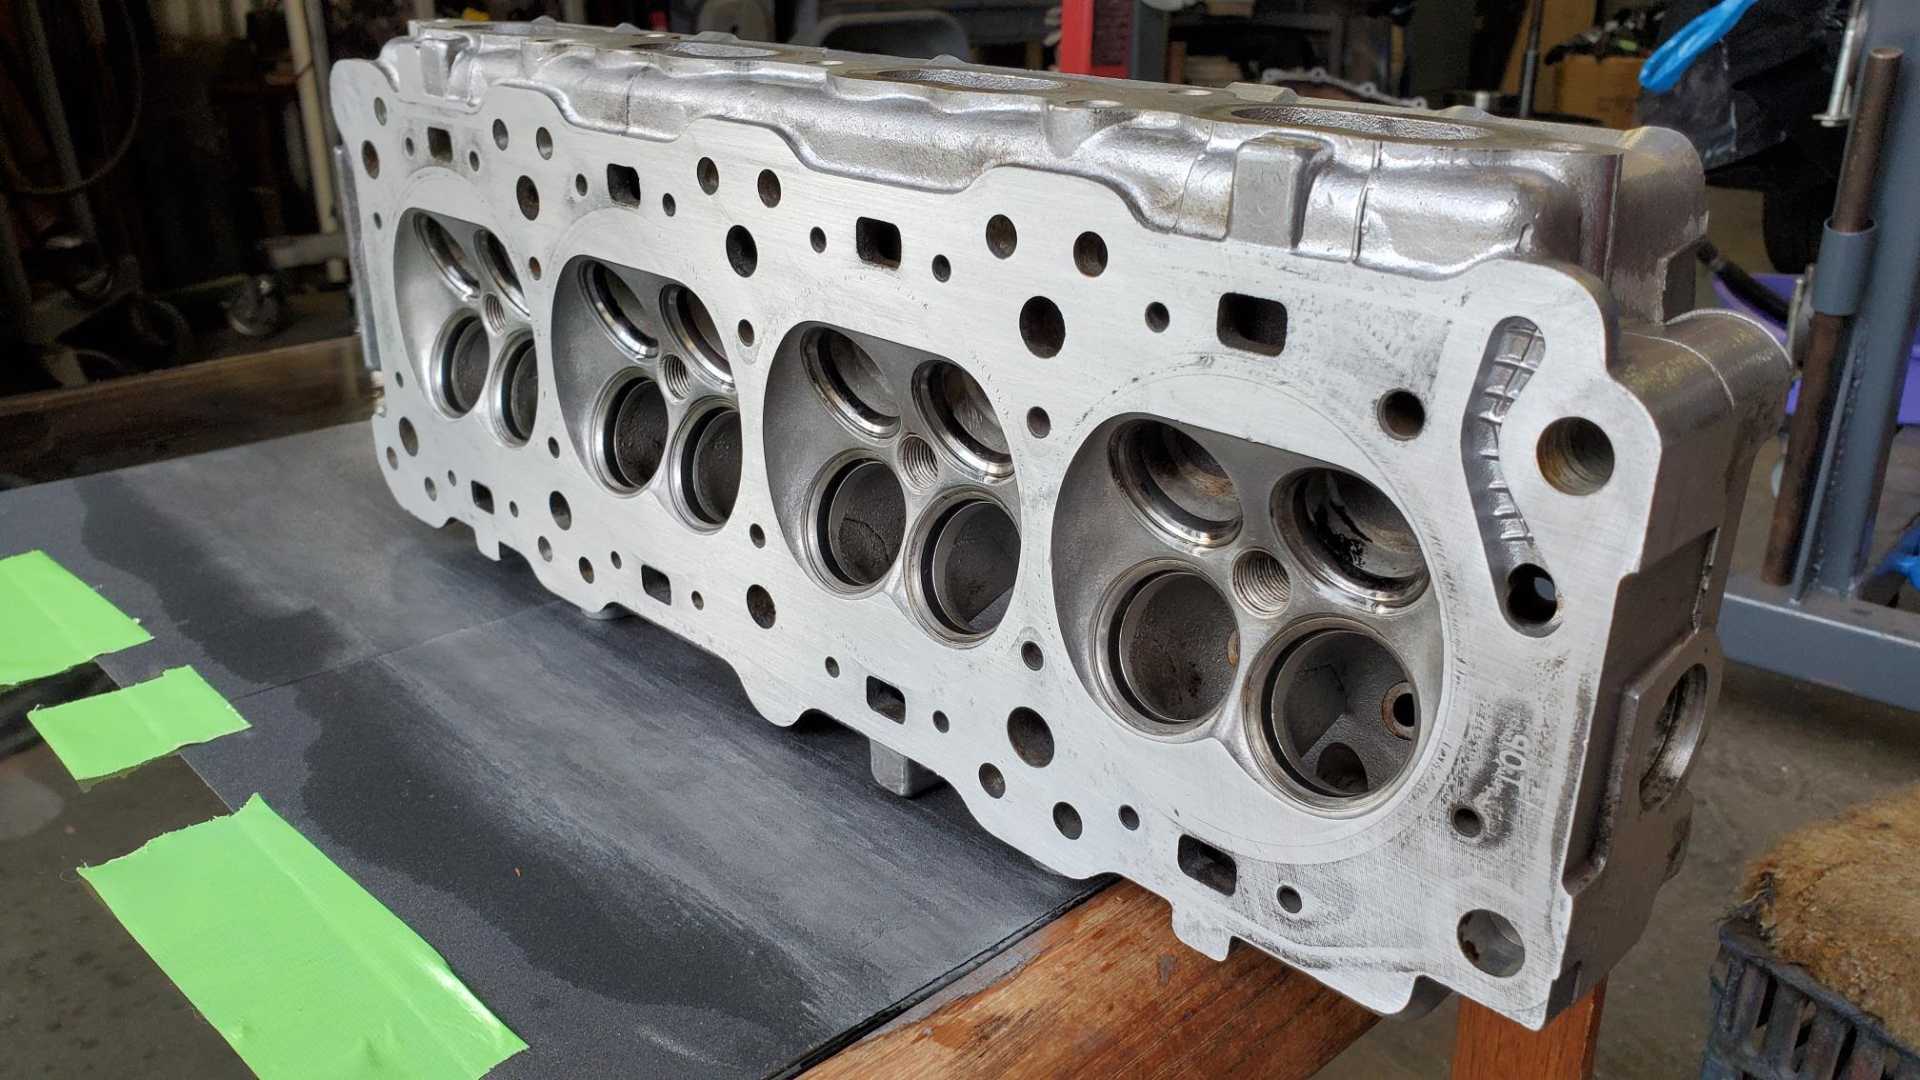
The results appear to be excellent. This first pic was about halfway through the process.
It still has some faint divots around the last combustion chamber, but overall it looks and feels smooth.
As you can see I got half the valves reinstalled. I lapped the valves using the electric drill/vacuum hose method, and leak tested those two sets by screwing in a spark plug and filling the combustion chamber with brake cleaner. No leaks that I could see.
Took me three hours just to get those eight valves installed and tested. Hopefully I can finish the rest this week. I’m also trying to resist the temptation to disassemble the rods and pistons to make sure I got the rings installed correctly.
[This message has been edited by Quadfather (edited 03-29-2021).]
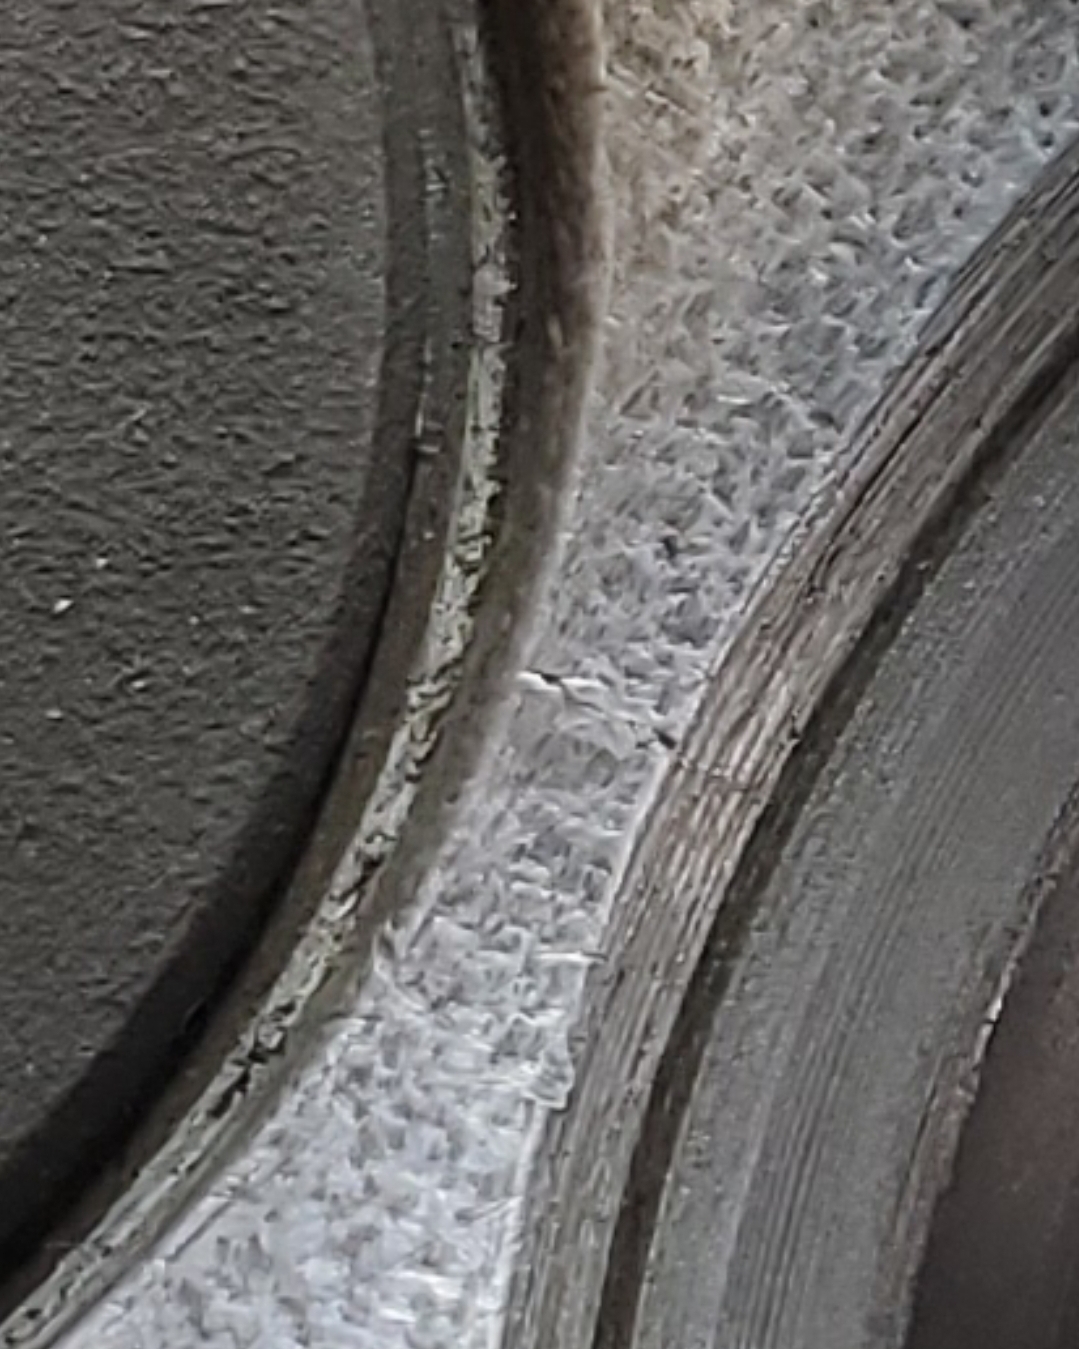
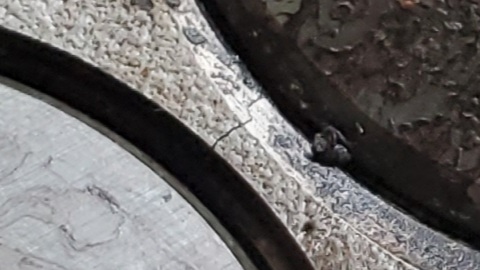
Well, another setback. Finally got back to working on the head, and noticed a crack in the number 1 combustion chamber between the intake and exhaust valves.
It actually looked worse when I first noticed it. Somehow spraying it with brake cleaner made it harder to see. Not to worry, I thought, I’ll just grab my spare 086 head. Of course, it has a similar crack, in the combustion chamber for cylinder #2.
Bummed. Cylinder Head International has Quad 4 086 heads for $225, the same price I paid for this head in 2008. Now to talk my wife into letting me buy one.
[This message has been edited by Quadfather (edited 04-10-2021).]
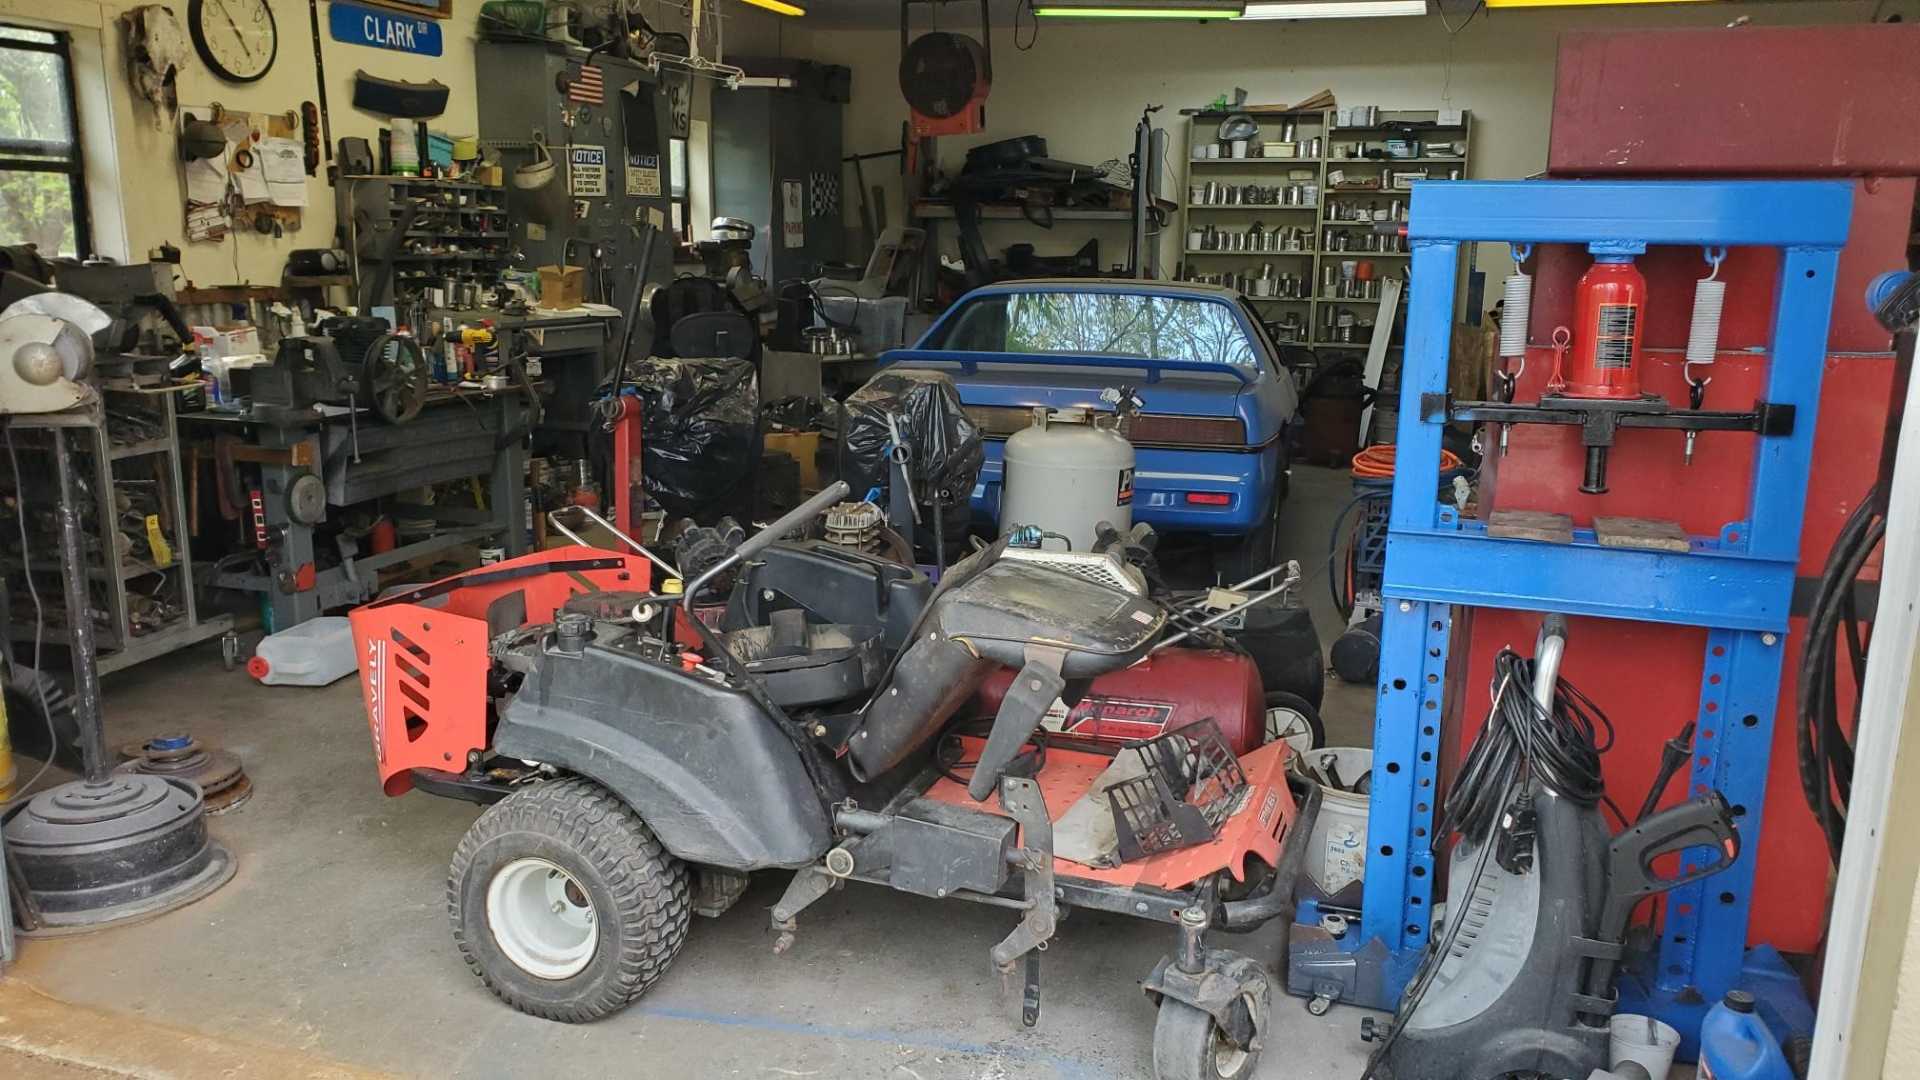
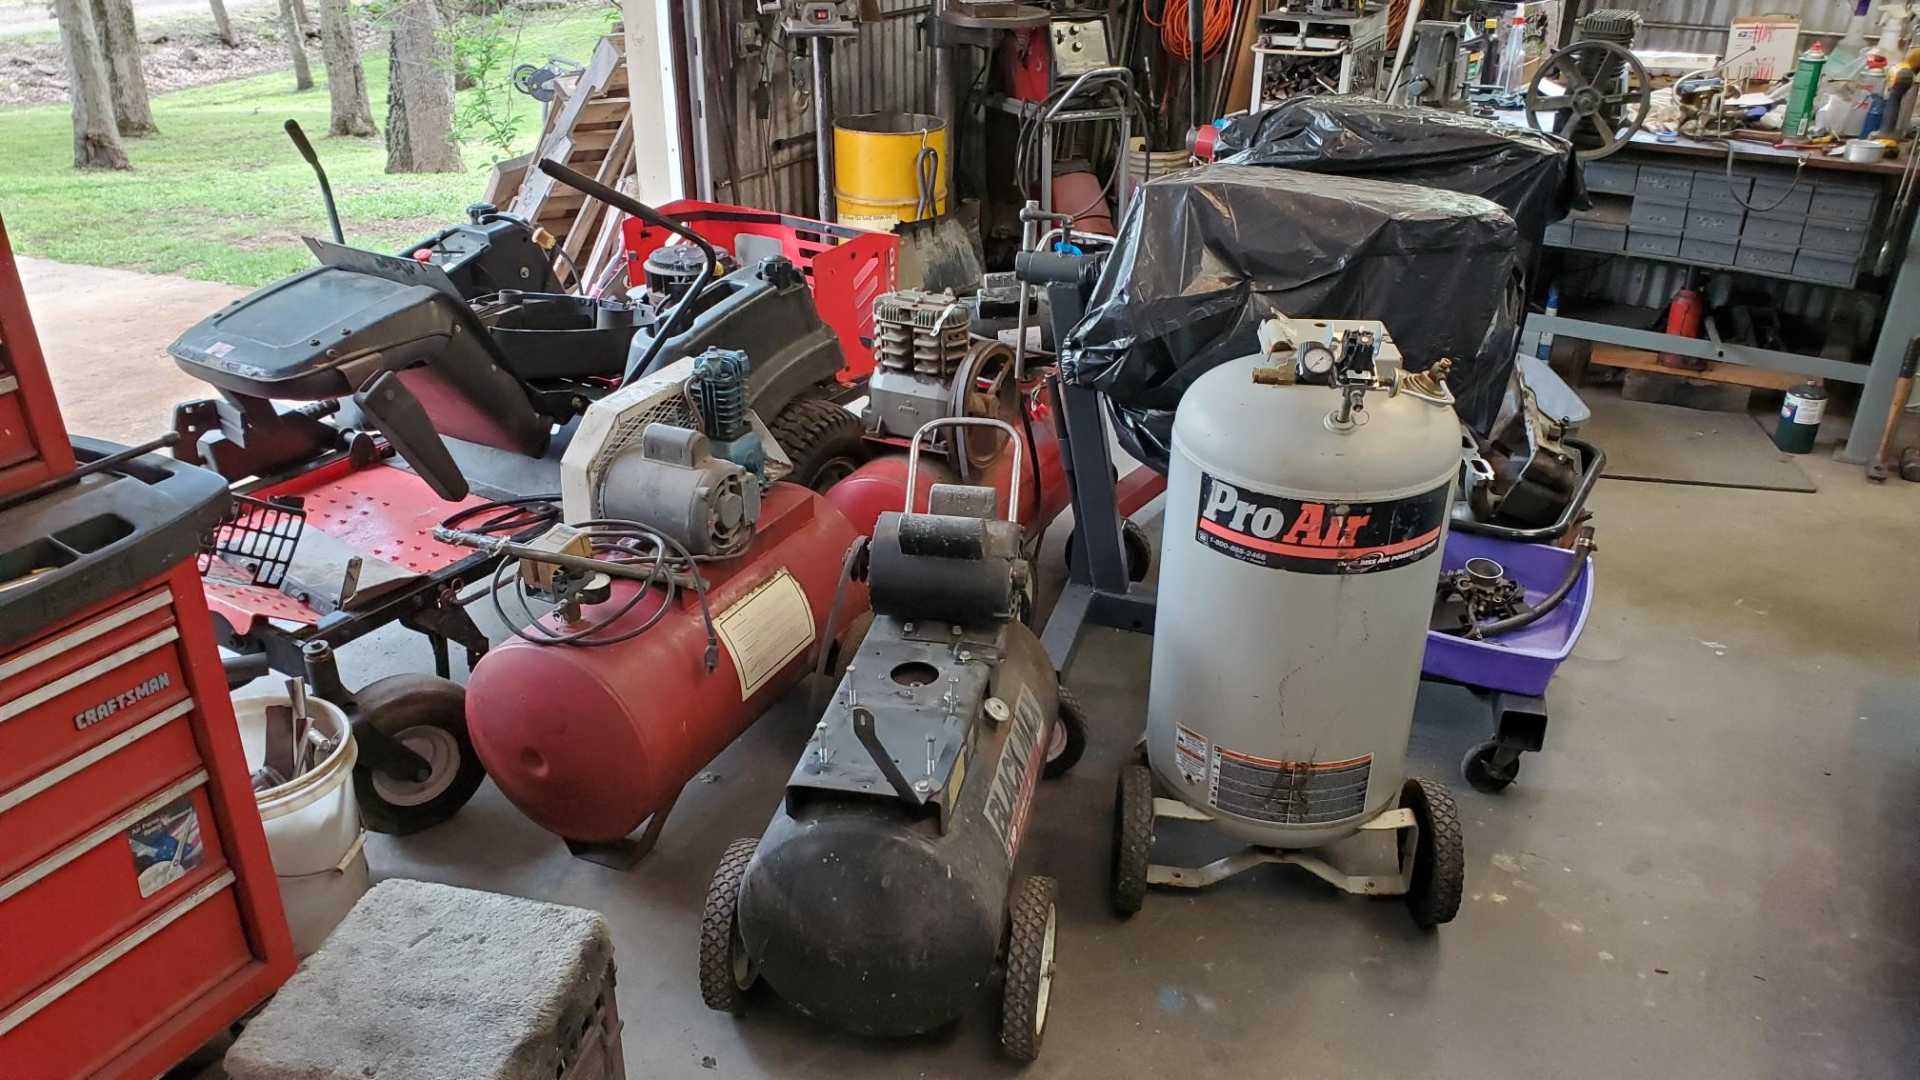
Haven't done any work on the car because I've been distracted by other projects. Trying to rehab my old Gravely mower instead of just storing it in my garage. Also working to replace another old air compressor. It's the compressor I keep at my house.
I had another old compressor I bought at an estate sale years ago and over the weekend bought two more "used" ones, hoping to be able to make one good compressor.
Hope to get back to rebuilding the Quad 4 in a week or two.
While I was in the shop working on various air compressor parts, the frustration really started weighing me down. I looked at the car and realized how much work I still have to do and the frustration took over.
Then, last night I dreamed I was out driving it. Somehow it had the original Iron Duke in it and I'd driven hundreds of miles from home yet that old engine was just purring. I woke up with a feeling of joy.
Been working on other projects in the shop as well as a big one at work, so haven’t made much progress over the summer. It’s harder and harder to focus on the Fiero during the heat of the summer.
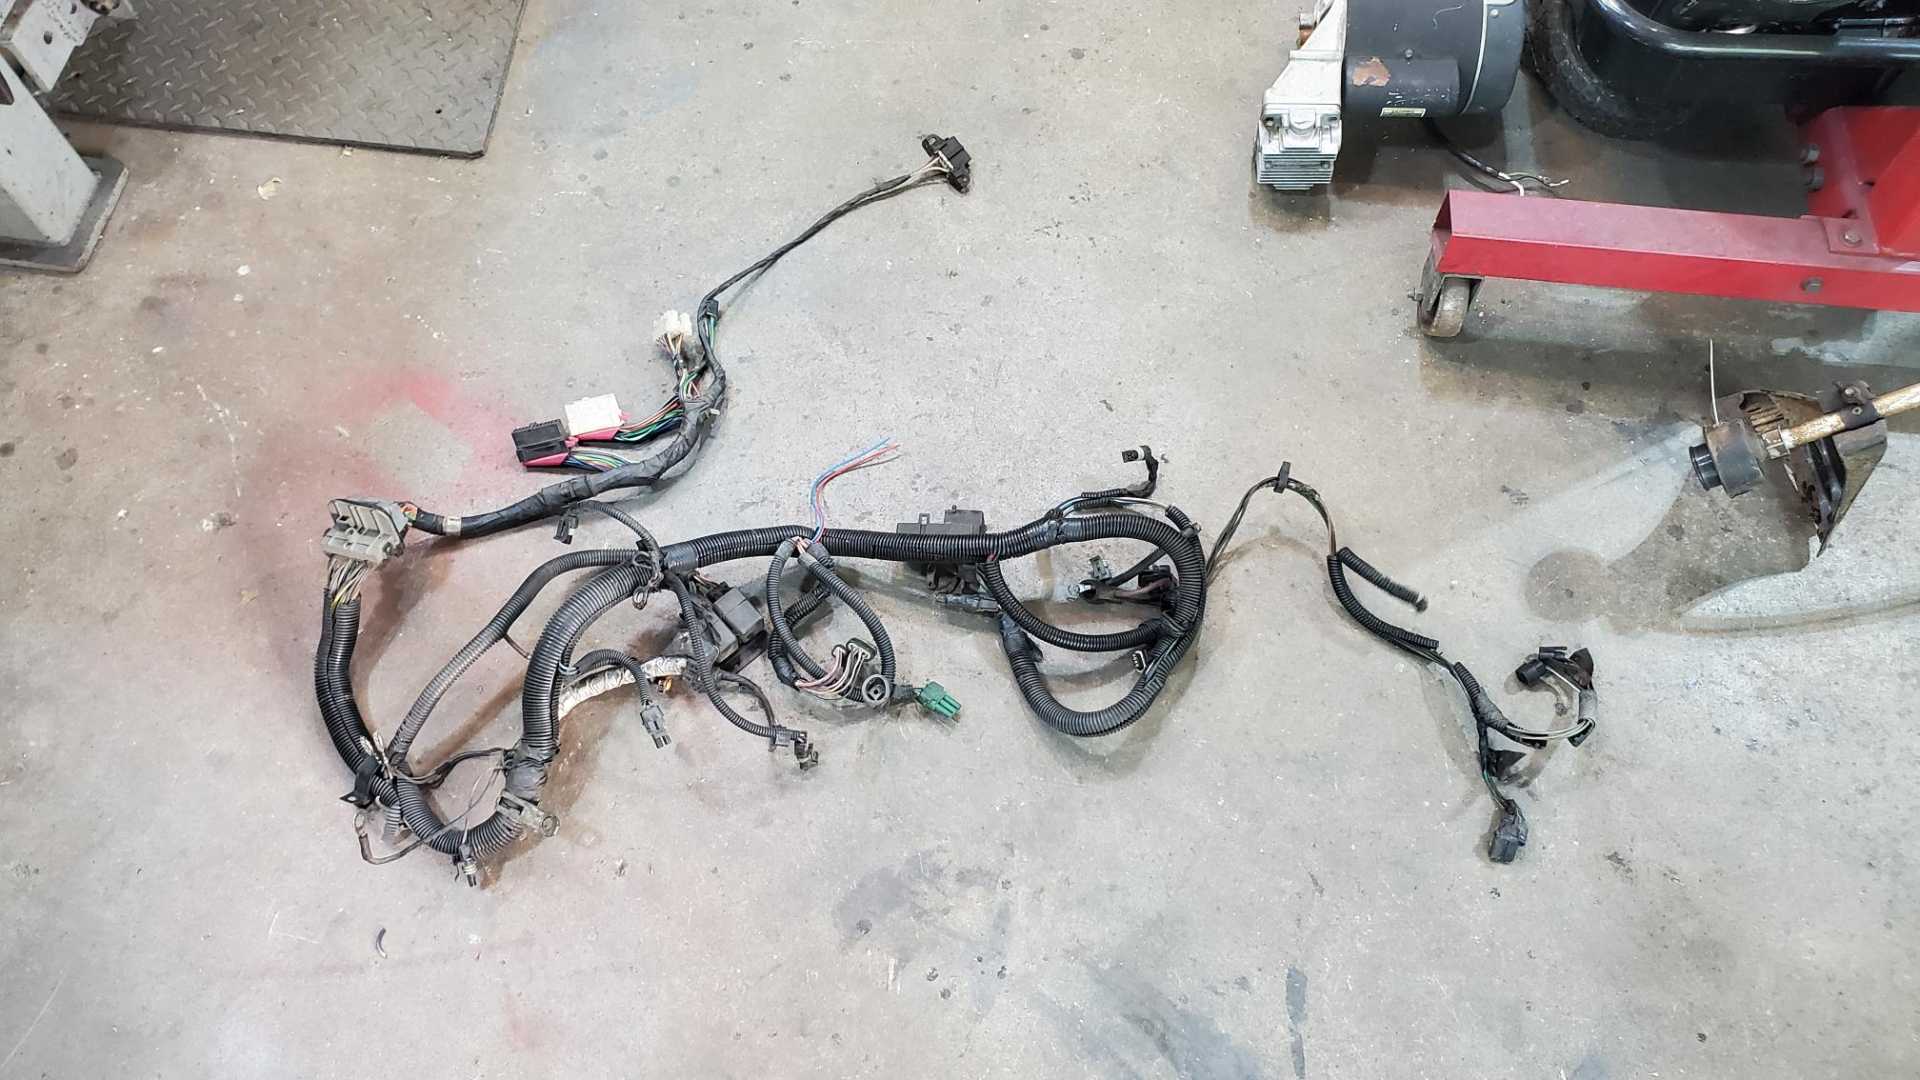
I did spend a couple of days looking for the Iron Duke engine harness. Finally found it on one of my spare parts bins right next to the car. Somehow the label had crinkled and wasn’t legible.
Finally realized that I need to mate the wires coming out of the Fiero plug to the Beretta engine harness, instead of mating the Beretta plug to the Fiero wires.
Still trying to face the music that I need to buy a new head. Maybe when the weather cools down.
[This message has been edited by Quadfather (edited 09-13-2021).]
You've gone through years of work to get this Quad four engine up and running. I admire your work and not to be critical; would not this project been easier if you just started with a working Ecotec engine?. You can buy many of the mounts and a complete stand alone wiring harness for some of these engines. Many performance options are also available for the Ecotec.
------------------ " THE BLACK PARALYZER" -87GT 3800SC Series III engine, custom ZZP /Frozen Boost Intercooler setup, 3.4" Pulley, Northstar TB, LS1 MAF, 3" Spintech/Hedman Exhaust, P-log Manifold, Autolite 104's, MSD wires, Custom CAI, 4T65eHD w. custom axles, Champion Radiator, S10 Brake Booster, HP Tuners VCM Suite. "THE COLUSSUS" 87GT - ALL OUT 3.4L Turbocharged engine, Garrett Hybrid Turbo, MSD ign., modified TH125H " ON THE LOOSE WITHOUT THE JUICE "
You've gone through years of work to get this Quad four engine up and running. I admire your work and not to be critical; would not this project been easier if you just started with a working Ecotec engine?. You can buy many of the mounts and a complete stand alone wiring harness for some of these engines. Many performance options are also available for the Ecotec.
The Ecotec would have been fine, but engine choice is not the reason this thing has been taking so long. I chose the Quad for two reasons: I was already familiar with it (both mechanically and performance wise), and I had one in my possession.
Trust me, I've spent a lot of time over the years thinking about the decisions I've made in this project. If I had a do-over, the biggest thing I'd change would be to fix the Iron Duke and start driving the car, then do the major upgrades along the way. Heck, I also had experience with Iron Dukes at that point.
[This message has been edited by Quadfather (edited 10-19-2021).]
Today I began the process of replacing the head. Cylinder Head International said they don’t have any Quad 4/2.3 liter heads in stock, so I had to ship mine first. It’s interesting to me that the same head came from the same company in 2008 when I was first working on my GTZ. Naturally I couldn’t find the crack again.
While I wait I’m trying to resist the temptation to disassemble the pistons and rods to make sure I did them right.
[This message has been edited by Quadfather (edited 10-19-2021).]
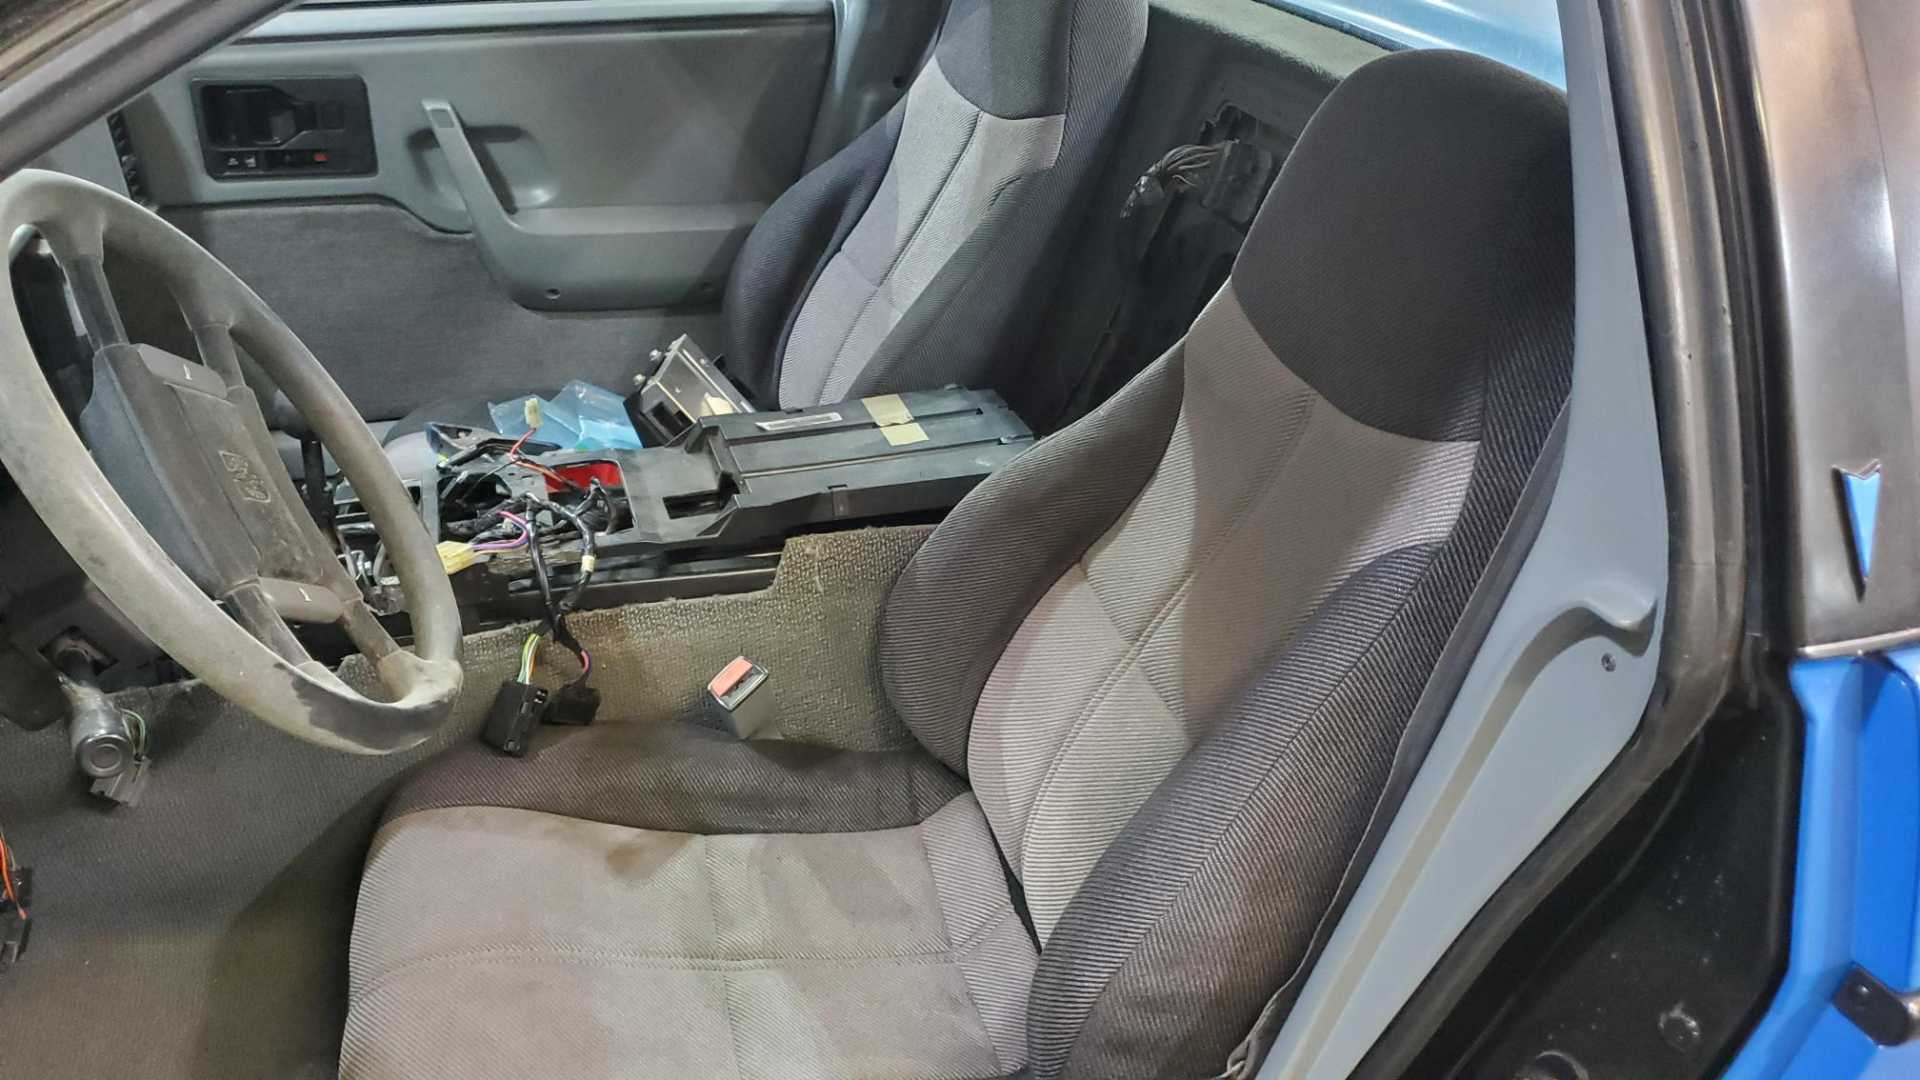
Over the last few months I’ve become convinced that I need to change my interior. I like the Camaro seats and the upholstery, but the texture and colors are wrong. I want this car to be full 80s shtick, so my seats need to be blue and black vinyl or leather.
That change will have to wait until the car is on the road.
I’m on vacation this week and ordinarily at this point in a staycation I’d have several tasks already completed on the car. Instead I’ve just been farting around.
Maybe it’s because I just wrapped up a major project at work that took a year to finish, including very focused effort for the last six weeks. Probably just about the time I have to go back to work the bug will hit me again and I’ll be wishing for time off to work on the car.
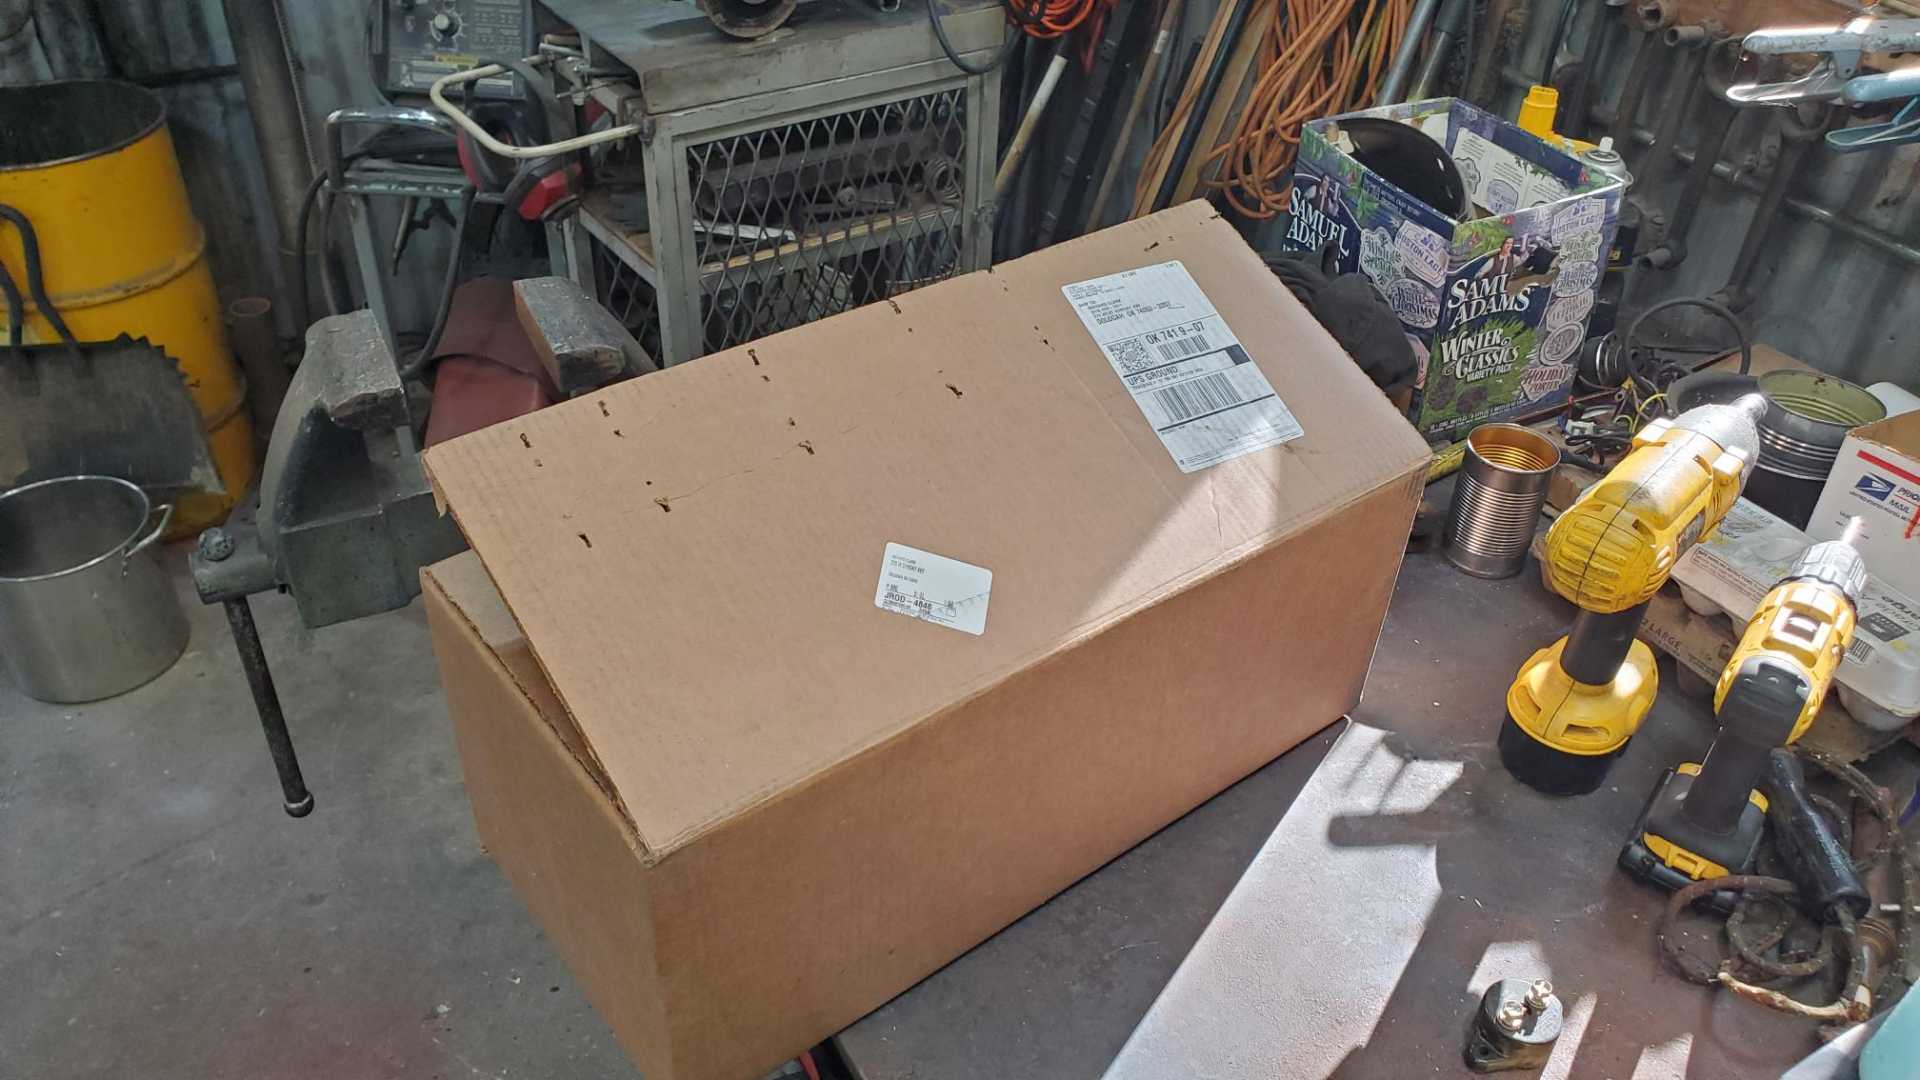
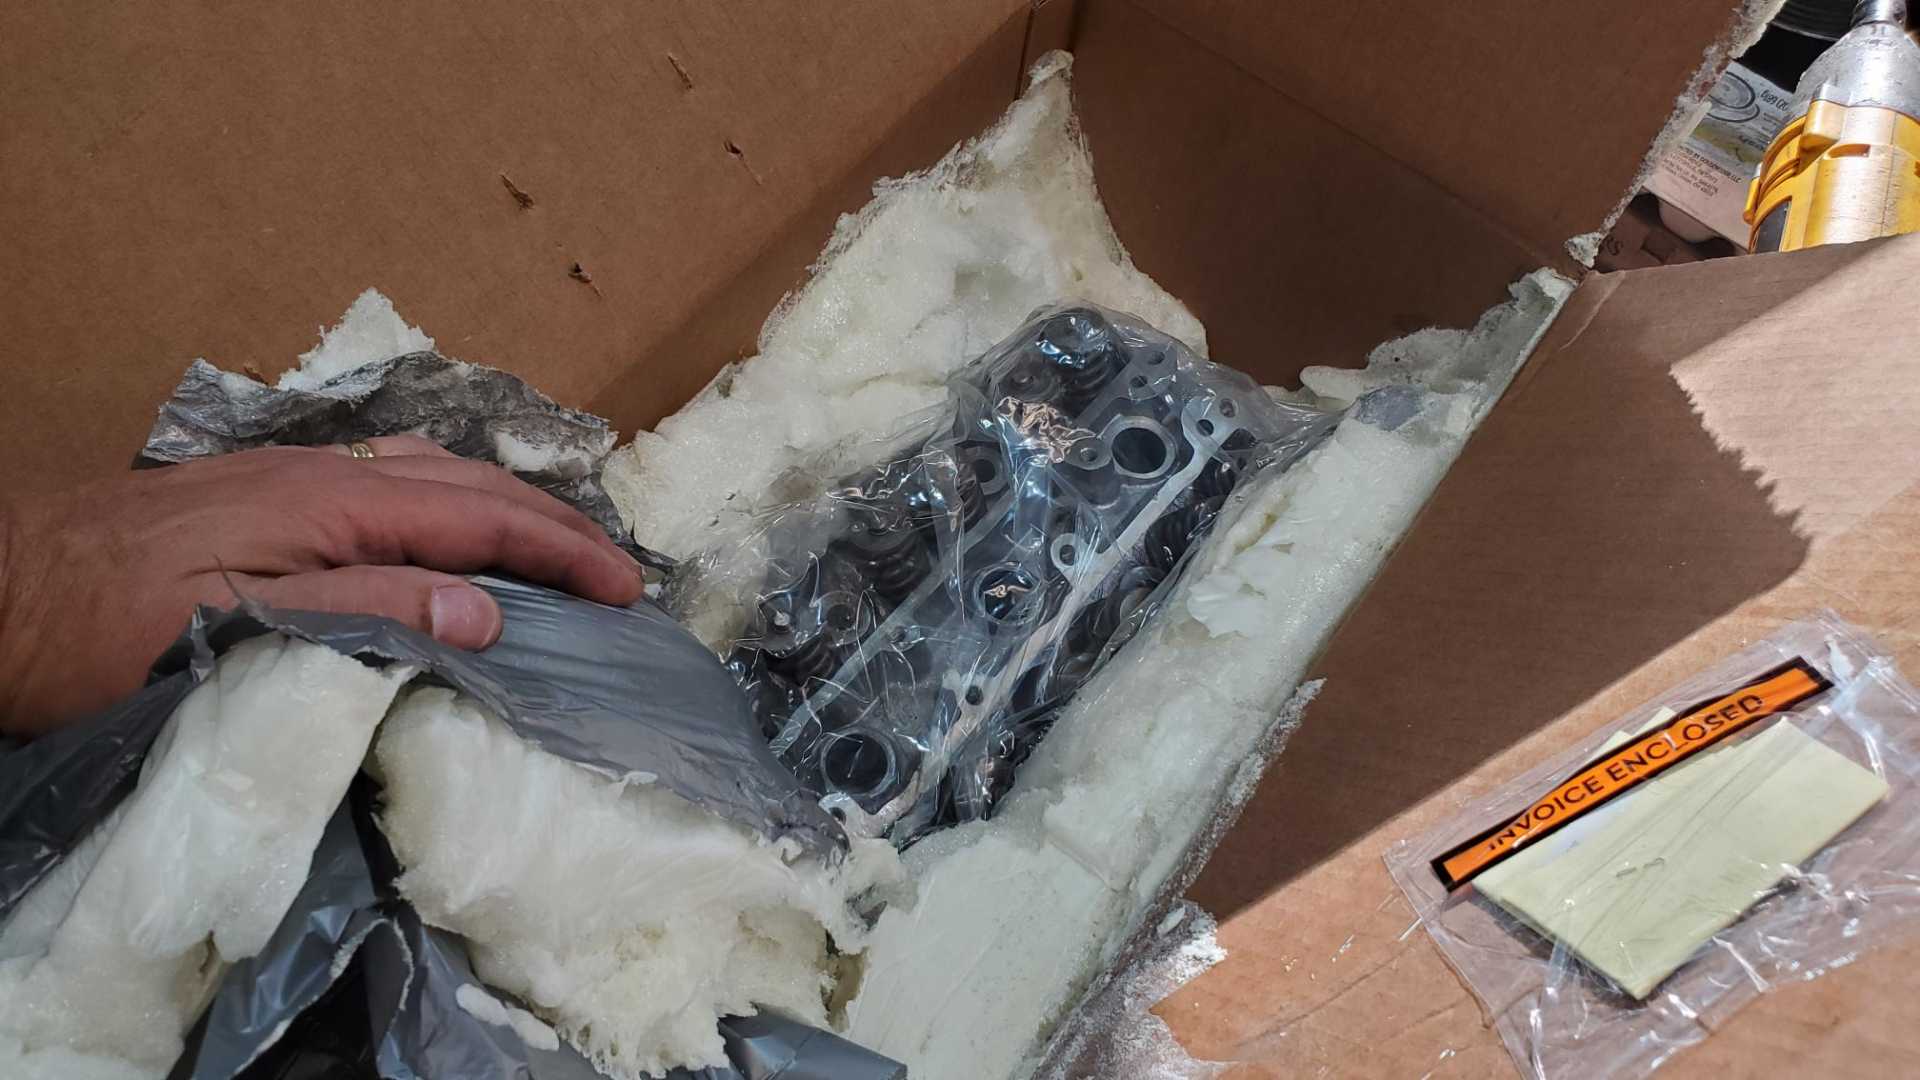
It’s like Christmas in October. The head came back from Texas.
I don’t think they packed it like this the first time they sent this head to me in 2008. The expanding foam works great.
I noticed the professional spread out the different shaped valves in different combustion chambers.
I have Fridays off for the rest of the year, because I have so much PTO, so I’m hoping to make progress this week. This will give me time to study up on installing the head before I try it on Friday.
[This message has been edited by Quadfather (edited 10-31-2021).]
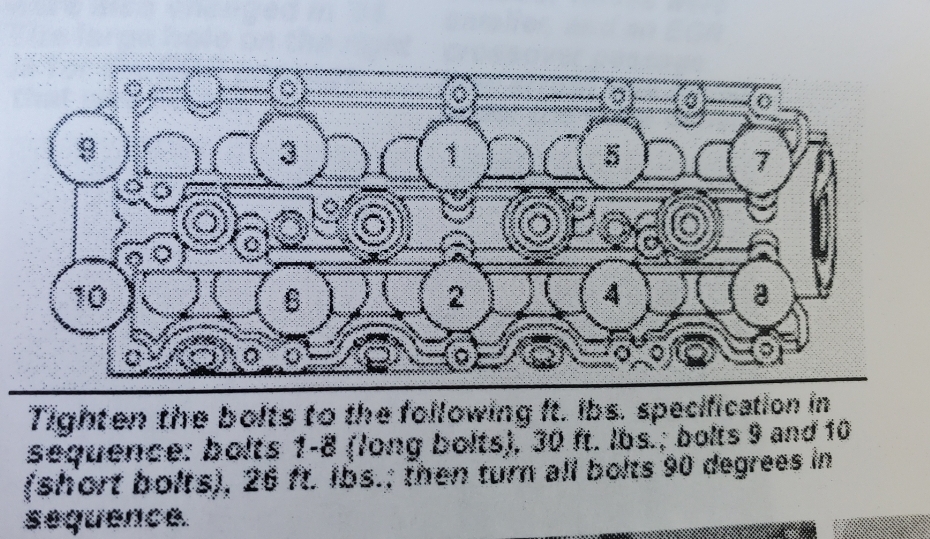
Ran into some trouble while installing the head. I made the mistake of comparing my factory service manual instructions with the instructions in my Haynes manual and they disagree. GM changed the head torque sequence several times over the years, so the FSM is not reliable. Not only are the torque values different, but so are the numbers of the bolts.
When I started working on this engine in 2008, I thought I used my Haynes manual when installing the new head. But this time around the torque settings didn’t seem right. Searching the internet just caused more confusion. Then I remembered that I saved all the information I printed off from the old Quad4Forurms 13 years ago, including instructions for torquing the head. These are the instructions I used back then.
[This message has been edited by Quadfather (edited 11-12-2021).]
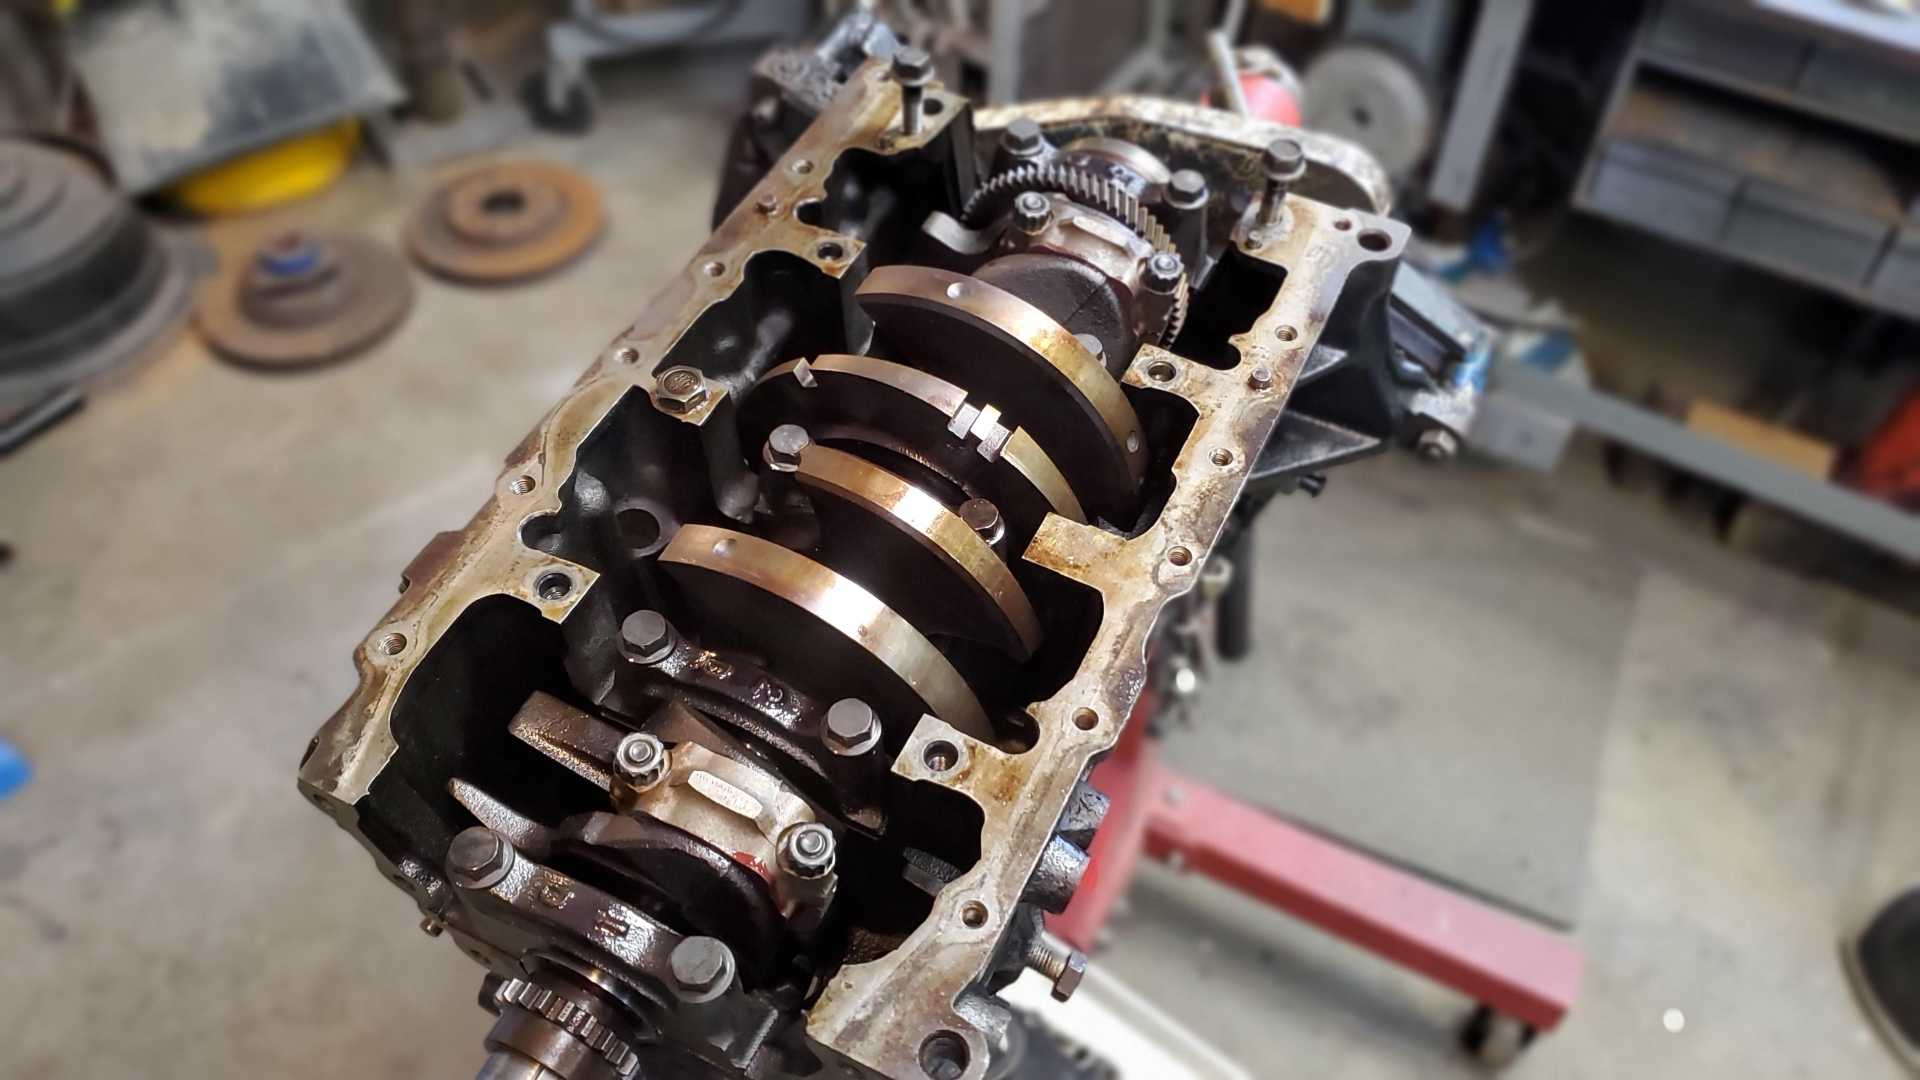
I loosened and then torqued the head bolts to the proper amount. Next up was the oil pump. I’ve always thought the Quad’s pump looks like a space ship from an 80s sci fi movie.
Notice how the pickup tube sits at an angle, because the engine is mounted a few degrees off of vertical.
The manual says to prime the pump by taking off the access panel and filling the inside with petroleum jelly.
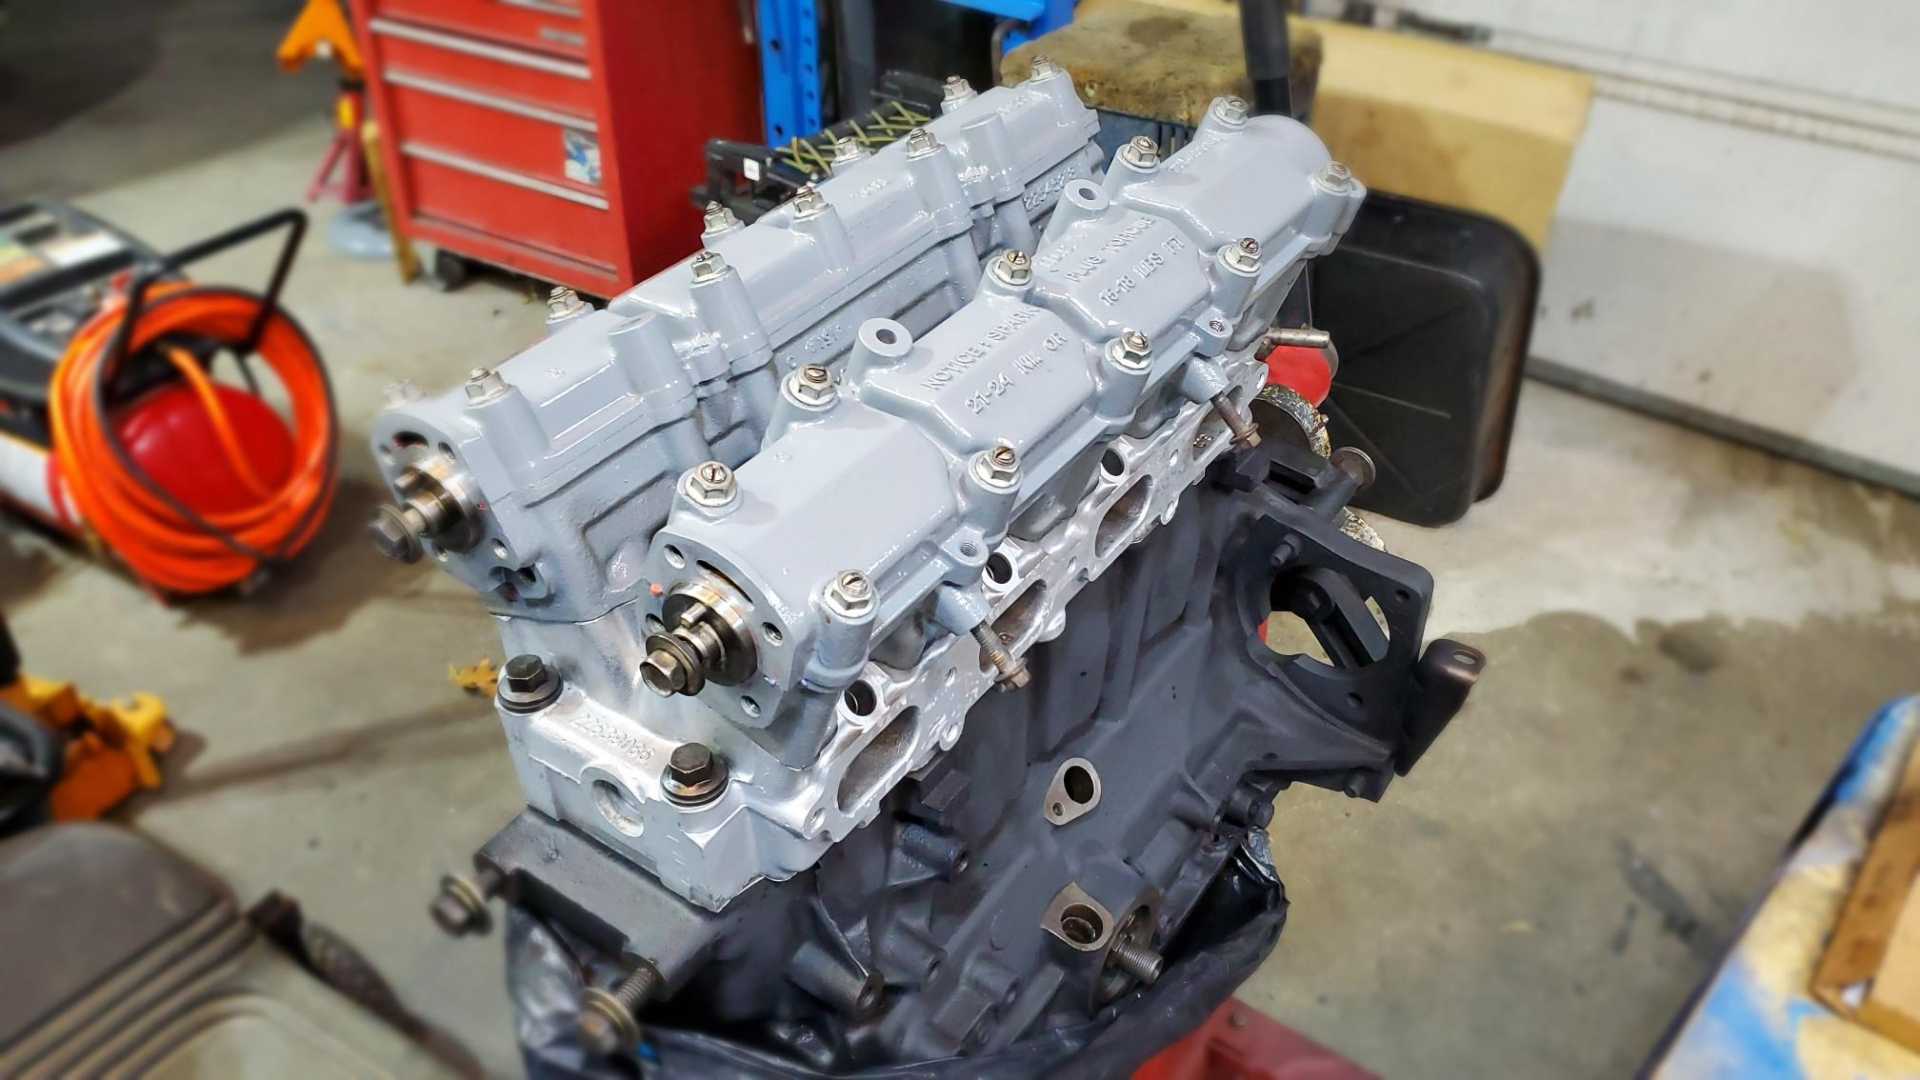
I’m now cleaning the cam towers. I’m probably going to paint them sail blue.
[This message has been edited by Quadfather (edited 11-12-2021).]
Really nice work! I just read through your whole thread, you are getting close. Quad Four is such a sweet motor, I look forwards to seeing more progress! If I were you I would focus mainly on getting it running and driving over everything else, that way you can enjoy it and it will motivate you to get to all the details that will make the car perfect.
Really nice work! I just read through your whole thread, you are getting close. Quad Four is such a sweet motor, I look forwards to seeing more progress! If I were you I would focus mainly on getting it running and driving over everything else, that way you can enjoy it and it will motivate you to get to all the details that will make the car perfect.
Thanks very much. Yes, I'm trying to keep a laser focus on getting the car on the road. Sometimes it's hard, though, especially when other fun projects pop into my head.
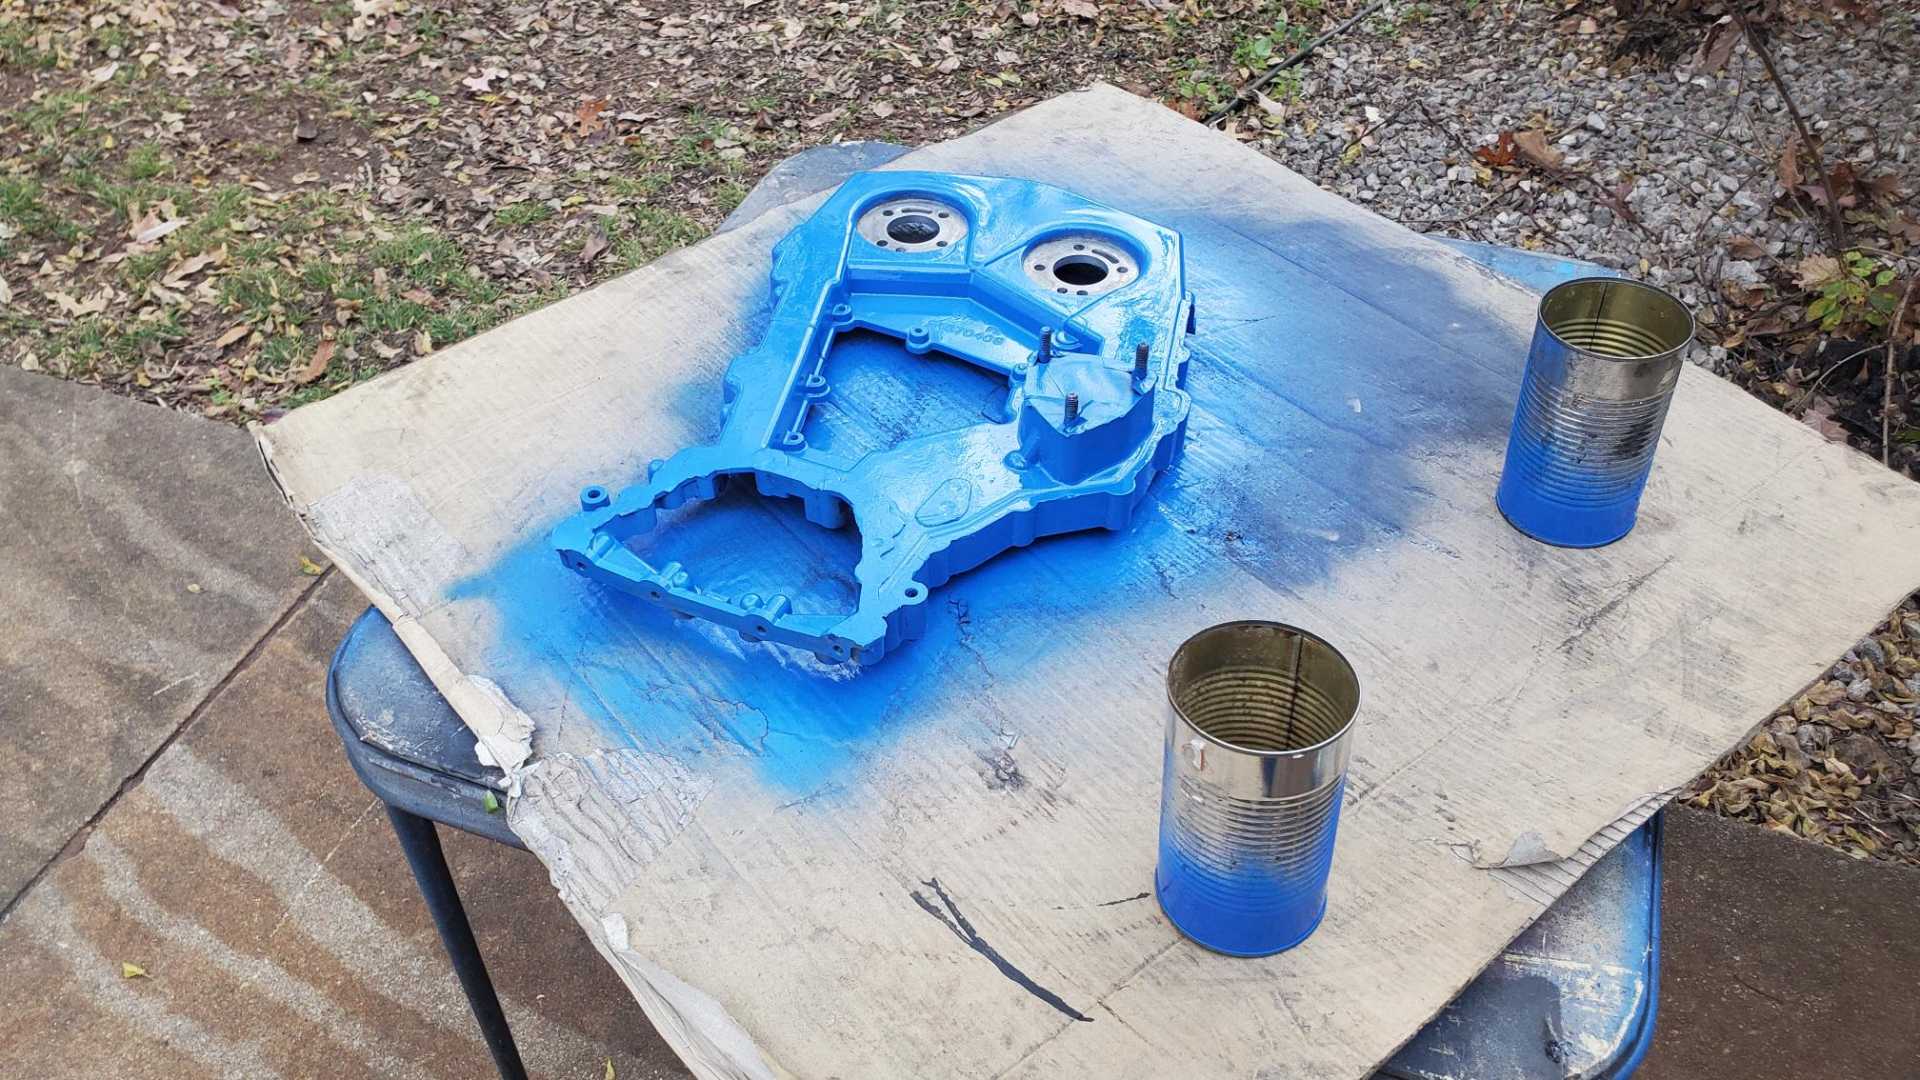
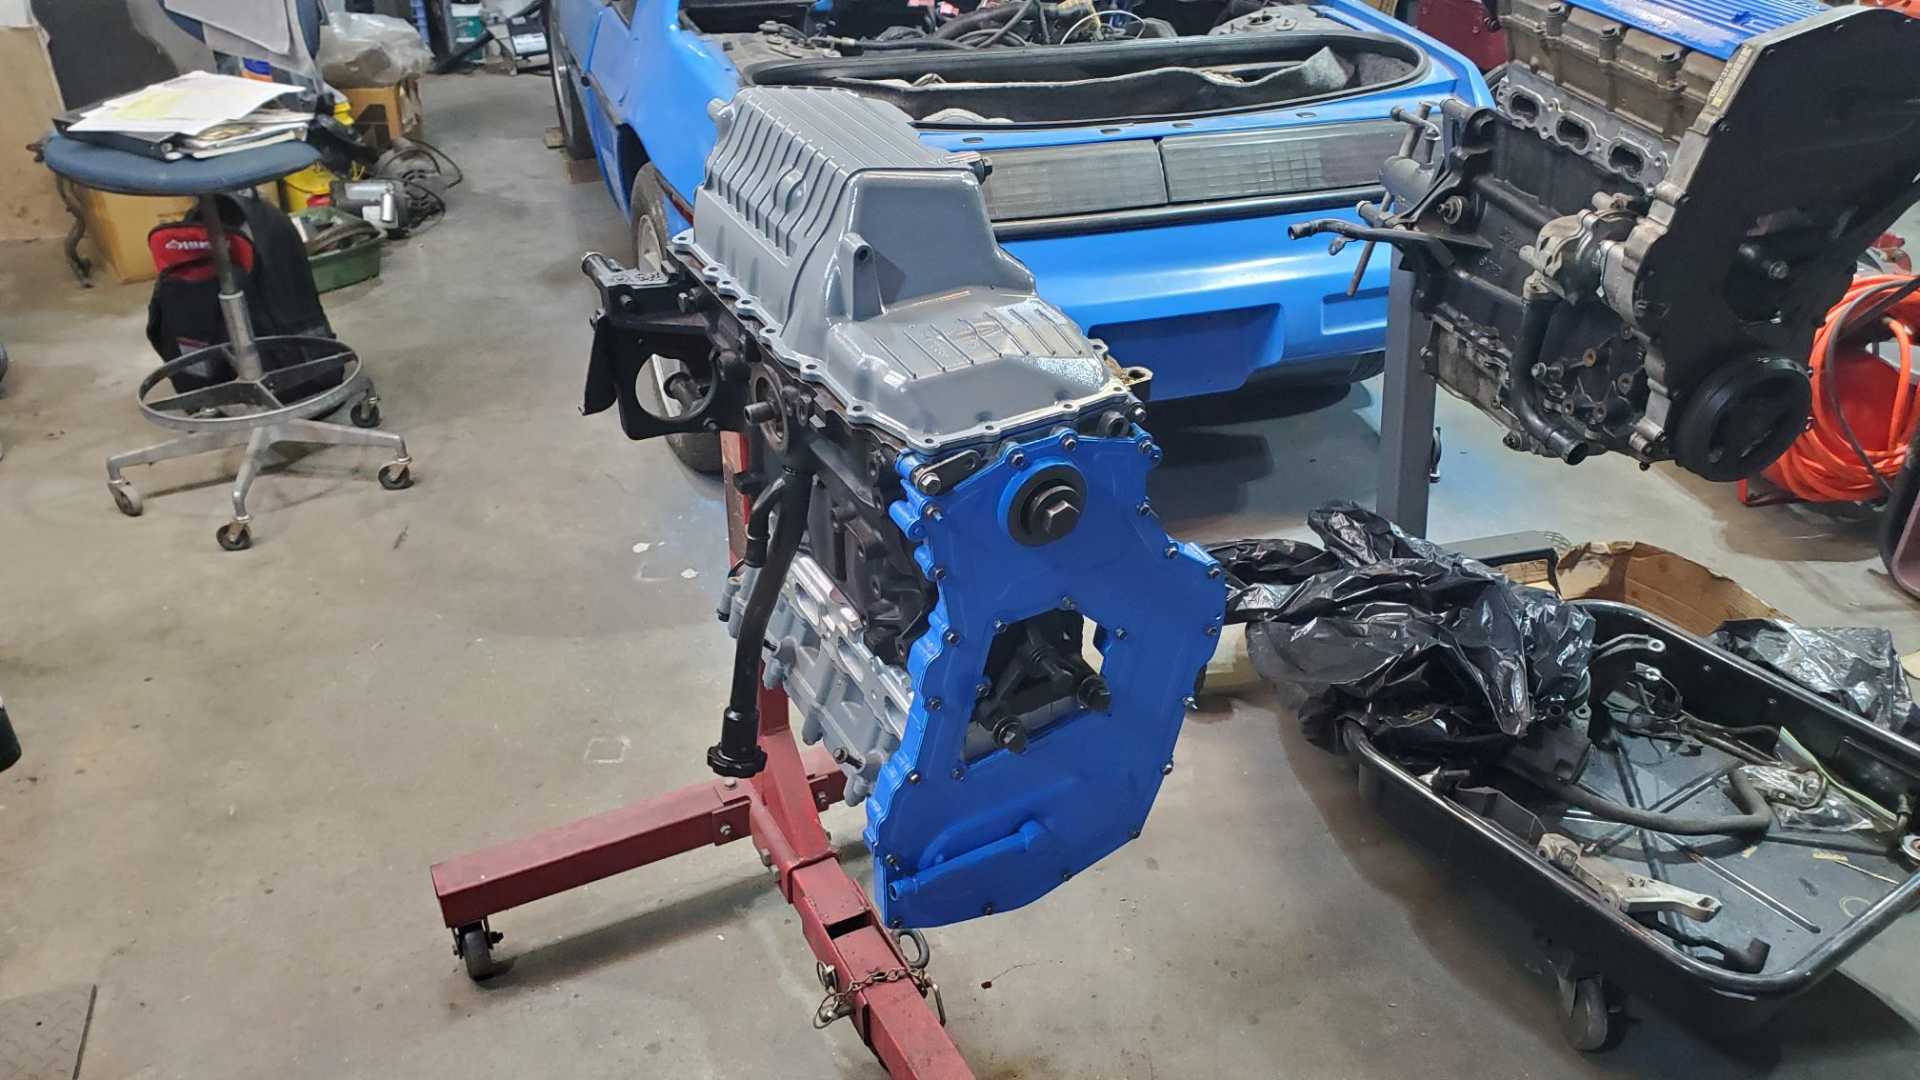
Made some progress today. I wanted to paint engine parts today, starting with the block, but Tractor Supply didn’t have regular old black so I used grill paint. Should make it easier to spot oil leaks.
Also painted the cam tower for the intake side. I wanted to use silver, but the closest thing Tractor Supply had was smoke gray.
And the timing housing. Recognize the color?
[This message has been edited by Quadfather (edited 11-20-2021).]
This engine quit running in 2012, while it was still in my rusty old GTZ, when the timing chain tensioner broke. Because the Quad is an interference engine it bent four valves in the process.
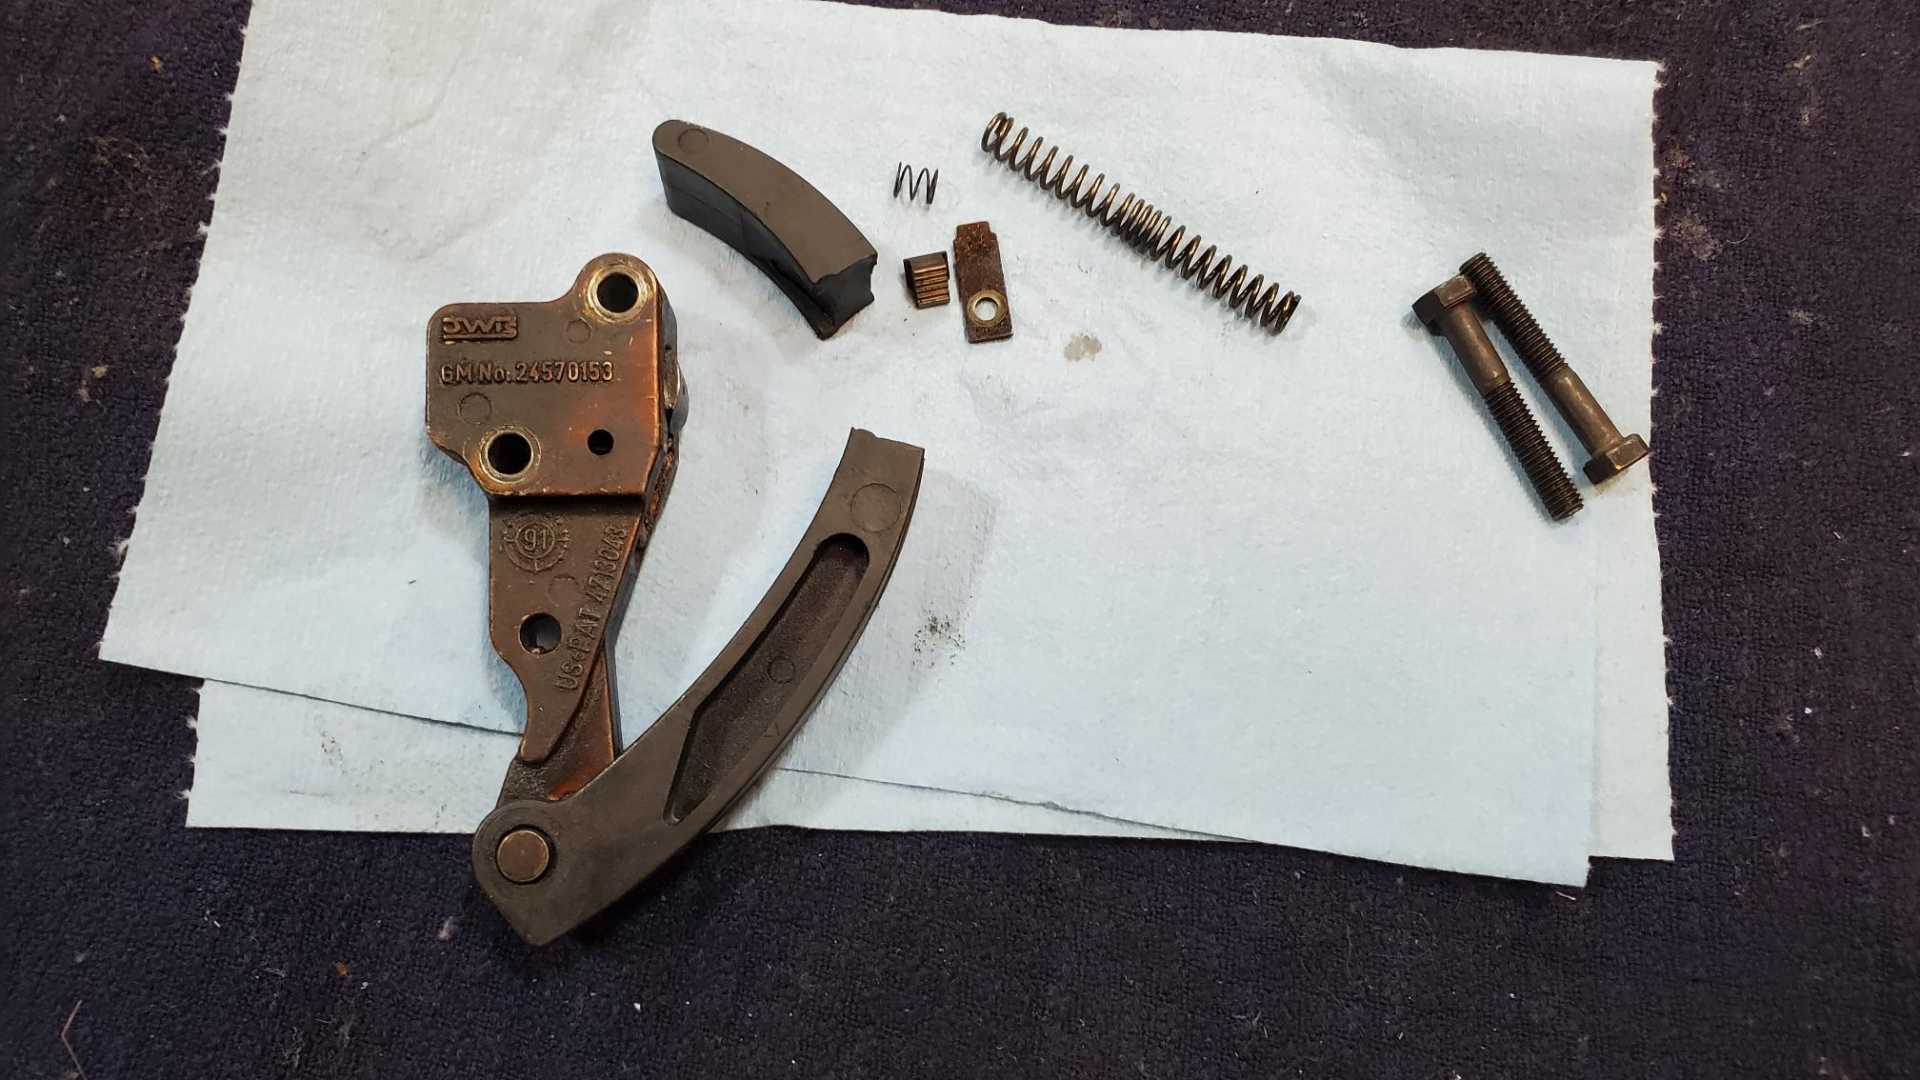
Today I spent about 20 minutes looking for the broken tensioner to figure out if any of it was salvageable or if I need to order a new one. I’ll have to order a new one. Even if I could remember how the spring is supposed to go back inside I don’t think there’s any way to get it back in there.
[This message has been edited by Quadfather (edited 11-20-2021).]
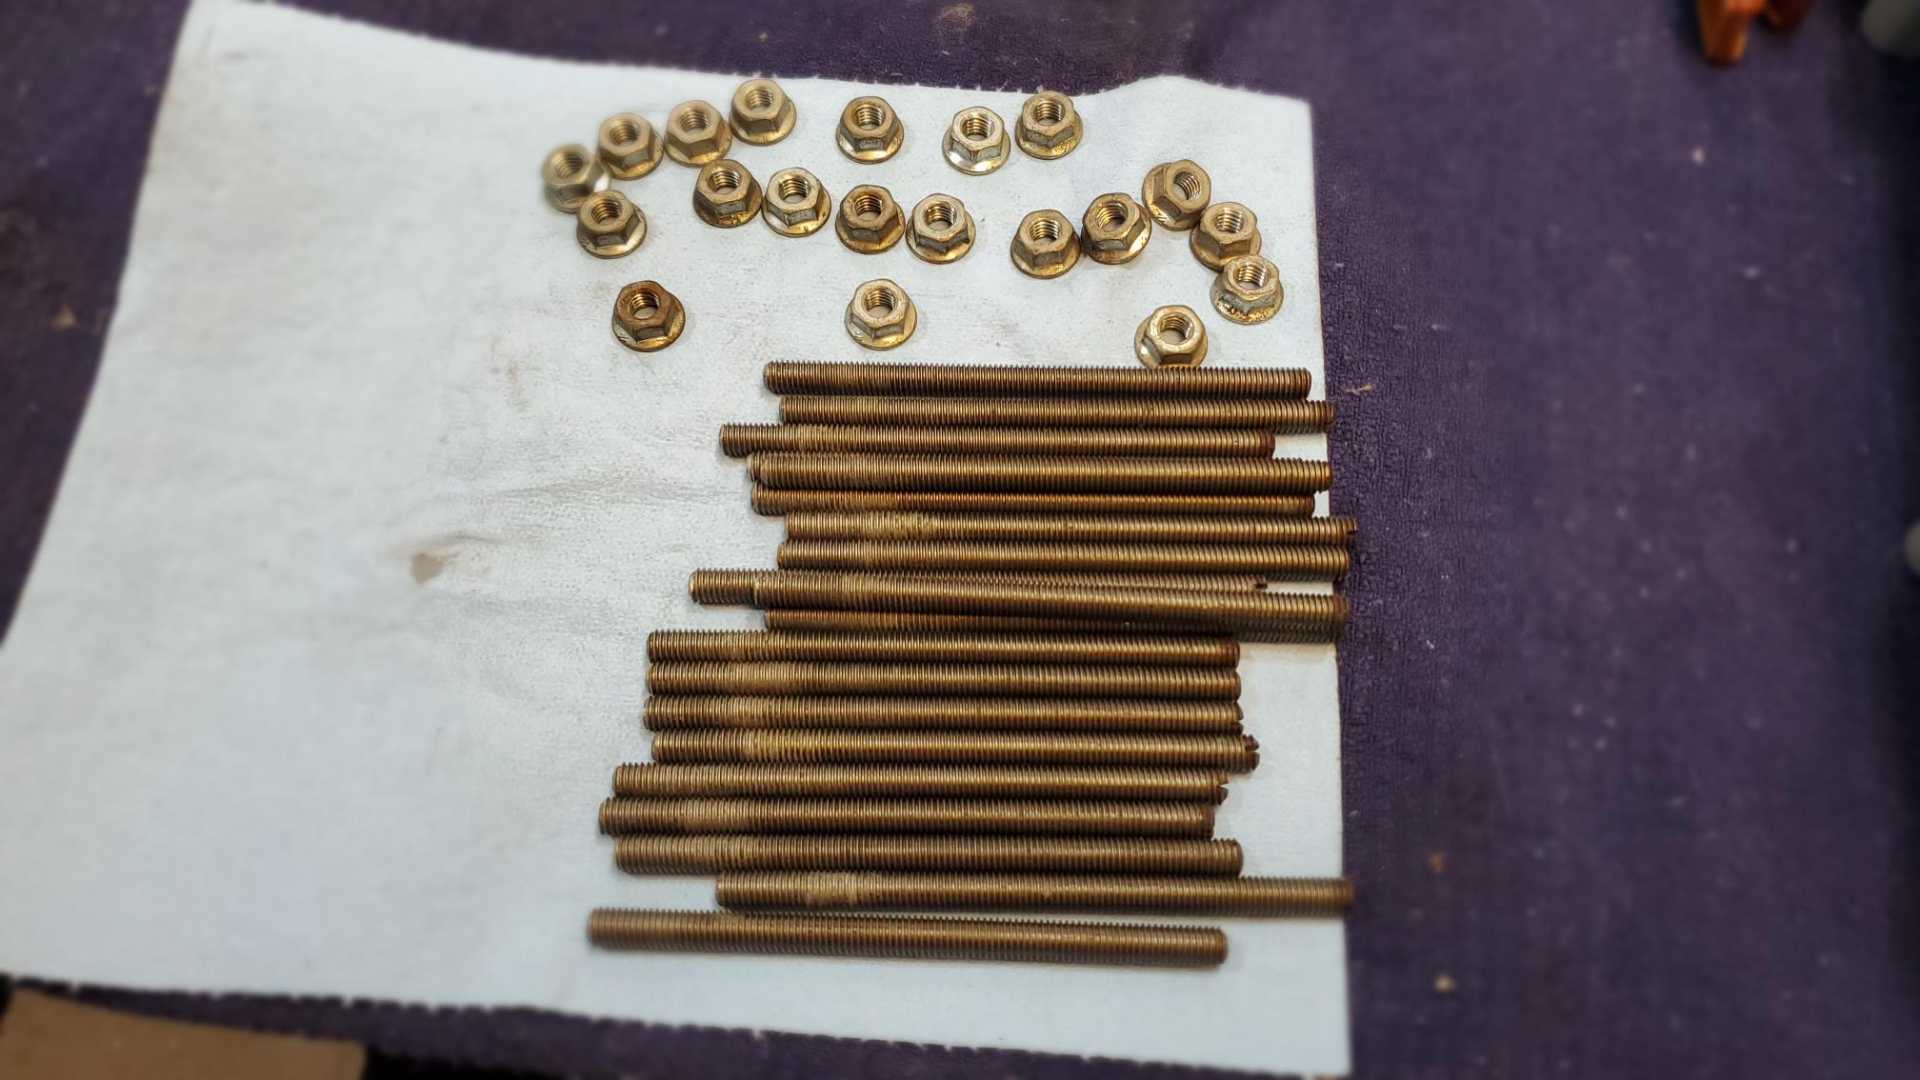
Back in 2008, I remember being excited when the remanufactured head arrived. I carefully installed it on the engine, then was crushed to discover the holes for the cam tower bolts were stripped. Thanks to the Quad4forums, I discovered that that was a common problem and the solution was to use studs. The holes are very deep but the OEM bolts only catch the first six or seven threads and often pull them out.
Instead of paying one of the forum members for a set, I bought some all-thread and made my own. It was a very tedious process. I bought three sections of all thread, cut them into 20 pieces, then had to carefully grind the burrs off each end. I also cut a slot in one end to use a screwdriver to install them. I don’t remember how long it took me to make them all, but it was worth it.
[This message has been edited by Quadfather (edited 11-20-2021).]
The new timing chain and gears arrived yesterday. I’m on vacation next week and soccer season ends tomorrow, so hopefully I’ll be able to get the engine almost completely reassembled in the coming days.
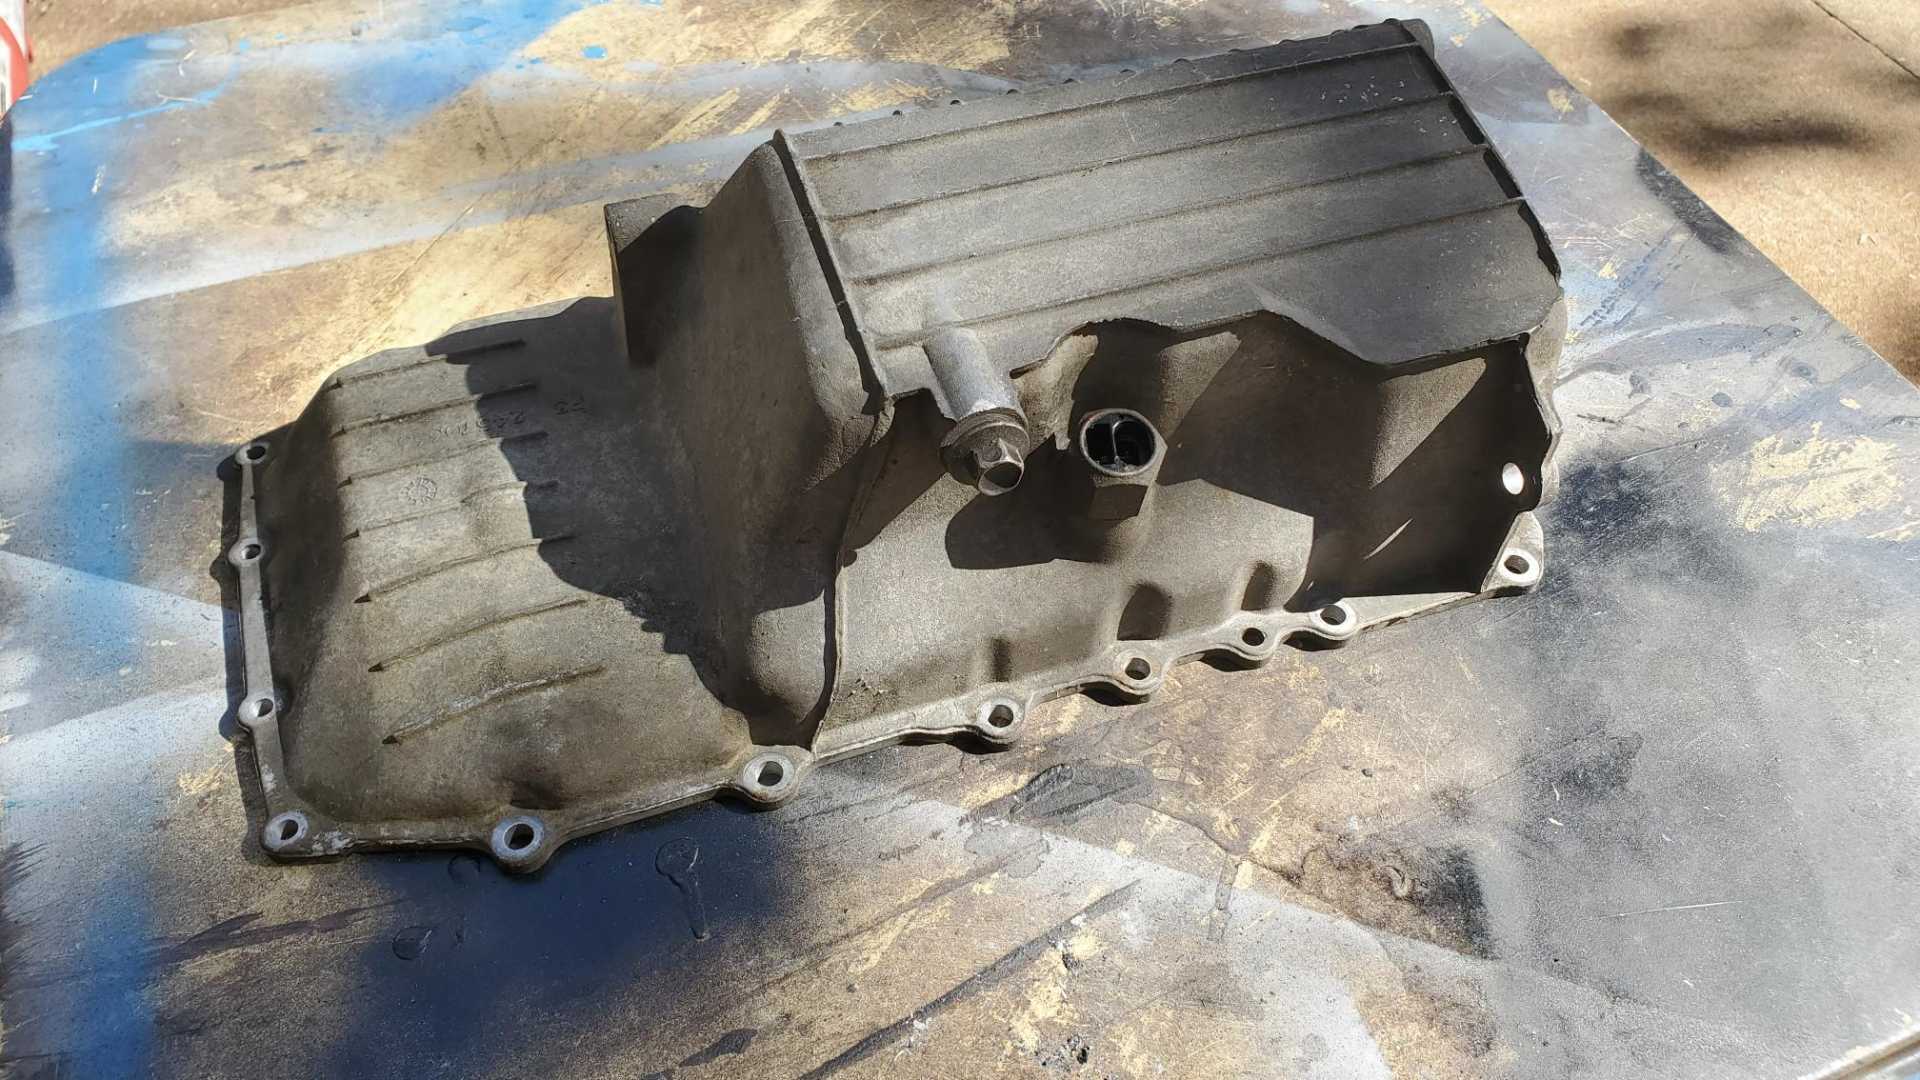
Amazing how difficult it can be to remove baked-on oil from engine parts. I ran out of oven cleaner but all Dollar General had in stock was the store brand and it didn’t work. I found an old can and managed to get the intake cam tower pretty clean.
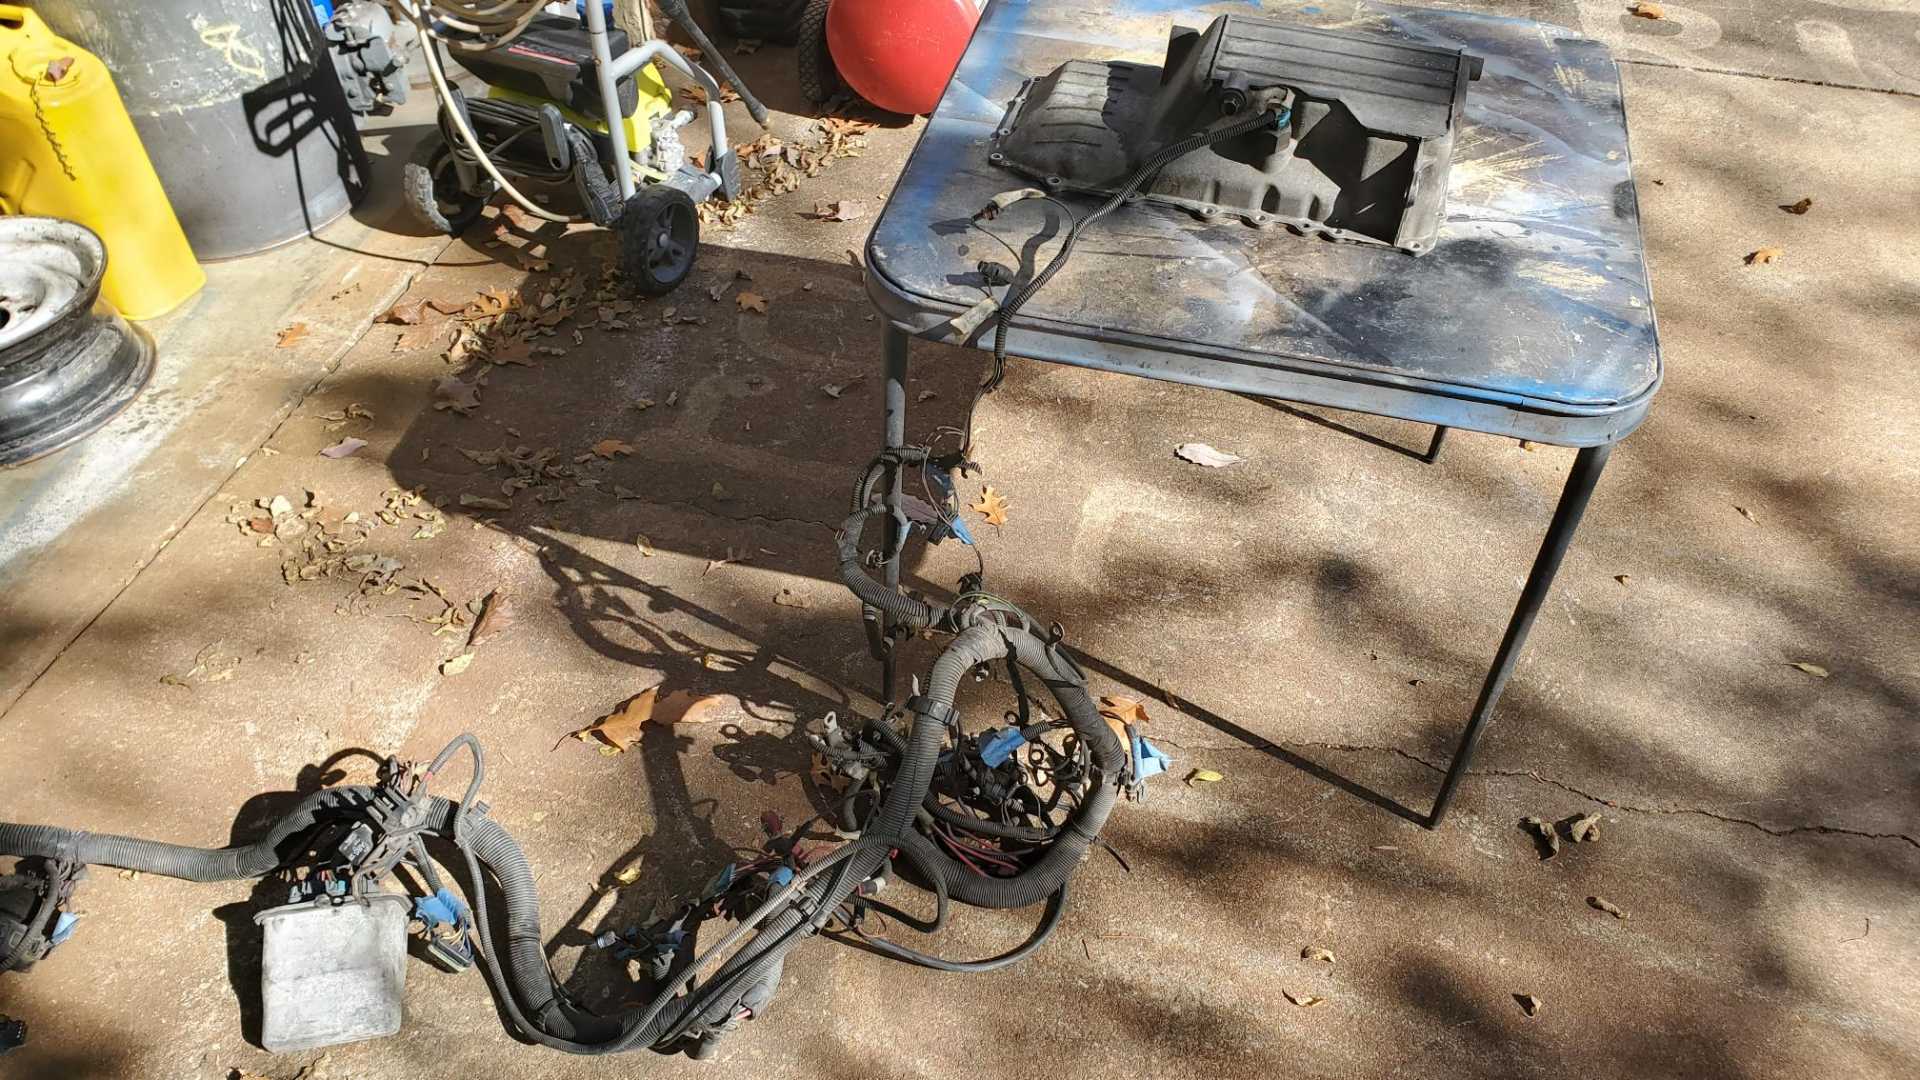
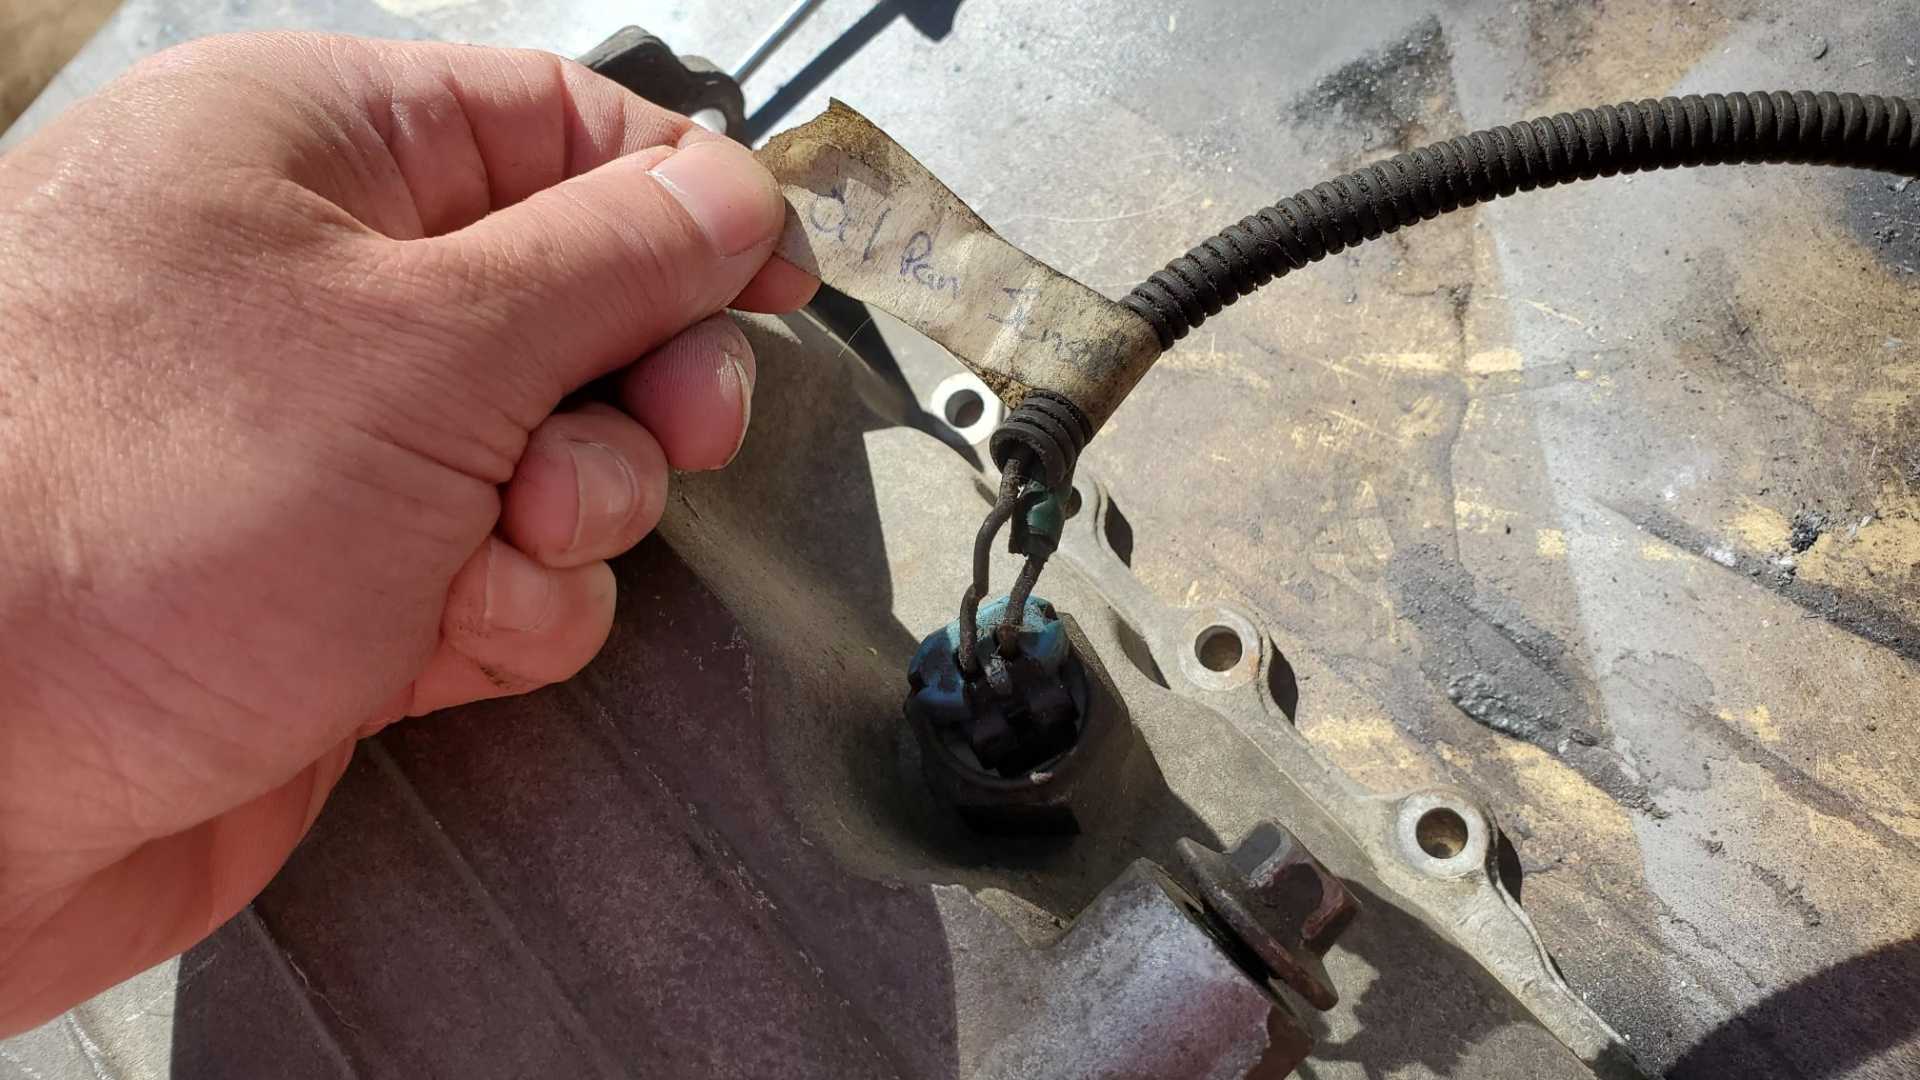
Then I got to looking at the oil pan and became worried I’d mixed it up with one of my spares. I don’t remember the pan from my GTZ having a sensor in it.
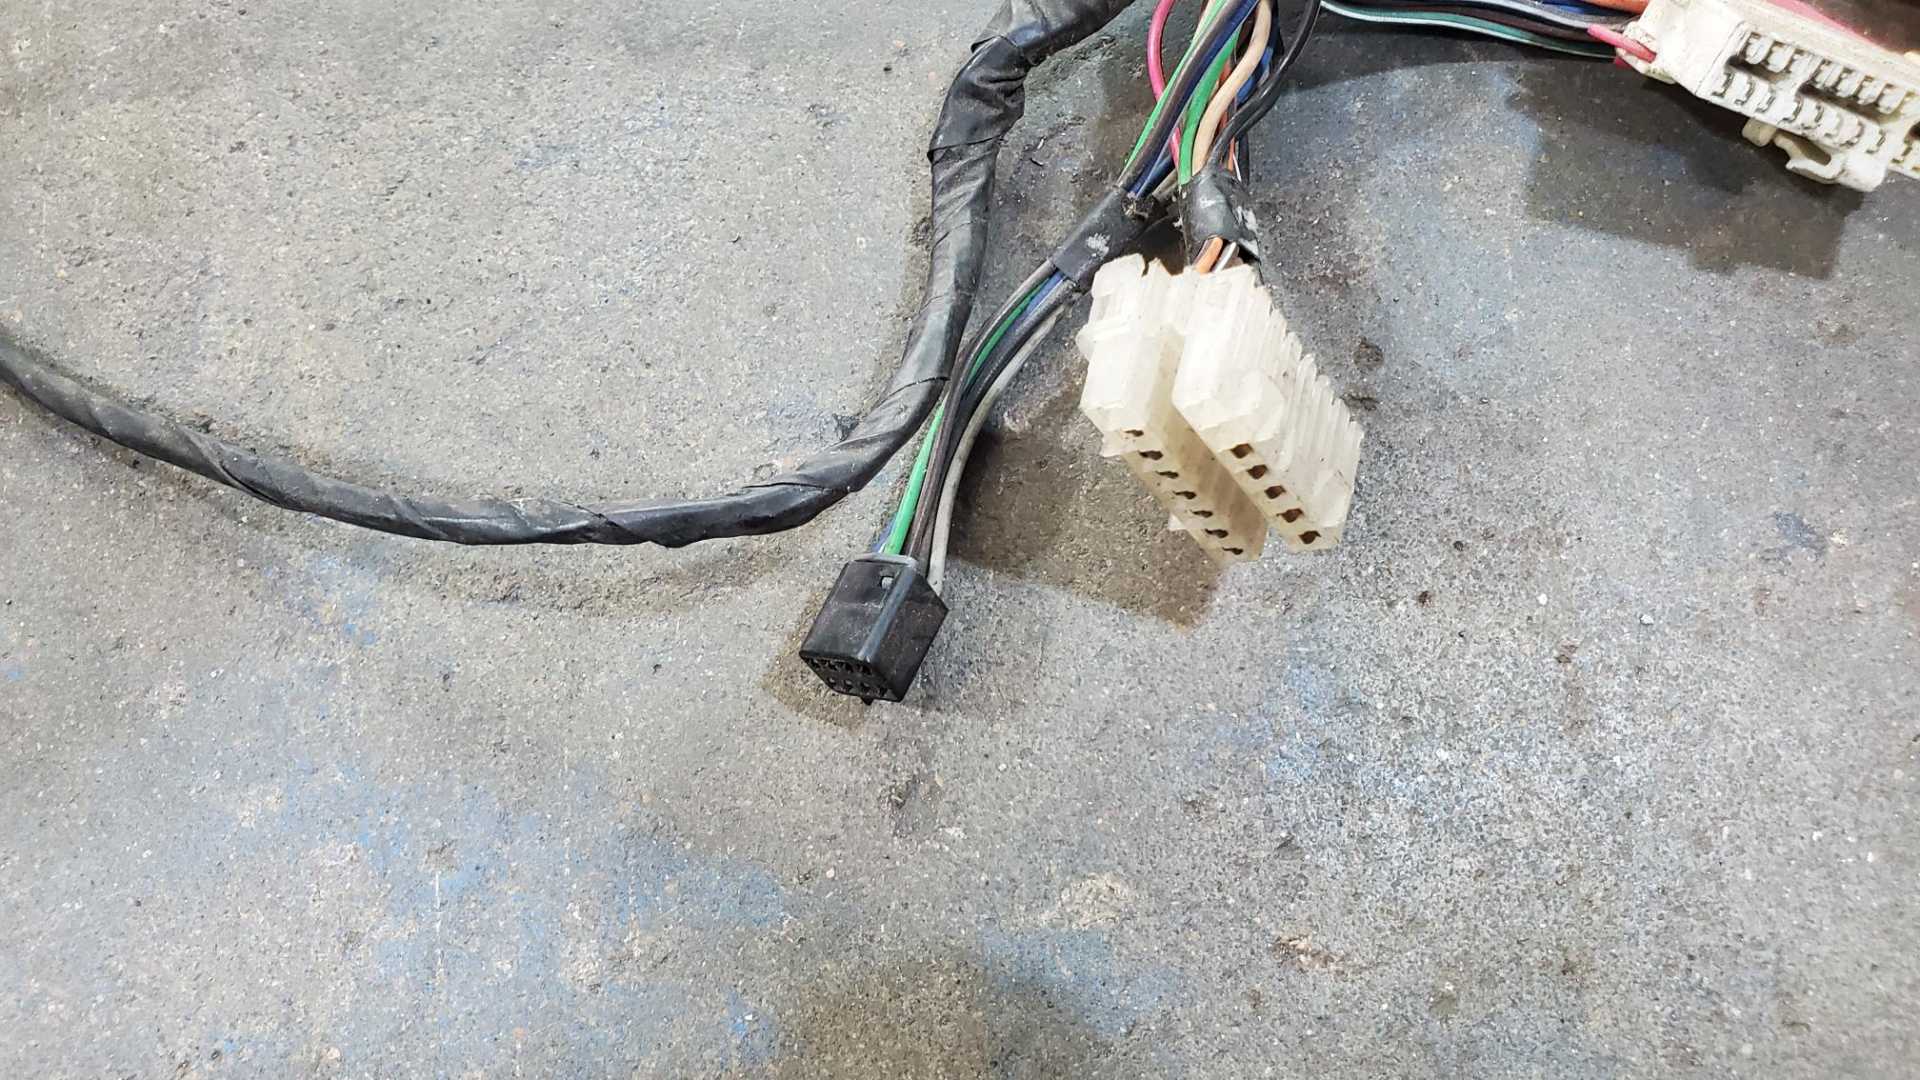
I considered several ideas for confirming if this was the right pan and finally dug out the engine harness. I thanked my 2012 self for labeling all the plugs on the harness.
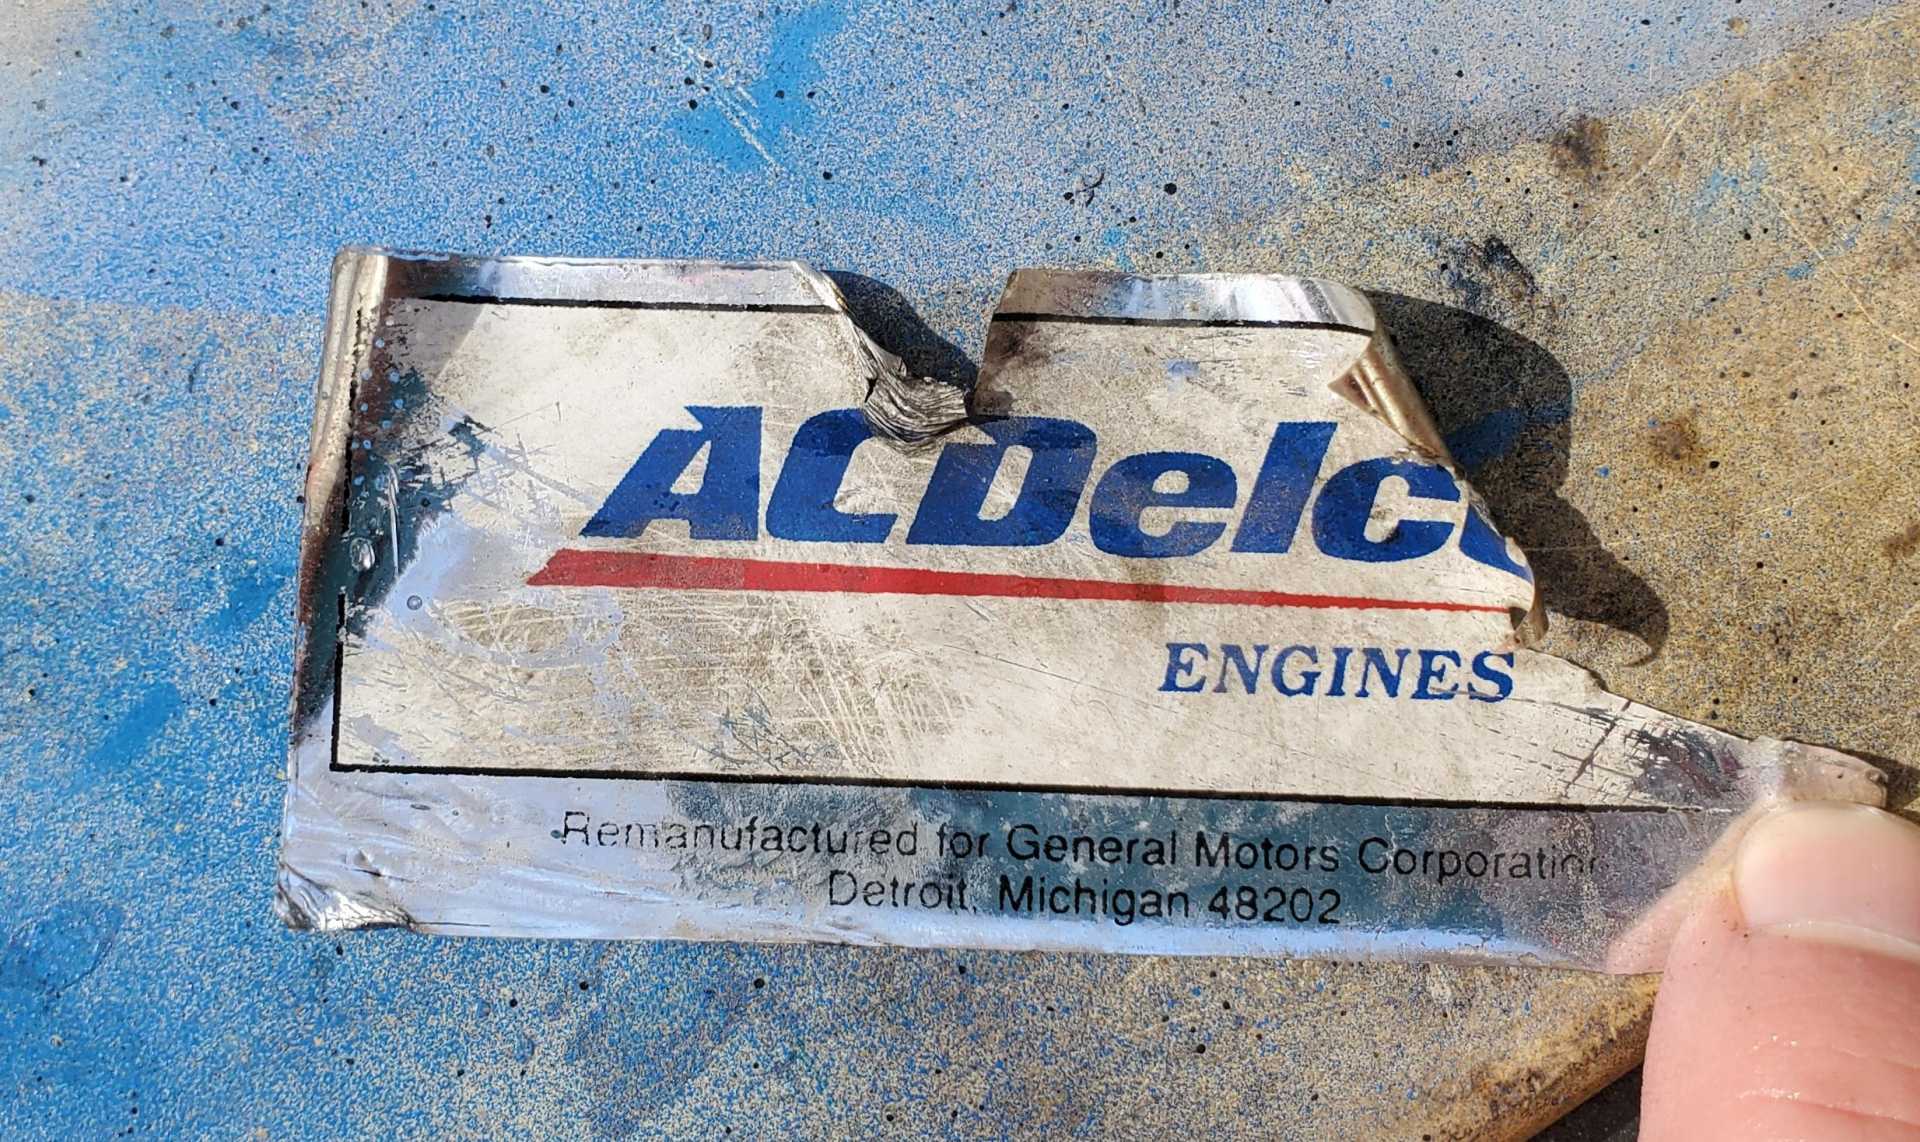
I’ve mentioned that this engine was a reman assembled in Mexico. Here’s more proof.
Hoping to reinstall the cam towers, cams and lifters tomorrow.
[This message has been edited by Quadfather (edited 11-22-2021).]
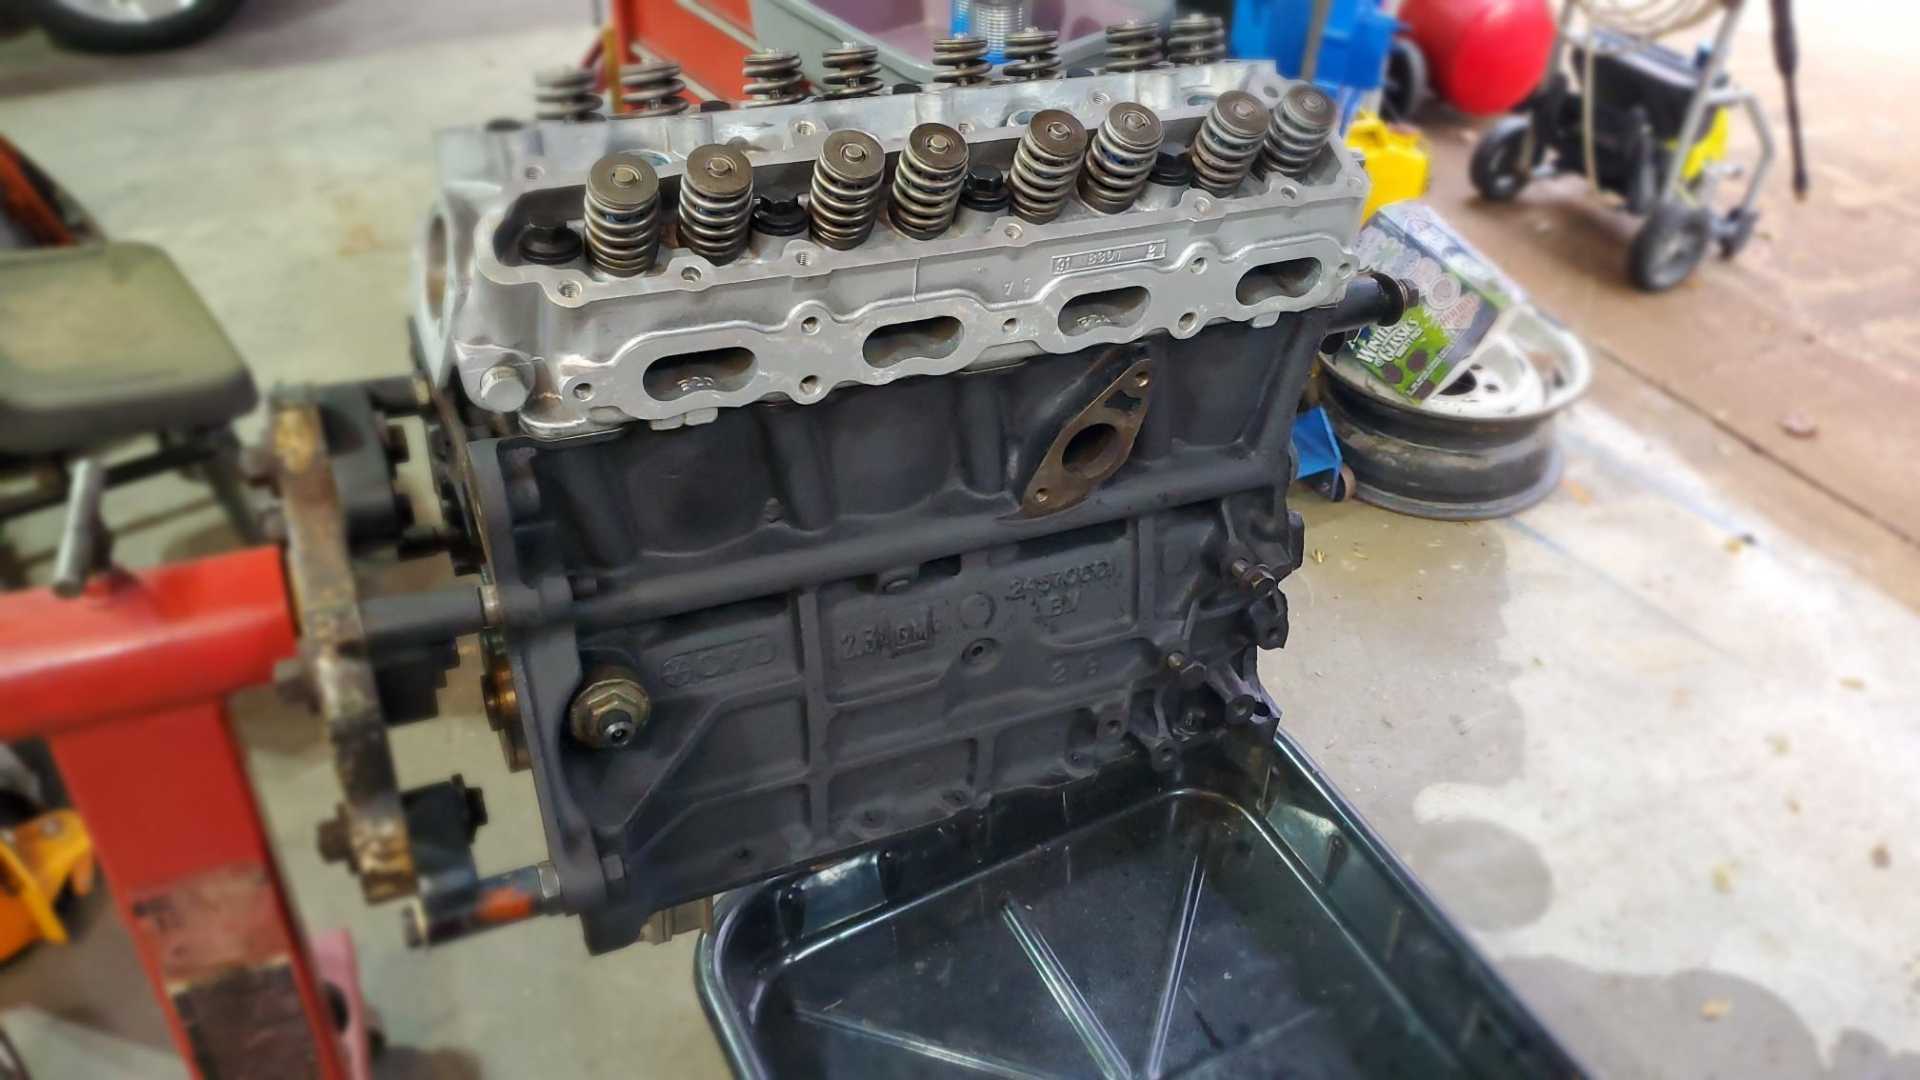
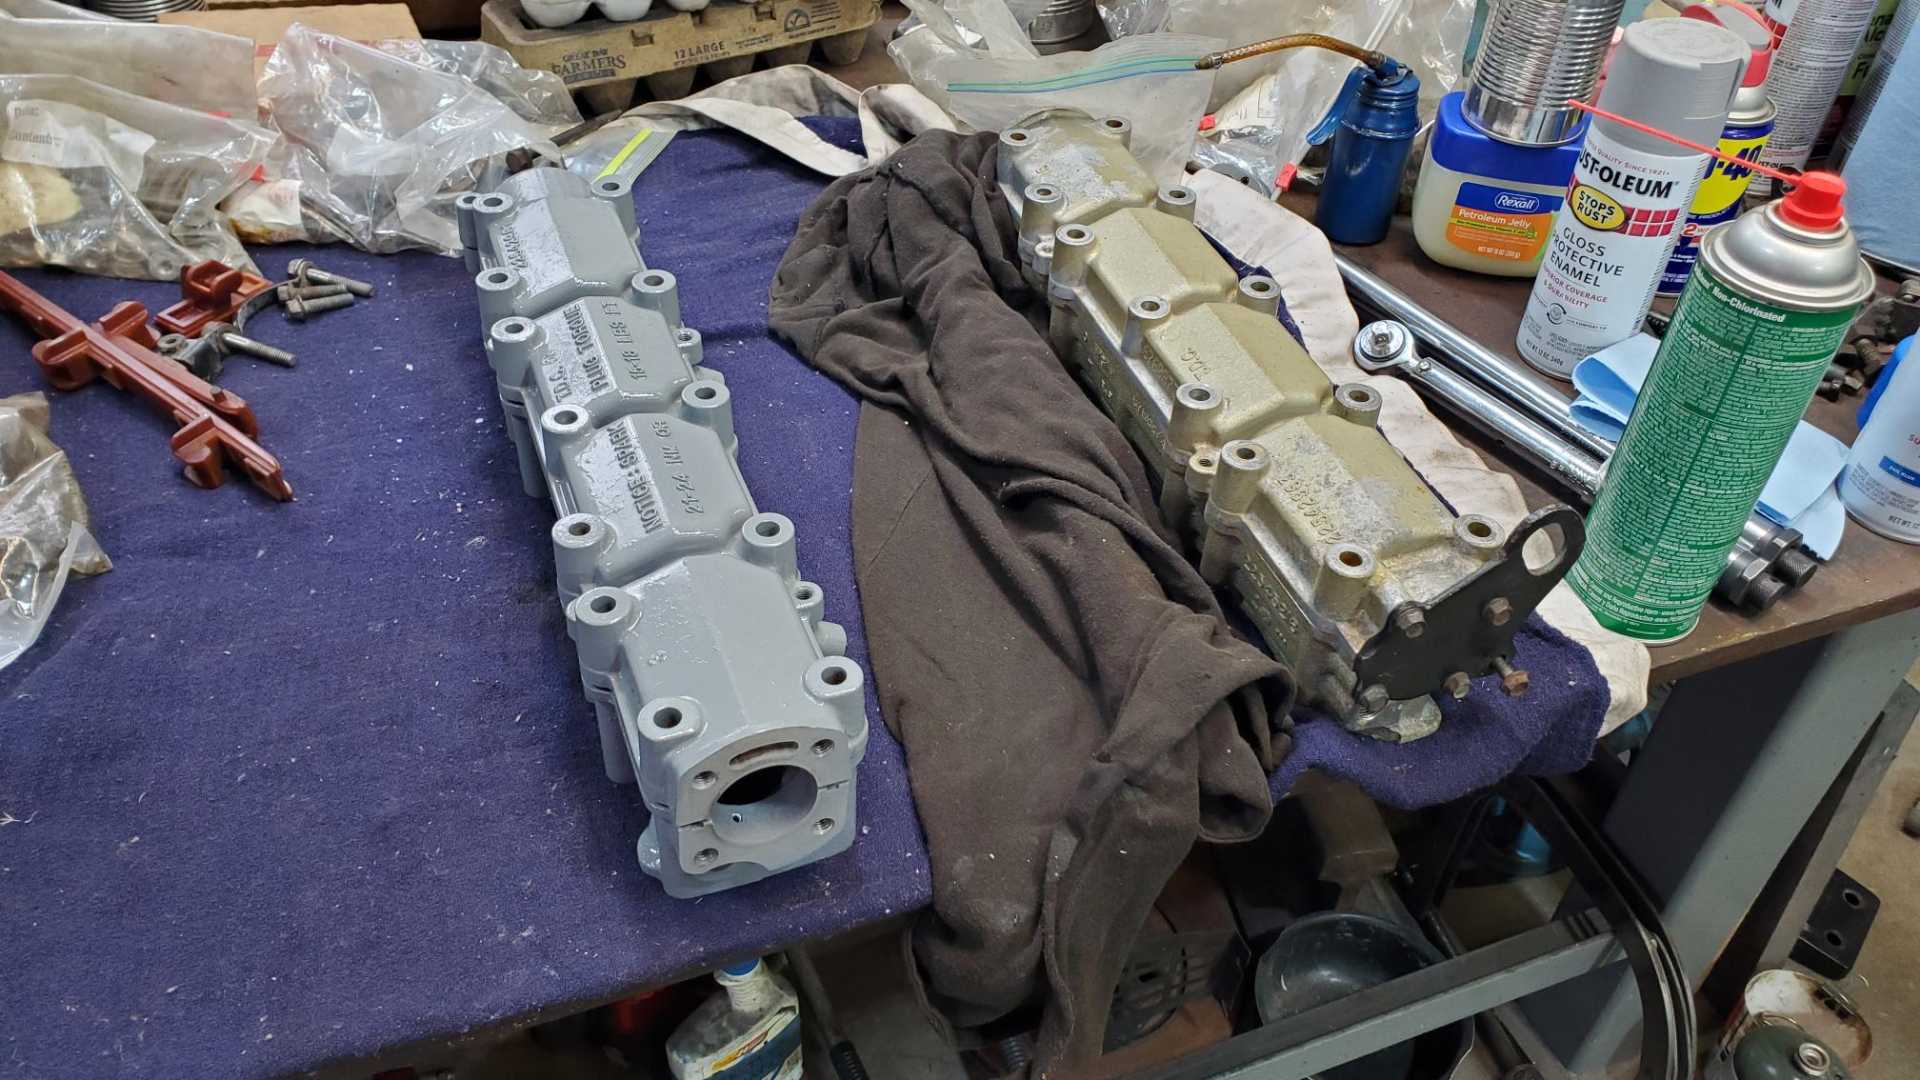
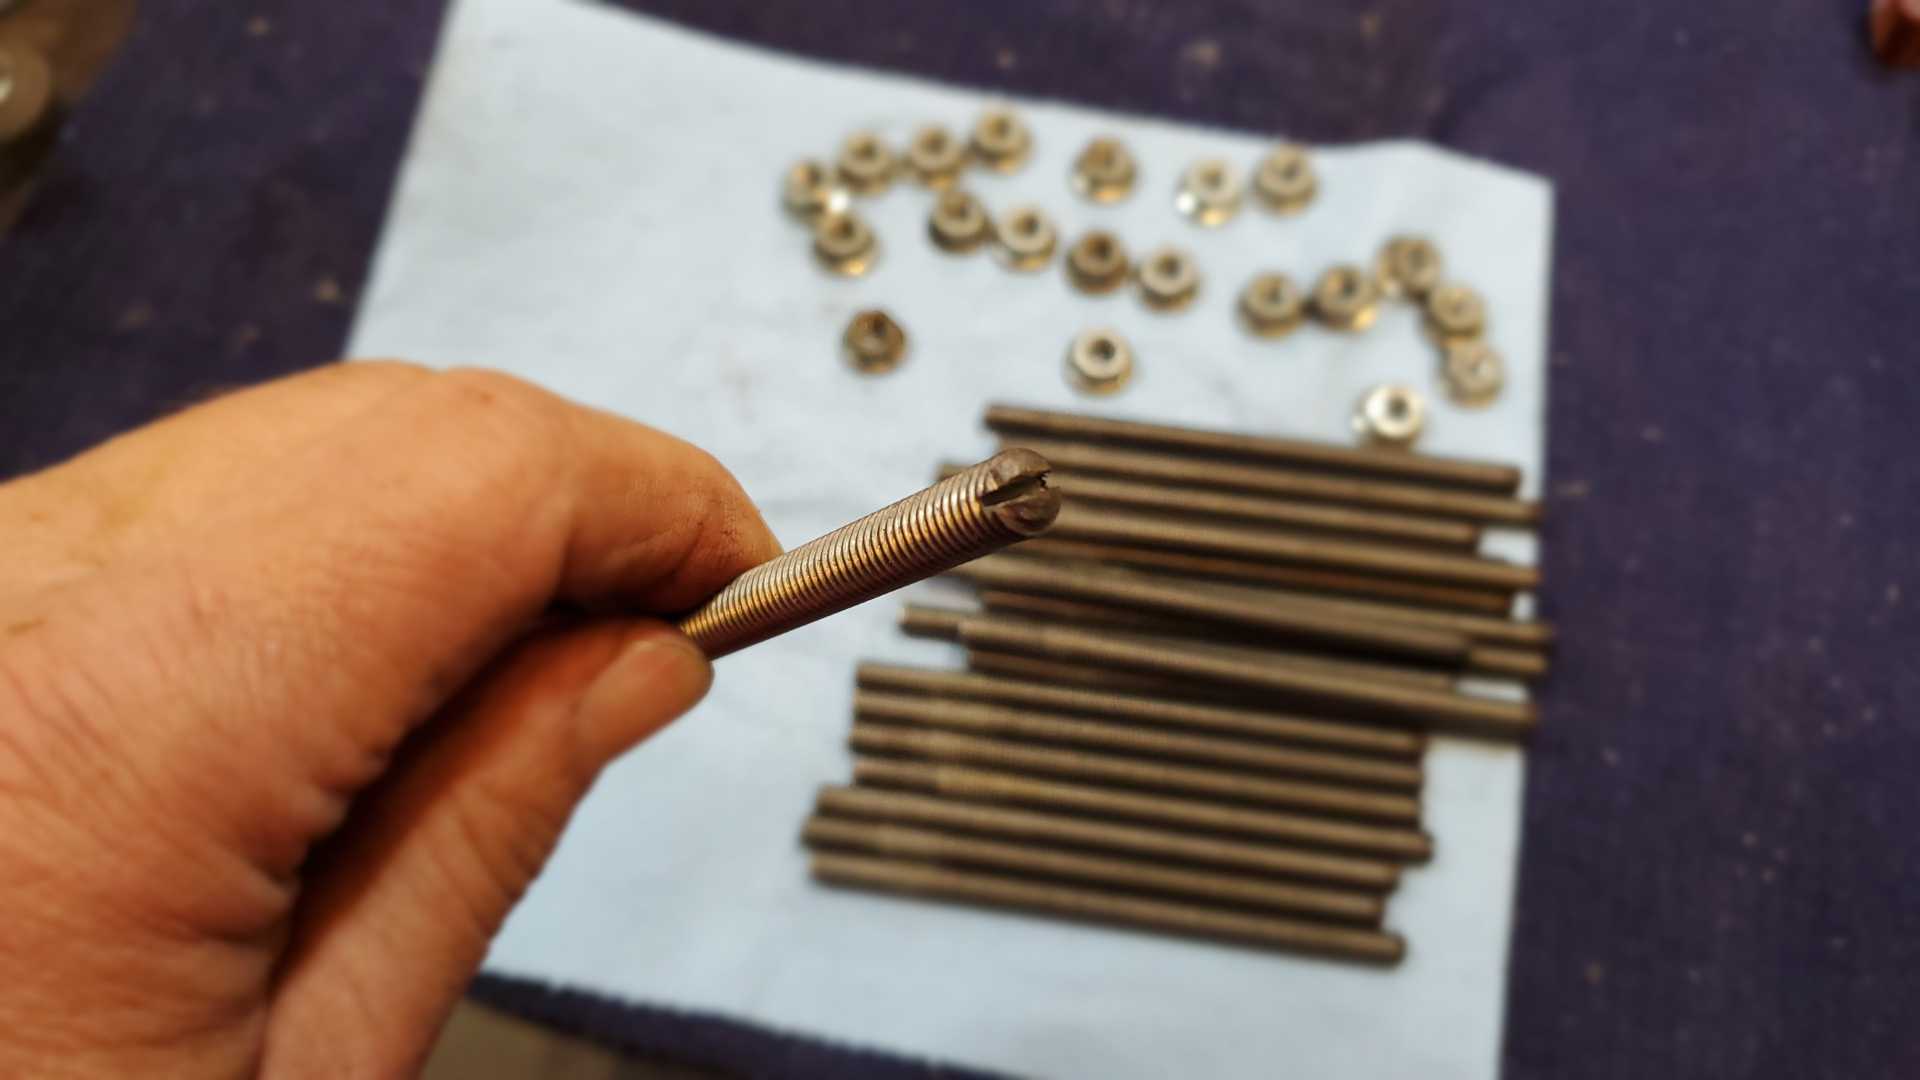
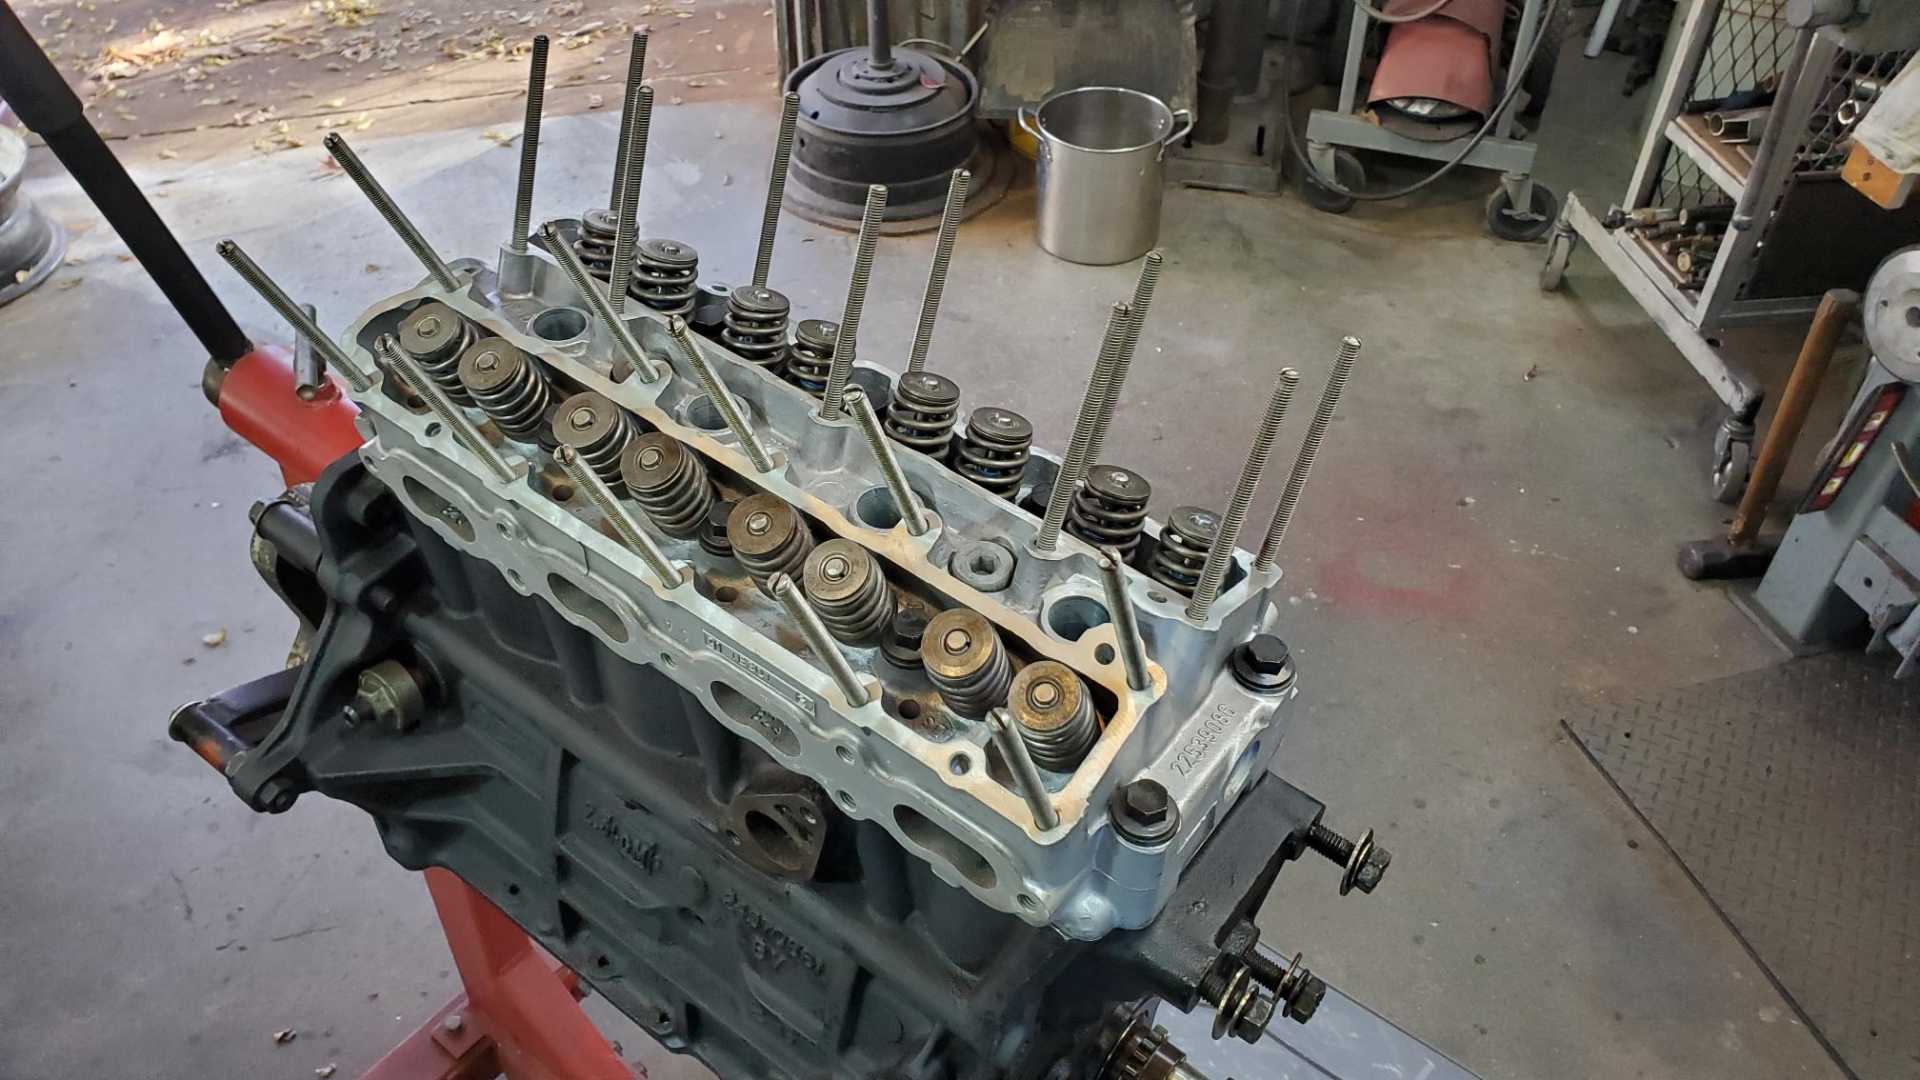
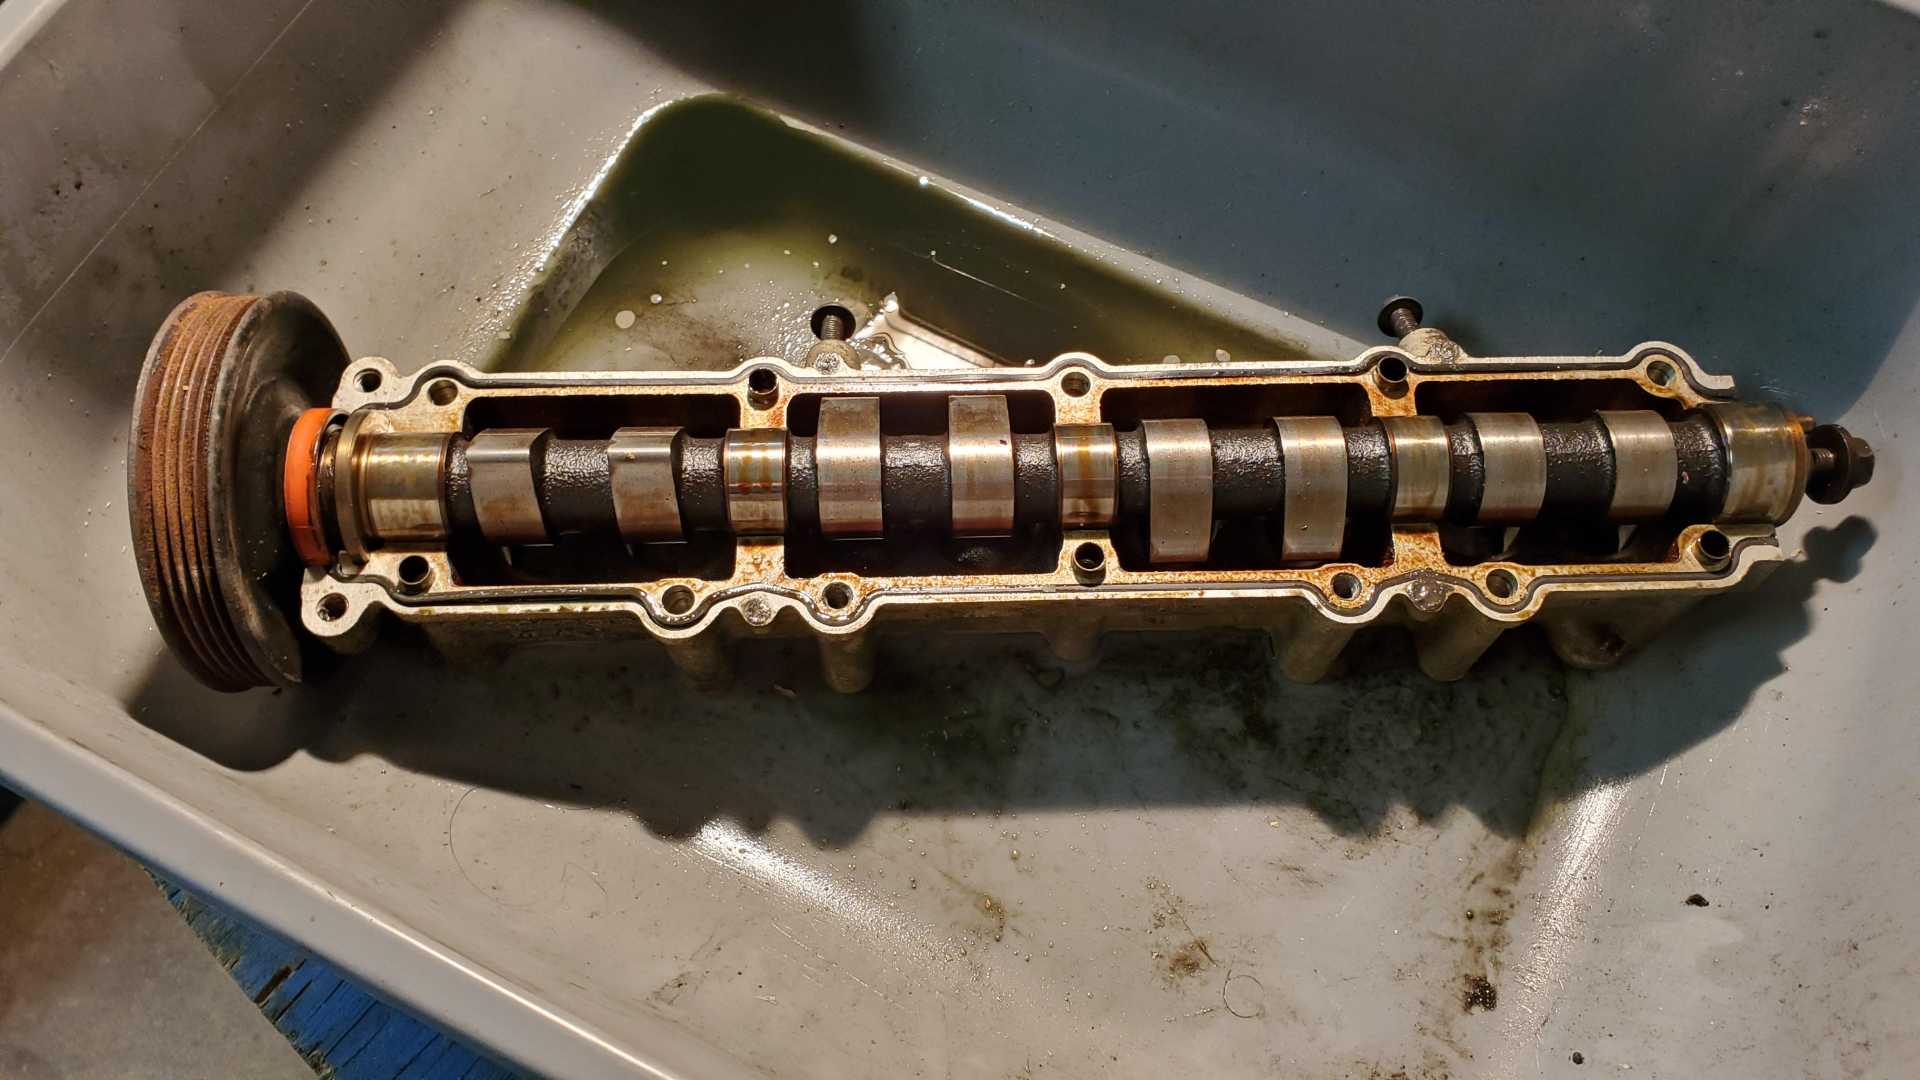
For the first time in almost a decade, my Quad has a head and cam towers installed. The homemade stud kit works well, after cleaning and adding some anti-seize to the bottom threads.
Spent a lot of time yesterday afternoon prepping the cam towers and caps for installation, then rushed around this afternoon to get the lifters and cams cleaned and installed.
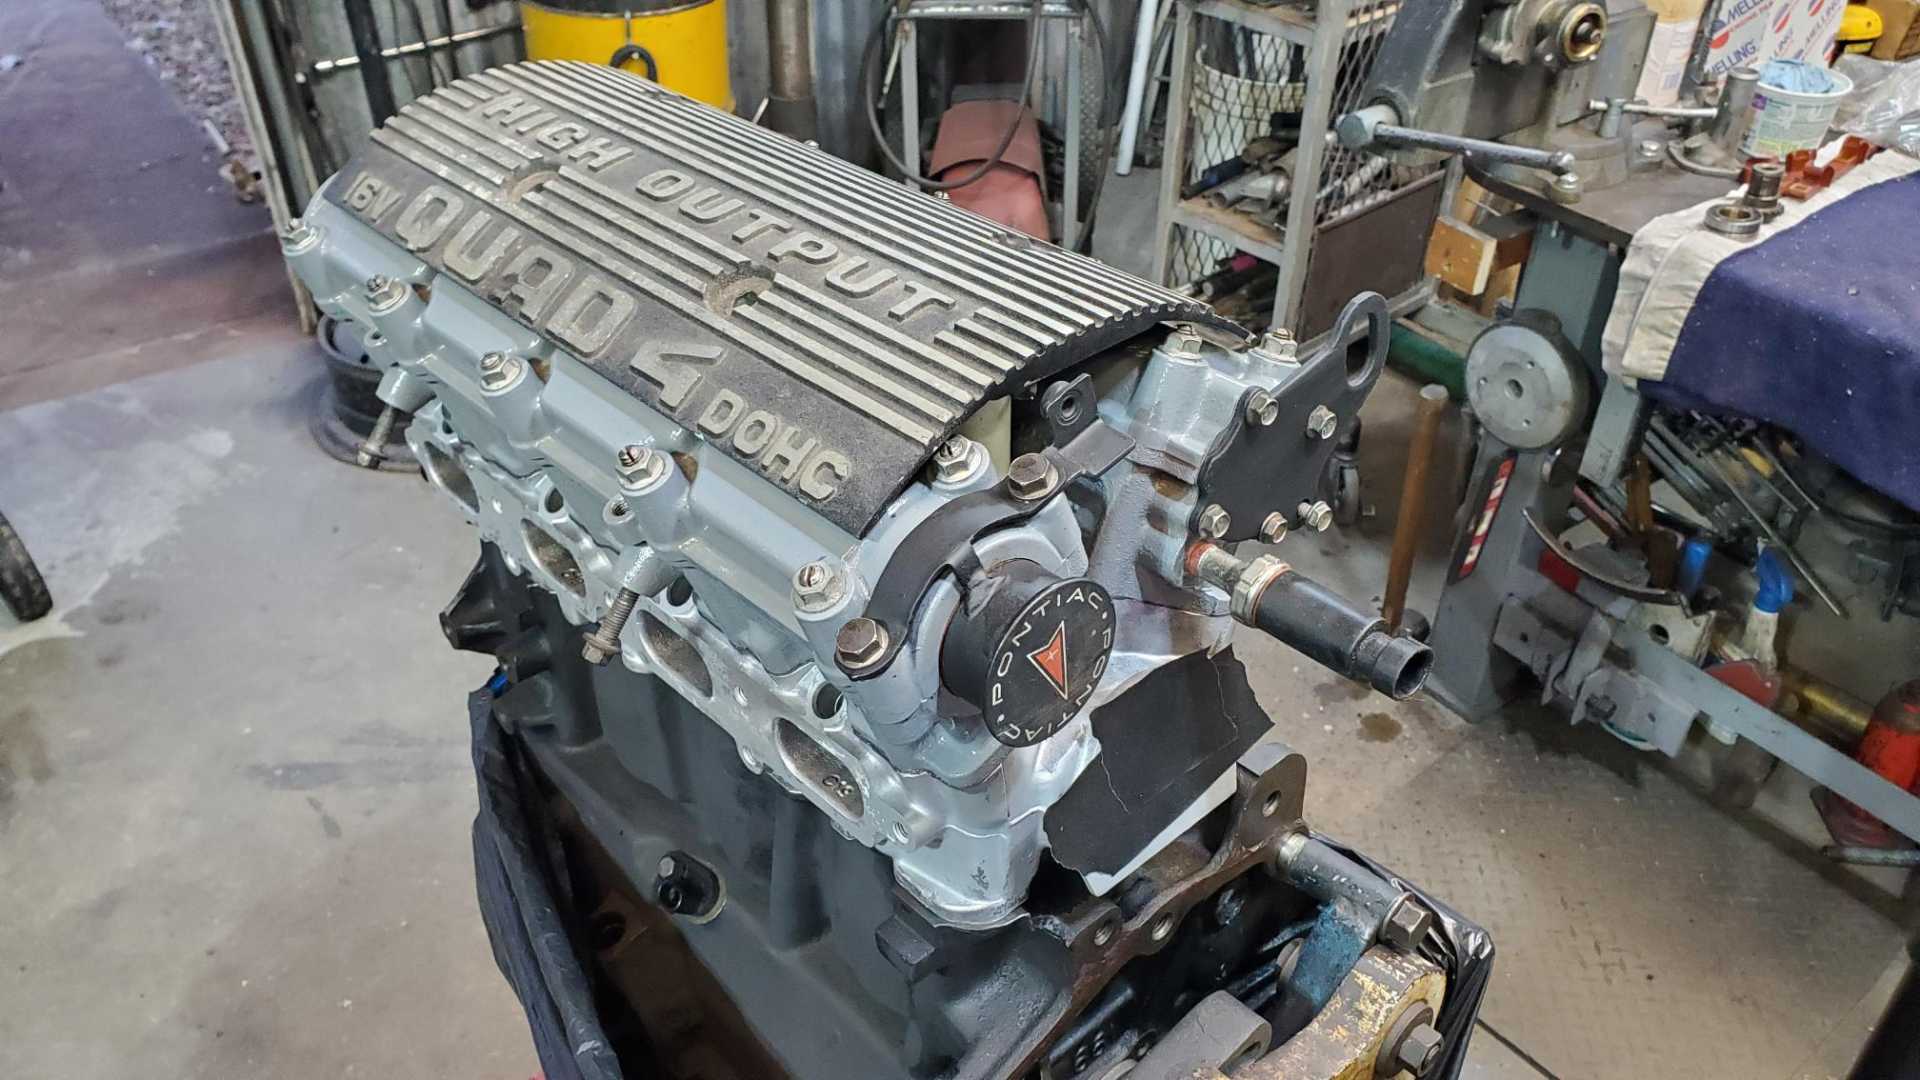
The Quad is such a weird-looking engine. No wonder the engineers decided to use an aluminum cover over the towers.
[This message has been edited by Quadfather (edited 01-10-2022).]
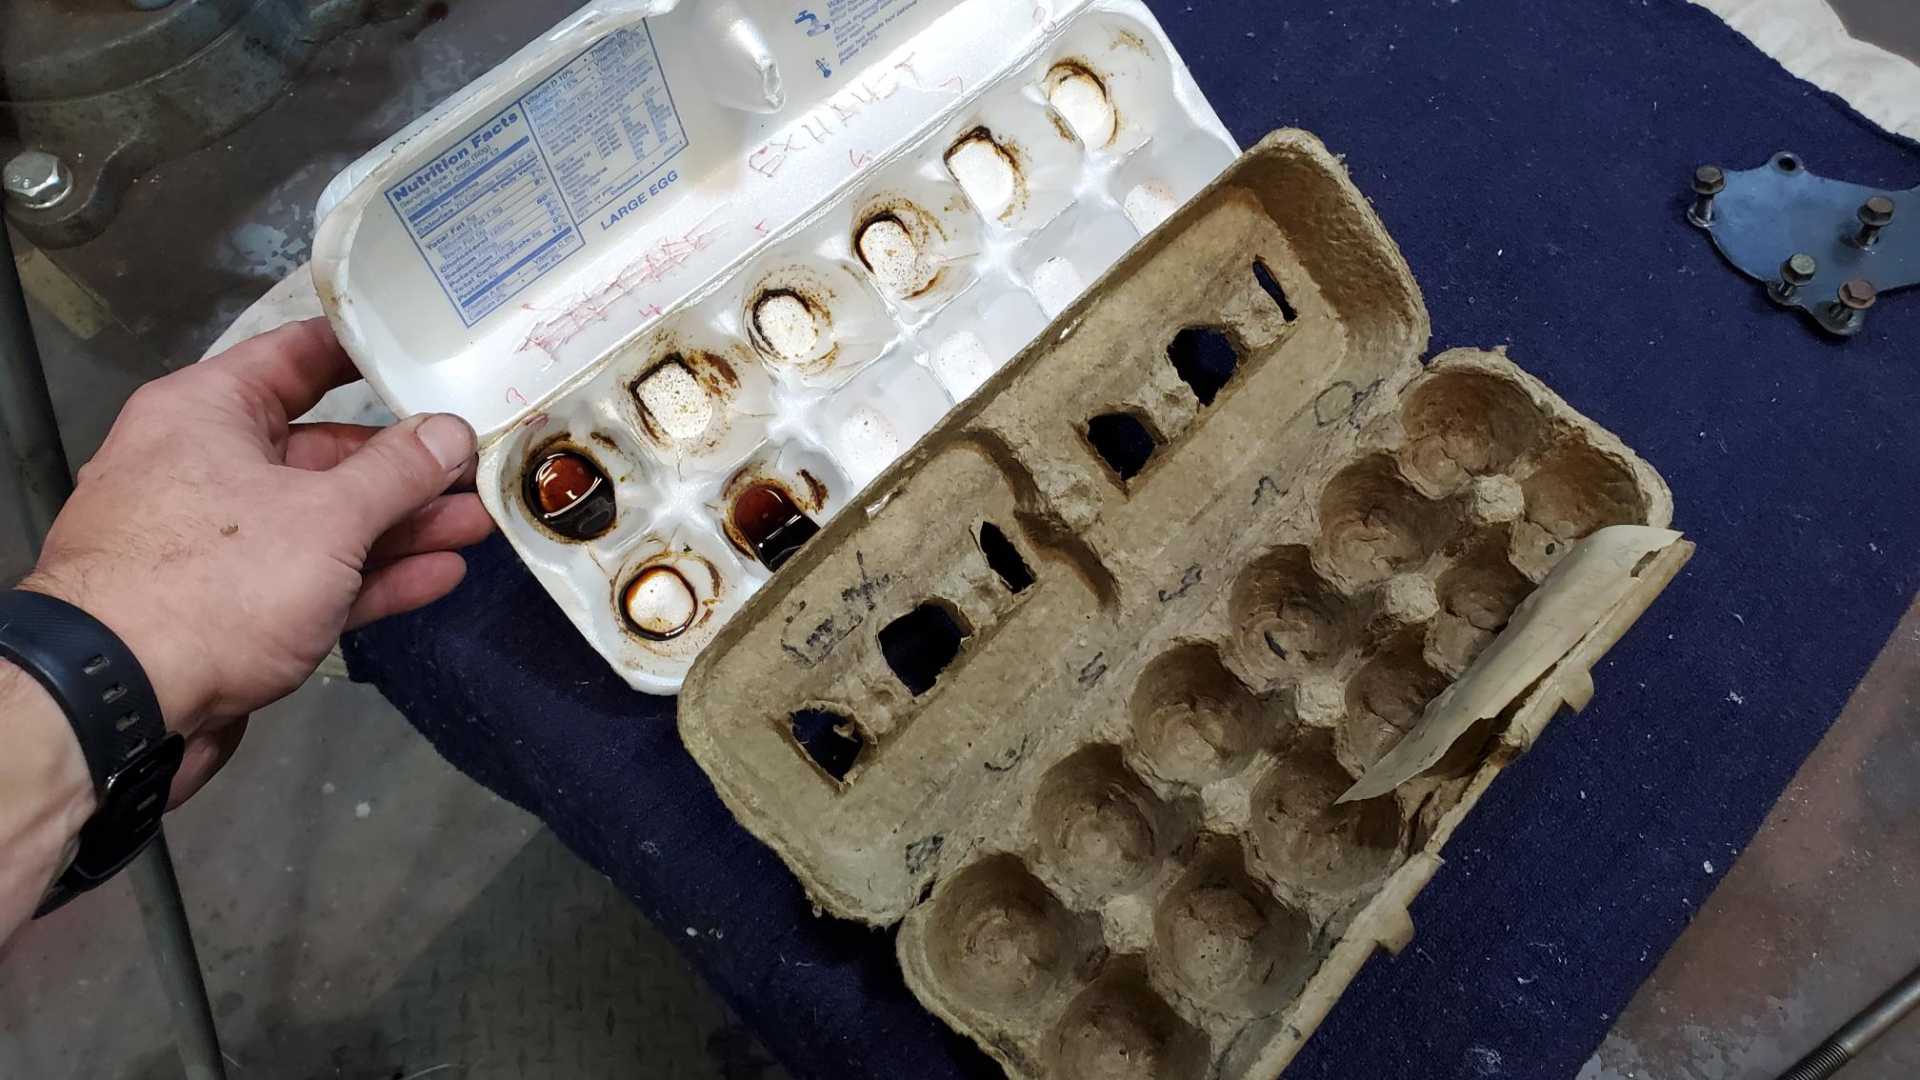
Here’s a tip about storing oily lifters for a decade. Use egg cartons, but be sure to pick polystyrene ones instead of the pressed paper ones. It was easy to read the numbers I wrote on the polystyrene one in 2012, not so much on the pressed paper one, thanks to it wicking up all that old oil.
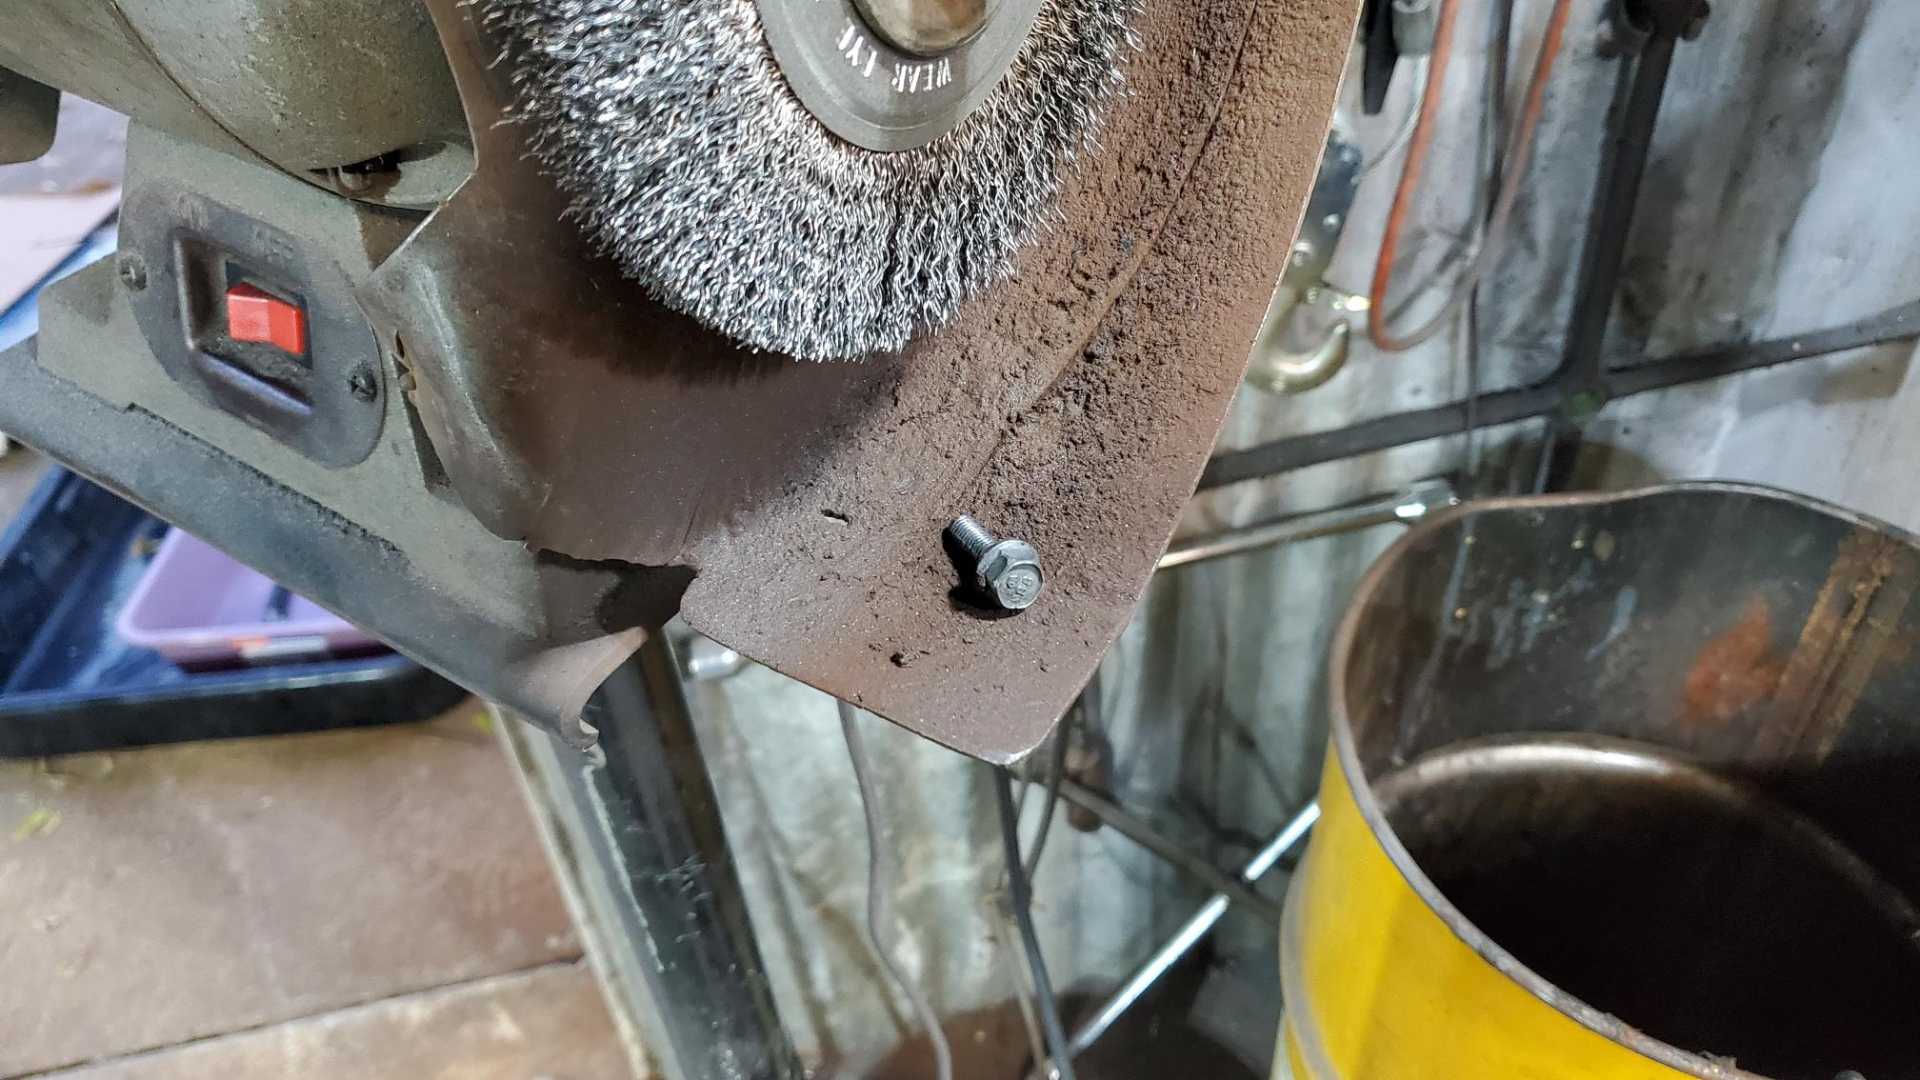
Also, beware of black holes. This is the plate/lifting eye that bolts to the end of the exhaust cam tower. One of the four mounting bolts disappeared this afternoon.
I spent about 20 minutes moving parts and tools off my work table and even got down on the floor and looked underneath but still didn’t find that bolt. The only logical explanation is that a small black hole opened up and transported it to another dimension.
While hitting the remaining three bolts with the wire wheel on the bench grinder, I dropped one. Spent ANOTHER 20 minutes looking for that bolt, too. Just as I was about to give up, I found it lying on the flange on the grinder. I swear I’d seen it flying across the floor after it left my hand.
Can’t do much reassembly while I wait for parts. My eBay timing chain tensioner arrived this afternoon.
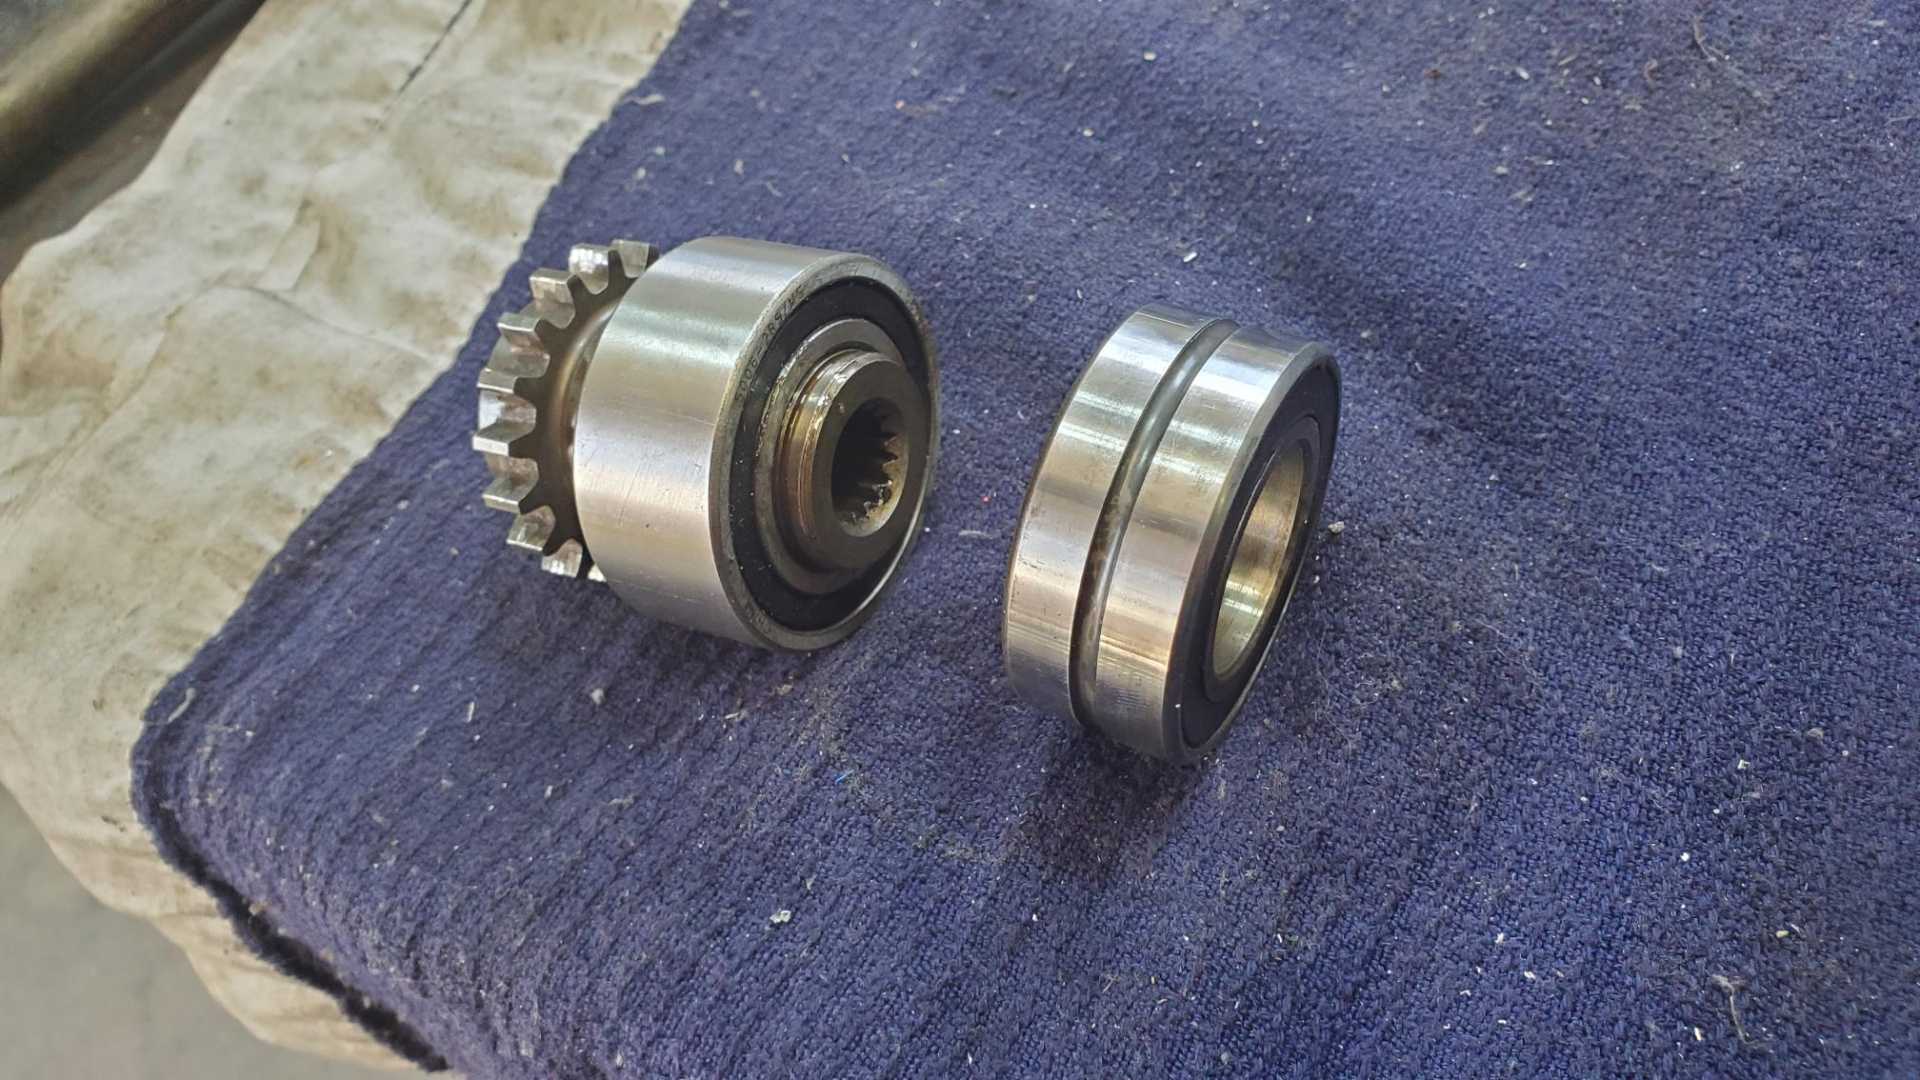
I also need a new bearing for the timing chain idler gear/water pump drive. I pressed out the bearing the other day to check it, then ruined it when I tried to reinstall it. Can’t get a replacement until Monday at the earliest.
[This message has been edited by Quadfather (edited 11-27-2021).]
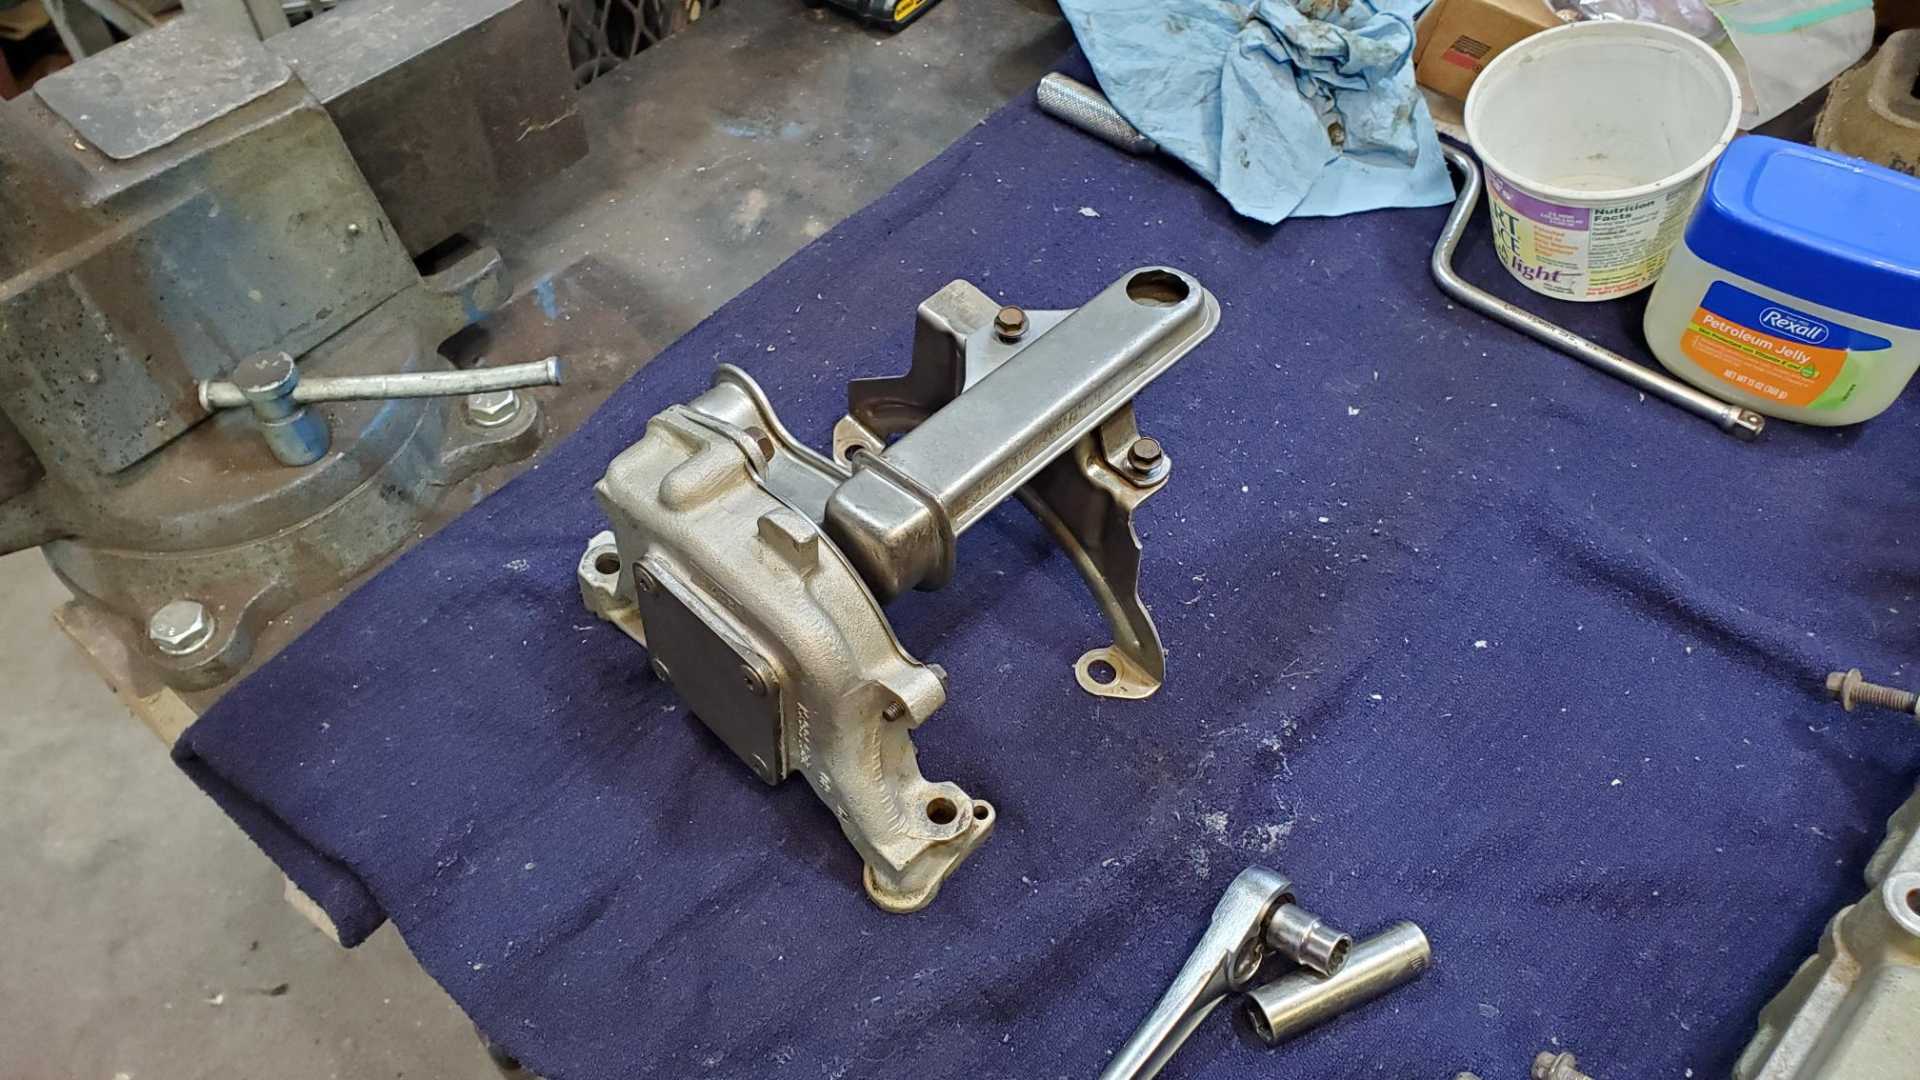
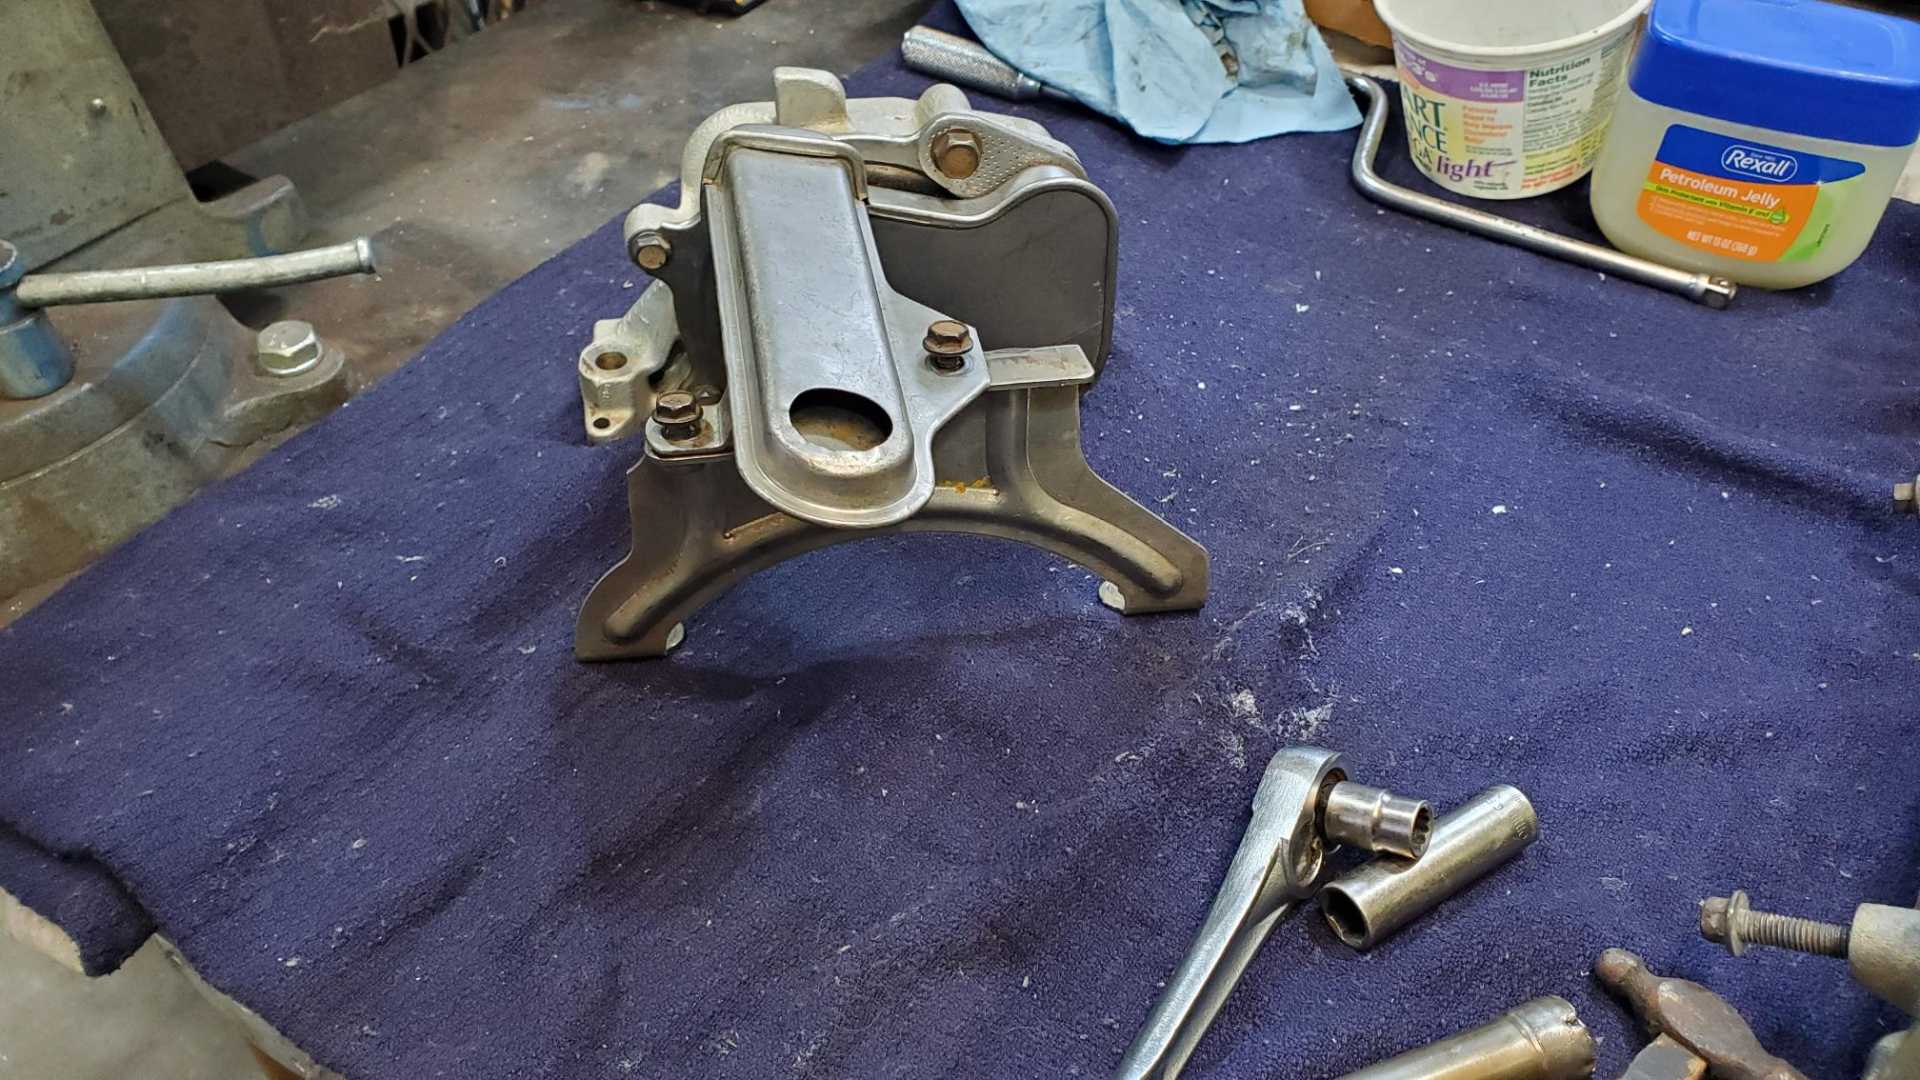
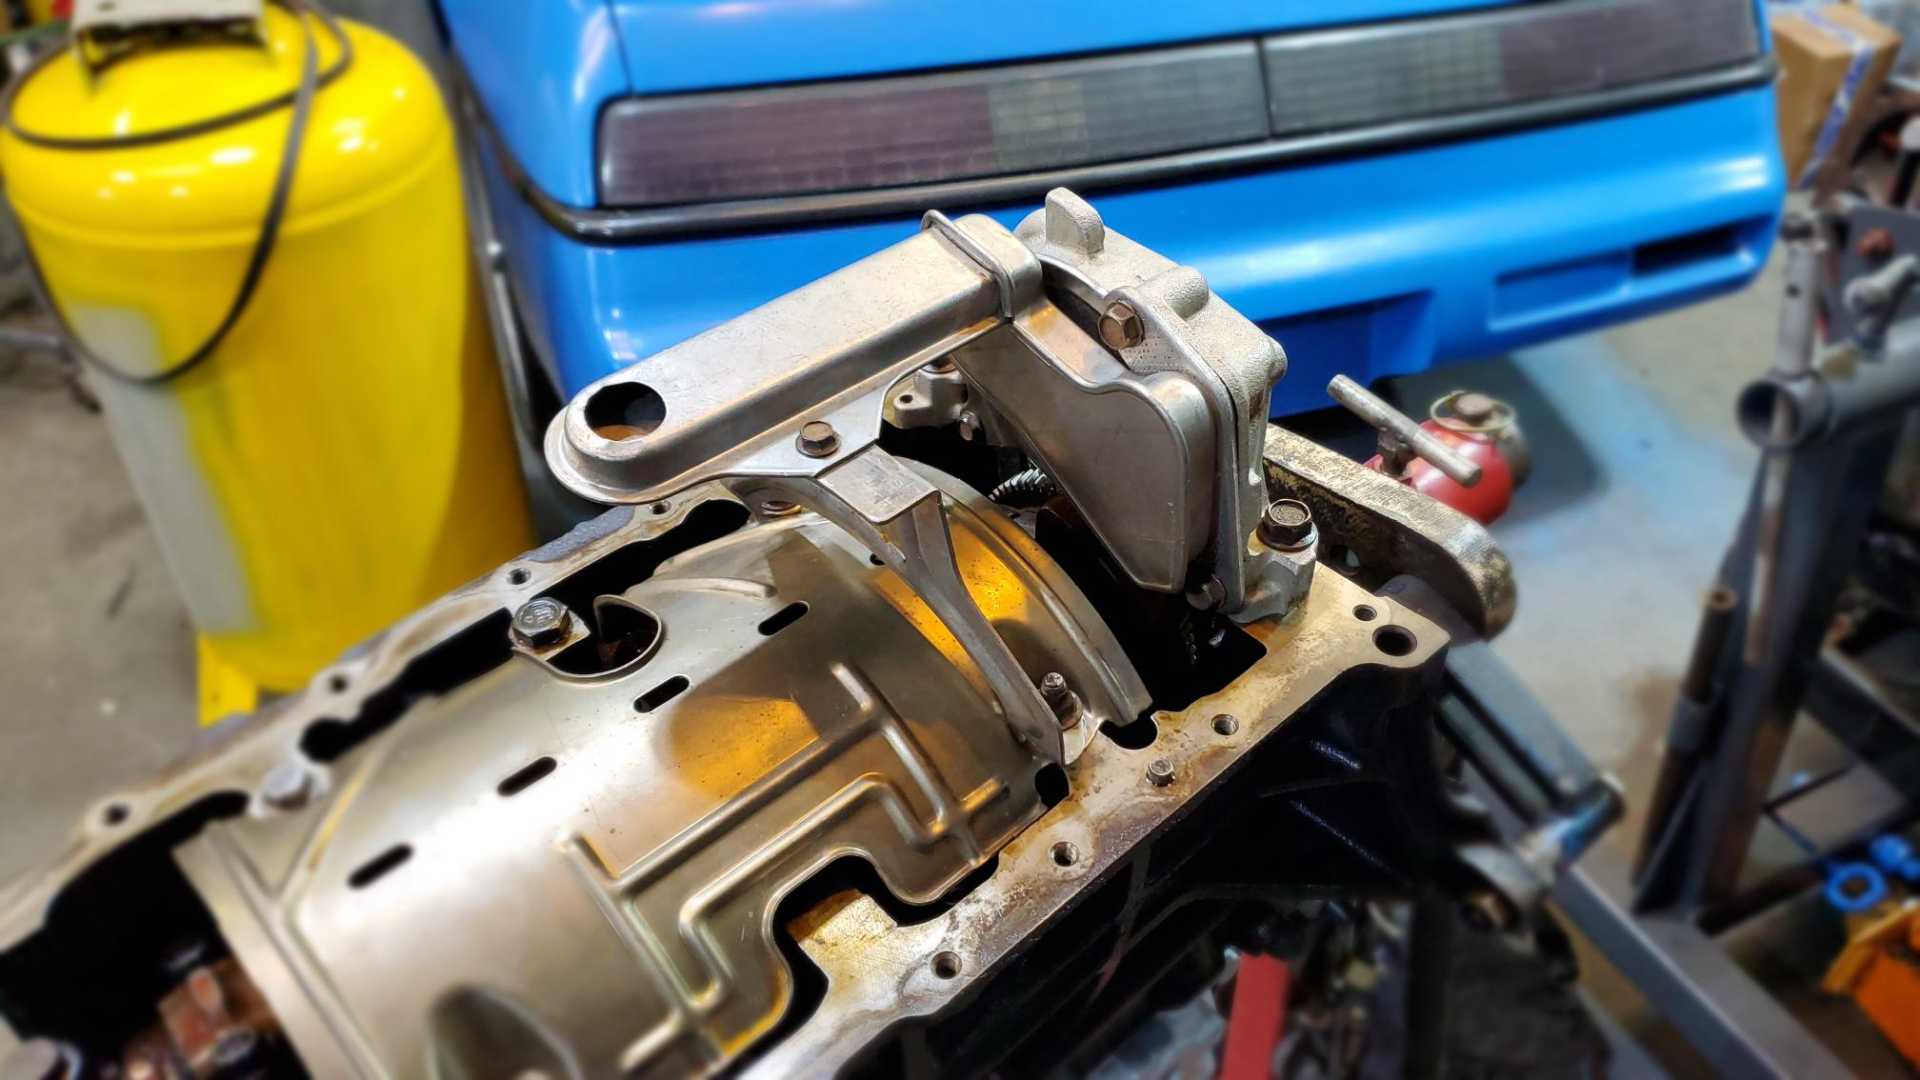
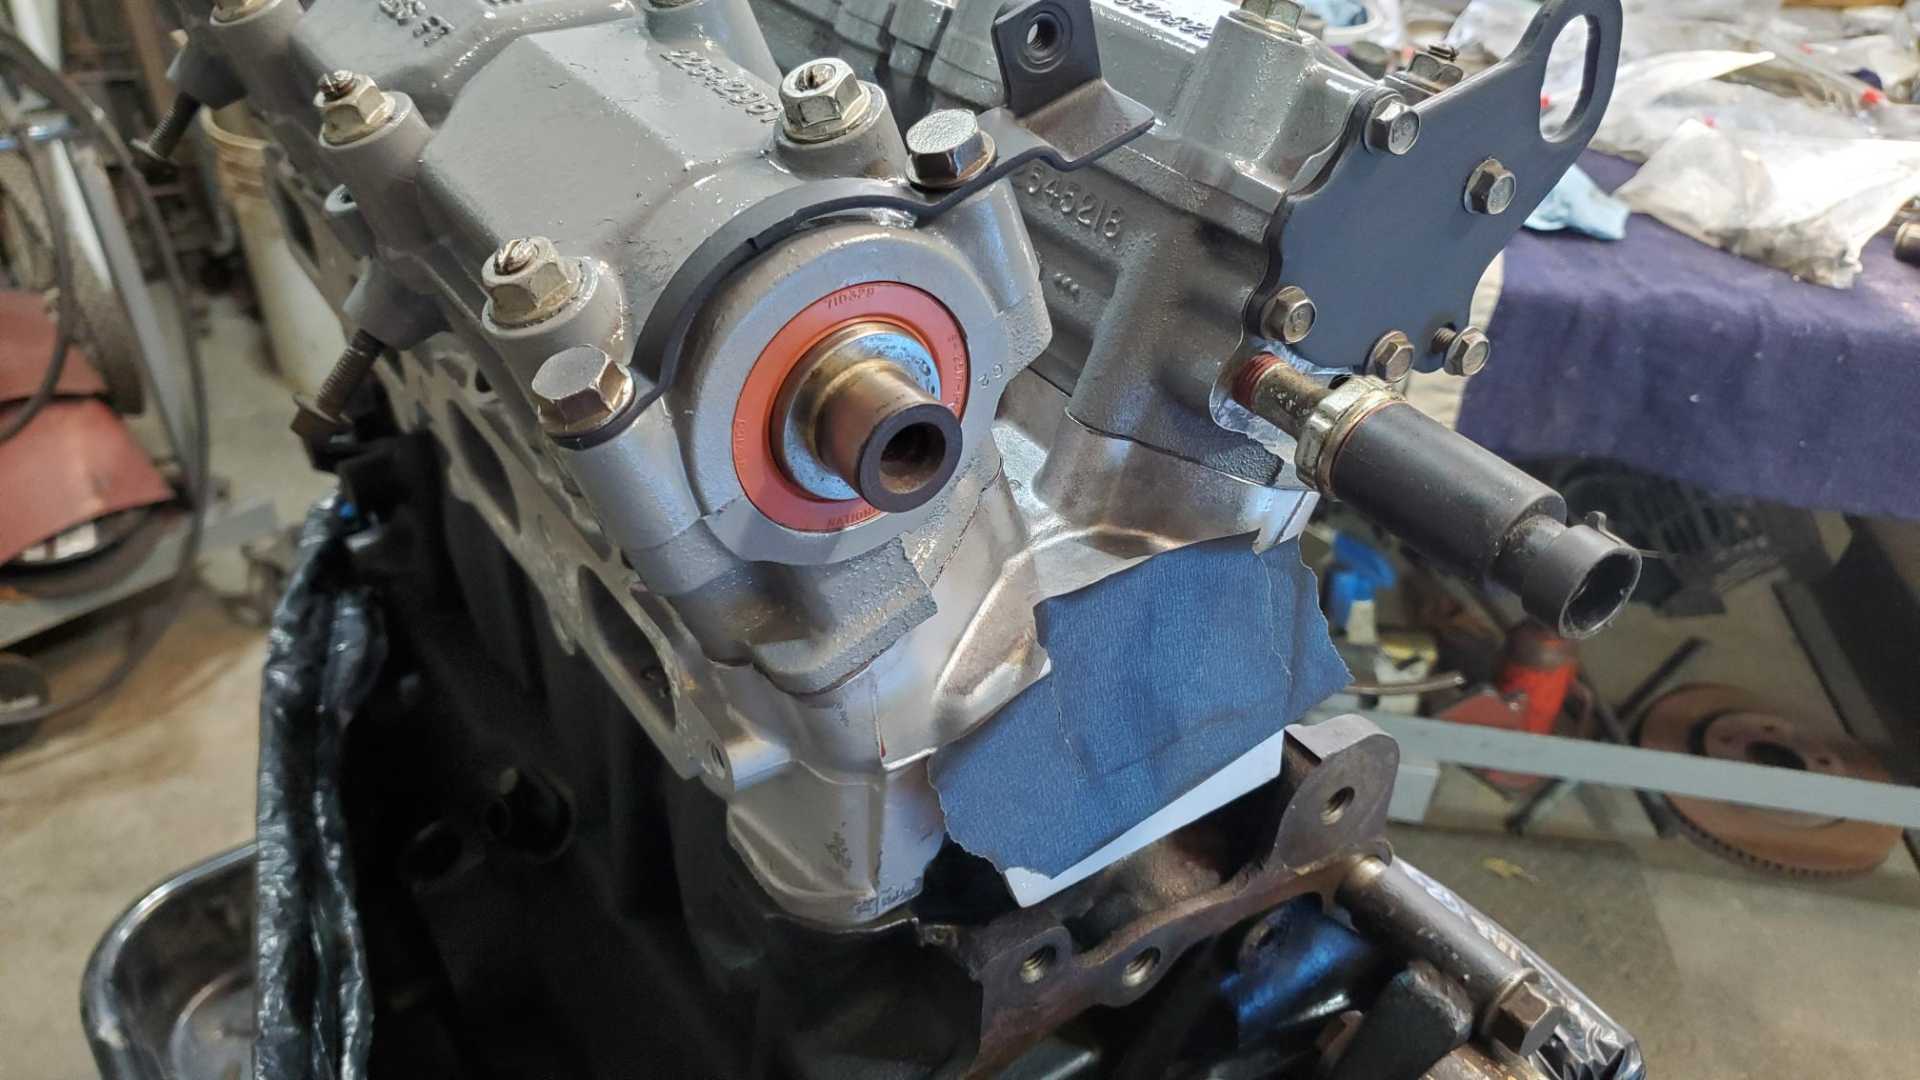
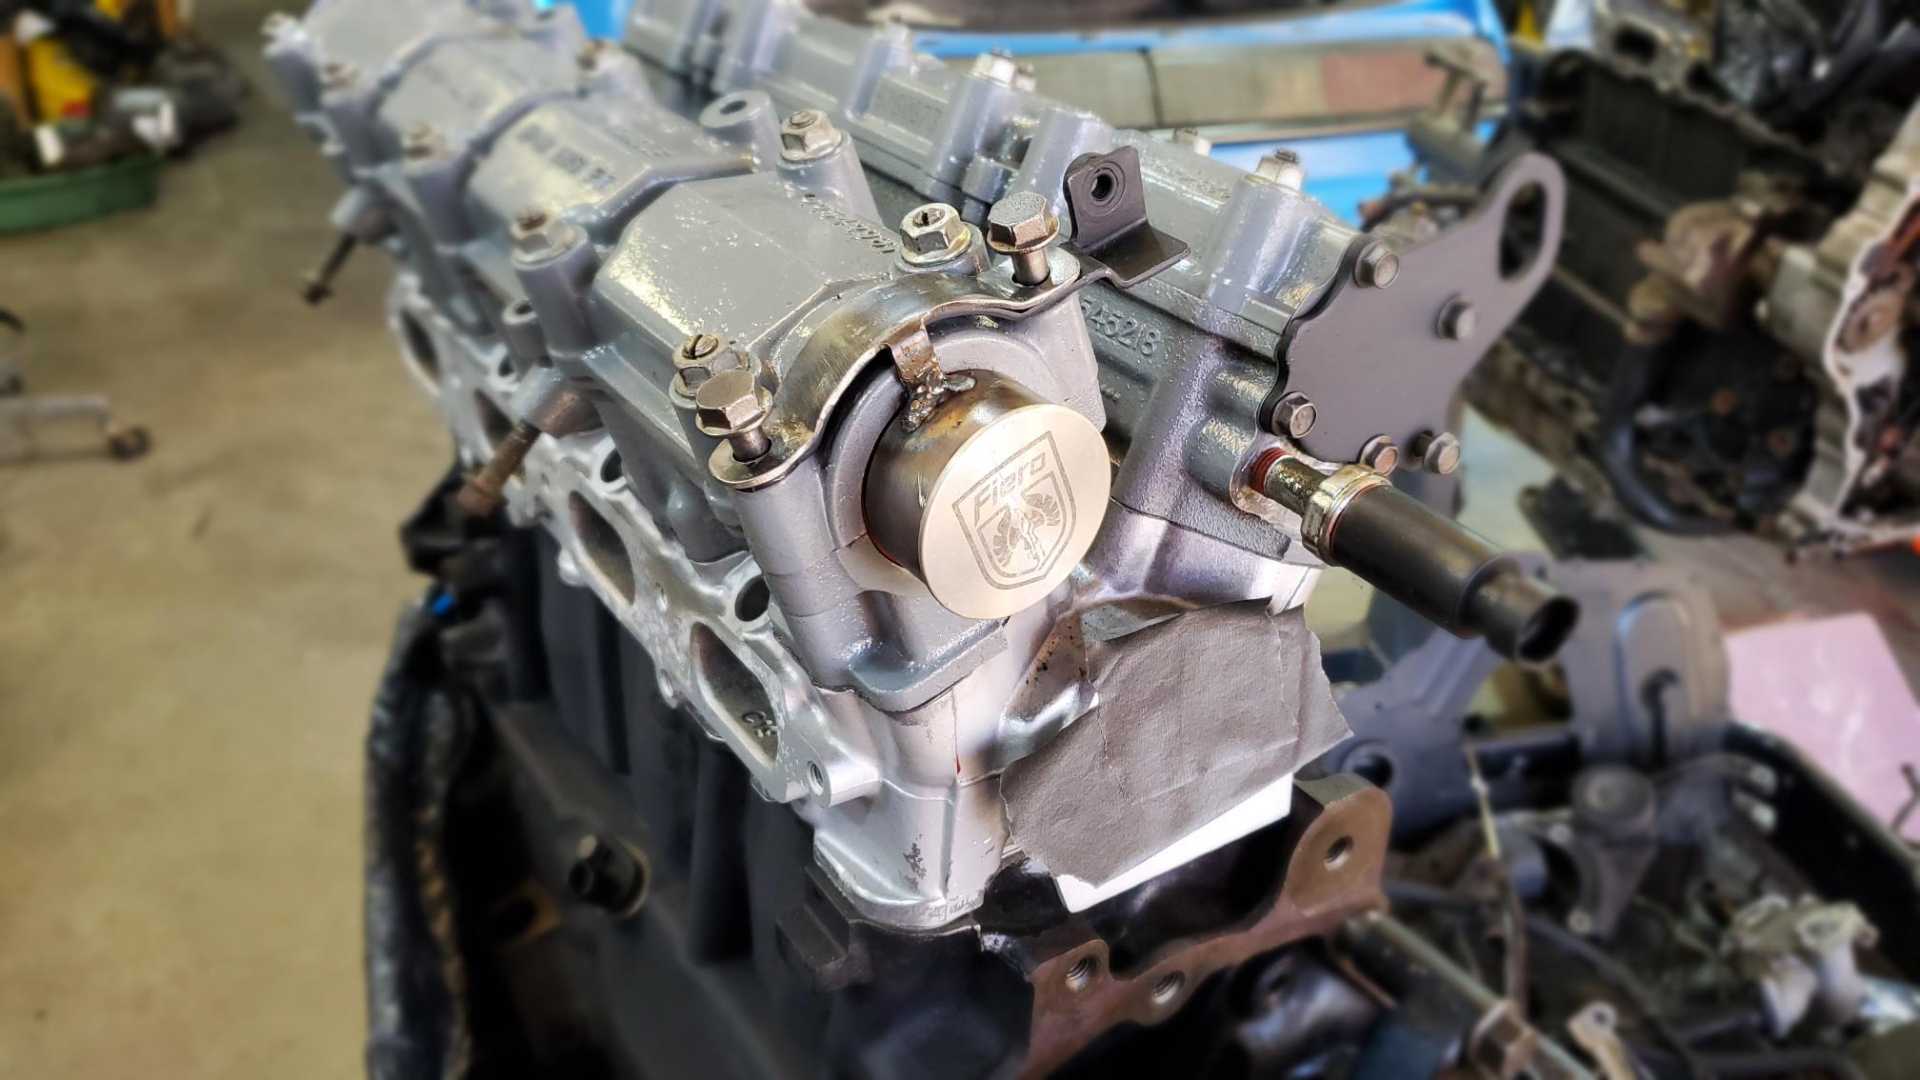
Waiting for parts gave me time to work on other projects. As I’ve mentioned before, the Quad drives the power steering pump with a pulley on the intake cam. Since it’s not needed in the Fiero I decided to remove the pulley. The downside is that leaves the nub sticking out of the cam housing and also causes concern about the oil seal being unprotected.
Some of the fellas in the Quad 4 Facebook group are racers who say they just leave it off and it never causes problems. One guy said he cuts the nub off and polishes the end so it looks better.
I decided to make a little cover, remembering my experience with making my own center caps for my GTZ wheels. Here’s the thread about that:
The cam housing has a couple of bolts on the end, presumably to hold the seal in place but also to hold a bracket for the fuel lines. I made another bracket to sit on top of that one.
The Grand Prix centers seem to be the best fit. I tried using a Fiero one but most of the teeth broke off.
[This message has been edited by Quadfather (edited 11-27-2021).]
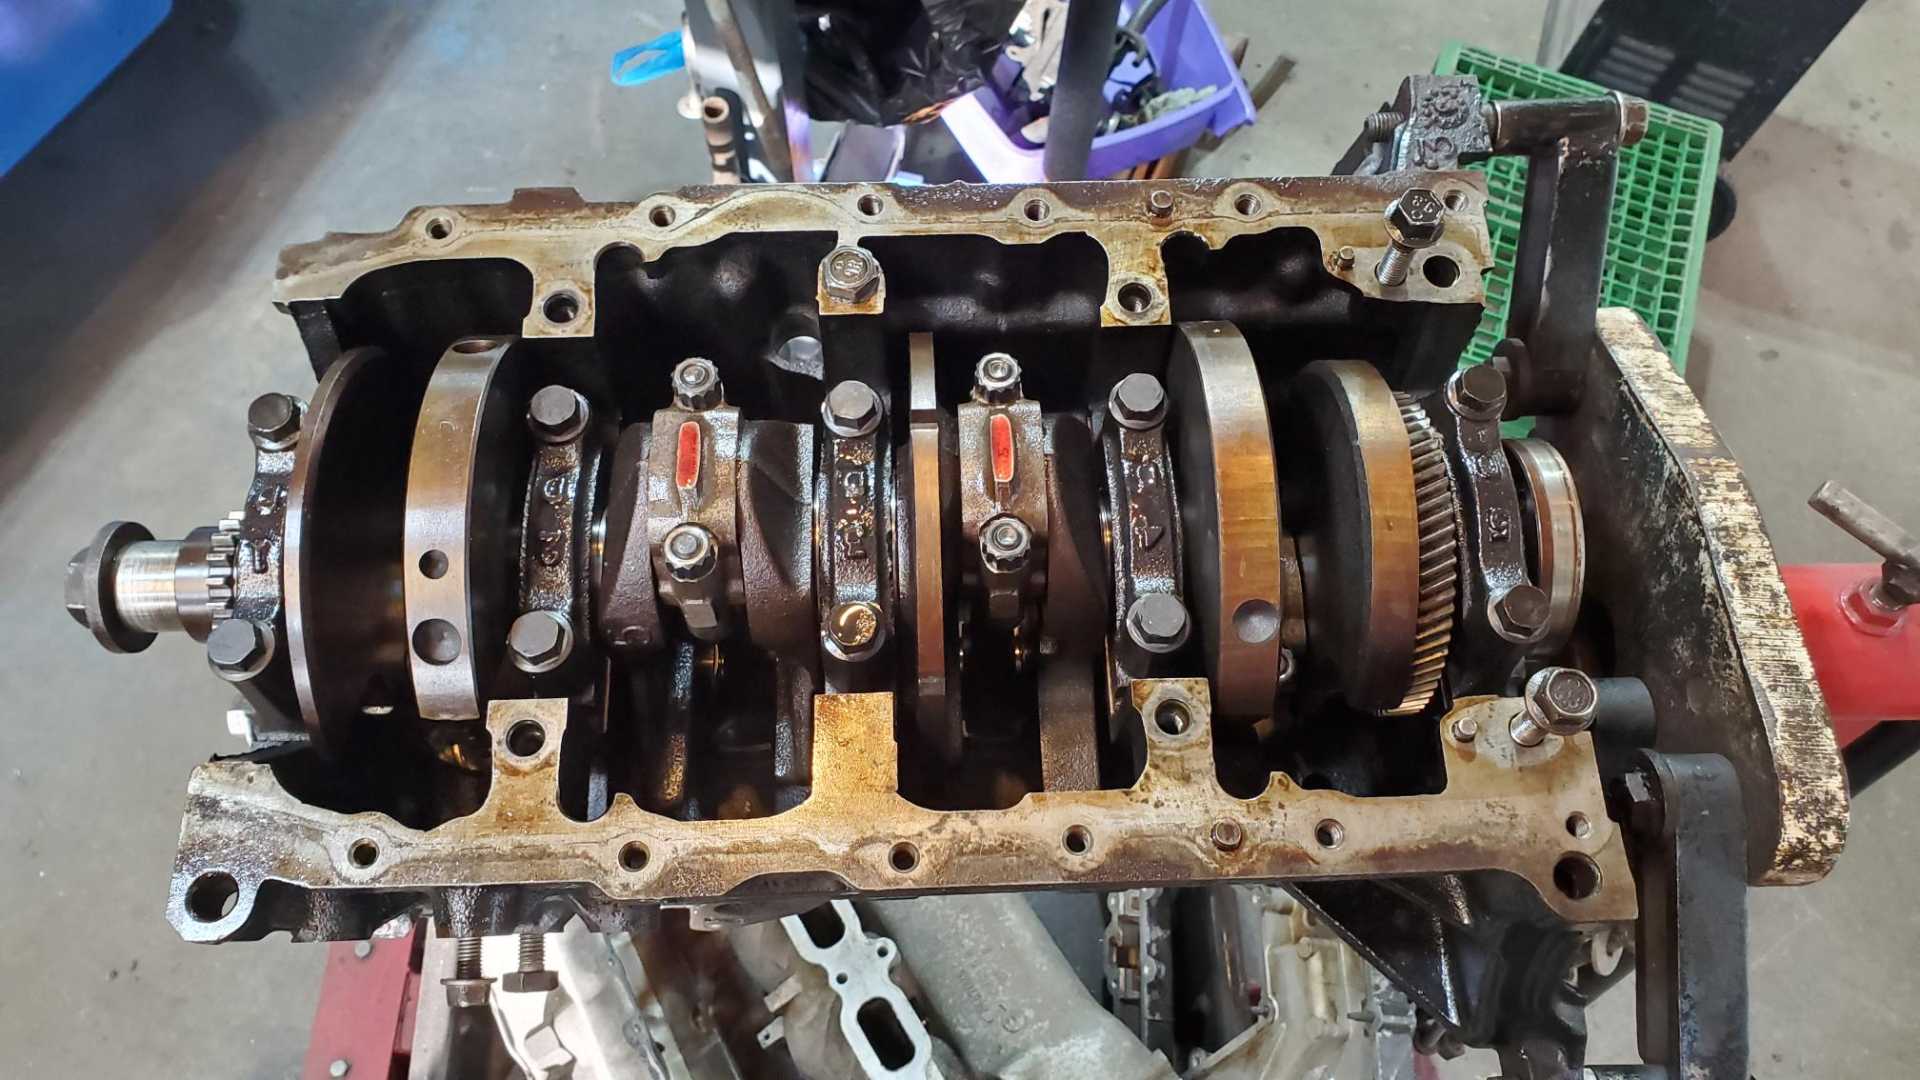
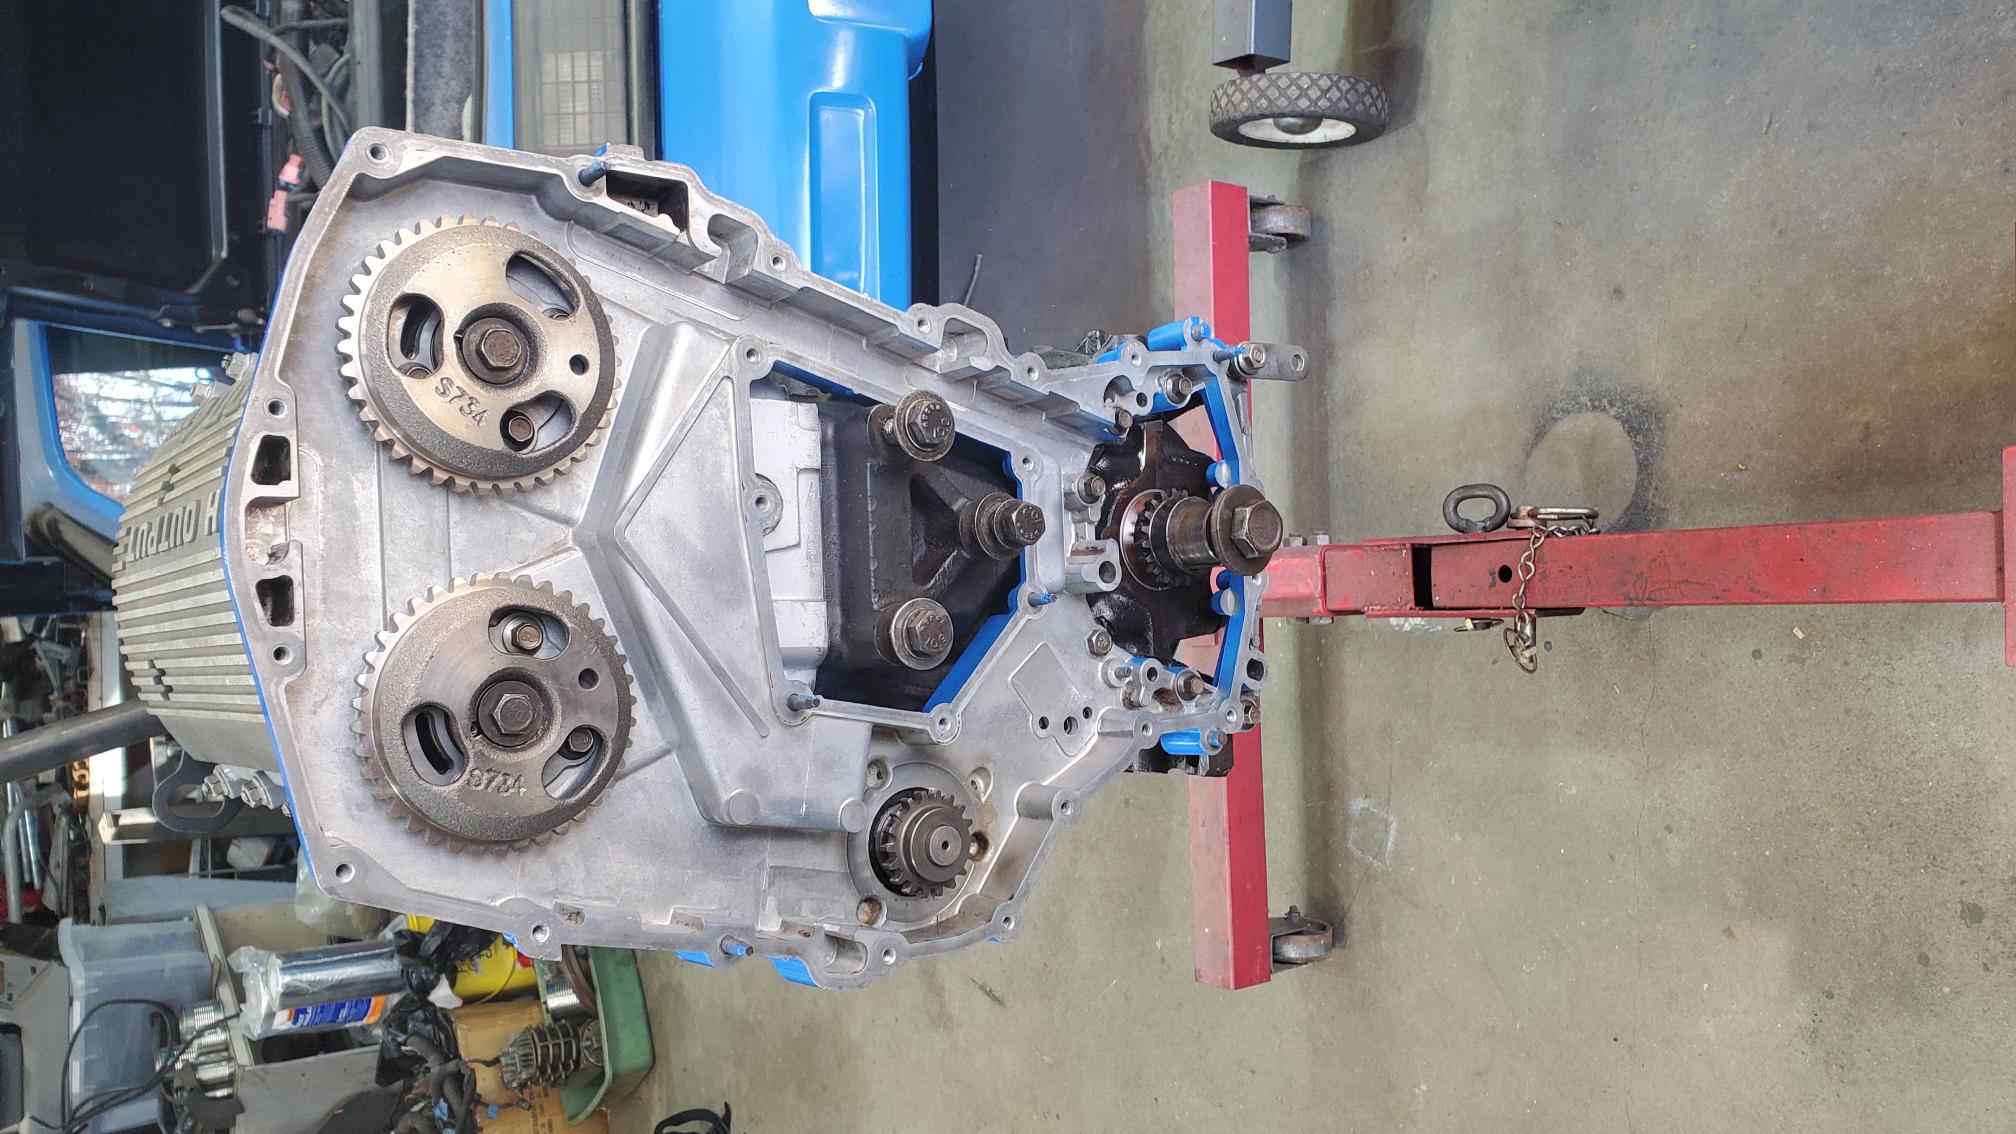
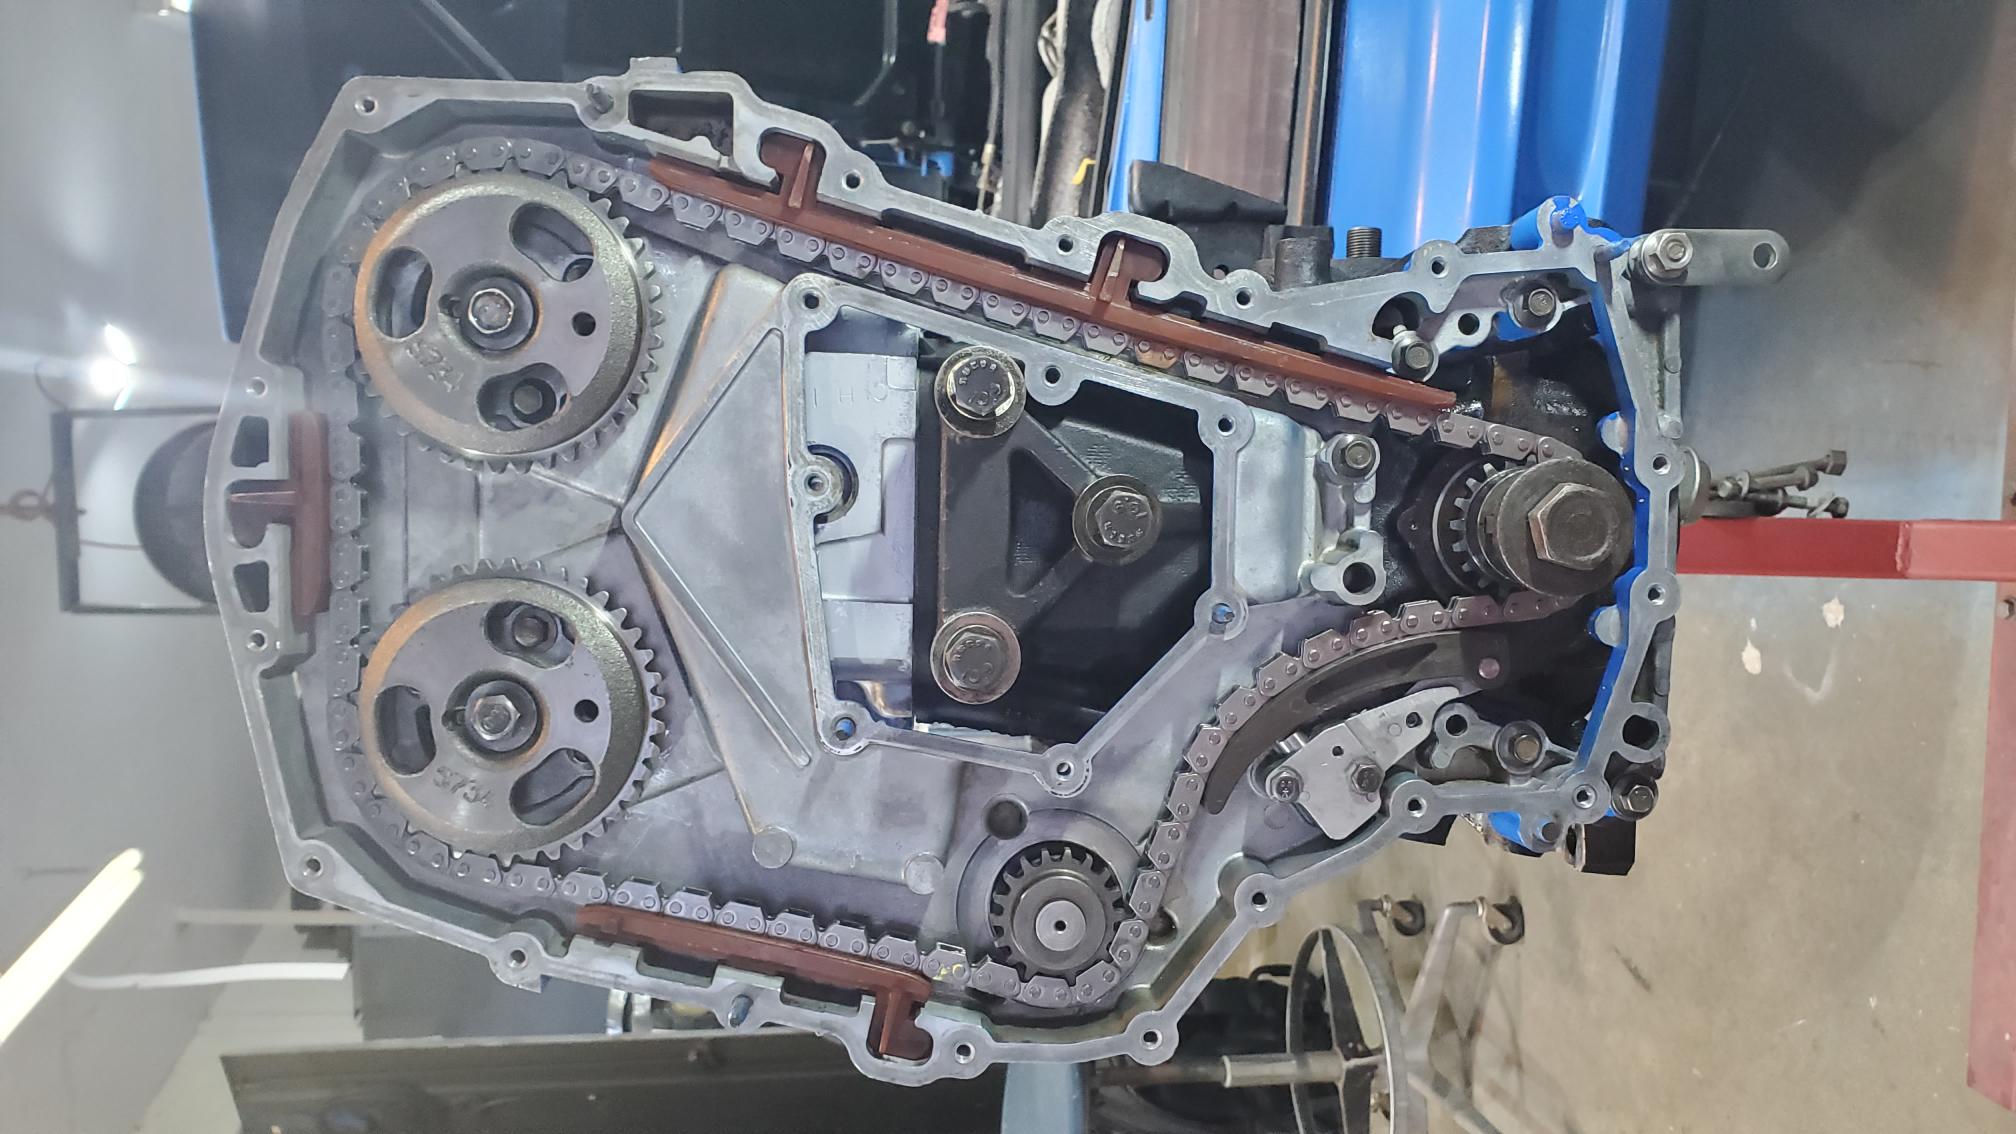
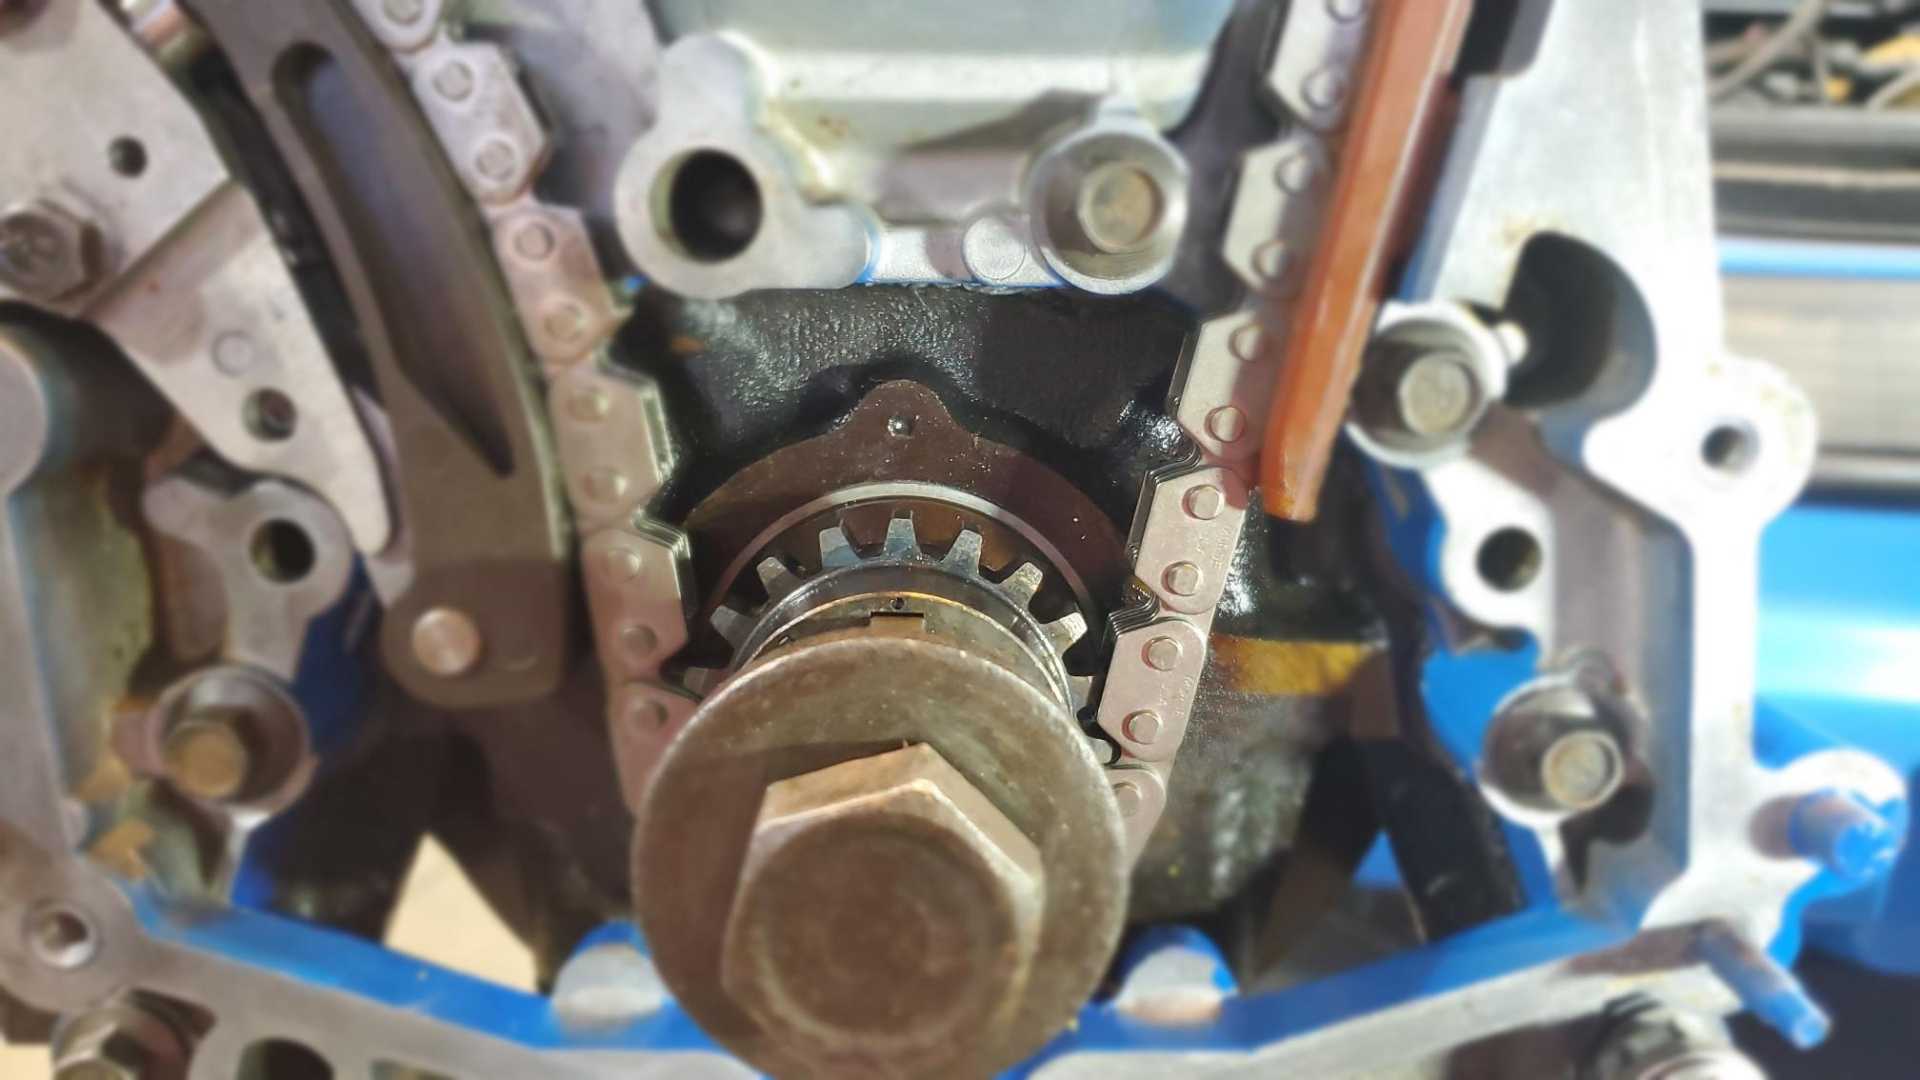
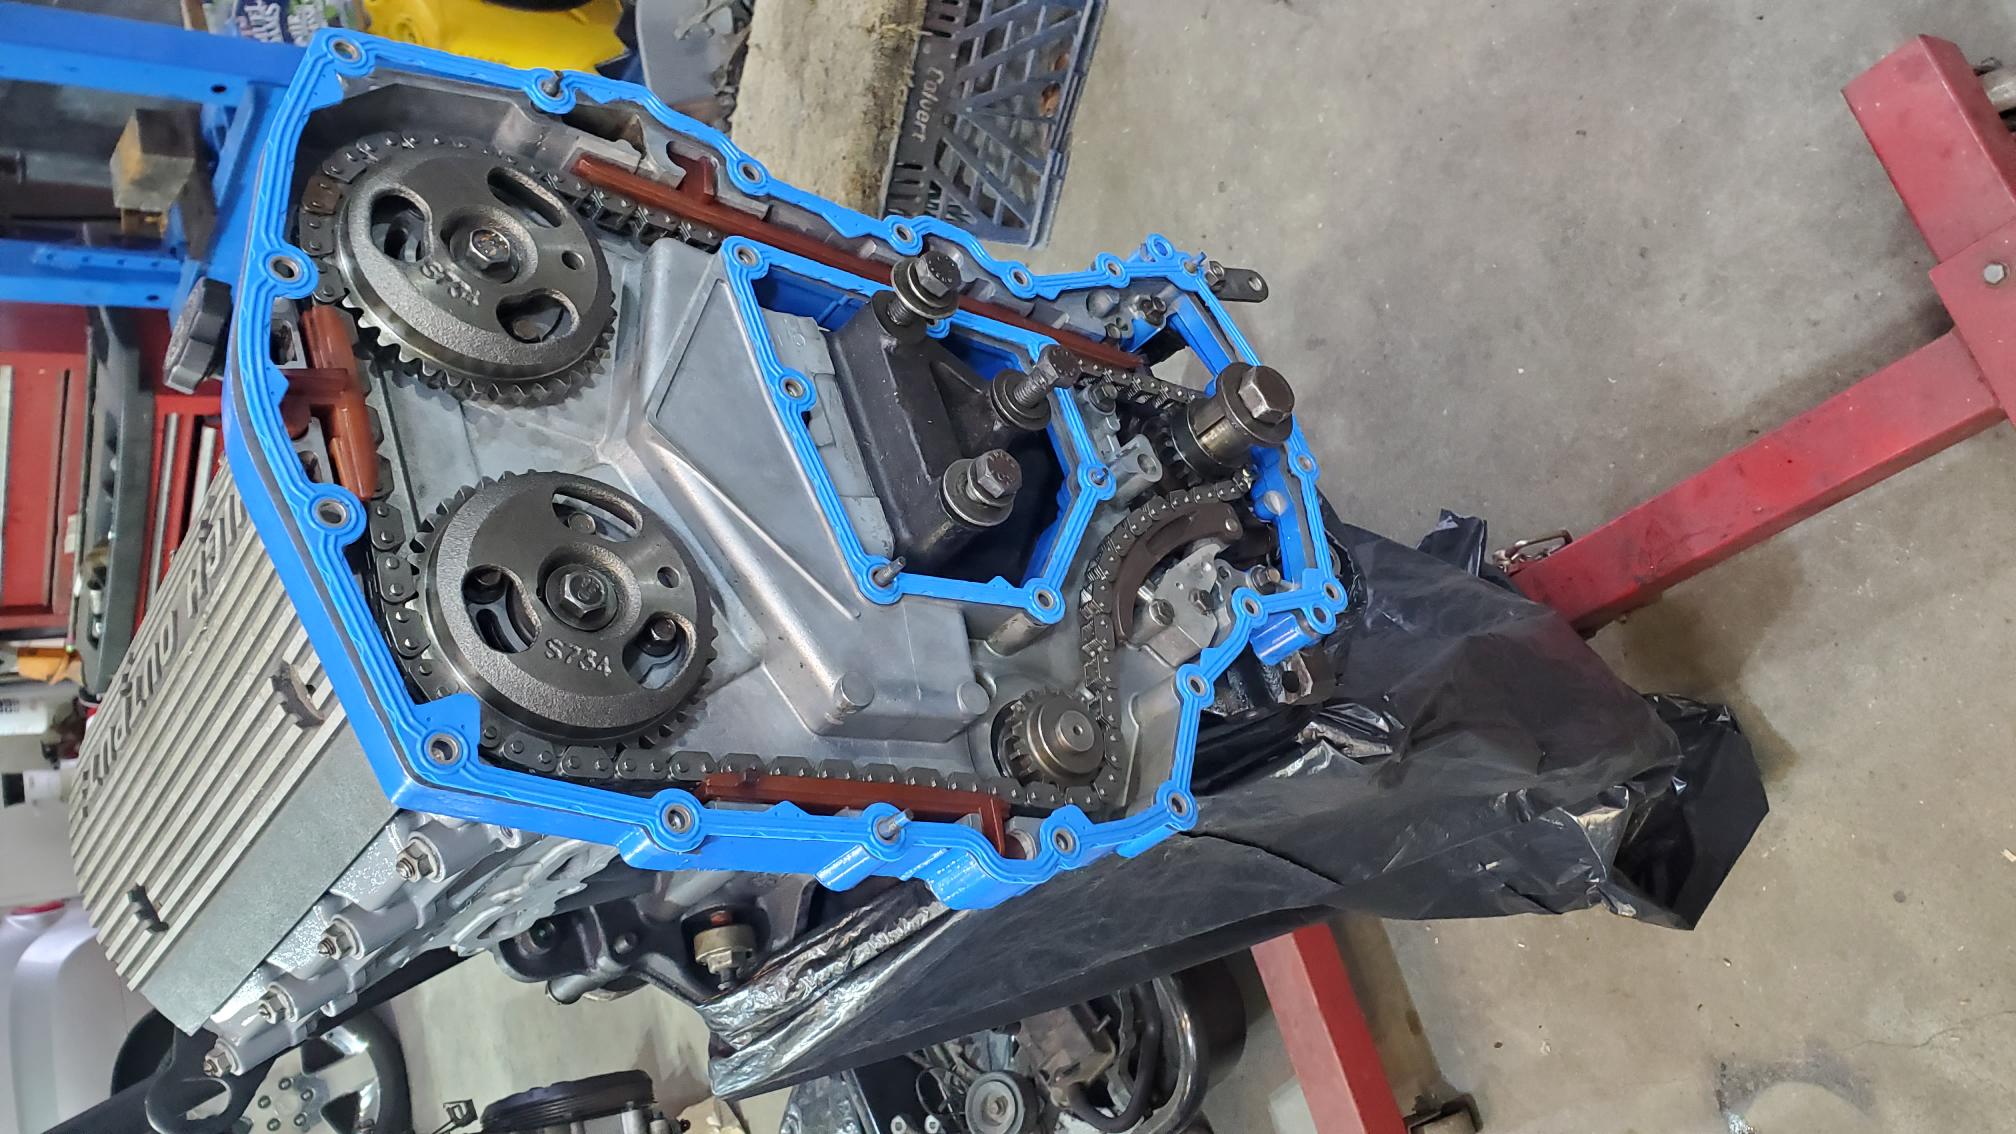
The timing chain is installed. Took me a week to track down a bearing for the water pump sprocket/idler. It doesn’t have the groove like the OEM one did, but the bearing store dude and I don’t think it will matter.
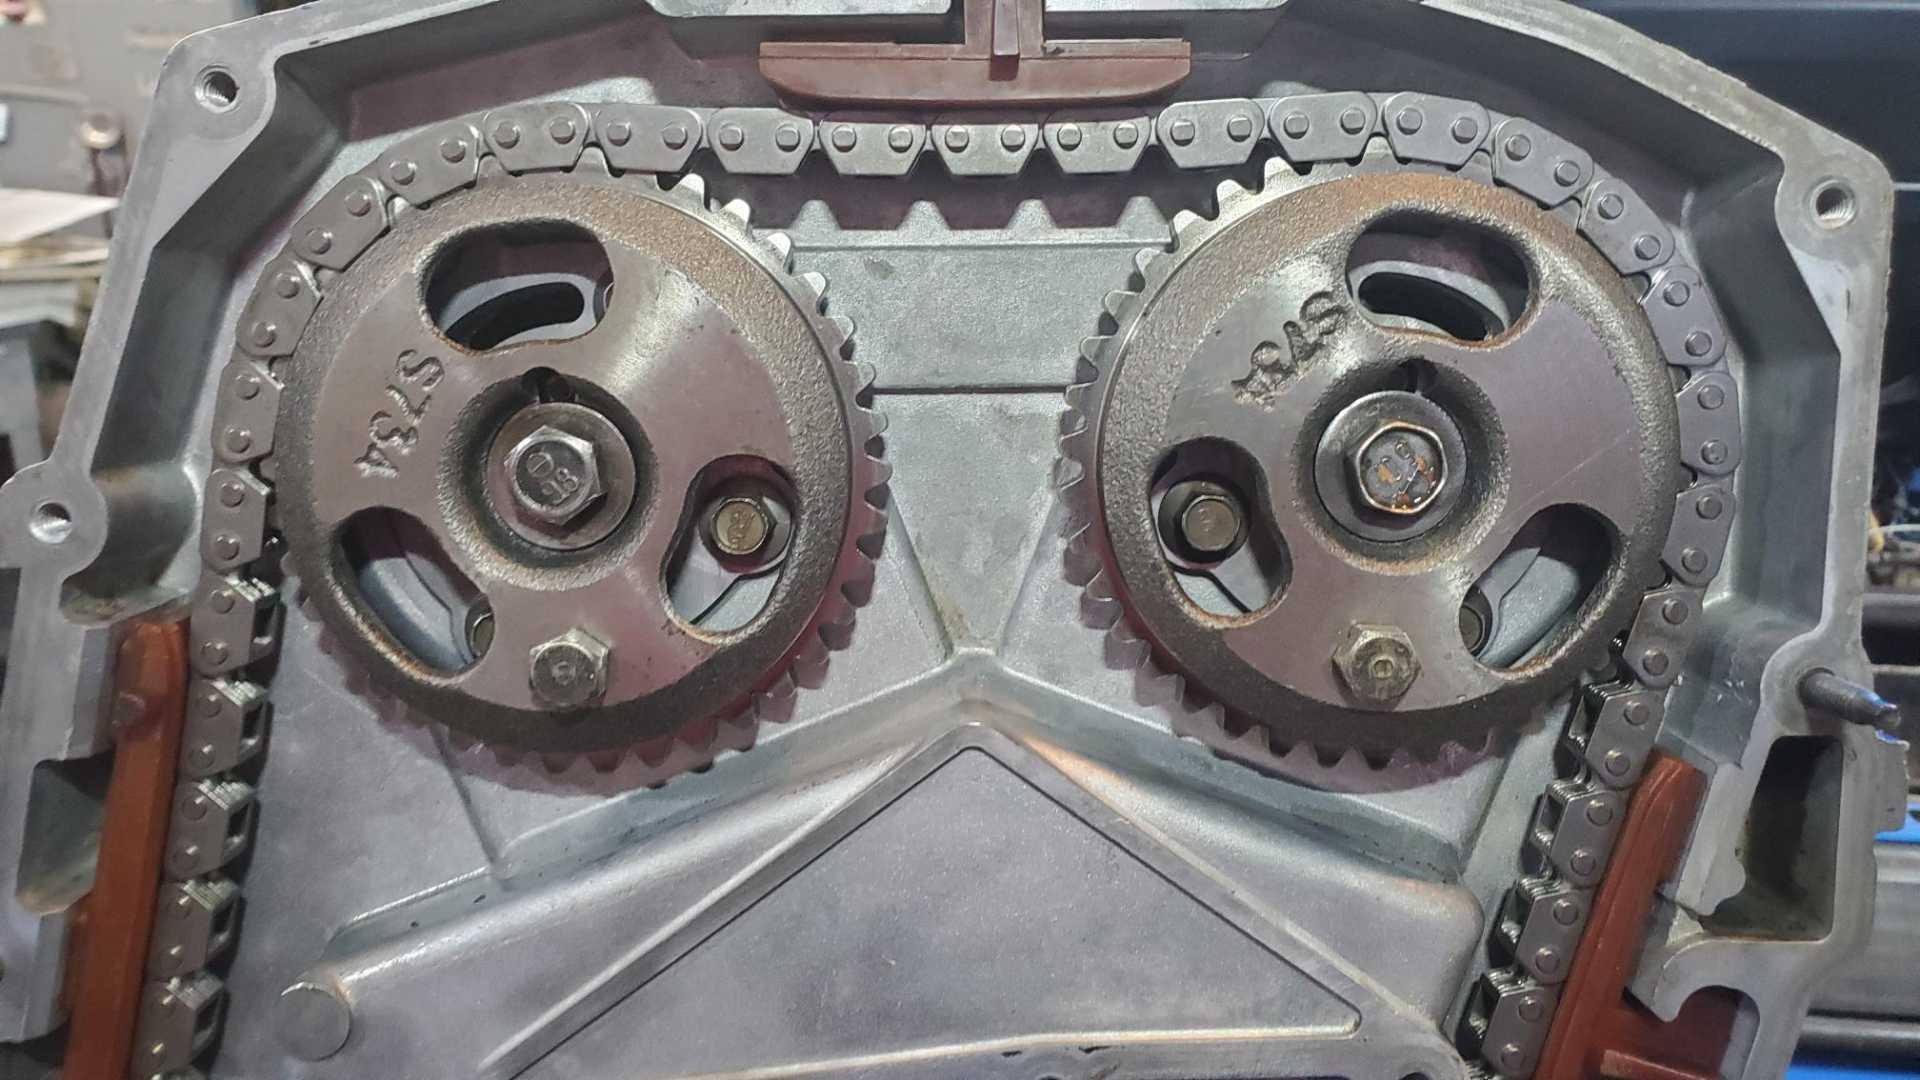
Took me about three hours to get the timing chain installed and dialed in. Timing a Quad begins with turning the crank 90 degrees off TDC. Each cam gear has a hole for an 8 mm bolt that aligns with a hole in the housing. Once those bolts are in place, the crank can be turned to TDC and the chain placed on the cam gears, then the crank gear, then the water pump, making sure the chain stays tight between the crank gear and the intake cam gear. Once the chain is tight around the three gears, you can install the tensioner and the guides, then pop the temporary wire off the tensioner. If you’ve done it right, you can remove the bolts from the cam gears, turn the crank twice and stop at TDC, and then be able to easily slide the bolts back into the cam gears.
I had a heck of a time getting the chain tight between the two cam gears. Even when I did and then turned the crank 720 degrees, the crank gear would be one tooth off of TDC. I was so frustrated I thought Rock Auto had sent me the wrong parts. I was in the process of boxing them up to get a refund when I noticed one cam gear was stamped “4” while the other was stamped “5”. The book says you should mark the cam gears before removing them, but these new parts didn’t come with any instructions. I swapped them and tried again and it worked.
[This message has been edited by Quadfather (edited 12-04-2021).]
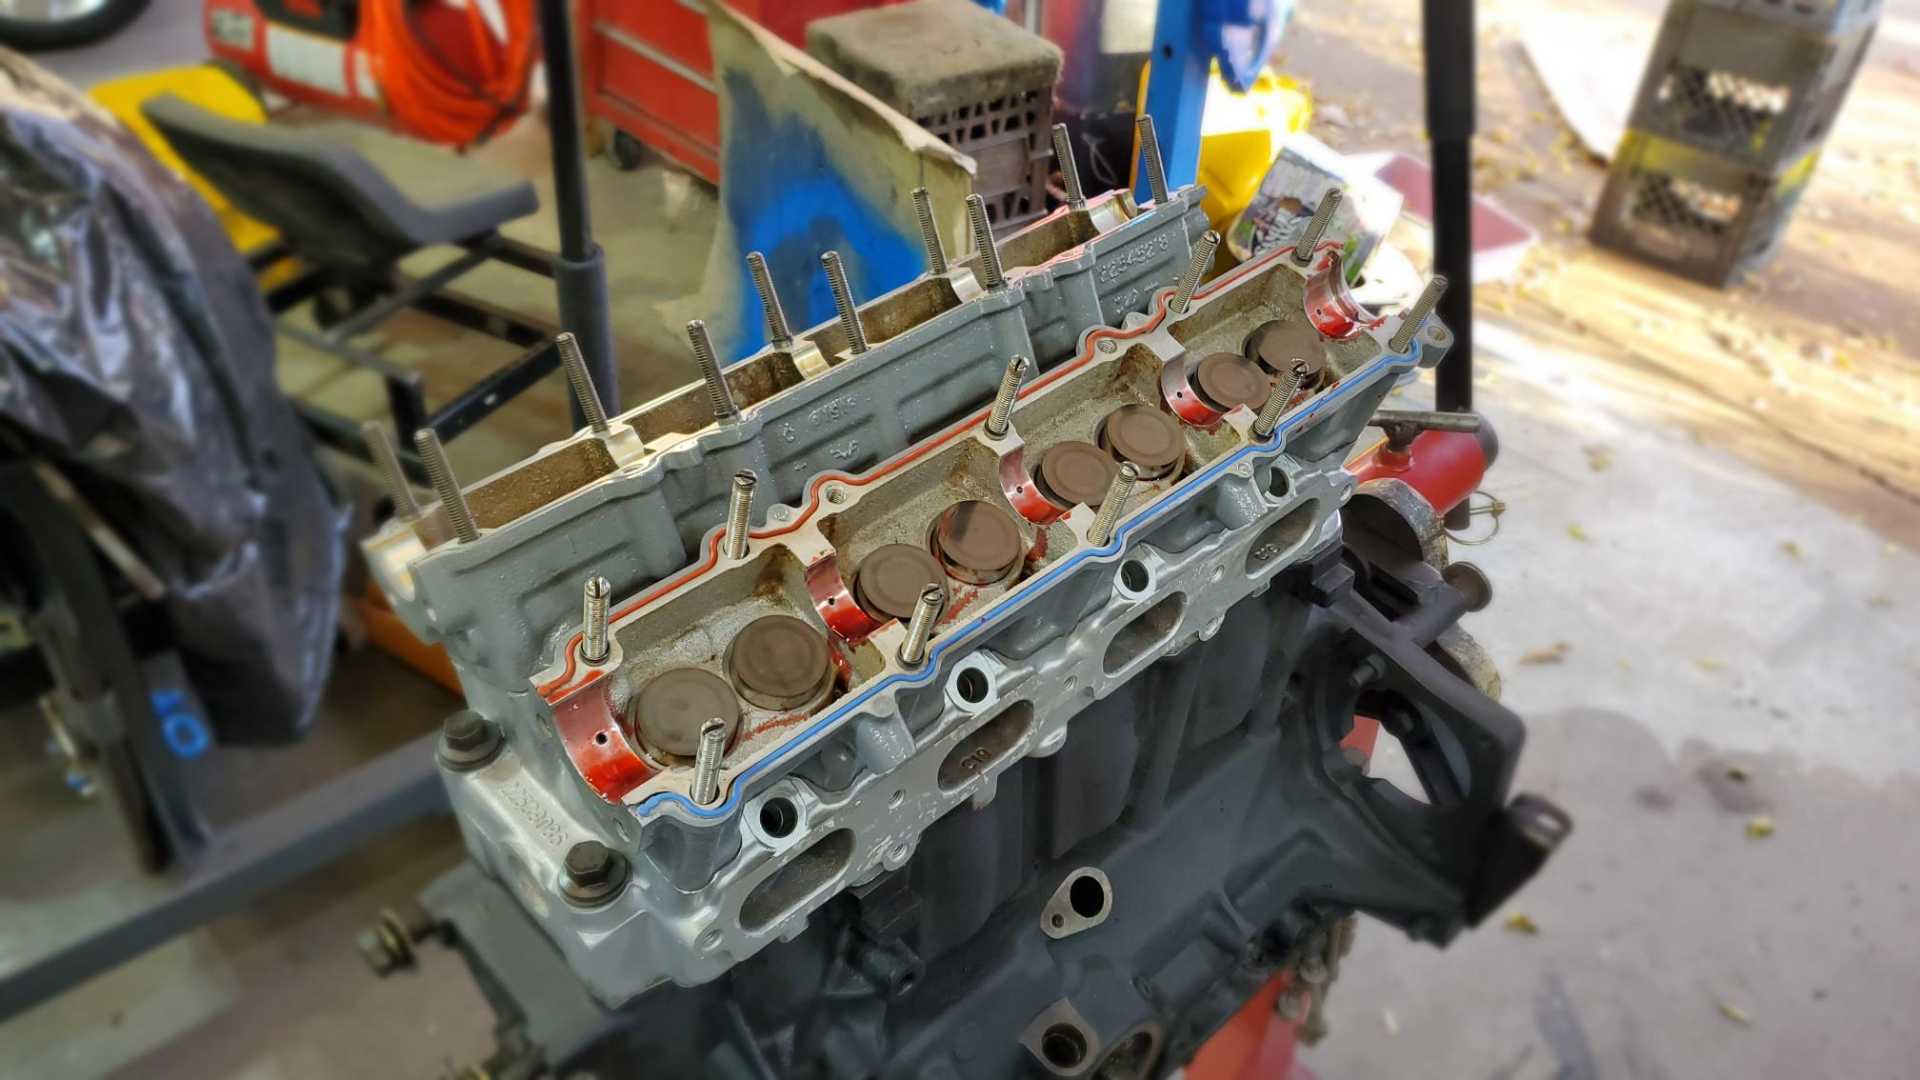
Got the timing chain all buttoned up. The gaskets for the timing cover are reusable but I didn’t hang on to the old ones and new ones were included in the engine set I bought back in the day.
Kinda cool that the gaskets match the body color.
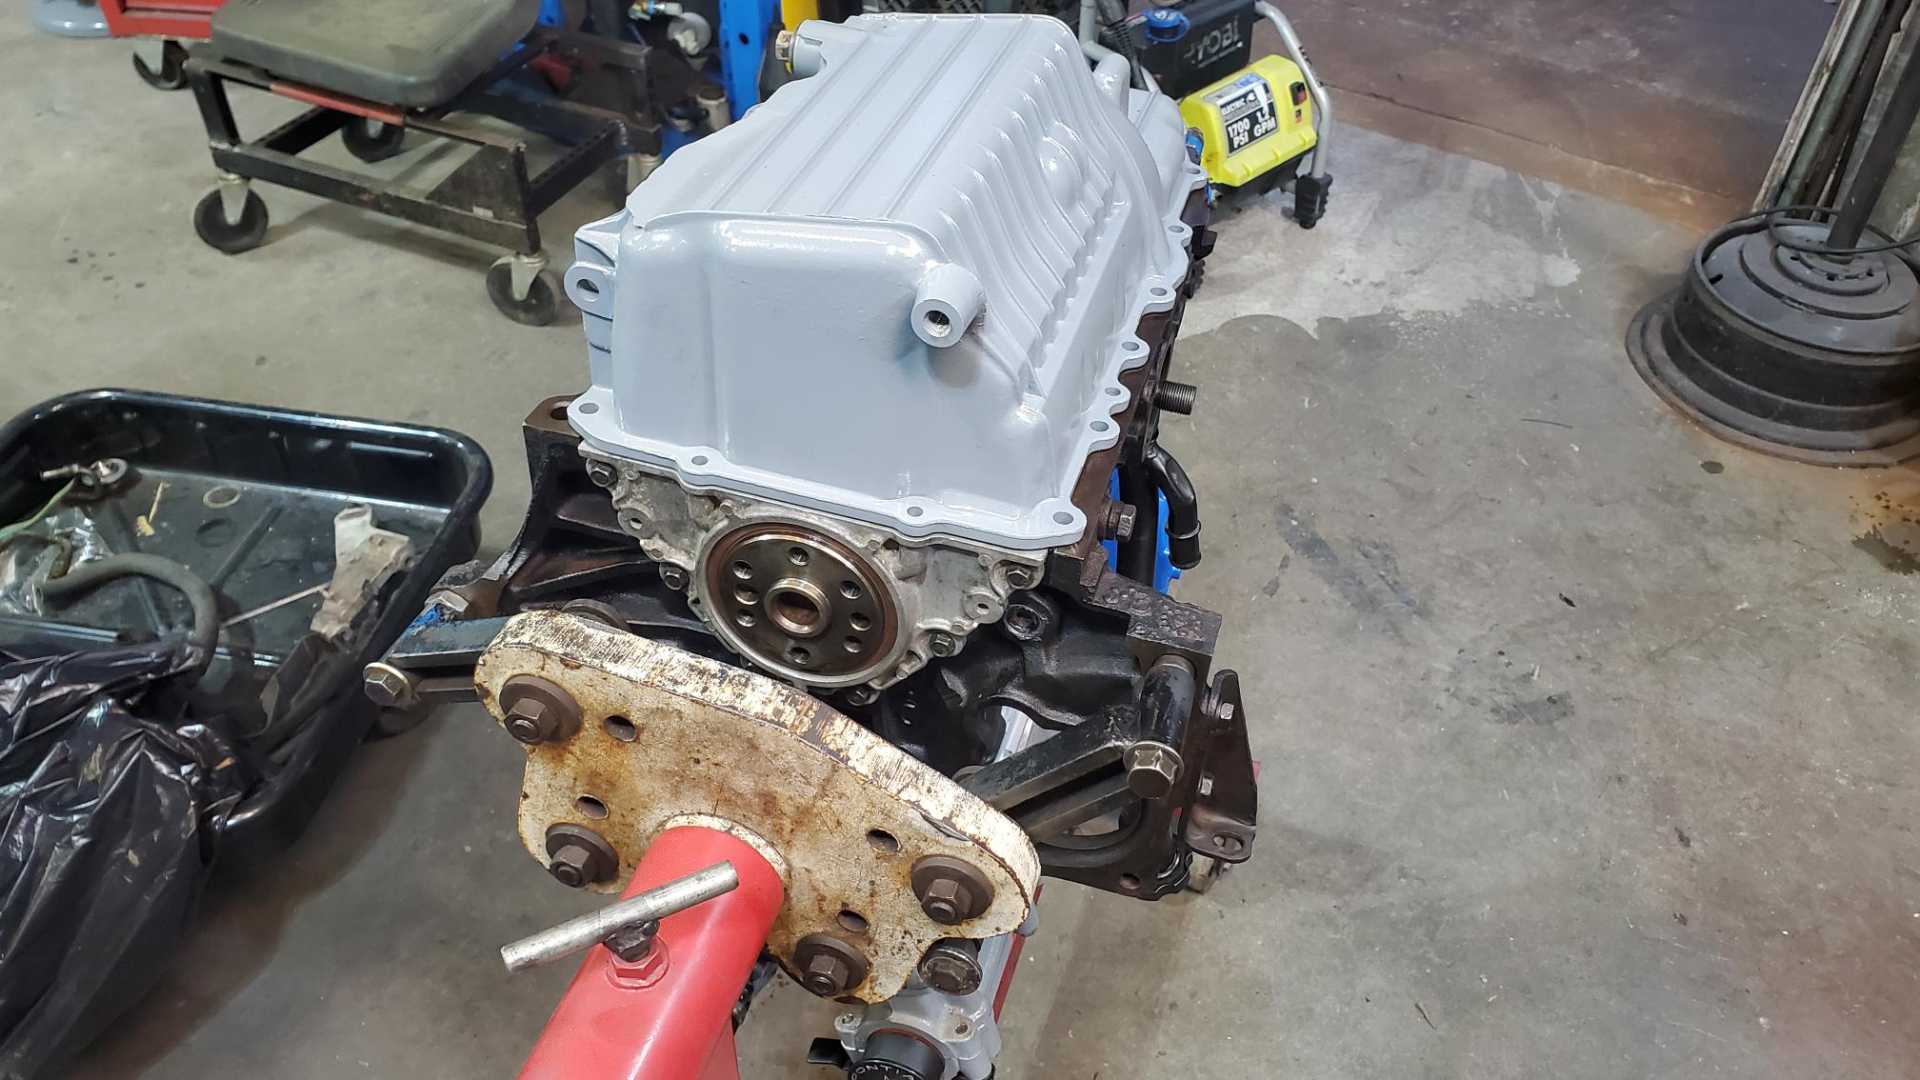
I also installed the rear main seal. The kit did not include a new seal but the old one looks great so on it went.
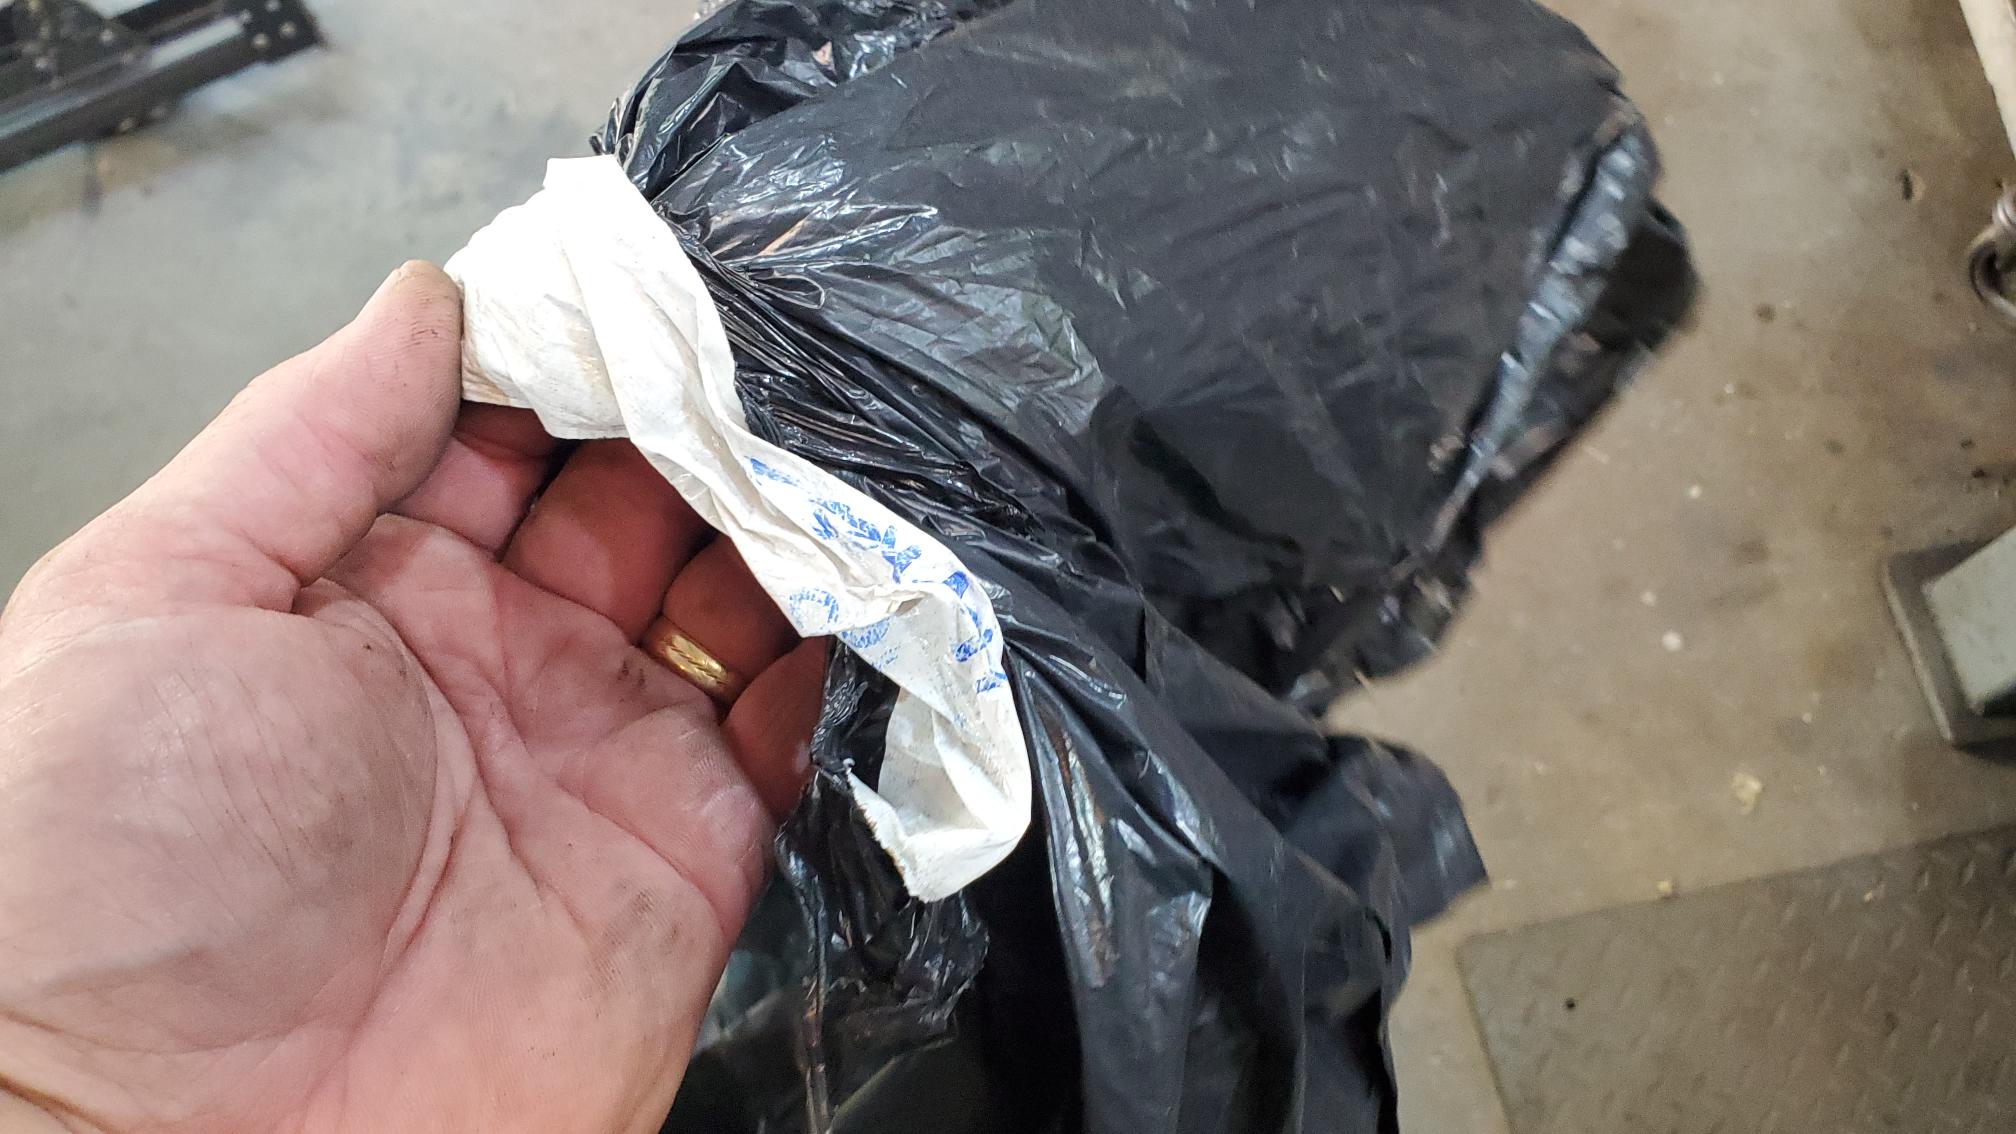
The engine is pretty top heavy so I thought about leaving it upside down overnight, with the oil pan just sitting there.
I eventually took the pan off and rolled the engine back upright, then added the trash bag to protect the bottom end.
[This message has been edited by Quadfather (edited 12-05-2021).]
As reassembly of the engine wraps up, the next big step will be cleaning up the transmission, painting it and mating it to the engine. The GTZ Getrag is bolted to my second spare Quad which is currently installed in the Fiero.
The shop would be very cramped with a third Quad in it, so today was cleanup day. I took 90% of my spare parts to the storage unit.
Still have to move some other non-Fiero items but I can’t decide if I’ll try to sell them, move them to storage or just dump them.
[This message has been edited by Quadfather (edited 12-05-2021).]
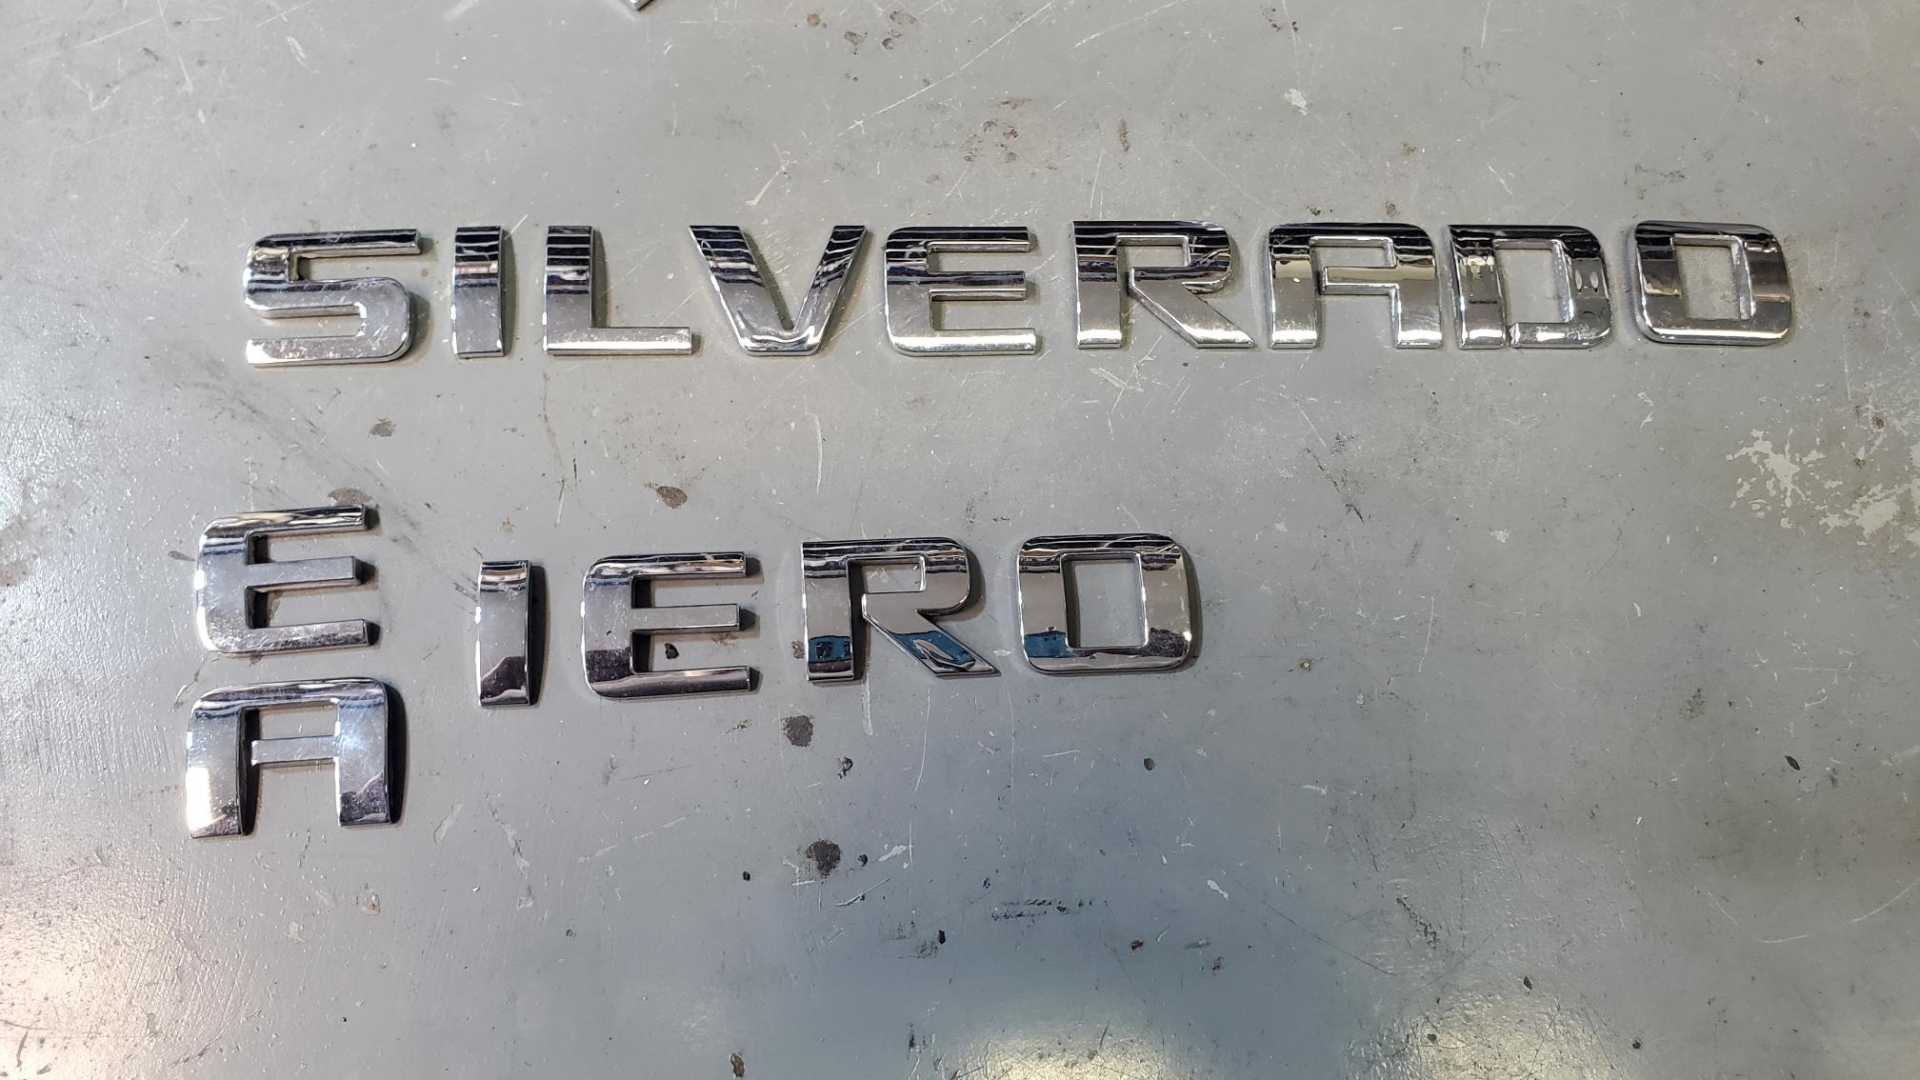
While organizing parts today, I came across these letters from one of the Silverados my company owns. When I first moved into the job I’m in now about two years ago, I found these letters in the office. One of our Silverados is wrapped, so the shop must’ve removed the lettering and given it to one of my predecessors who just left the letters in a drawer.
I’ve always liked this font and also noticed that except for the missing “F” the letters are in the same order in “Silverado” as they are in “Fiero”.
These would look cool on the left side of the deck lid. I’d have to modify either an “A” or an “E” to make an “F”.
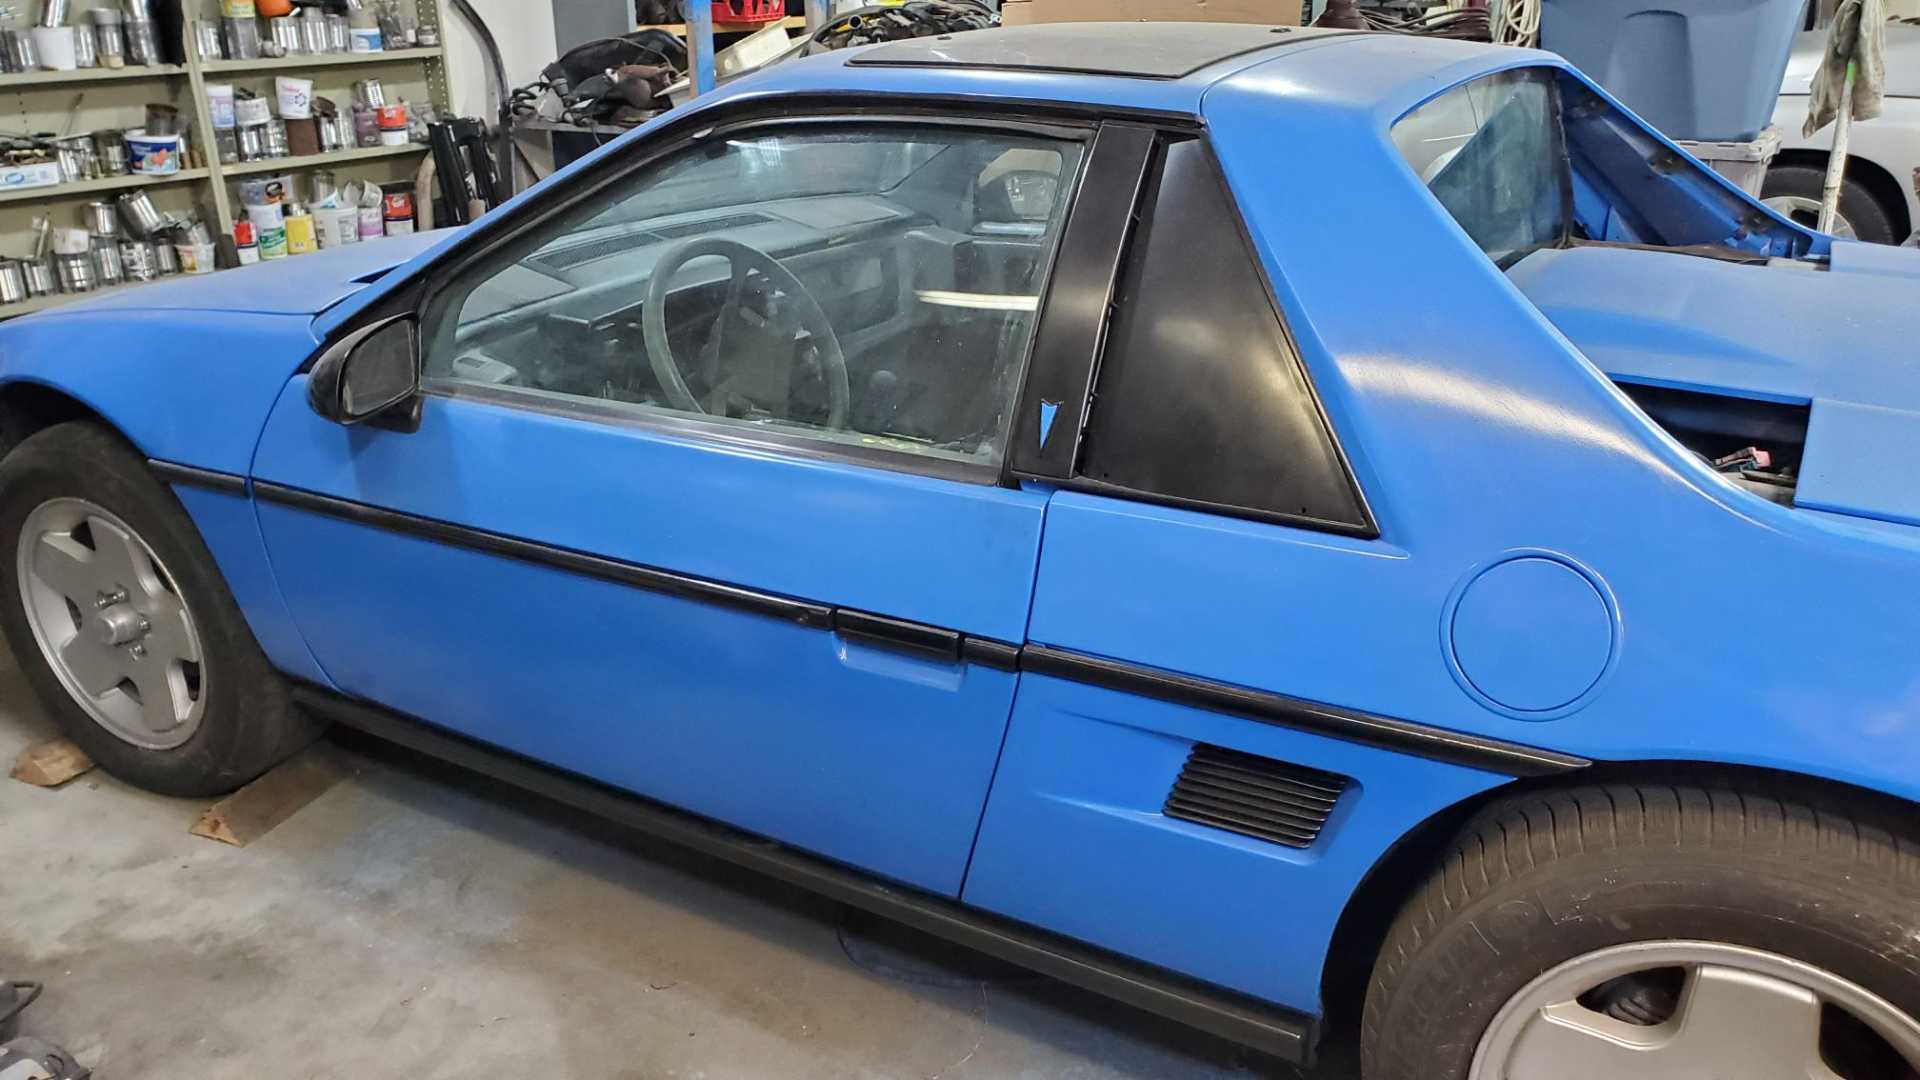
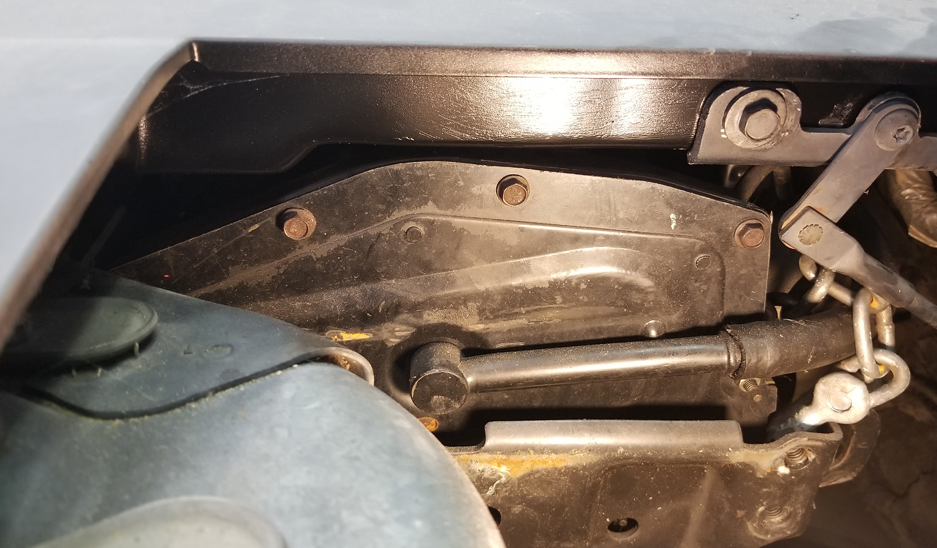
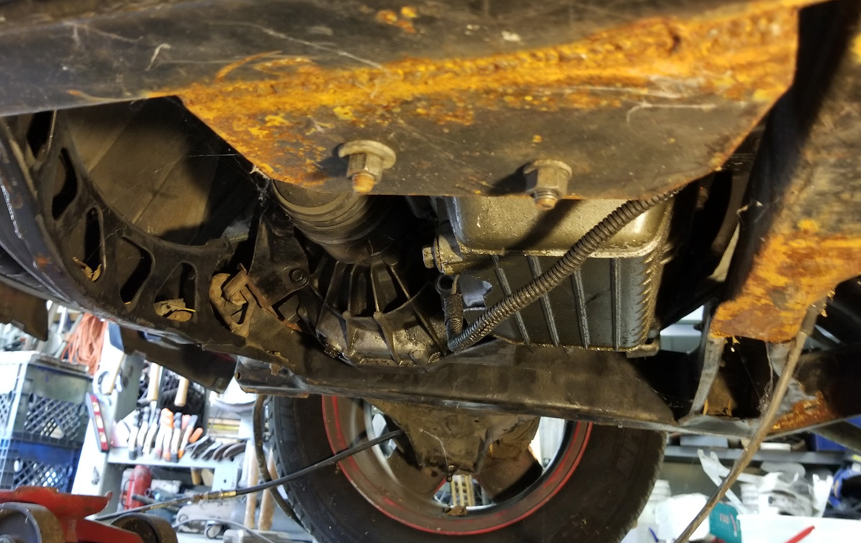
Been thinking a lot about the work that's going to be required to get the engine bay ready for the Quad. These photos that I posted earlier in my build thread show how nicely the Quad fits in the Fiero. The engine bay looks OK with a dirty old salvage yard engine sitting in it, that won't be the case when the shiny rebuilt engine goes in.
I need to re-engineer the upper engine mount I fabbed where the dog bone normally goes. More on that later. I'm also wondering if I need to redo the lower mounts so the engine tilts toward the back of the car a bit more. Based on this picture, I'm a little concerned about getting all the oil to drain out of the pan.
Of course the cradle still needs to be stripped or sanded and repainted, as do the rear suspension parts. Sigh. Lots of work. The plus side is this mechanical stuff doesn't intimidate me the way electrical work does.
Nice progress, I like your idea of oven cleaner. I myself have used LA's Finest degreaser from Dollar Tree. It is $1 per quart, so you can buy a lot of it, I use it in a big storage bin undiluted and I can clean most things in that, just don't leave aluminum things in it longer than 10-15 min before pressure washing. Also Klean and Strip Concrete and Metal prep from Home Depot is cheap phosphoric acid that can be used to extra clean parts after degreasing. Just keep off of sealing surfaces because it is an acid.
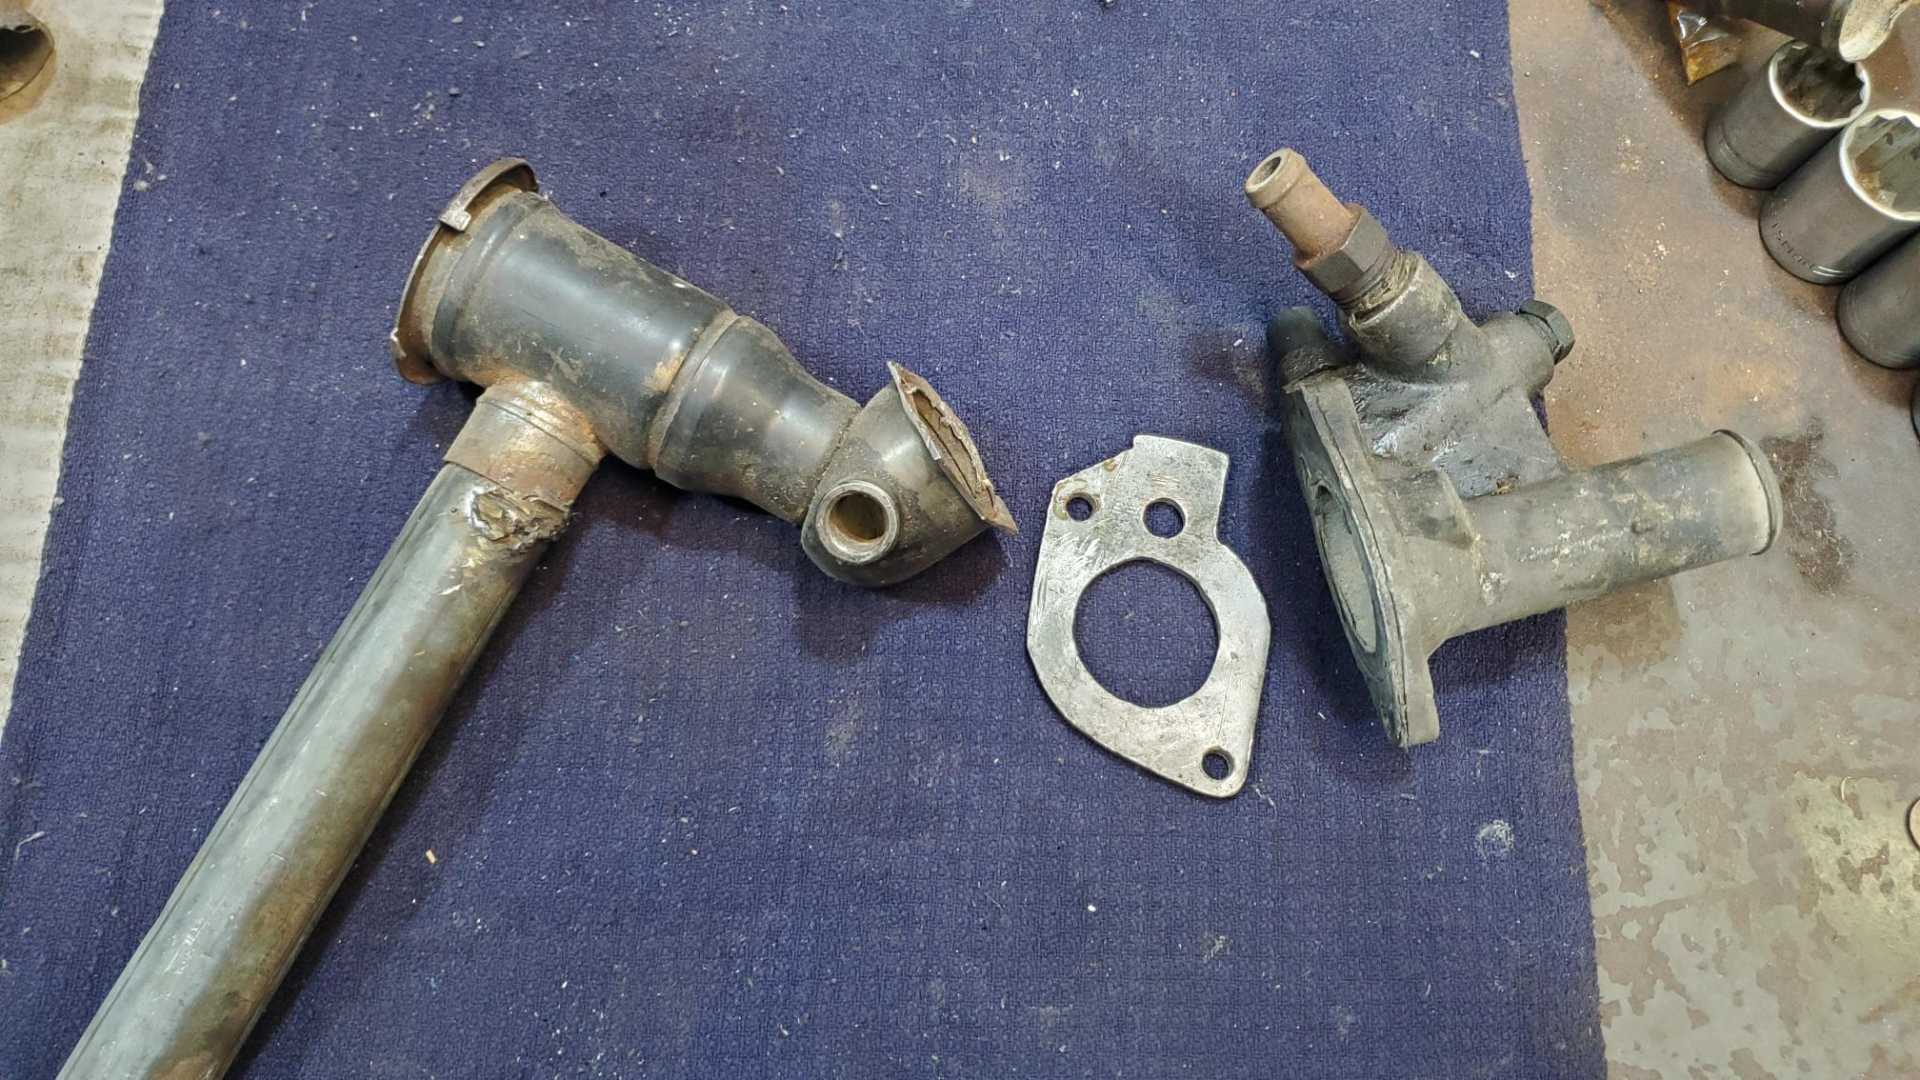
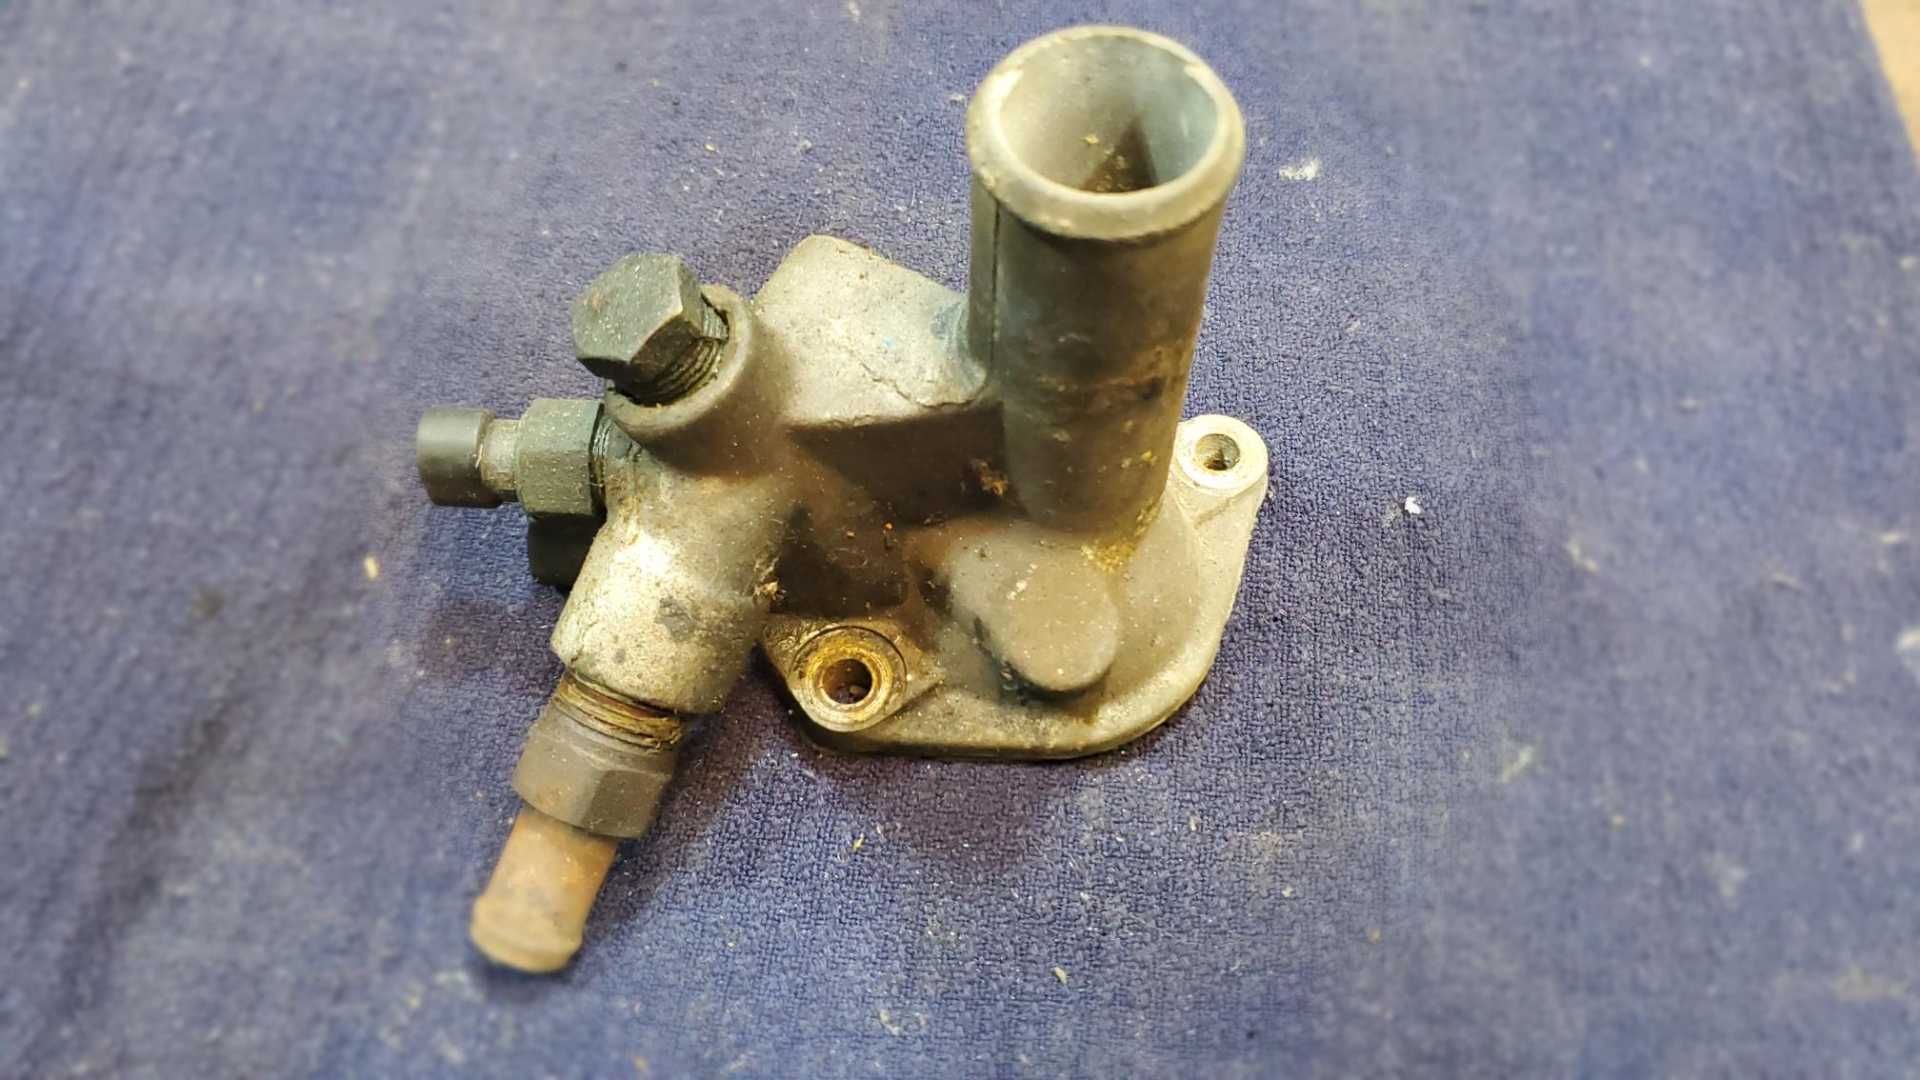
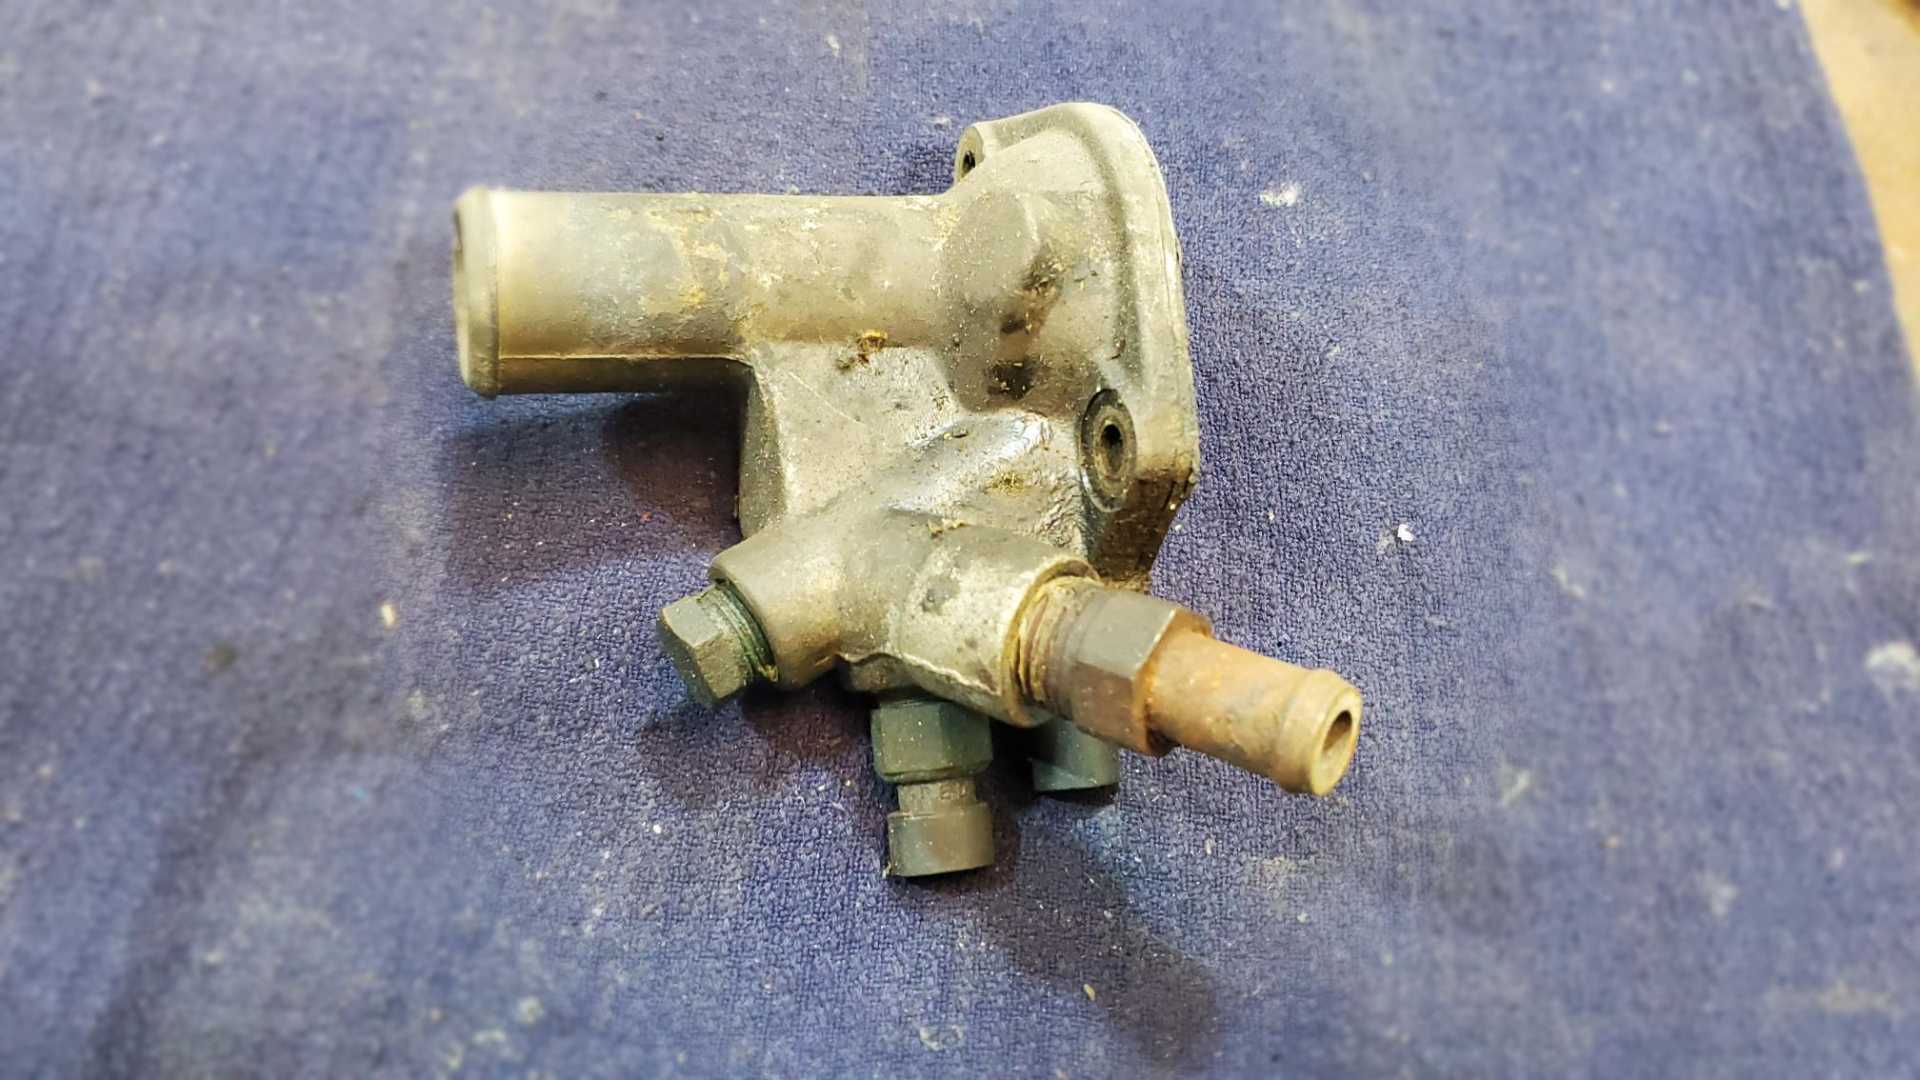
As I move parts around the shop and think about what will be needed to mate the Quad to the Fiero, I remembered investigating the coolant filling process for Quad/Fiero. In the Quad/Fiero swap, the highest point of the cooling system is the thermostat housing, which makes it the perfect place for a cap. Somewhere years ago I saw a thread about adapting the thermostat housing from a V6 Fiero to the Quad. Over the weekend I found the part I had experimented with back then.
The V6 housing has to be mated to a plate that will fit the Quad head. The Fiero housing is steel, the Quad’s is aluminum, so that means fabbing a mounting plate.
I’m pretty sure I gave up on this idea because I’d really need a Tig welder to pull it off but all I have is a Mig (and my skills aren’t good enough). Also, the housing needs two ports for temperature sensors.
The Quad came from the factory with two tubes that circulate coolant to the throttle body. One connected to the t-stat housing, the other to a port in the head just past the t-stat. They’re not necessary so I removed the lines and plugged the ports.
Also, notice the restriction on the fitting for the heater hose. Apparently if you use a regular size fitting there the force of the water pump will blow out the heater core.
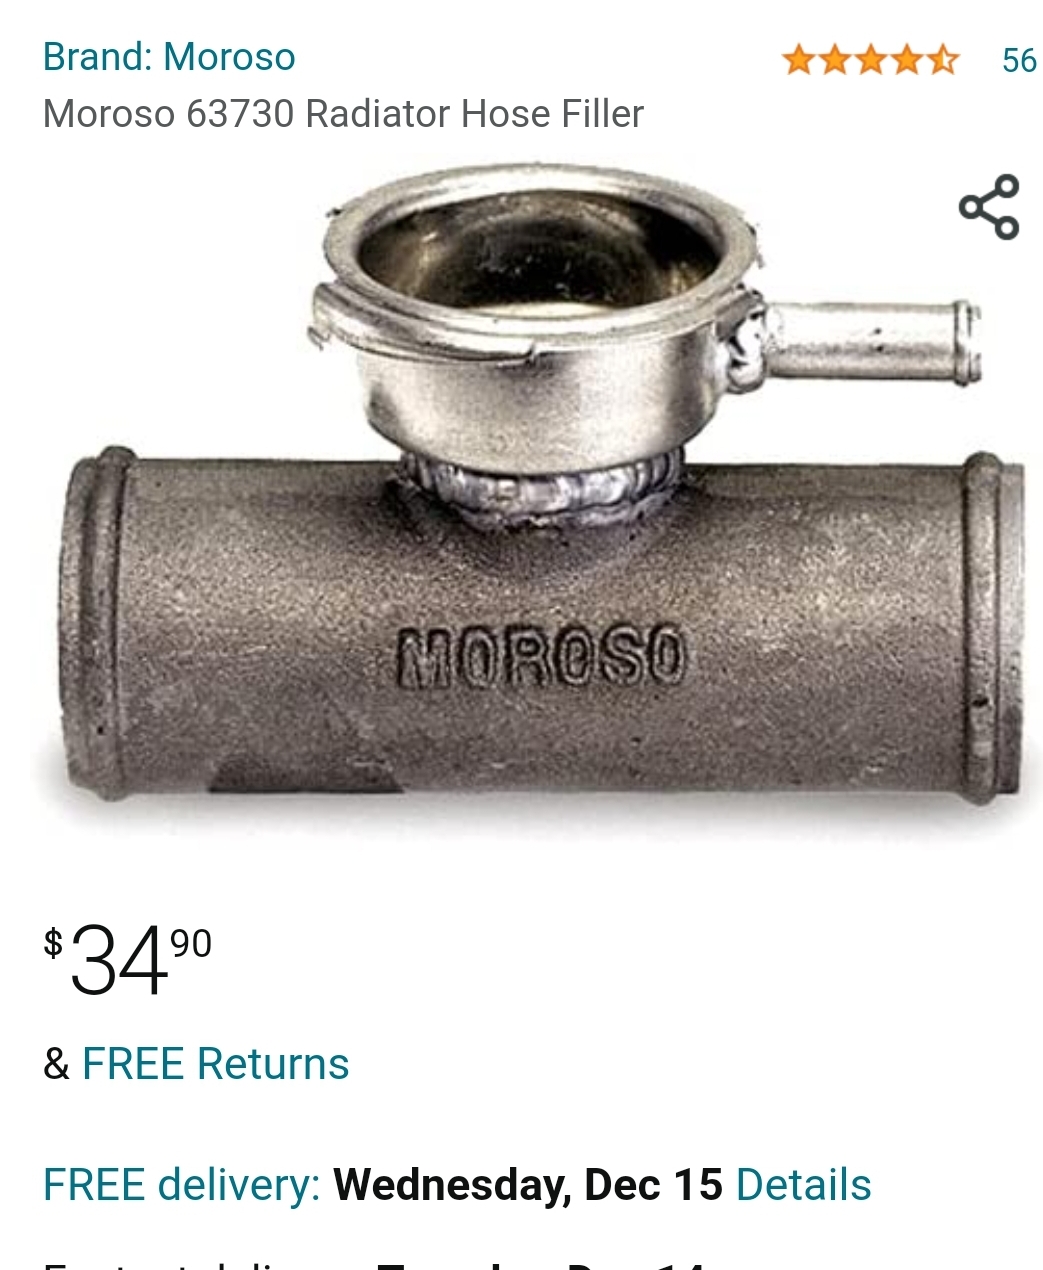
I’ll probably use something like this:
Using that would also allow the addition of an overflow jug.
[This message has been edited by Quadfather (edited 12-08-2021).]
Nice progress, I like your idea of oven cleaner. I myself have used LA's Finest degreaser from Dollar Tree. It is $1 per quart, so you can buy a lot of it, I use it in a big storage bin undiluted and I can clean most things in that, just don't leave aluminum things in it longer than 10-15 min before pressure washing. Also Klean and Strip Concrete and Metal prep from Home Depot is cheap phosphoric acid that can be used to extra clean parts after degreasing. Just keep off of sealing surfaces because it is an acid.
Interesting. I used some muriatic acid to clean out an air compressor tank and wondered if I could use it to clean engine parts. Don’t know that I trust myself to avoid damaging the parts.


 If I had a do-over, the biggest thing I'd change would be to fix the Iron Duke and start driving the car, then do the major upgrades along the way. Heck, I also had experience with Iron Dukes at that point.