The project was delayed because I had to replace a window regulator on my wife’s Grand Prix. I’ve been trying to come up with a good idea for drink holders for the dash, and yesterday while driving to the salvage yard I had an epiphany. I realized the drink holders from a 2002 LeSabre would be perfect. I know this because my daily driver is a 2002 LeSabre I inherited from my mom.
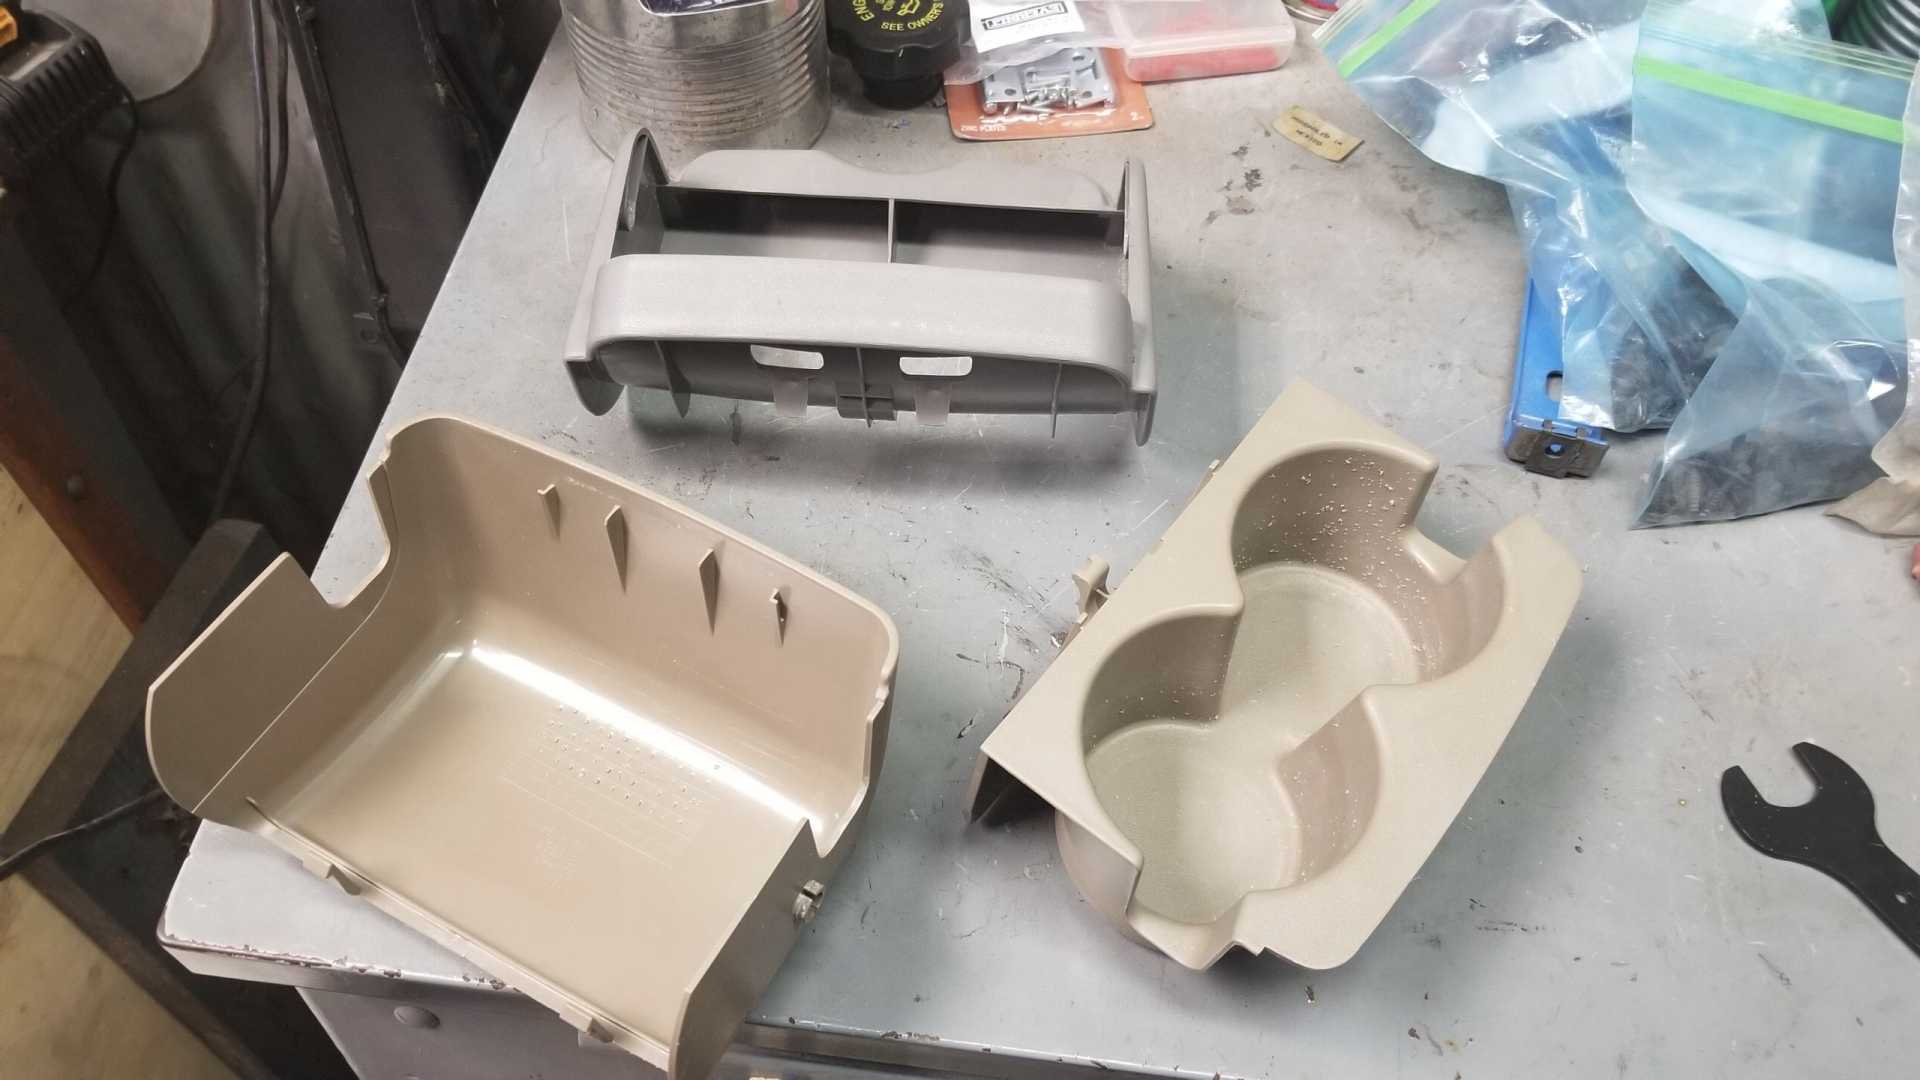
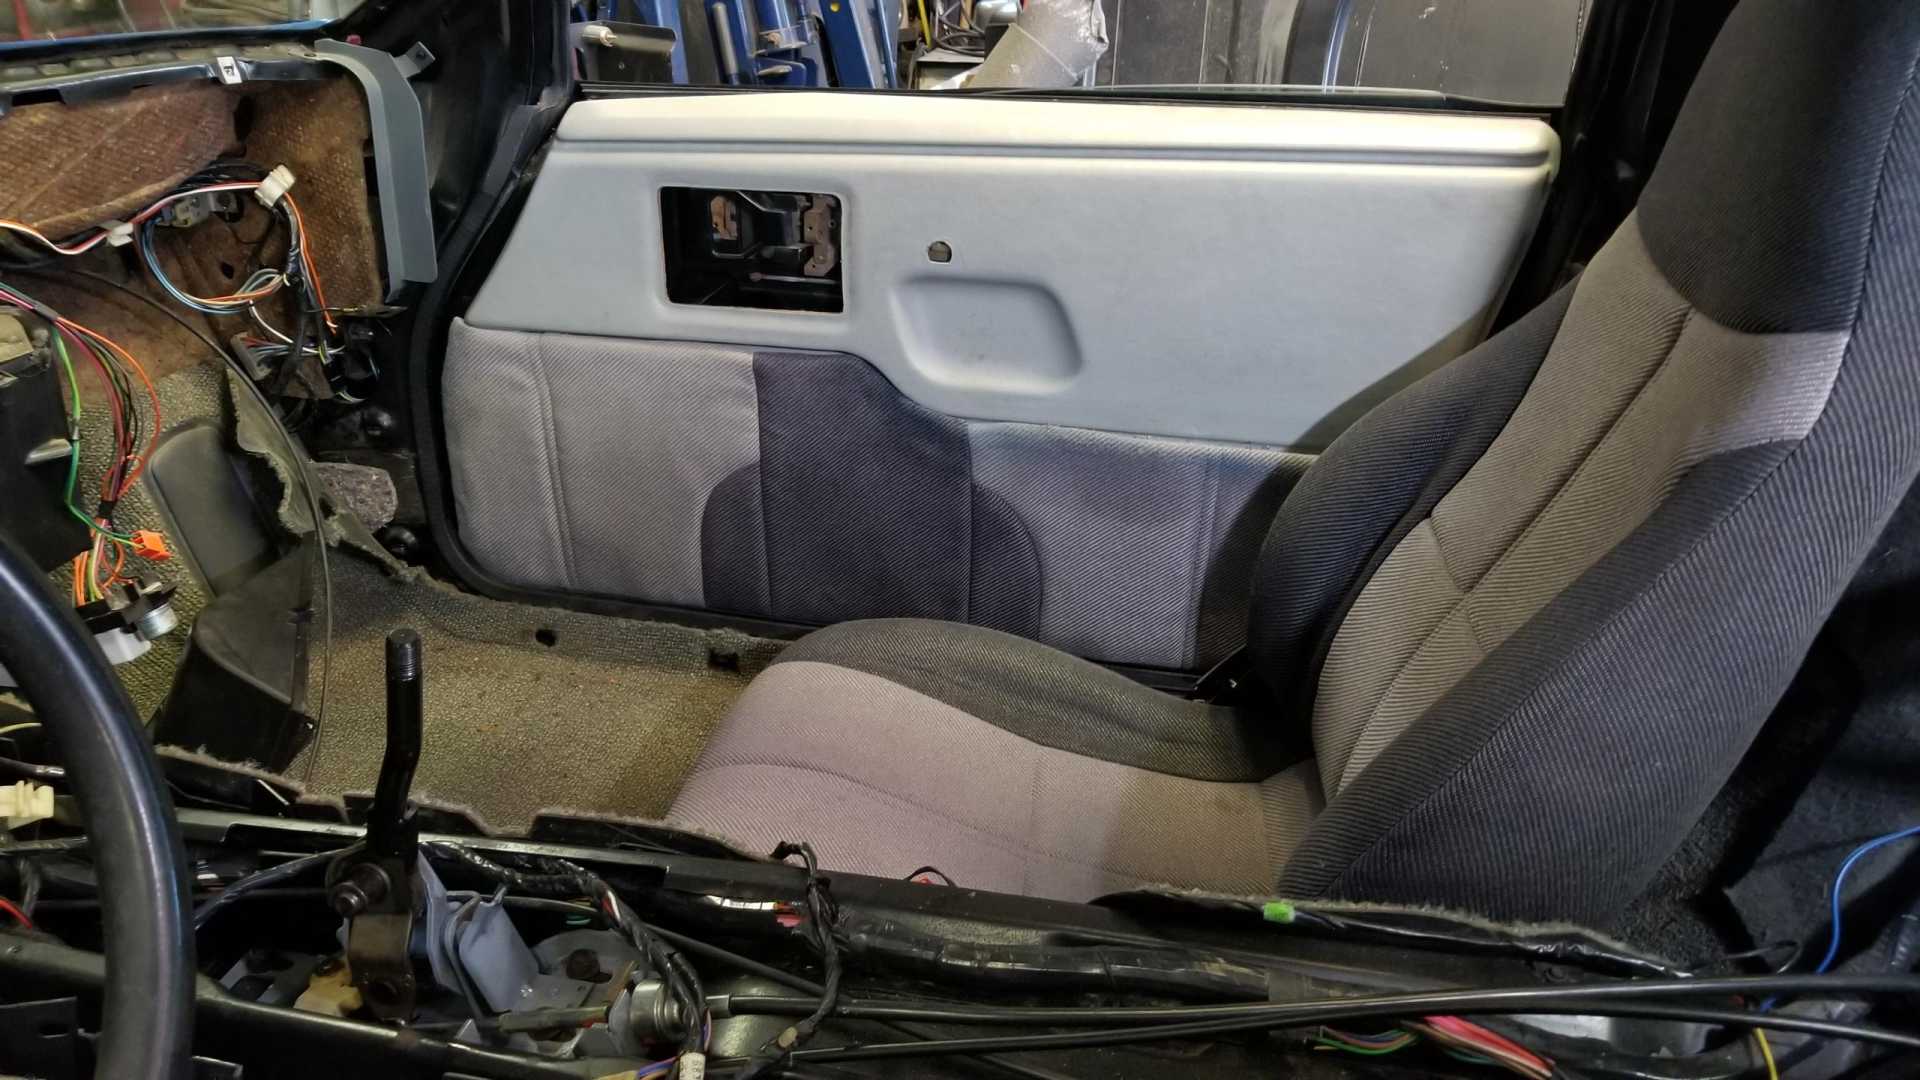
The LeSabre drink holder is attached to the front of the fold-down armrest. Once I got to the salvage I checked it out and saw that it pops right off and has a flat surface on the back which would make it easy to attach to the Fiero dash where that bizarre pocket thing is. My car had the even stranger half pocket, which was ripped and ugly.
Another plus for this drink holder is that it disassembles, making a change of color easy to apply. I bought the best parts from two different salvage yard cars, which explains the different colors in these photos, for a whopping $8.
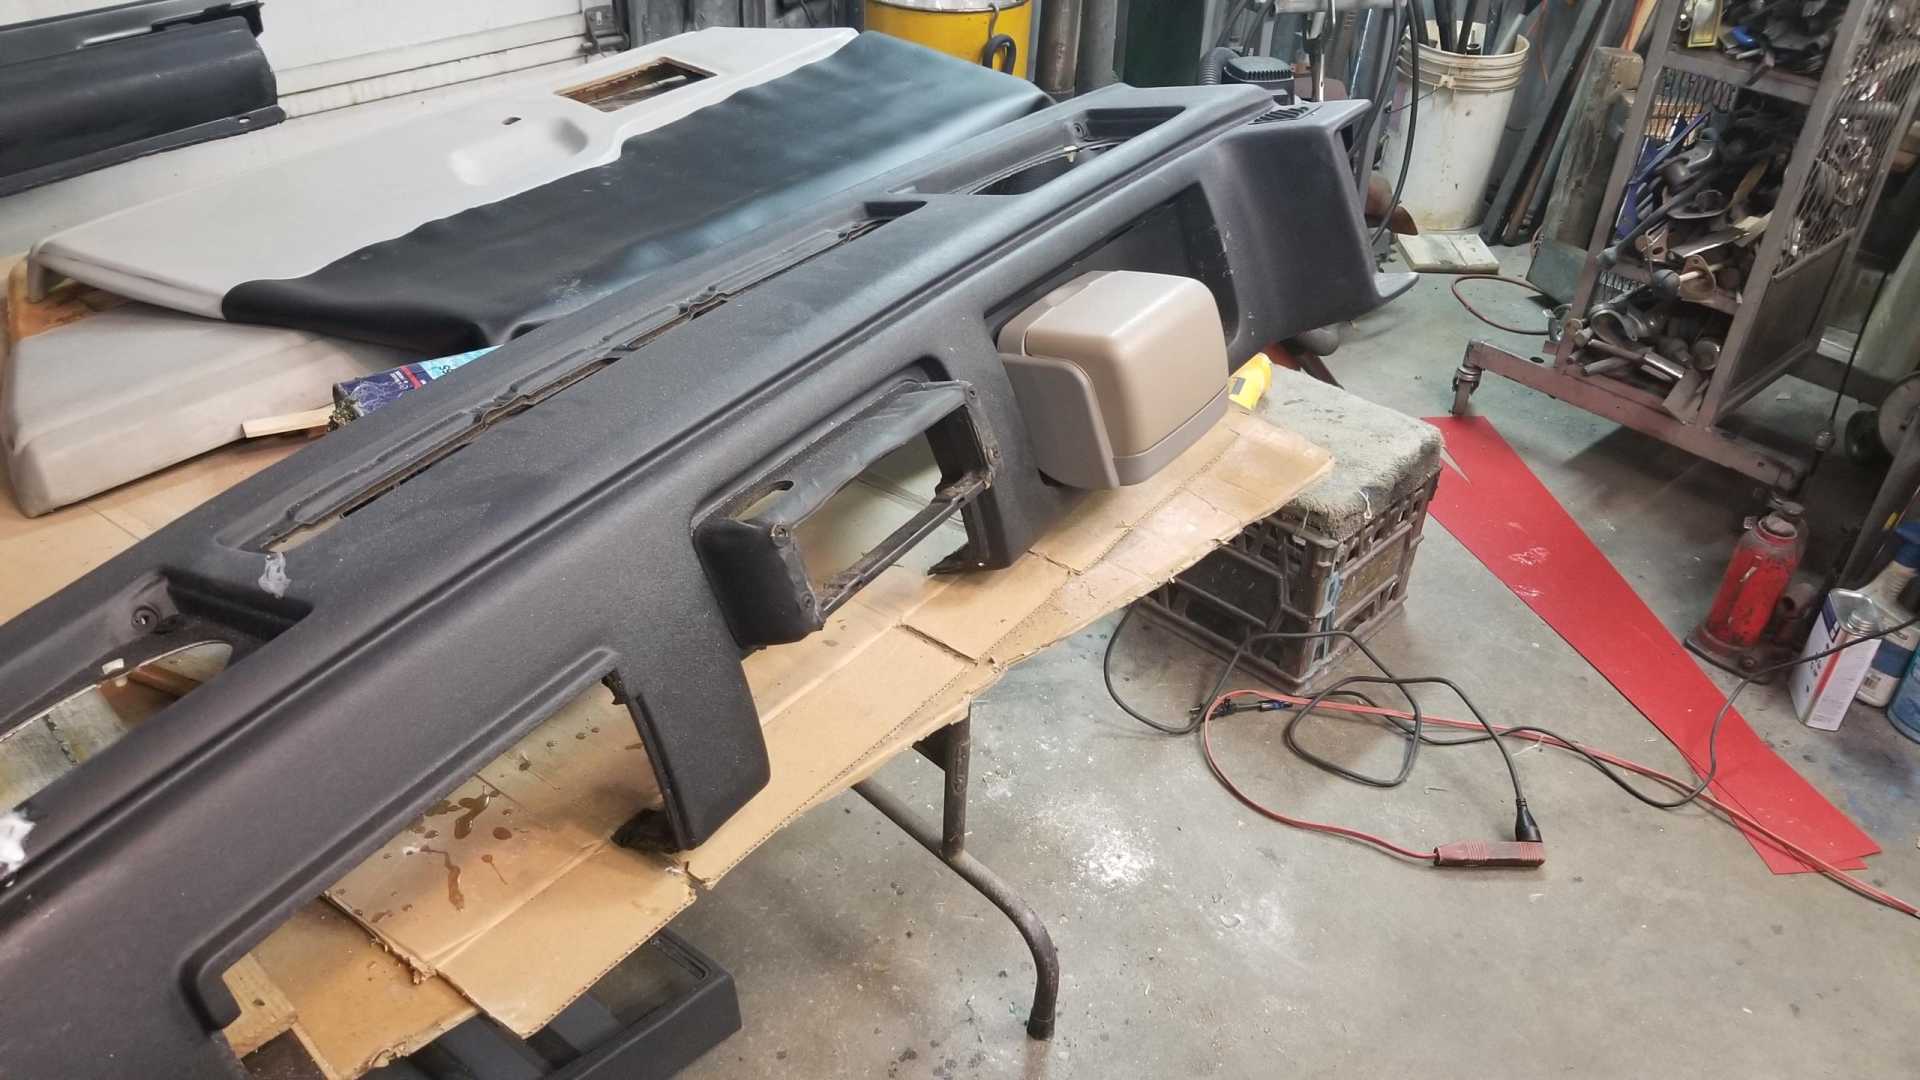
This afternoon I played around with some two-sided tape to see where I should install it on the dash.
I like the way it looks. I’m thinking I’ll cut a piece of plywood to fit in the recess of the dash, then fiberglass it and sand it smooth, then attach the drink holder with two small bolts. I plan to paint the dash and drink holder Rust-Oleum smoke gray.
[This message has been edited by Quadfather (edited 12-28-2019).]
Ever since visiting the salvage yard on Friday, I’ve been thinking about a different kind of upholstery on the door panels. I think the black vinyl I already bought would look fine, but while browsing in the salvage yard I saw a 4th gen Camaro with the two-tone seats like I have. For the first time, I noticed that interior has a section of gray cloth on the door panels to match the seats. I found very similar fabric on Amazon, so I think I’ll order some.
The darker gray would look good.
[This message has been edited by Quadfather (edited 12-29-2019).]
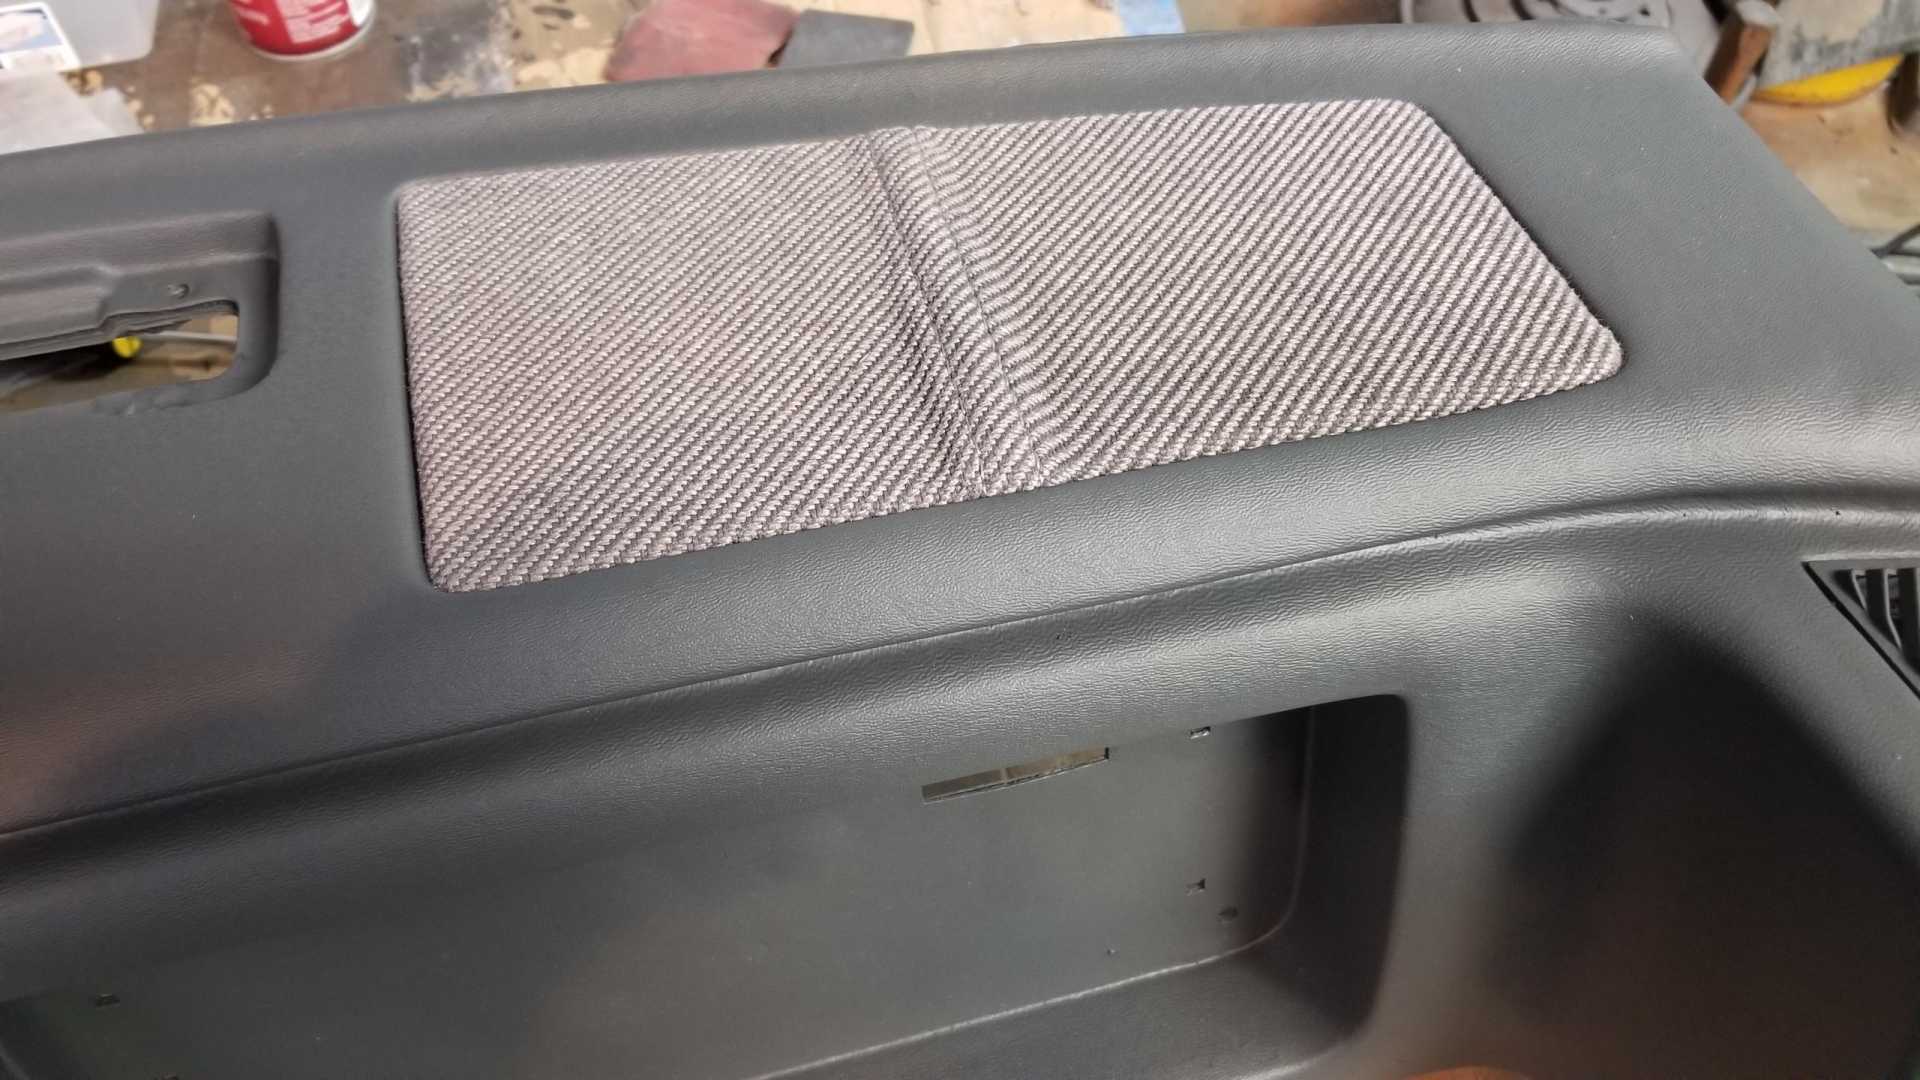
Five years ago, before discovering the compatibility of 4th gen Camaro seats, I was planning to reupholster my factory seats, so I bought a bunch of fabric. Today it was too cold to open the shop doors, so that meant no spray painting, so I tried using some of that fabric to reupholster the speaker covers. The fabric is velour so it’s probably not the best choice, but the process turned out to be so simple I can find some better fabric and do it again.
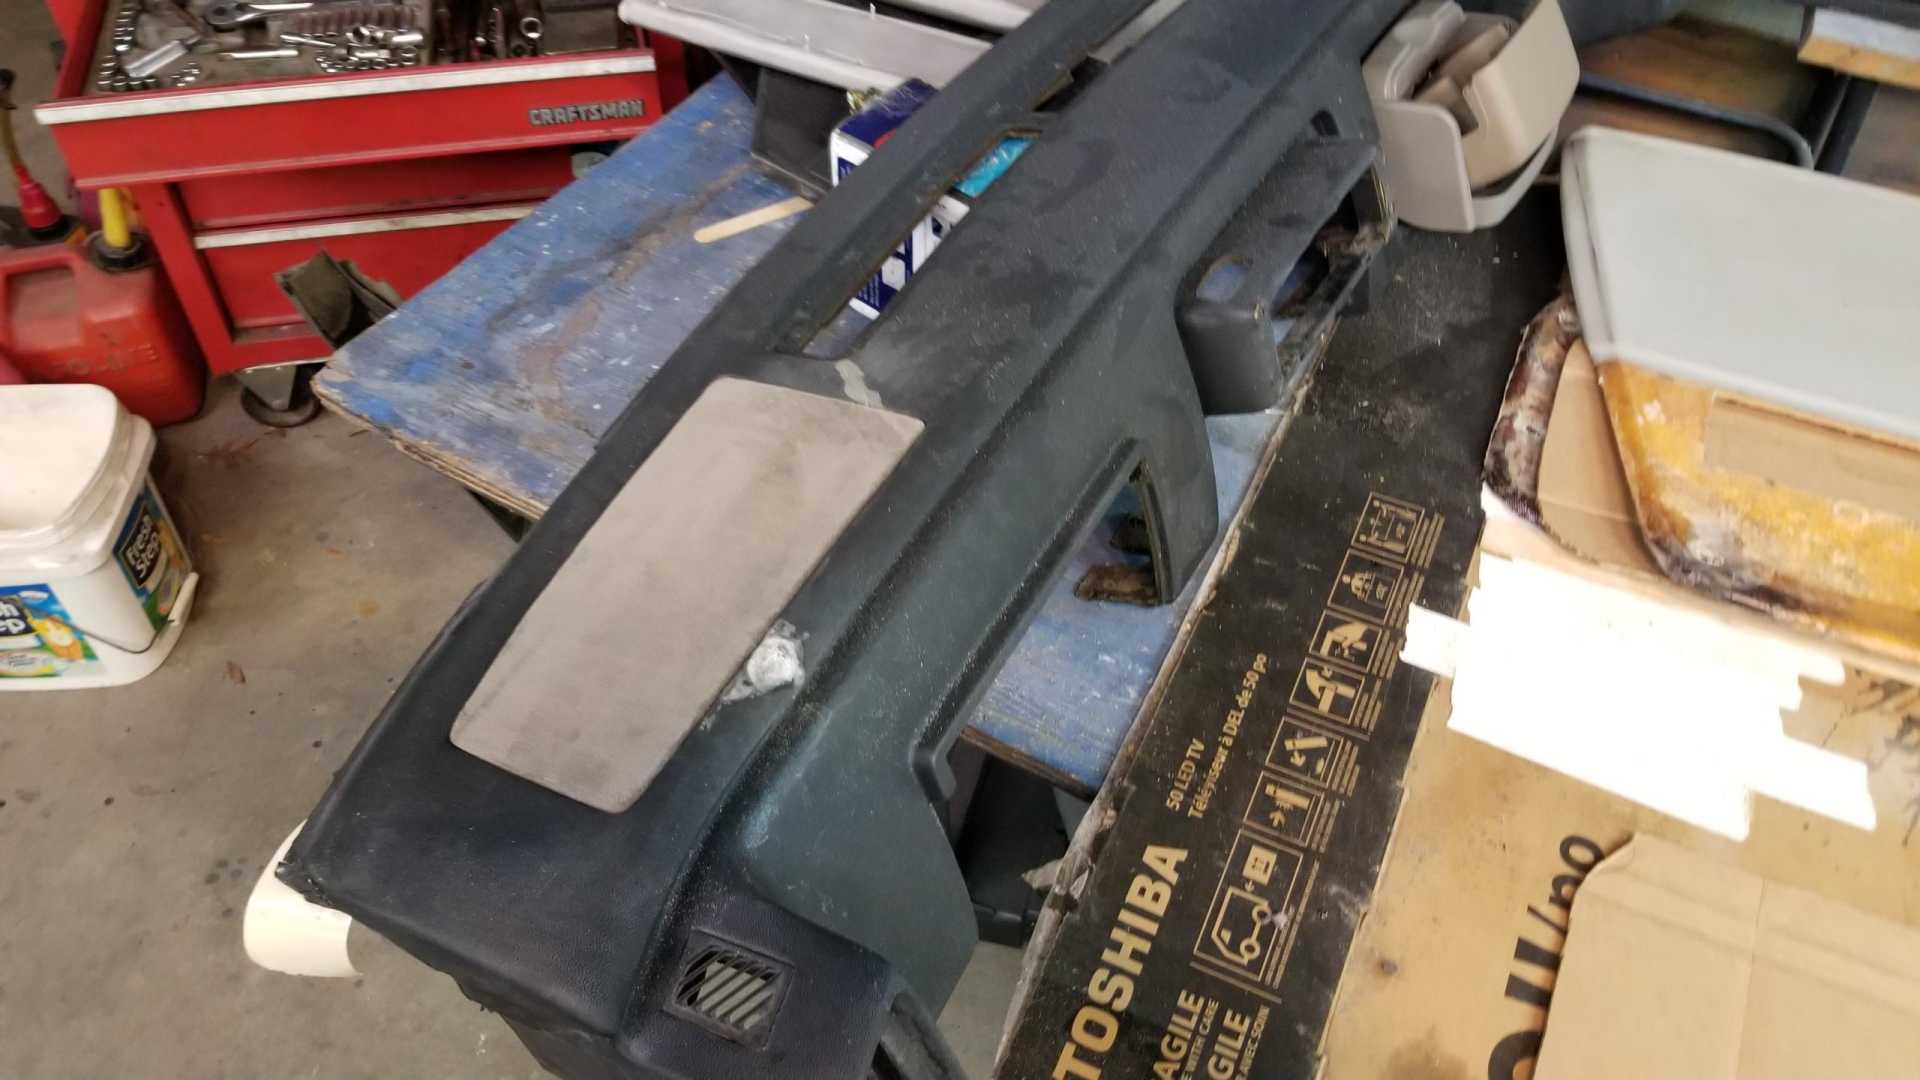
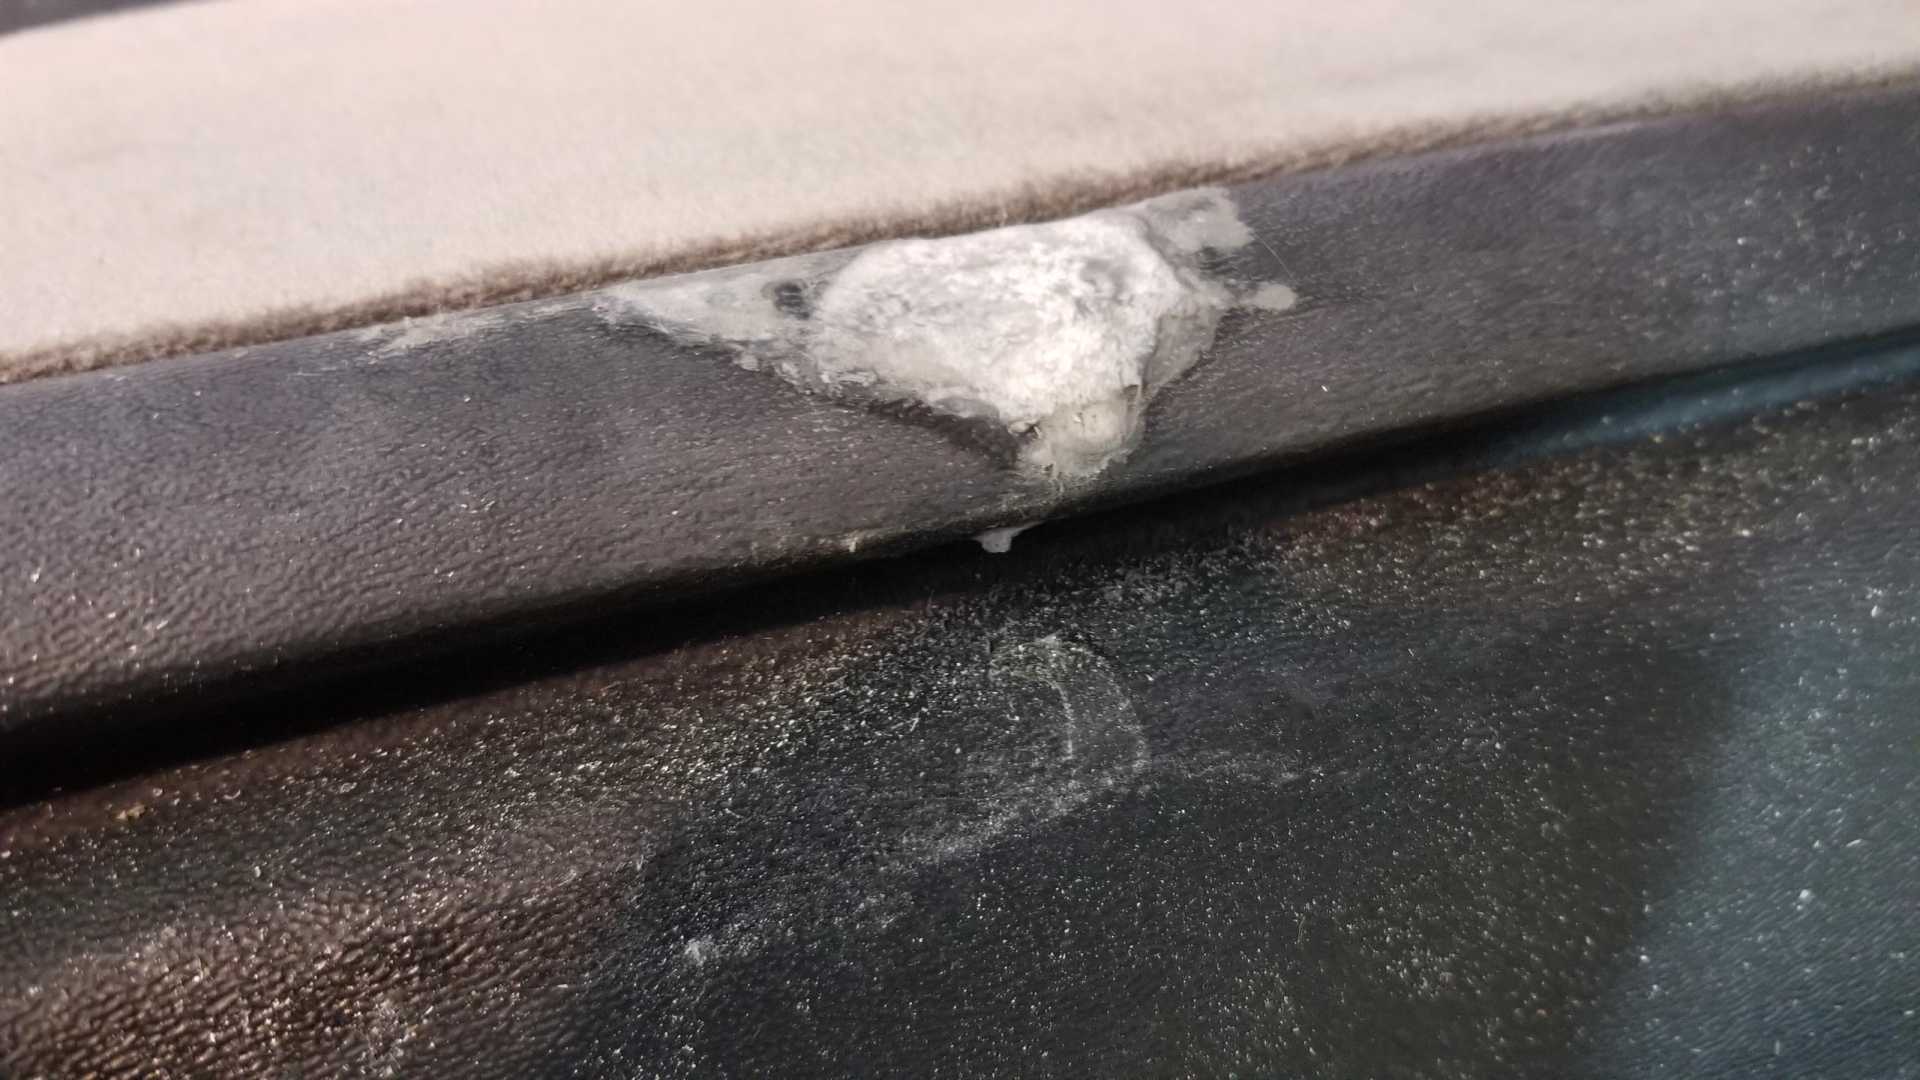
That white blob on the dash is a repair I’m working on. I must have dropped something on the dash while I was working on the door panels, because there was a golf ball-size impact point there. Hobby Lobby sells vinyl in a tube, but the cracks are so bad I’m having to layer the stuff on. It appears to be working, but still needs a few more coats.
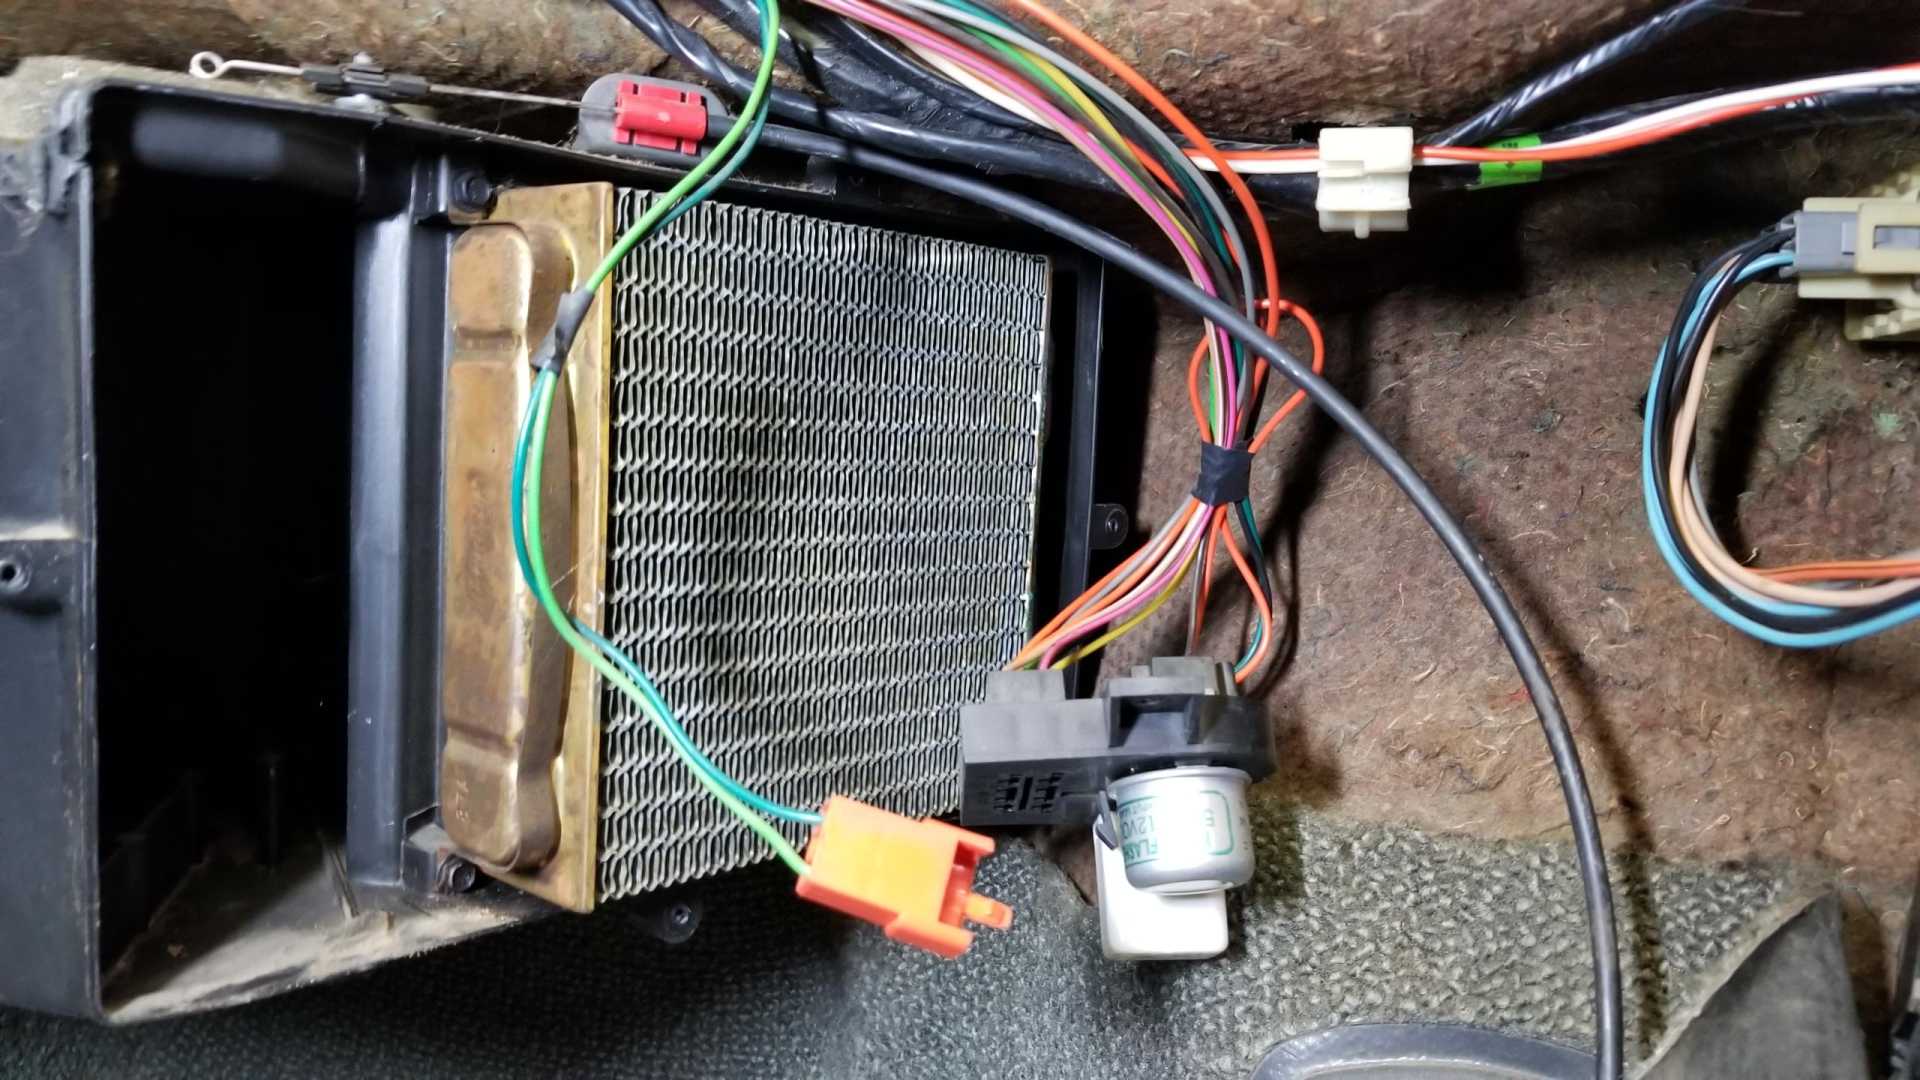
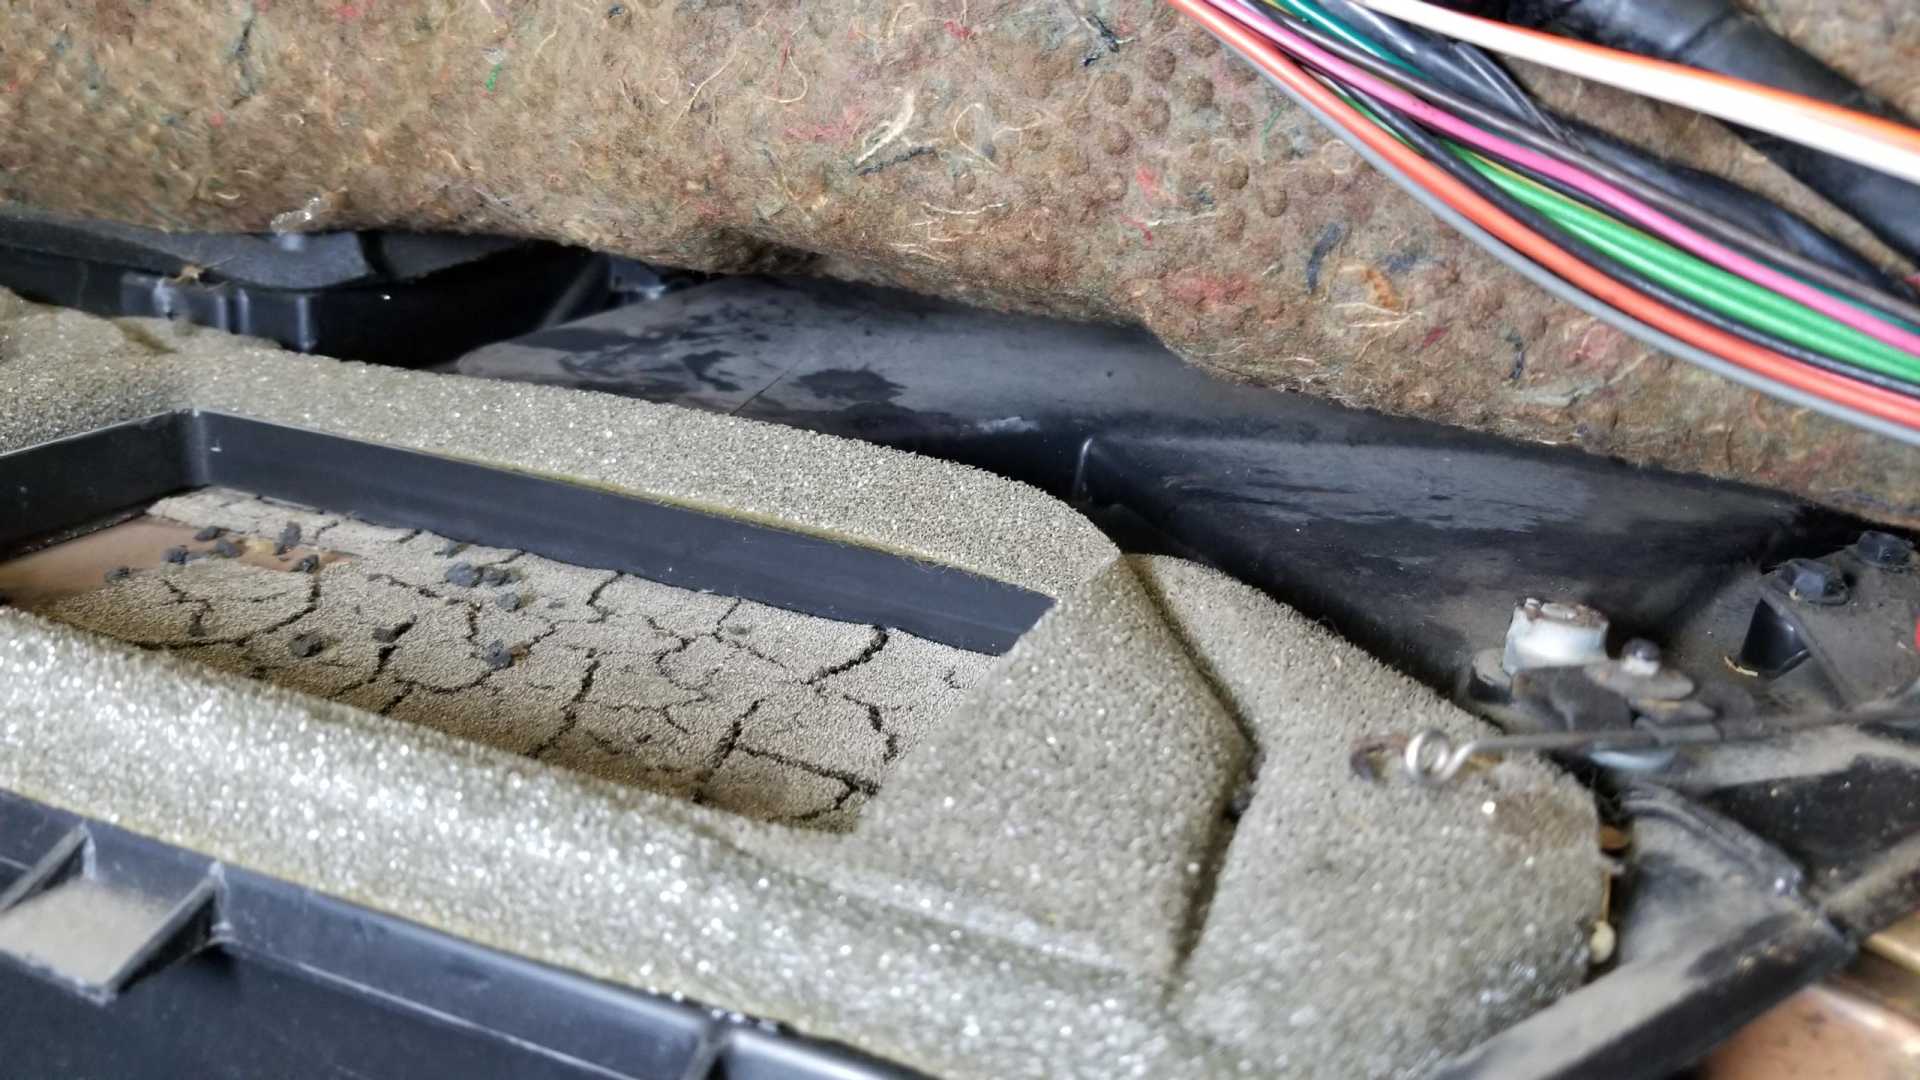
For weeks I’d been planning to take the access panel off and check the heater core for leaks, but today someone posted on the Fiero Facebook group about how easy it is to change, so I took the cue and checked. Has to be one of the easiest heater cores to access.
At first glance I thought mine was good, but then noticed evidence of small leaks.
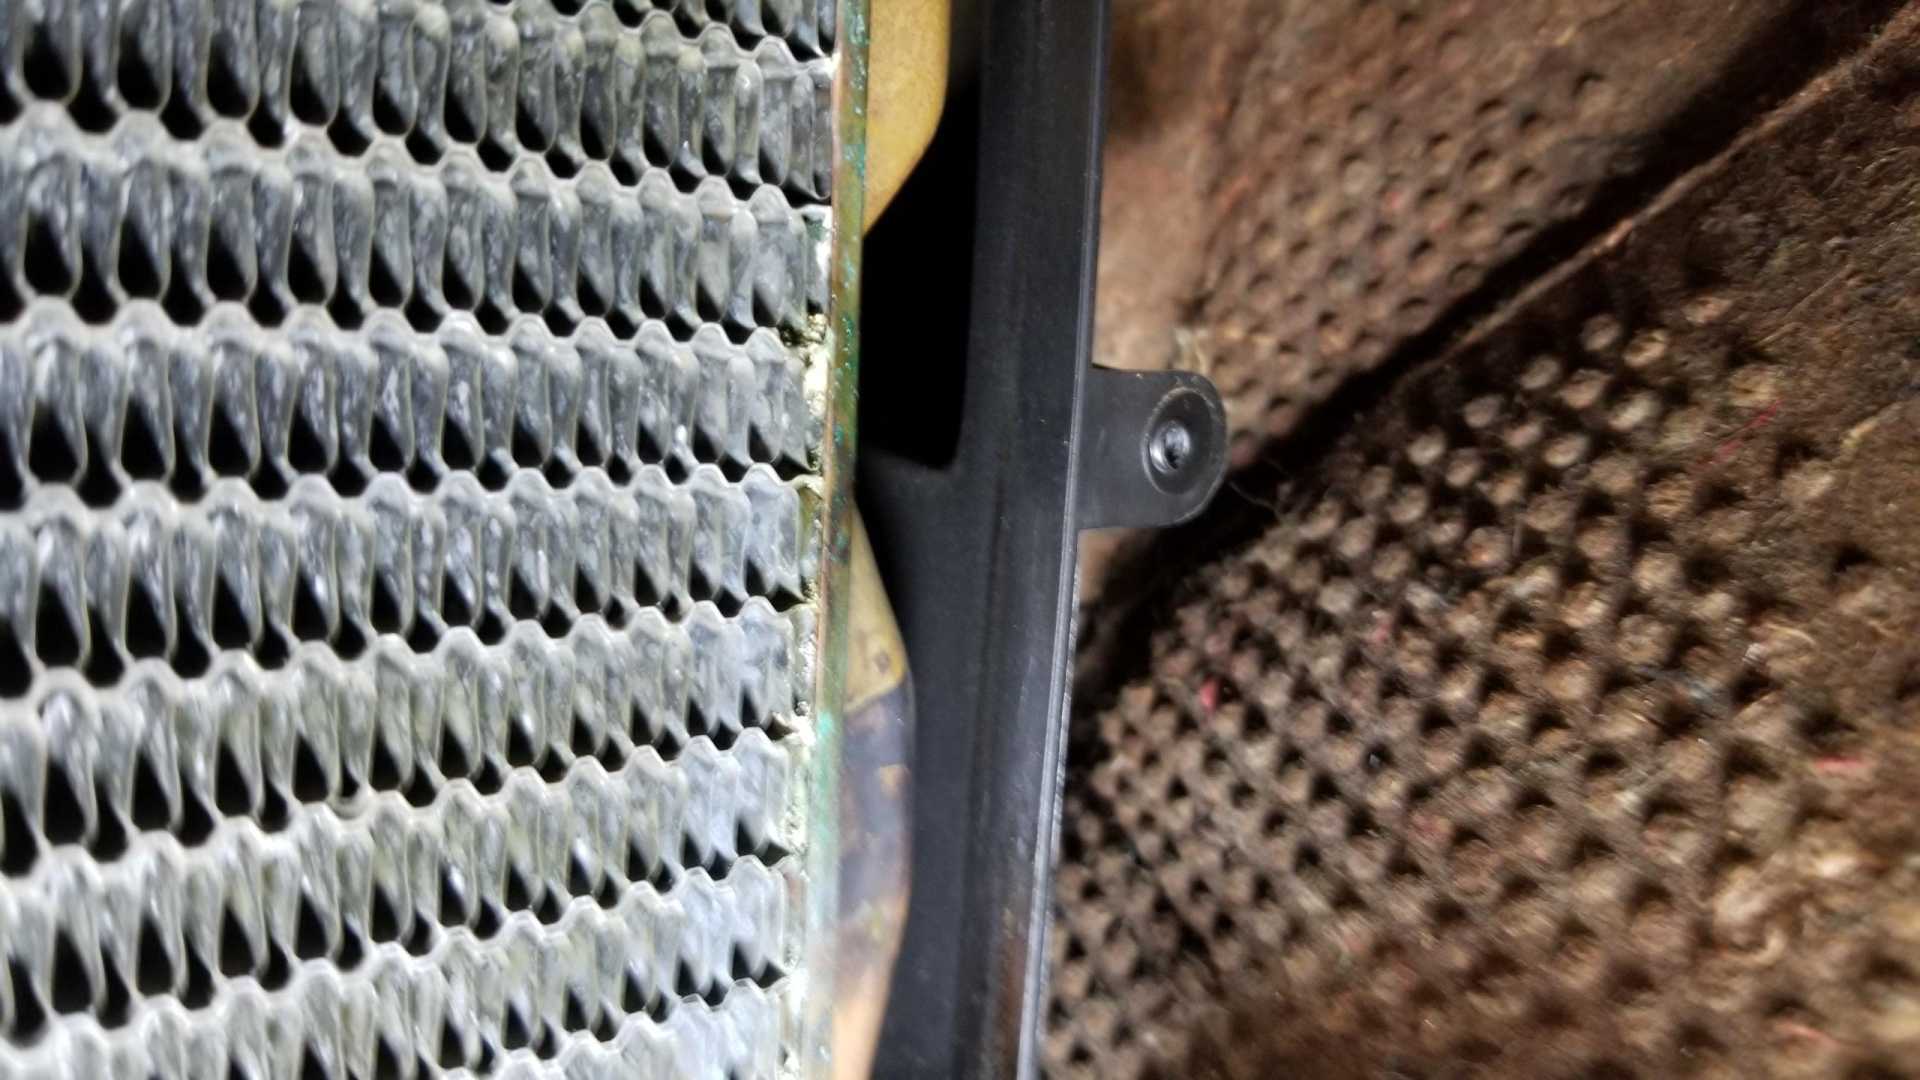
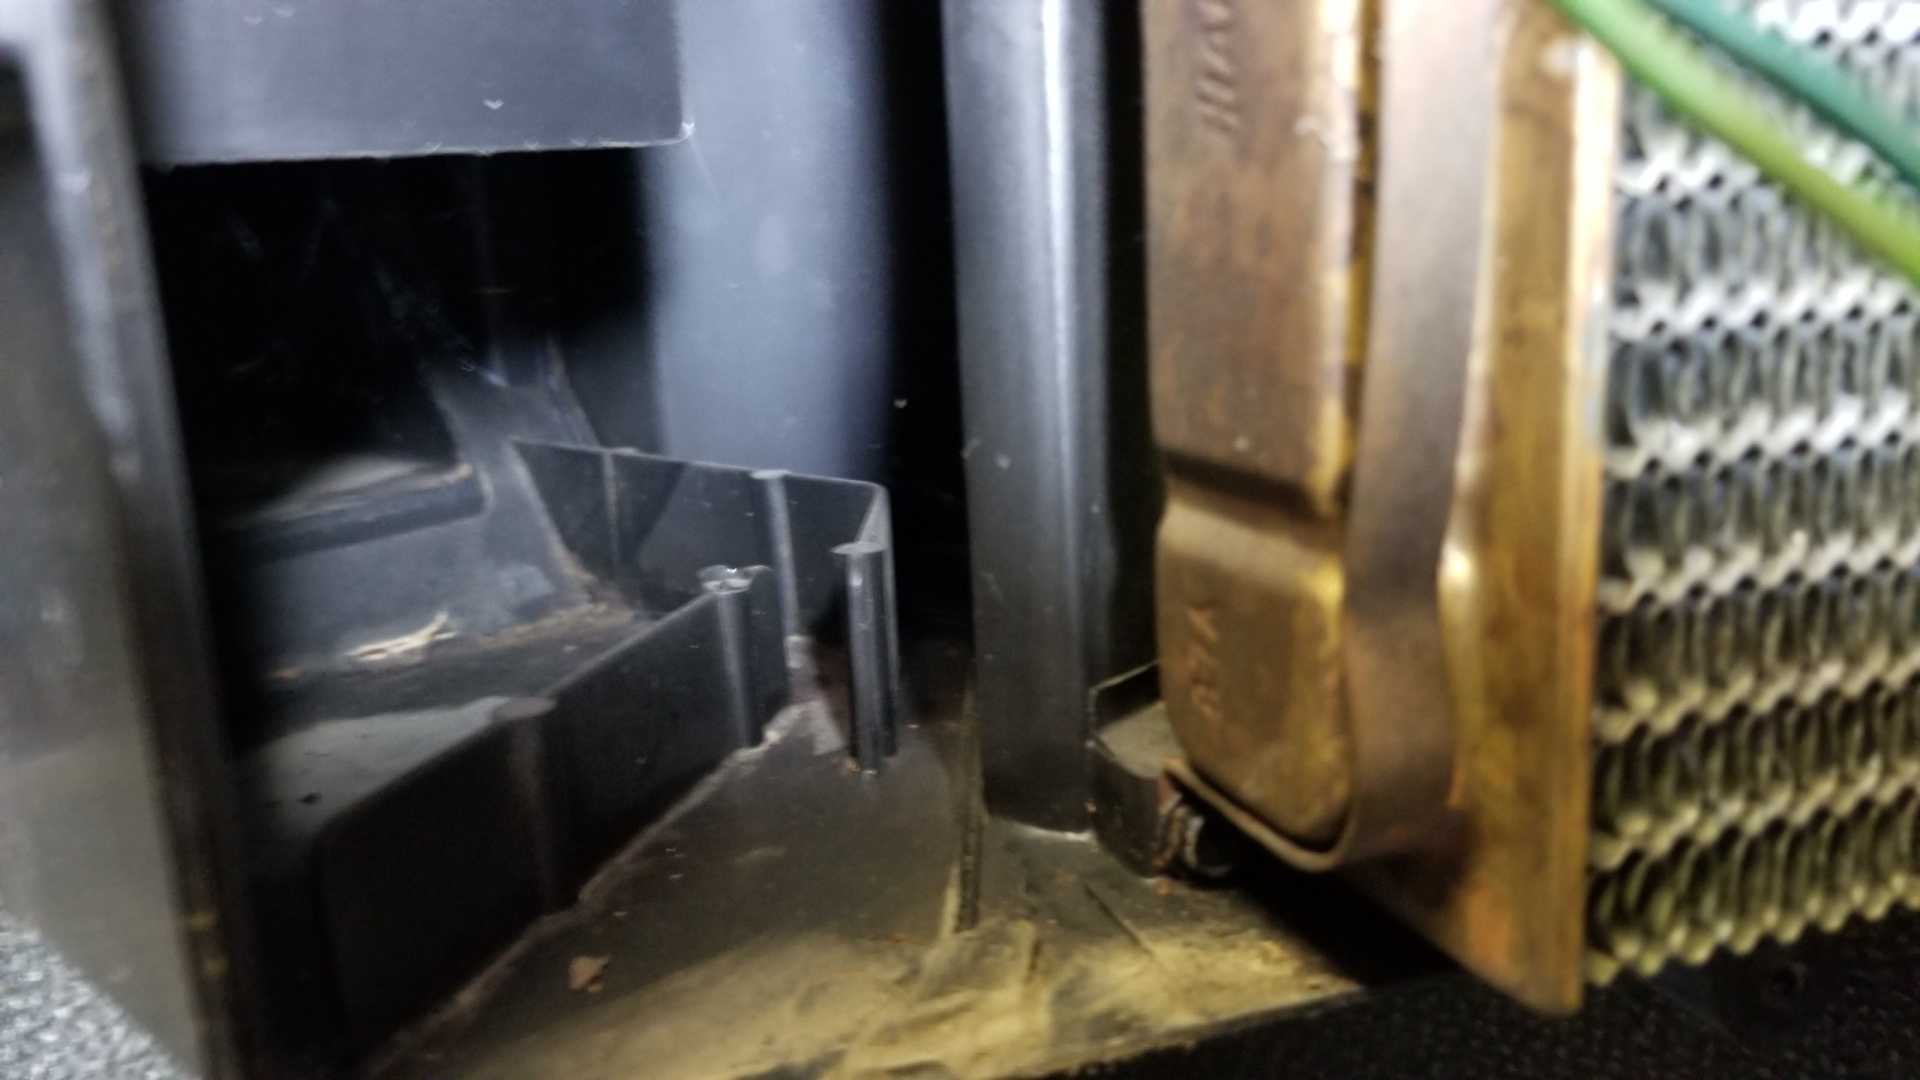
The rest of the ducting looks good, just a little dusty.
Still trying to work up the courage to splice the power window/locks harness into the car’s harness. Probably will do that this week. In the meantime, I’ll keep working on getting the dash and related parts ready for reassembly.
While shopping the salvage yard for the window regulator for my wife’s car, I saw a couple Camaros with the same kind of upholstery as my seats and made a note to get back to strip the rear seats.
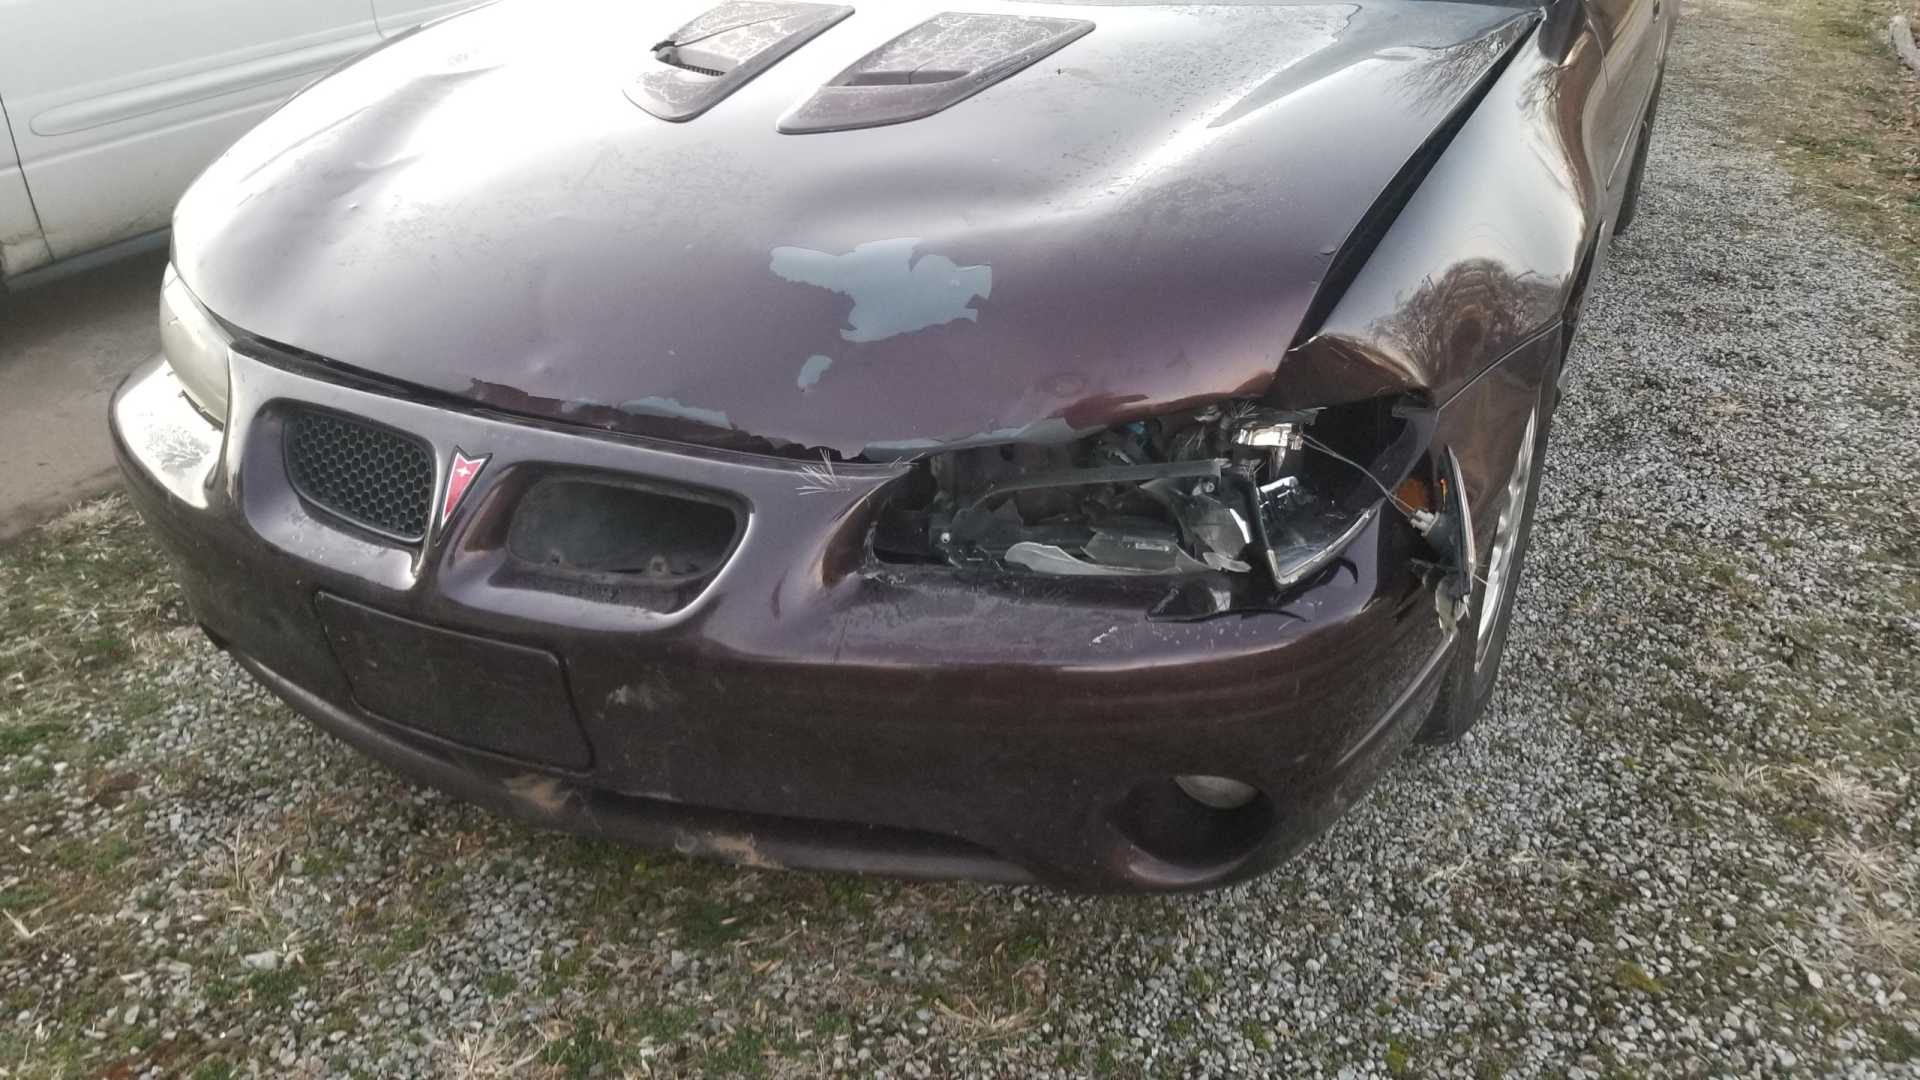
Thursday night my son hit a deer while driving the car. This is the third time deer have hit the car. I knew from my visit to the salvage earlier in the week there’s another 40th anniversary Grand Prix in the lot, so my son and I went and got the hood and the other parts we needed.
The replacement hood is banged up but still much better than the deer-damaged one.
This car has 225,000 miles on it and the body is just not worth saving, but we need it to be driveable for another six months or so. At that point I will remove the engine, trans, computer and harness for eventual use in another Fiero.
[This message has been edited by Quadfather (edited 01-06-2020).]
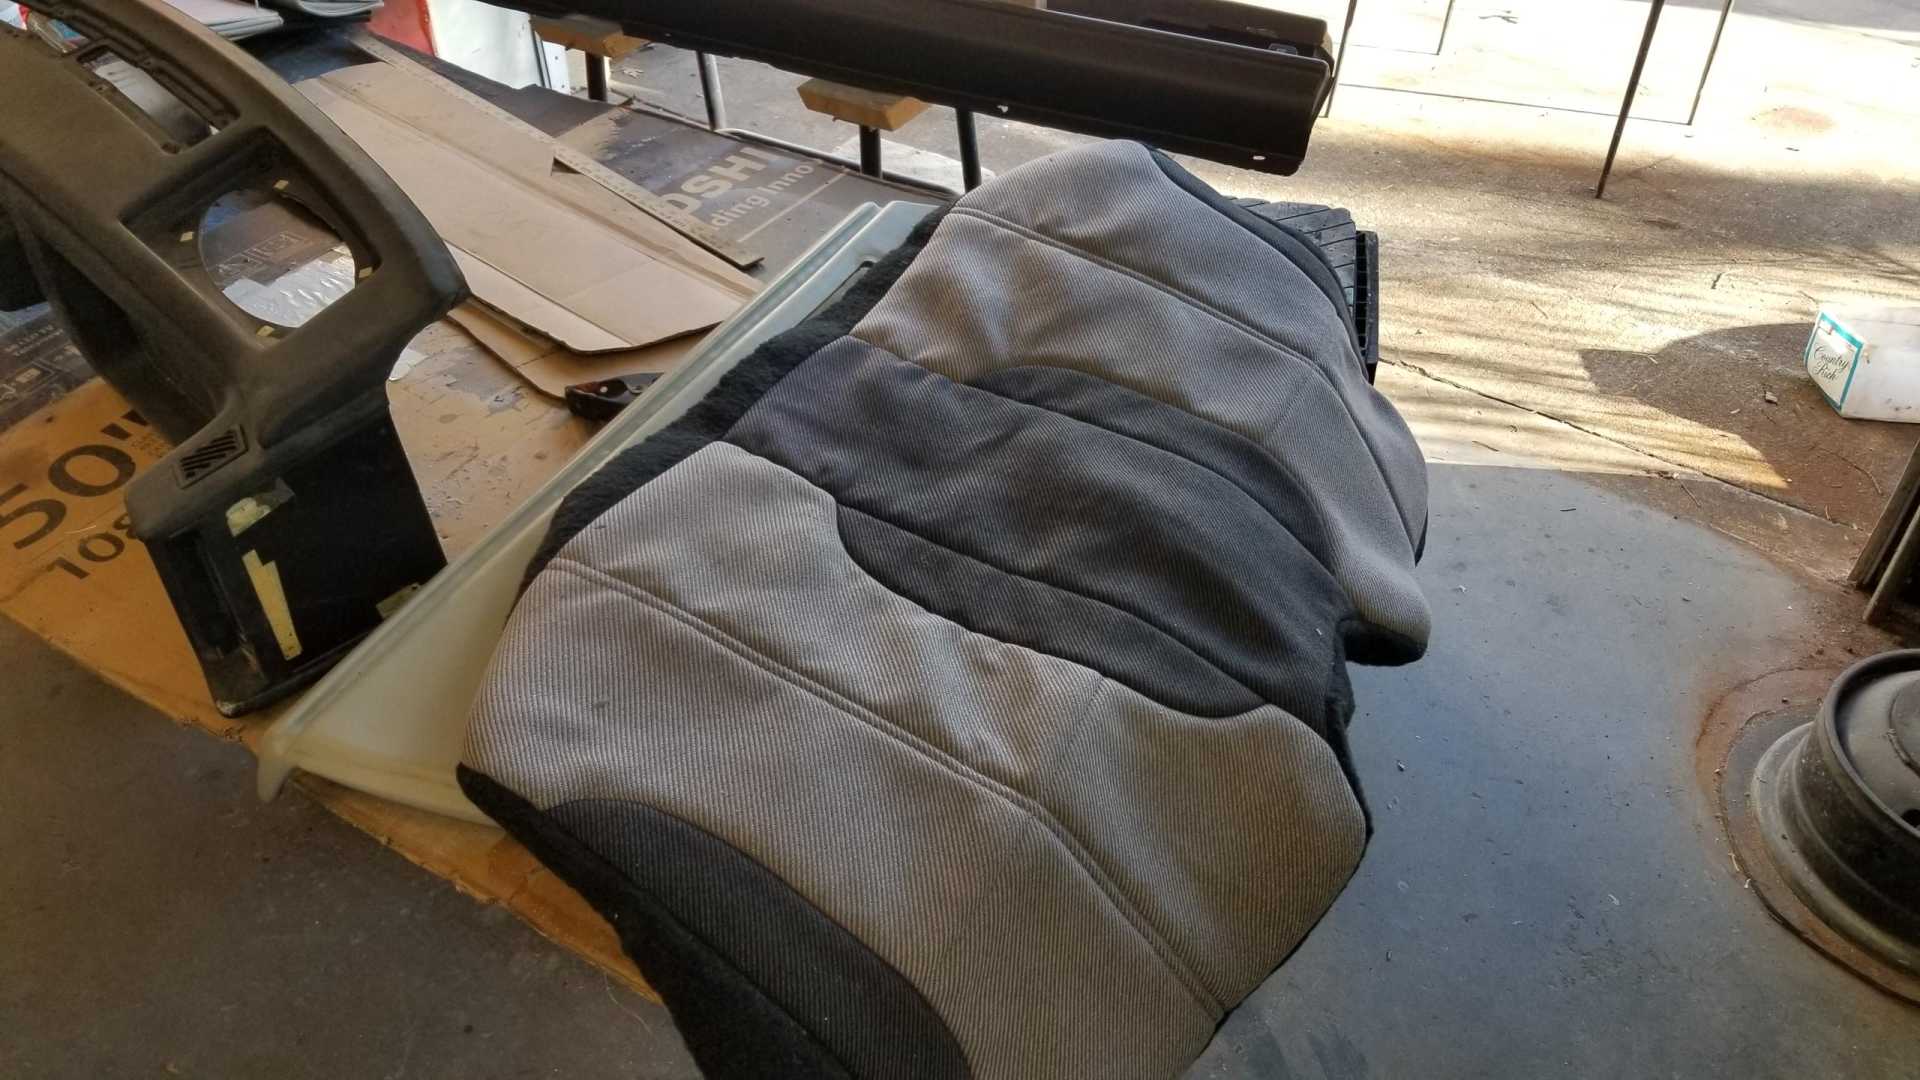
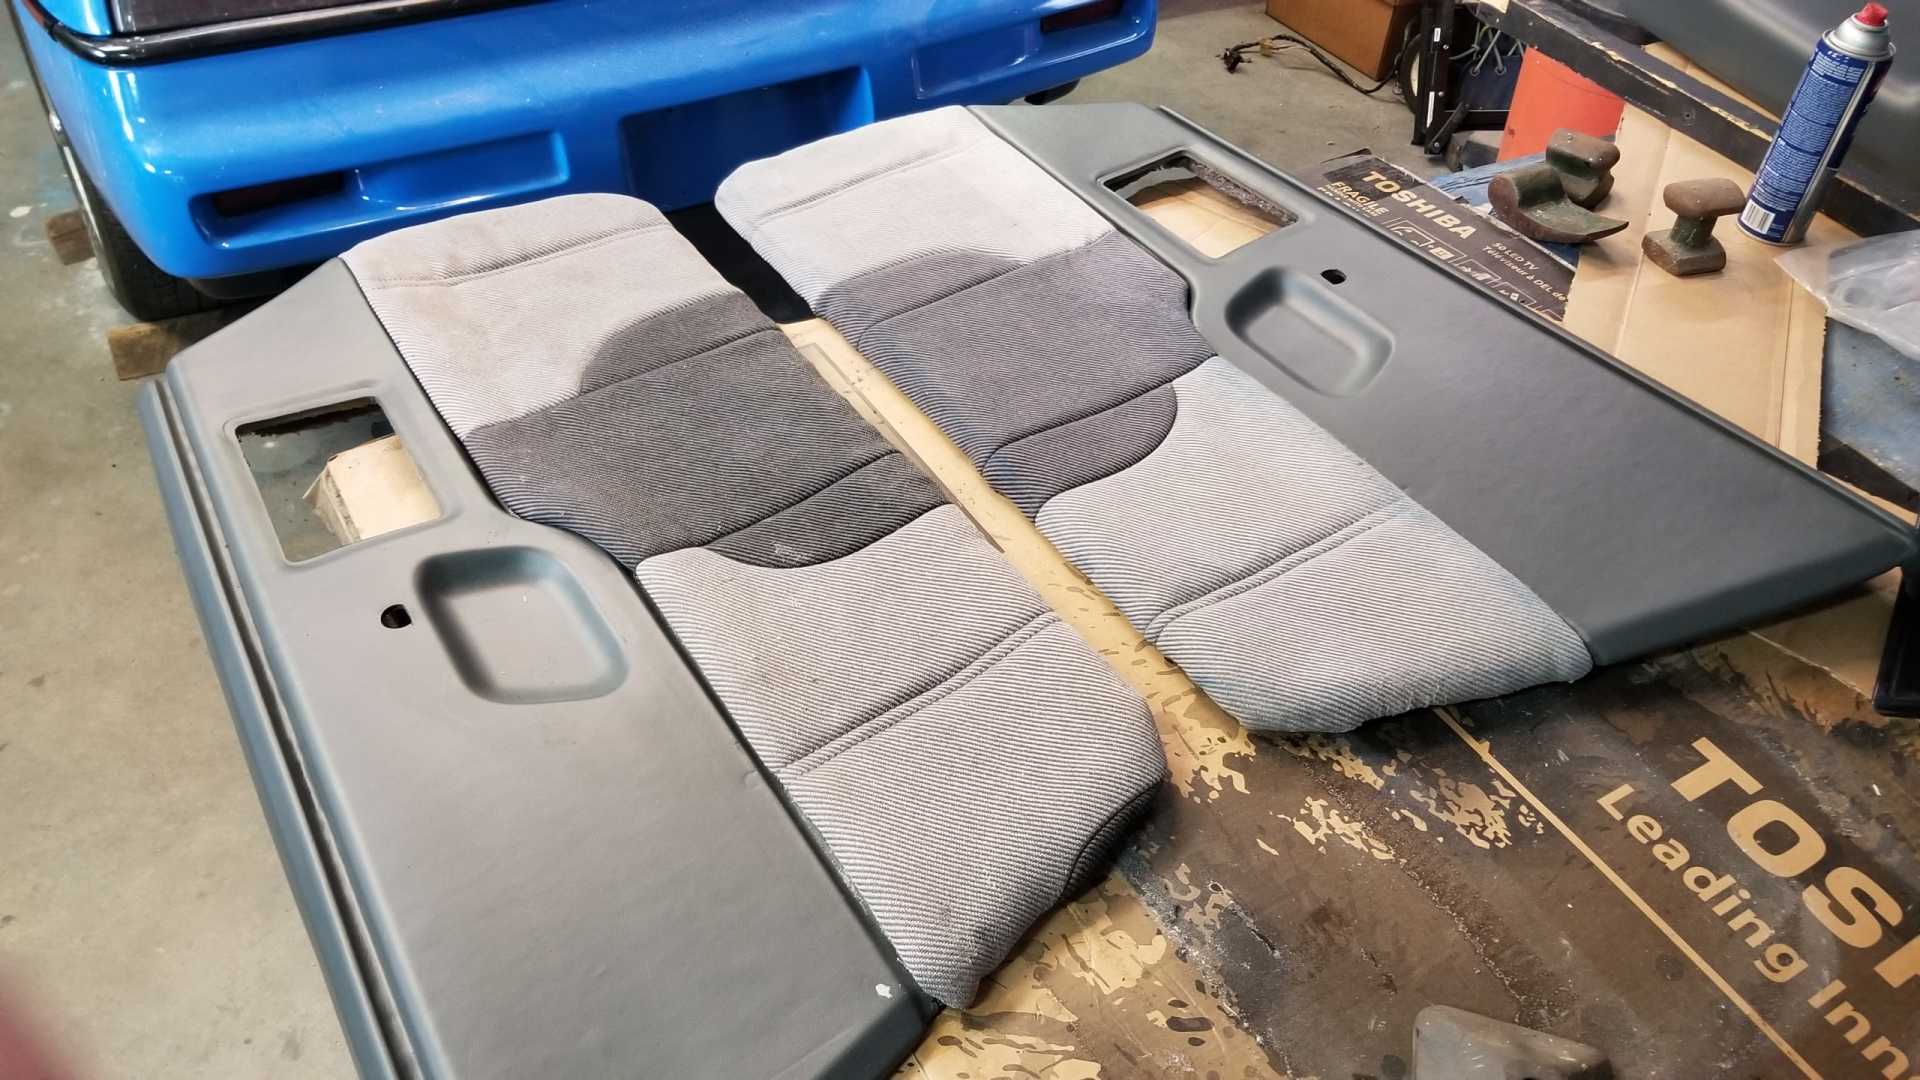
While at the salvage we also bought two rear seat covers from the 4th gen Camaros for a whopping $9.
One cover was in great shape, the other one not so much. It was faded and the carpet-like fabric that covers the back of the rear seat just crumbled. You might be able to tell that it was a bit faded, too.
I used the faded one for my first try, which was on the passenger door panel. I’ll keep looking for more 4th gen Camaros in the salvage with this kind of upholstery and grab another back seat cover, then re-do this door.
I like the look. I ran out of time in the shop, so I’ll try to do the other side this week. I’ll also try to take photos of the cutting and upholstery process. I think I’ll paint the vinyl parts of the panels a darker gray to get them to match the fabric.
While test fitting this panel to the door, I noticed the top part has been mis-shaped, probably from sitting around so long. I set it up with some clamps to straighten it out. I also took a close look at my inner dew wipes and unsurprisingly they need to be replaced. There’s no money in the budget right now for dew wipes or a heater core, so I’ll keep working on things that don’t cost much until I can afford those parts.
[This message has been edited by Quadfather (edited 01-06-2020).]
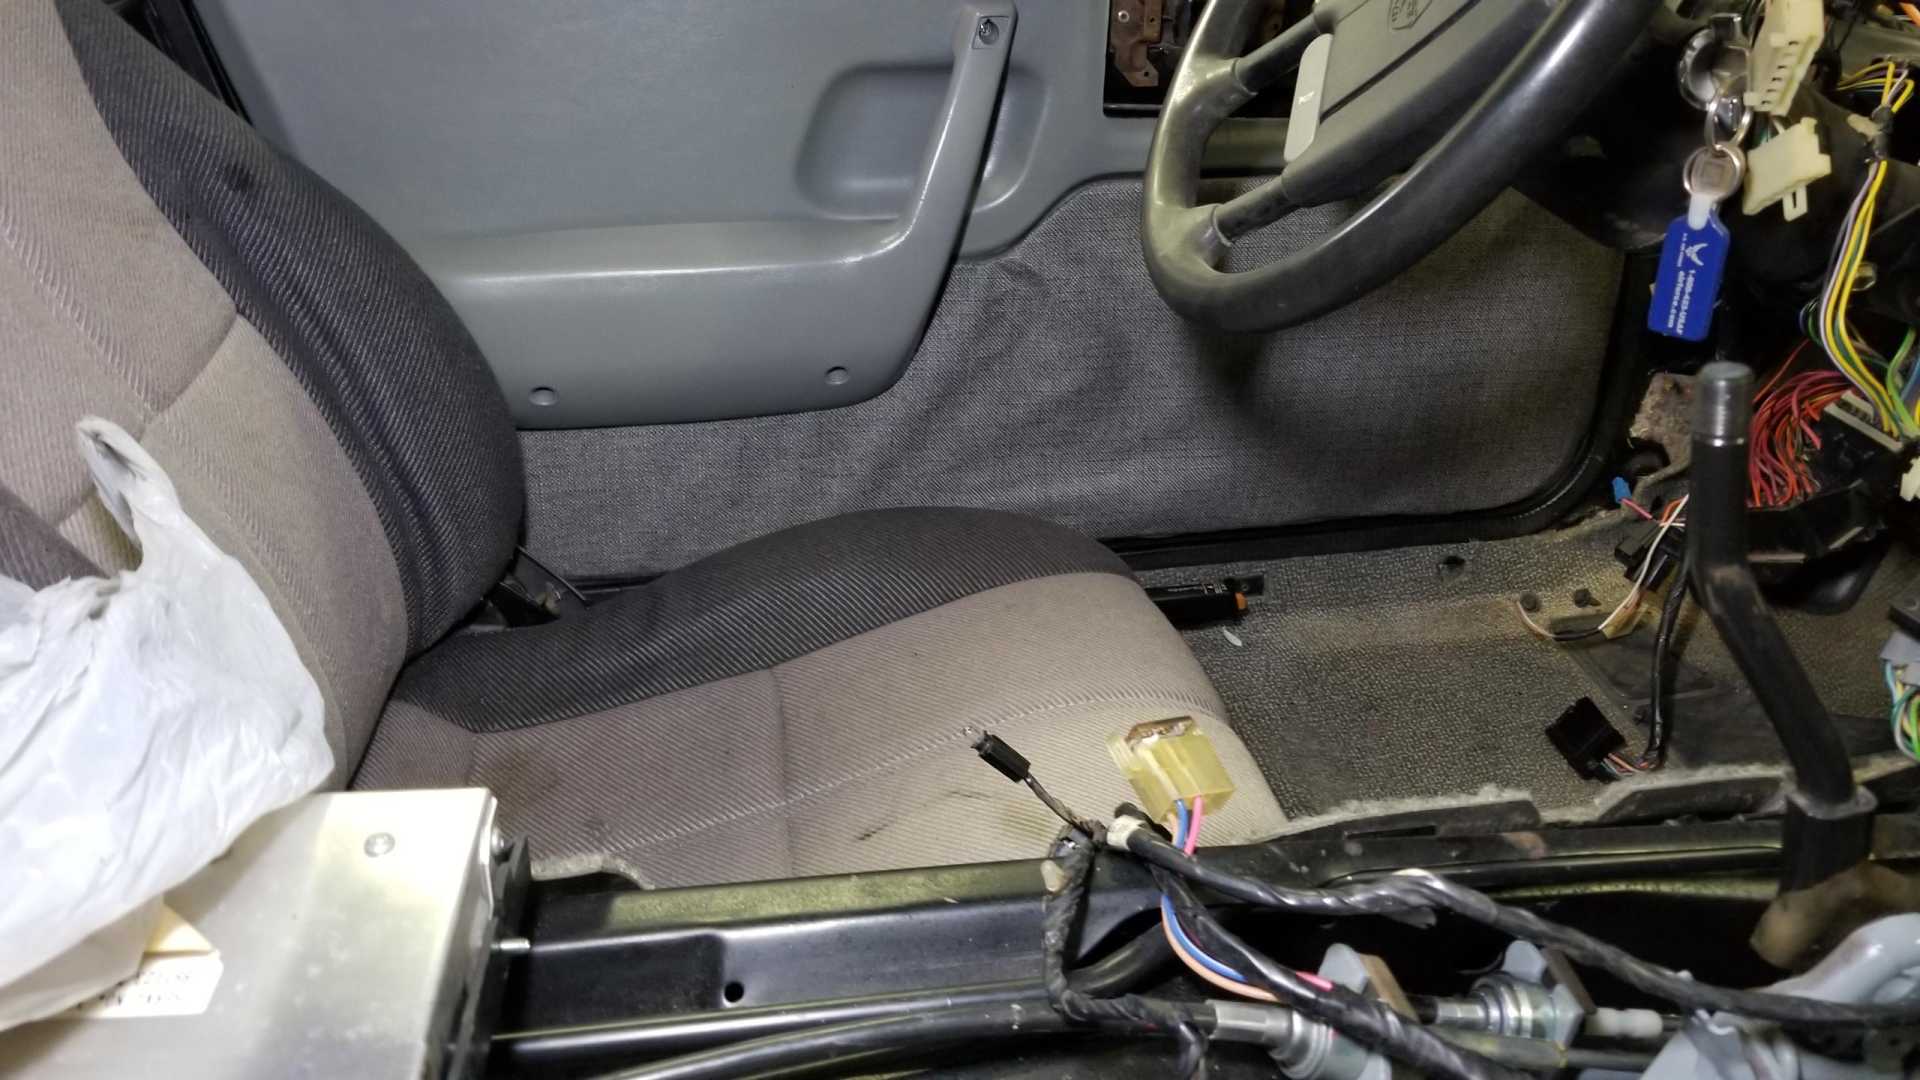
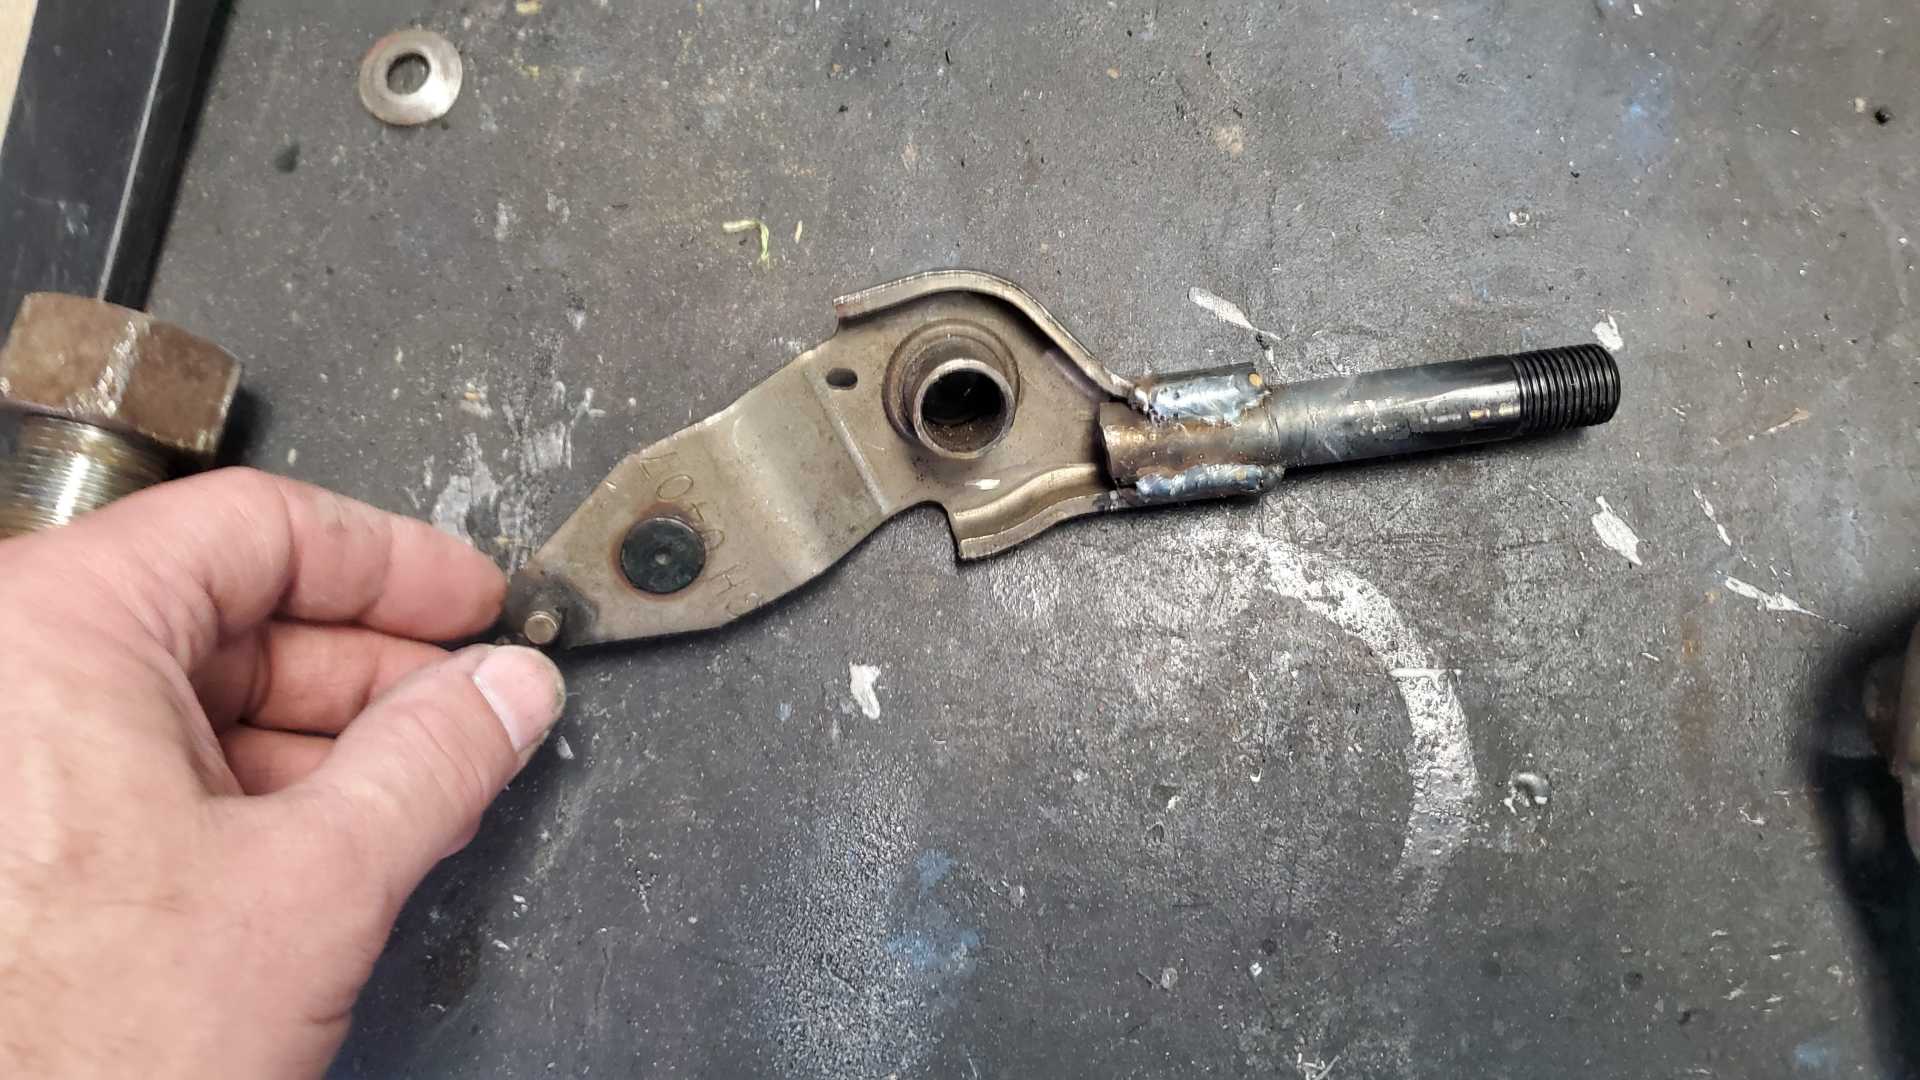
I did replace the clutch safety switch. Earlier in this thread I noted how the previous owner had put a jumper in the plug for the switch. The car has never run since I bought it, so I don’t know for sure but it’s a safe bet the switch was bad.
I figured replacing the switch while the dash was out would be much easier. A couple years ago I came across a thread on here that the Fiero switches aren’t available anymore so the poster used one from an ‘88 S10 Blazer.
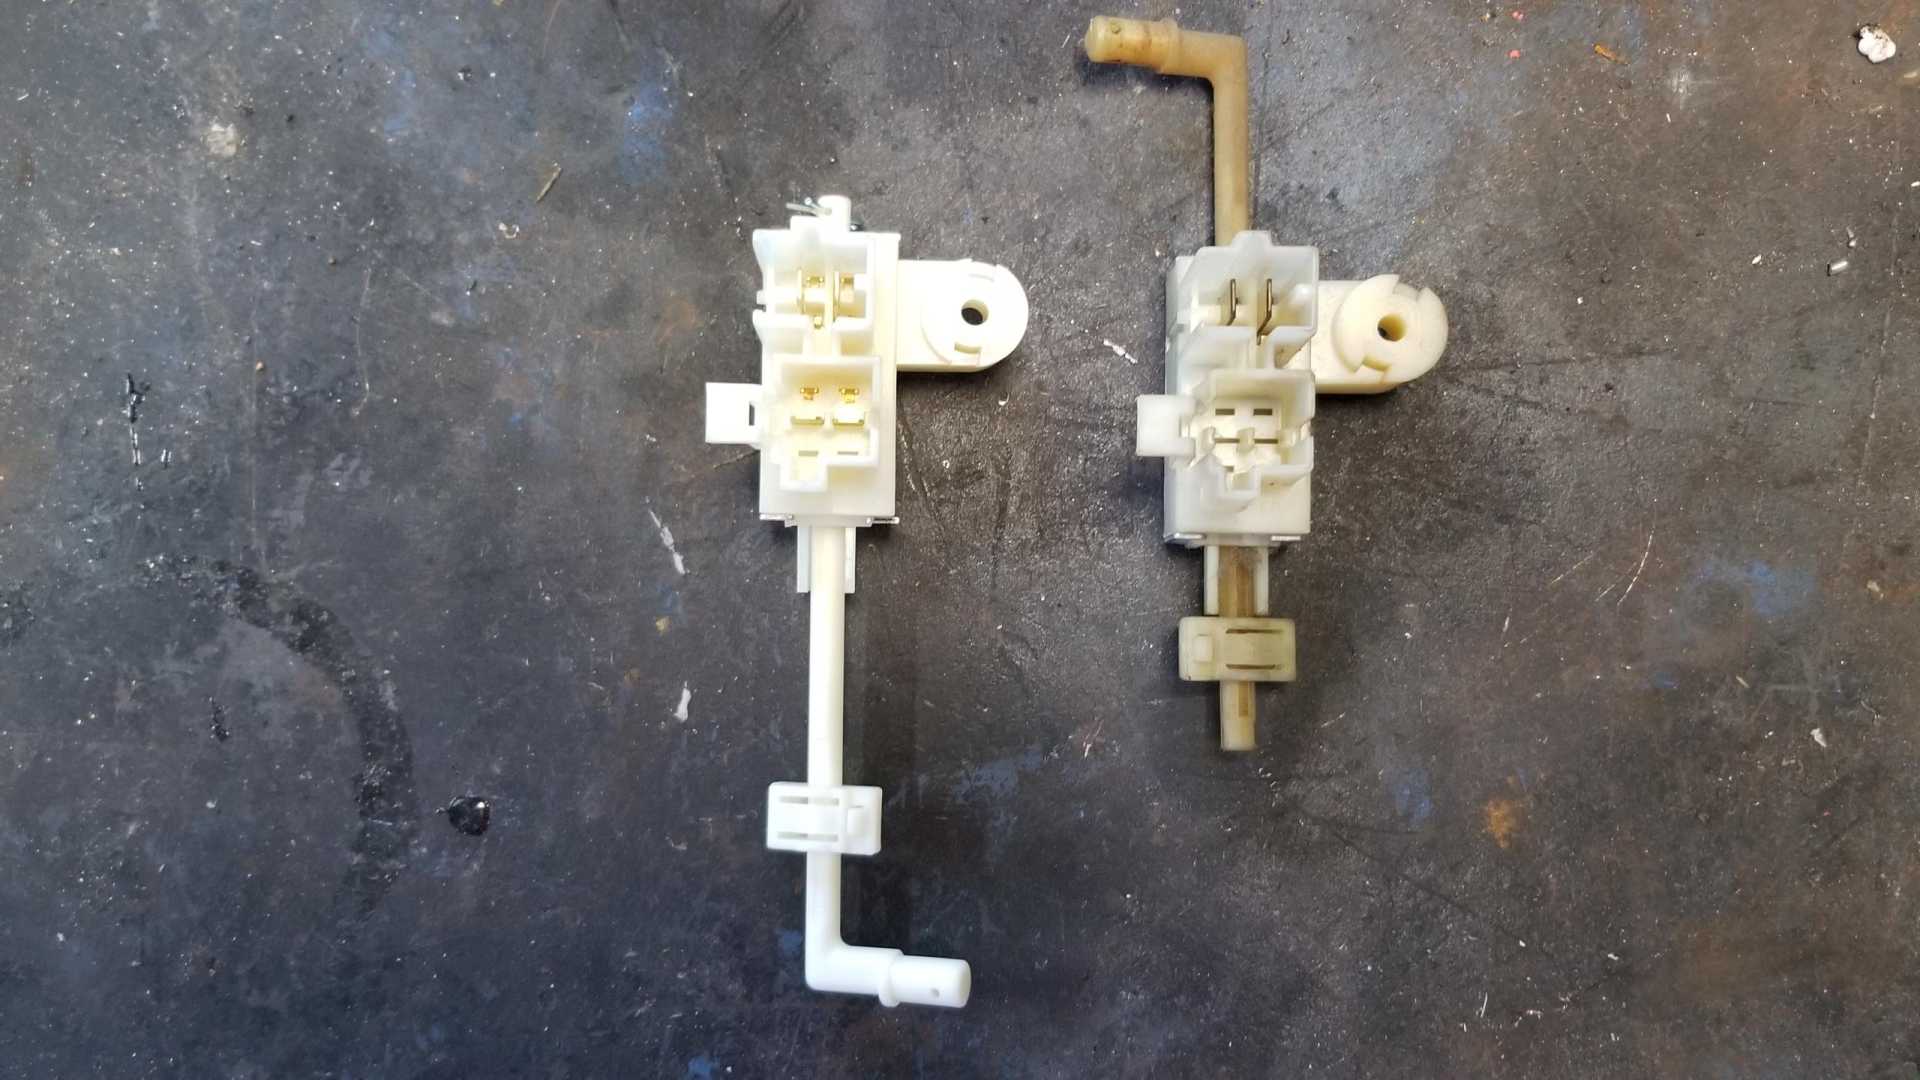
I ordered the S10 switch from RockAuto and sure enough, the switches look almost identical.
The S10 switch has an extra pickup, but that doesn’t matter. The biggest difference is that the rods move in opposite directions. It’s simple to put the Fiero rod and adjustment clip into the S10 switch from the proper direction. I then mounted the switch and used the clip to adjust the travel while moving the pedal. Definitely easier to do while the dash is out of the car.
Note: the S10 adjustment clip will not work on the Fiero push rod. The teeth on the Fiero clip don’t fit the S10 rod, so just use both the Fiero rod and clip.
[This message has been edited by Quadfather (edited 01-06-2020).]
I've really enjoyed your posts, I'm just beginning to do pretty much what you have done, sans engine upgrade. I hope you wont mind referencing what you have done, to rebuild my Fiero
I've really enjoyed your posts, I'm just beginning to do pretty much what you have done, sans engine upgrade. I hope you wont mind referencing what you have done, to rebuild my Fiero
Thanks
That would be great. Feel free to post your own build thread so everyone else can see what you’re up to.
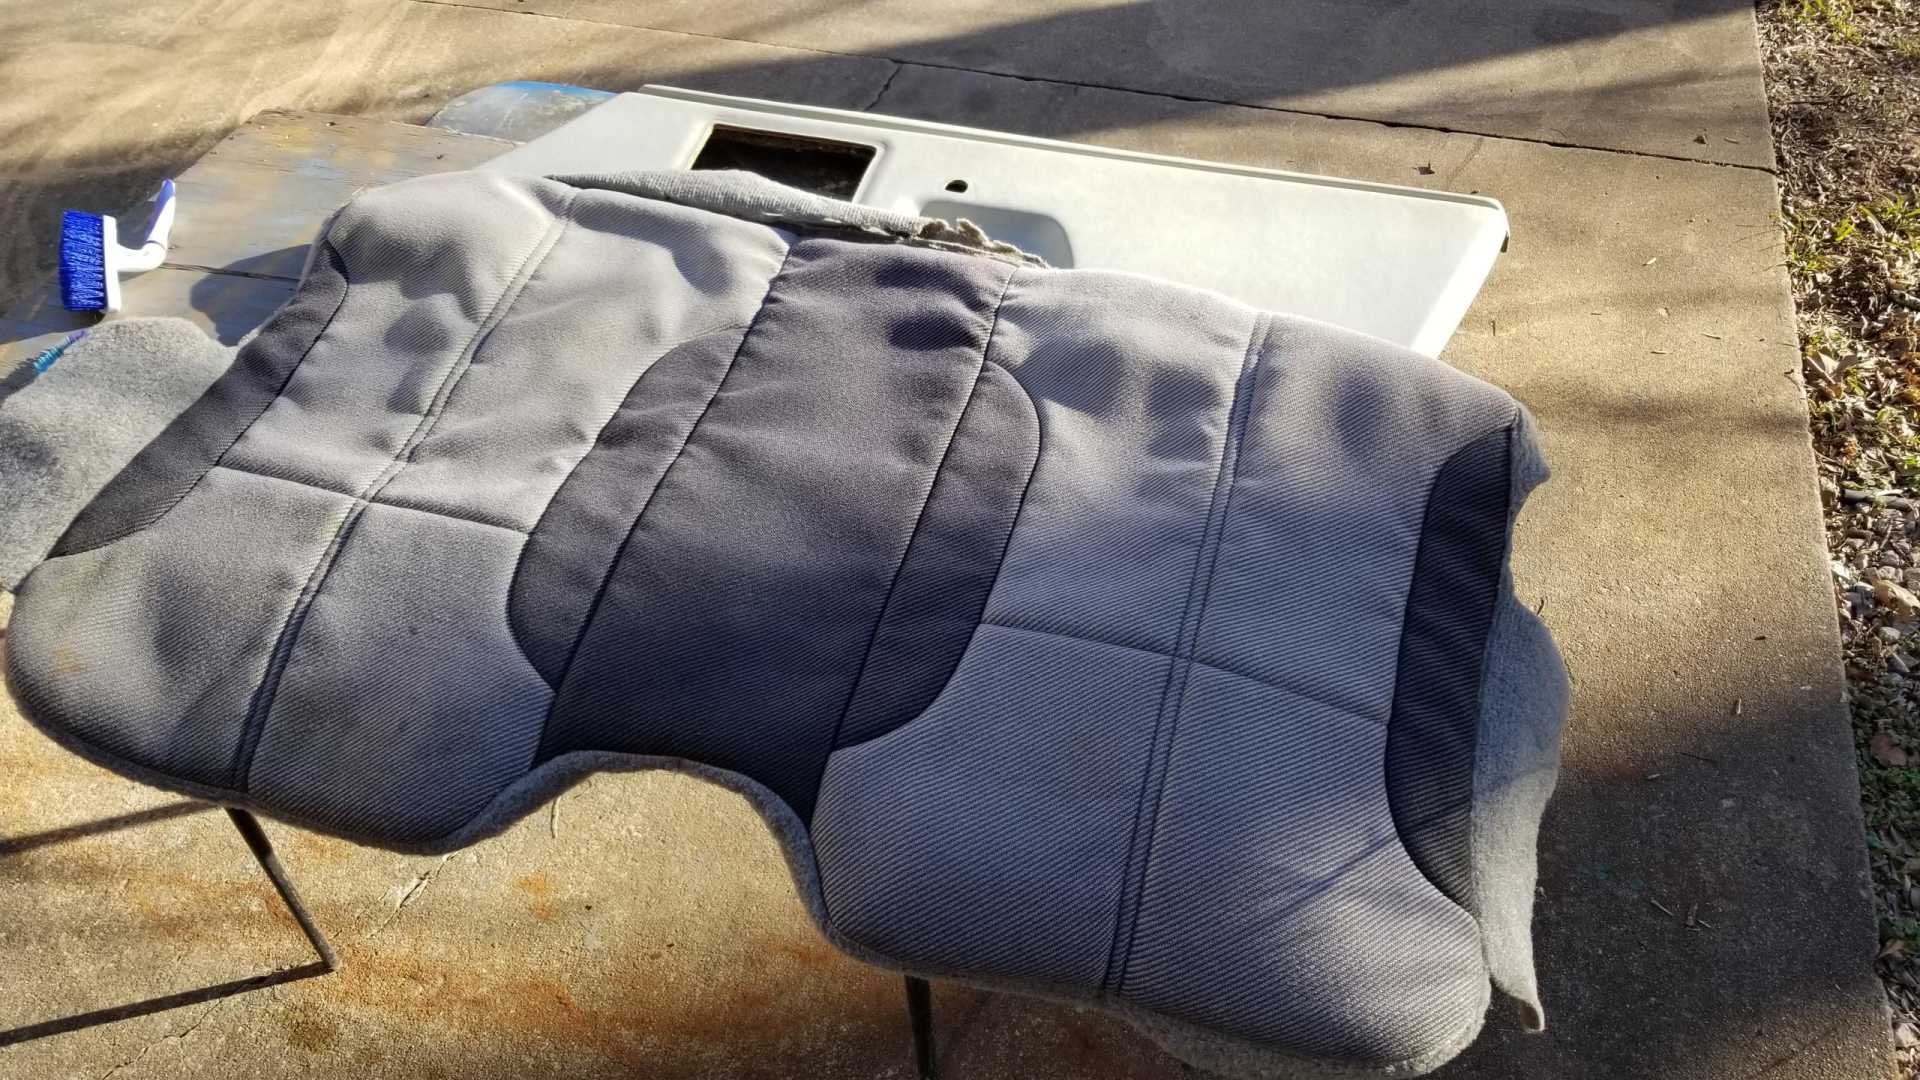
Finished using the Camaro seat material for the door panels, put the panels in the car and decided I didn’t like them, so off they came.
As I’ve mentioned before, one of the seat covers was badly faded and you can see that in the photo. The material is difficult to work with, since it’s three or four layers, including fabric and padding. The seams also make it tough to handle. It was difficult to get it cut to the right shape and to get it to wrap around the panel. I ended up with some differences between the two panels.
On the plus side, I like the texture of the fabric and the thickness it adds to the panels.
[This message has been edited by Quadfather (edited 02-09-2020).]
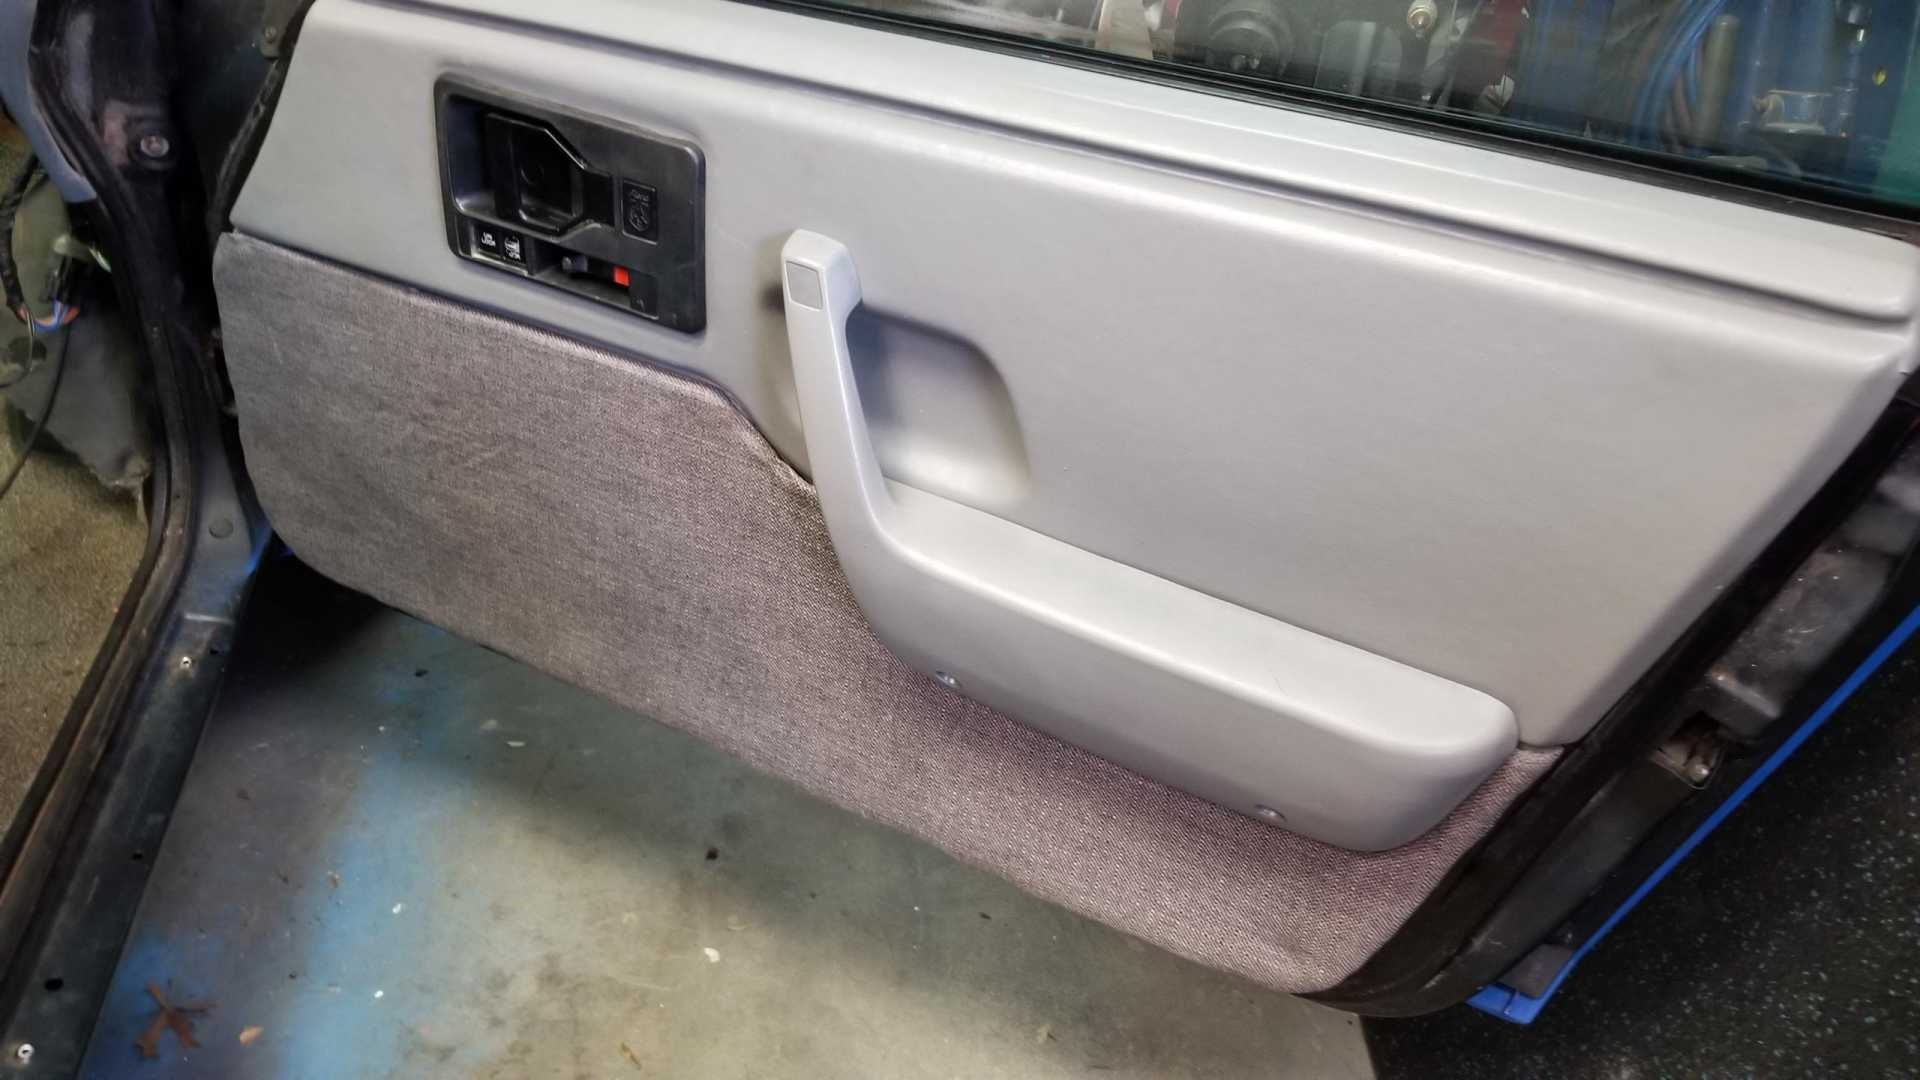
My wife and I were out shopping a couple weekends ago and made a stop at Hobby Lobby, so I looked through the fabric department for something to use. I found some grey fabric that I like a lot. It’s very rough, almost like burlap, and it was cheap. I got two yards for about $16.
The stuff is easy to work with and since I didn’t have to worry about seams or any designs, cutting it was a breeze.
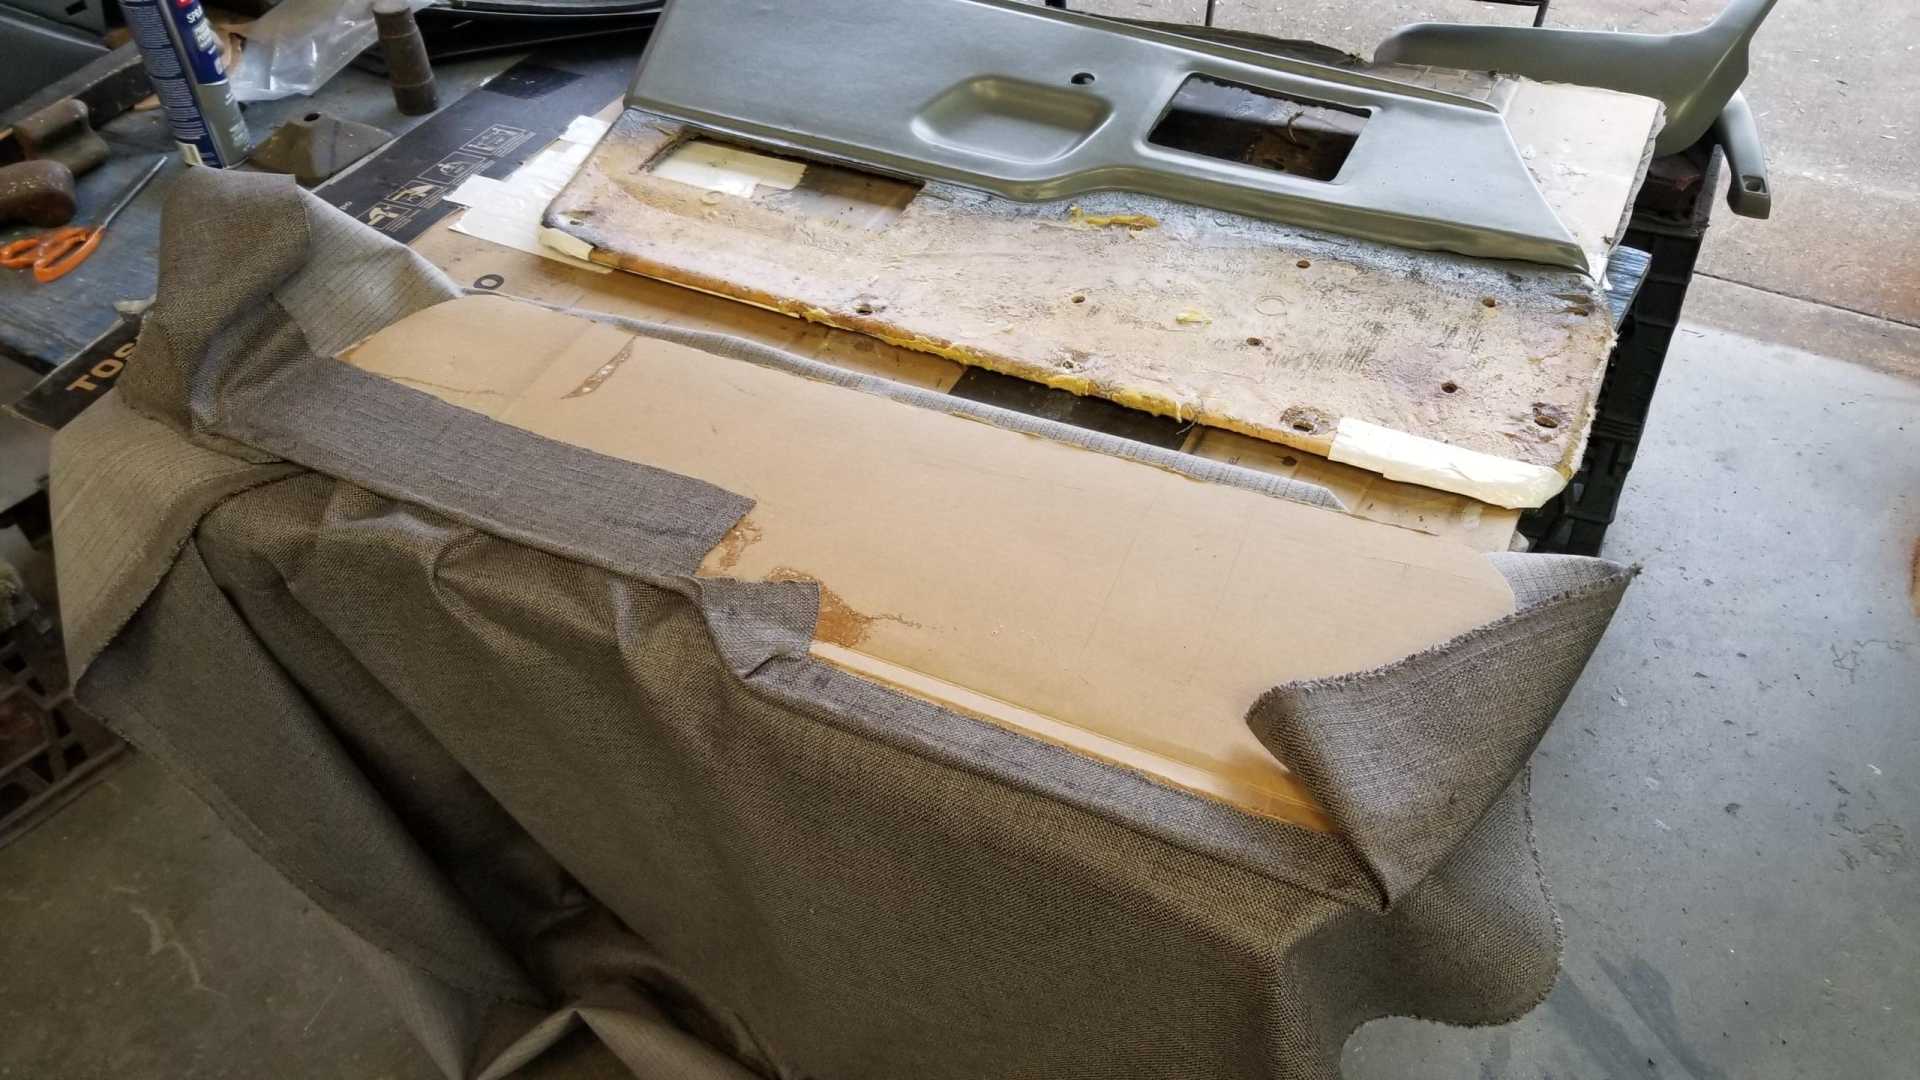
I wrapped the top edge around a piece of cardboard, glued the cardboard to the panel, then glued the fabric to the back of the panel. Doing it that way caused the fabric to be loose on the front side.
My plan is to pull this off, then glue the fabric to a piece of carpet padding, then glue the padding to the panel. Might get to it today.
[This message has been edited by Quadfather (edited 02-09-2020).]
Yesterday I spent about three hours in the shop, but only spent a small amount of that time actually working on the car. The rest of the time I was moving parts around and organizing spares. The shop is so full of STUFF it’s hard to stay focused. It’s also hard to find parts and fasteners, which I know I have, when I’m ready to put them back on the car.
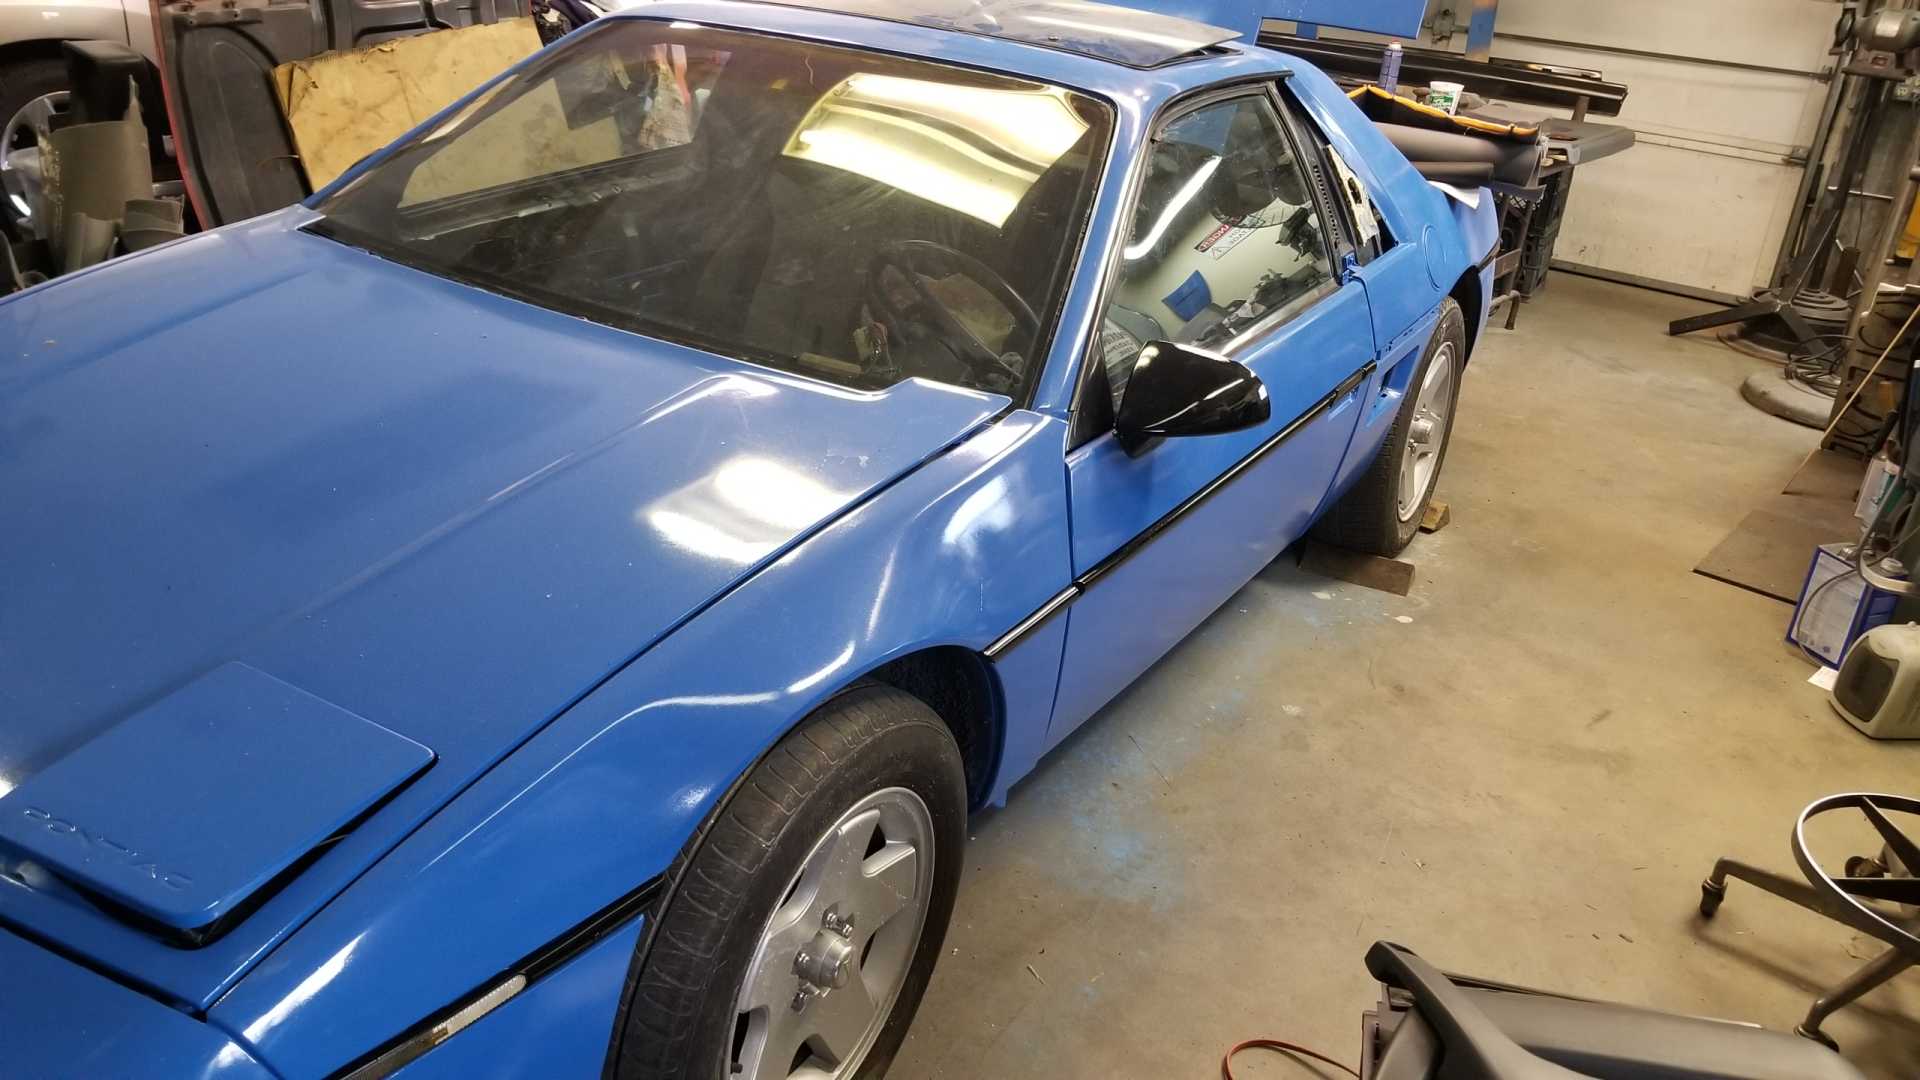
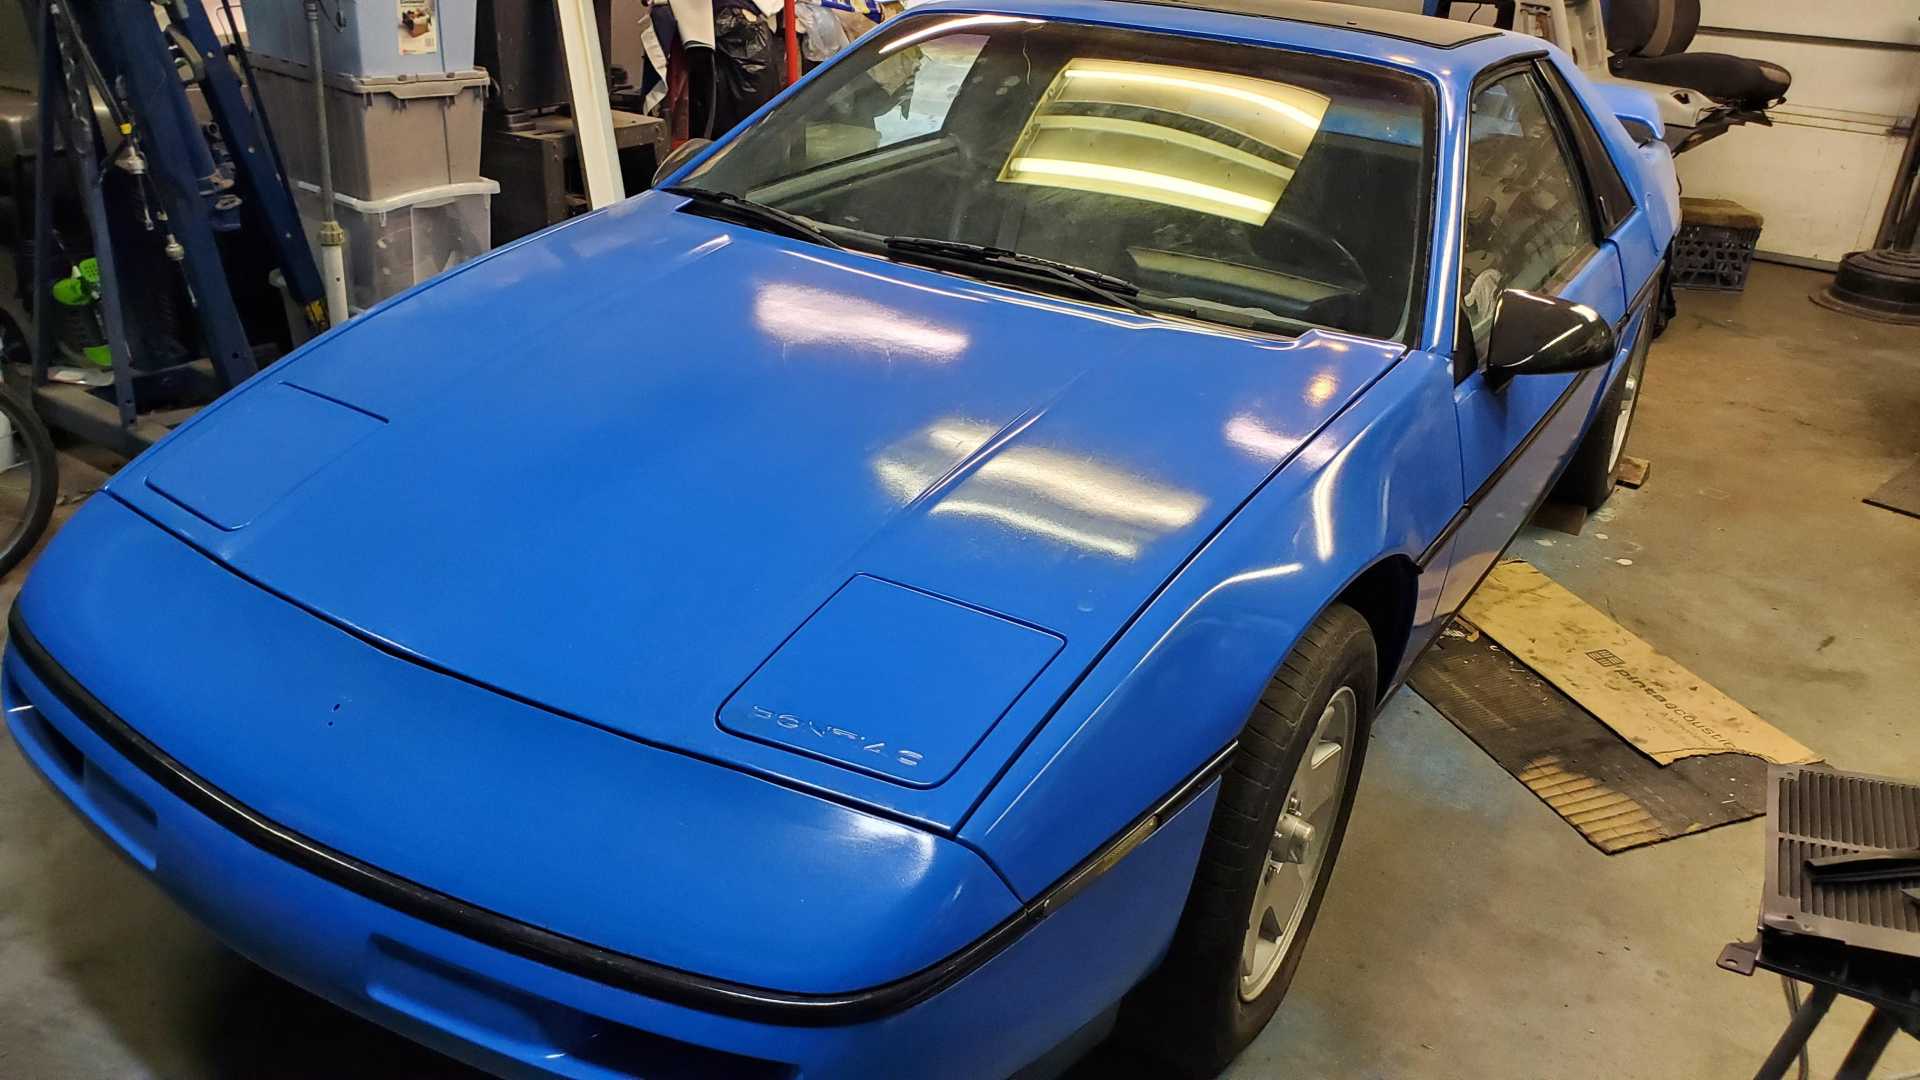
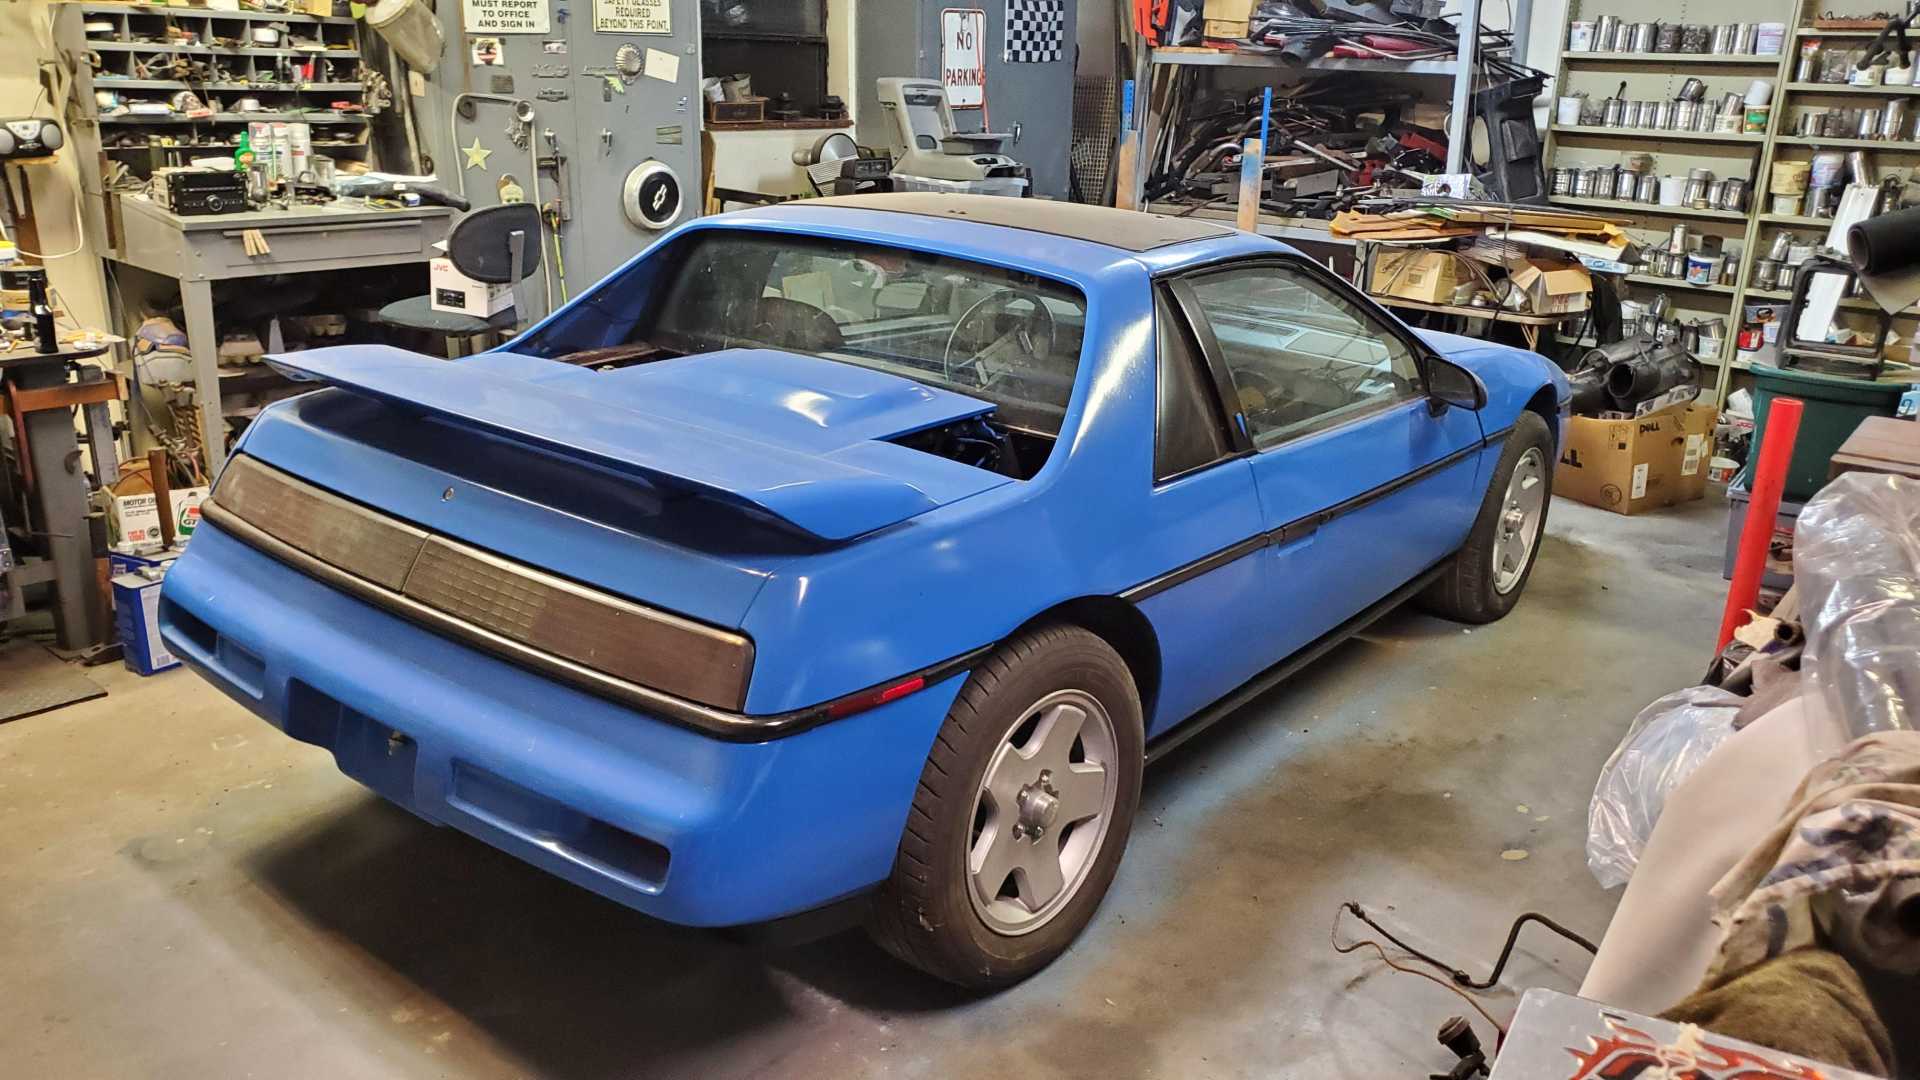
For months I’ve been set on wet sanding the car one more time, then carefully washing it, then installing all the trim. That changed when I got fed up with the lack of workspace. So now I’m installing everything I can and organizing the spares so I can get them out of the way.
As a result, the car looks like a car now. I’ve installed most of the molding as well as the mirrors. I also installed the deck lid lock so for the first time in years I can actually close it.
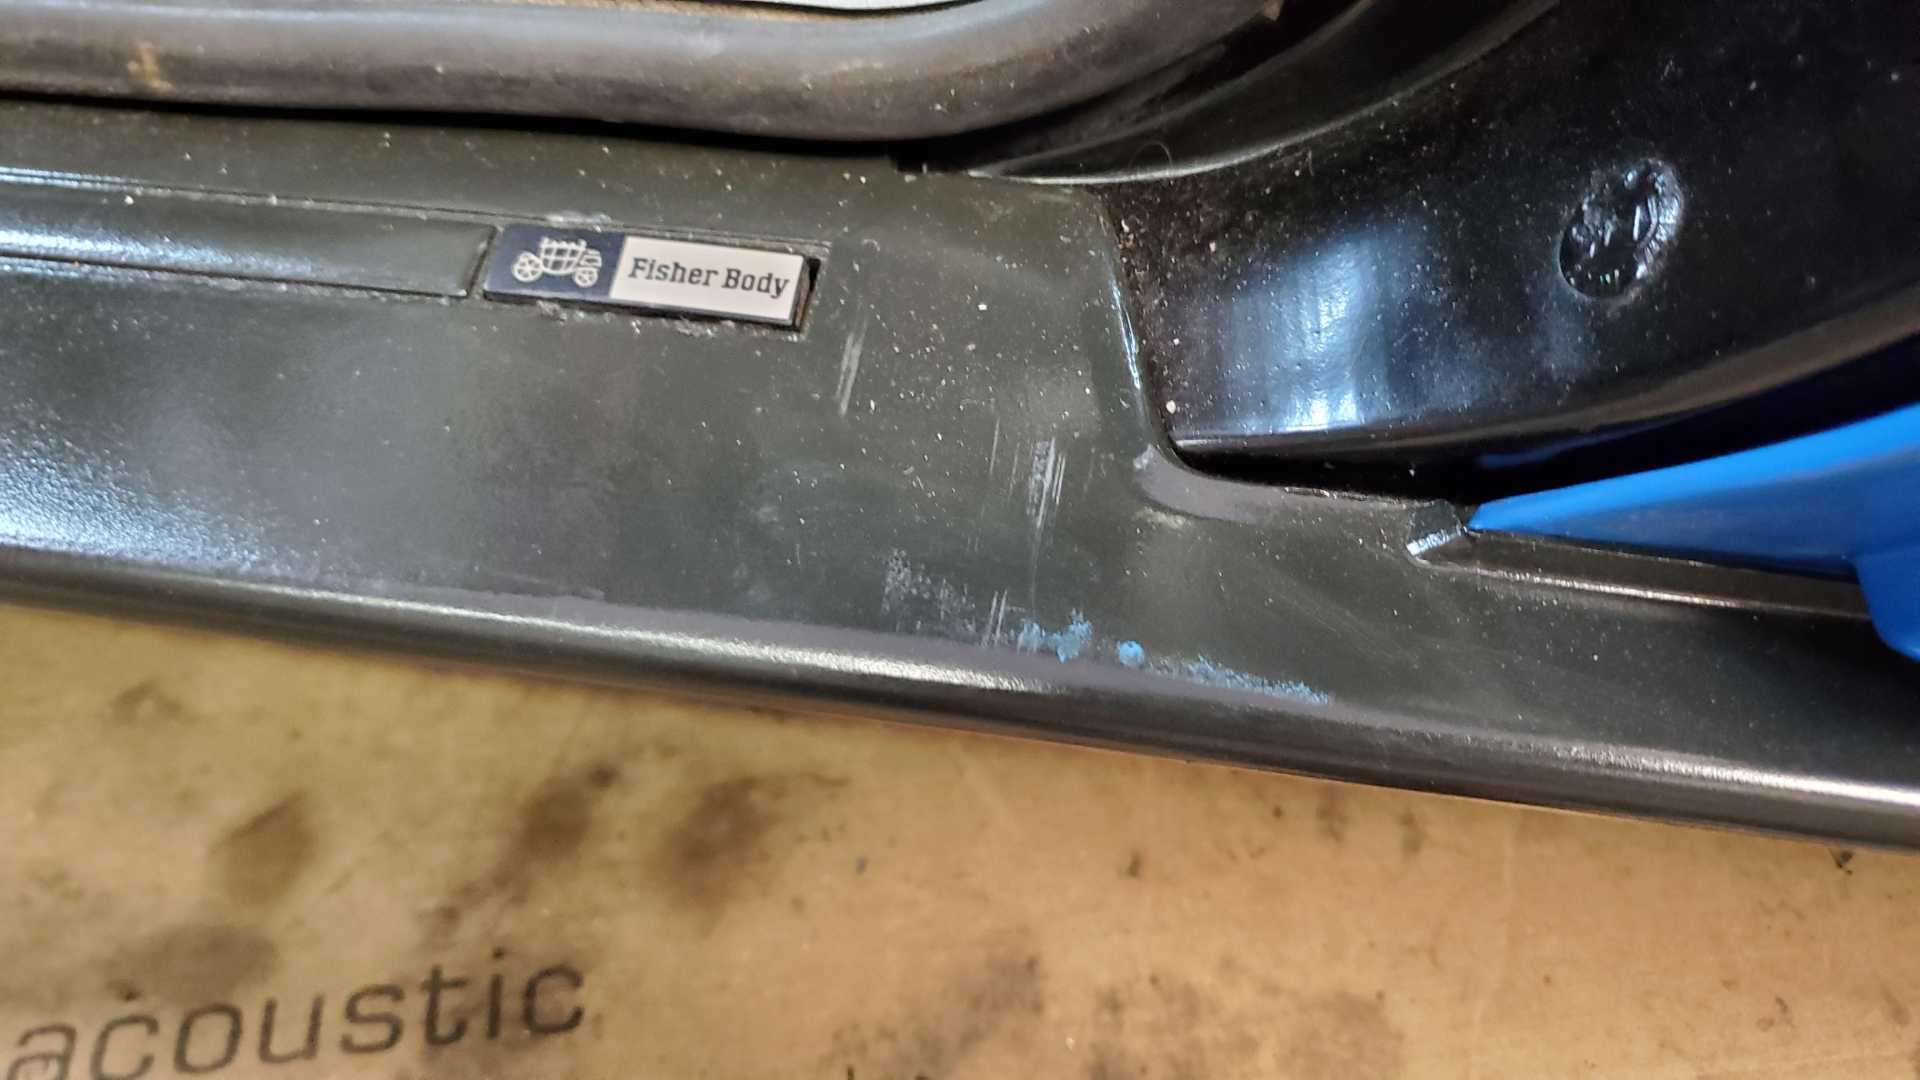
Today I hope to finish up painting the sail panels and installing the door sills and quarter panels. We’ll see.
I also have a new heater core to install, and then will focus on the wiring for the power windows/locks/mirrors. After that, it will be finishing the dash and reinstalling the skeleton.
[This message has been edited by Quadfather (edited 02-09-2020).]
Not much progress to report. I just haven’t had much time in the last several weeks to get over to the shop. When I do get over there, I feel overwhelmed by all the work I still have to do.
I’ve been upholstering the door panels, sanding and painting the sail panels, trying to fix the cracks in the dashboard and preparing to reinstall the sill plates.
They came out OK, but I’m not satisfied. I think I’ll get a set of door panels from the Fiero Store, but they’ll have to wait until I get the car on the road.
[This message has been edited by Quadfather (edited 03-01-2020).]
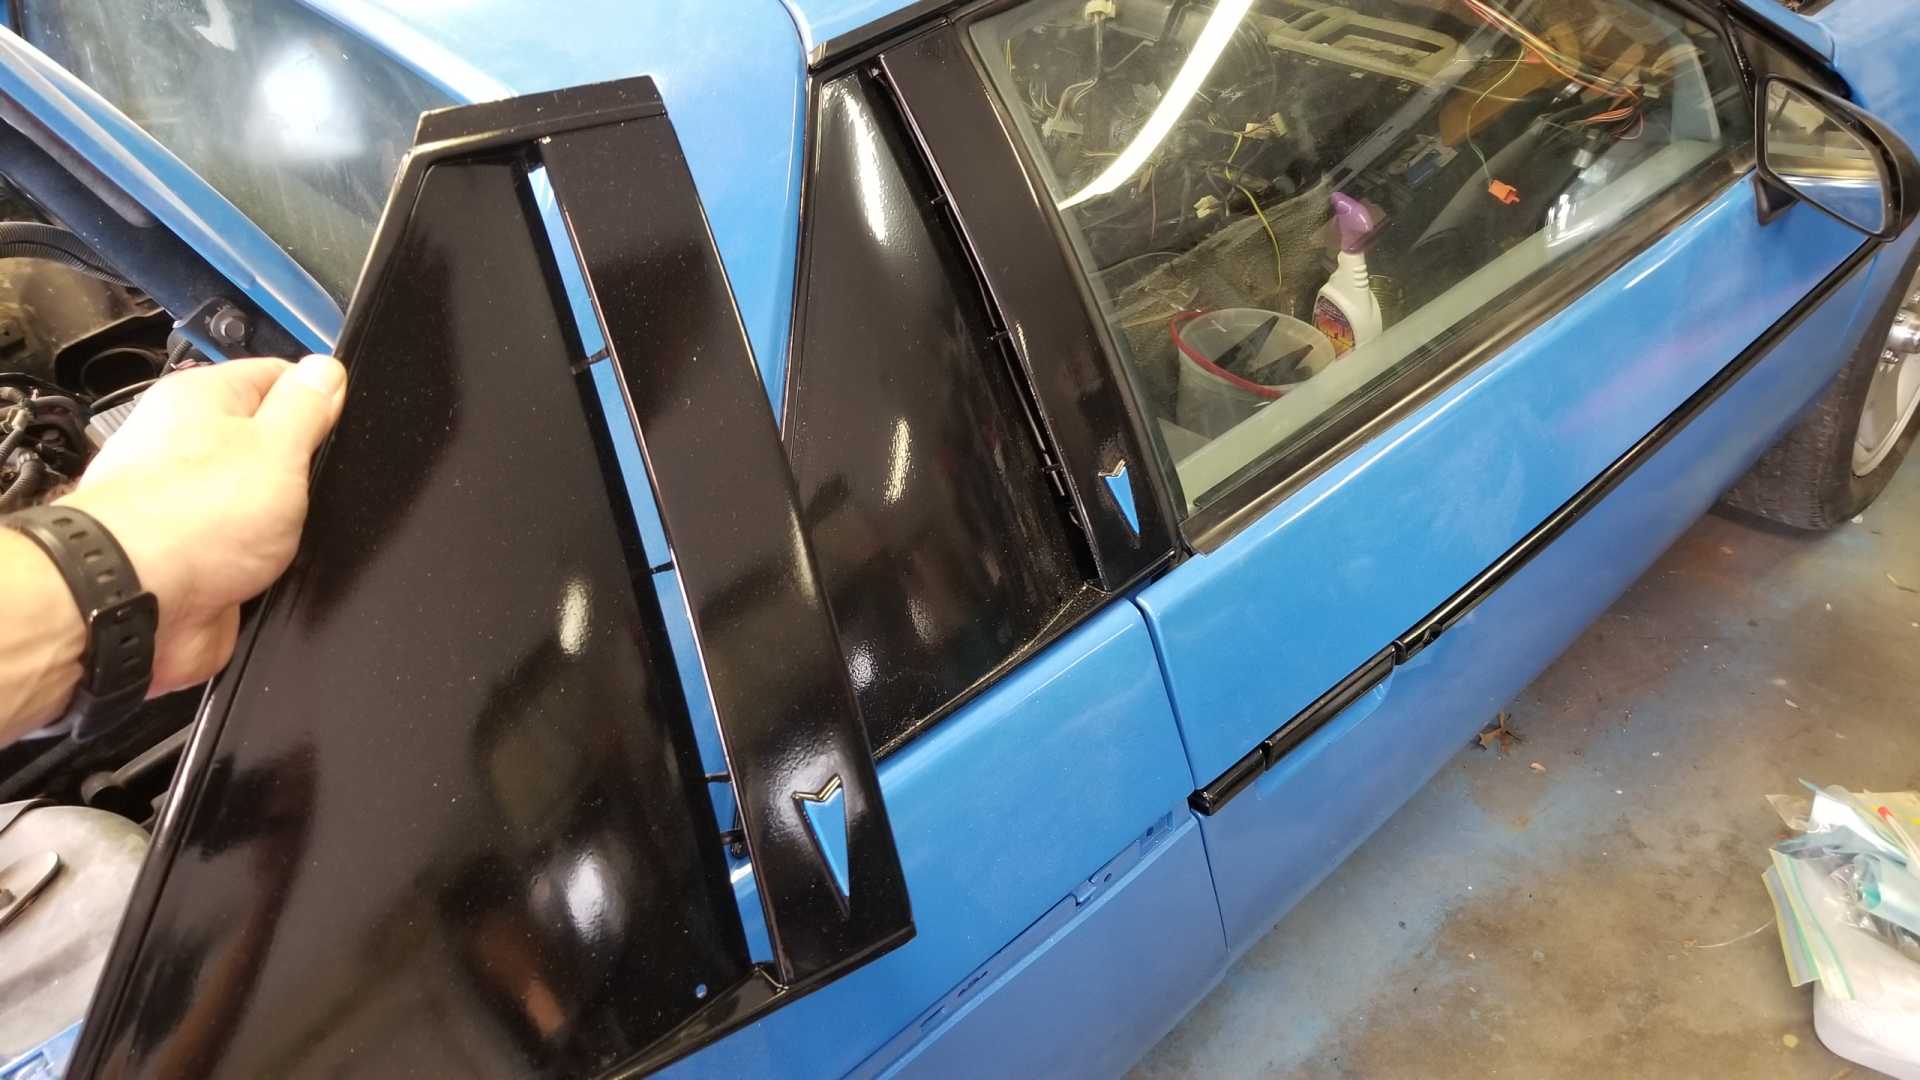
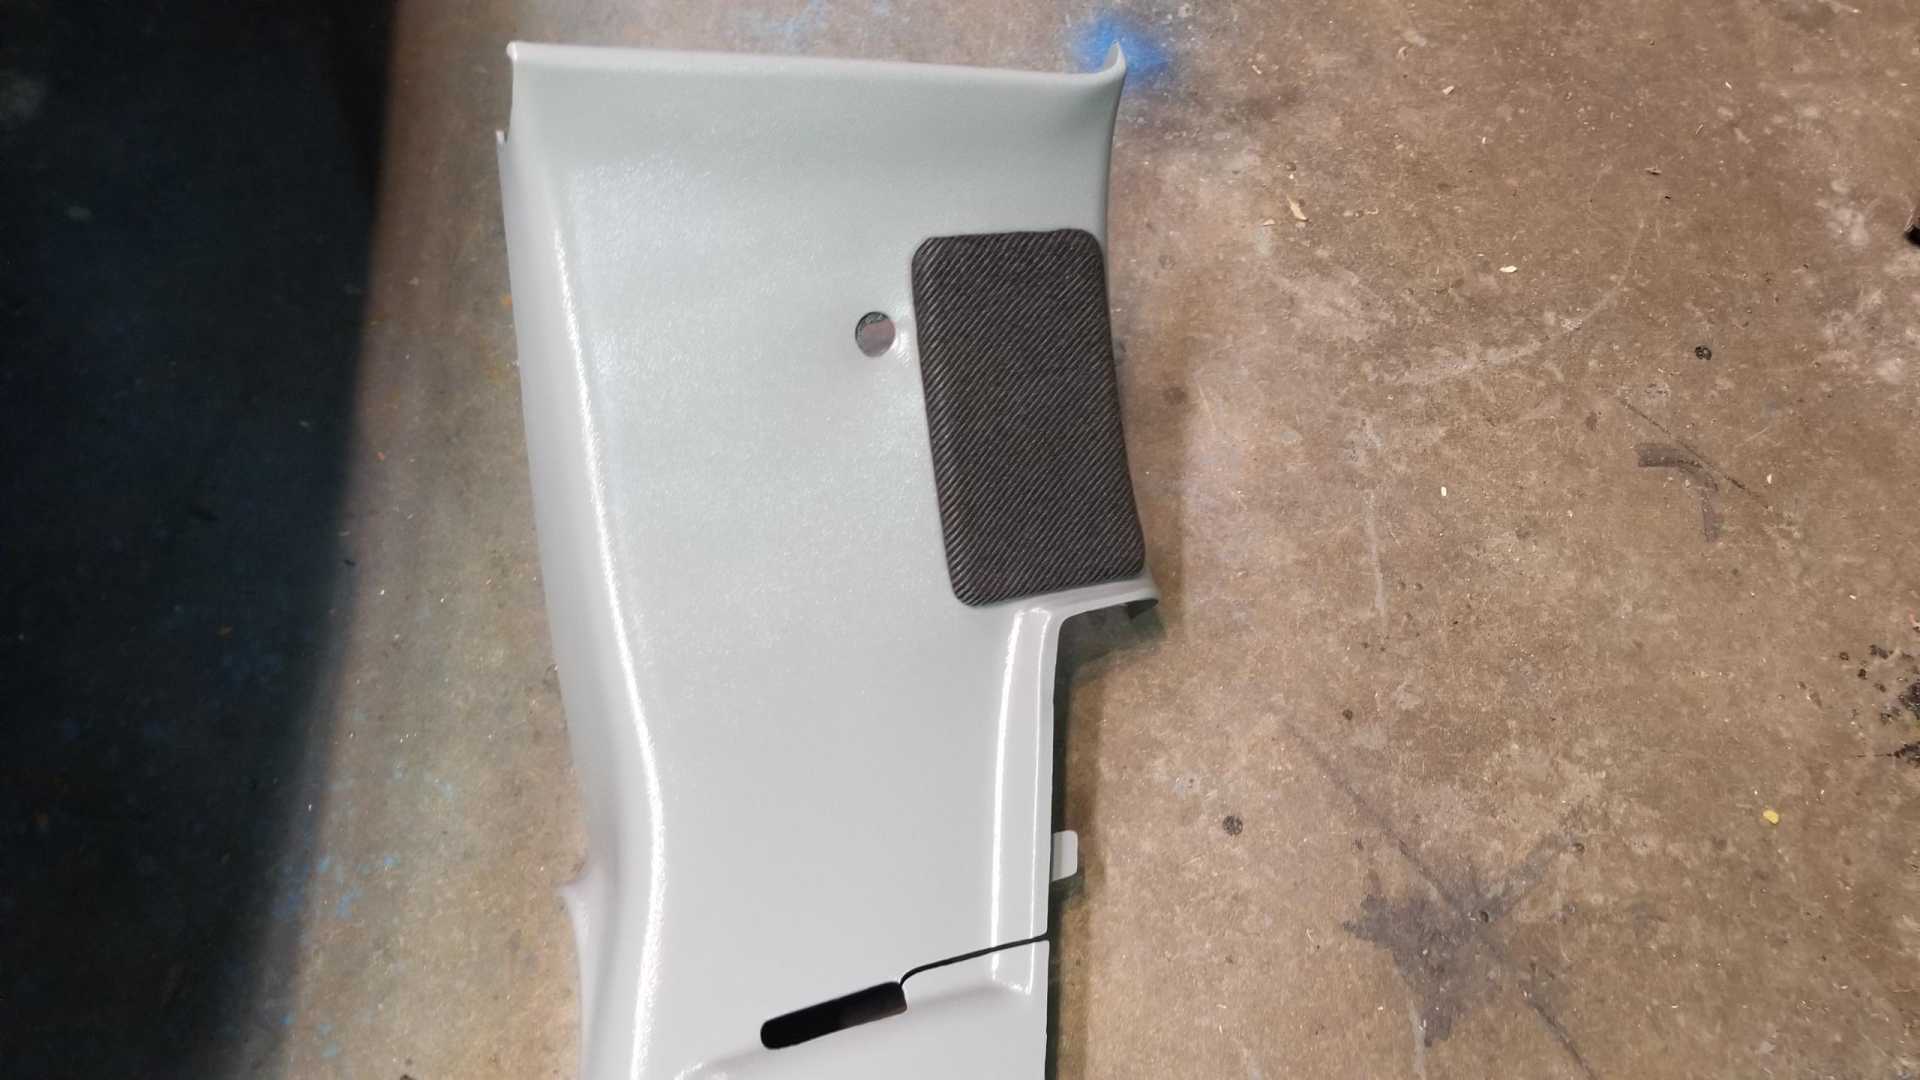
I sanded and painted one of my sets of sail panels, but the left one had some kind of contamination on it and the paint kept bubbling up. I finally gave up on it and grabbed one of my other spares (I have four sets). I then spent several days sanding and painting it, and then installed my other homemade blue Pontiac logo, only to realize I’d grabbed a right hand one instead of a left hand one.
I know I’ll be able to laugh about this at some point, but the timing was pretty bad. I have so many spare parts, nuts and bolts scattered all around the shop, it’s been very frustrating to complete simple tasks.
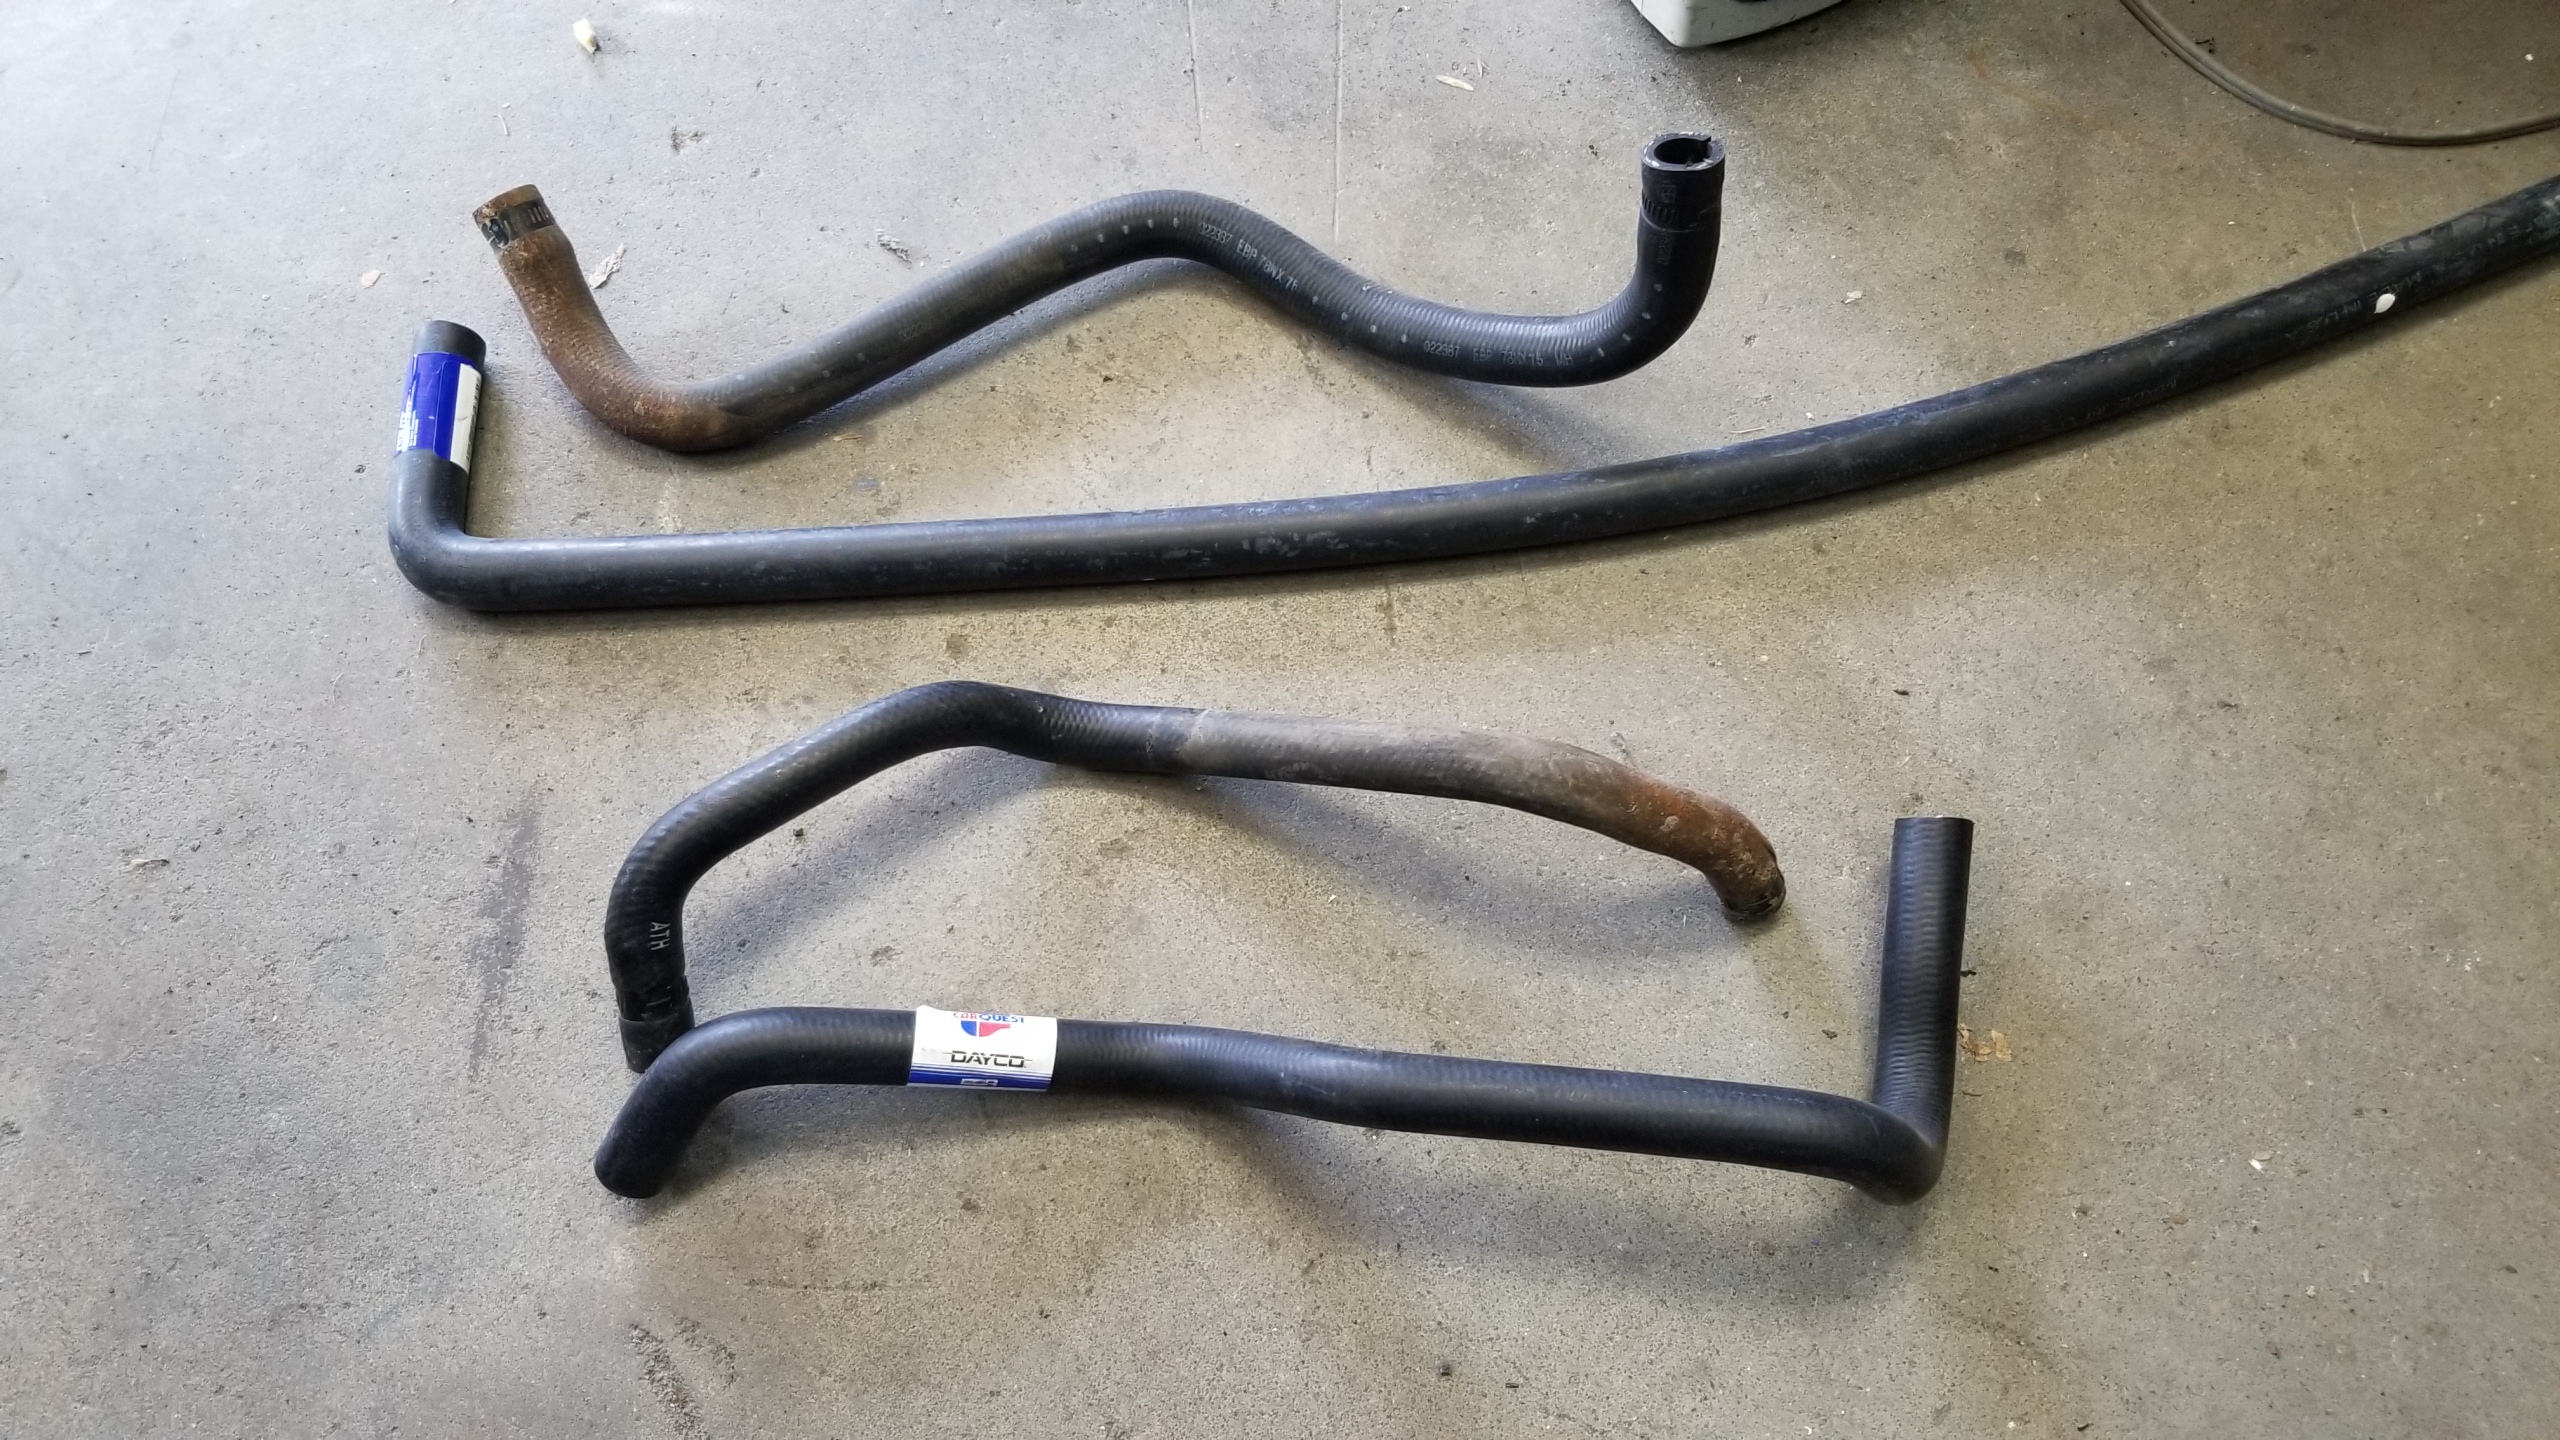
I had to cut my heater hoses to remove them so I could change the heater core. Turns out heater hoses for 1987 4-cylinder AC-equipped Fieros are hard to find. Rodney Dickman says his ‘88 hoses will work, but I wanted to see if I could find another option. I went to Advance Auto Parts then to NAPA and asked the guys if I could look at their stock and find hoses that were close enough to work.
NAPA had a whole ROOM full of heater hoses, but the closest one I could find to the larger hose was one with just a single 90-degree bend. It won’t work, because the turn to the tube under the car is just too sharp.
At Advance, I found a hose that was pretty close to the smaller Fiero hose. All it needed was about four inches cut off one end. This is the part number.
I ordered the larger one from Rodney Dickman today.
[This message has been edited by Quadfather (edited 03-01-2020).]
This week I tried a little experiment with the leftover Camaro upholstery. I used some of the light-gray material to re-cover the front speaker grilles, and the darker gray for the rear grilles.
I didn’t have pieces of the light gray big enough without a seam, so I just made sure the seam was the same on both front grilles.
[This message has been edited by Quadfather (edited 03-01-2020).]
My motivation is lacking while my frustration is high. Finding the right fasteners to reinstall parts has become a real challenge. Another issue is that as I work on different parts of the car I see problems left by my paint job. There’s overspray in the strangest places, even though I was very careful when masking the car.
Also, the clear coat is a mess. It has orange peel in places, there’s dirt stuck in it in others. Ninety-nine percent of the problems were caused by me not having the pressure set properly on the compressor so the clear coat went on way too thick.
I keep telling myself it will be better when I can roll (or drive) the car out of the shop and wash it very carefully.
In the meantime, I need to finish mating the power window/locks/mirror wiring harness to the car, finish repairing the skeleton and reinstall it, finish mating the cup holders to the dash and reinstall it, then reinstall the rest of the interior.
After that, it will be time to finish rebuilding the Quad.
[This message has been edited by Quadfather (edited 03-01-2020).]
Really struggling with this project. I spent part of both weekend days in the shop but got hardly anything accomplished.
Probably should have expected to be hit with this frustration right as I’m on the verge of finishing the paint and interior and ready to move to the engine.
[This message has been edited by Quadfather (edited 03-16-2020).]
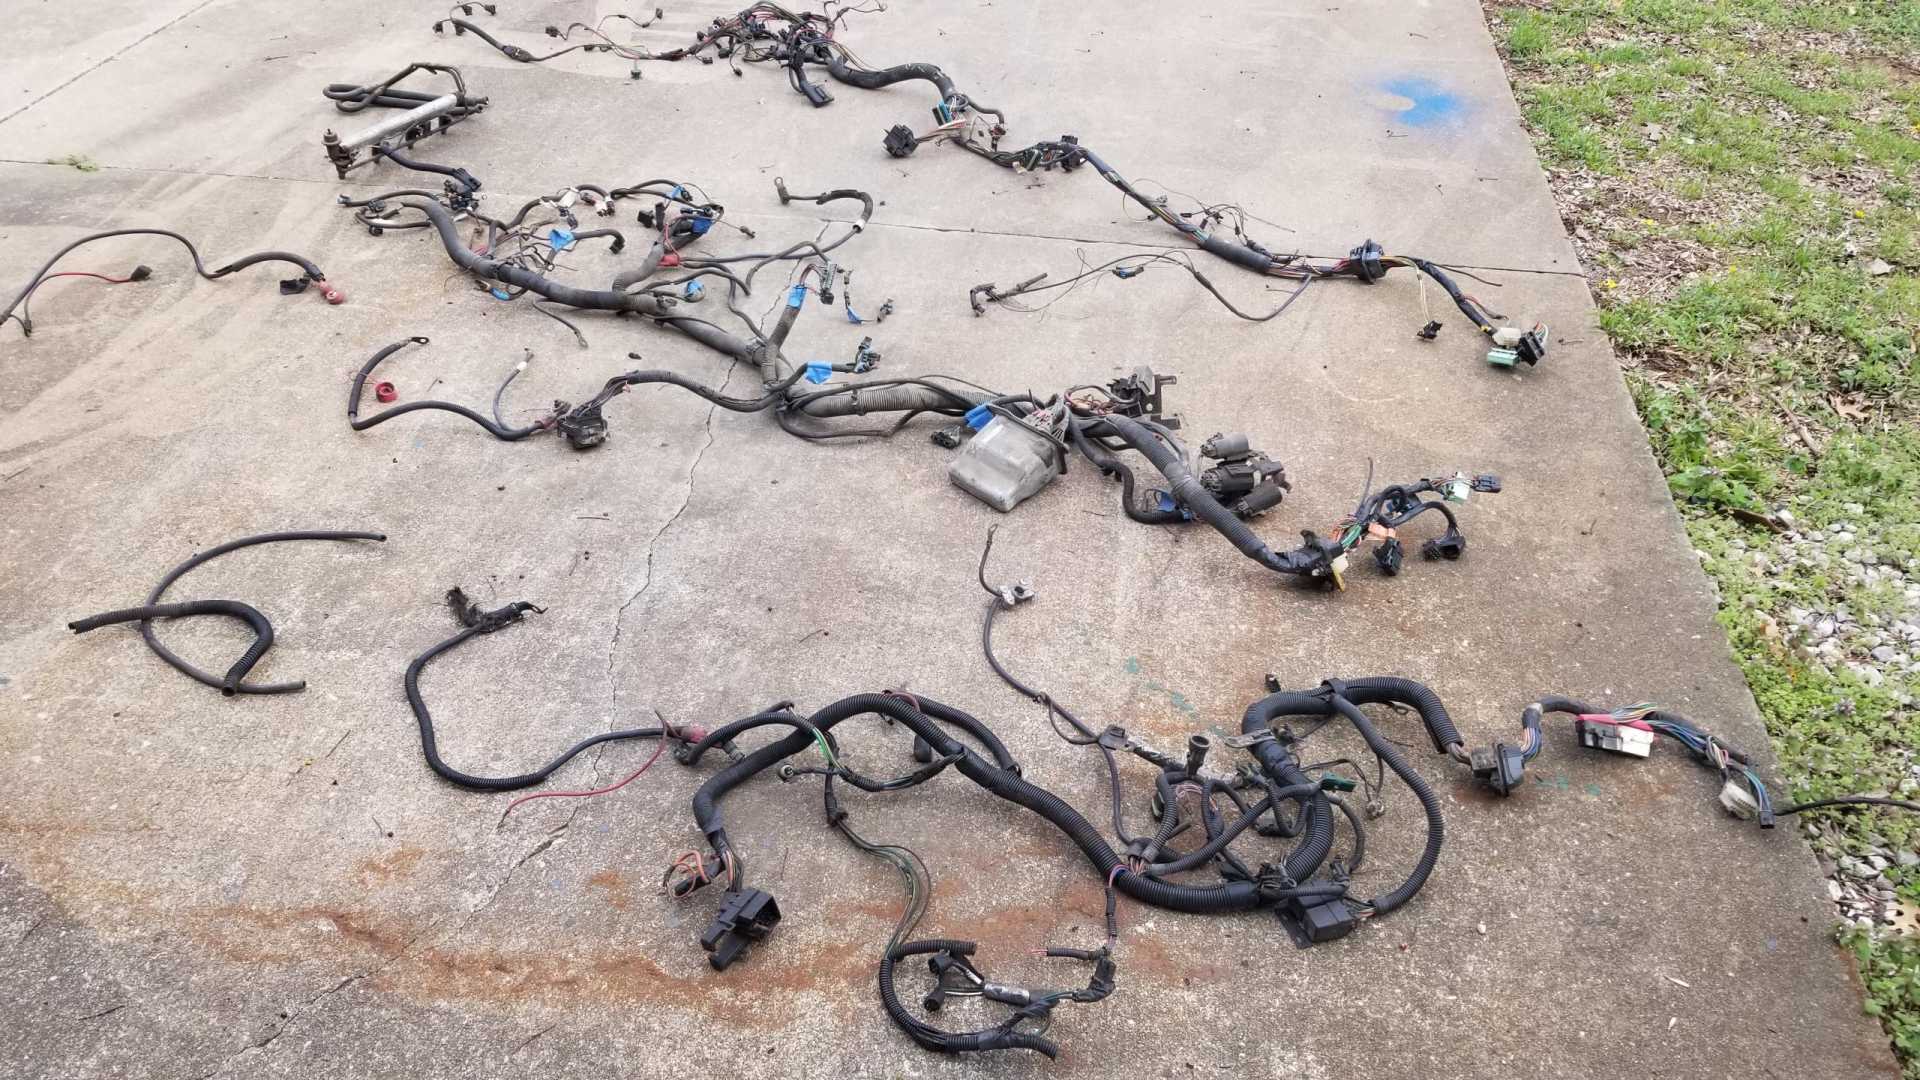
Fought the frustration and did a little work this afternoon. One night this week as I had trouble sleeping, I lay there thinking about this project and suddenly started thinking about the wiring harness. I couldn’t remember exactly how the Quad harness is supposed to be mated to the Fiero; does the Fiero harness plug into the Quad ECM or does the Quad harness?
See, I’ve been at this so long, I’ve forgotten many of the lessons I learned very early in the process. So today I dug through my storage areas and pulled out three harnesses. The Fiero harness is closest to the camera, followed by the harness from my GTZ. In the back is a harness from one of my spare Quads.
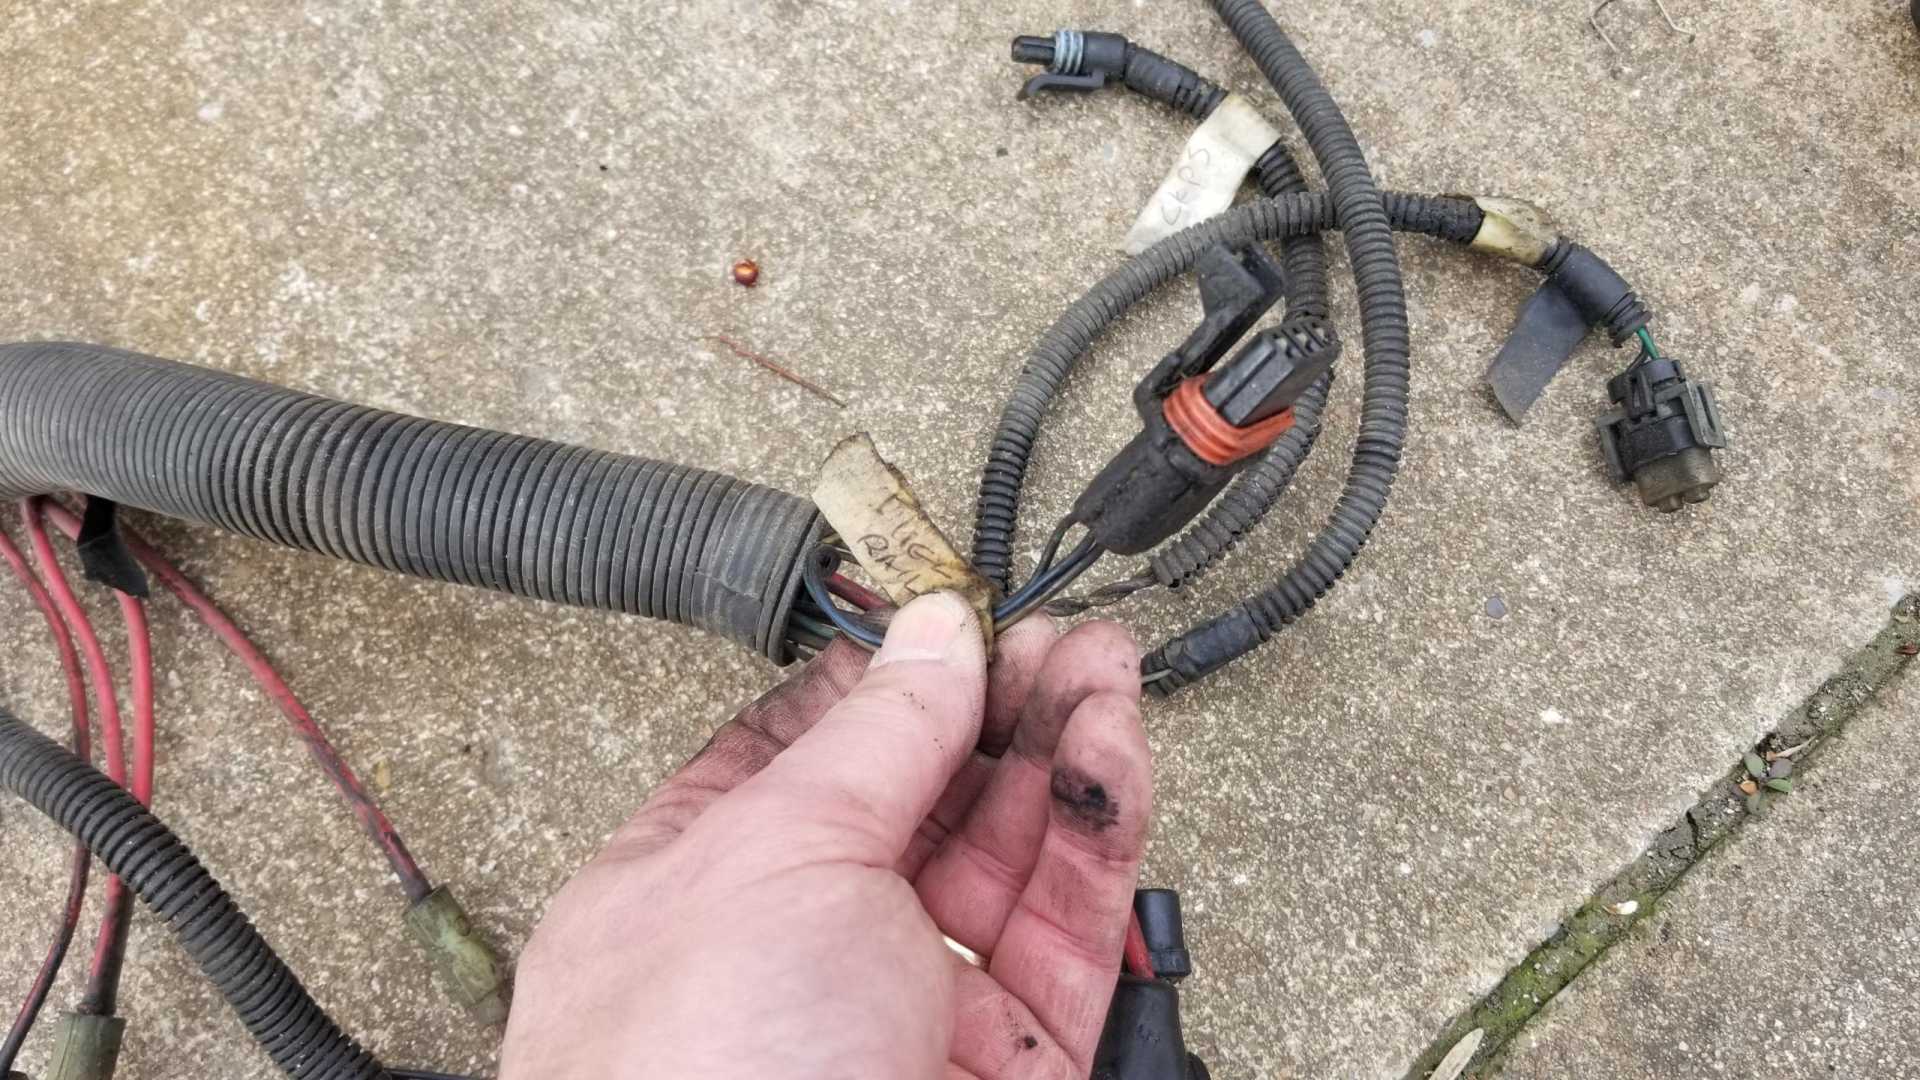
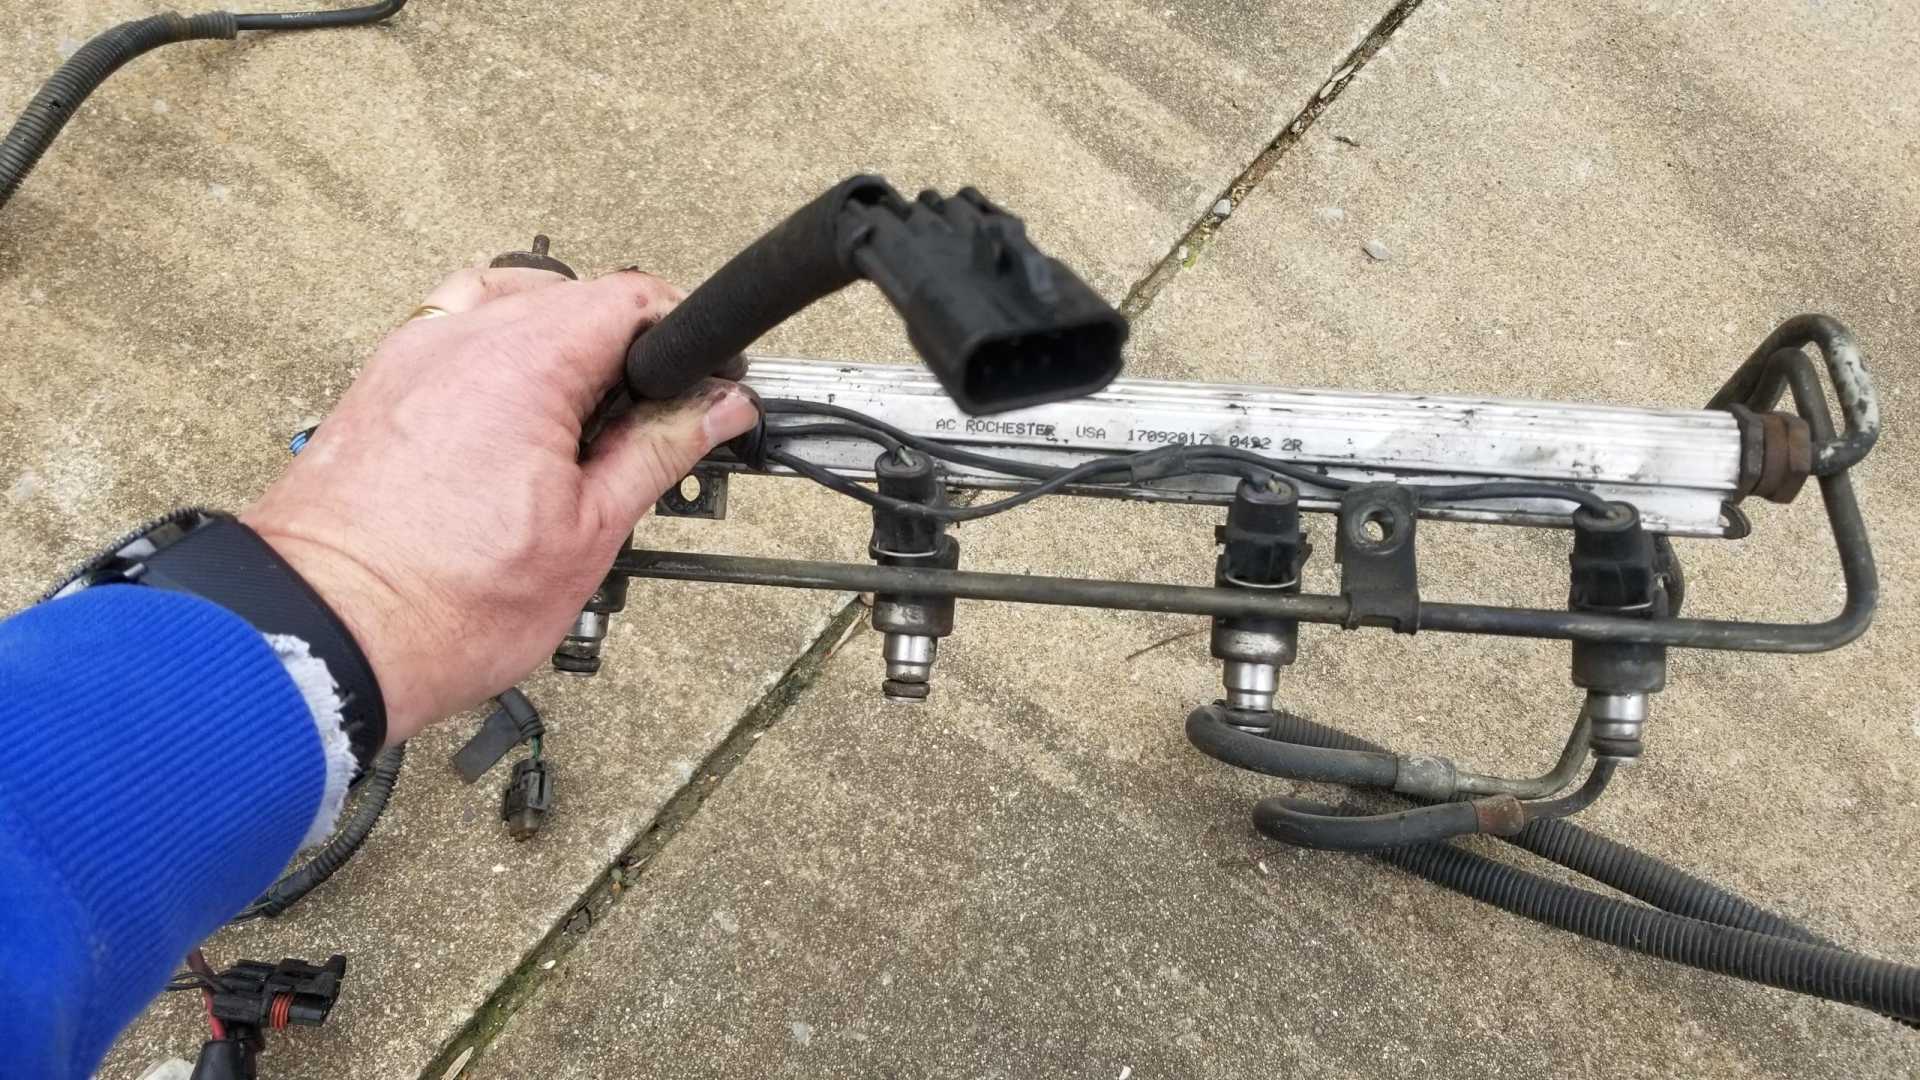
After comparing harnesses, I realized I have to plug the GTZ harness into the GTZ ECM. As I inspected the harnesses, I noticed the part that plugs into the fuel injectors was missing from the GTZ one. That sent me back into my piles of parts where I found those wires and plugs still attached to the GTZ fuel rail. In the process I noticed two of the injector plugs are broken.
[This message has been edited by Quadfather (edited 03-21-2020).]
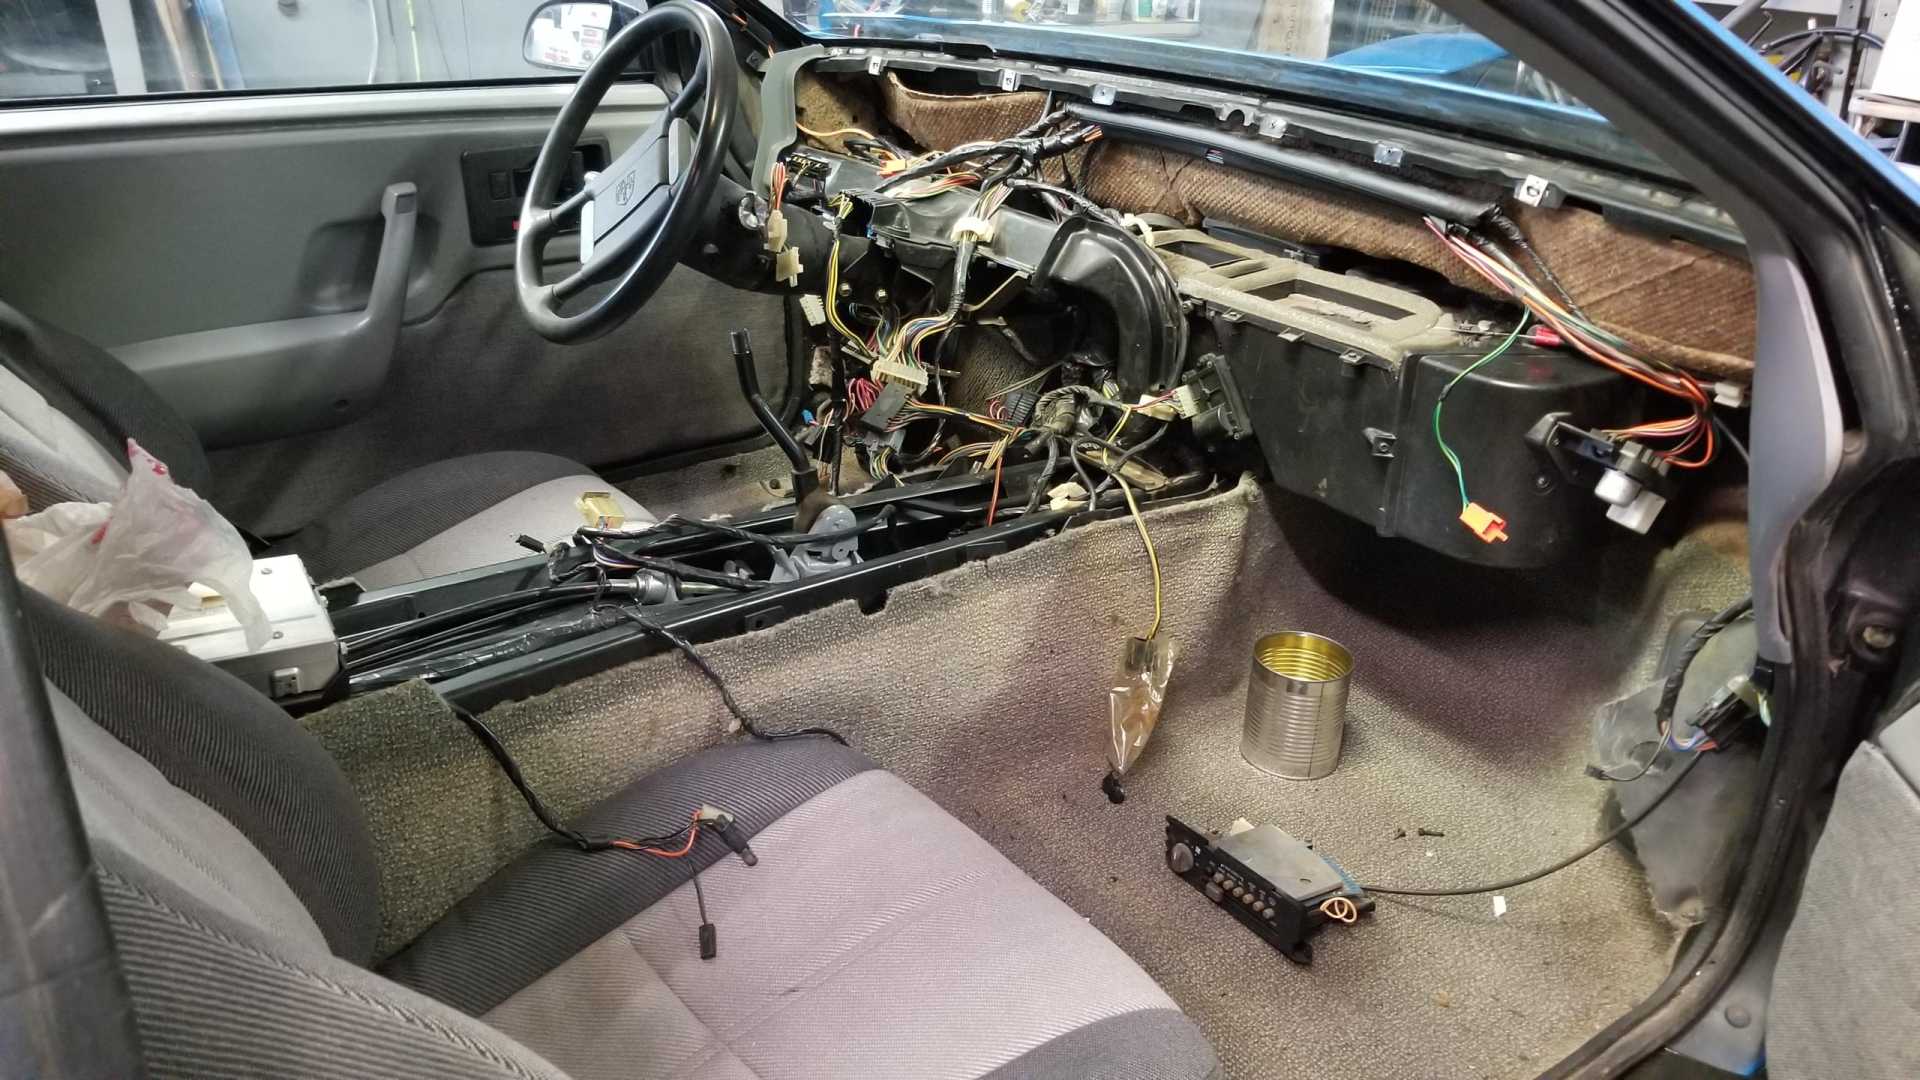
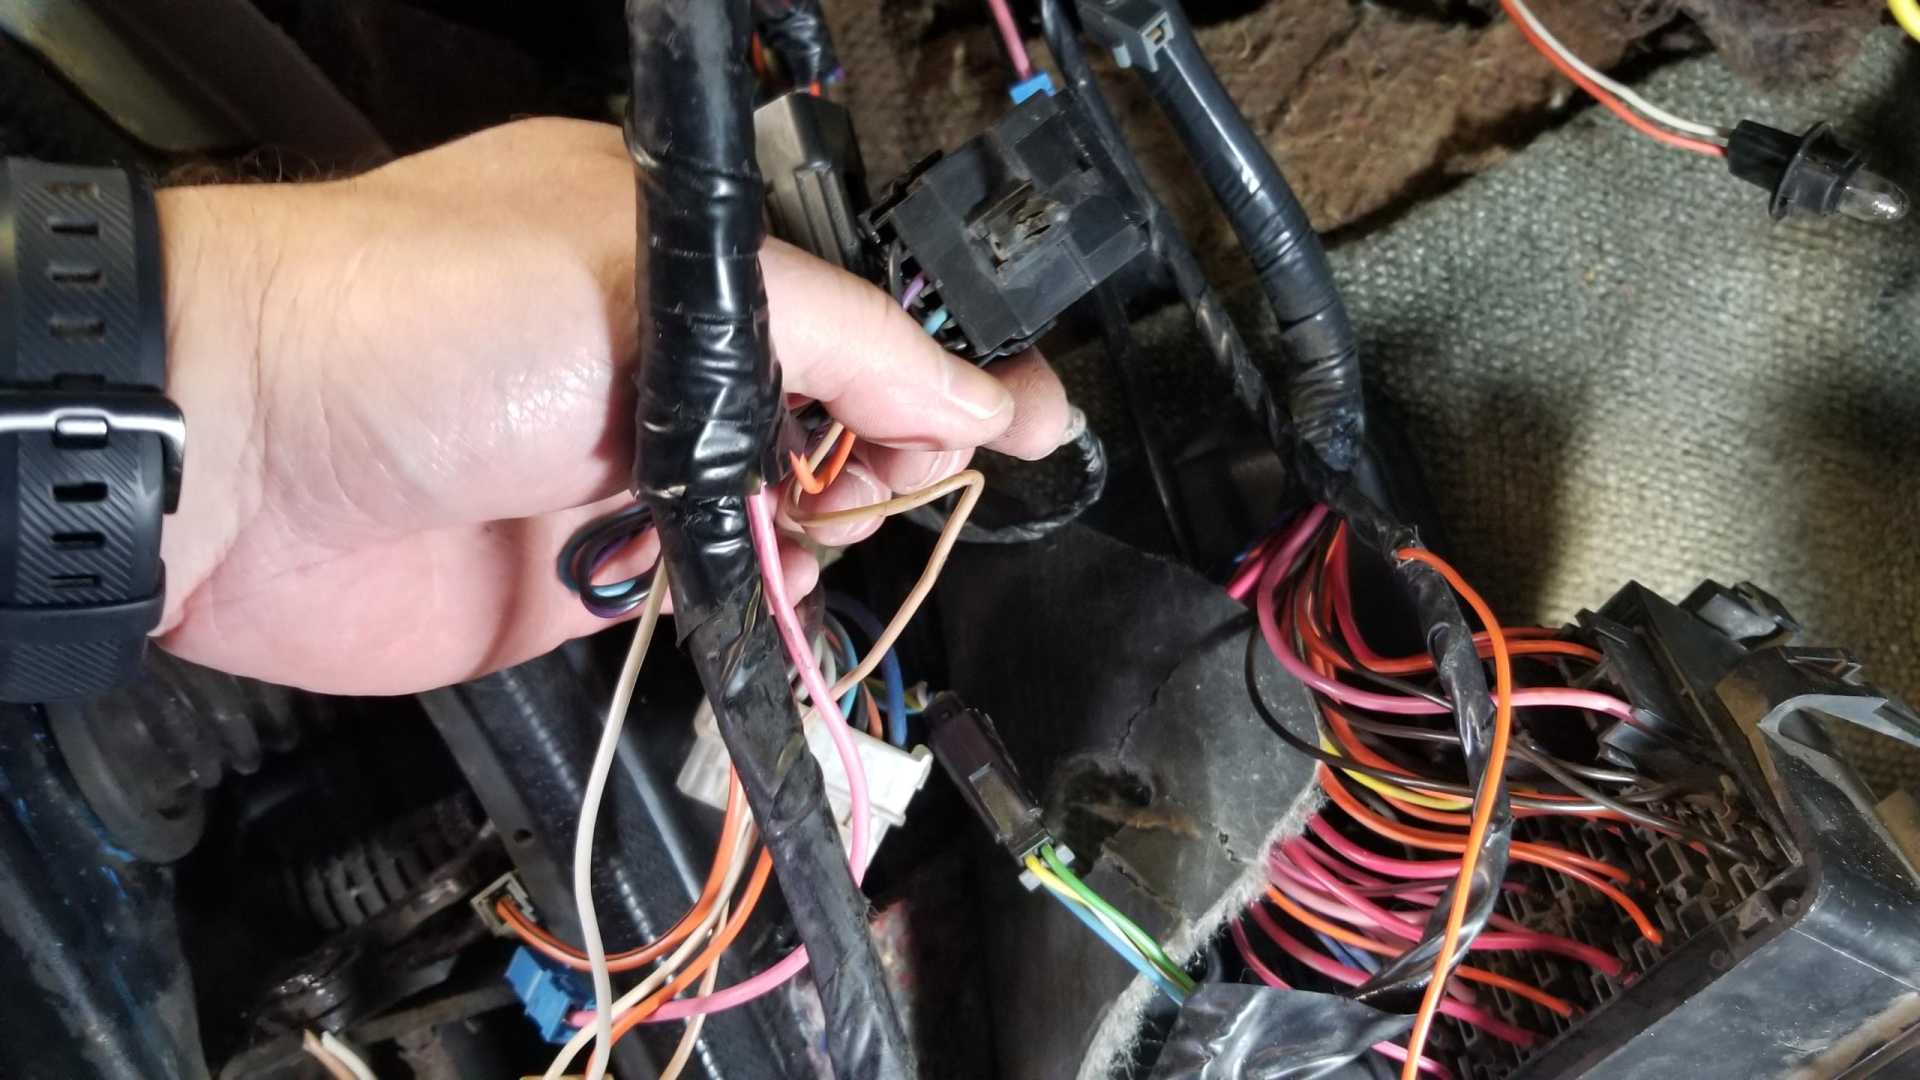
I also spent some time looking at the under-dash wiring harness and the salvage yard power window/mirror harness I added. Still trying to work up the courage to mate the added harness to the existing one, so today I just took my time and looked over where the connections will need to be at the fuse block.
Even though it’s an ‘87 base coupe, it was already wired for power locks, so all that’s required there is plugging the door wires into the factory sockets.
What’s confusing for me is the extra plugs on the salvage yard power window/mirror harness. There are three plugs on the salvage yard harness that are already plugged in on my car. Two of them are stuck high on the wall behind the cross member.
I mistakenly thought the power window/mirror harness would be a separate group of wires, but I now understand it’s part of the rest of the under-dash harness. That means I don’t need to worry about those plugs, right?
I can just leave these plugs unattached, because the factory plugs are already in use and serving the same purpose, right?
[This message has been edited by Quadfather (edited 03-21-2020).]
So.... progress has been very slow in recent weeks. I believe my driver's side sail panel is the anti-Christ. After stripping it and sanding it down to bare plastic, I did get paint to stick to it without bubbling up. I switched from Rust-oleum to Dupli-color gloss black, but the final coat has some overspray on it. I glued my homemade Pontiac emblem to it and installed it so that I could install the interior trim panel and the driver's side seat belt. Will probably end up masking off the side of the car and trying to get one more good coat of paint on it.
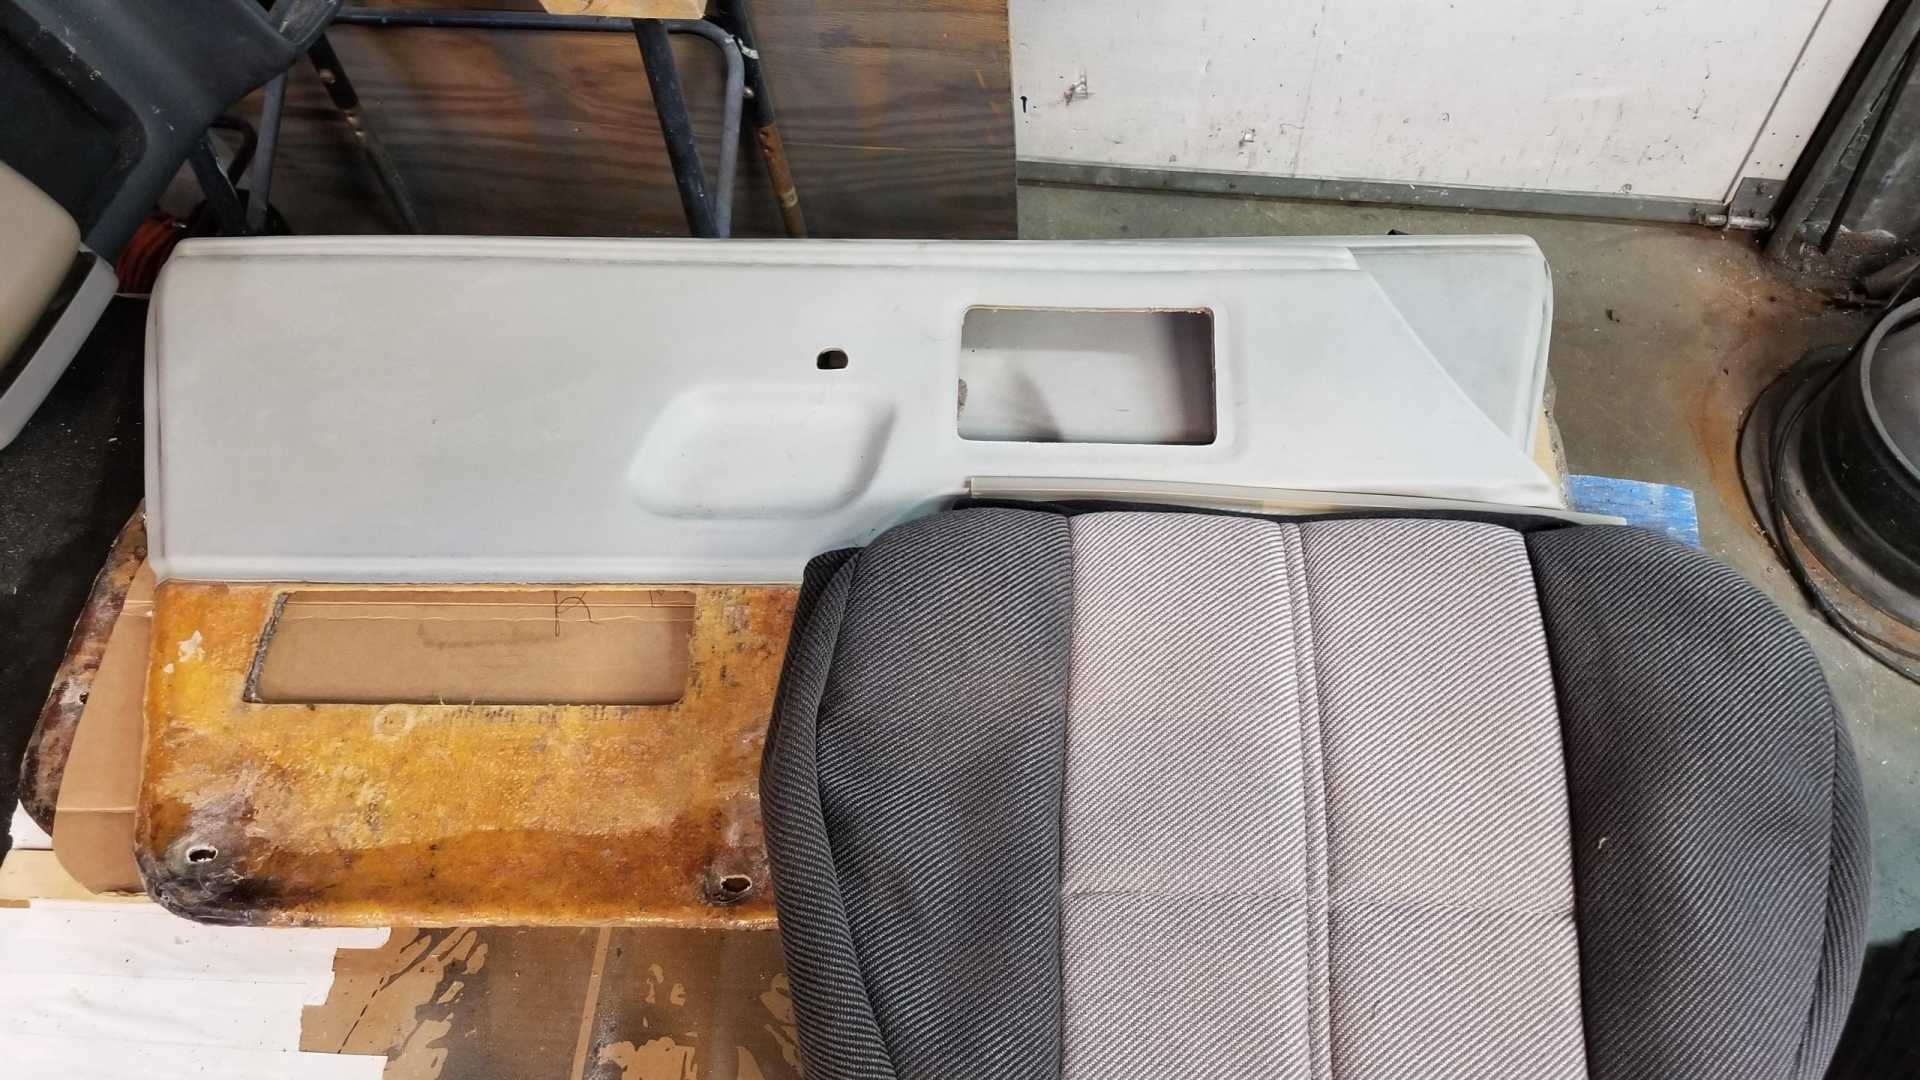
I posted previously that I planned to use a cupholder out of a LeSabre on the dashboard, but then saw someone post a pic of an aftermarket cupholder for a Corvette that fits to the right of the console. I loved the look and convenience of that, so I'll buy one eventually. That change in plans had me trying to figure out what to do with the glove compartment area of the dashboard, and I spent some time building a plastic tray and even covered it with black vinyl. The realization that it would take me a week or two to get it to look as good as I want changed my mind again. I found an OEM pocket on ebay and it arrived today.
In the meantime, I experimented with painting the dash and I like how it turned out.
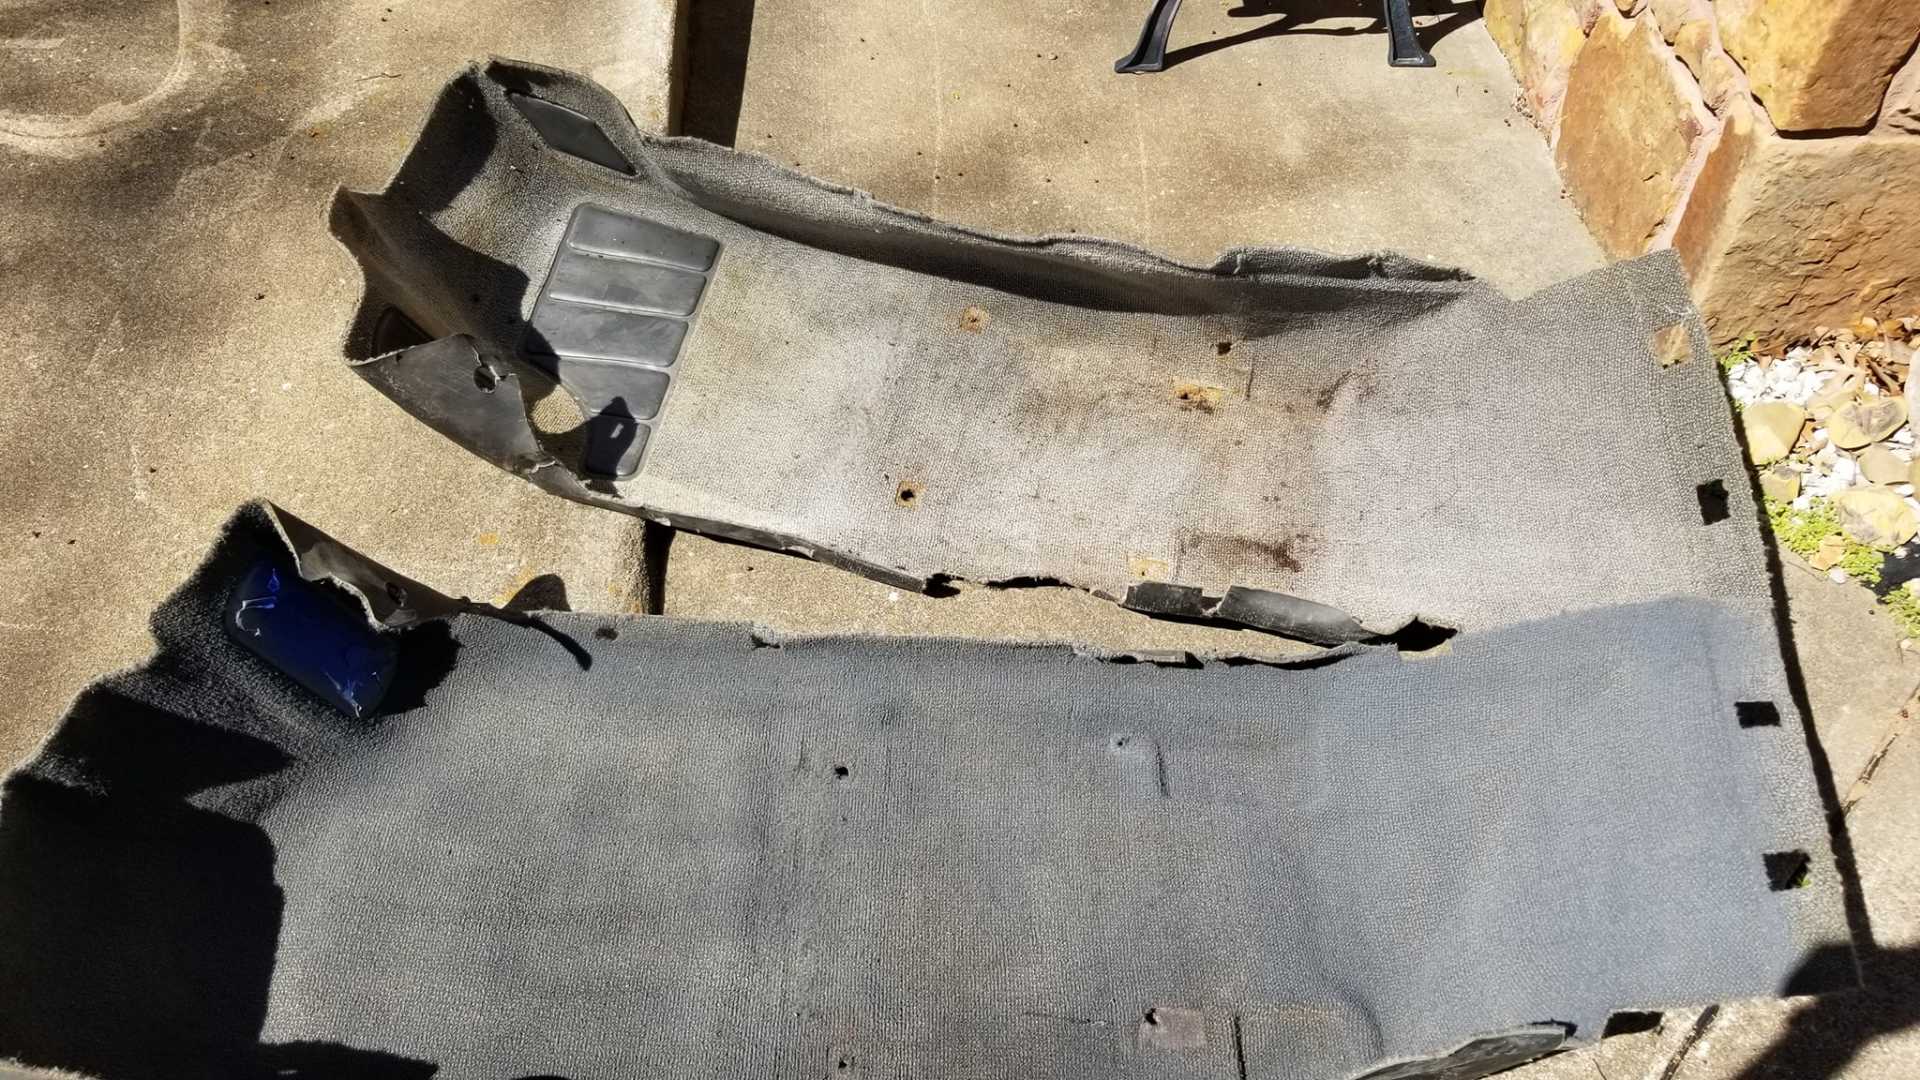
I'd never heard of carpet paint until someone mentioned it on the Fiero FB group, so I ordered a can and gave it a shot. It looks great.
Top photo is the before, bottom is the after. I should have ordered two cans.
[This message has been edited by Quadfather (edited 05-10-2020).]
The tediousness of dealing with what should be minor issues has really worn me down over the last couple of months. For instance, can't believe it took me two or three months just to get the driver's side sail panel installed. What really bothers me is how rough the clear coat looks now. Really hard to stay motivated when tasks I thought had been successfully completed seem to take two steps back.
But this morning I dreamed I was driving the finished car. The blue paint looked great and the engine was running well, and even the headlights were working perfectly. I don't remember if I tried the power windows but I bet they would've worked in the dream, too. It was one of those dreams that was so real, when I woke it took a few minutes to realize it wasn't real life.
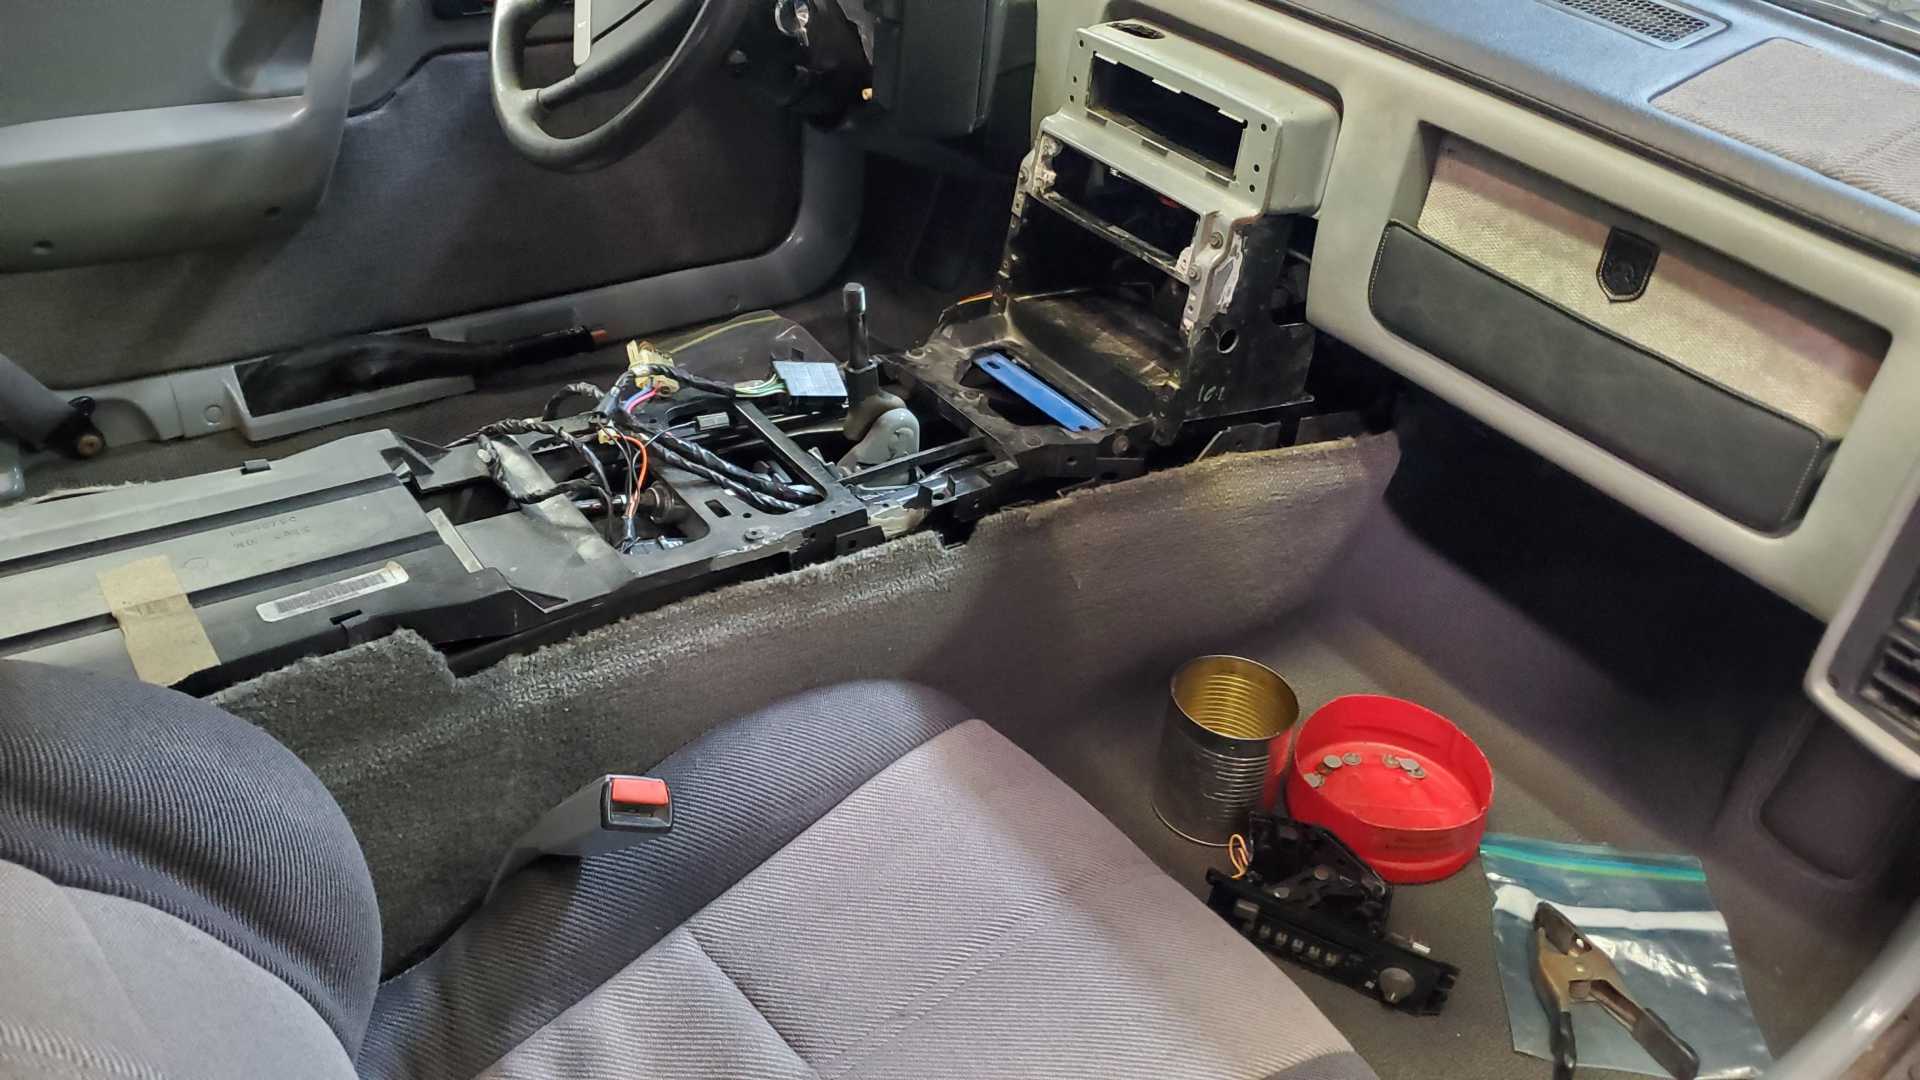
Still making slow progress in reinstalling the interior. I've been re-gluing and painting the console/shifter surround/radio cover. I'm adding GT gauges to my car and I got the matching radio cover when I took them out of a salvage yard car years ago. That cover had four holes drilled in the side, so I bought a better one off Facebook a couple weeks ago. It was tan so it needed to be painted. Anyway, I underestimated how much time and effort it would take to fix and paint all the interior pieces.
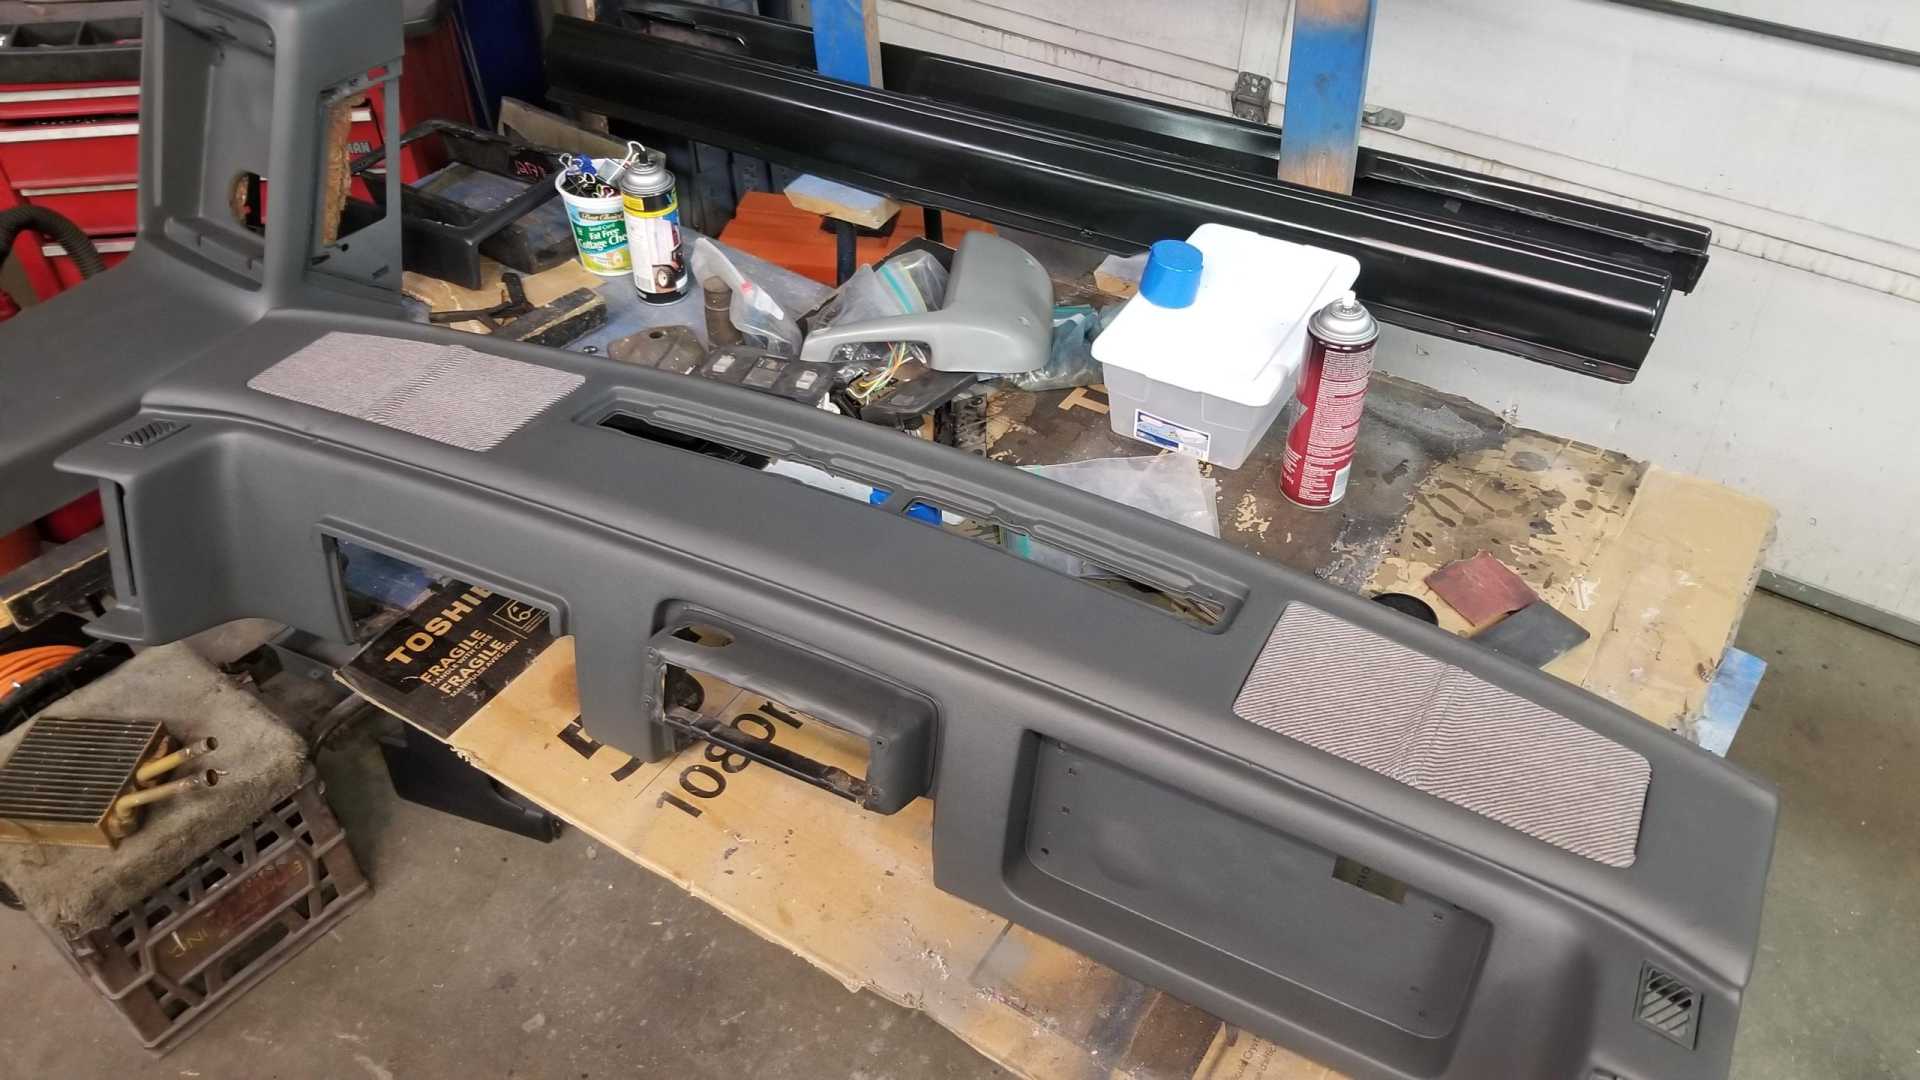
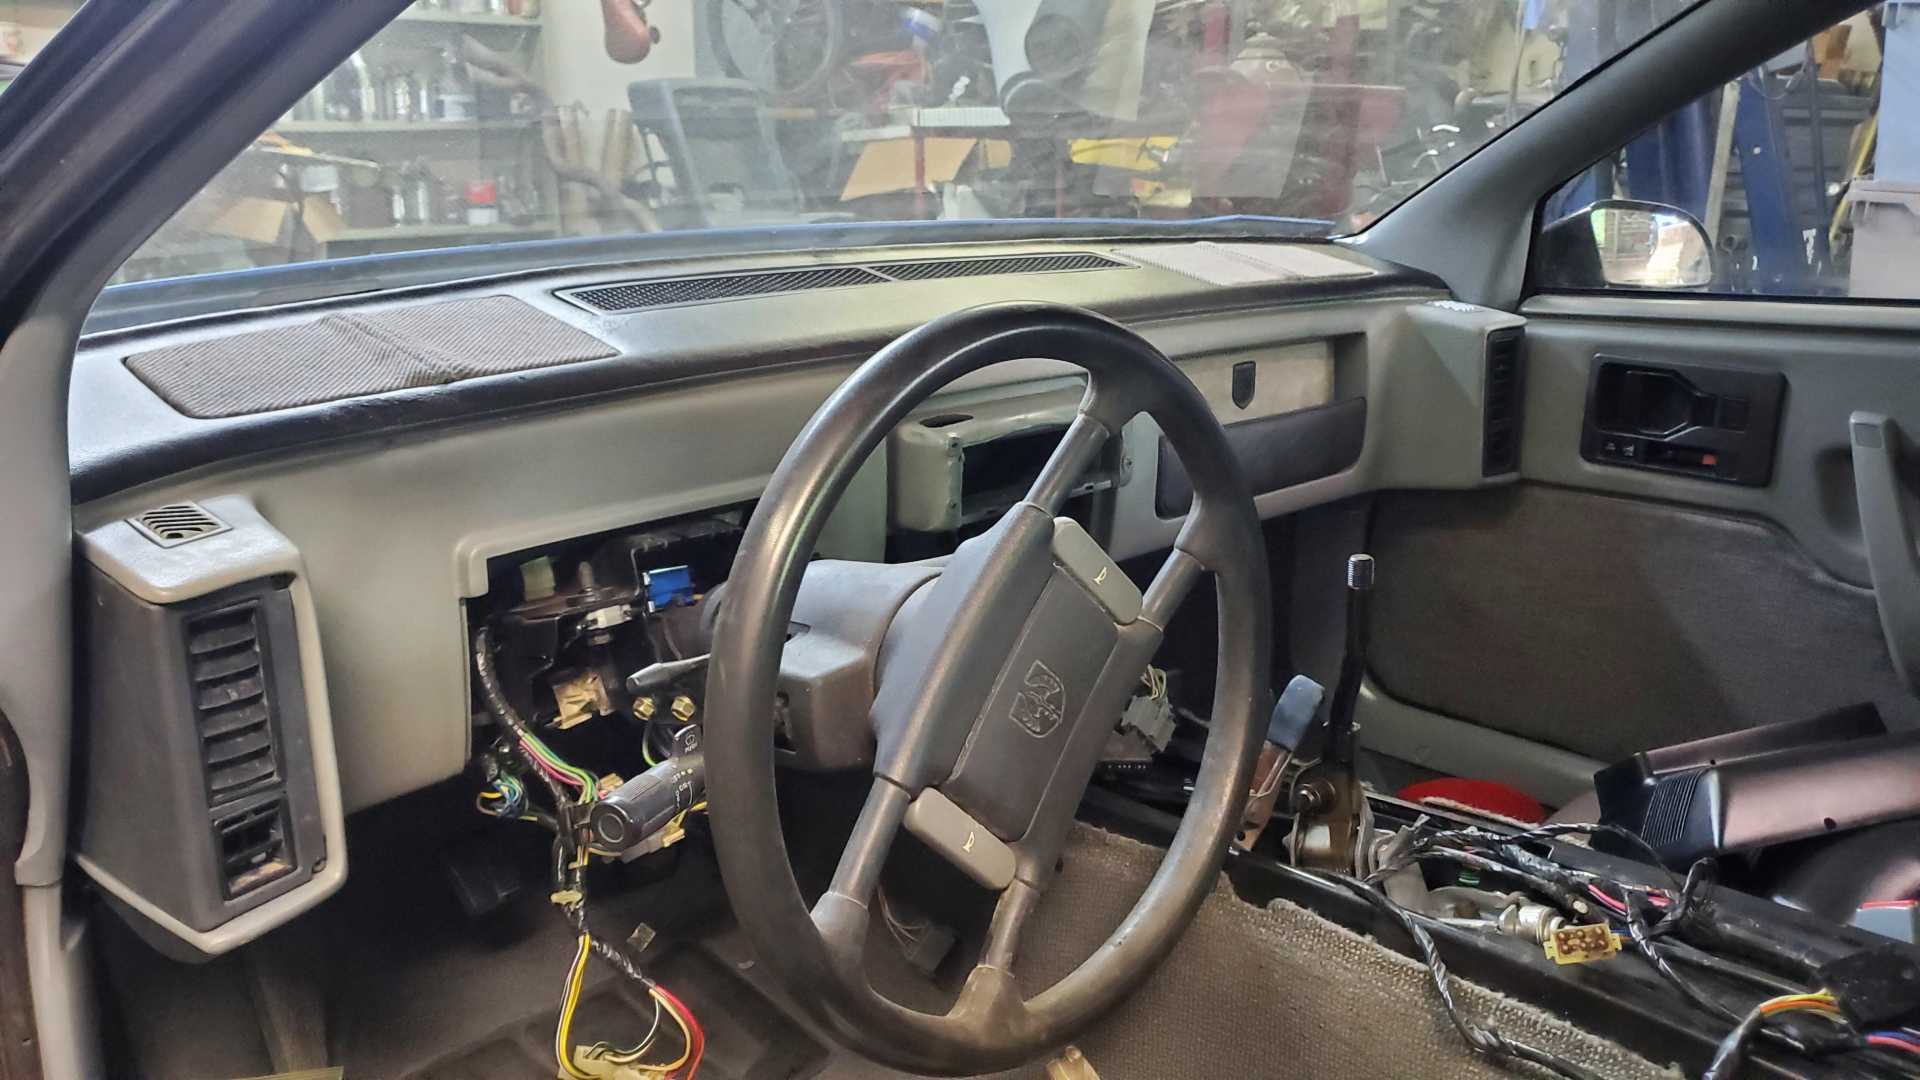
I reinstalled the dash and I think it looks pretty good. At some point I may spring for the replacement cover the Fiero Store sells, but that will have to wait until the car is driveable. You can see the dash pocket I bought off ebay.
Next up will be hooking up all the connections and reinstalling the instrument cluster, skeleton and everything that goes with them.
[This message has been edited by Quadfather (edited 05-20-2020).]
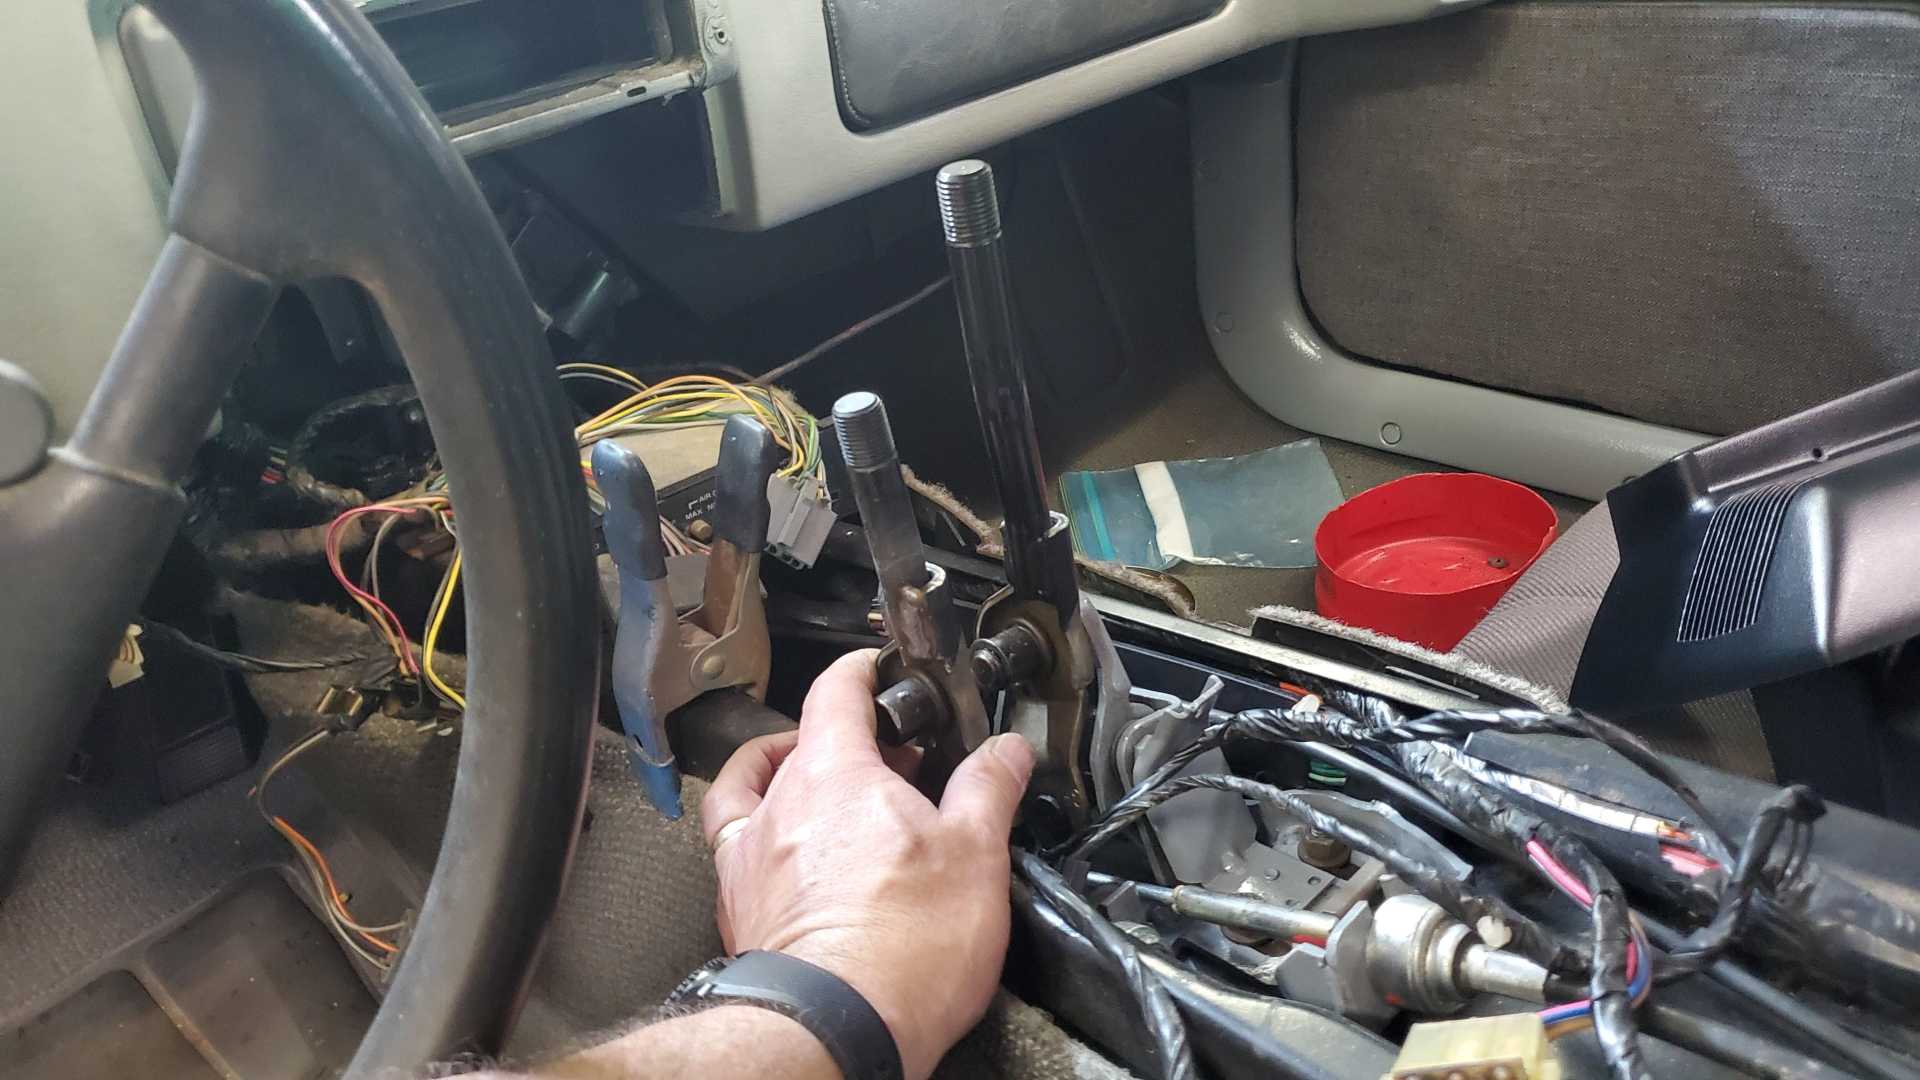
Now that the dash is back in the car, I mounted the hood release lever. For the first time in years, the hood is closed and latched. I also reinstalled the wipers.
The next logical step is installing my rebuilt skeleton, but I hesitated because it will be in the way when I mate the Quad’s wiring harness to the car’s. Decided to go ahead and put it in to make sure everything fits and the power windows/mirror/locks harness is routed properly.
[This message has been edited by Quadfather (edited 05-25-2020).]
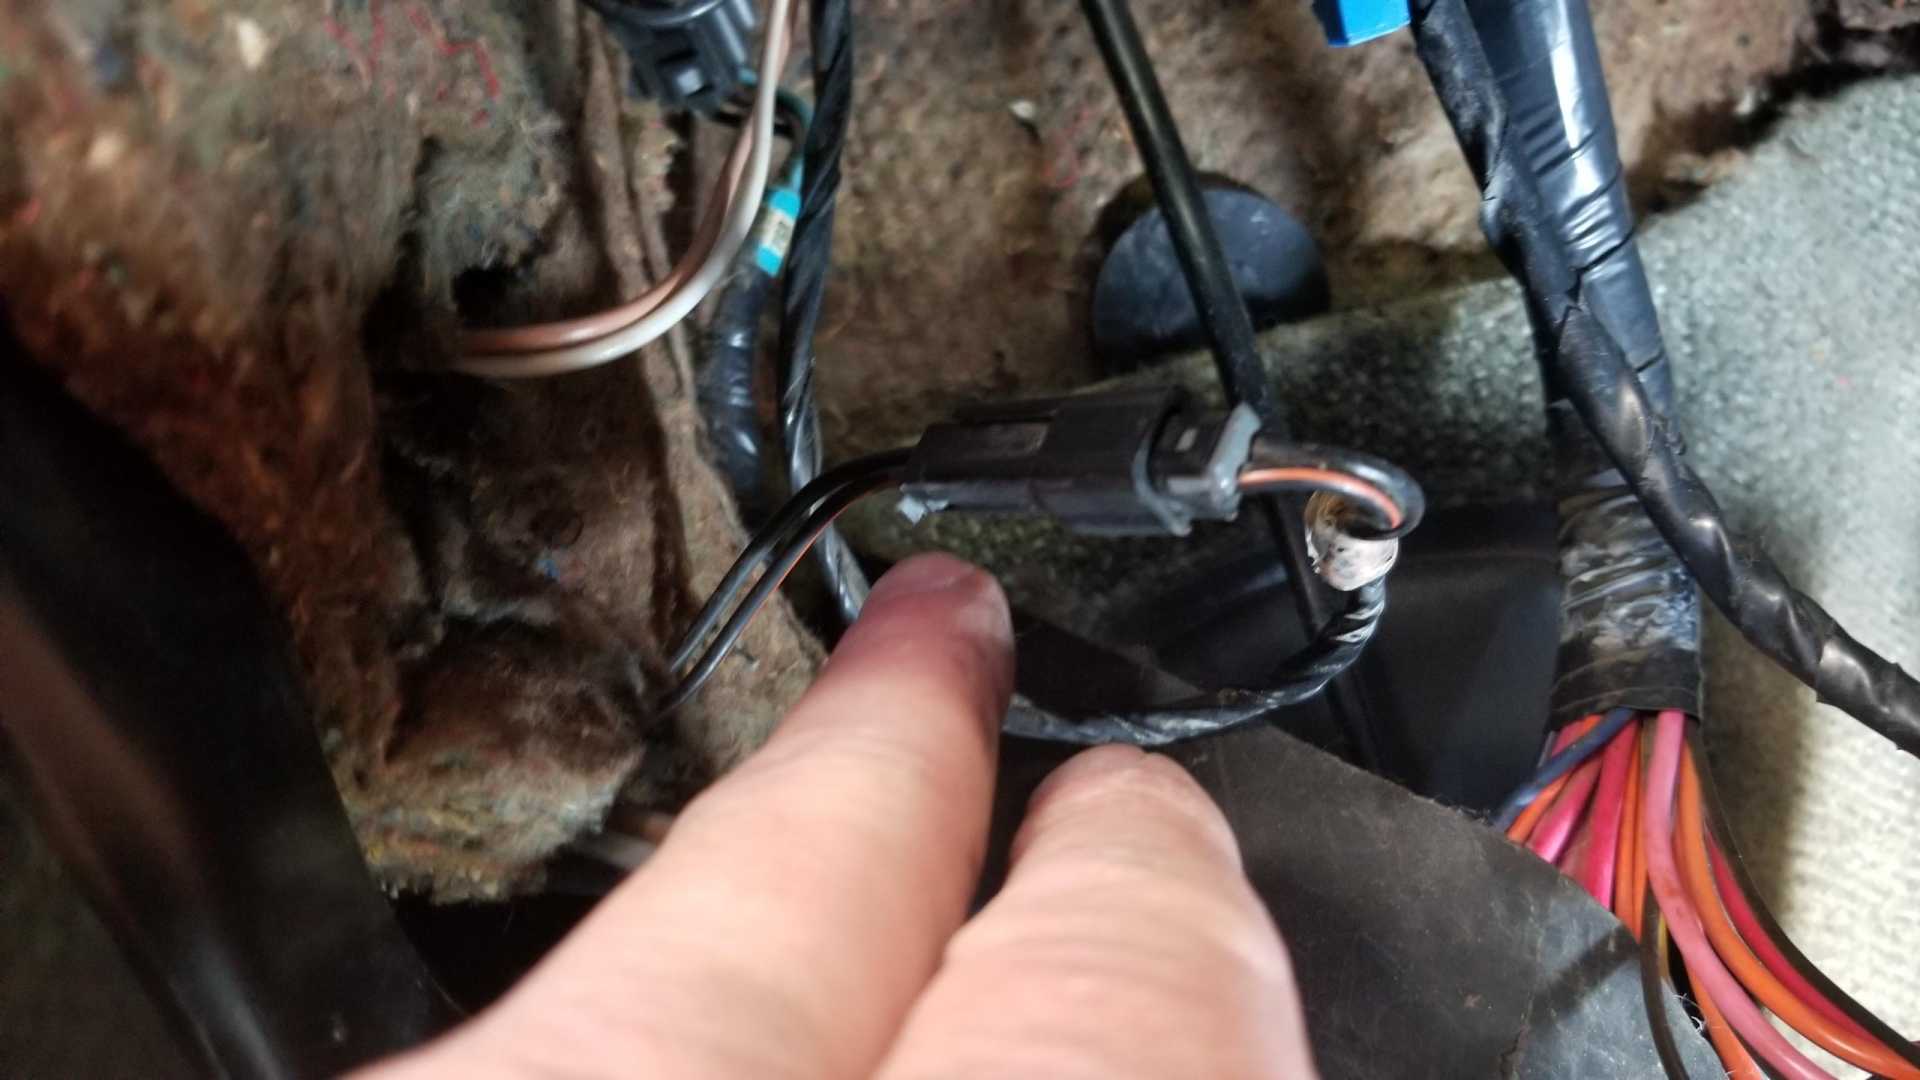
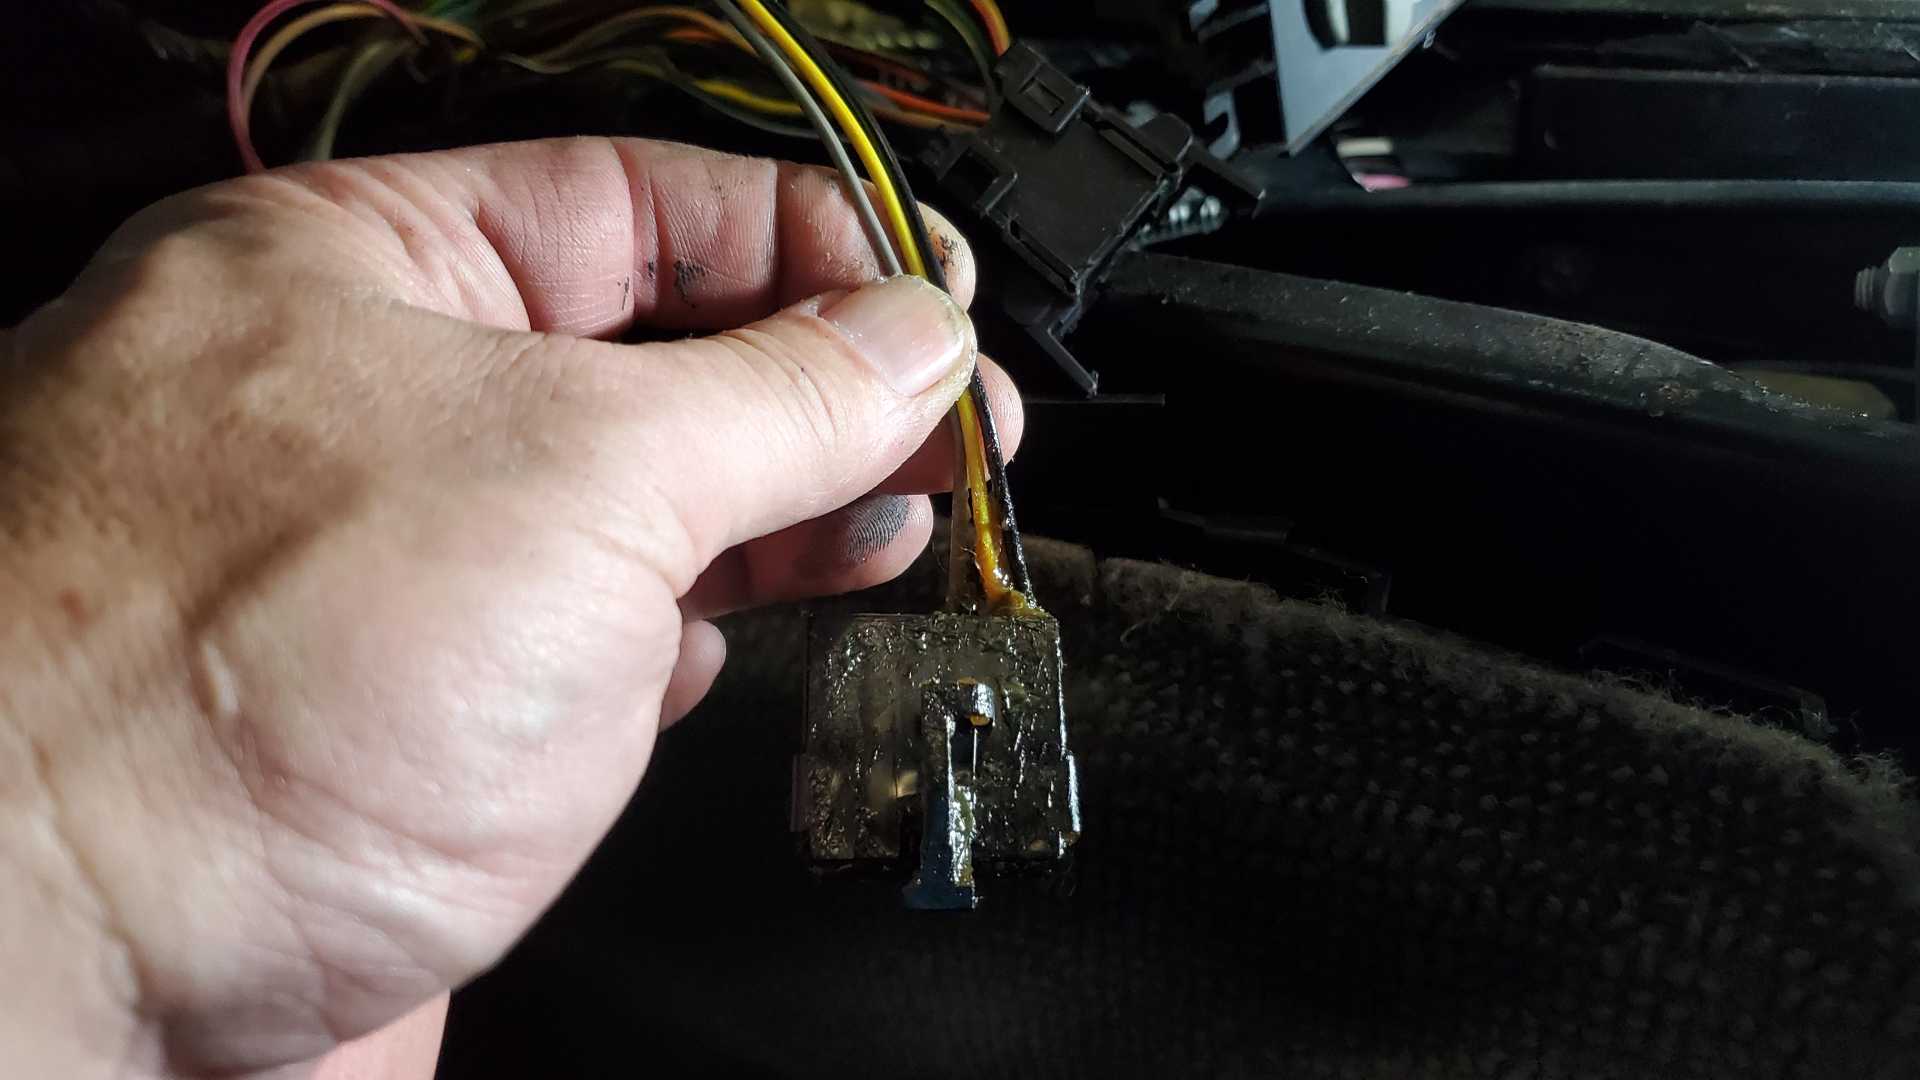
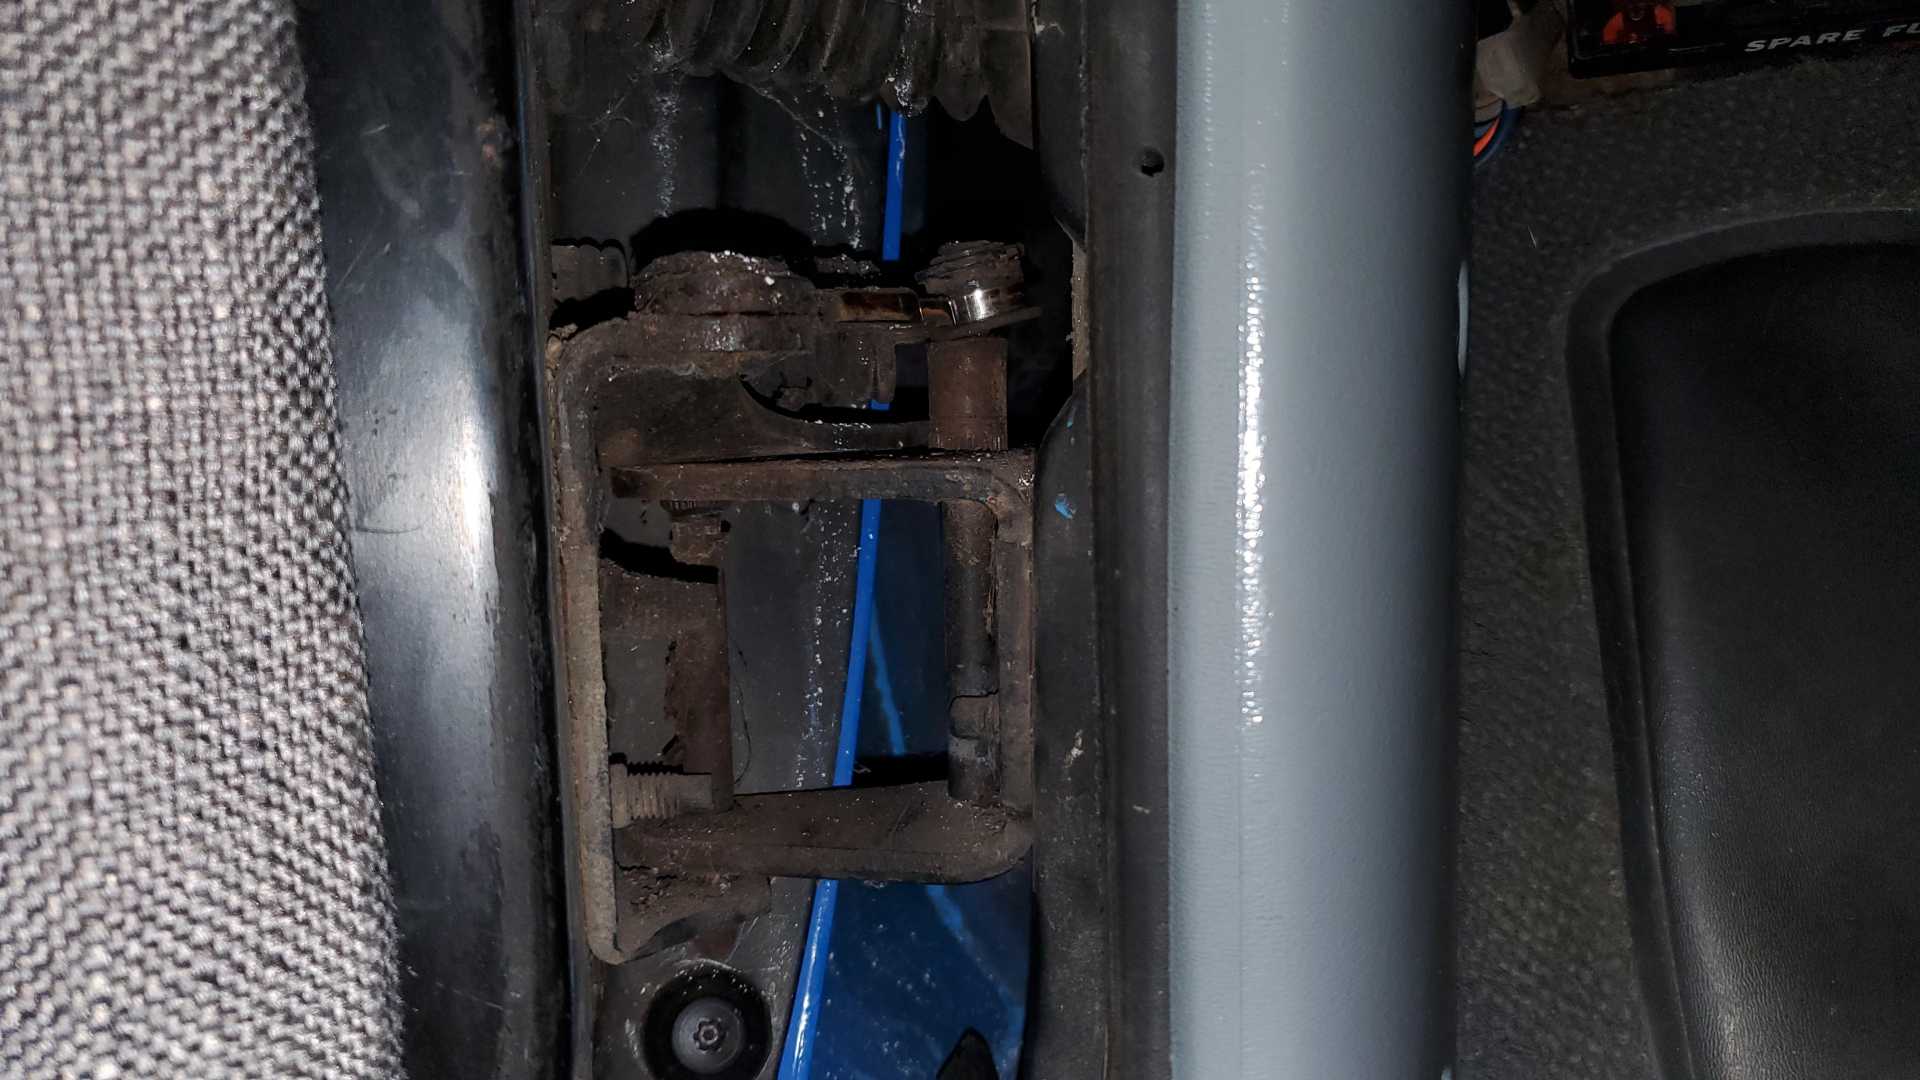
Still haven’t solved the mystery of this plug. It was covered in grease and stuck in a plastic bag when I removed the skeleton years ago.
I’ve scoured my factory service manual and even asked on Facebook, but I don’t know what it’s for. Three wires: yellow, black and tan (or possibly gray). Thought it might be for the cruise control module, which my car doesn’t have, but that plug has many more wires.
My car is an ‘87 coupe that had almost no options. It has AC and tilt steering, but nothing else. It DID have the plug for the trunk popper switch and the aux gauge cluster. It also had the under dash harness for power locks.
Spent a very frustrating couple of hours in the shop tonight. Last week was a crazy week at work, which ended with a very long day yesterday thanks to what was going on in downtown Tulsa. I ain’t no spring chicken anymore, so the long days wear me down.
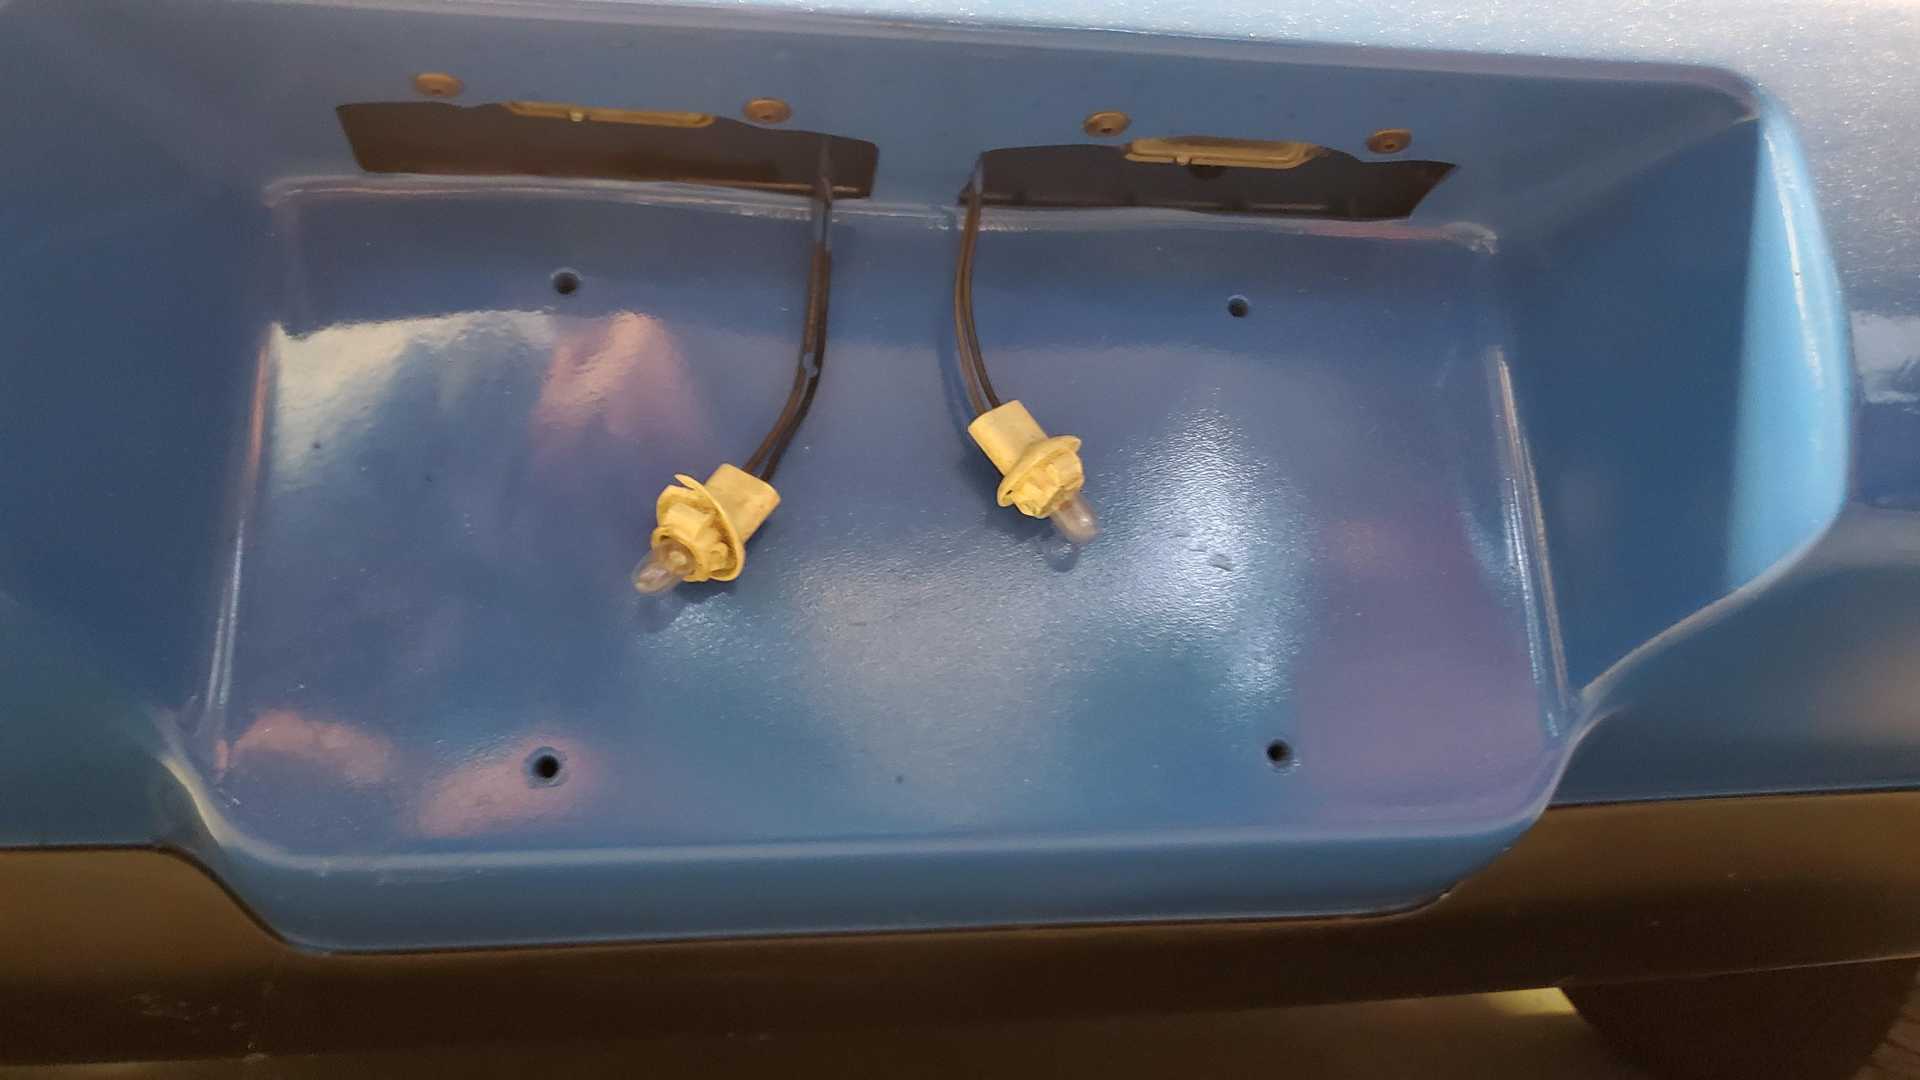
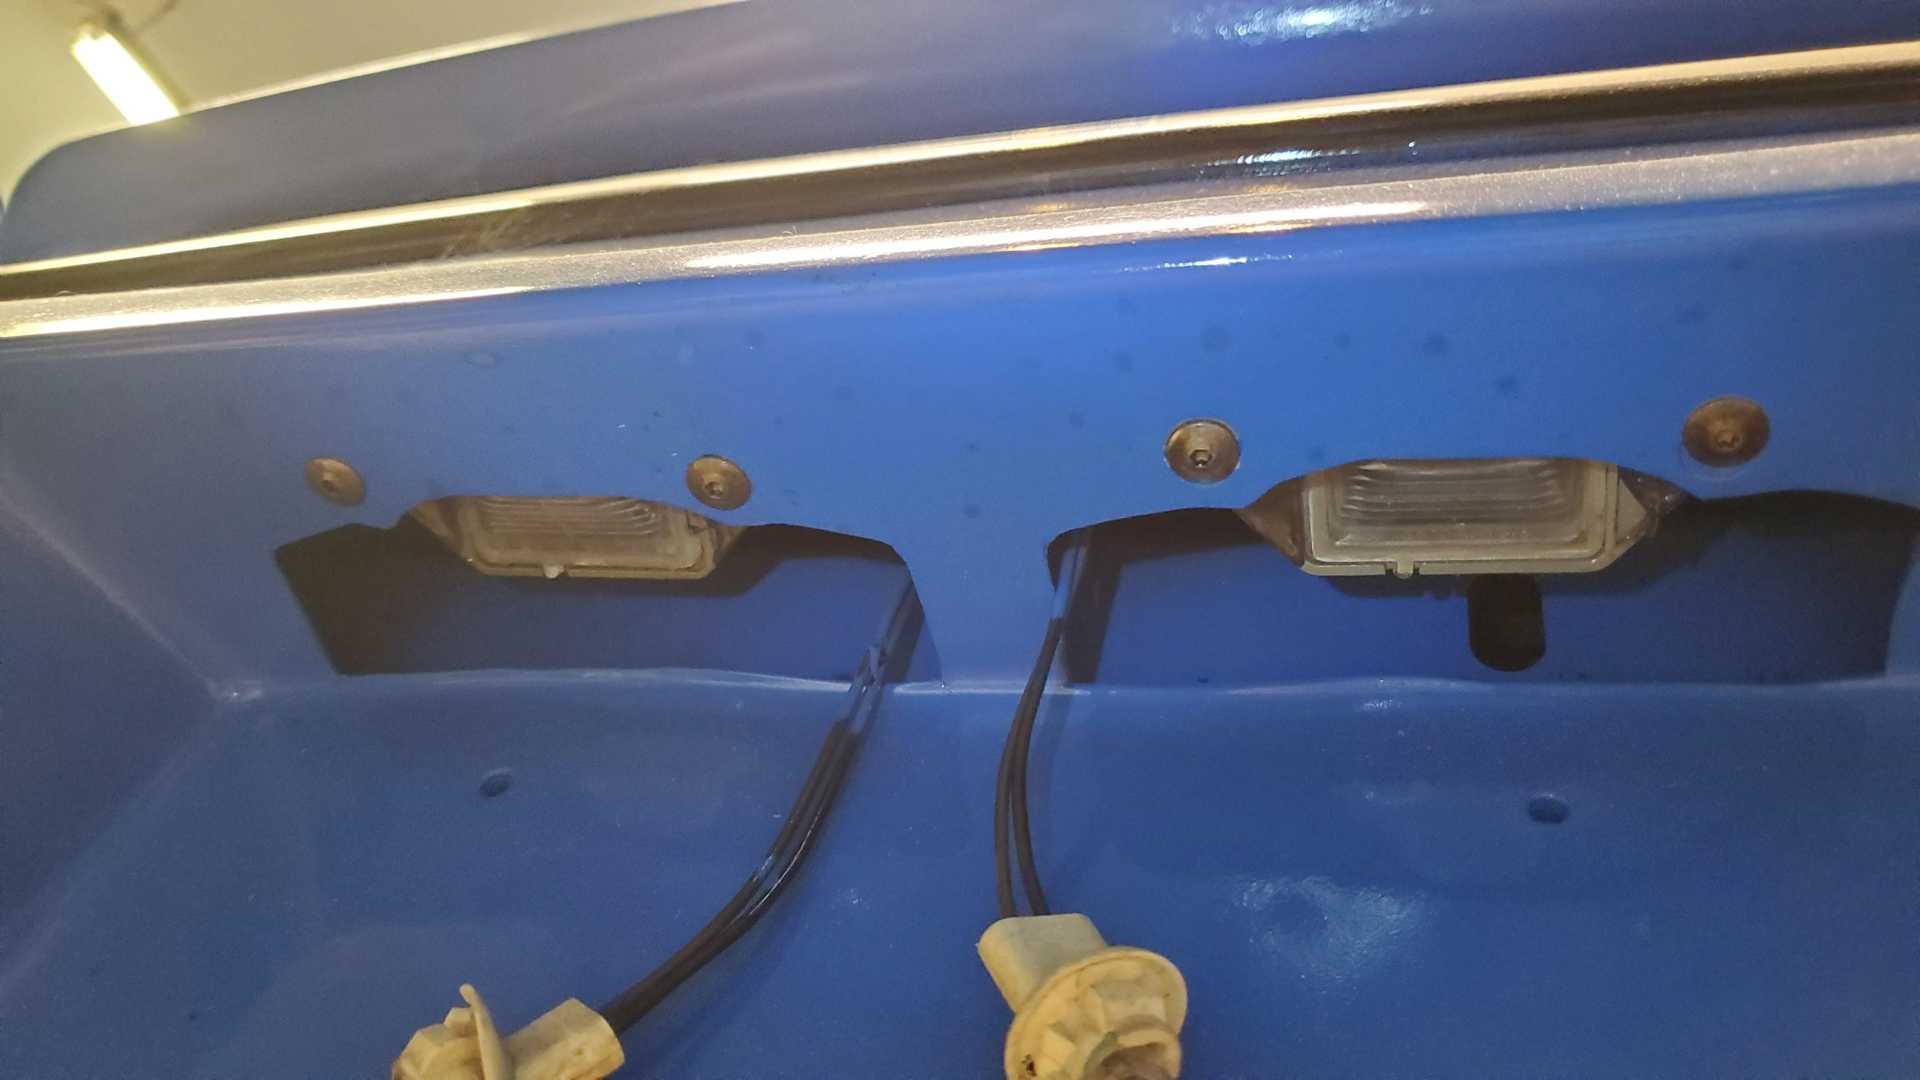
I wanted to do something, anything, on the car tonight, so when I saw the license tag lights hanging down I figured I’d install the sockets.
I looked everywhere for the sockets, including all of my spare parts bins. After about an hour, I was about to give up when I got down on the floor and looked up and there they were, already installed.
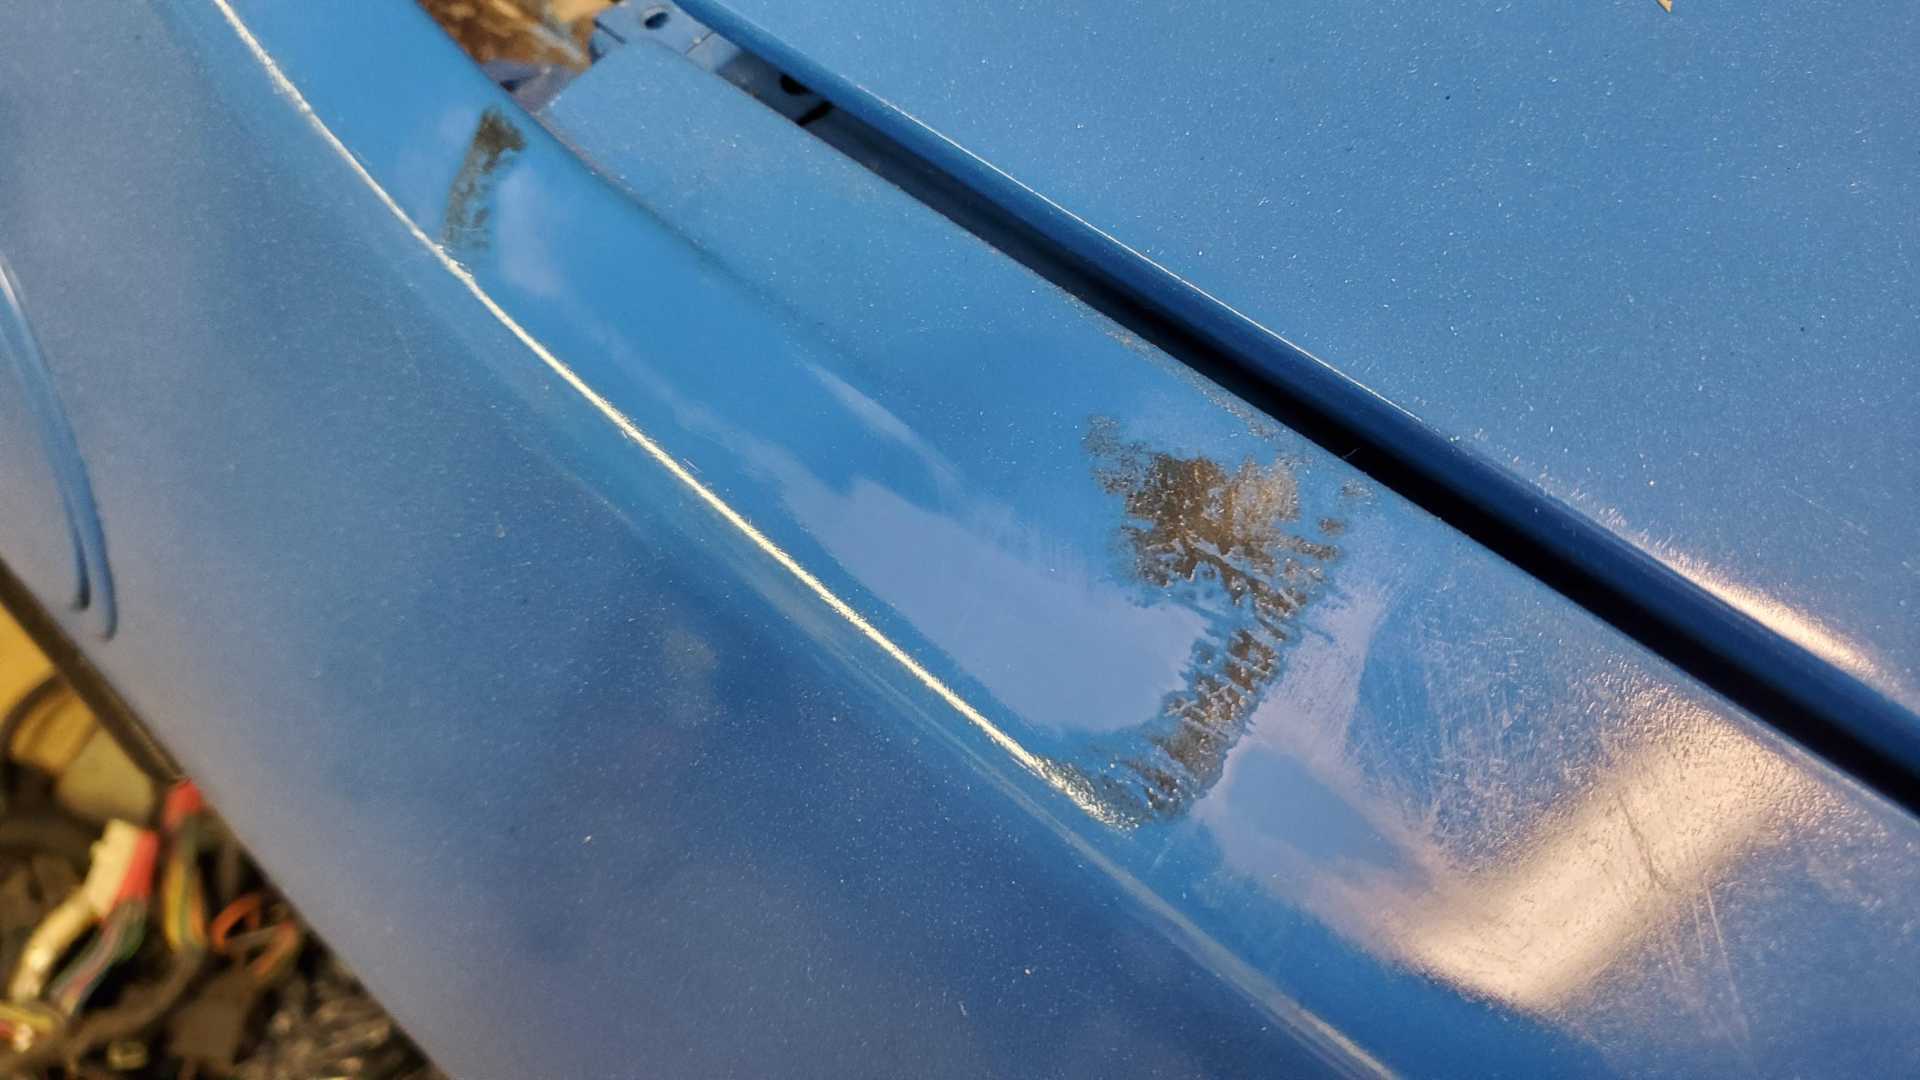
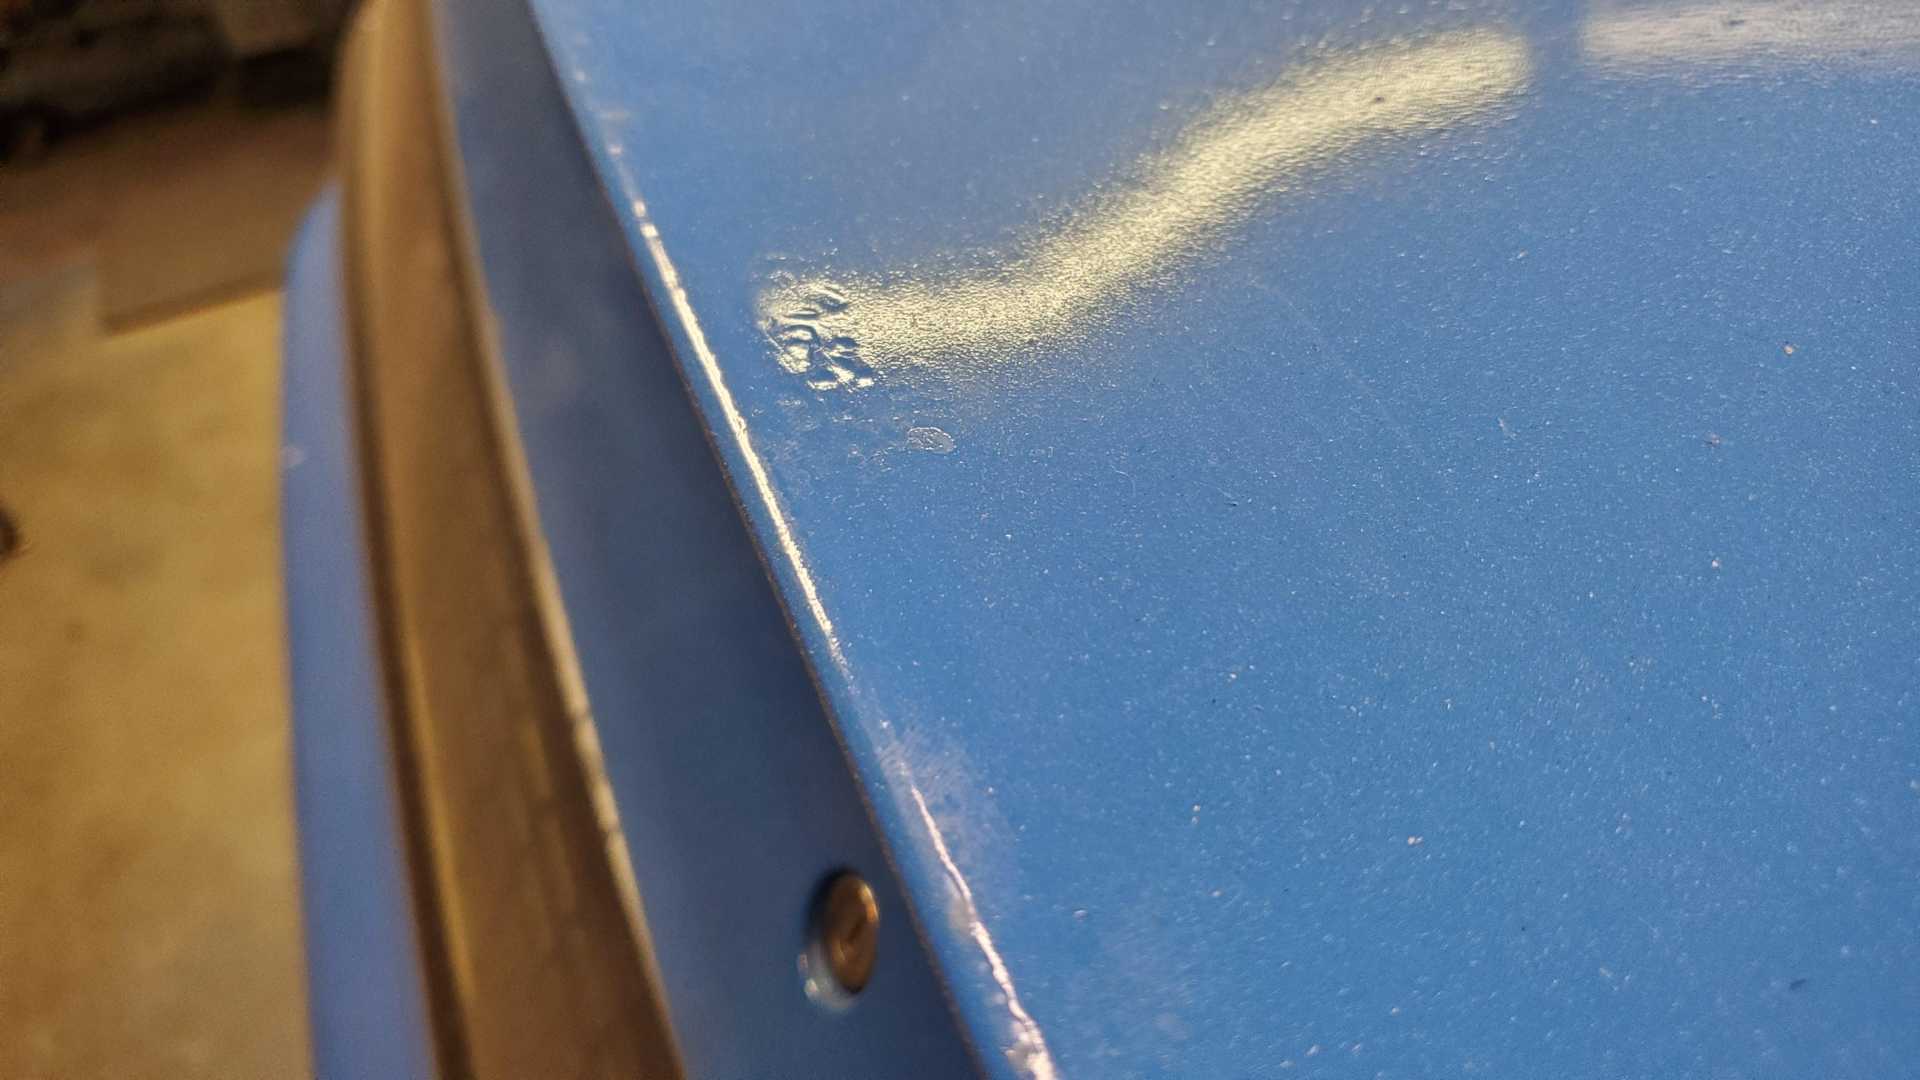
I’m still pretty frustrated with the state of the clear coat. It looked great for a few weeks after I sprayed it, but since then it has deteriorated. The worst spot is behind the driver’s side sail panel. It’s almost like something spilled on it and is reacting with the clear coat.
Pretty much the whole car has orange peel now, but the worst is the wing. It was the last thing I sprayed and was in a hurry to finish.
As frustrating as the paint/clear coat is, it is still a good looking car. It’s also a dust magnet.
I saw two Fieros on the road last week.The first was a white bumper pad on my way to work on Monday. The second was Tuesday evening while driving through Owasso. Always great to see Fieros on the road.
[This message has been edited by Quadfather (edited 06-21-2020).]
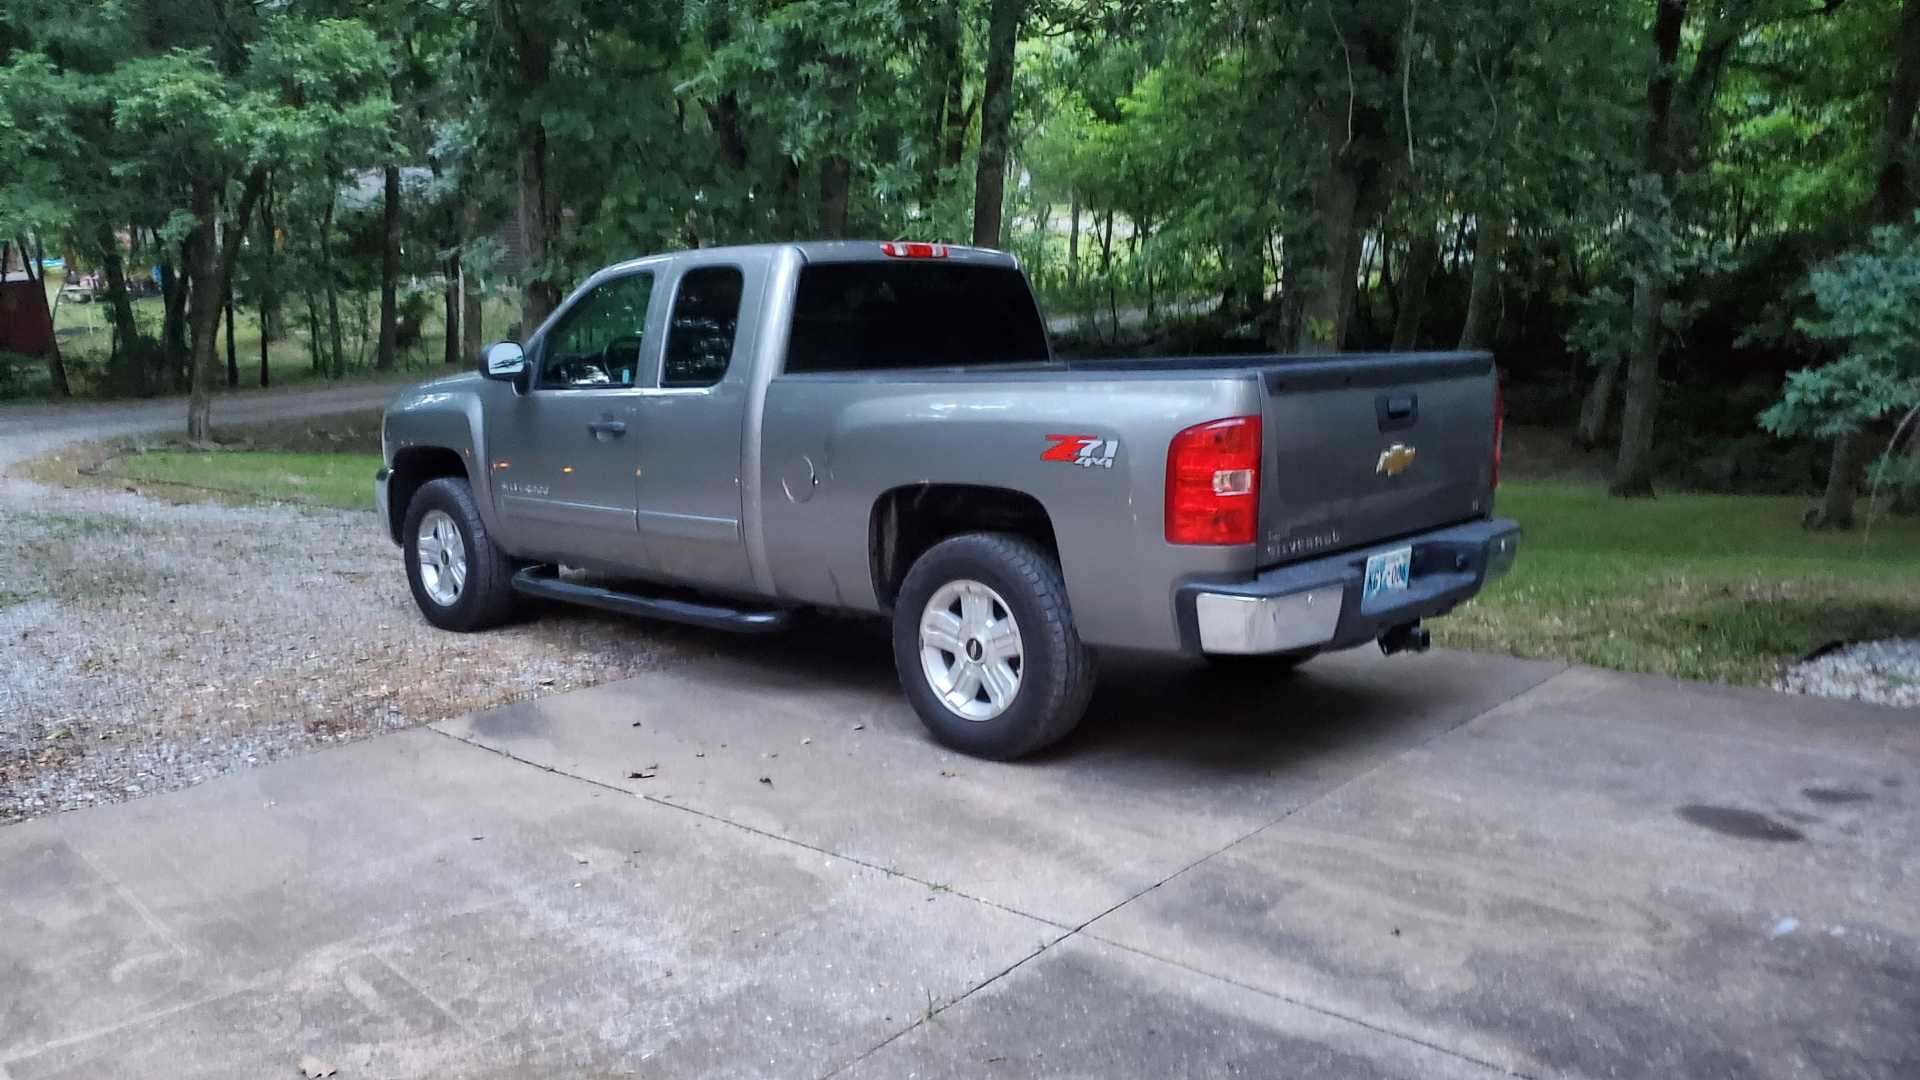
Another reason for slow progress on the Fiero is this.
My wife and I had been without a pickup since my ‘92 Silverado died three years ago. We got a great deal on this one, but it did need a few things fixed or replaced. Sure could have used it to haul some of the Fiero parts I bought over the years.
I’m working on building the courage to mate the Quad harness to the Fiero harness. When I first started researching the swap, I know I was confident in how to do it and knew the details, but it’s been so long I’ve forgotten all that and the self doubt has grown tremendously.
I know I have to unpin some of the big connectors, but do I put the Fiero pins in the Quad connector or the Quad pins in the Fiero connector. Does it matter? Throughout this whole process, this is the part that has always worried me. I have no problem welding up engine mounts, rebuilding the Quad, or even painting the car, but this wiring stuff is way out of whatever comfort zone I have.
When my brother first gave me the donor Beretta GTZ in 2008 and I pulled the engine to replace the head and head gasket, I had never worked on that type of engine before. I put it all back together and it started right up the first time I turned the key. Maybe I’ll get lucky and will have the same experience this time.
[This message has been edited by Quadfather (edited 06-21-2020).]
Pretty much the whole car has orange peel now, but the worst is the wing. It was the last thing I sprayed and was in a hurry to finish.
As frustrating as the paint/clear coat is, it is still a good looking car. It’s also a dust magnet.
Same thing happened to mine. Surfaces were clear, smooth, and shiny for about a month then found that the paint shrunk as it cured. With all this down time, I should go out and wet sand and buff it, but I'm too lazy.
Same thing happened to mine. Surfaces were clear, smooth, and shiny for about a month then found that the paint shrunk as it cured. With all this down time, I should go out and wet sand and buff it, but I'm too lazy.
Man, I understand. I may try a wrap this fall or winter, if I can get the car running by then.
Well, summer has arrived in Oklahoma. Maybe it’s an age thing, but my motivation is inversely proportional to the temperature/humidity level.
I haven’t done much directly on the car, other than to try wet sanding that one bad spot behind the driver’s side sail panel. It looks much better, but now the clear coat is gone from that spot.
[This message has been edited by Quadfather (edited 06-28-2020).]
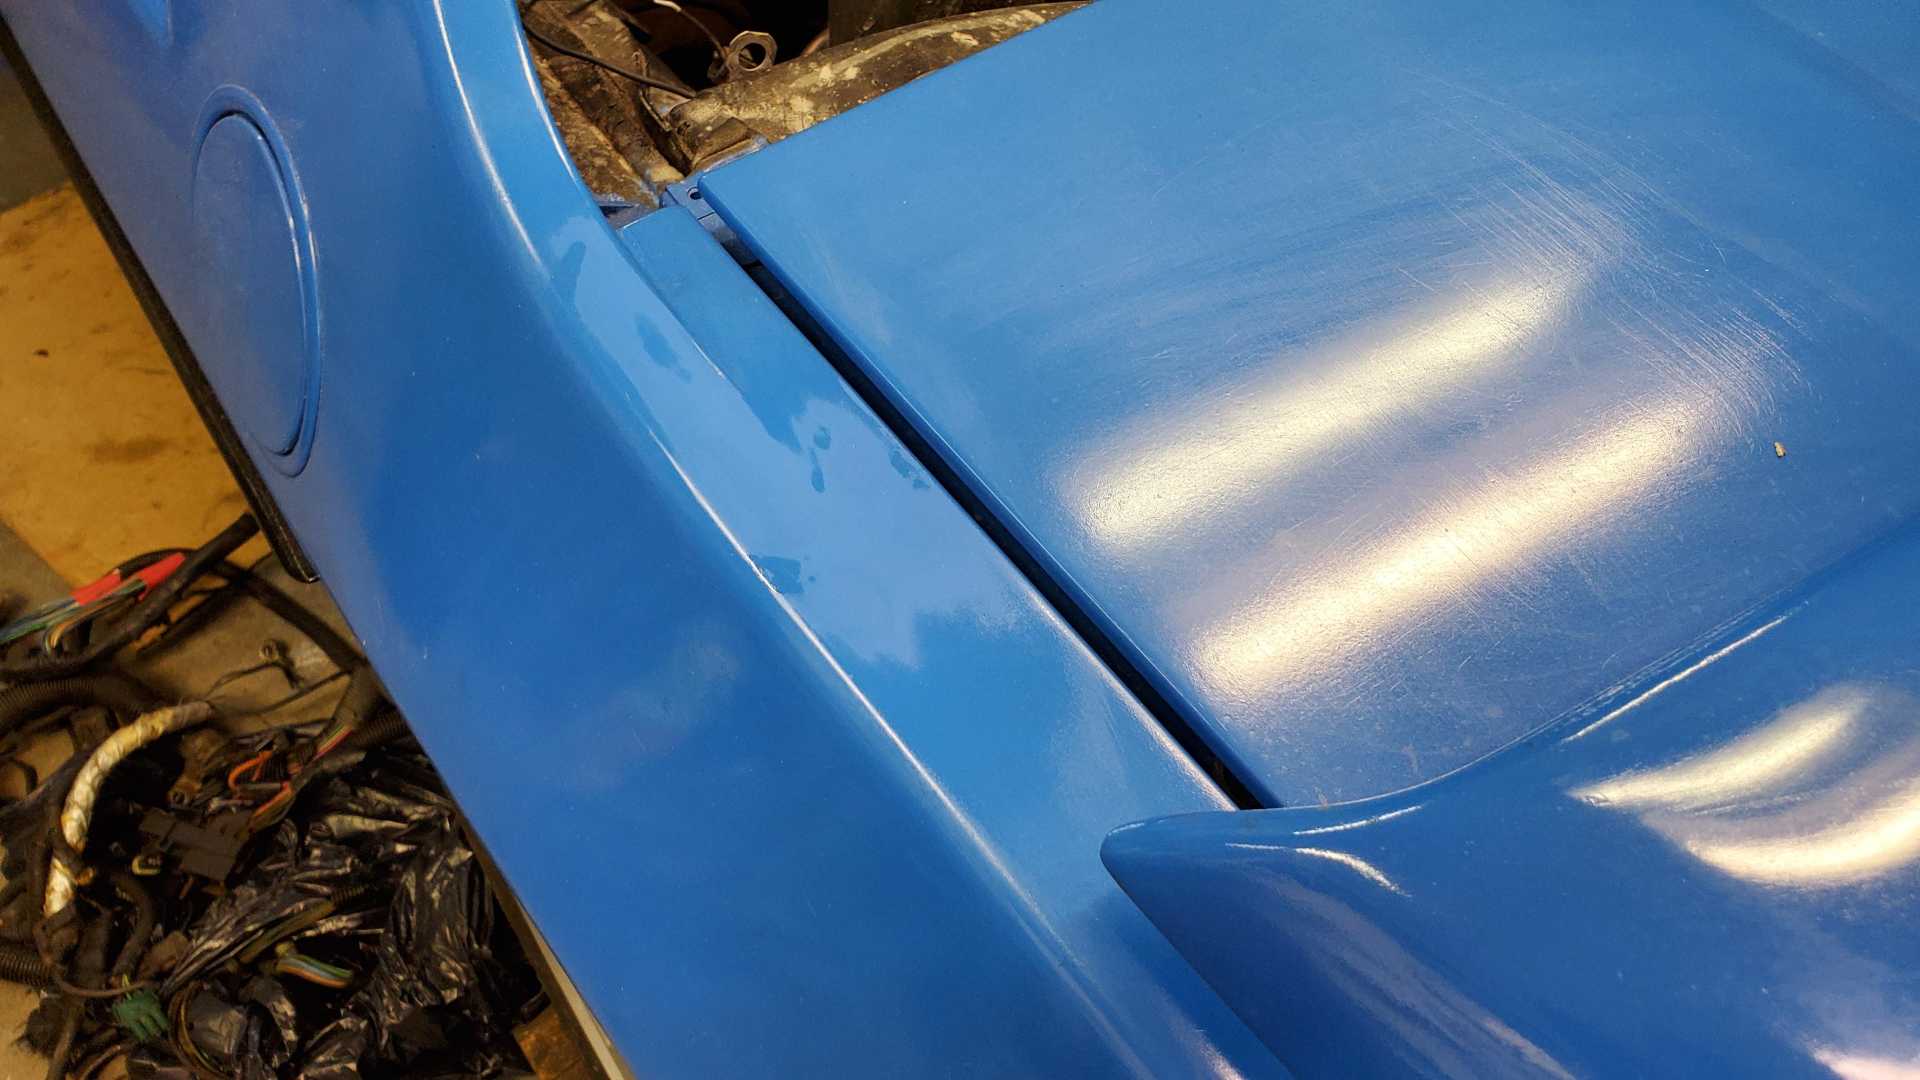
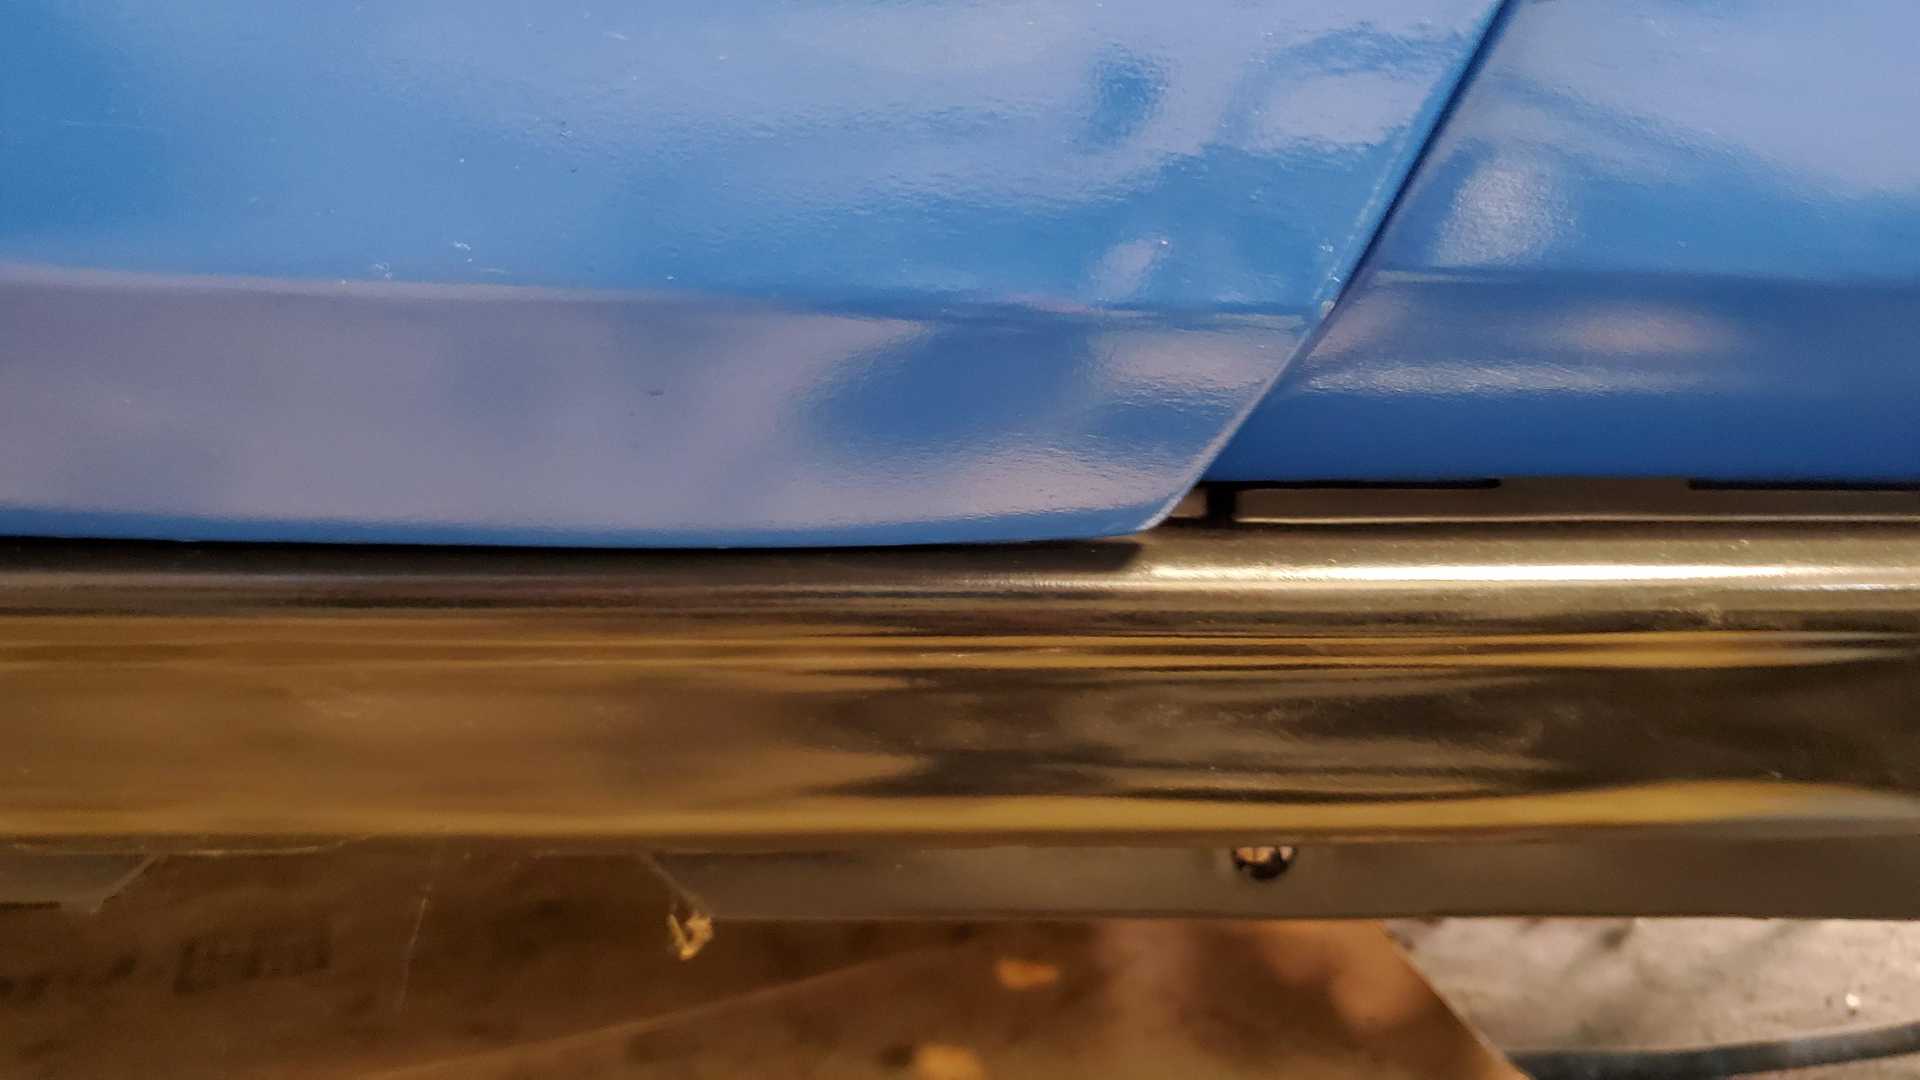
I’ve mentioned before how I’ve discovered overspray in unlikely places. In this case, what I thought was overspray is a symptom of another issue.
Yup, the door hinges are worn out, so the bottom of the door panel is scraping the sill panel when the door is opened or closed.
When I open the door and lift up on it from the back end, I feel at least an 1/8-inch of play. So add this to the list of tasks that need to be completed.
[This message has been edited by Quadfather (edited 06-28-2020).]
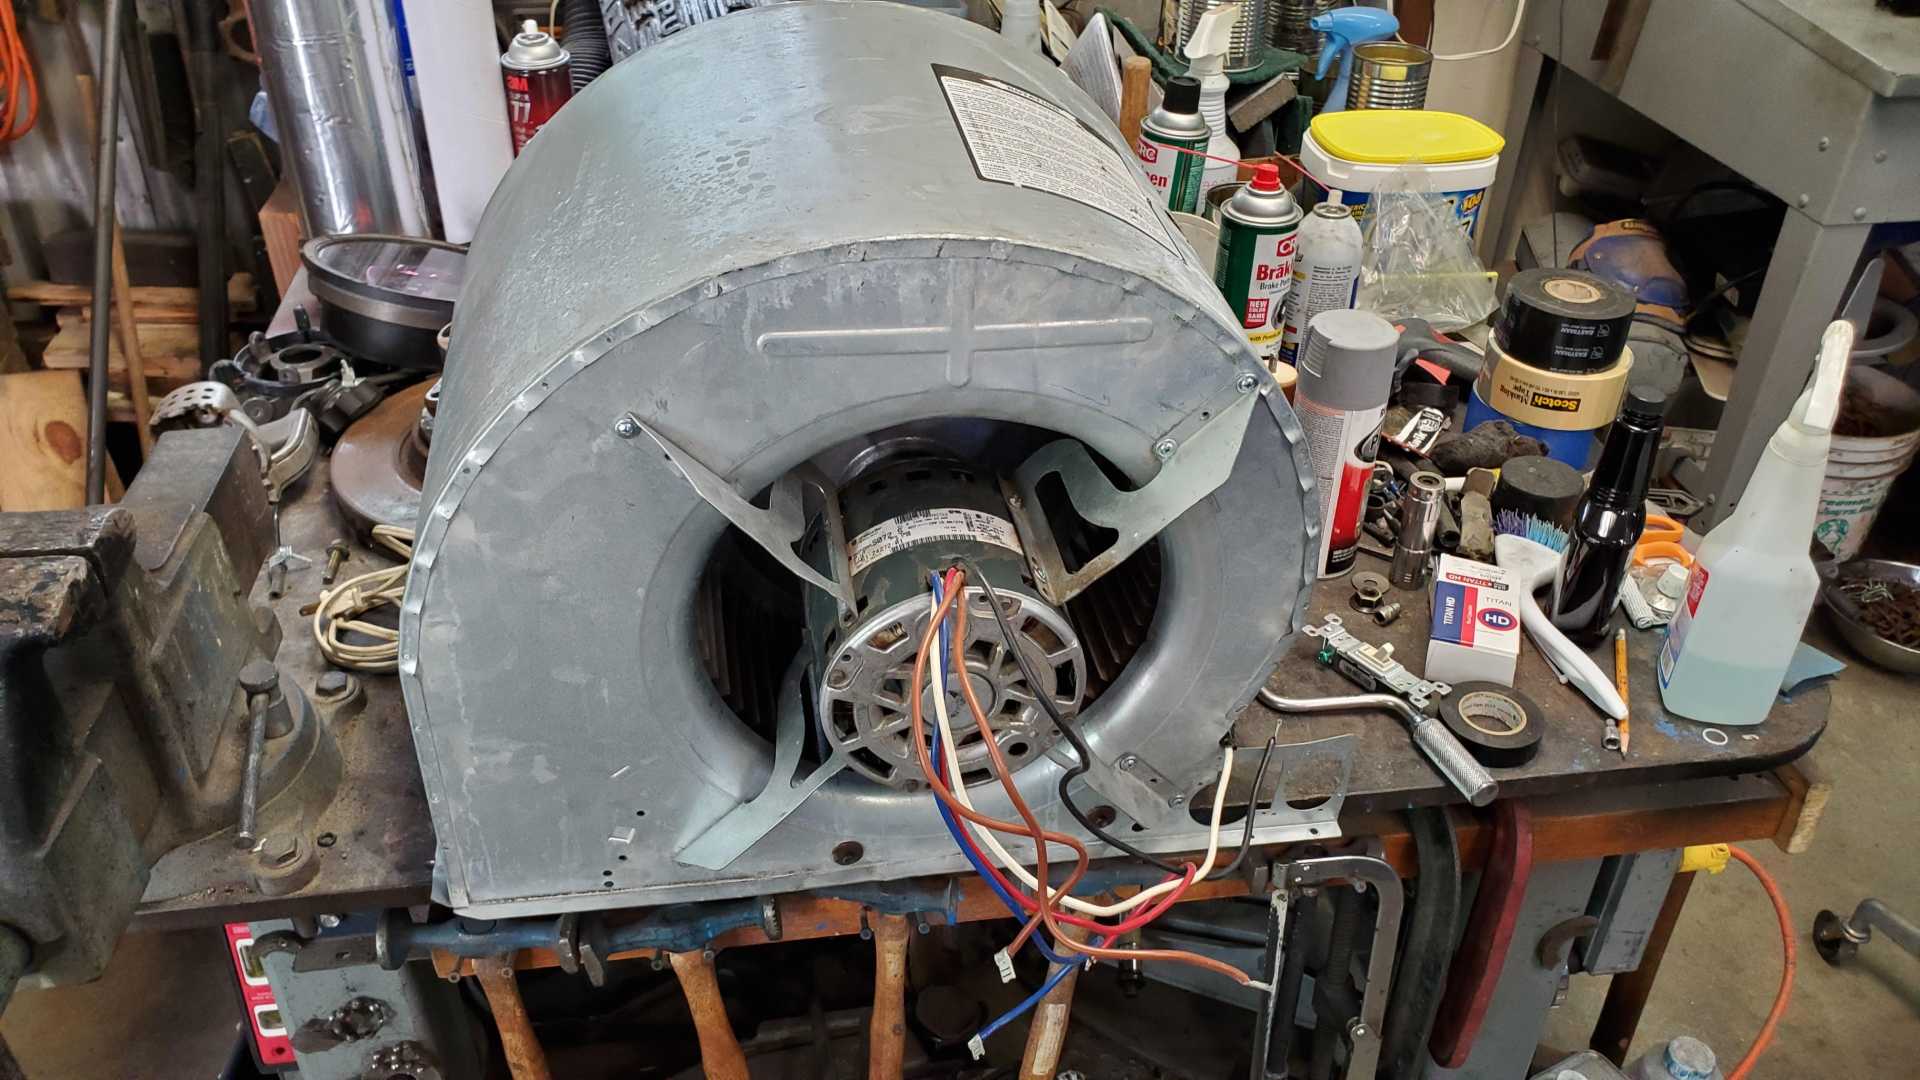
A couple weeks ago my wife and I stopped at an estate sale and I bought an old squirrel cage HVAC blower for 5 bucks. I wired it up and it worked, but since it didn’t have a capacitor I had to start the motor by hand. The ID plate was missing, so I took the motor to my local HVAC supply place to try to find the right capacitor. The guy at the counter, and a customer who was also an AC repair tech, recommended a 7.5, which cost me all of $10.
They told me if the capacitor is not the specified rating for the motor that the motor will burn up in a day or two, but I said for an investment of $15, it’s worth the risk. I will use it as a shop fan. I have a big pedestal fan, and a smaller fan my dad hung from the ceiling years ago, but the shop needs another one.
YouTube is full of videos for how to turn one of these into a shop fan, and this one blows a tremendous amount of air.
The guy at the supply place said he had another one in his truck he was going to throw away, so I took that one, too. It’s a little bit bigger than the estate sale one.
[This message has been edited by Quadfather (edited 06-28-2020).]
My wife actually suggested I rent a storage unit for my extra Fiero parts. My shop is actually the garage of my mom’s house. My dad died in 2003, so when my wife and family moved back to Oklahoma in 2005, I agreed to clean up the yard and garage at my mom’s request. Over the years she let me convert it to a shop, as long as I kept one stall open for her car. In the process, I became the caretaker of the whole property. I did this so my mom could stay in the dream house she and my dad designed years ago.
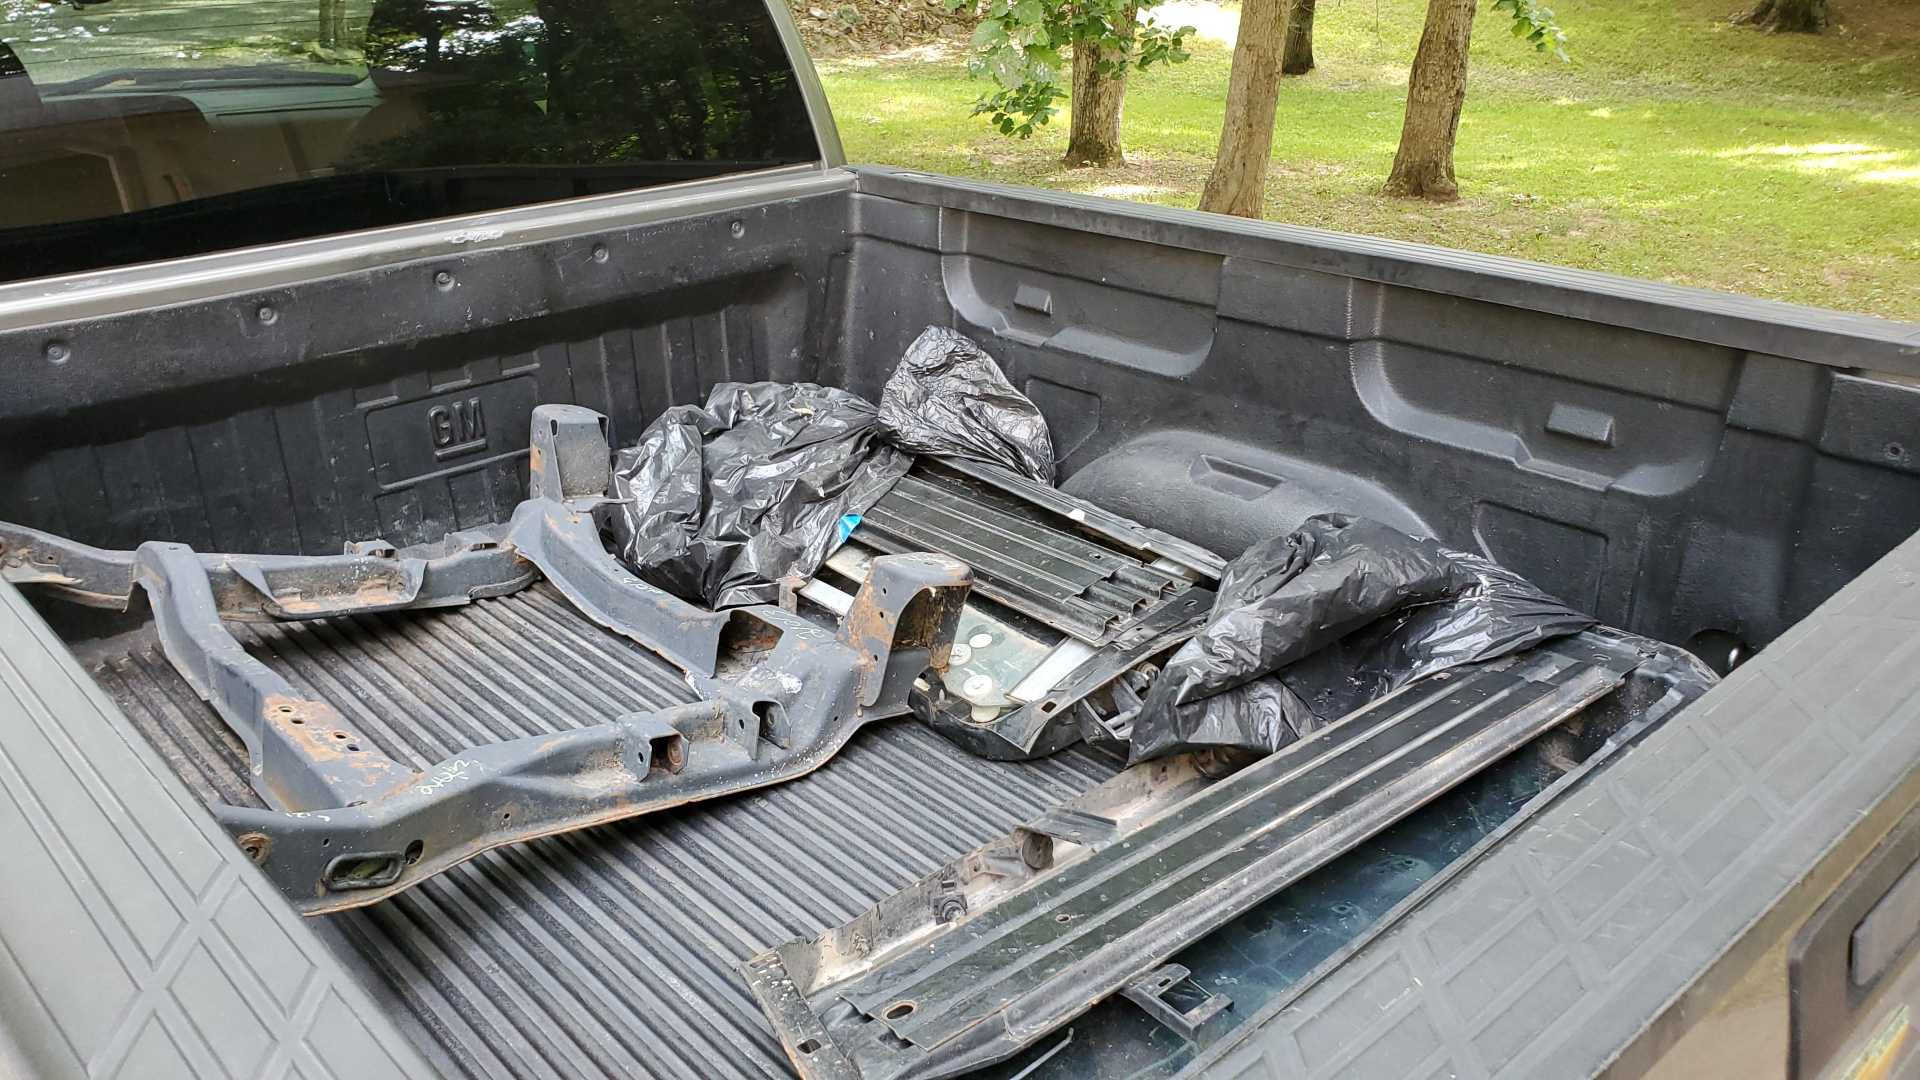
I won’t bore you with the legal details, but when she died in 2018, another brother moved into the house, against my wishes, obviously. From time to time he’s a real butthead, including the time he was burning some brush, and threw the spare sunroof panel on the fire. A couple weeks ago he gave me grief about “that junk metal” stacked behind the garage. That “junk” is a 1988 engine cradle and the two doors I used for power windows/mirrors. I don’t have room for them in my garage, so I’ve been carrying them around in my truck. When my wife saw them there yesterday, knowing the reason they’re there, she suggested I get a storage unit, and then actually started looking for one on the internet.
I have a lot of non-Fiero parts that can go to the unit, including the engine out of my old pickup, a lawn mower engine, a spare Getrag transmission, my two spare Quads... all kinds of stuff.
What’s going to come as a surprise for my brother is when I get my own shop and move all of my tools and equipment out of Mom’s garage.
[This message has been edited by Quadfather (edited 12-24-2020).]
I know years ago I had you grab some 88 coolant tubes for me. You had them in your attic while i got my life together.
Any chance you still have those?
Keep us updated on the build too.
Ah, man, it’s great to hear from you. Yes, I still have those tubes. If I recall, I had to cut them to get them to fit in the box, but I marked them carefully so they could be welded back in the right orientation. The box is still in the attic and I think it has your name and address on it.
I’ll get over to the shop in the next day or so and get up there to make sure the box is still there.
[This message has been edited by Quadfather (edited 06-29-2020).]