Pennock's Fiero Forum
  The Construction Zone
  Sourmug's Decklid Vent Build ** 56K Warning!!** (Page 6)

Post New Topic  Post A Reply
Email This Page to Someone! | Printable Version | Print VBook

This topic is 18 pages long:  1   2   3   4   5   6   7   8   9   10   11   12   13   14   15   16   17   18 
Previous Page | Next Page
next newest topic | next oldest topic
Sourmug's Decklid Vent Build ** 56K Warning!!** by Sourmug
Started on: 03-12-2006 03:40 AM
Replies: 681 (59731 views)
Last post by: labbe001 on 02-22-2024 04:39 PM
exoticse
Member
Posts: 8650
From: Orlando, Fl
Registered: Jun 2003


Feedback score: N/A
Leave feedback


Total ratings: 108
Rate this member

Report this Post06-30-2006 06:31 AM Click Here to See the Profile for exoticseSend a Private Message to exoticseEdit/Delete MessageReply w/QuoteDirect Link to This Post


Man the car looks great !


About the only thing i could see tweeking would be to move the spoiler back and add some wing tip extensions like here.


The front looks fabulous as well.


My tweek here, maybe just a closed mouth chin spoiler


Or maybe the skitime style chin spoiler.


IP: Logged
Comealongway
Member
Posts: 586
From: Calgary, Alberta, Canada
Registered: Dec 2002


Feedback score: N/A
Leave feedback

Rate this member

Report this Post06-30-2006 10:13 AM Click Here to See the Profile for ComealongwaySend a Private Message to ComealongwayEdit/Delete MessageReply w/QuoteDirect Link to This Post
Hey Nolan, what did you fill the holes left from the GT moulding on the doors and fenders?, I'm hoping to have my car back together this weekend, but that is pending parts
IP: Logged
Sourmug
Member
Posts: 4538
From: Calgary, Alberta, Canada
Registered: Sep 2002


Feedback score:    (29)
Leave feedback


Total ratings: 144
Rate this member

Report this Post06-30-2006 12:17 PM Click Here to See the Profile for SourmugSend a Private Message to SourmugEdit/Delete MessageReply w/QuoteDirect Link to This Post
exoticse:

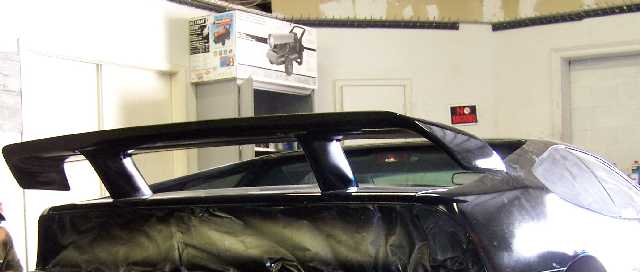
Thanks! The spoiler is already sitting 2" further back than the stock location. I'm not sure that I want to add the additional material to the wing tips, I need to digest that one for a bit, although it has been suggested before.

I have also been playing with the idea of adding something to the front lip. My concern is that I don't want to drag the front on the ground in access ramps etc.

Comealongway:

What holes are you referring to? If you mean the holes for the molding that runs the full length of the car they haven't been filled in. I will be retaining the moldings and wont be "smoothing" the car.

Nolan

[This message has been edited by Sourmug (edited 06-30-2006).]

IP: Logged
Sourmug
Member
Posts: 4538
From: Calgary, Alberta, Canada
Registered: Sep 2002


Feedback score:    (29)
Leave feedback


Total ratings: 144
Rate this member

Report this Post06-30-2006 12:34 PM Click Here to See the Profile for SourmugSend a Private Message to SourmugEdit/Delete MessageReply w/QuoteDirect Link to This Post

Sourmug

4538 posts
Member since Sep 2002
Continuing on with the suspension, I am adding Poly bushings c/w zerk fittings:


And here are some overall shots of some of the goodies that are going back into the car:


Nolan

[This message has been edited by Sourmug (edited 05-28-2007).]

IP: Logged
Comealongway
Member
Posts: 586
From: Calgary, Alberta, Canada
Registered: Dec 2002


Feedback score: N/A
Leave feedback

Rate this member

Report this Post06-30-2006 05:02 PM Click Here to See the Profile for ComealongwaySend a Private Message to ComealongwayEdit/Delete MessageReply w/QuoteDirect Link to This Post
I'm jealous that looks really good, are those lebaron breaks, how much did those cost you?

Also yes i was talking about the holes from the moulding, I was thinking of filling it with Bondo hair but the fenders flex a lot so do you think the PF-224 could be utilized for that one?
IP: Logged
Comealongway
Member
Posts: 586
From: Calgary, Alberta, Canada
Registered: Dec 2002


Feedback score: N/A
Leave feedback

Rate this member

Report this Post06-30-2006 05:04 PM Click Here to See the Profile for ComealongwaySend a Private Message to ComealongwayEdit/Delete MessageReply w/QuoteDirect Link to This Post

Comealongway

586 posts
Member since Dec 2002
Double post

[This message has been edited by Comealongway (edited 06-30-2006).]

IP: Logged
Sourmug
Member
Posts: 4538
From: Calgary, Alberta, Canada
Registered: Sep 2002


Feedback score:    (29)
Leave feedback


Total ratings: 144
Rate this member

Report this Post06-30-2006 06:22 PM Click Here to See the Profile for SourmugSend a Private Message to SourmugEdit/Delete MessageReply w/QuoteDirect Link to This Post
I don't really know what would work the best. I know there are a number of threads that have been posted about smoothing the lines but I have not really researched it.

Yes those are for the LeBaron brake swap. I bought the brackets for $50 US and the hubs were purchased from fierosound.

Nolan
IP: Logged
Sourmug
Member
Posts: 4538
From: Calgary, Alberta, Canada
Registered: Sep 2002


Feedback score:    (29)
Leave feedback


Total ratings: 144
Rate this member

Report this Post07-01-2006 08:40 PM Click Here to See the Profile for SourmugSend a Private Message to SourmugEdit/Delete MessageReply w/QuoteDirect Link to This Post
Here are some progress shots:


Man it sure feels good to actually put something back together on the car. I don't know about you but it's sure easy for me to feel that I'm never going to finish this. Having this done makes me think that I'm actually gonig to finish this... eventually.

Nolan

[This message has been edited by Sourmug (edited 05-28-2007).]

IP: Logged
Sourmug
Member
Posts: 4538
From: Calgary, Alberta, Canada
Registered: Sep 2002


Feedback score:    (29)
Leave feedback


Total ratings: 144
Rate this member

Report this Post07-04-2006 12:50 AM Click Here to See the Profile for SourmugSend a Private Message to SourmugEdit/Delete MessageReply w/QuoteDirect Link to This Post
I started working on the rear suspension today, particularily the struts. Here they are as they came out of the car:


Here are the bits that I'm keeping:


Now for a couple of questions. The second from the top coil on both rear springs had some sort of rubber "hose" tied onas you can see in this picture:


I assume that this is to prevent a rattling sound, is this correct? Secondly, do I need to keep this? (ie. new piece, reuse old or just delete it?)

Thanks
Nolan

[This message has been edited by Sourmug (edited 05-28-2007).]

IP: Logged
Blacktree
Member
Posts: 20770
From: Central Florida
Registered: Dec 2001


Feedback score:    (12)
Leave feedback


Total ratings: 350
Rate this member

Report this Post07-04-2006 01:05 AM Click Here to See the Profile for BlacktreeClick Here to visit Blacktree's HomePageSend a Private Message to BlacktreeEdit/Delete MessageReply w/QuoteDirect Link to This Post
I think it's to keep the coils from chaffing each other when the springs compress. I'm sure it quiets down the springs, too.

When I rebuilt my suspension, I deleted those rubber pieces. And now my Eibach springs have chaffing marks where the top coils have been hitting each other. I'm seriously thinking of putting some rubber hose on there to prevent it.

[This message has been edited by Blacktree (edited 07-04-2006).]

IP: Logged
Sourmug
Member
Posts: 4538
From: Calgary, Alberta, Canada
Registered: Sep 2002


Feedback score:    (29)
Leave feedback


Total ratings: 144
Rate this member

Report this Post07-04-2006 04:27 PM Click Here to See the Profile for SourmugSend a Private Message to SourmugEdit/Delete MessageReply w/QuoteDirect Link to This Post
 
quote
Originally posted by Blacktree:

I think it's to keep the coils from chaffing each other when the springs compress. I'm sure it quiets down the springs, too.

When I rebuilt my suspension, I deleted those rubber pieces. And now my Eibach springs have chaffing marks where the top coils have been hitting each other. I'm seriously thinking of putting some rubber hose on there to prevent it.


Thank you kindly!

Nolan

[This message has been edited by Sourmug (edited 05-28-2007).]

IP: Logged
PFF
System Bot
3800GMCC
Member
Posts: 144
From: SC
Registered: Jan 2006


Feedback score: N/A
Leave feedback

Rate this member

Report this Post07-05-2006 08:30 AM Click Here to See the Profile for 3800GMCCSend a Private Message to 3800GMCCEdit/Delete MessageReply w/QuoteDirect Link to This Post
Where did you purchase the poly bushing kit?

How was the fit when you installed them?
IP: Logged
Sourmug
Member
Posts: 4538
From: Calgary, Alberta, Canada
Registered: Sep 2002


Feedback score:    (29)
Leave feedback


Total ratings: 144
Rate this member

Report this Post07-05-2006 10:41 AM Click Here to See the Profile for SourmugSend a Private Message to SourmugEdit/Delete MessageReply w/QuoteDirect Link to This Post
I purchased the poly kit from Summit and found the fit to be excellent. Not too tight or hard to install. You just have to trim the thrust washers for the LCA bushings as they are too long.

Nolan

[This message has been edited by Sourmug (edited 07-05-2006).]

IP: Logged
Comealongway
Member
Posts: 586
From: Calgary, Alberta, Canada
Registered: Dec 2002


Feedback score: N/A
Leave feedback

Rate this member

Report this Post07-05-2006 11:41 AM Click Here to See the Profile for ComealongwaySend a Private Message to ComealongwayEdit/Delete MessageReply w/QuoteDirect Link to This Post
Well i used the Pf-224 on my fender holes, it was a bad idea, the stuff is too flexible to use, it worked great on the fender mouldings though, I filled the holes with bondo glass. I can relate it feels very good to be putting my car back together, the front end is bolted together since tuesday, now i have to finish my motor. Your car looks great BTW.

[This message has been edited by Comealongway (edited 07-05-2006).]

IP: Logged
Comealongway
Member
Posts: 586
From: Calgary, Alberta, Canada
Registered: Dec 2002


Feedback score: N/A
Leave feedback

Rate this member

Report this Post07-05-2006 01:07 PM Click Here to See the Profile for ComealongwaySend a Private Message to ComealongwayEdit/Delete MessageReply w/QuoteDirect Link to This Post

Comealongway

586 posts
Member since Dec 2002
Regarding the stage 2 side scoop install, has anyone trimmed the rocker panel of the tabs that clip into the GT mouldings, or have you perhaps cut holes in the new mouldings for the rocker panel?
IP: Logged
Sourmug
Member
Posts: 4538
From: Calgary, Alberta, Canada
Registered: Sep 2002


Feedback score:    (29)
Leave feedback


Total ratings: 144
Rate this member

Report this Post07-05-2006 07:06 PM Click Here to See the Profile for SourmugSend a Private Message to SourmugEdit/Delete MessageReply w/QuoteDirect Link to This Post
Post some pictures of your progress.

I'm not quite sure what you are asking on the scoops but you have to cut in all the mounting screw holes etc into the scoop edges.

Are you going to come to the CFOG meeting tomorrow? It should be a good one, Don will be in talking about fibreglass and mold making.

Nolan
IP: Logged
Sourmug
Member
Posts: 4538
From: Calgary, Alberta, Canada
Registered: Sep 2002


Feedback score:    (29)
Leave feedback


Total ratings: 144
Rate this member

Report this Post07-06-2006 12:36 AM Click Here to See the Profile for SourmugSend a Private Message to SourmugEdit/Delete MessageReply w/QuoteDirect Link to This Post
I have been busy cleaning up the rear strut assemblies:


The inside of the strut towers look good, no rust or visible wear. I'll just clean these up and give them a coat of paint.


I have also been working on the front of space frame. Here's how it looked before I started:


[This message has been edited by Sourmug (edited 05-28-2007).]

IP: Logged
Sourmug
Member
Posts: 4538
From: Calgary, Alberta, Canada
Registered: Sep 2002


Feedback score:    (29)
Leave feedback


Total ratings: 144
Rate this member

Report this Post07-06-2006 12:37 AM Click Here to See the Profile for SourmugSend a Private Message to SourmugEdit/Delete MessageReply w/QuoteDirect Link to This Post

Sourmug

4538 posts
Member since Sep 2002
And how it looked naked:


Over all not bad for a car that is almost 20 years old, just dirt and minor surface rust. As can be seen there were a few parts missing, the right hand support under the energy absorber and one of the lower fascia sheet metal supports.

There was some minor damage to the underside. The previous owner has apparently hit something damaging the left side "K" member and scored the underside of the front cross member:

And pinched the brake line to the rear brakes:

(sorry for the poor pictures)

[This message has been edited by Sourmug (edited 05-28-2007).]

IP: Logged
Sourmug
Member
Posts: 4538
From: Calgary, Alberta, Canada
Registered: Sep 2002


Feedback score:    (29)
Leave feedback


Total ratings: 144
Rate this member

Report this Post07-06-2006 12:53 AM Click Here to See the Profile for SourmugSend a Private Message to SourmugEdit/Delete MessageReply w/QuoteDirect Link to This Post

Sourmug

4538 posts
Member since Sep 2002
I did not notice any problems with the rear brakes when I had it on the road before but I'm going to replace the line just to be safe.
Here's a picture of the "K" member out of the car:

The lower attachment and the bolt head were almost shaved off flat. It has now been replaced. There doesn't seem to be any other "damage".

After a little bit of work the front now looks like this:


Nolan

[This message has been edited by Sourmug (edited 05-28-2007).]

IP: Logged
Sourmug
Member
Posts: 4538
From: Calgary, Alberta, Canada
Registered: Sep 2002


Feedback score:    (29)
Leave feedback


Total ratings: 144
Rate this member

Report this Post07-07-2006 02:21 PM Click Here to See the Profile for SourmugSend a Private Message to SourmugEdit/Delete MessageReply w/QuoteDirect Link to This Post
I have the day off today, Parade day for the Calgary Stampede! The Greatest Outdoor Show on Earth or so they say. Actually it's a fairy big deal with over a million people through the gates in a 10 day period. I have lived in Calgary all my life so I'm probably less interested than most. Here's a link if you're curious about the Stampede: http://calgarystampede.com/

Taking advantage of the day off I have finished the rear struts and they turned out pretty good, much better than how they looked coming out of the car.

Here are my next victims


Have a great weekend everyone!
Nolan

[This message has been edited by Sourmug (edited 05-28-2007).]

IP: Logged
Sourmug
Member
Posts: 4538
From: Calgary, Alberta, Canada
Registered: Sep 2002


Feedback score:    (29)
Leave feedback


Total ratings: 144
Rate this member

Report this Post07-08-2006 10:54 PM Click Here to See the Profile for SourmugSend a Private Message to SourmugEdit/Delete MessageReply w/QuoteDirect Link to This Post
I had some time today to do a little bit of work on the rear knuckles etc. I started by removing the tie rods. Here is a picture of the puller that I use:

And this is it in position:

It works pretty slick. Next I had to remove the 30mm hub nut on the ends of the haft shafts. I know that the manual says to use a large screwdriver to prevent the hub from turning but I used a deep socket slipped over the end of one of the bolts that holds the hub to the knuckle. I ten used the impact gun to remove the large nut. This worked quite well:

Once that was done I also used the impact gun to remove the 3 hub/knuckle bolts. If you can afford a decent compressor and tools it sure makes things easier.
To remove the hubs from the half shafts I used a 6" gear puller rather than the special GM tool. One was a real bear to get off but the other was quite easy to remove.

I also cleaned up the knuckles using the wire brush in the bench grinder and then I drilled out the tapped caliper holes and re-tapped them for the 12m 1.50 fasteners that are used to mount the adapters for the 11.25 brake upgrade.

The knuckles were then painted.


And while the paint was drying I also cleaned and painted the inside of both strut towers:


So all in all not a bad day.
Nolan

[This message has been edited by Sourmug (edited 05-28-2007).]

IP: Logged
PFF
System Bot
355Fiero
Member
Posts: 548
From: Victoria, BC Canada
Registered: Dec 2004


Feedback score: (2)
Leave feedback

Rate this member

Report this Post07-09-2006 03:32 AM Click Here to See the Profile for 355FieroSend a Private Message to 355FieroEdit/Delete MessageReply w/QuoteDirect Link to This Post
Nolan;

You are doing an excellent job on your car. It is looking very nice.

Keep up the great work as you are going to have a very beautiful vehicle when done. Gonna chop it as well?? ;o)

I put the new project on a trailer tonight to take it to a buddy's so I can get primer on my current project. Should be primered up in a week or so. Then on to the rest of the molds I showed you guys the other night and finish this bad boy off.

Keep up your work you are doing an excellent job.

Cheers
Don

IP: Logged
Toaster_Man
Member
Posts: 552
From: Alton, IL
Registered: Mar 2005


Feedback score: (1)
Leave feedback

Rate this member

Report this Post07-09-2006 01:00 PM Click Here to See the Profile for Toaster_ManSend a Private Message to Toaster_ManEdit/Delete MessageReply w/QuoteDirect Link to This Post
Did you paint the front end too, or were you just lucky enough to have it clean up that nice?

Fantastic job by the way. I love your attention to detail.
IP: Logged
Sourmug
Member
Posts: 4538
From: Calgary, Alberta, Canada
Registered: Sep 2002


Feedback score:    (29)
Leave feedback


Total ratings: 144
Rate this member

Report this Post07-09-2006 05:06 PM Click Here to See the Profile for SourmugSend a Private Message to SourmugEdit/Delete MessageReply w/QuoteDirect Link to This Post
Hi Don:
Thanks for your comments. What I'm doing is no where as complicated as your 355 conversion but I'm having fun. NO chop! I want to be able to fit into it once it's done.

Toaster_Man:
I painted the front end as well after it was all cleaned up and treated with Rust Mort. Thanks for you comments as well. It's nice to know that others are enjoying this thread too.

Nolan
IP: Logged
Sourmug
Member
Posts: 4538
From: Calgary, Alberta, Canada
Registered: Sep 2002


Feedback score:    (29)
Leave feedback


Total ratings: 144
Rate this member

Report this Post07-10-2006 10:02 PM Click Here to See the Profile for SourmugSend a Private Message to SourmugEdit/Delete MessageReply w/QuoteDirect Link to This Post
Here are the rear suspension pieces all cleaned up:

And assembled:


Nolan

[This message has been edited by Sourmug (edited 05-28-2007).]

IP: Logged
Blacktree
Member
Posts: 20770
From: Central Florida
Registered: Dec 2001


Feedback score:    (12)
Leave feedback


Total ratings: 350
Rate this member

Report this Post07-11-2006 12:30 AM Click Here to See the Profile for BlacktreeClick Here to visit Blacktree's HomePageSend a Private Message to BlacktreeEdit/Delete MessageReply w/QuoteDirect Link to This Post
Wow!

You're going to have to trailer the car everywhere to keep from dirtying up all that pretty paint.

IP: Logged
Fiero1Fan
Member
Posts: 4364
From: Brachttal, Germany
Registered: Sep 2005


Feedback score:    (19)
Leave feedback


Total ratings: 100
Rate this member

Report this Post07-11-2006 02:55 AM Click Here to See the Profile for Fiero1FanClick Here to visit Fiero1Fan's HomePageSend a Private Message to Fiero1FanEdit/Delete MessageReply w/QuoteDirect Link to This Post
He just wants to have the fun of cleaning everything up again after he gets back from where ever he went!! I will have the same fun every winter after a summer of sun and fun!! That is what the winters are for. Cleaning and Detailing, Detailing and Cleaning.

That does look good though Nolan. Keep up the good work.
IP: Logged
Comealongway
Member
Posts: 586
From: Calgary, Alberta, Canada
Registered: Dec 2002


Feedback score: N/A
Leave feedback

Rate this member

Report this Post07-11-2006 10:43 AM Click Here to See the Profile for ComealongwaySend a Private Message to ComealongwayEdit/Delete MessageReply w/QuoteDirect Link to This Post


In this picture you can see the holes that the rocker panel would clip into, so you think that stage 2 scoops should have this aswell?
IP: Logged
Sourmug
Member
Posts: 4538
From: Calgary, Alberta, Canada
Registered: Sep 2002


Feedback score:    (29)
Leave feedback


Total ratings: 144
Rate this member

Report this Post07-11-2006 02:13 PM Click Here to See the Profile for SourmugSend a Private Message to SourmugEdit/Delete MessageReply w/QuoteDirect Link to This Post
Comealongway:

I don't know if you need those holes or not as I have not yet had a really good look at what is required. You may want to bring that up in a thread with some of the people who have completed the installation of the stage 2 scoops. I just haven't gotten there yet.

Blacktree/Fiero1Fan:


Nolan
IP: Logged
Fiero1Fan
Member
Posts: 4364
From: Brachttal, Germany
Registered: Sep 2005


Feedback score:    (19)
Leave feedback


Total ratings: 100
Rate this member

Report this Post07-11-2006 04:51 PM Click Here to See the Profile for Fiero1FanClick Here to visit Fiero1Fan's HomePageSend a Private Message to Fiero1FanEdit/Delete MessageReply w/QuoteDirect Link to This Post
 
quote
Originally posted by Sourmug:

Blacktree/Fiero1Fan:


Nolan


Hey, I resemble that remark!!
IP: Logged
Sourmug
Member
Posts: 4538
From: Calgary, Alberta, Canada
Registered: Sep 2002


Feedback score:    (29)
Leave feedback


Total ratings: 144
Rate this member

Report this Post07-11-2006 11:27 PM Click Here to See the Profile for SourmugSend a Private Message to SourmugEdit/Delete MessageReply w/QuoteDirect Link to This Post
So my next modification has arrived:


These are a set of Norm's recessed lights that I purchased from Low_Key. My wife isn't sure that she likes these lights, she much prefers the stock pop ups. Fierosound doesn't like them either. I don't know. I think the stock lights are too high when they are up and I have not seen a set of slim pop ups that I like.

What do you think? I'd like to hear some peoples thoughts and experiences with these.

Thanks
Nolan

[This message has been edited by Sourmug (edited 07-12-2006).]

IP: Logged
PFF
System Bot
Sourmug
Member
Posts: 4538
From: Calgary, Alberta, Canada
Registered: Sep 2002


Feedback score:    (29)
Leave feedback


Total ratings: 144
Rate this member

Report this Post07-13-2006 03:03 PM Click Here to See the Profile for SourmugSend a Private Message to SourmugEdit/Delete MessageReply w/QuoteDirect Link to This Post
Just a bump. Looking for some opinions and experiences.

Thanks
Nolan
IP: Logged
Blacktree
Member
Posts: 20770
From: Central Florida
Registered: Dec 2001


Feedback score:    (12)
Leave feedback


Total ratings: 350
Rate this member

Report this Post07-13-2006 03:12 PM Click Here to See the Profile for BlacktreeClick Here to visit Blacktree's HomePageSend a Private Message to BlacktreeEdit/Delete MessageReply w/QuoteDirect Link to This Post
Considering that I'm a flushmount headlight owner, I say they look great.
IP: Logged
Fiero1Fan
Member
Posts: 4364
From: Brachttal, Germany
Registered: Sep 2005


Feedback score:    (19)
Leave feedback


Total ratings: 100
Rate this member

Report this Post07-13-2006 03:57 PM Click Here to See the Profile for Fiero1FanClick Here to visit Fiero1Fan's HomePageSend a Private Message to Fiero1FanEdit/Delete MessageReply w/QuoteDirect Link to This Post
Nolan, have you seen what Yellowstone did to his lights? What dou you think of it?
https://www.fiero.nl/forum/Forum1/HTML/056986.html
IP: Logged
Sourmug
Member
Posts: 4538
From: Calgary, Alberta, Canada
Registered: Sep 2002


Feedback score:    (29)
Leave feedback


Total ratings: 144
Rate this member

Report this Post07-13-2006 04:08 PM Click Here to See the Profile for SourmugSend a Private Message to SourmugEdit/Delete MessageReply w/QuoteDirect Link to This Post
Blacktree:

Have you had any issues or concerns? How well do the lights illuminate the road? What about cleaning under the lens?

Timo:

I had forgotten about his modification. It doesn't look too bad, I'll have to think about it.

Thanks
Nolan

PS: My wife thinks this is a Fiero's impersonation of Darth Vader

[This message has been edited by Sourmug (edited 07-13-2006).]

IP: Logged
Blacktree
Member
Posts: 20770
From: Central Florida
Registered: Dec 2001


Feedback score:    (12)
Leave feedback


Total ratings: 350
Rate this member

Report this Post07-13-2006 04:55 PM Click Here to See the Profile for BlacktreeClick Here to visit Blacktree's HomePageSend a Private Message to BlacktreeEdit/Delete MessageReply w/QuoteDirect Link to This Post
First of all, I should mention that my headlights are from Kris Munson, and use Camaro bulbs. I believe Norm's are different. So my impressions of light output and beam pattern probably don't apply to your setup. But that said, I'm willing to bet that you'd be better off with a set of fog/driving lights to augment the low-beams.

Every so often, I have to pop the hood and clean out the dust under the lenses. For me, that task is fairly easy because my headlight bulbs are mounted to the frame rather than the hood. Although, getting the hood and lights to match up can be a pain.

Hope that helps. And keep up the good work!
IP: Logged
Sourmug
Member
Posts: 4538
From: Calgary, Alberta, Canada
Registered: Sep 2002


Feedback score:    (29)
Leave feedback


Total ratings: 144
Rate this member

Report this Post07-14-2006 12:55 AM Click Here to See the Profile for SourmugSend a Private Message to SourmugEdit/Delete MessageReply w/QuoteDirect Link to This Post
Blacktree:

Thanks for the info.

IP: Logged
Sourmug
Member
Posts: 4538
From: Calgary, Alberta, Canada
Registered: Sep 2002


Feedback score:    (29)
Leave feedback


Total ratings: 144
Rate this member

Report this Post07-14-2006 01:01 AM Click Here to See the Profile for SourmugSend a Private Message to SourmugEdit/Delete MessageReply w/QuoteDirect Link to This Post

Sourmug

4538 posts
Member since Sep 2002
Oh, and I picked up these for later...

[This message has been edited by Sourmug (edited 05-28-2007).]

IP: Logged
Fiero1Fan
Member
Posts: 4364
From: Brachttal, Germany
Registered: Sep 2005


Feedback score:    (19)
Leave feedback


Total ratings: 100
Rate this member

Report this Post07-14-2006 01:42 AM Click Here to See the Profile for Fiero1FanClick Here to visit Fiero1Fan's HomePageSend a Private Message to Fiero1FanEdit/Delete MessageReply w/QuoteDirect Link to This Post
Darth Vader immitation...........that is just funny!!! She is right too!!!
IP: Logged
Sourmug
Member
Posts: 4538
From: Calgary, Alberta, Canada
Registered: Sep 2002


Feedback score:    (29)
Leave feedback


Total ratings: 144
Rate this member

Report this Post07-15-2006 12:34 AM Click Here to See the Profile for SourmugSend a Private Message to SourmugEdit/Delete MessageReply w/QuoteDirect Link to This Post
Well, I have started to tear apart the interior. I must admit that this is the modification that has me the most worried. I am not by any stretch an electrical person. I can wire a house and a garage but this will be a little more complex I am sure. I was going to wait until the car was running before I started this but I don't know when that will be. The funds are a little short as I am trying to keep this on my monthly budget so I thought that I might as well get started on this as I already have the Stealth dash.

I know that I am going to need help with this so I hope you guys are up to the task!

So I have started the demolition of the interior:


The car currently has an aftermarket alarm system that was installed by the previous owner. I think it's an el cheapo model so I am going to remove it and restore the wiring to stock condition. As you can see in the next picture there are a couple of "kill" switches that were mounted to the underside of the cluster housing. I don't think these really did anything anyways:

Here's the shot with the cluster removed:

And the dash removed:


I was quite amazed just how little hardware actually holds the dash in place.

That's it for tonight. Well it's has begun...

Nolan

[This message has been edited by Sourmug (edited 05-28-2007).]

IP: Logged
Previous Page | Next Page

This topic is 18 pages long:  1   2   3   4   5   6   7   8   9   10   11   12   13   14   15   16   17   18 
next newest topic | next oldest topic

All times are ET (US)

Post New Topic  Post A Reply
Hop to:

Contact Us | Back To Main Page

Advertizing on PFF | Fiero Parts Vendors
PFF Merchandise | Fiero Gallery | Ogre's Cave
Real-Time Chat | Fiero Related Auctions on eBay


Copyright (c) 1999, C. Pennock