The fun trick of a Fiero cooling system relative to a FWD car's cooling system is that the Fiero has two high points.
I never ran a pressurized surge tank on my Northstar car, BUT I did run a lower pressure cap at the back than the front. I also capped off the overflow nipple at the back. That way when the system warms up and burps air, it burps air from the back first, but when it cools back down, it has to draw coolant from the stock overflow bottle at the front. That way I purged both high points of the system from one bottle.
You can probably do something similar for your system... you just have a surge tank where I have an inline filler neck.
If you keep the system basically as the stock 3.6 system, you'll need to manually bleed the radiator. If you keep the Fiero overflow bottle up front, but try to make yours work like mine, then you'll end up filling the surge tank to the brim, which may not be a great thing.
Actually... you may be able to automatically bleed the radiator by running the vent line from your radiator cap under the car all the way back to your surge tank...
Once the radiator is manually "burped" , will it stay that way or will it have to be redone from time to time?
In a perfect world in which you only ever send liquid coolant to the radiator, it should stay that way... but the world isn't perfect and if you don't allow some means of burping the radiator, you're likely to accumulate a gas bubble over time. Try it with a no-vent cap and see what happens, but be prepared to add a vent if that doesn't work well.
In a perfect world in which you only ever send liquid coolant to the radiator, it should stay that way... but the world isn't perfect and if you don't allow some means of burping the radiator, you're likely to accumulate a gas bubble over time. Try it with a no-vent cap and see what happens, but be prepared to add a vent if that doesn't work well.
Thanks again for the info. I think I'll start with a 20 pound cap on the radiator. The cap on the surge tank in the engine compartment has the 20pound cap that was standard with the Impala. I think I will start with that and see how it works. My next question is , should I run an overflow tank on the radiator overflow line, or just dump it on the ground?
I did something similar with my 4.9. I completely removed the overflow from the front. The radiator got a 20 lb cap. I have a fill adapter at the engine, using a 15(?) lb cap. It has an overflow fitting piped to a reservoir in the engine compartment. (This reservoir is similar to the stock Fiero reservoir, except that it's at the highest point. It is not pressurized.) Prior to going with this setup, I used to lose a lot of coolant out of the front overflow. (Not really germane to this discussion, but I'm blaming it on the "stop leak" tablets that GM recommends for the 4.9. They tend to deposit grit on the radiator cap sealing surfaces. Not a good thing for a Fiero setup.) Since this change, I have not experienced a moments difficulty with coolant loss.
I can post a pic if you want, but I'm sure you get the idea.
[This message has been edited by Raydar (edited 08-21-2020).]
After a bit of thought,( I realize that's dangerous) I gotta ask, the Impala didn't have an overflow. Why do I need to add one?
The Impala only had one high point in the cooling system... the Fiero has two. If I do go with a pressurized surge tank, I'll probably keep it at the back with the stock Fiero overflow at the front.
However...
quote
Originally posted by Raydar:
I did something similar with my 4.9. I completely removed the overflow from the front. The radiator got a 20 lb cap. I have a fill adapter at the engine, using a 15(?) lb cap. It has an overflow fitting piped to a reservoir in the engine compartment. (This reservoir is similar to the stock Fiero reservoir, except that it's at the highest point. It is not pressurized.) Prior to going with this setup, I used to lose a lot of coolant out of the front overflow. (Not really germane to this discussion, but I'm blaming it on the "stop leak" tablets that GM recommends for the 4.9. They tend to deposit grit on the radiator cap sealing surfaces. Not a good thing for a Fiero setup.) Since this change, I have not experienced a moments difficulty with coolant loss.
I can post a pic if you want, but I'm sure you get the idea.
...maybe I'm too conservative about that and Raydar's way would work fine for you.
Raydar, do you check the level in the radiator regularly? Did you completely block off the overflow port on the radiator cap?
[This message has been edited by Will (edited 08-22-2020).]
...maybe I'm too conservative about that and Raydar's way would work fine for you.
Raydar, do you check the level in the radiator regularly? Did you completely block off the overflow port on the radiator cap?
The stock Fiero overflow tank in the front is not an option due to the reverse flow of the LFX, requiring that the new radiator have the return (high hose fitting) on the passenger side. This puts a radiator hose where the overflow tank was. The stock Fiero tank is not a good shape for the driver side, so getting rid of the tank makes a simple solution, if it will work. I could modify the radiator cap to prevent suction of air when contraction happens, by blocking the one way vent on the cap. Using a lower pressure cap (18 psi) on the pressurized Impala surge tank in the engine compartment would make the system very similar to the original Impala, but with an easy way to burp the front high point with the modified cap on the radiator. What do you think?
Ok, here is my next question. I am now working on my doors. Here is the situation. The 1988 doors have manual mirrors and windows. My 1986 parts car has power mirrors and windows. Unfortunately the parts car doors have broken handles, inside and outside, and bad hinges. The 88 has good handles and hinges. Now for the question. What is the easiest way to get to the hinge bolts? It looks like either the window tracks have to come out or maybe the door skin could give access to the bolts. Any advice is appreciated.
...maybe I'm too conservative about that and Raydar's way would work fine for you.
Raydar, do you check the level in the radiator regularly? Did you completely block off the overflow port on the radiator cap?
I wouldn't say you're too conservative. I just trust the front cap more than you do, apparently. Gotta do what works for you.
My front overflow is essentially non existent. I mean, the fitting is still there, but the cap is 20 lb, and non vented. (I don't think I've actually capped off the fitting. I need to check.) The only place it should ever vent is at the lower pressure cap, in the rear.
With that said, it has been that way for years, and I haven't had any issues. I think I may have added coolant once - maybe twice. And not a great amount. Mostly just topped up the reservoir/overflow. I've never seen any evidence of an air bubble in the system. No "twitching gauge" or funny noises. No overheating. (It did run very warm on one of our 100 degree days, with the A/C on and at 75 MPH, but that's a whole different issue.)
To directly answer your question... No. I haven't physically checked the radiator level. I haven't found it necessary. I figured that as soon as I crack the cap, any air is going to come out quickly, immediately followed by coolant. Although I suppose I could raise the front...
Radar, thanks for the info. I have decided to block the center check valve in the 20 psi cap on the radiator and go with a 15 on the surge tank in the rear. Sound familiar?
Moving on to the next little project, I am rebuilding my doors. I just ordered the window wipes from TFS, but I haven't been able to find some other parts. First on my list are the plastic bushings on the hinge detent rollers. Anyone know where they can be found?
I am looking for recommendations on hoses/fittings to connect the hydrolic clutch line to the slave cylinder fitting on my Saab F40 transmission. Can anyone provide part numbers or other info? Thanks
Moving on to the next little project, I am rebuilding my doors. I just ordered the window wipes from TFS, but I haven't been able to find some other parts. First on my list are the plastic bushings on the hinge detent rollers. Anyone know where they can be found?
Rodney Dickman sells detent roller kits with bronze bushings.
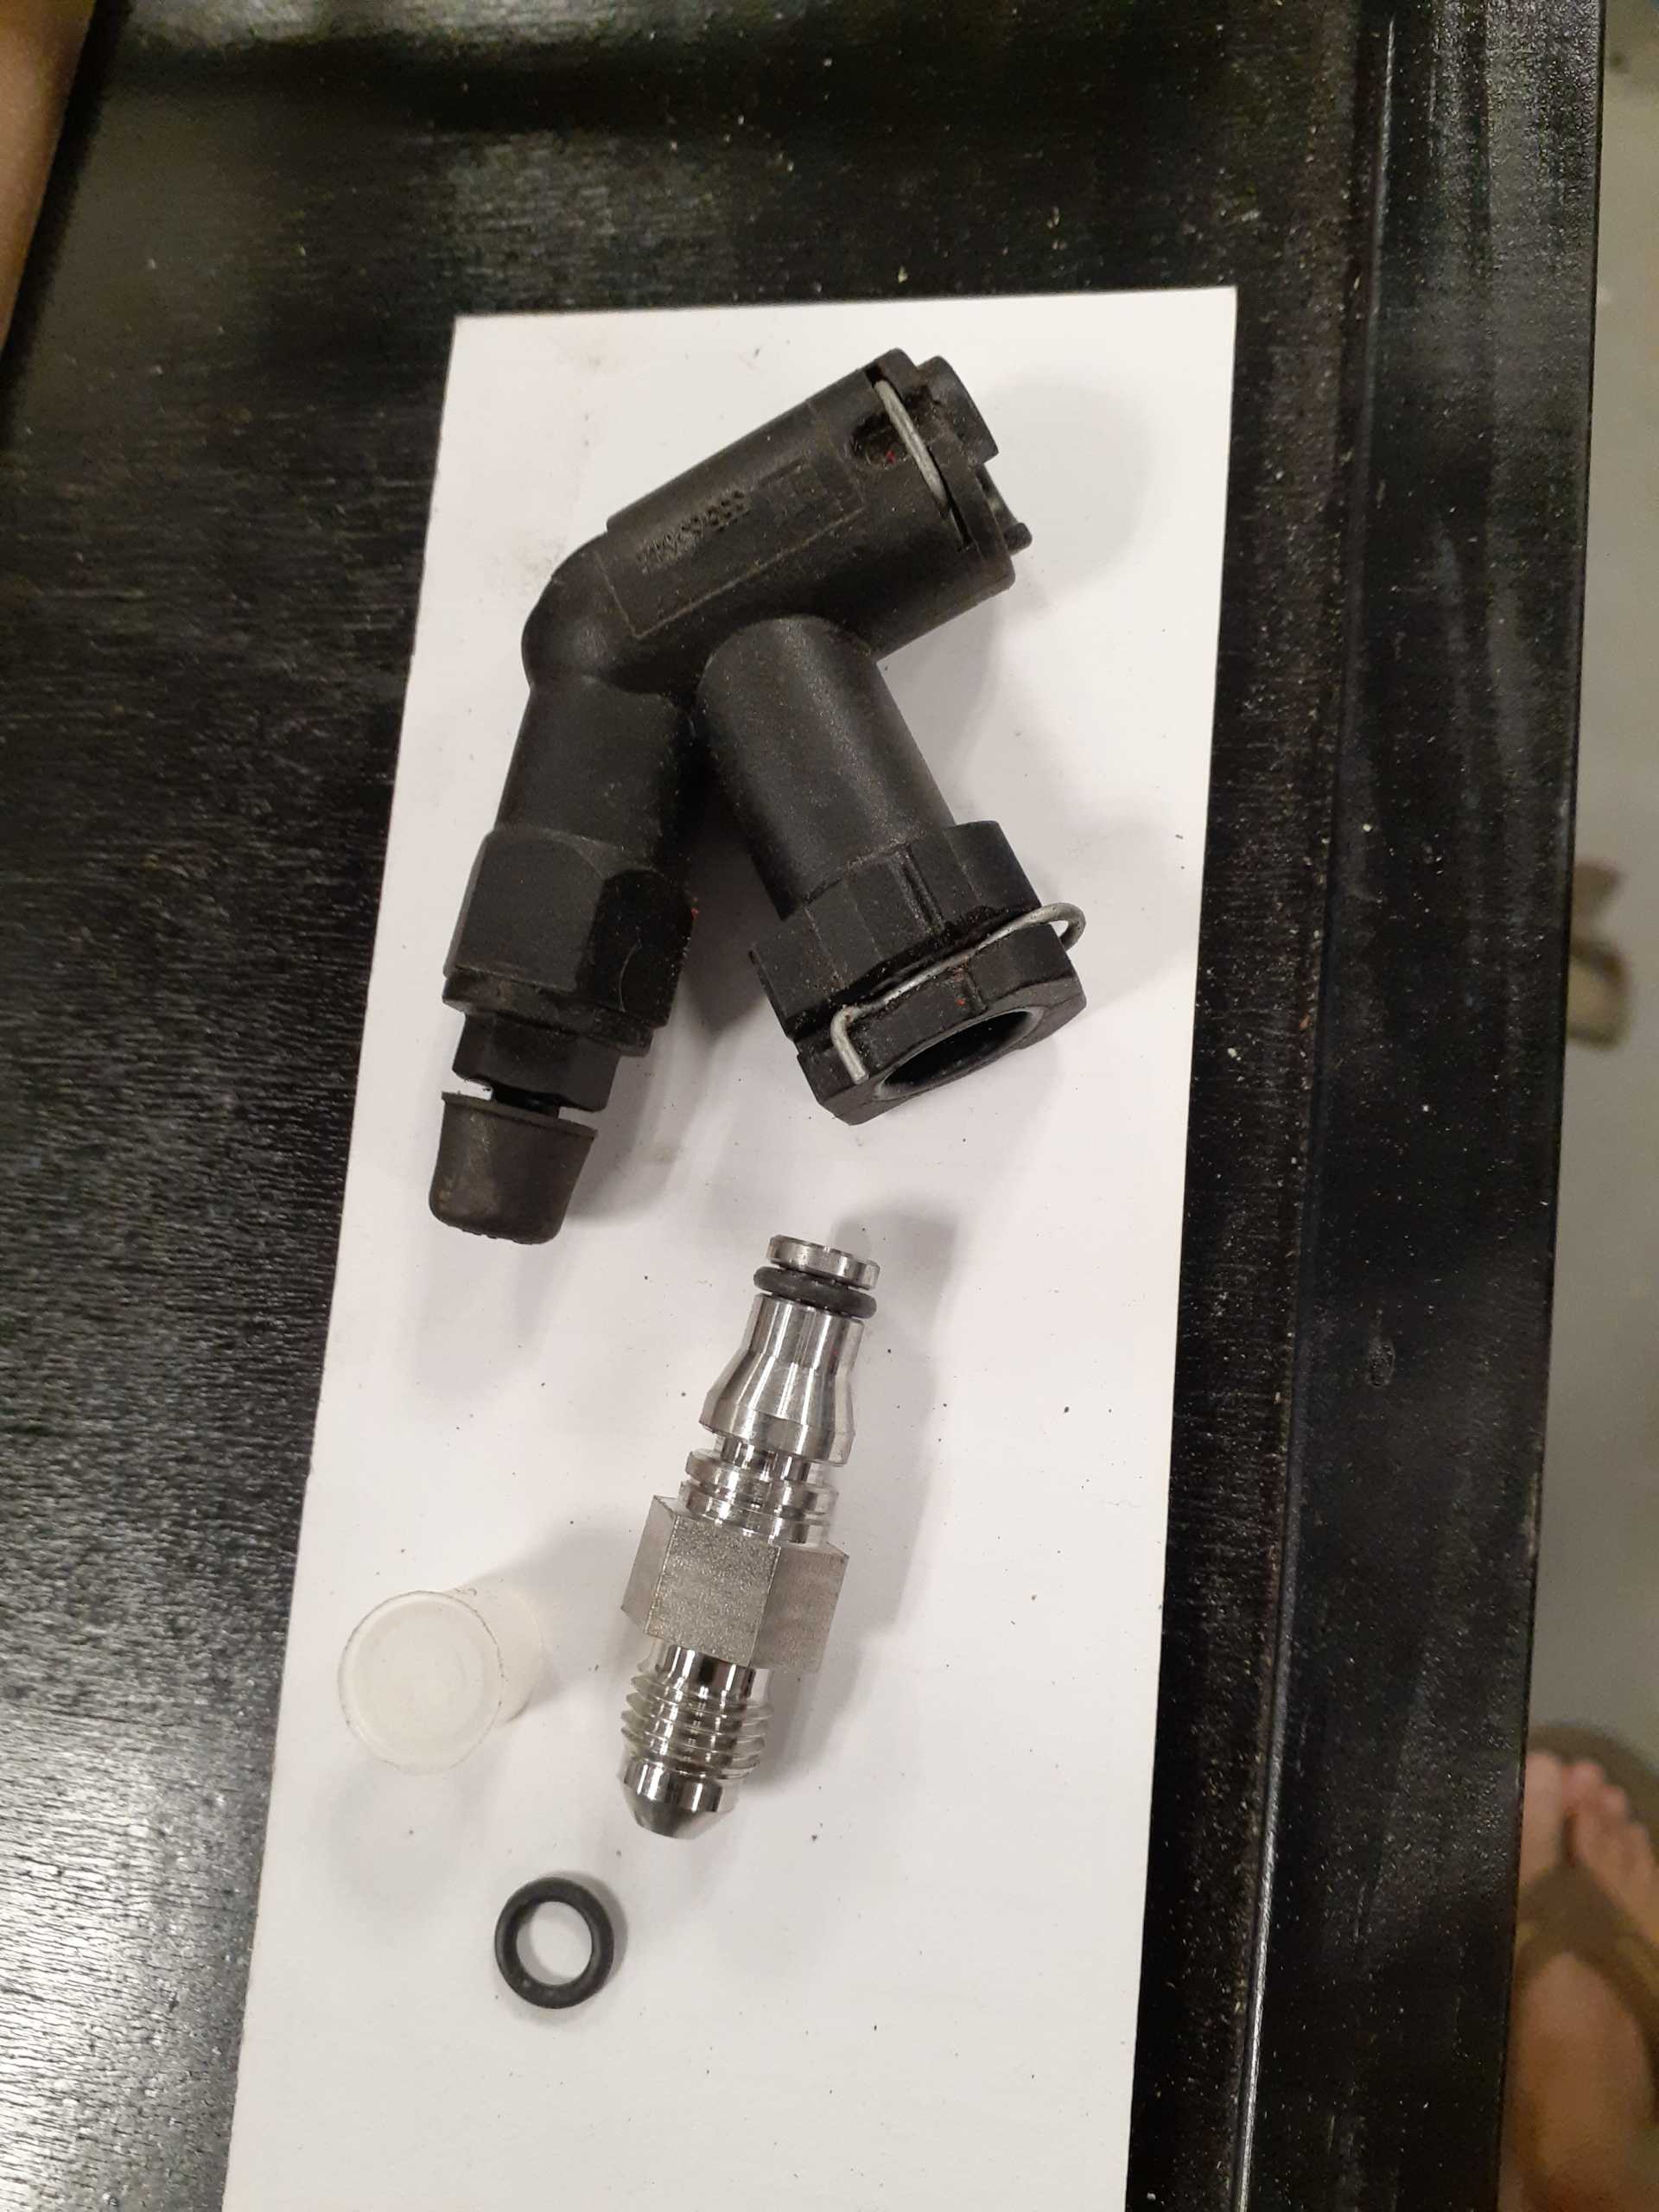
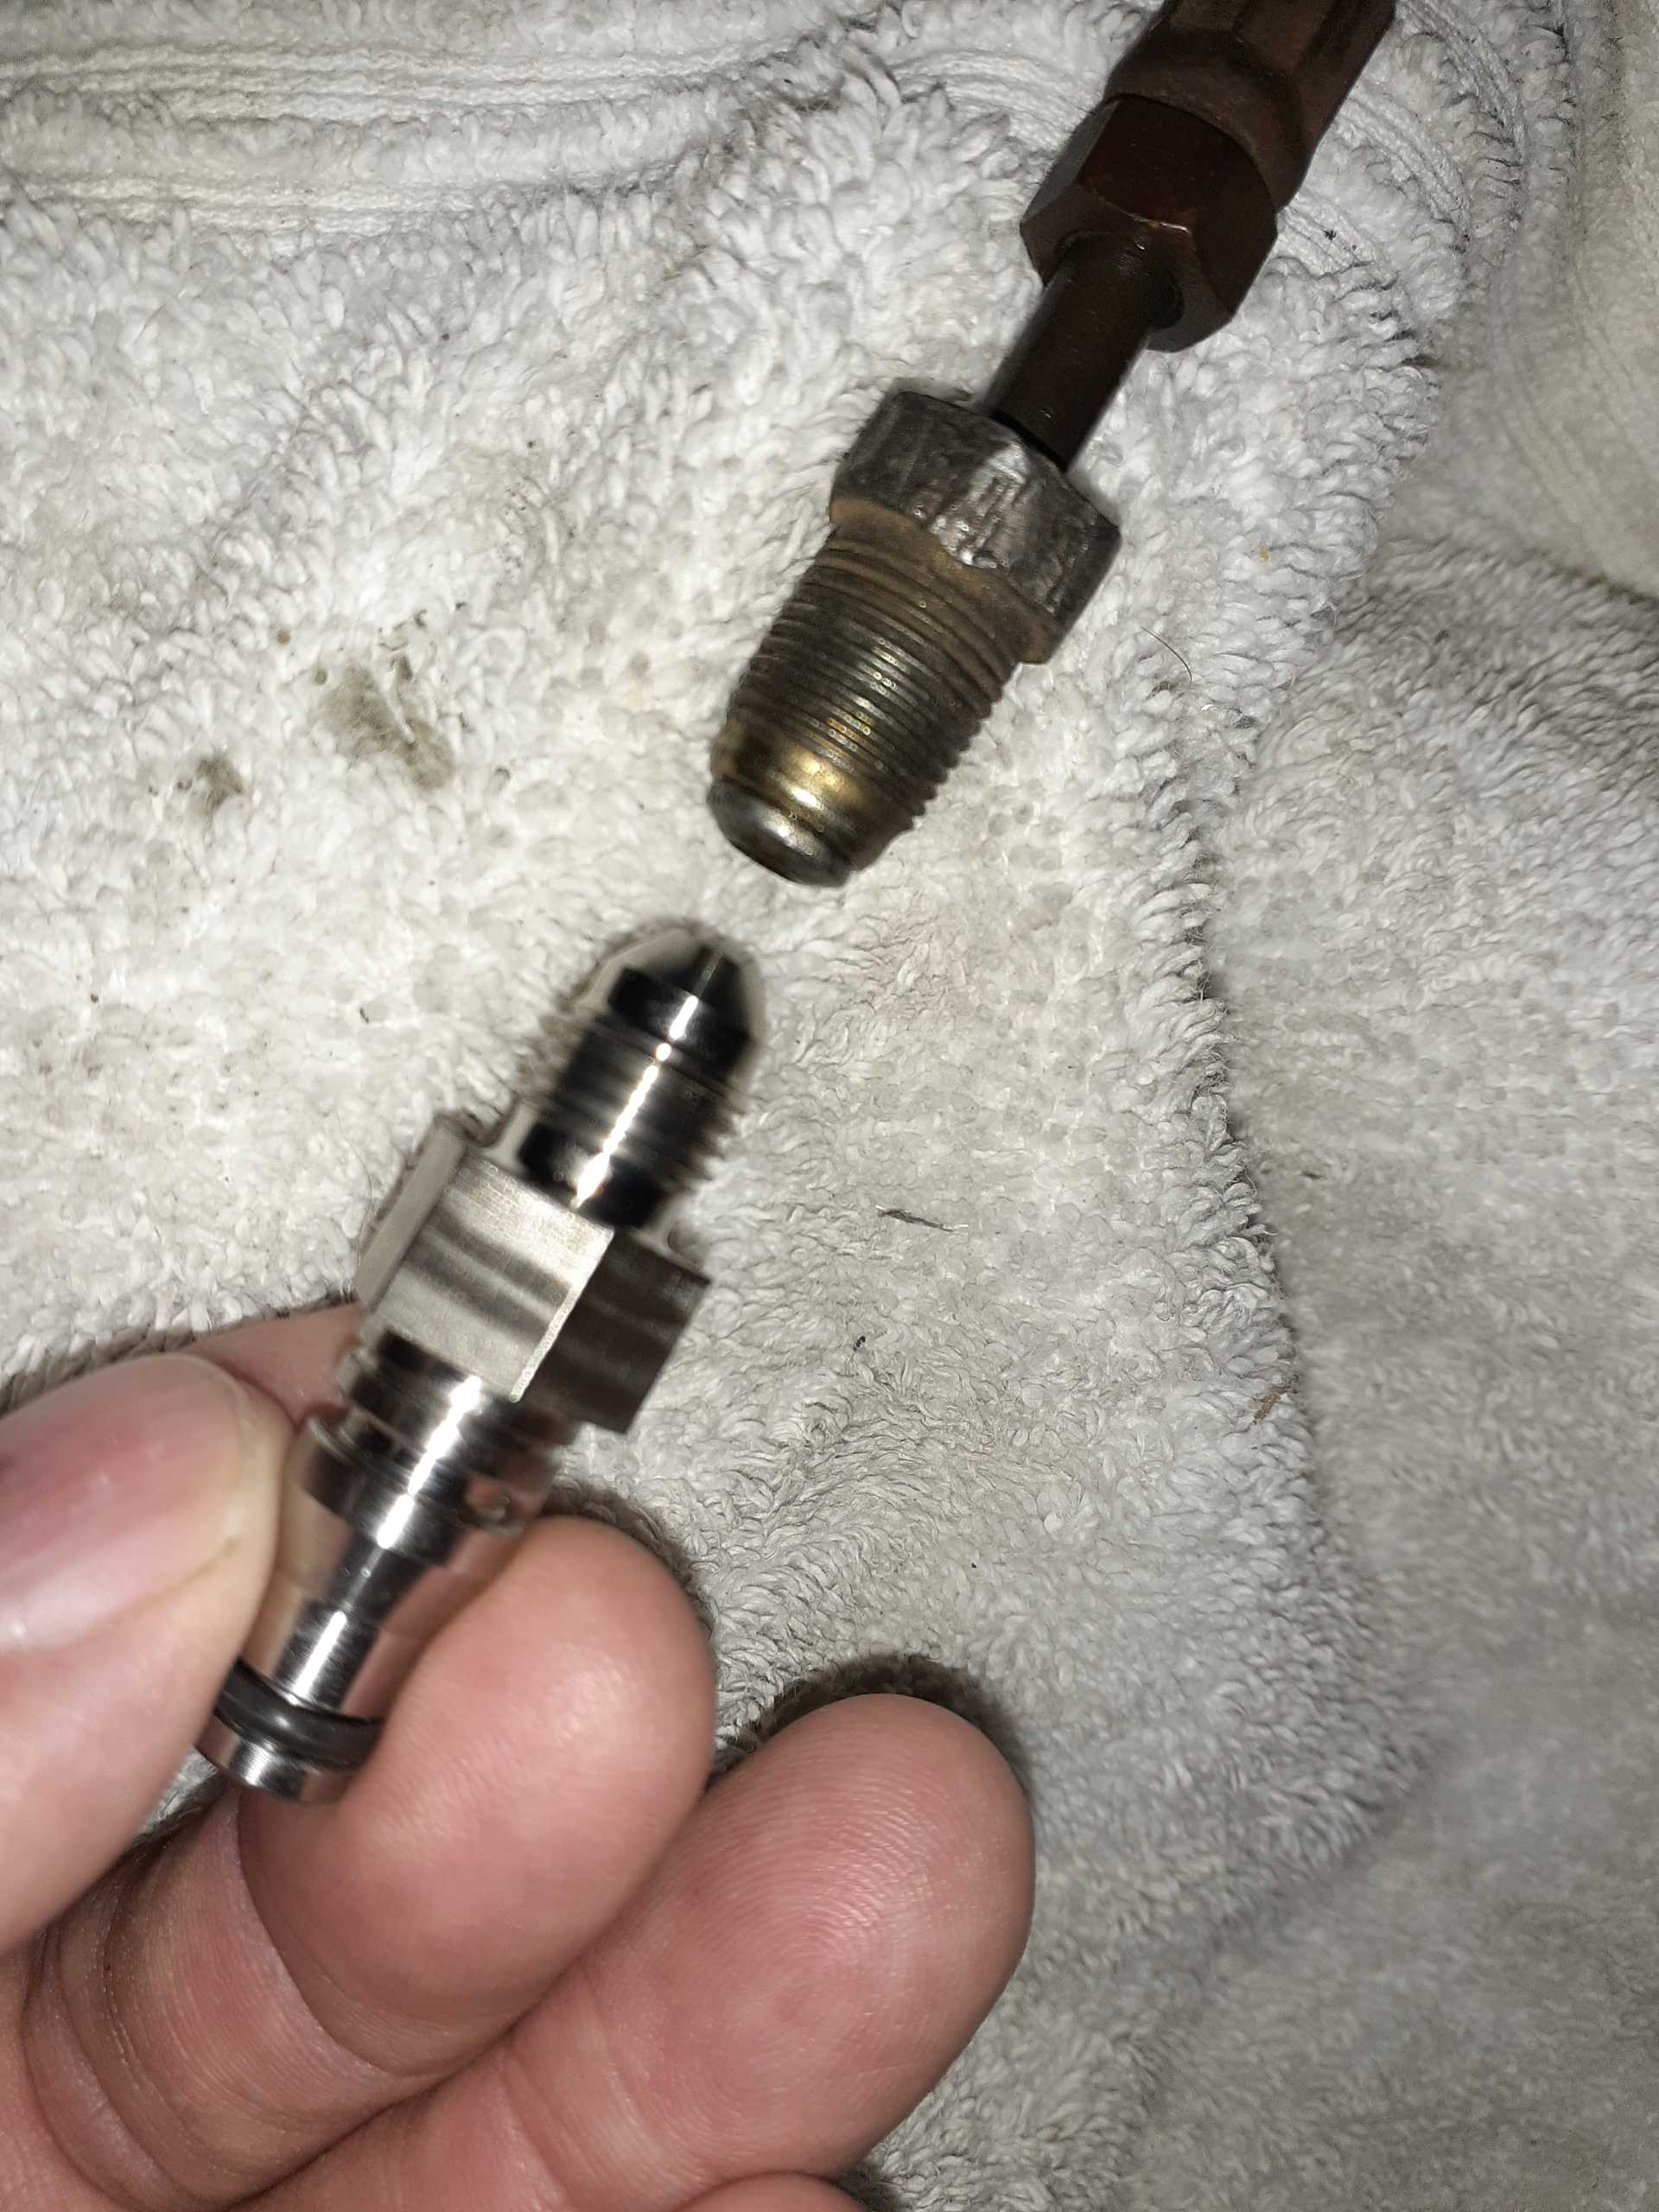
I was digging through some parts I bought almost 3 years ago, (yes, I have been working on it that long) and found these. Are these what I need for the clutch line?
[This message has been edited by Daryl M (edited 08-31-2020).]
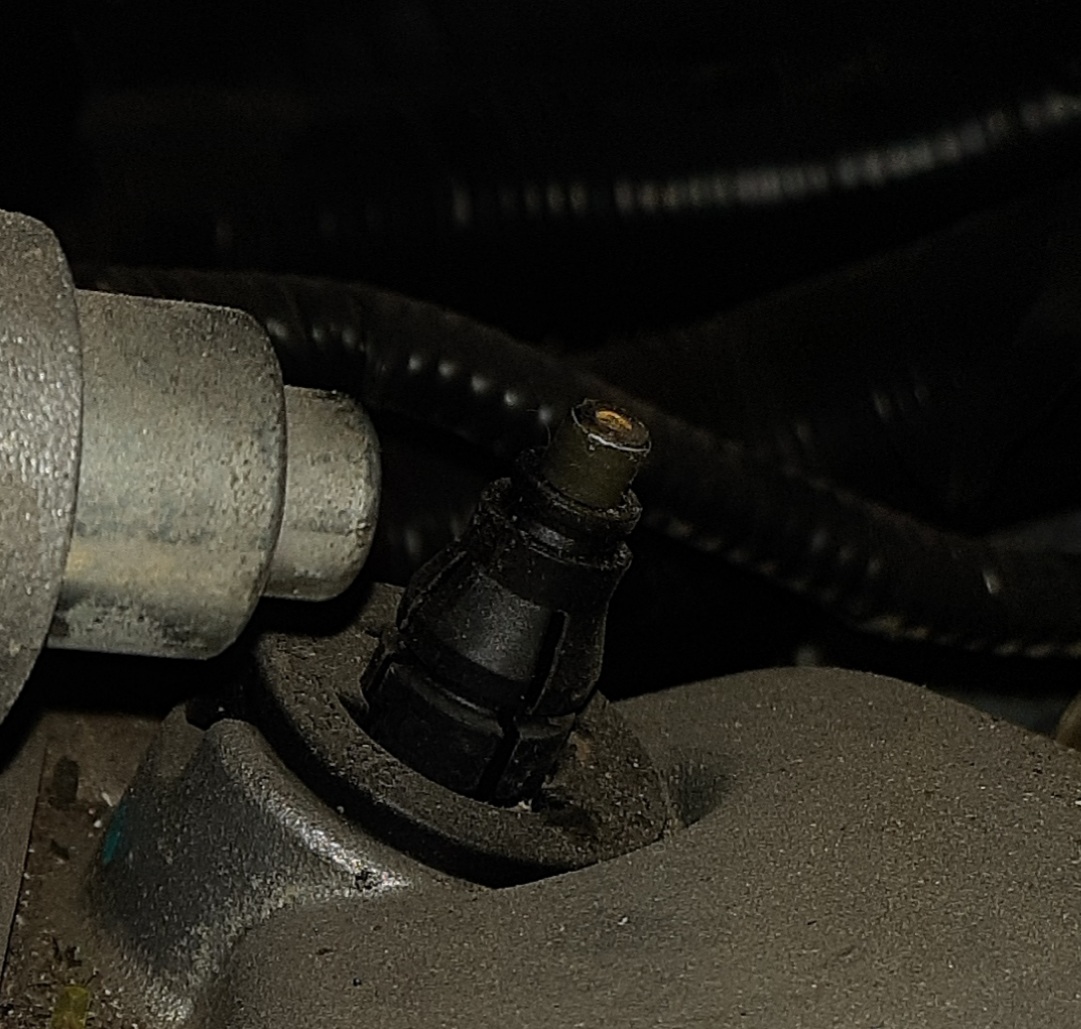
You should post a picture of the clutch line connector portion on the transmission. There are at least 2 different types.
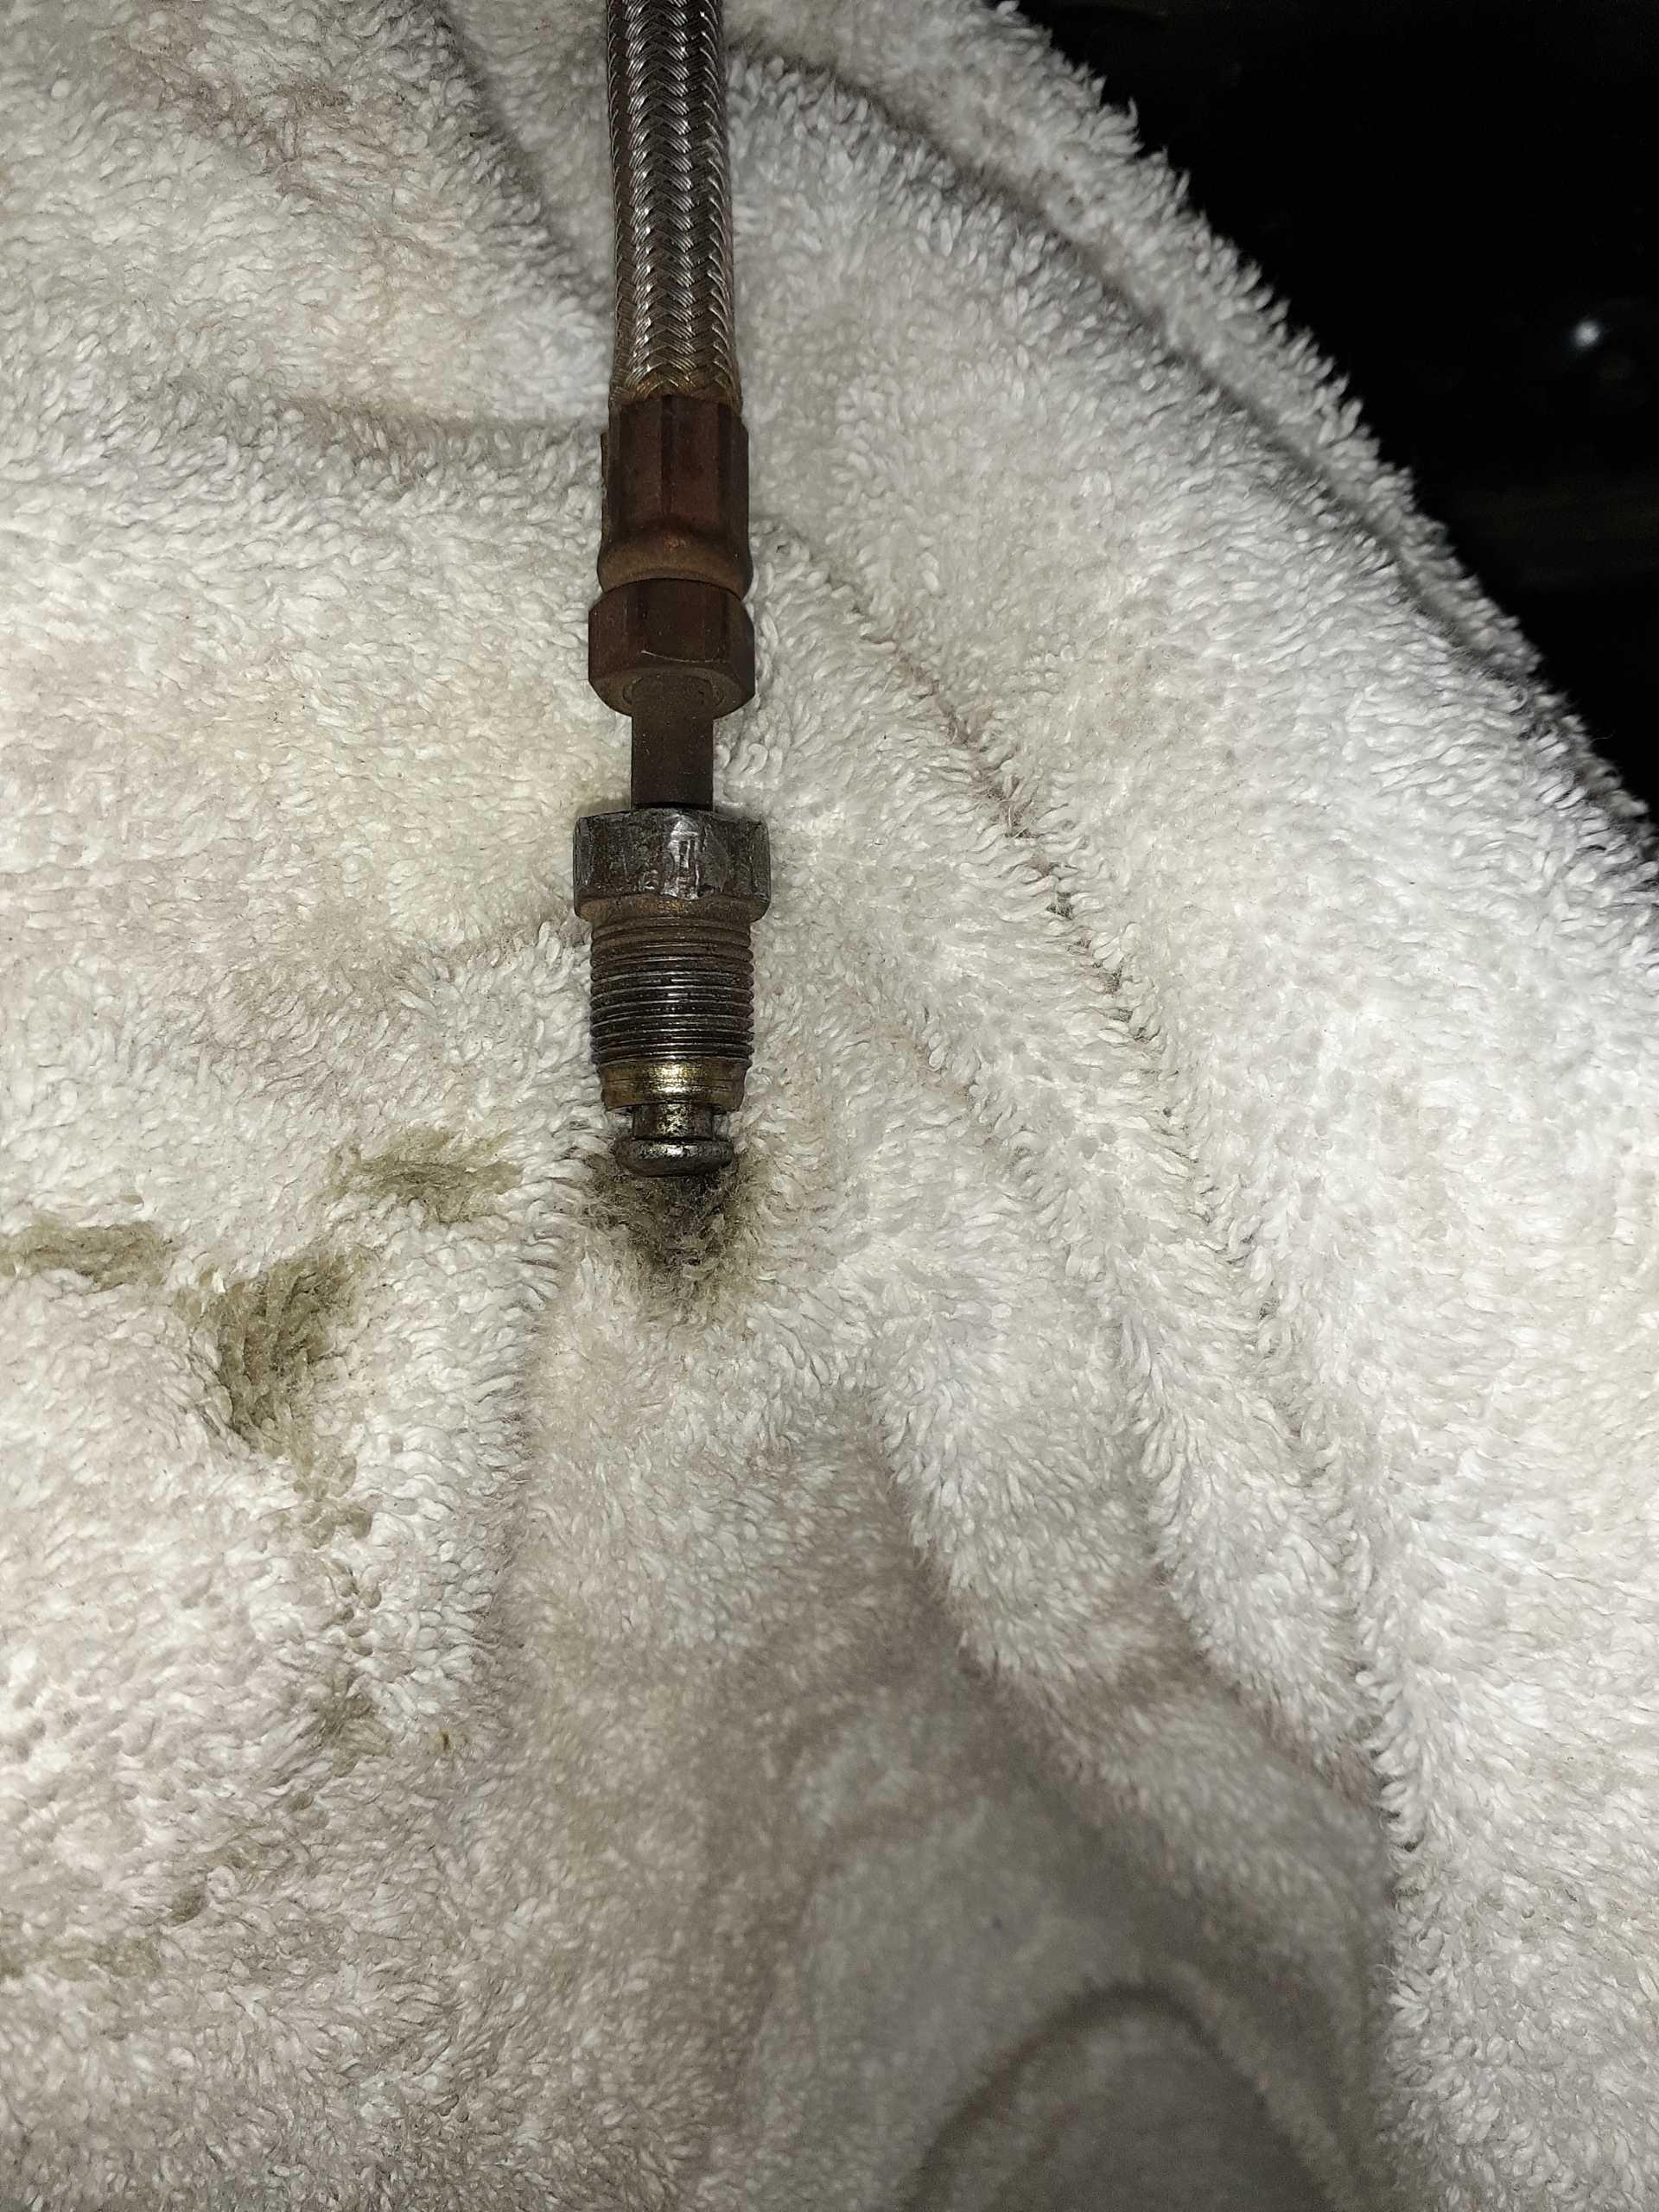
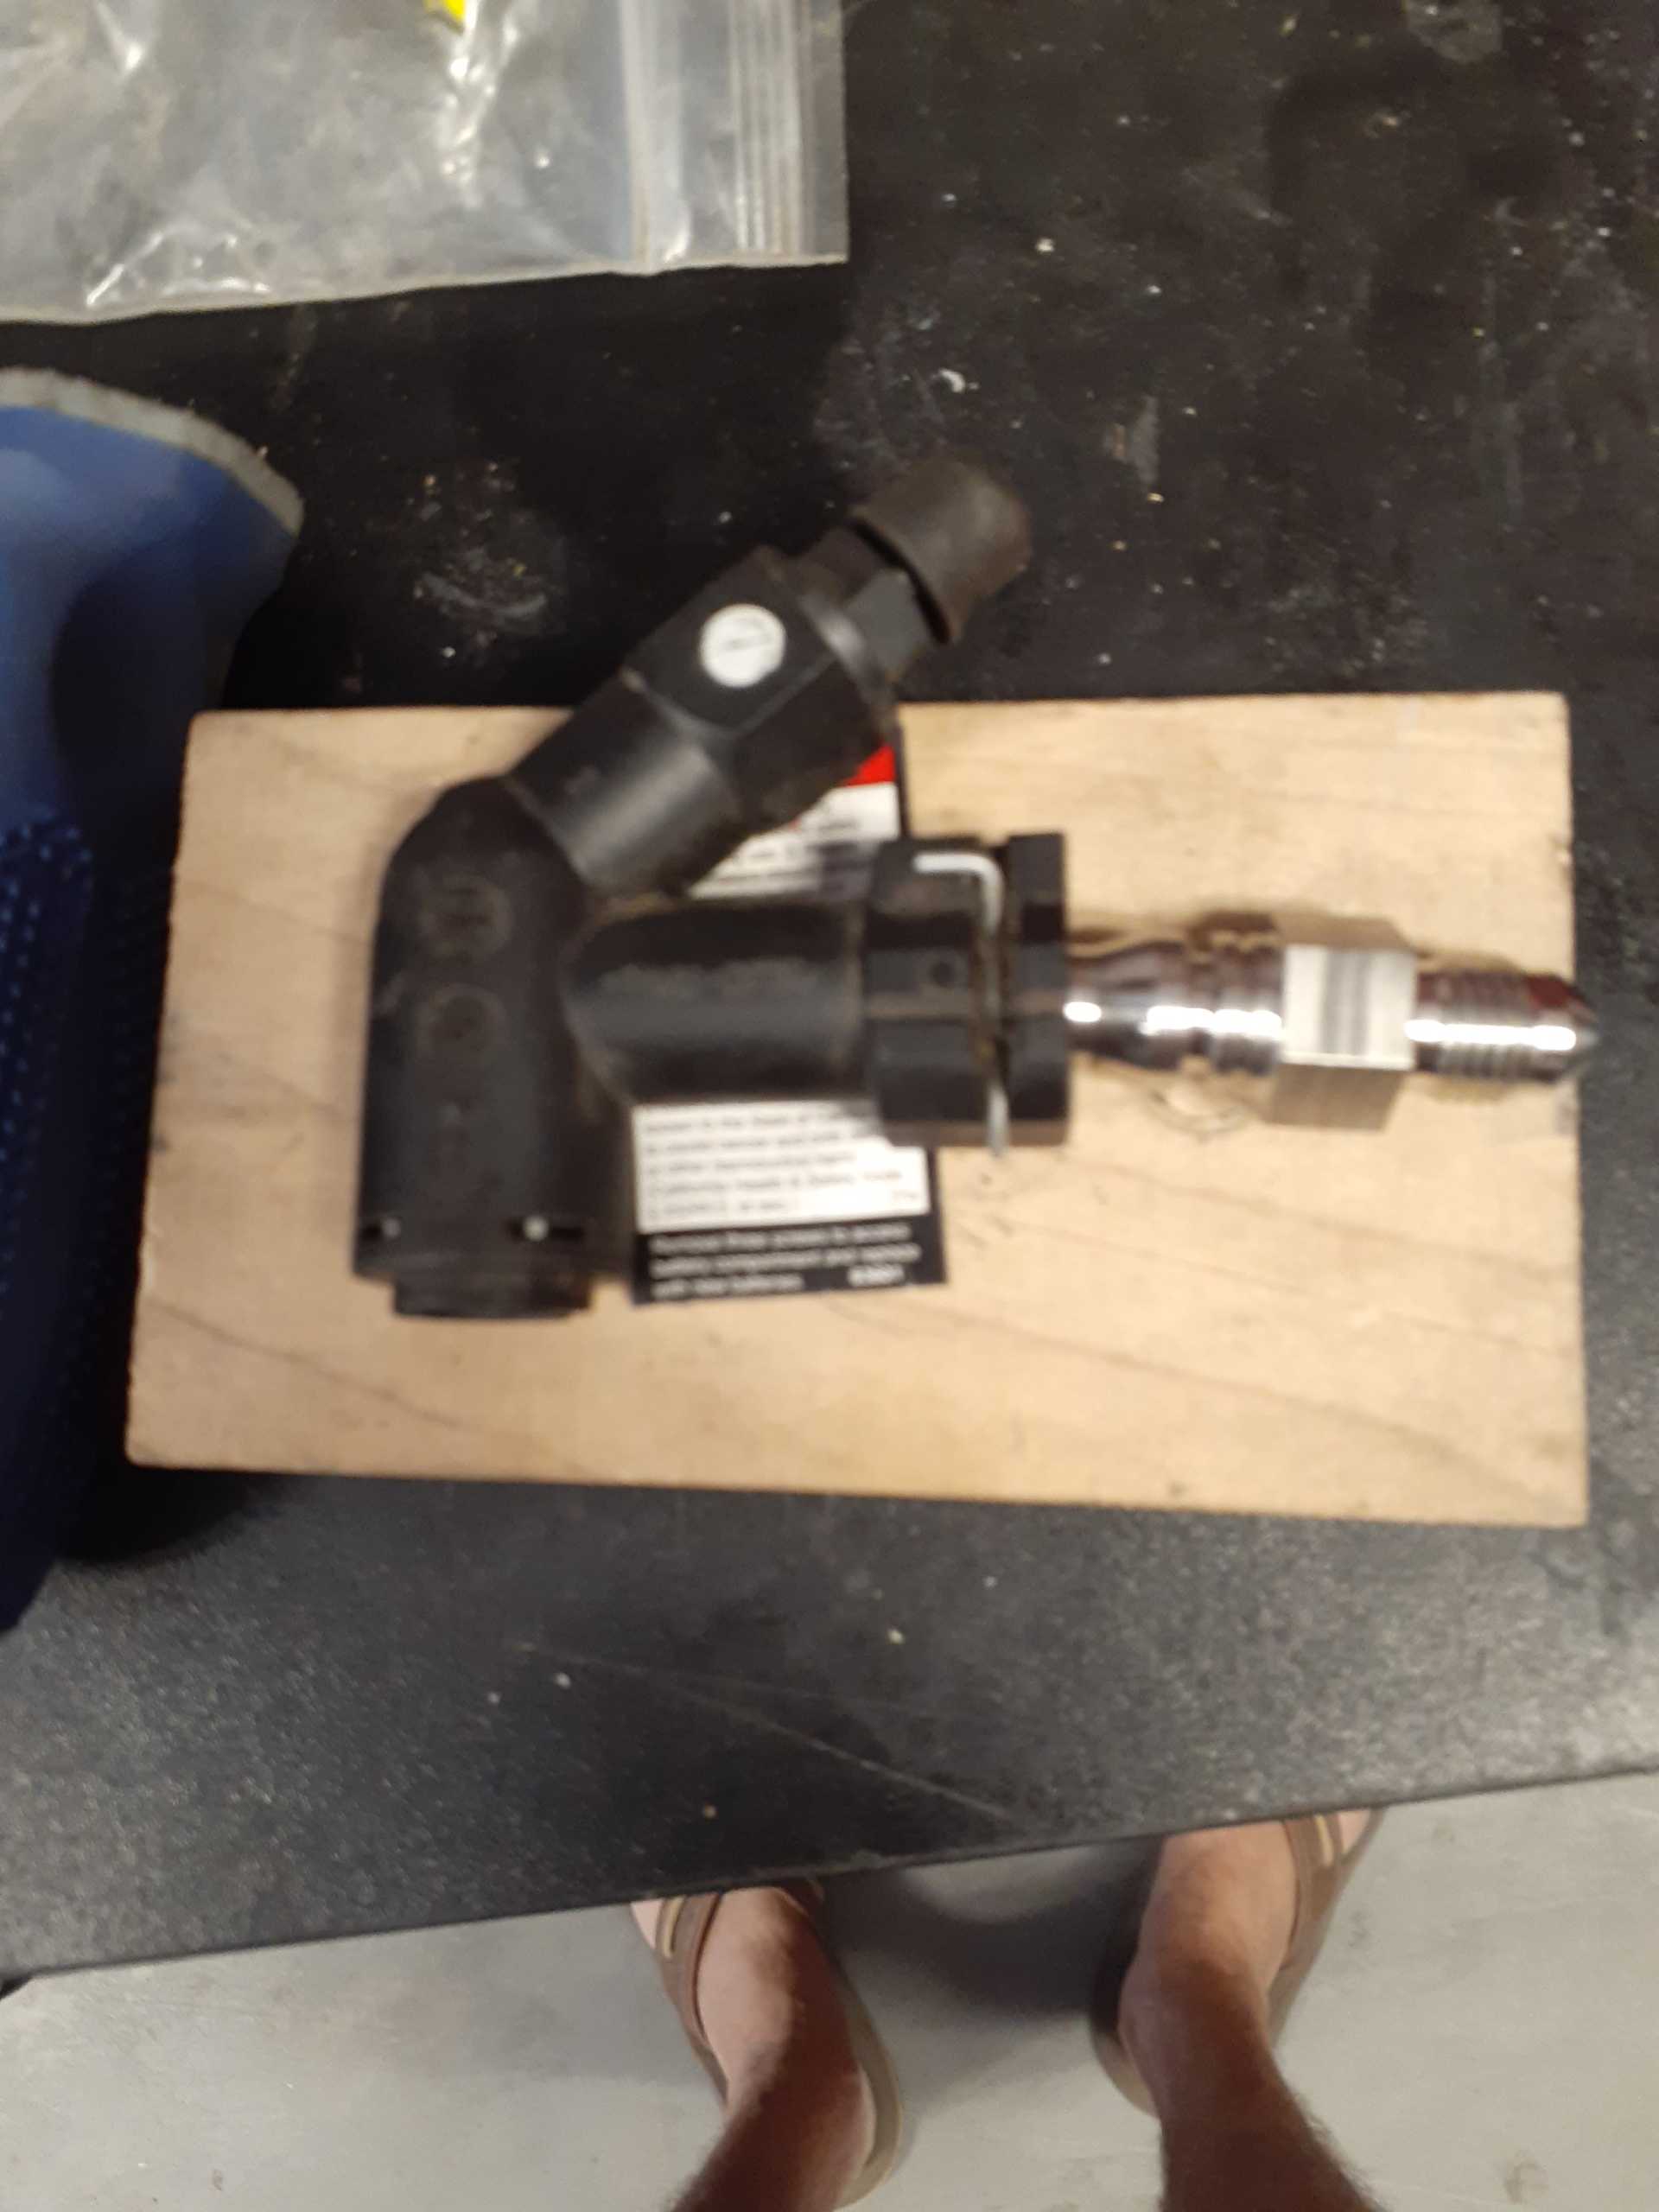
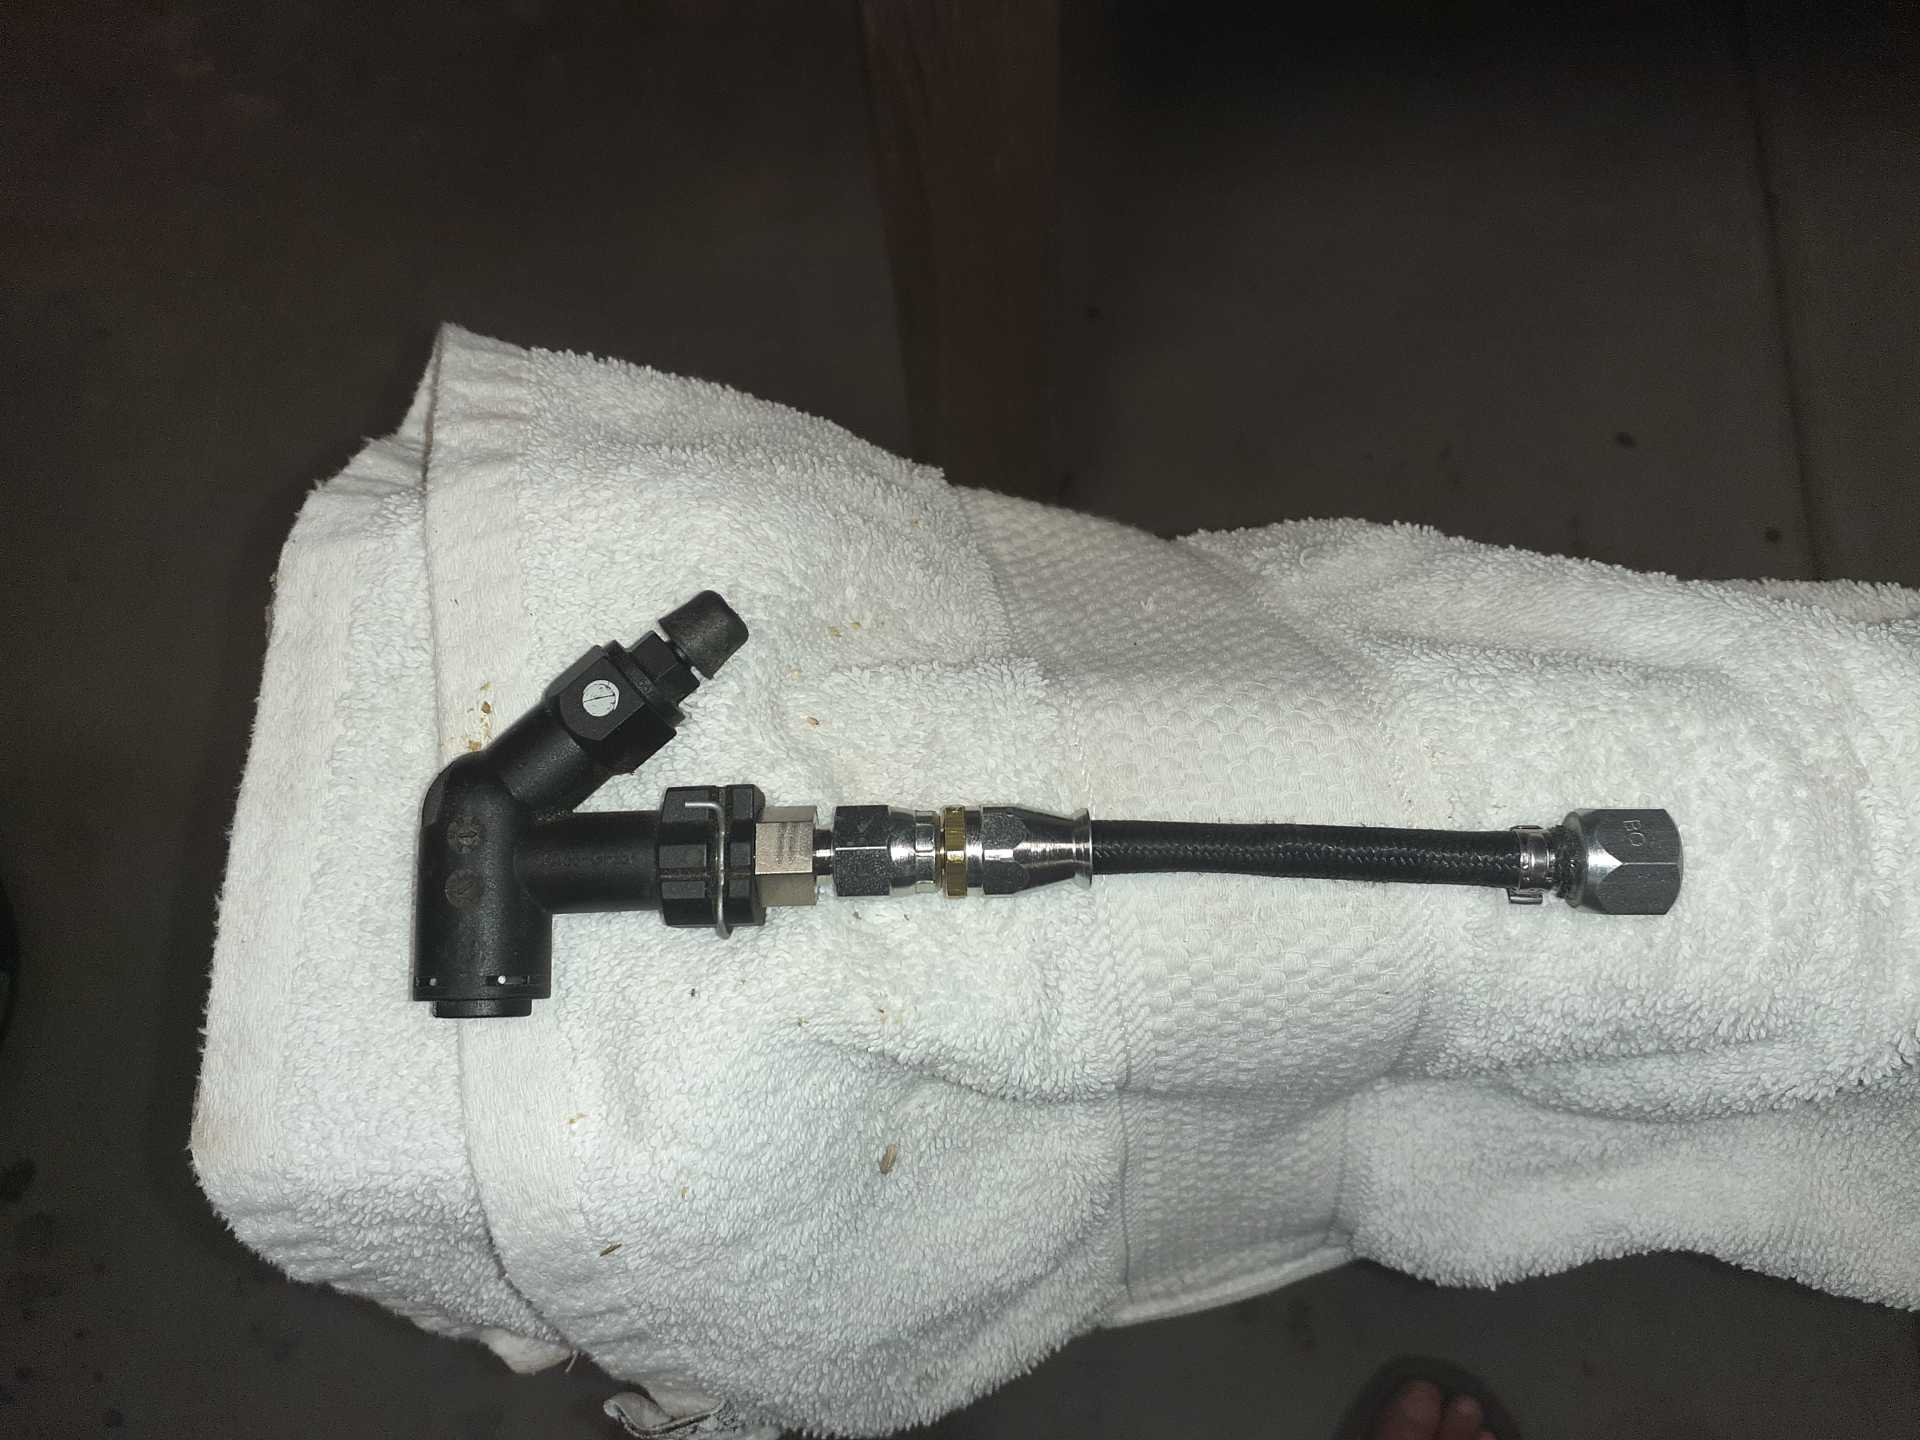
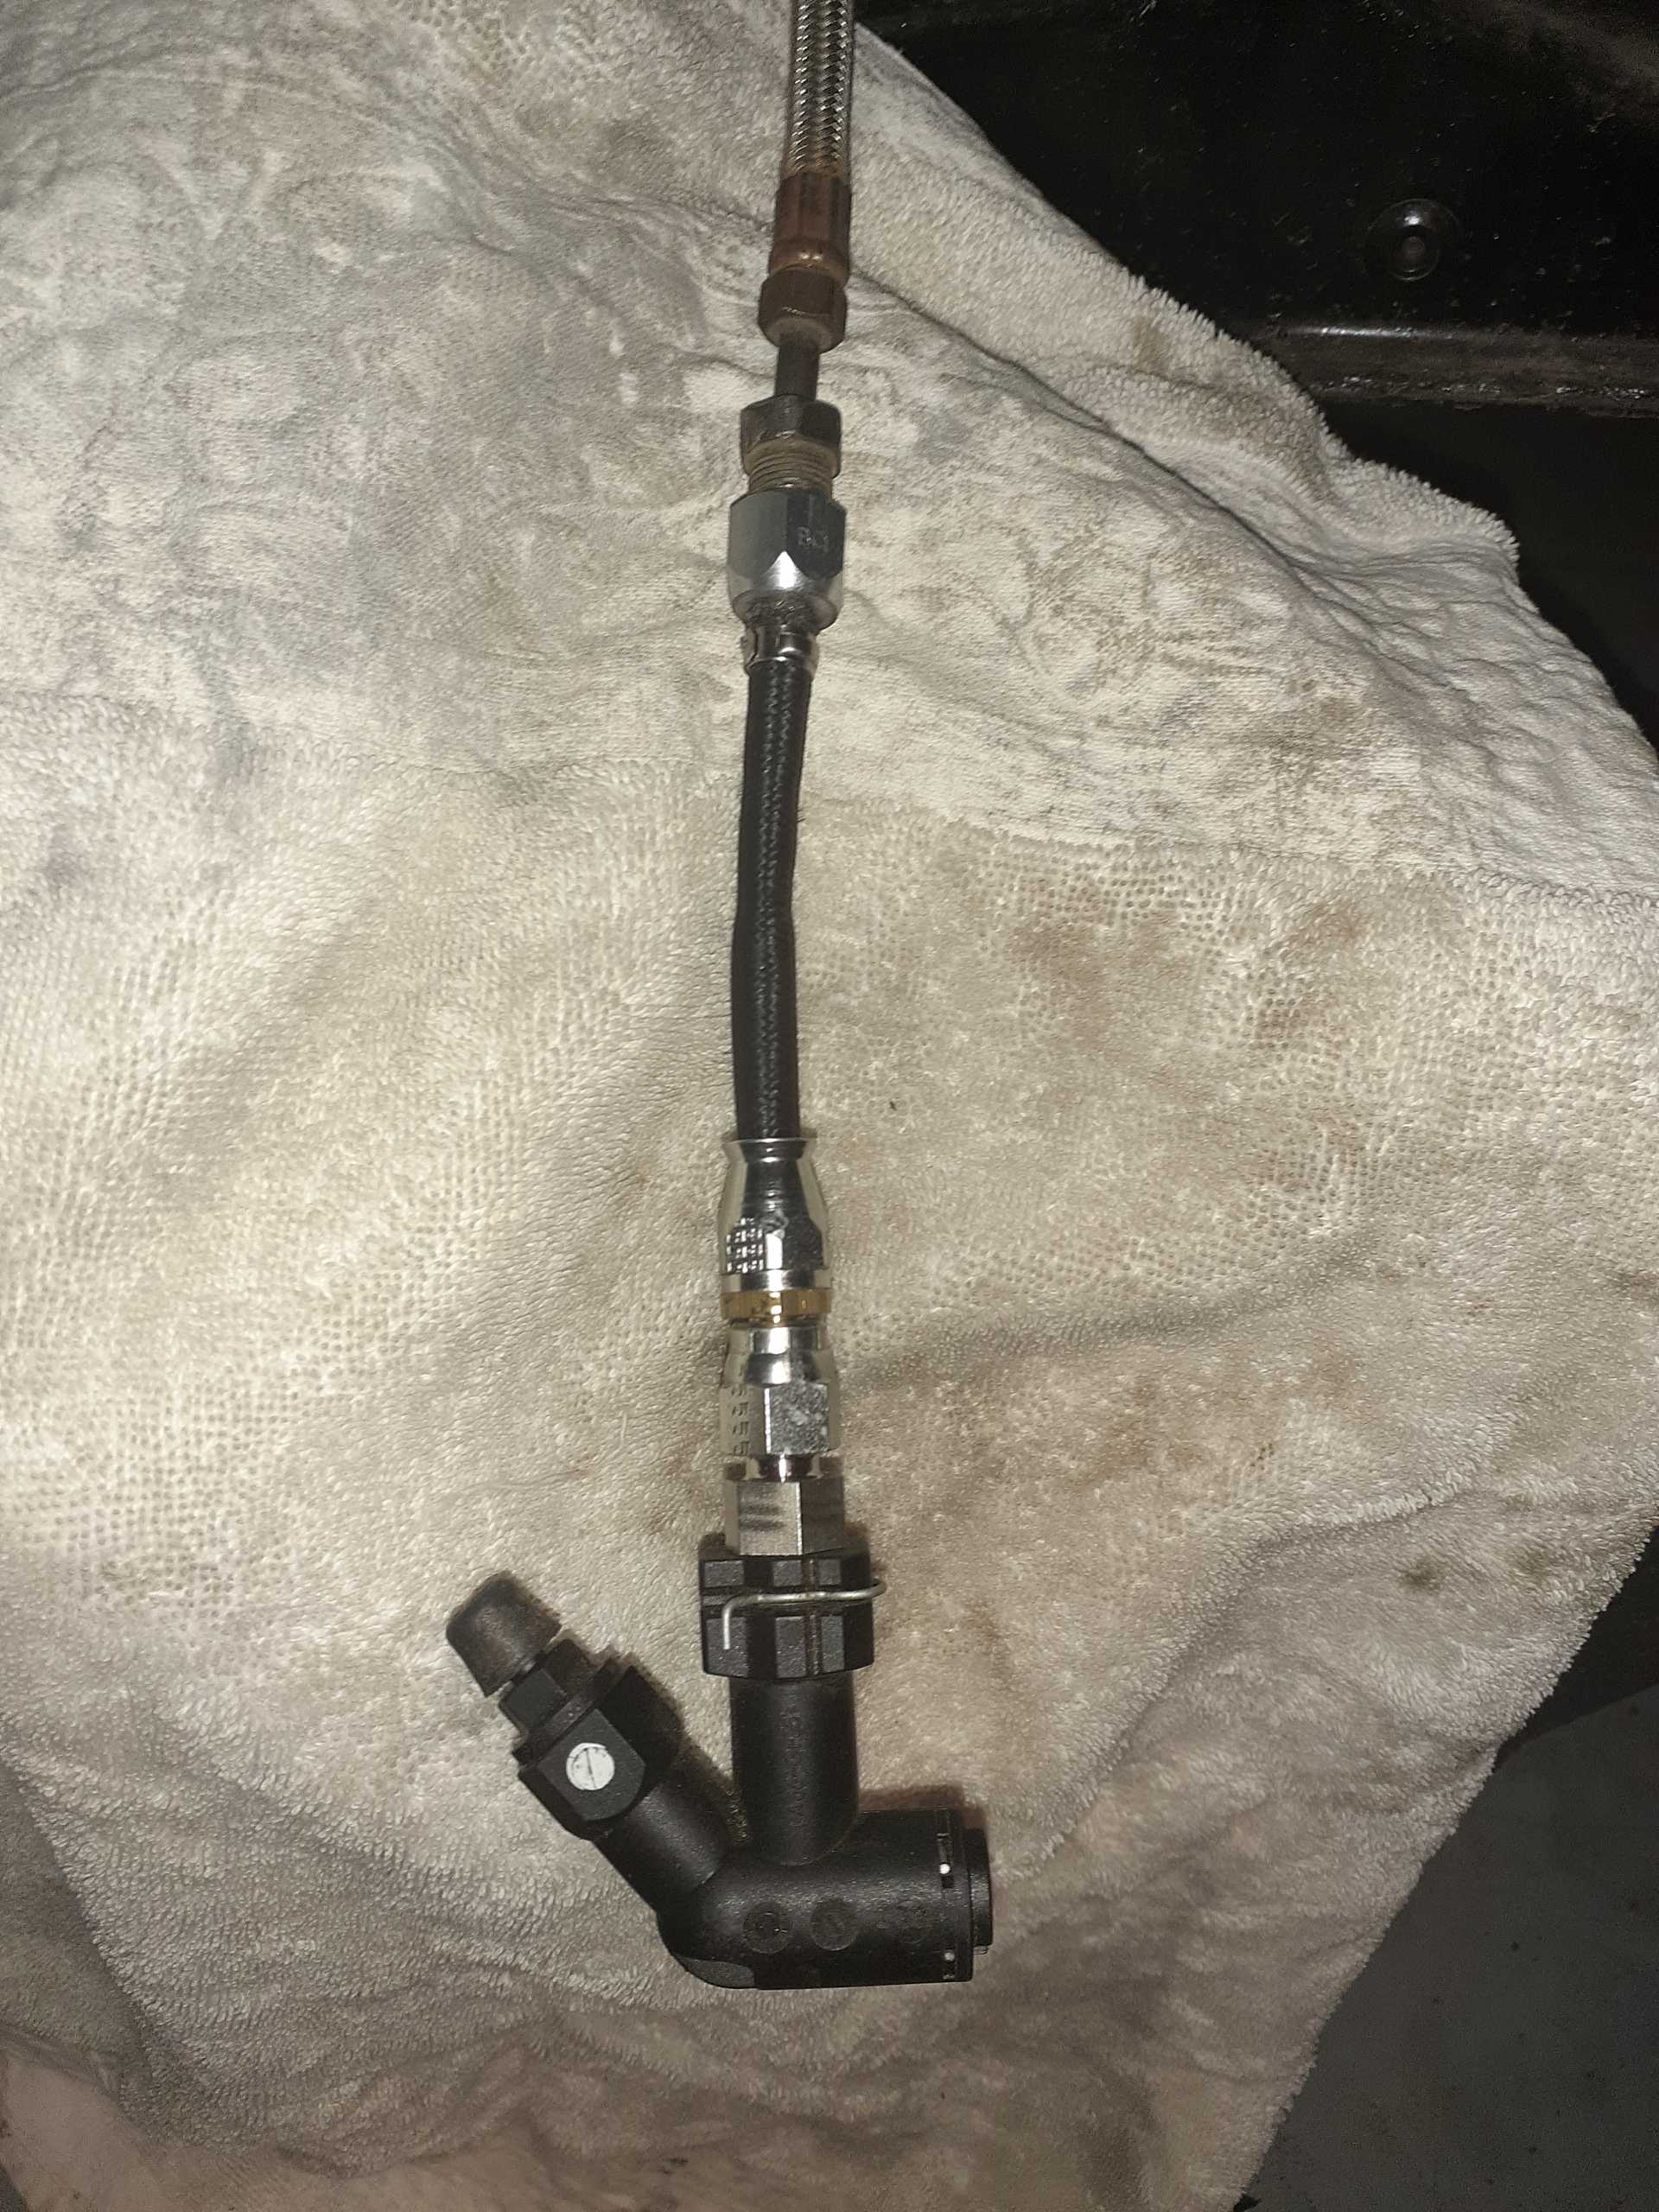
Guru, you are rright. You need more info, so hopefully these photos will fill in the blanks. The first is the fitting you were asking about on the transmission. The others are of the hydraulic line from the clutch master cylinder. The line is about 6 inches to short to reach the fitting on the transmission. Thanks for looking at this for me.
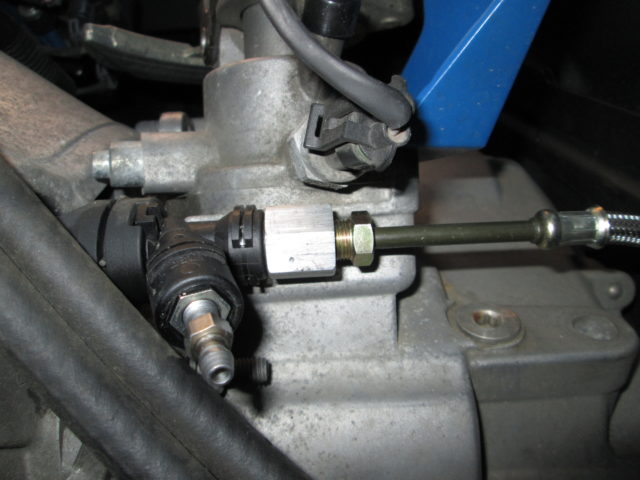
The standard G6 F40 uses a different HTOB, clutch line connector, and bleeder assy which is what my clutch line connector is designed to work with. It allows the Fiero line to thread in on one side and has the quick disconnect fitting for the bleeder assy on the other.
The one you have might still use the same bleeder quick disconnect fitting (which might allow my fitting to work, but I haven't confirmed it), but it will need to connect higher and about 2-3" closer to the transmission. You can get the clutch line repair kit from Rodney: https://rodneydickman.com/a...eywords=clutch+line. With this, you can cut the old line in the proper location to make the clutch line several inches longer.
You likely could also use your AN to quick connect fitting, but you will still have to rework the Fiero clutch line to accept the AN hose fitting. Either method will likely work it really just depends on what parts you want to use.
[This message has been edited by fieroguru (edited 09-02-2020).]
The standard G6 F40 uses a different HTOB, clutch line connector, and bleeder assy which is what my clutch line connector is designed to work with. It allows the Fiero line to thread in on one side and has the quick disconnect fitting for the bleeder assy on the other.
The one you have might still use the same bleeder quick disconnect fitting (which might allow my fitting to work, but I haven't confirmed it), but it will need to connect higher and about 2-3" closer to the transmission. You can get the clutch line repair kit from Rodney: https://rodneydickman.com/a...eywords=clutch+line. With this, you can cut the old line in the proper location to make the clutch line several inches longer.
You likely could also use your AN to quick connect fitting, but you will still have to rework the Fiero clutch line to accept the AN hose fitting. Either method will likely work it really just depends on what parts you want to use.
I'm thinking if I could find or have made an adapter piece 6 inches long, to connect the two pieces shown in the first photo below, my problem would be solved. The black composite piece, I think you called it the Bleeder, fits the fitting on the transmission. The other side of the black fitting fits as shown. What do you think?
That would work, but I will be a custom designed and machined piece. Female AN to Fiero clutch line is not going to be an off the shelf item.
I think I have determined that the size of the AN fitting is a -4, but I am having difficulty determining the size and type for the Fiero fitting. Would you know?
How much pressure is in the clutch hydrolic system when the pedal is depressed?
Depends entirely on the clamp force of the pressure plate, the motion ratio of the pressure plate fingers, and the size (piston area) of the HTOB. The hydraulic clutch components that I have found with line pressure design specs recommend keeping it less than 50 bar = 725 psi. There are also videos of people checking their clutch line pressures and find them to be in the 100 to 300 psi range. I haven't ever measured mine but the pedal effort is definitely higher than stock 2.8 (stock 2.5 is super light pedal pressure).
Depends entirely on the clamp force of the pressure plate, the motion ratio of the pressure plate fingers, and the size (piston area) of the HTOB. The hydraulic clutch components that I have found with line pressure design specs recommend keeping it less than 50 bar = 725 psi. There are also videos of people checking their clutch line pressures and find them to be in the 100 to 300 psi range. I haven't ever measured mine but the pedal effort is definitely higher than stock 2.8 (stock 2.5 is super light pedal pressure).
Since the pressure plate and HTOB is from a Saab, I would think the pressures would be similar to the Saab. I ordered a -4AN female fitting and hose rated at 1000psi. As soon as I determine the size and type of fitting the Fiero slave takes, I'll start sourcing that fitting so I can just make a short adapter.
Watching the adapter construction very closely as I'm one step behind you.
I've been getting lots of help, both locally and from this forum. When I finish the adapter, I'll post what I decided on. Like most things, there many solutions that will probably work.
I have FieroGuru's hydraulic adapter which "looks" to fit into the composite assembly, will verify shortly.
However, mine isn't 6" short only about 1-2" short which might be addressed through a minor repositioning of the clutch line. I'm converting from an auto to a manual so all my test fitting at the moment of my clutch line is simply holding it in place...
[This message has been edited by msweldon (edited 09-05-2020).]
I have FieroGuru's hydraulic adapter which "looks" to fit into the composite assembly, will verify shortly.
However, mine isn't 6" short only about 1-2" short which might be addressed through a minor repositioning of the clutch line. I'm converting from an auto to a manual so all my test fitting at the moment of my clutch line is simply holding it in place...
I have an F40 question. I tried to bleed the hydraulic clutch system last night and realized that it appears that the clutch is always disengaged. It has been 2 years since I mated the engine to the transmission. I don't recall noticing it being this way, but I don't know for sure. What is the logical next step to determine why it is always disengaged? Thanks Daryl
I have an F40 question. I tried to bleed the hydraulic clutch system last night and realized that it appears that the clutch is always disengaged. It has been 2 years since I mated the engine to the transmission. I don't recall noticing it being this way, but I don't know for sure. What is the logical next step to determine why it is always disengaged? Thanks Daryl
Sounds like you have a clearance issue. If by disengaged you mean like a depressed clutch pedal, then you have insufficient pressure plate to throwout bearing clearance, or worse, a clearance problem that resulted from too much bearing travel, damaging the bearing and causing it to seize extended, disengaging the pressure plate. You should have about a 1/4 to 1/2" pedal travel before feeling a resistance increase signaling bearing engagement. The excessive travel incident has happened before although I do not recall the specific symptoms other than the bearing needing to be replaced to resolve the issue. There are other possibilities, but insufficient clearance between bearing and pressure plate would be my first suspicion.
Sounds like you have a clearance issue. If by disengaged you mean like a depressed clutch pedal, then you have insufficient pressure plate to throwout bearing clearance, or worse, a clearance problem that resulted from too much bearing travel, damaging the bearing and causing it to seize extended, disengaging the pressure plate. You should have about a 1/4 to 1/2" pedal travel before feeling a resistance increase signaling bearing engagement. The excessive travel incident has happened before although I do not recall the specific symptoms other than the bearing needing to be replaced to resolve the issue. There are other possibilities, but insufficient clearance between bearing and pressure plate would be my first suspicion.
Regardless, it looks like the cradle gets dropped again and the transmission and engine have to be separated to see what I did wrong, right?
Regardless, it looks like the cradle gets dropped again and the transmission and engine have to be separated to see what I did wrong, right?
It appears so. If you can carefully loosen all of the tranny bolts after supporting the bottom of the motor to unload the connection point and back the transmission away from the block without moving it off the dowel centering pins, you may be able to confirm the problem if it resolves and you can no longer turn the wheels freely in the same direction with the transmission in gear. I would imagine there's enough room for about a 3/16" gap between the mounting surfaces and still have the dowel pins engaged.
Just be sure to confirm there's nothing you can do to have the transmission engage, make sure there's no potential blockage in the customized portion of your fitting. It's been a long time since I worked with the gearbox but, I vaguely recall there being a check valve somewhere in the hydraulic system. at the transmission. Crack the bleed valve and make sure nothing changes to avoid tearing it down for nothing.
[This message has been edited by Joseph Upson (edited 09-24-2020).]
It appears so. If you can carefully loosen all of the tranny bolts after supporting the bottom of the motor to unload the connection point and back the transmission away from the block without moving it off the dowel centering pins, you may be able to confirm the problem if it resolves and you can no longer turn the wheels freely in the same direction with the transmission in gear. I would imagine there's enough room for about a 3/16" gap between the mounting surfaces and still have the dowel pins engaged.
Just be sure to confirm there's nothing you can do to have the transmission engage, make sure there's no potential blockage in the customized portion of your fitting. It's been a long time since I worked with the gearbox but, I vaguely recall there being a check valve somewhere in the hydraulic system. at the transmission. Crack the bleed valve and make sure nothing changes to avoid tearing it down for nothing.
Well, I guess it had to happen. I did loosen the bell housing bolts to see if it was a clearance problem. Fluid gushed out, so I guess I may have a small leak. Anyway, the cradle is out and awaiting disassembly. Wish me luck.
[This message has been edited by Daryl M (edited 10-01-2020).]
Originally posted by Daryl M: Well, I guess it had to happen. I did loosen the bell housing bolts to see if it was a clearance problem. Fluid gushed out, so I guess I may have a small leak. Anyway, the cradle is out and awaiting disassembly. Wish me luck.
If clutch hydraulic fluid came from the bottom of the bell housing clutch area upon backing the transmission off a little, I suspect you have too much hydraulic volume and snapped the hydraulic throwout bearing past its stop, as I mentioned earlier has happened before, ruining the hydraulic bearing. . . . . . I wanted to come back and mention, that when I swapped the F40 in the 86, I was using the clutch mastercylinder from the 1984 model, because of all the versions I had experience with, it was the most dependable and trouble free for me. I was aware of the potential hydraulic mismatch with the F40 at the time and elected to put a couple of precautionary spacers between the firewall and mastercylinder mount to reduce hydraulic flow volume and I suspect that is why I never had a problem with the hydraulics after install.
[This message has been edited by Joseph Upson (edited 10-02-2020).]