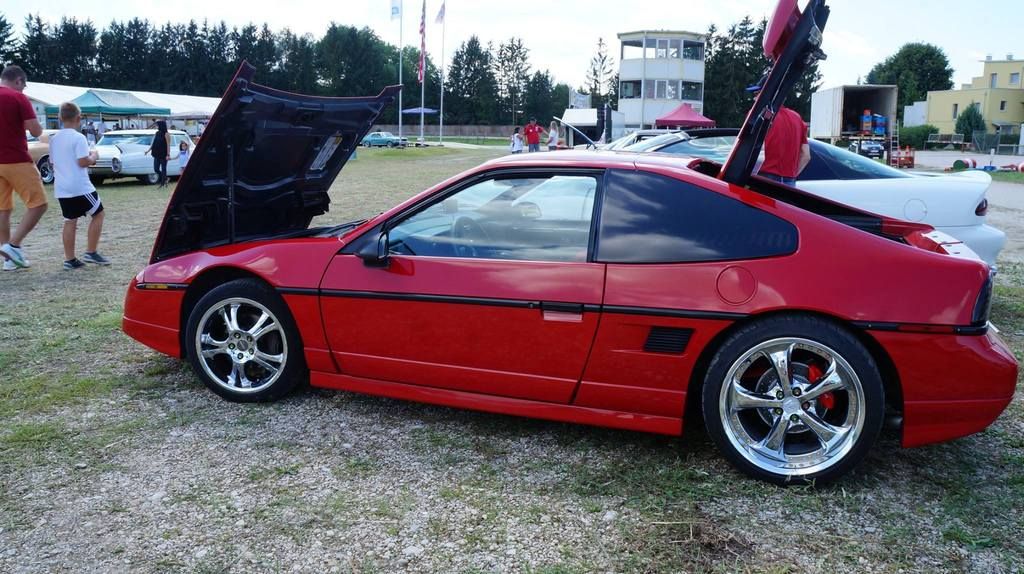
The chrome paint is extremely sensitive without a protecting clear coat layer. It is also not resistant against nitrocellulose-based acryl clear coats, only polyurethane clear coats can be used (without thinning it with Xylol)! However, after the Glisten PC polyurethane clear coats is applied, the paint job is resistant against gasoline, oil, salt and heat resistant up to ~ 200°C.
[This message has been edited by Moar (edited 02-23-2016).]
Just out of curiosity have you considered the 3.4 DOHC?
If I would live in USA I wouldn´t bother with V6 engines. I would do a V8 swap instead (maybe Cadillac 4.9 V8).
Here in Austria, things are completely different. Engine swaps are uncommon here. When an engine dies the car goes to the next junk yard and the owner buys a new one. People who work on engines are not normal here. Furthermore, EVERY modification on a car needs to be legalized by the state inspection which cost several $100 for each part. Besides that, it is almost impossible to legalize non Europe parts in Austria or Germany! If I want to legalize an engine which was never used in a Fiero from the factory, the emission certificate will cost about $3000!!! I´ll definitely not got this way and I will not spend hundreds or even thousands of $$$$ for legalization (just paper stuff).
Therefore, the only alternative is to get a bigger engine which looks like stock -> the 3.4L pushrod engine.
I know I can´t get much power out of it with a Fiero intake plenum, but I need it in order to retain the stock look... Maybe nitrous juice will help?
PS: At the beginning I have also thought about buying a 4-banger Fiero and to swap a V8 engine into it. I thought if I have luck, the cops may think it´s just the stock 4-cylinder Iron Duke when they only see 4 ignition wires of one cylinder bank at the first glance...
[This message has been edited by Moar (edited 02-23-2016).]
These Dawg's performance parts seem to be quite interesting. However, the prices are a bit on the high side and there are no flow bench test results or dyno runs available for the modified UIM.
I´ll take this intake plenum modification into consideration and will try to make one by my own as soon as I find time. I hope that also a 3.4L engine can breathe sufficiently with this mod.
The images that don't show are over 300K in total size. The horizontal pixel count is 1024 or less, which is what is needed, but the vertical dimension is too long. You can look it up by right-clicking on the picture, "view image info".
[This message has been edited by Gall757 (edited 02-29-2016).]
Moar, I know you know how to trim picture size with paint function? Anyway ,if I know it almost everyone must know it. Depending upon the forum I have had to trim pictures to post.
Moar, I know you know how to trim picture size with paint function?
Yes, of course! I will resize or trim my pictures as soon as I have time.
Now I´m thinking about the driveshaft problem and how I should cut the groove in it. Obviously it is an extremely hard steel (I think quenched and tempered steel)? I tried to cut a groove with my dremel and I could just scratch the surface with the diamond grinding bit! If I use the angle grinder instead I can only keep an axial position tolerances of about +/- 1/2 mm which is maybe too inaccurate.
It would be really interesting which kind of steel this is. There are very high stresses in the spline shaft (max. static torque is somewhere in the neighborhood of 1100 Nm per driveshaft before the wheel begins to spin).
Originally posted by Moar: . .. Furthermore, EVERY modification on a car needs to be legalized by the state inspection which cost several $100 for each part. Besides that, it is almost impossible to legalize non Europe parts in Austria or Germany! If I want to legalize an engine which was never used in a Fiero from the factory, the emission certificate will cost about $3000!!! I´ll definitely not got this way and I will not spend hundreds or even thousands of $$$$ for legalization (just paper stuff).
I hope it never comes to that here, but we are headed that way slowly. Sounds similar to what SEMA is fighting with right now in beginning stages.
These Dawg's performance parts seem to be quite interesting. However, the prices are a bit on the high side and there are no flow bench test results or dyno runs available for the modified UIM.
I´ll take this intake plenum modification into consideration and will try to make one by my own as soon as I find time. I hope that also a 3.4L engine can breathe sufficiently with this mod.
I have a 3.4 liter push rod engine installed in one of my vehicles with a Truleo intake and a turbo. It performs nicely and even looks good (IMHO).
Unfortunately this is not possible for Austrian Fiero drivers. In this case I would need to install the stock plenum each year in order to pass annually inspection. And of course, turbochargers or supercharges are a no-go here (if the car doesn't come from the factory with TC or SC).
I need hourspower + stock engine look! Almost impossible, isn´t it?
Nevertheless, some modifications are still possible (like CAI*, ignition system, exhaust system with fake cat, internal engine mods, ...). *) Cold air intake can be removed easily for inspection.
[This message has been edited by Moar (edited 02-29-2016).]
The images that don't show are over 300K in total size. The horizontal pixel count is 1024 or less, which is what is needed, but the vertical dimension is too long.
My experience when posting images here (I use PIP) is that there is no height restriction with the image. As long as the file size is 300 kb or less and the maximum width is 1024 pixels, you're good to go.
Moar, use a free photo editing program like IrfanView to re-size and/or re-compress your images. I love this program as it allows the maximum file size to be set before you save the re-sized images. (No need to experiment over and over with different compression settings.)
[This message has been edited by Patrick (edited 02-29-2016).]
Moar, Re circlip groove on shaft. Seems like that is a job for a form tool on a tool post grinder. Your father is a lathe operator? He will know the setup which is a bolt on accessory with a motor driven grinding wheel. The grinding wheel would be "formed" with a diamond tool to the dimensions. You probably know about this technique, But it is expensive. Others have questioned the need, but I cannot comment on that. The alternative is to anneal the splines but that seems tedious on such a long piece, and requires rehardening /tempering. Perhaps someone will chime in again on this. Two cents...........
PS. Please do not take offense, but if you are using a Harbor Freight "diamond abrasive," my experience is that they are beyond useless junk and simply fly to pieces.
[This message has been edited by hobbywrench (edited 02-29-2016).]
No, it is not his job. Hi drives trains and big excavators at ÖBB. But he has access to a lathe at work during the week!
However, we have both sufficient skills to use a lathe. The problems are the tools. The repair shop at ÖBB is very old and the tools are old too. In the past ÖBB has used the shop often for repairing a lot of stuff themselves, but nowadays almost everything is repaired by service companies instead. Therefore, nobody at ÖBB buys new lathe tools.
Alternatively we can use a grinding disc from an angle grinder (with about 3 mm thickness). We must fix this grinding disc somehow on the lathe... I have calculated a minimum diameter of 24.7 mm for the groove with a big 3 mm radius. (original diameter is 25.9 mm directly after the spline)
With these groove dimensions the shaft´s fatigue endurance shouldn´t be affected too much. (but I have not considered the impact of lost surface hardness due to the lathe operation)
Regarding surface harness I´ve found the following hardness depth profiles:
[Induction hardened AISI 1070 steel bars: The blue curve represents Q&T material, which begins to loose hardness at 0.05” (1.25 mm) below the surface significantly.
Case hardened steel (unknown material): This case hardened steel begins to loose hardness at about 0.6 mm below the hardened surface.
I only need to remove 0.6 mm radial, therefore I should still have sufficient micro-hardness at this depth.
PS: Yes, I have used a China diamond grinding bit.
[This message has been edited by Moar (edited 03-03-2016).]
It would seem if the circlip groove is not perfectly square at the bottom and the sides are not vertical, force would more easily dislodge the circlip? Force like we use to remove the shafts. Has anyone else responded to your plan outside the forum?
Yes, I know that the c-clip may not hold the shaft very tight in position. The groove edges in the shaft must be rounded in order to reduce the notch effect. (circlip groove with sharp edges has a very high notch effect factor of about 2.0!) Furthermore, the c-clip wire thickness needs to be reduced to 1.00 mm. The inner diameter of the bore of the differential housing is 27.30 mm. When c-clip is pressed into the bore the inner diameter of the c-clip will be 25.30 mm (compressed). The circlip groove inner diameter will be 24.70 mm. This means the c-clip will have a radial clearance of about 0.3 mm while the shaft is inserted into the diff housing. Maybe I should grind the c-clip wire thickness down to 1.20 mm instead (more stiffness compared to 1.00 mm).
No, I haven´t ask others so far. But are there any alternatives to my plan? What else I could do to hold the shaft in position after the front section of the spline is cutted off
[This message has been edited by Moar (edited 03-01-2016).]
Finished snap ring groove after fine grinding and polishing (di = 24.90 mm):
Cutted off spline shaft front section:
Modified Fiero c-clip engaged into new custom groove:
The good thing is that one drive shaft (long one, passenger side) is now ready for installation, but the other one (short one, driver side) is messed up! I don't want to post a picture of the other drive shaft, because the groove is not a small snap ring groove it is more a predetermined breaking point. My dad is often very imprecise and now he has messed up one of my drive shafts. The inner diameter of the groove is only 23.07 mm instead of 24.70 - 24.90 mm! If I would have used the angle grinder for making a groove by myself the diameter would be much more precise. Next time I know.
I´m not motivated to make any calculation for the messed up drive shaft, because I already know that it will break sooner or later anyway (even with stock engine). (also the passenger side drive shaft with correct groove dimensions may break with the bigger 3.4L engine in conjunction with wider tires after some hard acceleration starts)
A new drive shaft only costs about $25, but shipping costs are nearly $100.-
[This message has been edited by Moar (edited 10-25-2017).]
In the meantime, I have carried out some driveshaft’s calculations. The maximum transmittable torque of the weakest driveshaft (with the biggest groove) is about 1250 Nm with assumed material 34CrMo4.
I think it is almost impossible to get so much traction that a torque of 1250 Nm is exceeded (per wheel). Only with wide tires on dry concrete under very hard acceleration you may archive + 1250 Nm.
BTW, the Getrag MG-282 DIFFERENTIAL should handle up to 3500 Nm (short-time dynamic peak load). We can be glad that the Getrag is so strong!
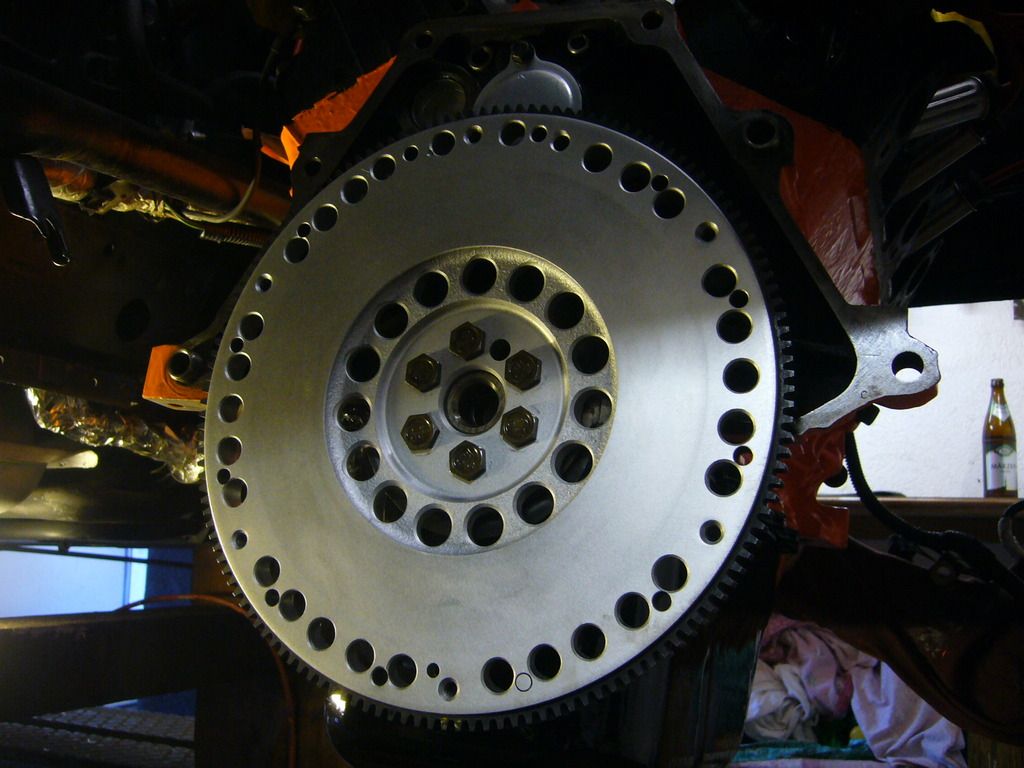
Furthermore, I have made some progress on the engine side!
Lightened flywheel installed:
Test-run with modified oil pump and lightweight flywheel:
RAM HD clutch installed:
Next I´ll search for hidden rust spots inside the engine bay and fix them before I install the tranny. I need to build custom transmission mounts (on basis of stiffer Dodge Ram engine mounts). I also ordered a polyurethane engine mount, but my poly parts have been lost
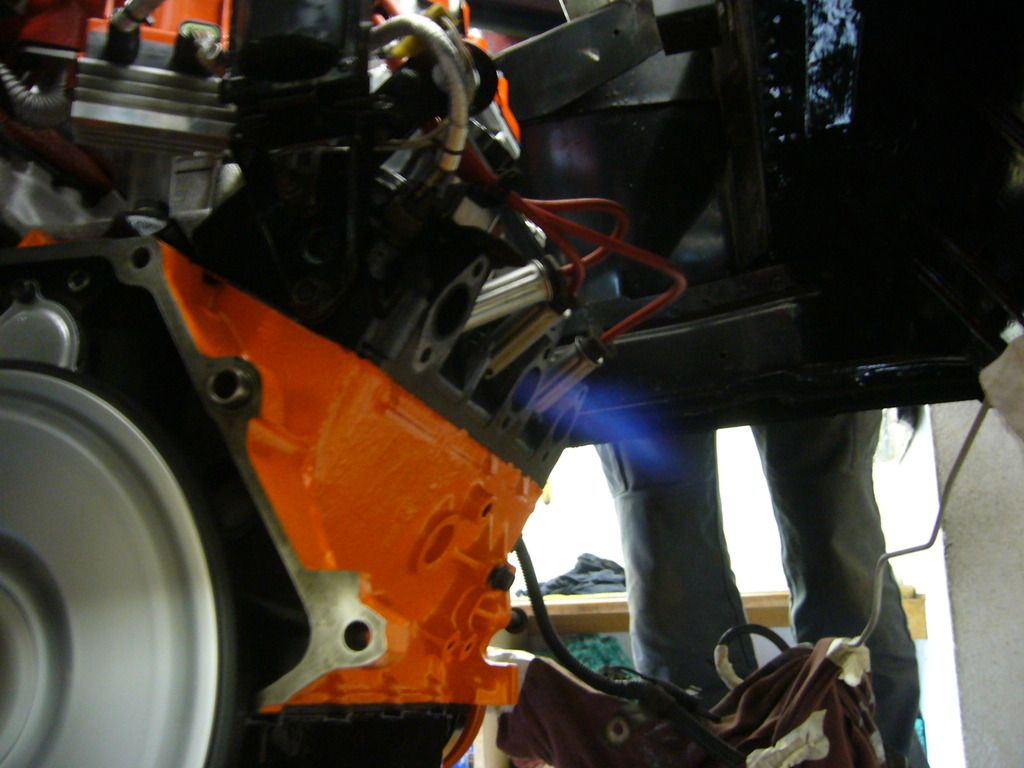
Very nice stuff. Have the exhaust ports been opened up. They kinda look bigger. I would open mine if ever the original heads come off . (5/8" dia. I think was the go to dimension)
Originally posted by hobbywrench: Very nice stuff. Have the exhaust ports been opened up. They kinda look bigger. I would open mine if ever the original heads come off. (5/8" dia. I think was the go to dimension)
At the moment the exhaust ports are still unmodified (dia. 29-30 mm). Exhaust ports only look bigger due to the black carbon buildup, which goes up to the inner edge of the exhaust manifold gasket (~ 35 mm). The inlet diameters of the exhaust manifold are smaller than the exhaust ports (manifold inlets ~ 26-27 mm)! However, the smallest passages are inside the manifold (T-junctions) which are even smaller than the inlets (~ 18-20 mm)! FYI, the exhaust valve diameter is 36.1 mm.
Porting exhaust ports doesn’t make much sense if stock manifolds are used. But you can port-match the exhaust manifolds to the head ports.
To sum up, stock manifolds are a piece of junk! Pontiac knows how to kill the power of an engine...
It is not a big secret, that a lot of power can be unleashed with custom headers and a high-flow exhaust system (especially in case of the Fiero)! I have already ordered some 90° stainless steel elbows for custom headers.
Originally posted by Patrick: Did you actually run the engine with no installed exhaust manifolds? It must've really "barked" out of those open exhaust ports!
Sorry for the bad video and audio quality. Next time I will use my camcorder.
I just wanted to check the oil pressure and searched for oil leaks. Fortunately, I have high oil pressure (about 70 - 75 PSI at idle, cold) and no leaks (so far).
FYI: My Fiero project is on hold now. I hope that I can proceed the work on my Fiero after 13th Mai.
I need to put all my working capacity into my Mazda Miata now. I have gotten a letter from the government and I was forced to drive my Miata to the state inspection of upper Austria, which is the strictest inspection in Austria (or the strictest inspection in the world). Of course, my Miata has not passed (but that´s usual for the first attempt) and now I need to “fix” it if I wanna keep the car.
On Friday the 13th my Miata MX-5 finally passed the state inspection at the Austrian government! My MX-5 drives like **** now, but it fulfils CURRENT Austrian laws of 2016. Hopefully, Austria doesn´t change these stupid inspection regulations again.
Now back to the Fiero ...
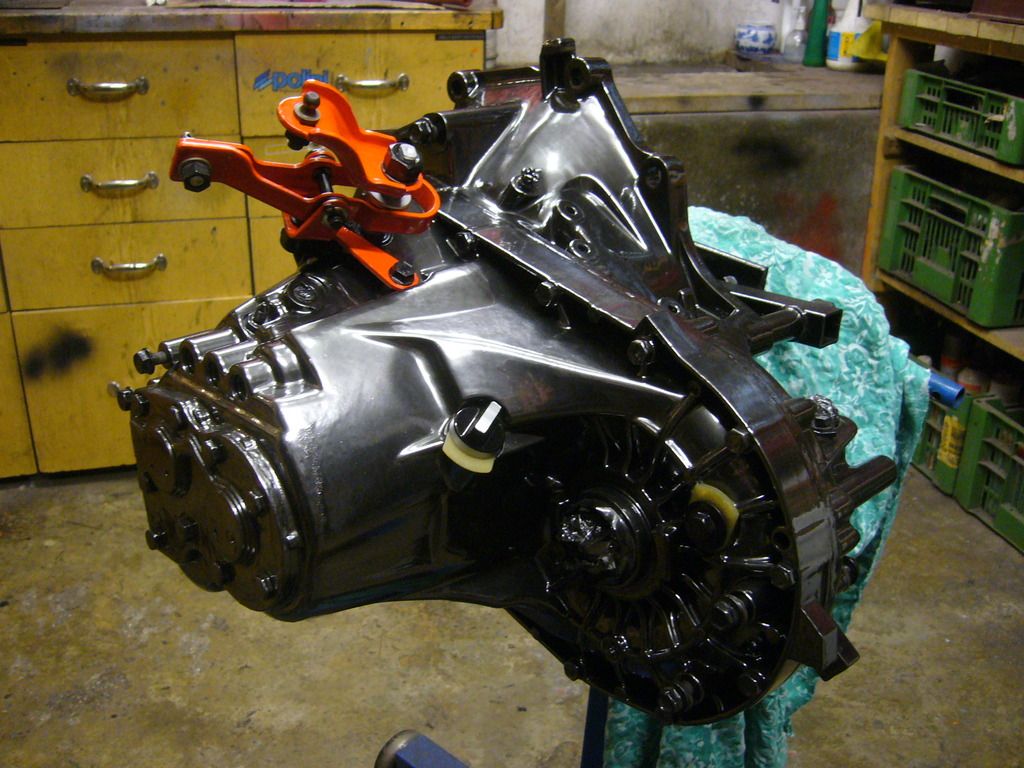
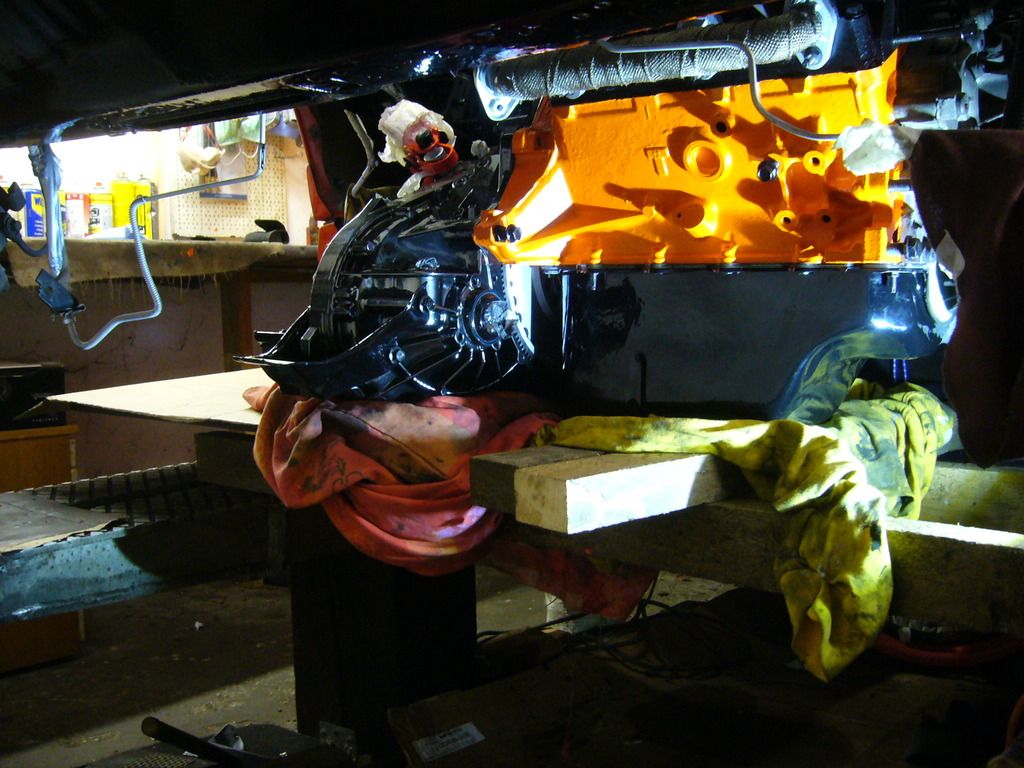
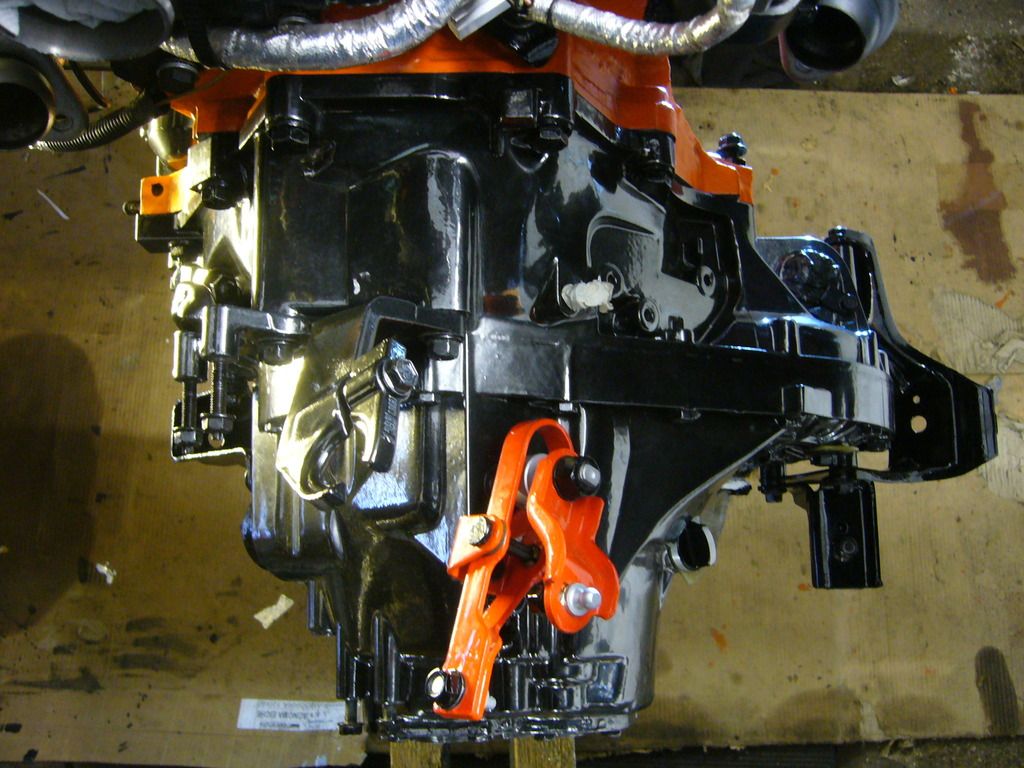
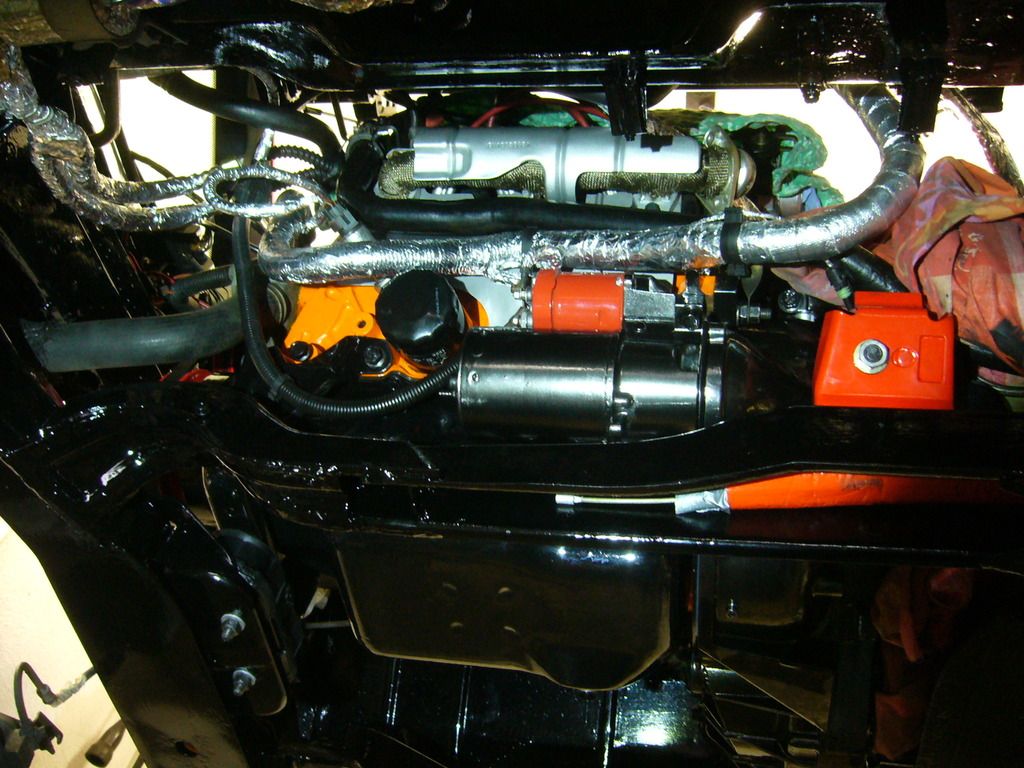
Transmission/engine and cradle installed! Everything looks way better than new
here are the pictures: (detailed description coming soon...)
Axle stabilizer bearings with drive shaft seals:
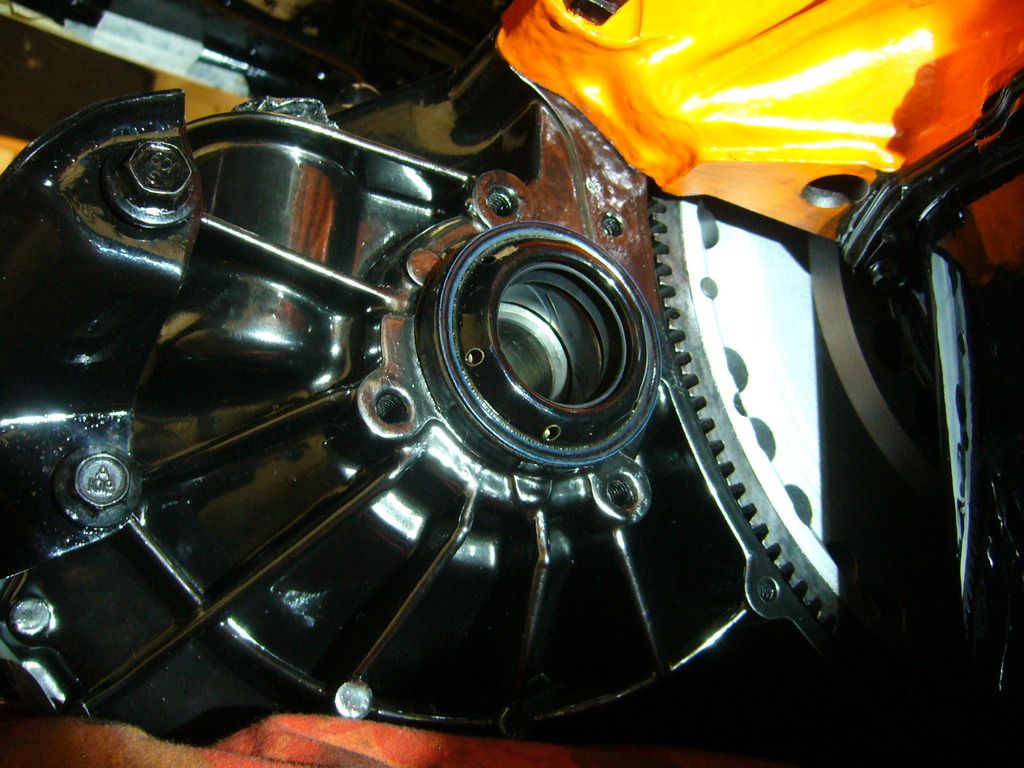
Release bearing installed:
Tranny ready for installation:
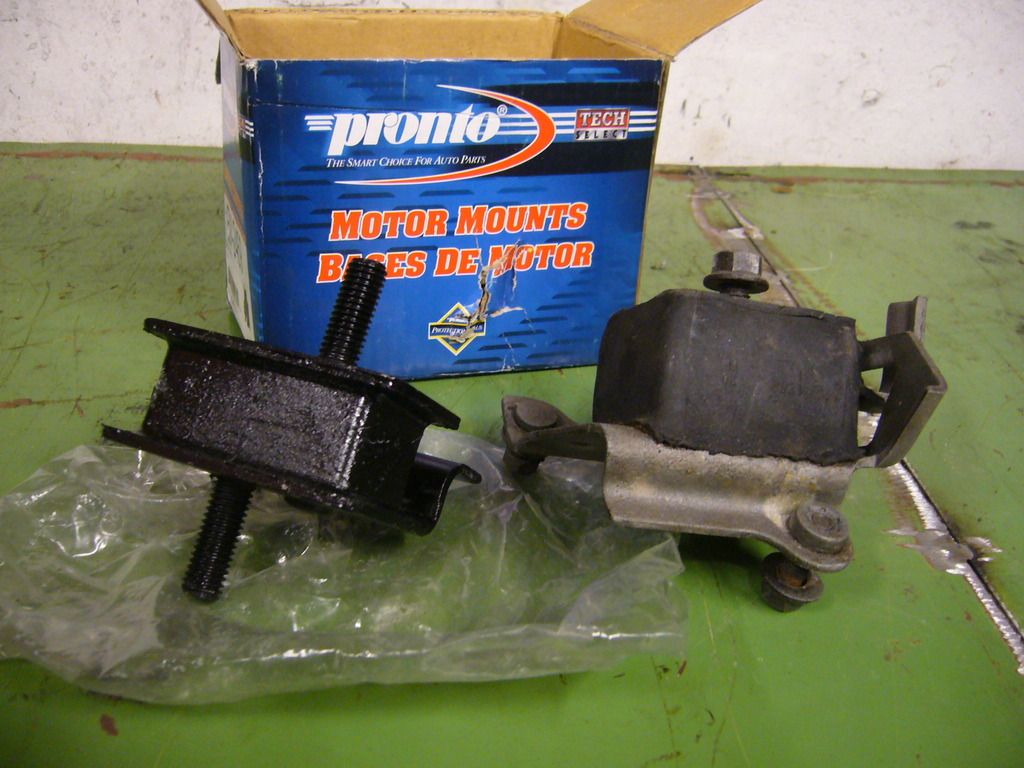
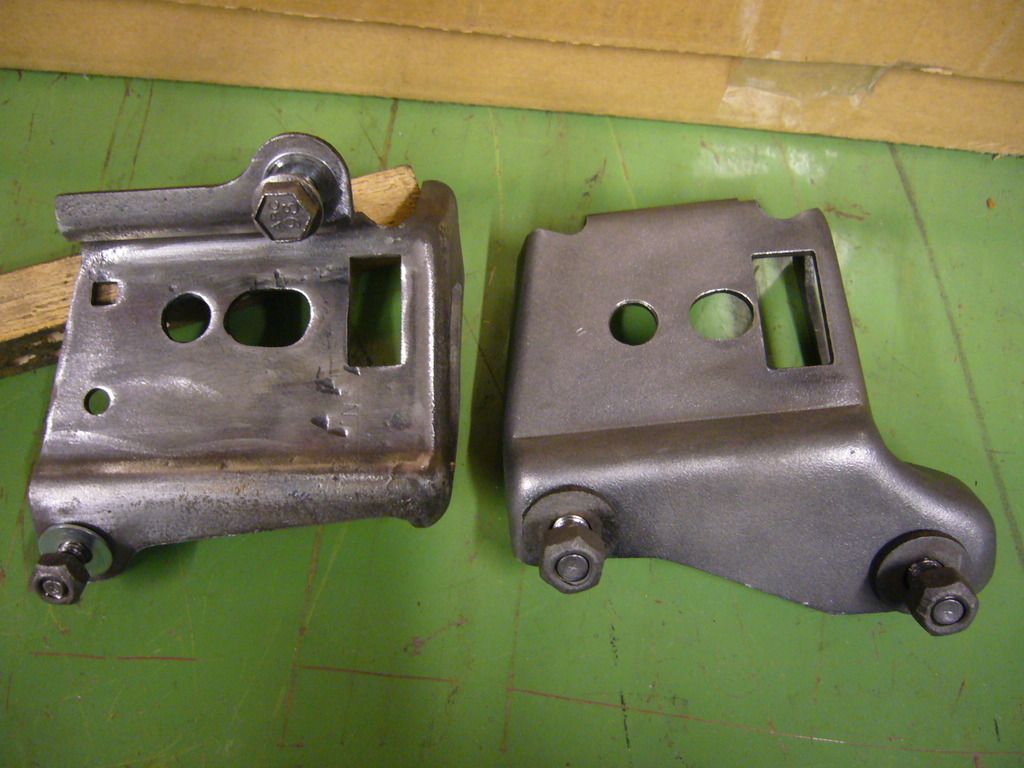
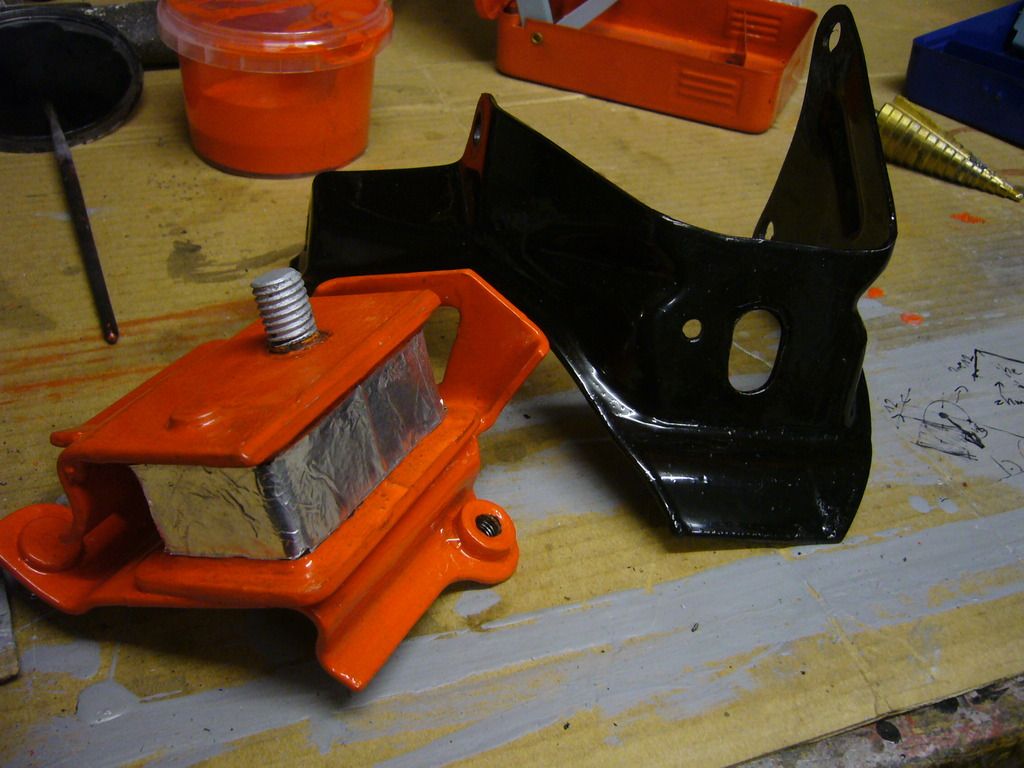
Custom transmission mounts (´79 Dodge Ram engine mounts - cheap alternative to poly mounts):
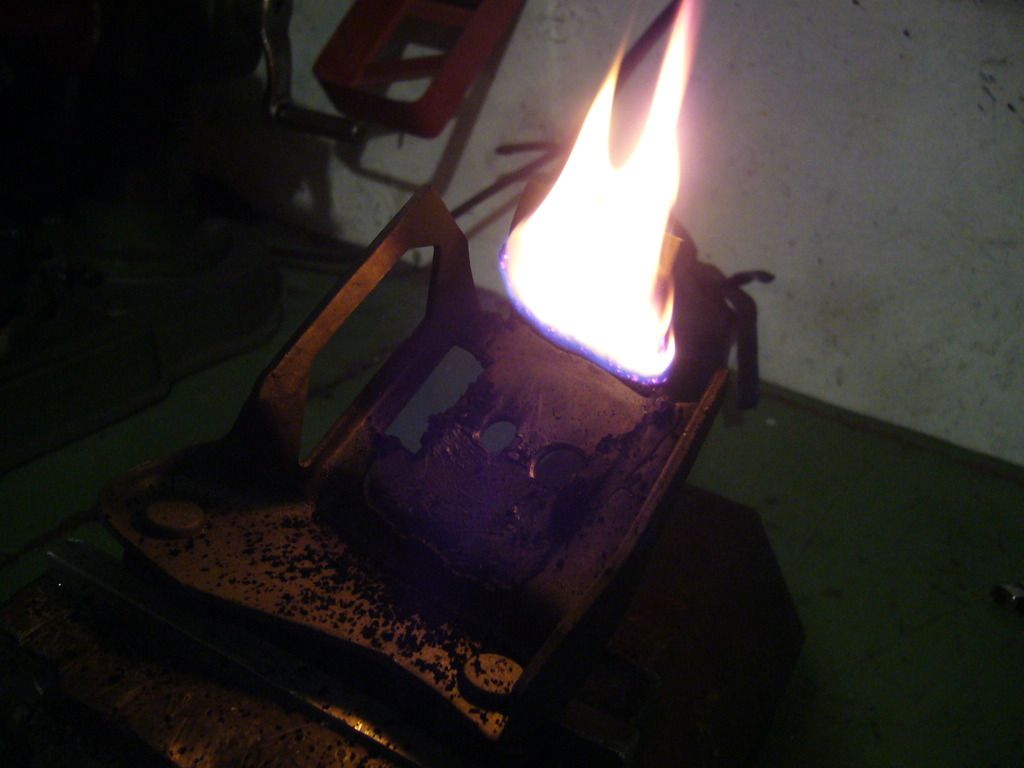
Burning away old rubber from Fiero mounts:
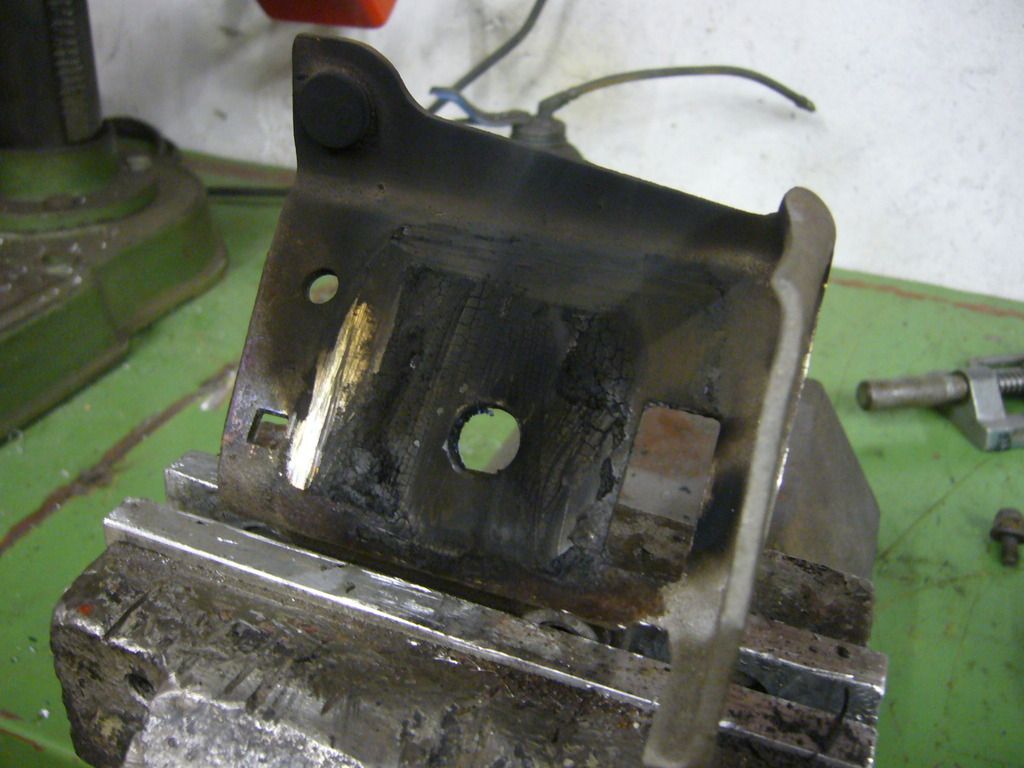
Cleaned Fiero mount brackets:
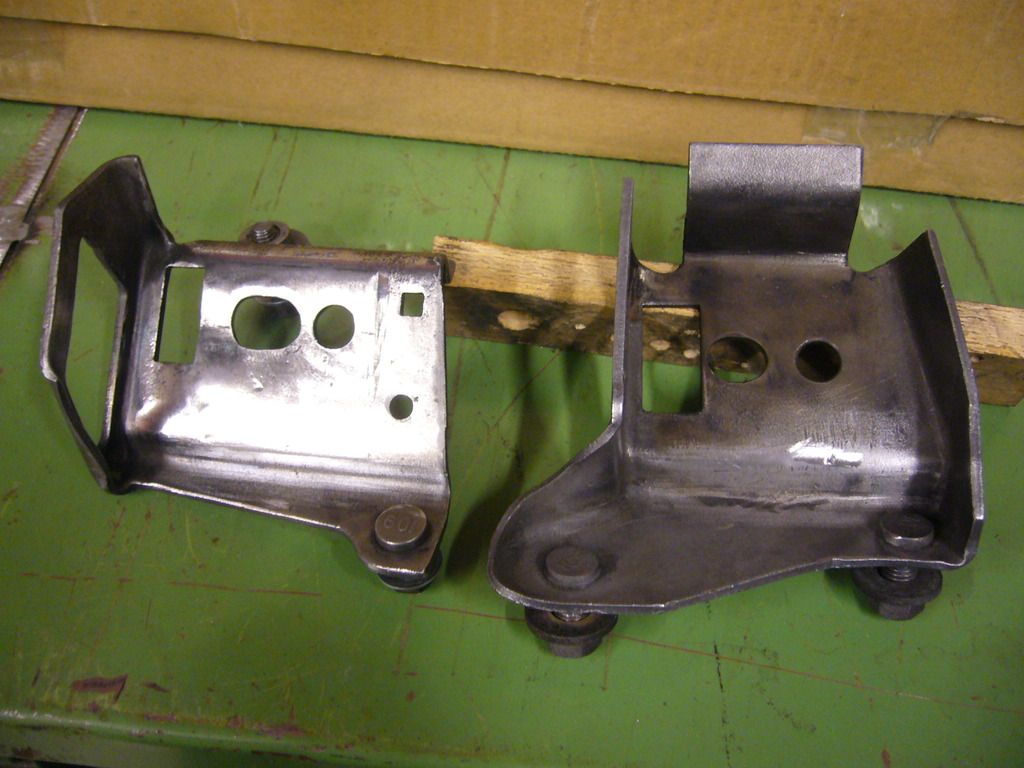
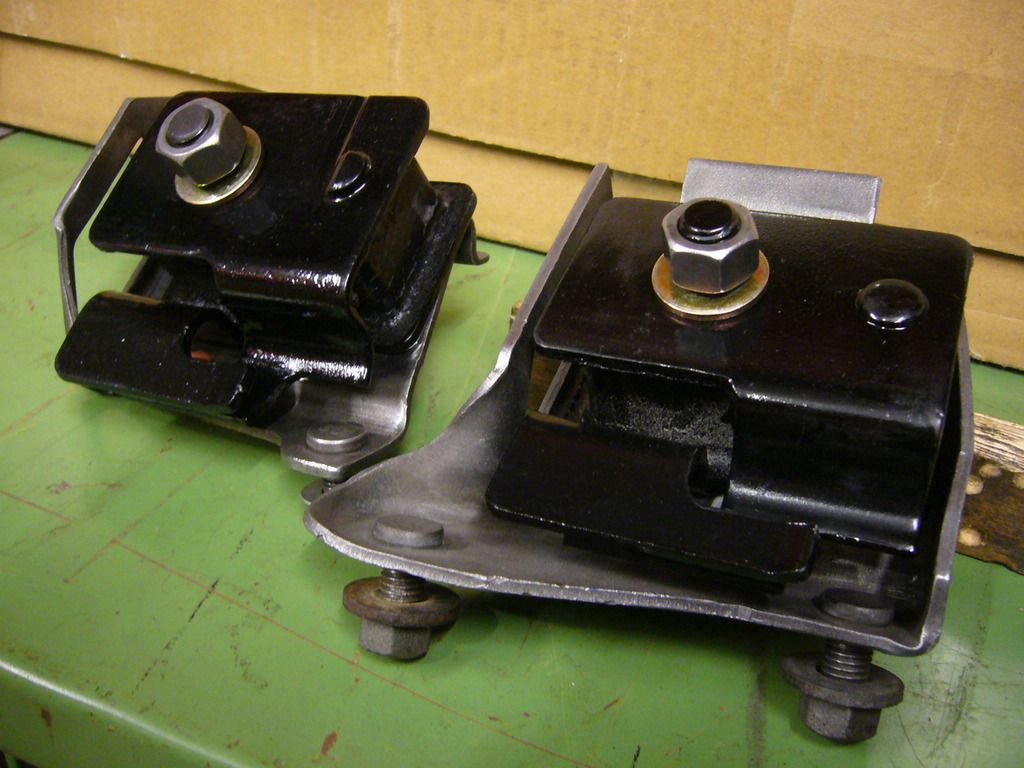
Ram engine mounts installed into modified Fiero brackets:
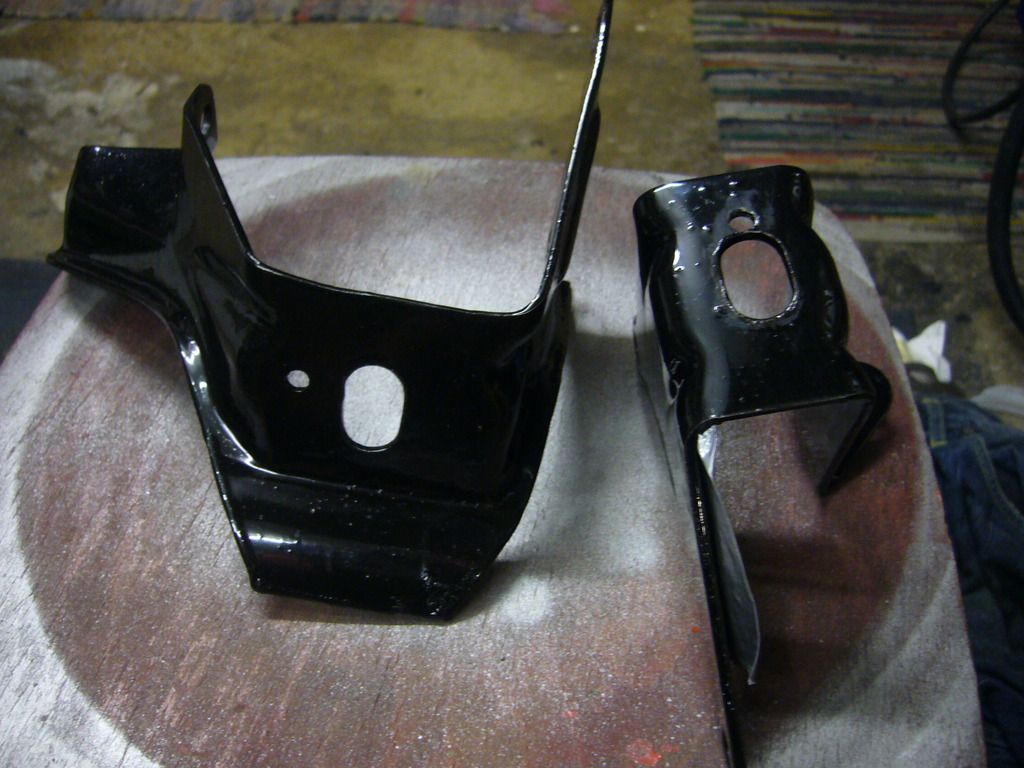
After painting:
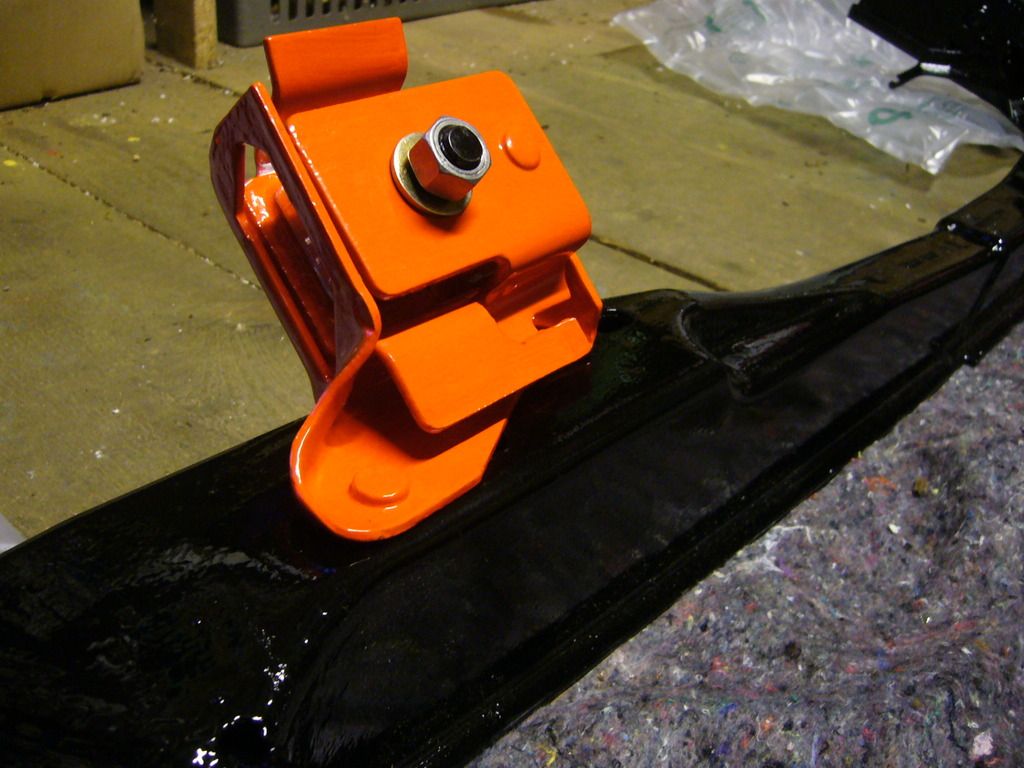
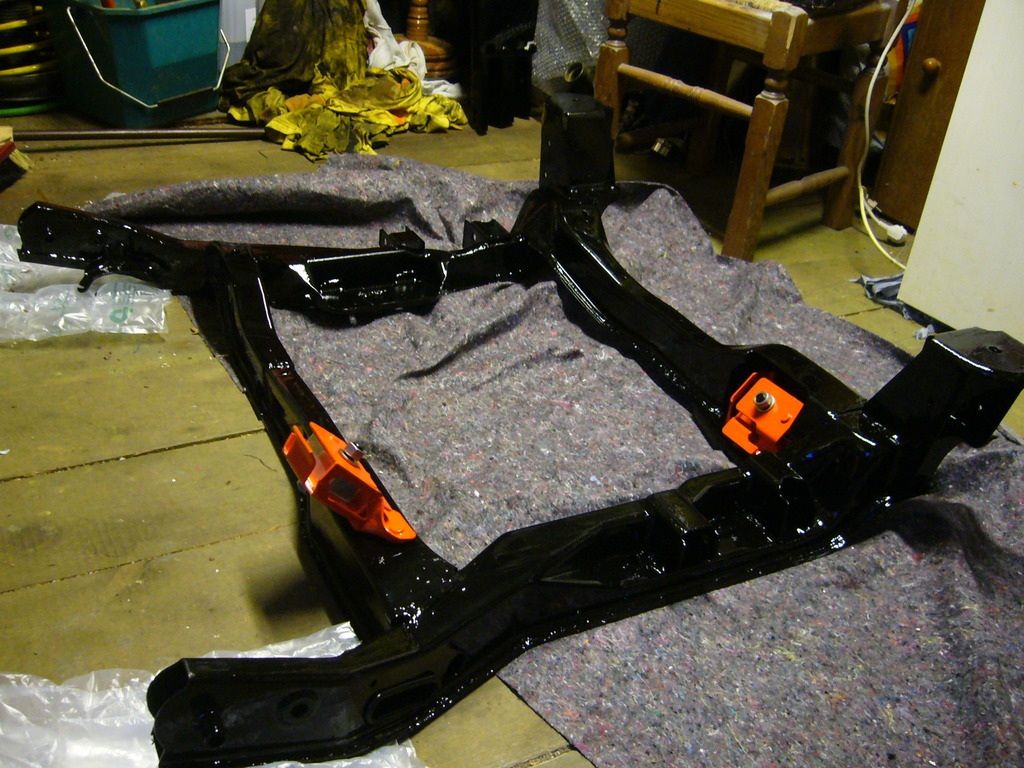
Freshly painted cradle ready for installation:
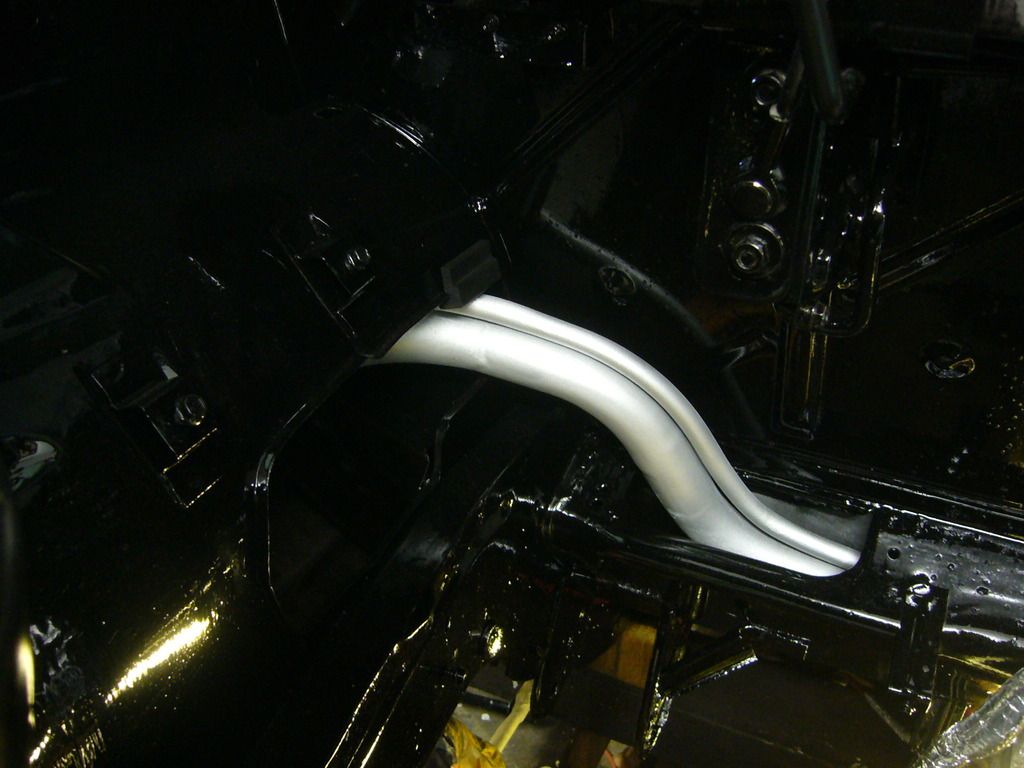
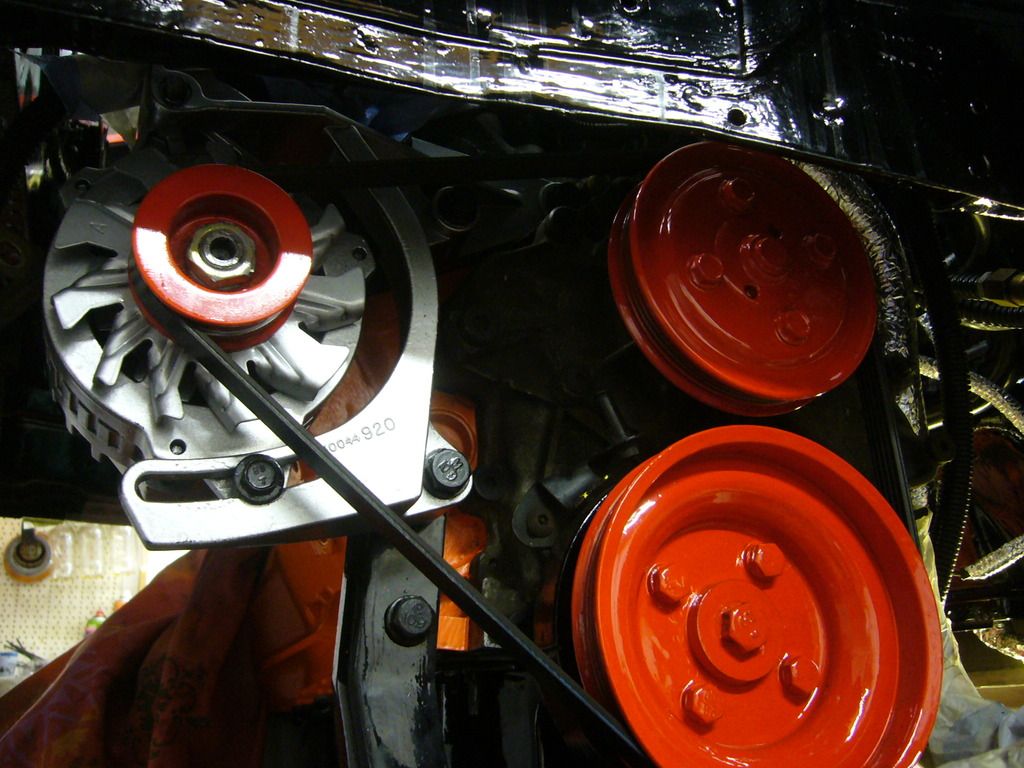
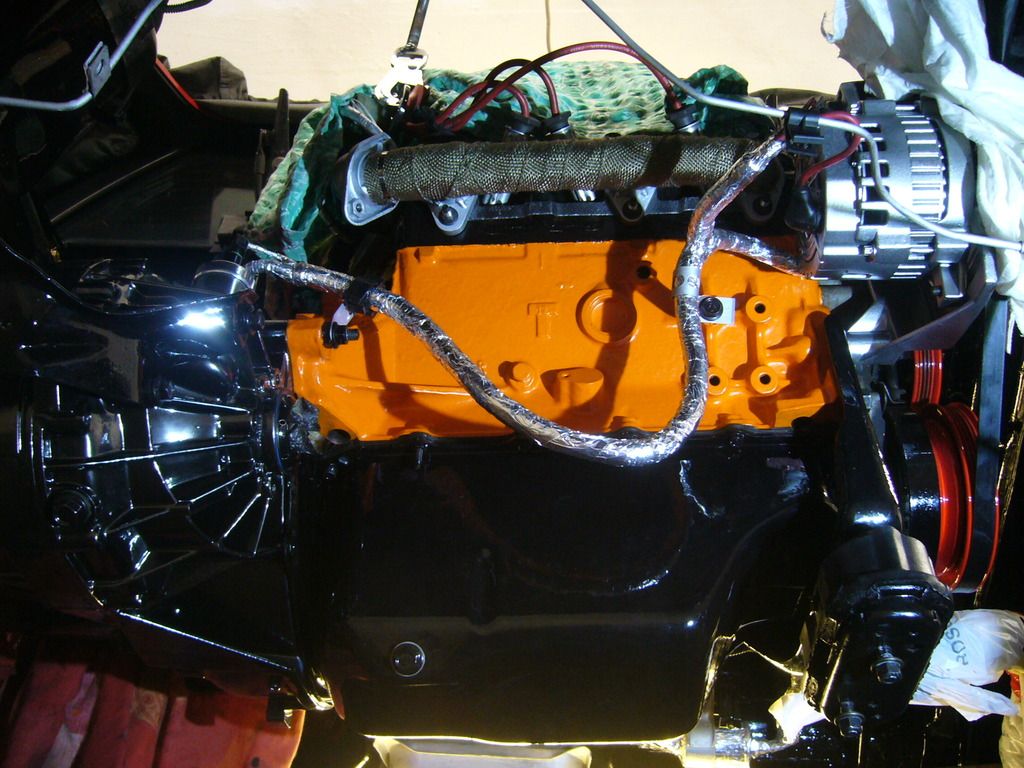
Engine bay prepared for tranny installation: (painted in high gloss black, new heat insulation of wiring harness)
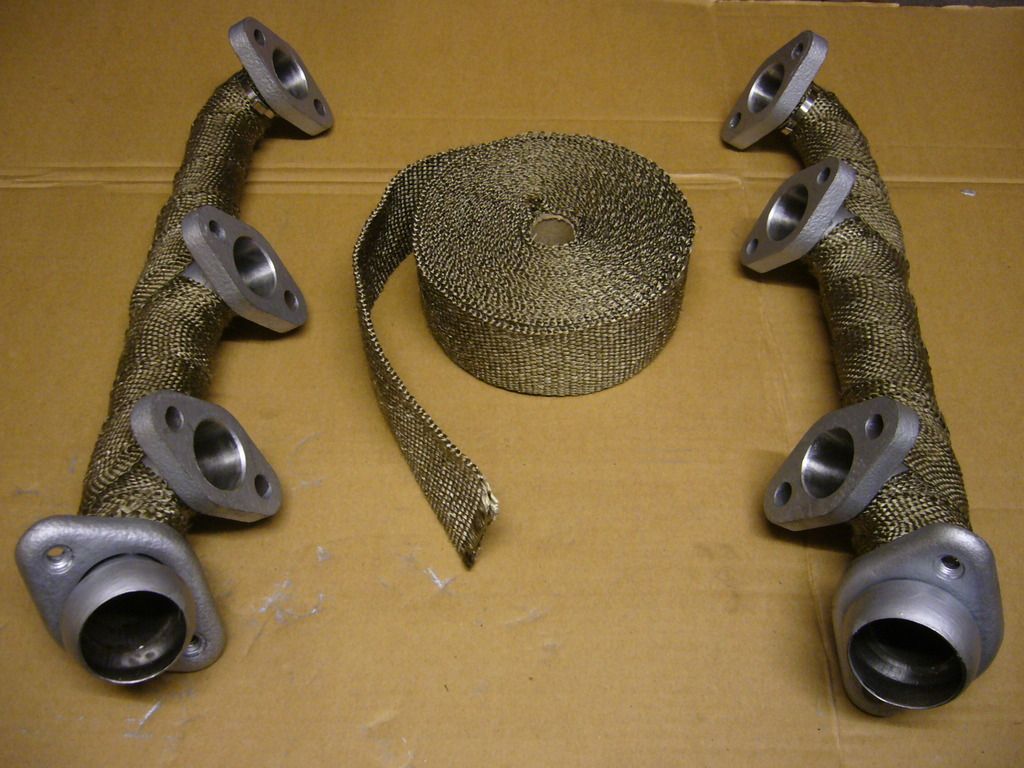
Ported and heat wrapped OEM Fiero headers ready for installation (I workd on them 2 days):
Tranny installation (at least 2 persons required - in my case 3 persons):
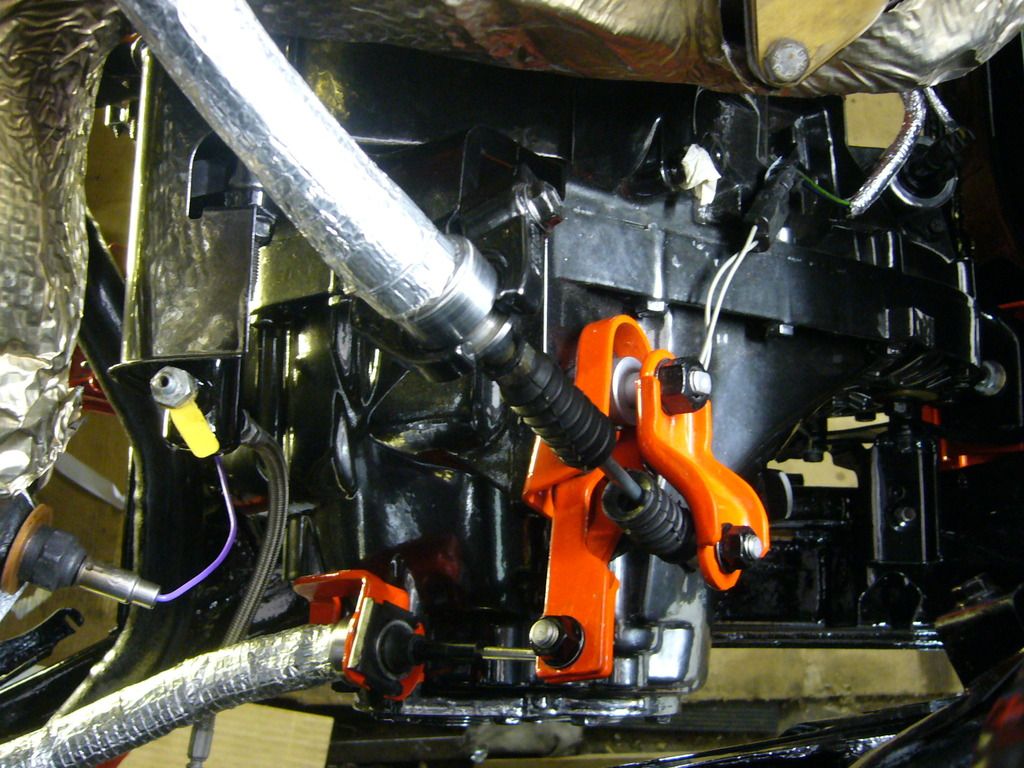
After first test fit of my custom tranny mounts (cradle was already installed) I noticed that I need to remove all tranny mounts and tranny brackets again, because some further modifications were required!
Modifications: Cutted rear mount upper edge and modified tranny brackets with elongated holes:
Finally it was possible to install the cradle and tranny mounts:
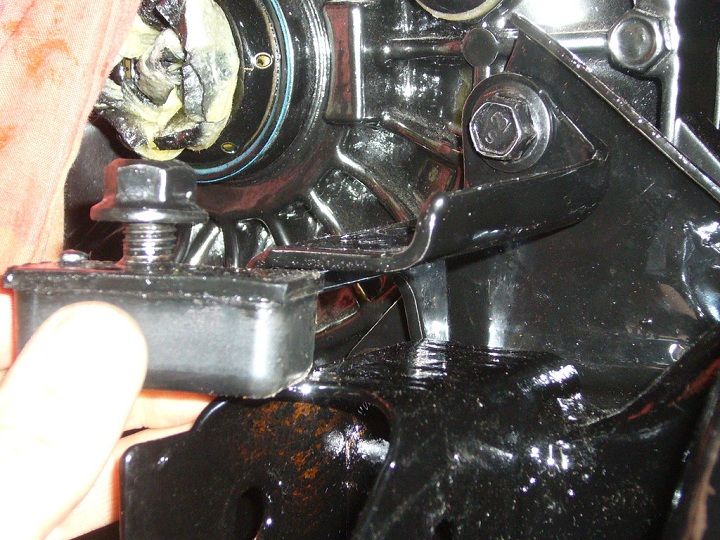
Another minor modification was required (because the tranny/engine sits a bit lower now):
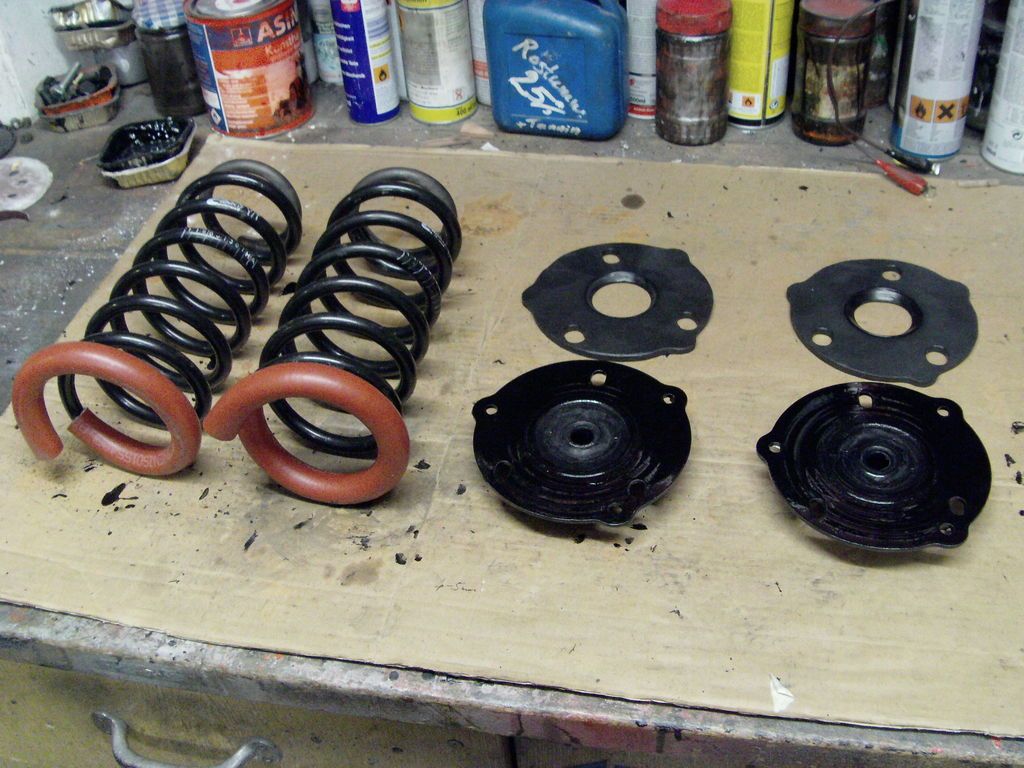
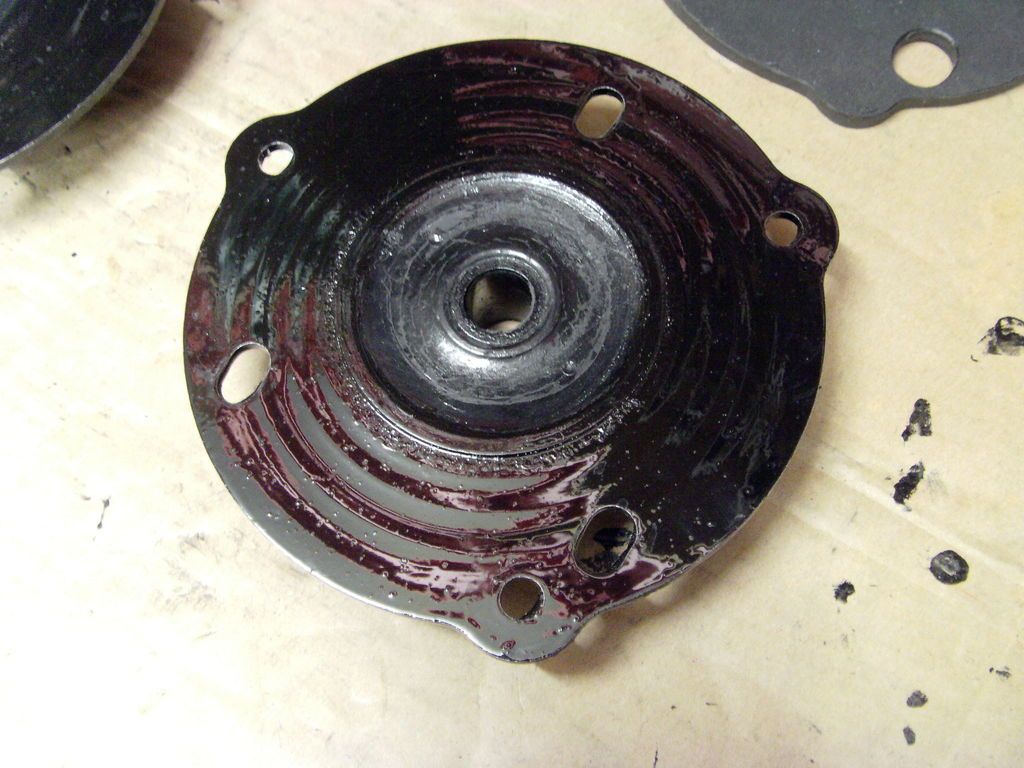
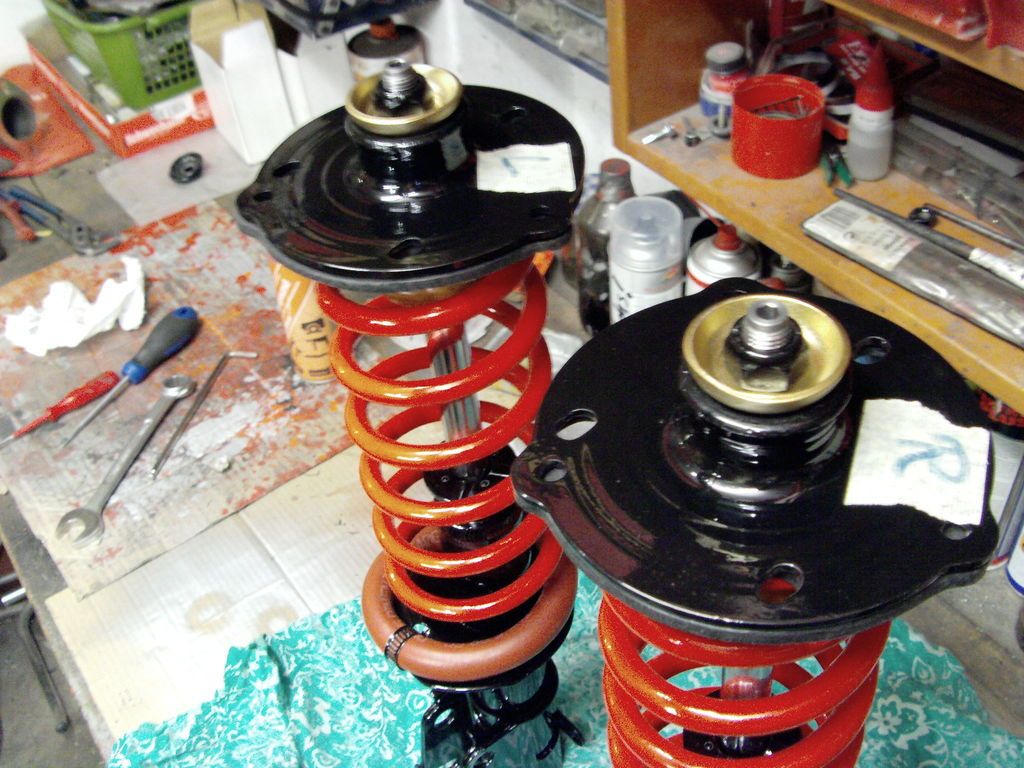
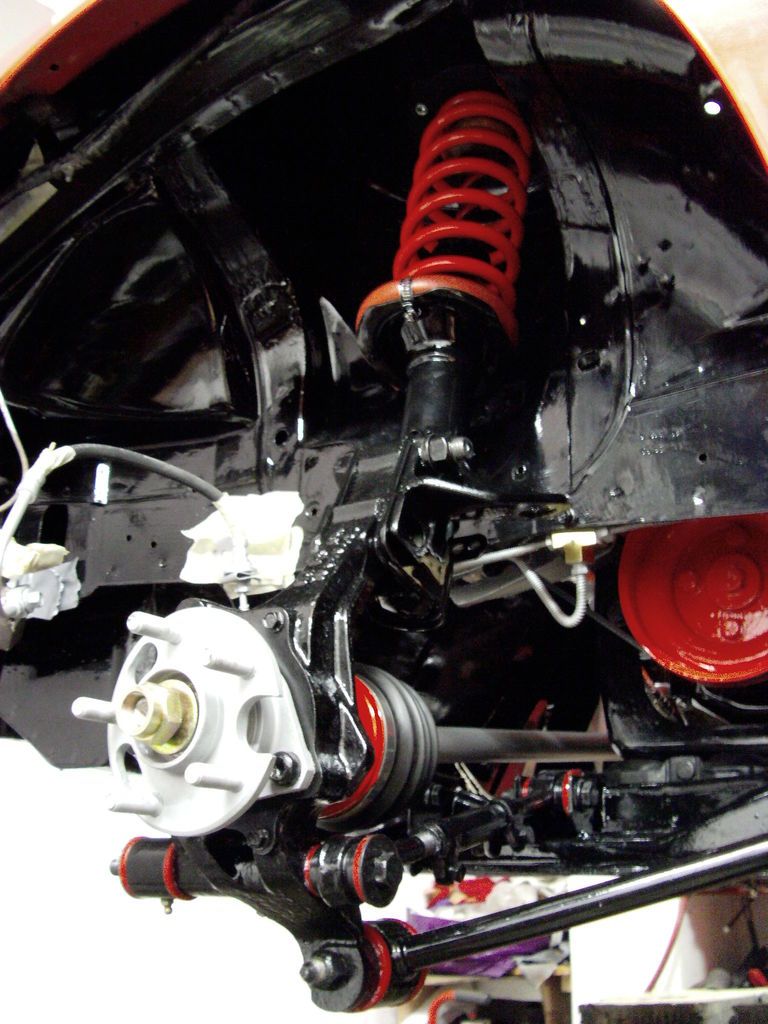
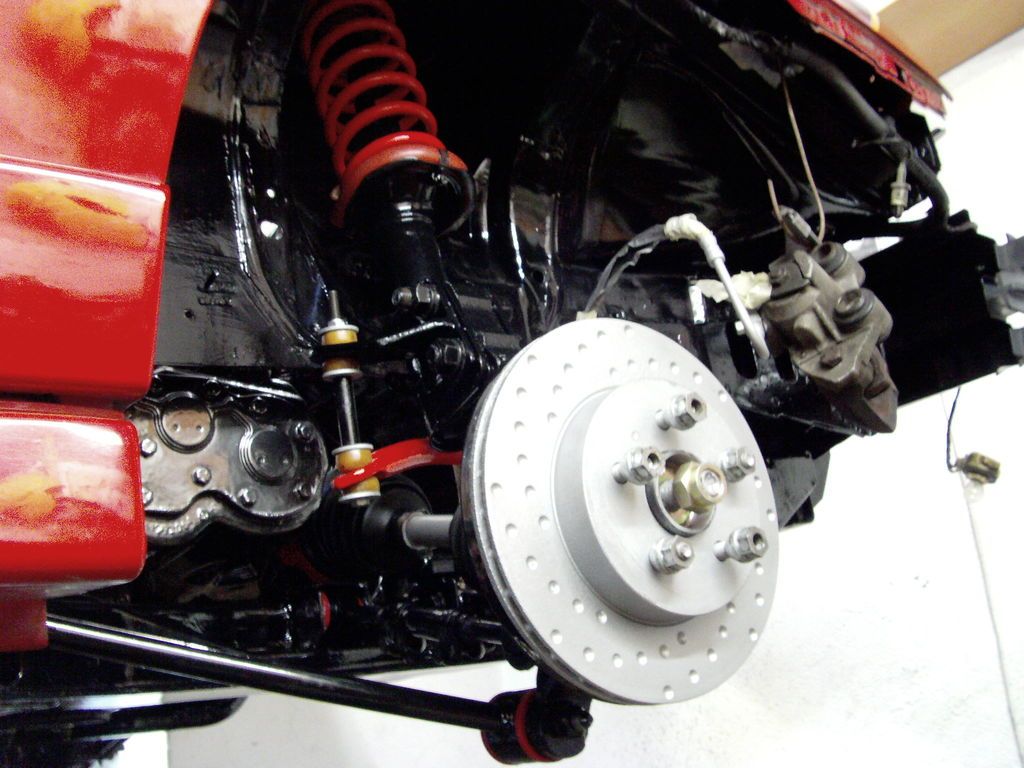
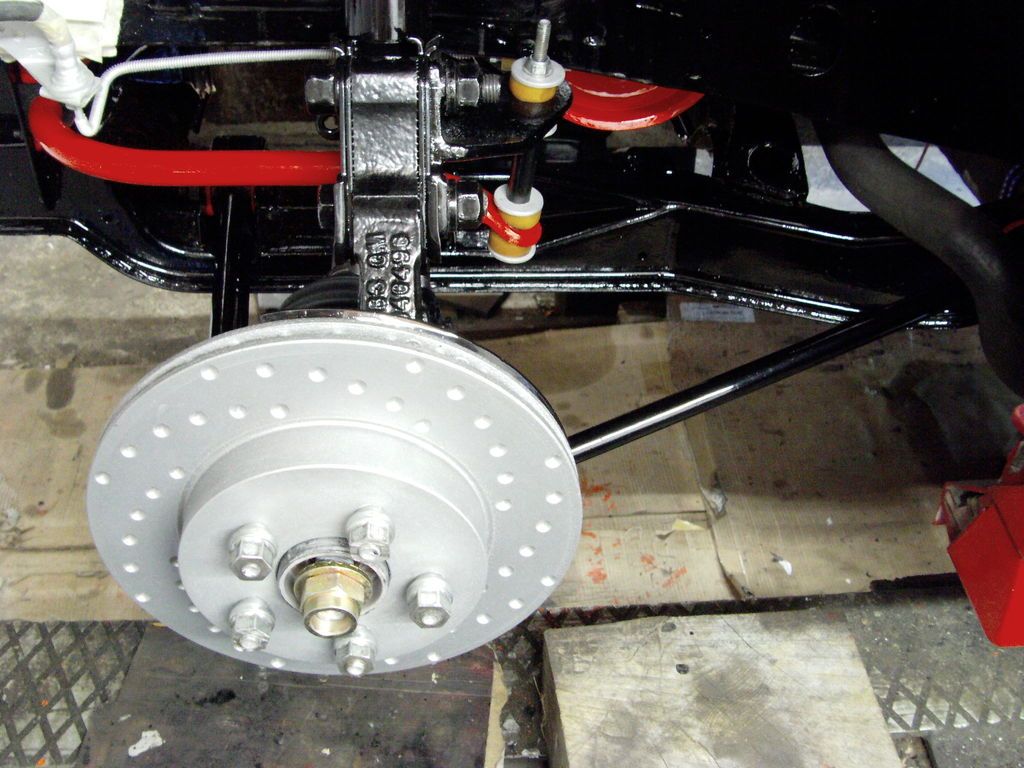
Modified strut mount plates (elongated holes for additional camber adjustment):
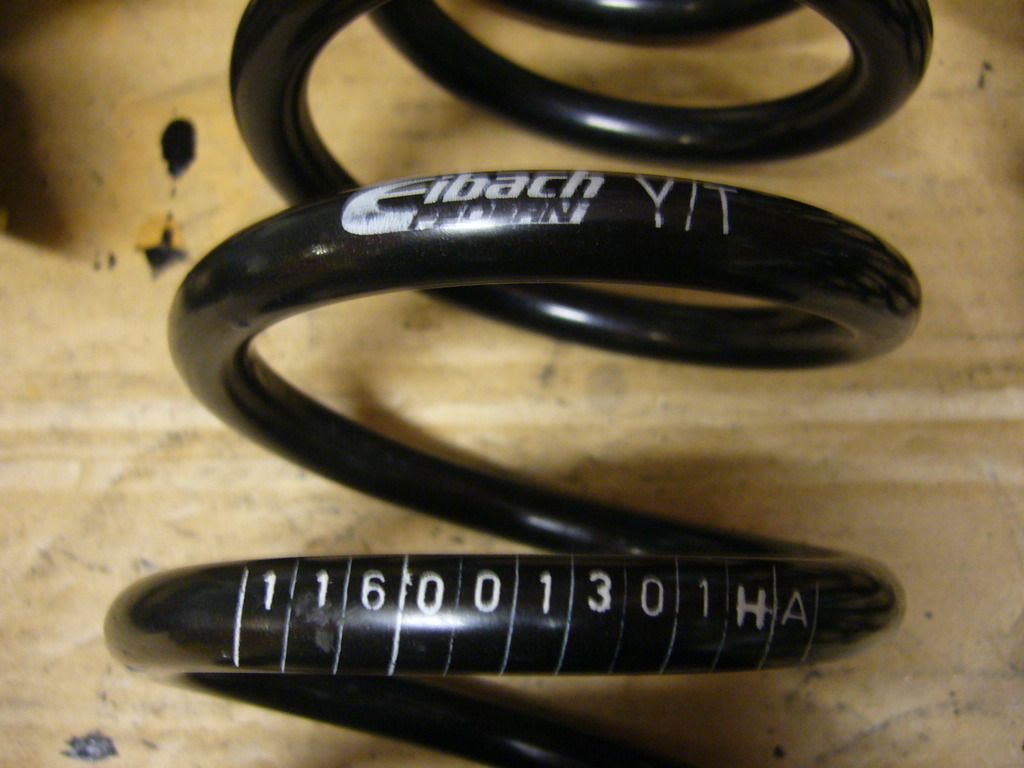
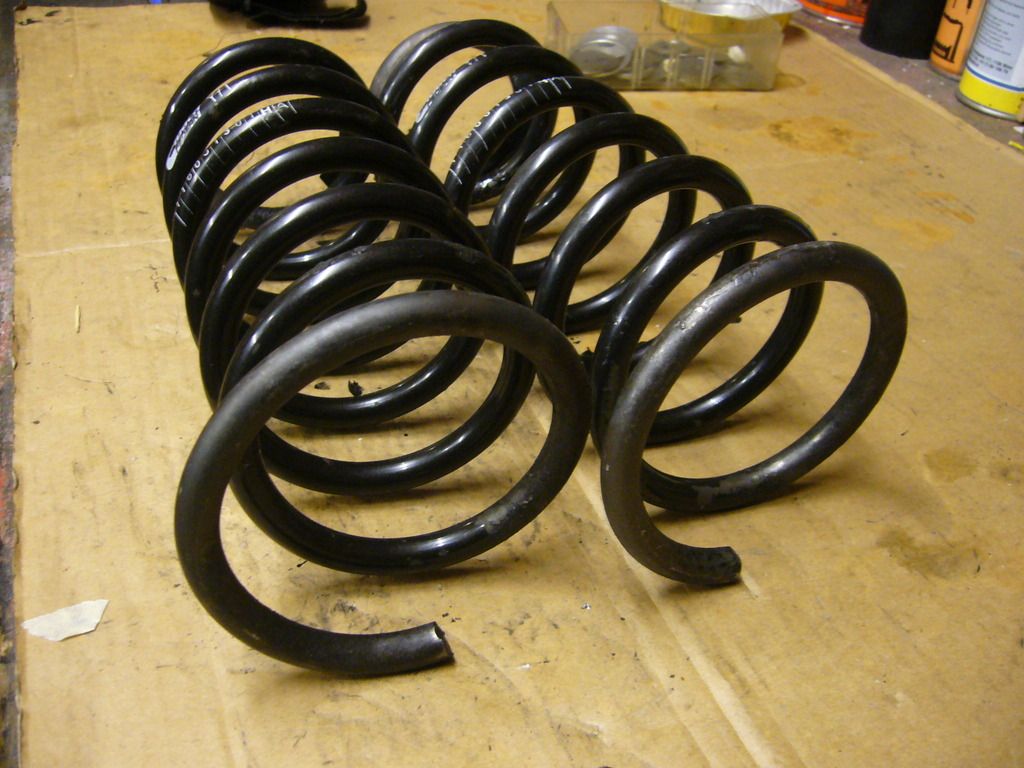
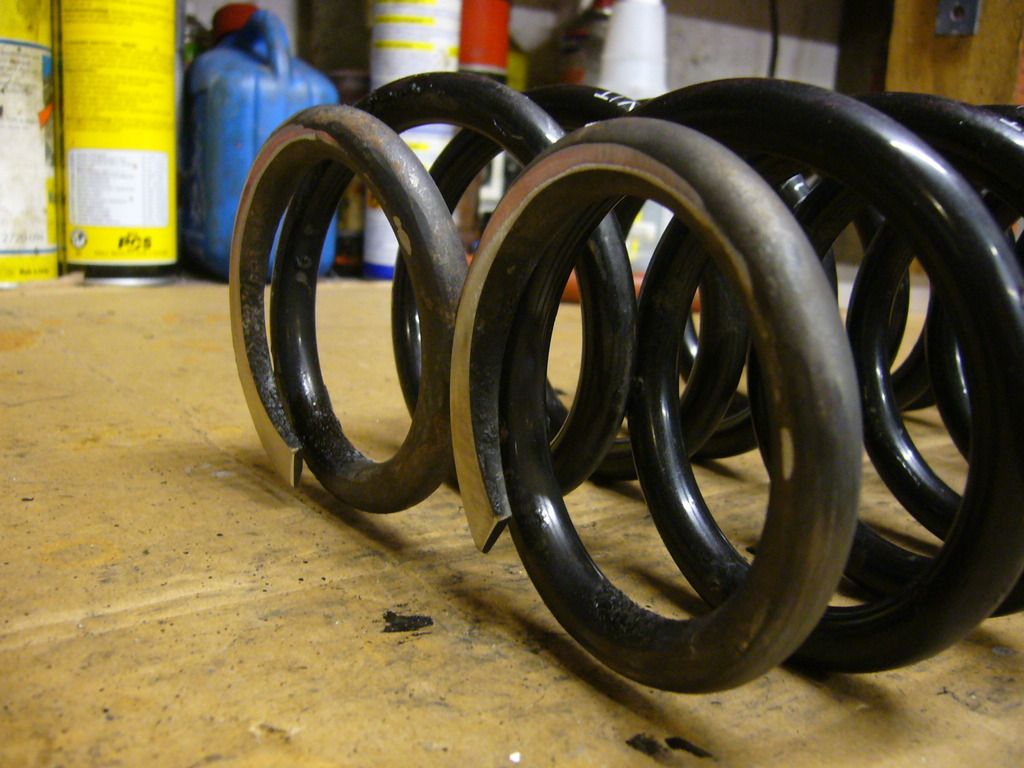
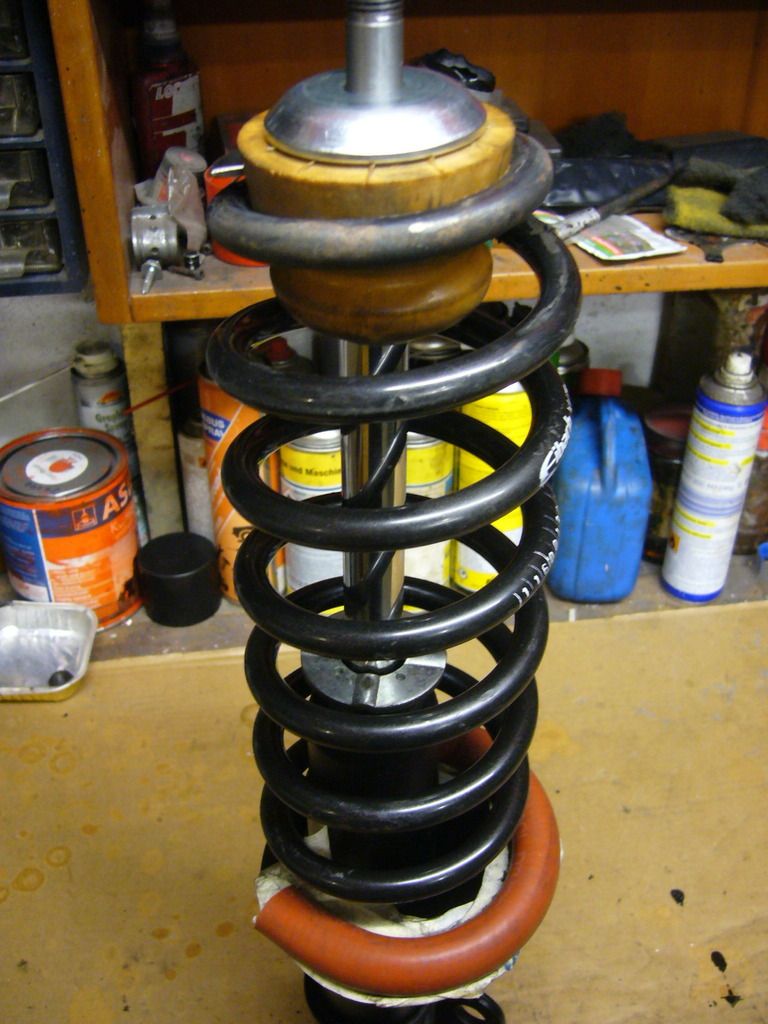
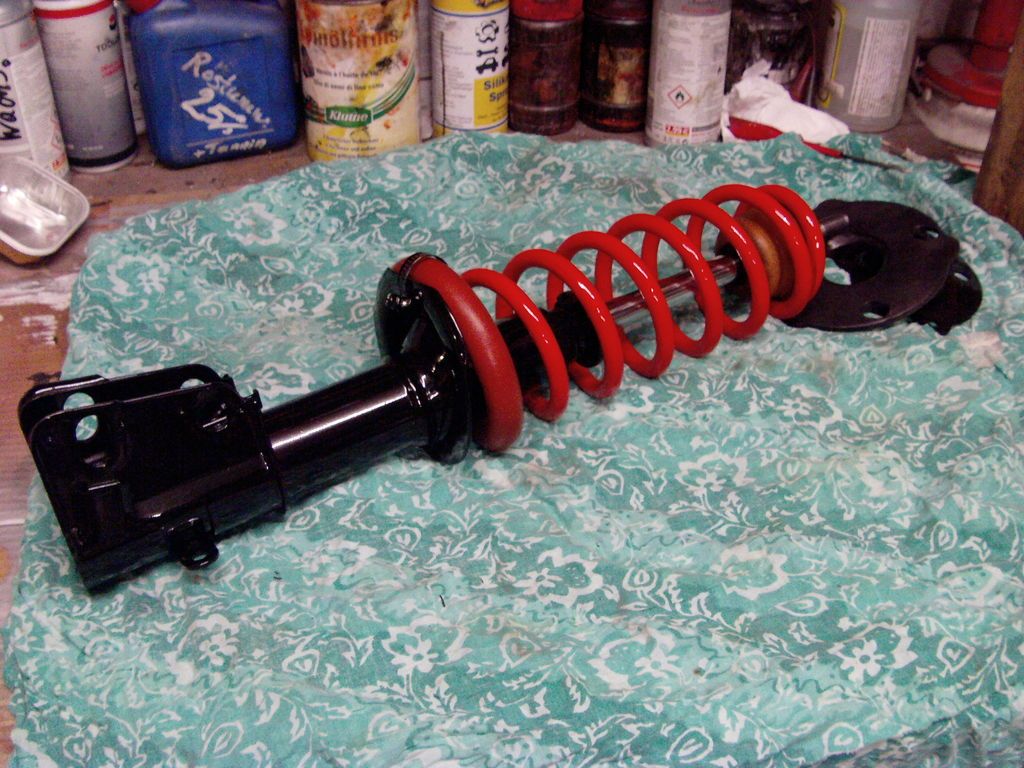
Modified Eibach Mitsubishi Lancer springs (part number# 116001301): (1/2 coil cut with bent & grinded ends)
Spring calculation: *) Ground clearance measured from side skirts.
Resulting rear spring rate: 196.9 lb/in
F/R wheel rate almost like ´88 Fiero stock F/R. I´ll use ´87 Fiero Eibach front springs, k = 52.3 N/mm (298.5 lb/in).
Technical spring specs coming soon...
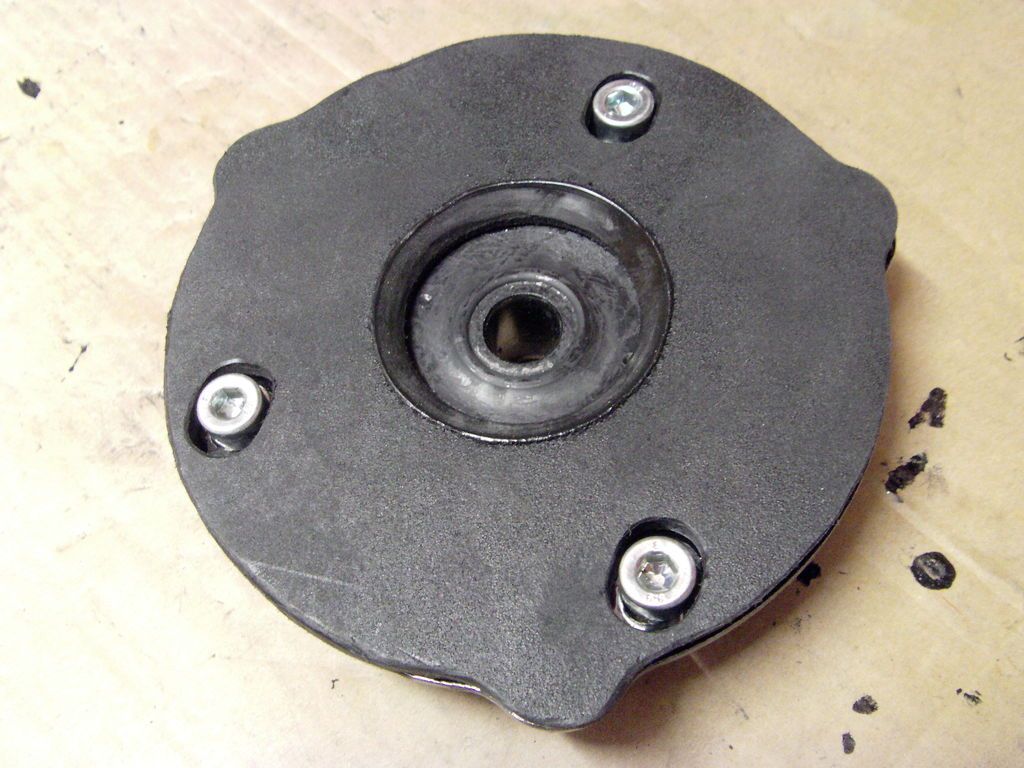
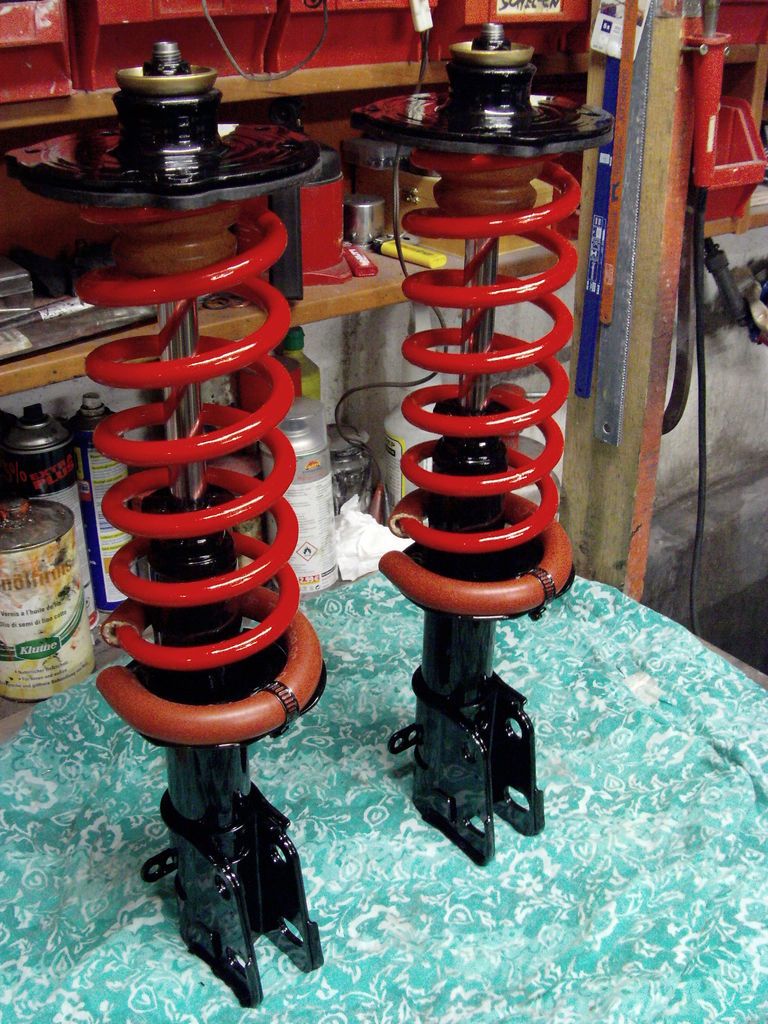
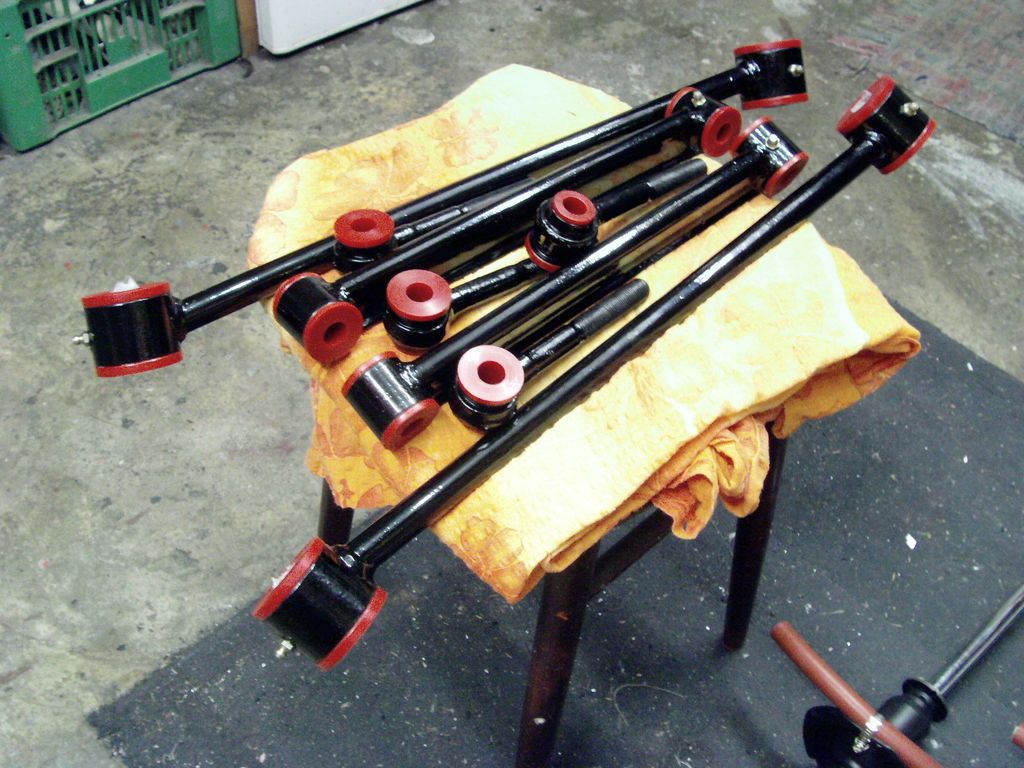
PROTHANE poly bushings installed:
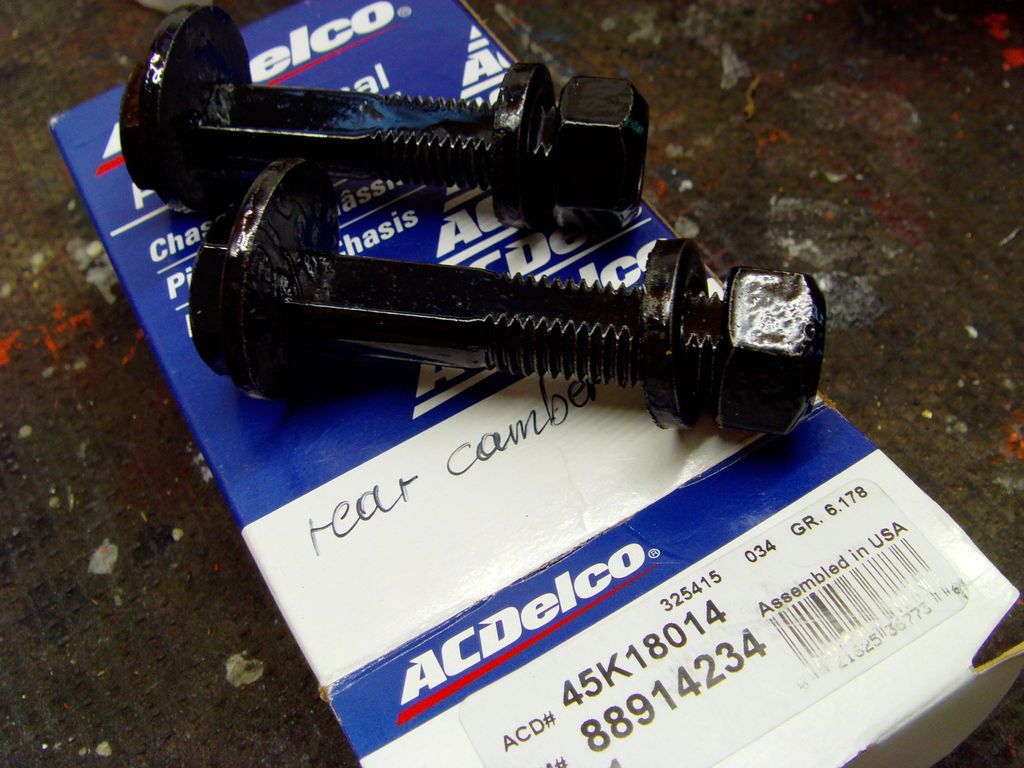
Camber bolts painted with POR15:
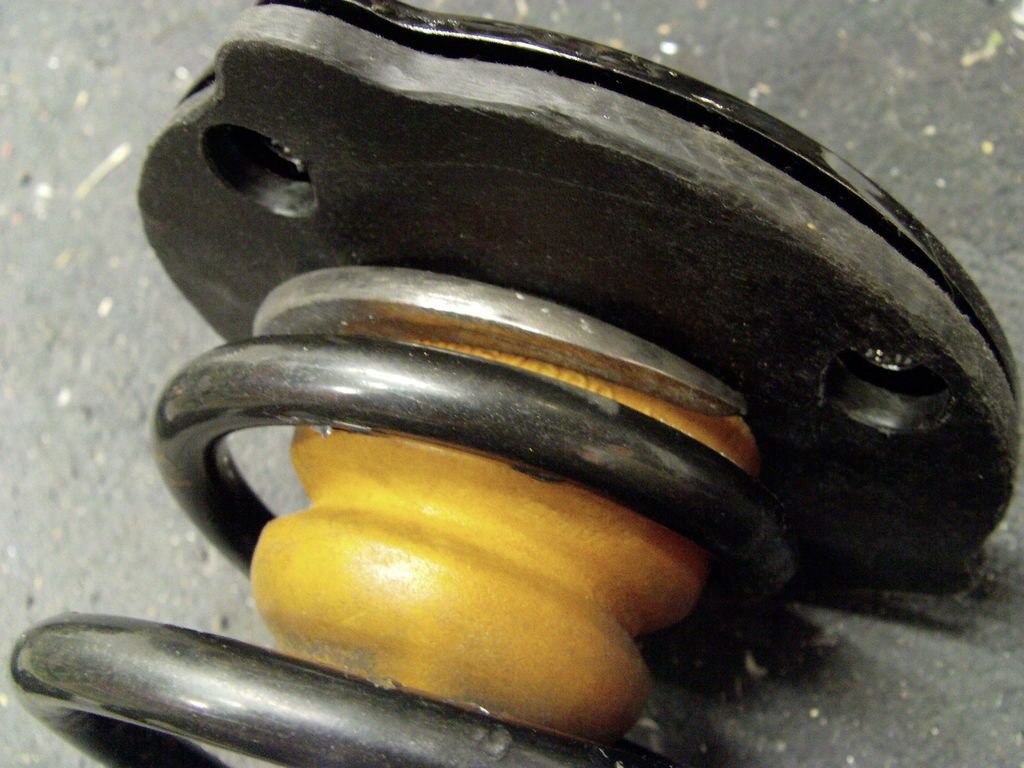
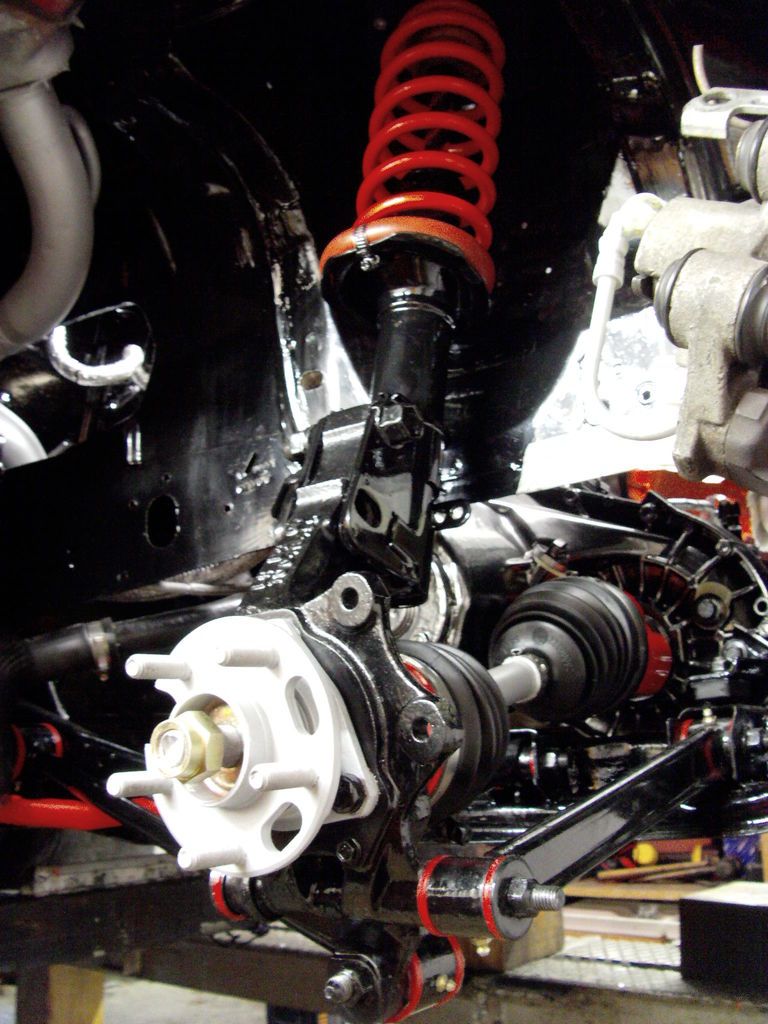
Suspension stuff put together:
The big benefit of this suspension setup is that I can also drive with this setup in Austria without problems with the ****in´ police or ****in´ mechanics at annual inspection (hopefully).
I will tell them that I have just painted the stock coil springs in red during my restoration project. I know that some red suspension parts (like RED suspension bushings) are strictly illegal in Austria, but I hope that this doesn´t apply to red springs and stabilizer bars…? But everything is possible to be illegal in Austria.
However, a much more “legal” look I can only achieve with black paint. But I wasn´t able to resist to paint some parts in red. Black/red paint combo looks awesome!
Above you can see my old resurfaced and drilled stock rotors. They are also illegal now. I have forgotten that I am in Austria as I drilled the holes... Therefore I need to order new rotors soon (in order to pass next inspection).
[This message has been edited by Moar (edited 02-18-2017).]
As a parked my Fiero in the garage and opened the hood I recognized some oil drops. Both axle shaft seals are leaking again and work begins again...
Especially the driver side leaks quite much and ****s up the whole engine bay. Passenger side leak is almost nothing (so far).
It looks like I have the same problem like qwikgta.
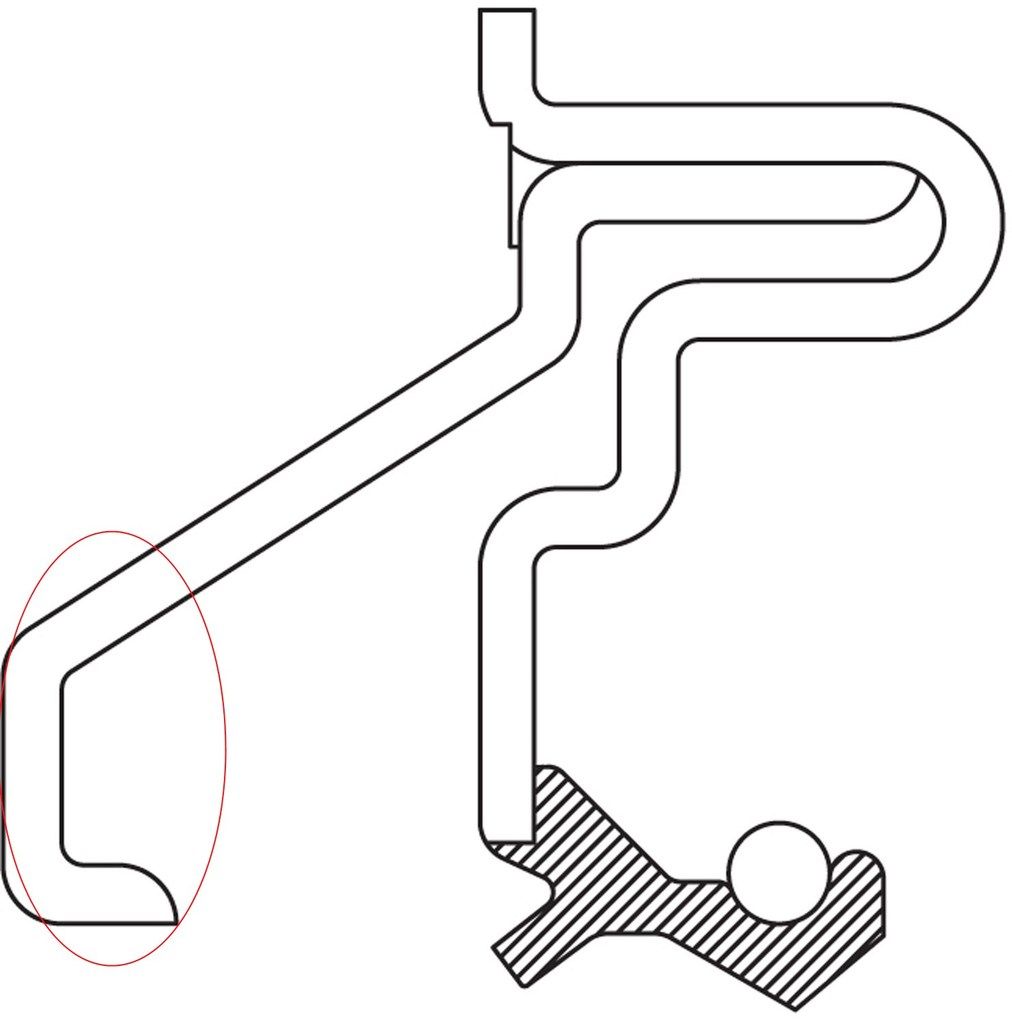
Copy of qwikgta sketch about the problem:
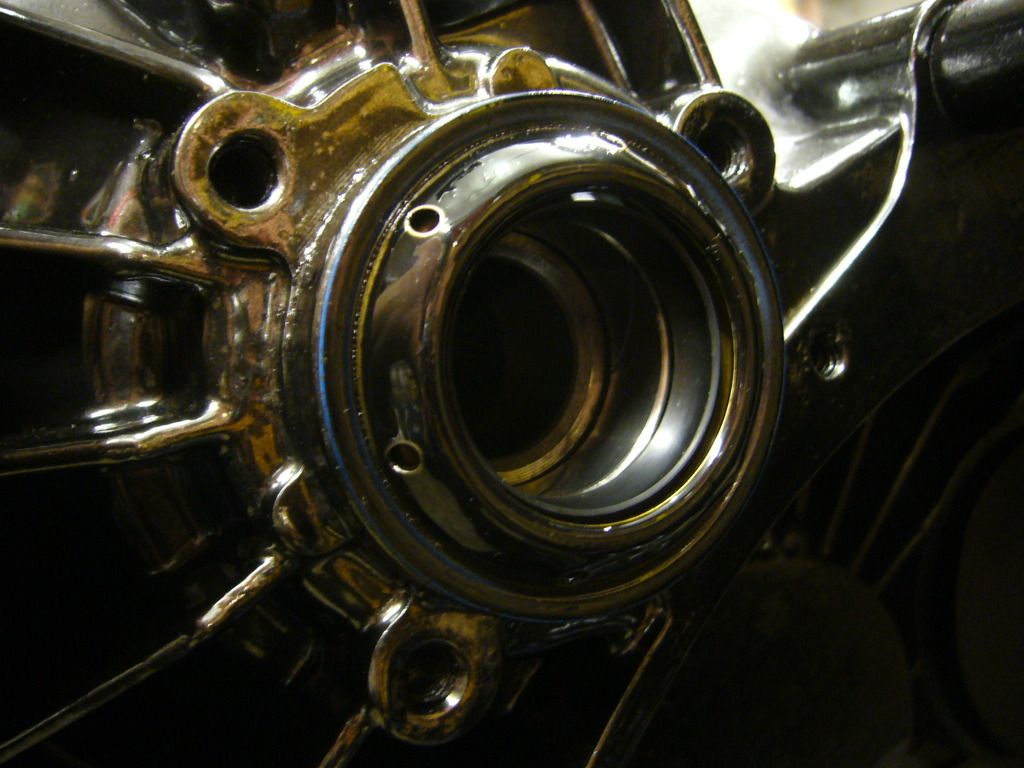
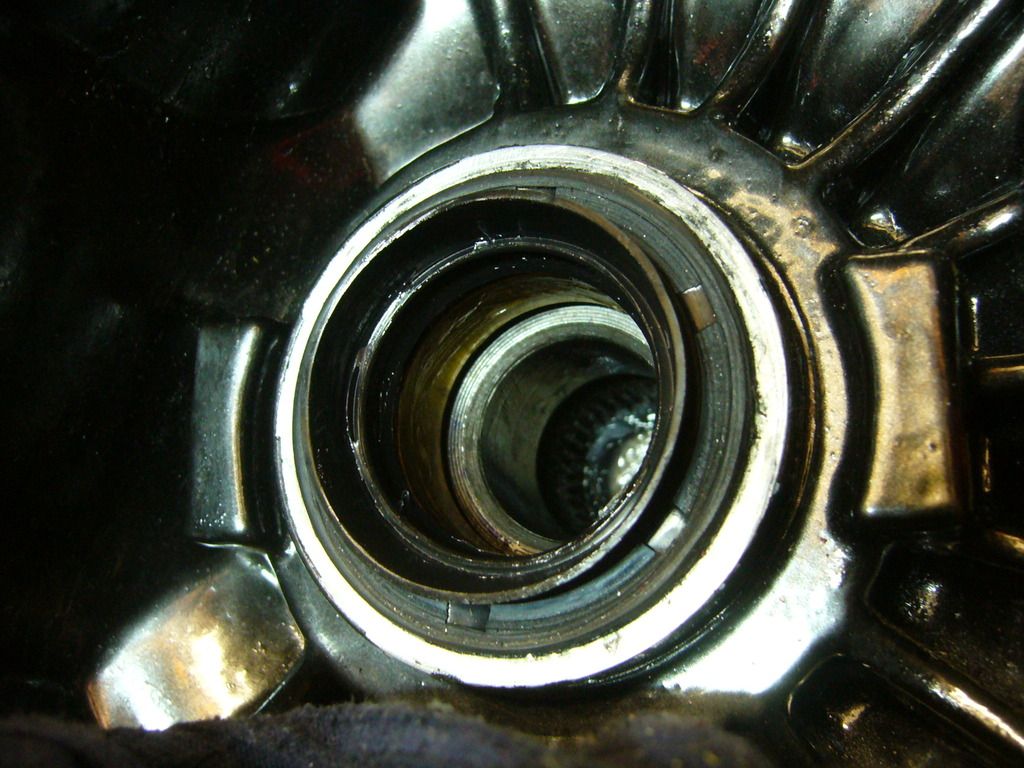
The surface of the drive shaft journal on which the seal rides I have smoothed/polished very carefully before installation. This cannot be the cause of the oil leak / seal damage.
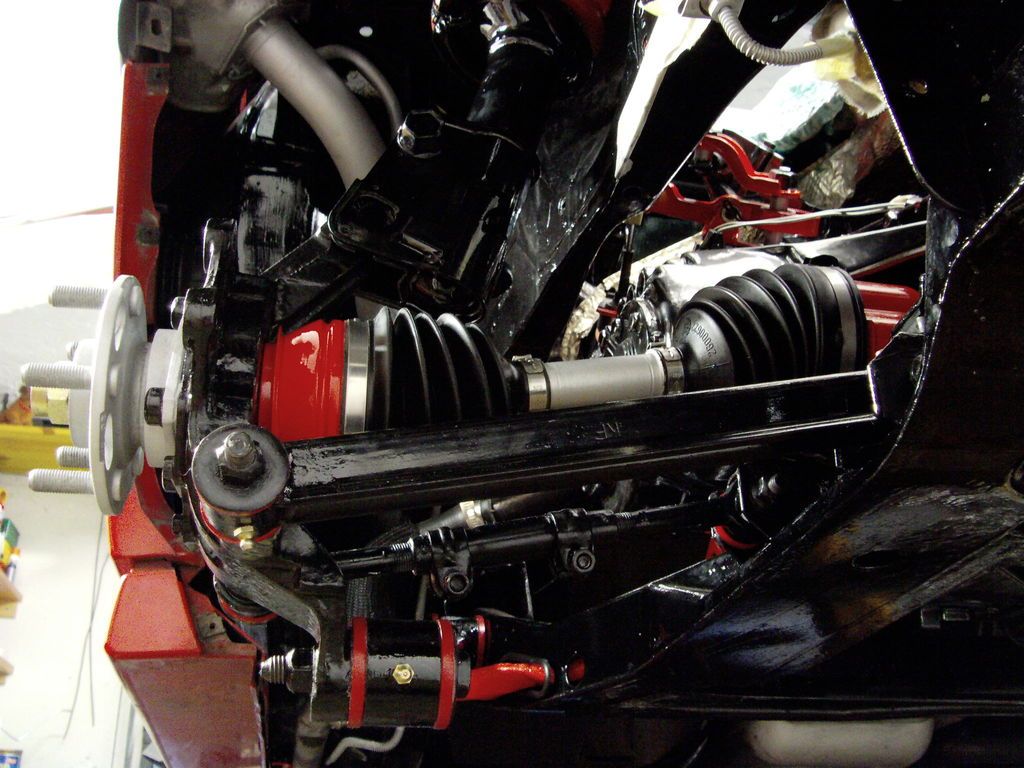
The tripod has contact in axial direction with the shaft seal cage (see red circle):
In this area the leaking oil is contaminated with metal particles due to the axial interference of the parts. Maybe these metal particles have damaged the axle shaft seal? This is one problem, which I have to fix soon.
However, I can remember that a small leakage was already there before I drove with the car! At this time there weren´t any metal particles.
Maybe leakage is a common problem with this type of axle seals (OEM Fiero seal style)?
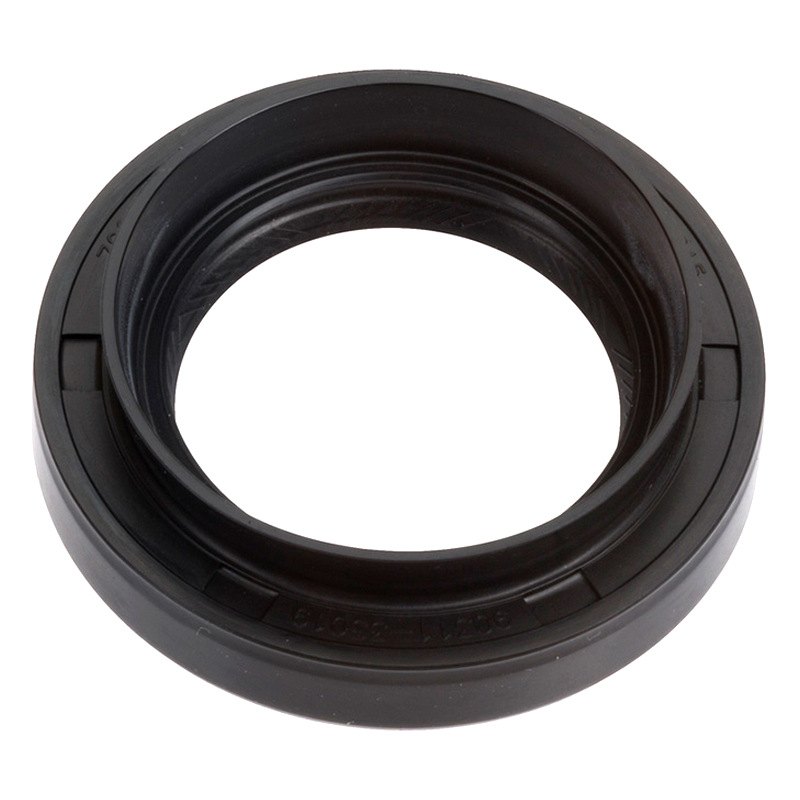
I could try out NATIONAL # 223540 as alternative shaft seals (with a big rubber dust seal instead of the metal cage of the OEM Fiero seal): This seal is for the 2003 - 2006 Pontiac VIBE and many other newer cars like the Toyota RAV4. ID and OD are same like the Fiero shaft seal (35 / 55 mm)!
Last week as I have changed tires & wheels to original for annual inspection, suddenly the leakage became very worse. The leakage was so bad, that almost the whole tranny oil leaked out in about 2 hours! I think the reason was the axial movement of the axle shafts during tire change (caused by the suspension travel).
I have trapped the oil and I have found out that there are a lot of small metal flakes in it I know some metal flakes are normal with new bearings during the transmission break-in procedure. Therefore, an oil change is recommended after approximately 500 miles. Gears even need almost 5000 miles to bed-in completely (remember I have also changed the differential)!
However, I don´t know how much metal flakes are normal and which particle amount indicates a transmission problem.
I have placed a strong magnet under the oil and most of the particles are magnetic. There are small bronze metal flakes in it which are attracted only slightly by the strong magnet magnetic, whereas dark / black particles are attracted much stronger by the magnet.
Hope it´s not a problem with the differential bearings. Maybe these metal flakes are mainly coming from these add-on bearings? (one add-on bearing is made of brass material, whereas the other one is made of a gray sinter material)
Is this amount of metal flakes normal after the first 100 miles?
Moar, Great pictures and I must say if you could convert your personal energy applied to your project into the car somehow you would not need an engine. Great work. I guess we Americans can take heart that "big brother" has not dropped on us as hard as in Austria.
I can not tell much from the pictures, but so many chips does not seem normal. The fact that your trans oil level has dropped while leaking suggests something could have been starved of lubricant and cooling for a period. And you did not tell us how hard the test run was while this was happening. I know you put in a lot of research on the preload of the diff bearings. Were they tight after you used your gauge(s). The stub end engagement of the inner spline is something to consider , but I cannot picture how it would play. During slight movement could that stub end gouge the female spline?
Edit: That is good work on the springs. I know how difficult refoming and flattening is. I am glad to see you are not afraid of heat on the end of the spring . Do you gain camber adjustment with both the flat sided bolts AND the slotted spring seats?
[This message has been edited by hobbywrench (edited 09-05-2016).]
I´m 100% sure that there was always sufficient transmission oil in my tranny during test drives. I have recognized early that the new axle shaft seals are leaking. One side already started leaking after driving the first few meter (just a little bit, but it became worse and worse over time). For this reason I always kept attention to the oil level. The leakage of the left axle shaft seal became extremely worse during tire/wheel change AFTER my last test drive.
Furthermore, I always drove with ½ power during test drives (only up to 3500 rpm, not more). I cannot imagine that there has something overheated. Usually oil changes its color after a few overheating cycles (becomes darker and darker). But the color of the trans oil has not changed. Besides the metal particles the oil looks like new.
Regarding the preload I am sure the diff bearings are tight enough (and there is absolutely no play). They are even slightly tighter than recommended. (I have used a shim 3 sizes larger than ZERO lash, whereas 2 sizes larger is recommended in the Getrag manual). The reason for this decision was that the bearing cones and races came from different manufacturers. (brand new KOYO races mixed with slightly used TIMKEN cones) I thought a little bit of extra preload will help to compensate the additional preload-lose during run-in caused be the mixing of different bearing manufacturers. Hope that this was not a bad decision...
Suspension work: My intention was to get a lowered and nice handling car whereby keeping an “original” suspension look for low $$$. I know I should have pained the springs black here in Austria. However, I hope that I will pass the next inspection also with red springs. The maximum possible neg. camber is -2.8° (with slotted strut mount plates & camber bolts). In my first Fiero I only installed camber bolts and I think more than -1.8° was not possible.
[This message has been edited by Moar (edited 09-08-2016).]
The reason for this decision was that the bearing cones and races came from different manufacturers. (brand new KOYO races mixed with slightly used TIMKEN cones)
Using new bearings with old cones is never a good idea.
Yeah, I know. If I wouldn´t live in Austria and if I could buy a set of new high-quality TIMKEN bearings in the next hardware store then I wouldn´t have done this. I prefer TIMKEN bearings over Austrian SKF bearings. Expensive doesn´t always mean great quality...
But maybe a new set of SKF cones & races would have worked better compared to my KOYO/TIMKEN mix. However, I have compared bearing main dimensions and angles before combing them (no differnce). I cannot say anything about bearing micro geometry, since I don’t have the right tools for this.
In the meantime I have gotten replacement seals and a lot of other Fiero spare and performance parts.
Thanks to Nelson!
I will show you how good Toyota RAV4 axle shaft seals fit Fieros
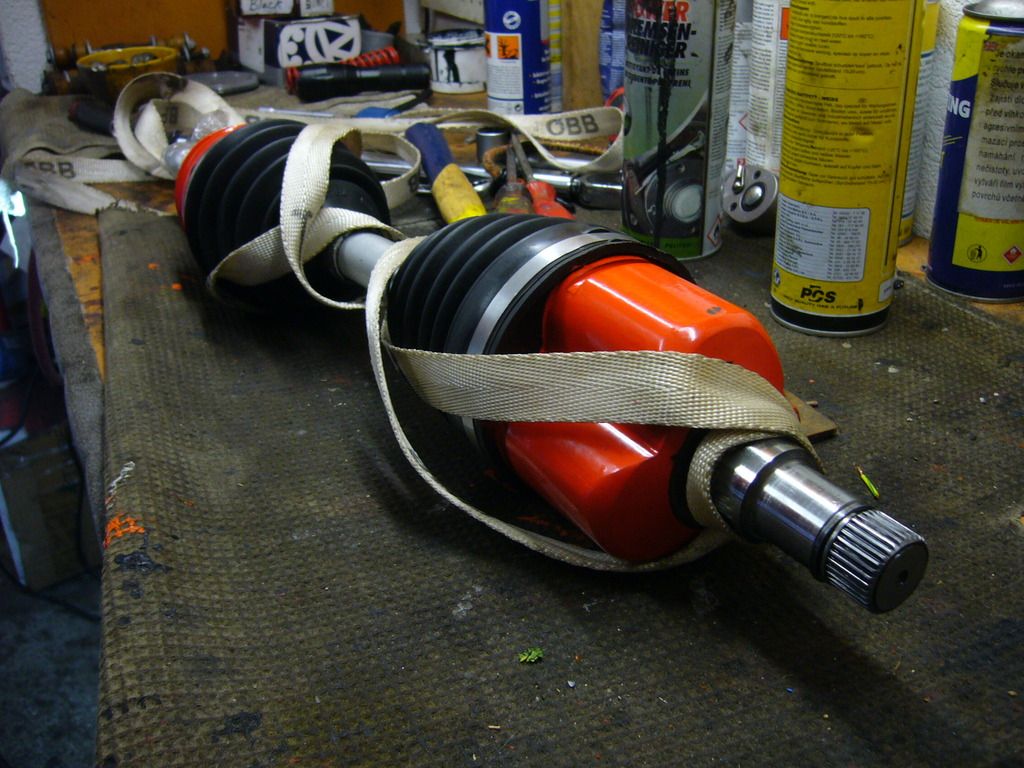
1. Step: Removing suspension components and drive shafts:
I have found out that a belt much easier to push out the drive shaft:
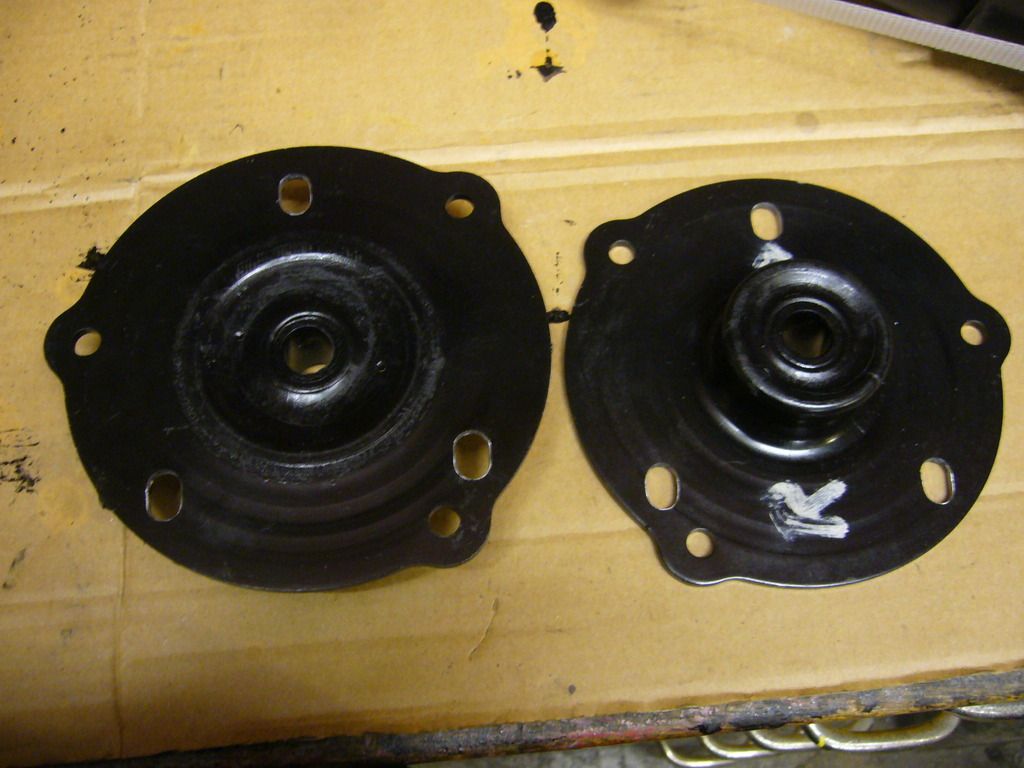
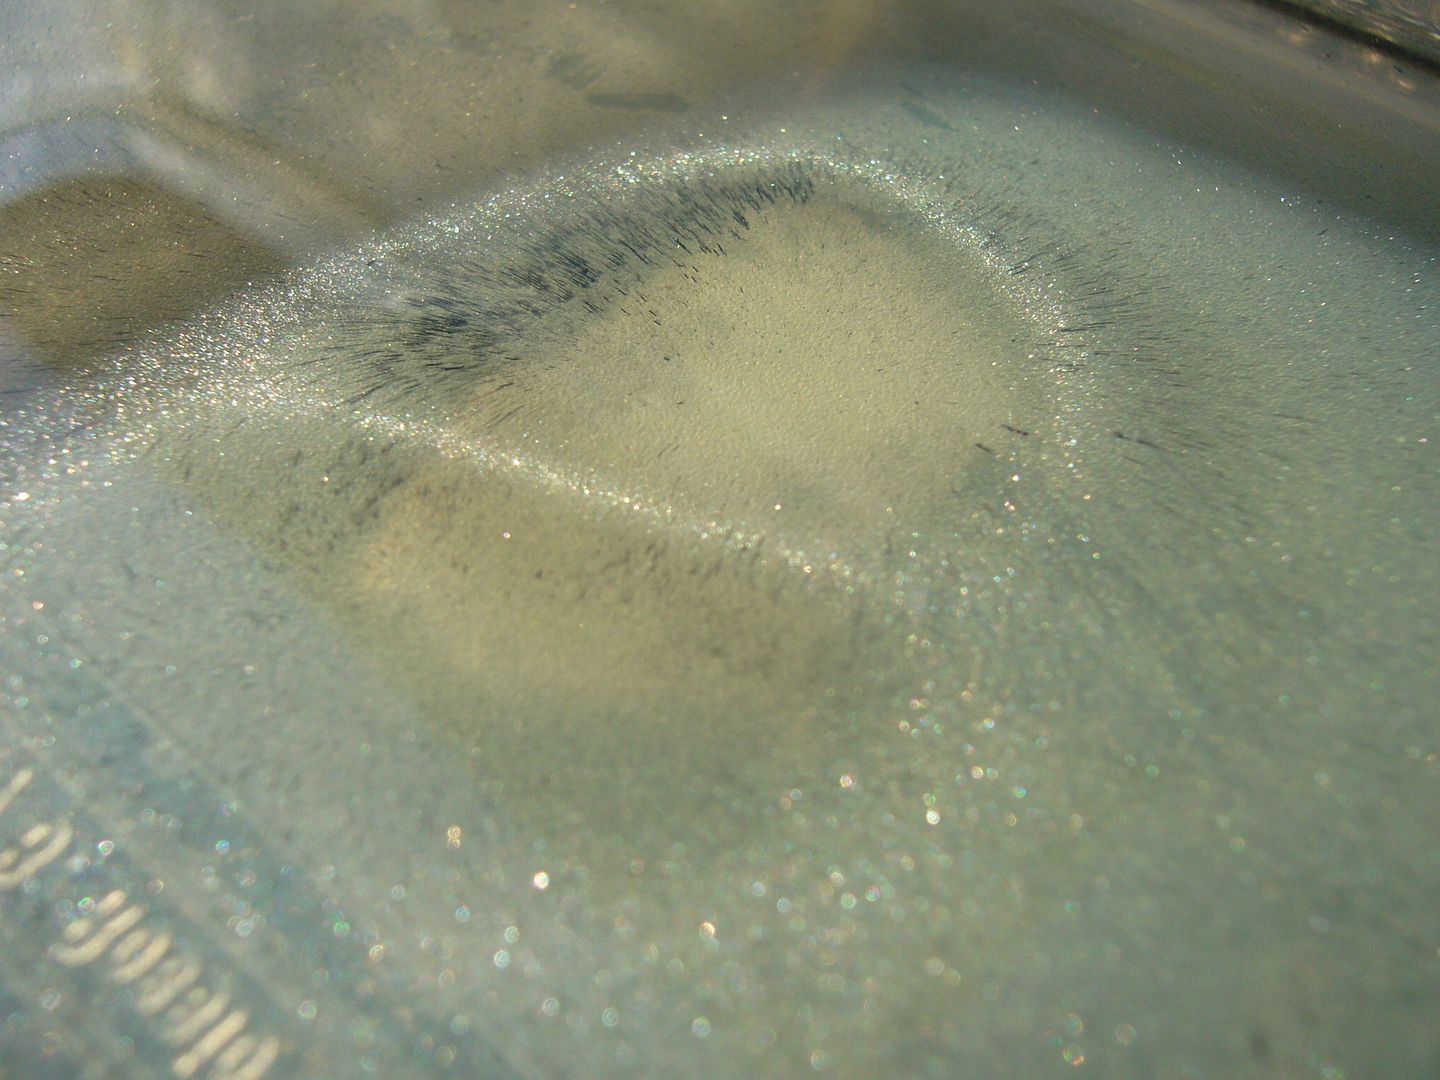
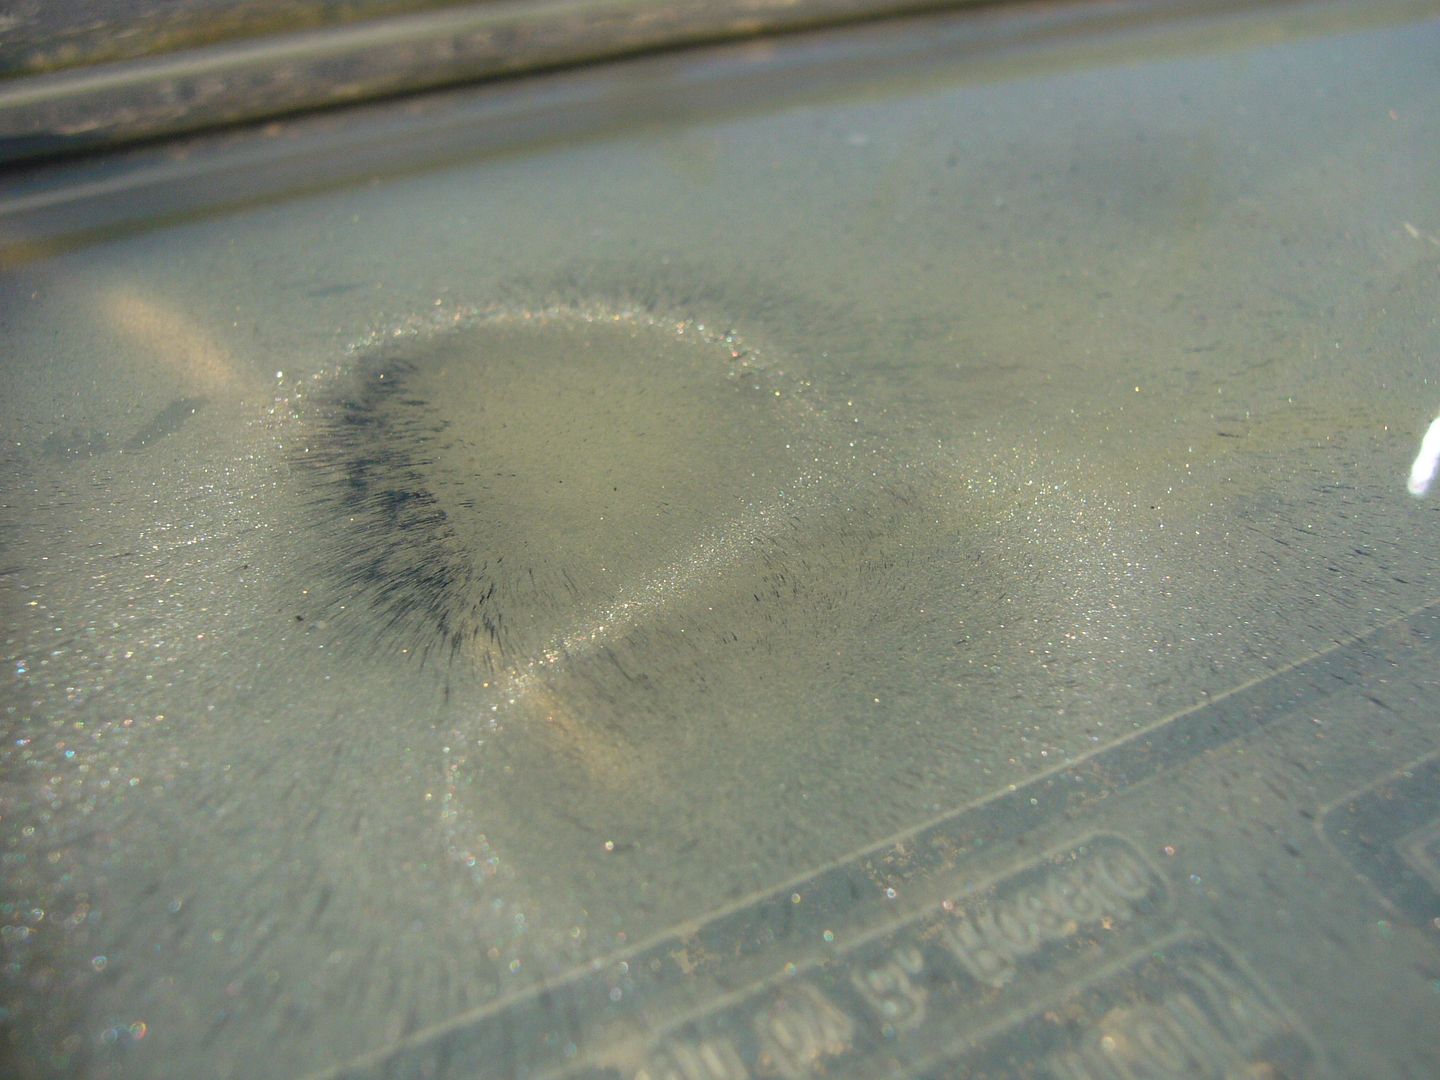
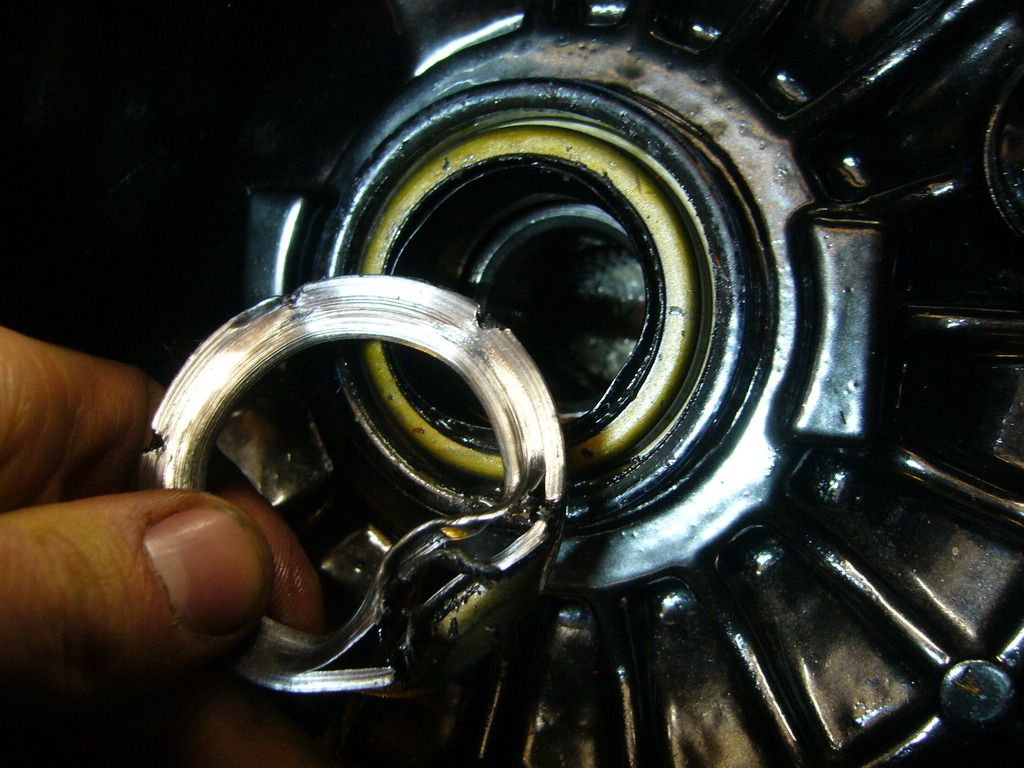
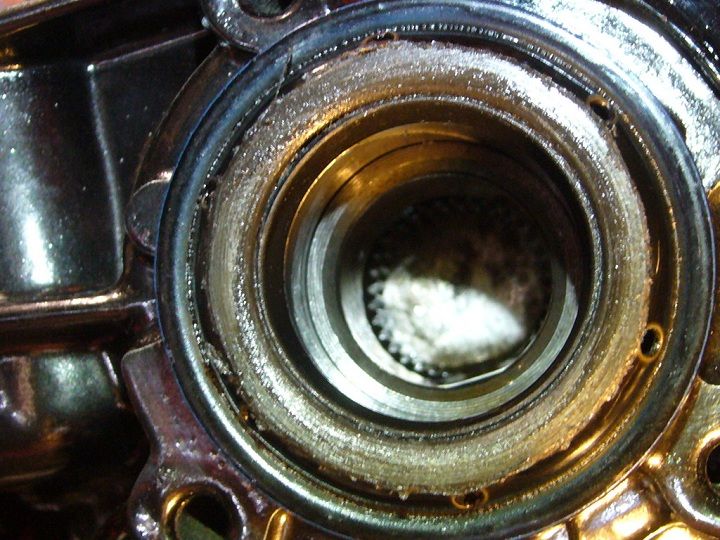
2. Step: Removing old axle shaft seals:
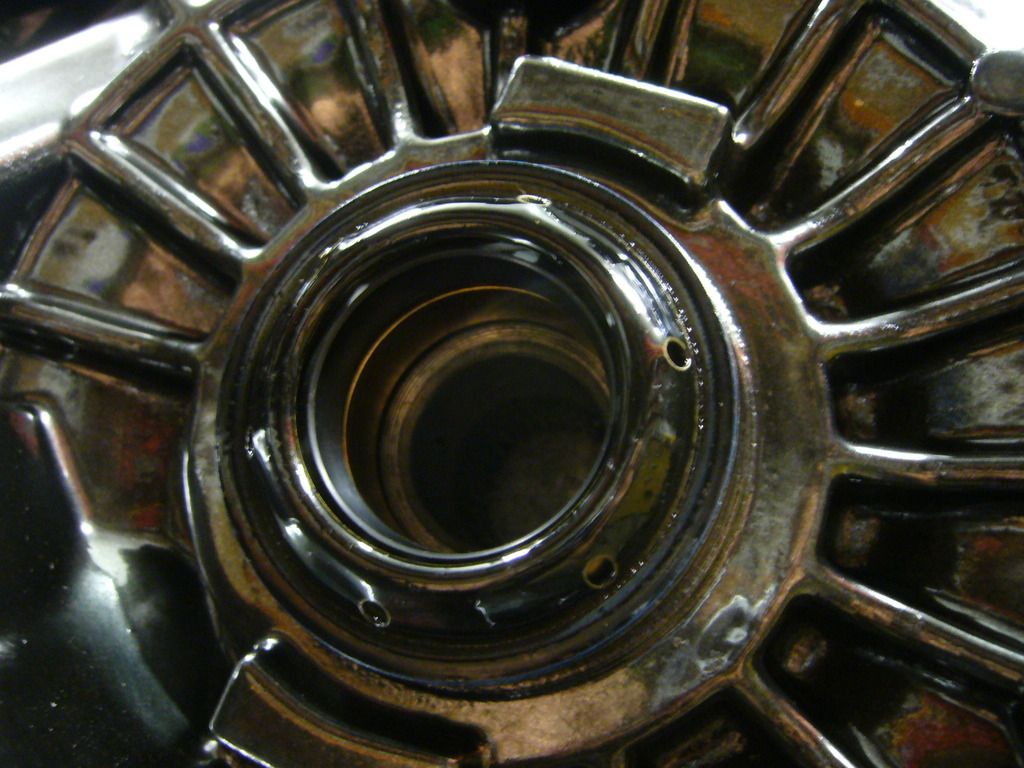
Here you can see how I remove parts of the damaged seal - worn seal metal cage: As you can see on above picture the seal was loaded with high axial forces!
Seal completely removed:
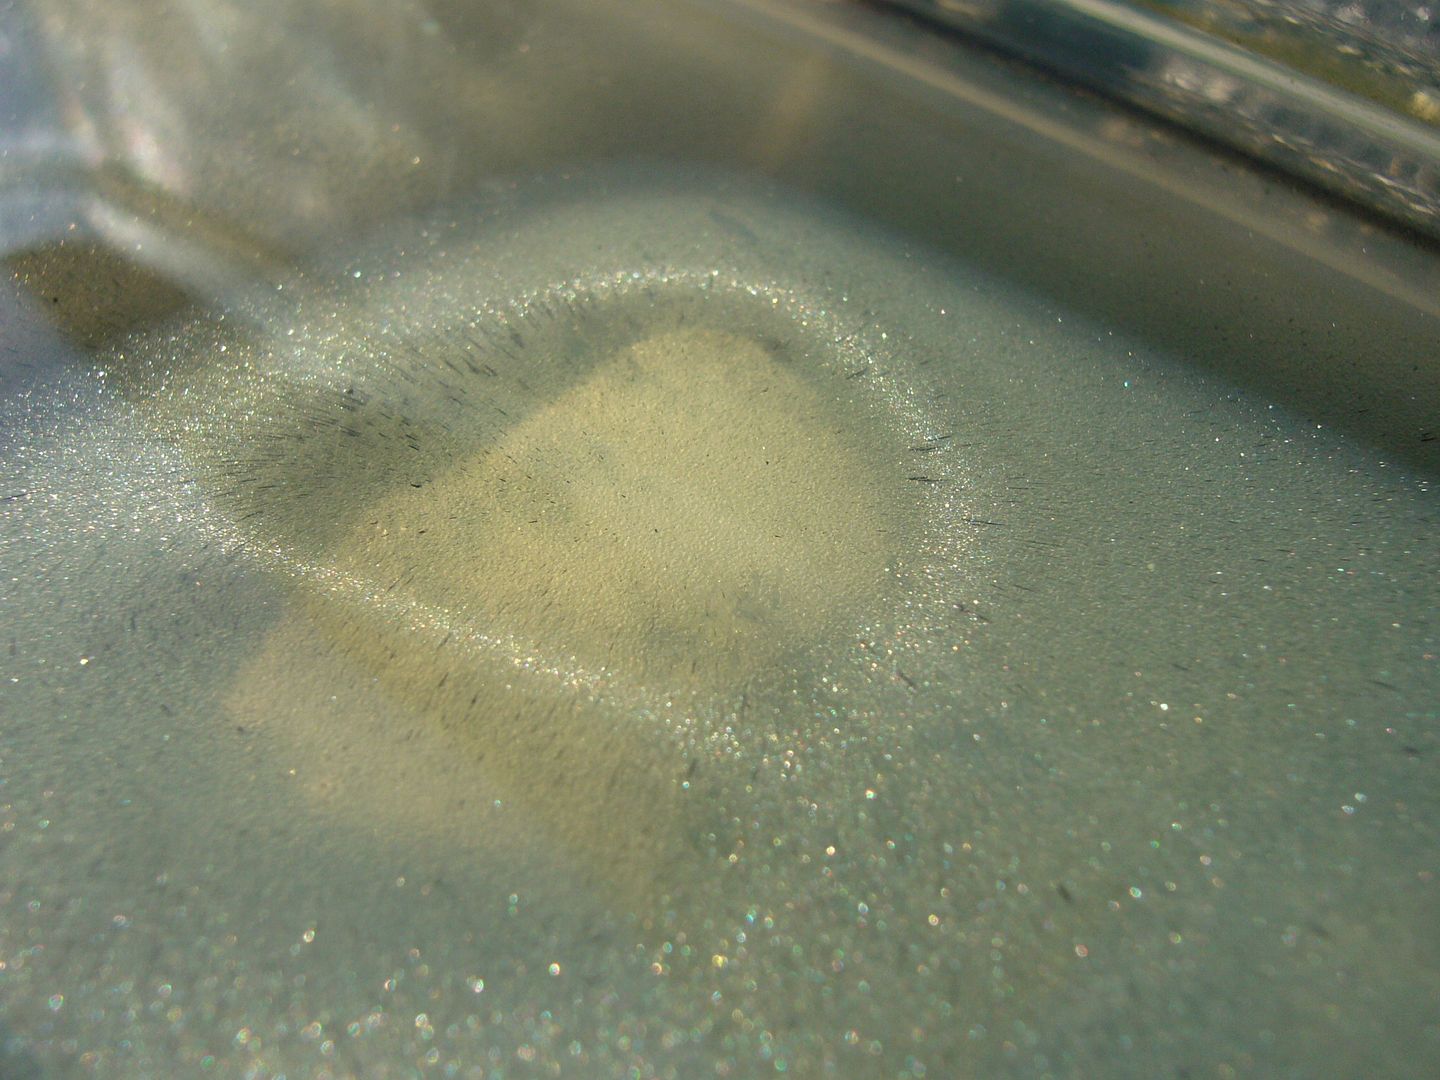
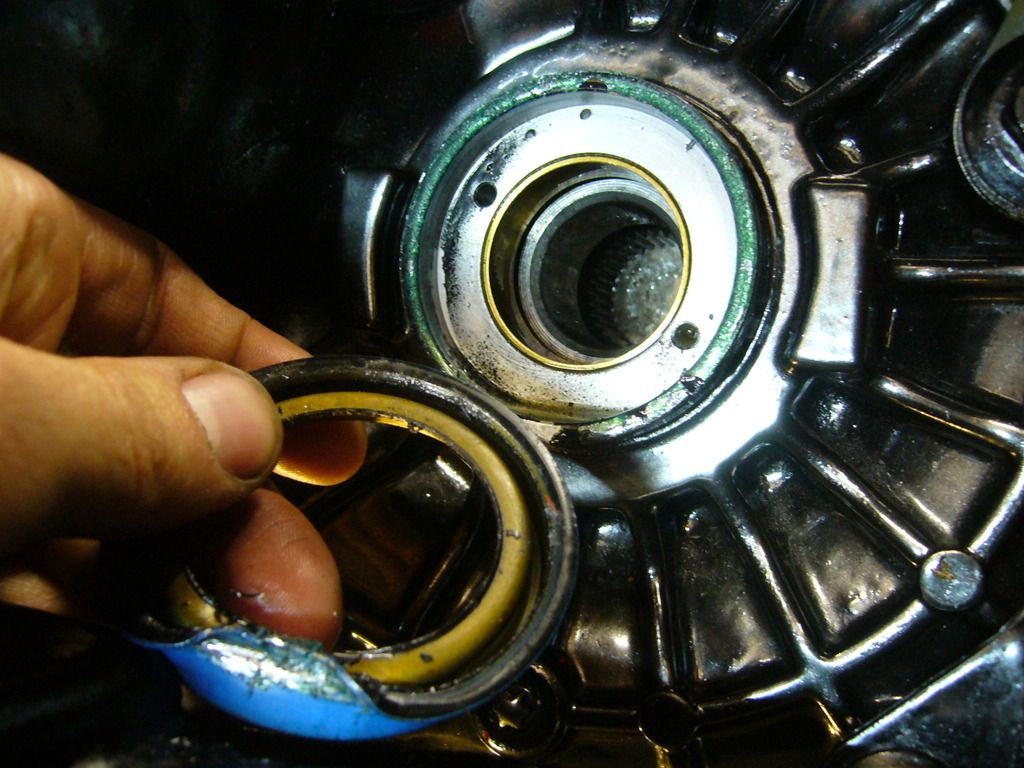
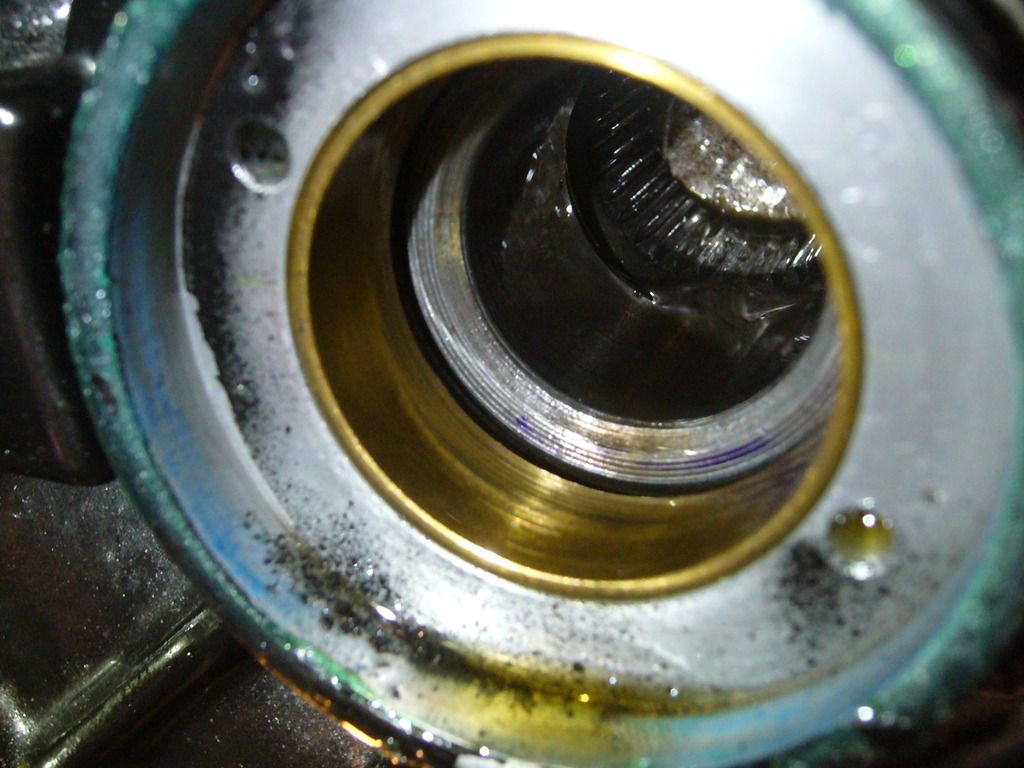
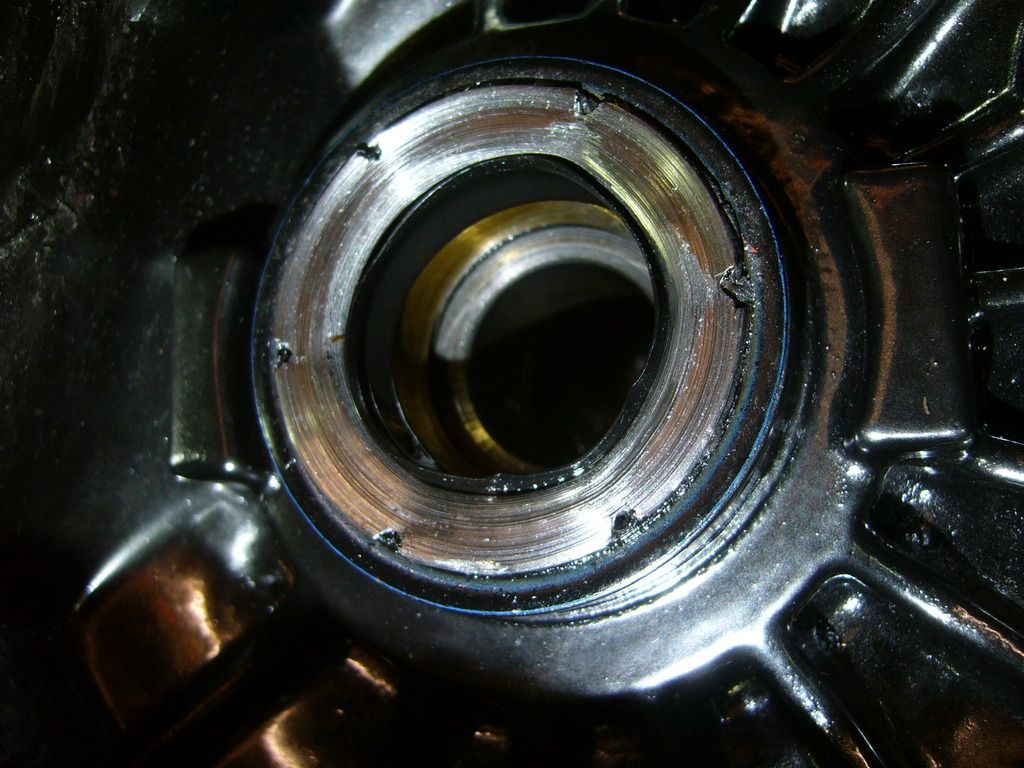
Failure analysis:
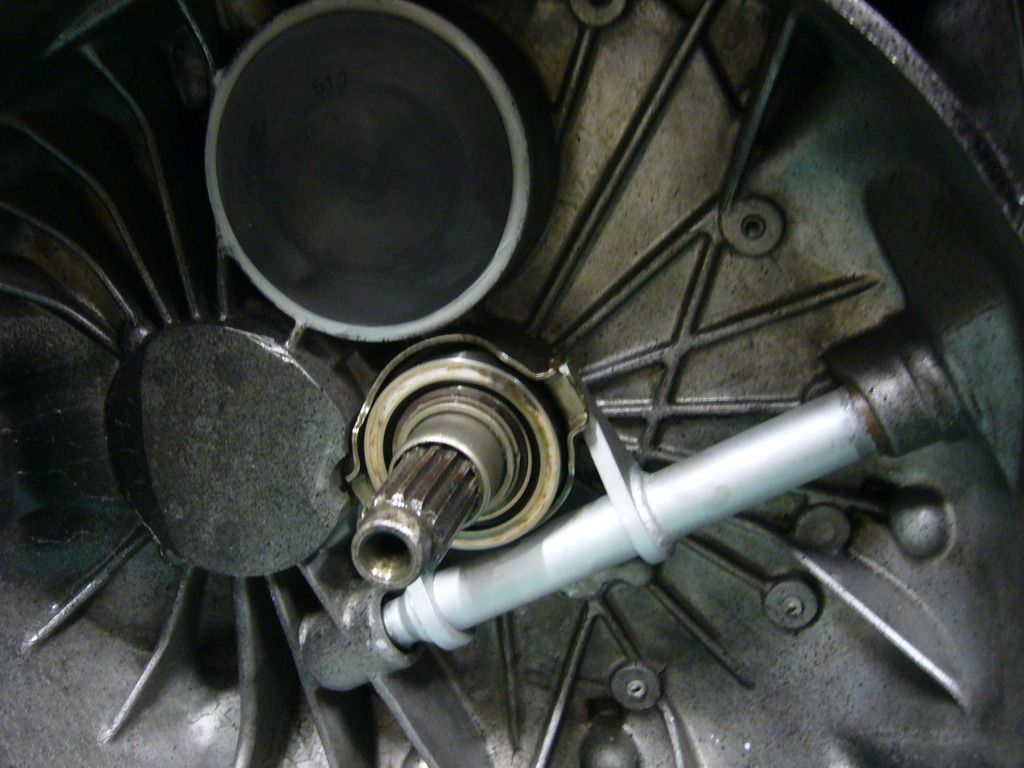
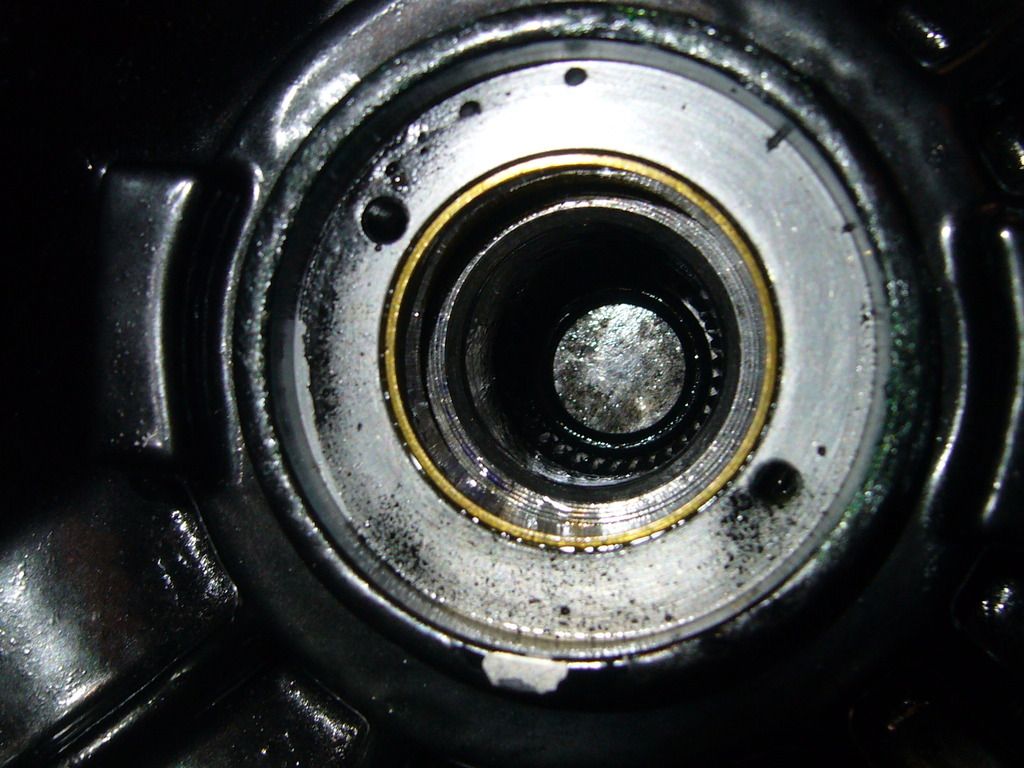
Light wear on the bronze axle support bearing: I think that the gold colored metal particles in the transmission oil are coming from this weak bronze support bearing (drivers side in my case). Maybe this wear is normal for this type of support bearing (bearing break-in).
Unequal axial wear on axle shaft seals: Unequal axial wear means that the tranny is not centered accurate enough. However, centering the tranny will just diminish but not eliminate the problem.
You may wonder why I am facing these axle shaft seal leakage problems while others don´t. Well, I think the main reason for my problems are support bearings and the LSD. Axle support bearings have a considerable protrusion compared to OEM axle shaft seals (about 10 mm). Furthermore, for the LSD upgrade it was necessary to cut the ends of the drive shaft splines. Obviously, I cut my drive shafts 2 or 3 mm too shot, which means that there is no “axial stop-surface” inside the differential anymore. These two main reasons in conjunction with high negative camber of -2.0° lead to axial preload on axle shaft seals!
Ideas - problem solving: - Centering tranny in cradle - Axial stoppers inside diff - Alternative axle shaft seals with elastic lip (TOYOATA RAV4 seals) - Shorten drive shafts - Reducing negative camber
Implementation of ideas:
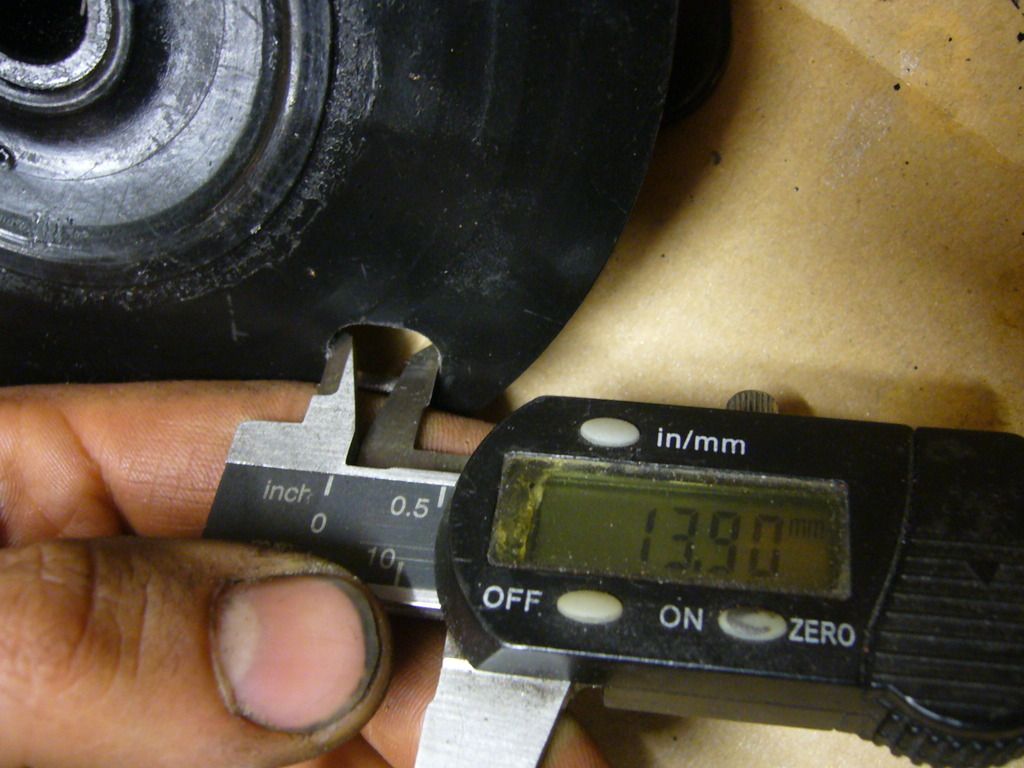
Fist I measured the required thickness of the “axial stoppers”. I used a bubble gum and put it onto the drive shaft tip and inserted it into the differential to obtain the required thickness of the “stopper”. IICRC the required thickness was 3 mm.
I have found out that O-rings fit perfectly into the LSD and that I can use them as “axial stoppers”
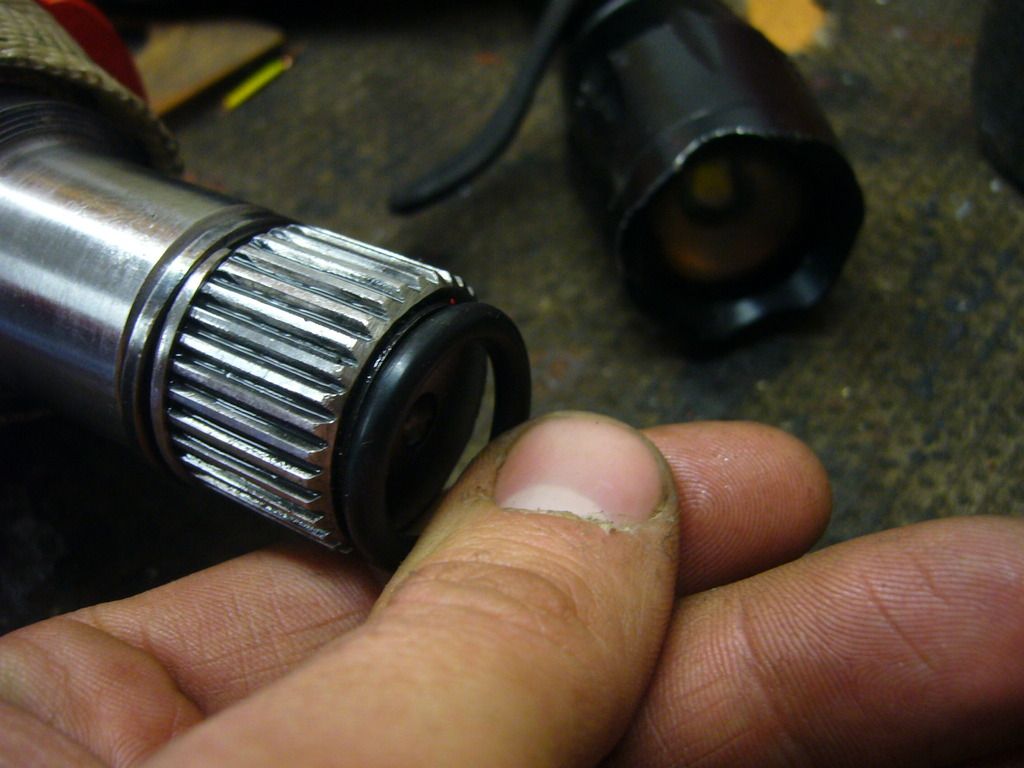
Then I have installed new axle shaft seals: Tip: Use a old brake caliper piston for installing axle shaft seals, if you don´t have special tools (1.6 Miata caliper piston in my case).
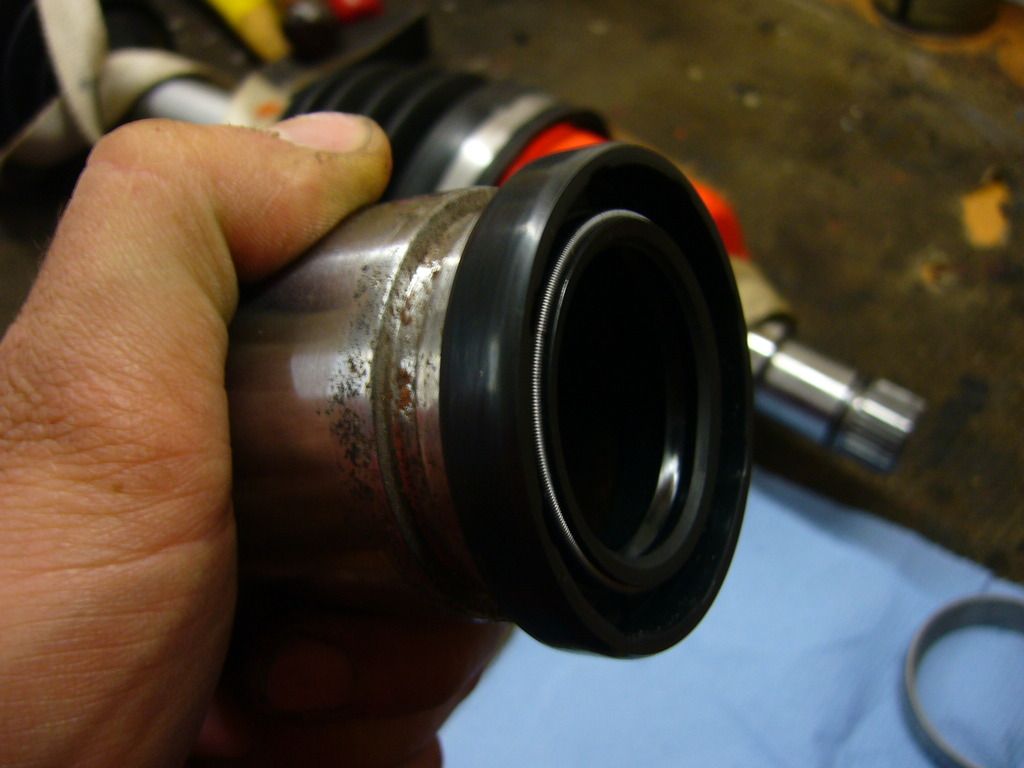
New axle shaft seals in place:
BTW, do not forgett to put grease on the seal lips before installing drive shafts!
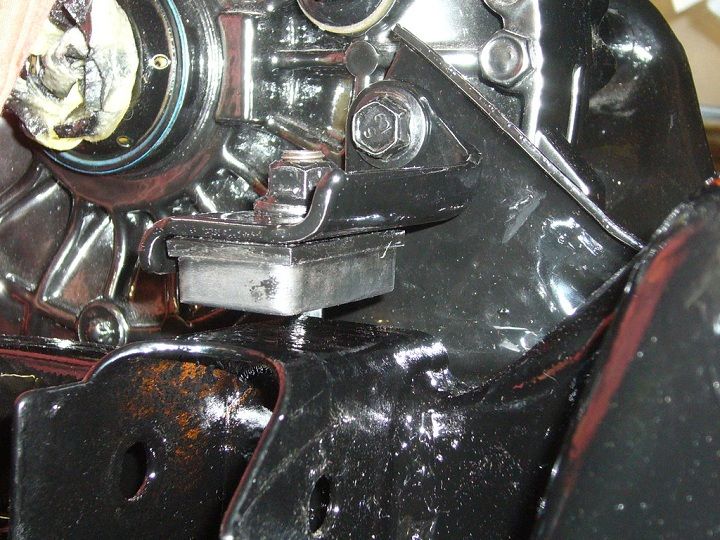
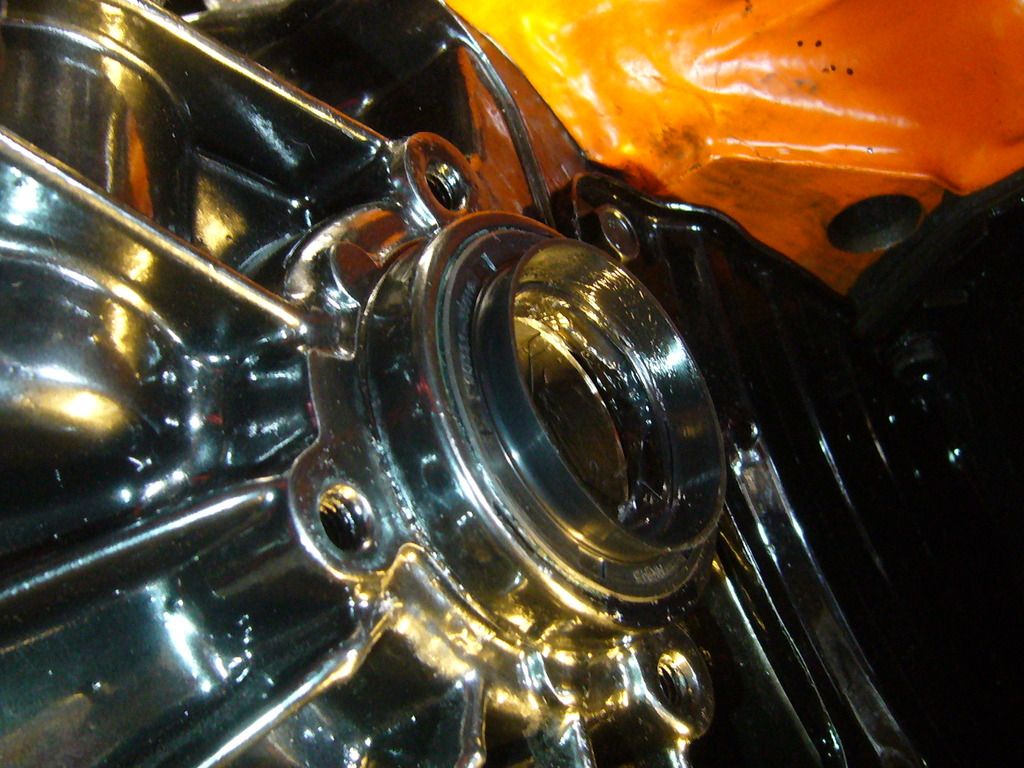
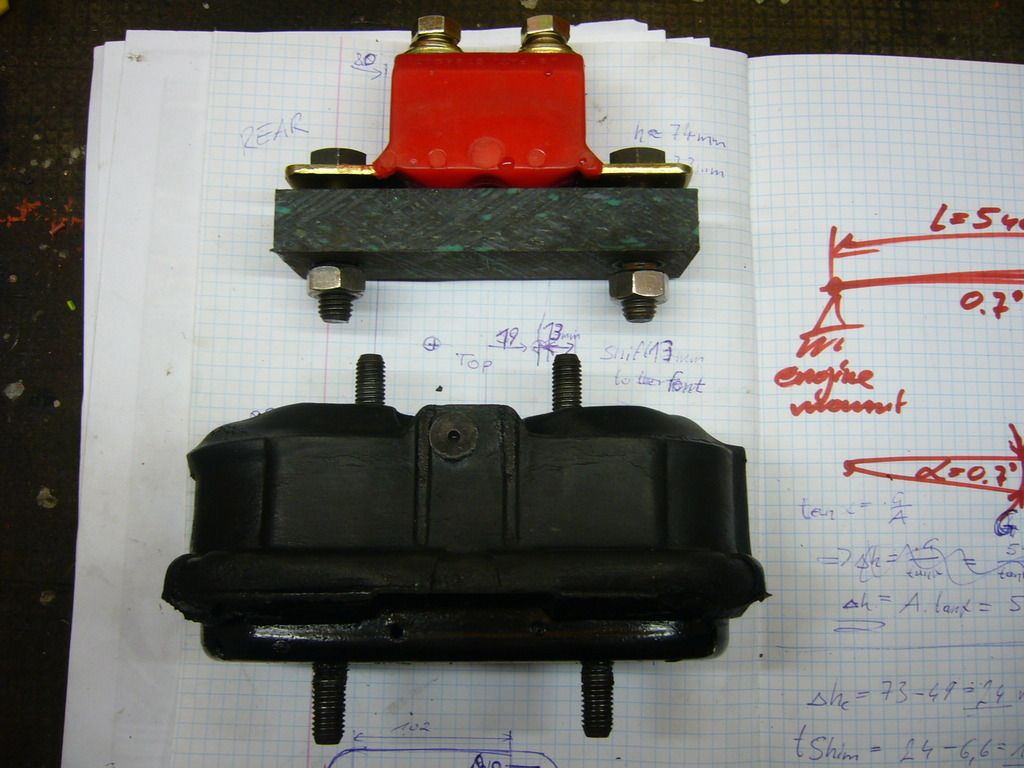
Next I replaced the OEM engine mount with a polyurethane mount from Energy Suspension.
Comparison of OEM engine mount with poly mount: The poly mount is much smaller, but stronger!
New poly engine mount in place with a heavy duty spacer plate:
The spacer plate thickness was adjusted to level the engine/tranny perfectly horizontal with the shorter ´79 Dodge Ram tranny mounts in place (which were installed last year):
Now the engine/tranny is perfectly centered and horizontal!
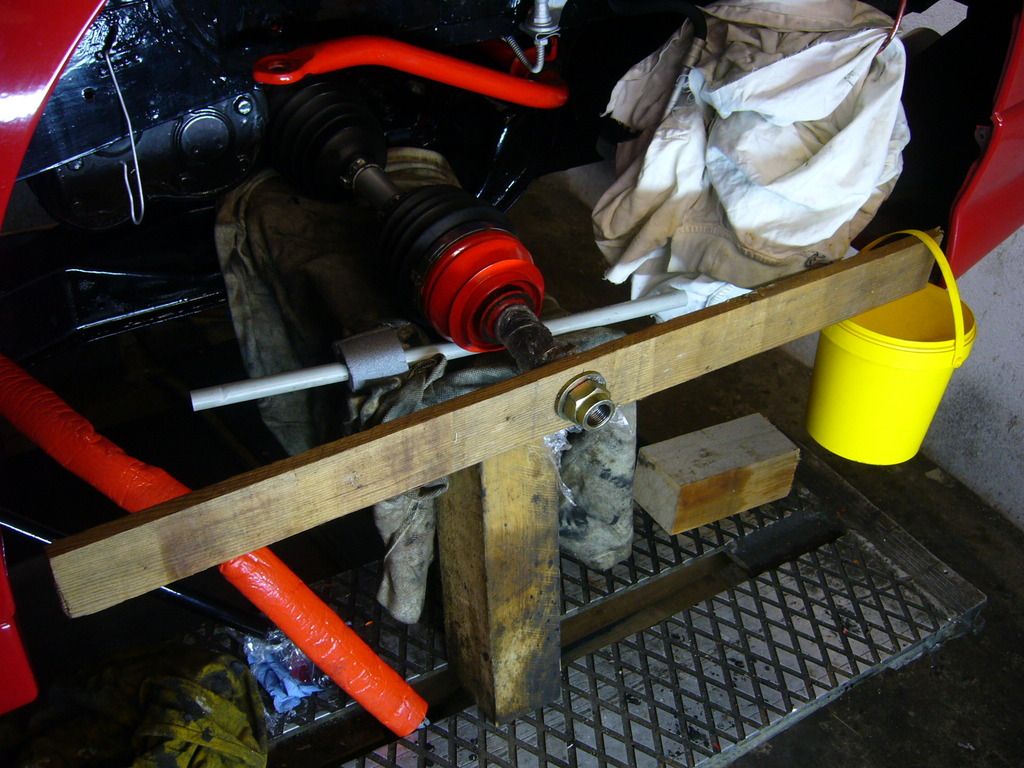
In order to shorten the drive shaft length a few millimeters, I just loosened the small CV-joint boot clamps (inner ones), pulled the boot ends approx. 5 – 10 mm inwards and squeezed them to get all the air out and tightened the clamps again (this will reduce axial force a bit).
Furthermore, I have reduced camber form -2.0 to -1.4 deg.
I have also measured transmission drag torques in order to validate differential bearing preload to be sure that nothing is wrong with my bearings:
This is how me measure bearing drag torque in Austria In Austrian hardware stores I couldn´t find a drag torque measurement tool, therefore I made this “stone age tool”. Next tool which I will order in USA...
On 2nd Mai my lowered Fiero passed inspection with a ZEX stealth nitrous system in place and since then I drove the car without any problems Also no axle seal leakage anymore with the new TOYOTA RAV4 seals – I highly recommend them over OEM seals!
I´m drove already 4000 km with the new LSD differential and the transmission keeps working so far!
BTW, the car is very funny to drive with a limited slip diff (40%)! Very easy to make donuts
Recently, I changed the transmission oil (1st oil flush recommended after approximately 1000 miles, 2nd after 5000 miles). I have opened the drain plug and have recognized how thin this 75W90 stuff is when hot – thin like water! The oil was contaminated with many small metal particles – it looked similar to a brown/gold metallic paint! I think this seems to be normal for the first oil flush (I haven´t found any big metal particles in the oil, only extremely small ones).
However, I upgraded to HYPOID 90 LS (= 85W90) GL5 transmission oil which is approx. 27% thicker compared to 75W90 at operating temperature and has high-pressure additives as well as special additives for LS-differentials. Compared to the original transmission oil (5W30) the dynamic viscosity of 90LS is 88% higher at 90°C, which should give sufficient increase of flank safety factors, protection against pittings and additional protection for bearings.
Just ran across this old thread while reviewing cold start data. Still driving my 85 GT . I am downsizing and hate to think of sending the rebuilt tranny to the scrap yard crusher. If anyone wants it speak up. I did get a torque reading off the input spline shaft...about 1-2 ft libs.
Just ran across this old thread while reviewing cold start data. Still driving my 85 GT . I am downsizing and hate to think of sending the rebuilt tranny to the scrap yard crusher. If anyone wants it speak up. I did get a torque reading off the input spline shaft...about 1-2 ft libs.
Hi hobbywrench, your torque readings (1-2 ft-lib = 136-271 N.cm) are very similar to what I have measured on my own tranny and seems to be OK. My Fiero 5-sp transmission is working without any problems since the rebuild, I just need to replace the shift selector cable and then everything will be perfect again. Anyway, I hope that you will find someone who pays a fair price for your perfectly rebuilt transmission.


_1.JPG)


 It must've really "barked" out of those open exhaust ports!