My poly bushings were ordered last tuesday, they received my money and sent me an order number. I have emailed them once on the status they replied and said thet were waitning to receive them, I guess red is a special order. Im getting irritated and cant get a hold of them. http://www.prothanesuspensionparts.com/ anyone delt with them before?
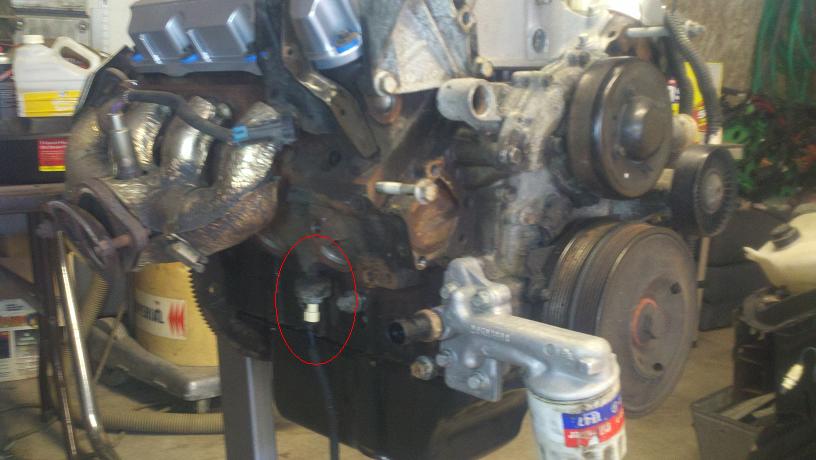
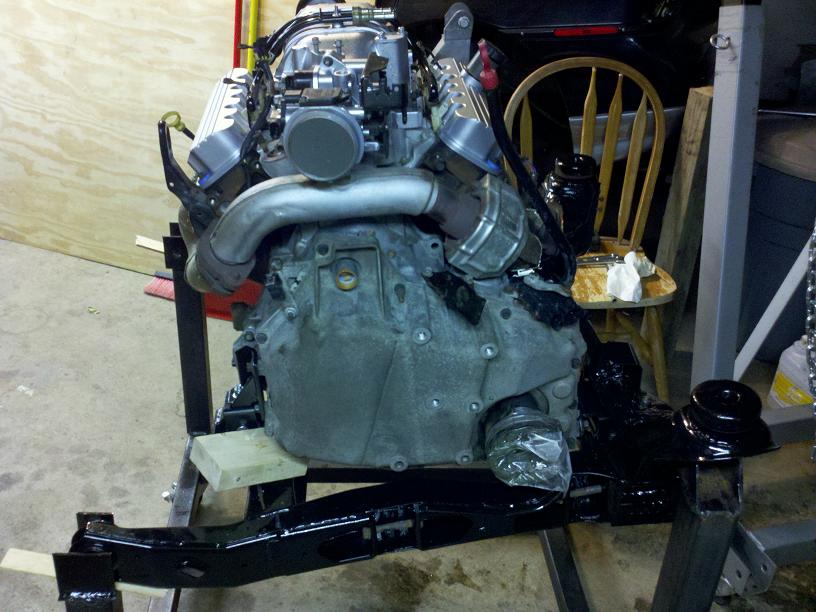
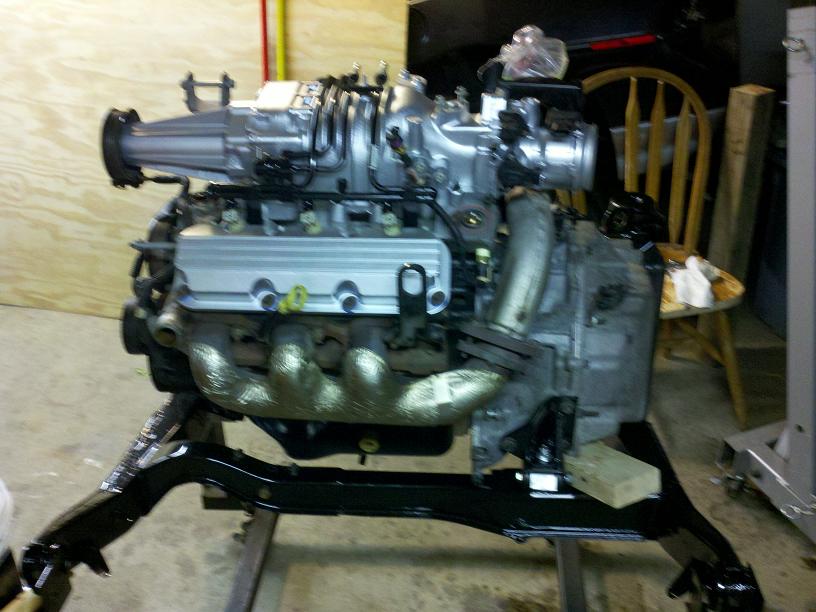
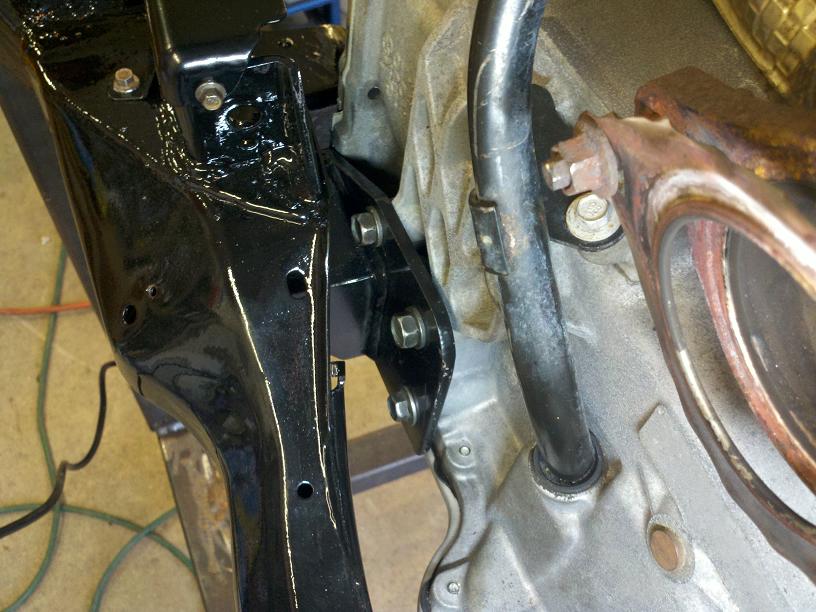
Well. My new bushings have not come in yet. I cleaned up the oil pan Gasket. Next I will clean up the front of the motor and get the motor mounts painted. What are the sensors for on each side of the block under the heads?
[This message has been edited by hercimer01 (edited 06-16-2011).]
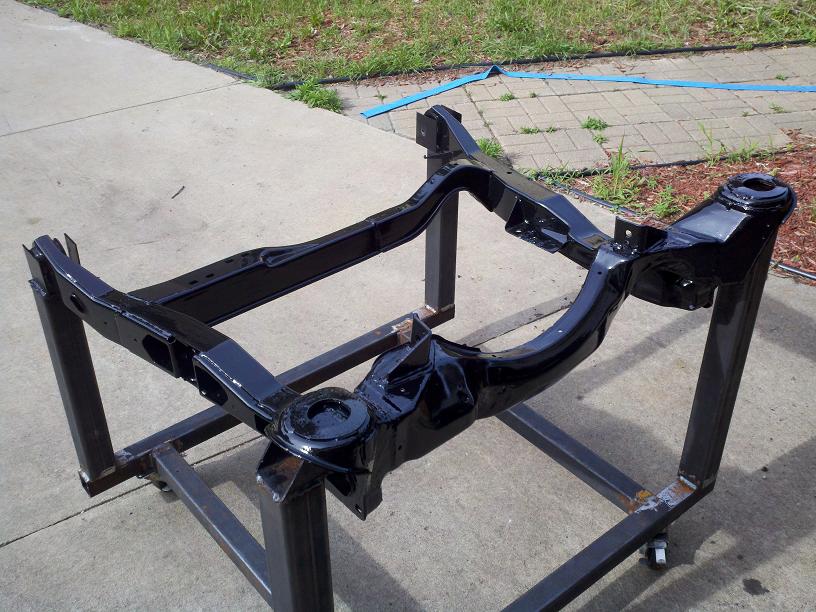
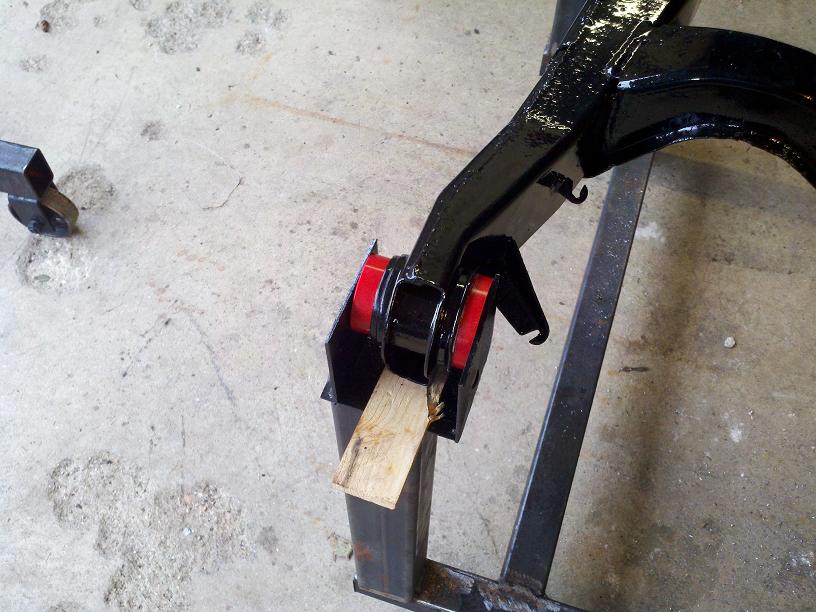
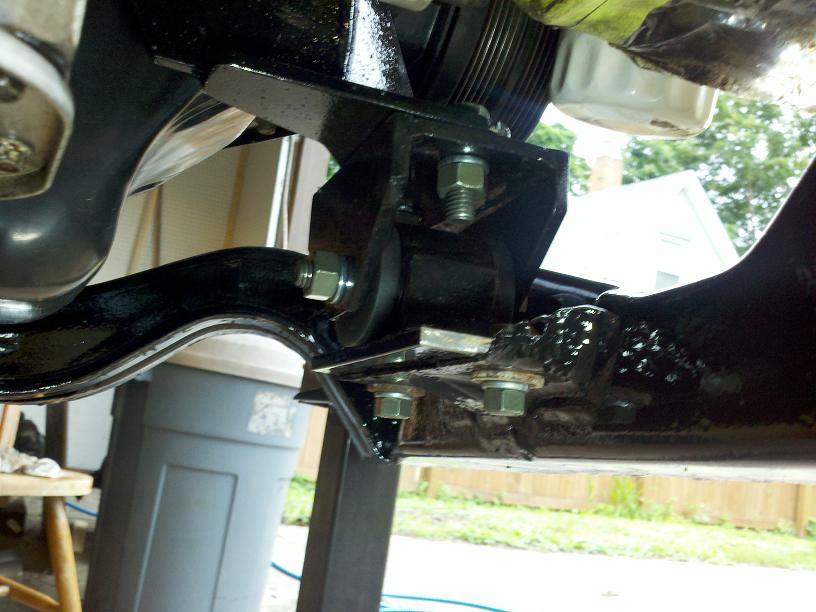
My cradle bushings finally shipped out this morning, so i started scrubbing the trans today, man what a mess. The lower control arm bushings are on back order for at least another week.
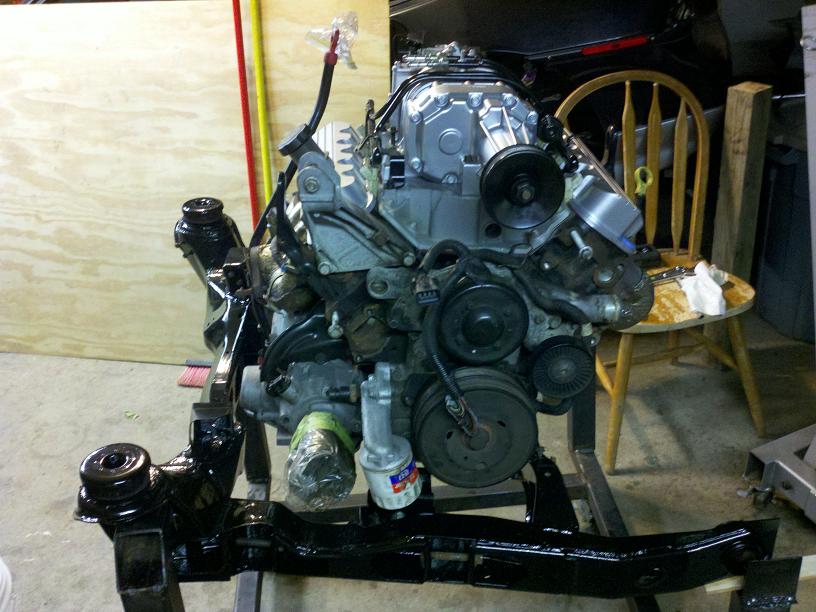
Still haven't gotten my cradle bushings, I got tired of waiting so i did this today. I still have to match drill the motor mounts to the frame. I decided to delete the EGR also.
for sure it will hit the part the trunk hindges mount to i had the same issue so i mover the ICM to the trunk wall you will have to extend the wireing as well trust me dont try to use stock ICM location i wont work it to tight and a ***** if you ever had to change a coil or modual, I was even thinking of putting the coil pack inside the trunk pop a hole throught with a rubber gromet for your wireing and plug wires you will need aftermarket wires to do this ( longer ones)
He may have to loose the decklid spring but it shouldn't hit the hinge itself. The spring may have to go anyway since they sometimes hit the supercharger. Mine did.
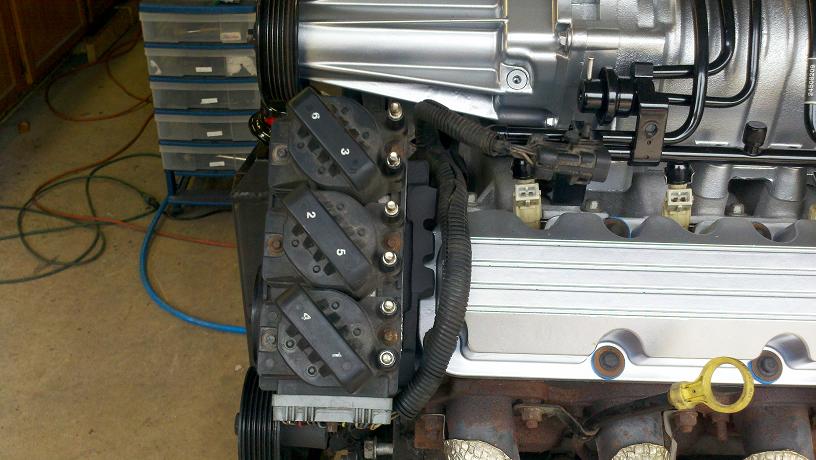
I have my coil packs mounted it the same spot as the OP except I turned my on their side for more room and easier access for the connections. I'll get a picture later today.
Mine hit also but I did not want to move the battery up front so I mounted mine on the firewall, right behind the driver seat, between the mount for the decklid hinge and the hole in the firewall for the wiring harness going to the ECM.
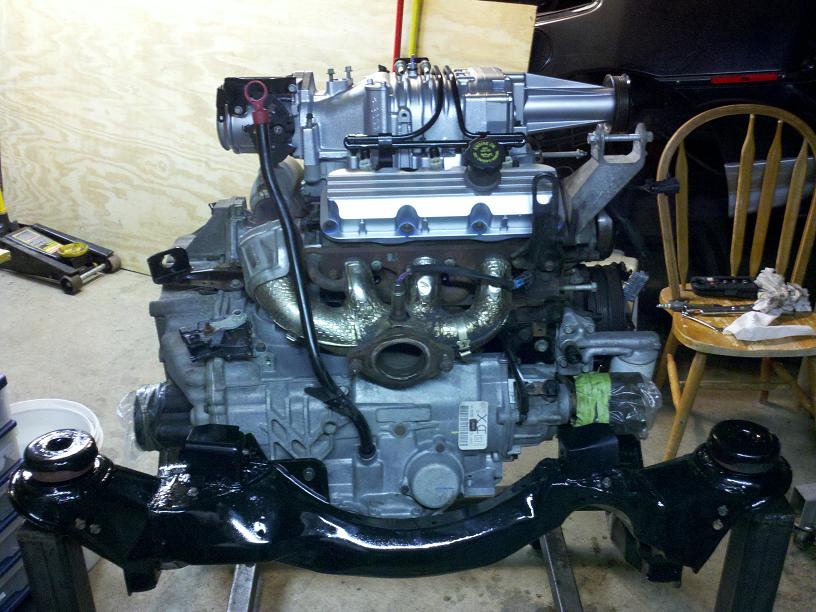
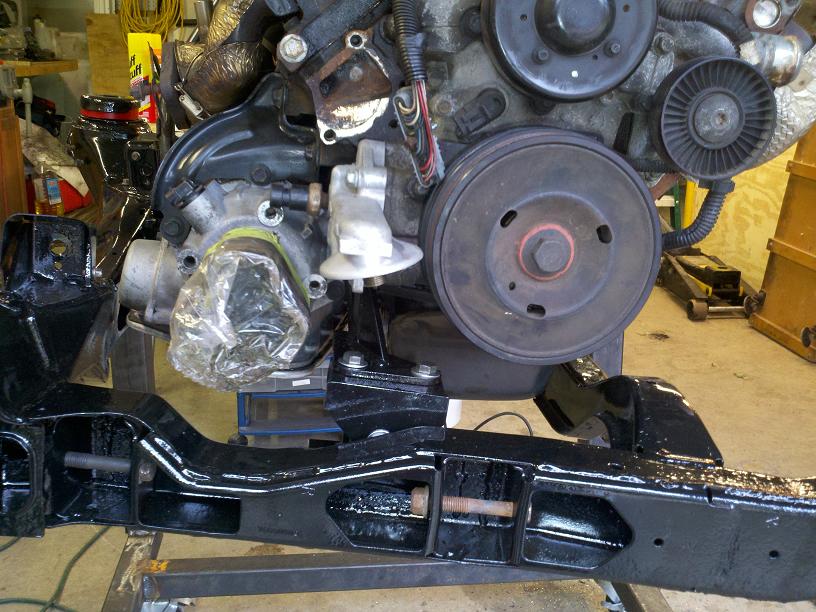
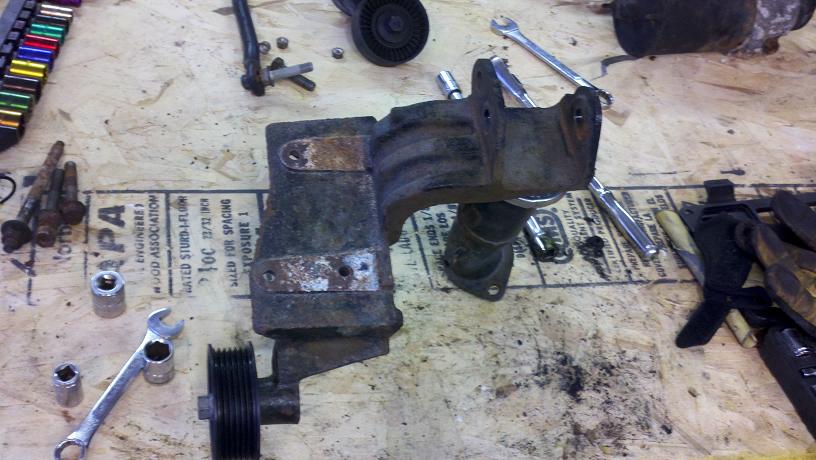
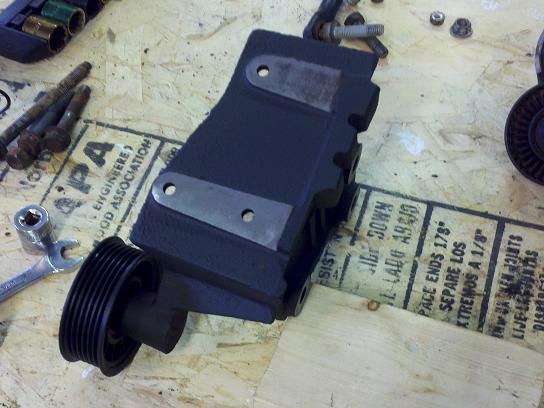
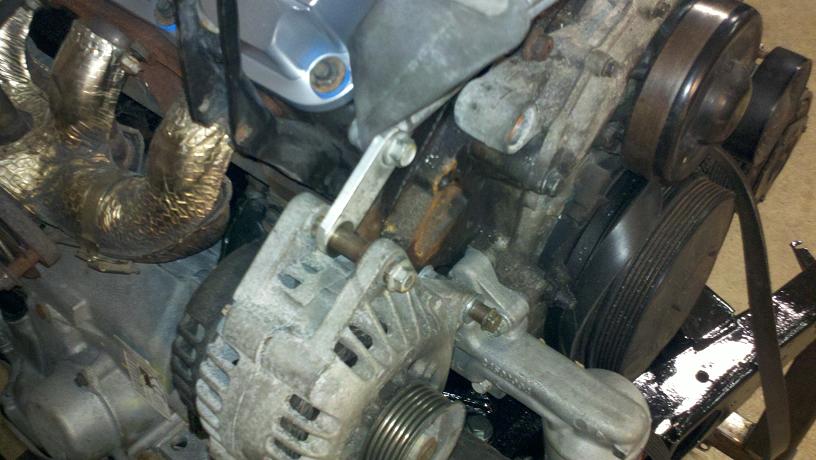
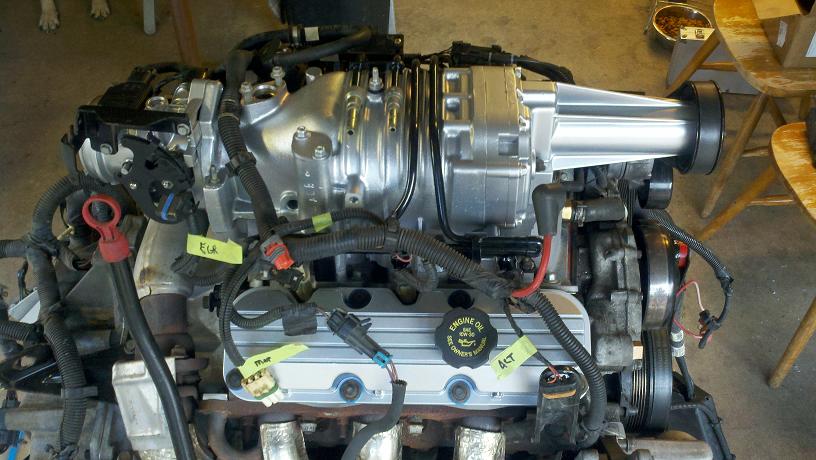
I mocked up my alternator and idler pulley today. The idler is the one from the super charger belt with a smaller diameter pulley from a 2000 Trailblazer. The dogbone bracket was milled down to the flat surface and the idler bracket will be about 5/8" thick welded to the dogbone bracket. The alternator will probably changed to a 1/4" aluminum plate with an extra mounting hole. Once I get the final product done i will post drawings with measurements. Im still revising so this could change.
Edit; Progress. Idler bracket done but still needs to welded. I will post drawings later.
[This message has been edited by hercimer01 (edited 06-27-2011).]
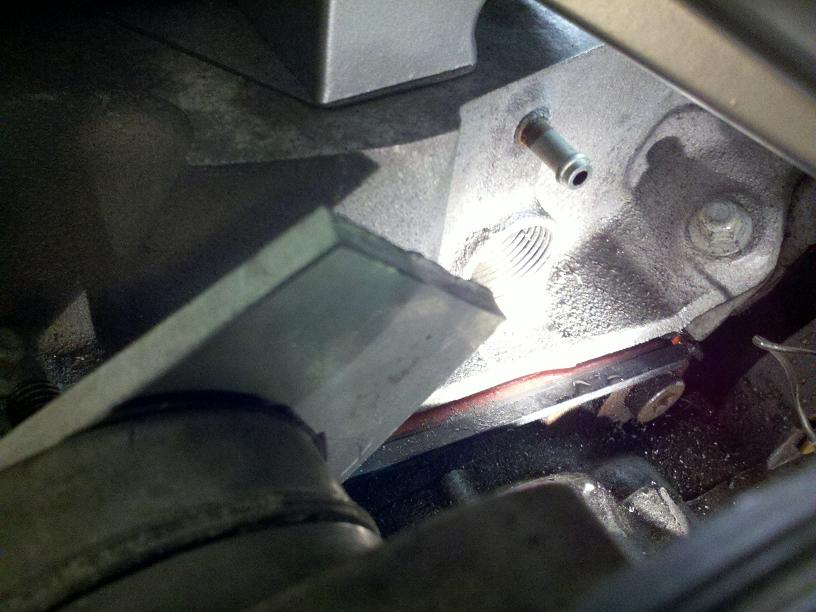
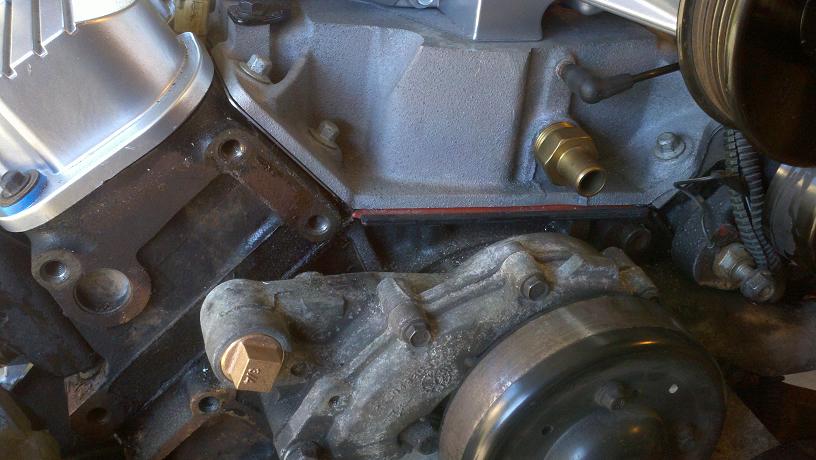
I borrowed a 3/4" NPT tap. I plan to put aluminum fittings in the two antifreeze lines. I dont know will they have to be straight or 90 degrees?
Edit; Sorry, I was being lazy. I went out and looked at it and they will have to be 90 degree elbows. I had to hog out the manifold hole. It looks like i will have to take the LIM back off to install it.
[This message has been edited by hercimer01 (edited 06-27-2011).]
Hercimer, Just wanted to get in here and say what a nice job you are doing on your build. REALLY like that roll around engine cradle cart you made, care to share the specifics or better yet a drawing of it. I would love to have something like that when I start my build, I HATE crawling around on the floor to work on stuff and that looks like it puts things where you need them. Nice touch and again nice work. Having ridden in a 3800sc and having gotten to drive it I think it is safe to say you will NOT be disappointed. Makes for a very quick and responsive car. Too fun!! peace
I think i got ahead of myself by taping out the heater hose attach holes. I can make the LIM work, but the timing cover will probably have to be replaced or welded. I have a friend who welds aluminum so im lucky there.
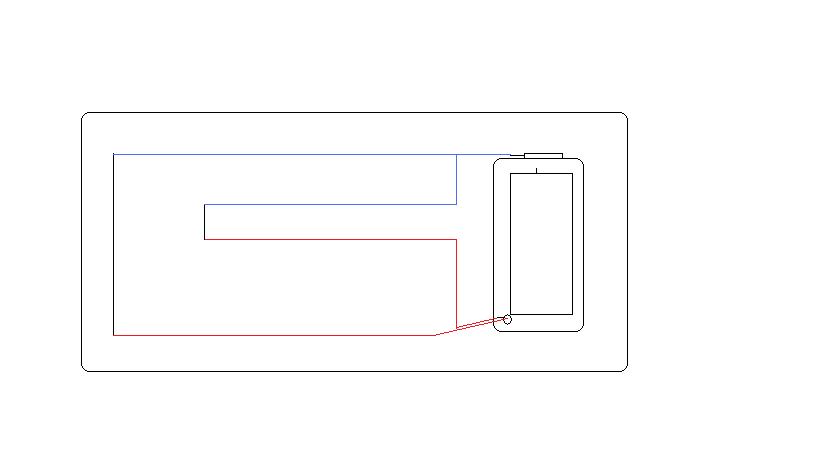
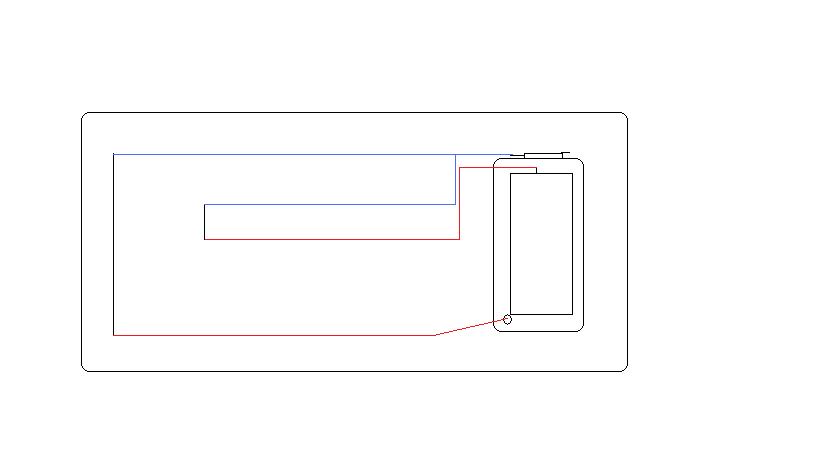
Ok. Ive researched the cooling system. Ive come up with two alternatives. #1 with a modified T-stat housing = more money. Or #2 3800 stock T-stat housing. I will probably go with the stock housing for now. Later, after i get her up and running and more money, Ill start modding. Here's some diagrams i came up with help from darkhorizons drawings and bmwgurus help.
Thanks Guys. I think I will try to keep it in the same location, Trying to keep it "Lo Budget" here.
Relocating the ECM is a simple matter of extending wires, unless you're worried about more expensive spark plug cables, it doesn't affect your budget much at all. If you do try to keep it in the stock location and rotate it 90*, I'd like to see how it turns out! Keep up the good work!
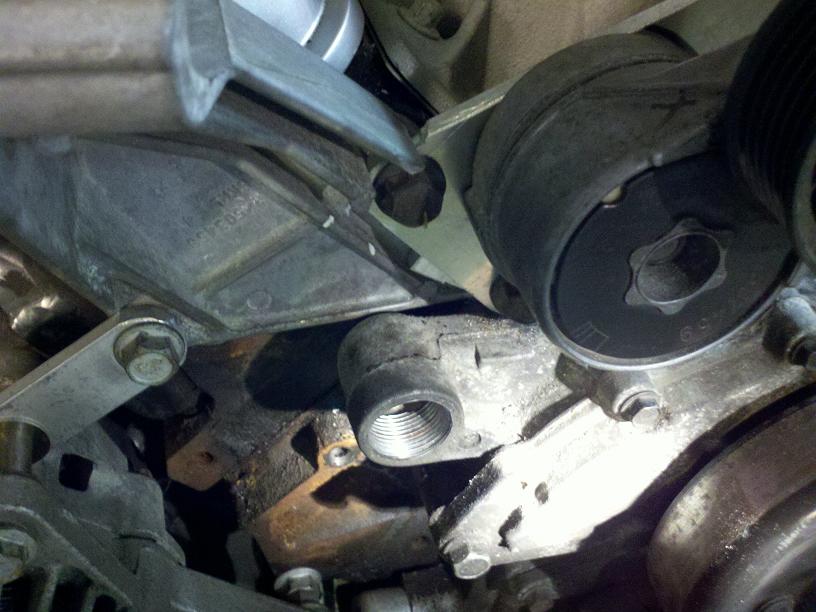
It looks like i was right after all. Here are the fittings, the plug was 5.50 and the hose fitting was from a friends junk box. I will have to add a filler tee at the 3800 stock thermostat cover and and tee somewhere on the passenger side for a return of the heater system.
[This message has been edited by hercimer01 (edited 07-04-2011).]
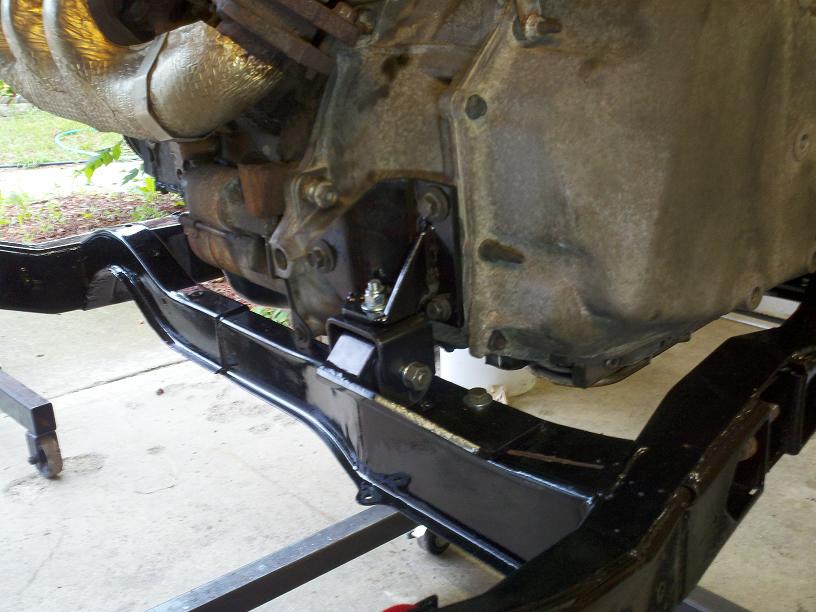
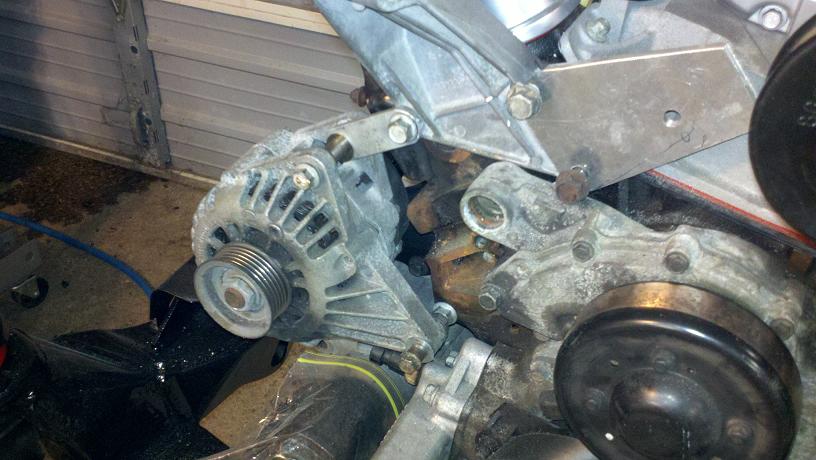
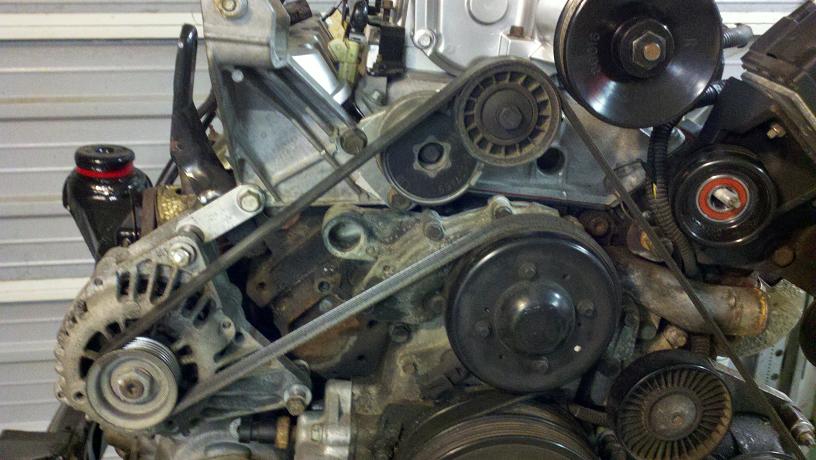
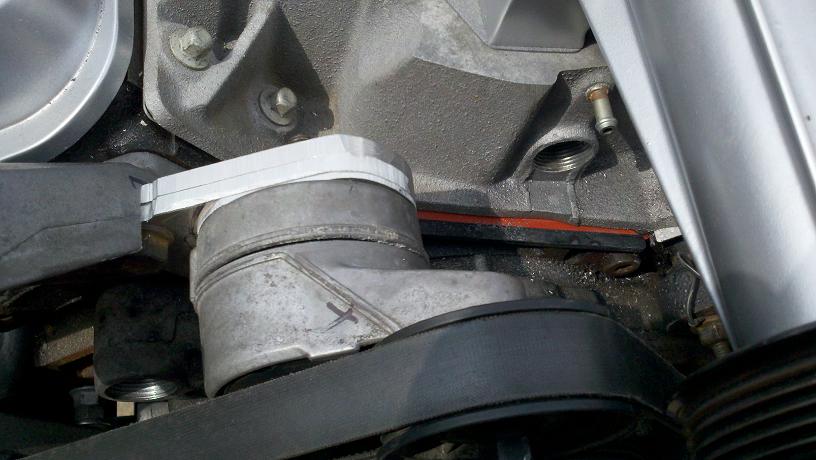
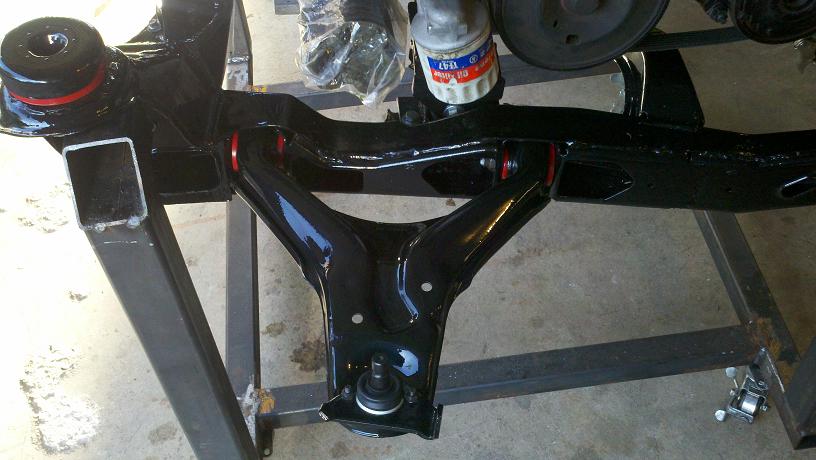
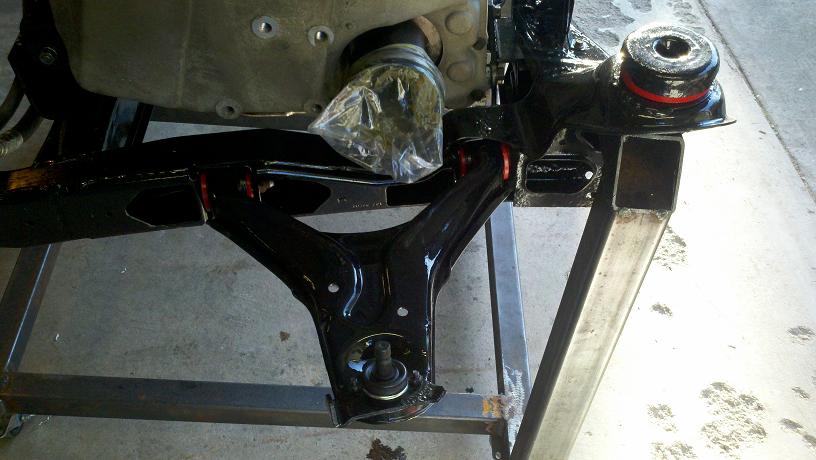
Those are the best pictures I've seen of 3800 mounts. Thanks! I never knew the front mount was only attached to the right side of the block.
yea, and its crap. I would always suggest another style mount than that... at least something that offered some rotational resistance... that mount is doing nothing more than holding the motor off the ground...
yea, and its crap. I would always suggest another style mount than that... at least something that offered some rotational resistance... that mount is doing nothing more than holding the motor off the ground...
Is that not what the dogbone is for? These are a far cry better than west coast fieros in the gauge thickness of the steel and bolt grades.
Is that not what the dogbone is for? These are a far cry better than west coast fieros in the gauge thickness of the steel and bolt grades.
The BEST dogbones I see are complicated... and get in the way of quite a few things. It is very hard to get a hold of any type of steel when making a dogbone in the factory fiero location.... When making lower mounts you have many options to go to factory holes using very limited amounts of fabrication and material..
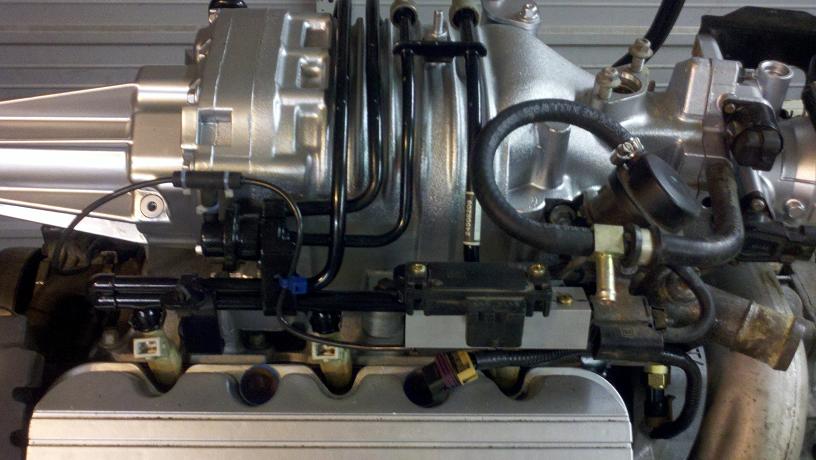
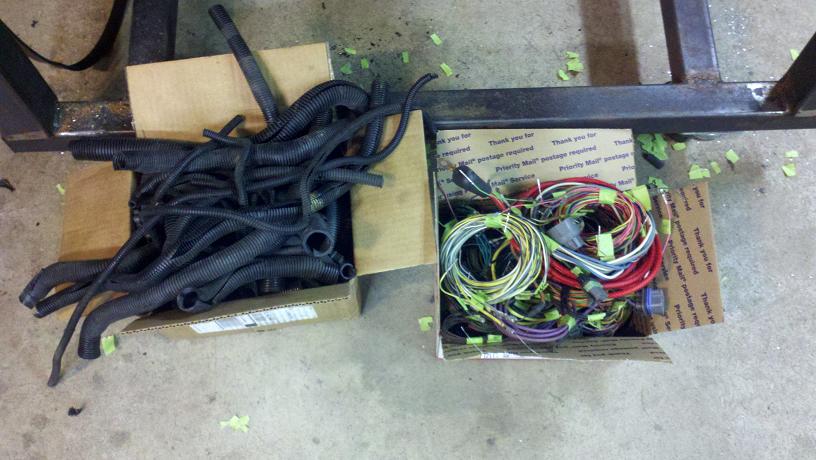
The idler mount and and brace are off to get welded. Now its time for the harness. I unwrapped all the loom and tape from it today. I plugged all the connectors into the motor first and labeled them.
[This message has been edited by hercimer01 (edited 05-27-2012).]
The harness was just laying on there so i could strip it, thanks any way. I still have to plug the top vacuum hole. The vacuum fitting there is for the Brake Booster and EVAP, How is the Evap supposed to be plumed in? I know The code will be deleted from the ECM but I want it to operate. I plumbed the boost line on the LIM to the fuel regulator to the MAP and the BBV. Is the fuel regulator supposed to be in the Vac or Boost line?
Its hard to believe that the harness will fit into a little box when you are done.
EDIT to add this diagram of Mike Gonzales that I used to wire the car with.
[This message has been edited by hercimer01 (edited 05-07-2013).]