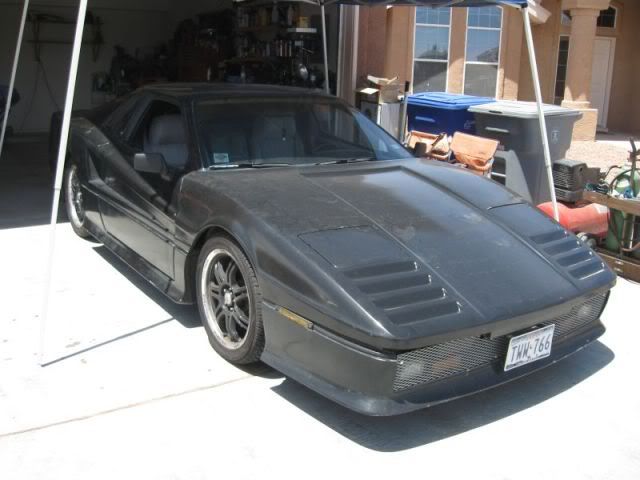
Vette tail lights? Shame Shame Pat. Did your mufflers show up today? I would be tempted to take the ride with out any mufflers. You have lots of self control! Joe
Ein Bier Bitte?
[This message has been edited by josef644 (edited 05-05-2010).]
Who is more excited as the XTC get closer to being finished, you or your son..??
Well that's a hard one. I'm excited cuase it means one more project out of my garage - plus I think it will be a great car. My son because he has been afoot for 3 months and hates to borrow the Durango. It ain't a cool ride for a 16 year old!
Vette tail lights? Shame Shame Pat. Did your mufflers show up today? I would be tempted to take the ride with out any mufflers. You have lots of self control! Joe
Ein Bier Bitte?
Ha - Joe, Don't think I have not thought of it. WIth my "great" neighbors, they would have the National Guard at my house before I could get back. That's way I treat them to a 10 pm XTC with no exhaust symphony every night! No mufflers yet - hopefully this afternoon! I'll work all night to finish it up if I have too. I want to drive it tomorrow or Friday!
Got the new brake lines on tonight. I put the calipers together so I could bleed the brakes - still got to put one anti rattle clip on - they are on thier way to me now. It took forever to get the brakes bled. Lots and lots of air but we got it n the end. No mufflers again today at AZ so I got my money back - I'll order some from Summit or Jegs and will have to wait another week. I will take it for an uncorked drive tomorrow though. It's pretty much done now except for the exhaust and a few little things like the ebrake cables and AC hose. I may get that stuff done this weekend. I think I'm taking a break from wrenching on Saturday and go play.
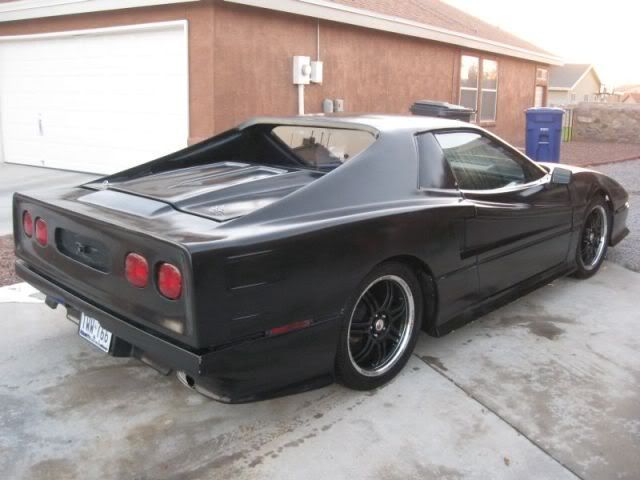
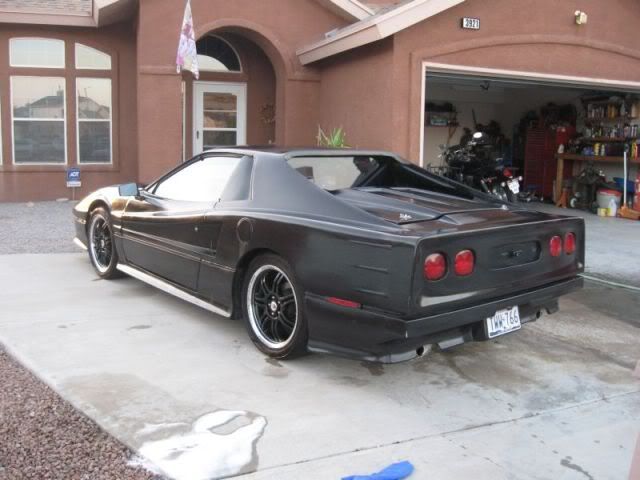
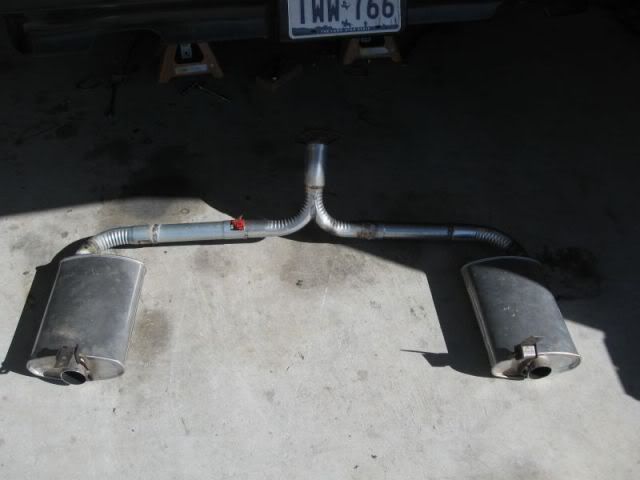
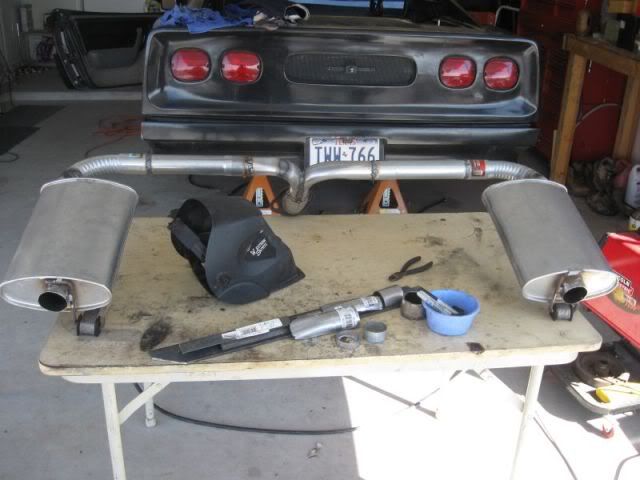
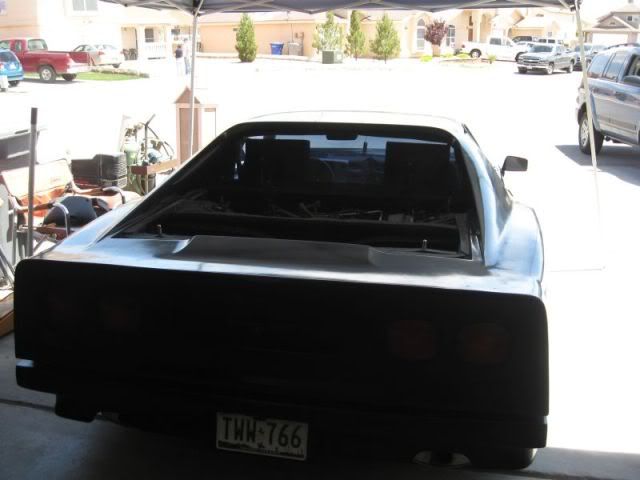
Picked up some turbo mufflers from my buddy and started working the exhaust this evening. I decided to rework the Y pipe as the first one was too large in diameter and did not fit well in the space available. I am now building a new Y pipe out of 2". I thinki it will work out better and give me better clearance along the rear of the cradle. The mufflers are perfect - fit nicely in the space along the frame rail and will be easy to hook up inot the Y pipe. No pics tonight - I'll get some up tomorrow as I fab the exhaust. Maybe a test drive tomorrow evening? I hope so. I've just about had all this car I can stand!
Pat......you ready to knock off this wrenchin' crap for a day and go have some fun? Burgers and beer await us at the bustling Timberon Country Club.
After today! I am ready to leave right now. Had a marathon exhaust session today. Lots of custom fitting took place. I had to drum up my old pipe fitter skills. Managed to get it in place and hanging. Sounds great. I have to fab 2 more hangers, drop the whole thing and weld it up then reinstall. I think Sunday will be test drive day. I'm taking tomorrow off! Hope I can keep up with all the Vettes!
I have taken a few days off so the cuts on my hands heal up a bit. The hand cleaner burns the crap out of the small cuts I got working on the mower Thursday. I had to replace the drive unit.
I did the rear brakes on our Elantra yesterday so we are good to go to S.A. Friday.
I have taken a few days off so the cuts on my hands heal up a bit. The hand cleaner burns the crap out of the small cuts I got working on the mower Thursday. I had to replace the drive unit.
I did the rear brakes on our Elantra yesterday so we are good to go to S.A. Friday.
Back in my 88 Coupe Monday
Joe
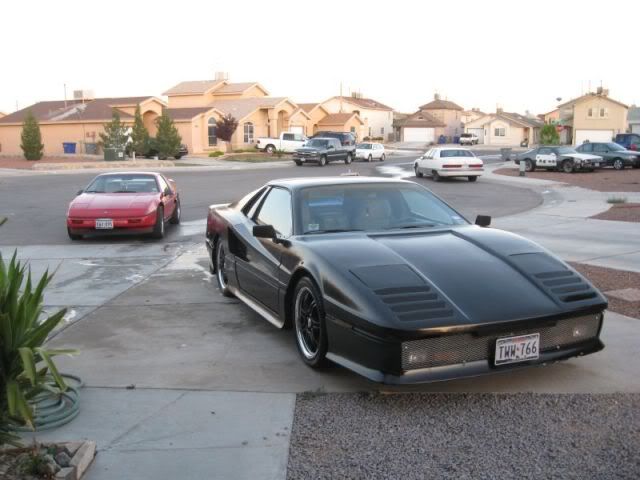
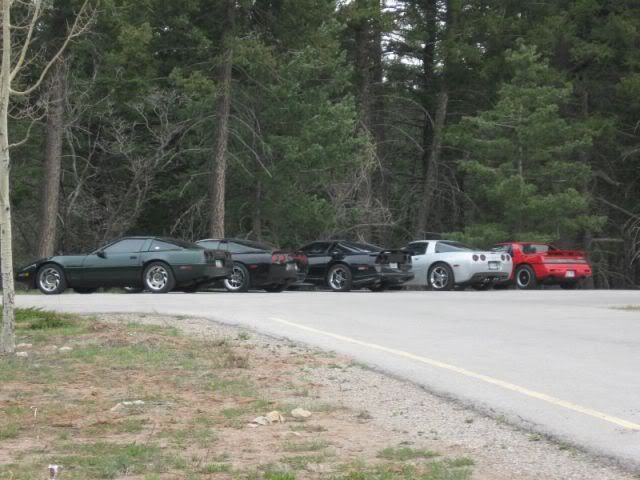
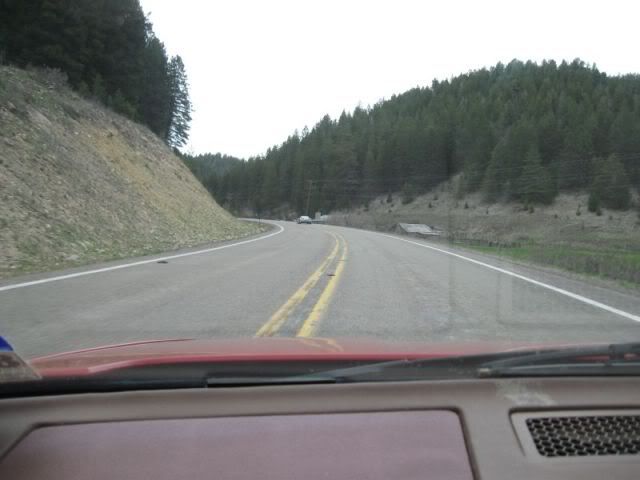
Hey Joe - I hear ya on the cut up hands! As I was working the exhaust yesterday, I had a 4" grinder get away from me - twice! Both times it got wrapped up in my t shirt and left 2 nice skid marks on my belly! It did not bother me at all till I got up this morning, jumped in the shower and Youwch........ The soap was stinging bad. So I spent the day today - driving the Formula. I chased a bunch Vettes all over the mountains in Southern New Mexico - it was a blast and just what I needed.
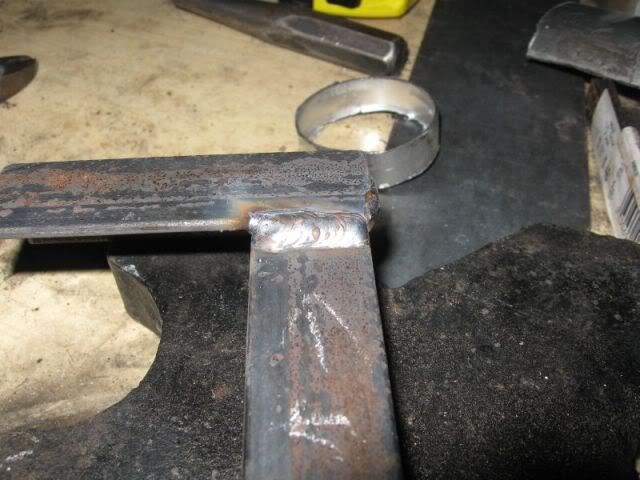
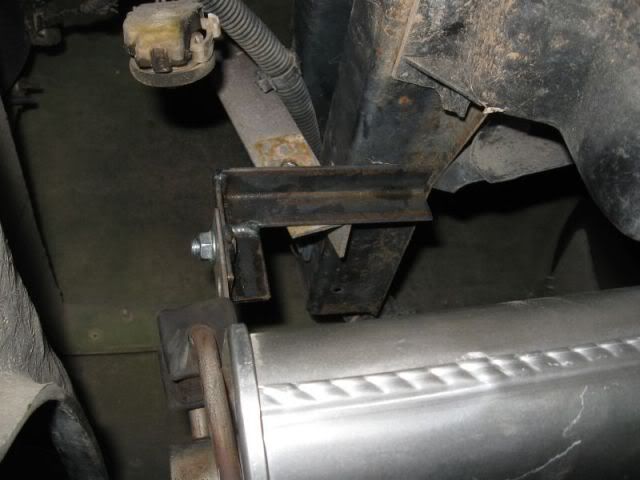
After I got home around 6:30, I jumped on the XTC. I had to fab 2 more hangers for the mufflers. I had some really good welds and a couple of really bad ones. I'll have to do some grinding when I pull the exhaust out to weld it up. I do not know what went wrong but my little welder went crazy on me - when I was trying to weld the new hanger brackets to the car. I was too tired and pissed to try and figure it out tonight - I'll figure it out tomorrow!
Good Weld!
Driver side fit up:
This weld looked pretty good for upside down!
I won;t post pics of the crappy welds - it's just plain embarassing!
More tomorrow.
Pat
[This message has been edited by katatak (edited 05-09-2010).]
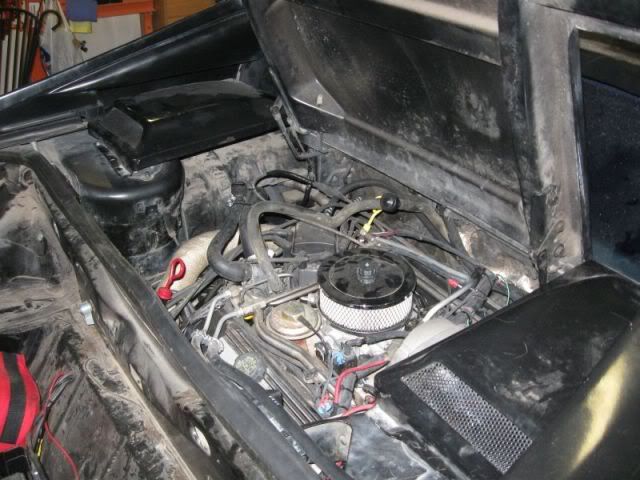
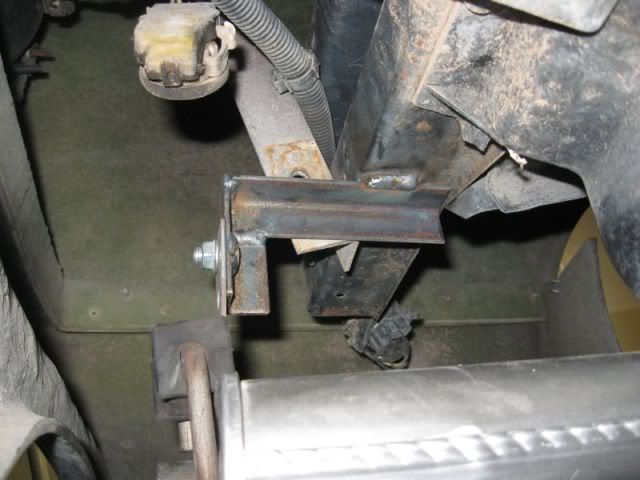
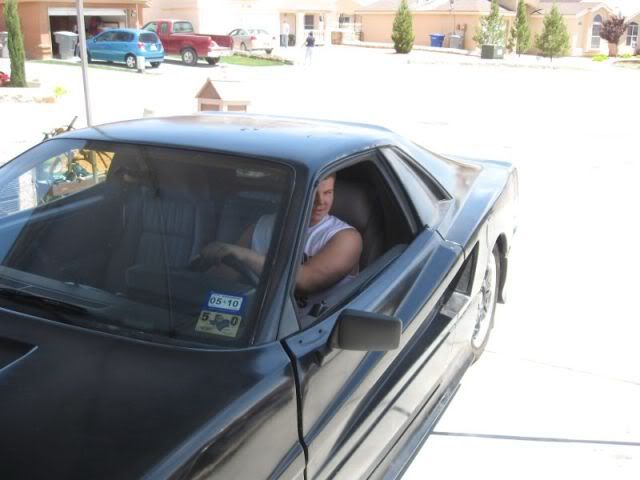
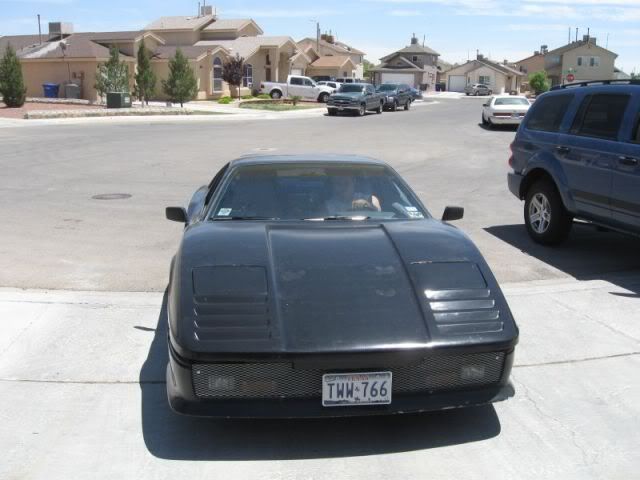
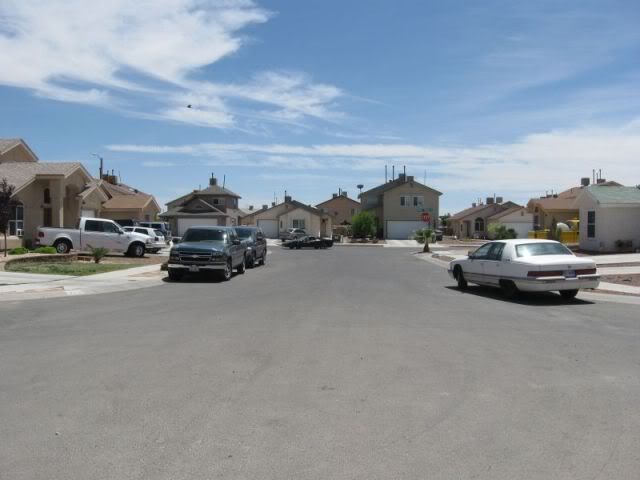
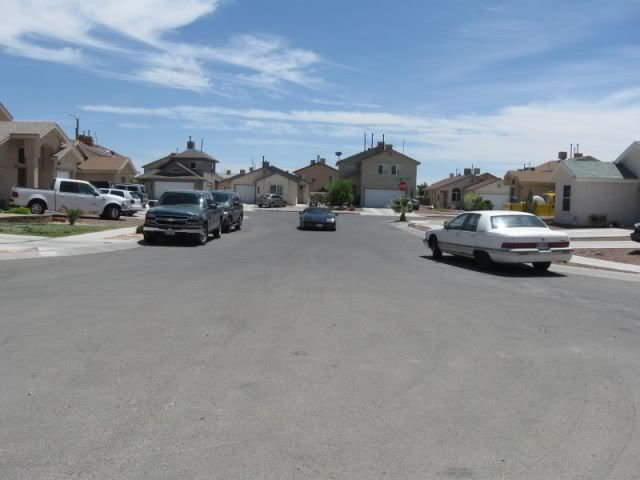
So this morning I got an early start - 6:00 am and I was laying under the XTC. Had a lot of little things left to finish up. I dropped the exhaust so I could weld it up. Still not sure what's wrong with my little Welder but I had a heck of a time getting a good weld. I did manage to get it done. As it was cooling off, I installed the e brake cables only to find that I had them in backwards - so I did it twice. Then when I though it was done, I dsicovered that I had the main cable on the wrong side of the rad hose and it was pinching it almost closed - took it back apart at the adjuster and rerouted the cable. We hooked up the trans cooler, torqued the axle nuts, tied up som hoses and wires, installed a new exhaust doghnut and reintalled the exhaust. It fit better with the new doughnut! Go figure? I did get the passenger side muffler back about an inch farther than the drivers side and probably no one will notice but it bugs me. Maybe I'll fix that later. After getting the rear tires and and sat on the ground, I fired it up - time to see if the tranny works. Reverse - no problem - backed it out of the garage, into the street. Now Drive - yep she moved forward!
Had the boy jump in the passenger seat and off we went. Been driving it around the neighborhood for acouple hours now. No real issues. She runs smooth and has a ton of torque - what a difference 100+ HP will make! She never went over 200* so I think that part is sorted out. I am very happy to have it moving again. A huge sense of relief and accomplishment! I'd do it all over again starting tomorrow. There are a few things left to sort out but nothing that I have not done before. Here's my punch list for project completion!
Gas Gauge and OP Gauge is still goofy - although the gas gage is now moving around some - maybe I jarred it loose cruising around today. Put the Deck Lid back on. Finish the AC - just needs to run some lines and charge it. Install engine oil cooler - got everything, just need to decide where and how to mount it.
It does not sound like much of a list and I am just glad that it moves under it's own power.
Exhaust out for weld up:
Welded up and ready to go back in:
Another satisified customer!
His first drive with an extra 100 ponies!
Just to the ennd of the block and back!
Sounds as good as it looks now!
Checking it for leaks and burnt wires!
All that work just to turn it around in the garage!
I would have preffered to take a little more time and detail some things better but I was under pressure to get this one done quick. It could be better - maybe next time around I would detail the engine compartment and spend a lot more time "sanitizing" the wiring and hoses. Just need this one to be functional. I think it will be a great car for the boy to drive back and forth to school and work - if he can keep out of trouble with it???? I mean afterall - it's half Caddy now. My Mom has a 92 with over 200K - she's had it since new, regular service and all - she has only had a few major problems - power steering pump and a water pump at 160K. It's been a geat car.
He and I do have an understanding - he has 0 chances - one mistake and he loses the car! That's one deal with him that I will keep! I'm pretty sure he will work hard to stay out of trouble - he loves the car too much! It was a lot of fun building it with him - he has a lot of ownership in the car and he has learned a lot of lessons over the course of the last 3 months. He fully understands the importance of being organized and knowing what and where he threw things as he was tearing it apart. All those little bolts and springs and clips - add up when you have to start scrounging and buying them. I am really glad we had the chance to do this together. When I was his age, I had a lot of car/truck projects - at one time I had 5 50 thru 55 Chevy trucks - and my Dad was right there for all of them. I would not trade that for anything. Now that the garage is clear, it is time to get my 70 Monte back together. Last year's bonus finally hit the bank so I have a green light to finish the car. It will be simple and easy compared to what I just went through - looking forward to something less complicated.
I did do some more work on the XTC this afternoon. Got the deck lid back on, air cleaner figured out and tied up some more wires. The E Brake light was stuck on so I cleaned up the contacts at the brake lever. Drove the car around some more - nothing but smiles when I drive it. Turned out way better than I was expecting. I was worried about the axles but all the worries are gone - I took it over to the high school and ran it through it's paces - passed all speed bump tests with flying colors. No clunks, grinds or funny noises. There is a little occaisional "chirp" It does not sound like the belt. I'm thinking it is the rear brakes - new pads and really rusty rotors!
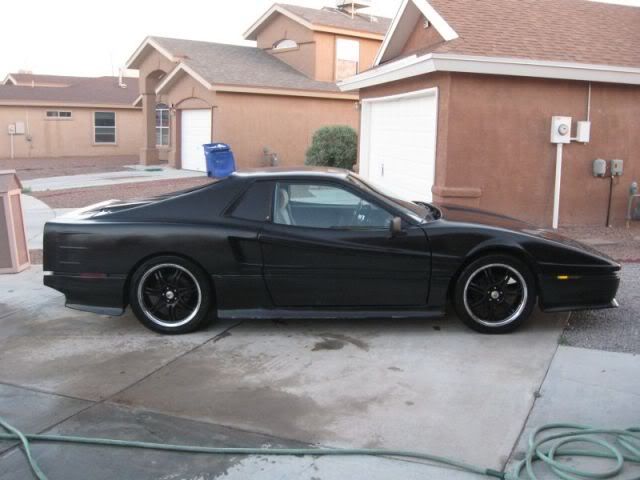
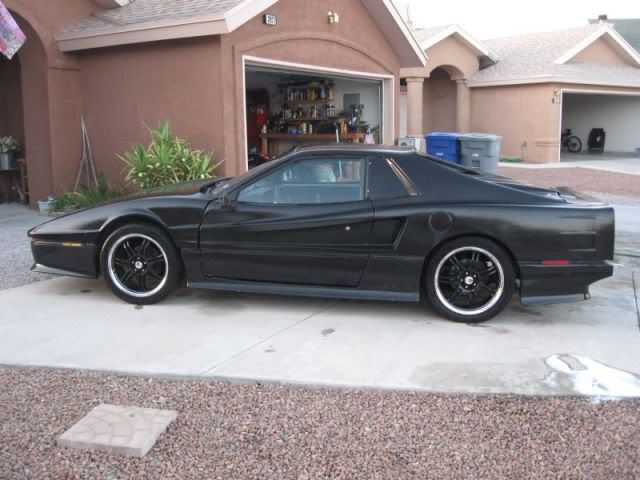
Awww man, the XTC is on the road again! WOOOHOOO!!!! I bet your boy is just itching to get out there and drive it. BTW, those wheels are a perfect match for that body, it really sets it off. I'll come down and give you a hand and we'll do a dash swap for him.
Awww man, the XTC is on the road again! WOOOHOOO!!!! I bet your boy is just itching to get out there and drive it. BTW, those wheels are a perfect match for that body, it really sets it off. I'll come down and give you a hand and we'll do a dash swap for him.
Thanks Andy. Funny you should mention a dash swap - that's the next project for the XTC (at least one that I will do) - an interior makeover - all new custom stuff! Come on down and enjoy the hot weather..... We can both sit in the lawn chairs in the shade and bark orders at him!
Just awesome! That car could have not found it's way into a better home. I caught the thread where you thanked the gang that helped out in the heart transplant. You ARE one standup guy Pat.
The run that you took through tthe New Mexico mountains with the Corvettes must have been like a dream run. I am more than willing to bet that the most of the Vette guys couldn't shake you. It is nice to be able to enjoy our little mid engined monsters.
Thanks Tony! It was a good project and I'd do it again in a minute. Chasing the Vettes through the mountains was a lot of fun. I had no chance when it came to power but the Old Fiero does an amazing job in the twisties. Rick 88 was there! He will tell you that it was a great ride. He and I had to slow down for the Mrs's so they could take in the scenery on the way back but it was still fun - we did not waste any time. Between the 2 other guys, Rick and I, there are 8 Fiero's - I am pretty sure they love driving thier Fiero's as much as thier Vettes. There is nothing like a line of cars - regardless of make - chasing each other through the twisties!
Had some time to do some tinkering today. Found where the Alt wire was wearing on the tensioner pully. I rerouted the wire and tied it down - should solve the problem. I set the timing the other day but it did not seem to be right. It felt like it was too far advanced. Almost like the spark was "scattered" causing a rough feel - like a miss (or several misses). After reading every 4.9 thread ever posted on PFF last night, I decided to play with the timing/idle learn, et.c this afternoon. I hooked up my timing light, jumpered A & B, fired up the car and the timing was jumping all over the place. I messed around for over an hour and came to the conclusion that my timing light must be fubar! I went and bought another one and sure enough, the my old Snap On timing light has gone goofy on me. It breaks my heart - this was my grandpa's timing light - it's an oldies but a goody. I'll have to see if I can get it fixed!
Anyway, with the new light, I could see that it was set at about 16 plus degrees. I set it at 12, locked it down. Went through the idle learn procedure and went for a drive. Runs smooth, no stutter, miss, nada! Idles aroung 750 - no sail on that I can detect. Seems to down shift at the right time when slowing or coming to a stop. I took a spin around town - light to light type heavy traffic driving - ran great and never went over 190*. I got it out on the highway - mainly to check the speedo with my GPS (it's about 3mph to the slow side versus the GPS) - and it edged up to 220* and hovered there at speeds of 70 to 80 MPH. Coming back into town, I ran around 55 to 60 and the temp came back down between 200 and 220*. I think I still have an air flow problem in the front of the car. I thought I was not going to have to build a "funnel" to force air to the rad but I was wrong. I think at speeds over 50, the air does not get to the rad due to the length and design of the front of the XTC body. Looks like it's back in the garage for a fix! Off to San Antonio for the Round up in the AM - More next week.
You might try a lower air dam extension under the front bumper as a quick fix to force more air up to the radiator. Maybe some hood vents may be in order too.
After I added a chin spoiler to my car I had to do the same thing. I just took some of that black plastic garden edge stuff from the hardware store and bolted it to the existing rad air deflector under the car. You can't see it, but it adds a few inches to the original air deflector and directs more air up to the rad. Solved my problem for temps rising on the highway with my old 2.8
[This message has been edited by doublec4 (edited 05-16-2010).]
After I added a chin spoiler to my car I had to do the same thing. I just took some of that black plastic garden edge stuff from the hardware store and bolted it to the existing rad air deflector under the car. You can't see it, but it adds a few inches to the original air deflector and directs more air up to the rad. Solved my problem for temps rising on the highway with my old 2.8
No doubt. I just mentioned this to Dogcreek yesterday. Buy a short section/roll of the good stuff. The airdam area is larger than you will need. Great! Just cut to fit. And there is a built in lip for which one is able to attach securely with nuts'n bolts to the undercarriage. I read this somewhere, and did this to one of my old E250s. Just don't get the cheapo stuff. You can feel the difference.
That car has come such a long way. I remember giving Carver1 a friendly rubbing over the "doiley" mesh in the front when he originally bought it. Now, the shortbus is getting a makeover. Old Fieros never die,.........
Thanks guys for the airdam idea. The XTC has no airdam at all. I think I will look at fabbing up one this weekend and see how it works. I fear I will still need to build some sort of "funnel" between the grill and the rad. It's just so long in the nose and there is really nothing there to direct the air to the rad - maybe an airdam will "scoop" up eough air - the only issue is that the nose is so low to the ground now - I suppose if it's just under the rad, it may be close enough to the front wheels where it won't drag too much. My head is grinding away now.
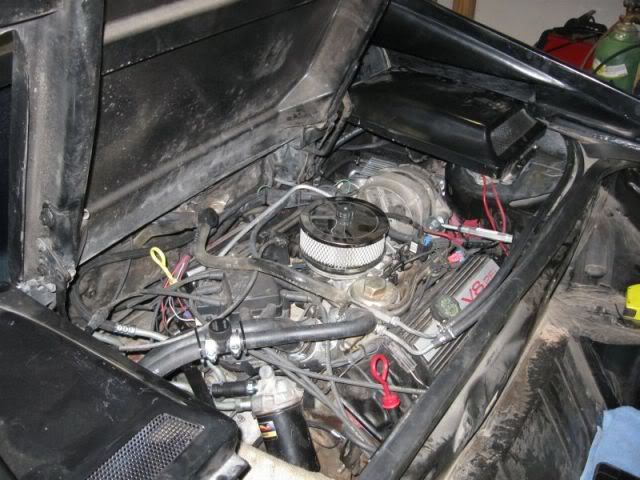
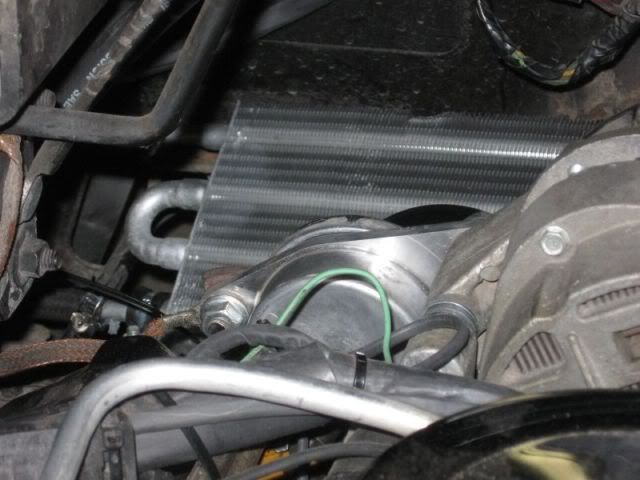
I managed to finish up some more small details this afternoon - in doing so, I found some more than need addressing. The OP gauge was pegged so I took the sender out - it was working on the Duke pre swap and took it back to AZ - life time warranty - and picked up a new one. While I was doing that, I also picked up an oil cooler for the engine oil. I got the lines run and the cooler mounted - I put it on the passenger side just above the frame rail - the old battery box was rusted out and left a hole in the fender. I cut out all the rust awhile back with the intention of "patching" up the hole later but it turns out that it is the perfect fit for the new cooler. I will fab a kind of a box to cover the exposed side and then duct it to the scoop on the right side just behind the door. It's functional for now. I fired it up to check for leaks and was pleased to see that the OP gauge is now working.
While mounting the oil cooler, I noticed that the plastic fan on the alternator pulley was looking rough. Upon further inspection, it looks like the motor is torquing backwards far enough to let the pulley rub on the strut tower. - about an inch. I'll have to fab up a dog bone now. I'm glad now that I did not move the engine 1/2" to the passenger side - it would have ate my alternator. This is the source of my squeak on the right side. I still have to fab a brace/bracket to support the rad/heater hose above the crossover. When it get's warm, it sags and ends up riding on the crossover. It's amazing all the little things that come up with these swaps - they are not a straight forward - bolt in deal. I was reading a thread awhile back about folks wanting someone to build/assemble a "swap kit" for the 3800 and the 4.9 - I'm not sure that a "kit" would be a one size fits all thing. I scoped out another 4.9 swapped Fiero in San Antonio at the Round Up this weekend. Lots of things done differently! Most better than the way I did them and I followed most the swaps documented here on the forum. It just proves that there is more than one way to skin a cat or is that caddy? When it cools off this evening, I'll go at it again - I need to get this car on the road!
As I was sitting in the living room in the nice cool air this evening, I had a constant nagging form one particular 16 year old - Is it done Dad? Can I drive it Dad? What do we have to do to get it done Dad? and on and on.... so I got up and went to the garage to see what else I could get finished up. First on the agenda was a dog bone or torque strut. I am not completely sold on the version I came up with but I will give it a shot to see if it works. I have seen other 4.9's using a similar setup and have had no issues - we will see. I used a 3/8" stainless turn buckle. I picked up some Derlin bushings that fit snuggly into the eye of the turn buckle but had to drill out the inside for the 10mm bolts. I bolted it to the stock Dog Bone mount on the chassis and to the alternator bracket on the motor. After a few test drives this evening, so far so good. We will keep a close eye on it till I can fab a better bracket and build something with heim joints or something fancy like that. I really did not think the motor would move as much as it does - more so under load.
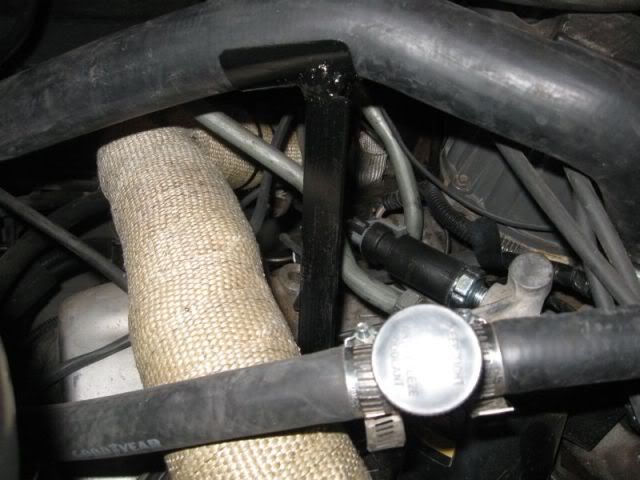
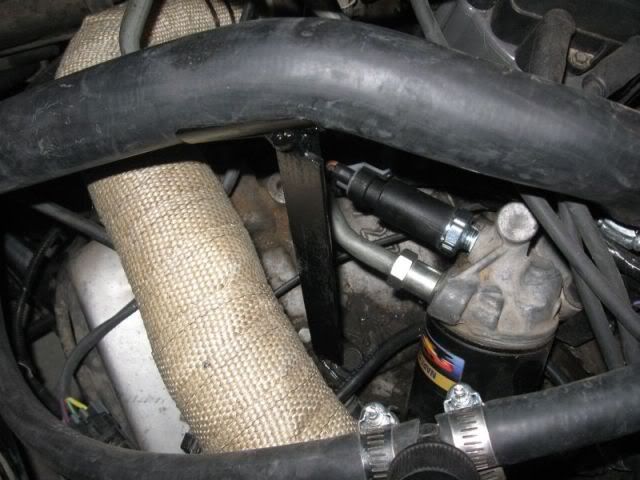
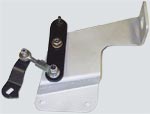
Second thing I needed to do was fab up a bracket / support for the rad hose - that was quick and easy - a piece of angle iron, a couple notches, drill a hole, add piece of muffler pipe split in half, a little bending and welding and that was done.
The last thing I had to do was "button up" the AC compressor. I had a couple little plastic plugs in it to keep the debris out but it's going to be awhile before I have time to get the AC going so I cut an AC hose manifold off a Caddy and sealed the stubs I left coming out of the block then bolted the block with seals to the compressor. Right now its just an elaborate idler pulley.
What's left? Well nothing that won't keep us from driving the car but I still have some things to do. The list is getting shorter.
Fab a box/scoop for the engine oil cooler to keep road and tire debris out of the cooler. Install the firewall heat shield. Drop the tank to work on the fuel level sender. Rebuild the door hinges - parts ordered - will do that as soon as I have the parts - passenger door hinge pin is broken. Finish the AC - need hoses and flush the system out then oil and charge it up. I think we are going to take the interior out of the V8 Coupe and swap it into the XTC - I have a new direction for the V8 Coupe. It will need new rotors and pads before the end of the summer - pads are ok now but the rotors are looking worn. I'm sure I'll come up with a few more - we all know it never ends.
Watching the paint dry on the rad hose bracket:
Of course I had quality help!
Bracket installed:
Temporary Torque Strut:
Oil Cooler:
All buttoned up: - for now!
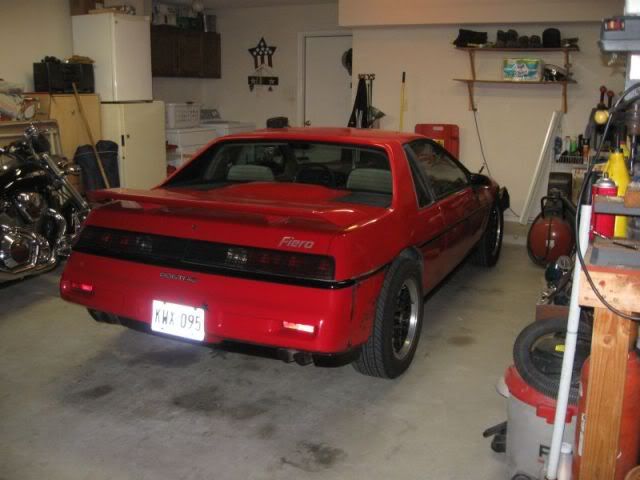
Red has her house back - all cleaned up after her 1500 mile trip to San Antonio for the Round Up!
Here's a short clip of the exhaust - not really my cup of tea but the boy loves it - still needs a couple of tips - maybe he can find some short resonator tips to change the note a bit? It will do till he can afford something better.
Pat, how many quarts of transmission fluid did you need to top off thte dip stick? I need to get some of that pretty soon.
Joe
Hey Joe.
The trans had the tripots from the Caddy still in place when I got it from Carver1. I lost about 1.5 quarts when I swapped the axles. I ended up putting 2 quarts in it. Not sure if yours was drained - usually the majority of the trans oil is in the torque converter - if you did not split the motor / trans and drained the converter I would get the engine to temp then check the stick - add a quart at a time till it comes up on the stick then shift from park to reverse for a few seconds then to drive for a few then back to park and recheck. If you did not drain it, i would think 3 or 4 quarts would fill the pan? I'll do some digging and see what I can find on 4t60 capacity.
Great idea, I just looked in my book, and it says up to 6.5 quarts. When I pulled out the old caddie tri-pots no fluid came out, so I am thinking its almost empty. Plus the trans cooler lines are both empty
[This message has been edited by josef644 (edited 05-21-2010).]
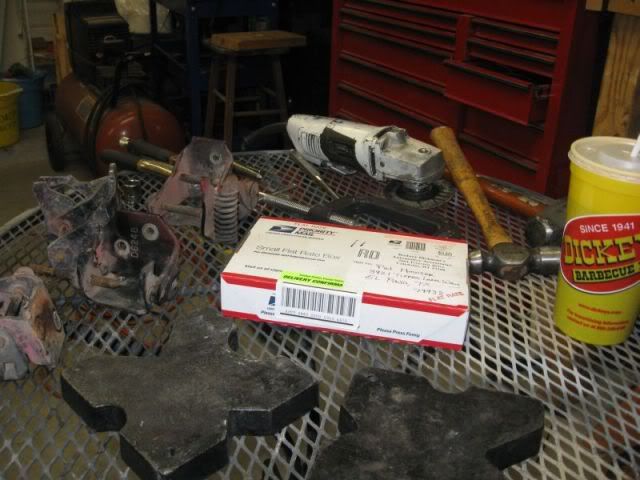
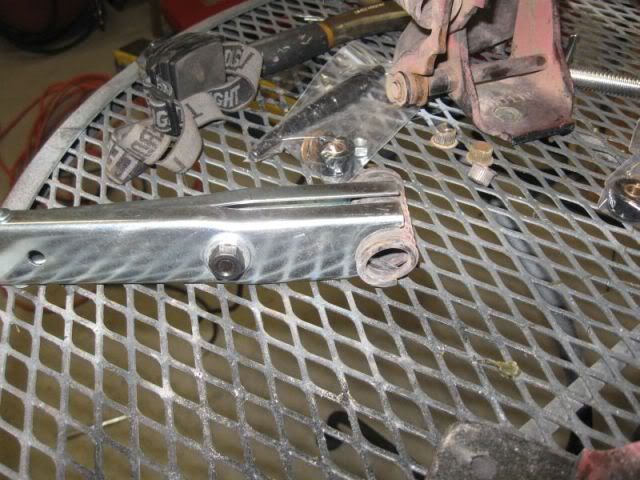
After fiddling with the AC on the Formula, I decided to rebuild the hinges for the XTC. I had an extra set of hinges in the shed and I ordered the parts for RD - they showed up today. Managed to get all four hinges rebuilt. Tomorrow we will install these hinges - or at least the driver will install these tomorrow - I am just going to watch - plus I will be starting another project tomorrow after I get the AC on the Formula going.
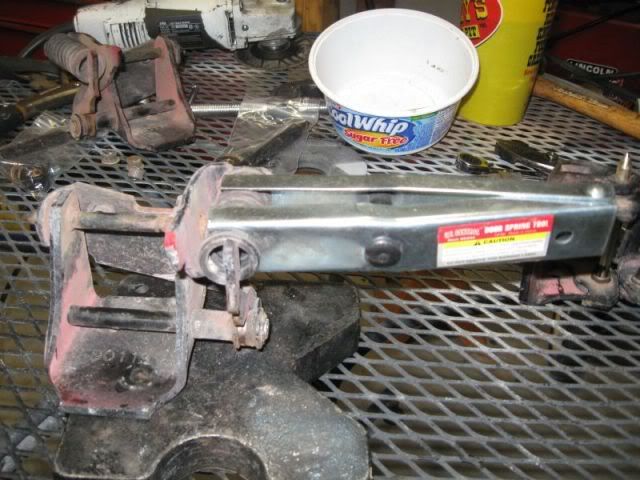
After a run to Dickey's BBQ Pit, I got out my favorite hinge destruction tools and went to work.
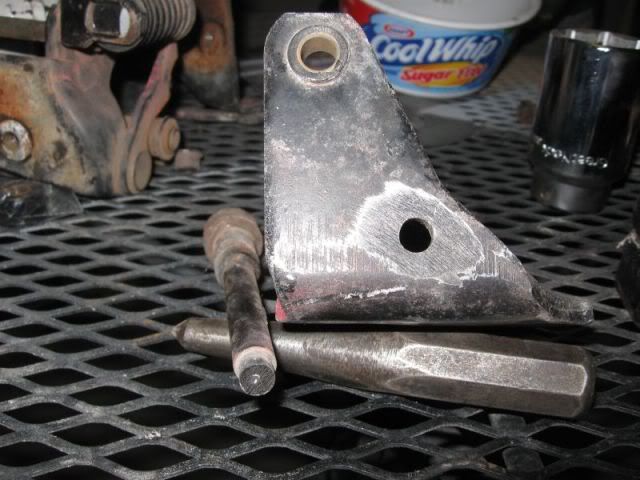
Anyone ever see a hinge pin like this one? Its not wore out so I think I'll throw it my road trip tool bag - never know when you might need a quick hinge pin?
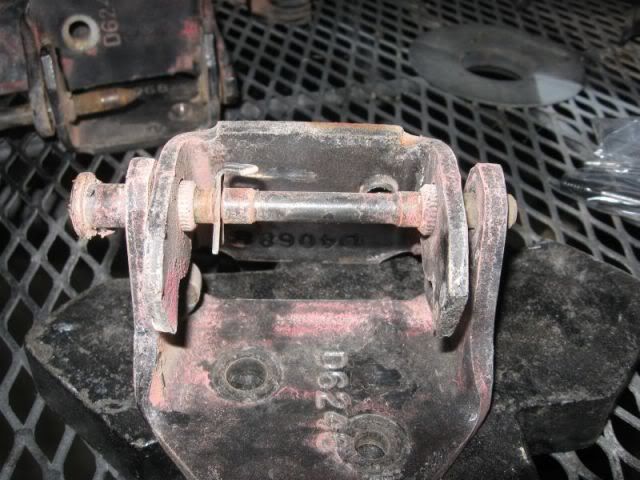
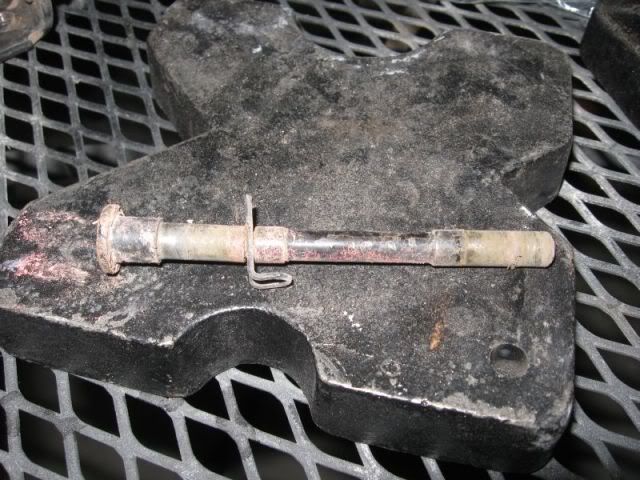
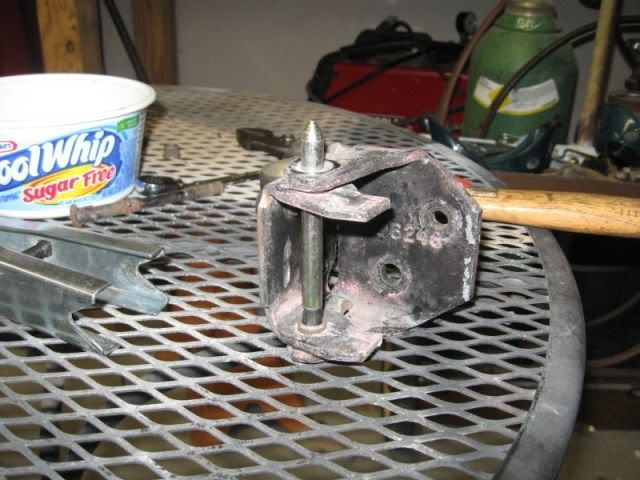
After knocking out the old pin and bushings, the new ones go in easy - well easy with a big hammer!
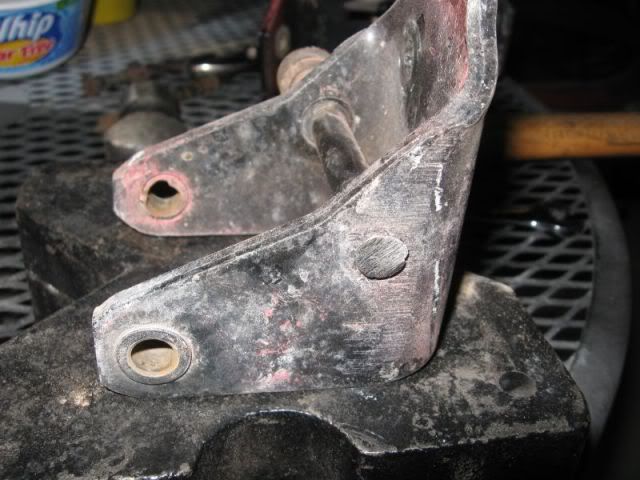
Two top hinges done:
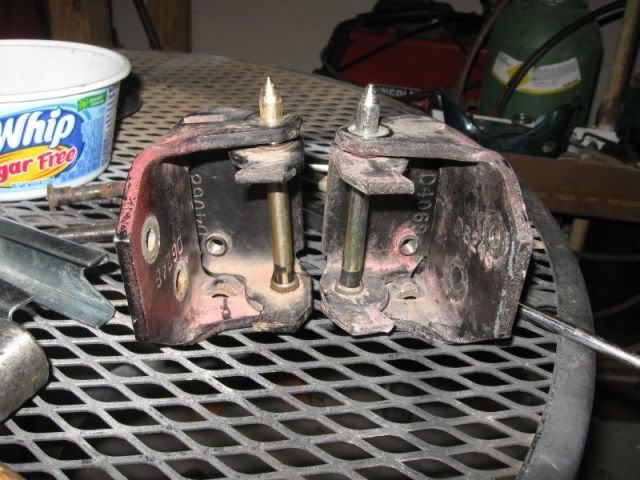
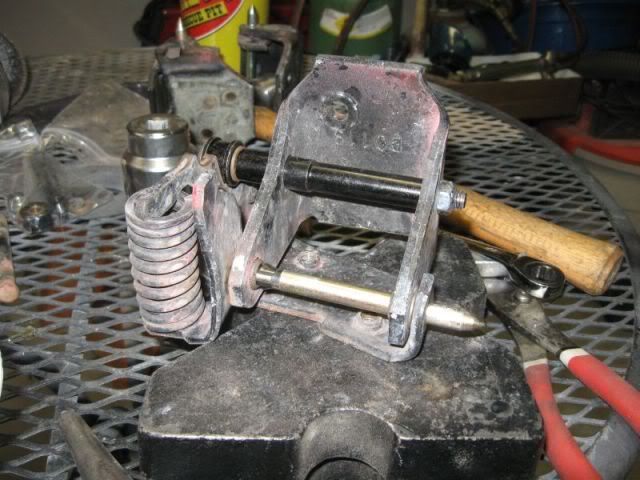
Taking apart a bottom hinge: Watch out for that spring!
You have to grind the swedge off of the old roller pin:
Then knock it our with a punch:
Keep an eye on that spring - I have had them slip out of the press and go flying around the garage!
One more little project popped up with the XTC today. It looks like there is too much heat on the shift cable/shift lever at the trans. The plastic cable end will not stay snapped on the little ball pin on the lever - I think its melted the inside of the plastic end - not sure what the fix will be? Not sure I can rebuild all the brakets and get them away from the heat! Back to the drawing board I guess.
Spent the better part of yesterday morning and this morning trying to rebuild the shift brackets. While I was messing with it yesterday, the guide tube on the shift cable broke off! So I had to mix up some epoxy and try and glue it back together. I used PC-7 - king of like JB weld. Well I got anxious and did not let it cure long enough and it started to crack. This morning, I went back to work on it and rebuilt the trans / shift lever. Also rebuilt the cable mount. Strated putting it togetner and my expoy broke.
After a few choice words, I regained my composure. I ended up wrapping fiberglass mat around it about 3 layers thinck, let it setup and it looks like it will hold - at least till I can get anohter cable. After a lot of trial and error - and I mean a lot of it. I think I have it corrected. I built a "pin" for the shft cable end to fit over with a washer and nut on top. Without the corssover pipe in place, everything worked perfectly. After the cross ove pipe was back in, that all changed.
With some manipulating, adjusting and a lot of cussing, I now have it working - well drivable anyways. I can get it into drive wtihout the cable hitting the crossover but can't down shift to 3,2,1. It's ok - the 16 year old does not need to be "banging" gears in with the auto anyway but it bugs me that it is not 100% functional - it will work for now but I have a new plan already brewing!
Are you worried about the bracket pinching into the hose? If you extended the short end and had a curve in it that should alleviate any issues.
The "cup" is positioned just below a formed curve in the hose. So far so good - no colapse or even a sag in the house. This hose is pretty stiff as it is. I was worried at first that it may cause a problem but after about 200 miles on it, I think it will be OK. Thanks for the reply.
Pat I want to make you aware of the West Coast Fiero's 4T60E shifter bracket. It uses center pivot between the shifter arm and the shifter cable, thus moving the cable and it's plastic center away from the heat by several inches. Copied from their web site:
T465E & T465EHD Transmission Shifter Adapter.
"The WCF T465E Shifter Adapter enables you to install the stock Fiero automatic transmission shifter cable to the T460E transmission, reversing the shift pattern on the transmission and providing cable clearance for the Exhaust manifold.
The shift lever on the T465E is 180 degrees out from the standard Fiero transmission. With this adapter, the shifter will function correctly, like the stock Fiero shifter.
The stock Fiero shift cable may be used in this application.
Please specify T465E transmission when ordering. $120.00 Please specify T465EHD transmission when ordering. $120.00" and a link, about half way down the page: http://www.westcoastfiero.c...ion_accessories.html
A bit pricy I think, but food for thought. Joe
[This message has been edited by josef644 (edited 05-24-2010).]
Pat I want to make you aware of the West Coast Fiero's 4T60E shifter bracket. It uses center pivot between the shifter arm and the shifter cable, thus moving the cable and it's plastic center away from the heat by several inches. Copied from their web site:
T465E & T465EHD Transmission Shifter Adapter.
"The WCF T465E Shifter Adapter enables you to install the stock Fiero automatic transmission shifter cable to the T460E transmission, reversing the shift pattern on the transmission and providing cable clearance for the Exhaust manifold.
The shift lever on the T465E is 180 degrees out from the standard Fiero transmission. With this adapter, the shifter will function correctly, like the stock Fiero shifter.
The stock Fiero shift cable may be used in this application.
Please specify T465E transmission when ordering. $120.00 Please specify T465EHD transmission when ordering. $120.00" and a link, about half way down the page: http://www.westcoastfiero.c...ion_accessories.html
A bit pricy I think, but food for thought. Joe
Wow... Thanks Joe! I was kinda thinking about a setup like that and how to make it work but could not "see" it. I agree - it's pricey but it may be just the trick. I imagine those would give the full range for all gears too! If my latest version fails ( and it most likely will). I may have to go this direction and then be done with it.


 Who is more excited as the XTC get closer to being finished, you or your son..??


 Ein Bier Bitte?


 That car could have not found it's way into a better home.