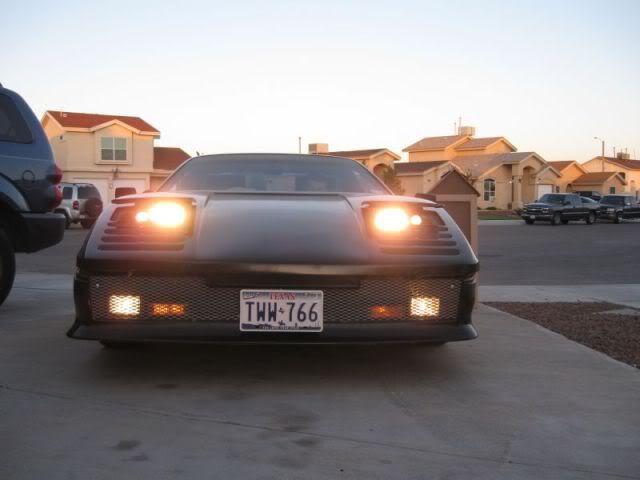
Great job!!! I really like what you done with the driving lights...might have given a lot of us some new Ideas for our light mods
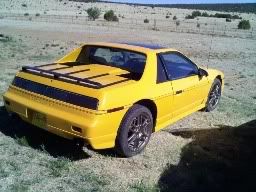
So did I read right and the XTC is now your baby? so we will see it at the Ruckus?
Paul
Hey there Paul - thanks for the reply. Well yes the XTC is in my posession. It will end up being my 16 year olds first car....... and yes, my plan is to bring it to the Ruckus. Just have a few more things to finish on it.
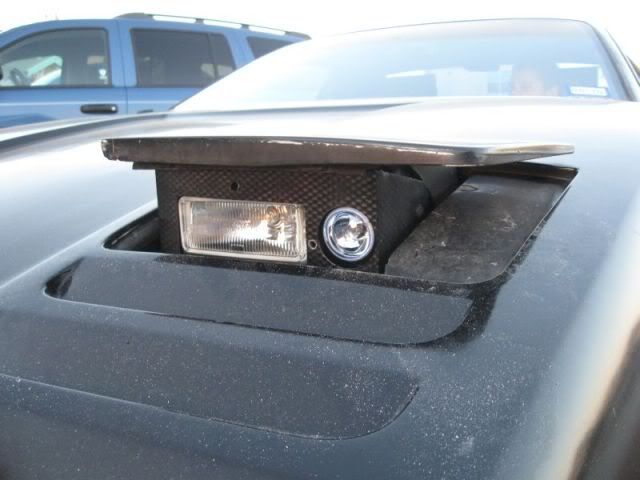
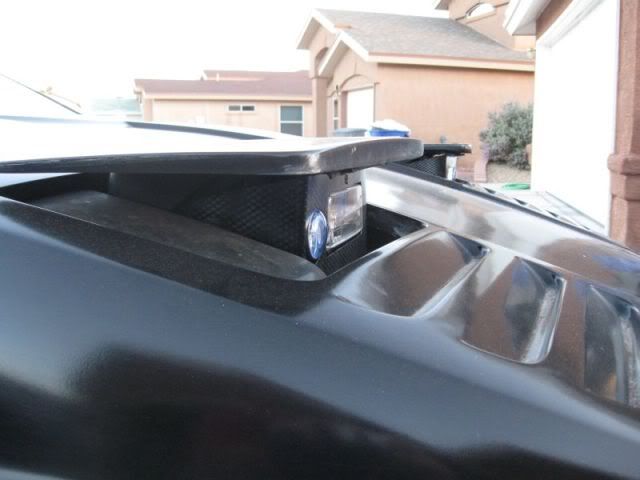
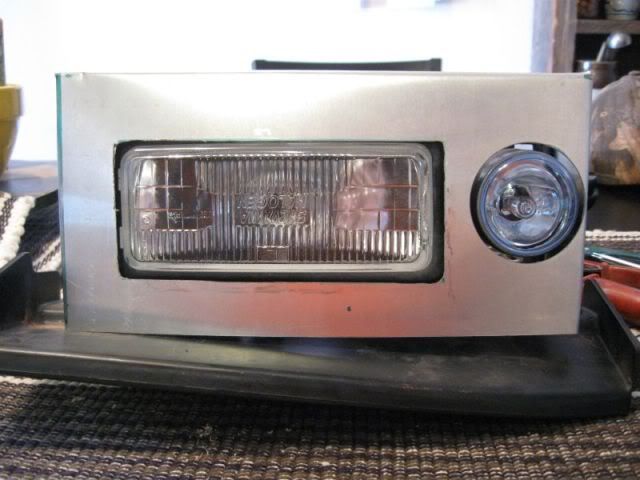
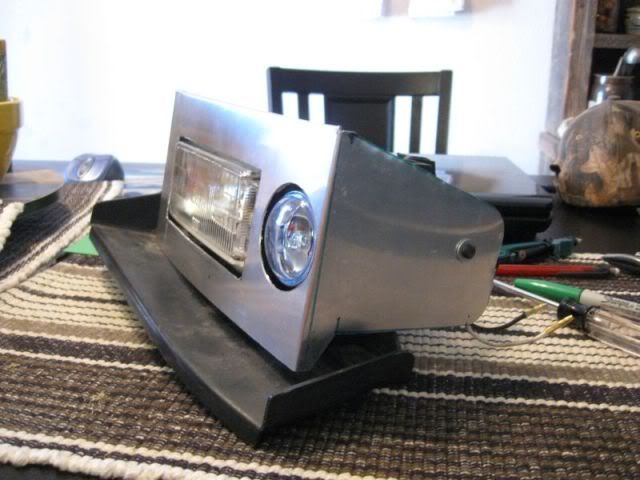
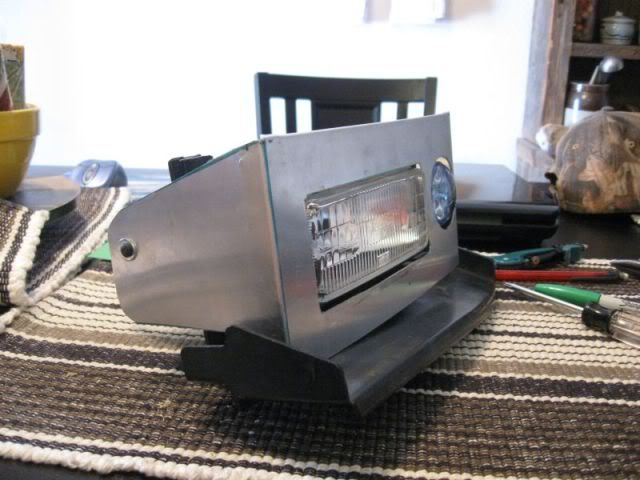
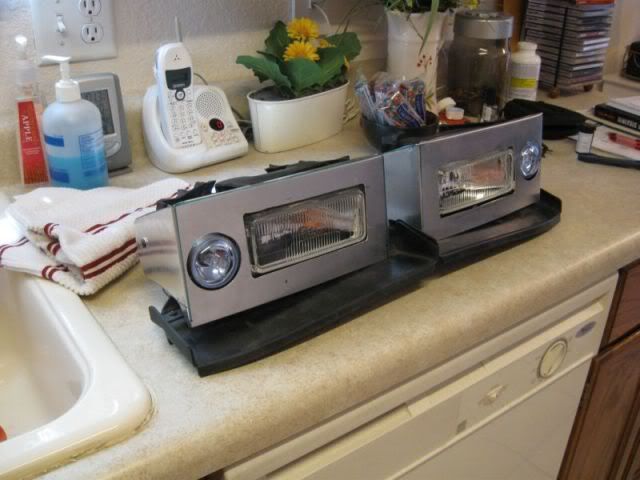
I really like the way these turned out - there are a few changes I want to make but they are minor and easy. I have to take them apart for paint and a few finishing touch's. I will take a bunch of pics how they are assembled and post em up for anyone interested. The 2 new headlights were the biggest expense - 50.00 for the pair. I got the Camaro headlight assembly at a junkyard for 20.00 but none of the lights worked. If you could find a set with working lights, it would be cheaper. The driving lights were 25.00 so I got under 100.00 in the setup. I am actually starting a set for the Formula.
Pat
Edit to add - Page 4 ownage - Yahooooooo............
[This message has been edited by katatak (edited 07-08-2009).]
Those look great! They really fit the look of the XTC! Good job!
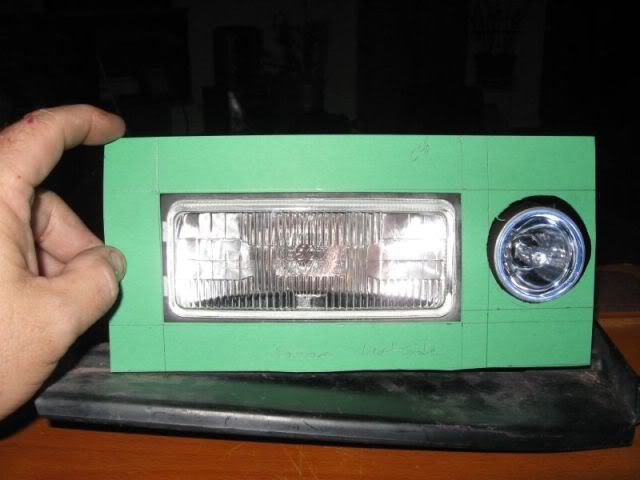
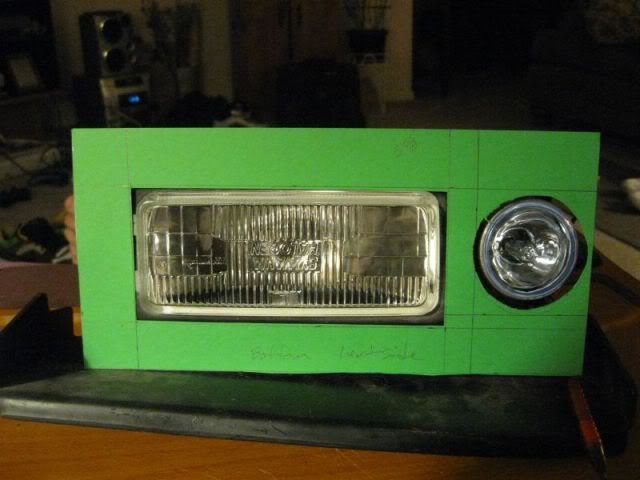
Thanks J. It was pretty easy to do. I was dreading it at first - worried about the possibility of having to do some fiberglass work or mixing up a bunch of epoxy, etc. All I had to do was trim the Fiero bucket a little and cut it down then trim up the Camaro bucket to fit squarly in the Fiero bucket, drilled some holes, put in a few screws and done. I will take them back apart and clean them up with some paint - make sure everything is tight. I spent maybe 4 hours building the first one and an hour on the second one.
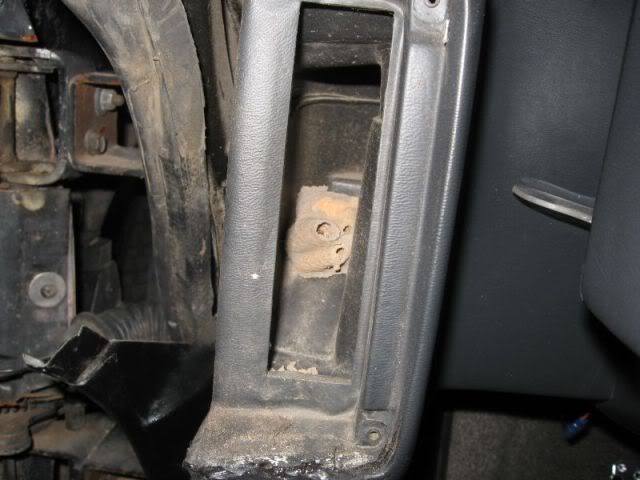
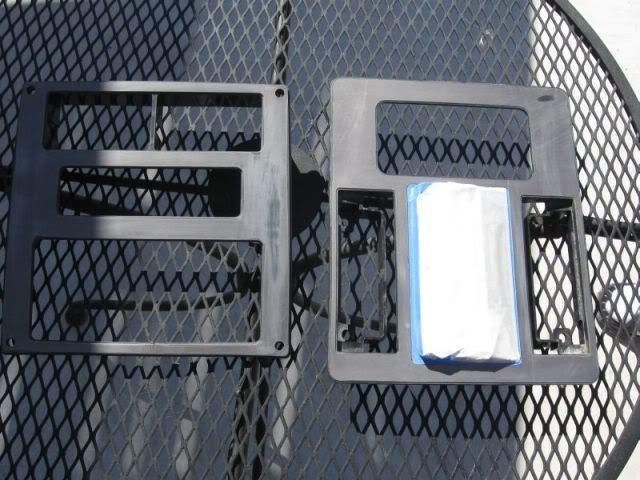
One more piece of the lo pro headlight project completed this evening. I got the template made for the face plate/cover for the new headlight buckets. I have some 16ga aluminum sheet that i will fab the cover's from. With any luck, I will have the covers done tomorrow night. Then I will disassemble both buckets and paint them up. I also got a packag from the AC ferry today via Fed Ex - new AC compressor, Accumulator, Variable orifice tube, hi and lo pressure switchs w/new connectors and the R134 control valve. Guess I'll be rehabing the AC Saturday......I Can't wait. I drove the car this evening - it was 101 out at 8:00pm and I am cooked. I will never have another "black" car!
The template is a "rough outline. I will radius all the inside corners to fit the light better and the round hole for the driving light will be - well - round. I'll use a whole saw to cut the hole. There will also be "sides" bent back to cover each side and will attach at the stock points on the Fiero bucket.
Just read through this whole thread. Neat project I have one suggestion:
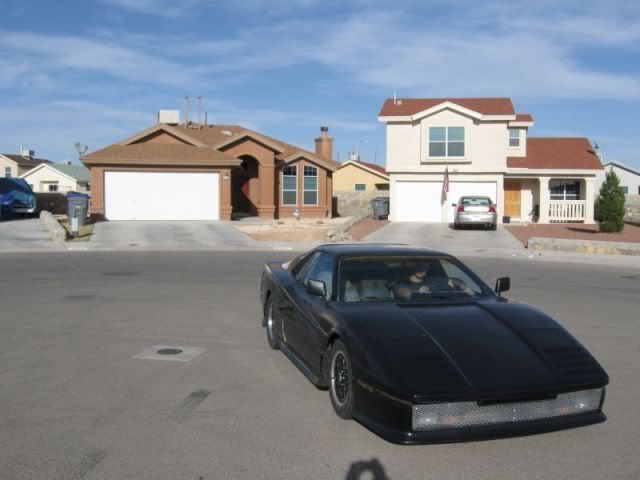
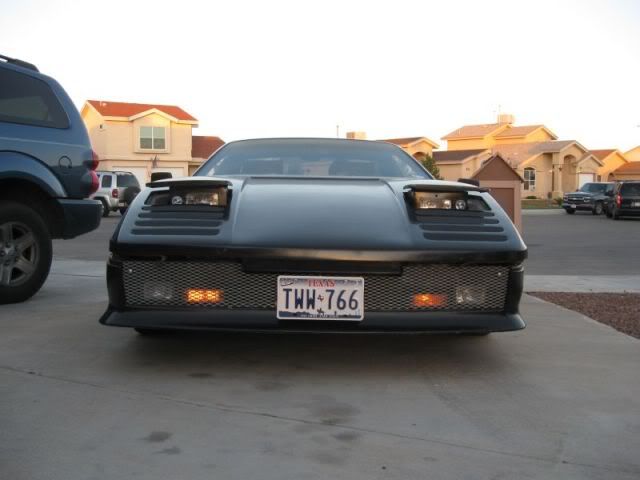
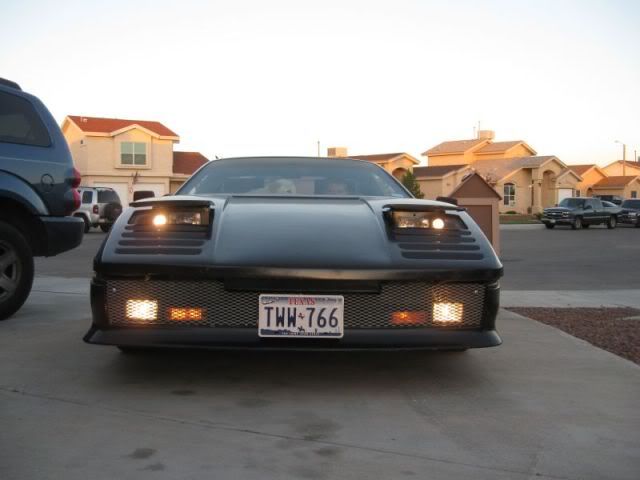
With the rest of the car being black, the front wire mesh stands out like a sore thumb IMHO. Maybe try making it black or some darker color?
I do agree. The plan is to eliminate the mesh all together. Benihd the mesh grill is wide open and the air is not directed into the radiator like it should be. I am going to mold a "funnel" out of fiberglass into the radiator. The driving lights and turn signals will be molded into the "funnel" at the outer edges and it will be open to the radiator kinda of like the stock Aero nose.
HEYYYY! I spent alot of time on that front grill. The old one was black. It didn't look that great.
I took it out to do some measuring and I can concur - it is tough to get out and then back in - but I will say you do excellent work, it fits very good. Nice and ight and no rattles..... I just got to learn some fiberglass skills now..... I also want to add an extractor hood scoop and I want to fill in the louvers in front of the headlights - smooth the hood out.
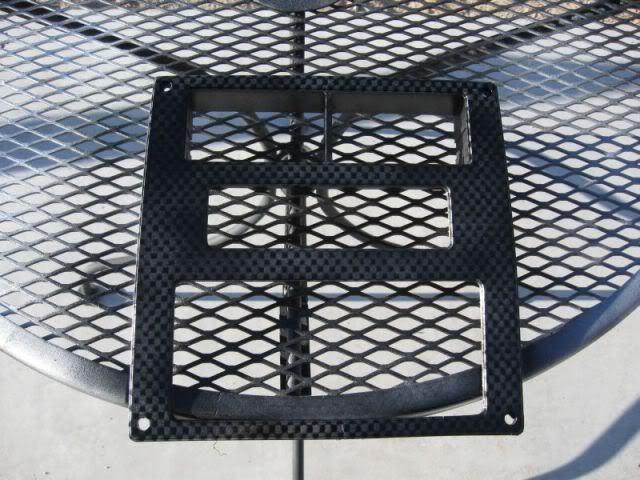
So I got the crazy idea that I would attempt to paint the headlight covers to give them that "carbon fiber" look. So I spent a few hours on the net, watching some yuotube, reading some posts and decided what the heck. If it does not turn out, I can just paint em black and be done. So here's my first run at it. Not too bad - there is room for improvement but I was surprized how they turned out.
The plan for the day was to get the AC going on the XTC but all the parts did not show up. Got everything but the 2 new switch connectors. I decided that it was too hot anyway - 105 in my driveway today.
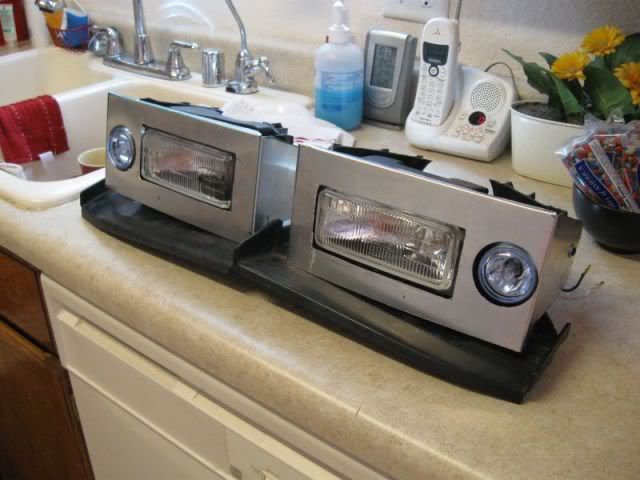
I needed to finish up some of the wiring for the headlight project and finish the assembly of the buckets. So off to the parts store I went. I needed to build some headlight connectors and run some wire for the driving lights. I sat in the living room in the AC and built the connectors and the wiring harness. Then I "rebuilt" the buckets - they were put together with some sheet metal screws so I removed the screws and drilled out the holes then installed some #10 bolts & nuts with locktite and double nutted. When I got shade in the driveway, I went to work. I could last about 30 - 45 minutes in the shade then I had to go in and cool off. It took most the day to get the lights finished up.
Now that I'v done this once, there are a few things I would do different (cheaper and quicker) but I guess if I did not learn something in the process, it was not worth doing. Got them done for now but I will fab some new covers. I used 18ga aluminum and it is too flimsy. I will use 18 or 16ga steel for the new ones. I also learned some tricks for the "carbon fiber" paint. I have a few more plans for this process on some interior parts. I also was able to do some measuring so I can build an insert for the grill to direct the air into the rad. This is where I will learn to do fiberglass?
Today was the big day. The plan was to rebuild the AC system on the XTC. Here's a list of all the parts:
Remanned V5 compressor - 47.95 off E Bay R134 control valve - 78.00 from Rock Auto Normal Service - Variable Orifice tube - 19.99 - Autozone New Accumulator - 19.99 - Autozone New high pressure switch w/new connector - 35.00 - Autozone New low pressure switch w/new connector - 24.99 - Autozone 16oz PAG 100 oil - system uses 11oz - 15.00 - Autozone 3 12 oz cans of R134 freon - 24.00 - Autozone Nice Cold AC in a black car = Priceless!
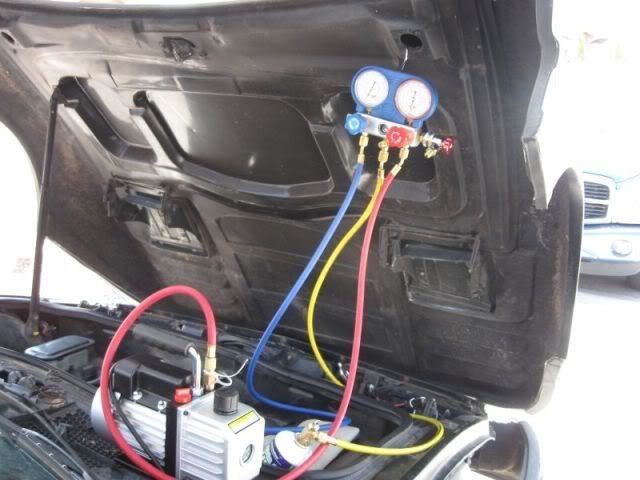
I also bought a electric 2.5 CFM vacuum pump from Harbor Freight. It was the floor model so the Manager gave it to me for 40.00 - regular 90.00. I had been using the 10.00 air compressor version but thet electric one works so much better. I am always messing with AC so it will pay for itself. So without the vac pump, I got about 250.00 in parts and goodies.
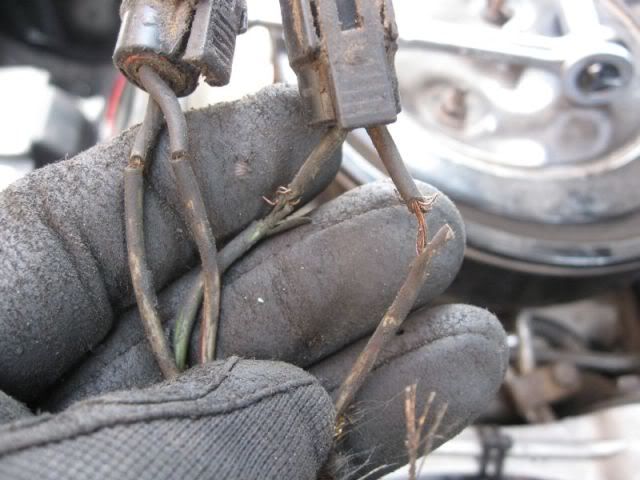
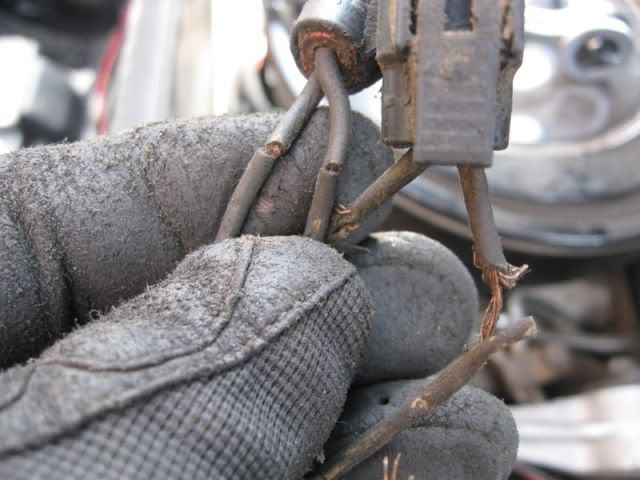
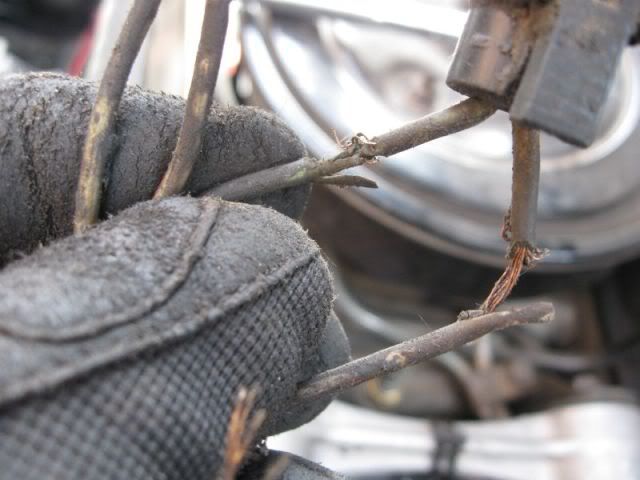
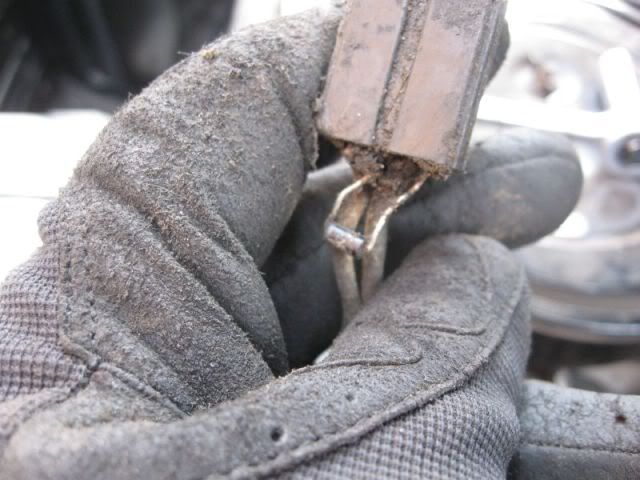
I removed the old compressor, removed the old accumulator and orifice tube, flushed the lines and blew them out with a lot of air. I found several bad spots in the wiing for both the hi and lo switch's. The majority of the time spent was fixing the electrical issues. After looking at it, I noticed that where the wires come down behind the water pump (duke), they are fairly close to the exhaust manifold - probably why all the wires and the plastic loom was so hard and brittle. I replaced all the wires, installed new plastic loom and used "Simmons" High heat spark plug boots made from nomex to cover the lower end where it runs close to the exhaust. They come in sets of 2 so I put the other one on the starter cables to protect them. They work very well. I installed the new switches and the control valve in the compressor and filled the comp with oil. I put half in the compressor and the other half in the "suction" side of the accumulator. I buttoned everything up and put the new vac pump to work.
I let the vacuum pump run for a few hours then I closed the valves and let it sit for an hour. The cool thing about the electric vac pump is that you can see it pull the moisture out of the system. Once I new it would hold good vacuum, I opened the valve on the first can (1st one I put in has dye in it). I let the system take as much of the can as it will without starting the car. Then I check for leaks around the fittings up front and at the compressor. When I'm sure there is no leaks, I start the car and feed the rest of the 1st can into the system. With the 1st can in, I was already getting 75* air at the vents. Toward the end of the 3rd can, my pressures were around 30 on the low and 230 on the high. I put a large fan in front of the car to get some air moving over the condensor and I was able to get 46.7* air out of the center vents. Good enough for me!
Bad Wires! And my new vac pump & setup ready to charge:
I took it for a little drive and going down the highway @ 70 mph I am gettin 46* air out of the center vents. Sitting at a traffic light it blows 50* air. I have an air flow issue in the front of the XTC right now. I can't wait to get that issue fixed to force more air into the radiator. One other thing I found was that where the 2 tubes go into the firewall, they were leaking cold air. The factory goop that is there to seal it off was hard and crumbly. I used some silicone sealer to seal them up and it made a noticable difference inside the car. It was like getting one higher speed on the fan!
I also think I broke my wrist getting the old compressor out but that's another story.........
Thanks for the reply..... Been out of town for a few days and will be back on the project this weekend. Next project is to install a set of doors with power windows and locks. Also will install new outer & inner dew wipes and install a remote keyless entry thingy..... I did do some more "carbon fiber" paint on the gauge cluster plate and the AC ducts on the dash. They turned out ok but need to be redone. I get better each time but not where I want them to be. The plan is to do the center console cover and the radio surround with the carbon fiber paint too. When I was changing the AC ducts, I found a nice wasps nest in the left hand duct...The wasps were dead though.
I had an idea looking at the front end: What if you took a piece of mesh like it has now, and bend it so the front area comes slightly in front of the two back areas, to meet the front part where it sticks out further? I drew a picture below of the bends as a top view. Also, if you cut X-shaped lines the size of the foglights/turn signals, you could bend the triangular shapes back, and have the lights recessed slightly into them, instead of being covered up partially?
I like the carbon fiber effect painting so far. I've always wondered what a Fiero interior would look like if you replaced the brushed aluminum looking trim with carbon fiber...
Thanks for the reply. You have some good ideas for the grill. I have not had much time lately to work on the car but I am planning on rebuilding the doors and installing power windows and locks over he next week. Stay tuned.
This is a very cool project you have there! This winter I started a rehab/overhaul on a F40 replica that was completed in the early 90's and then stolen, car was found in a warehouse many years later and passed through an owner or two before I picked her up. You are making some great progress on your project I will be following along can't wait to see how she turns out.
This is a very cool project you have there! This winter I started a rehab/overhaul on a F40 replica that was completed in the early 90's and then stolen, car was found in a warehouse many years later and passed through an owner or two before I picked her up. You are making some great progress on your project I will be following along can't wait to see how she turns out.
Matt
Hey Matt,
Thanks for the encouragement. Post some pics of your project / rehab of that F40. I was not a big fan of the rebodies till I got this one. They kind of grow on you. For me, I think it's mainly because it is so unique. This is the only one of it's kind in El Paso!
I do not have too much more planned for this one. I am going to rebuild the doors / hinges and install new door glass with power windows and locks/remote entry. I have some "duct" work to do up front to direct the air to the rad and put an extractor hood scoop in. Then it's off to paint. Hope to have it done by December. Maybe looking at a 4.9 swap next winter?
Ok, I started sorting out all the stuff I need to install the power windows and locks. Awhile back I picked up some doors off of an 85 with 30k on the clock. I was going to swap out the guts and door glass into the existing doors on the XTC but after looking it over the last few days, I think it will be quicker and easier to just install the doors off the 85. There is some metal fab required on the doors for the modified XTC hinge assembly but it's pretty simple. I am going to order a some hinge rebuld kits from RD along with the new rollers/pins and rebuild the hinges before I install the doors (just because it is easy). The dew wipes are not cracked or broke on the 85 doors but they are hard. I think I will install some new dew wipes prior as well. I have all the wrinig harness out of the 85 along with the window switchs and door locks. Just not sure if it will be a plug and play in the 88. Pics of progress to follow as I will be starting this project tomorrow. Just wish it would start to cool off around here.......
Just a thought about the door removal. Of the four bolts holding the door on, take out the three outside bolts first. Then remove the last bolt at the inside bottom of the A pillar. Less chance of one pinching their fingers. The doors are heavy, but I found that they were not as heavy as I have always heard. A jack underneath the door is a major help to relieve pressure on the bolts. A helper to steady the door helps, but is not completely necessary. The three outside ones are 13mm. The inside bottom one is 15mm.
Just a thought about the door removal. Of the four bolts holding the door on, take out the three outside bolts first. Then remove the last bolt at the inside bottom of the A pillar. Less chance of one pinching their fingers. The doors are heavy, but I found that they were not as heavy as I have always heard. A jack underneath the door is a major help to relieve pressure on the bolts. A helper to steady the door helps, but is not completely necessary. The three outside ones are 13mm. The inside bottom one is 15mm.
Tony
Thanks Tony for the tips.
I have a slight change of plans now. I took the XTC for a little road trip today. I had some errands to run over on the West side and I stopped by to see my buddy Rick at the Chevy dealership. I had a power door lock relay to drop off for his door lock issue. Anyway, while we were there (I was with my 19 year old son) we looked at all the new toys. First we looked at 6 Camaro's, then 2 Cobalt SS's, then an HHR SS and then about a dozen Vettes. I fear that my 19 year old son does not appreciate the 88 Formula anymore. No, I did not buy a new toy - just wanted to brag about playing with a bunch of new Chevy hot rods half the day..... Anyway, the road trip was about 100 miles round trip and I noticed something that I did not like with the XTC. Around town, light to light in city traffic, the temp never gets over 190* with the AC on all the time. When I get it out on the interstate - flat ground running 65 - 70, the temp starts to rise. Although it never overheated - highest temp was climbing over the mountains from the West side to the North East side - was 230 - 240. I think this confirms my suspicion that the "ducting" or actually the lack of ducting from the grill to the rad is not sufficient at highway speeds. I think that there is a vaccum being created between the grill and the rad and there is not enough air flowing through the rad. Another reason I am thinking this is due to the fact that the faster I go, the warmer the AC blows. Around town, I get 38* air out of the center vents. At 65 it is around 44 and as the speed increases, the temp does too. At 80, the AC blows 50* air. The minute I slow back down to 50 or less, 38* air. A sign to me that there is not enough air flowing over the condensor. Is my thinking correct?
So, this weekend is dedicated to solving this problem - not necassarily cause I am worried about the car overheating but becuase I want the AC as cold as possible while I'm cruising down the interstate. Now the door rebuild is on the back burner. My plan is this. I have one of those small RV wireless back up cameras. I am going to put the camera up in the nose of the XTC and then tie some surveyors ribbon in various places inside the nose between the grill and the rad. Then I'm going for a drive to see what is going on in there. After that, I will build some duct work in there with some heavy cardboard and repeat. Should be an interesting project. If I can get the duct work right, I will be learning the art of fiberglass.....Not looking forward to that but it has to be done. I am also thinking of some sort of extractor scoop too - to help get the air through the rad. More to come.
Pat
Pat, I think the ducting and a hood vent will definitely help the cooling problem. Instead of fiberglass how about some thick sheet plastic that you can cut and glue together. This would save a lot of fab time and fiberglass itching. The XTC is coming along nicely!
I'm glad you and you son had fun checking out the Camaros, Vettes and SS's. I am ordering the new 2010 Corvette Gran Sports. You need to come see one when they arrrive.
As neat as these new cars are, I love jumping in my 88 GT for the drive home. Now if I could get one of the 304 horse direct injection V6's hooked to a G6 six speed installed in my Fiero, I am sure I could get home a little faster! Are you listening Archie?
I need to stay away from Rick's work....Too many temptations! I should have never climbed into that Camaro Rick. Good thing I did not get in the Z06. Now All I have to do is figure out how to get one of those Cobalt motors for the XTC. Of course that Camaro V6 would do nicely too. If I had nothing but time and money........Come on Power Ball!
I need to stay away from Rick's work....Too many temptations! I should have never climbed into that Camaro Rick. Good thing I did not get in the Z06. Now All I have to do is figure out how to get one of those Cobalt motors for the XTC. Of course that Camaro V6 would do nicely too. If I had nothing but time and money........Come on Power Ball!
Speaking of temptation, we just got in our first 2010 Corvette Grand Sports! I'll get in with you on that Power Ball purchase.
Stopped by a local car show today and was looking at a couple cars with Lambo doors. My 16 year old had an interesting idea. He is thinking suicide Lambo doors. After looking at the XTC, I am not sure it would be possible but it is an interesting idea. We parked the XTC in a parking lot adjacent to the lot where the car sho was taking place. After we made the rounds looking at all the cars, when we returned to the XTC to leave, we had a pretty large crowd gathered around the car. Mostly younger folks asking questions like :is that an NSX" and comments like "never seen a Ferrari like that one", etc. It was fun talking to them. Some of them did not even know what a Fiero was - had never heard of one. We spent over an hour talking Fiero's and body kits, etc. I was impressed with a few of these younger guys and thier automotive knowledge. Of course there were a few that wanted to swap some Honda Vtec turbo charged rice burning thing in there but I just chuckled at them. Many were surpirsed when I opened the "trunk" to see the mid engine layout. I got to get to work on the door swap!
It was overcast and cool outside today so I pulled the hood off the XTC so I could get an idea of what I need to do to build a "tunnel" to direct the air from the grill to the rad. Looks like it will be fairly simple. I basicallly have to build a box. I am not sure what material I will build it out of. I have zero fiberglass skills but I am pretty good with sheetmetal. I was alos thinking of using some plexiglass and either fab some sheet metal angle bars and fasten it together with rivets or use epoxy. I'll have to do some experimenting with a few different materials before I build the insert.
I also sorted out the wiring harness for the power windows and stripped the donor doors down. I have to do a little "body" work on the donor doors to fit the XTC door hinges. As soon as I get my 70 Monte out of the garage, I plan on getting the XTC in there to finish the rehab. More later.
After neglecting the XTC for the last 5 weeks, I finally got back to working on the doors. I got the donor doors notched and fitted up for the hinges. Also fixed an oil leak and put a new valve cover gasket on today. Poor XTC has taken a back seat to the 86 V8 Coupe. Too many Fiero's - so little time! More to come.
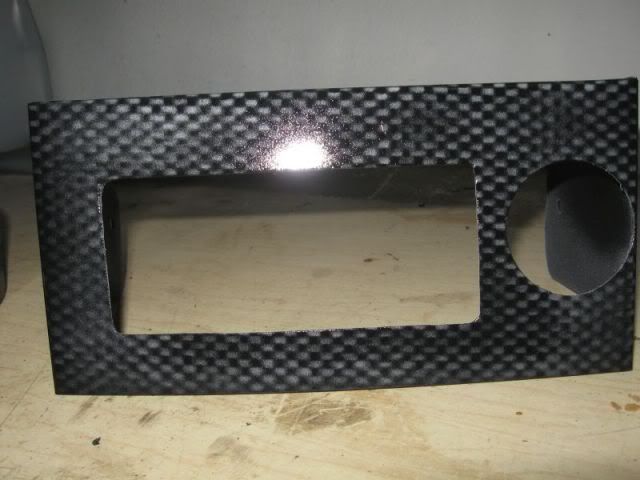
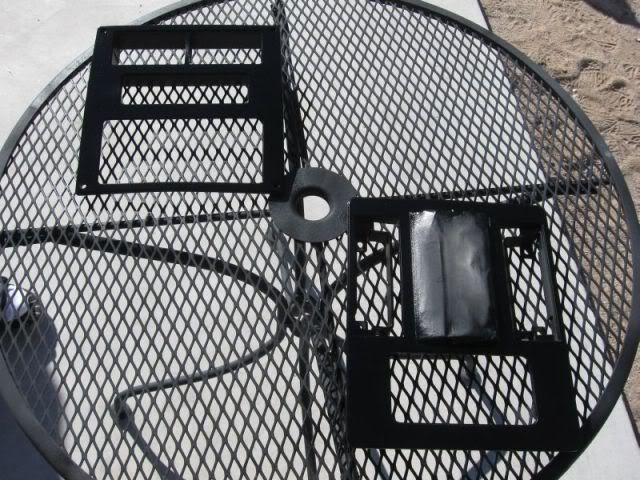
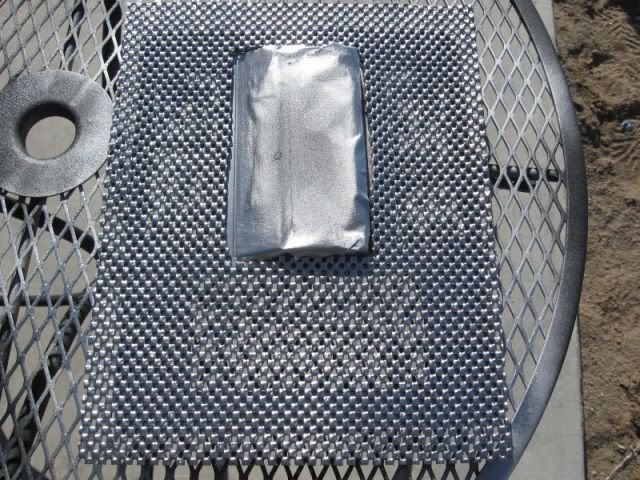
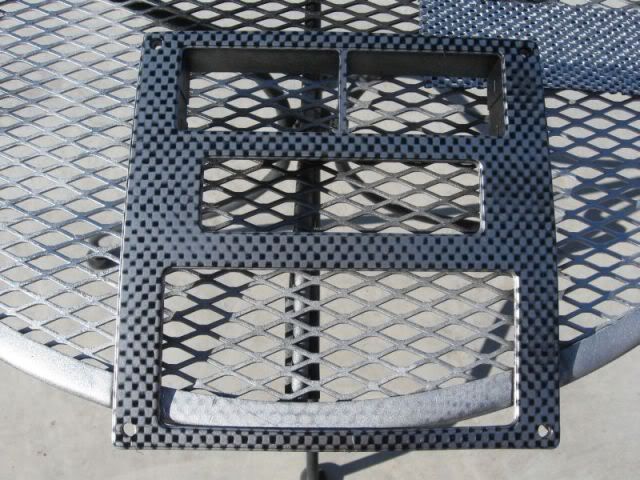
Today, Chris - my 16 year old who will soon be taking over the care and feeding of the XTC decided it was time to get some much needed work done on the car. Awhile ago, he wanted to give the car some "carbon fiber" look. We watched some youtube vids and did some experimenting and did the "painted" carbon fiber process on the Speedo bezel and the dash corner AC vents. I told him then that this was the last time I would "do the work" on his car. From then on, it was up to him what, when and how things got done.
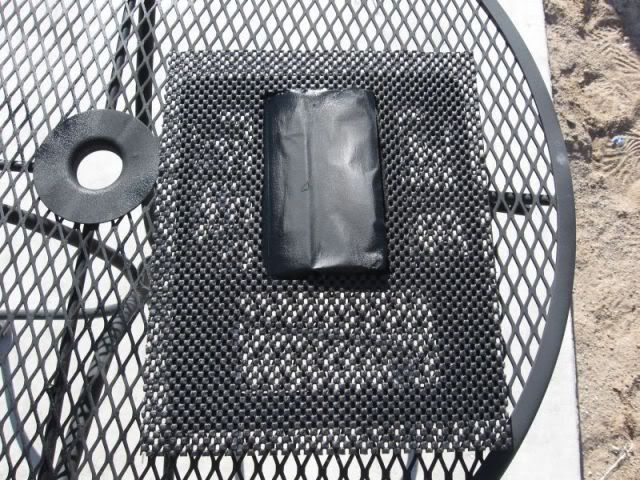
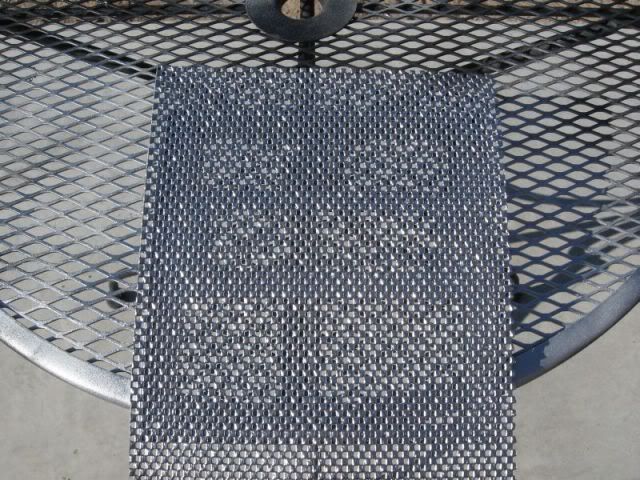
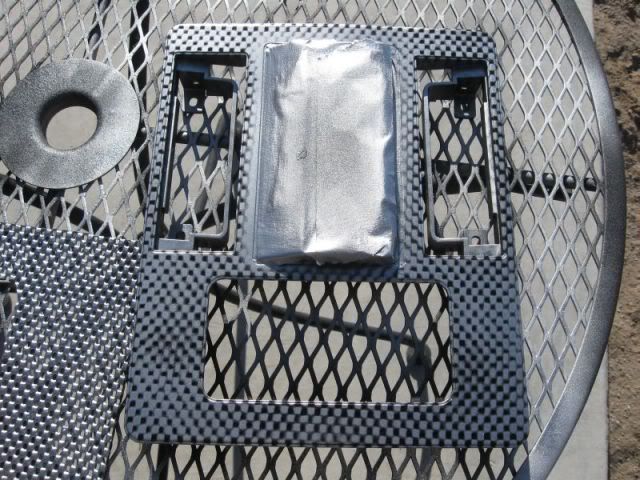
While I was working on the V8 Coupe, he decided to try his hand at the carbon fiber paint thing. For a kid that up unitl today, had never done anything like this on his own, I am pretty impressed. Here's the results:
Masked, sanded and primed: Black coat on: Mask in place: Silver coat on: Drying in the sun: Black fogged on: And 3 coats of clear:
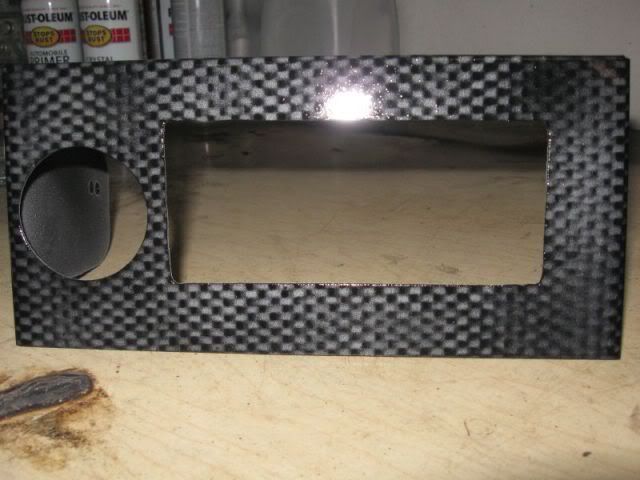
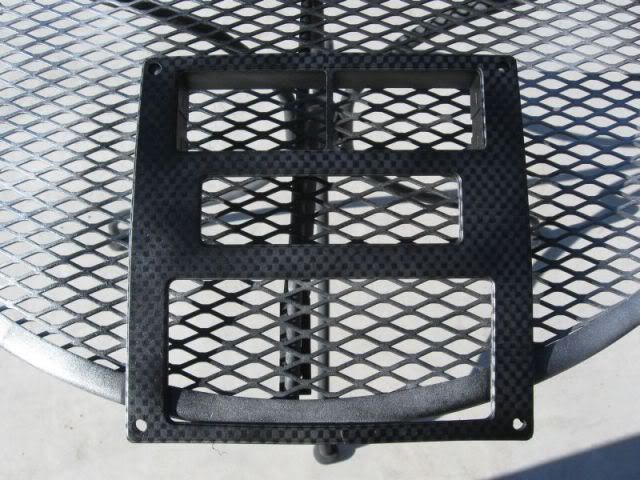
They turned out a little dark and have some shading areas but I think he did pertty good for his first attempt all on his own from start to finish. Makes me a proud papa to see my boy taking an interest and taking care of his car.
Now for the rest of the story. At around 12:00, he went out to the car to take off the old AC suround and Shifter cover. At around 7:30, I went out front to close up the cars and he had left the doors open, the stereo on and the battery did not have enough umph to start the car. Now he's out there in the dark jumping it...... They never learn....lol.
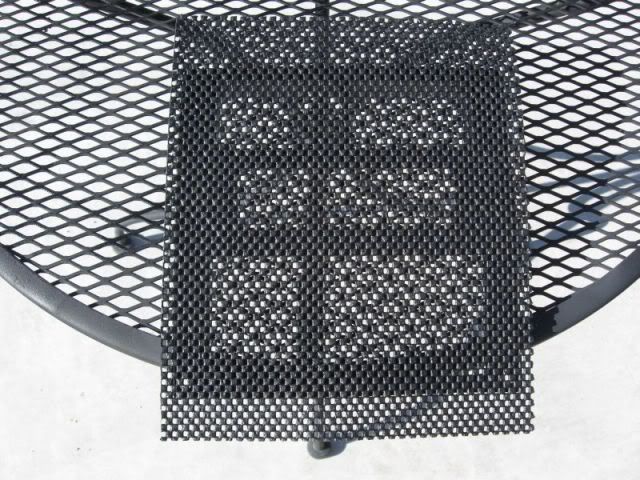
Does that foam stuff come in a tighter weave? You're good at what you're doing and the technique works, but a tighter weave would make it look much more realistic.
I must have been sucking on exhaust fumes... I didn't realize that you were also working the XTC. Keep up the great work! Tell your son he did a fantastic job! The CF turned out really sharp!
[This message has been edited by Sofa King (edited 11-24-2009).]
I am finding out the same thing as your son is...he can do abything as long as he tries. It may take a few times of practice to get it right but the resulting satisfaction is worth it. He is 20 years ahead of me though! Keep it up!
Been a few days since I read through this thread, been busy working on the V8 Coupe. Thanks everyone for your positive comments. I agree, a tighter pattern would look better. This is just everyday anti skid shelf liner we picked up at Lowes. As for the "son learning", it was just what he needed to boost his enthusiasm for the car. Since we got the pieces installed, He has been tinkering with it everyday. I caught him cleaning the carpets in it on Sunday. I'll be turning it over to him on the 19th of December. I will be "assisting" him in any furture work but I want him to do the work.
We still need to install some electric / remote door locks. We have a set of low mileage doors with power windows and locks that will go on the car but not till spring. Once I have a good handle on fiberglass work, we will start the body work process on the XTC and try to get it painted before summer. There are a lot of little cracks in corners and in places where the PO bolted or riveted or screwed body panels togeher, the bondo is flaking out so there is a fair amount of work to do. We also have to build a "air funnel" inside the nose to direct the air to the rad better. That will be our first glass project on the car. I'm cutting my fiberglass teeth now on the V8 Coupe project. I can screw it up all I want.
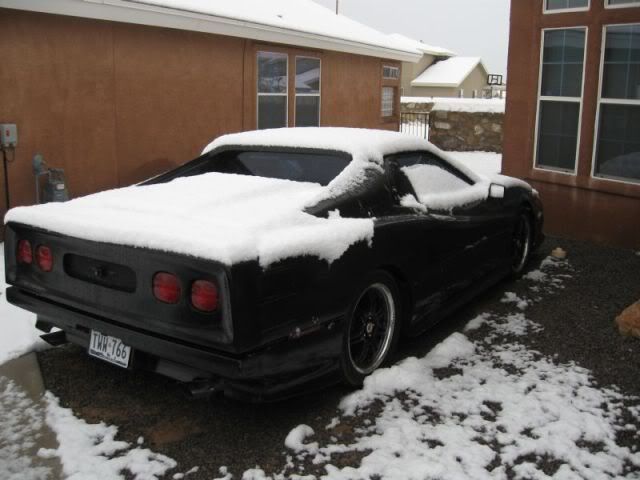
Here's a shot of the XTC as it sits this am - looking lonely but trust me, it gets driven everyday and the old Duke runs like a top. Perfect for a 16 year old. More later.
Pat
[This message has been edited by katatak (edited 12-01-2009).]
Well I have a new project for the XTC. I have tweaked my back for the last time trying to lift the hood on this car. It's time ot install some gas lift cylinders or electirc actuators. I really just want to push a button and have the hoood come up - something like Madcurl's car. A couple of gas charged lift cylinders would be ok too if I could pop the hood release and be able to raise it with out taking steroids first. Anyone have any ideas? I guess I need to figure out what the thing weighs so I can start researching actuators and lift cylinders and such. I think I need to talk to Madcurl.
I have that same problem with my F40's rear clip - very heavy to lift. I want actuators as opposed to gas struts always pushing on the fiberglass when closed. I need to talk to Madcurl too.
I have that same problem with my F40's rear clip - very heavy to lift. I want actuators as opposed to gas struts always pushing on the fiberglass when closed. I need to talk to Madcurl too.
Rob
I still have the info I sent Katatak... if you want it?
Thanks for the info and help Madcurl. I will be ordering the 12" actuators and the control module from DD on Monday. Do you get a percentage from DD for outside sales???? It aint cheap but it's "sweet".. Thanks again.
Thanks for the info and help Madcurl. I will be ordering the 12" actuators and the control module from DD on Monday. Do you get a percentage from DD for outside sales???? It aint cheap but it's "sweet".. Thanks again.
Pat
No percentage, but I'm glad to pass along the info I got from David (Pantera Replica owner). Have you planned out the location or needed brackets to complet the job?


 I have one suggestion: