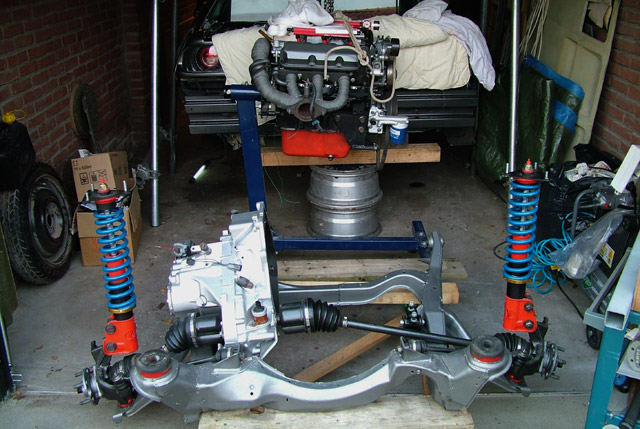
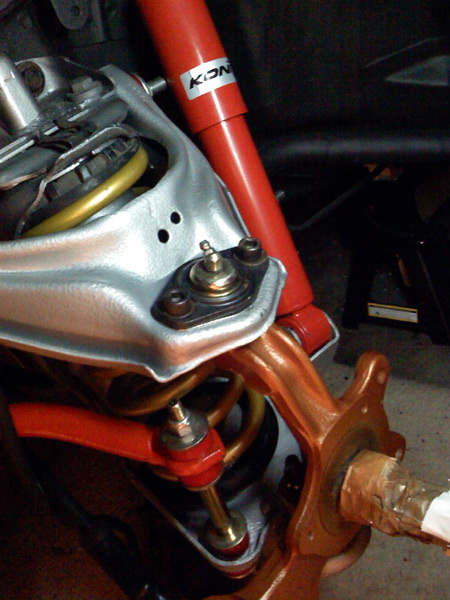
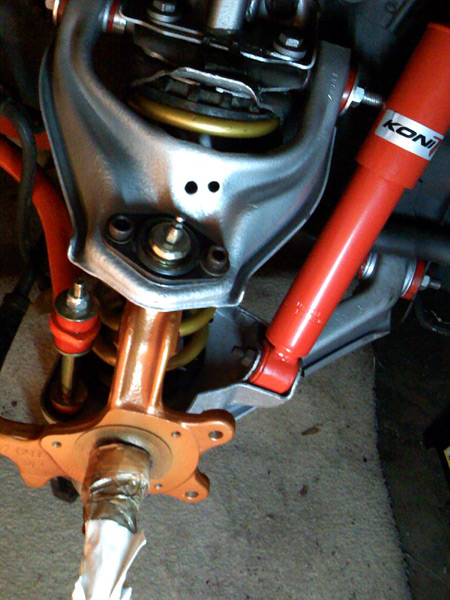
Most of the front suspension is finally done and installed..
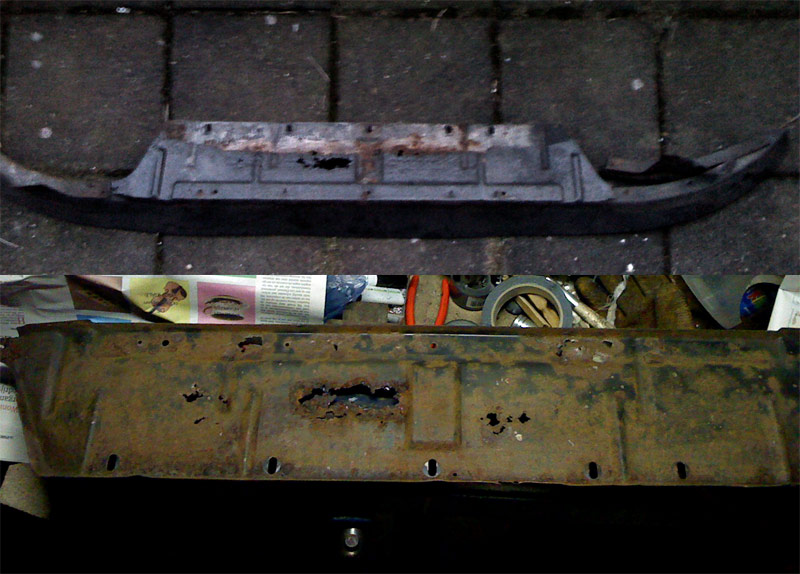
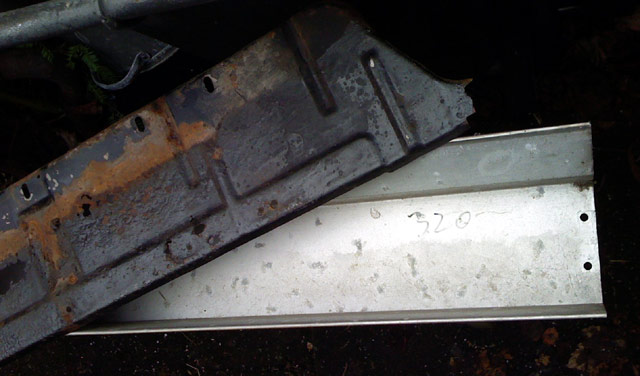
There are still a few jobs to do to the front underbody... first this airdam bracket is toast I just started to make a simple replacement piece in aluminium and will restore the other parts...then I can set up the intercooler hoses (I will have to add a little mod to the airdam for that) and then I want to fabricate a support bracket for the nose to feel save if I ever get to test the top speed ...when its done
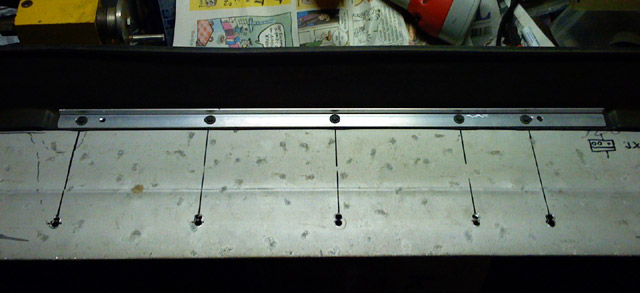
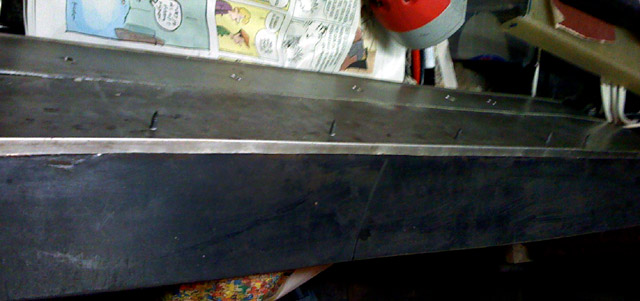
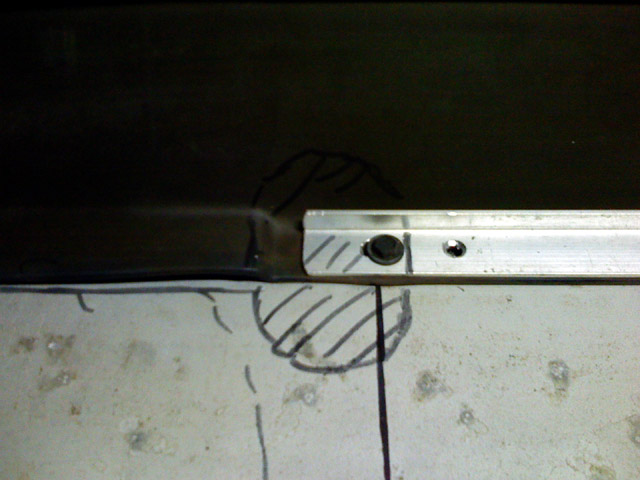
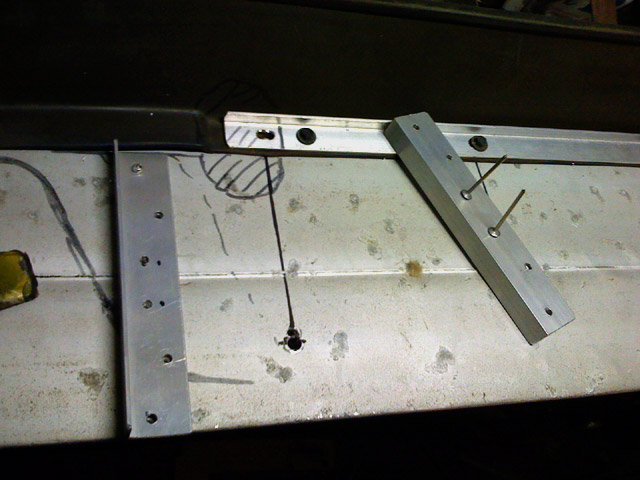
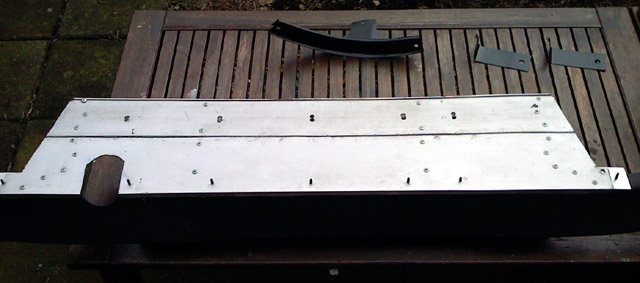
Started with some scrap aluminium with a good thickness mapping and drilling new holes testfitting This cut is needed to clear the IC radiator tubing I will use 4 L profiles for strength and pop rivet them
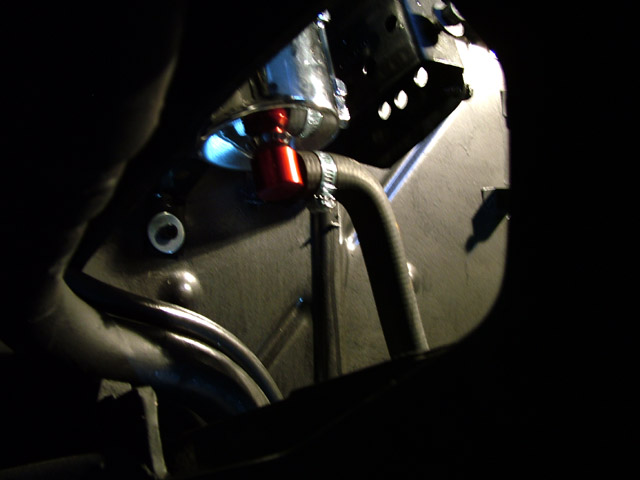
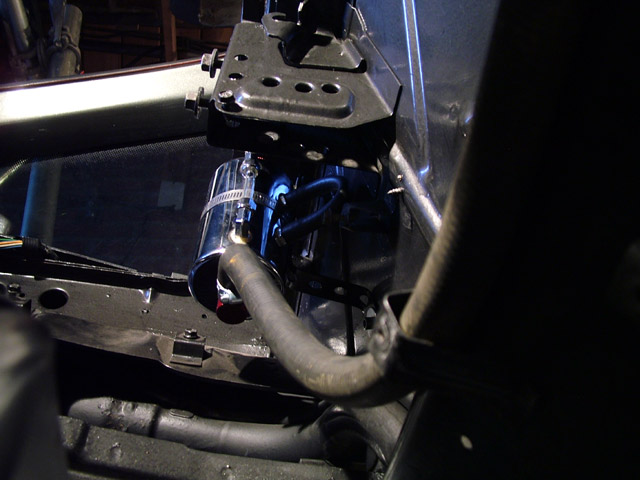
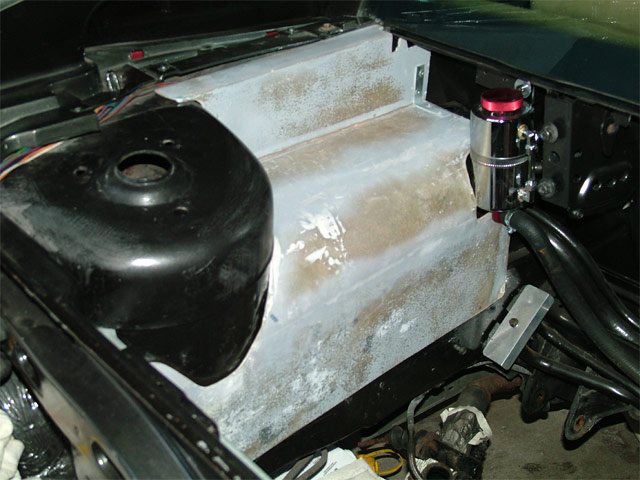
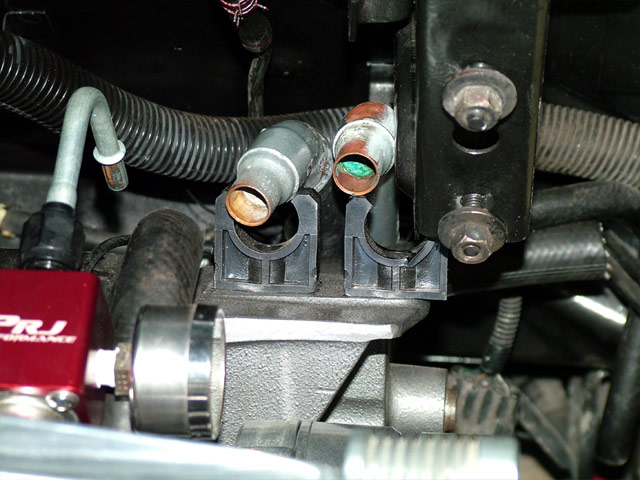
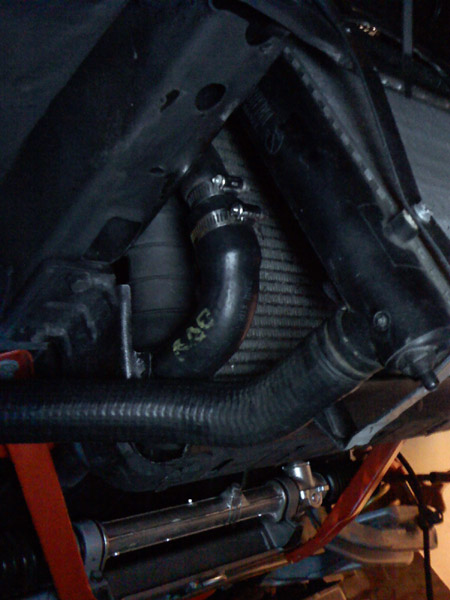
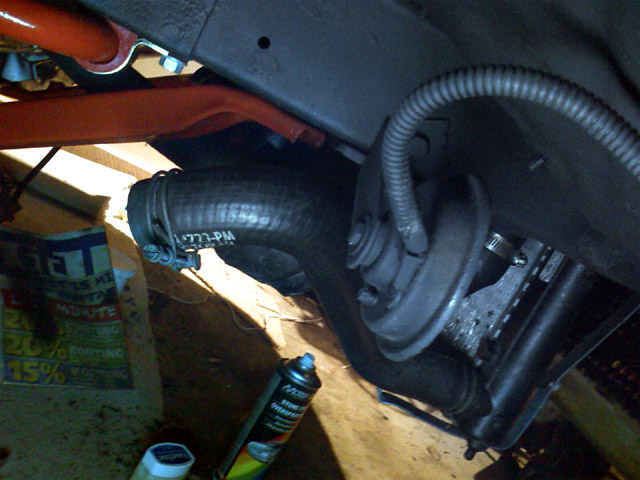
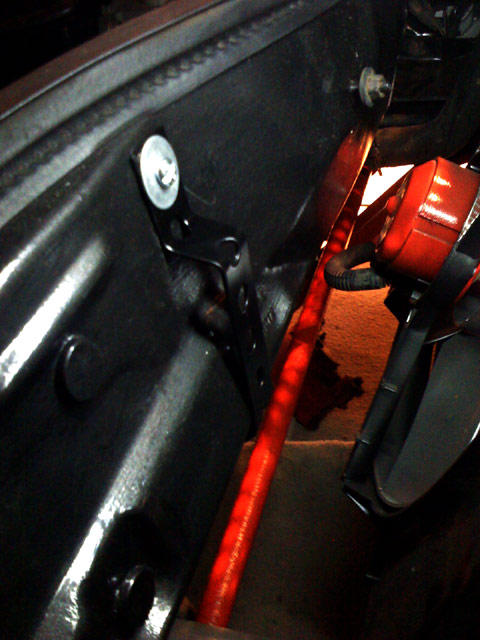
Now theres some extra space to try to setup the tubing for the IC radiator. I decided I want the pump mounted in the front trunk...for easy access I guess. This doesnt make the routing easier..hehe. After some trying and combining hoses and adapters: This is a Fiero hose, it fits and curves just right! Sorry about the bad picture quality.....iphone camera and low light dont go well together.. More to come
Started with some scrap aluminium with a good thickness mapping and drilling new holes testfitting This cut is needed to clear the IC radiator tubing I will use 4 L profiles for strength and pop rivet them
Now theres some extra space to try to setup the tubing for the IC radiator. I decided I want the pump mounted in the front trunk...for easy access I guess. This doesnt make the routing easier..hehe. After some trying and combining hoses and adapters: This is a Fiero hose, it fits and curves just right! Sorry about the bad picture quality.....iphone camera and low light dont go well together.. More to come
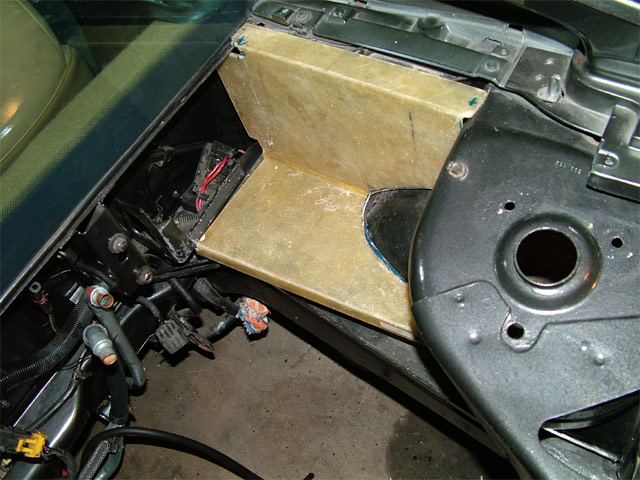
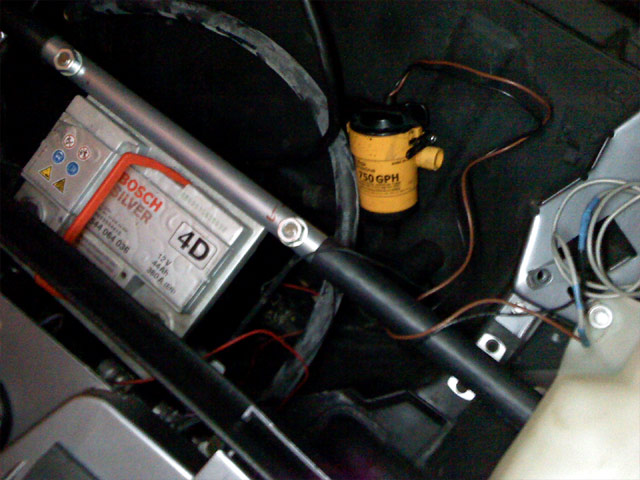
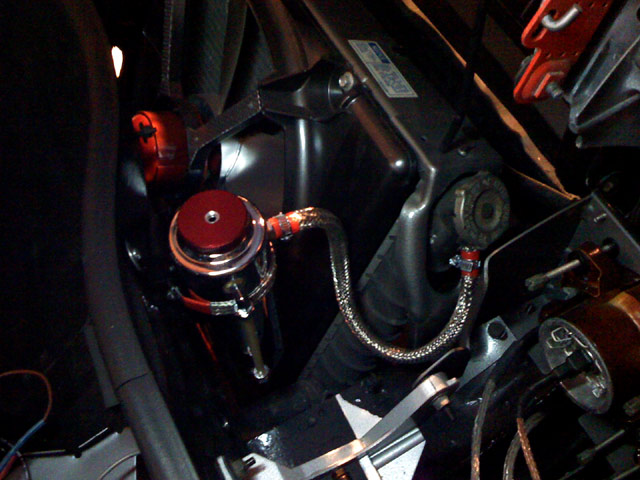
Ok, moving to the front trunk, I will pull everything out to route the IC plumbing first..
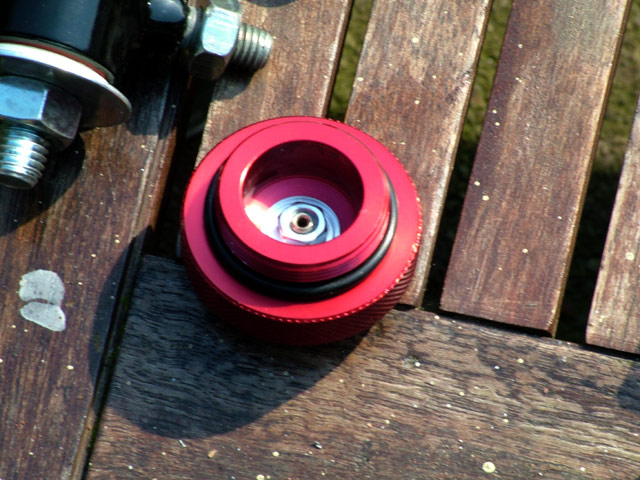
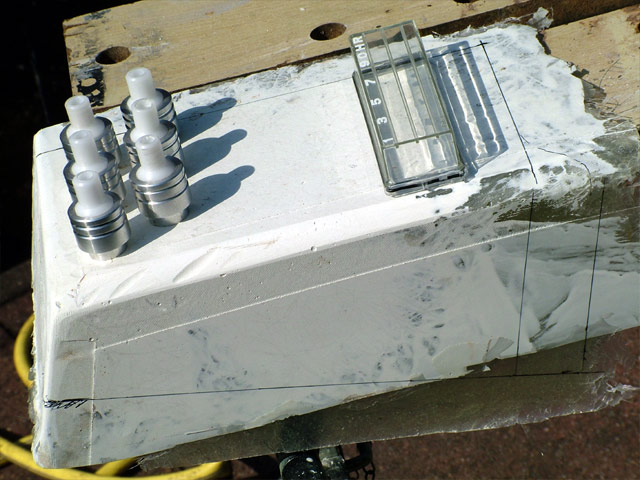
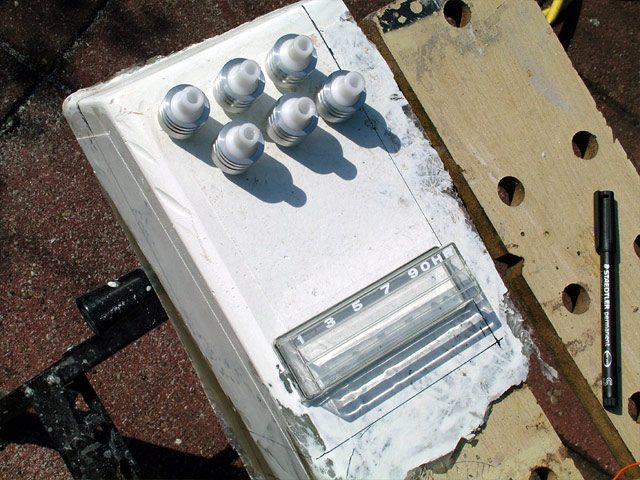
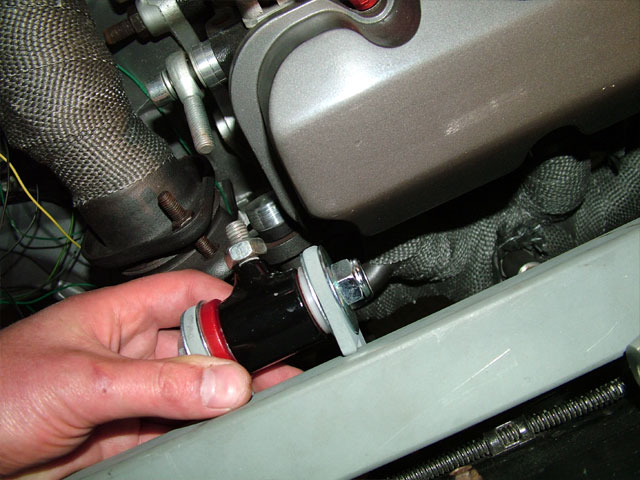
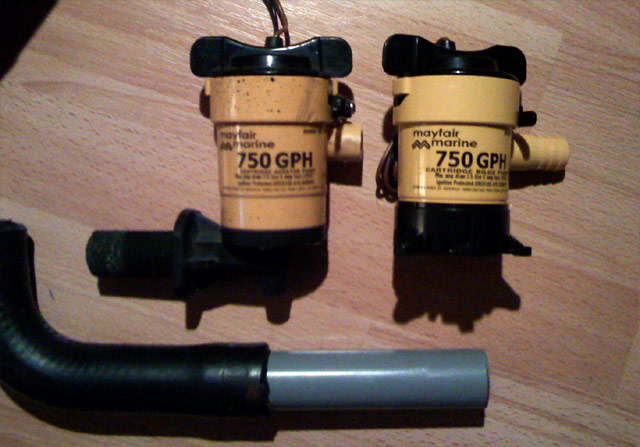
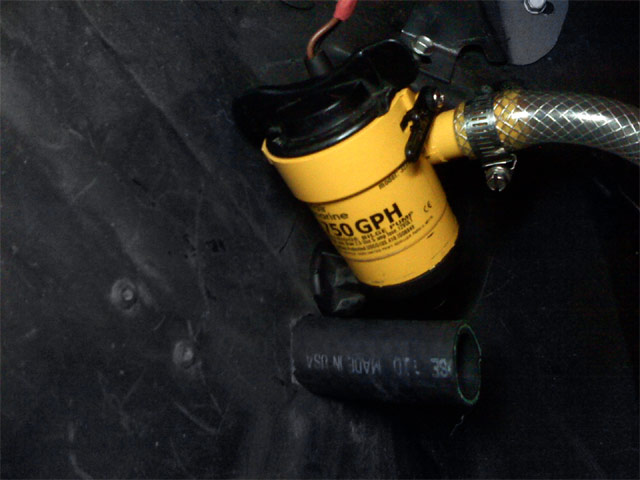
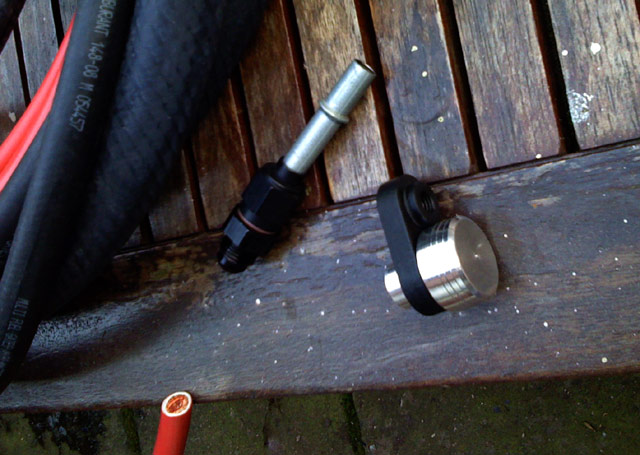
I got two bilge type pumps (1 new spare) with the kit, the used one has a cut or broken outlet so I am going to switch some parts..
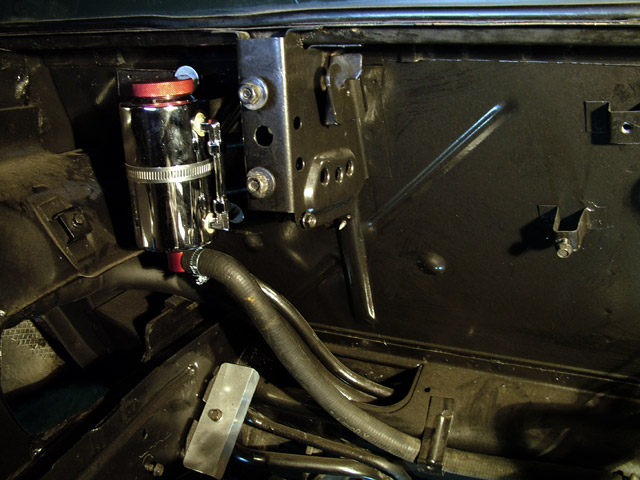
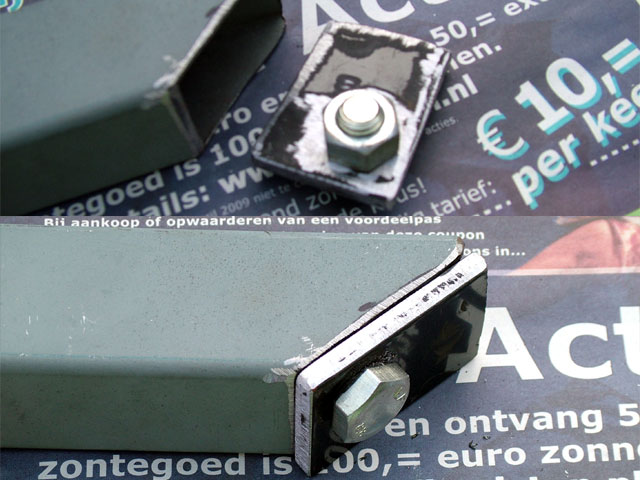
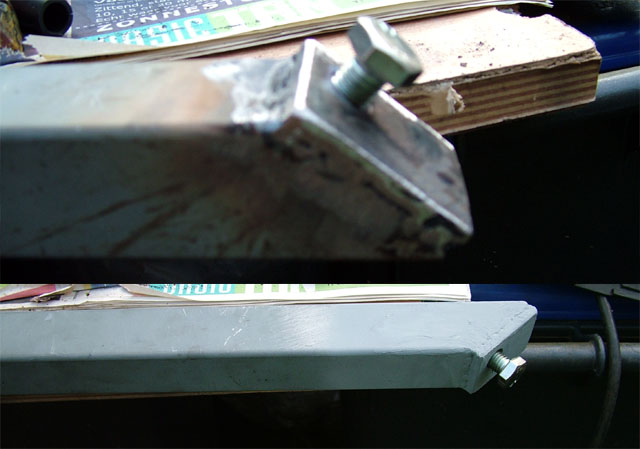
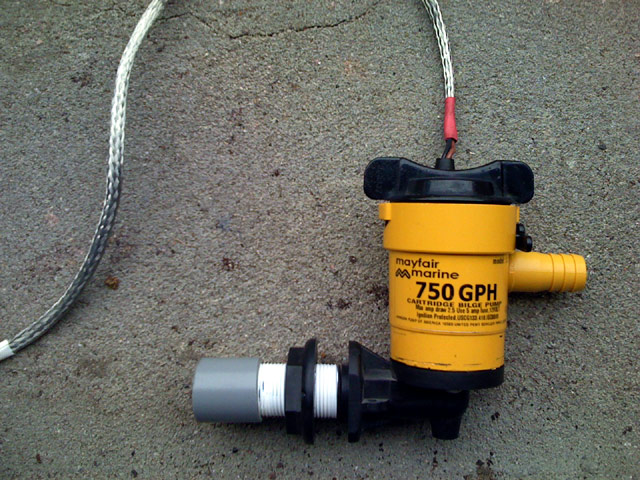
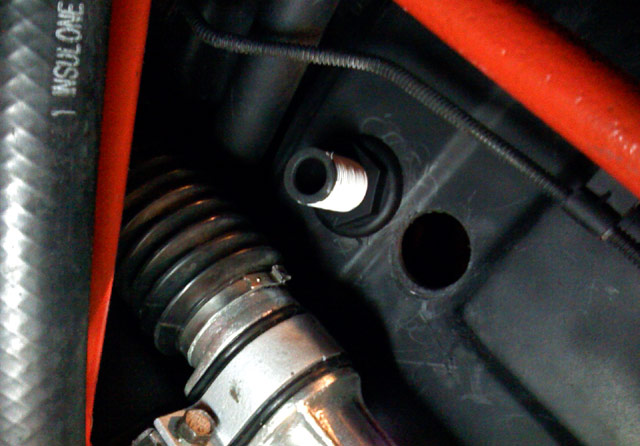
Now it is set up, the threaded inlet and nut make it possible to mount it through/to the trunk wall, added teflon for sealing and made an adapter to mount the wider radiator hose
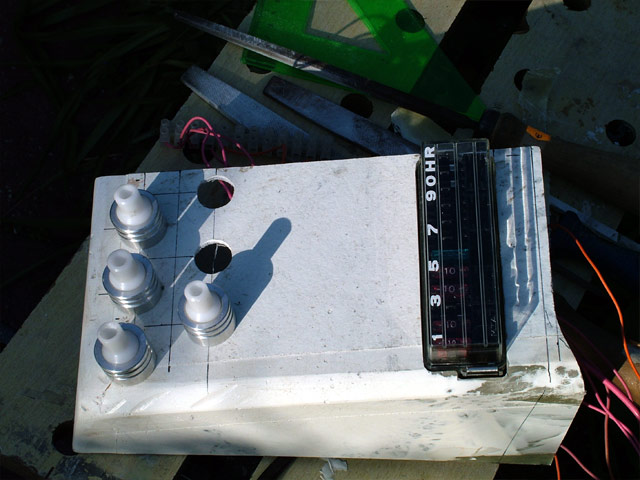
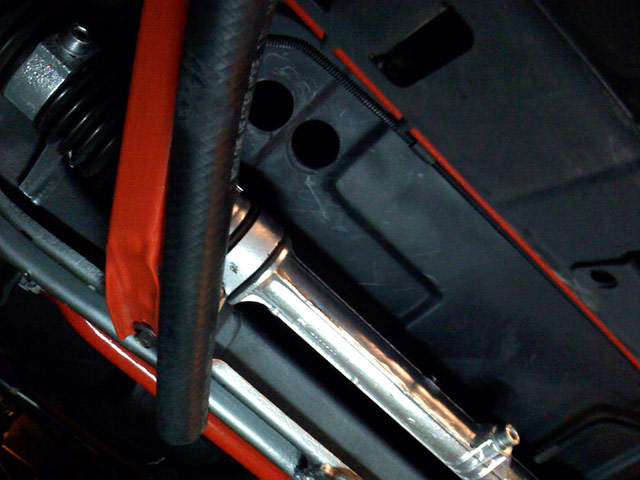
2 holes
fitting the pump inlet
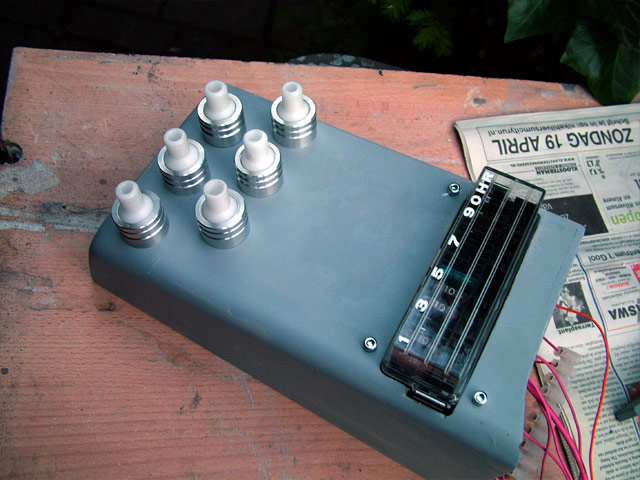
I dont know about the reliabilty of these pumps (theyre made by Johnson), but they are easily replaced (click and turn cartridge type), cheap and now easy accessable (just lift the front hood )
Wow, it's been awhile since I tuned into this one. Why isn't this in the construction zone yet? Your car is one of the most built bodies out there. Your fiberglassing skills are very good and inspirational to me to try my body changes. Keep up your awesome build. ~John
------------------ John 1955 Chevrolet 210 Sedan (Sitting idle for the moment) 1988 SE seized duke... next engine? 1988 CJB T-Top (Project car) 2001 Saturn LW300 (Daily driver) 2001 Saturn SL1
Wow, it's been awhile since I tuned into this one. Why isn't this in the construction zone yet? Your car is one of the most built bodies out there. Your fiberglassing skills are very good and inspirational to me to try my body changes. Keep up your awesome build. ~John
I am going to have to agree with this as well as all the other praise posts. Your car is beautiful and your workmanship top notch, you put the rest of us to shame.
Fie RO, when you get a chance, could you update this thread with more pics of your Fiero interior and outside? I would love to see more recent/current pictures (both wide angle, and details shots)
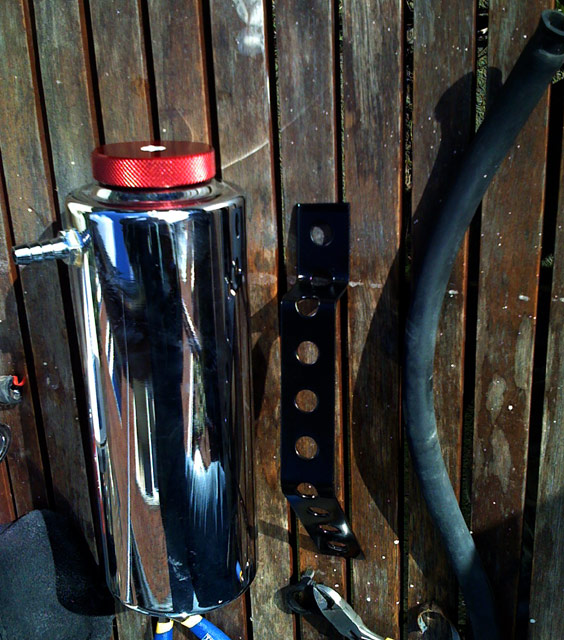
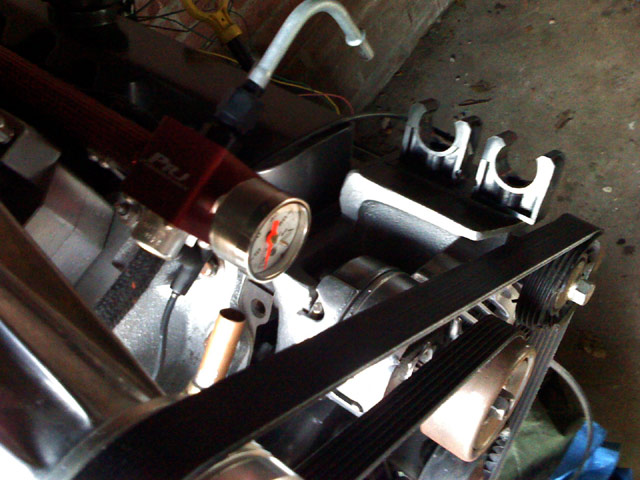
Thanks for the kind words, guess I am pretty devoted to this little obsession.. ...but it also takes a lot of time in learning (from mistakes) and finally getting stuff sorted out and done.. got some stuff done this week though..! changed my fancy replacement radiator overflow can bracket setup to a custom bend basic bracket to clear the hoodvent and headlights.. painted and installed bracket
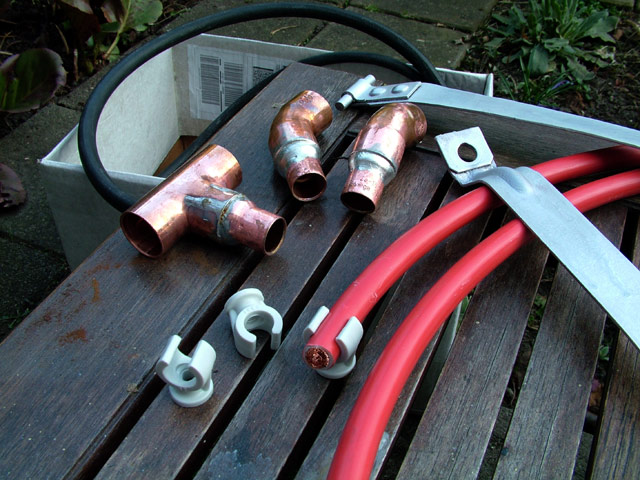
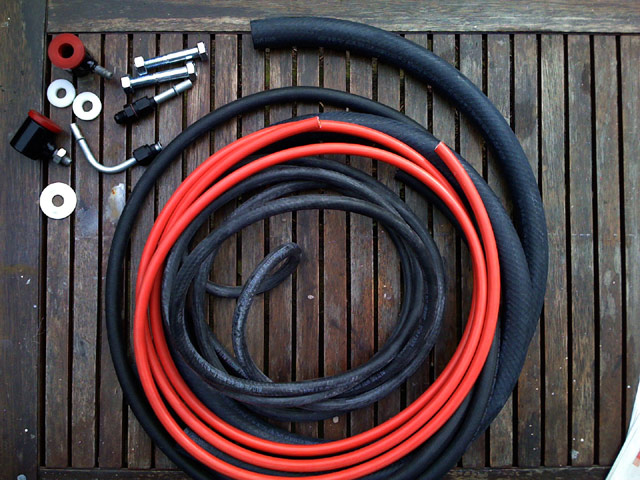
Got some tubing ...! 2m of 22mm ID heater hose 2m of 10mm ID fuelhose 4m of 8mm ID fuelhose 3m of 50mm2 battery wire (I have a front mount battery)...I didnt do a math on the needed thickness but it feels like a thick enough wire Turned a plug for the egr port on the stock rear (L67) exhaust manifold testfit I was thinking on using JBweld to stick it there...good or bad idea?
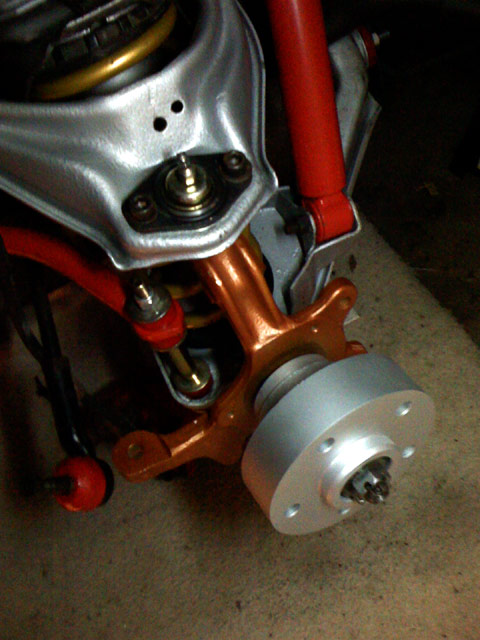
Last friday I had the front hubs done, removing the studs was a 5 minute job with help of an hydraulic press. Then I dropped them off to have them turned down , they got it done the same afternoon. That was a 45min 65 euro job according to the bill, which I think is reasonable
cleaned, prepped, a basecoat of zinc primer and painted with hi-temp paint
testfit
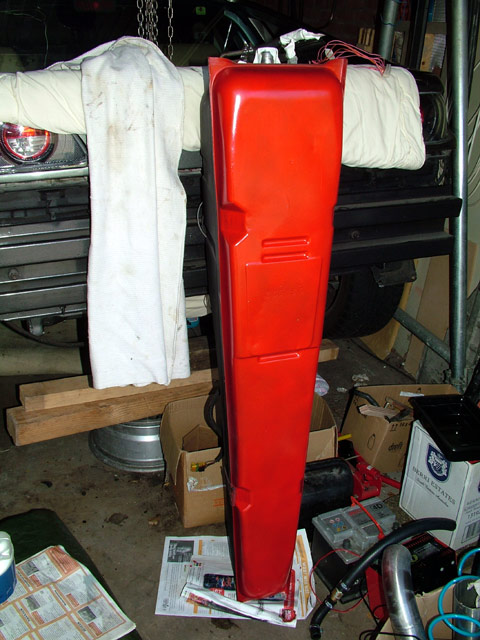
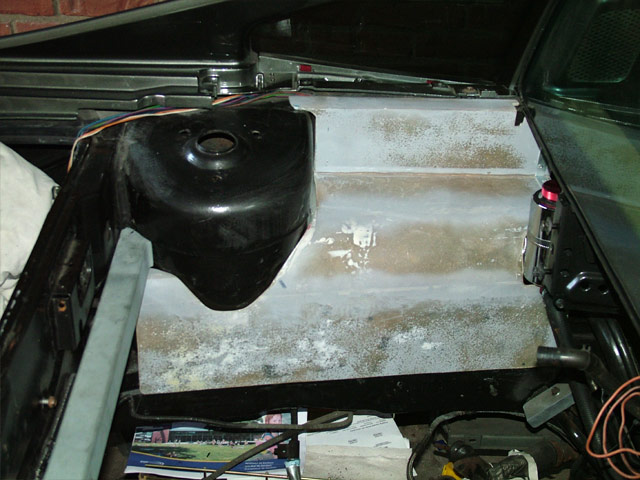
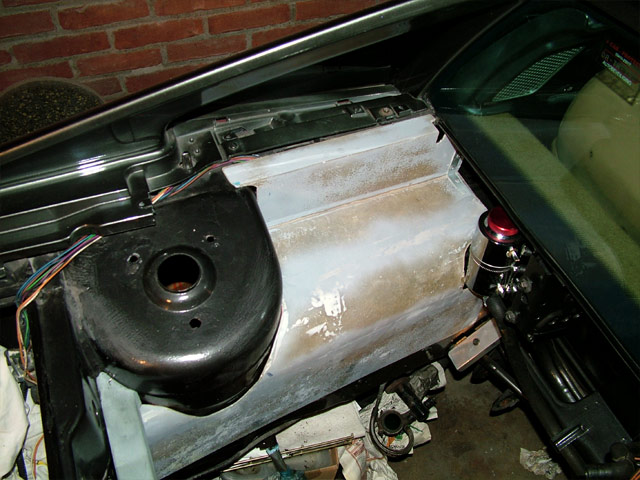
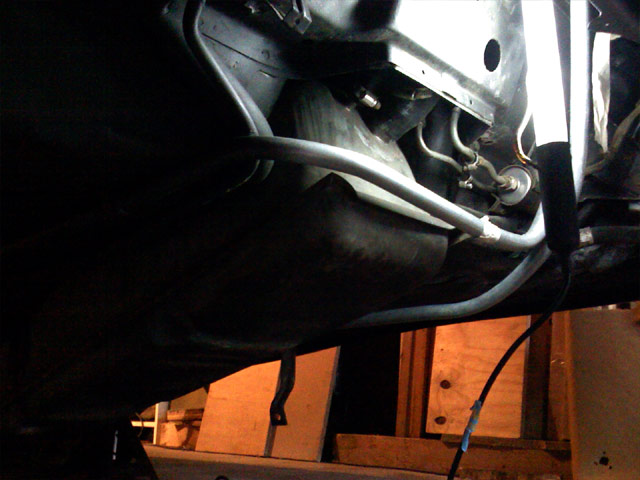
Time to drop the fueltank for paint and a Walbro fuelpump
I will replace most of the old tubing, especially the metal lines after the filter that have rusted inside and caused injector problems in the past
Not sure if I have ever chimed in here. Great build thread. I know that I enjoyed the read. I also try to keep up on your postings. I bet that a lot of others here are interested in you build. Good luck to you, and keep up the high quality of work that you are doing.
Originally posted by Austrian Import: Take lots of pics when you do. I would love to see updated pics of the exterior and the interior.
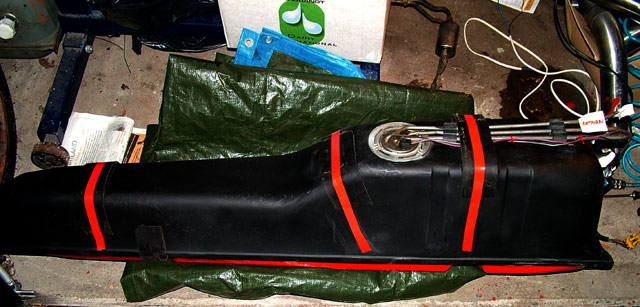
Hmm to bad these are down on the list Sooo many custom jobs everywhere, first goal is to get it back on the road and that alone needs a lot of work already...because I want to do it the right way.. I have a two-tone fueltank though Spent some time and brakecleaner on the underside to clean it up..the rest was fine..then zinc primer, paint under and underbody coating on the top of the tank needs more black
Scored some misc parts at the hardware store during my usual snooping around Some fittings and reducers for the IC routing and a T to hook up the catchcan/filling...just soldered together before picture Also found these clips which may be useful to route the battery cable
when I took off the front swaybar 2 bolts snapped and they caused a lot of trouble, I burned and snapped a few drillbits on those, then I drilled new holes next to them (the new swaybar mountholes are longer and allow relocation) and tapped them. I am using 10.9 grade bolts now (actually these are 2.8 exhaust manifold bolts I never used) . More stuff added
I just had the same thing happen to my sway bar bolts with a similar outcome. Only, I even broke an easyout in the hole. . .
Fie Ro, Those clips for the cable look quite useful. What are those clips for? I haven't done my battery relocation yet, but those look almost perfect to keep my cable under control. Thanks for posting all the awesome detail in your build. Sincerely, John
Originally posted by thegreep: I just had the same thing happen to my sway bar bolts with a similar outcome. Only, I even broke an easyout in the hole. . .
..cool, I broke a drill bit that stuck in there, these jobs are sure a PITA ! One thing I finally learned after this is that spending some cash on some good HSS drill bits makes everything easier....!
quote
Originally posted by FieroCustom: Fie Ro, Those clips for the cable look quite useful. What are those clips for? I haven't done my battery relocation yet, but those look almost perfect to keep my cable under control. Thanks for posting all the awesome detail in your build. Sincerely, John
Hi John, I am not sure what theyre for... I found these in the racks of my local hardware store, there are more sizes (most bigger), I think theyre clips for central heating tubing and domestic wiring...whatever..they looked usefull and happen to fit right..!
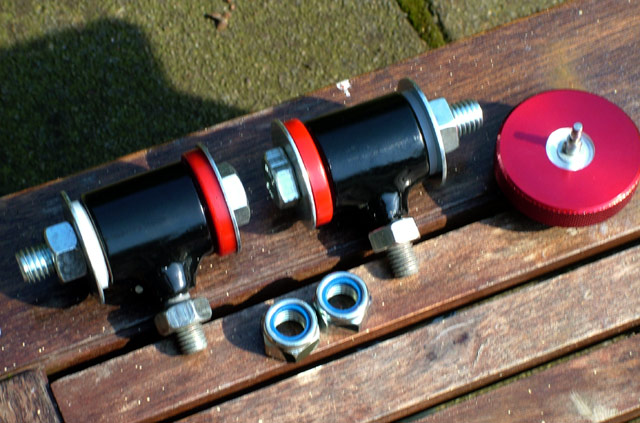
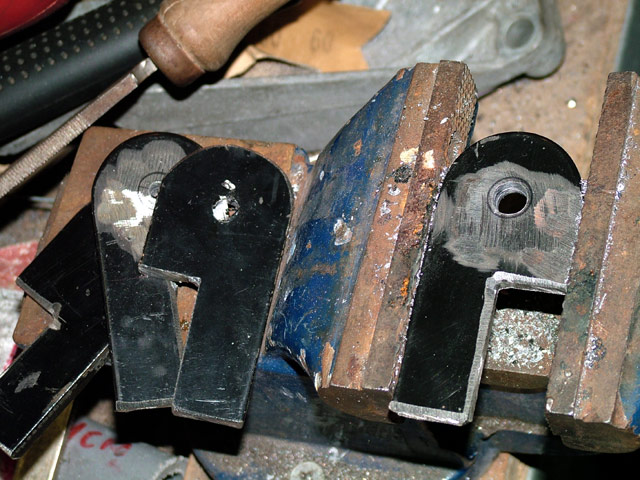
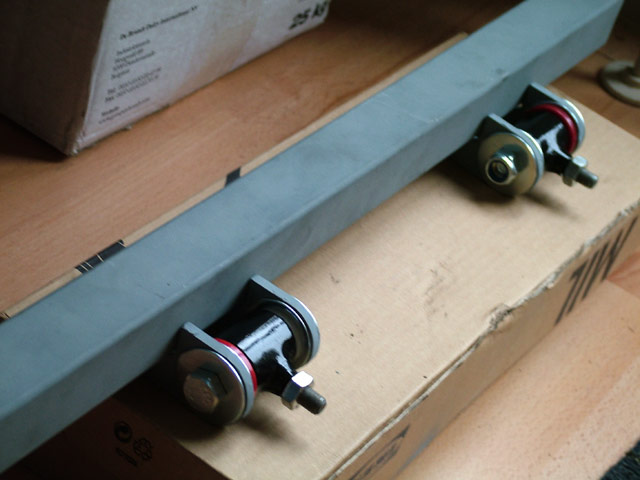
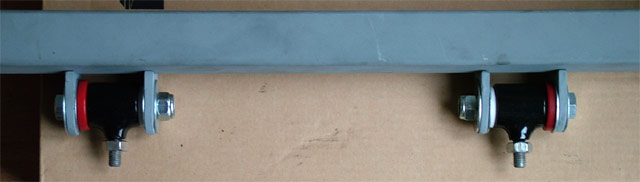
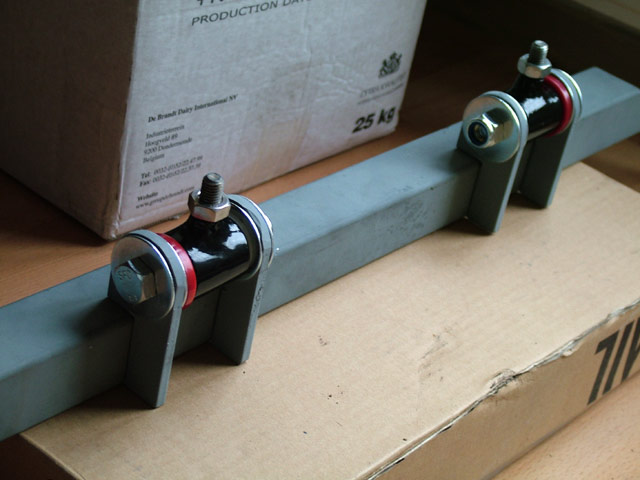
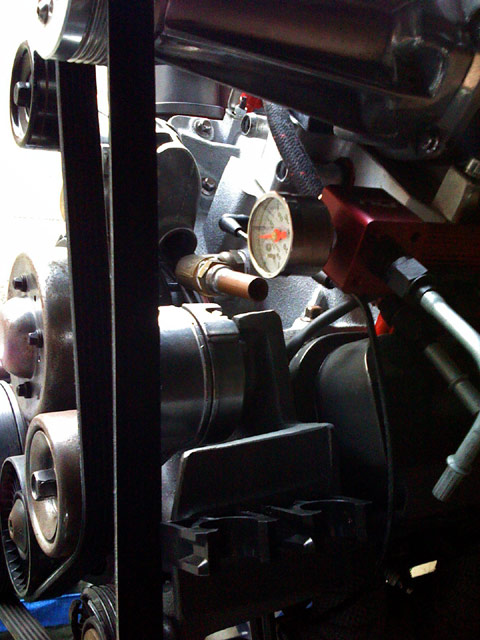
Ok more pictures machined the radiator overflow tank cap to mount a ...eh..mini breather On the left are the trunkside dogbonemounts
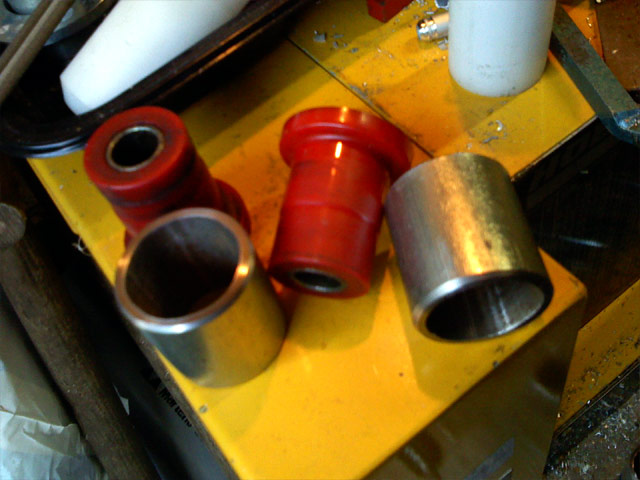
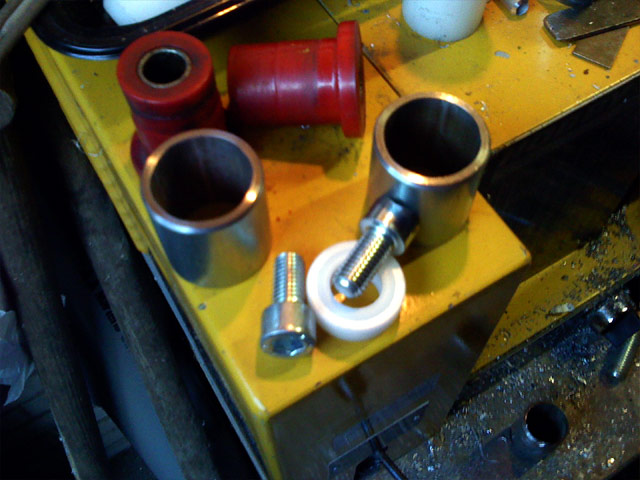
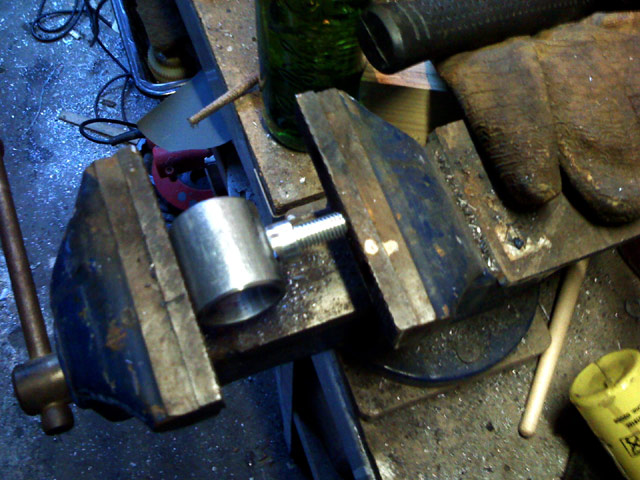
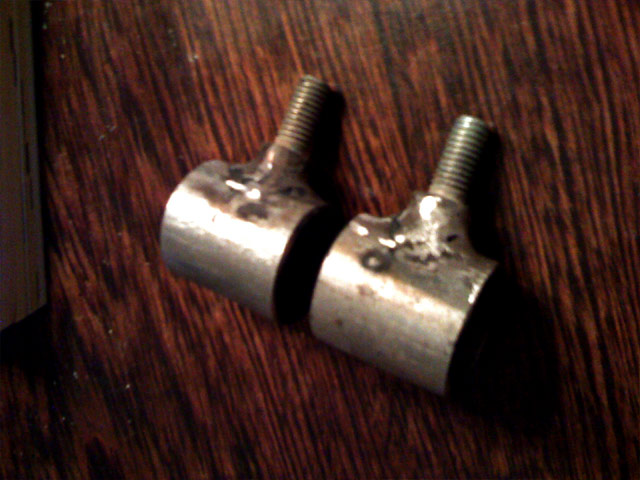
This is how I made them : starting with 2 upper A-arm poly bushings, cut and machined heavy duty gas pipe choice of bolts a bit of V shape grinding and almost ready for the $50 arc welder abuse halfway welding up and grinding down...and cutting slack paint
Originally posted by Austrian Import: Fie RO, are you still going to do the Porsche brakes, or are you going to do alternate, i.e.: WCF/Fieroaddiction/Corvette/etc. setups?
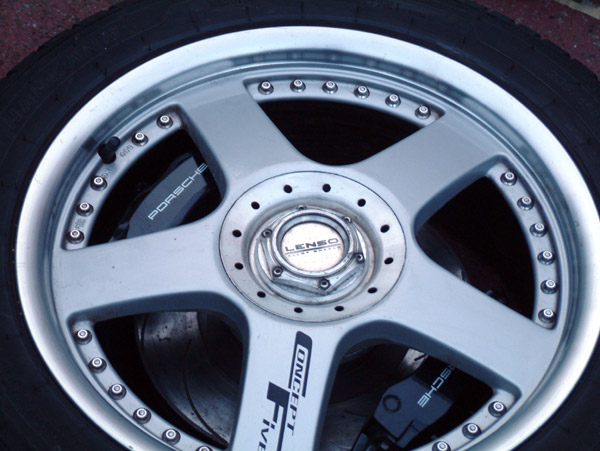
I am still going to use the porsche/brembo calipers.....still filtering out the rotor options... I collected a lot of info and measurements about rotors over time, looking at bolt pattern, center hole, depth etc but there are also the variables depending the setup itself..:
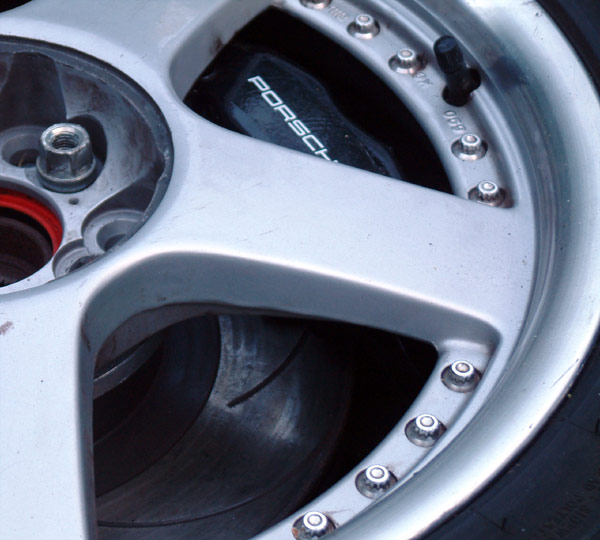
The main issue is the calipers are pretty wide and I have low offset wheels so I will probably need spacers for clearance. For the front there looks to be more room for "deeper" rotors, on the rear there is less room before hitting the knuckle...may go with vette rotors if no other solution. I will try to arrange an appointment with a rotor supplier to go through the final list of rotor options...or I will go with a custom 2 piece setup for the front..
quote
Originally posted by revin: nm I was feeling naughty....
LOL, I did read your original post
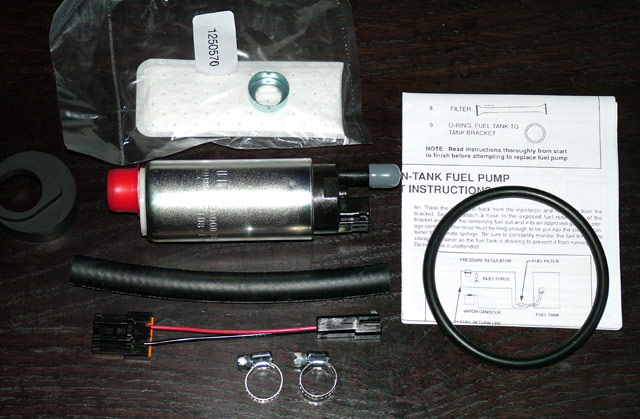
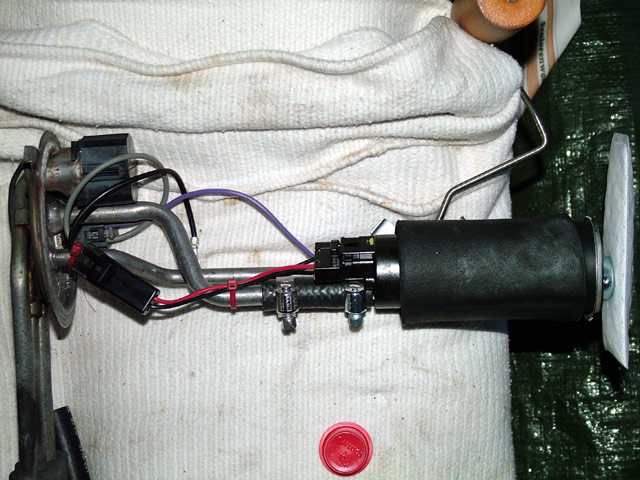
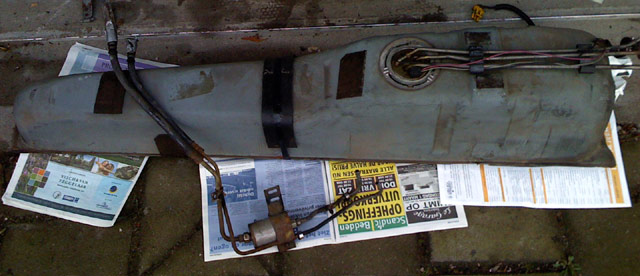
Anyway, I had some ISP problems last weeks so I have some pictures/updates waiting : This is the Walbro 255lph high pressure fuelpump kit Everything bolts right up I tested the fuelpump a few seconds to make sure it works
Fueltank ready to go back in...I call it The Sneaker
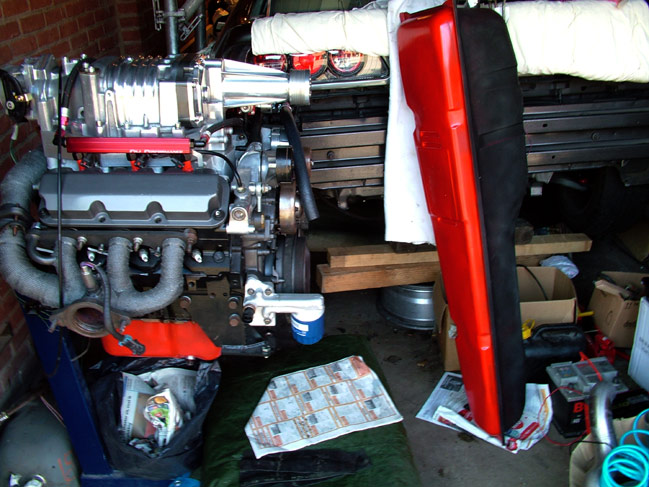
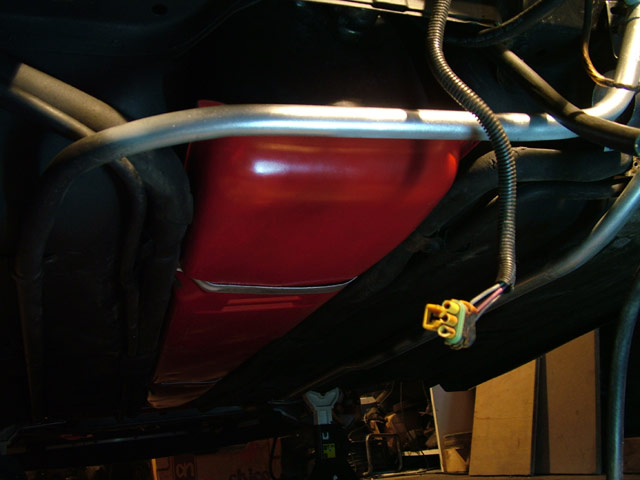
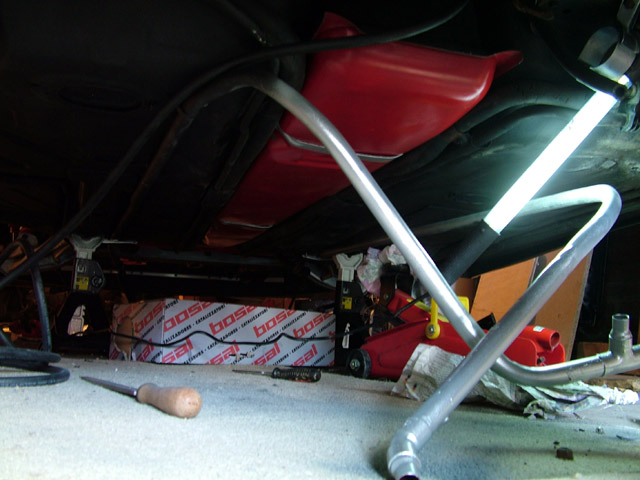
The usual struggle to hook up the hoses to the tank but its back in place..note the intercooler tubing is well away from the tank and doesnt interfere with the tank removal and install
Last drop of the IC tubes to solder the end fittings and finish, added a T for a reservoir/filling point in the enginebay
Originally posted by Austrian Import: What offset are your wheels?
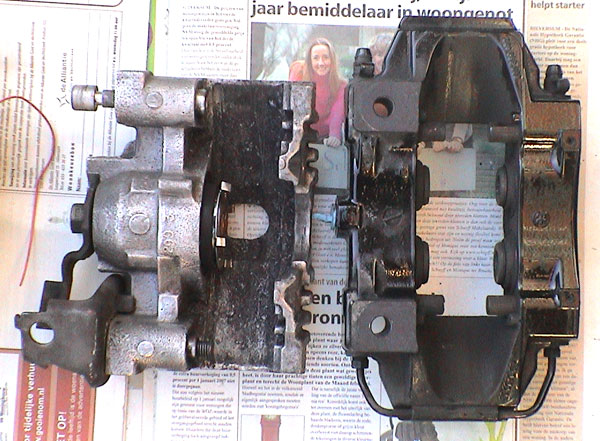
I recall 37mm.. The brembo's are pretty wide on the outside...this is the smaller caliper
With a 10mm spacer both calipers clear fine...this is a mockup I did almost 2 years ago, with a subaru rotor. These are close to Fiero specs but have a 57mm centerhole (Fiero 56mm)...1mm too much so useless..
Back to the underbody...and getting closer to the enginebay need to dust off here !
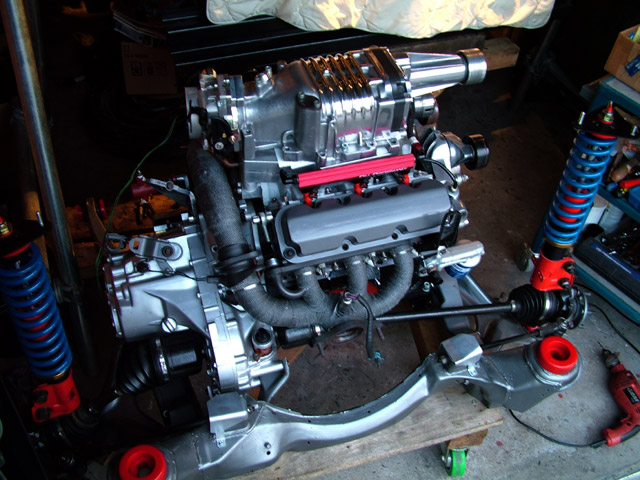
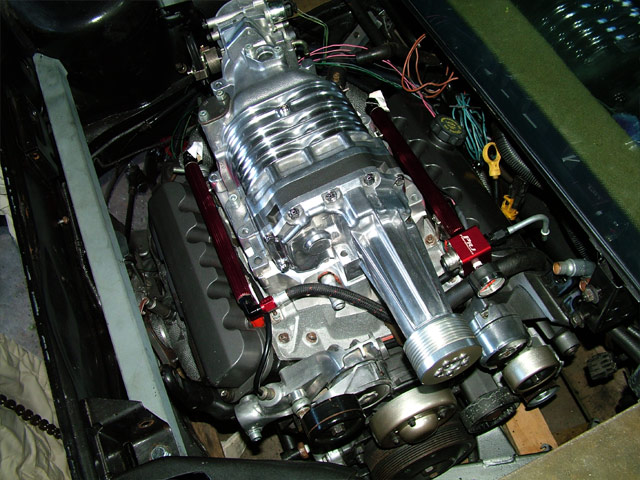
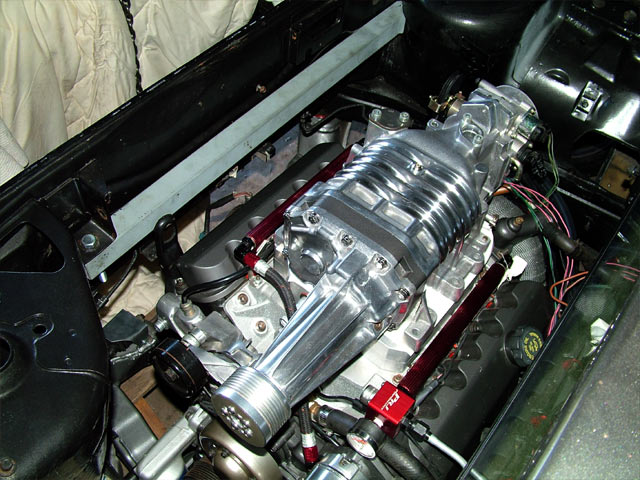
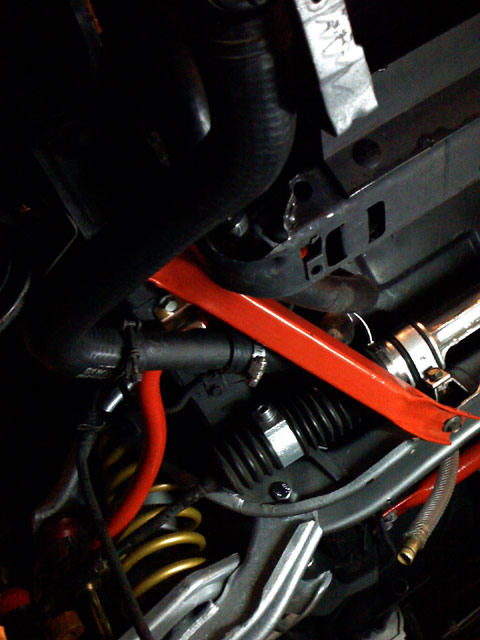
I dropped the cradle to add the engine still needs a clutch etc but untill I have all these parts I can put it in and already fabricate the dogbones, coolant lines and wiring routing and lengths...
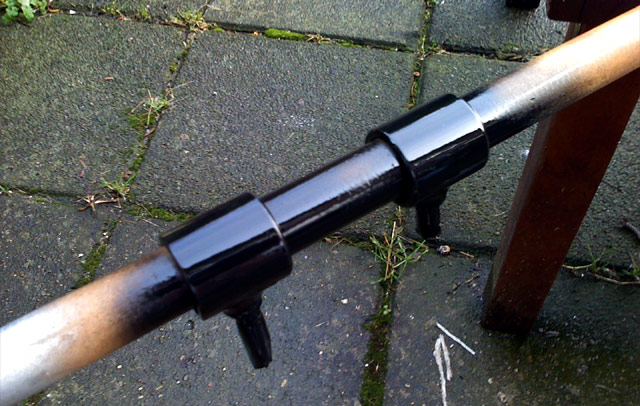
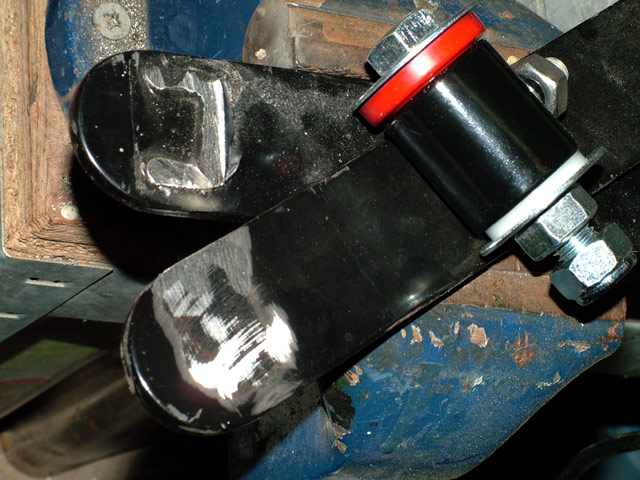
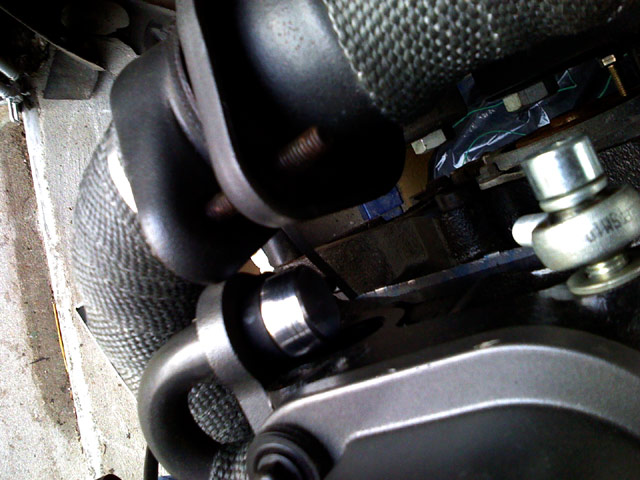
Working on some enginebay parts... Got it figured out how to mount the dogbones/strutbar, I will bolt it directly to the driver side strut tower, setup done by welding a nut to the back of the 'endcap' and then welding the cap to the bar
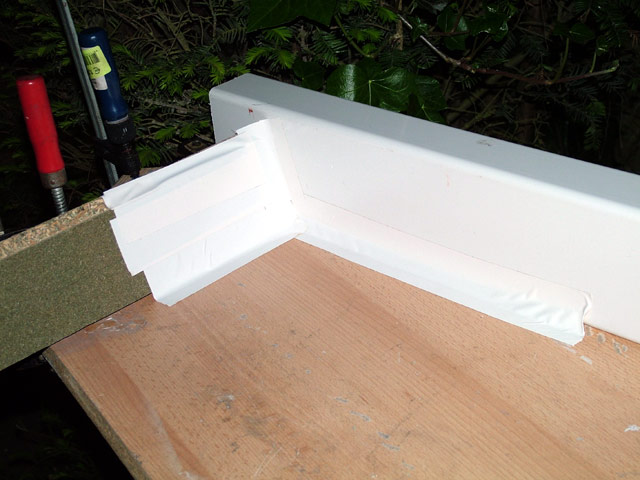
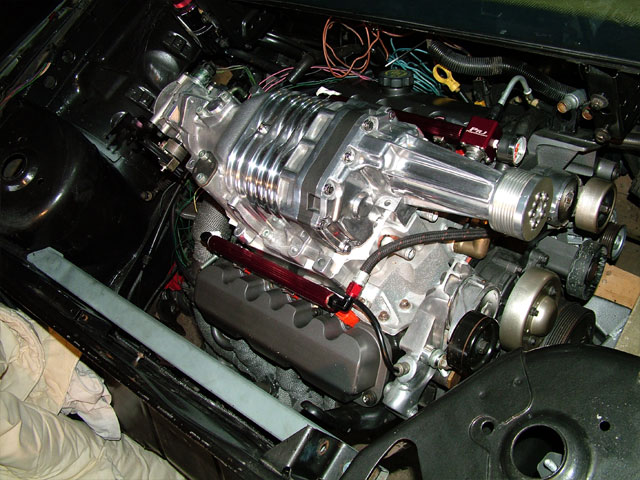
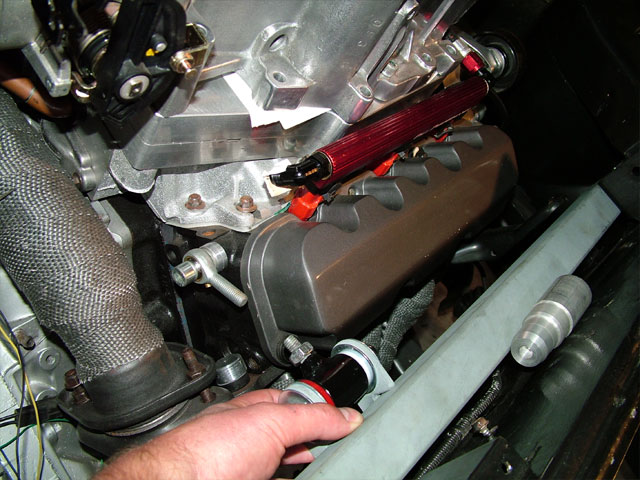
Working on the side panels for the enginebay. I already made the basic shapes last summer but now is the time to make them fit, cut and mod
Last friday I had the front hubs done, removing the studs was a 5 minute job with help of an hydraulic press. Then I dropped them off to have them turned down , they got it done the same afternoon. That was a 45min 65 euro job according to the bill, which I think is reasonable
cleaned, prepped, a basecoat of zinc primer and painted with hi-temp paint
testfit
Time to drop the fueltank for paint and a Walbro fuelpump
I will replace most of the old tubing, especially the metal lines after the filter that have rusted inside and caused injector problems in the past


 I know that I enjoyed the read. I also try to keep up on your postings. I bet that a lot of others here are interested in you build. Good luck to you, and keep up the high quality of work that you are doing.

 I am really looking forward to seeing both again this year here at FE III.
 Sooo many custom jobs everywhere, first goal is to get it back on the road and that alone needs a lot of work already...because I want to do it the right way..