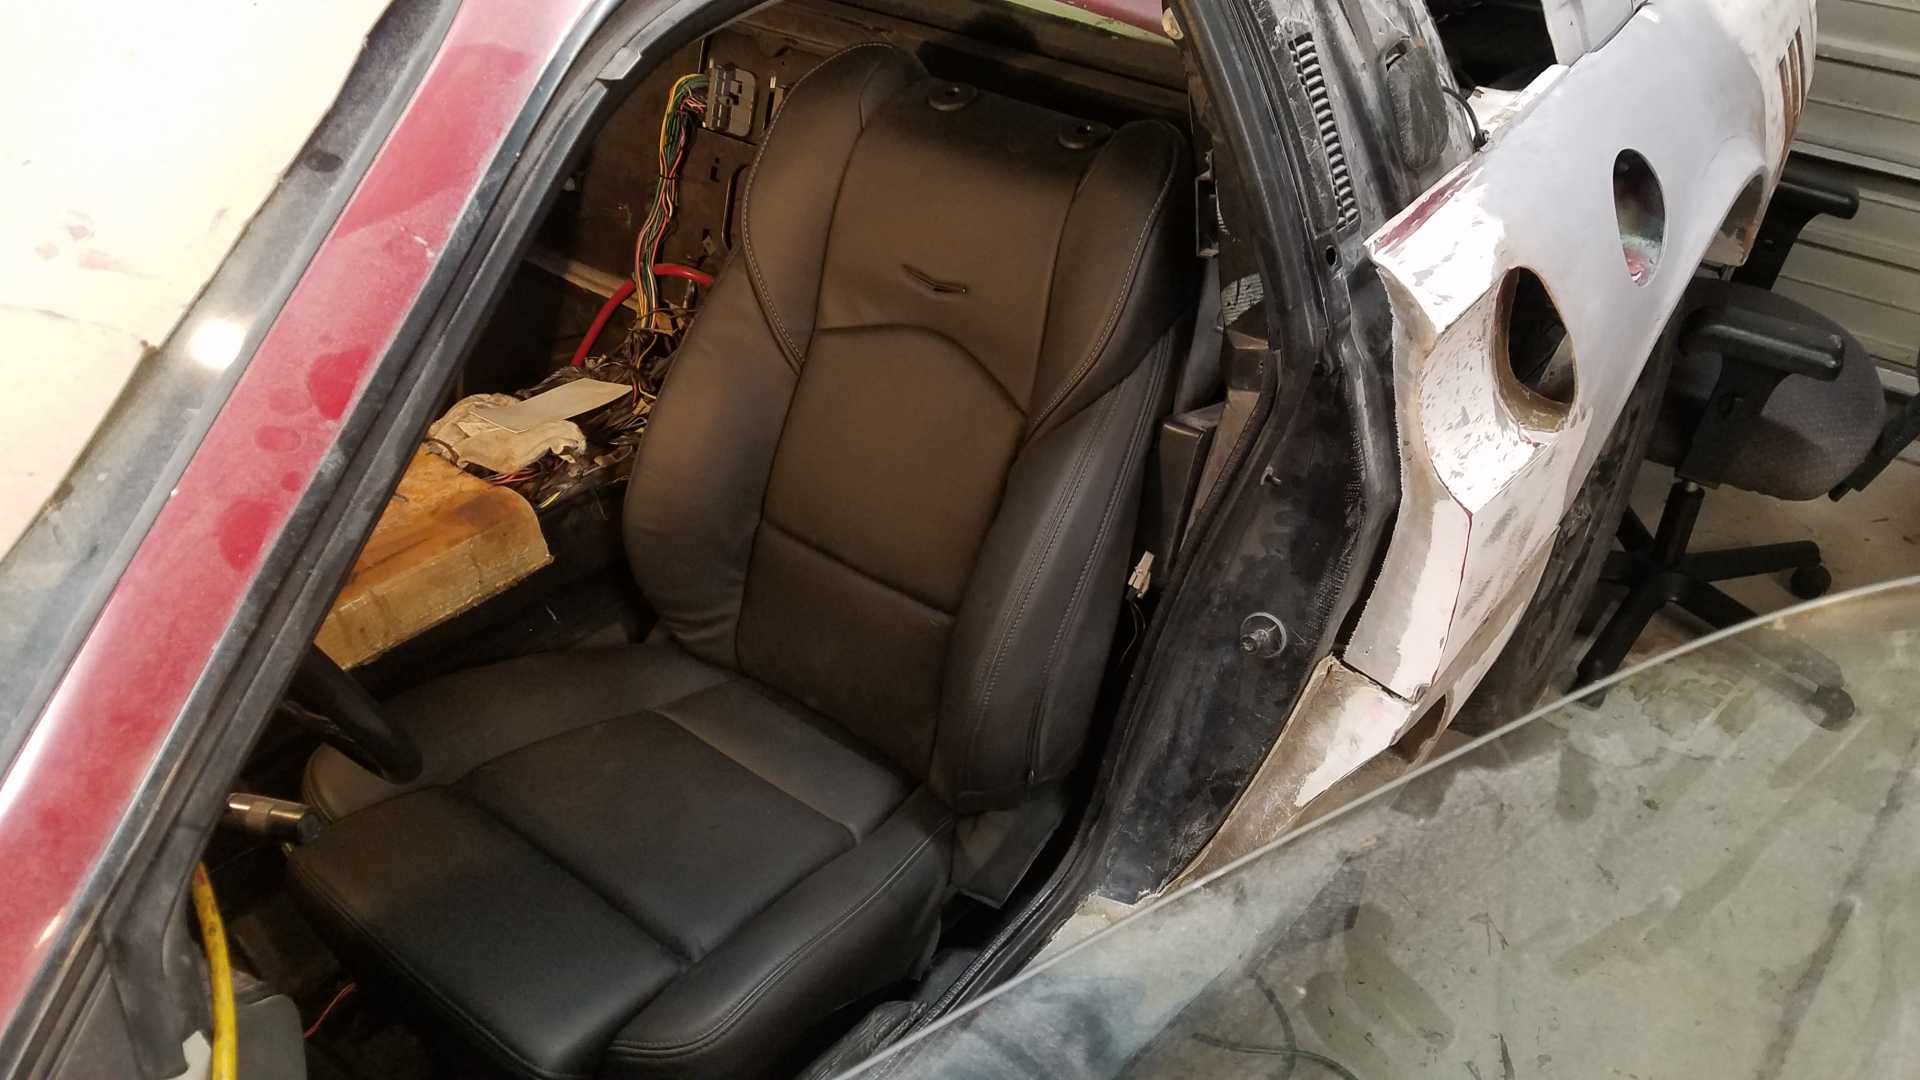
These seats have more of the GM standard size base (ie like the Fiero), So I'm gonna try to make it work. And it kind of fits....
After countless hours, I managed to completely disassemble the seats. The hard part was removing all of the extra brackets from the rails. The seats are much easier to handle when naked.
Several challenges still lie ahead. Mounting the seat frame to the rails. It will need to be removable. Second item is the power adjust. The rails are about 3" closer together than on the ATS, so the adjuster motor and frame needs to magically shrink. Then there is the wiring. These seats have full power and features. I've had to eliminate the power height adjust, but I think I can salvage the rest.
No idea when I'll get more done, but I wanted to show some progress.
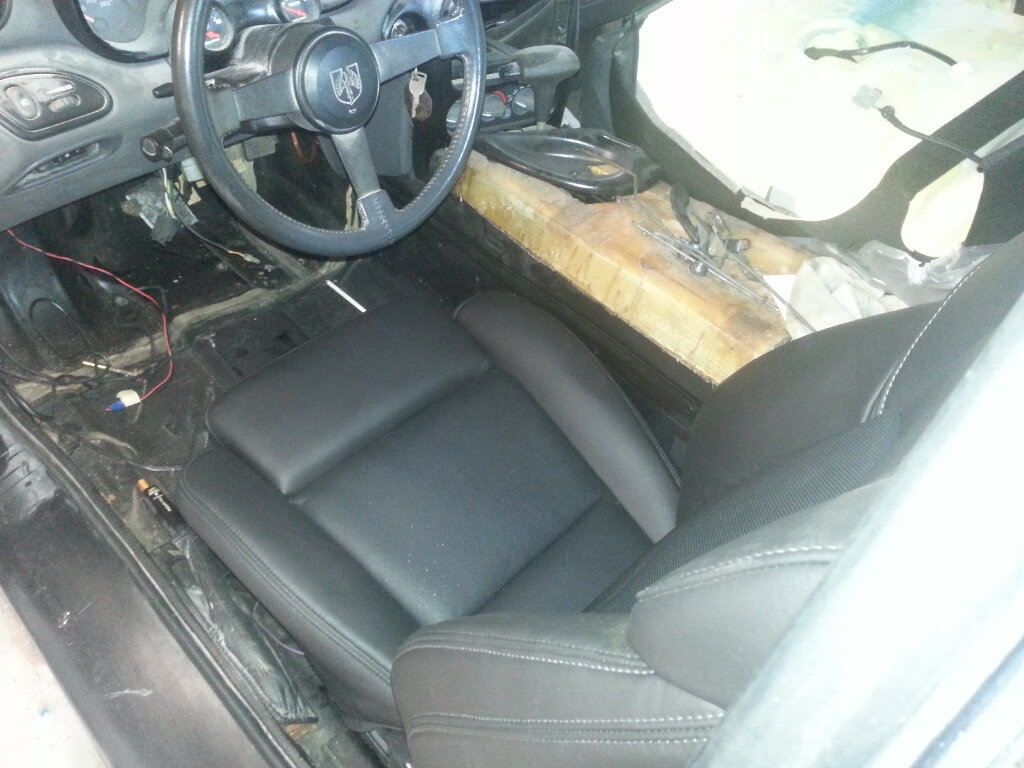
I mounted the seats to the power rails and made the rails removable.
The power assist for the forward/reverse was modified. I still need a shorter square drive, but they look to be available.
As for wiring, I managed to remember where most everything went, but I have not attempted to connect it into the car. That will wait until I get back into interior mode.
Still some challenges. I think it's still sitting too high for my 6 foot upper body. My head hits the roof. And there's still mounting the switches and all of the wiring. And lastly duplicating it on the passenger side. As for now, I need to take advantage of the weather and work on other things, so this is put on the backburner.
It's been a while updating this thread. These pics belong here, instead of my "body" thread.
I was correct in my last post that the seat was too high. I ended up taking about 1.5" out of the driver's side. Passenger side was ok.
I also have the fore-aft motors working, the tilt working, and the thigh tilt working on both seats.
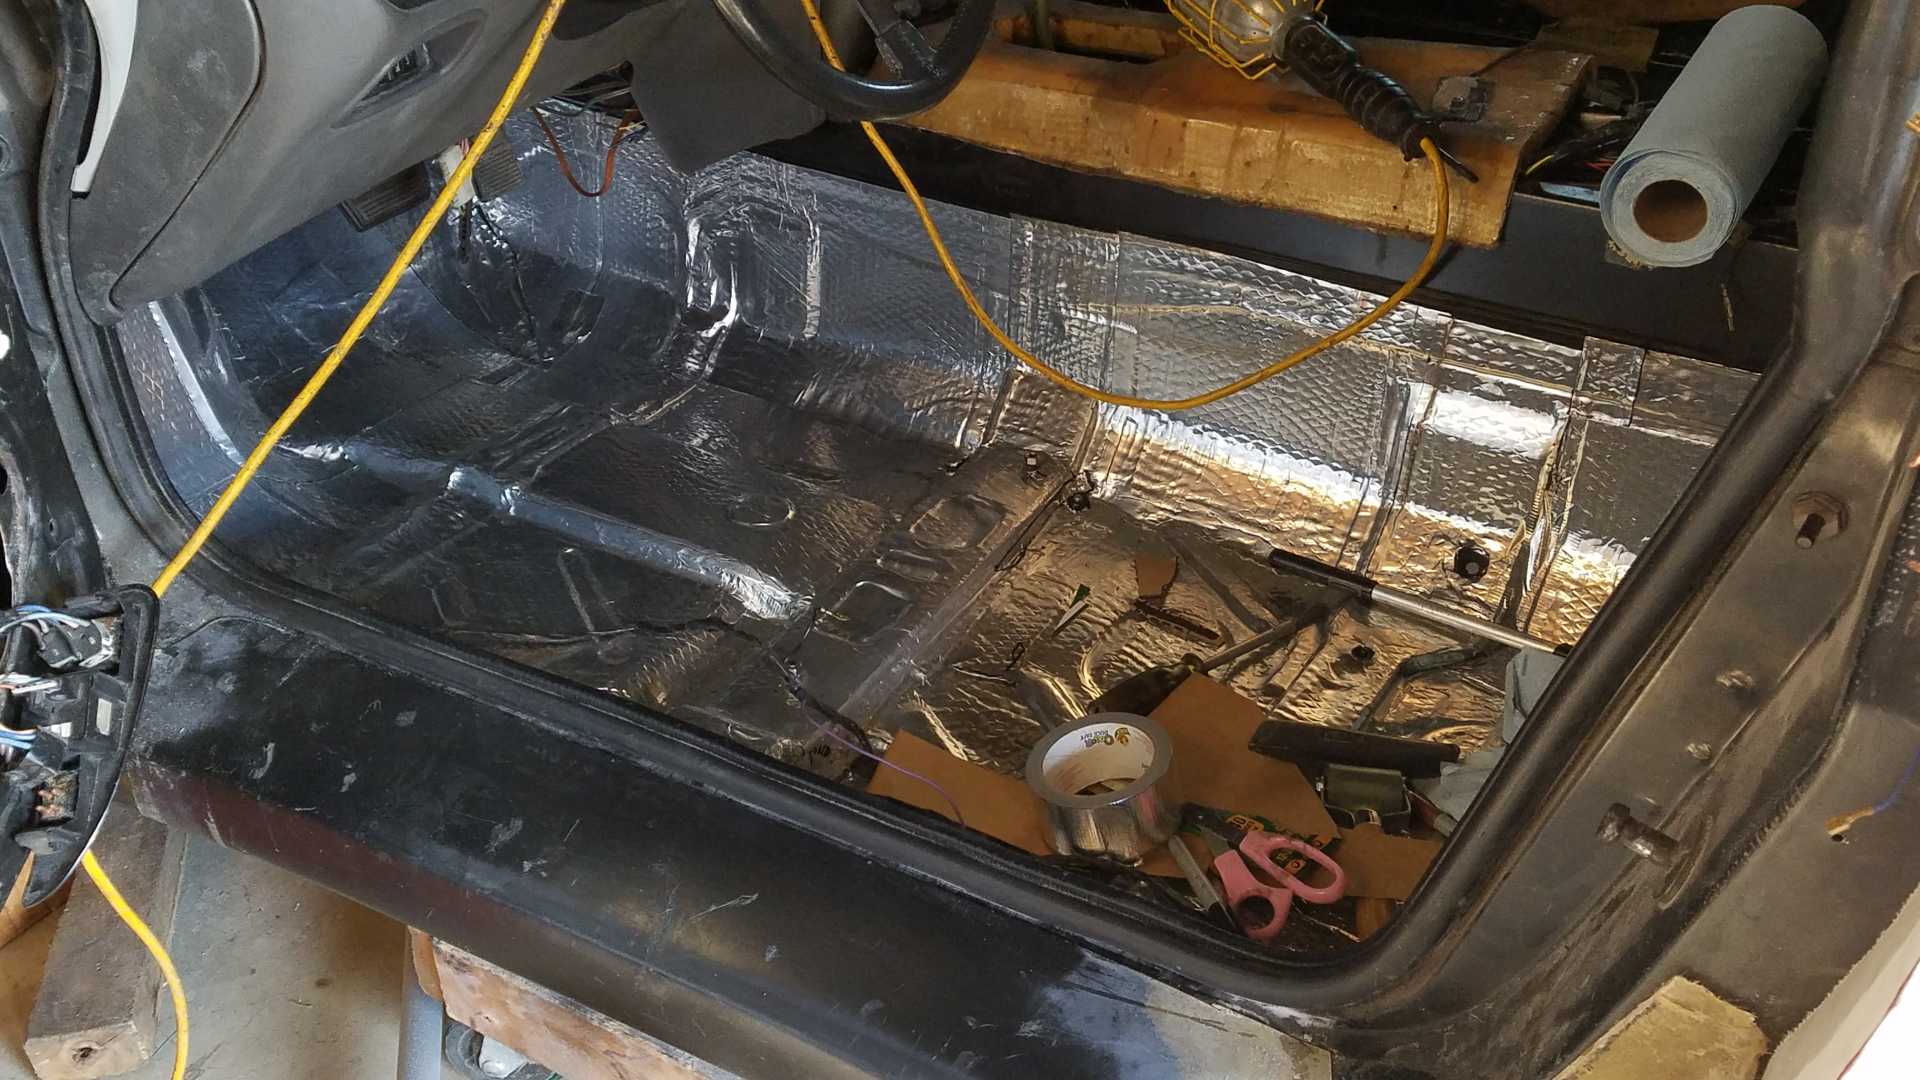
Currently, I'm installing Noico 80mil butyl sound deadening. I'm about 2/3 done, but I will run out of mat before completing. So I have to order more. I'm also thinking of using 50 mil butyl or 210 mil foam for the roof. Thoughts?
Lastly, I'm also seriously considering a different dash swap.
Couple choices:
or
And...I ordered some carpet and vinyl samples for color matching.
thanx for looking...
Bob
[This message has been edited by RCR (edited 03-29-2021).]
An additional 18 sq ft of Noico 80 mil sound deadener arrived today, to go along with the 36 sq ft already in the car. Also purchased 25 sq ft of 50 mil that I will use on the roof.
Still awaiting color samples. Hmm??
Did a few other things, but that's for another thread.
Happy Easter
Bob
PS, I looked at the dashes above... Too small.. Not going to work.
[This message has been edited by RCR (edited 04-04-2021).]
Work has been a ***** for the last 8 months, but some motion... I ordered some black carpet. Should be arrive in about a week. Still looking at new dash options.
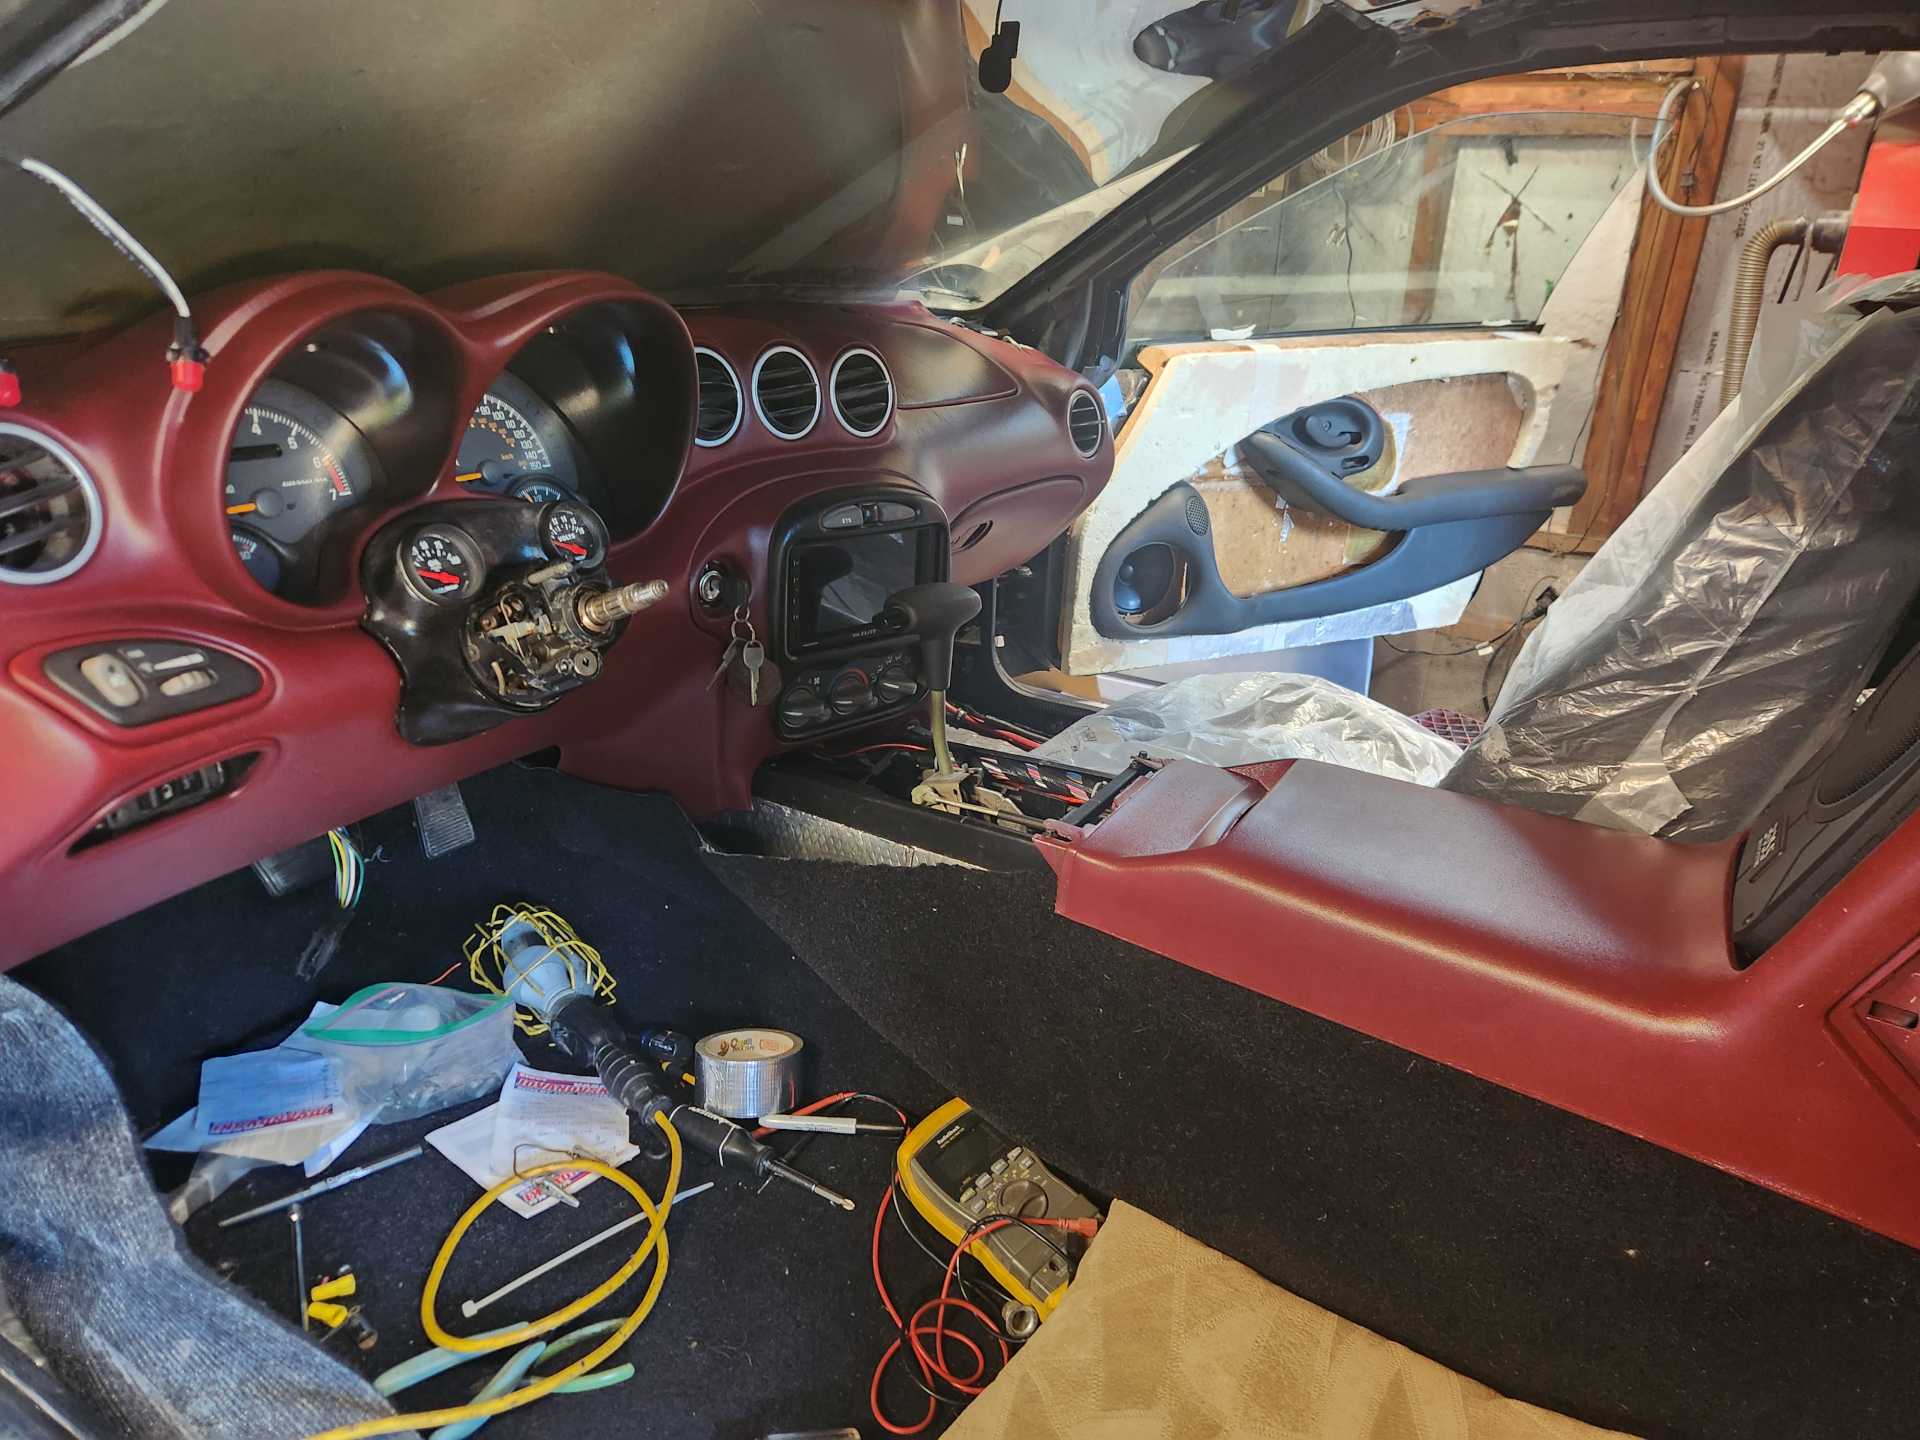
As a matter of fact... I need to download all of the pics, but I have spent the last couple weeks working on the interior.
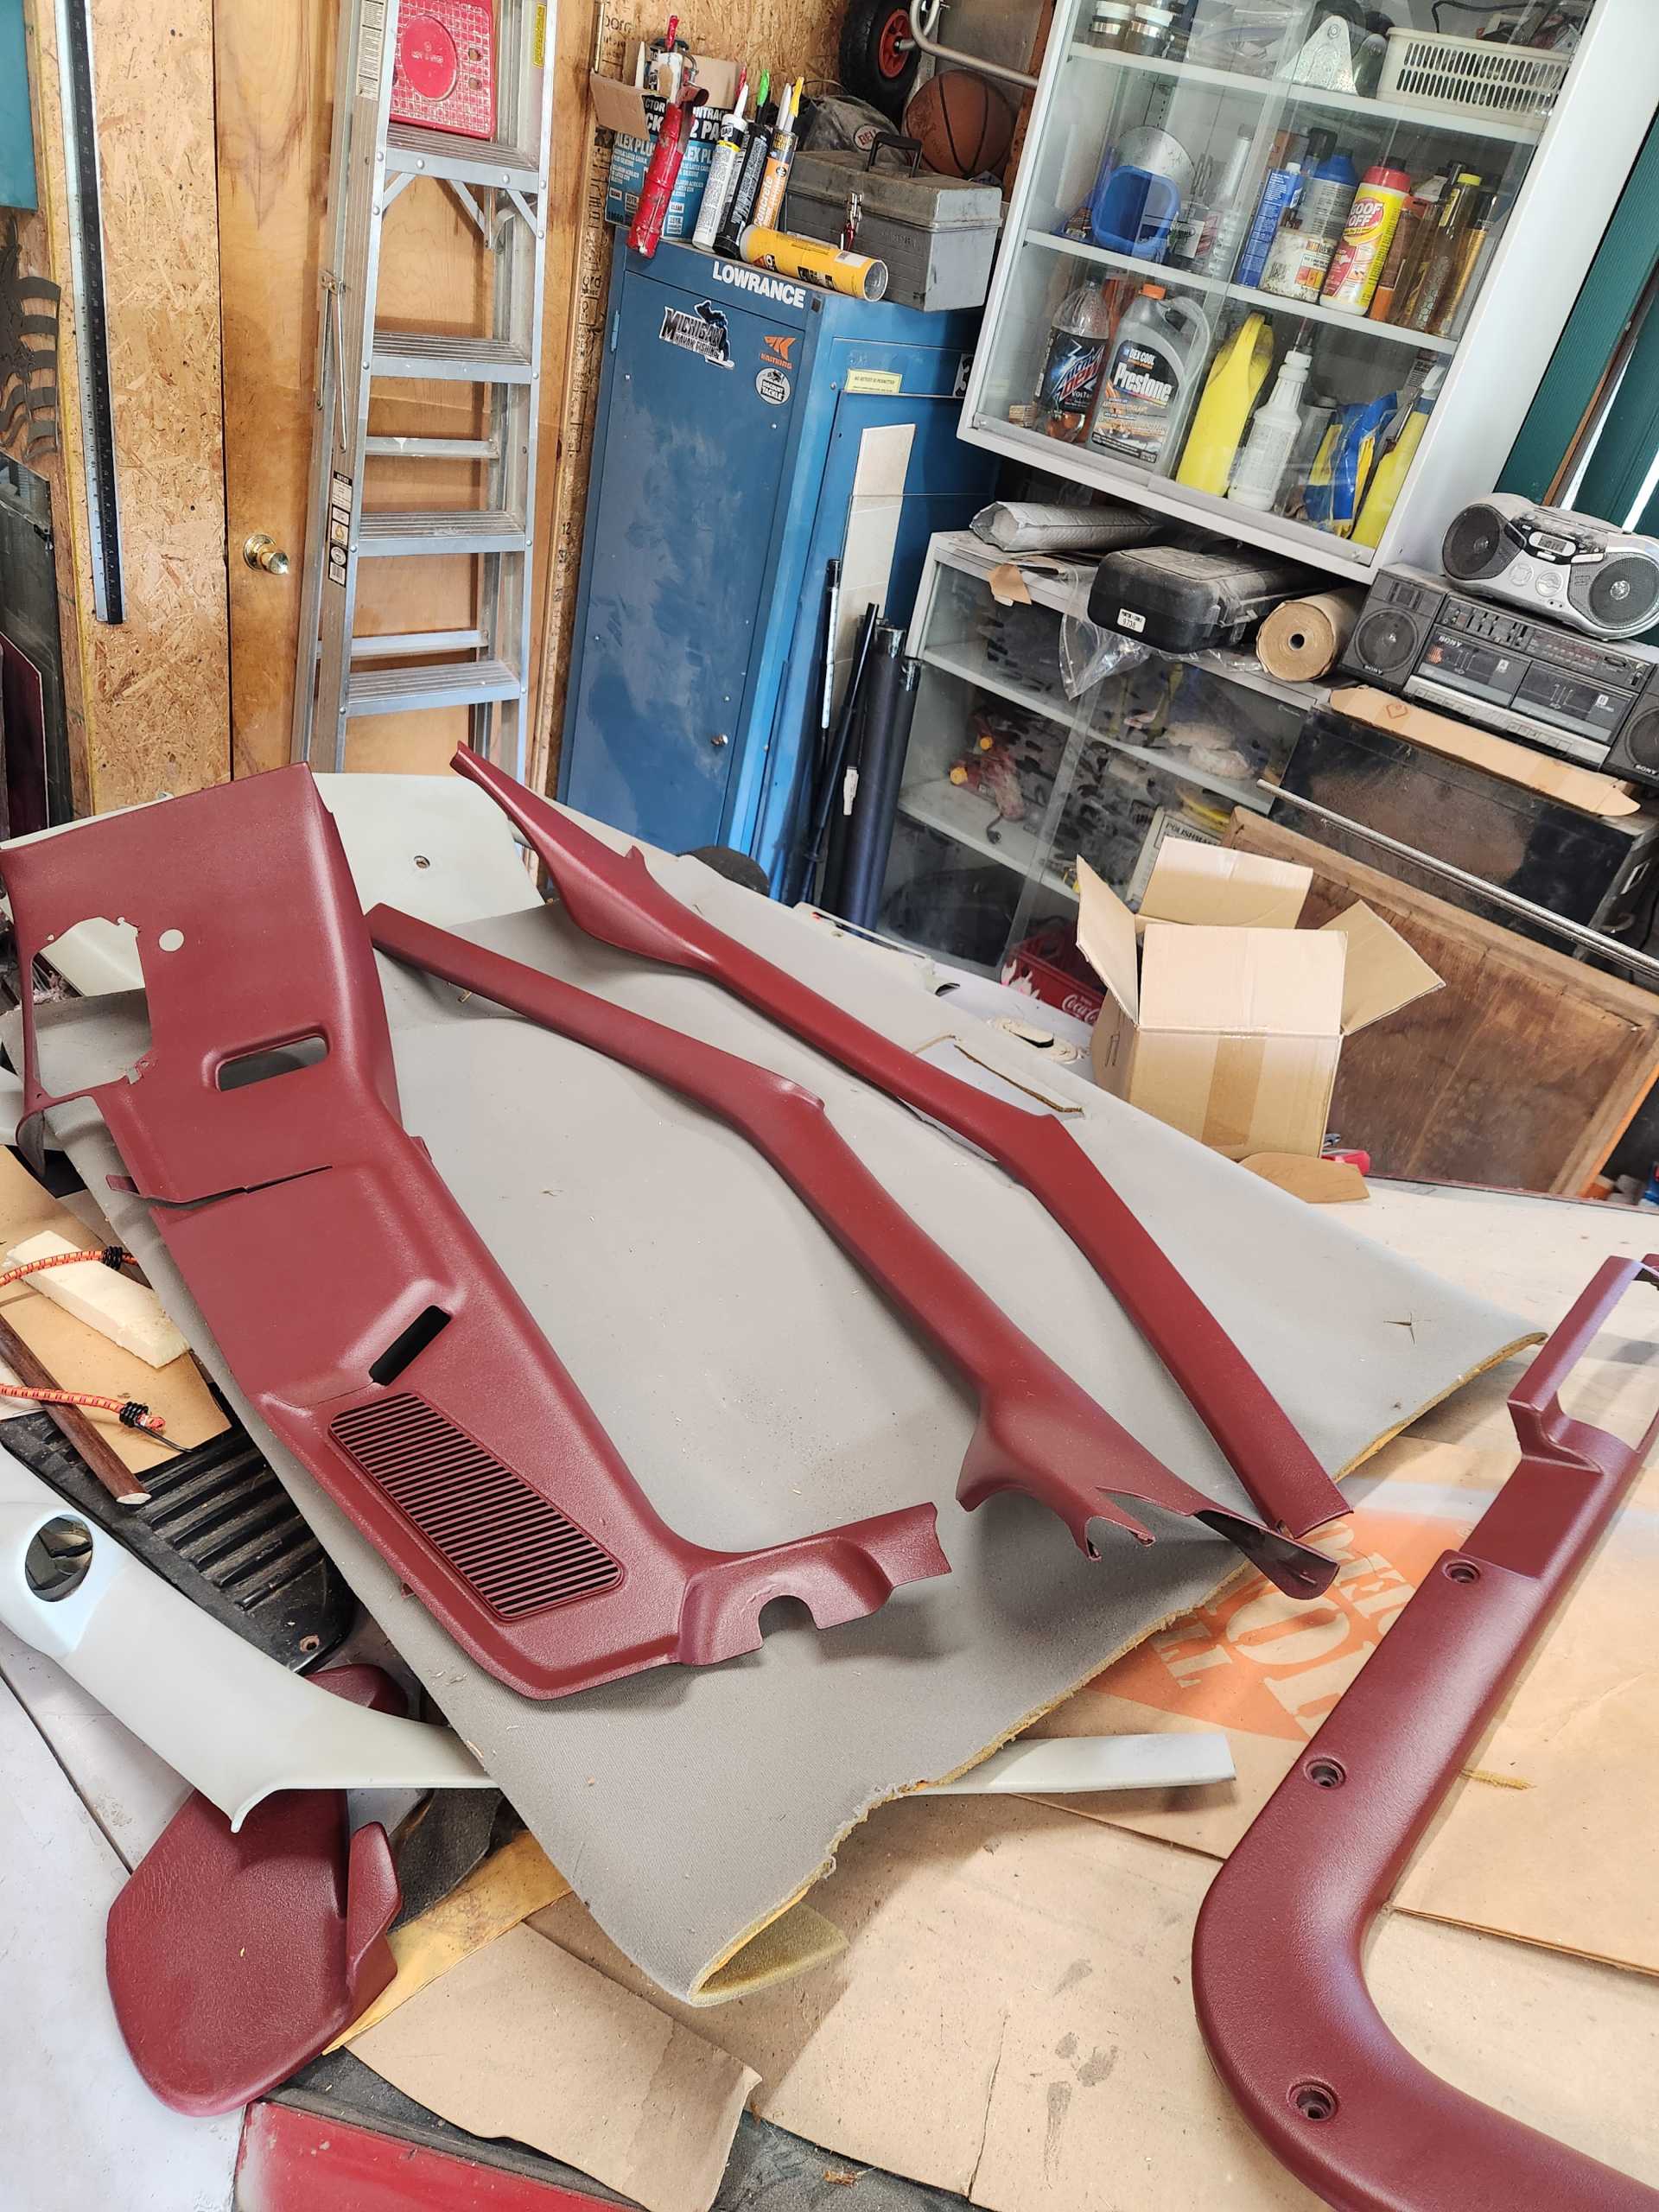
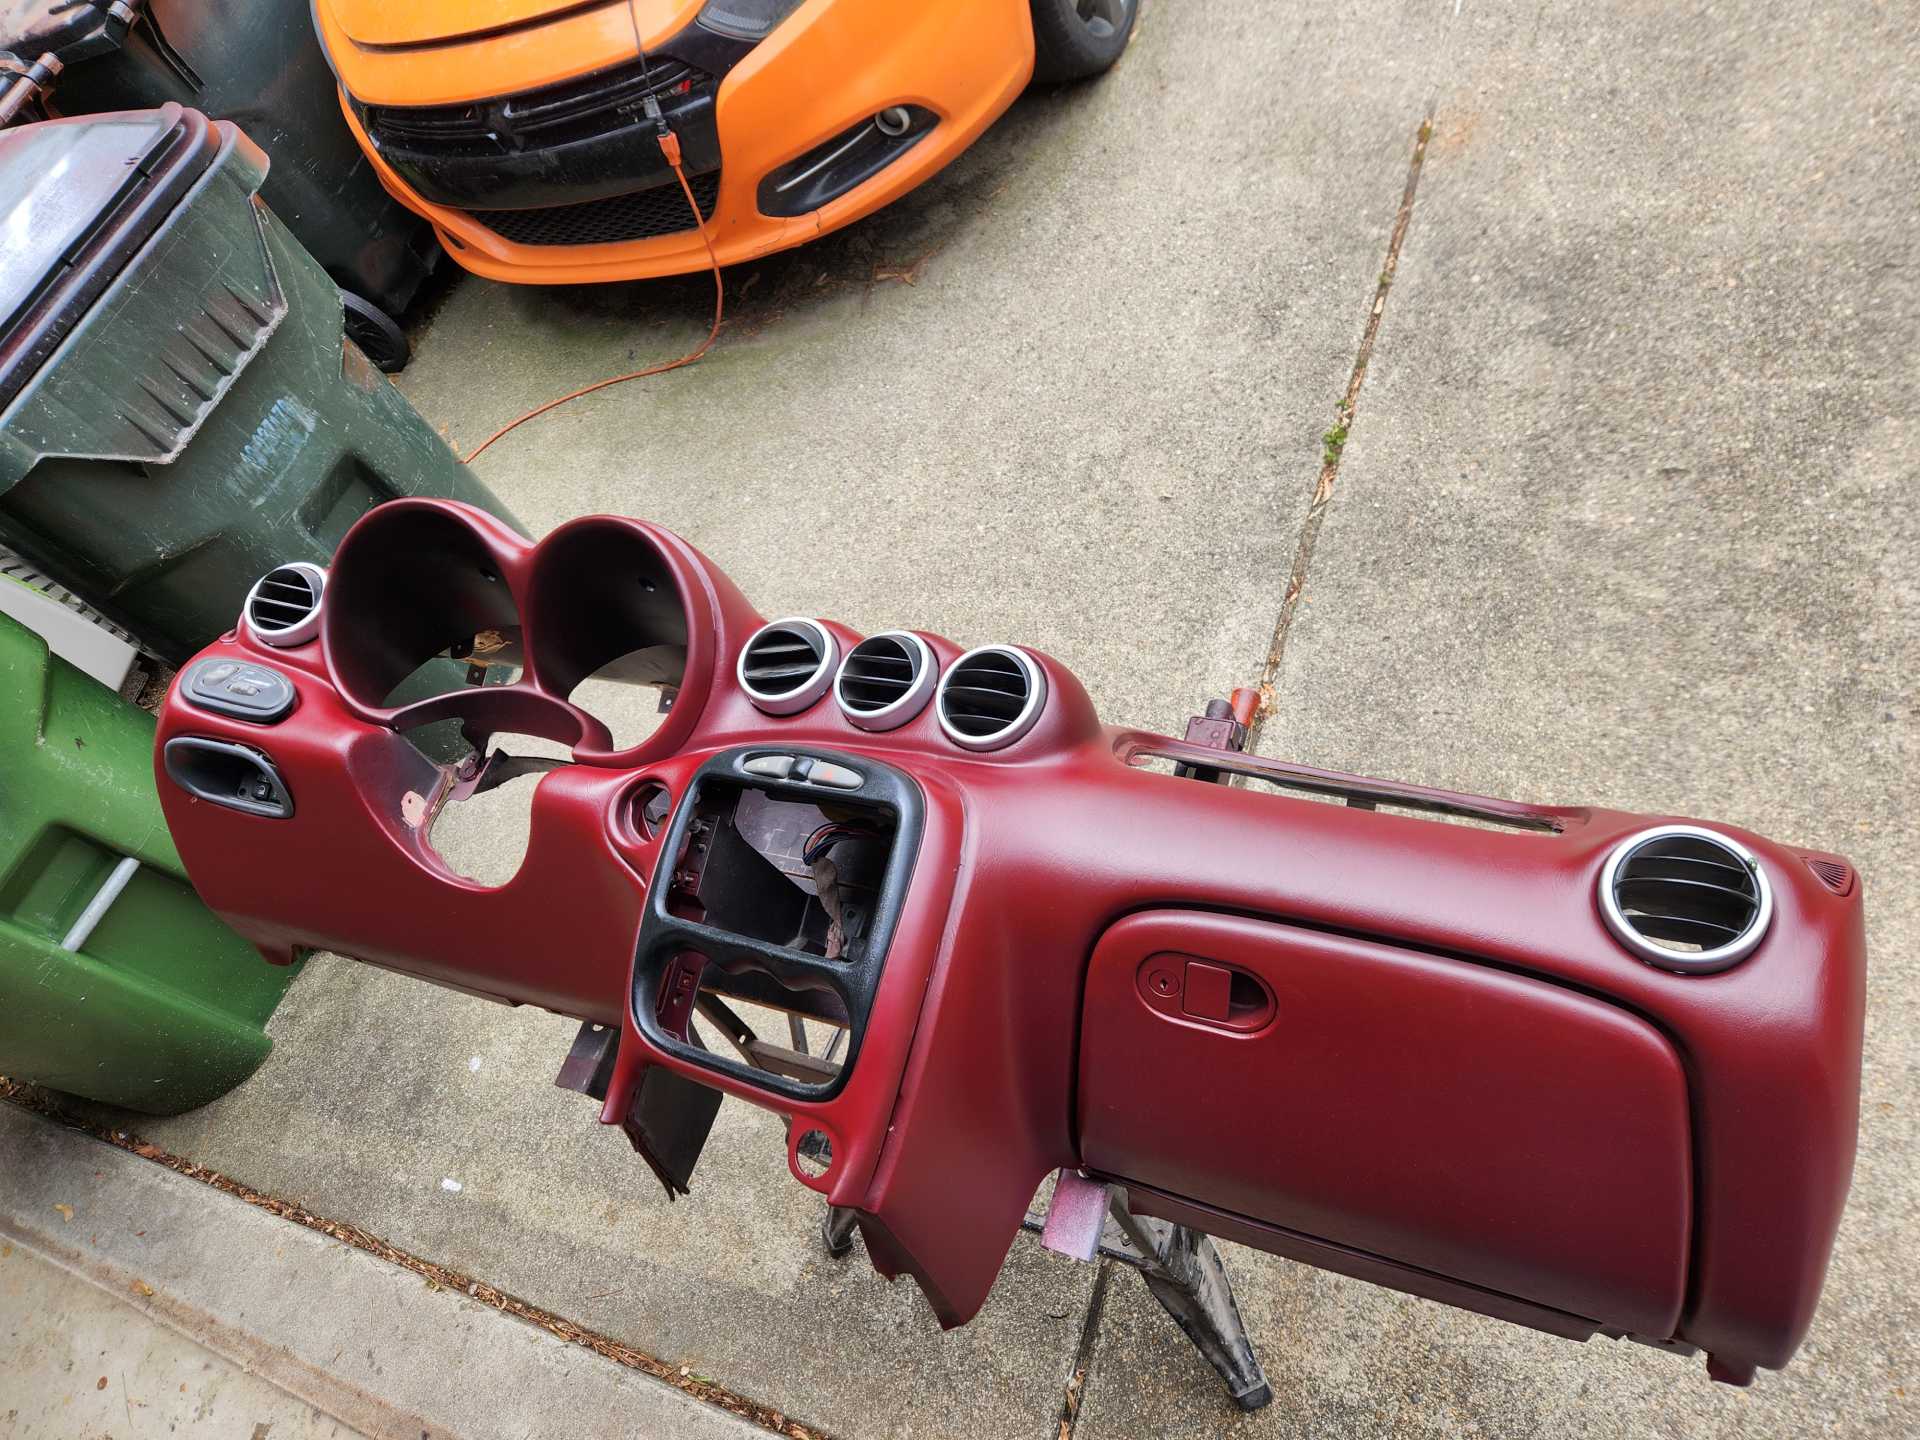
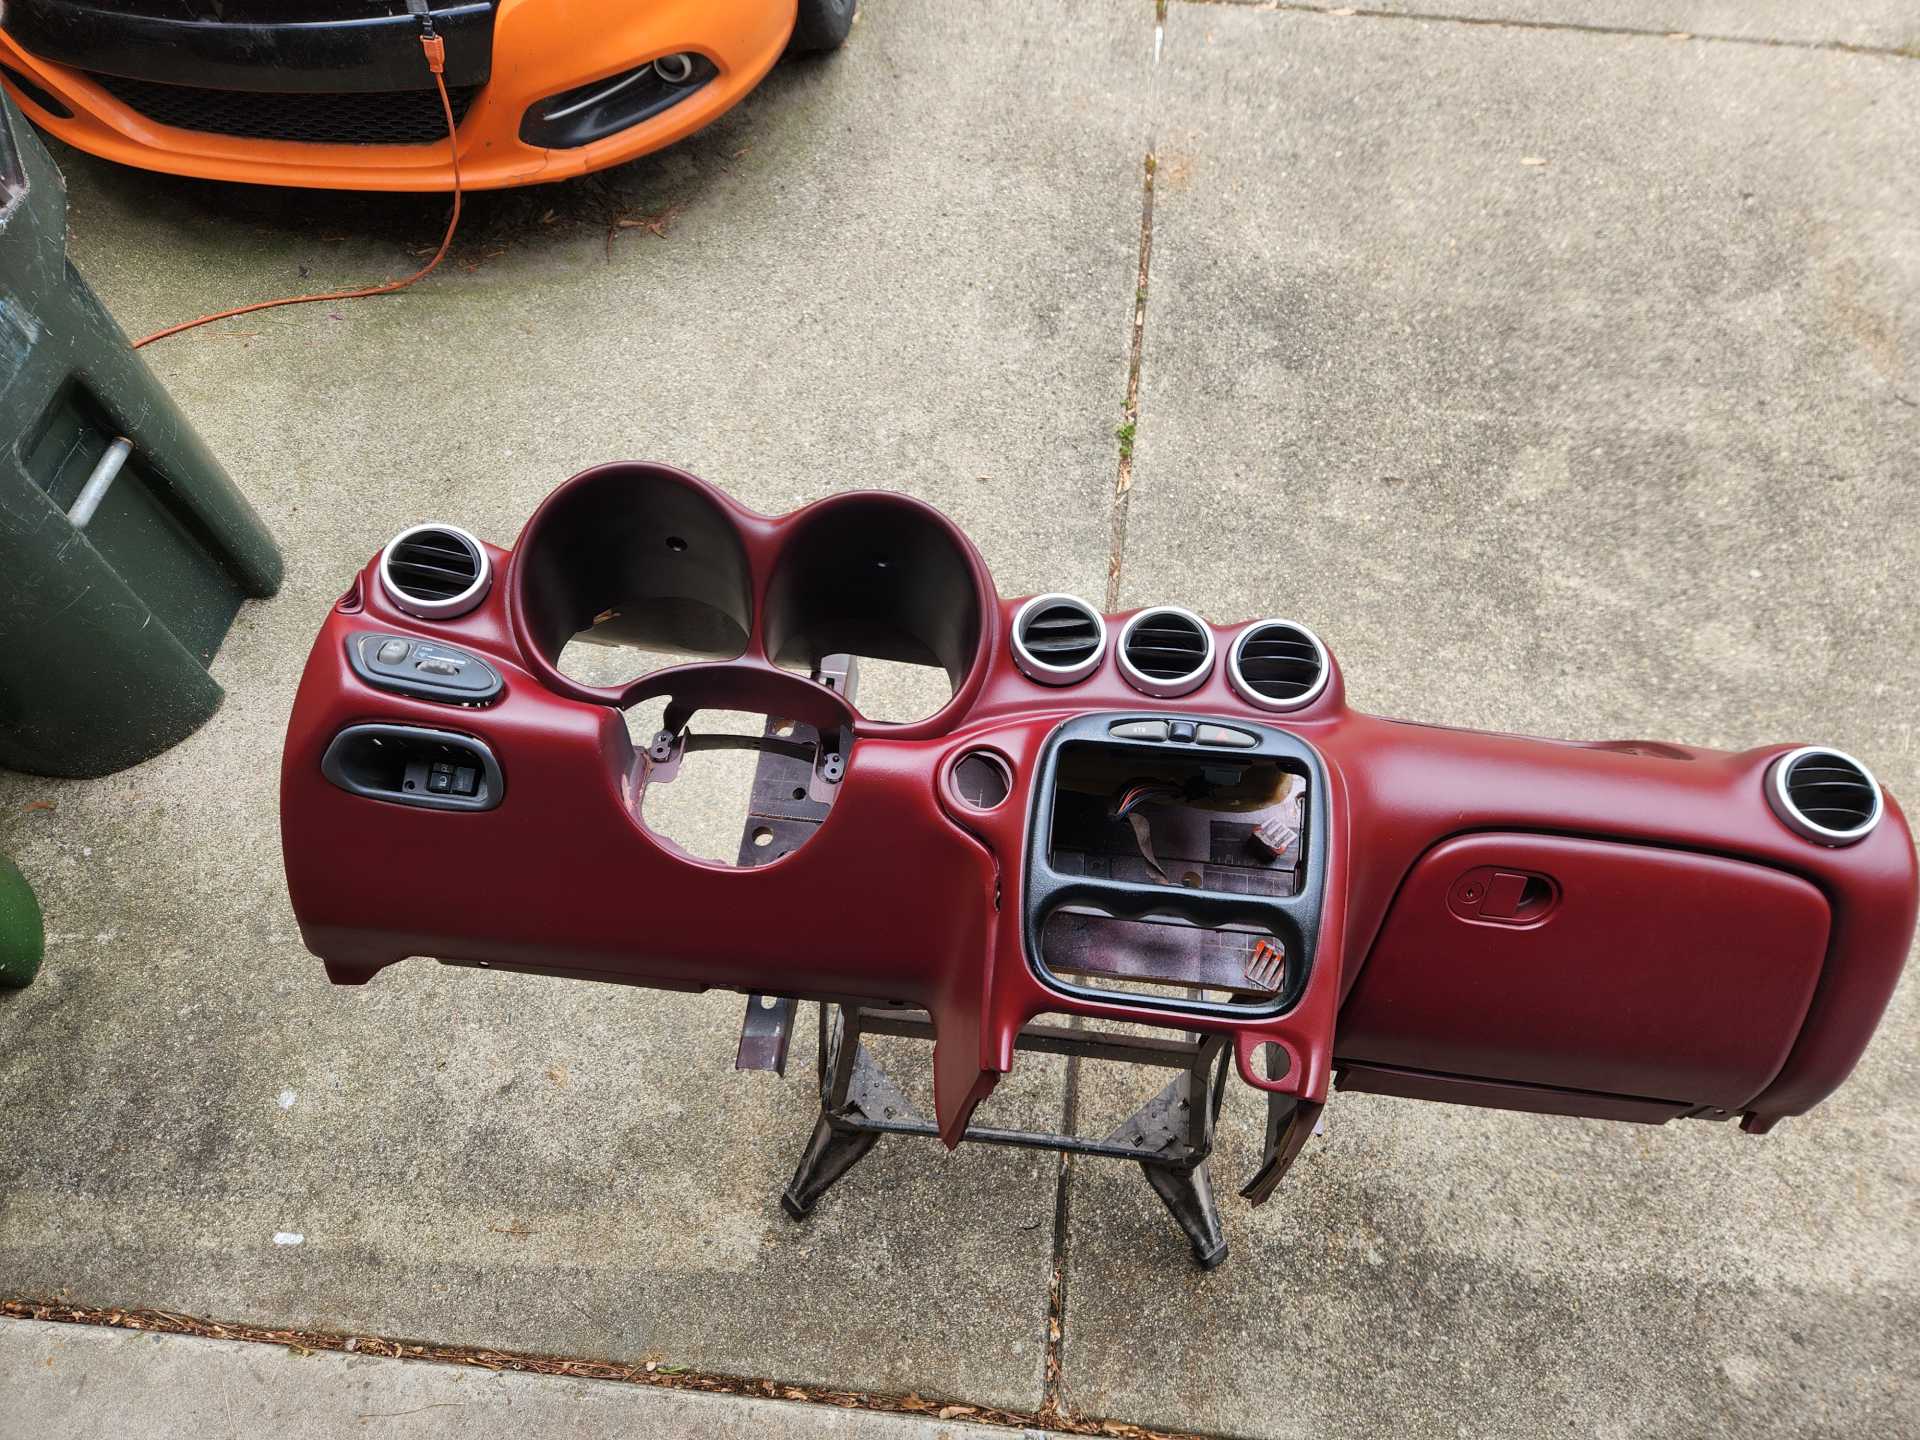
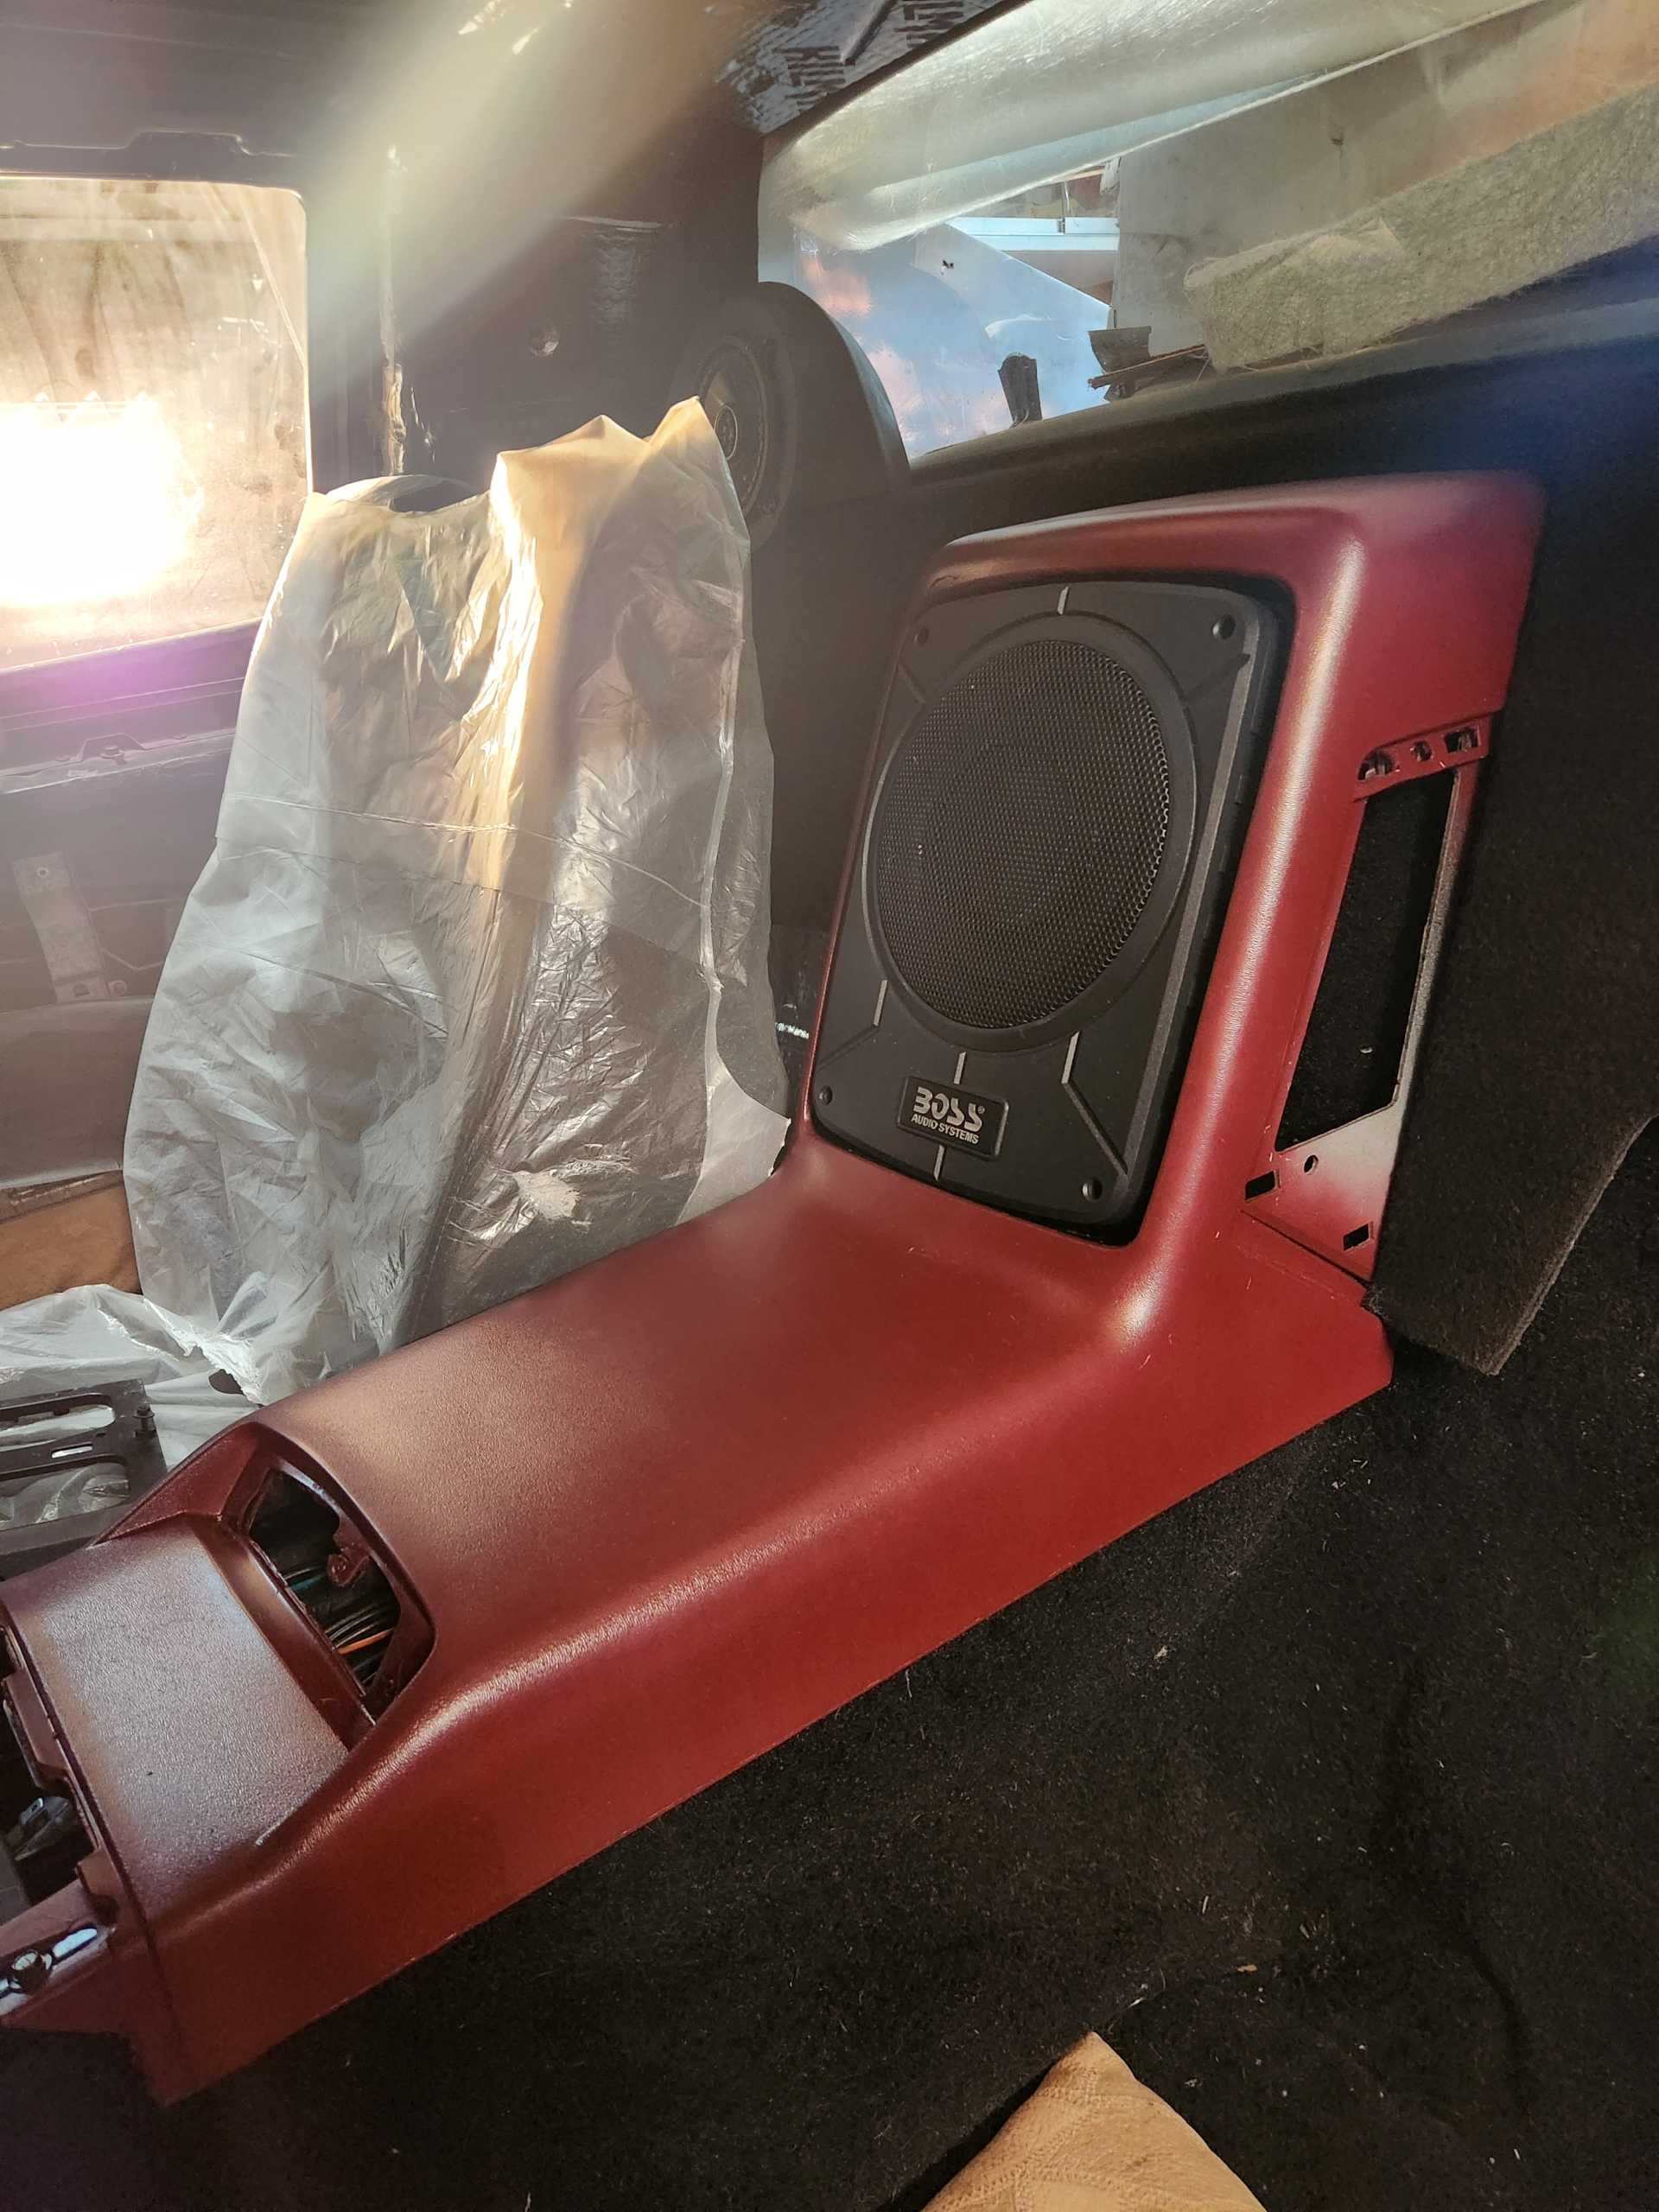
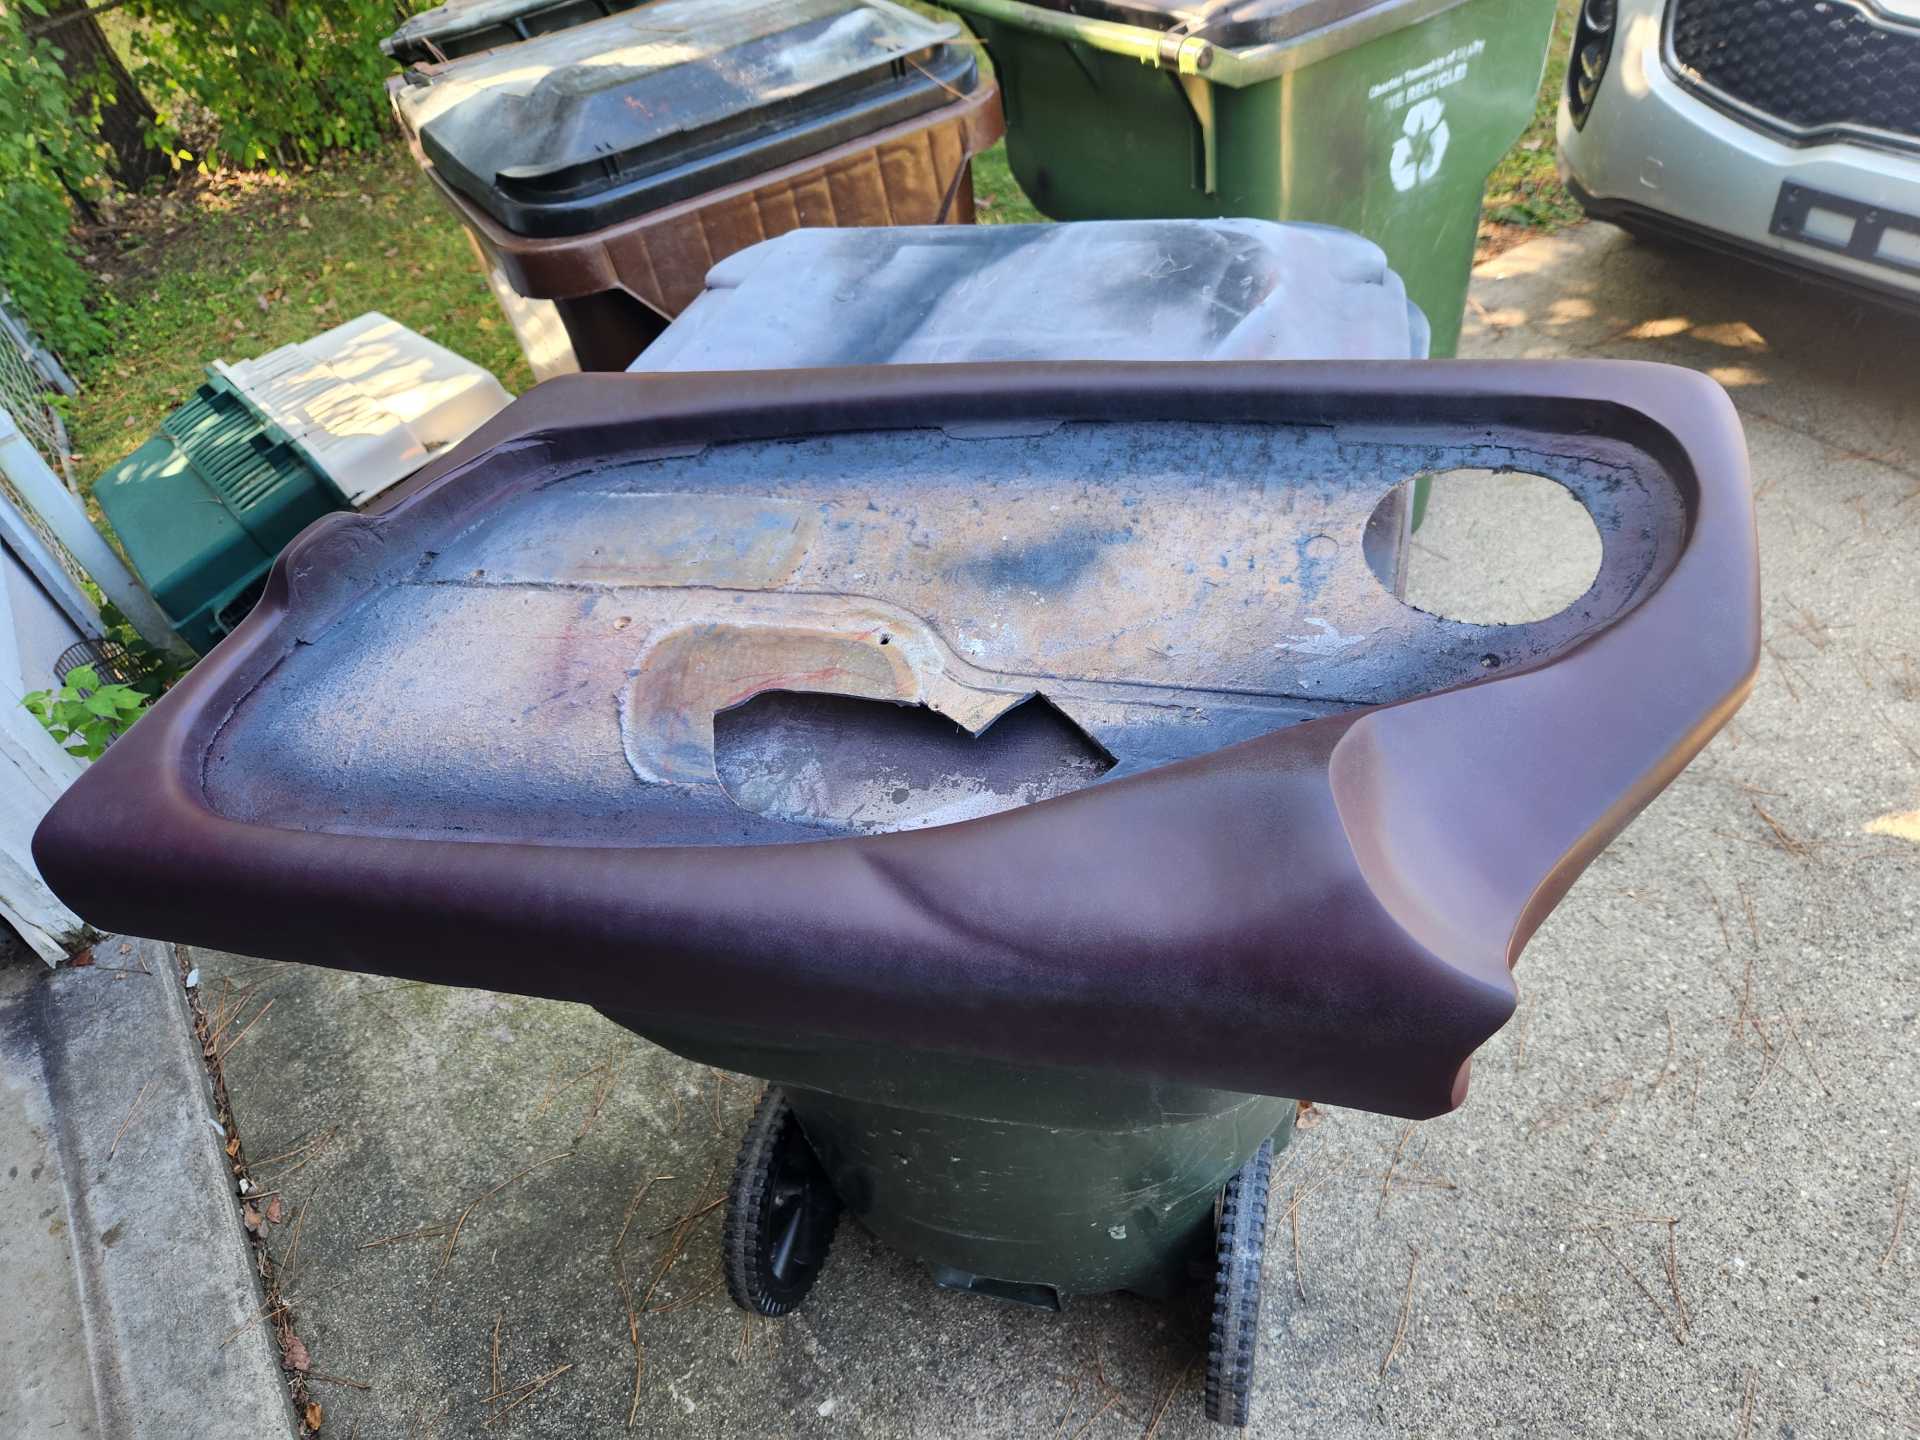
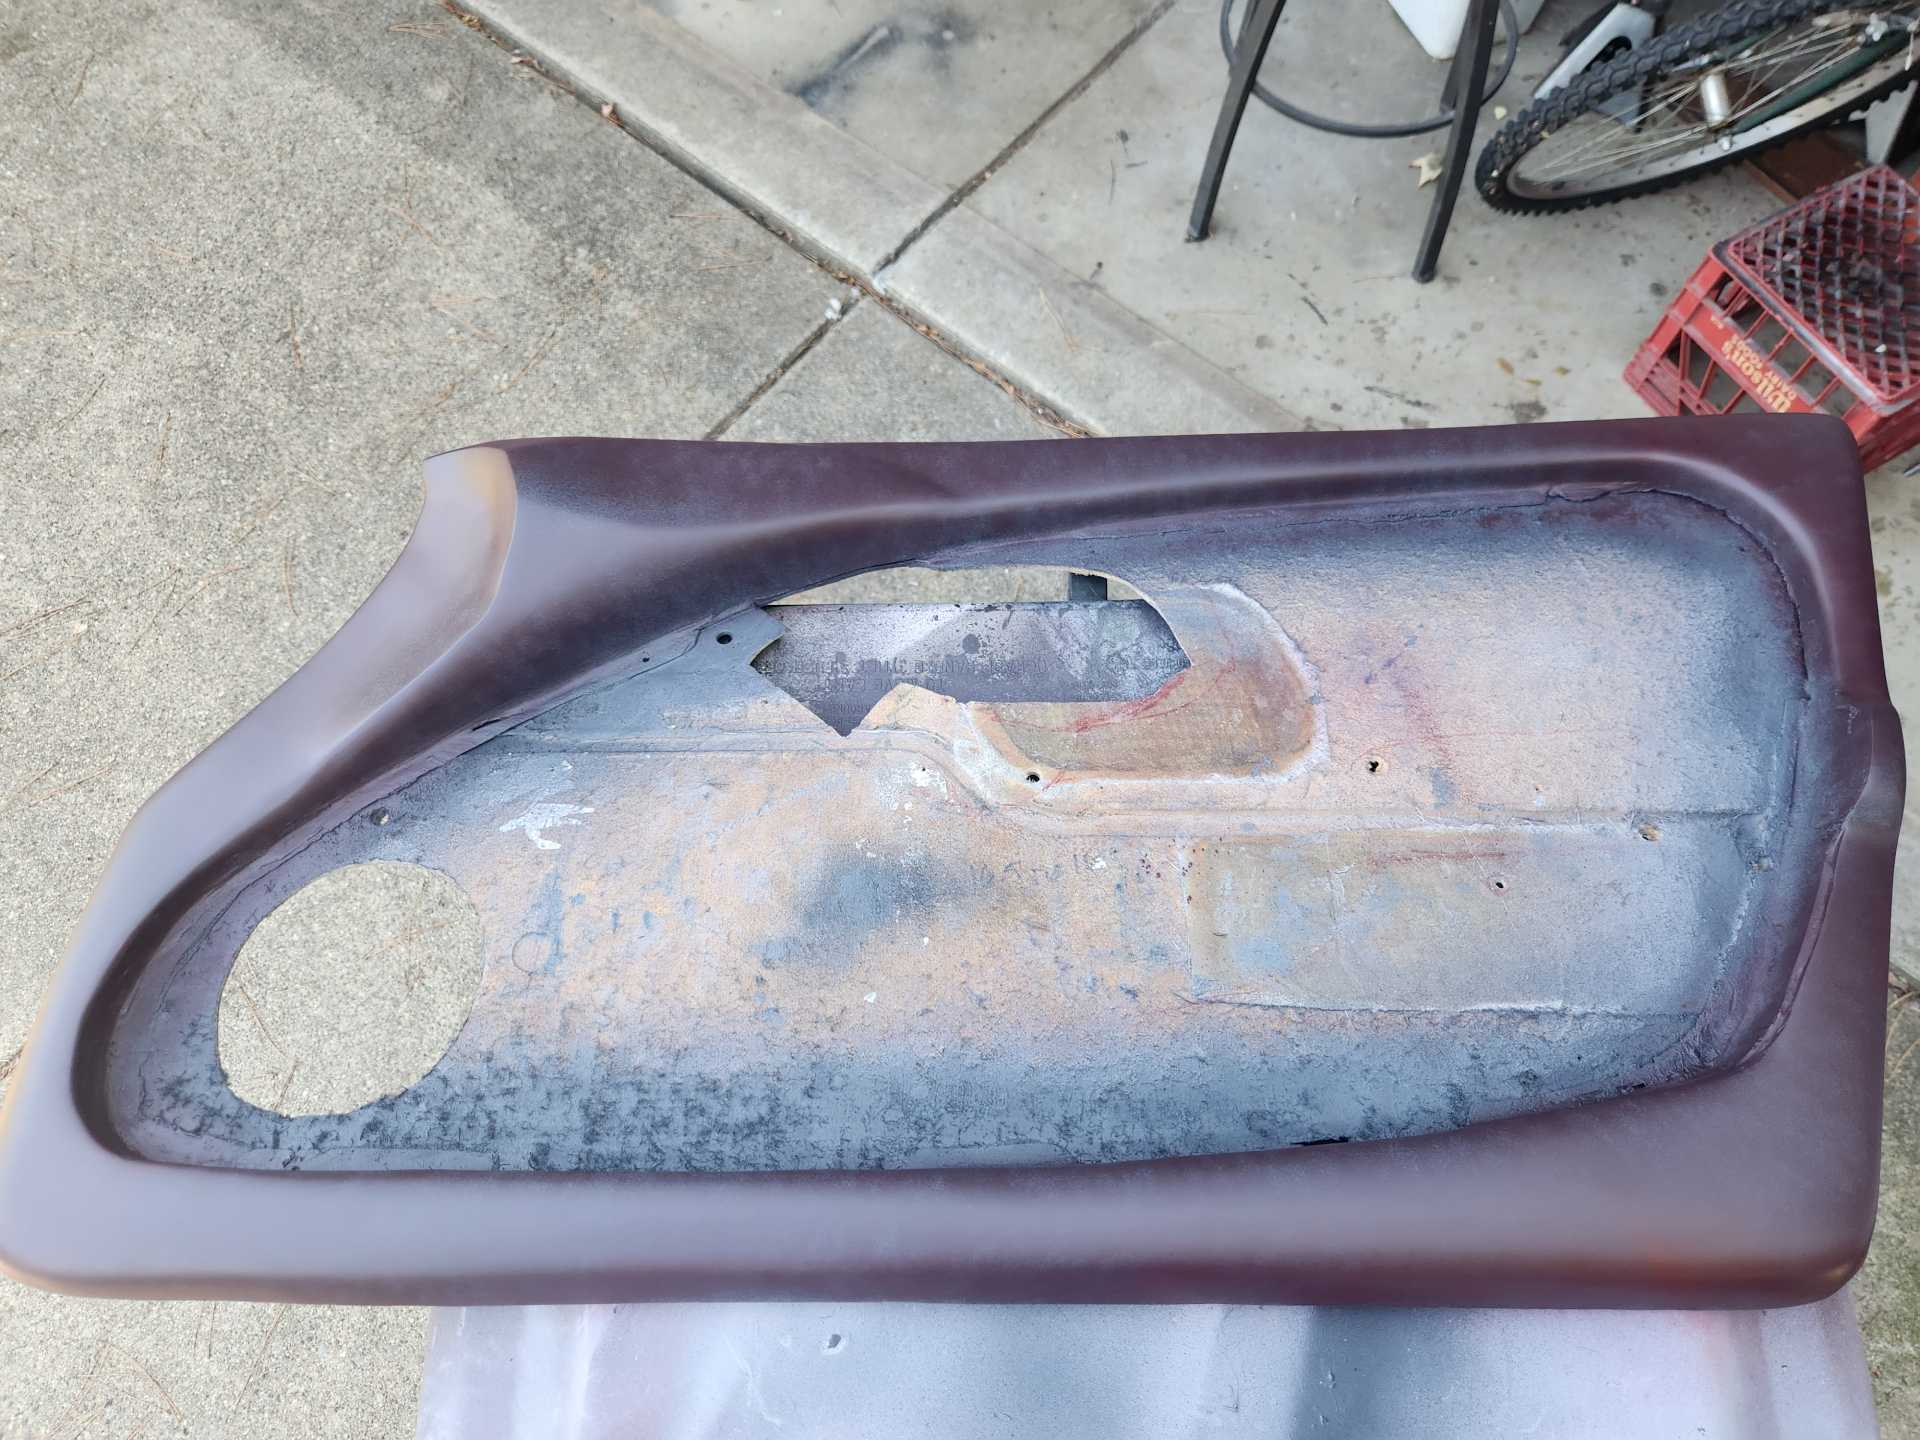
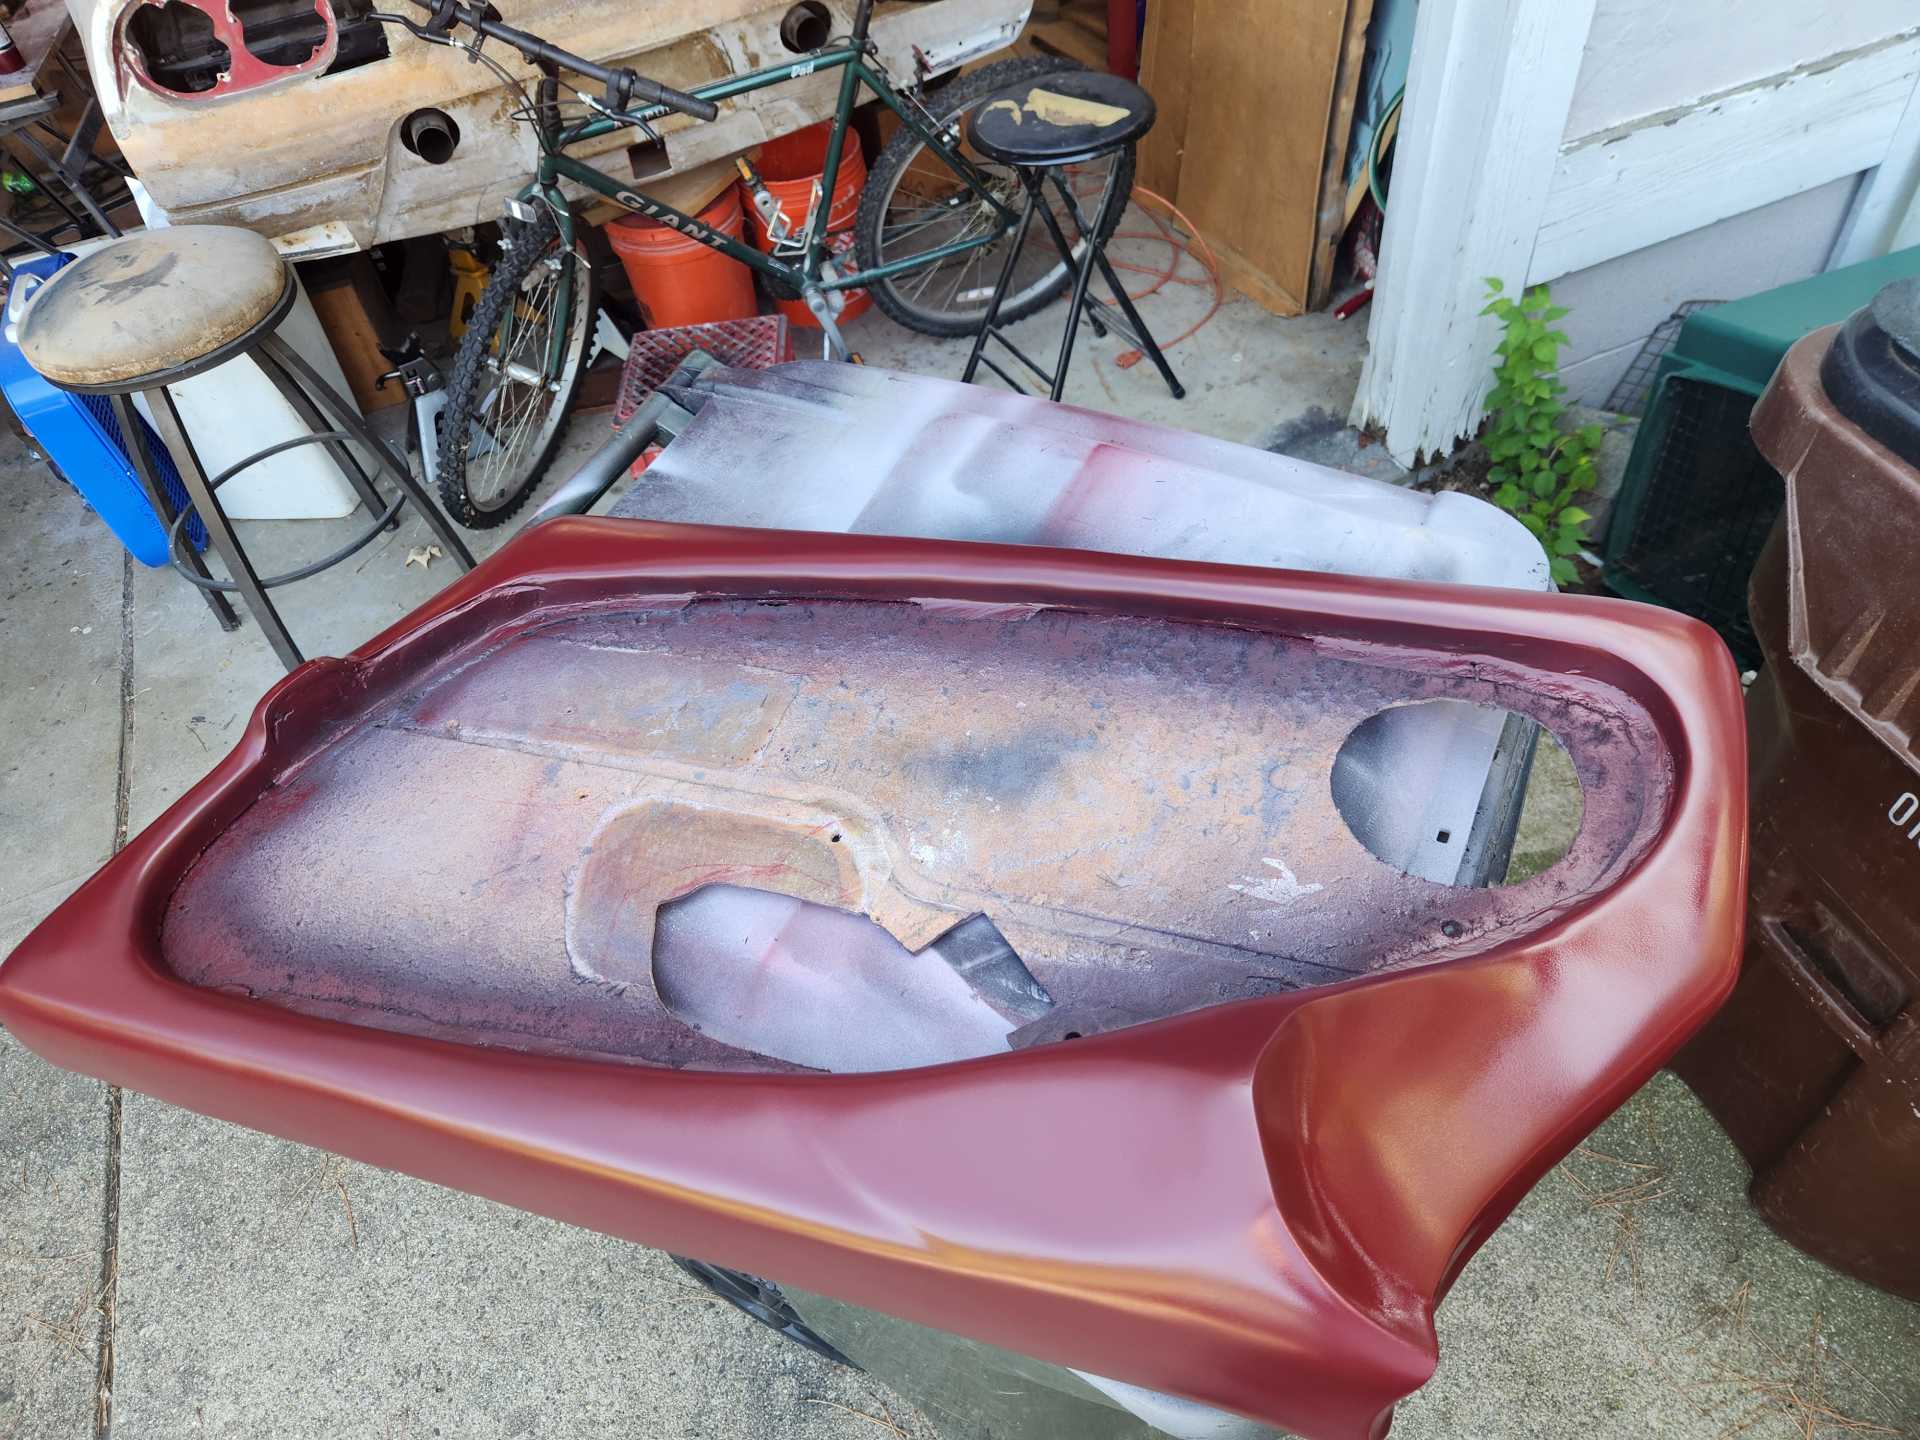
I pulled all of the panels out of storage. They have been cleaned and painted SEM Napa Red. I pulled the dash out last weekend, it is also now Napa Red, with silver and black accents. I also pulled off the door I created for the airbag cover, went to the scrap yard and pulled a mint cover that will be installed, but I ran out of paint, so that's on order.
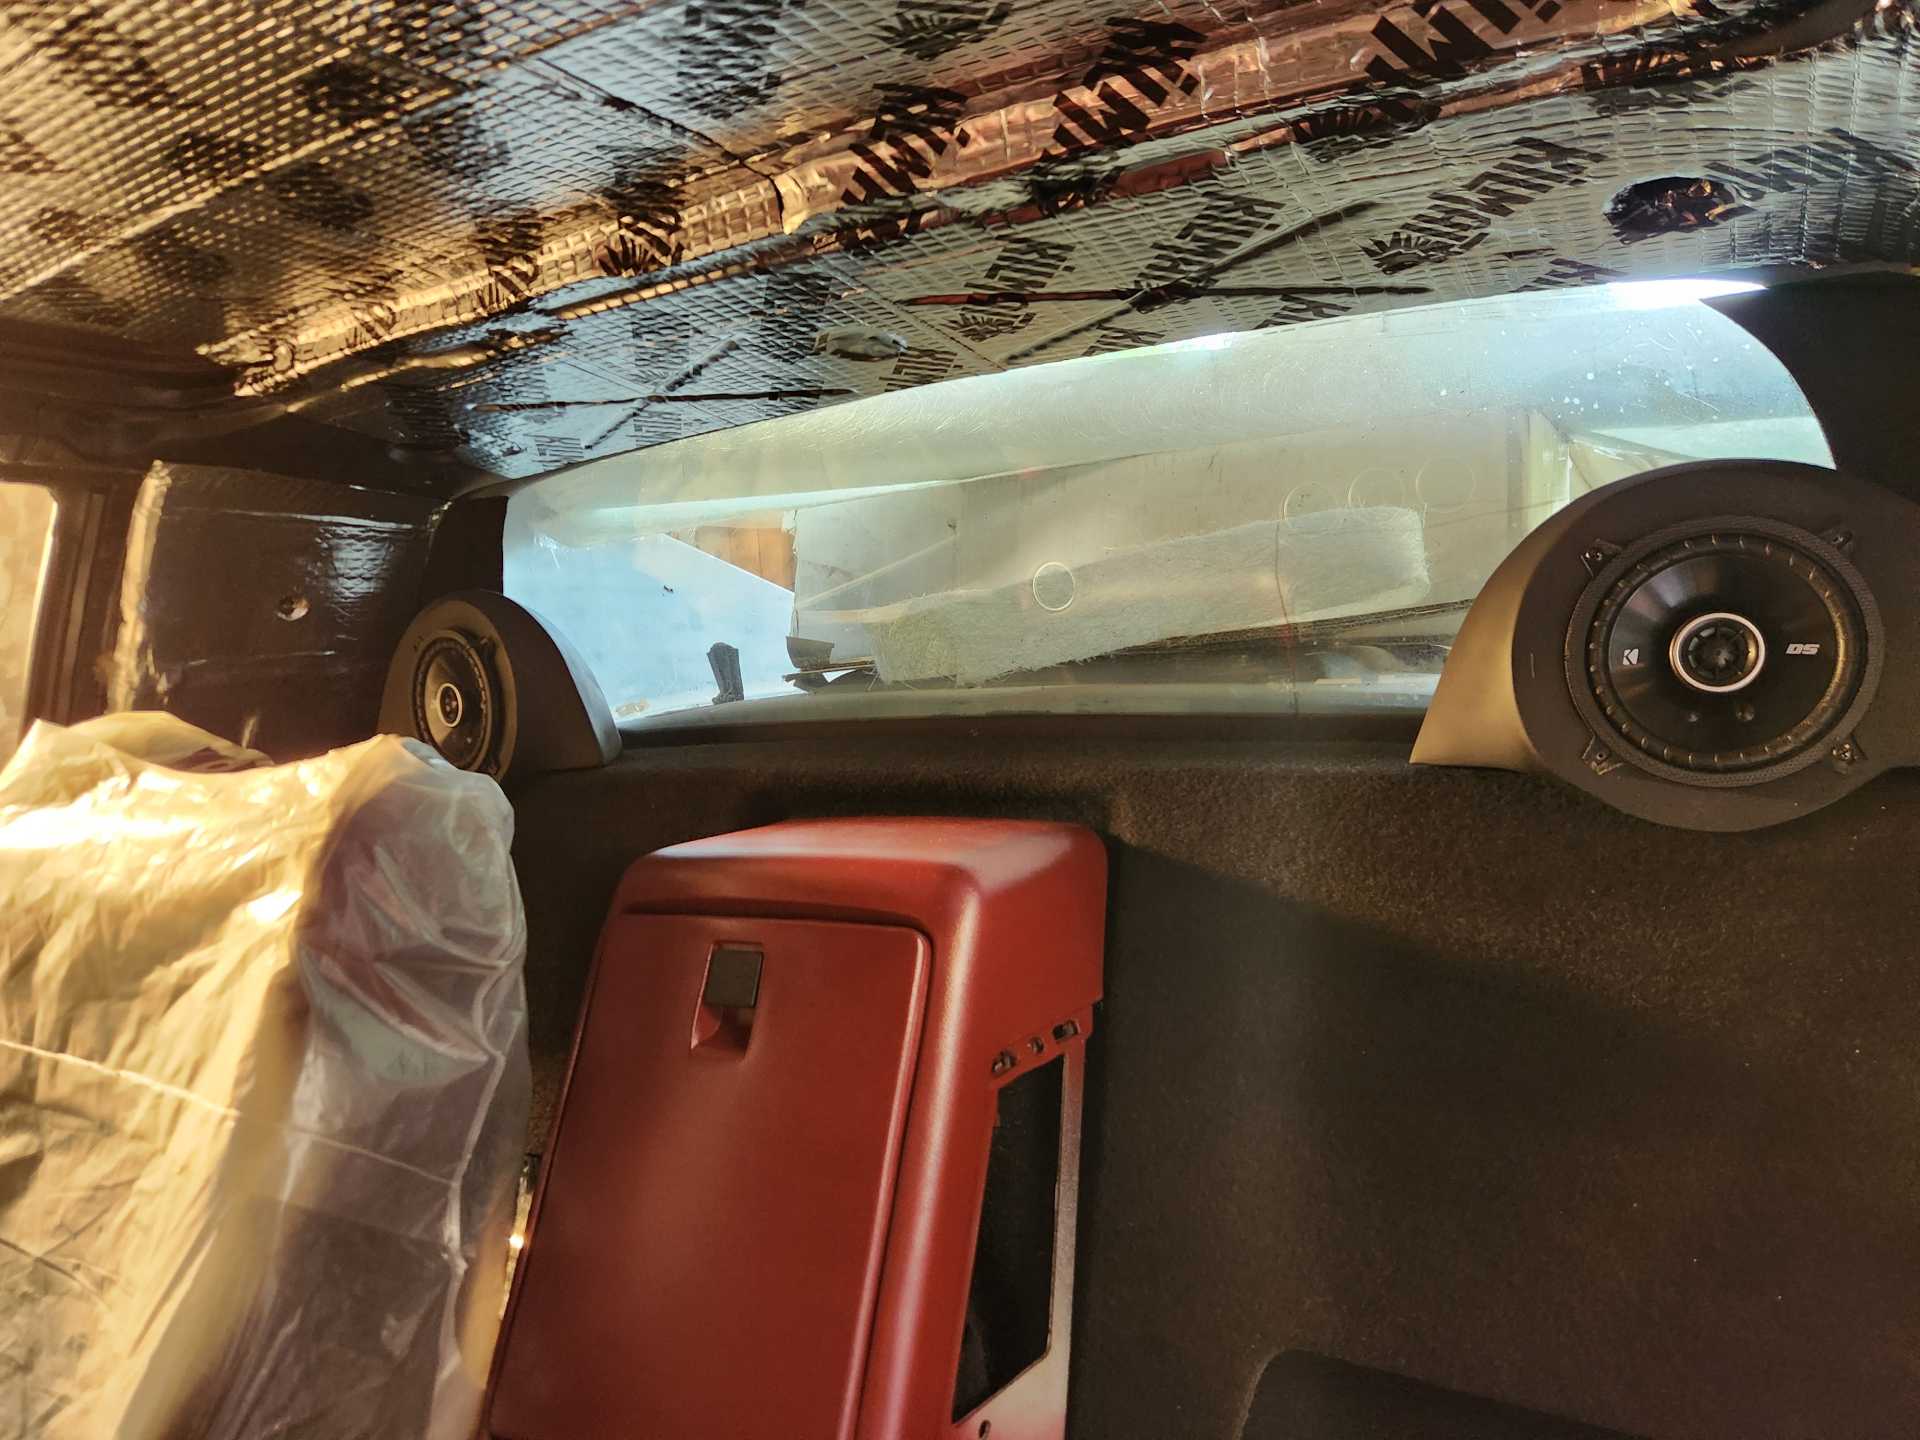
Most of the roof was covered with 50 mil sound deadener (a little to go on passenger side).
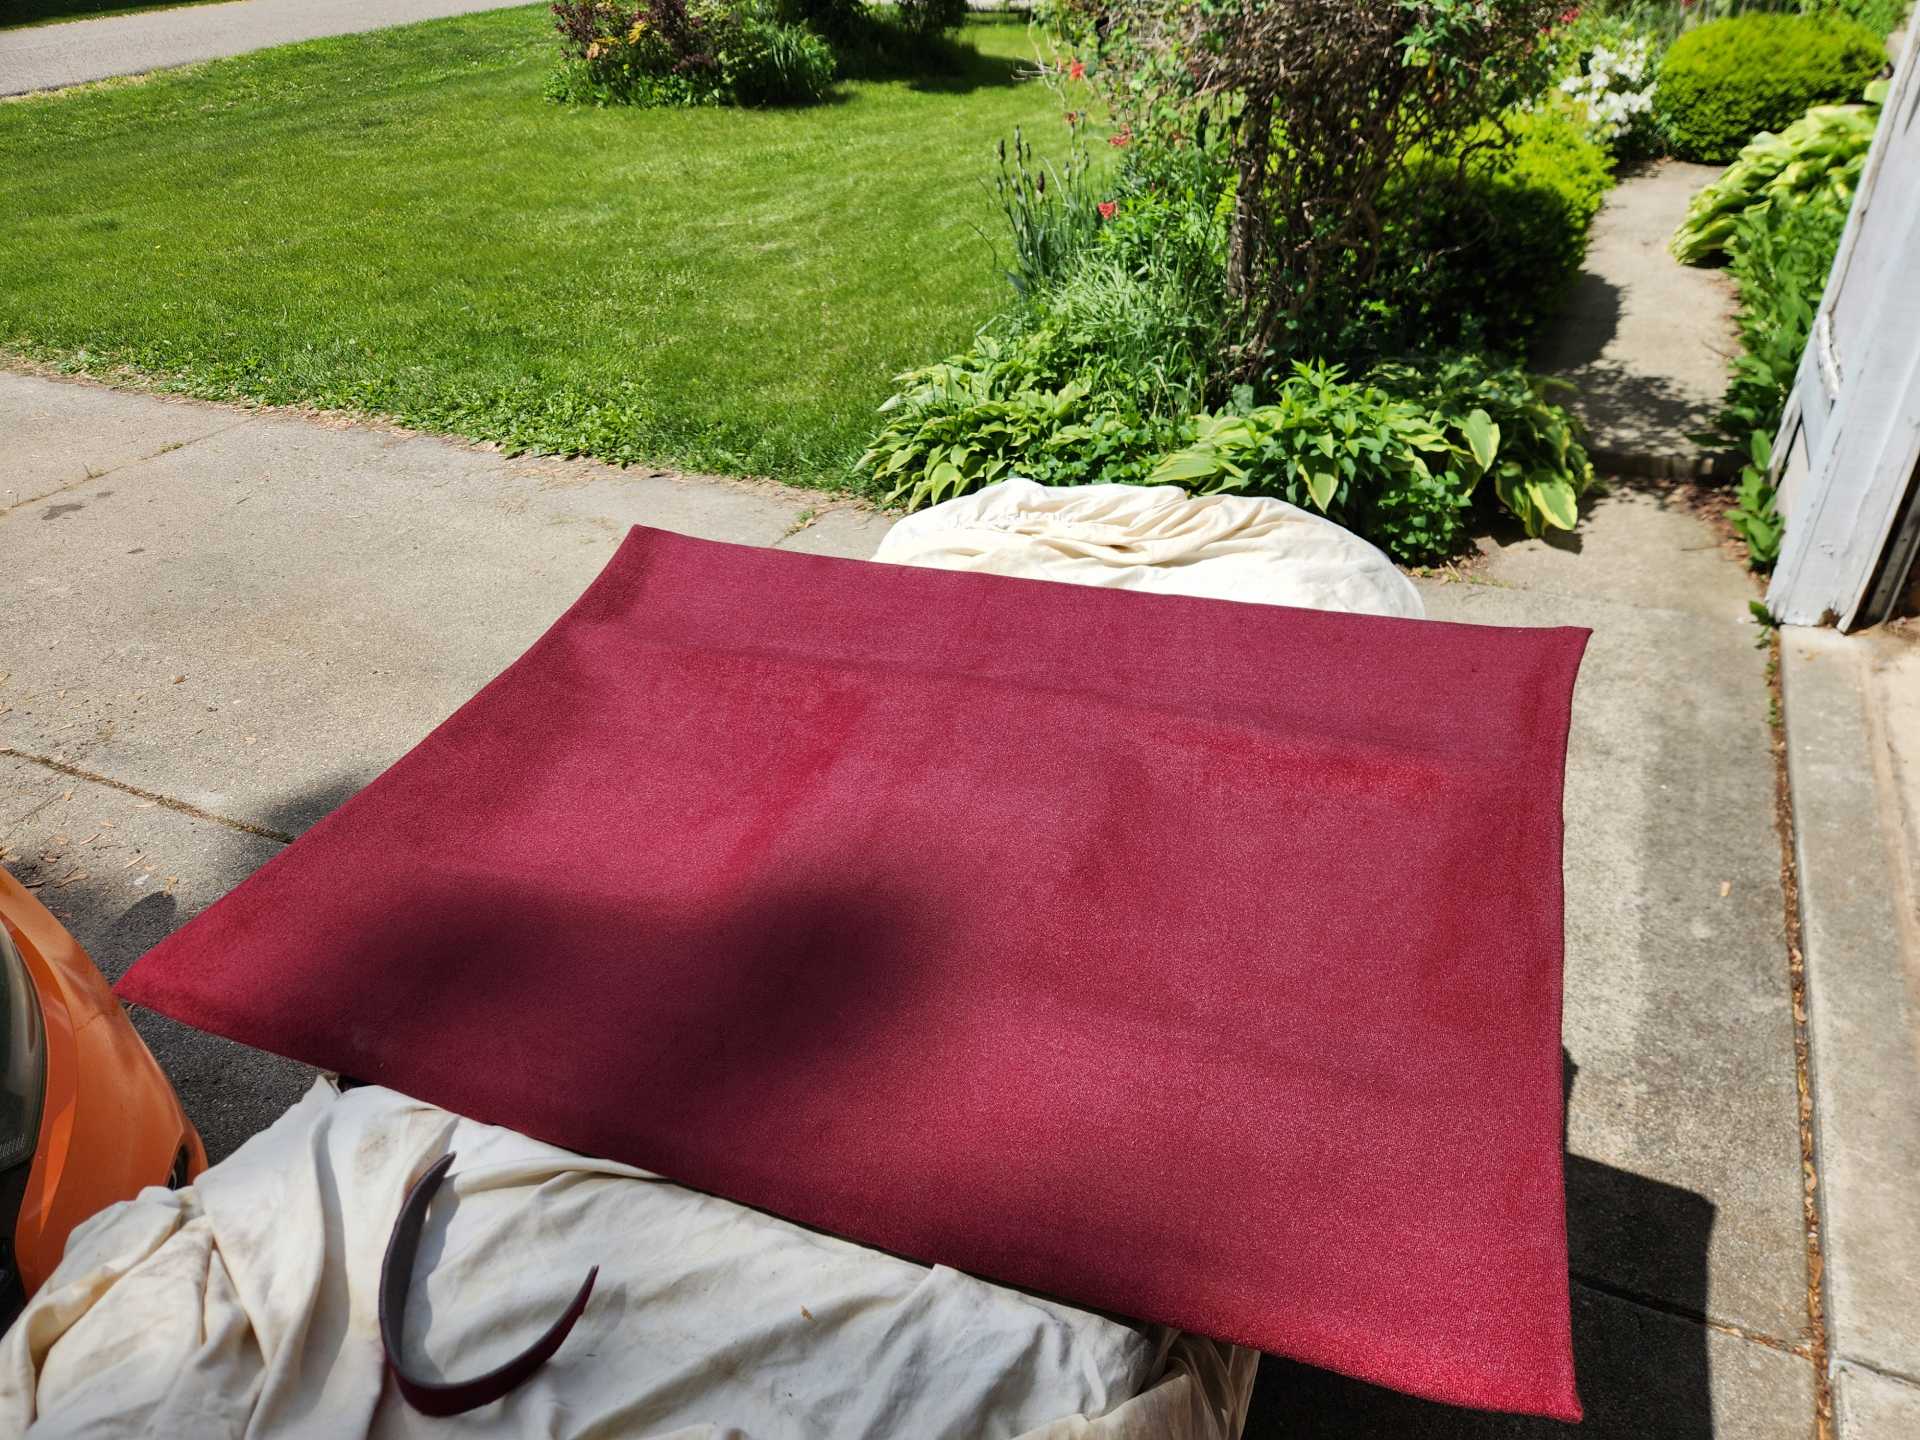
The grey headliner was stripped. The backer repaired, and recovered with a pretty close match to Napa Red.
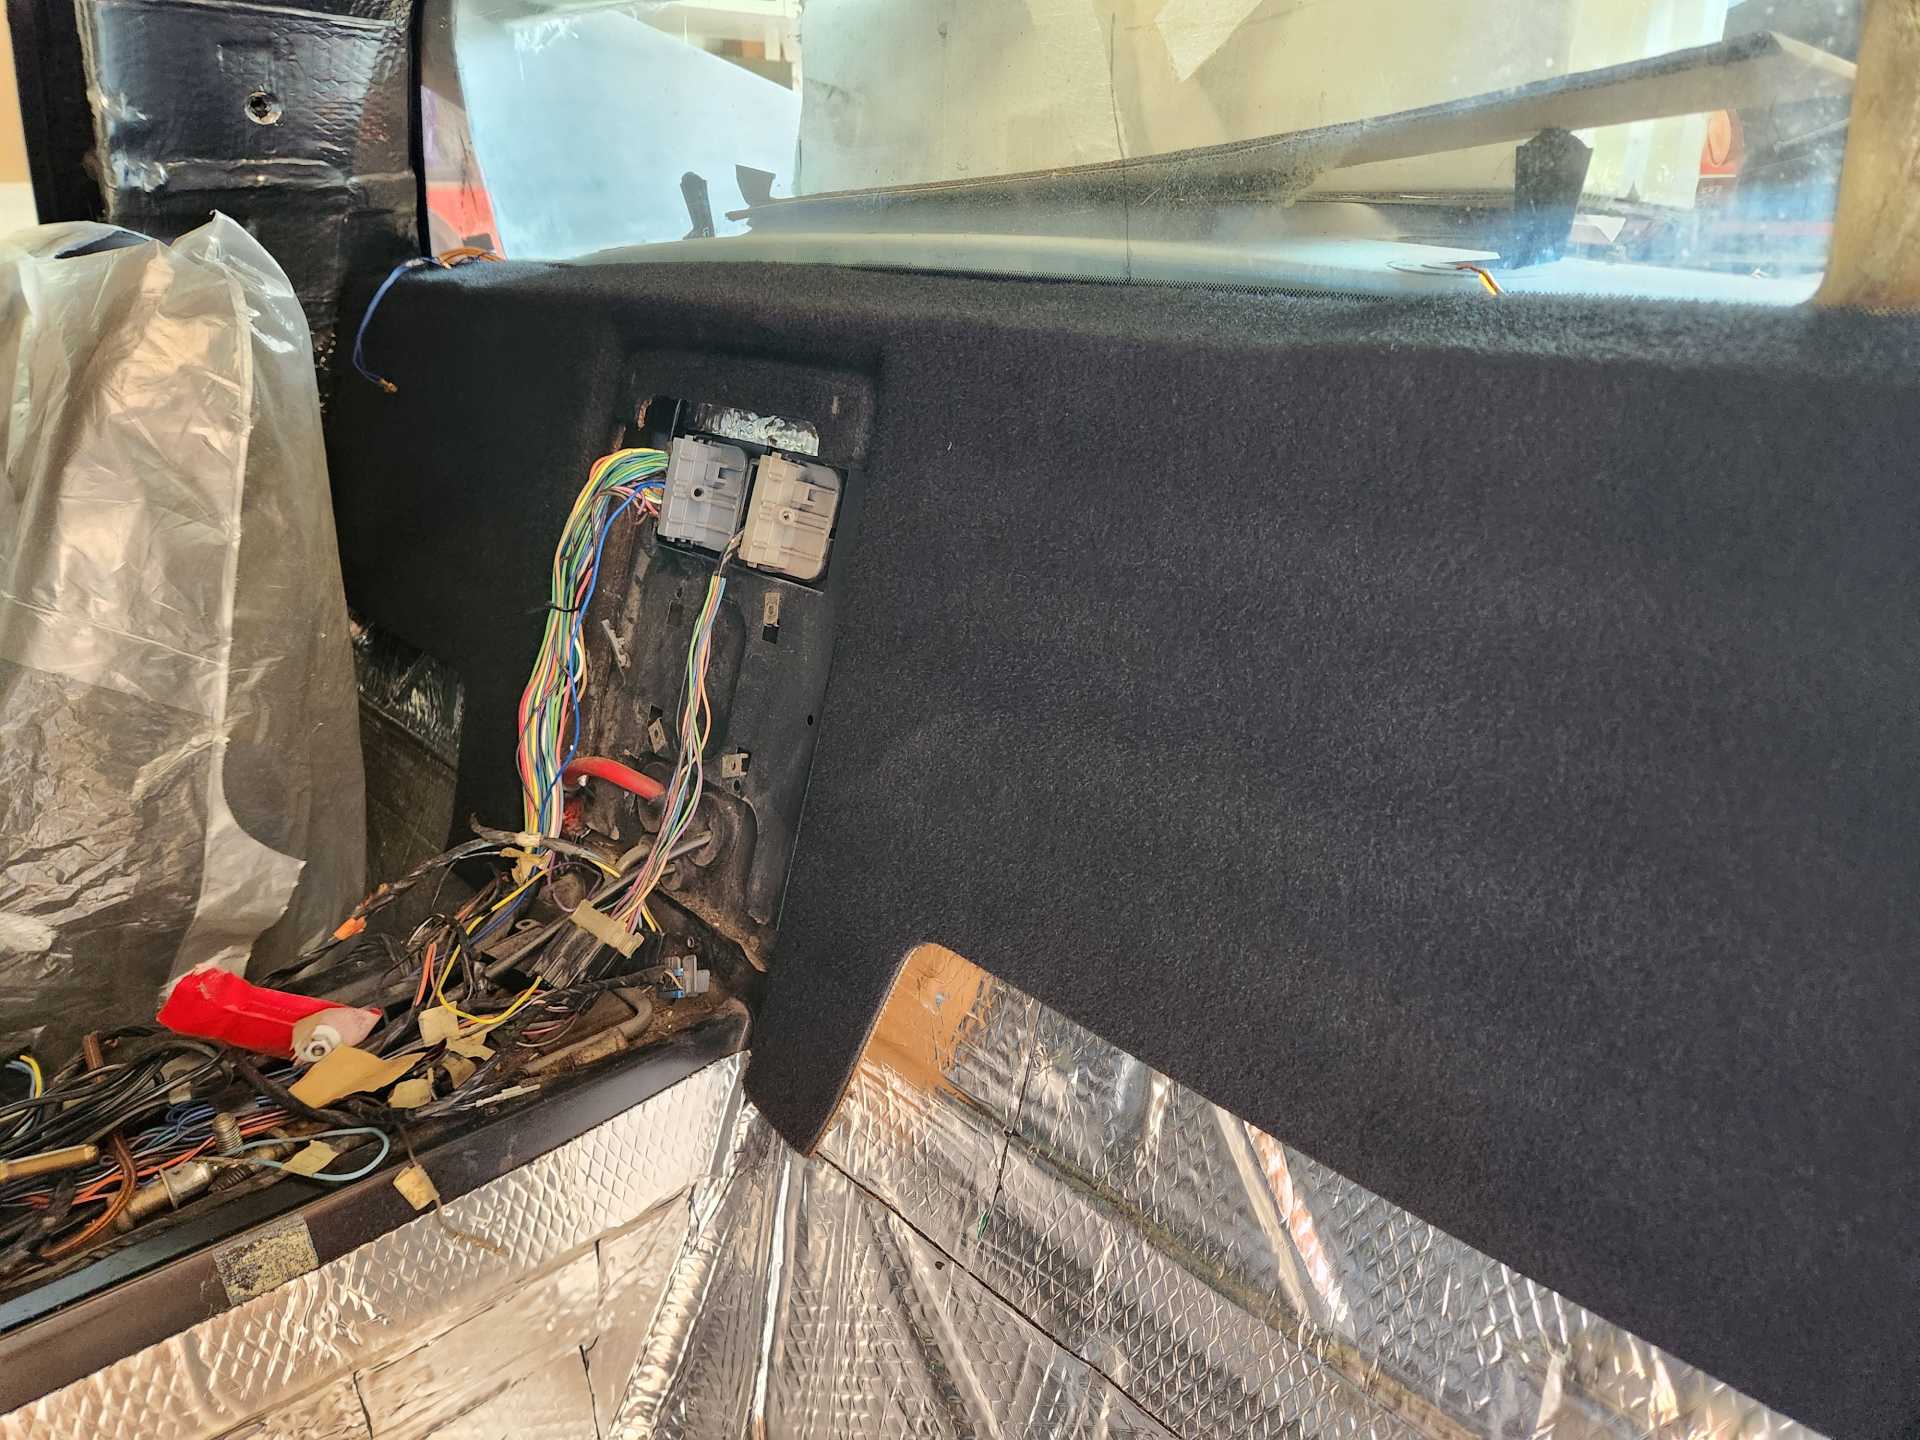
I also spent some time adding a new fuse box to the frunck, where I'm getting power for a new Boss amp and ran power for the power seats.
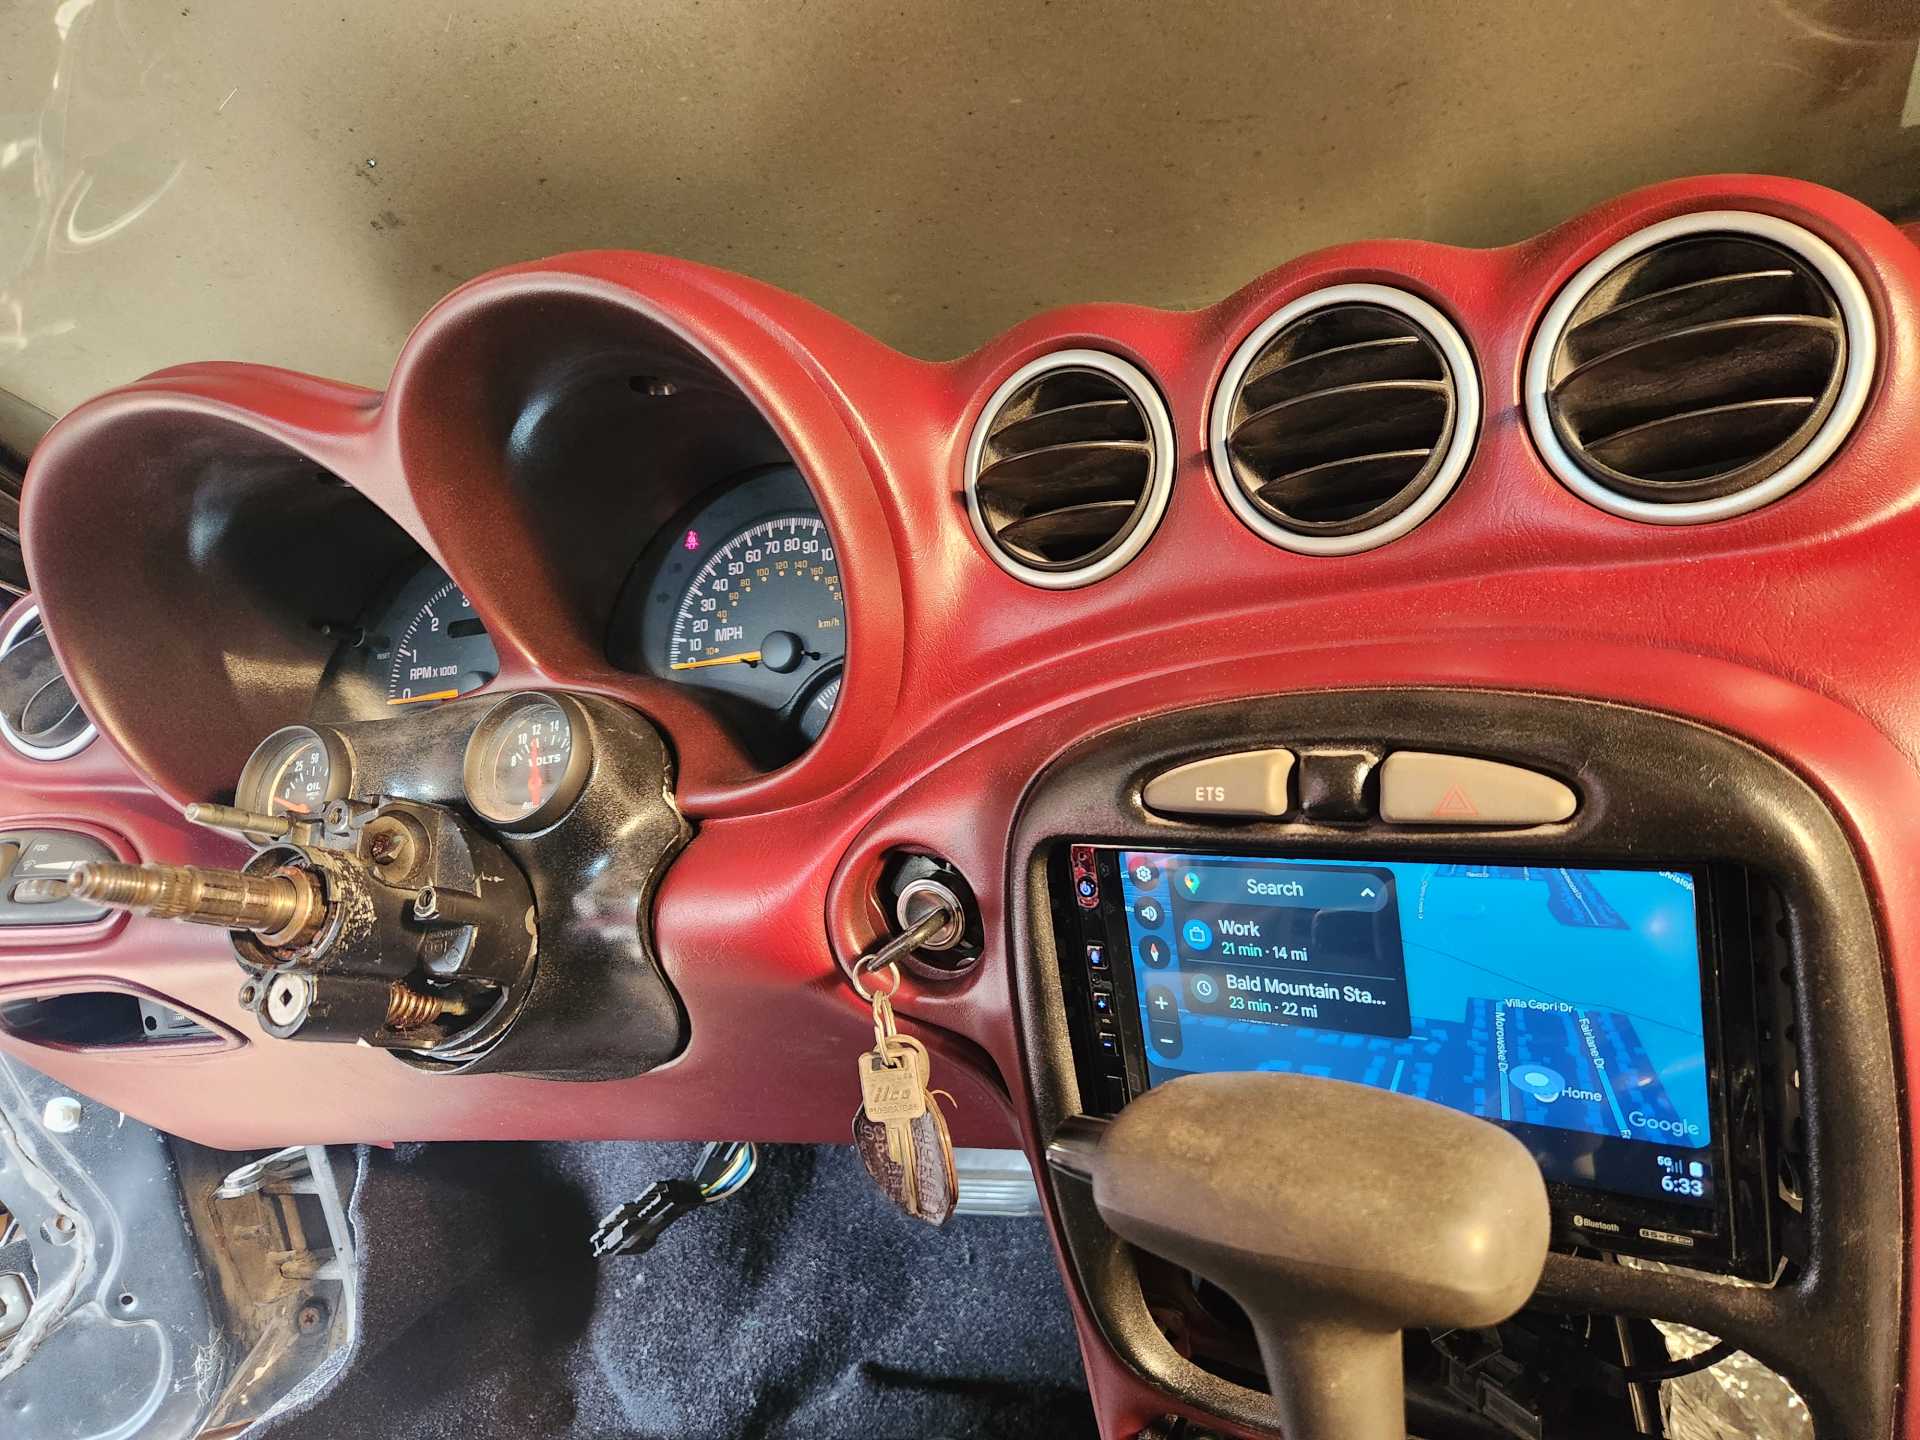
And, lastly, I ran though and found all of the proper stereo wiring, then installed a new Boss 7" multi-media head unit.
Heck, I've got a couple minutes, here are some pics...
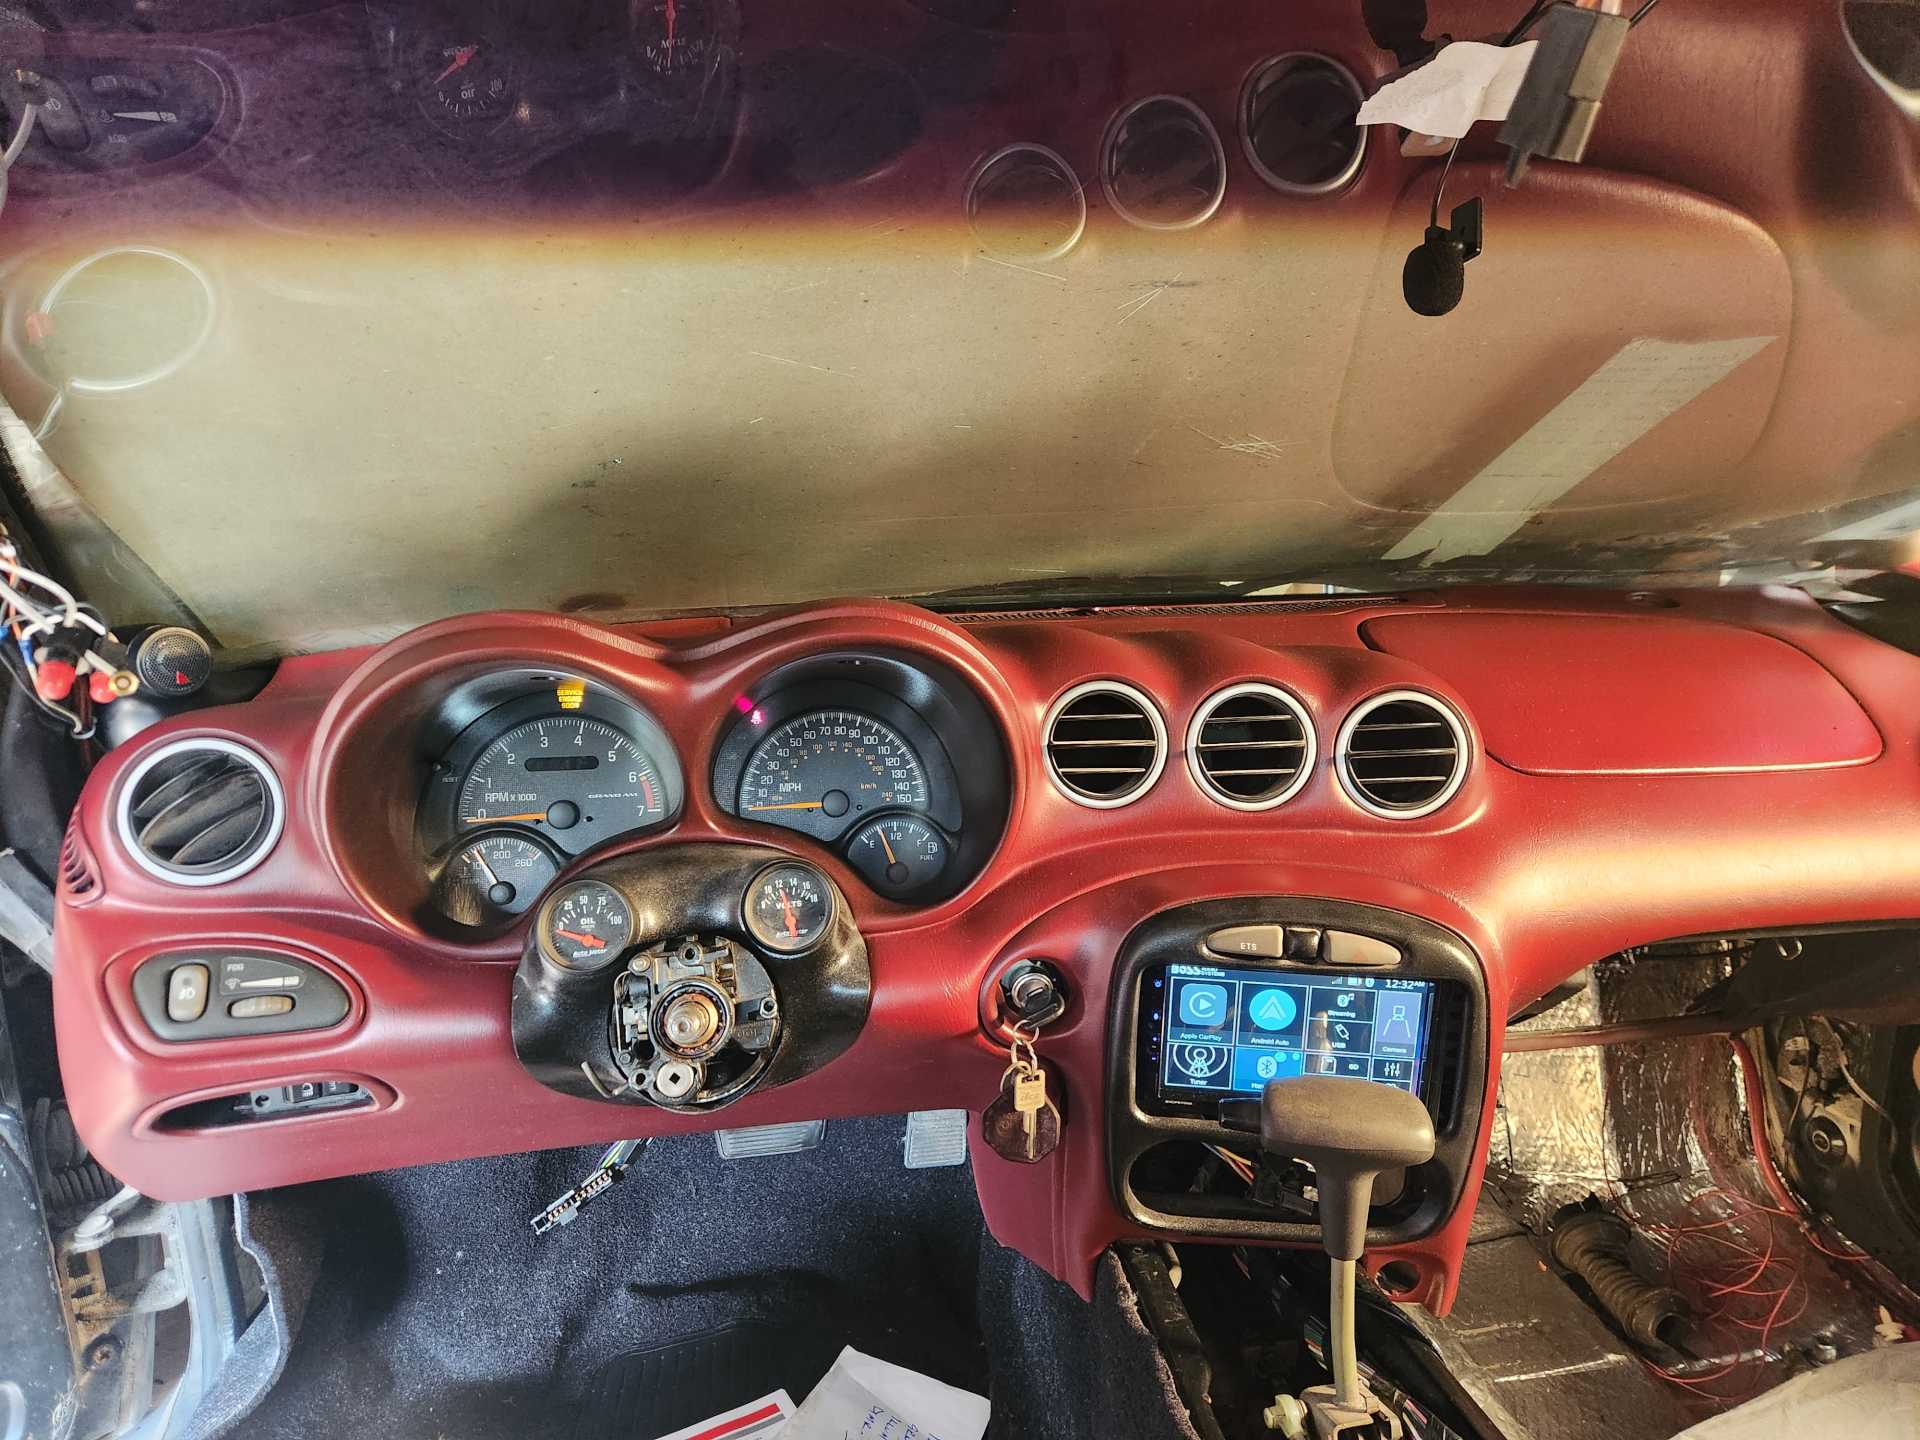
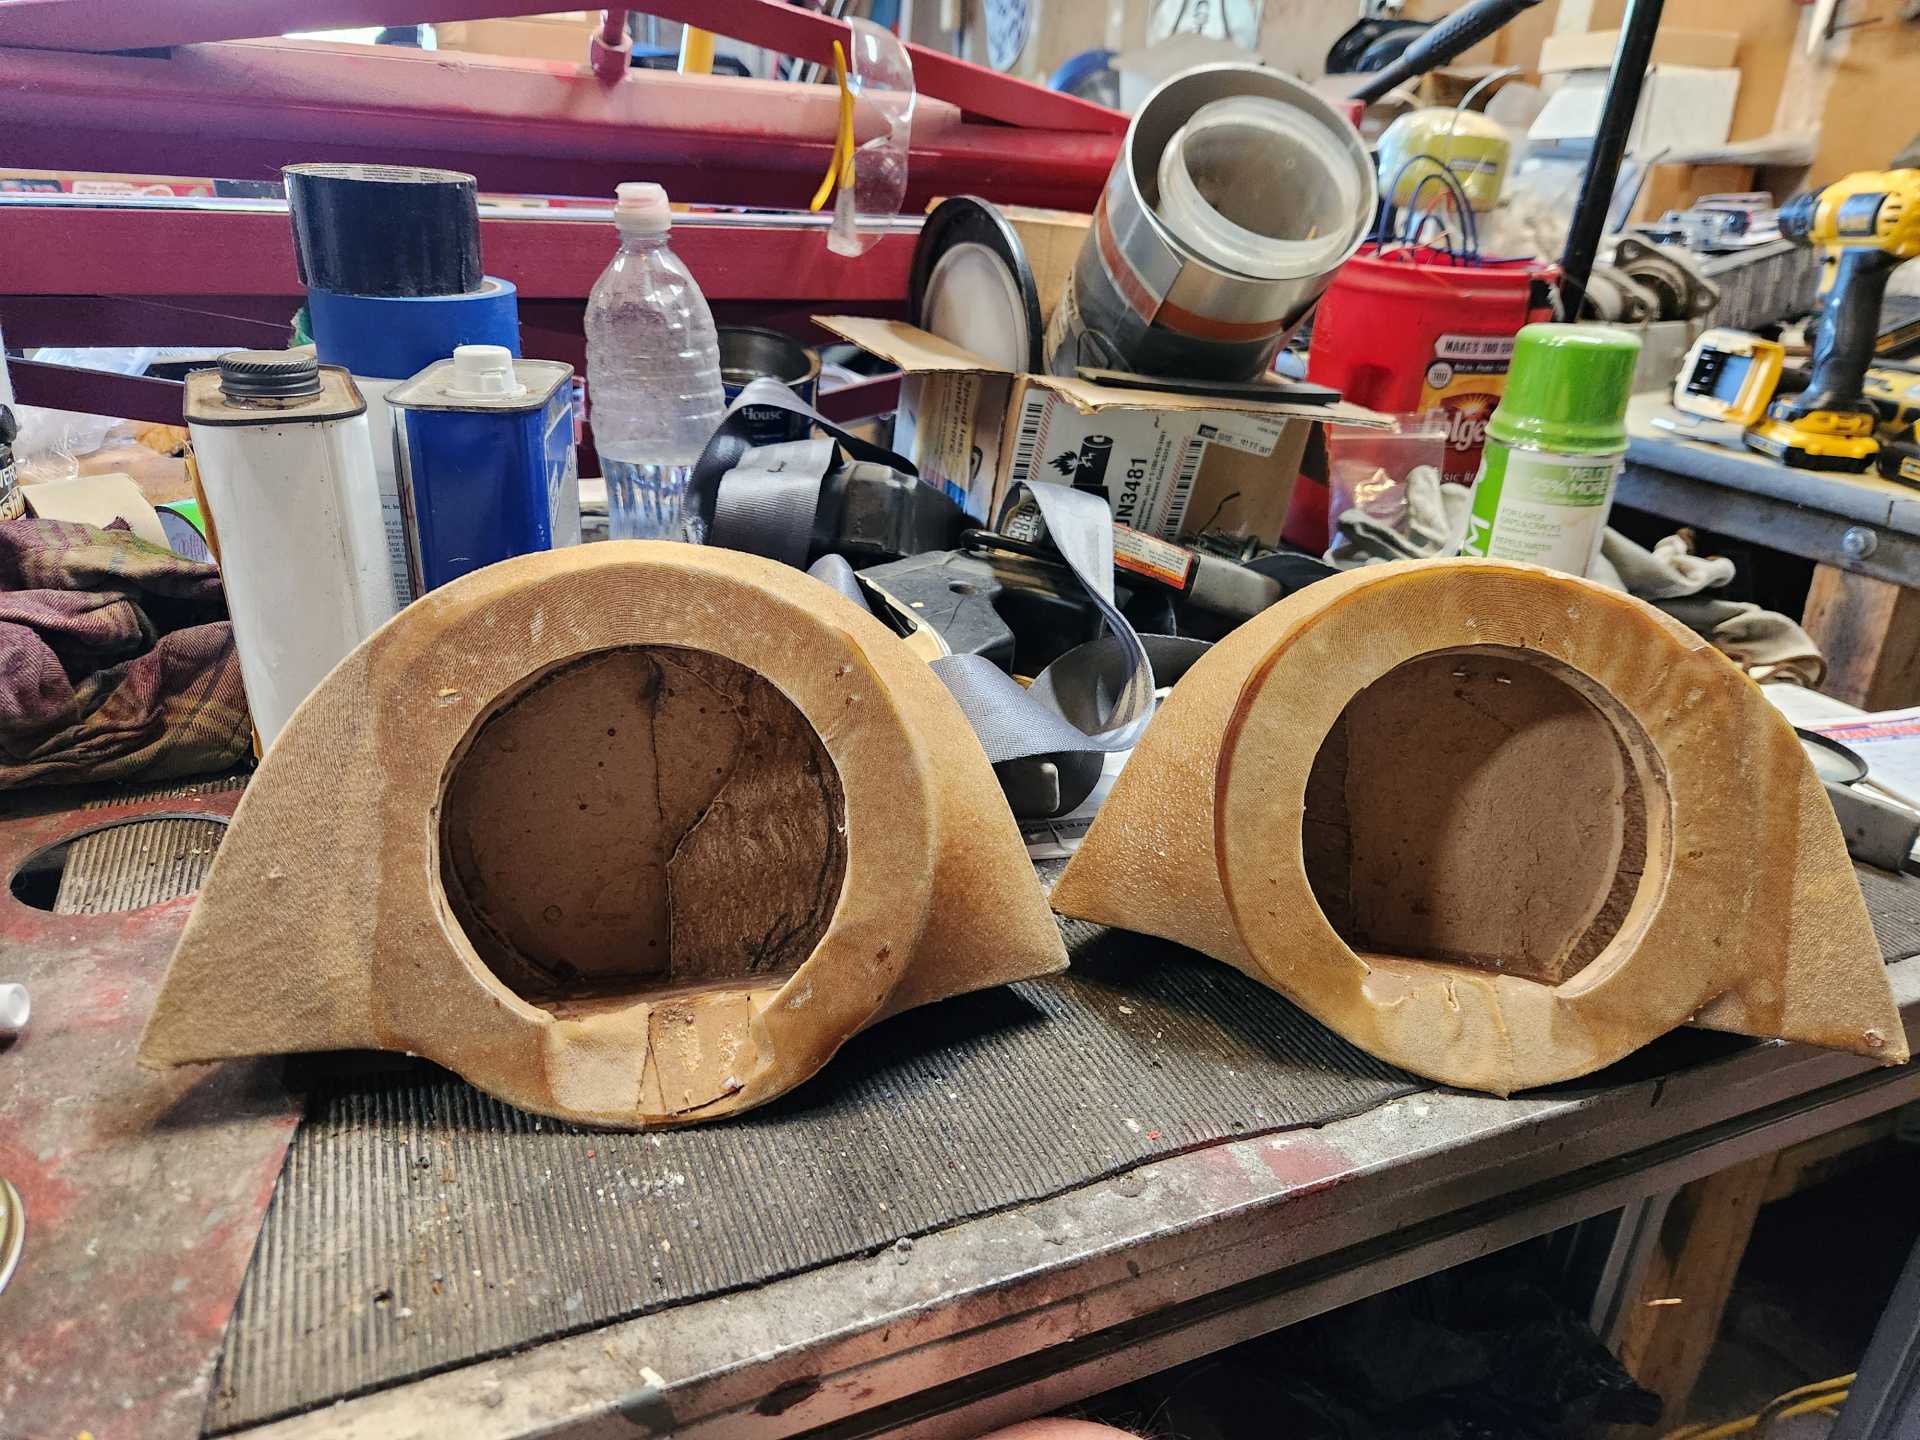
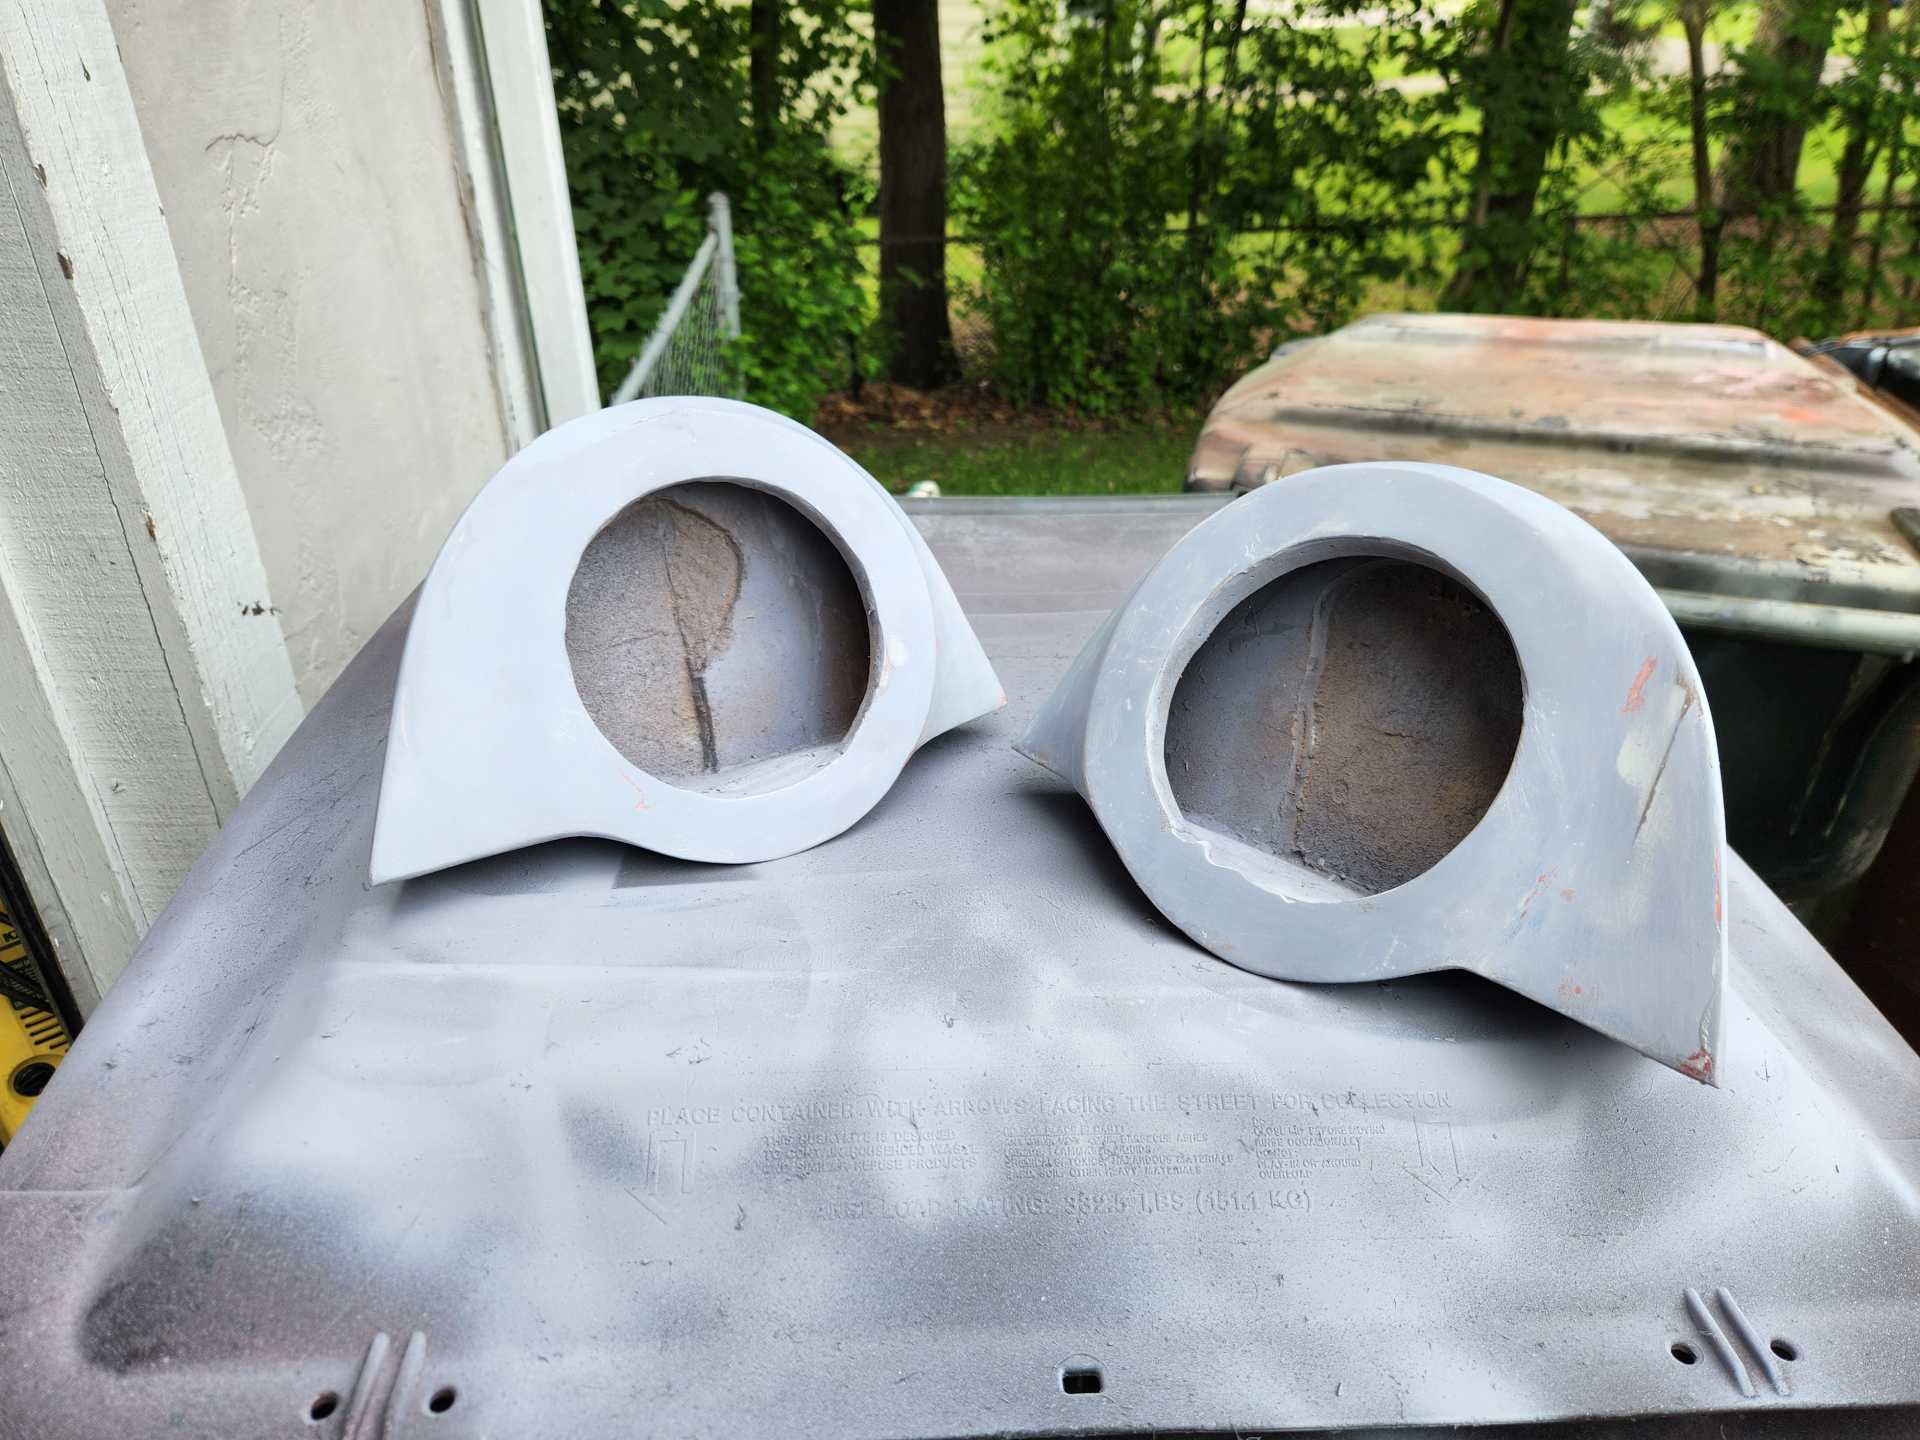
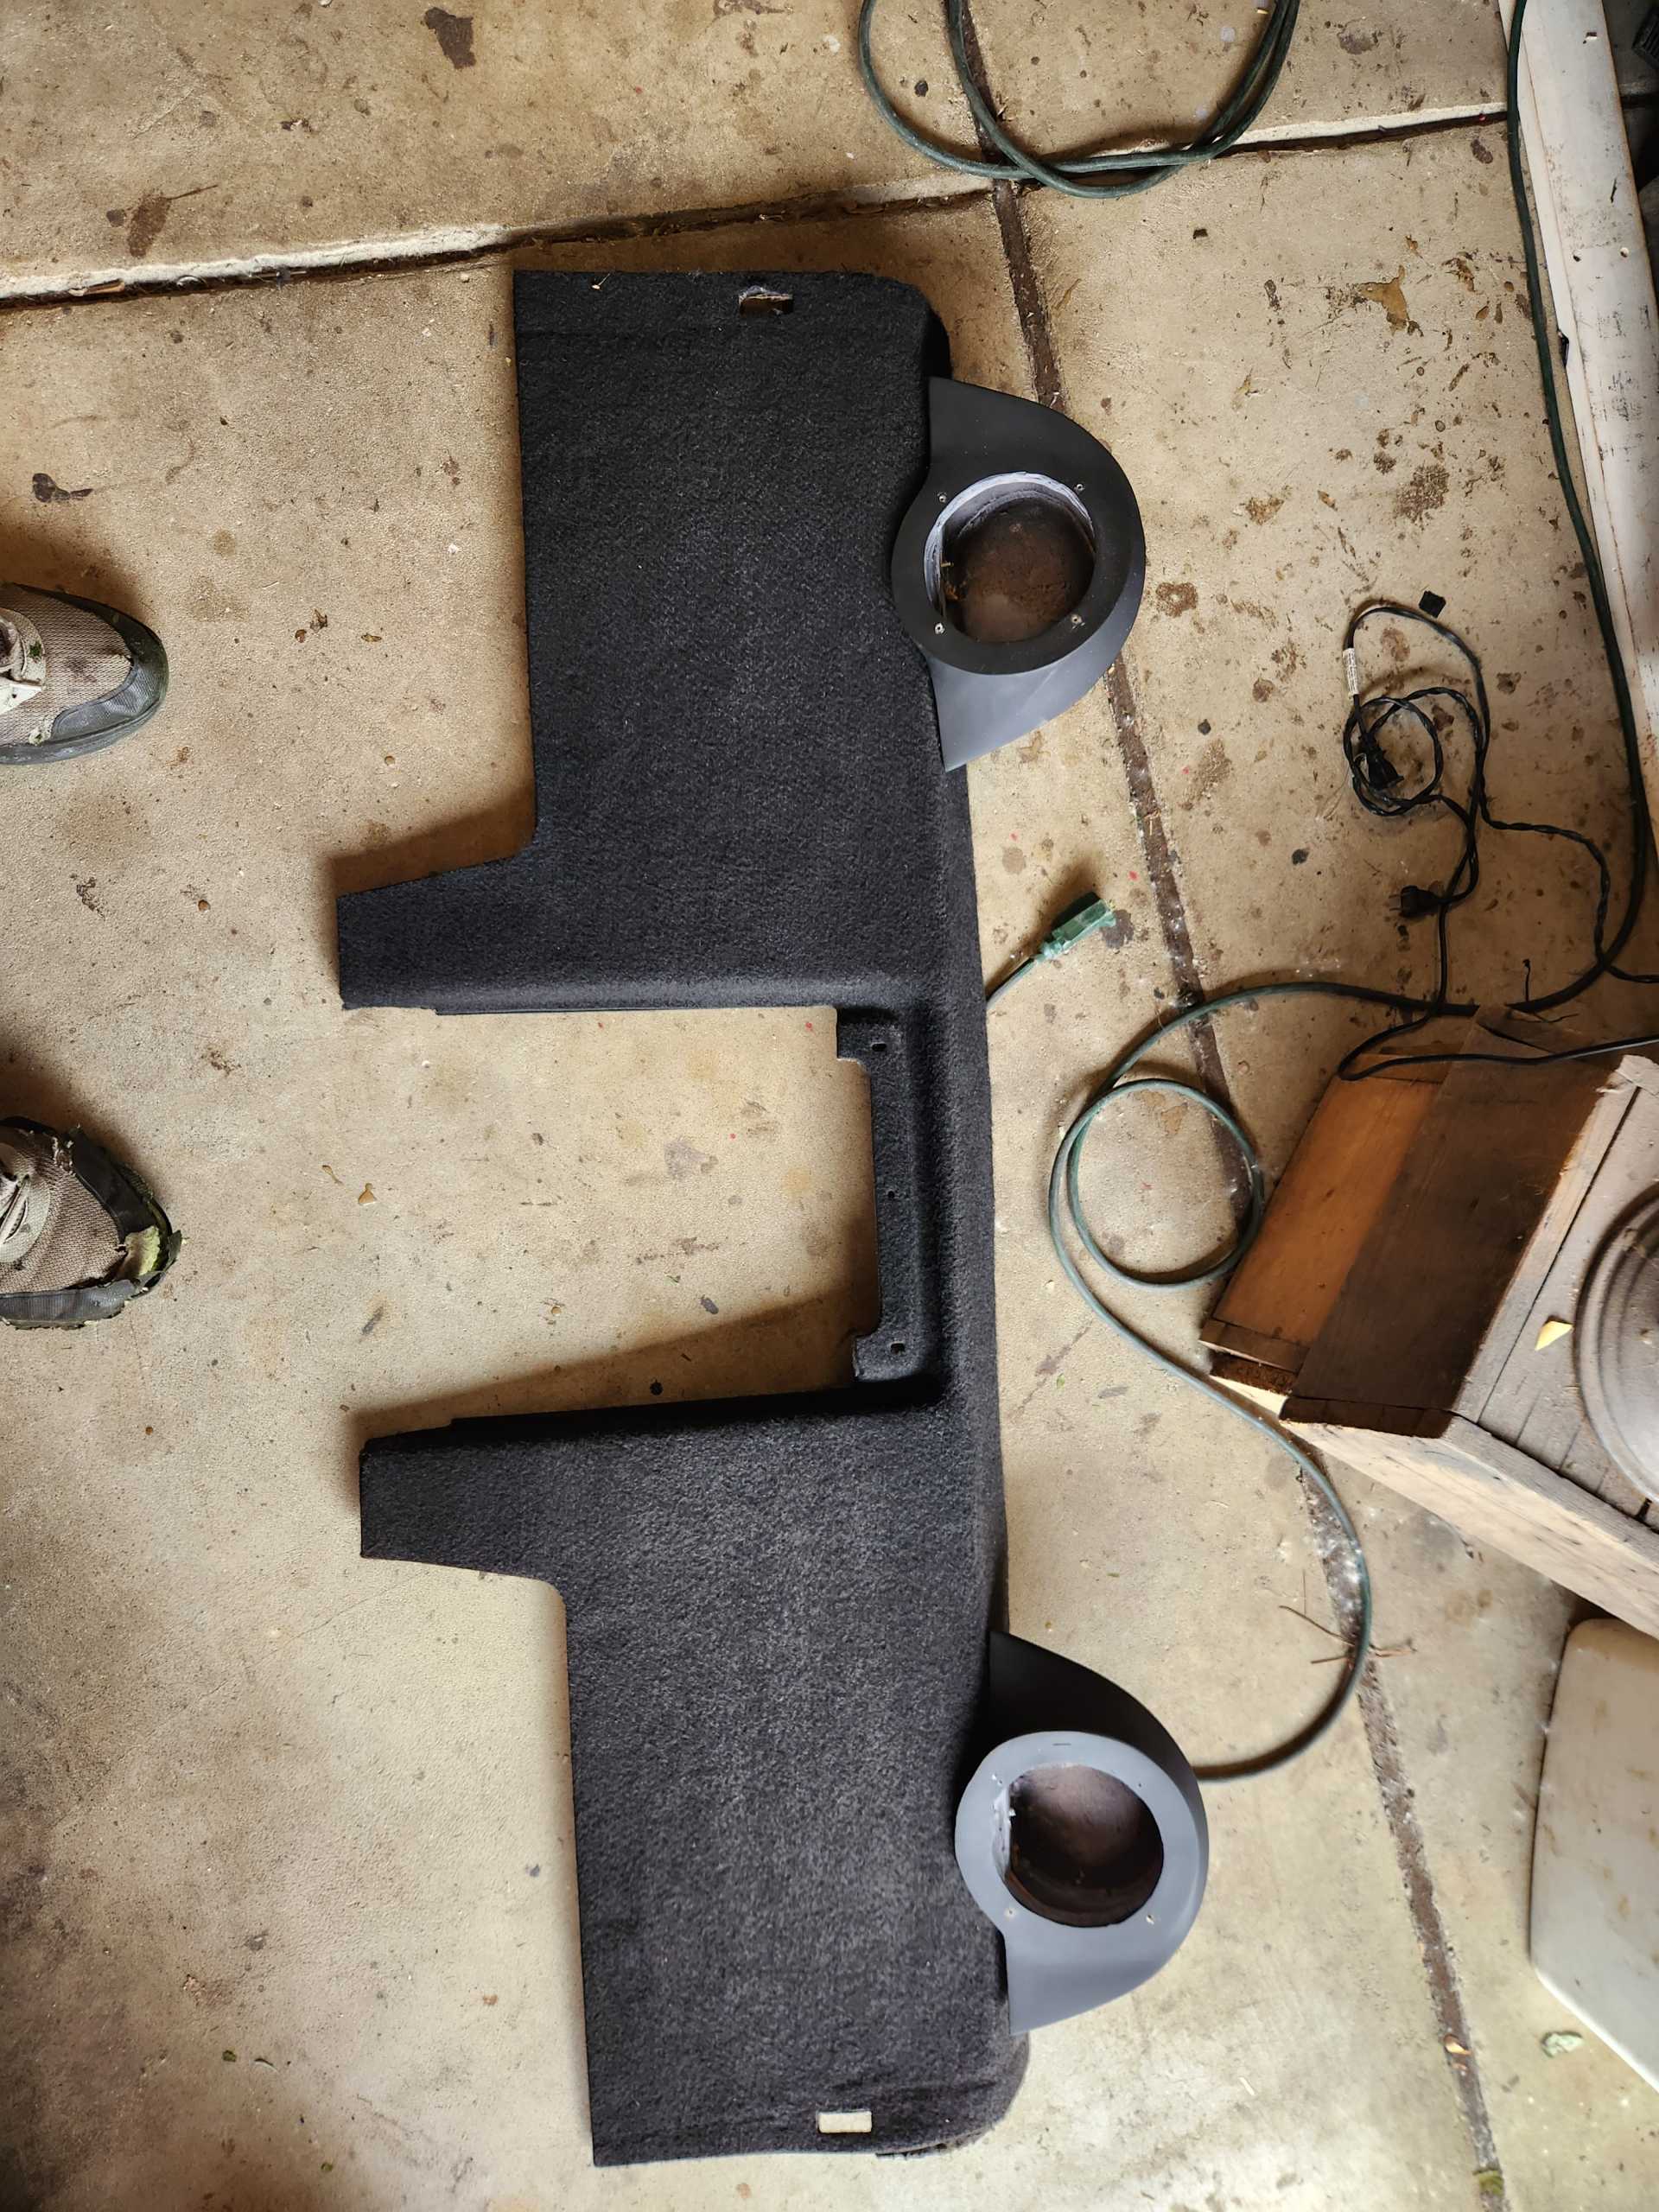
Feels like about 10 years ago, I made some speaker pods for behind the seats. I actually finished and mounted them. I put Kicker 5.25" speakers in them, connected to Kenwood amp (temporarily). And pics, as well as the dash remounted...
Getting real bad at taking pictures along the way.
Spent a lot of time debugging a hopefully bad head unit. New one is on the way.
Spent some time debugging and figuring out what I did umpteen years ago. Now the HVAC blower works.
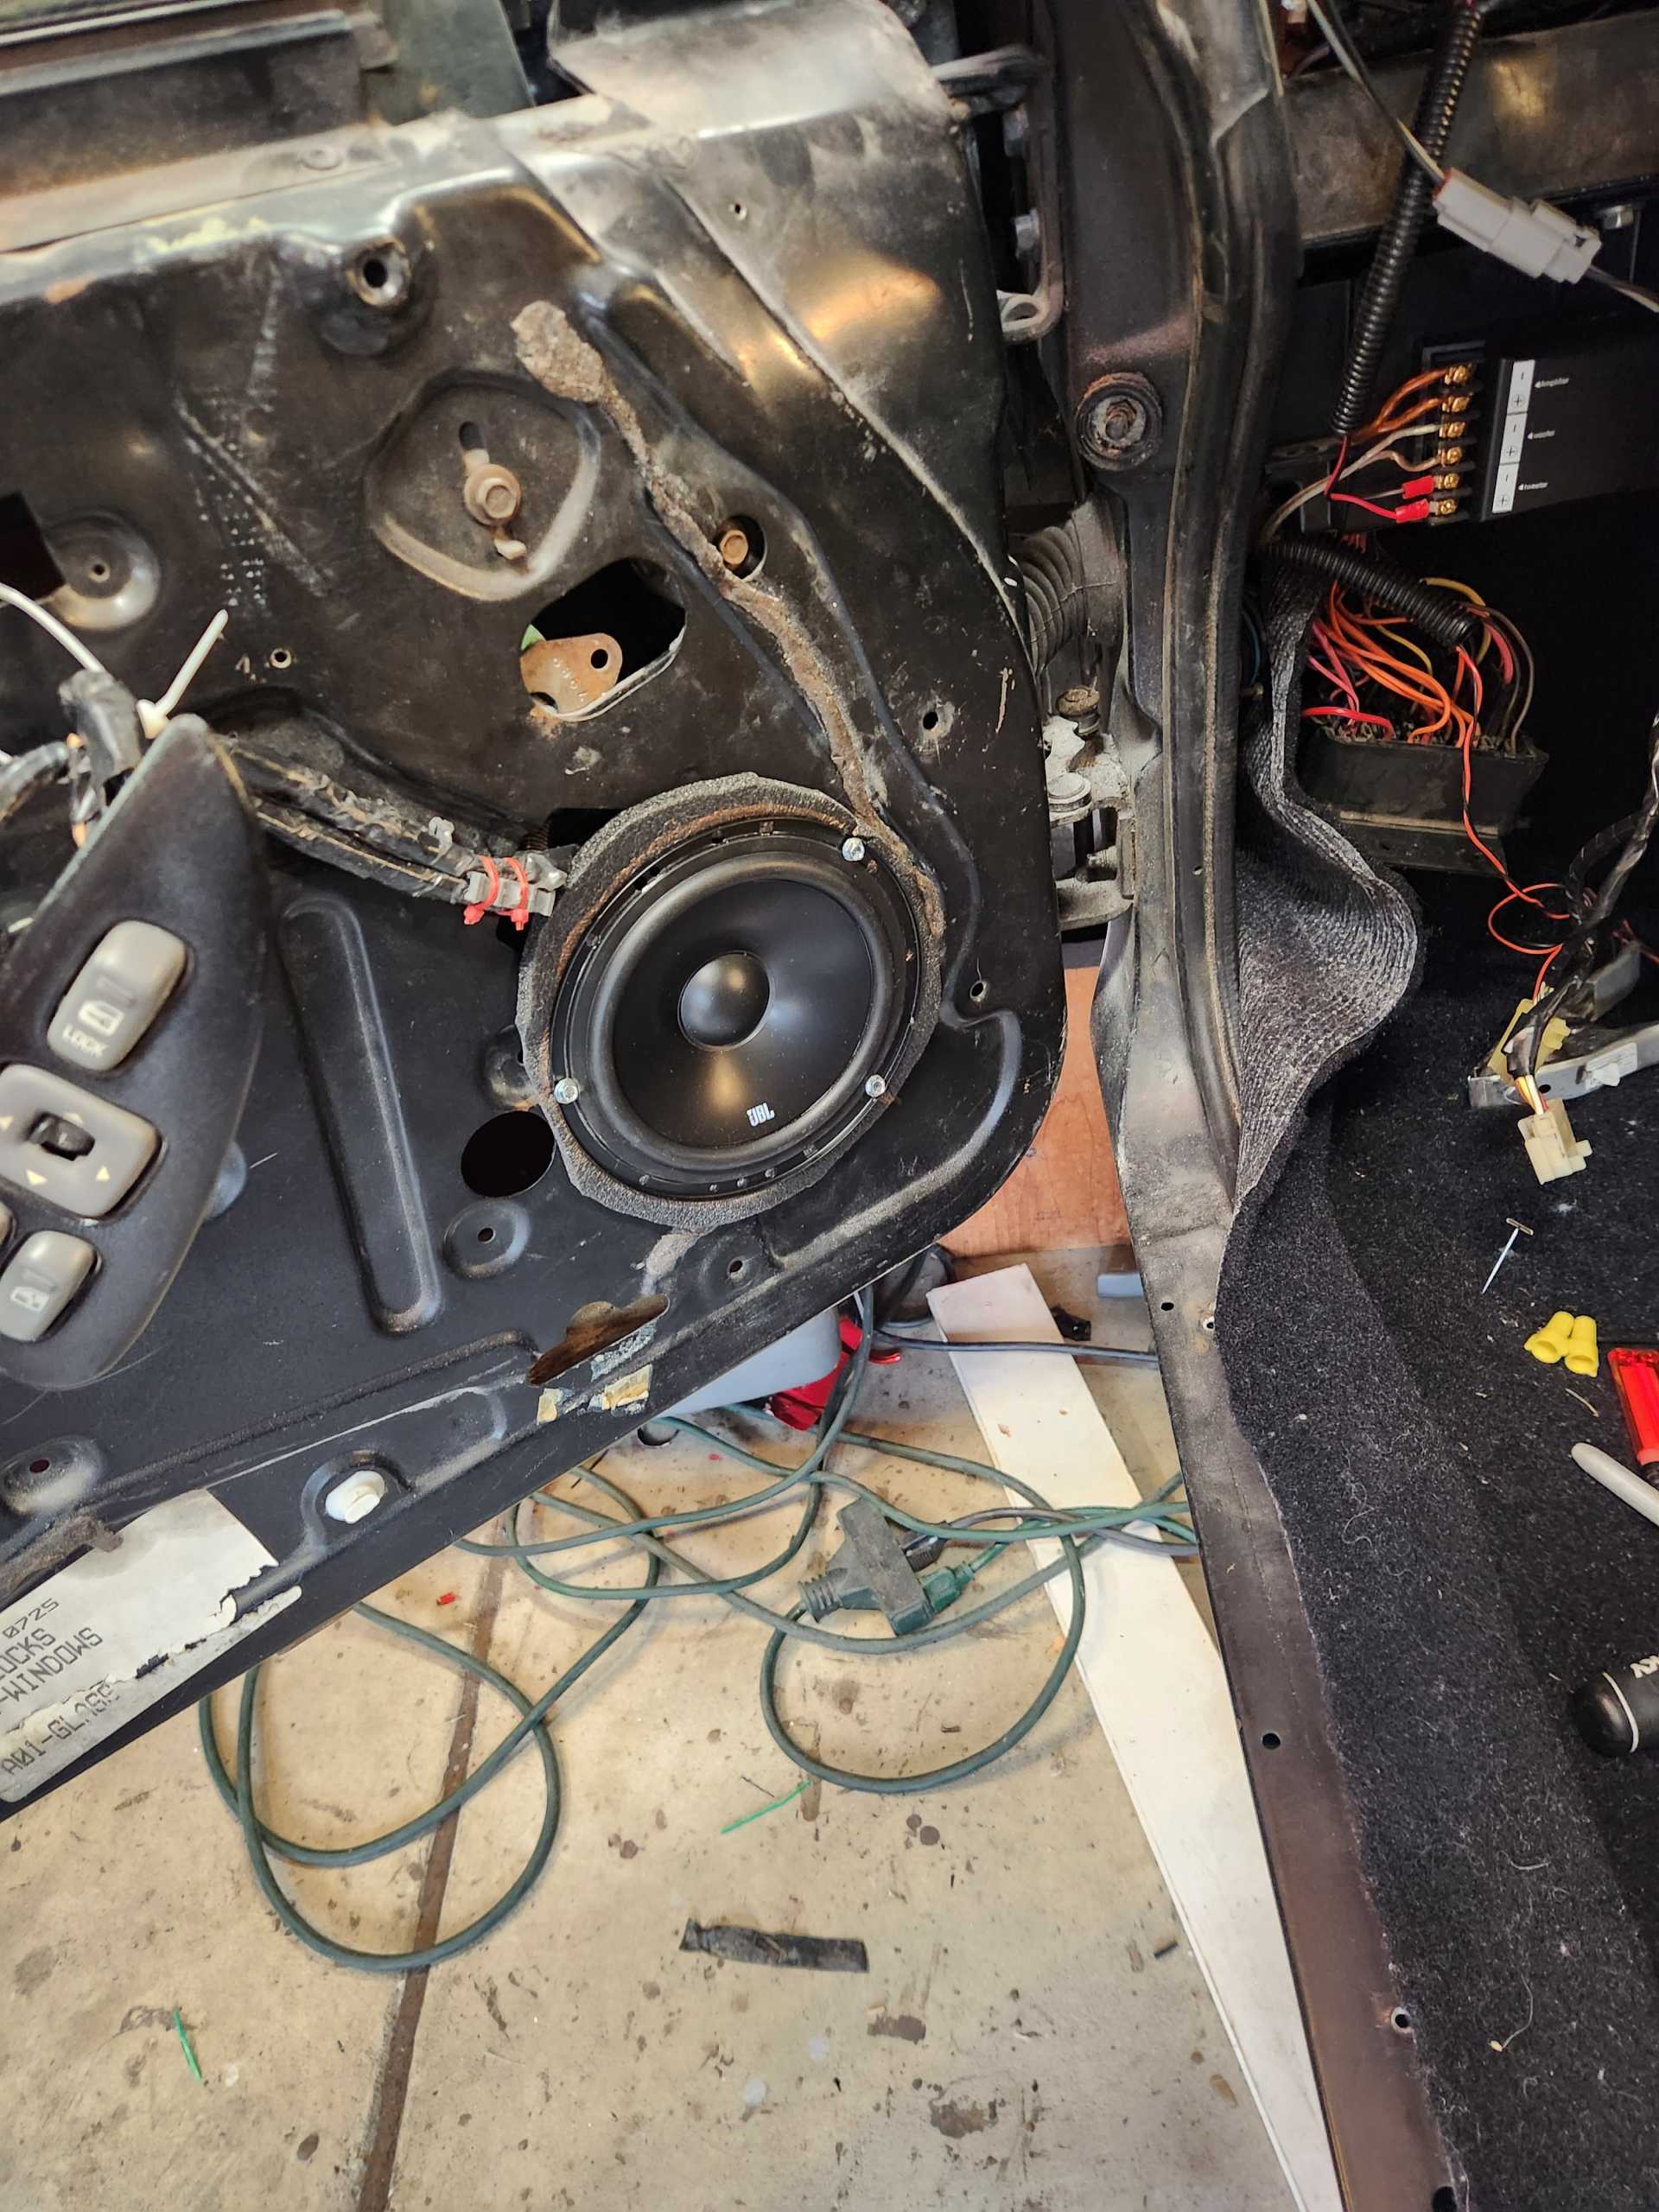
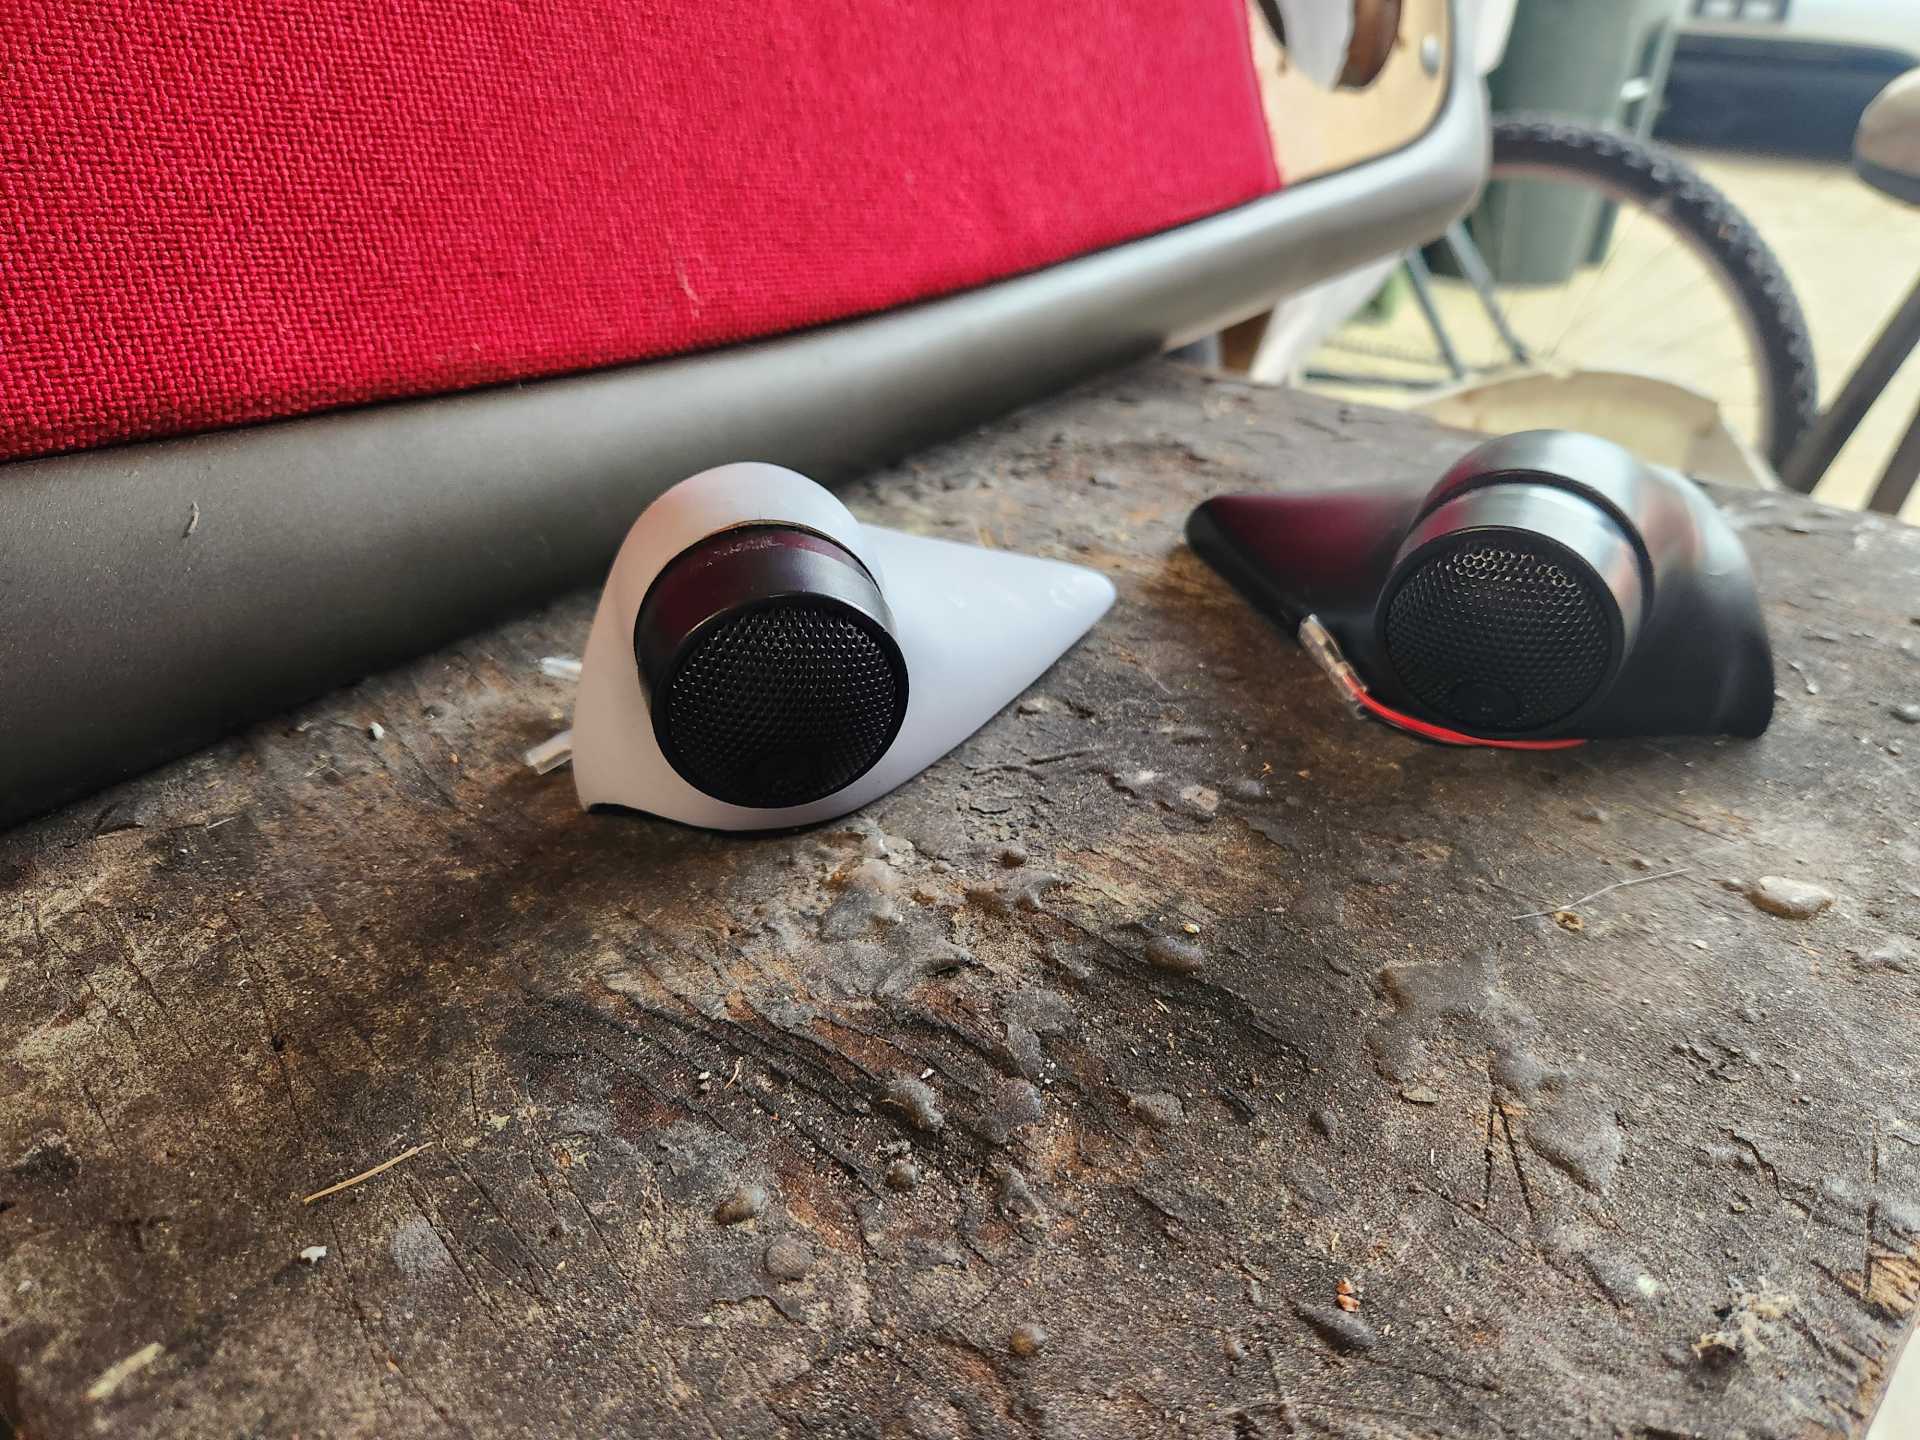
Mounted some 6.5" JBLs (one side) in the door. Also reworked the component tweeters for JBLs.
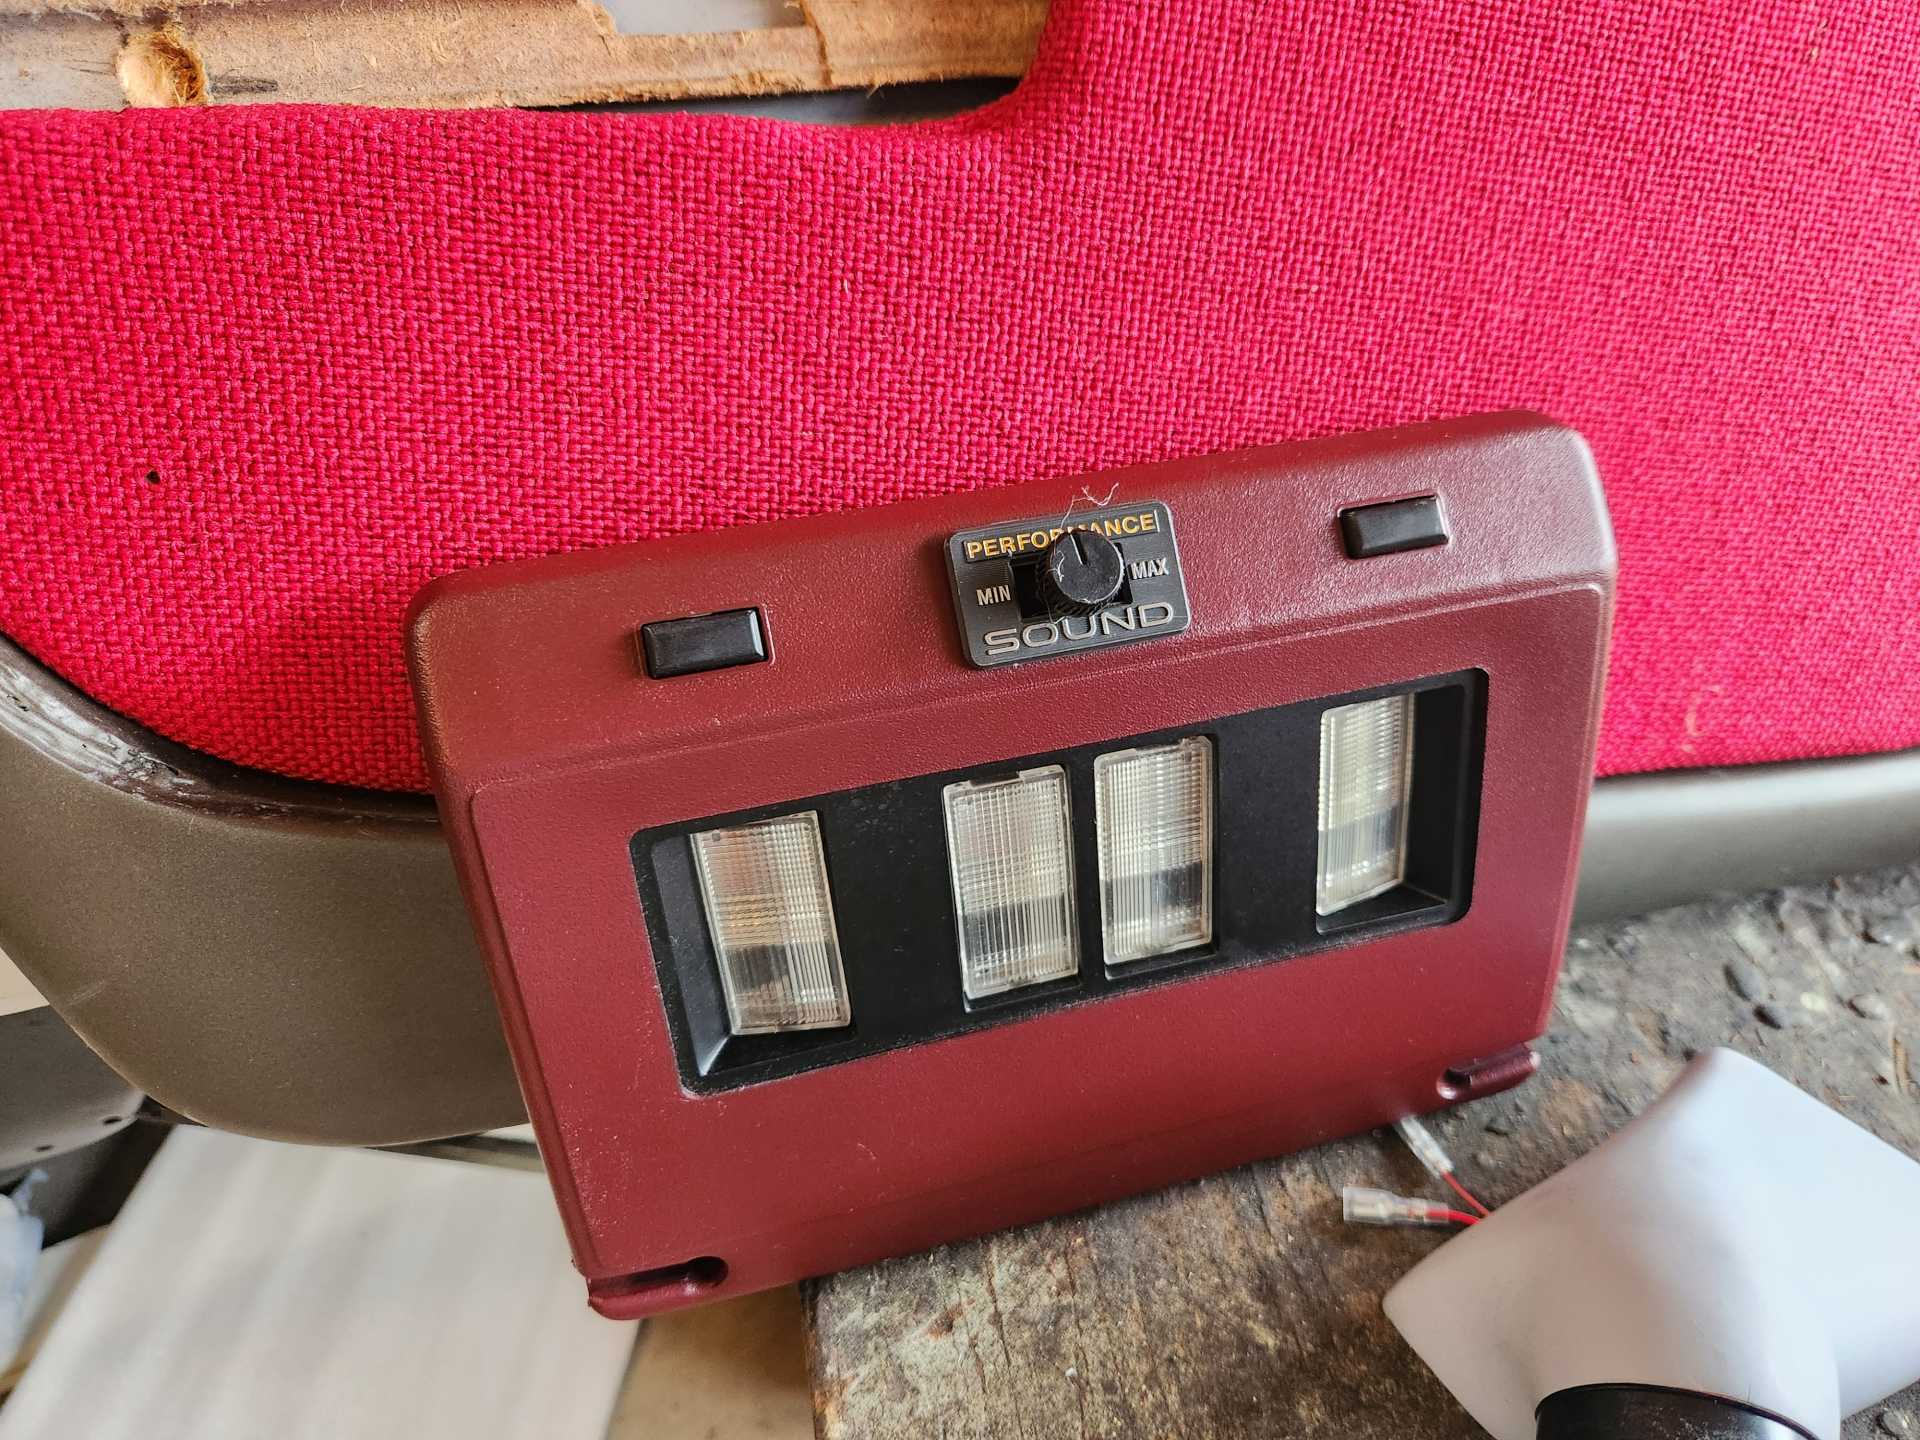
And...I mounted a Boss Audio 8" powered sub in the center console, and made new mounts for the console. The subwoofer has a remote control dial, so I mounted that in the overhead light panel where the stock sub control is.
Also started farting around with the trans cooler and AN lines. A couple more fittings should be here today.
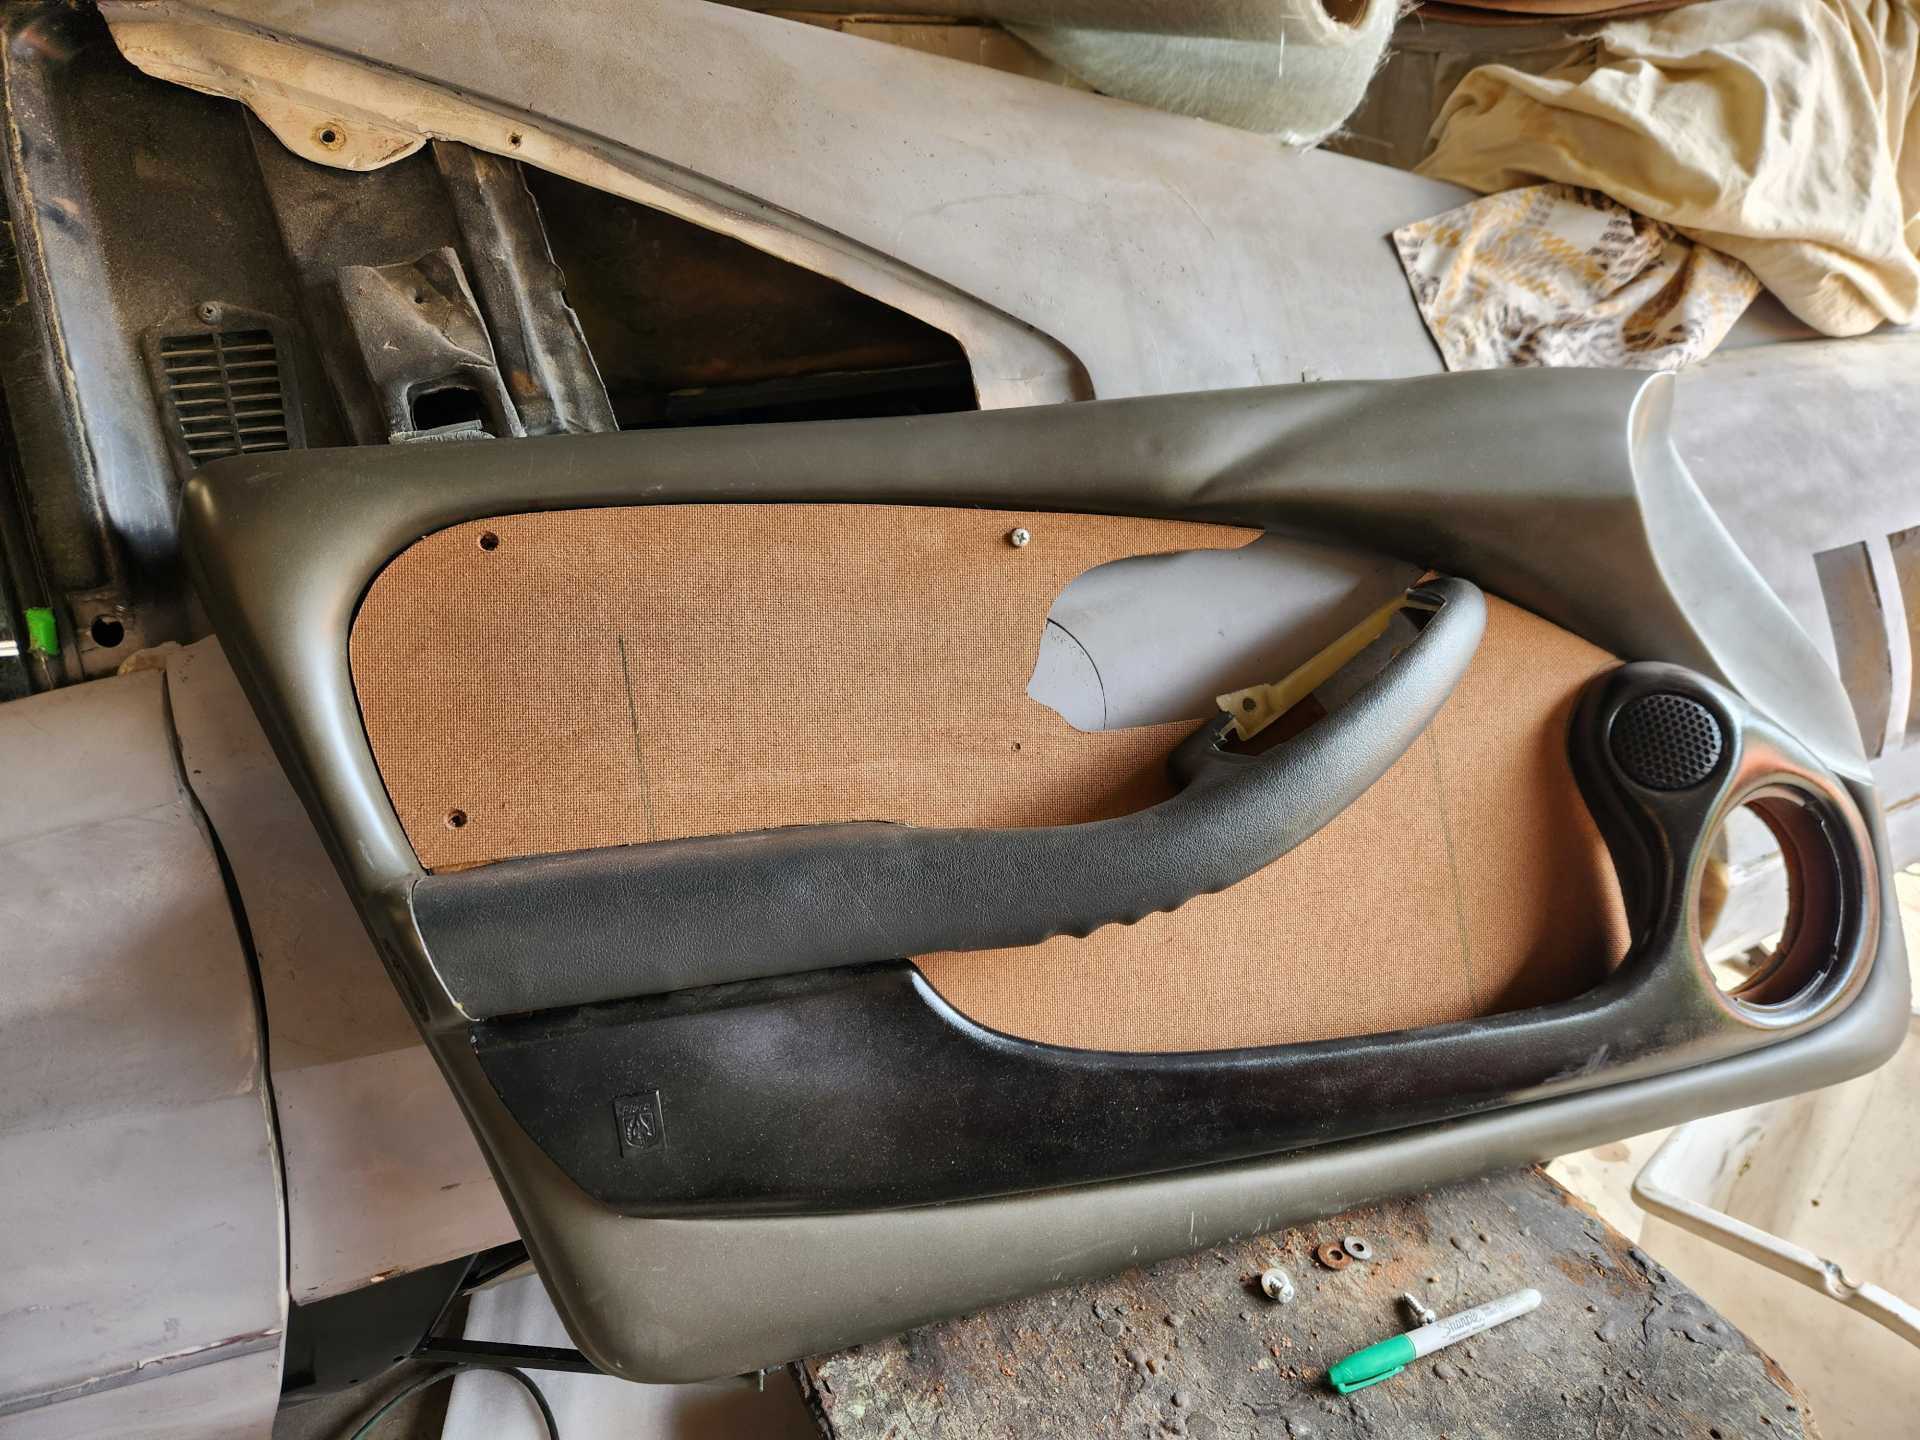
I need to make the second door card, and refinish the original in new colors.
Looked better with the dash in. It's a disaster at the moment.
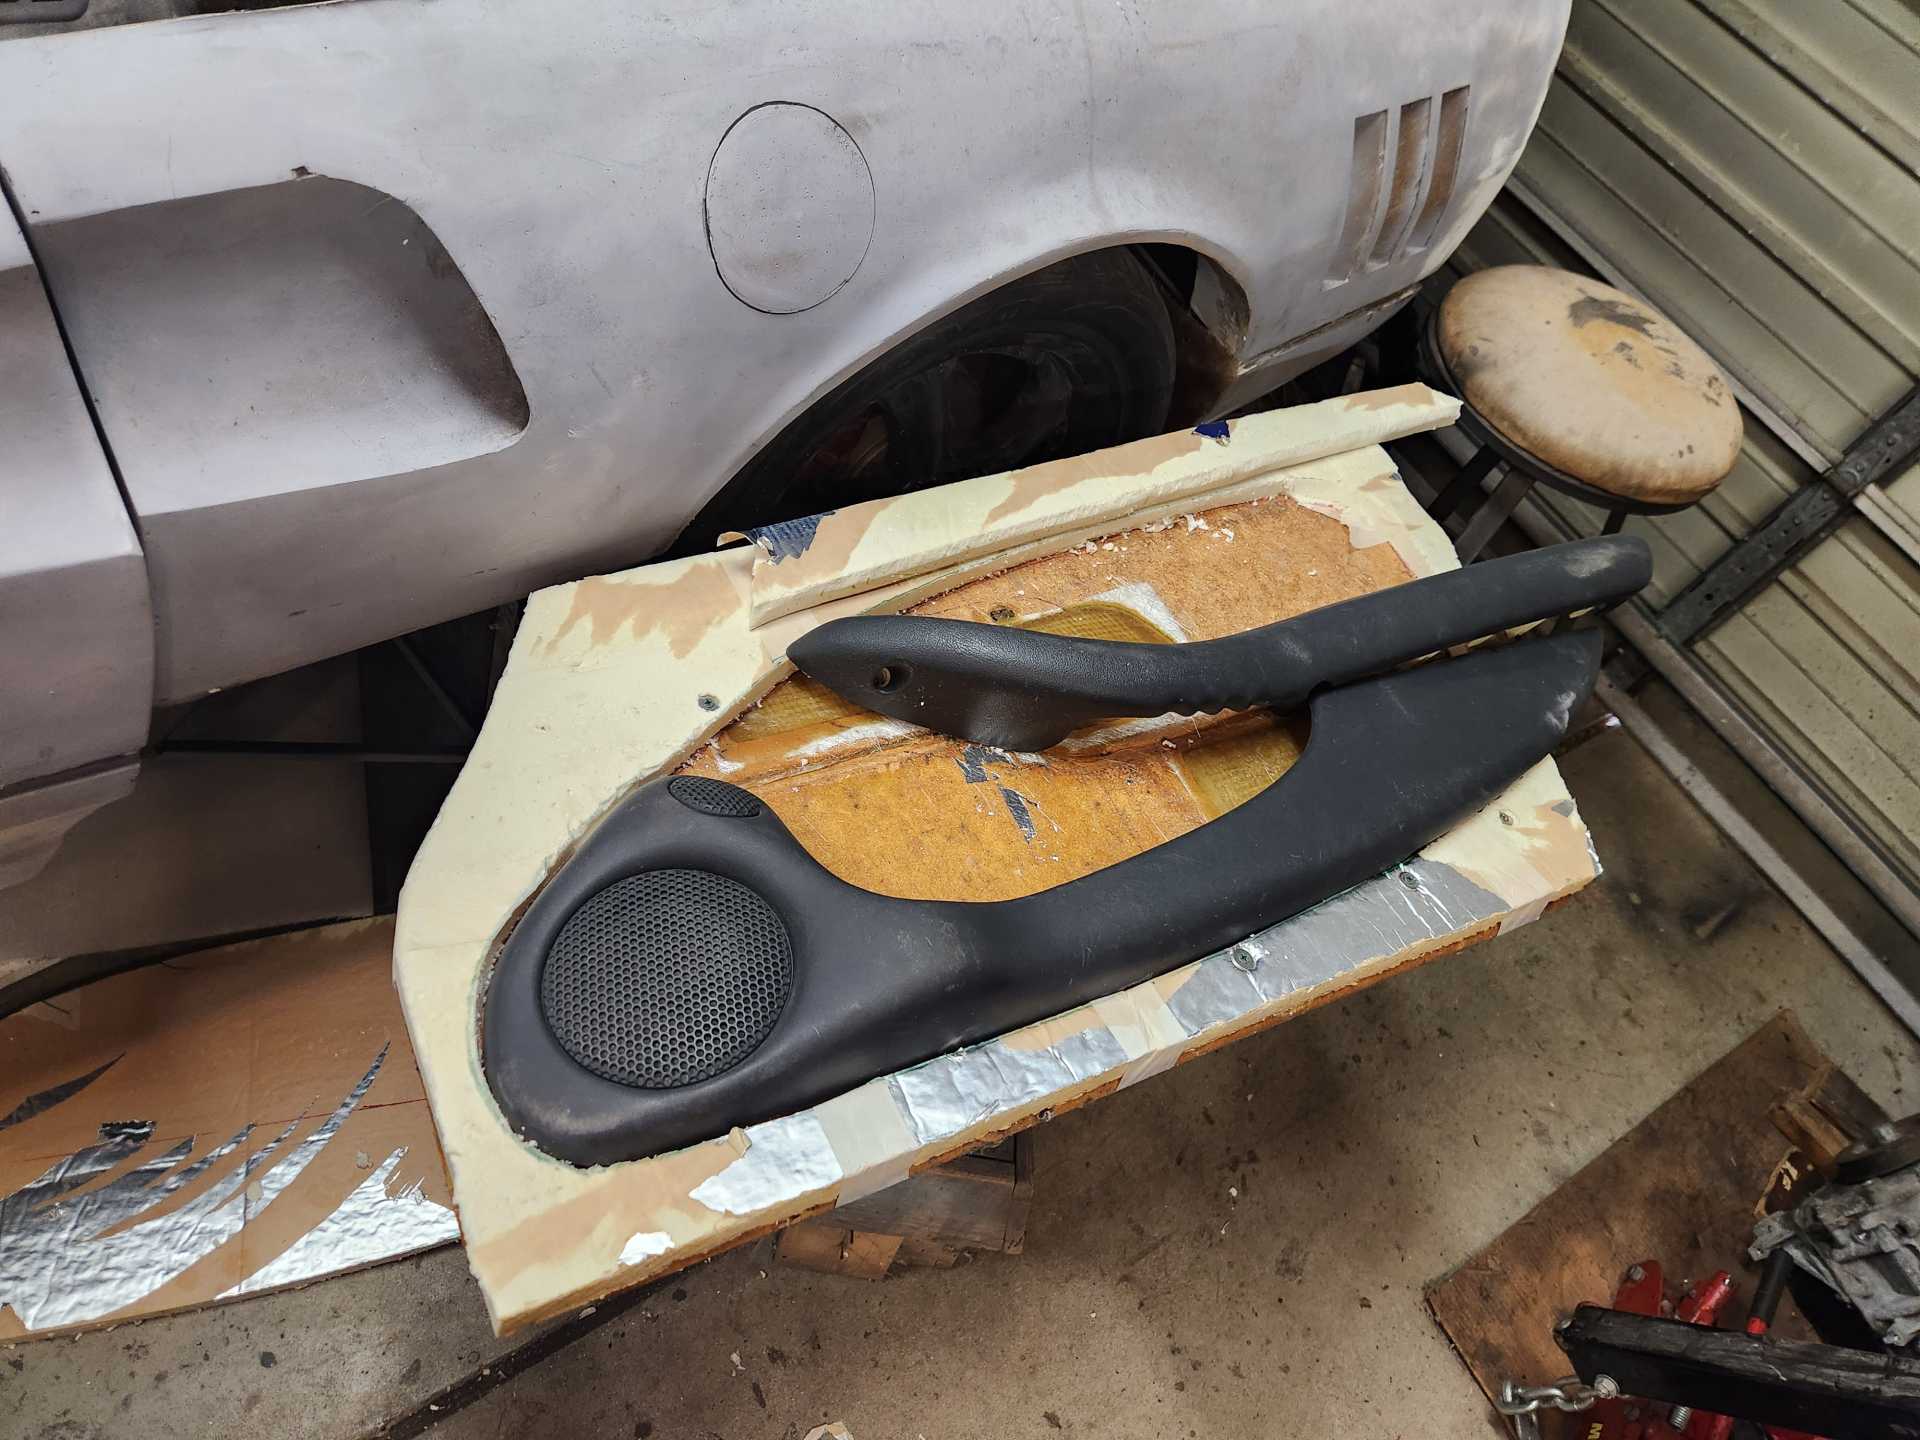
Starting making the new insert. This will be covered in black tweed. Just waiting for the christmas trees that hold it down.
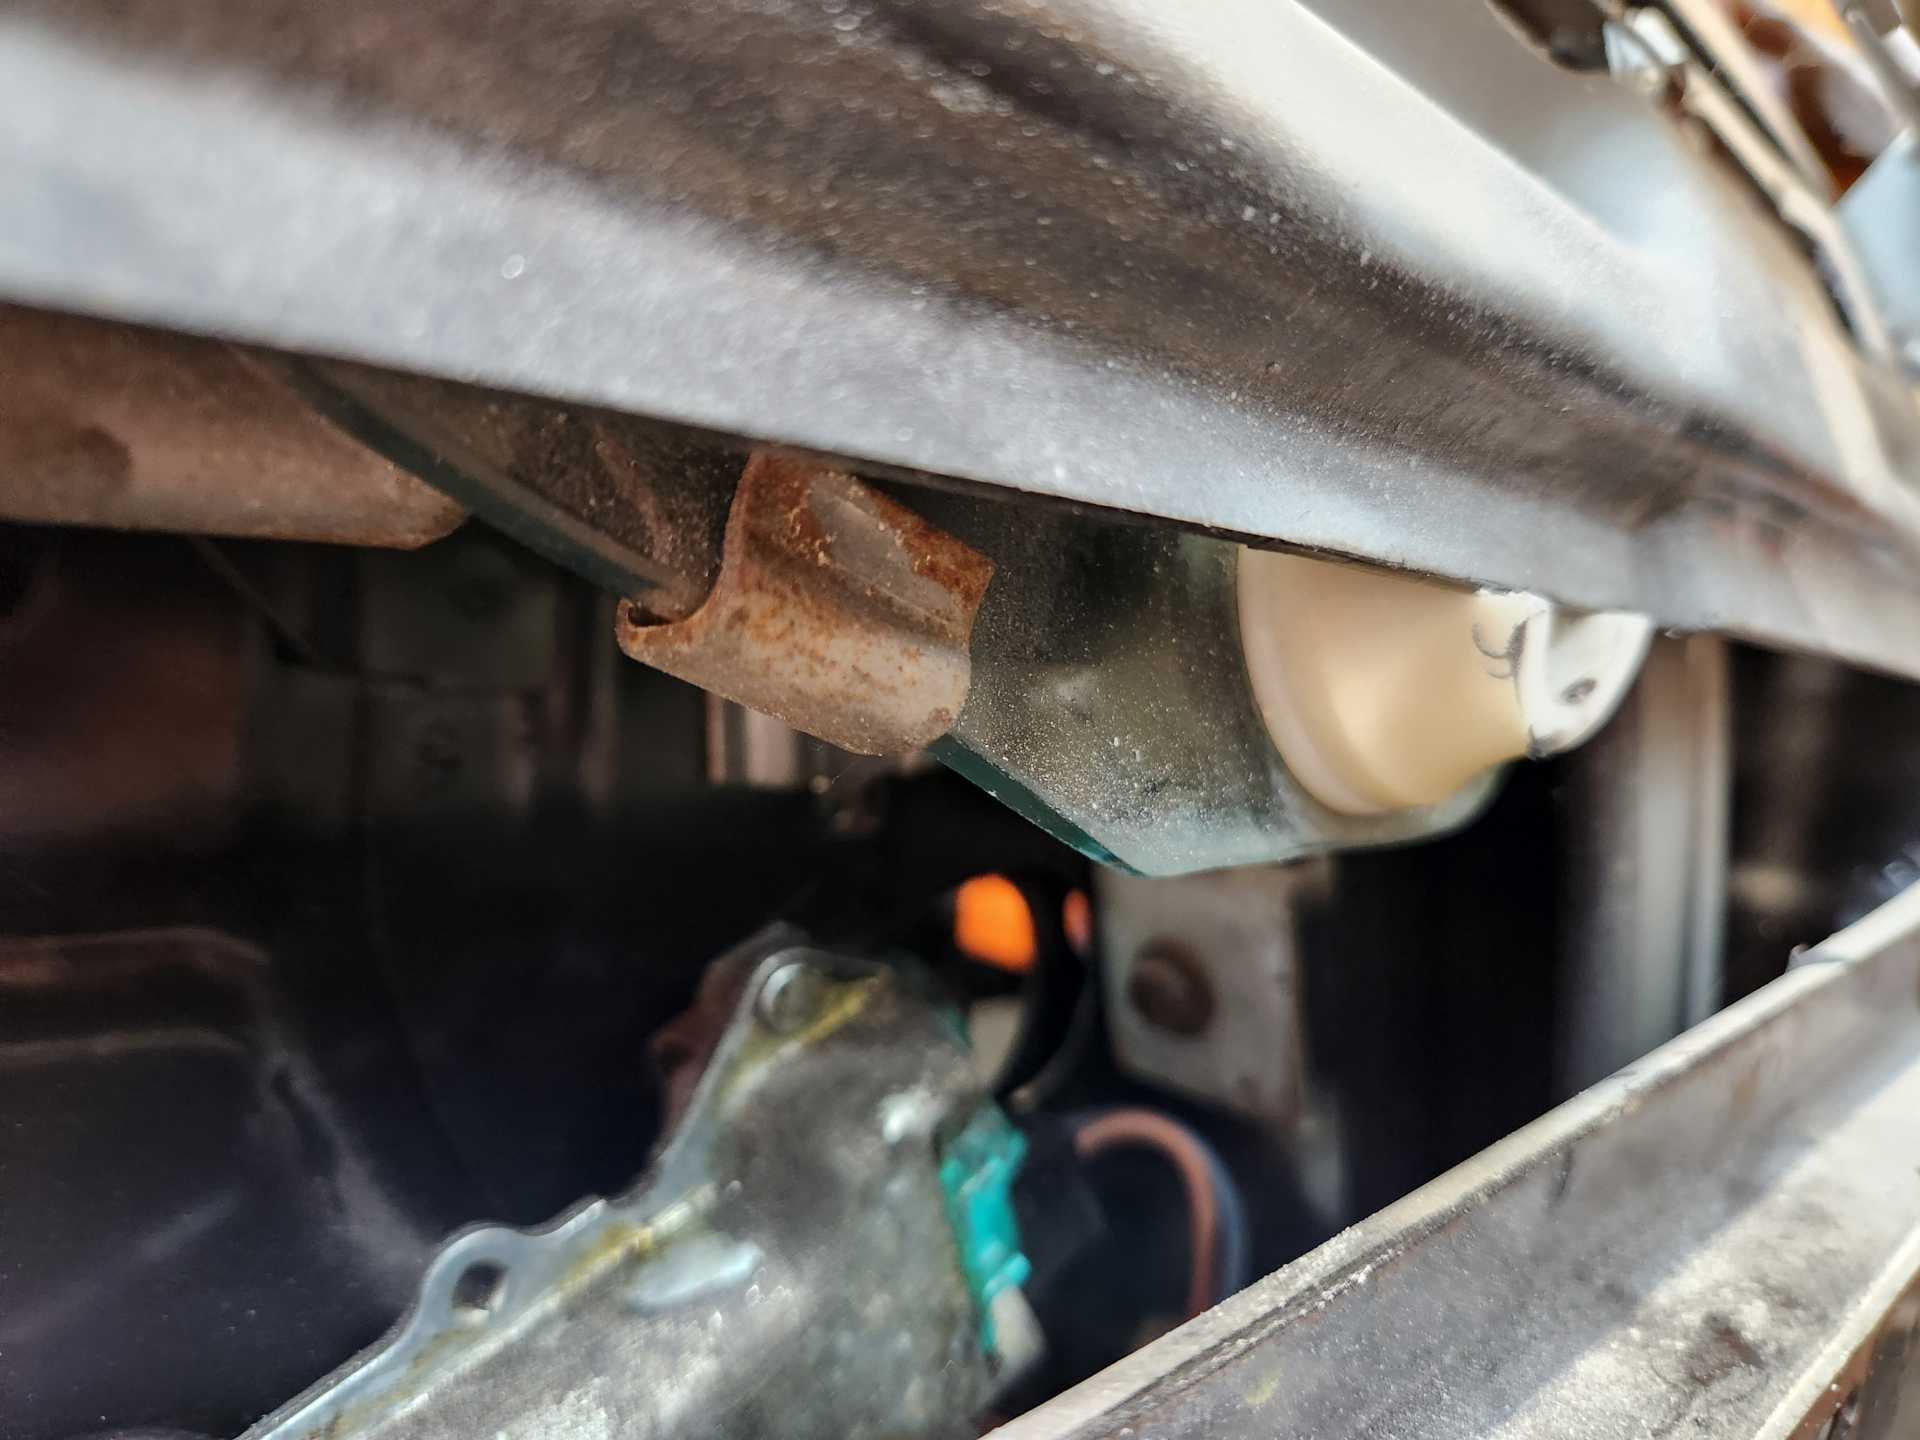
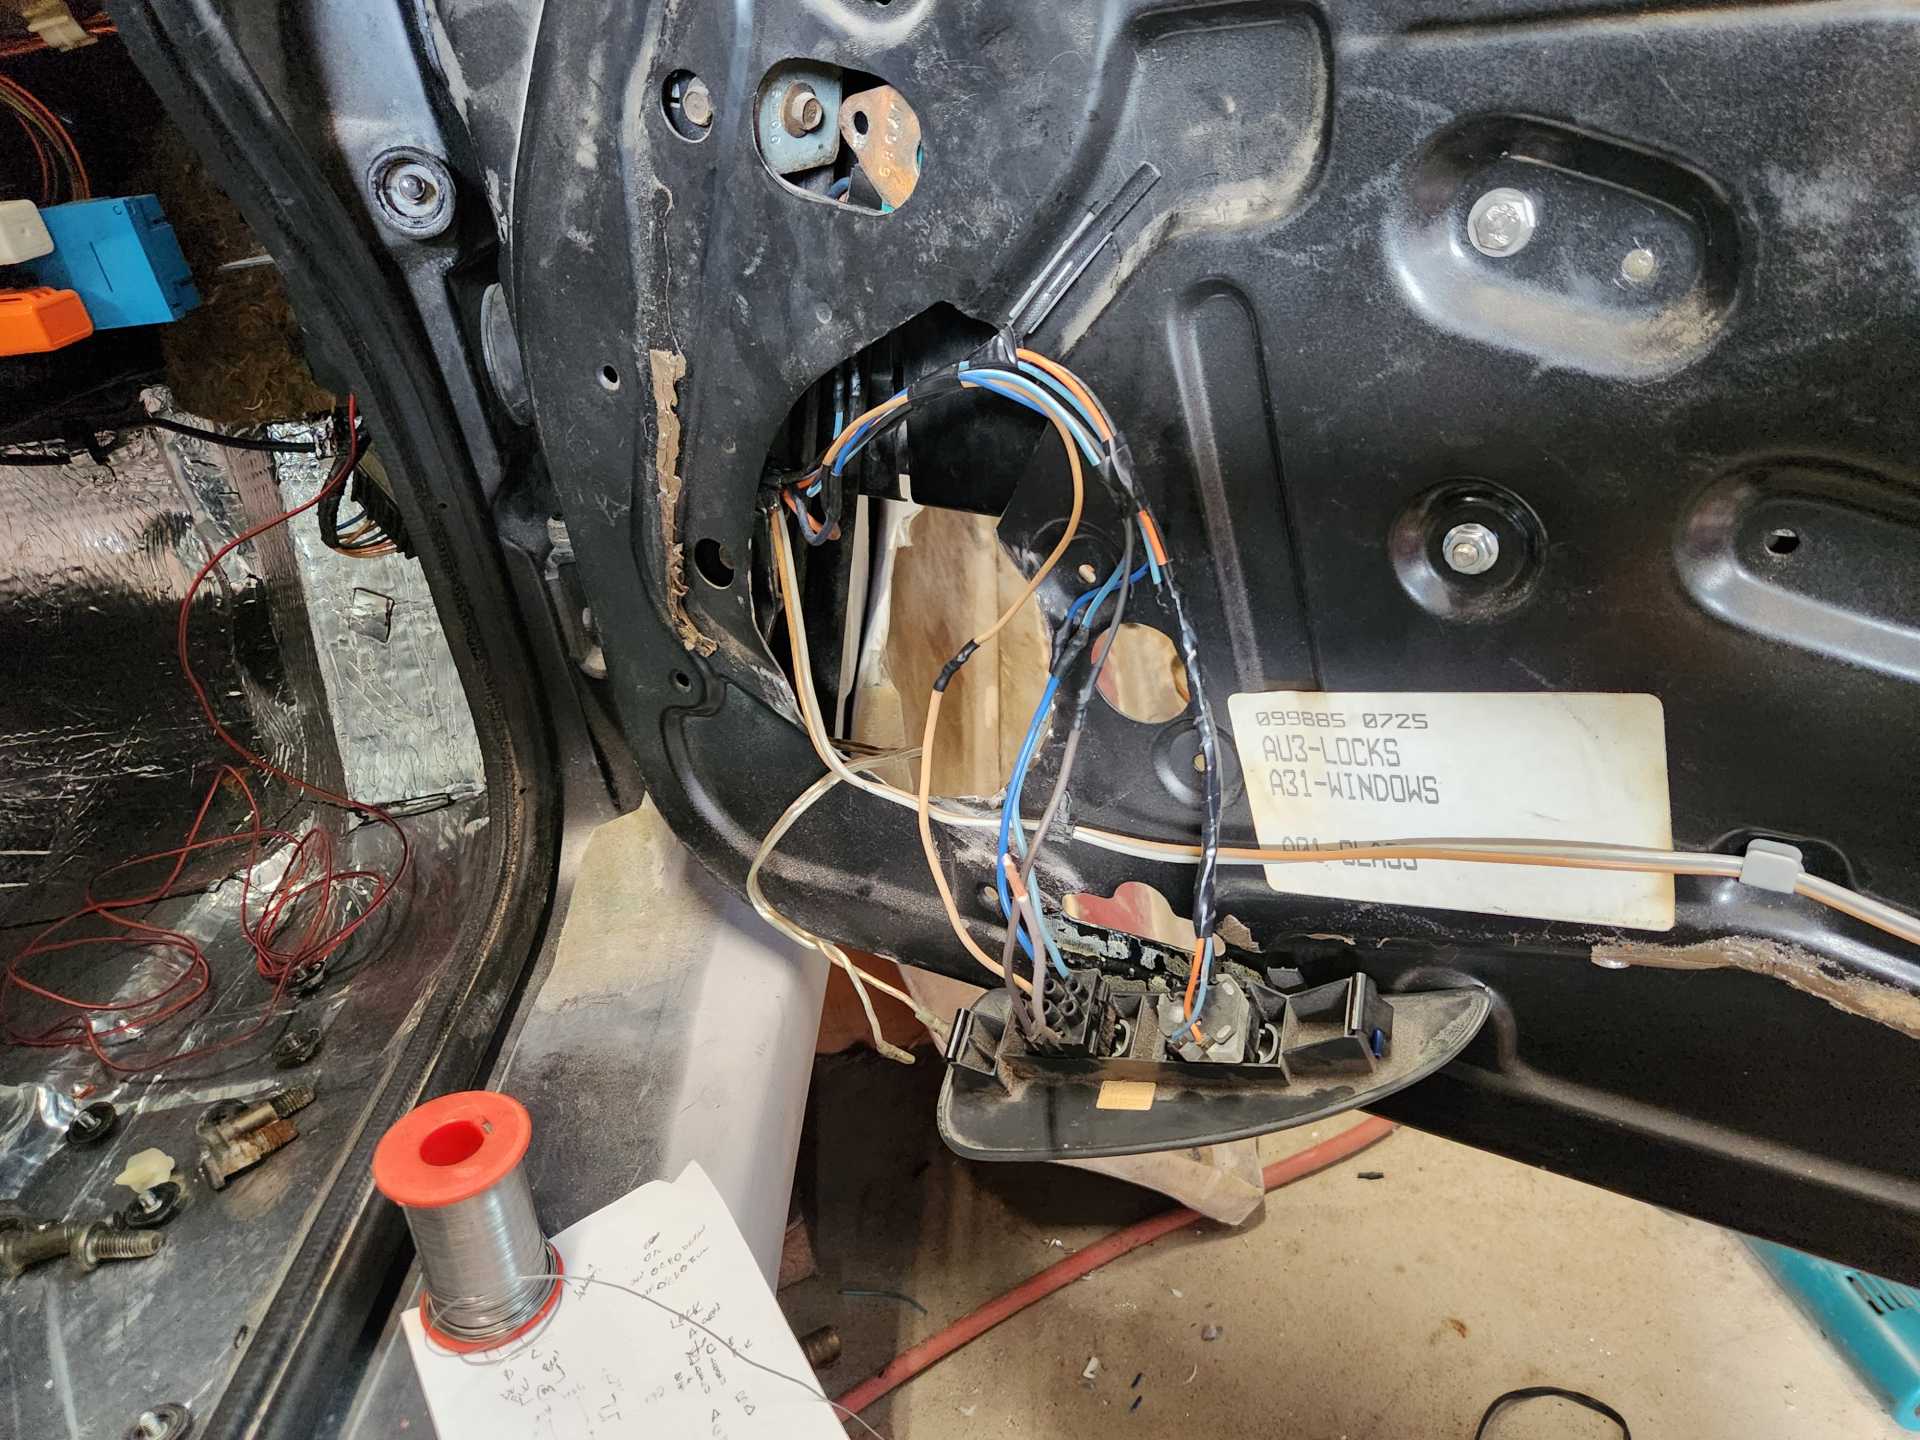
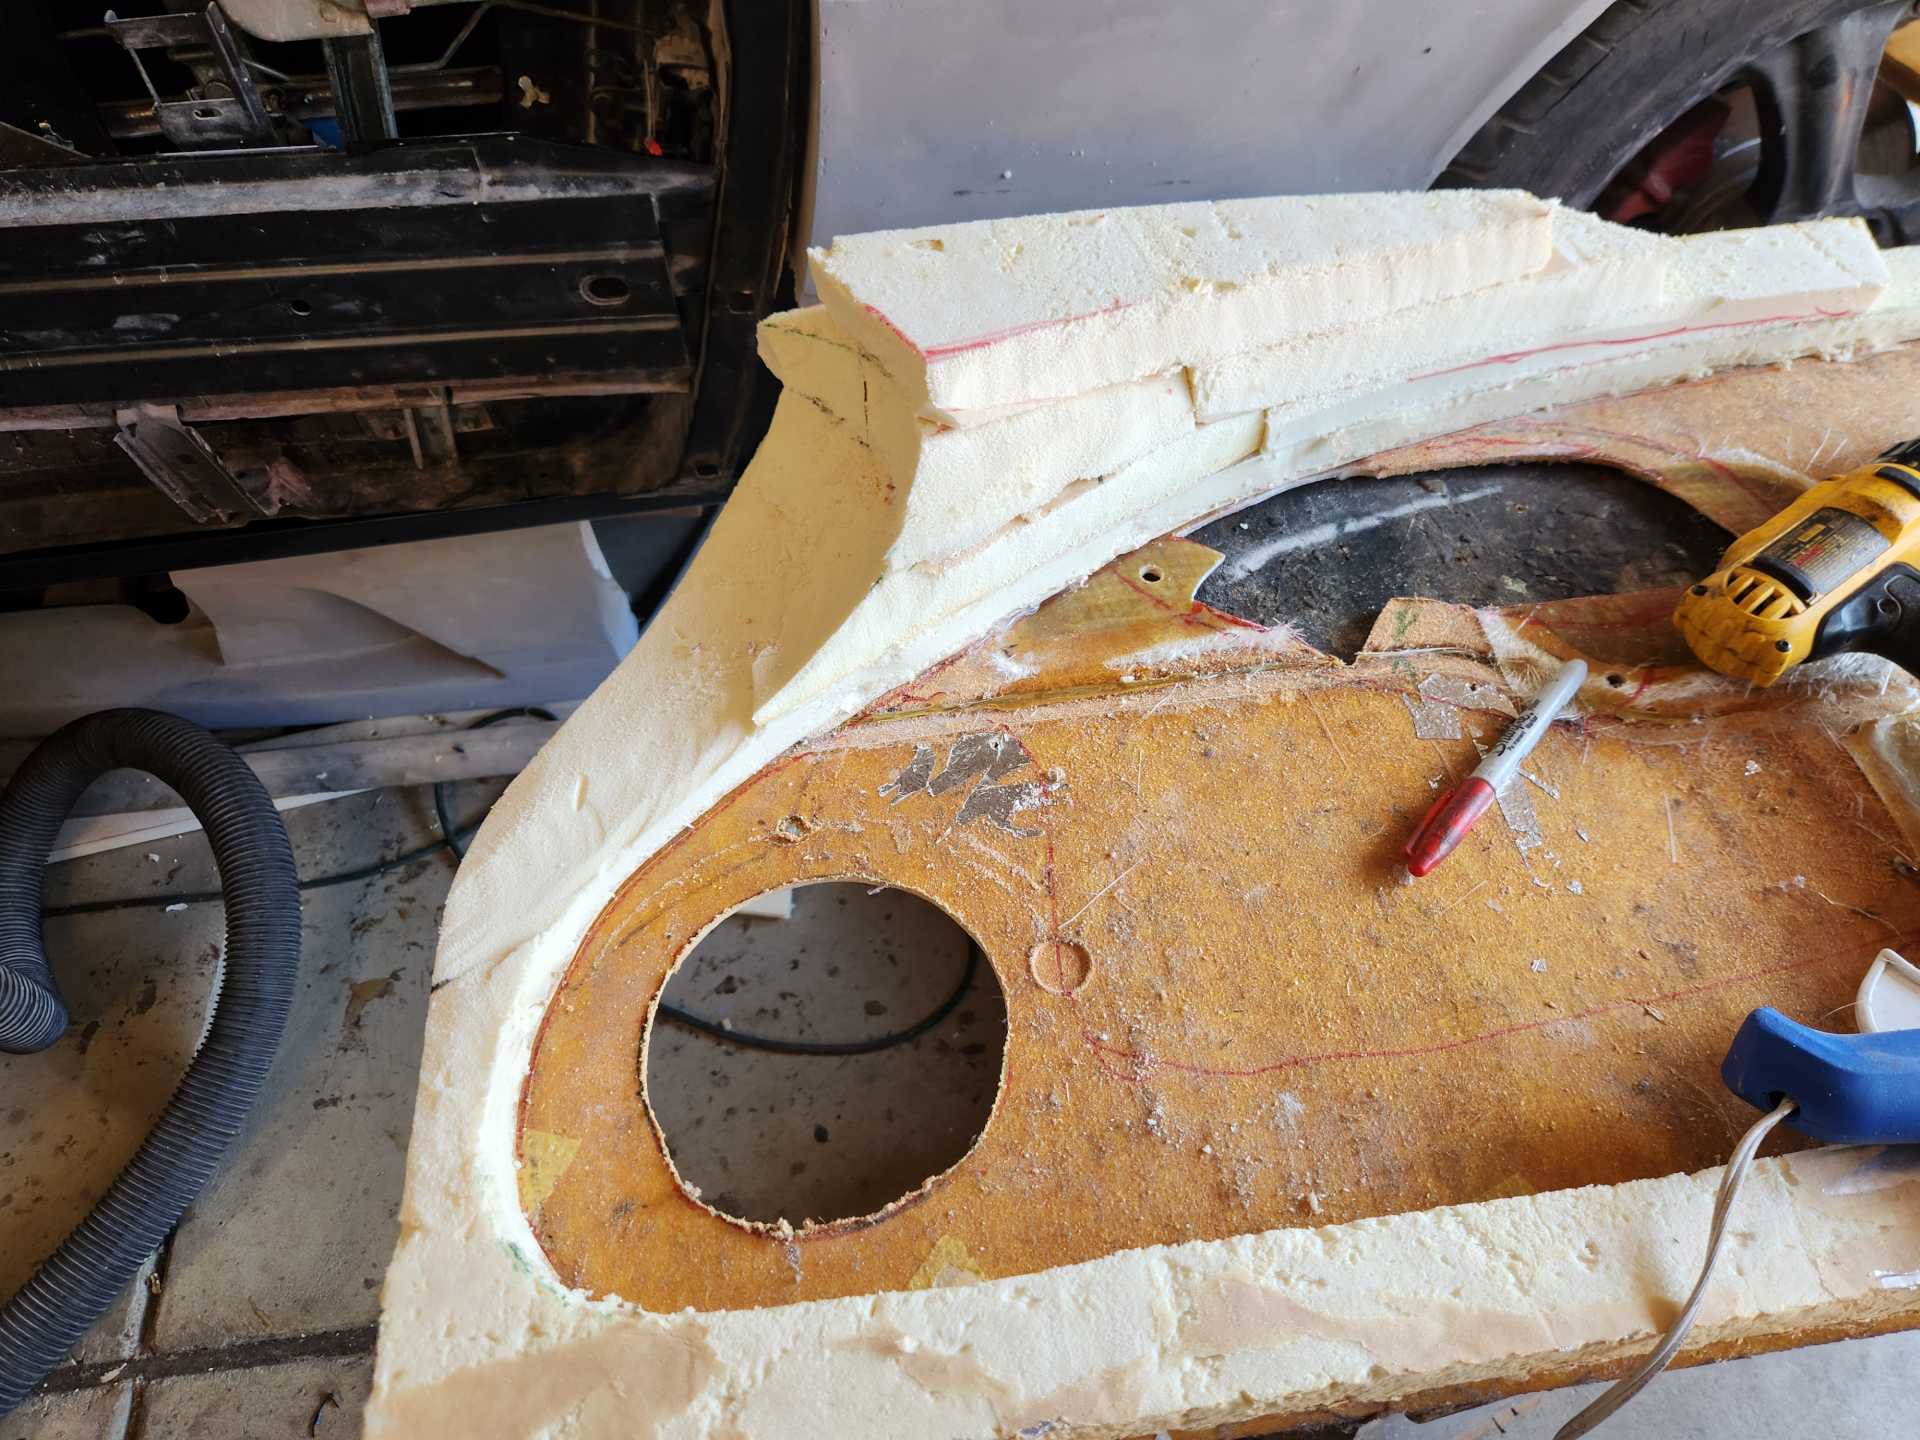
Also started mocking up the passenger side. That's going to take a bit of work. Besides the door panel, I have to move the window regulator, cut the speaker hole, run any wiring, and make brackets and move the door handle. Did it once before, so it's possible. Just need to remember the recipe.
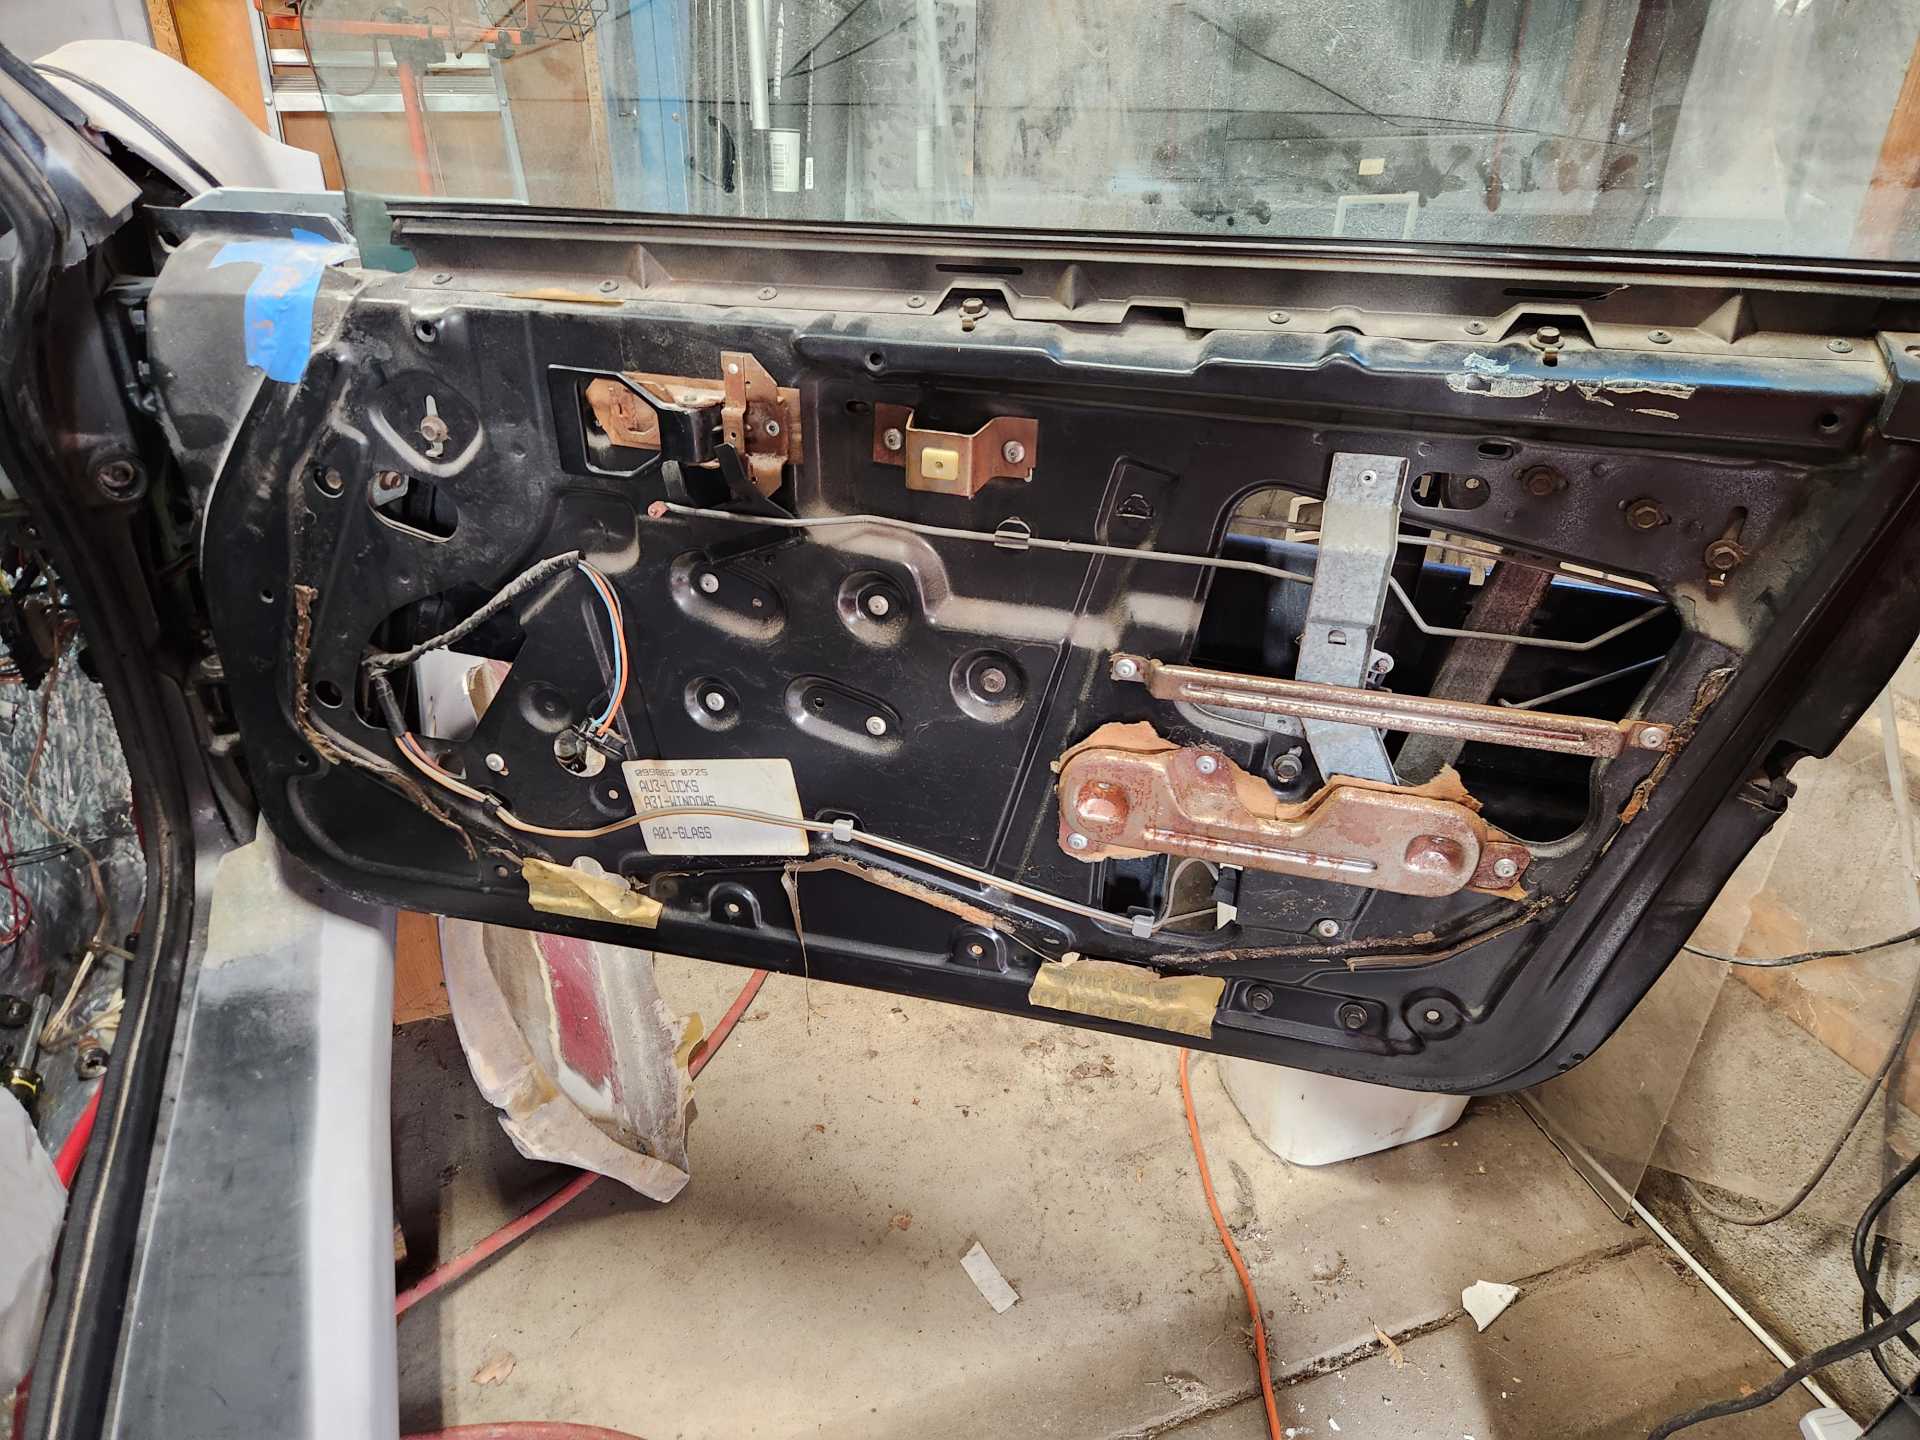
Bits of progress. I started to tackle the passenger door mods. First off was relocating the window motor. Had to go back to Rickady's thread in the archive (called out on page 3 I think) to refresh my memory. After so many years, I forgot I also needed to wire the switches for the door. That was a pita, but is almost complete (need a Vrun power line). Everything is working, though. I also had to rework the window stops. They hit the speaker baffles. So much fun...
Some pics... The start of the door. I'll be removing the handle and some of the brackets.
Here the motor is reclocked. It would have been easier to swap right and left, but that epiphany came out after I did the drivers side.
Window stop. I took the existing stop and spun it around to the other side (outside of glass), then trimmed it down to hit the crash beam like Rick did. Works like a champ.
Wiring almost complete, hole for speaker cut out. The Firebird switches all work. I can only make the passenger window go up/down from driver controls until I run a power wire. Everything is wired through the door to the body. Just need to finish the run inside.
That was my Saturday...
Bob
[This message has been edited by RCR (edited 07-27-2025).]
Hmmmm.... that's an issue I never considered. How much width needs to come off each side? You'll have to let us know what solution you come up with.... assuming it doesn't involve using a chainsaw to narrow the seats.
I had a similar experience with the Lambo. My friend was looking it over and said "Have you tried fitting the license plate yet?" I hadn't. We then proceeded to find out that no, it doesn't fit. I'll now need to make a custom bracket to solve the issue. But this pales in comparison to your door card/ seat issue.
Hey Neil. Long time, man... Your build looks great...
I'm not sure what I will do, but there are only two option.
1) Keep the Cadillac seats and trim off at least 2 - 2.5" from the arm rest. Pretty sure that would mean coming up with a totally new door card, otherwise it would look ridiculous.
2) Go back to Fiero seats. Pull all the sound deadener on the floor so I can re-re-rework the mounting points. The seats will have to be reupholstered to match the rest of the interior. Leaning this way. Mr Mikes here I come?
But, with all the stucks and ridiculous heat in the garage, the show must go on.
Ended up fabbing the door pull rod. I used and moved the door latch, so I had to modify the original. Second time was the charm.
Also did work on the door panel itself (how I found out it hit the seat.)
Pics tell the story.
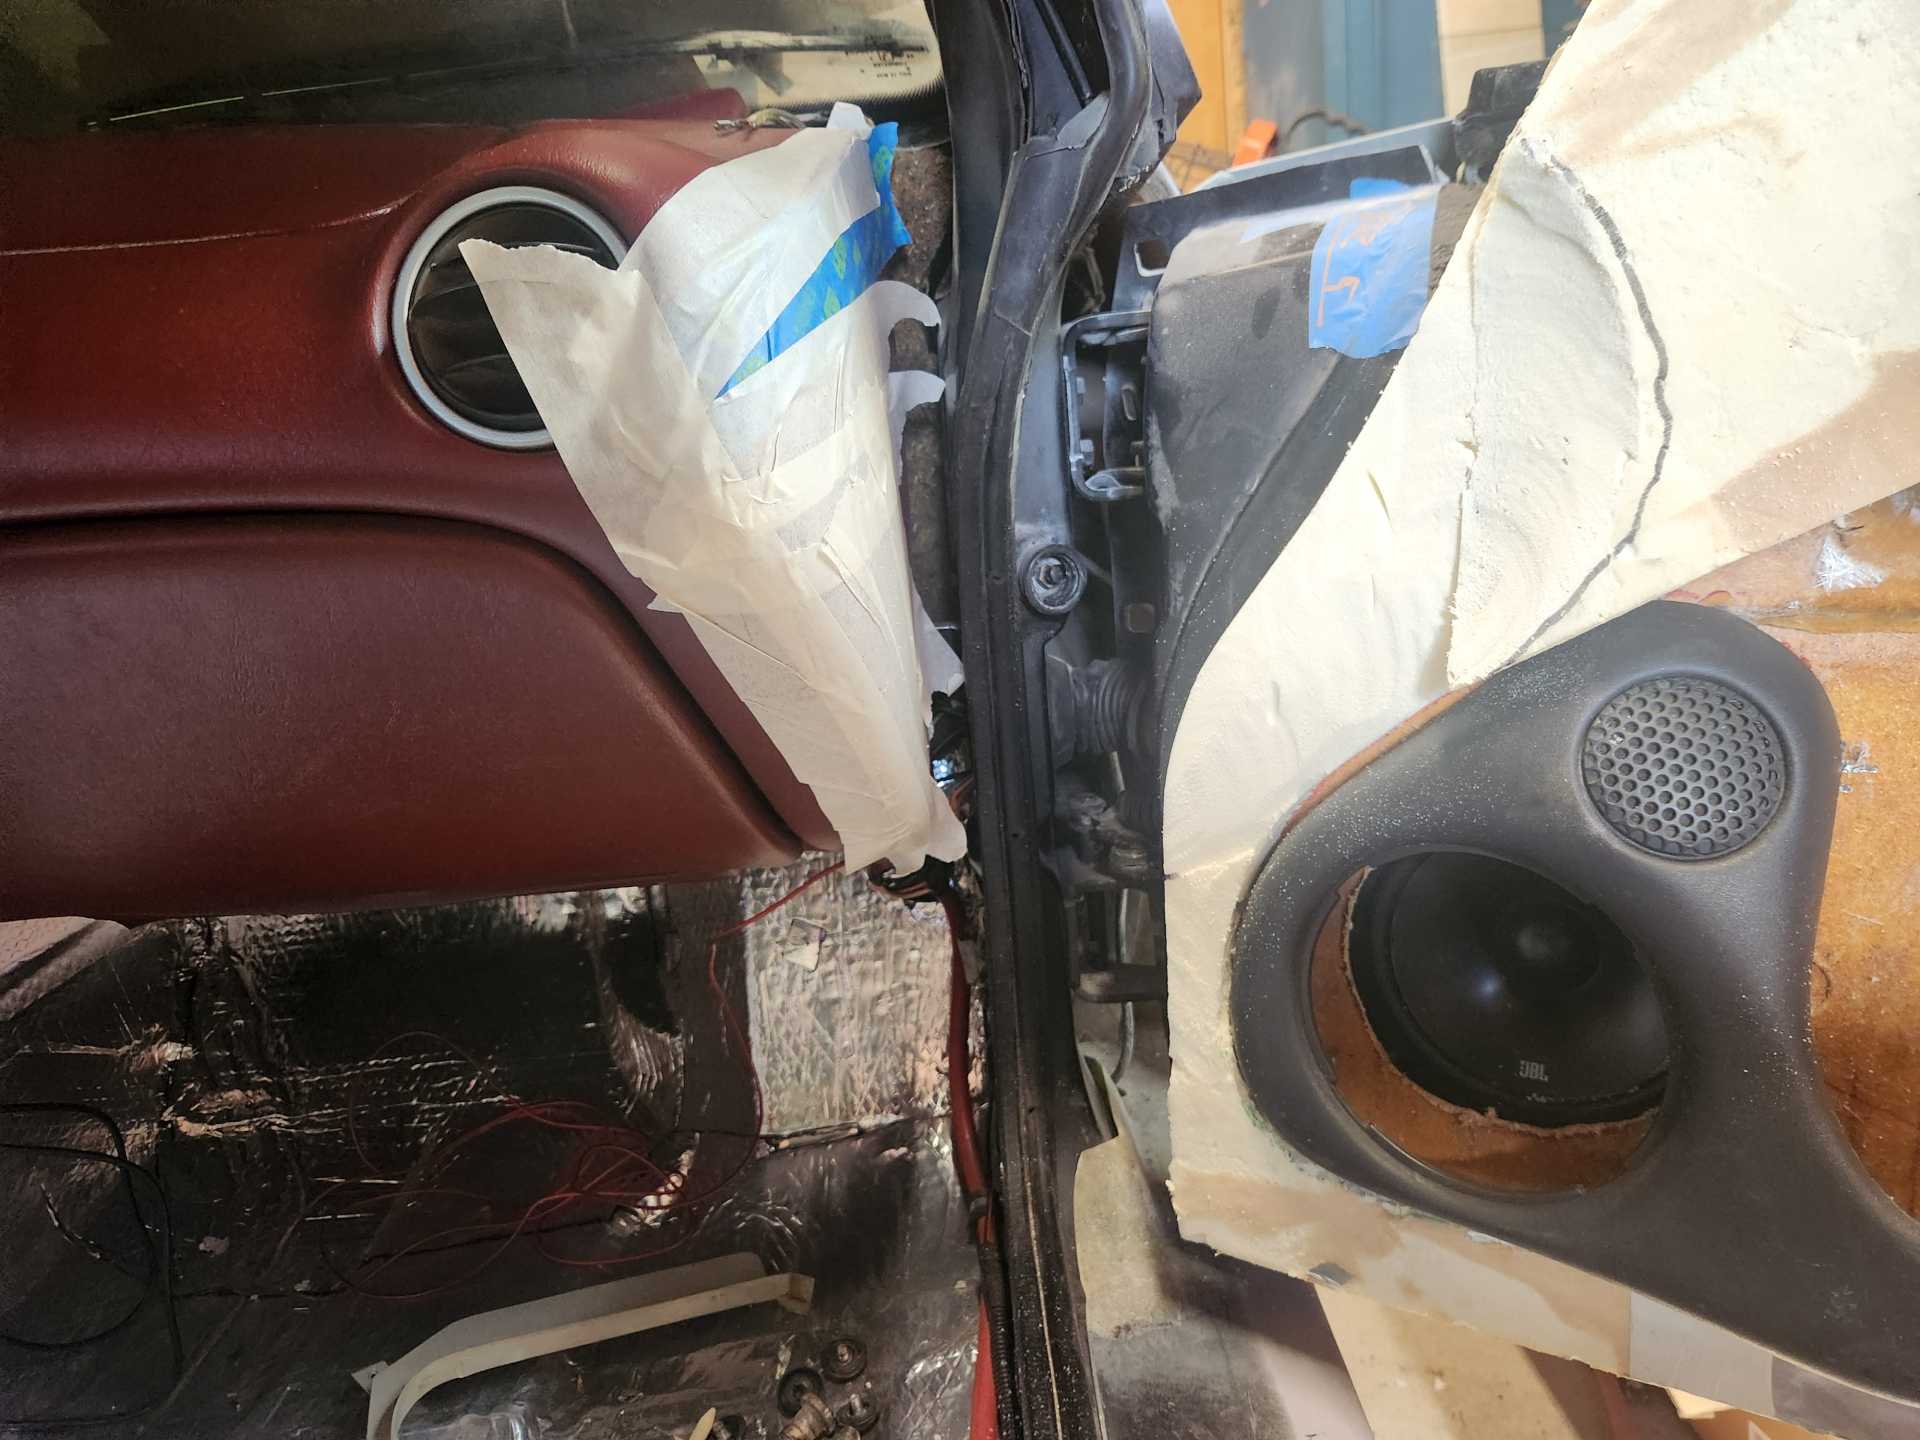
Rough fitting, before trimming the armrest and lower panel to allow door to close.
Taped of dash to protect it. Starting to form the foam to match the dash.
Building up the foam (way too much)
Rough fitting, trying to determine the form. I'll need to put the A-pillar trim in to see what else needs filling.
Hi Bob Looking good! I love the dash and how you incorporated it.
I know you’re frustration your door cards looked really good. For what it’s worth if your going to recover the seats anyway unless your doing it yourself I’d cut the seats down. That’s the route I took with mine seats as full custom , the bolster along the side has lots to work with. Just a thought. And also check the room along the “B” panel with the seats in I had to cut down along the headrest side to allow it to fit and slide. One of the things to look out for as well on the windows , after doing all the mods make sure you put everything together on the door including the whiskers and door rubbers and close and lower the glass with the doors closed. I found everything ran fine with it open but ran slow closed.
Stay at it 😁 Wayne
Thanx for checking in, Wayne, and thanx for the heads up. I did build the door up and found that the window hit the speaker baffles. A few mods later and it was clear. It does run slow (always did). I know there was a "fix" for that at one time. I'll need to look it up.
After lots of sanding, bondo, sanding, primer, sanding, more filler, sanding, primer, sanding, spot filler, primer, sanding, primer, the first color coat went on.
Then more color.
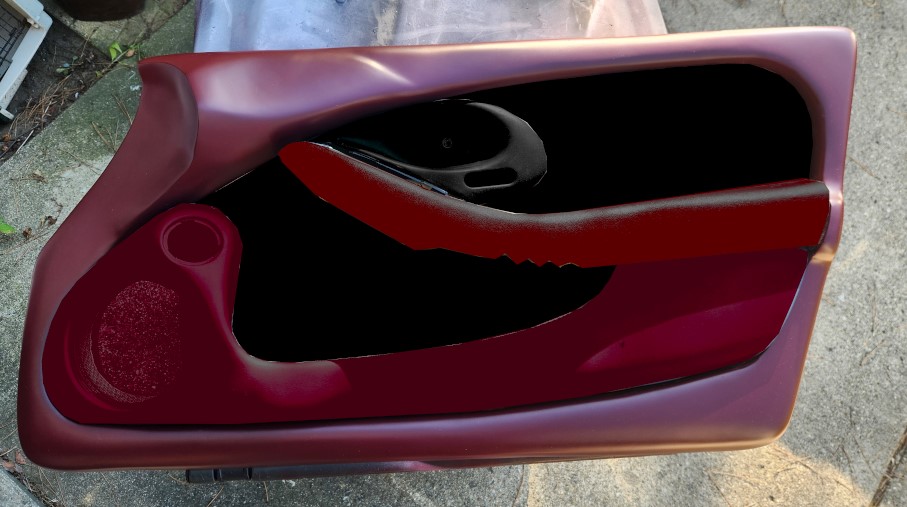
After playing in GIMP for a while, I think I'm going with the pull and bottom cup holder in napa red, and the door latch in black. The middle insert will be black suede.
Starting to wind down for season, but there's a lot to do yet.
Bob
[This message has been edited by RCR (edited 09-28-2025).]