Pennock's Fiero Forum
  The Construction Zone
  My interior build... (Page 2)

Post New Topic  Post A Reply
Email This Page to Someone! | Printable Version

This topic is 5 pages long:  1   2   3   4   5 
Previous Page | Next Page
next newest topic | next oldest topic
My interior build... by RCR
Started on: 03-19-2006 09:28 AM
Replies: 178 (24177 views)
Last post by: kendell on 02-06-2023 08:57 PM
RCR
Member
Posts: 4397
From: Shelby Twp Mi
Registered: Sep 2002


Feedback score:    (7)
Leave feedback


Total ratings: 102
Rate this member

Report this Post04-13-2006 07:30 AM Click Here to See the Profile for RCRSend a Private Message to RCREdit/Delete MessageReply w/QuoteDirect Link to This Post
Nolan: No I have not picked up the video. A lot of people over there say the videos are a must, but with a lot of reading on the site and a little practice, I'm not sure what the videos will show you. Certainly not worth the money to me.

Thanx Bobadoofunk...

IP: Logged
RCR
Member
Posts: 4397
From: Shelby Twp Mi
Registered: Sep 2002


Feedback score:    (7)
Leave feedback


Total ratings: 102
Rate this member

Report this Post05-09-2006 12:25 PM Click Here to See the Profile for RCRSend a Private Message to RCREdit/Delete MessageReply w/QuoteDirect Link to This Post
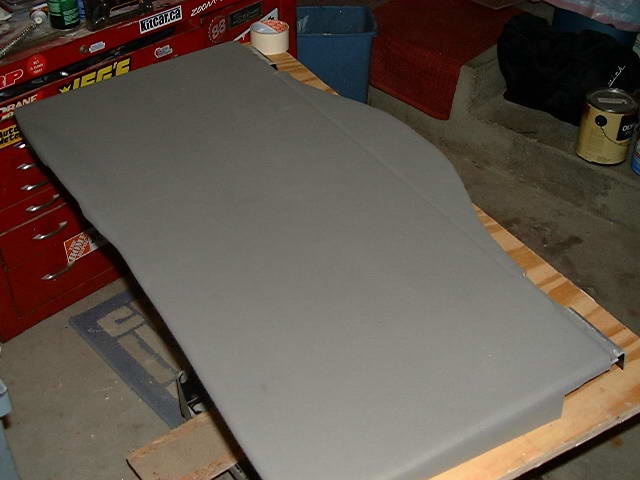
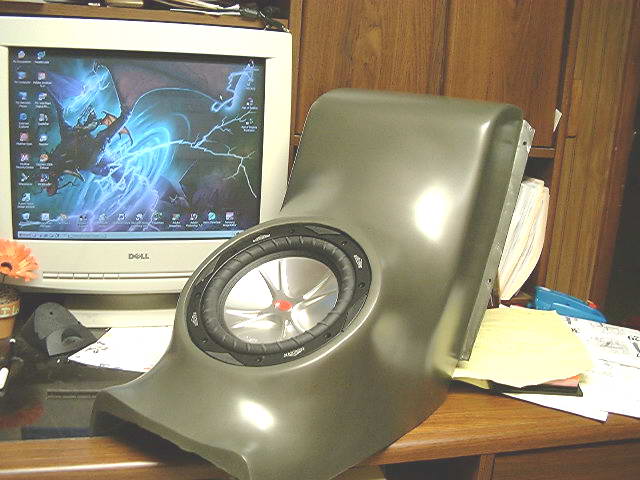
I've taken a lot of phots, but I don't have anything to post yet. The build has been slow, as usual, but progress is there. First off, the subwoofer enclosure is all but done. I had a little issue with paint the other day. I ran out of paint before it was finished. I bought the same brand/color/etc. When I sprayed the last coat on, it all cracked and checked. WTF. So I had to sand it down again, re-prime, and re-shoot the color. No problem second time around. The only thing left is to drill a hole for the wire and hook it up. I'm debating whether to connect the wire direct to the sub, or to put a terminal strip on there...

The amp rack is moving slowly. I purchased 5 fans to use in the front compartment and on the rack. Two will be used behind the headlights to push/pull air into the compartment. 2 or 3 will be on the rack, moving air around the amps. The fans should be here Friday, so hopefully I'll have it figured out by next week.

I also re-started my door panel project. Hopefully I'll have pics of that forthcoming.

Bob
IP: Logged
Sourmug
Member
Posts: 4538
From: Calgary, Alberta, Canada
Registered: Sep 2002


Feedback score:    (29)
Leave feedback


Total ratings: 144
Rate this member

Report this Post05-09-2006 02:50 PM Click Here to See the Profile for SourmugSend a Private Message to SourmugEdit/Delete MessageReply w/QuoteDirect Link to This Post
WE NEED PICTURES!!!

Nolan
IP: Logged
Fiero1Fan
Member
Posts: 4364
From: Brachttal, Germany
Registered: Sep 2005


Feedback score:    (19)
Leave feedback


Total ratings: 100
Rate this member

Report this Post05-09-2006 03:23 PM Click Here to See the Profile for Fiero1FanClick Here to visit Fiero1Fan's HomePageSend a Private Message to Fiero1FanEdit/Delete MessageReply w/QuoteDirect Link to This Post
 
quote
Originally posted by Sourmug:

WE NEED PICTURES!!!


I second that!!!
IP: Logged
RCR
Member
Posts: 4397
From: Shelby Twp Mi
Registered: Sep 2002


Feedback score:    (7)
Leave feedback


Total ratings: 102
Rate this member

Report this Post05-09-2006 07:21 PM Click Here to See the Profile for RCRSend a Private Message to RCREdit/Delete MessageReply w/QuoteDirect Link to This Post
Did someone ask for pictures? Let's see...Oh, here they are..

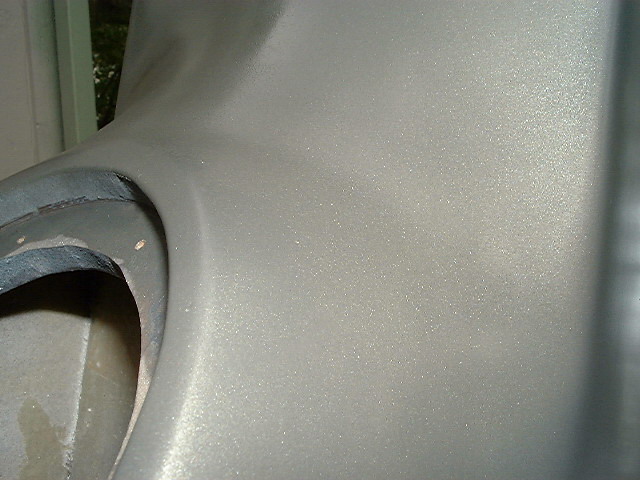
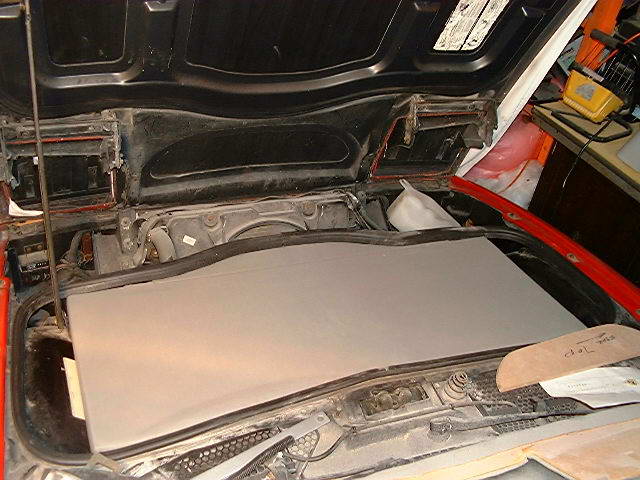
First pic was supposed to show the wrinkles in the paint, but instaed, it really shows the metalic grey, so:


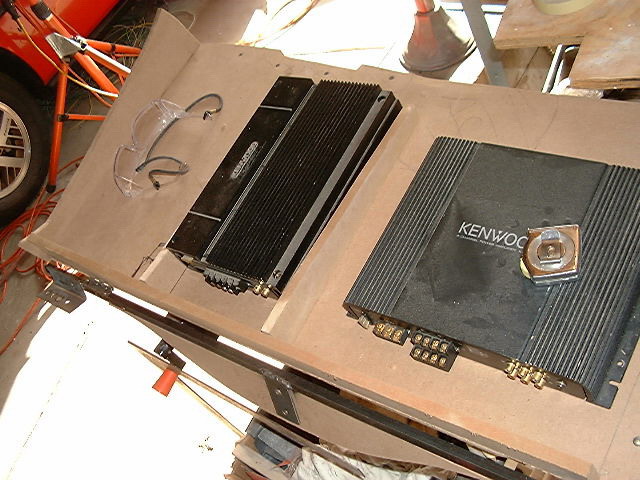
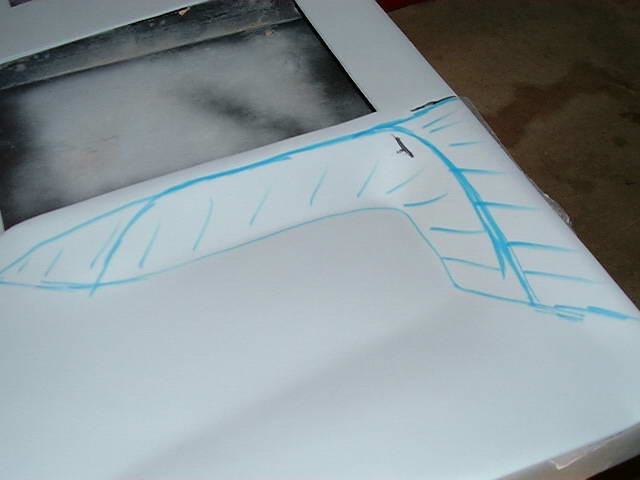
On to the amp rack build...
Here I'm laying out the positions of the amps.


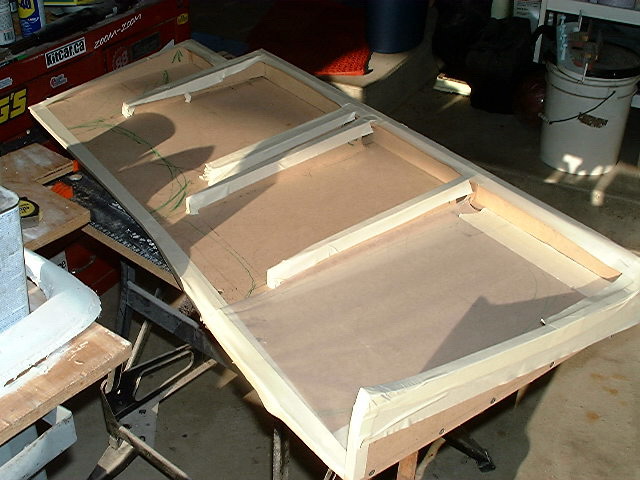
This one shows the skeleton that will give it some shape. Nothing too radical (well, not radical at all) since this is the first attempt at doing this. I'm using 1/2 MDF for the whole thing.


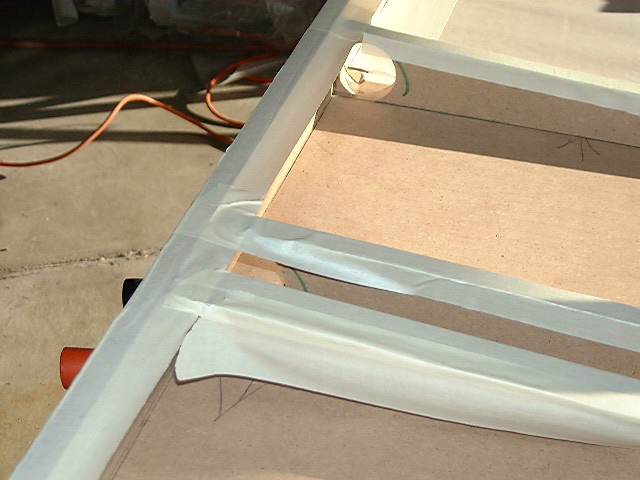
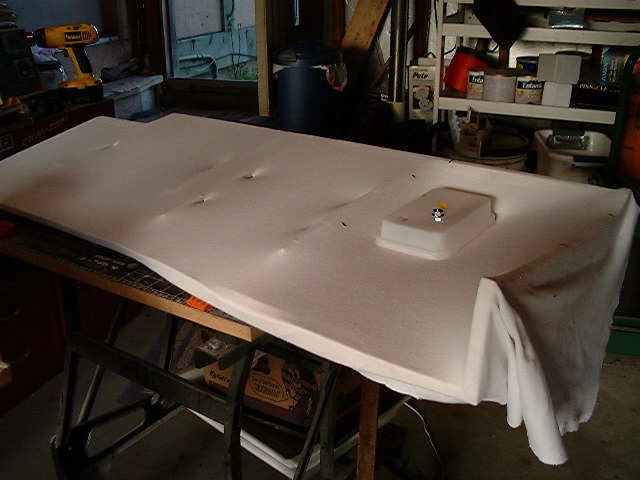
To keep the cloth and resin from sticking to everything, I covered the skeleton with masking tape, and used wax paper on the large areas.


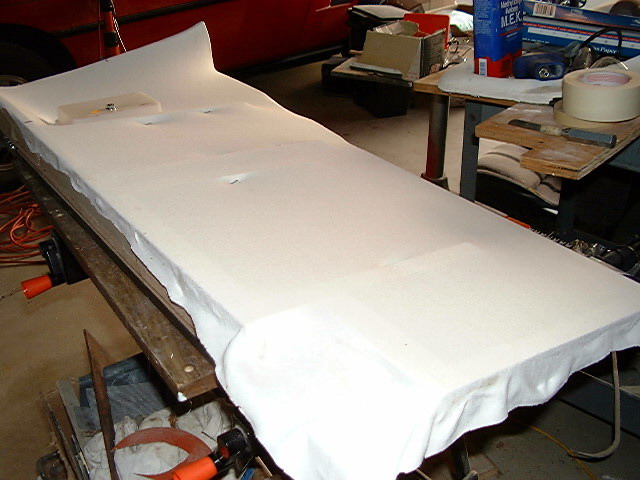
Here I've stretched my spandex over the entire thing. I wraped the edges over the rack, hot gluing them to the masking tape to allow easier removal once it was hard.


IP: Logged
RCR
Member
Posts: 4397
From: Shelby Twp Mi
Registered: Sep 2002


Feedback score:    (7)
Leave feedback


Total ratings: 102
Rate this member

Report this Post05-09-2006 07:29 PM Click Here to See the Profile for RCRSend a Private Message to RCREdit/Delete MessageReply w/QuoteDirect Link to This Post

RCR

4397 posts
Member since Sep 2002
This is another view of the wrap, trying to catch the shadows to show the shape. The fiberglass can top on the right is being used to leave an impression in the cover. I need this to clear the power brake reseviour(sp?). The top happened to be almost the exact size and shape of the brake cover. Once the resin hardened, I removed the cover and coated that blank spot with resin.


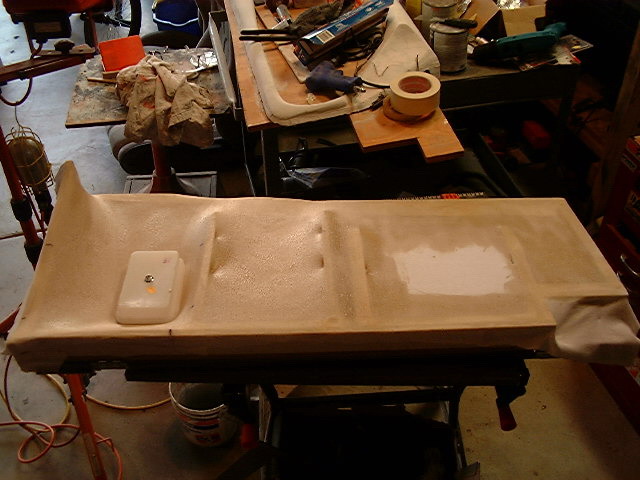
And here it is covered in resin:


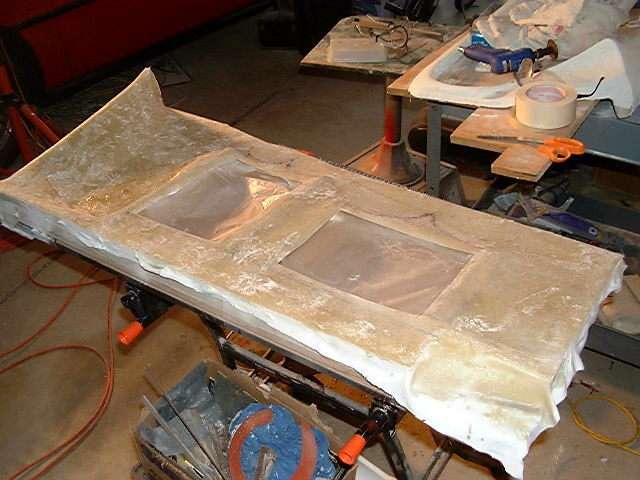
A couple of layers of 1.5 oz matt and I've also cut out the amp holes:


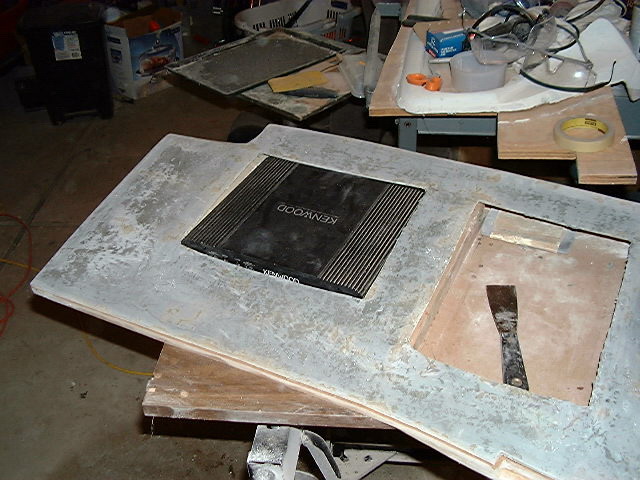
And here I'm test fitting one of the amps.


That's it for the racki pictures. I'm expecting some fans by Friday, so hopefully I can get them mounted and on to the finishing.

[This message has been edited by RCR (edited 05-09-2006).]

IP: Logged
RCR
Member
Posts: 4397
From: Shelby Twp Mi
Registered: Sep 2002


Feedback score:    (7)
Leave feedback


Total ratings: 102
Rate this member

Report this Post05-09-2006 07:53 PM Click Here to See the Profile for RCRSend a Private Message to RCREdit/Delete MessageReply w/QuoteDirect Link to This Post

RCR

4397 posts
Member since Sep 2002
And more, as I open the chapter on the door panels. I was going to wait until I was further along, but since I mentioned it...

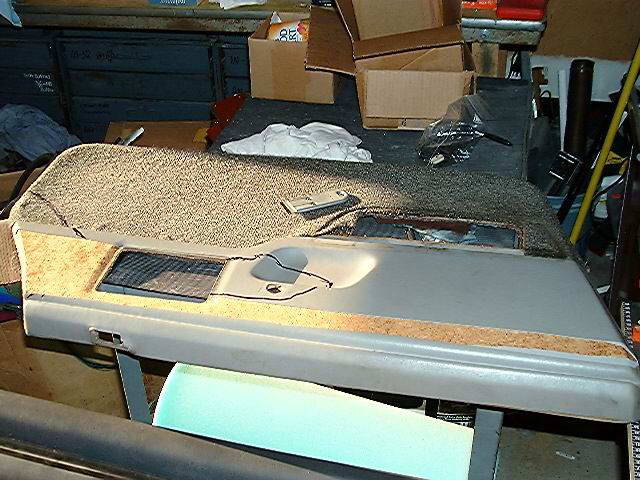
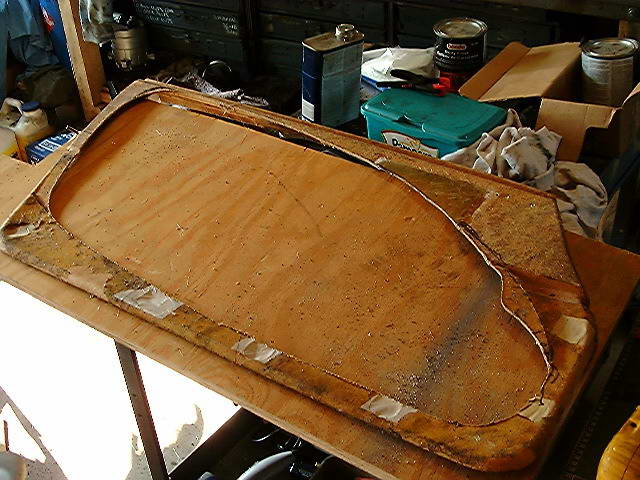
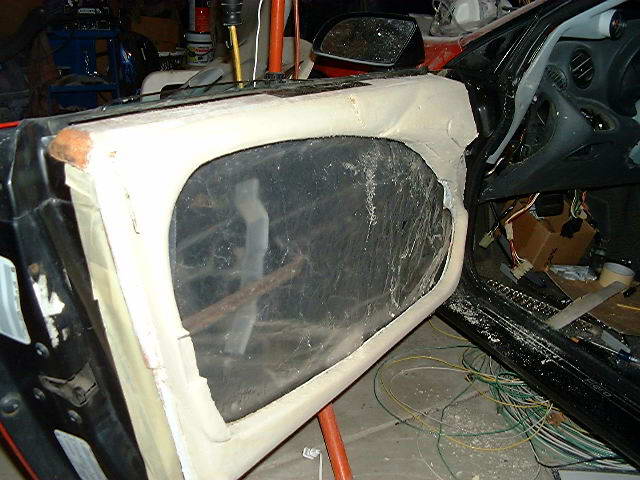
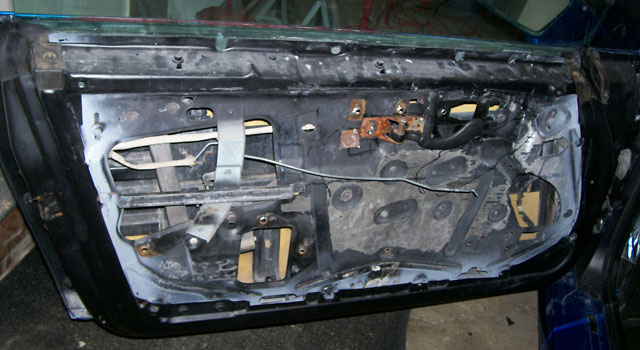
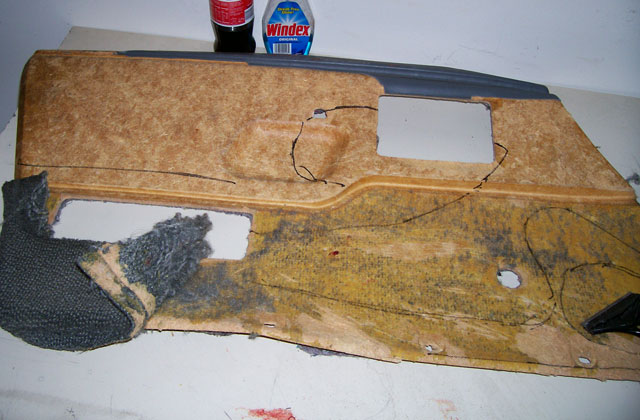
Here is the door panel we all know and love. I felt it was no longer compatible with the dash I put in, so it needed some radical re-styling. In the spirit of Roy(MrFixit) and Jon's(Jscott) Firebird interior swaps, I thought I'd go the same route with the door panels. Unfortuneately, they don't match up to well to the dash, so I decided to reuse as much as I could and build my own.
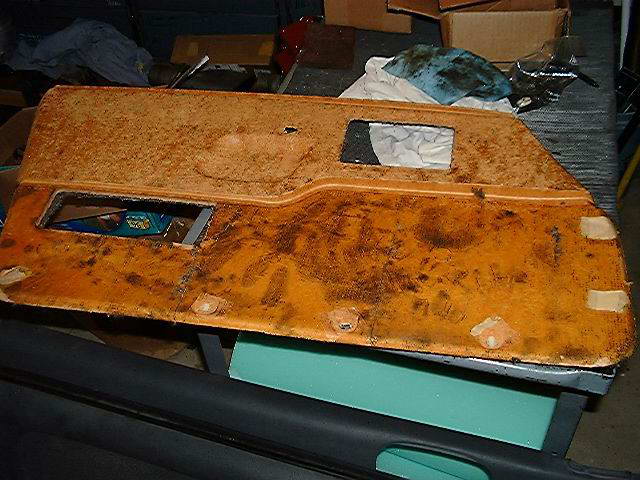

Stripped:


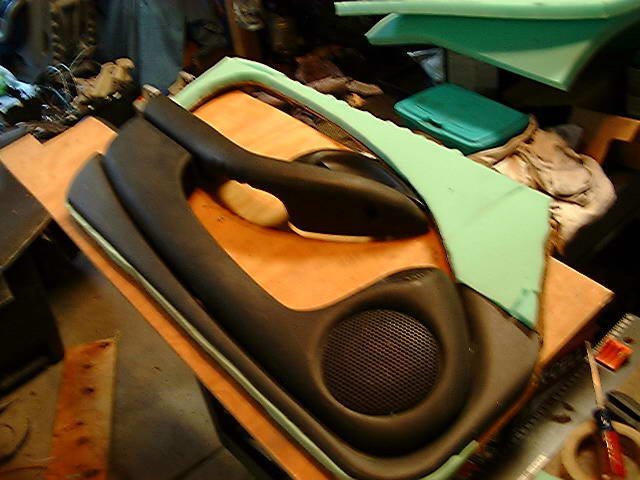
This pic shows the door panel with the components mocked up. The center portion will be cut out and probably upolstered in grey suede. The Fiero panel is a bit too "textured" so I had to cut it apart and flatten it out. I also had to fill the openings where the stock door latch comes thru and I cut out where the new latch will go. This is actually pretty similar to how Roy did his.


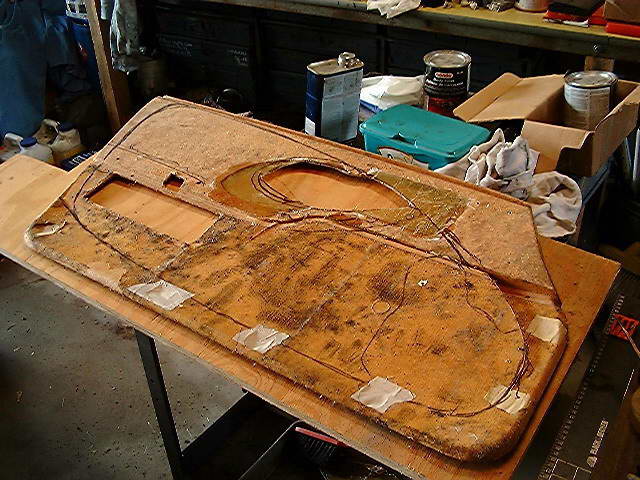
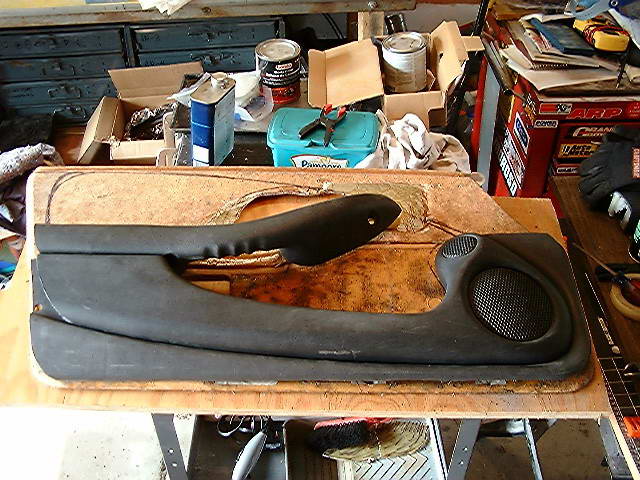
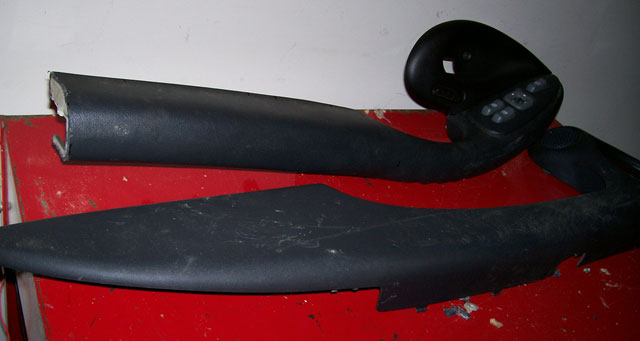
Here I'm ling up all the pieces:

I was planning on reusing the bottom of the panel, the door pull, and the speaker box/storage tray.

Here the center is gone, and the panel is mounted to a piece of plywood to keep it flat.


My first thought was to wrap it in hi-density foam, but that looked aweful:


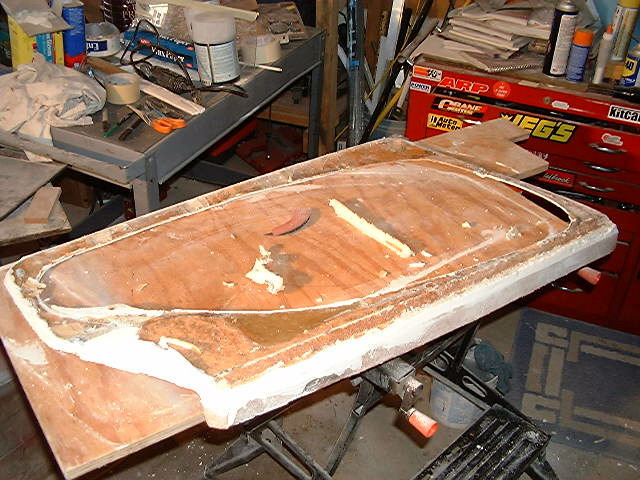
So I decided to try poly foam. I shaped the foam and covered it with Kilz latex primer and drywall compound. I also droped the idea of using the bottom of the original Firebird panel, figuring it would be just as easy to form my own.
Here is a shot with the first pieces of foam:


And here it is with all the foam and drywall stripped off so I could do it again:

My intent was to use the drywall and foam to make a mold. But with all the glassing I've done recently, I've decided mold making is not for me. These will be one-off pieces, so I didn't want a bunch of drywall compund in my doors, so it had to go. I picked up some "yellow" foam at Home Depot, so this was a good opurtunity to give it a try.


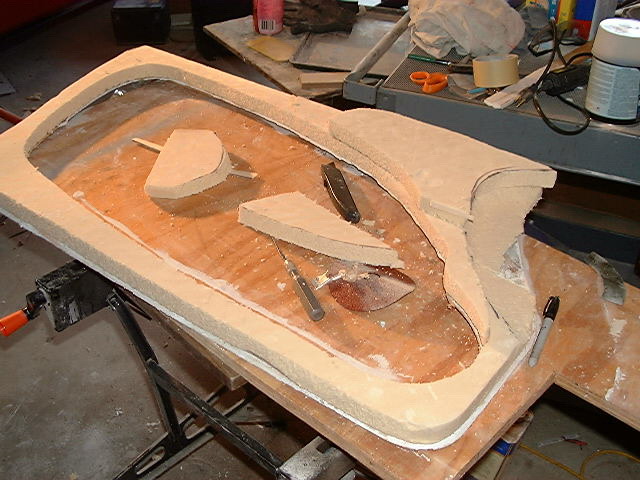
Here is the new mock-up with the urethane foam. Nice stuff to work with, but I hadn't realized that it was fiberglass reinforced. Just something else to stick to my fingers as I sand...


I've done more sanding and shaping, but the camera needed a recharge so those pics will be later...

Thanx for tuning in, now back to your regularly scheduled program...

Bob
IP: Logged
RCR
Member
Posts: 4397
From: Shelby Twp Mi
Registered: Sep 2002


Feedback score:    (7)
Leave feedback


Total ratings: 102
Rate this member

Report this Post05-09-2006 08:01 PM Click Here to See the Profile for RCRSend a Private Message to RCREdit/Delete MessageReply w/QuoteDirect Link to This Post

RCR

4397 posts
Member since Sep 2002
PS, Cudos to Cliff. The PIP worked perfect today.

thanx...
IP: Logged
Sourmug
Member
Posts: 4538
From: Calgary, Alberta, Canada
Registered: Sep 2002


Feedback score:    (29)
Leave feedback


Total ratings: 144
Rate this member

Report this Post05-09-2006 09:15 PM Click Here to See the Profile for SourmugSend a Private Message to SourmugEdit/Delete MessageReply w/QuoteDirect Link to This Post
So I take it that the components you are using on the panels are from a firebird? I like the idea. Keep it coming.

Nolan
IP: Logged
RCR
Member
Posts: 4397
From: Shelby Twp Mi
Registered: Sep 2002


Feedback score:    (7)
Leave feedback


Total ratings: 102
Rate this member

Report this Post05-09-2006 10:40 PM Click Here to See the Profile for RCRSend a Private Message to RCREdit/Delete MessageReply w/QuoteDirect Link to This Post
Yes, the speaker pods, door pull/arm rests, latches, switches, and overall look will be like the Firebird, with a small twist.

Bob
IP: Logged
Haagster
Member
Posts: 1378
From: Harrisburg, Pennsylvania
Registered: May 2001


Feedback score: N/A
Leave feedback

Rate this member

Report this Post05-10-2006 03:48 PM Click Here to See the Profile for HaagsterSend a Private Message to HaagsterEdit/Delete MessageReply w/QuoteDirect Link to This Post
OK Bob. Your door panels definitely have my interest (since I am struggling on how to do the panels for my car!!).

"Back to the regularly scheduled program"??? THIS IS A REGULARLY SCHEDULED PROGRAM - NOW!! Outstanding work!!!

------------------

Project Fiero GT 2M8 Update thread

[This message has been edited by Haagster (edited 05-10-2006).]

IP: Logged
PFF
System Bot
Fie Ro
Member
Posts: 3735
From: Soest, The Netherlands
Registered: Sep 2001


Feedback score: N/A
Leave feedback


Total ratings: 132
Rate this member

Report this Post05-10-2006 04:58 PM Click Here to See the Profile for Fie RoSend a Private Message to Fie RoEdit/Delete MessageReply w/QuoteDirect Link to This Post
[insert popcorn gif thingie here]
IP: Logged
Haagster
Member
Posts: 1378
From: Harrisburg, Pennsylvania
Registered: May 2001


Feedback score: N/A
Leave feedback

Rate this member

Report this Post05-14-2006 09:26 PM Click Here to See the Profile for HaagsterSend a Private Message to HaagsterEdit/Delete MessageReply w/QuoteDirect Link to This Post


any updates??? and to get this back on top...

[This message has been edited by Haagster (edited 05-14-2006).]

IP: Logged
RCR
Member
Posts: 4397
From: Shelby Twp Mi
Registered: Sep 2002


Feedback score:    (7)
Leave feedback


Total ratings: 102
Rate this member

Report this Post05-15-2006 07:38 AM Click Here to See the Profile for RCRSend a Private Message to RCREdit/Delete MessageReply w/QuoteDirect Link to This Post
Slow going with Mother's Day weekend. I've fiberglassed the door panel surround. It's to a point where I can remove it from the door to finish it off. It will need another layer of glass, then I need to add some sort of flange to mount the center piece. My fans were delayed by a late train, so I should get them today. I also worked on putting a bottom in my trunk, but that's another tale...

There should be another good update soon.

thanx for asking...

Bob

edit: Fans are here. <thumbs-up>

[This message has been edited by RCR (edited 05-15-2006).]

IP: Logged
RCR
Member
Posts: 4397
From: Shelby Twp Mi
Registered: Sep 2002


Feedback score:    (7)
Leave feedback


Total ratings: 102
Rate this member

Report this Post05-15-2006 07:51 PM Click Here to See the Profile for RCRSend a Private Message to RCREdit/Delete MessageReply w/QuoteDirect Link to This Post

RCR

4397 posts
Member since Sep 2002
Ok...As I left it, I had a rough shape on my "work" table. After taking the panel on and off the car about a hundred times, I mounted it to the door with all of the fasteners. Before doing that, though, I covered the door in plastic so I wouldn't slop resin all over the place. And sometime in there, I almost burned the car to the ground, but that's in another thread. Anyway, I shaped the panel so first, I could close the door, then matched it to the trim pieces. Then I shaped the panel to flow with the dash and lastly, how I wanted it. Here are some progress pics:

This pic shows the panel mounted:


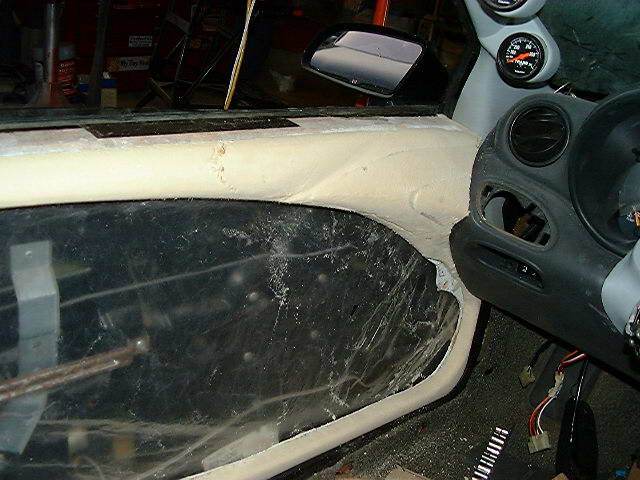
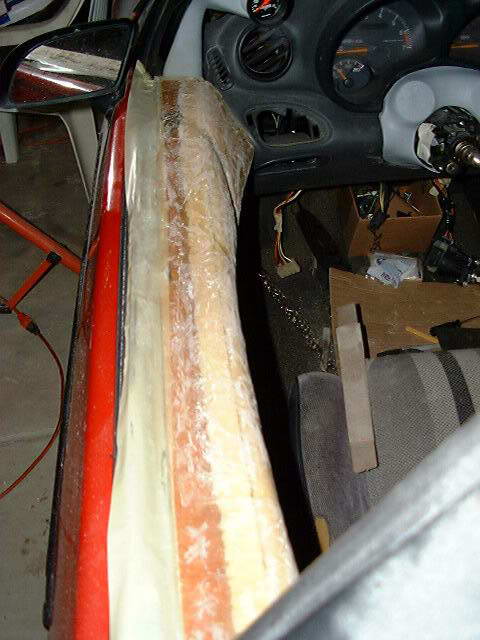
And this is with the door closed I tried to follow the flow of the dash into the panels:


Here is a closer shot of how the end is sculpted out to match the dash. The foam is soft enough that 180 grit sandpaper cuts it smoothly, but it doesn't take forever. I pretty much used a utility knife, a small Xacto saw blade, and various pieces of sandpaper to do all of the sculping.


Here is a closer shot of the detail I put dividing the rise into the dash from the top sill. It should flow pretty well into the door pull.


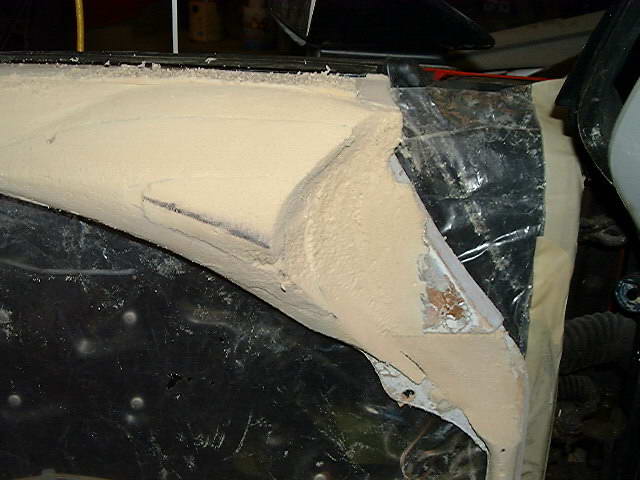
After getting the sculpting how I wanted it, I started laying up 1.5oz matt. I started at the top and worked my way down. To help aid the fiberglass in keeping it's shape, especially on the bottom edges, I wrapped the foam and glass with aluminum foil. I tried spraying the foil with cooking spray to help release it. The foil was still a bit@#^ to get off. I had to scrap a lot off with a knife, but it did the trick. It kept the glass from coming off the foam, so the shape was intact.


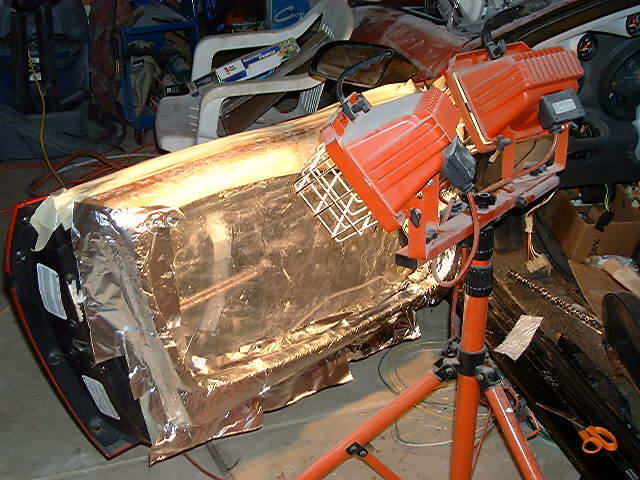
Here is a shot of the bottom half, using my "dryers". 1000 Watts of halogen power. It'd work better without the aluminum reflecting the heat back, but you do what you have to do...


Lastly, here is a shot with the door closed that shows the curve of the panel from the top.


Next step is to pull the panel off and finish the glassing and add some of the detail work.

till later...

Bob

Edit: A couple invaluable tools when working with fiberglass: a good shop vac to clean up the dust. And a respirator, to keep that crap out of the lungs.

[This message has been edited by RCR (edited 05-15-2006).]

IP: Logged
Haagster
Member
Posts: 1378
From: Harrisburg, Pennsylvania
Registered: May 2001


Feedback score: N/A
Leave feedback

Rate this member

Report this Post05-16-2006 08:58 AM Click Here to See the Profile for HaagsterSend a Private Message to HaagsterEdit/Delete MessageReply w/QuoteDirect Link to This Post
I didn't get past this point because that was right at the point when the "fit hit the shan" at home (can you spell separation and divorce)...


I can (almost) start working on it again. Still need to get a different (better) driver's door panel and a passenger panel to work... And yes, you have at least 1 "fan" actively reading your thread!!!

------------------

Project Fiero GT 2M8 Update thread

[This message has been edited by Haagster (edited 05-16-2006).]

IP: Logged
RCR
Member
Posts: 4397
From: Shelby Twp Mi
Registered: Sep 2002


Feedback score:    (7)
Leave feedback


Total ratings: 102
Rate this member

Report this Post05-16-2006 12:09 PM Click Here to See the Profile for RCRSend a Private Message to RCREdit/Delete MessageReply w/QuoteDirect Link to This Post
Leave the pics Haagster...Just adds to the flavor of the topic....
Hope you get your "business" in order soon and get back at it. Always good to see what ideas others have and how we take different paths to execute the same thing. Looking forward to seeing you build.
- It looks like you have your door pull moved already. I haven't done that yet. I was thinking I should do it when I know how the center panel works out, but maybe I should do it first after all...

Bob

[This message has been edited by RCR (edited 05-16-2006).]

IP: Logged
Haagster
Member
Posts: 1378
From: Harrisburg, Pennsylvania
Registered: May 2001


Feedback score: N/A
Leave feedback

Rate this member

Report this Post05-16-2006 03:05 PM Click Here to See the Profile for HaagsterSend a Private Message to HaagsterEdit/Delete MessageReply w/QuoteDirect Link to This Post
The door pull was not fun... Something wrong with trying to do that at 10PM in a garage that is about 20 degrees. I have not touched the passenger door yet, so that is coming too.

Thanks for letting me piggy back on your thread a little. I think having similar installs in the same thread is great <remembering back to mrfixit, jscott1, PBJ doing the first of the Firebird dash install threads> for variety and interest.
IP: Logged
Sourmug
Member
Posts: 4538
From: Calgary, Alberta, Canada
Registered: Sep 2002


Feedback score:    (29)
Leave feedback


Total ratings: 144
Rate this member

Report this Post05-16-2006 03:41 PM Click Here to See the Profile for SourmugSend a Private Message to SourmugEdit/Delete MessageReply w/QuoteDirect Link to This Post
Great progress! It's going to look great once you are done.

Is the foam you are using a mix, spray can or a solid sheet?

This is sure going to help me out once I finall get around to doing my interior.

Nolan
IP: Logged
RCR
Member
Posts: 4397
From: Shelby Twp Mi
Registered: Sep 2002


Feedback score:    (7)
Leave feedback


Total ratings: 102
Rate this member

Report this Post05-16-2006 06:41 PM Click Here to See the Profile for RCRSend a Private Message to RCREdit/Delete MessageReply w/QuoteDirect Link to This Post
 
quote
Thanks for letting me piggy back on your thread a little. I think having similar installs in the same thread is great <remembering back to mrfixit, jscott1, PBJ doing the first of the Firebird dash install threads> for variety and interest.

My pleasure...

 
quote
Is the foam you are using a mix, spray can or a solid sheet?

Nolan, I'm using 1.5" (I think??) urethane foam board from Home Depot. It's yellow, has foil backer on one side and paper on the other. It's also fiberglass re-enforced.

Bob
IP: Logged
countach711
Member
Posts: 797
From: Littleton, Colorado
Registered: Sep 2003


Feedback score: N/A
Leave feedback

Rate this member

Report this Post05-17-2006 12:53 AM Click Here to See the Profile for countach711Click Here to visit countach711's HomePageSend a Private Message to countach711Edit/Delete MessageReply w/QuoteDirect Link to This Post
 
quote
Originally posted by Haagster:

I didn't get past this point because that was right at the point when the "fit hit the shan" at home (can you spell separation and divorce)...


You can call me crazy, but I think I'd rather keep my wife a bit more than a car... just a thought.
IP: Logged
PFF
System Bot
Haagster
Member
Posts: 1378
From: Harrisburg, Pennsylvania
Registered: May 2001


Feedback score: N/A
Leave feedback

Rate this member

Report this Post05-17-2006 06:45 AM Click Here to See the Profile for HaagsterSend a Private Message to HaagsterEdit/Delete MessageReply w/QuoteDirect Link to This Post
 
quote
Originally posted by countach711:
You can call me crazy, but I think I'd rather keep my wife a bit more than a car... just a thought.


You have a PM (to keep this thread on topic)...
IP: Logged
squisher86SE
Member
Posts: 1350
From: Franklin, IN, USA
Registered: May 2005


Feedback score: (1)
Leave feedback

Rate this member

Report this Post05-17-2006 11:37 AM Click Here to See the Profile for squisher86SESend a Private Message to squisher86SEEdit/Delete MessageReply w/QuoteDirect Link to This Post
RCR: I didn't catch this thread in time to respond close to your speaker picture, but oh well.

I am currently using a Kicker CVR8, and they do sound just as good as they look

I'm using a center console box, AusFiero-style I believe. Connected to a 380 watt Alpine amplifier fed by a Pioneer head unit. Won't rattle the windows on the car next to you, but it can chase you out of the Fiero! Very crisp and hits really hard for an 8".
IP: Logged
RCR
Member
Posts: 4397
From: Shelby Twp Mi
Registered: Sep 2002


Feedback score:    (7)
Leave feedback


Total ratings: 102
Rate this member

Report this Post05-17-2006 12:00 PM Click Here to See the Profile for RCRSend a Private Message to RCREdit/Delete MessageReply w/QuoteDirect Link to This Post
Thanx squisher: Sounds good to me (no pun intended). I'm looking forward to firing up again.

Bob

Edit for the foam.
I took a look at what I'm using. It is Dow Super Tuff-R, polyisocyanurate insulation. 1" thick. And it is fiber re-enforced.

[This message has been edited by RCR (edited 05-17-2006).]

IP: Logged
RCR
Member
Posts: 4397
From: Shelby Twp Mi
Registered: Sep 2002


Feedback score:    (7)
Leave feedback


Total ratings: 102
Rate this member

Report this Post05-31-2006 07:46 PM Click Here to See the Profile for RCRSend a Private Message to RCREdit/Delete MessageReply w/QuoteDirect Link to This Post
As always, I've run into a major stumbling block. When I made my measurements for the rack, I made sure to measure everything twice. Unfortuneately, I measured twice from the wrong mark. The fiberglass cover hits the brake fluid resevoir. Since I need to button up the front, the following discussions will be on how to repair stupid mistakes without starting from scratch.

more later

Bob
IP: Logged
RCR
Member
Posts: 4397
From: Shelby Twp Mi
Registered: Sep 2002


Feedback score:    (7)
Leave feedback


Total ratings: 102
Rate this member

Report this Post06-10-2006 07:22 AM Click Here to See the Profile for RCRSend a Private Message to RCREdit/Delete MessageReply w/QuoteDirect Link to This Post
It's been an up and down June. When it comes to the car, mostly down. Either I'm working too much and missing details, or just bad luck. Let's get to the pics....

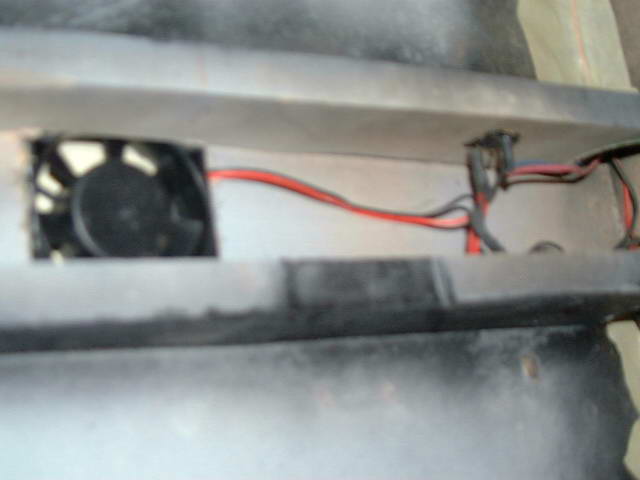
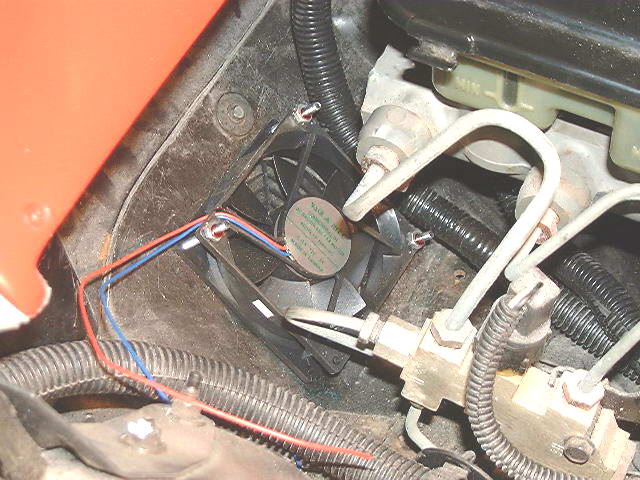
I've been ansy to finish the amp rack and get to other things, so I've concentrated my efforts in that direction. Cooling was brought up as an issue, so I've tried to resolve that by adding three fans to the rack. One fan each will blow onto each amp. I have a third fan that is centralized to blow air out. Here is a blury pick of the center fan. I will be spacing the amps off the board about 0.25" to allow air to move under them. All fans are 2x2x0.6". Off the top of my head, they are rated at 8cfm. I bought them from Jameco. They have a large selection of fans if anyone is interested. I cutout holes in the board, and glued the fans into place. The center fan needed to be reccessed into the ribs so it wouldn't stick out the top. I'm powering the fans from the amp power. I use a small relay powered from the amp accy line to turn them on/off.


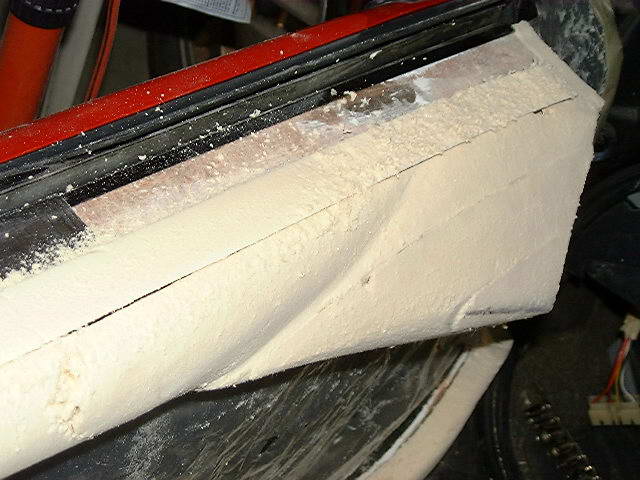
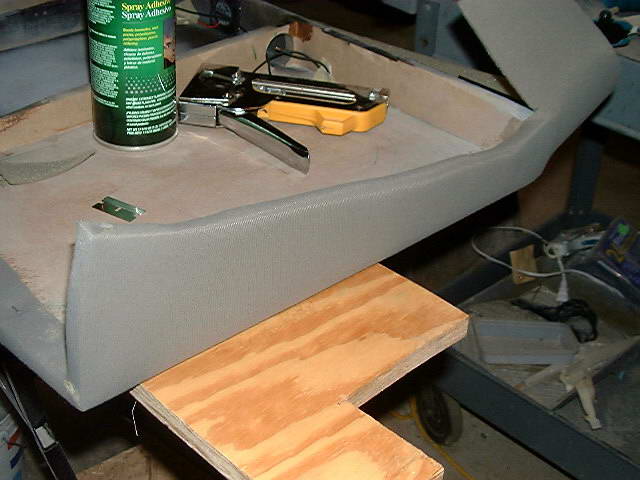
After the fans were installed I installed the material cover for the rack. I'm using a leftover piece of headliner material to cover everything. It's not the most durable stuff, but it's easy to use and I thought it looked good. I sprayed the surface using #M Hi-Strength 90 adhesive. Here is a before/after shot of the side:


I wrapped the material up and over the side, stapling it to the inside edge of the rack.

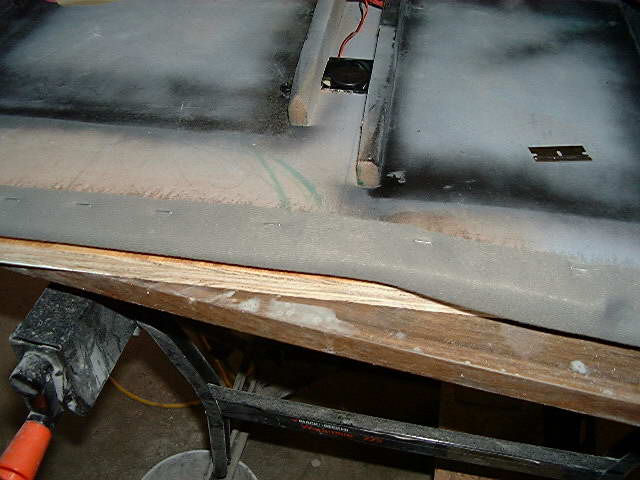
Here is a shot of the length of the rack, showing the material wrap, the staples, and the material trimmed with a razor.


And heres the finished product:


more...
IP: Logged
RCR
Member
Posts: 4397
From: Shelby Twp Mi
Registered: Sep 2002


Feedback score:    (7)
Leave feedback


Total ratings: 102
Rate this member

Report this Post06-10-2006 07:36 AM Click Here to See the Profile for RCRSend a Private Message to RCREdit/Delete MessageReply w/QuoteDirect Link to This Post

RCR

4397 posts
Member since Sep 2002
... And as the saga goes, I had run into problems. I mounted the rack and cover, only to find I missmeasured, so the cover hit the brake resevoir. It was close, I only had to shave of this much:


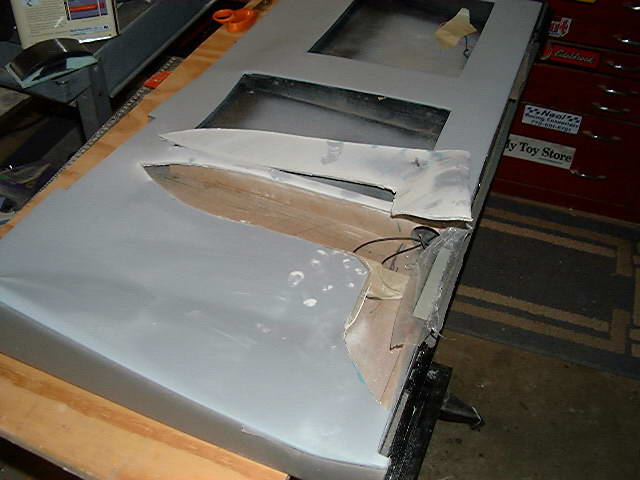
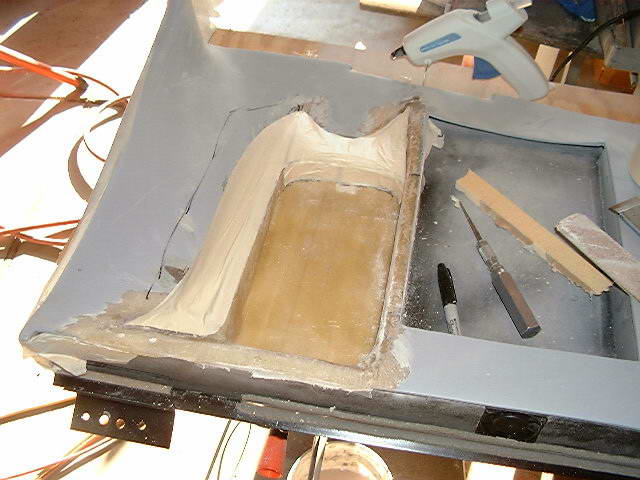
The repair process was similar to the build. Cut out the interference:


Glue material to the back side and place the spacer in the proper location:


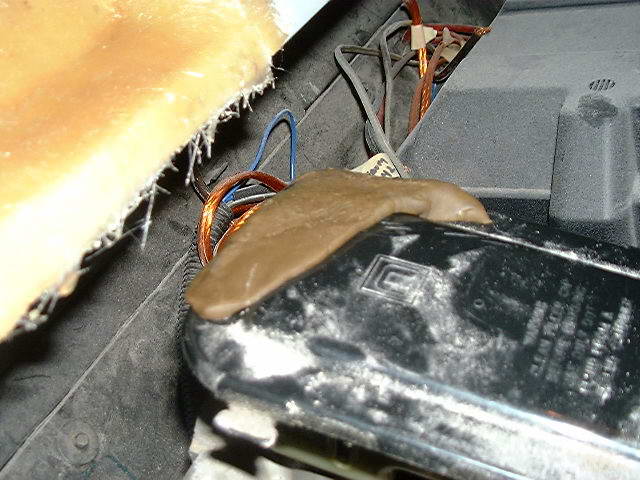
Then the typical resin, two layers of glass, filler, lots of sanding, primer then this:

That's Playdough on the resevoir, and it still hit. Hmmm...Back to the drawing board.

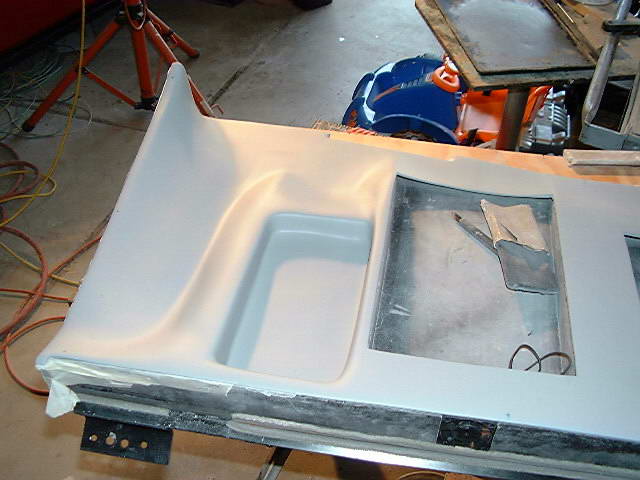
So, back to cut, add foam this time, cover in layers of glass, fill, primer, and sand til arm numb between each step:


I tried to make a pocket that kind of followed the same lines as the rest of the rack. I'm not too sure I like the way it looks, but I'm happy with the way it came out for all the work that went into it. I should also mention I did it twice. I cracked it along the seam of the joined areas, about 8" long, when doing another trial fit. Here's what it will look like mounted, minus the color coat:


I've got a lot more detail work to do, but at least this one is winding down. Then back to the door.

Thanx for viewing, and as always, comments and suggestions are welcome.

Bob

[This message has been edited by RCR (edited 06-10-2006).]

IP: Logged
RCR
Member
Posts: 4397
From: Shelby Twp Mi
Registered: Sep 2002


Feedback score:    (7)
Leave feedback


Total ratings: 102
Rate this member

Report this Post06-10-2006 06:30 PM Click Here to See the Profile for RCRSend a Private Message to RCREdit/Delete MessageReply w/QuoteDirect Link to This Post

RCR

4397 posts
Member since Sep 2002
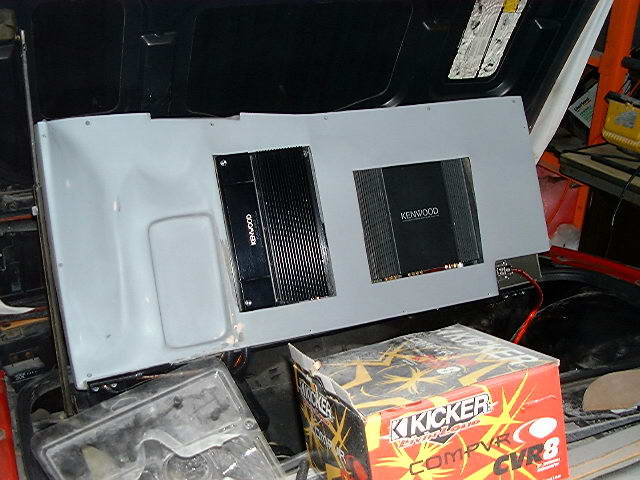
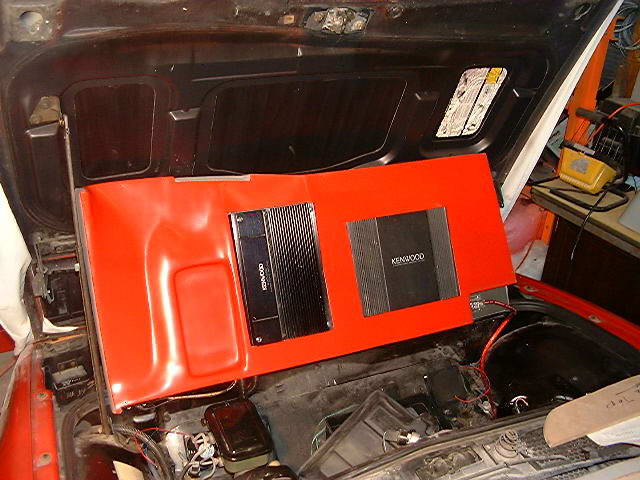
It's been a very productive day. I've finish sanded the rack cover, painted it, and installed it. The pics speak for themmselves:


I have detail work to do, such as finding some kind of latch mechanism, but that can wait. I also installed two more fans, in a push/pull configuration. These will be wired to the amp turn-on wire like the other three. These fans also came from Jameco, and I believe they are rated at 18 CFM.


<note that this one cost me a coolant bottle>

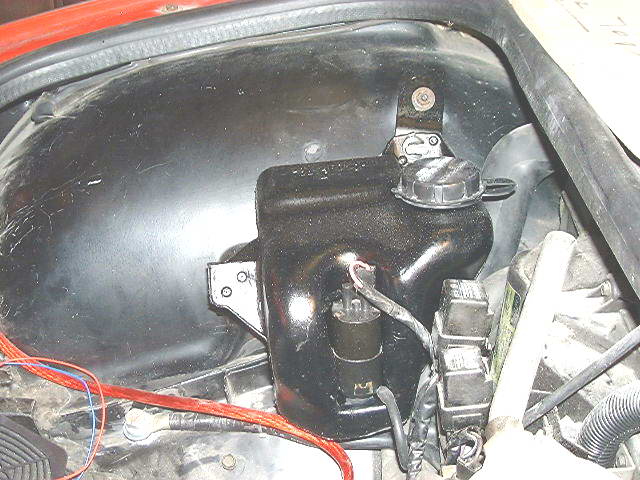
And speaking of bottles, the washer fluid bottle hit the rack, like everything else, so I moved it down about 1.5". I also decided to spruce it up a bit by painting it black. There is a spot on the side I masked off so I can see the fluid level.


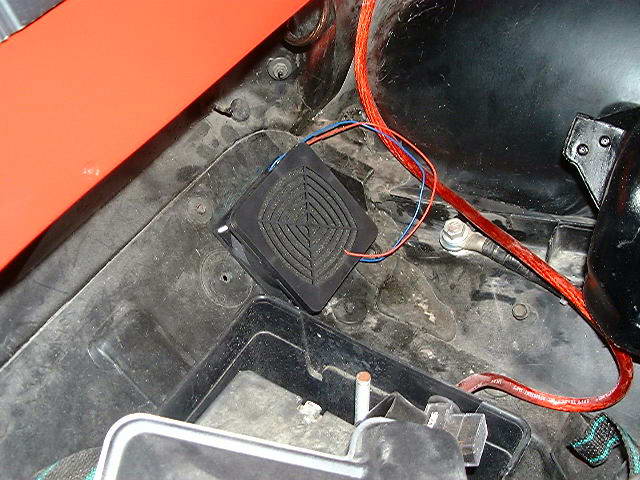
I also finished the subwoofer/console. I purchased a speaker spring-clip for the bottom, so I could mount the speaker wires. I wired up the speaker, stuffed it full of polyester batting, and screwed it closed. It's all ready to mount in the car.


So, with that, the car is almost done. Now all I have to do is build/finish the door panels, the column surround, two speaker pods, the head liner/AV system, and the trunk. Piece of cake

Bob
IP: Logged
MartyK
Member
Posts: 105
From: Springdale, AR
Registered: Feb 2006


Feedback score: N/A
Leave feedback

Rate this member

Report this Post06-17-2006 04:13 PM Click Here to See the Profile for MartyKSend a Private Message to MartyKEdit/Delete MessageReply w/QuoteDirect Link to This Post
Any updates ?
I have been watching this thread for some final pics..... Thanks .... MK
IP: Logged
The Funkmaster
Member
Posts: 1541
From: Chilliwack, B.C., Canada
Registered: Oct 2004


Feedback score: (1)
Leave feedback

Rate this member

Report this Post06-17-2006 10:07 PM Click Here to See the Profile for The FunkmasterSend a Private Message to The FunkmasterEdit/Delete MessageReply w/QuoteDirect Link to This Post
oooooooh I like the shiny sub box Very professional.
IP: Logged
Amida
Member
Posts: 2349
From: Seattle, WA. USA
Registered: Jul 2003


Feedback score: (4)
Leave feedback


Total ratings: 63
Rate this member

Report this Post06-18-2006 10:54 AM Click Here to See the Profile for AmidaSend a Private Message to AmidaEdit/Delete MessageReply w/QuoteDirect Link to This Post
That's some sound system Bob. How many speakers are you going to use? I like th door panels.

[This message has been edited by Amida (edited 06-18-2006).]

IP: Logged
PFF
System Bot
Sunflash
Member
Posts: 89
From: Atlanta, GA
Registered: Oct 2004


Feedback score: N/A
Leave feedback

Rate this member

Report this Post06-18-2006 12:49 PM Click Here to See the Profile for SunflashSend a Private Message to SunflashEdit/Delete MessageReply w/QuoteDirect Link to This Post
Wow you guys are doing great work. Lots of ideas and some stuff I didn't think of when making new panels for my '83 toyota truck last year. Looks like its time for a spruce up on the truck to help learn some new skills.
IP: Logged
RCR
Member
Posts: 4397
From: Shelby Twp Mi
Registered: Sep 2002


Feedback score:    (7)
Leave feedback


Total ratings: 102
Rate this member

Report this Post06-19-2006 07:42 AM Click Here to See the Profile for RCRSend a Private Message to RCREdit/Delete MessageReply w/QuoteDirect Link to This Post
Rob,
The entertainment system has been pieced together on a shoestring budget. I have component speakers (1" tweeter & 5 1/4" midrange) for the front. I have some old 6 1/2" 3 ways for the back, but I may change that, and the 8" subwoofer. I also have a 10" LCD screen to stick somewhere. Lotsa fun....

Thanx for checking in everyone. I'll be off all projects for the next couple of weeks as I try to finish some house projects and strip another Fiero for parts. Can't have enough parts, I guess.

later...
Bob
IP: Logged
Joe Torma
Member
Posts: 3485
From: Hillsborough, NJ USA
Registered: Jul 2001


Feedback score: N/A
Leave feedback


Total ratings: 129
Rate this member

Report this Post06-19-2006 10:14 AM Click Here to See the Profile for Joe TormaClick Here to visit Joe Torma's HomePageSend a Private Message to Joe TormaEdit/Delete MessageReply w/QuoteDirect Link to This Post
Looks good!
Will the radiator fan overpower those fans and let very hot air into the compartment?
IP: Logged
RCR
Member
Posts: 4397
From: Shelby Twp Mi
Registered: Sep 2002


Feedback score:    (7)
Leave feedback


Total ratings: 102
Rate this member

Report this Post06-19-2006 11:55 AM Click Here to See the Profile for RCRSend a Private Message to RCREdit/Delete MessageReply w/QuoteDirect Link to This Post
 
quote
Will the radiator fan overpower those fans and let very hot air into the compartment?


I hope not...I placed the fans outboard near the headlights, to get cooler air. Also, in the near future, I will be adding a hood vent.

Bob
IP: Logged
Korupt
Member
Posts: 762
From: Buckeye, Az
Registered: Jul 2004


Feedback score: N/A
Leave feedback

Rate this member

Report this Post06-20-2006 07:28 PM Click Here to See the Profile for KoruptSend a Private Message to KoruptEdit/Delete MessageReply w/QuoteDirect Link to This Post
TTT i wanna see what happens any updates?
IP: Logged
RCR
Member
Posts: 4397
From: Shelby Twp Mi
Registered: Sep 2002


Feedback score:    (7)
Leave feedback


Total ratings: 102
Rate this member

Report this Post06-21-2006 07:07 PM Click Here to See the Profile for RCRSend a Private Message to RCREdit/Delete MessageReply w/QuoteDirect Link to This Post
I'm currently stripping an 86 SE. That has top billing because it needs to get out of here. Thanx for the bump...

Bob
IP: Logged
RCR
Member
Posts: 4397
From: Shelby Twp Mi
Registered: Sep 2002


Feedback score:    (7)
Leave feedback


Total ratings: 102
Rate this member

Report this Post07-04-2006 10:14 AM Click Here to See the Profile for RCRSend a Private Message to RCREdit/Delete MessageReply w/QuoteDirect Link to This Post
still stripping parts, archive prevention bump
IP: Logged
Haagster
Member
Posts: 1378
From: Harrisburg, Pennsylvania
Registered: May 2001


Feedback score: N/A
Leave feedback

Rate this member

Report this Post07-04-2006 07:51 PM Click Here to See the Profile for HaagsterSend a Private Message to HaagsterEdit/Delete MessageReply w/QuoteDirect Link to This Post
Been a while for sure... I just picked up 2 'other' door panels for mine and stripped the carpet off and made the cuts... Keep this alive (I'll post a few pictures here too so it wont archive before its time)!!

------------------

Project Fiero GT 2M8 Update thread

IP: Logged
RCR
Member
Posts: 4397
From: Shelby Twp Mi
Registered: Sep 2002


Feedback score:    (7)
Leave feedback


Total ratings: 102
Rate this member

Report this Post08-20-2006 07:37 AM Click Here to See the Profile for RCRSend a Private Message to RCREdit/Delete MessageReply w/QuoteDirect Link to This Post
I'm back...and I actually have an update. It rained yesterday so I couldn't work on the house So back to the story:
I got back to work on the door panel. Idecided I need to finalize the look of the entire panel, so I needed to get the insert together. I took the center section that I had cut out, and trimmed it to fit into the new opening. The opening was slightly smaller because of the added fiberglass. I also made sure that the edges had nice smooth edges. This is so I can use it as a template to smooth out the outer section. I decided it would be easier to mount if I had a flange to mount it to, but I wasn't sure how to go about this. I decided to flange the main outer section, and attach the center to it. This will make covering the center easier. I plan on installing studs around the center section once I get to that point. Anyway...here are some pics:


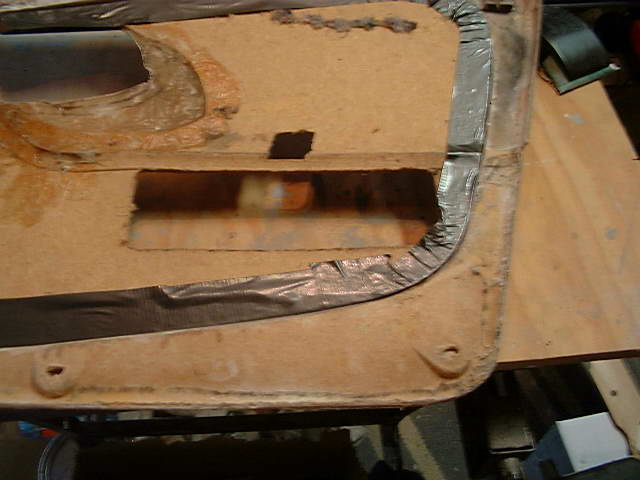
This pic shows the trimmed center installed with a layer of duct tape installed on the edge.


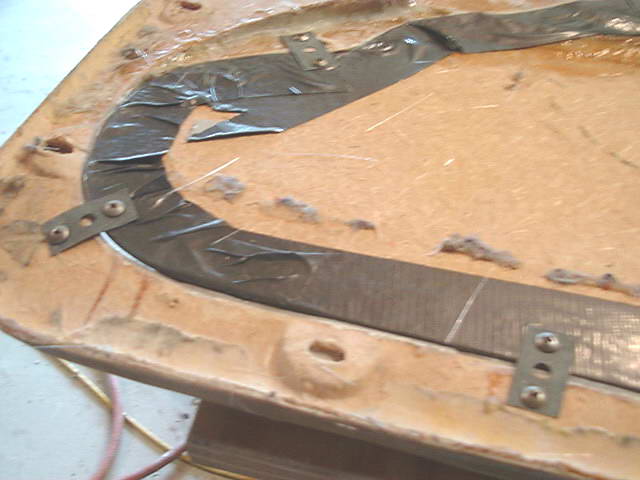
Here, I've installed some temporary bands to hold it together.


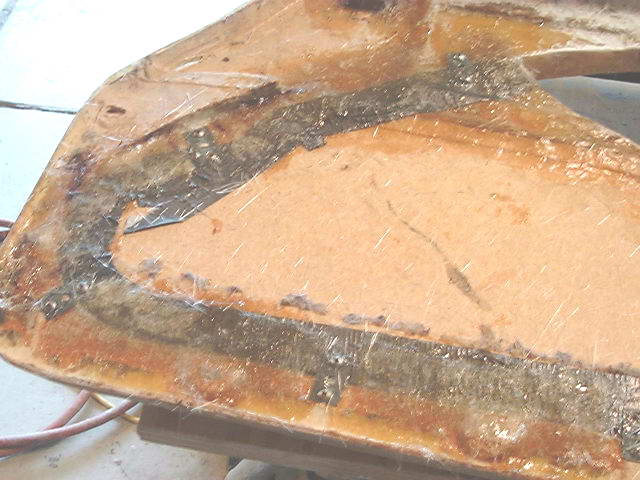
And here are several layers of glass (2oz matt) installed. Once the flange is complete, I will remove the bands and fill in the missing sections where the bands were. This will provide a complete support area for the center.

Hopefully it rains today, too

Bob
IP: Logged
Previous Page | Next Page

This topic is 5 pages long:  1   2   3   4   5 
next newest topic | next oldest topic

All times are ET (US)

Post New Topic  Post A Reply
Hop to:

Contact Us | Back To Main Page

Advertizing on PFF | Fiero Parts Vendors
PFF Merchandise | Fiero Gallery | Ogre's Cave
Real-Time Chat | Fiero Related Auctions on eBay


Copyright (c) 1999, C. Pennock