For the grip length, you can work that out by measuring the thicknesses of the parts you have.
For the material, steel is obviously stronger, but harder to install.
I don't know anything about the T-tops; I can't say if aluminium would be strong enough. However, if the aluminium gets wet, it may be corroded via galvanic corrosion.
Well there's at least 30 main large rivets, with probably another 30 smaller or supporting rivets, it seems like 1/4" aluminum rivets are good for about 1000 pounds shear strength? So it seems they would be more than adequate. The main rivets are installed from the interior and are mostly sealed off from the elements, but there are many rivets on the outside just under the panels and trim.
So, I'm now confused about the head gaskets (I recieved my permatorque severe duty head gaskets today), I looked into it more and while many people call the permatorque SD gaskets MLS, in some documentation felpro has 3 distinct options: MLS, permatorque SD, and permatorque. The versions for the 3.1l (your engine) has normal permatorque and permatorque SD, which is fancy looking black with blue rubber seals. For the 3400 (my engine) there's permatorque and permatorque SD, which looks very very similar to the normal one, same construction, just maybe a darker color. Other engines that have the felpro MLS head gaskets are very clearly multiple loose layers held together with rivets. Were your head gaskets clearly multiple layers, or do you maybe not have MLS head gaskets? Just a fancier version of a more normal style? MLS head gaskets also don't seem to use the "fire rings" that your fancy permatorque SD and my not so fancy permatorque SD have.
From the cut edge, I was able to see that the gasket was indeed made from multiple layers of steel. The layers were not paper-thin, there were perhaps (going from memory here) 5-6 layers in total.
I just looked on Rockauto for the Permatorque SD 541SD gasket for the 3400. It looks to be dark grey without the blue areas. Maybe the "Permatorque SD" branding is applied to gaskets having a different construction (i.e. it is meaningless marketing wank).
You may also consider using head gaskets for the 3.4 F-body, since you are using the iron heads. The 3.4 F-body and Fiero gaskets look essentially the same, except for the diameter of the fire ring.
The 3400 head gasket is missing one hole at each end; I don't know if this matters or not. You should also compare the engine blocks visually (with photos if you don't have a Fiero or 3.4 F-body block available) and see which gasket makes more sense to use.
I'm running the 512SD gasket for the Fiero, which is now discontinued. If later I can only get 513SD (3.1L Gen 2) gaskets, I'll wonder whether I should run them as-is, or maybe I could punch the extra holes.
[This message has been edited by pmbrunelle (edited 05-16-2025).]
From the cut edge, I was able to see that the gasket was indeed made from multiple layers of steel. The layers were not paper-thin, there were perhaps (going from memory here) 5-6 layers in total.
I just looked on Rockauto for the Permatorque SD 541SD gasket for the 3400. It looks to be dark grey without the blue areas. Maybe the "Permatorque SD" branding is applied to gaskets having a different construction (i.e. it is meaningless marketing wank).
You may also consider using head gaskets for the 3.4 F-body, since you are using the iron heads. The 3.4 F-body and Fiero gaskets look essentially the same, except for the diameter of the fire ring.
The 3400 head gasket is missing one hole at each end; I don't know if this matters or not. You should also compare the engine blocks visually (with photos if you don't have a Fiero or 3.4 F-body block available) and see which gasket makes more sense to use.
I'm running the 512SD gasket for the Fiero, which is now discontinued. If later I can only get 513SD (3.1L Gen 2) gaskets, I'll wonder whether I should run them as-is, or maybe I could punch the extra holes.
Ok, interesting, the 541sd is dark grey, on one side, and a slightly darker version of the striped blue on the other side. That's the only difference that I can tell.
I did have the Firebird 3.4 gaskets on it, so I'll look at the block a little later today and see what's under that hole.
[This message has been edited by 1985 Fiero GT (edited 05-17-2025).]
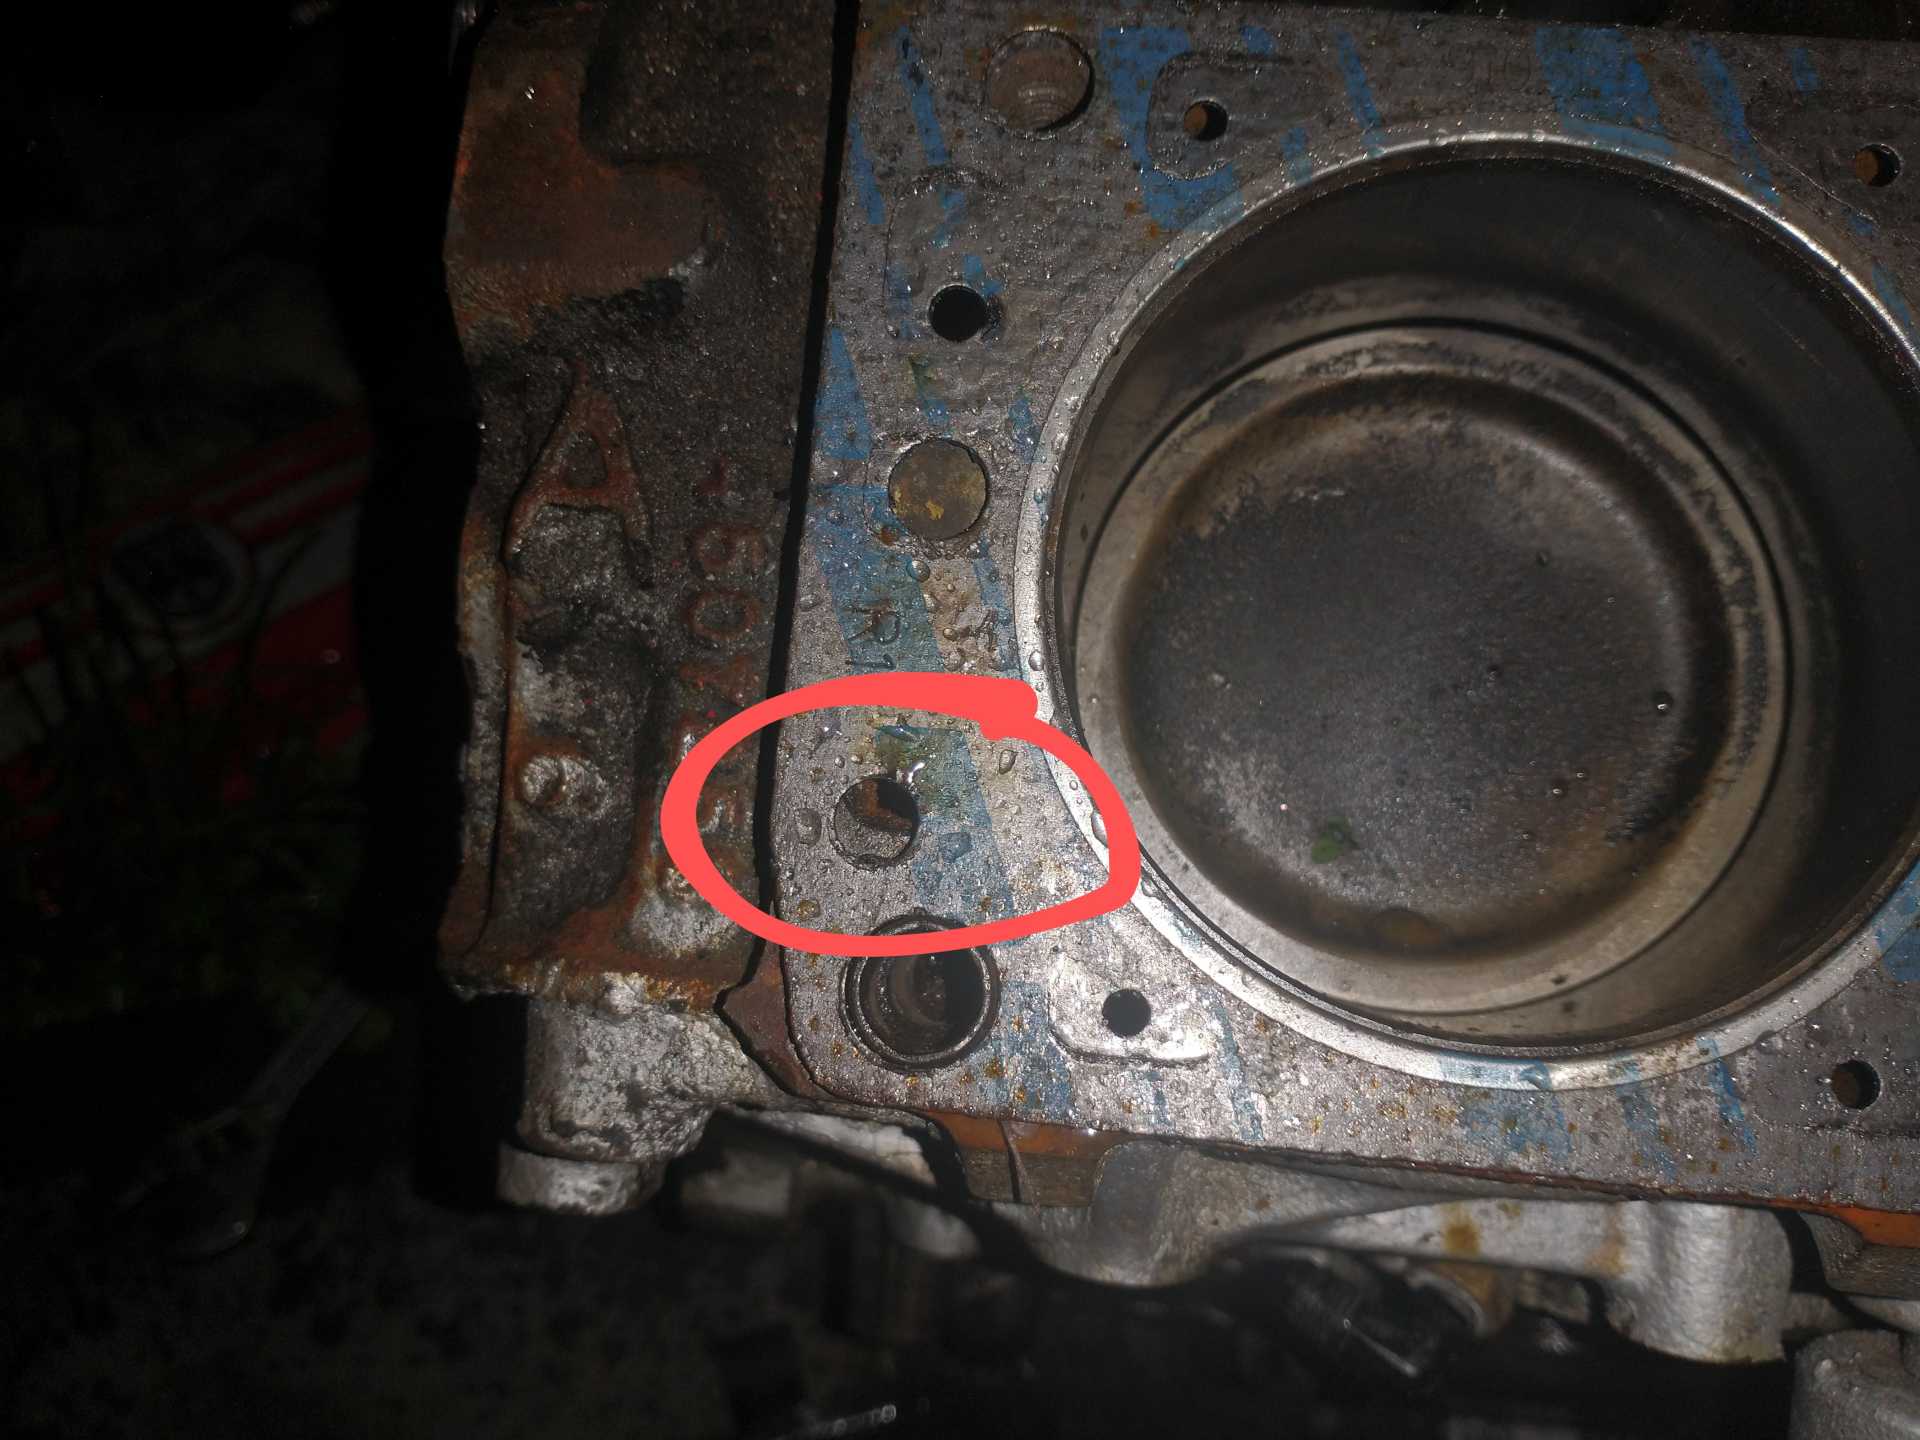
Ok, so the Fiero 2.8 and the Camaro 3.4 and the iron heads have passages under the missing holes on the 3400 gaskets, the 3400 block also has coolant passages there (although a little offset from the 3.4 Camaro head gasket hole). The hole above the circled one does not exist on the 3400 block on the front of the engine, but does at the rear of the engine, from pictures I've found that's the same as the 2.8 and 3.4.
So I guess I made the right choice unknowingly to start with by getting the standard Camaro 3.4 head gaskets, and those are what I should use, that extra coolant hole should be used probably.
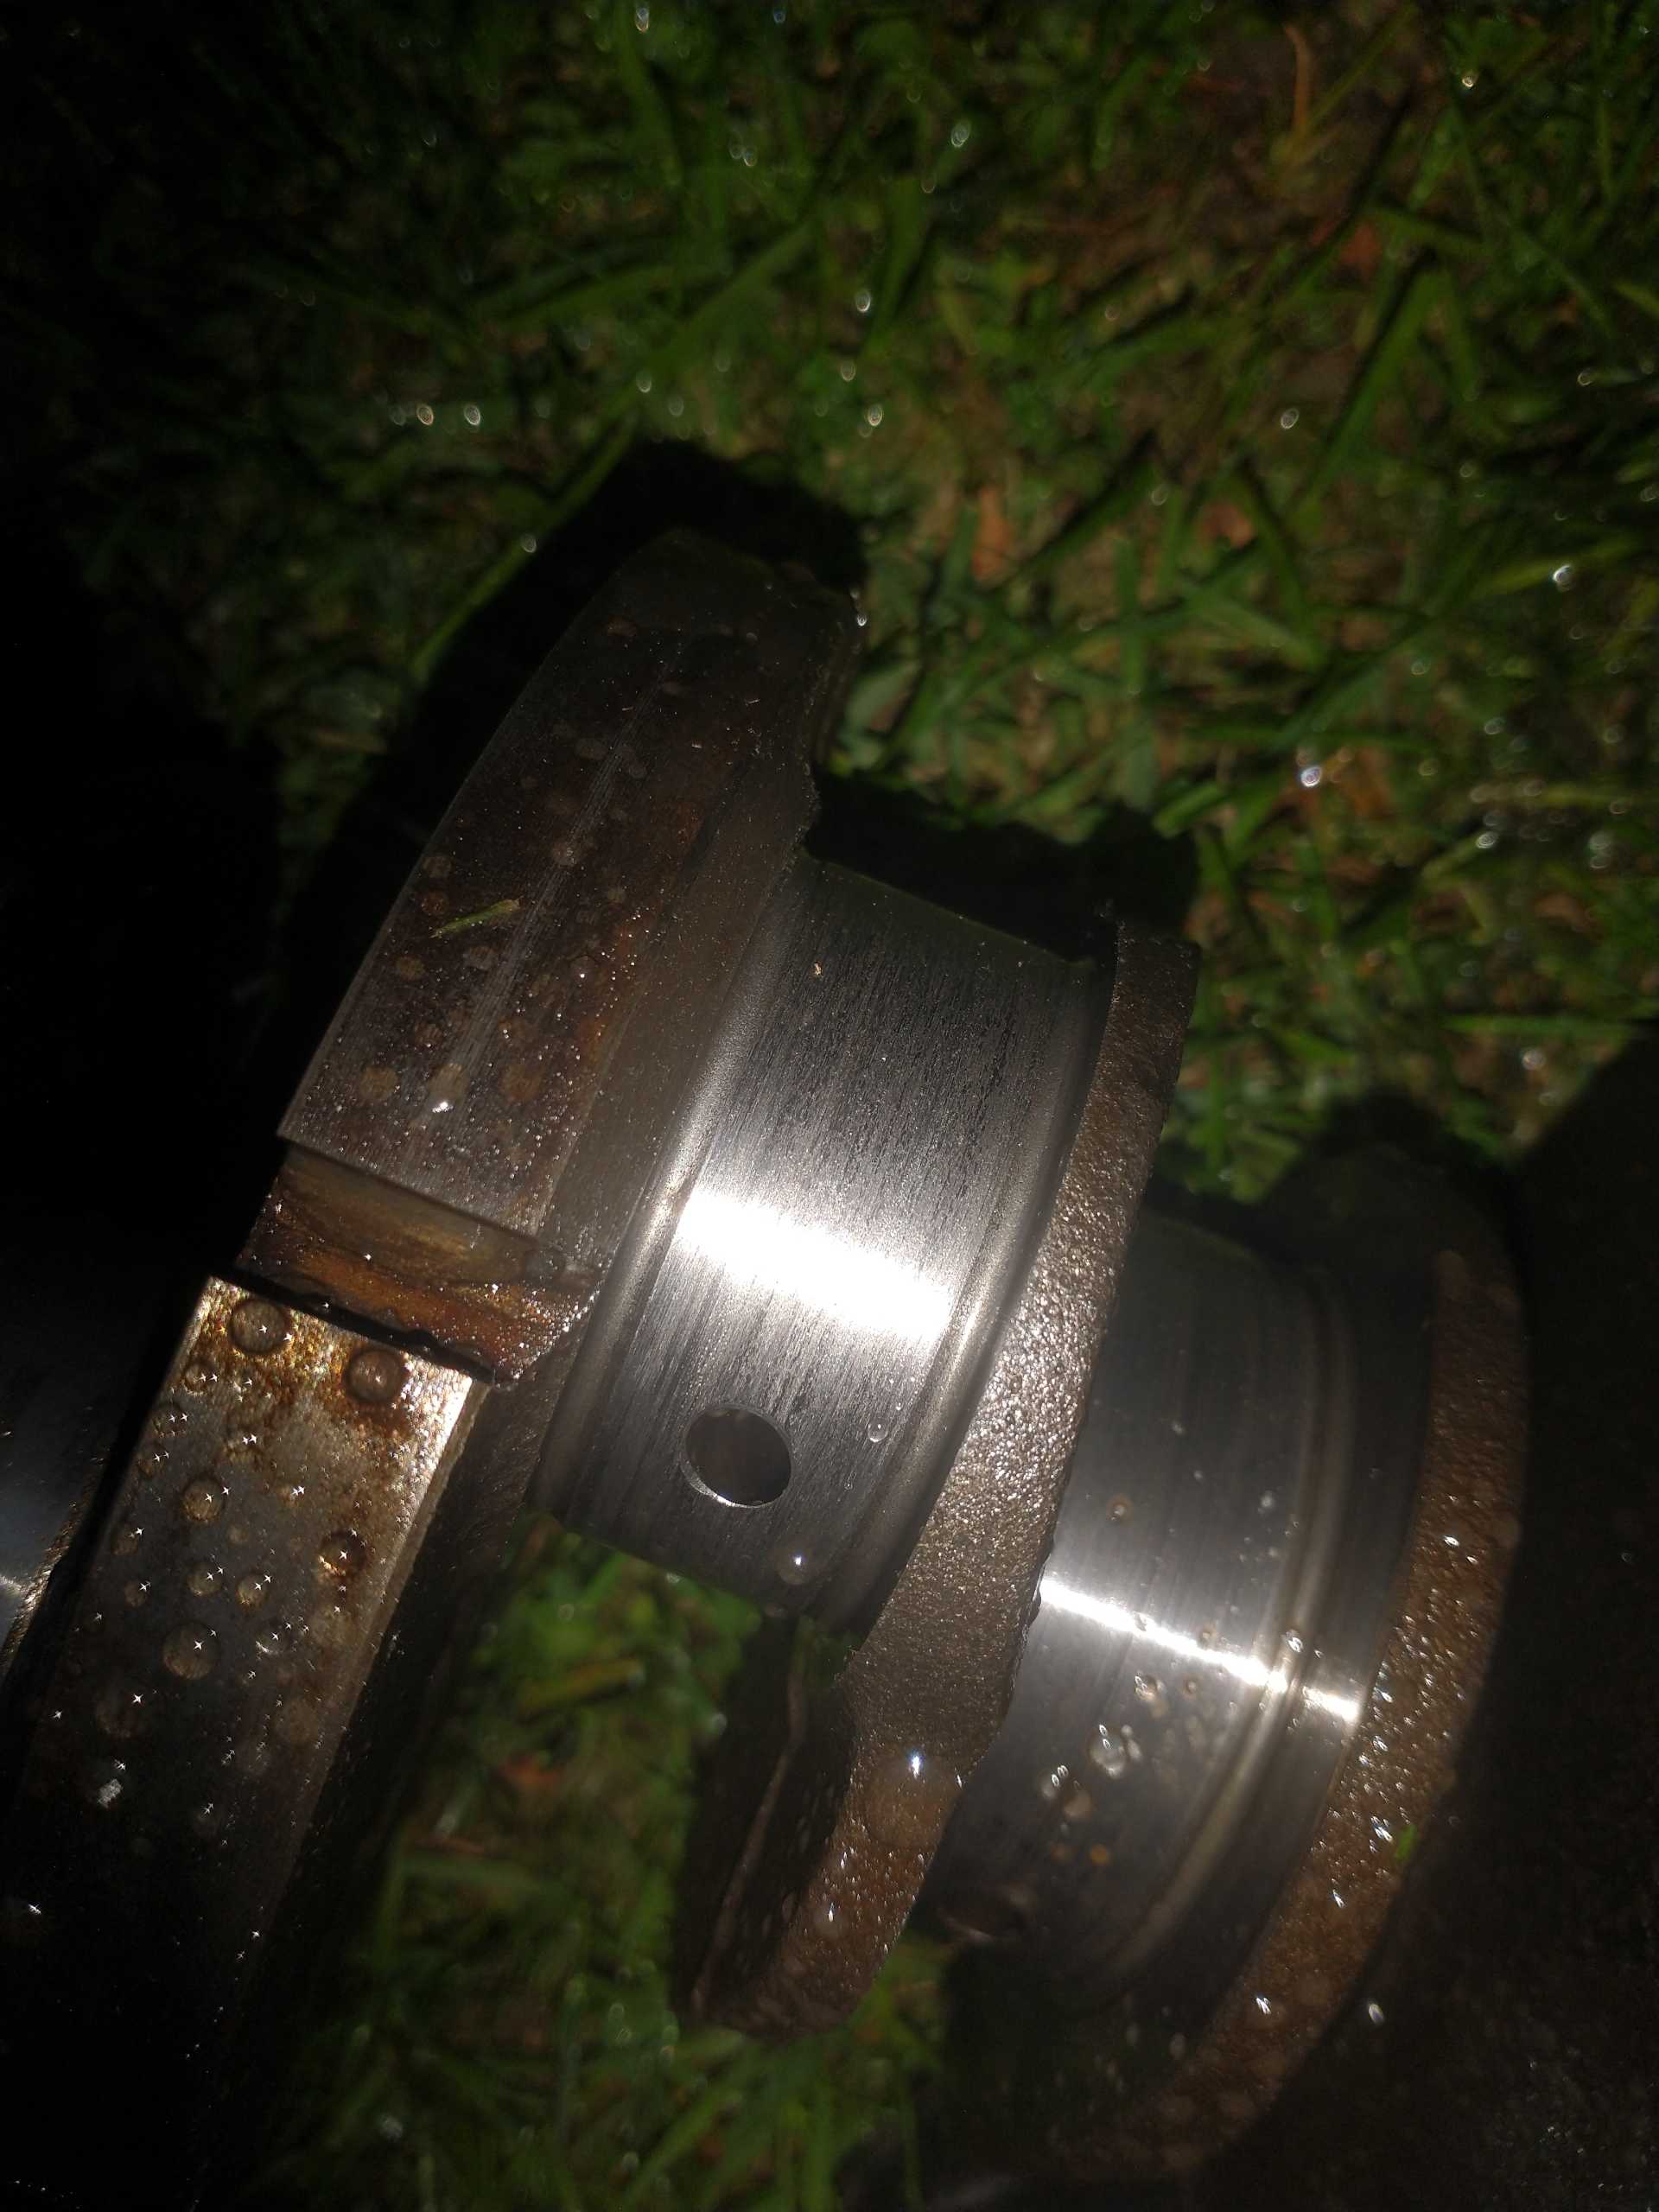
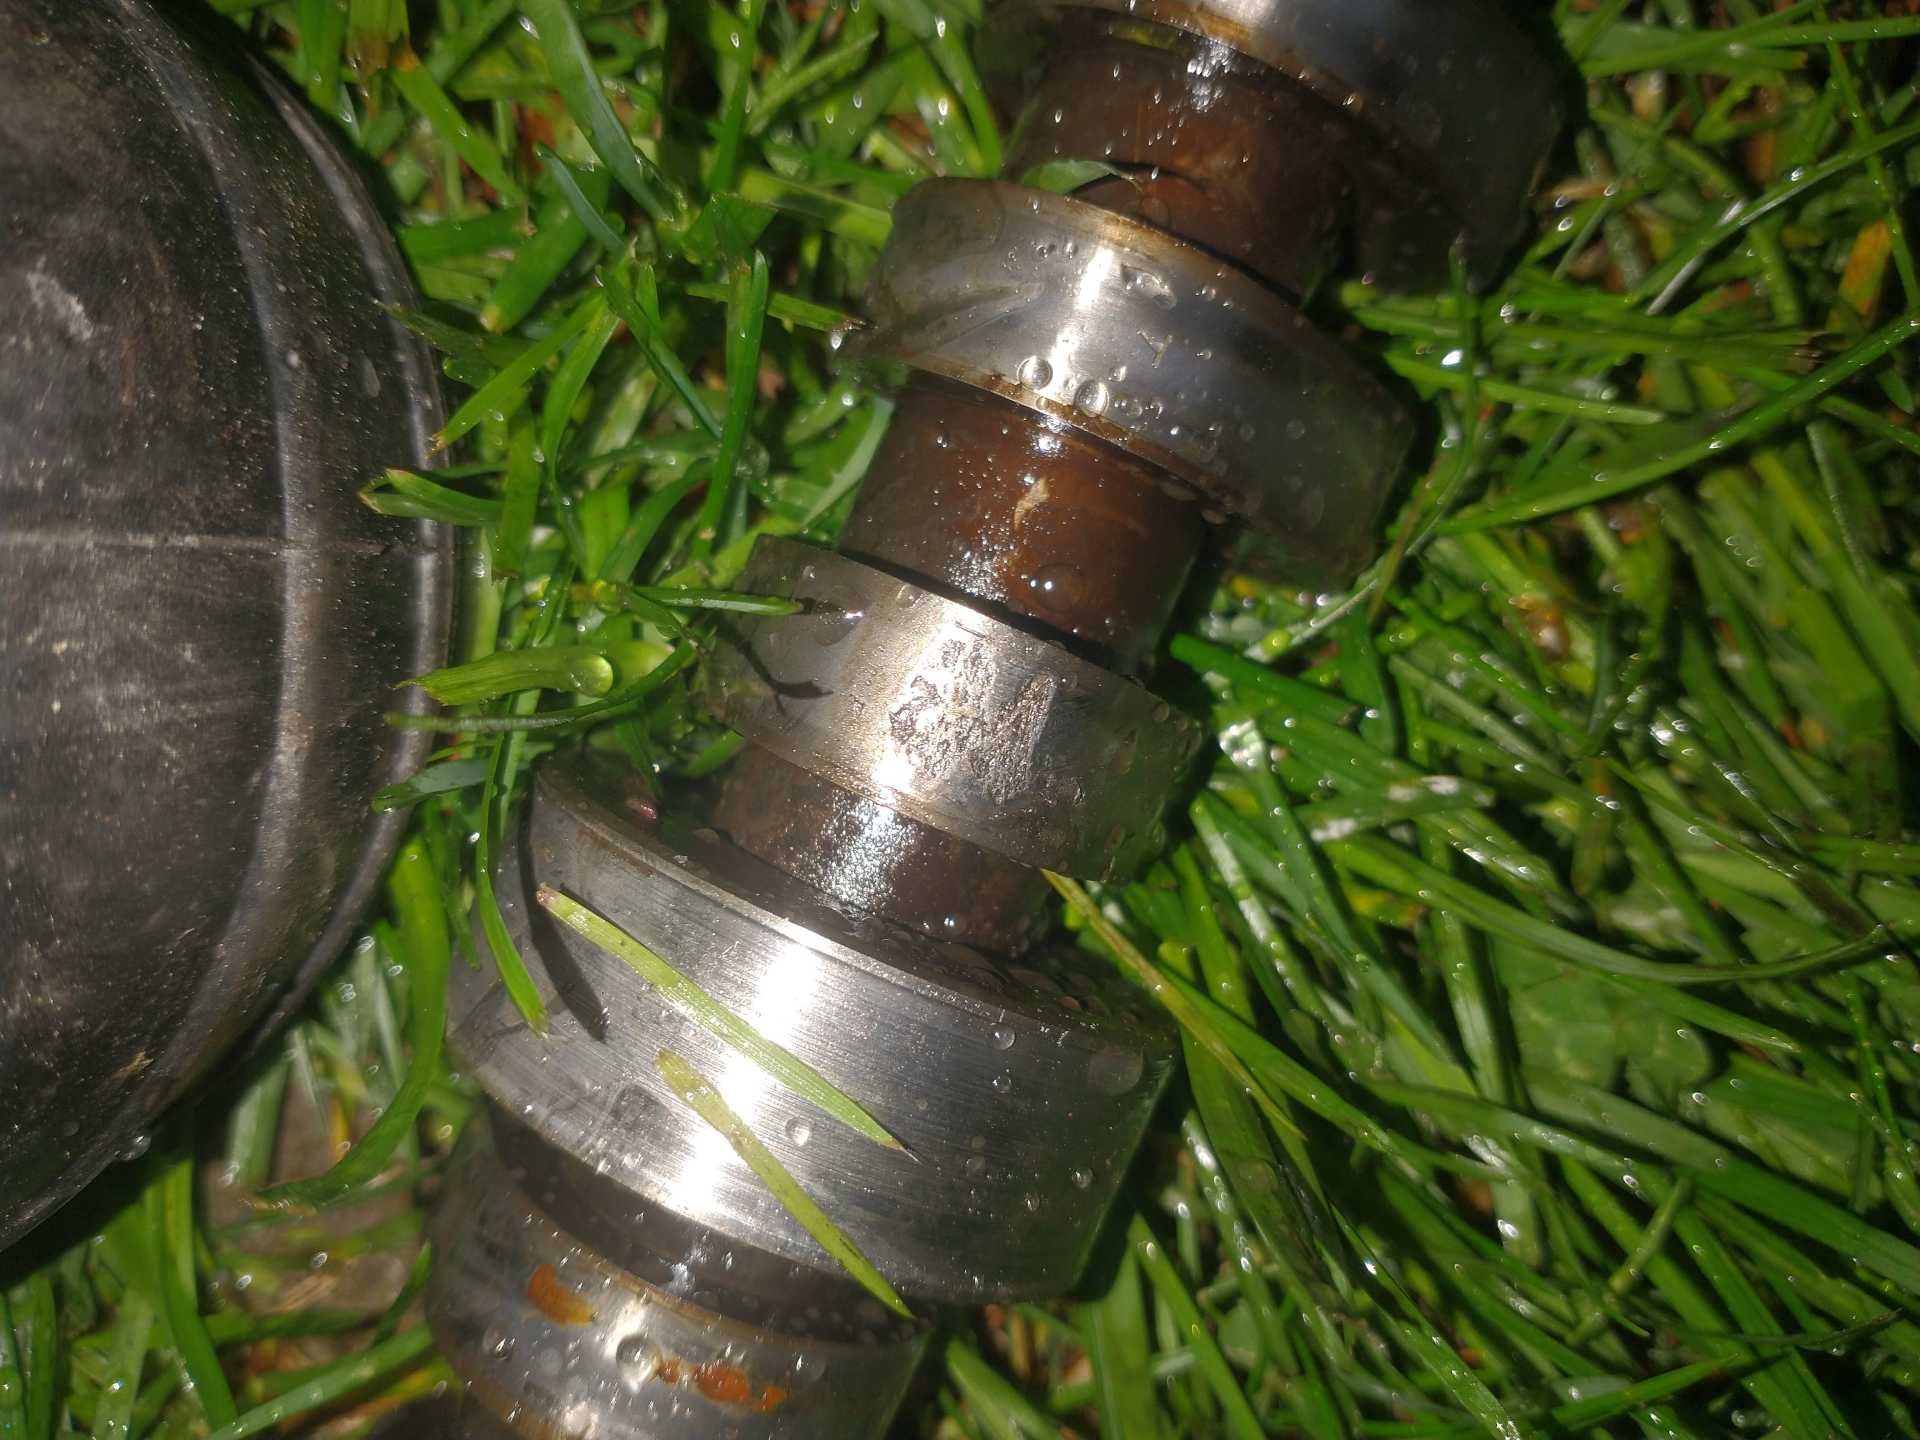
Ok, got the donor junkyard engine a while ago, and did some tear down on the blown engine yesterday.
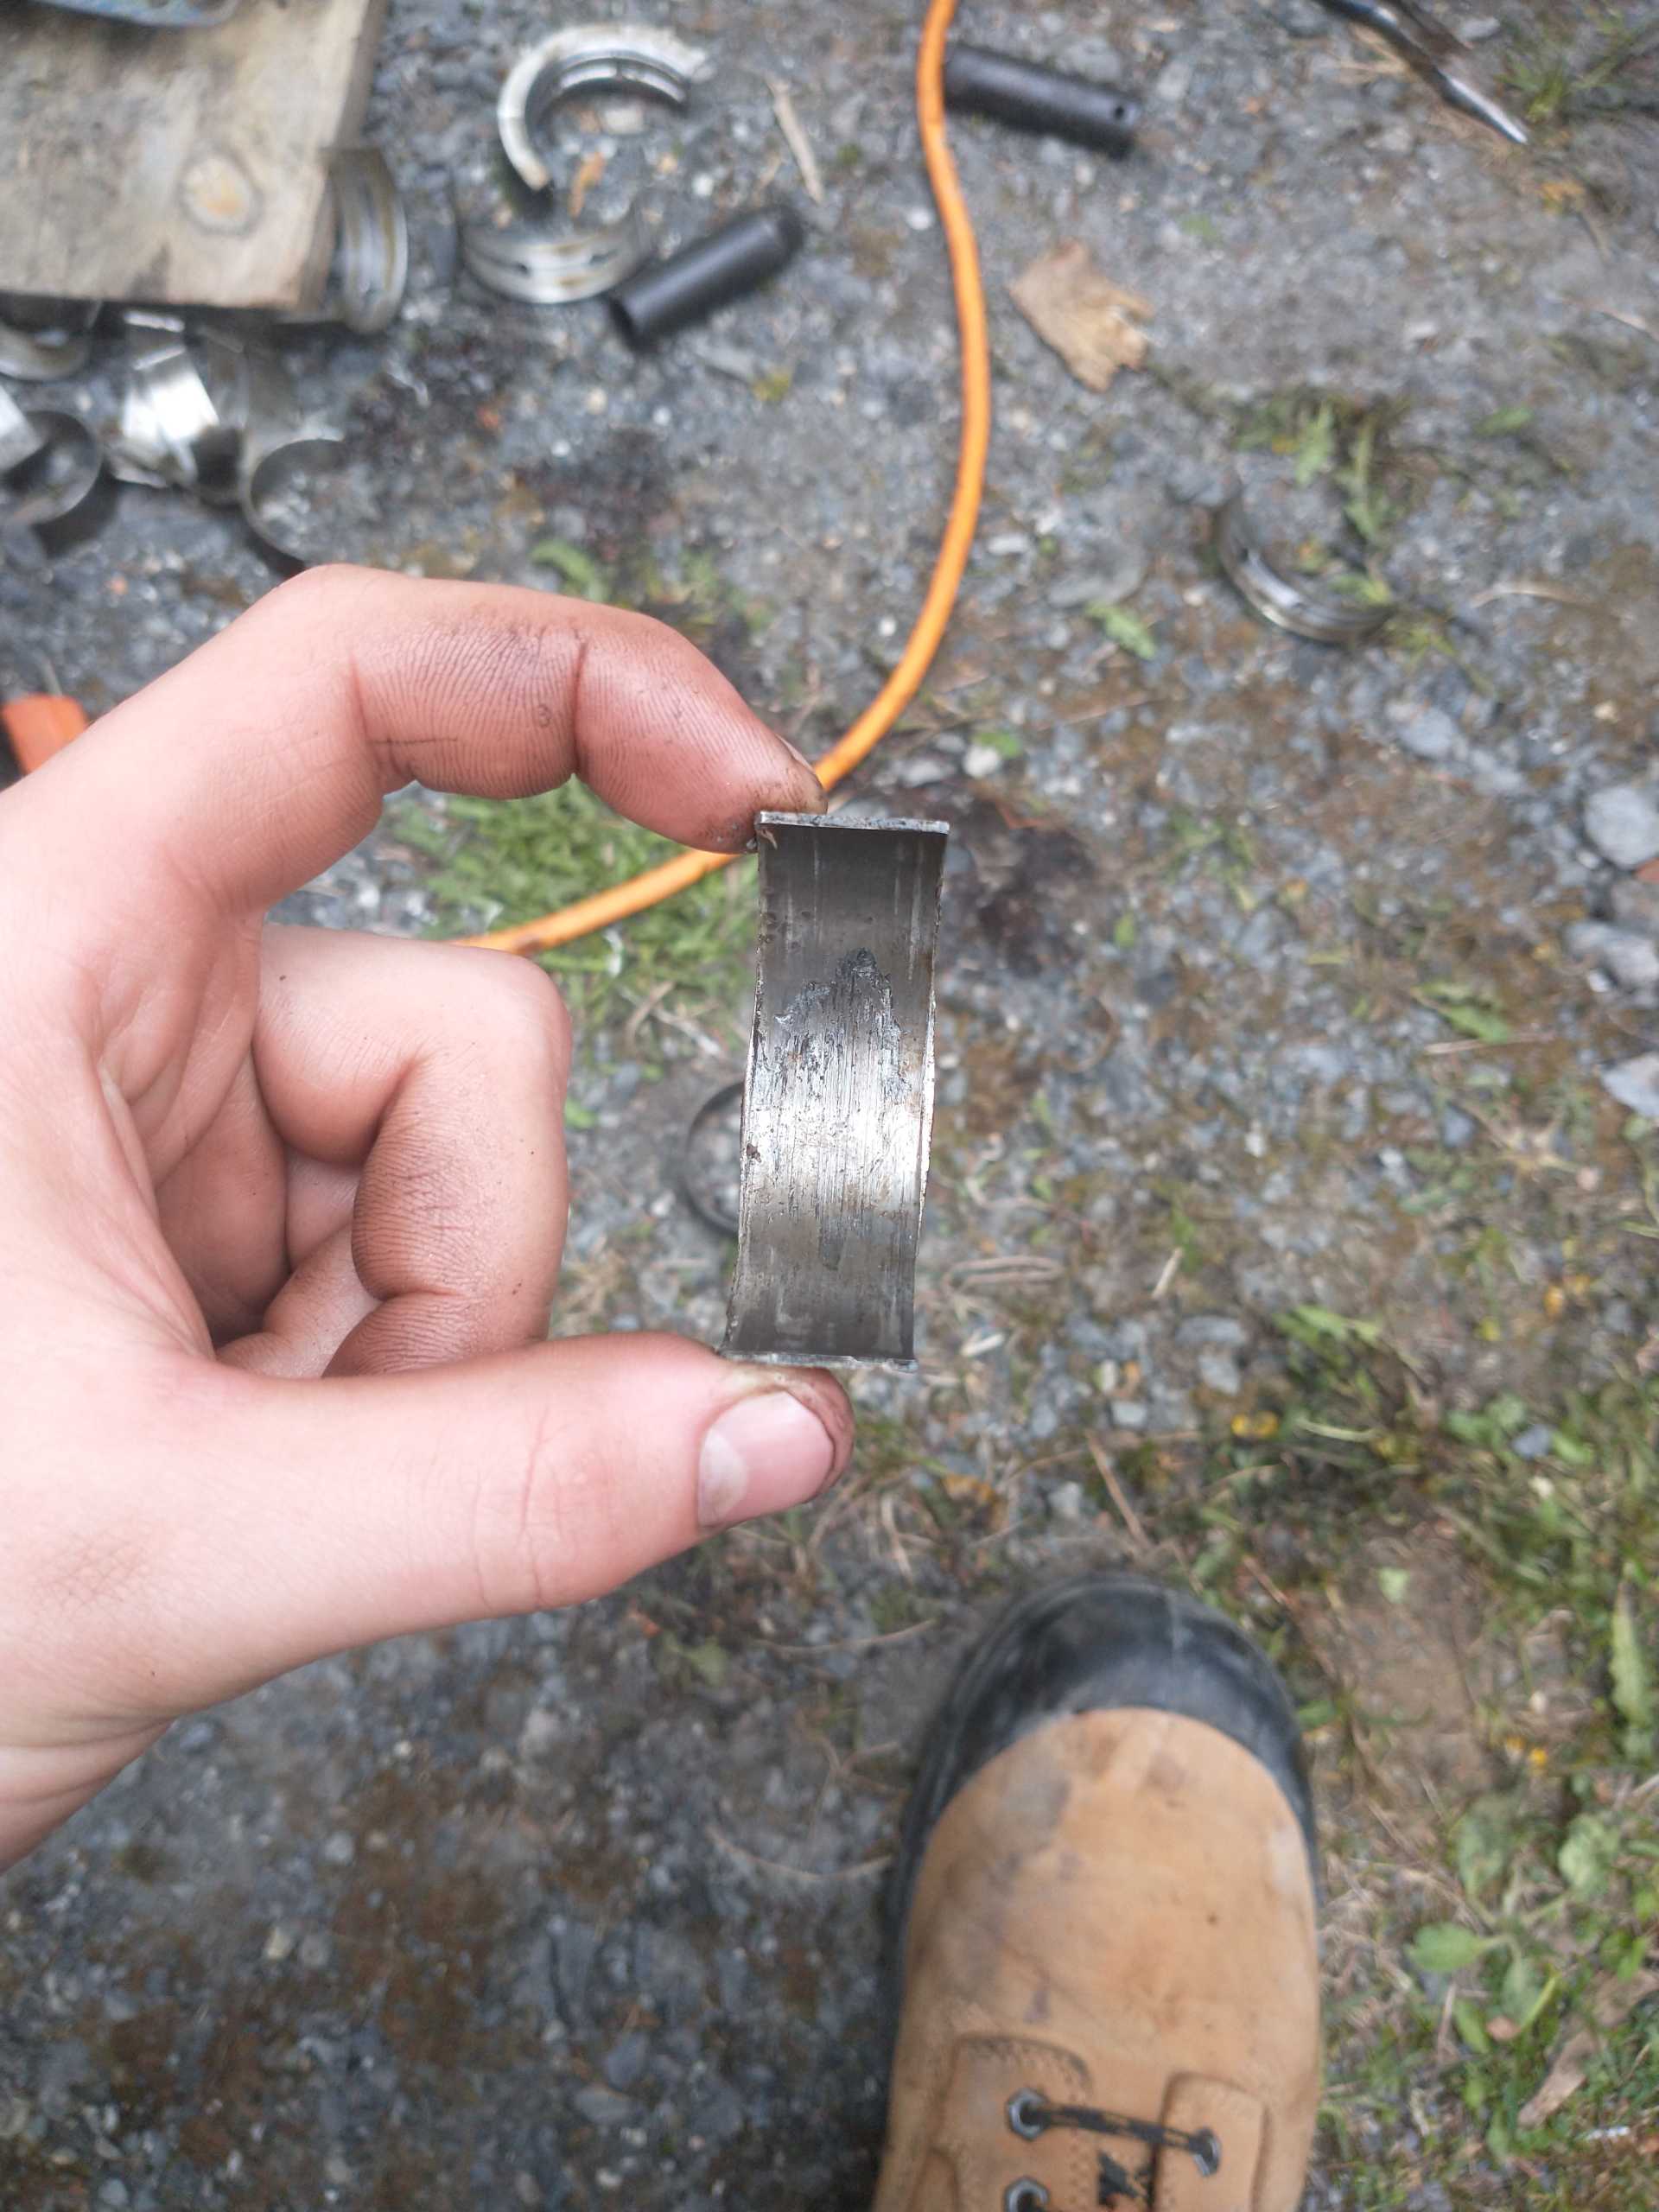
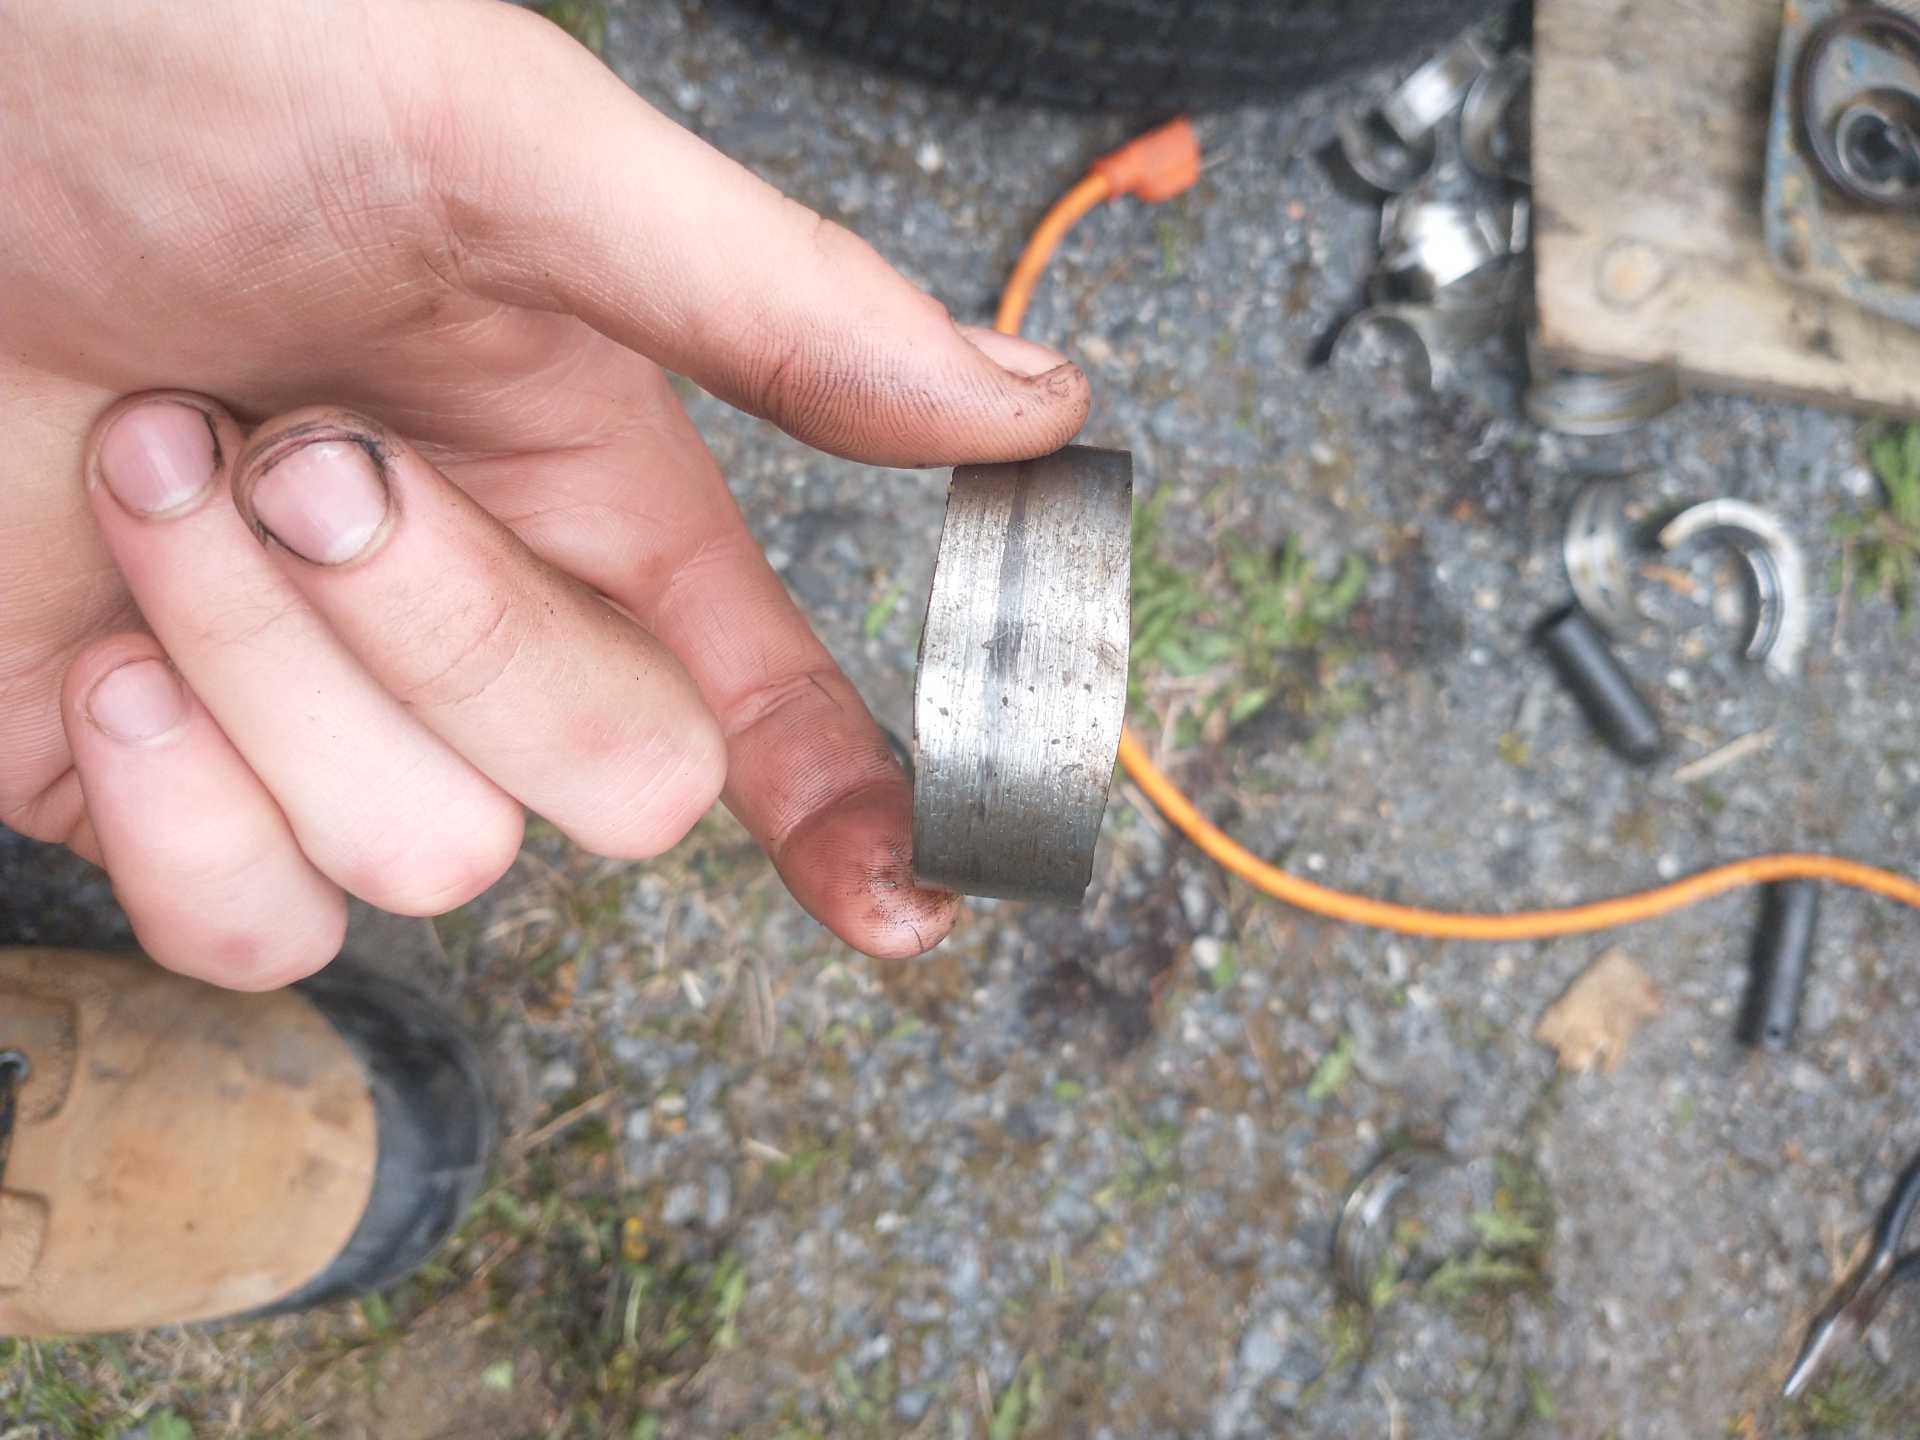
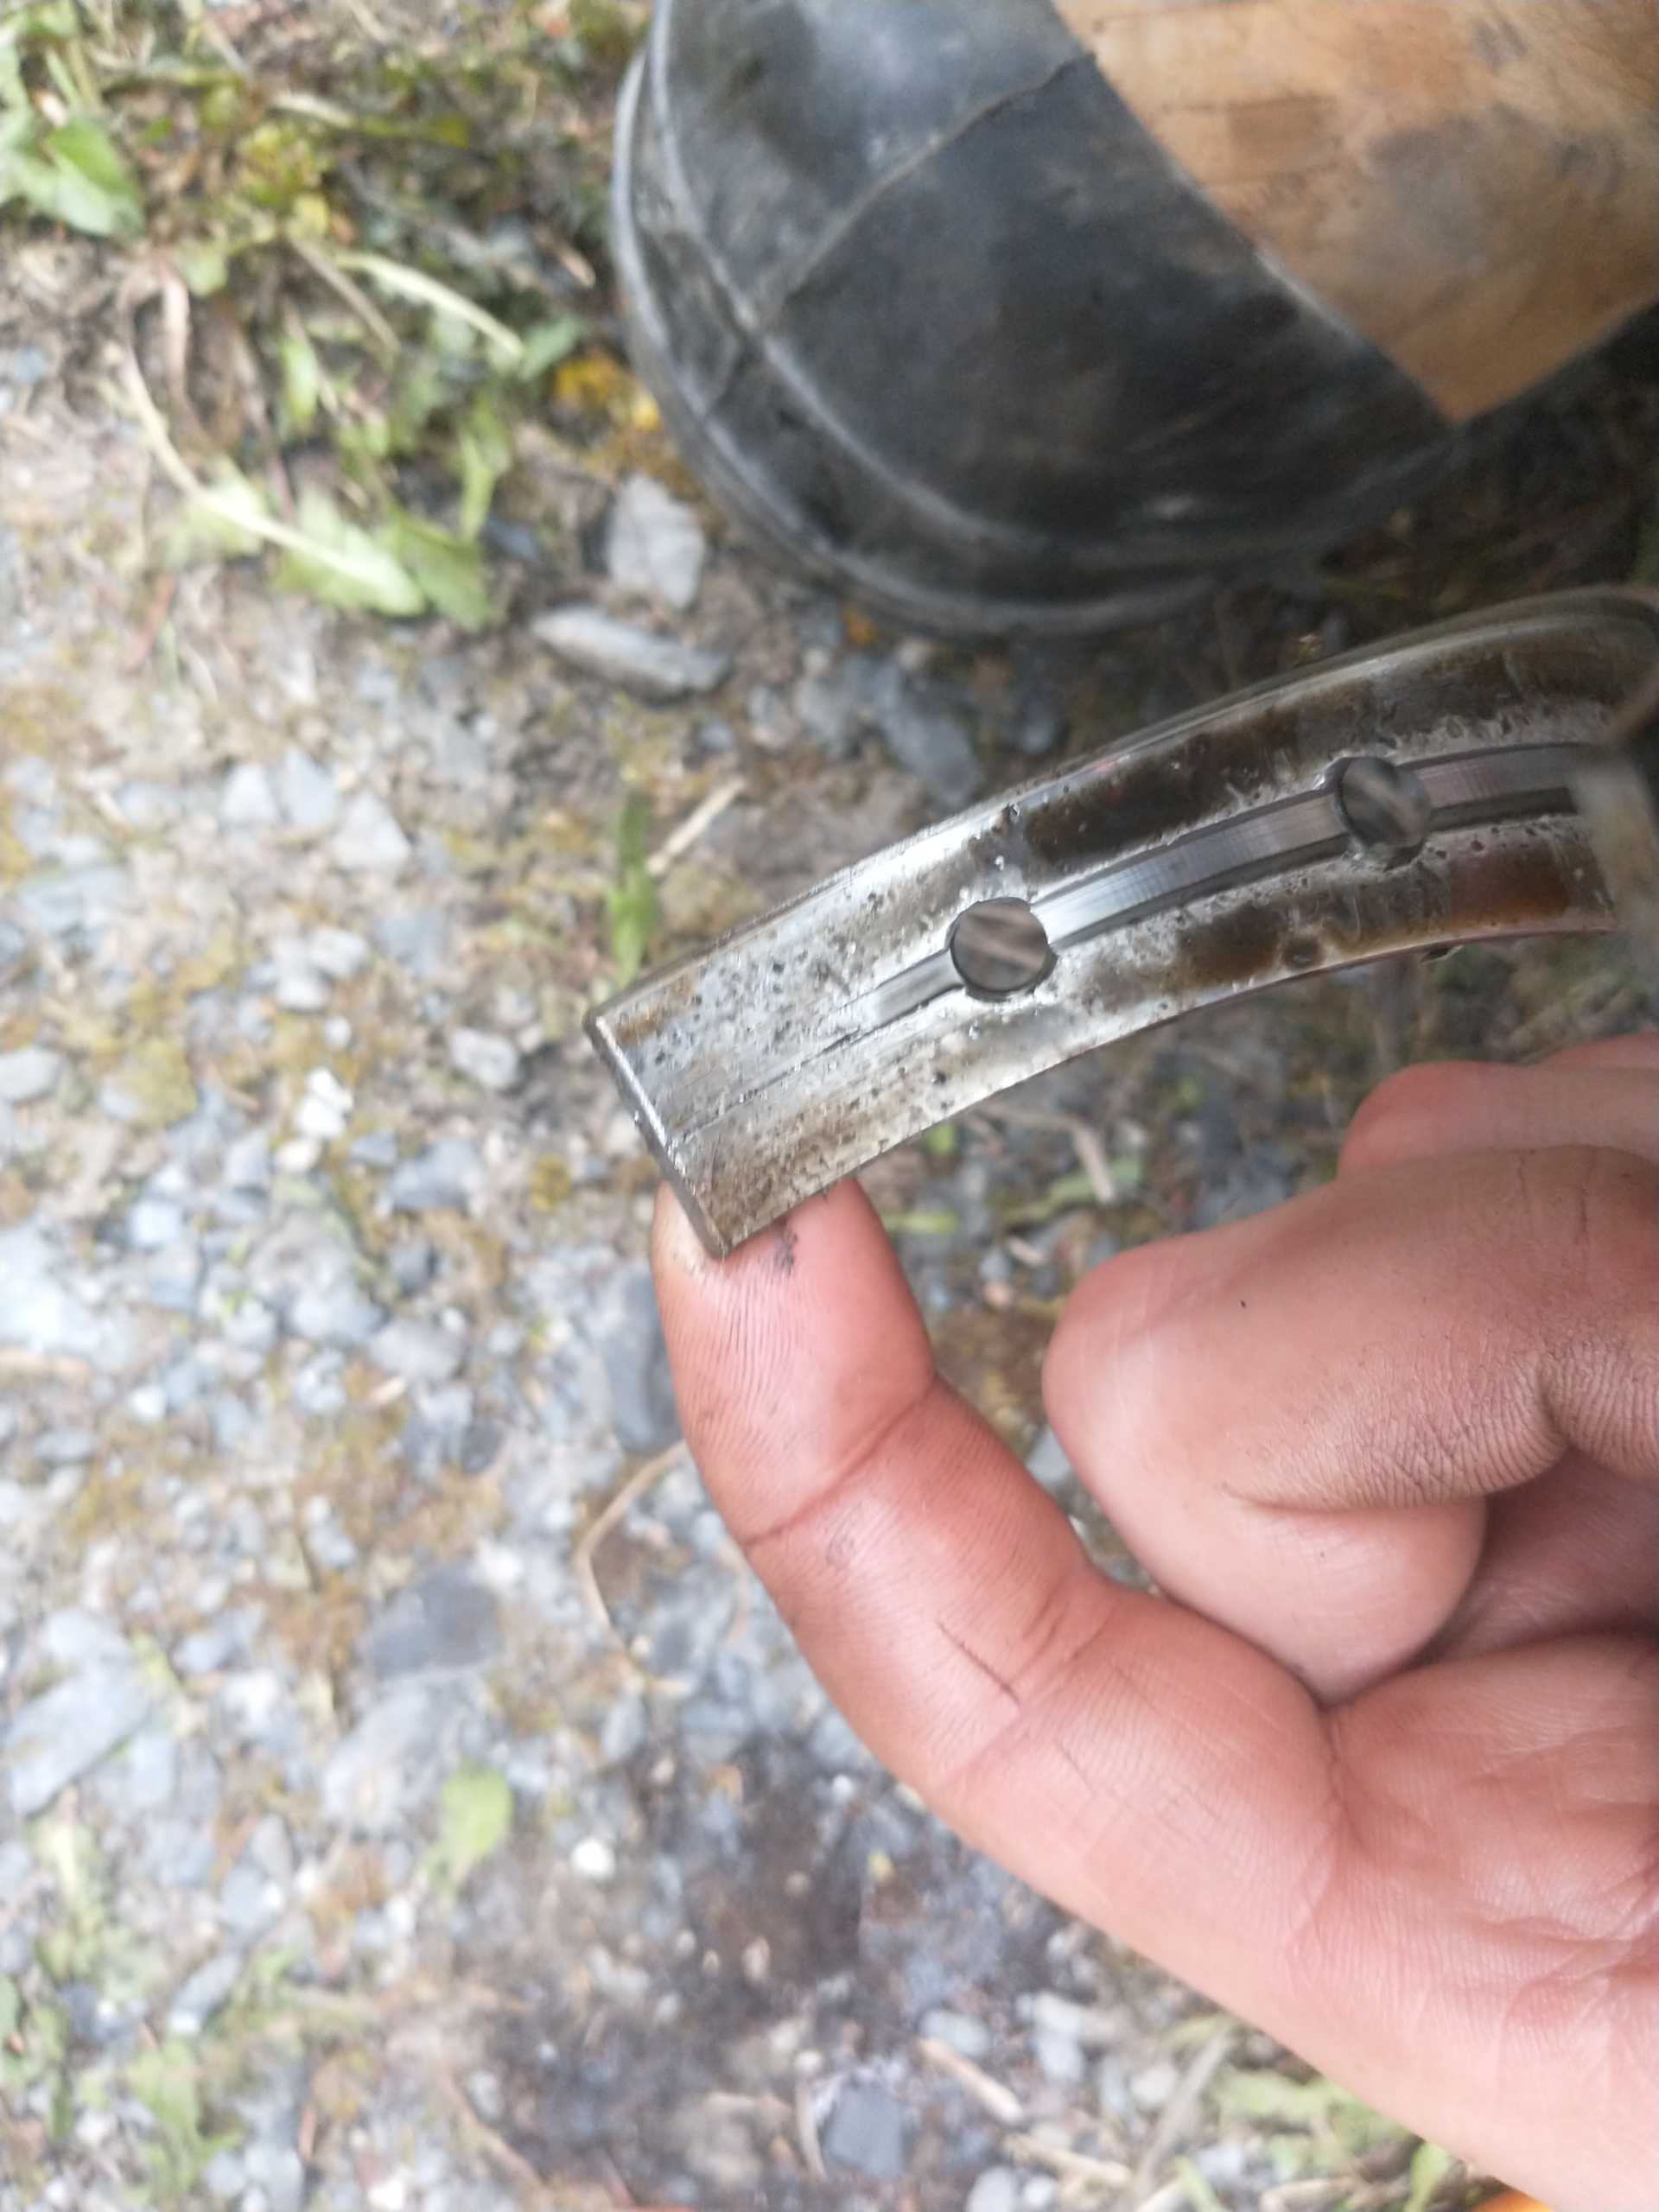
Most of the bearings and associated journals were scored, #4 rod bearing was flattened and had spun a bit in the rod. Worst of the main bearings.
I think there was maybe approx. 1 main bearing, 1 rod bearing, and 1 cam bearing that didn't have fingernail catching gouges.
Crankshaft: The corroded part on my camshaft, all the lobes had slight rust/imperfections in a line with that, but that was the only one where that happened at the peak of the lobe, it wouldn't have lasted too long probably. Would have been a high or low spot as the engine sat at the junkyard and condensation or other things gathered there.
The "new" engine I got is a mixed bag, it had water or coolant or something muddy in one cylinder, not enough to have locked it up (piston in the middle of its motion, will move down freely, but won't go past the rust halfway up, I also haven't tried to push it). The crankshaft looks fine, journals are smooth, camshaft looks fine, no corrosion anywhere and smooth journals and lobes. I have those cleaned up and waiting to be installed. I think I'll use the blown engine's block, and 5/6 of the pistons/rods (replace the spun rod/piston with a rod/piston from the donor, I'll use the rings from the blown engine though just to keep all the rings matched to their cylinder bores). I'll also use the lifters from the donor engine, they all looked fine. I've cleaned the blown block with 4 steps, first I hosed it down (spraying water into every coolant and oil port, and everywhere else), then immediately I used half a jug of cleaner/degreaser and scrubbed everything accessable, then I hosed it down again, same method as before, then I used a whole can of brake clean focused on all the oil passages, spraying it in one hole and having it come out 5 others haha, so hopefully there shouldn't be any more metal left. Before I install the cam I'll probably reinstall the oil pump and put an oil pan and filter on and run the pump with a drill, just pumping that oil though everything and the filter should catch anything leftover by the cleaning process, as well as making sure there's oil and not brake clean or degreaser ready to lubricate the engine when it is reassembled. One major downside of reusing the block is that I'll have to replace the cam bearings (trashed), but that's easier than dealing with the rust in the cylinder on the other one.
[This message has been edited by 1985 Fiero GT (edited 05-23-2025).]
You have a fair number of pictures with what appears to be water droplets. Is this after washing the parts? Are you drying them after?
It is a bad idea to use a piston/rod assembly from one engine in another (used) engine block.
If the replacement piston/rod is slightly taller than the original one, the replacement piston ring may run into the wear ridge created by the original piston ring.
Gun barrel brushes are ideal for cleaning deep oil passages.
[This message has been edited by pmbrunelle (edited 05-24-2025).]
You have a fair number of pictures with what appears to be water droplets. Is this after washing the parts? Are you drying them after?
It is a bad idea to use a piston/rod assembly from one engine in another (used) engine block.
If the replacement piston/rod is slightly taller than the original one, the replacement piston ring may run into the wear ridge created by the original piston ring.
Gun barrel brushes are ideal for cleaning deep oil passages.
All the parts pictured are the bad parts, the scored crank, scored bearings, scored cam, those were laying nearby as I cleaned the engine, so got splattered with water, they eventually got dried, but they don't matter, the block and any good parts are getting water, then degreaser, then water, then brake clean, then drying with some paper towel.
For the piston and rod, I'll still be using the rings that were in that cylinder, all cylinders will keep their respective rings, and only the knocking and spun bearing one will get a piston and rod from the "new" engine (exact same engine/year range, same rods, same pistons). I also can't see or feel any wear ridge on the bores of any cylinders, whether that would be something that is still dangerous at measurements smaller then I can detect, I don't know.
Originally posted by 1985 Fiero GT: I also can't see or feel any wear ridge on the bores of any cylinders, whether that would be something that is still dangerous at measurements smaller then I can detect, I don't know.
If you can’t feel a ridge with your fingernail, it’s probably ok.
For bigger ridges, a ridge reamer can be used to cut off that excess metal.
Alright, I measured all gaps, installed the crankshaft and replaced a few of the pistons.
Some of the pistons had some vertical scoring on the skirt, just enough to catch a fingernail on, and had worn the slight horizontal marks down (they all had tiny horizontal circular grooves as a part of the finish, not wear)their associated bores had some vertical scratching in the lower half, but nothing that would catch a fingernail, so I replaced those pistons and the one with the spun bearing on the rod with the good pistons/rods from the donor motor. Funnily enough the spun bearing one didn't have a scored skirt, so I think I replaced 4 pistons in total, one for the bad rod, the other 3 had scored skirts, the good pistons all still had the horizontal ridged finish that could be felt with a fingernail on the skirt, the pistons with the extra wear were the ones that were rocking back and forth a "lot", the replacements and the 2 good ones still moved, but not as much.
Piston ring gaps were all more than enough (according to online calculators I only need about 0.020 or so, I measured them fairly close to the top of the cylinder, maybe that increased the size slightly): Cylinder number, top ring, second ring. 1, 0.042", 0.050" 2, 0.045", 0.054" 3, 0.042", 0.054" 4, 0.030", 0.042" 5, 0.034", 0.046" 6, 0.034", 0.046"
That's a maximum variance of 0.015" for the top ring, 0.012" for the second ring, as I've said before, all of these rings are still in their matched bores, so they all have the same mileage and should have had the same life. I also measured cylinders 2 and 4 rings in each other's cylinders to see if it was the rings or the bores that were giving the varied reading, I got the exact same measurement between the 2 bores with both sets of rings, so the rings have the variance.
Rod bearings measured: 1, 0.001", 2, 0.001", 3, 0.001", 4, 0.001", 5, 0.001", 6, slightly over 0.001", but still closer to that than 0.0015", the next step on the plastigauge. Recommended spec is 0.0007-0.0024", so I'm on the low side of that for all.
Main bearings measured (timing side to flywheel side): 1, 0.0015", 2, 0.0015", 3, 0.0020", 4, 0.0020". Recommended spec is 0.0008-0.0025", so it's still within spec, with the rear 2 being on the high half, front 2 being about in the middle.
[This message has been edited by 1985 Fiero GT (edited 08-17-2025).]
Getting the engine back together, nice new oilpan with a bung welded in professionally, waiting on head gaskets but otherwise the engine is just about ready to go back on the cradle. I had an issue with the timing cover gasket, is that something I can just rtv and it'll be fine or do I need to get another gasket for it?
Had a look at the turbo, and it has a not insignificant amount of play, so I'm getting a replacement, literally every bearing that the sparkly oil went into got destroyed.
I'll probably get the engine in the car very soon, then start on the t tops while waiting for the turbo and head gaskets, unless they're going to be arriving fairly soon, in which case I'll get it on the road for a while first.
Originally posted by 1985 Fiero GT: I had an issue with the timing cover gasket, is that something I can just rtv and it'll be fine or do I need to get another gasket for it?
1. Without the gasket, the water pump pulley may be misaligned in relation to the rest of the accessory belt drive.
2. RTV between iron and aluminium directly touching each other is a recipe to tear the RTV with differing thermal expansion coefficients. The gasket can deform to accommodate relative movements between the parts.
If anything (such as corroded gasket surfaces), coat the gasket with RTV on both sides.
Timing cover gasket installed successfully, flywheel/clutch installed with arp crank bolts and torqued to spec, ARP head studs, heads cleaned and reinstalled, valve lash set, engine mated to transmission on the cradle, almost ready to go back in the car! Only thing I'm still waiting for parts wise is the turbo, but that is the last step. Engine turns over easily by hand (when I had the heads off and between the compression bumps now that the heads are on), compression bumps require a ratchet to go through, feel harder to go through than my old 2.8 did.
Tomorrow I'm going to replace an axle seal (I had a little transmission fluid drip from there over my 100 kms, I'll at least verify that it is the seal and not anywhere else), and work on getting the engine in the car. I touched up the welds on the shifter mechanism (with normal steel wire this time) and it flowed a lot better and is much better, I'll put some paint on it, and it should be good.
I also added bushings to the select arm movement (stock f23 uses plastic bushings, I had no bushings and a little play for the 100 kms I've driven, I picked up a universal set of door hinge bushings at Canadian Tire, and by opening up the inner diameter of 2 of them a tiny bit (0.3 mm, basically I just put a drill bit that fit in the hole, and ran it for quite a while while rotating the bushing and applying gentle pressure) I got perfect bushings for the select movement, it moves freely but with no play.
I redid a clamp on my intercooler so now it holds water, got it mostly bled and the pump running properly. I have 4 oil filters (I'll change one after the first drive or so), and plenty of oil to change out the moment it starts looking dirty, this time 10w40. I rewired the spark bypass wire, before I just had it hooked into the TPS 5v, but it took longer to start after I did that so I'm going back to how GM wanted haha. For the time being I'll use a temp sensor in the water line on the intercooler as my intake air sensor, being in the intercooler water it shouldn't get too effected by heat soak (besides the pump is hooked up to the fuel pump relay, so when I turn the key on it will circulate the water a bit, taking away any heat soaked water in the engine bay before the engine is even started), and it should give the ECM a fairly accurate estimate of the air temp going into the engine, it will be much more smoothed/slow to respond to spikes than a sensor in the airstream, but at the same time the intercooler itself should be absorbing heat spikes and not letting that get to the engine anyhow.
MLS gaskets do not have any other material between the layers. They are embossed so that the layers combine to increase pressure around the bores and coolant passages, and he layers are riveted together so they stay aligned for installation.
Engine is back in the car, everything hooked up, and I got a first start, moved it out of the car tent, changed the oil, and took it for a drive today. Everything good so far.
Originally posted by WOT-Tech: MLS gaskets do not have any other material between the layers. They are embossed so that the layers combine to increase pressure around the bores and coolant passages, and he layers are riveted together so they stay aligned for installation.
I do not remember seeing any other materials between the layers of steel, but my gasket cutting and forum post (which I linked to) dates from 2017, so my memory may be fading. The only photos I have are the ones I attached to the forum post.
Do you have photos or recent memories of the internal construction of Fel-Pro 512 SD gaskets?
quote
Originally posted by 1985 Fiero GT: Everything good so far.
Engine is back in the car, everything hooked up, and I got a first start, moved it out of the car tent, changed the oil, and took it for a drive today. Everything good so far.
Awesome! Too many projects don't get finished, so this is great to hear
quote
Originally posted by pmbrunelle:
I do not remember seeing any other materials between the layers of steel, but my gasket cutting and forum post (which I linked to) dates from 2017, so my memory may be fading. The only photos I have are the ones I attached to the forum post.
MLS gaskets are considerably more expensive, and have rivets holding the layers together. The top layer of the SD gaskets is not embossed or steel. The link below has some pics of MLS gaskets.
With ARP head studs, the SD gaskets are probably going to be fine as long as the tune is good. Its the demolition derby and super high cylinder pressure builds that absolutely need MLS. It also takes a machined flat and smooth ( <50 RA) deck surface so a bit more work than the Fel-pro SD gaskets.
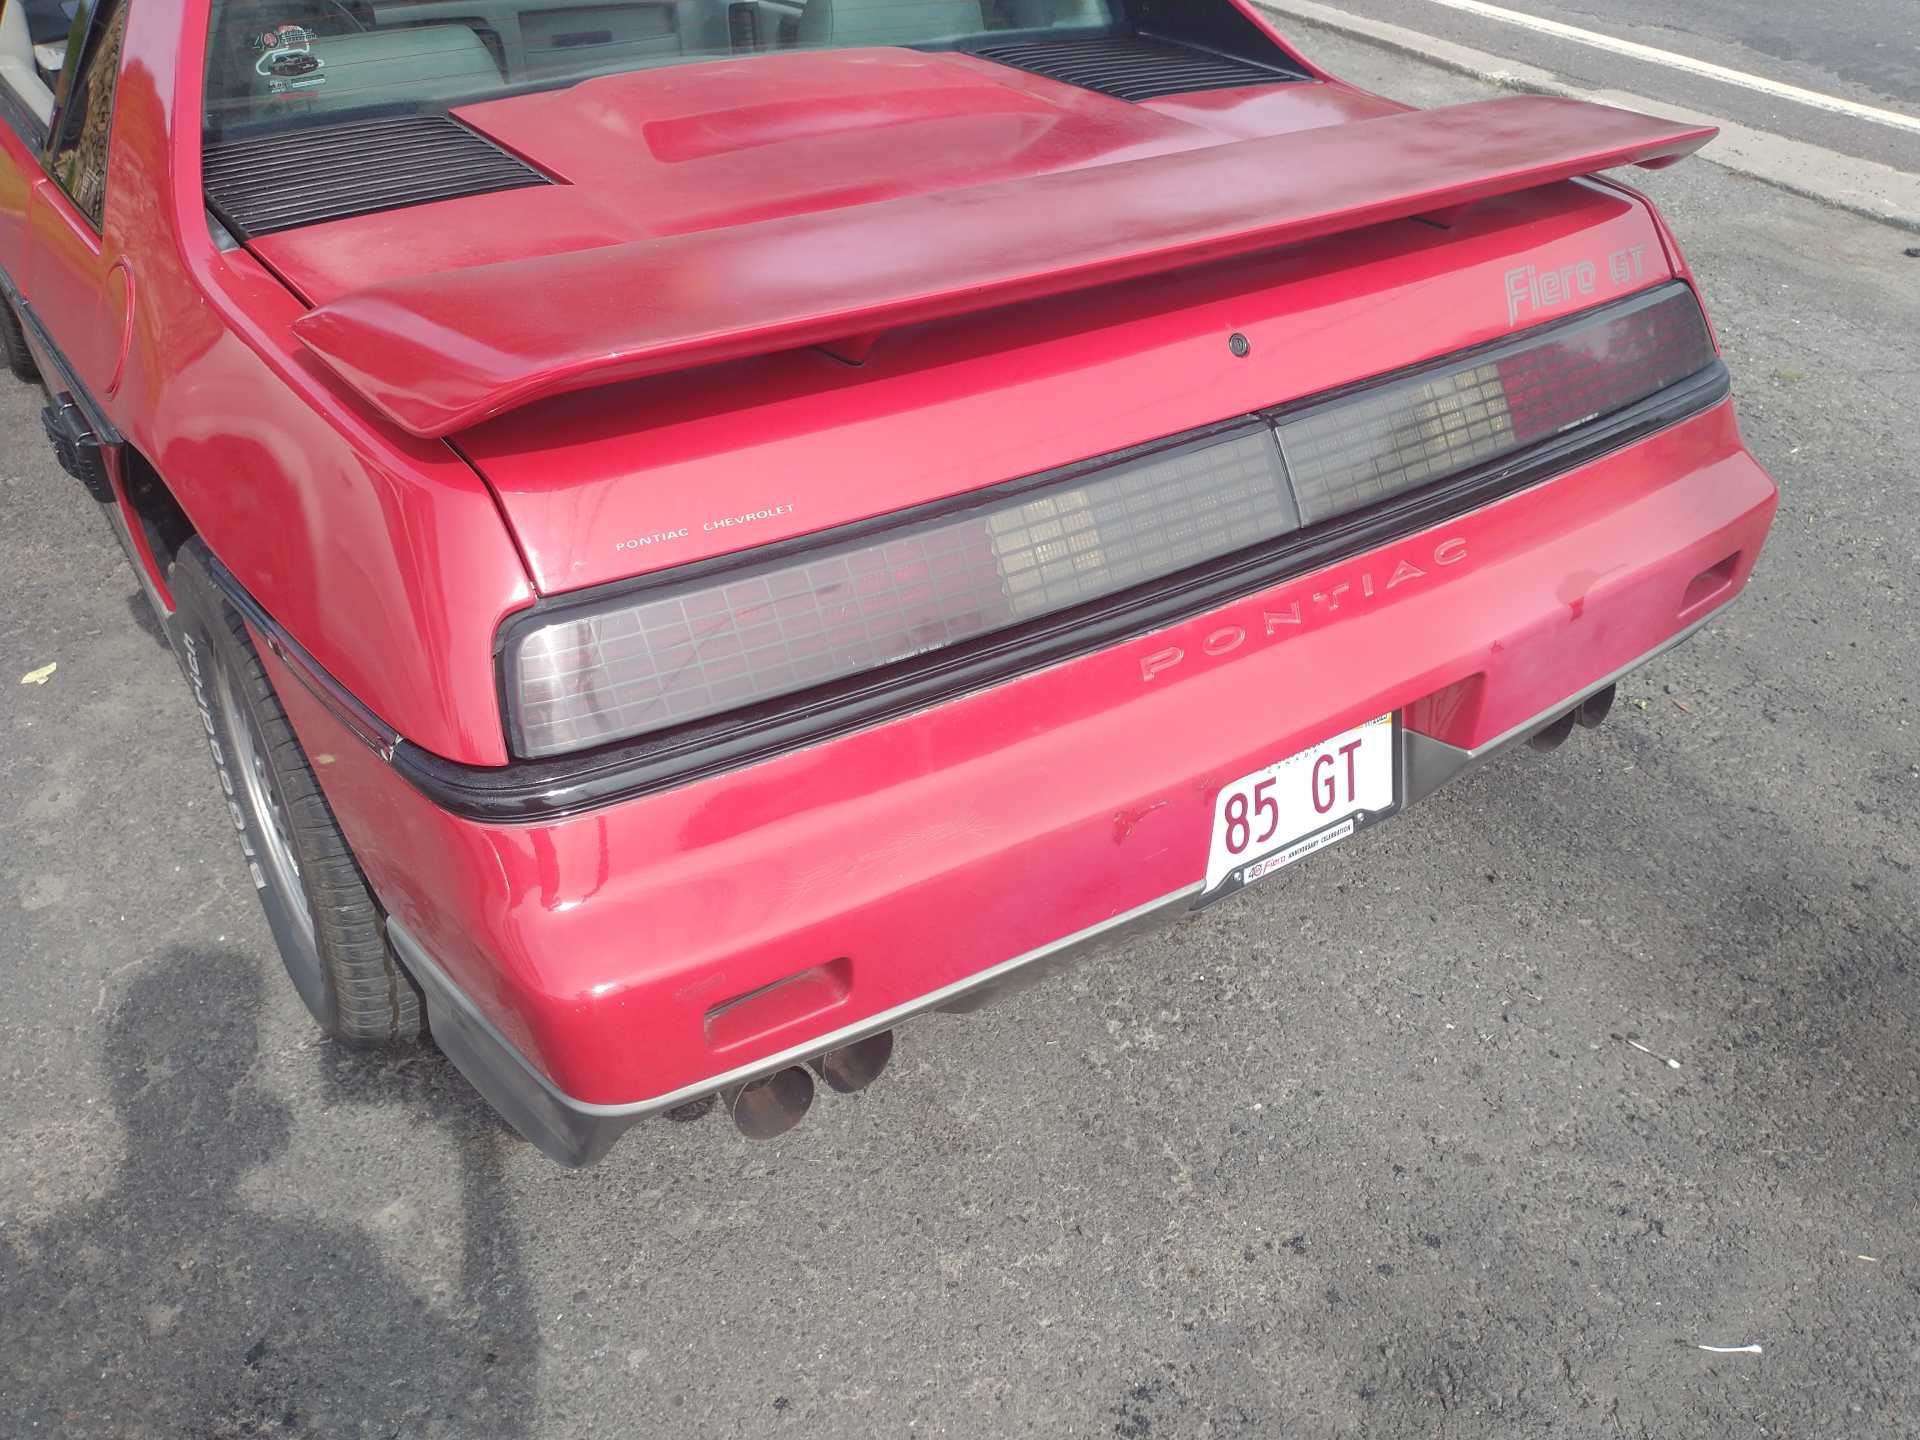
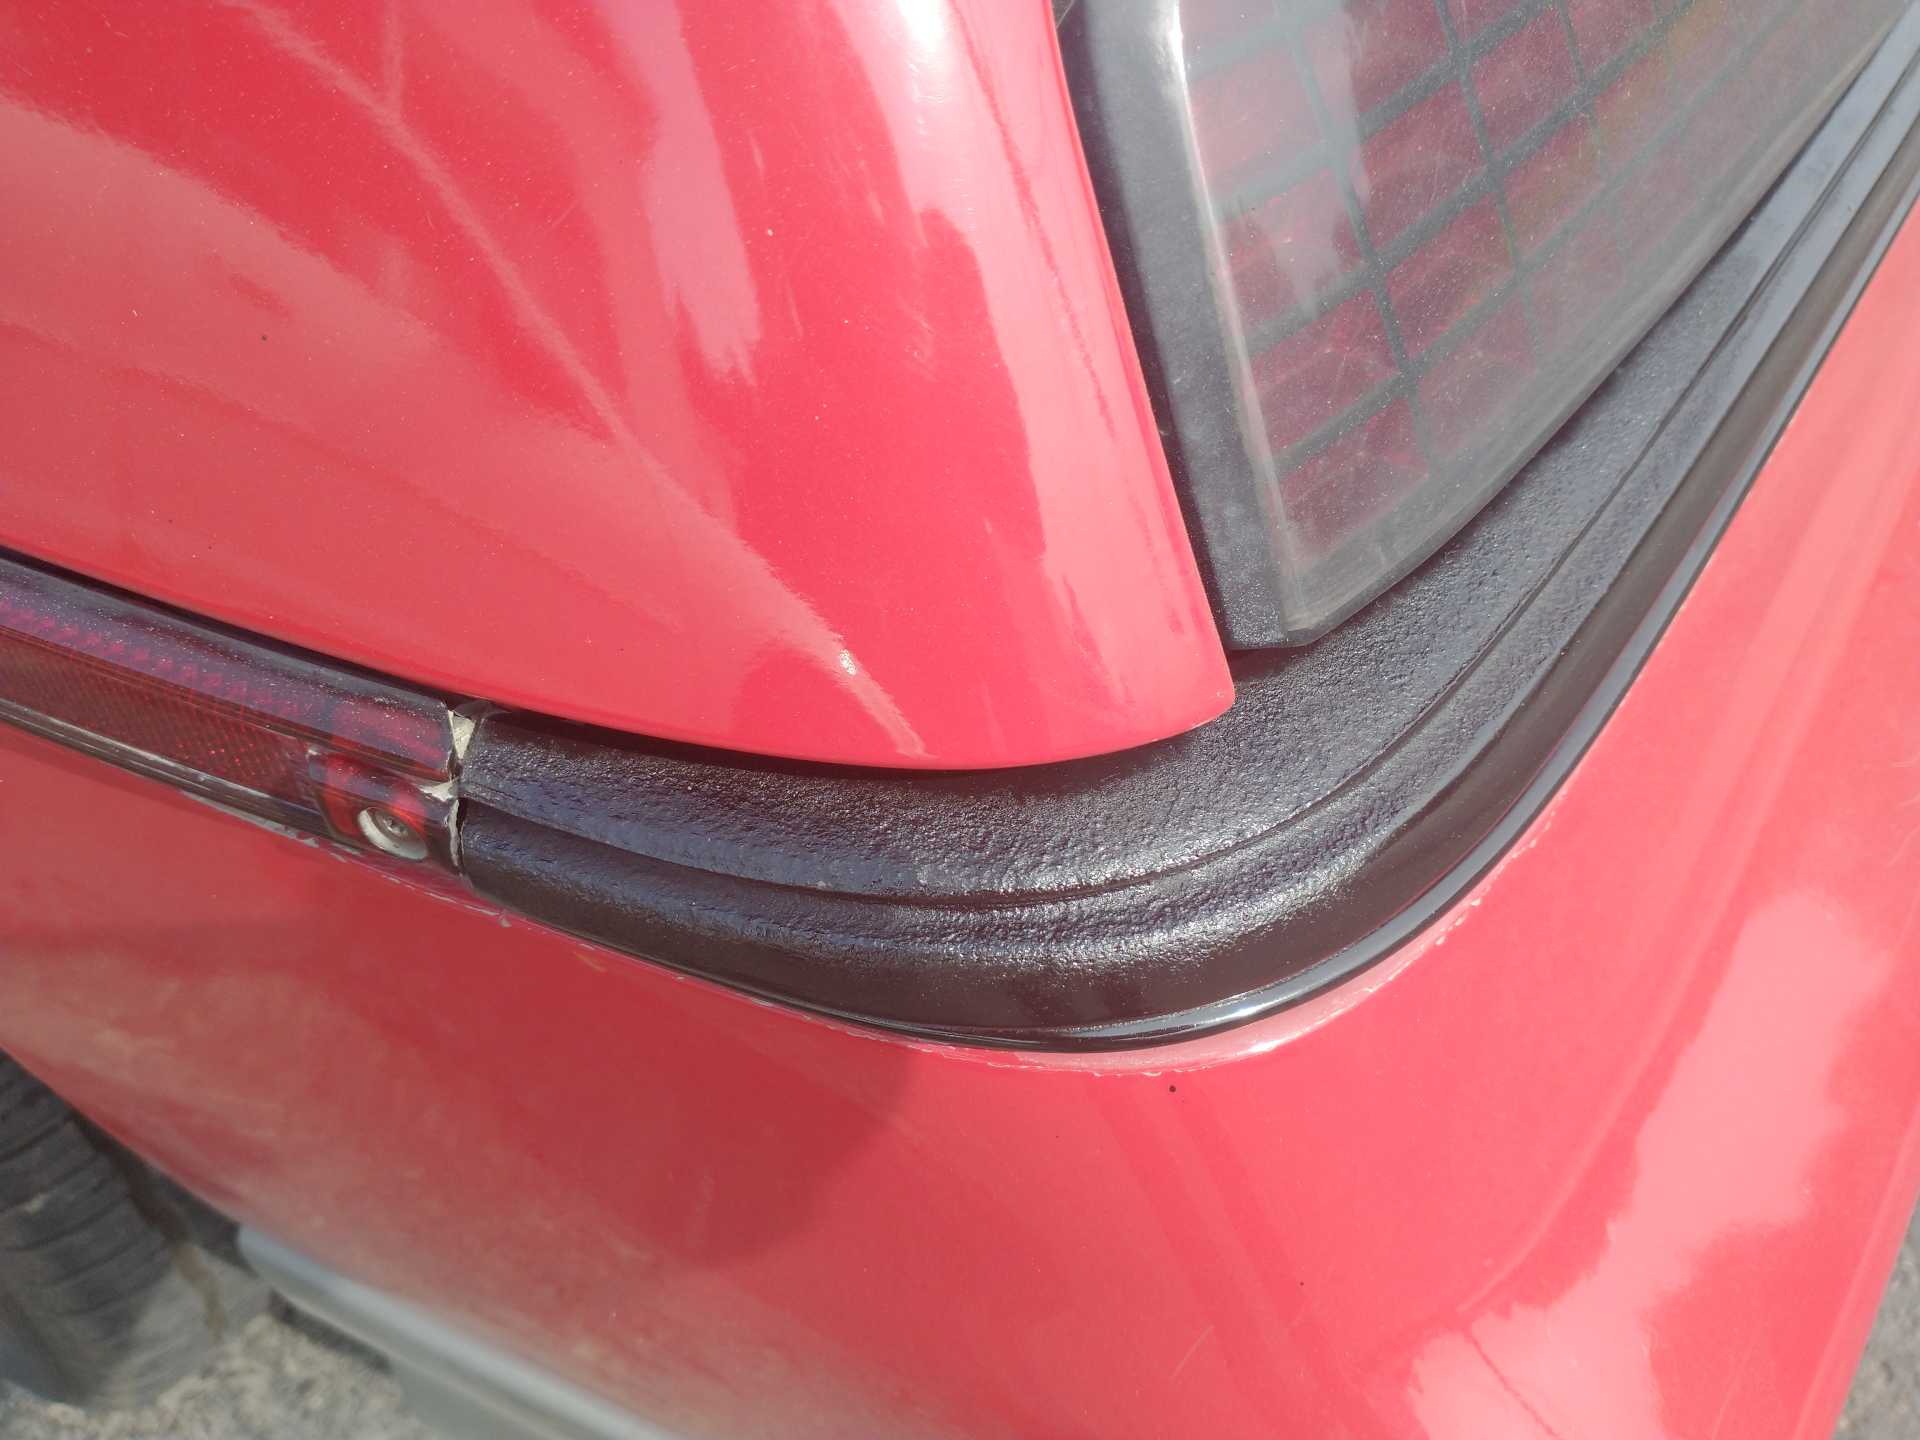
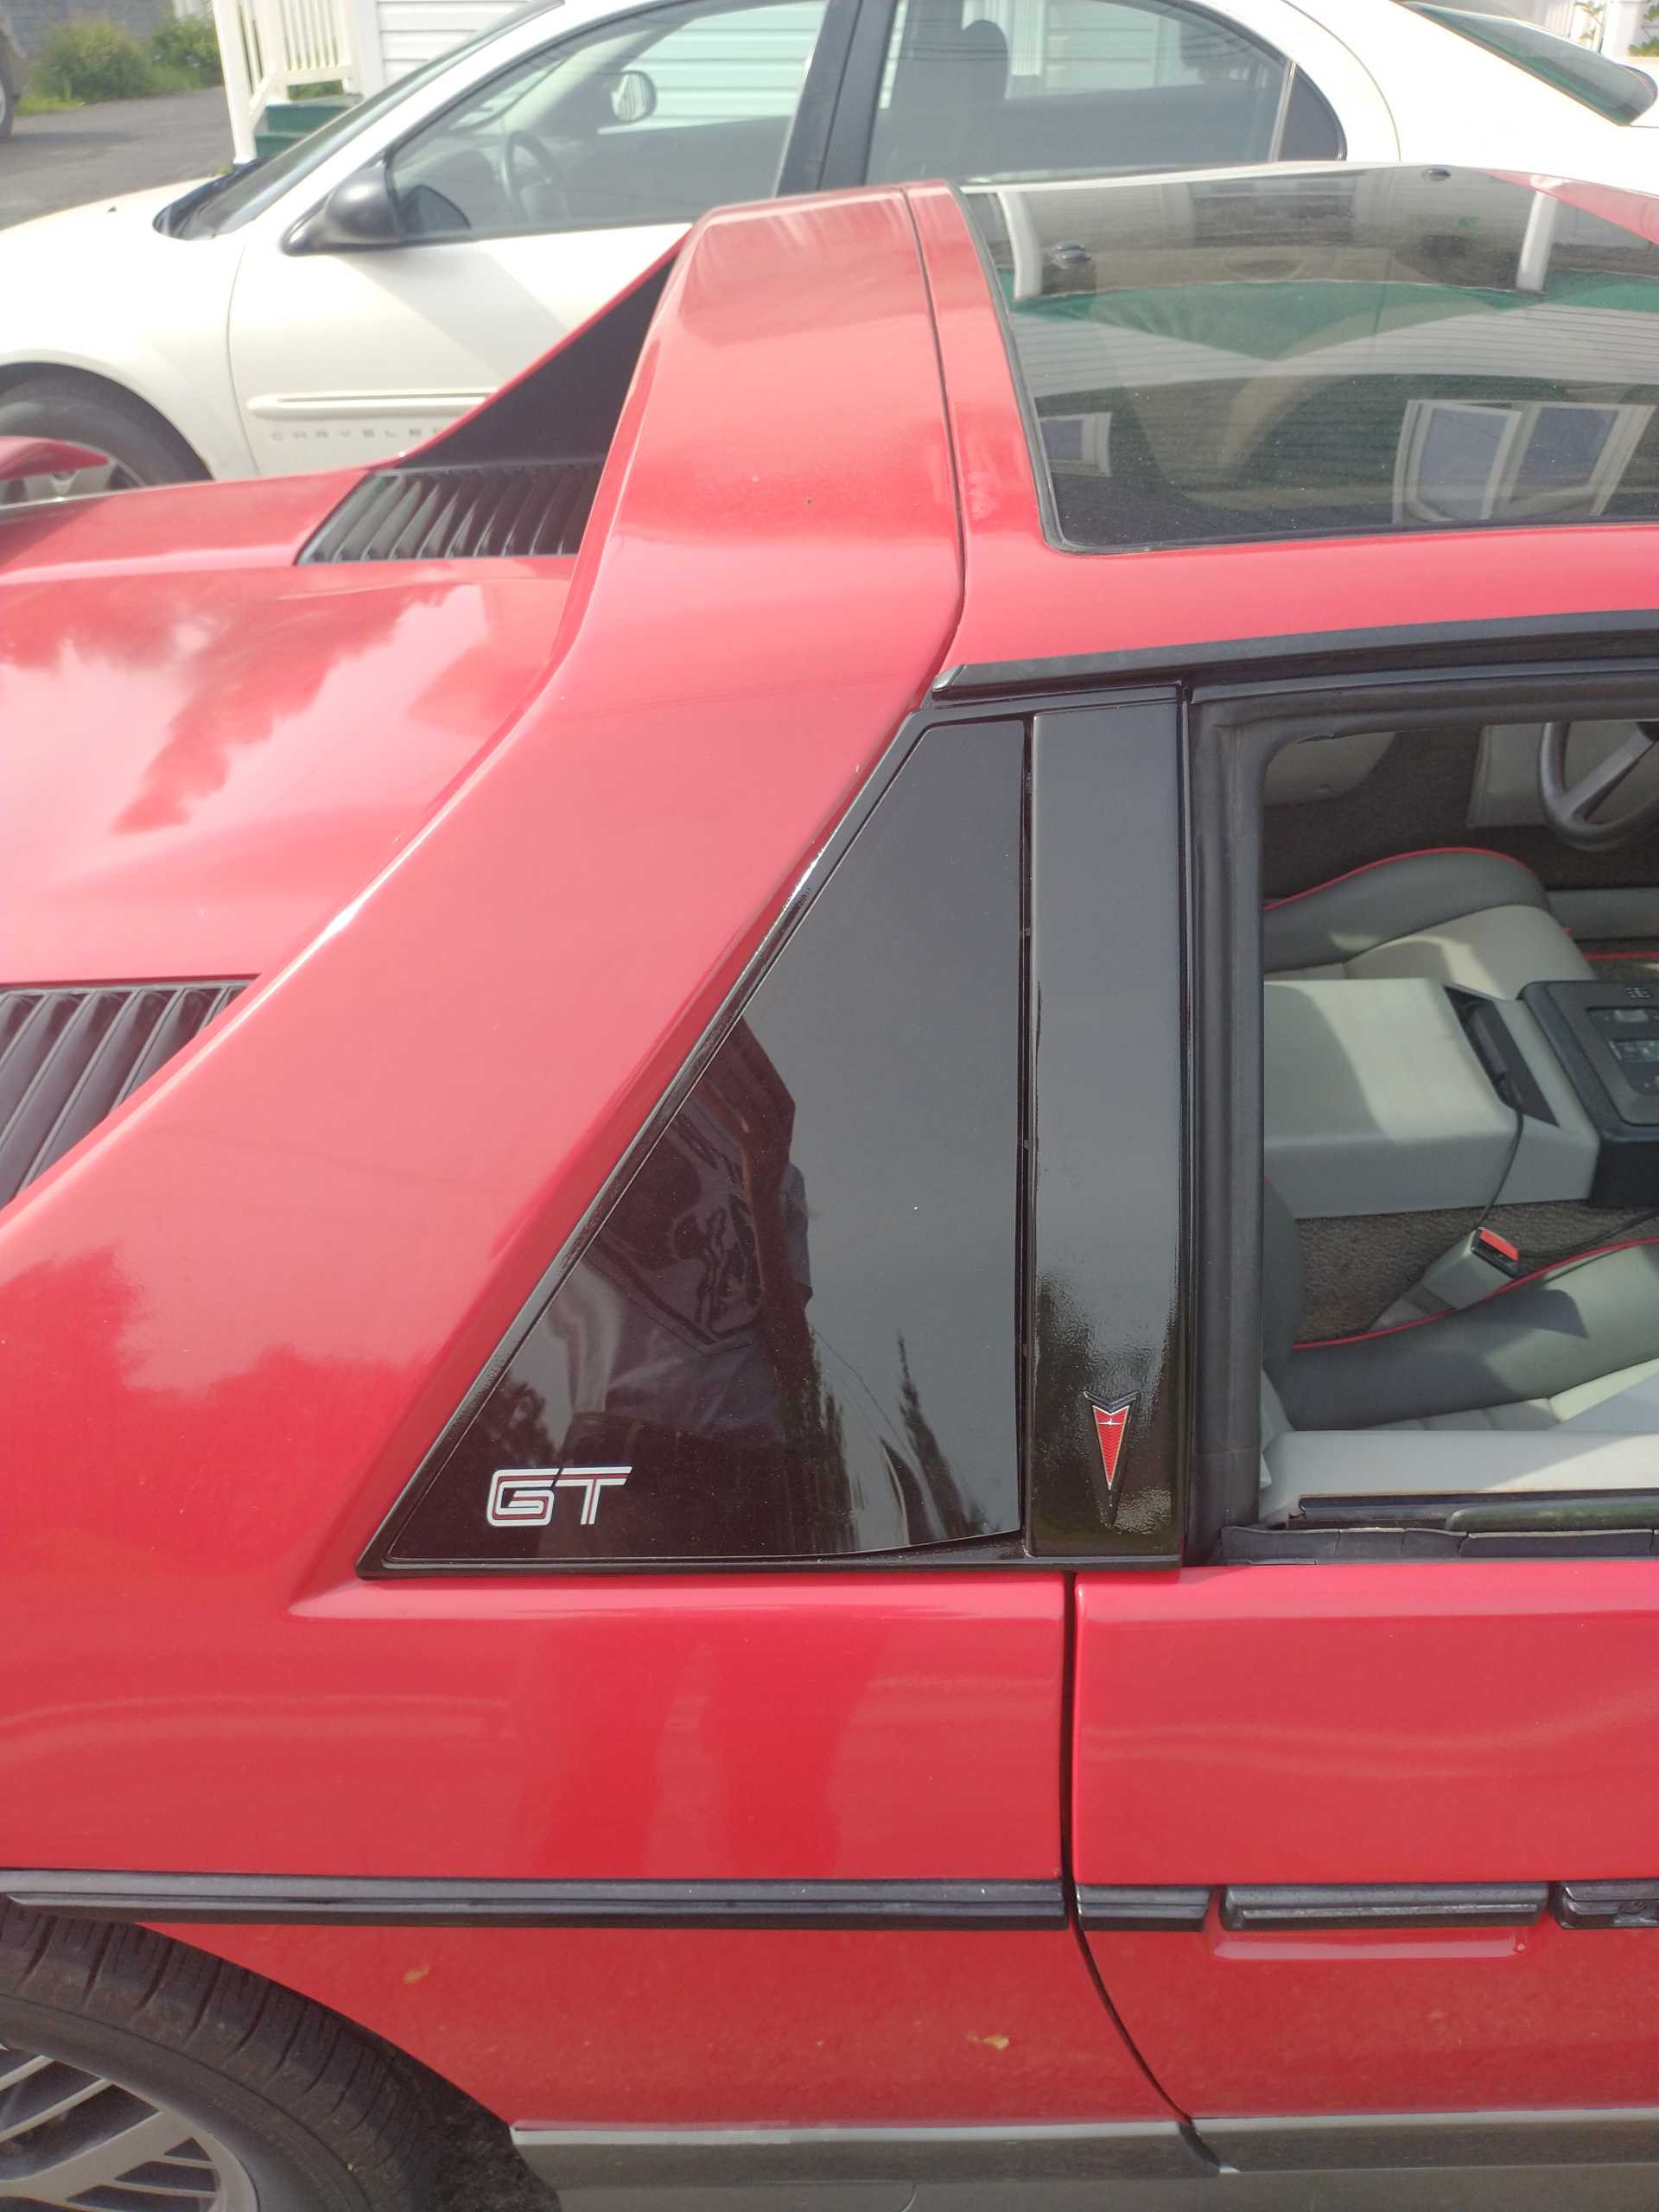
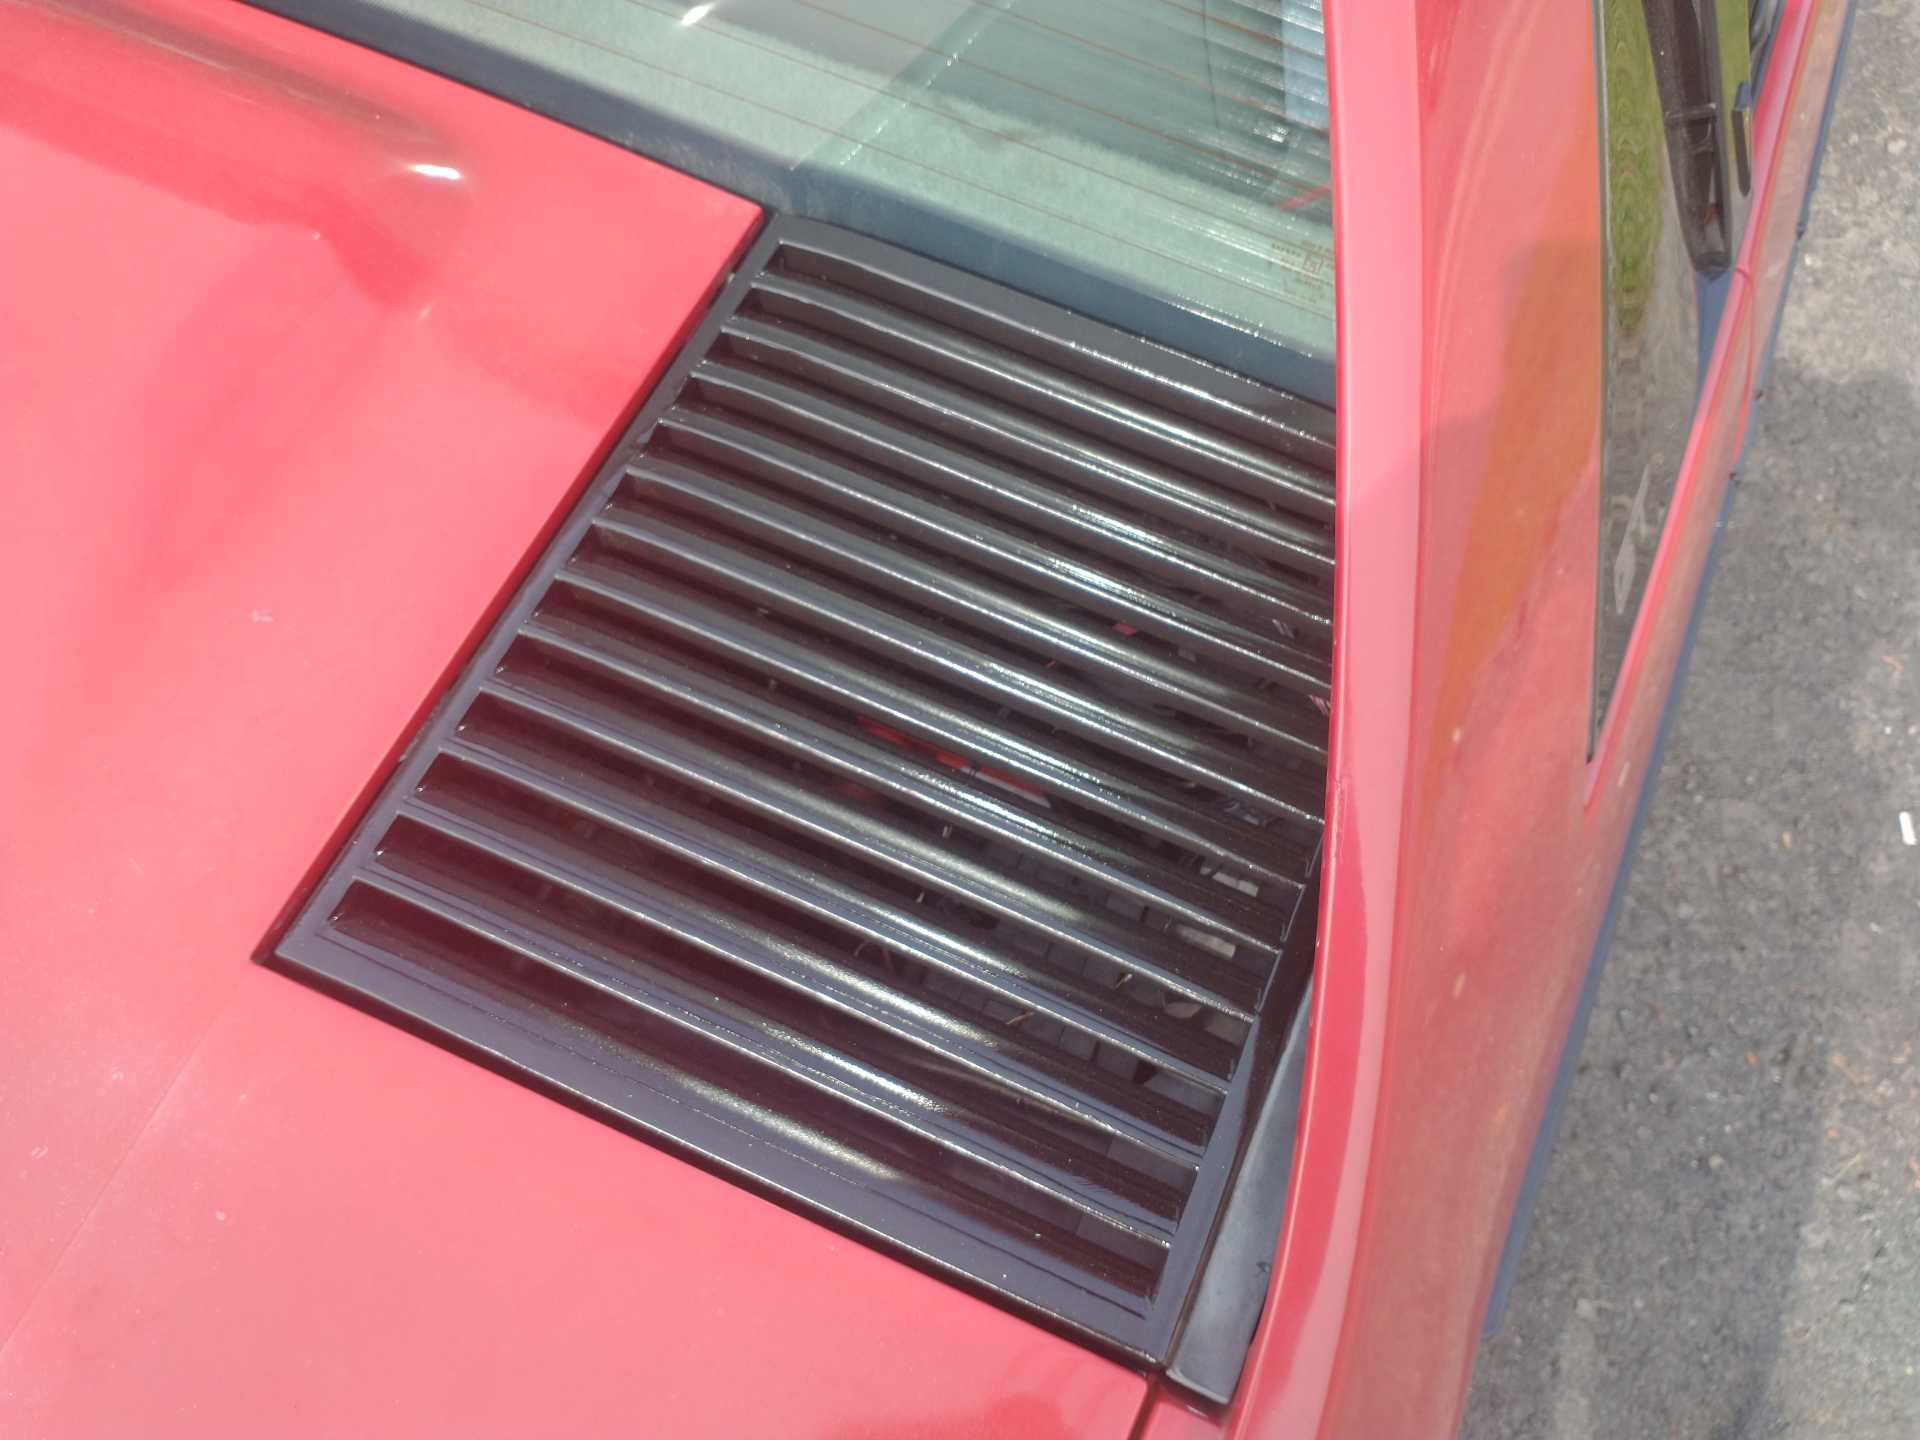
I finally painted my sail panel mount, and replacing my sail panels and Pontiac emblems (have had the new ones for over a year), I also painted my decklid vents (one was half peeled off, and used a q-tip to paint all the damaged rub strip (the parts on the front and rear bumpers were really degraded, looked like the surface had flaked off, was a sandy brown color), it's still rough and worn down, but it looks much better now, to dark for pictures tonight.
Megasquirt takes a second to sync before it can start (using the distributor and cam sensor it reads the cam sensor first, then distributor even though the distributor is the main input) so the engine often has to turn over several cylinders before the ECM cam even start commanding spark and fuel. I didn't like that slight delay on starting, so I rewired the ICM bypass signal, so when starting, the ICM is sparking immediately, at 10* every cylinder, I also have the ECM give the engine a priming shot so there's a little fuel for the ICM spark to burn, and it works great. It starts just as fast as the stock 2.8 with good ECM and everything working did, so quick you hardly hear the starter, just turn the key and vroom. For the prime shot, I slowly increased it until it started to do something then increased it a little more until it didn't improve the starting time, then dropped it back down, it ended up being 8ms (all this testing was done fully warmed up, haven't tried it cold, it'll probably want more fuel then though). I know with a priming shot you have to be careful to not flood the engine, I don't intend to switch the ignition on and off more than 2 or 3 times between starts, and I tested and 3 doesn't have any noticeable difference, so how many times would it have to prime before it floods the engine?
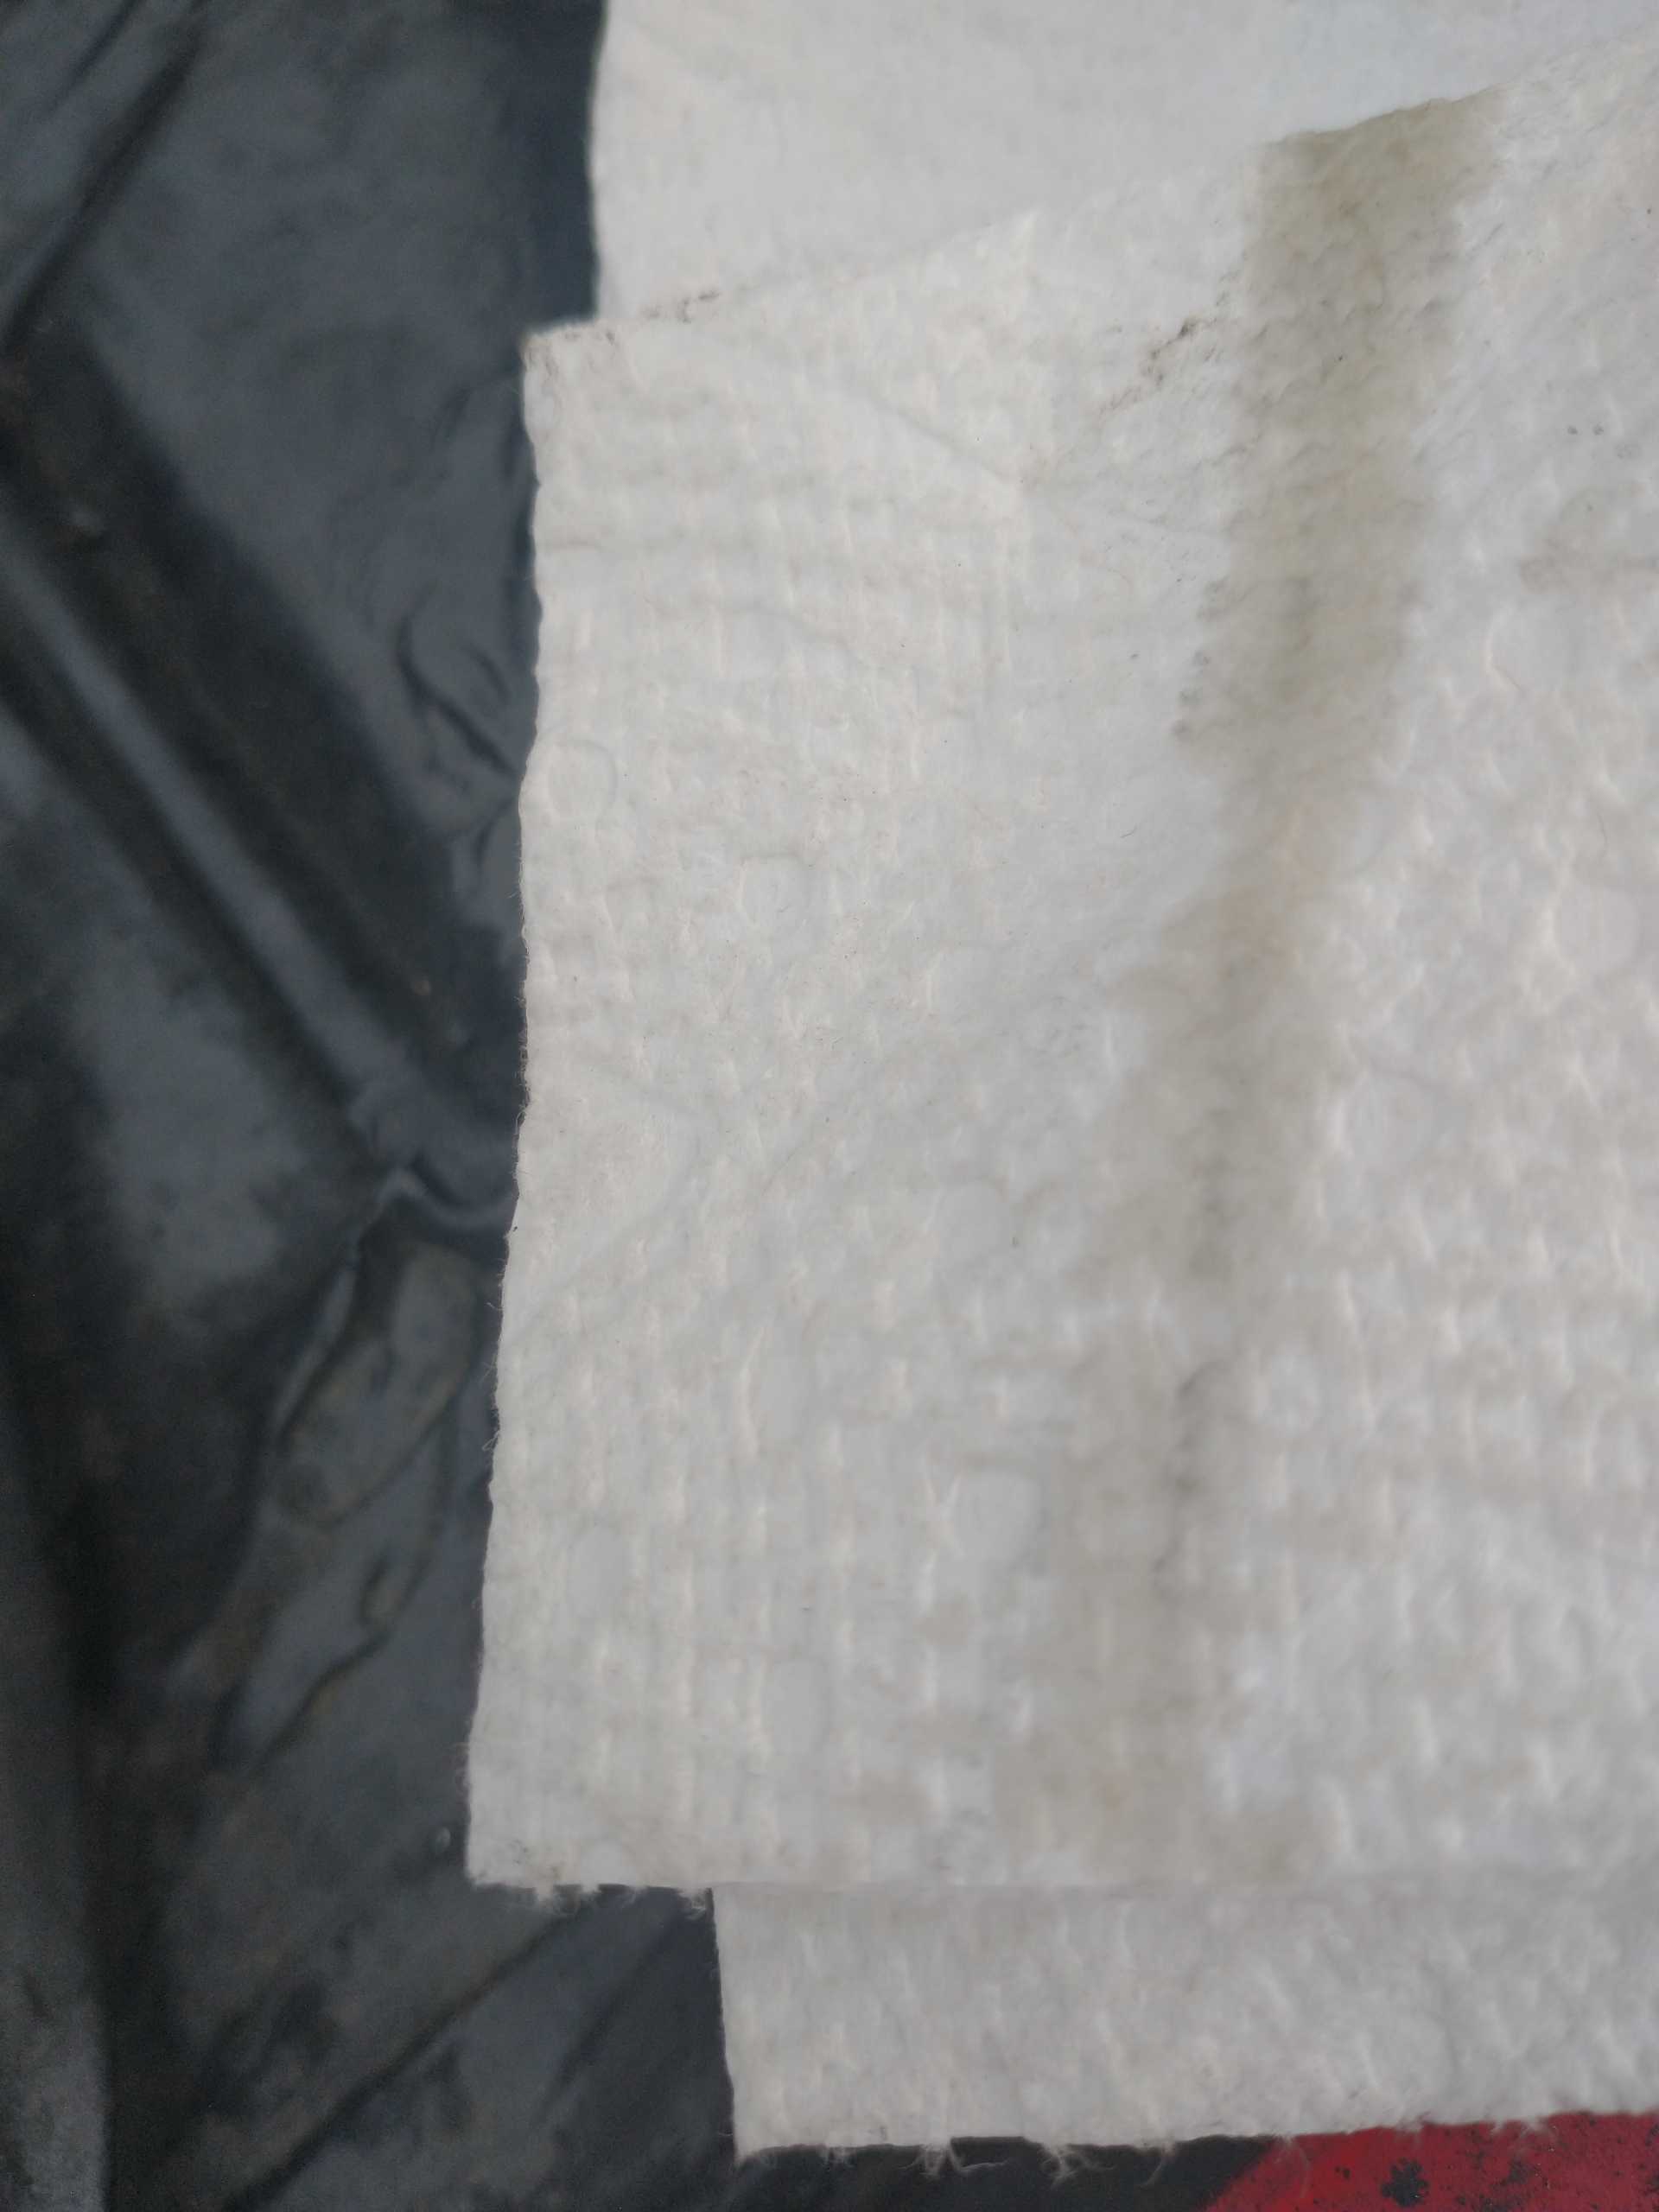
Damaged trim: Sail panels: Decklid vents: Current oil color:
I now have 110kms on this engine, more or less no issues, I learned that my old harmonic balancer had slipped a little (got a new one as the rubber was a little cracked, scribed the mark from the old balancer on the new one, then verified with a screwdriver down the spark plug hole, it was 9* off (would say 10* and actually was 19). I had a little pinging on a single run a couple days ago, so I stayed light on the throttle until I figured it out. I rotated the distributor back to say 1* (actually 10*) along with resetting the megasquirt timing and it works fine now. Oil is still very clear and clean (after rebuild I extensively primed, started the engine and let it warm up once on brand new oil and filter, then changed it and all the driving has been on new oil and filter), although my dipstick gave me a bit of a startle. When I pull the dipstick out and wipe the length of it with paper towel, it leaves a darker smear on it along with the oil, making it look much dirtier/more metallic than it is. If I wipe just the dry part, it leaves that smear, then separately wipe the oily part and it's nice and clean. My dad's stock Fiero also does the same thing, so I don't know if that's normal for the dipstick to just be dirty enough to leave a smear even if the oil is clean, but it had me worried for a few minutes haha.
The 5 speed is nice to drive, and I'm getting used to the new clutch (bites much harder than the old one)
I avoided the priming pulse on my Fiero due to flooding fears with multiple key on/off cycles. The car takes some time to start, but not an excessive amount.
My dad had a Jeep Comanche with the 4.0 L I6 and Renix fuel injection. It took a few seconds of cranking before it would start; that’s just how long it took for things to sync and start working.
If you find priming pulse settings that work for cold starts without flooding, then I may want to try something similar on my car.
I just did a cold start and yeah it's not yet dialed in for that, for a fast startup you'd also need immediate spark to, I don't think your setup has anything that will provide spark before the ECM has sync, so you'd have a bit of fuel, but that wouldn't burn until the ECM gets sync and starts to output spark, and injecting fuel, so I don't know if the priming pulse would benefit you much. For my car the "base fuel pulse width" or whatever it's called under the engine and sequential settings is 8.5ms, and the lowest number that gave me fast starting at operating temp for the priming pulse was 8ms, so that's probably related.
By calculation that's only like 0.05cc of fuel per cylinder, the heads have about 52cc of volume in the combustion chamber, so it would take about 1000 key on/off to flood it enough to hydrolock, not including the dish in the pistons, that's good to know haha.
[This message has been edited by 1985 Fiero GT (edited 06-28-2025).]
Just did a little testing, I just applied the cranking pulse curve to the priming pulse (3x the fuel at-22 as at normal temp) so it's 24 at -22 and 8 at 185, and smoothed in a straight line between that. It's about 50* out right now and it started quick and well.
Originally posted by 1985 Fiero GT: I just did a cold start and yeah it's not yet dialed in for that, for a fast startup you'd also need immediate spark to, I don't think your setup has anything that will provide spark before the ECM has sync, so you'd have a bit of fuel, but that wouldn't burn until the ECM gets sync and starts to output spark, and injecting fuel, so I don't know if the priming pulse would benefit you much.
I looked at a datalog I had of an engine start, and while cranking, I see some time where there is an RPM signal (and hence sync?), but where the engine hasn't fired off yet. So maybe a priming pulse could shorten this phase. Probably worth trying once I get my car running.
In datalogs, I assume that the actual start of cranking happens when the battery voltage starts dropping, as this indicates when the starter motor begins running.
Oh yeah, no comparison haha, it just goes through the gears so fast, there is no such thing as lugging the engine now, 2000 rpm and above and it just accelerates.
I finally did a full throttle run today, not specifically through the gears or all the way through the rpm, but just to see what boost it gets to, etc. just on the wastegate.
Max boost 175kpa, hit that as low as 3200 rpm (started at 2500), settles to around 160-165kpa @ 4200+ (maybe slightly sticky wastegate, unless that's normal for it to hit a peak for a short time, then settle a little lower as the wastegate works).
For a full throttle run from 3200 to 5300 rpm, AFR was 9-10:1, and over 190kms of driving, I've averaged 13.8L/100 kms, so definitely some improvement to be had there haha, my idle and cruising is closer to 12/13:1 at the moment, I'll work on all that.
Intercooler also seems to be doing it's thing, the temp sensor in the water outlet of the intercooler shows 3* over my estimation of ambient, and increases another 2* during a full throttle run.
Coolant stays at 185* (thermostat rating) when I'm moving, climbs 10* during an acceleration, then quickly drops down to 185* again in the time it takes me to release the throttle, and shift into 5th gear.
Currently at 320 kms, tomorrow will be another 40, but the rest of the week should have a lot less driving than I have had recently, unless I decide to just drive for no reason haha.
[This message has been edited by 1985 Fiero GT (edited 06-29-2025).]
Originally posted by 1985 Fiero GT: Max boost 175kpa, hit that as low as 3200 rpm (started at 2500), settles to around 160-165kpa @ 4200+ (maybe slightly sticky wastegate, unless that's normal for it to hit a peak for a short time, then settle a little lower as the wastegate works).
After the turbo, you are running a stock Fiero exhaust system, correct? Maybe it is restrictive and is creating a high-pressure environment for the wastegate to discharge into. Not sure if that can affect the boost spiking.
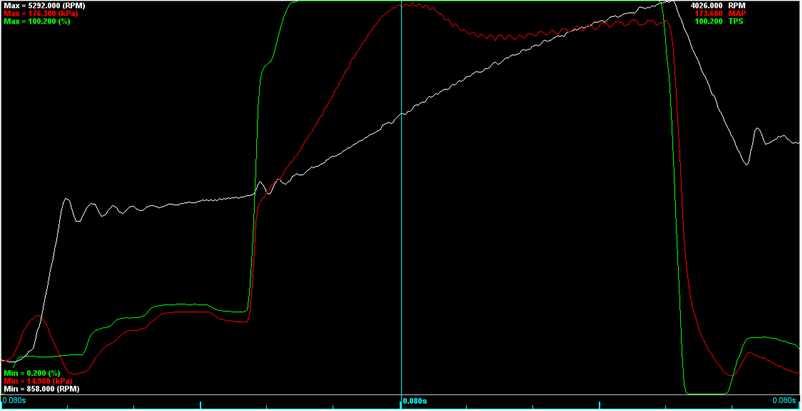
My car doesn't overshoot like you describe yours doing. Here is an example of mine running off of wastegate spring pressure (electronic control deactivated):
After the turbo, you are running a stock Fiero exhaust system, correct? Maybe it is restrictive and is creating a high-pressure environment for the wastegate to discharge into. Not sure if that can affect the boost spiking.
My car doesn't overshoot like you describe yours doing. Here is an example of mine running off of wastegate spring pressure (electronic control deactivated):
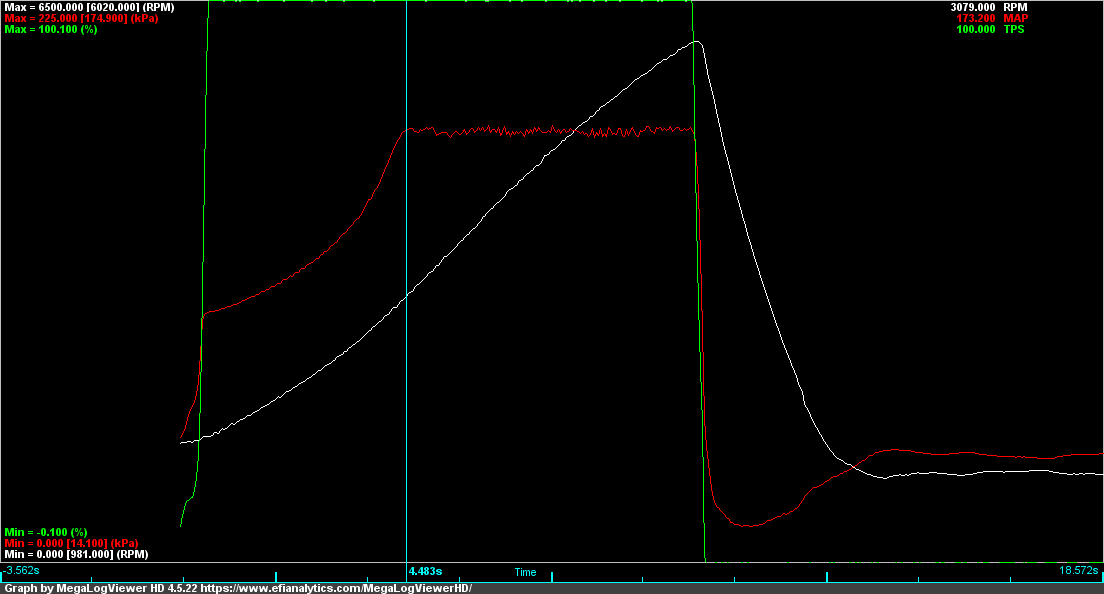
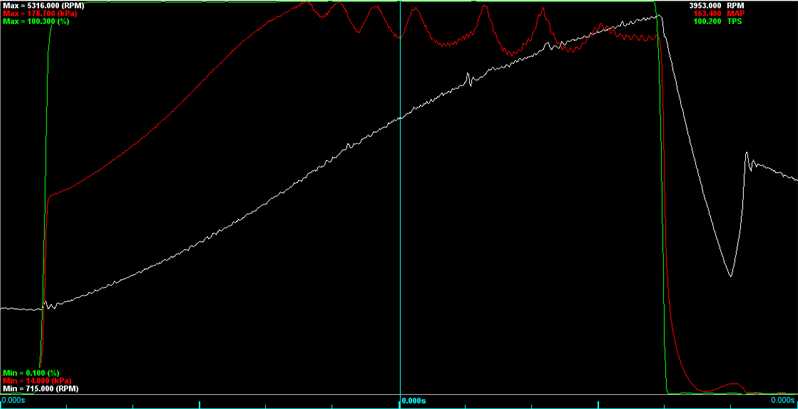
Yes, Fiero (looks like it was replaced at some time) Cat and original muffler. That may have something to do with it, but it does seem to hit 175, then undershoot and start to come back again, here's a picture of my high rpm run: Peaks at 175 kpa@4200, drops down to 160@4600, then climbs back to 167/8@5300 (end of run). I would assume that the visible small spikes and dips in boost once its peaked is the wastegate opening more/less, if so then that wouldn't really explain the larger dip across the rpm, but I would think if it were an exhaust restriction, it would't get better at higher rpm, it would peak and go down, not peak, dip, and start to return. As for the wastegate itself, it is the one that came with the maxpeedingrods turbo, it is a sealed cheapo unit, with no published specs, but considering it consistently limits it to 175kpa (at least to begin with, and it never goes above that, i have overboost protection at 180kpa, haven't hit that at all), so I think that would be the spring rating.
Side note the new turbo I had to get (metal oil took out the old ones bearings), is very nice. The exhaust and intake housings and almost everything else are the same as the last one (so I reused the exhaust housing because I had already ported the wastegate and knew that it worked well), but the compressor wheel is billet (old was cast) and it was the first time for me to see something like that in person, very cool. Anyhow the turbo is balanced on both ends, and while I'm sure the metal is cheaper and the bearings are worse than a name brand, it was packaged well, with instructions, troubleshooting guide, and brand advertising booklet, all in good, fairly correct English, even though it's a "cheap Chinese turbo", it has me impressed, and even if it doesn't last to long, it was only $200, and the turbo is only 4 bolts, a v-band clamp, 2 silicone clamps, and the 2 oil lines before I can remove it.
Tomorrow if i remember, I'll do a full throttle run from a lower rpm, so the boost can hit 175 at 3200, instead of starting at a higher rpm like this pass, and hopefully hold there as high as I want to go, or at least get more data of the peaks and dips.
It hit 175kpa at 3139 rpm, then fluctuated between as high as 178.7 kpa to as low as 155 kpa 7 times through the run (I really felt it that time, this is the most obvious it has been). considering the points at which it "decides" to be at a lower boost and a higher boost seem random (this log fluctuated immediately and more often, the last one didnt fluctuate as much or as sharply), I don't think it's from restrictive exhaust, I just think the wastegate actuator is cheap and sticks a bit. If it ends up bugging me I might get a better one, but this is still super fun as it is haha!
On the first turbo I had tried to see how much psi it took to open it, and all I had acces to was a big air compressor, i tried to use the regulator to see when it opened, and I didn't get any consistent results, initially I blamed that on the regulator being hard to get consistently as low as 10 psi, but now it looks like that was actually the wastegates fault.
The first graph looks like it could be livable, but the second with the never-ending oscillations looks less so. I bet you could feel the oscillations in the butt dyno.
Besides the boost pressure acting on the diaphragm, there is another force acting on the wastegate actuator.
Pre-turbine exhaust pressure is trying to push the wastegate flapper door open. So maybe there is a cycle where: More boost -> more exhaust gas generated More exhaust gas -> more pre-turbine exhaust gas pressure High pre-turbine exhaust gas pressure -> blows open wastegate flapper door Opened wastegate flapper door -> less boost pressure Less boost -> wastegate closes Wastegate closes -> more boost pressure
How did you set the preload on the wastegate actuator rod?
I'm wondering if you wouldn't have enough preload (to keep it closed despite the pre-turbine exhaust gas pressure), and that the wastegate is being blown open when it shouldn't be.
Yeah the second one was a surprise, the worst example I've had yet, and yeah it felt equivalent to the bucking when crawling around idle rpm in first gear on my old 4 speed.
I basically didn't set any preload, so that's probably it. What procedure should I follow to set preload?
Originally posted by 1985 Fiero GT: Yeah the second one was a surprise, the worst example I've had yet, and yeah it felt equivalent to the bucking when crawling around idle rpm in first gear on my old 4 speed.
Does it buck in parking lot crawling with the F23?
I messed around a lot with the spark table to minimize bucking.
Some of that bucking effect depends on the transmission; a transmission with more lash betweeen the gears can allow for more bucking.
A large amount of bucking depends on the engine and tune, with how the engine torque varies as the RPM bounces up and down.
quote
Originally posted by 1985 Fiero GT: I basically didn't set any preload, so that's probably it. What procedure should I follow to set preload?
Does it buck in parking lot crawling with the F23?
I messed around a lot with the spark table to minimize bucking.
Some of that bucking effect depends on the transmission; a transmission with more lash betweeen the gears can allow for more bucking.
A large amount of bucking depends on the engine and tune, with how the engine torque varies as the RPM bounces up and down.
Much much less than the 4 speed if any, I haven't noticed it, but I adapted my driving style a lot with the 4 speed so I haven't tried out the combinations that would cause bucking yet. Mostly when I'm parking lot driving it's actually in neutral, either with the clutch or shifter, if I'm going fast enough to be in 2nd, I'll do that, if I'm accelerating or engine braking I'll leave it in gear, but just crawling around to find a parking spot, I'll engage the clutch for a few seconds then coast, etc. I don't do that enough to worry about extra wear on the clutch, if I lived in a city or something out might be different.
I'll look into the preload.
That could also explain why it takes an extra 100 rpm to reach the 175kpa vs your graph, if there's always a little exhaust leaking past that would reduce the spool up efficiency.
[This message has been edited by 1985 Fiero GT (edited 06-30-2025).]
I didn't read back through your whole thread, but too large of a wastegate could cause those spikes too. Valve opens, reduces drive pressure/boost, stalls turbo, valve closes, drive pressure and boost spike, valve opens, repeat.
------------------ "I am not what you so glibly call to be a civilized man. I have broken with society for reasons which I alone am able to appreciate. I am therefore not subject to it's stupid laws, and I ask you to never allude to them in my presence again."
I invited Lou Dias to trash me in my own thread, he refused. sorry. if he trashes your thread going after me. I tried.
I didn't read back through your whole thread, but too large of a wastegate could cause those spikes too. Valve opens, reduces drive pressure/boost, stalls turbo, valve closes, drive pressure and boost spike, valve opens, repeat.
It's the integrated wastegate in the turbo, same style as the White Bug, after PM Brunelle had boost creep and ported it to fix it, I ported mine before installation, with it ported and the flapper disconnected from the actuator, it made about 150kpa on the first turbo. Now it's a new turbo, original housing, mostly the same otherwise, shouldn't be much different in terms of wastegate efficiency, so about 150kpa wide open, and I know there is no wastegate preload at all, so I'll fix that and go from there.