If you're obsessed with the whole wire tucking thing, you can certainly have the distributor oriented any way you like.
The #1 cylinder can also be connected to any of the 6 posts on the distributor as you wish. Just respect the firing order, 1-2-3-4-5-6 in a clockwise direction.
IP: Logged
02:39 PM
87antuzzi Member
Posts: 11151 From: Surrounded by corn. Registered: Feb 2009
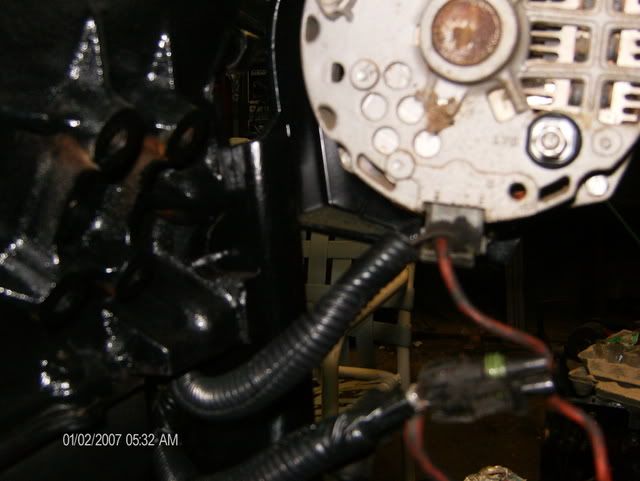
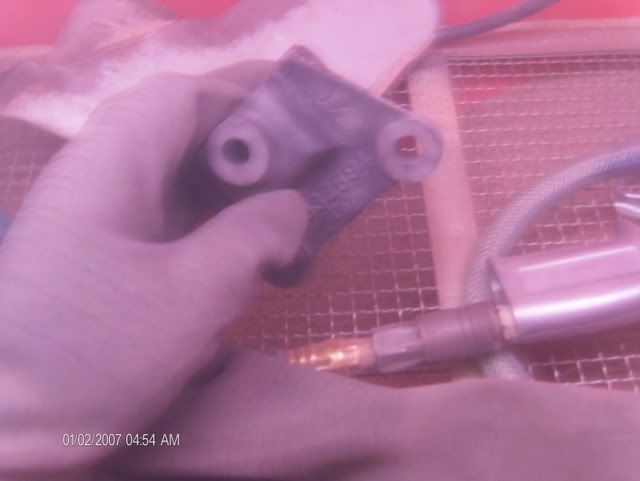
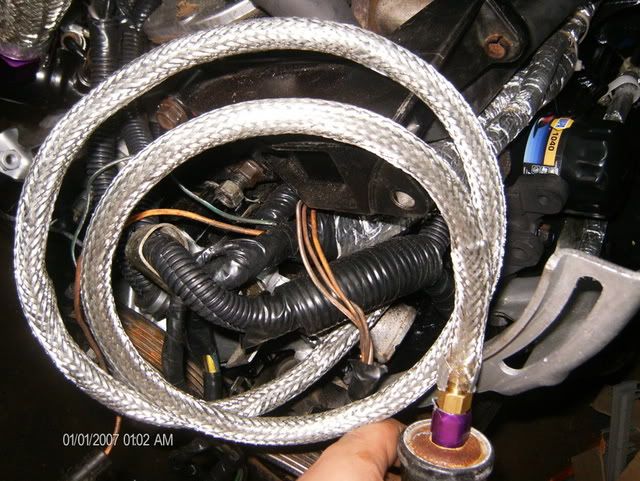
This is the only wires that run trunk side of the engine. The alt, and the speed sensor Ac mount all painted and purdy. More parts in the sand blaster. (i thought i was done with this crap
IP: Logged
12:37 AM
87antuzzi Member
Posts: 11151 From: Surrounded by corn. Registered: Feb 2009
Ok. I have a cradle stripped to metal. My powder coat guy is being flaky so im just going to coat it in something. but what......Whats cheap and holds up good??
IP: Logged
02:59 AM
Blacktree Member
Posts: 20770 From: Central Florida Registered: Dec 2001
POR 15 works pretty well. I put 2 coats of it on my engine cradle about 4 years ago, and it still looks great.
If you decide to use POR 15, wear a long-sleeve shirt and rubber gloves. When that stuff gets on your skin, it won't come off until the skin wears off.
When that stuff gets on your skin, it won't come off until the skin wears off.
That is so true. I agree, POR 15 is great stuff and I use it on a bunch of stuff. Our 67 GTO's are pretty much covered head to toe in that stuff. Isn't exactly the cheapest but a little seems to go a long way.
IP: Logged
04:20 PM
PFF
System Bot
87antuzzi Member
Posts: 11151 From: Surrounded by corn. Registered: Feb 2009
I have to admit, this old dog is learning a couple new tricks here. You have some fresh ideas that I think are interesting, like the wire tucks. I think I'll turn the distributer like you mentioned, too.
IP: Logged
05:59 PM
87antuzzi Member
Posts: 11151 From: Surrounded by corn. Registered: Feb 2009
I have to admit, this old dog is learning a couple new tricks here. You have some fresh ideas that I think are interesting, like the wire tucks. I think I'll turn the distributer like you mentioned, too.
LOL. IM unemployed. I stayed up till about 5 in the morning then unplugged my alarm clock at 6 when it went off. Im hoping my A/C pump will fit because a majority of the harness runs in that area.
IP: Logged
06:02 PM
Blacktree Member
Posts: 20770 From: Central Florida Registered: Dec 2001
BTW, I did the distributer twist like you mentioned in the wire tuck thread, and tucked away the wires to the ignition module. It looks a lot better! You should try it
IP: Logged
09:57 AM
87antuzzi Member
Posts: 11151 From: Surrounded by corn. Registered: Feb 2009
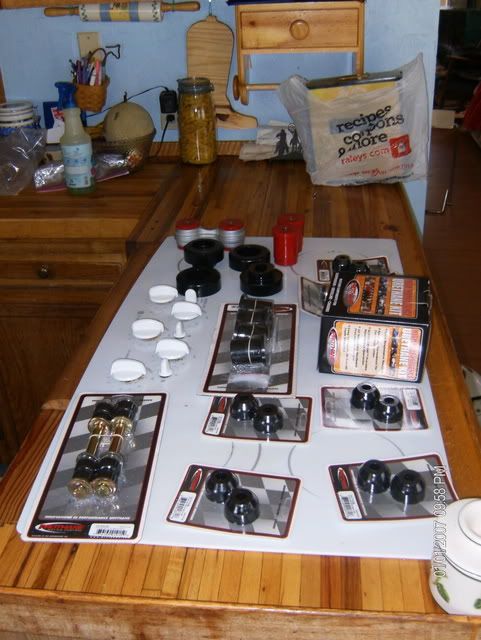
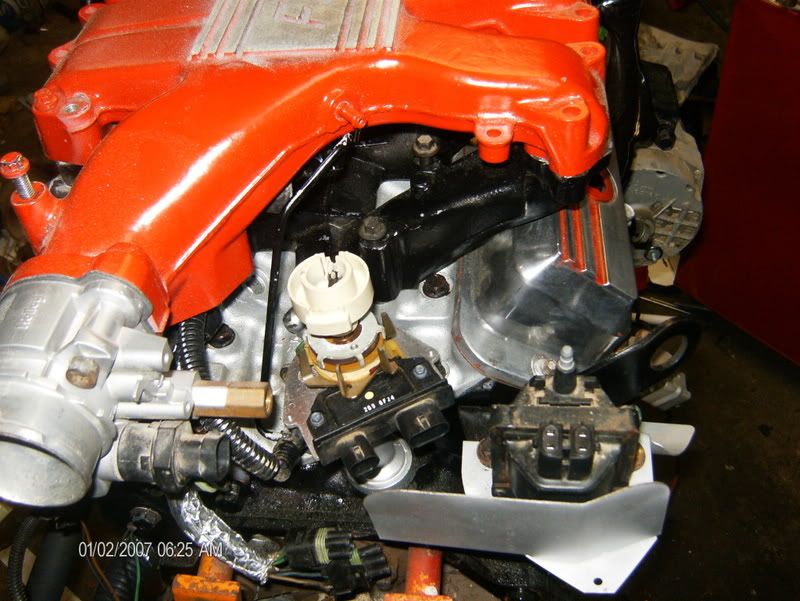
If you recognise this pic I feel sorry for you. This made my life a living hell for a hour. Just a little "test fit" to get to visualise the finished product. Anyone want to guess why my oil pressure sending unit line is 5 feet long? Anyone want to guess why the map and egr control valve wires are 5 feet long? Also have 5 foot vacuum lines.... All them ugly sensors are going in the trunk, tucked in a corner out of view. Im also thinking about putting the coil on the fire wall. The fuel pump relays are also being moved to a new location to clean up the engine bay. And for my "big trick" The cruse control diaphram is getting moved behind the transmission on a bracket im going to make. Im going to loop the cabe behind the engine. It should work.... I also got one of them cheap "line your rubber hose" kits just to make it look good.
IP: Logged
11:10 PM
Blacktree Member
Posts: 20770 From: Central Florida Registered: Dec 2001
Cool idea. Just keep in mind that the oil pressure senders have a tendency to leak oil. So if you value your trunk carpet, you might want to put a drip pan under the oil pressure sender... hehe.
IP: Logged
11:21 PM
Jun 3rd, 2010
87antuzzi Member
Posts: 11151 From: Surrounded by corn. Registered: Feb 2009
Cool idea. Just keep in mind that the oil pressure senders have a tendency to leak oil. So if you value your trunk carpet, you might want to put a drip pan under the oil pressure sender... hehe.
Im not using the factory oil pressure sender.....I got me some aftermarket gauges
IP: Logged
01:04 AM
fieroguru Member
Posts: 12647 From: Champaign, IL Registered: Aug 2003
Couple of things to consider: Remove the brass ends from the throttle body left over from the coolant tubes - they will unscrew from the throttle body. Put the Oil pressure sendor down by the oil filter - that is where the current line comes from. Just slide the map sensor under the upper plenum... it fits there just fine and will be out of sight.
I am a big fan of eliminating clutter, but not at the expense of more hoses/lines draped across the engine compartment and also prefer to black out all the lines/harness so they do not draw attention to them vs. the flashy braiding or colored looms... it is just a matter or perspective. Instead of people complimenting me on how pretty all my lines, hoses, harnesses are, I prefer them to ask where they are.
IP: Logged
04:51 PM
PFF
System Bot
87antuzzi Member
Posts: 11151 From: Surrounded by corn. Registered: Feb 2009
Couple of things to consider: Remove the brass ends from the throttle body left over from the coolant tubes - they will unscrew from the throttle body. Put the Oil pressure sendor down by the oil filter - that is where the current line comes from. Just slide the map sensor under the upper plenum... it fits there just fine and will be out of sight.
I am a big fan of eliminating clutter, but not at the expense of more hoses/lines draped across the engine compartment and also prefer to black out all the lines/harness so they do not draw attention to them vs. the flashy braiding or colored looms... it is just a matter or perspective. Instead of people complimenting me on how pretty all my lines, hoses, harnesses are, I prefer them to ask where they are.
I didnt know they unscrewed. As for the lines....Its not so much the lines I dont mine is whats on the end that I do. I just hate looking at sensors and coils and wires.....
IP: Logged
05:14 PM
Jun 7th, 2010
87antuzzi Member
Posts: 11151 From: Surrounded by corn. Registered: Feb 2009
I was going to send ya a message saying I got them. A plus to you. Im going to bondo skin them and put them on when i put in my new engine. Quick question for anyone reading. To get rid of little nicks in fiberglass will bondo hold up good? Im talking small nicks too.
IP: Logged
10:43 PM
Blacktree Member
Posts: 20770 From: Central Florida Registered: Dec 2001
Body filler is safe to use on small surface blemishes. You should only be concerned if a nick is on the edge of the panel (basically a notch in the edge). That would need to be repaired with fiberglass resin.
How is the engine coming along?
IP: Logged
10:58 PM
Jun 8th, 2010
87antuzzi Member
Posts: 11151 From: Surrounded by corn. Registered: Feb 2009
Body filler is safe to use on small surface blemishes. You should only be concerned if a nick is on the edge of the panel (basically a notch in the edge). That would need to be repaired with fiberglass resin.
How is the engine coming along?
Engine is done. cradle is done. My coil overs are here and my polly is going in the cradle in the afternoon. Now is on to pulling the old engine itself. I need the injectors out of the old engine because they are almost new. So I have all the hard stuff left to do
IP: Logged
01:00 AM
motoracer838 Member
Posts: 3751 From: Edgewater Co. USofA Registered: Jan 2006
I was going to send ya a message saying I got them. A plus to you. Im going to bondo skin them and put them on when i put in my new engine. Quick question for anyone reading. To get rid of little nicks in fiberglass will bondo hold up good? Im talking small nicks too.
Thanks Kris.
Duraglass is a good way, to fix edges on fiberglass parts, Bondoglass will do the job just about as well.
Joe
IP: Logged
06:28 PM
Jun 13th, 2010
87antuzzi Member
Posts: 11151 From: Surrounded by corn. Registered: Feb 2009
OMG. A update. I just picked up a th125c transmission, left and right spindles, both axels, both hubs, both control arms, rear tie rods and a killed back from bearhugging my new trans into the garage. Those things are wayyyy heavier than they look! Pics in a minute or two.
IP: Logged
12:50 AM
donnie072003 Member
Posts: 1956 From: LaSalle, IL. Registered: Feb 2010
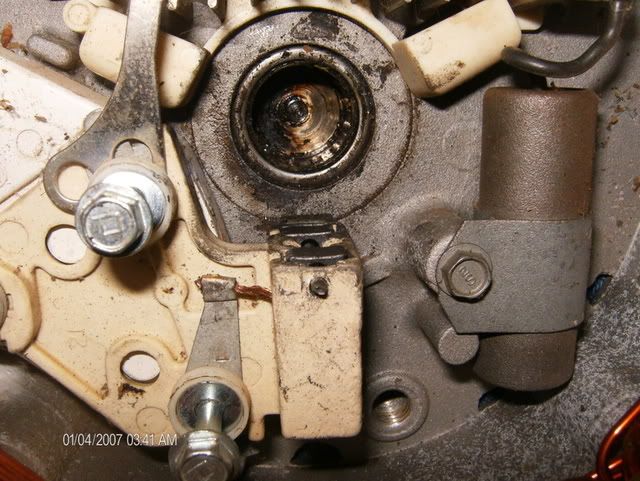
good build thread and the polybushes look good in black. I have noticed whilst looking through your pics that the dogbone bracket that goes towards the front of the engine has changed position on the before pic it shows it is bolted directly to the cylinder head and then a/c bracket. in the after shot it is shown bolted the other way round the ac bracket first then the dog bone mounting
before
after
I only noticed this as I am at that stage of putting the engine back together
jon
[This message has been edited by jon m (edited 07-29-2010).]
IP: Logged
03:26 PM
87antuzzi Member
Posts: 11151 From: Surrounded by corn. Registered: Feb 2009
good build thread and the polybushes look good in black. I have noticed whilst looking through your pics that the dogbone bracket that goes towards the front of the engine has changed position on the before pic it shows it is bolted directly to the cylinder head and then a/c bracket. in the after shot it is shown bolted the other way round the ac bracket first then the dog bone mounting
before
after
I only noticed this as I am at that stage of putting the engine back together
jon
Good eye. I saw that when I went to put the dogbone bolt in and it would not line up. The engine is friggen dusty as can be so im debating if i want to tear it down and clean it up or just clean it up with a rag.
IP: Logged
03:35 PM
87antuzzi Member
Posts: 11151 From: Surrounded by corn. Registered: Feb 2009
Ladies and gentlemen! the 2.8 is getting supercharged, I repeat the 2.8 is getting supercharged. I have one of them vortec kits for a while now and am thinking "why the hell not". I can actually think of a million reasons the 2.8 should not be supercharged . Its such a toss up though . A/C or boost. I love em both . Oh yeah! i also have a "treat" for you all following this thread. When I get the fiero in the garage I am going to TRY to get a rod to throw out of the engine (rock on gas pedal). Of course I will record it!!