I contemplated making a build thread for a while but I decided that even if no one else is really interested in it, it is worth documenting the history of my first car for me.
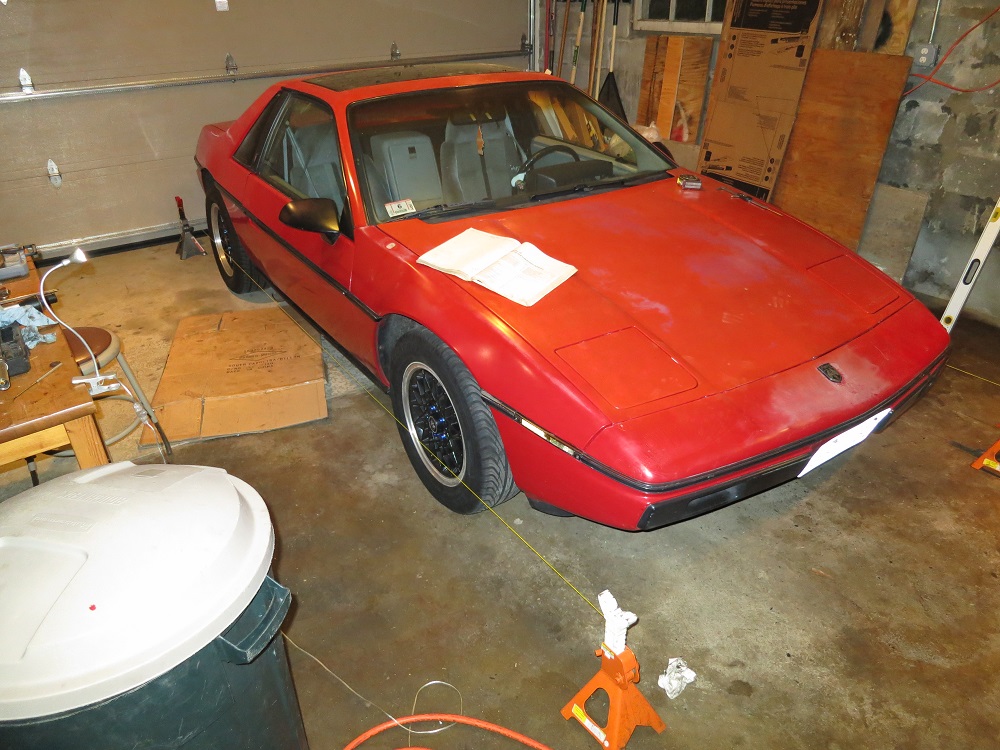
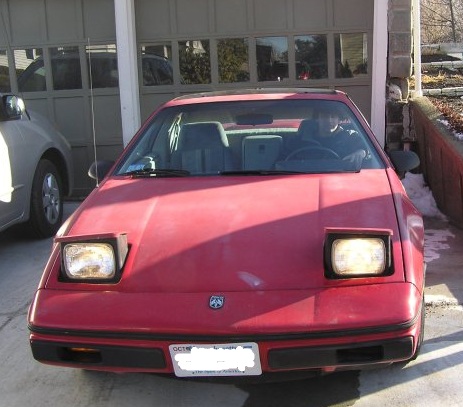
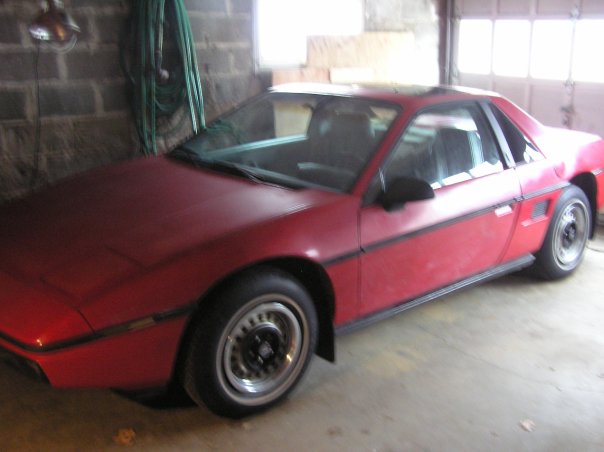
So January 2010 I bought my first car, a 1985 base model with a 4 cylinder 5 speed
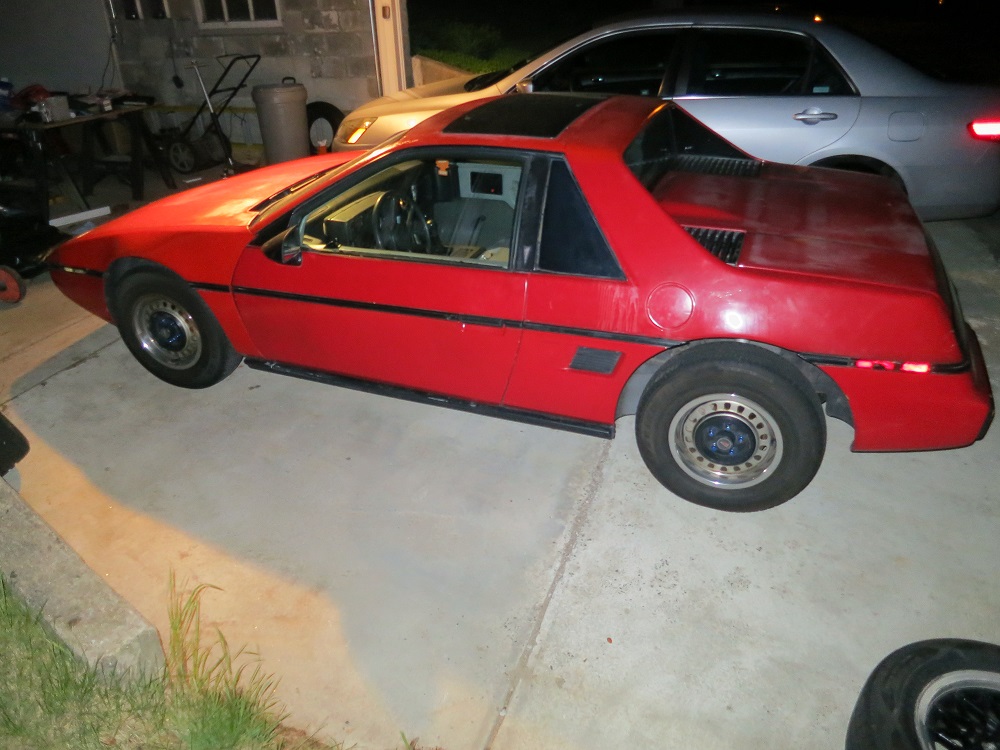
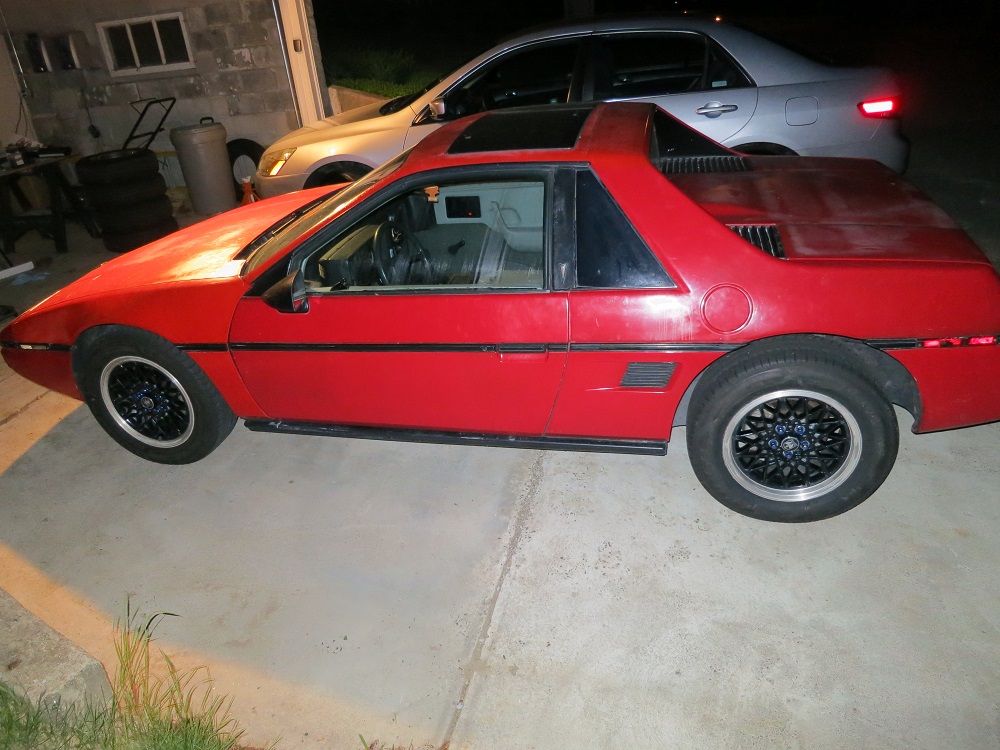
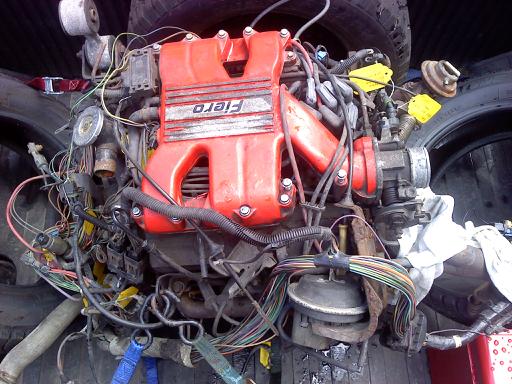
This is what she looked like when I got her. She was in rough shape, rear brakes did not work, paint was awful, engine was running rough, one of the headlight motors was broken, interior was all warped, and four different sized tires were installed. Broke down on the way home in the worst possible place on the highway with no break down lane. Then everything else proceeded to go wrong. Slave and master cylinders for the clutch, I replaced the rear calipers, replaced the headlight motor, did some bodywork and experimented with some painting (which went terribly at first). I replaced the throttle positioning sensor and O2 sensor and plugs and wires and cap and rotor and the engine ran much better. I also got some new tires (but they are not the best) I did lots of little things and then I decided that I wanted a bigger engine. I wanted to eventually race the car in a competitive class so I wanted to swap in a 2.8. I found a 2.8 for free, bought a Spec stage 2 clutch, got a shifter rebuild kit from Rodney and his solid cradle bushings, got some KYB shocks and struts, bought the 2.8 fuel pump, and some poly suspension bushings. I installed all these things and did the engine swap in a week with my friend from school in his uncles garage. His uncle races a really nice 1973 911 in a vintage car class I wish I had a picture of it to post here.
Well the engine that I put in was a great step up from the 2.5, but it was burning a quart of oil every 100 miles. I found out it was the rings that were the problem unfortunately so I replaced them over my past winter break. I replaced a leaky oil pan too. I honed the cylinders and replaced the piston rings and cleaned the combustion chambers and the top of the pistons. I also replaced the rod bearings and cleaned a lot of things on the engine and replaced all the gaskets to stop the engine from dripping oil.
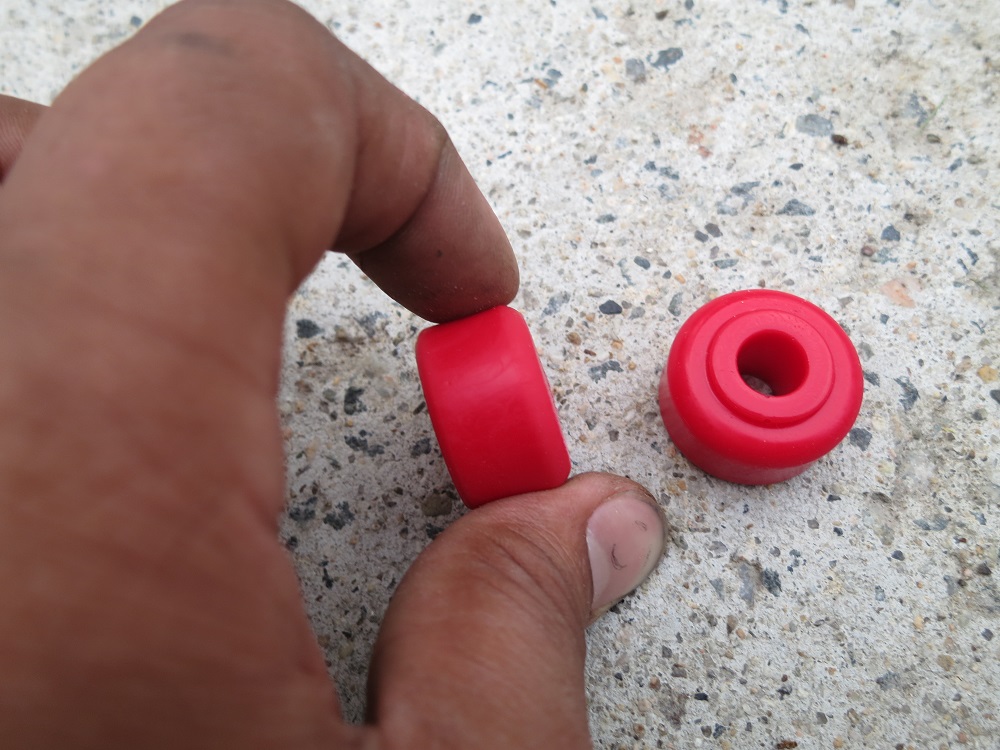
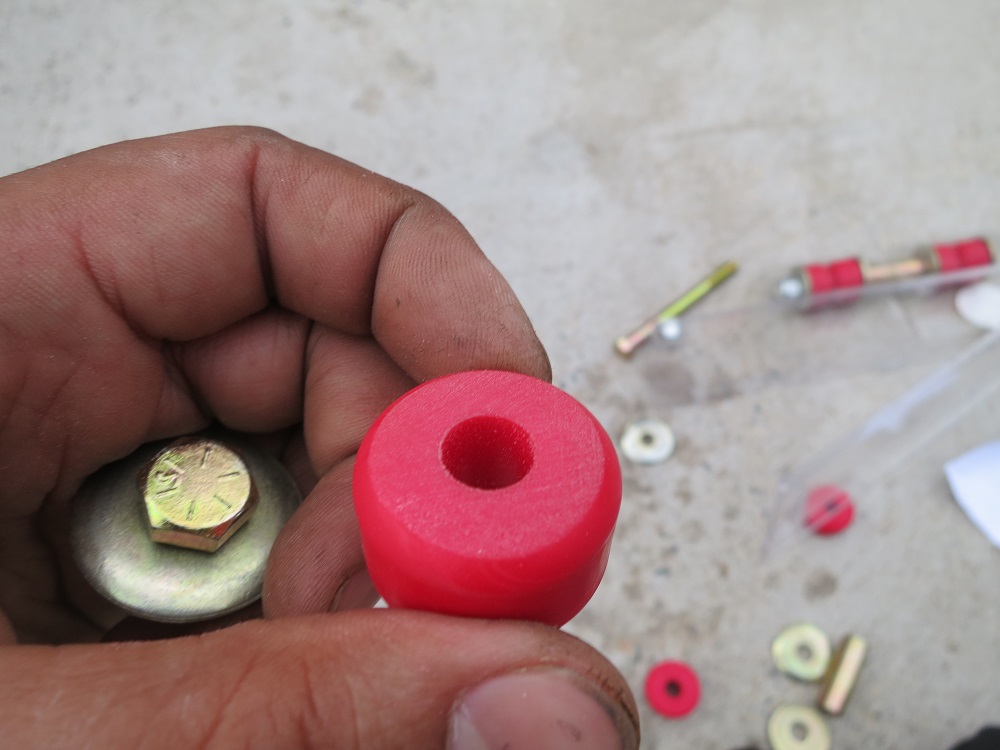
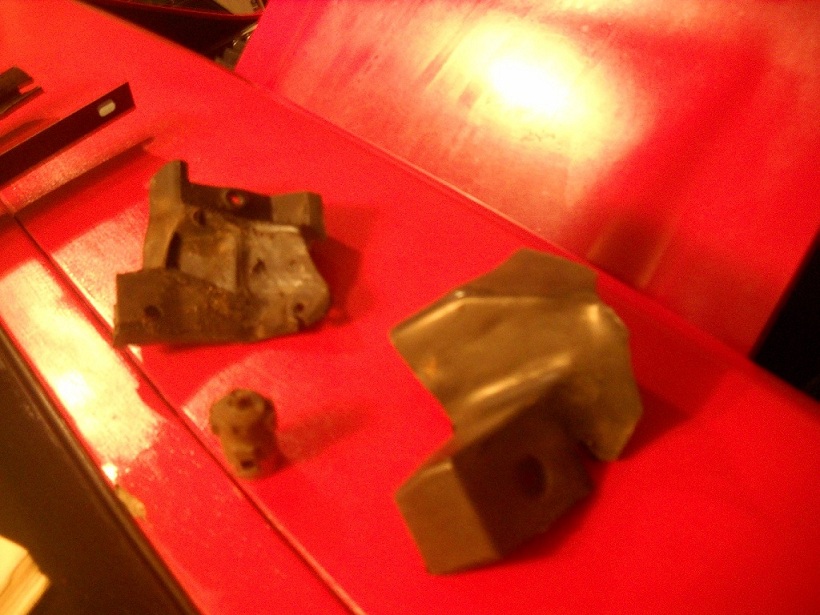
Poly Bushings
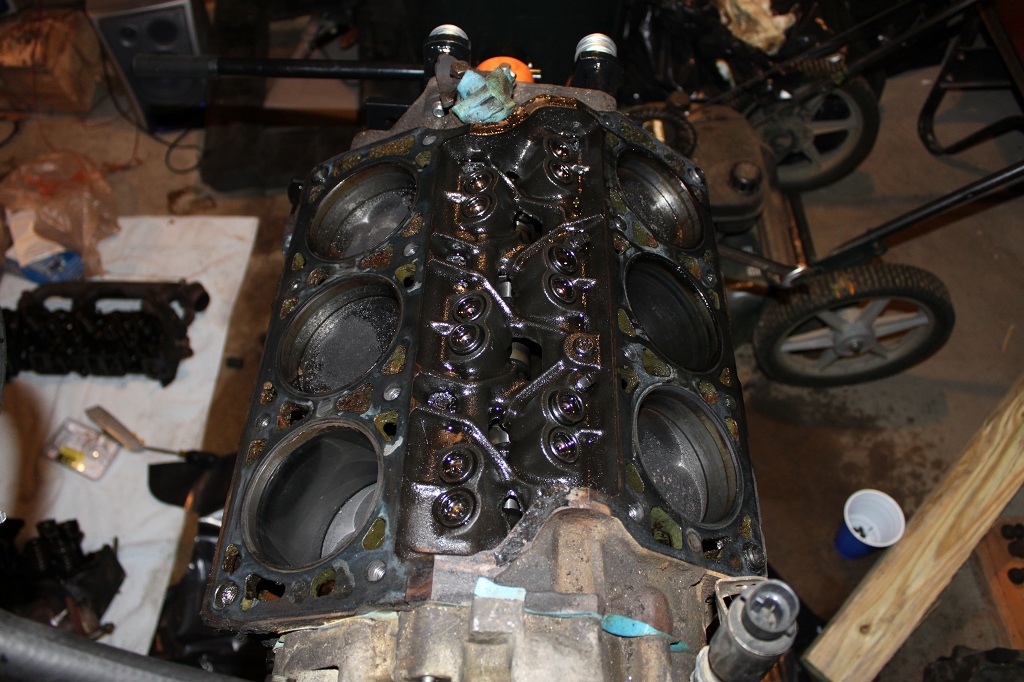
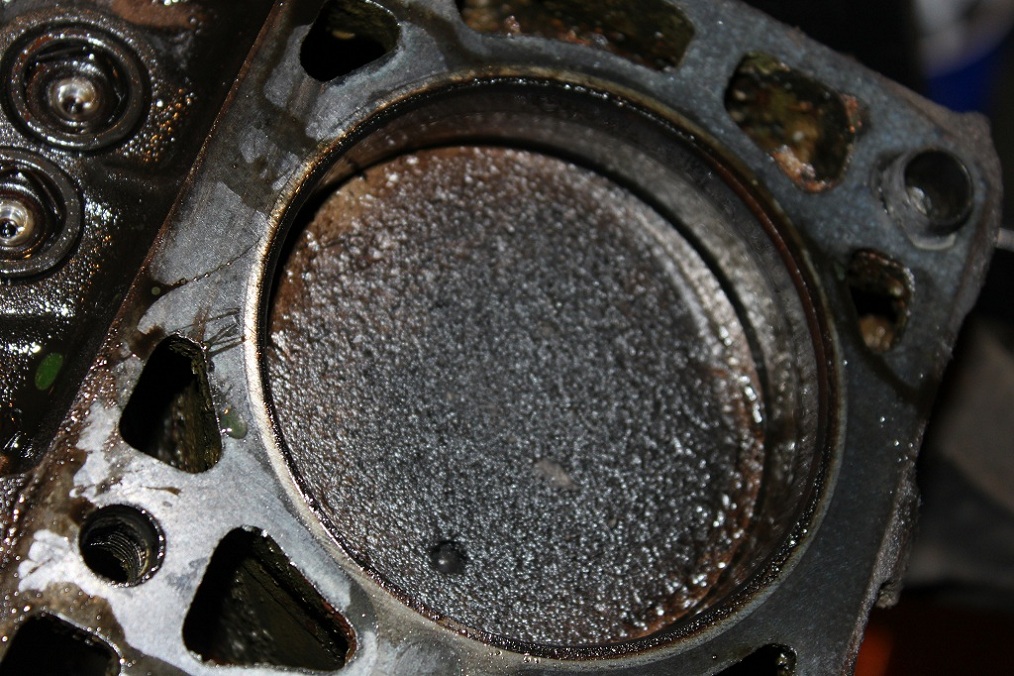
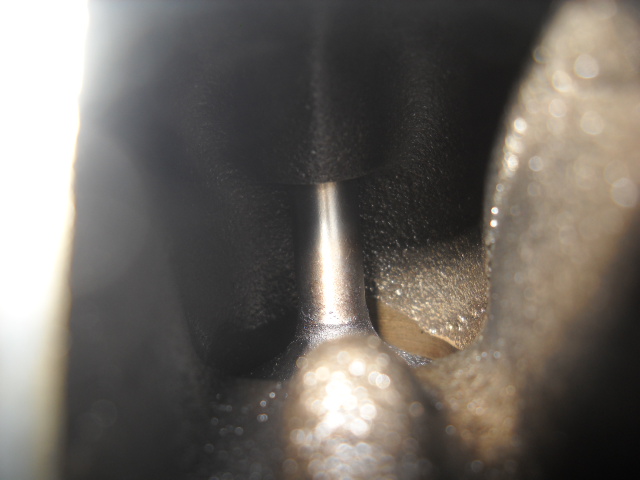
Some cylinders are worse than others
One of the worst cylinders
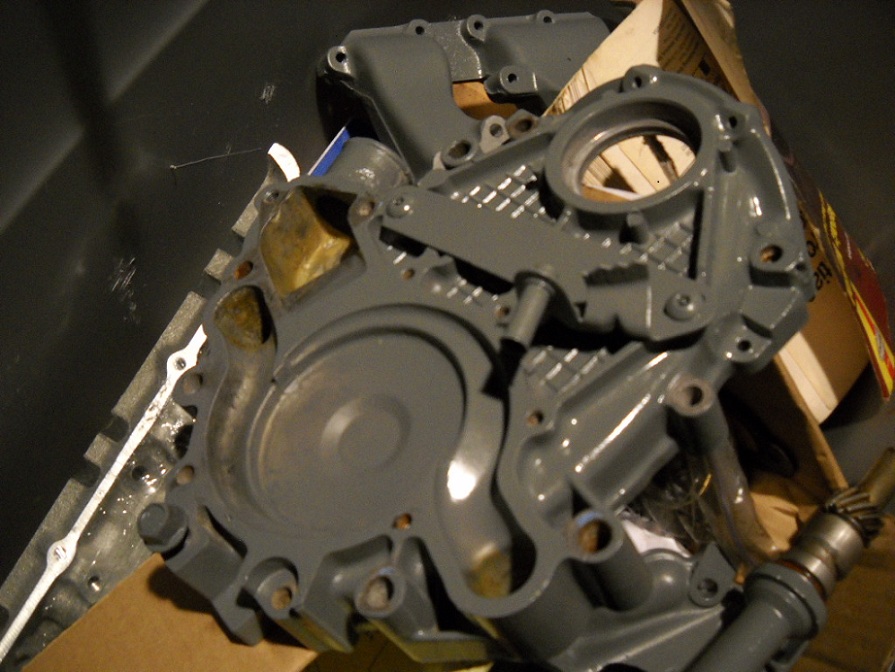
How oily the block always was
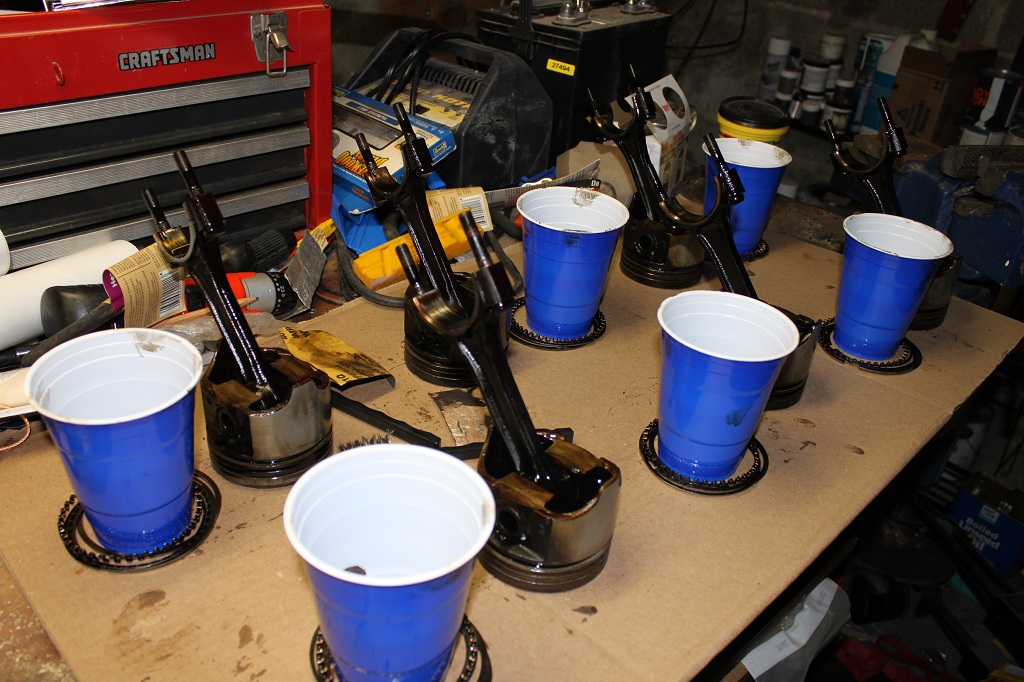
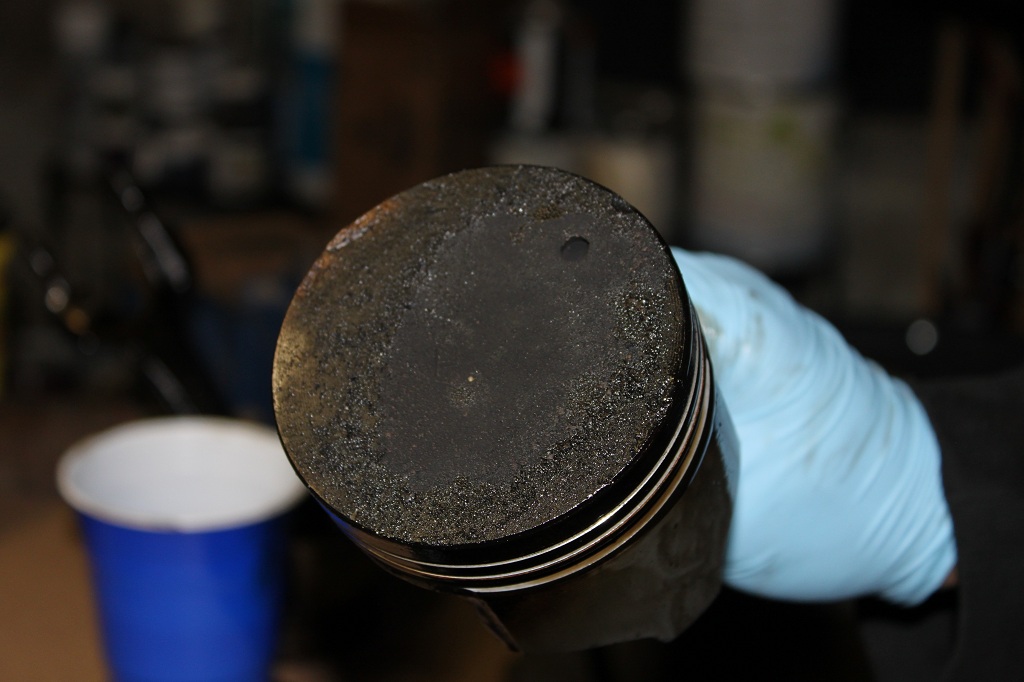
The pistons were covered in burned oil
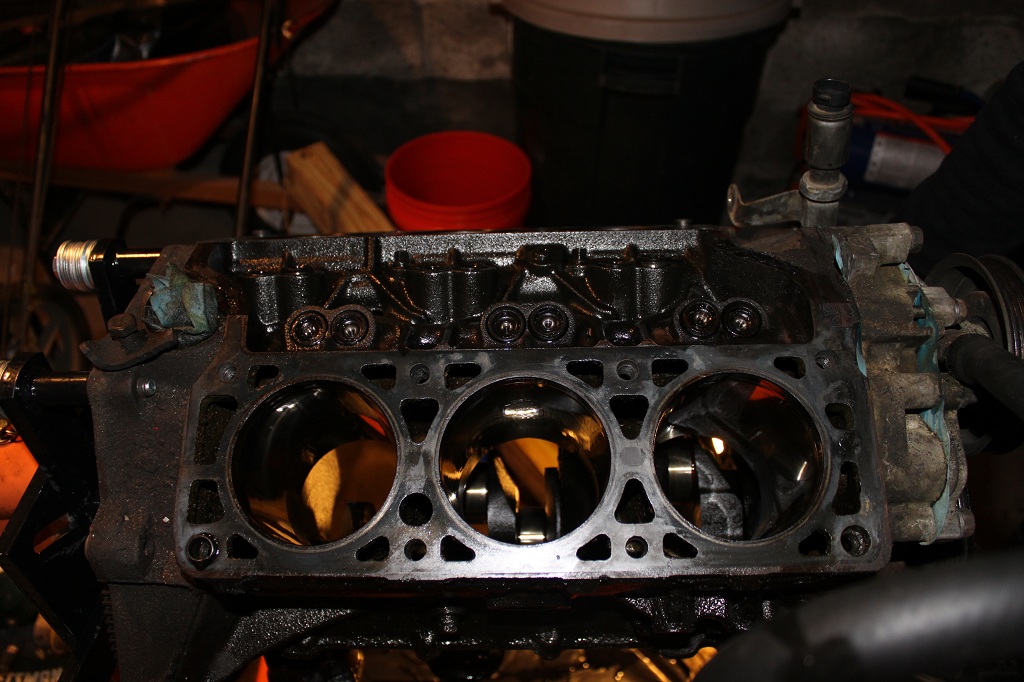
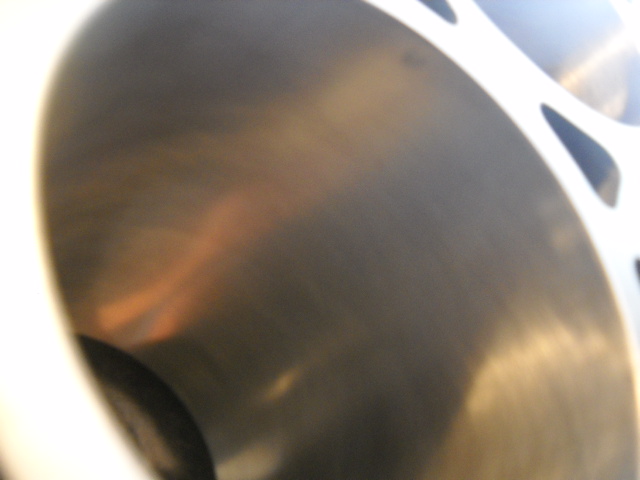
You can see how incredibly shiny the bores are
[This message has been edited by zkhennings (edited 03-04-2014).]
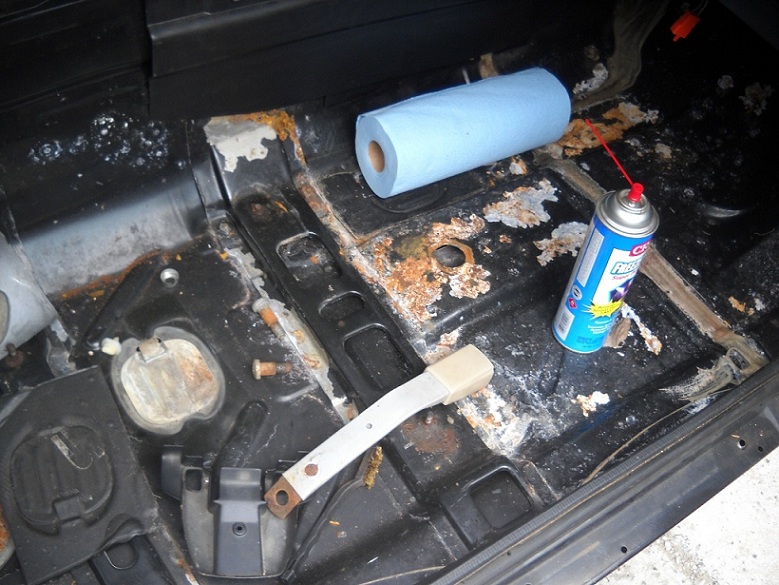
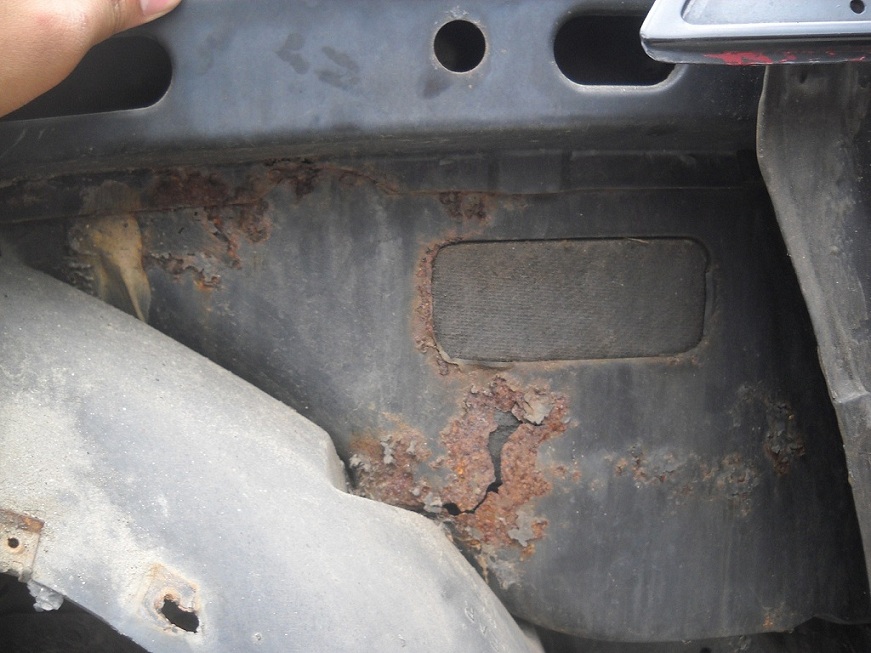
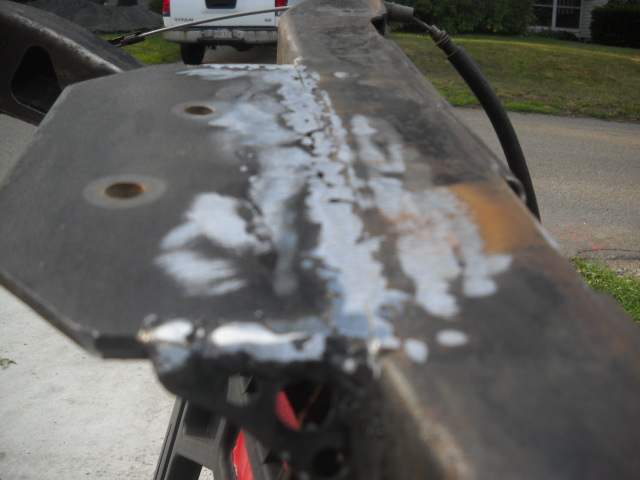
The engine stopped burning oil, but when I opened up the engine I found a really chewed up piston, broken lifters, a cracked head among other things. Also I replaced the transmission mounts and the engine vibrations are now transferred to the car and the engine vibrates a lot. Also my valve guides are worn and the exhaust smells like oil when I let off the gas. Also the ring gap in the cylinders was a little too big, and there is a serious ridge at the top of the bores. So I was planning on getting the cylinders bored and getting new pistons and rings. And ignoring the head work for now. But I found a great deal for a new bottom end and some redone heads. I am also getting rid of any frame rust so I have stripped my car. Here's what I have done so far this summer.
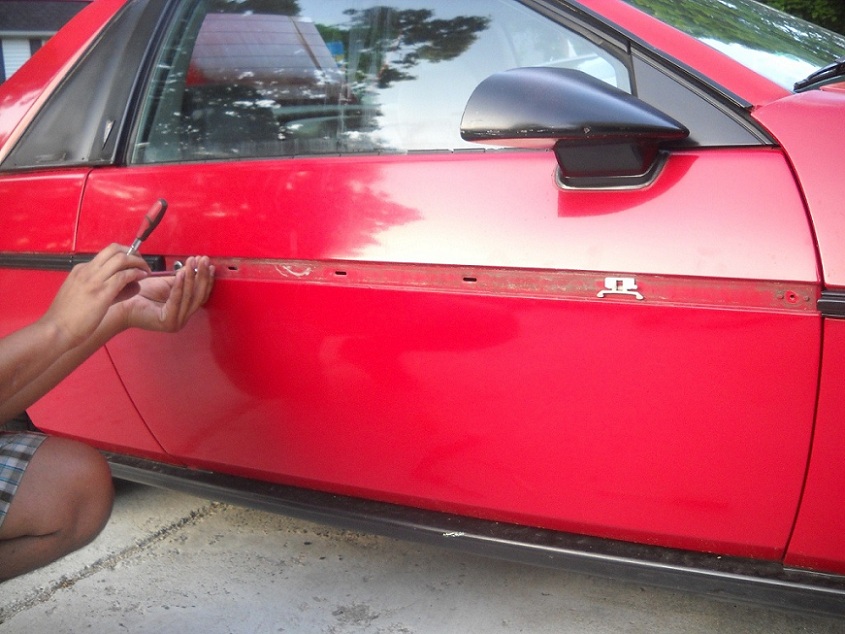
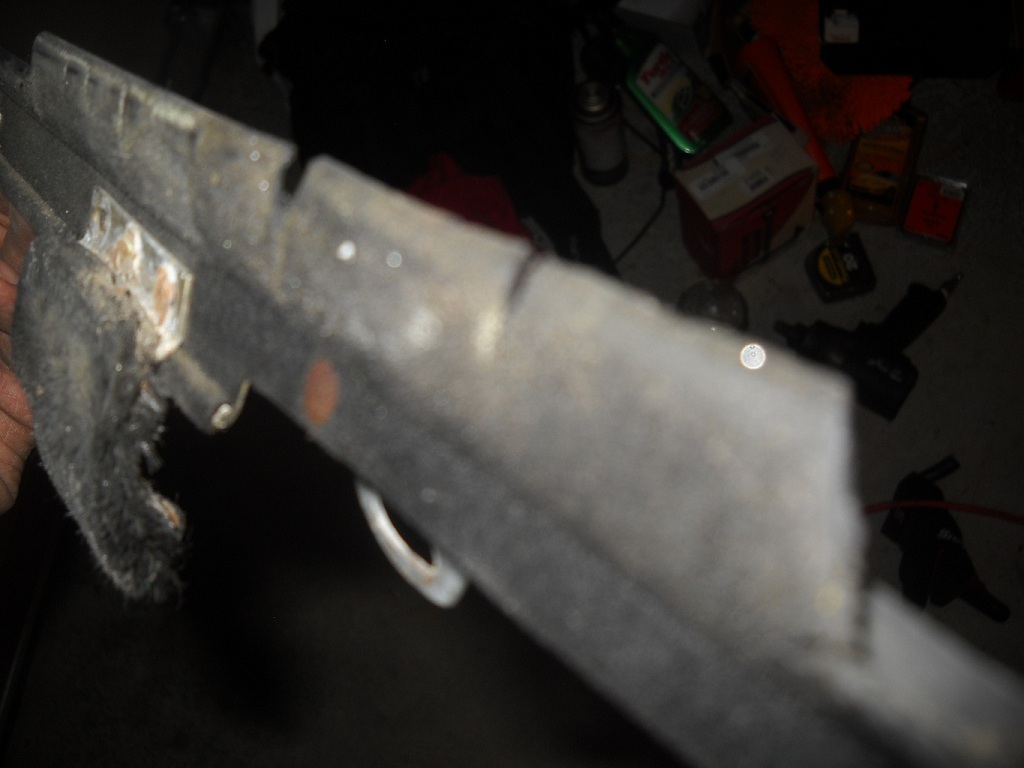
Very little rust on doors
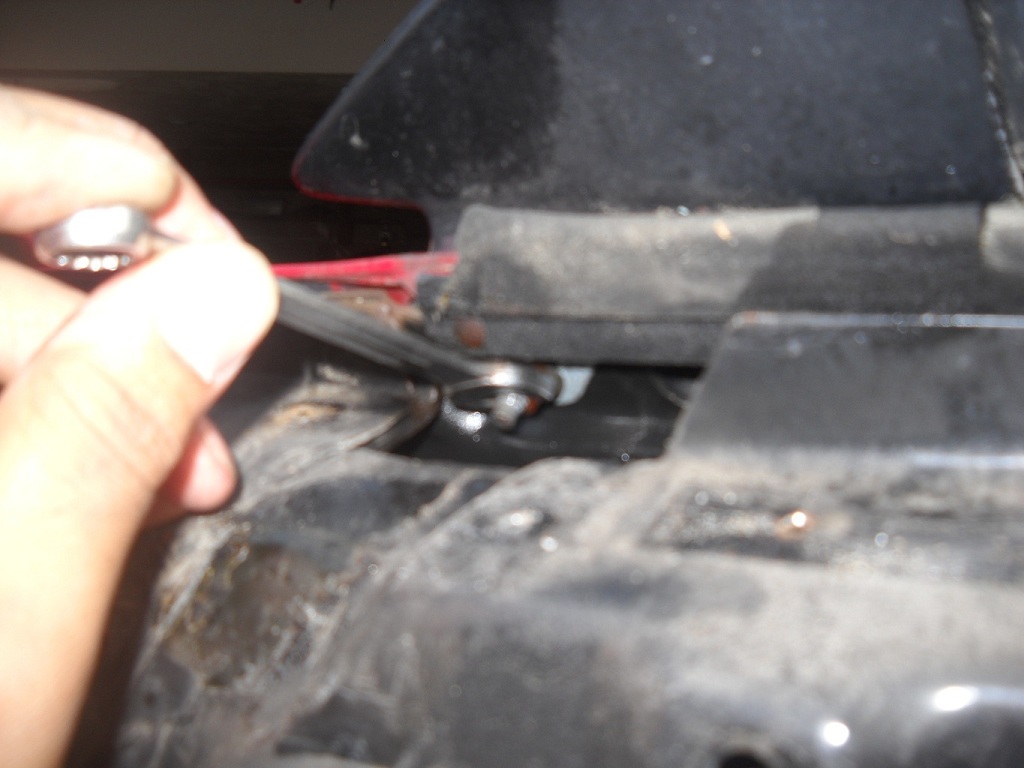
10mm wrench on mirrors
These are on the corners of the door and were glued on and screwed on... What do you use to put them back on?
Not much rust on doors
My awful Dew wipes
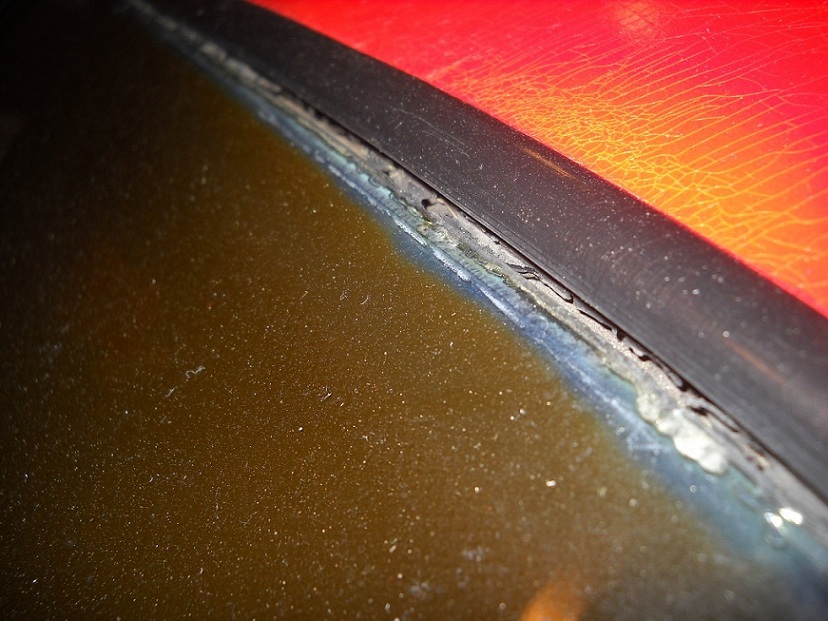
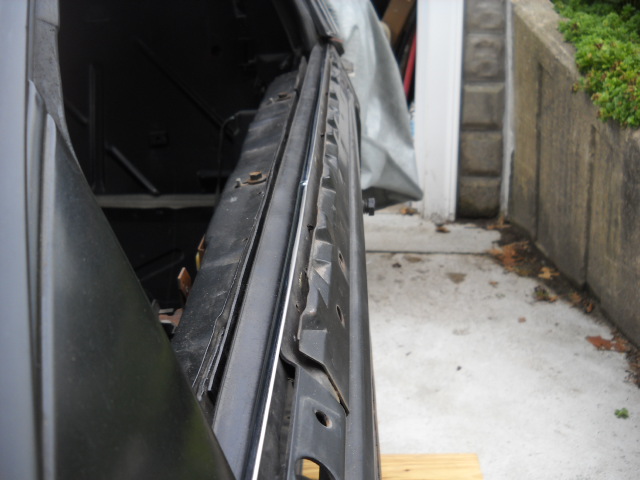
Windshield has a gap at the top
Little chip wired into the tach with a micro pot built in to adjust for the v6
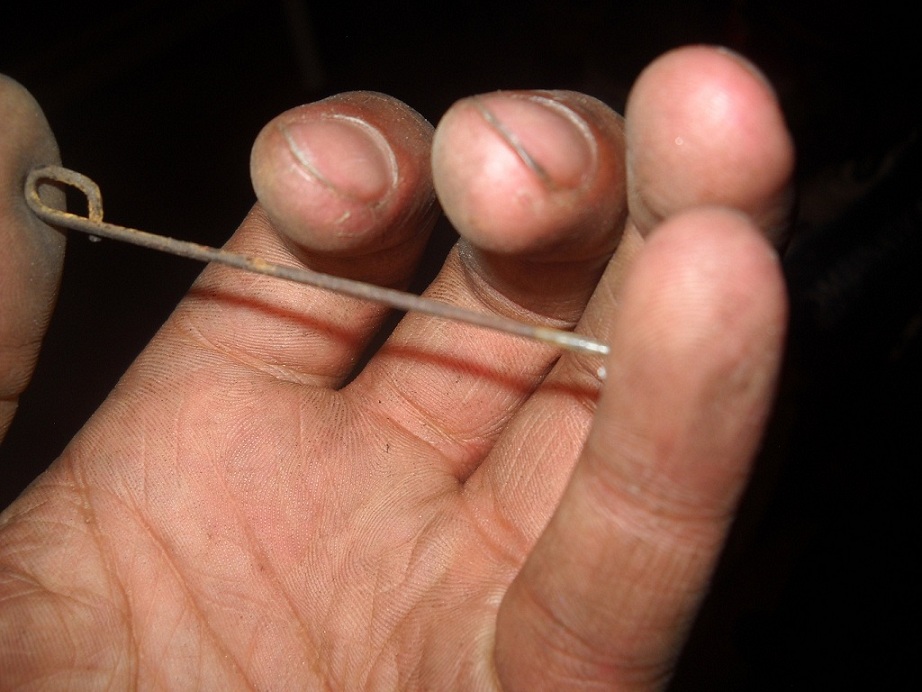
This broke, it keeps the door handle in the down position on the outside. Maybe I'll make a new one out of piano wire.
Here you can see the extent of damage to the paint
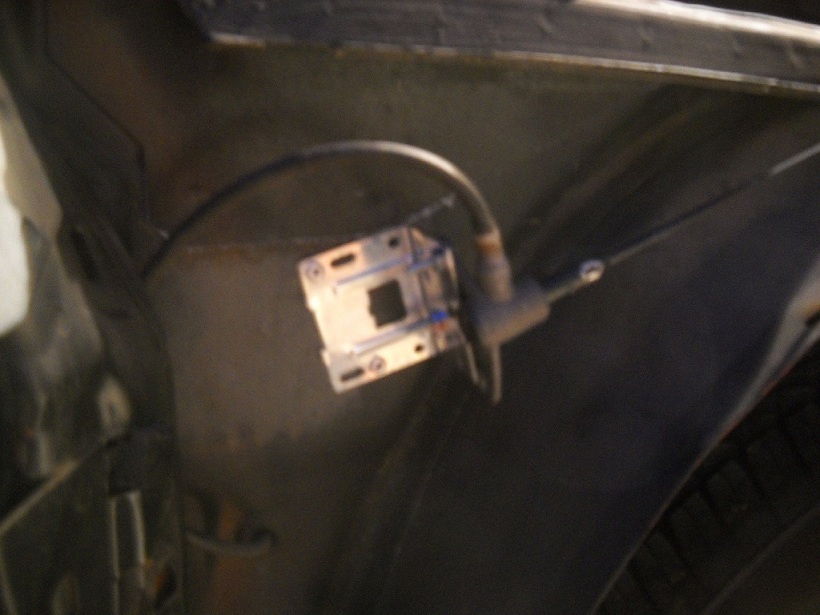
Hidden Antenna. Works the same being under the fender
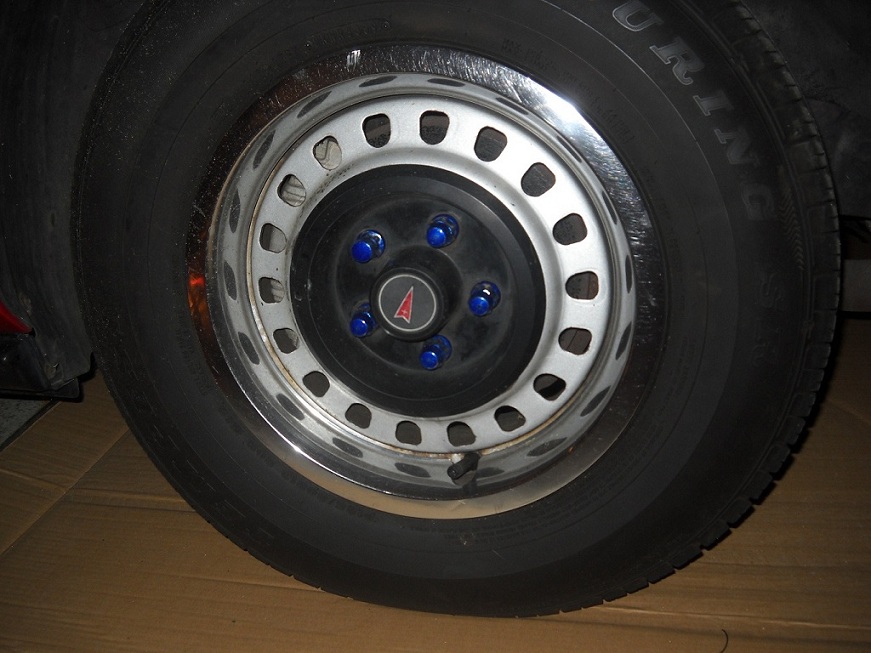
The 13 inch wheels I have now. Hopefully I am getting some of the gt rims soon.
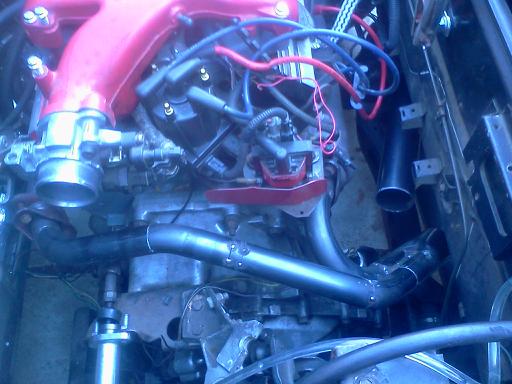
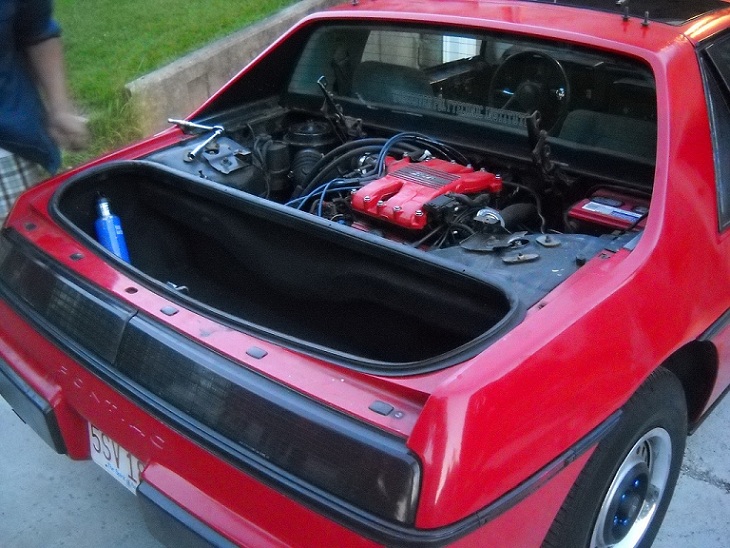
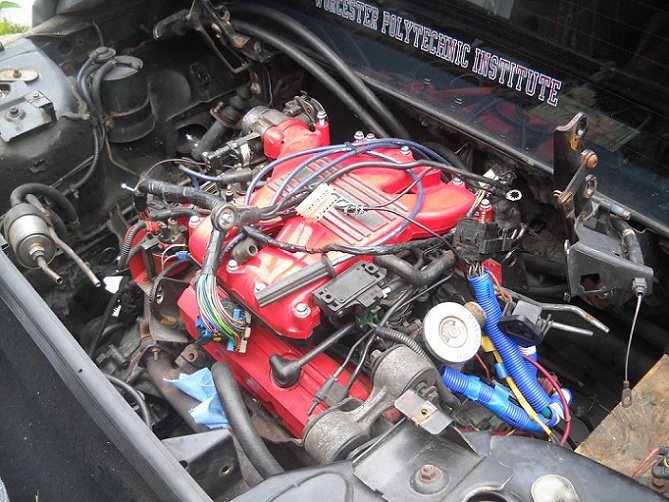
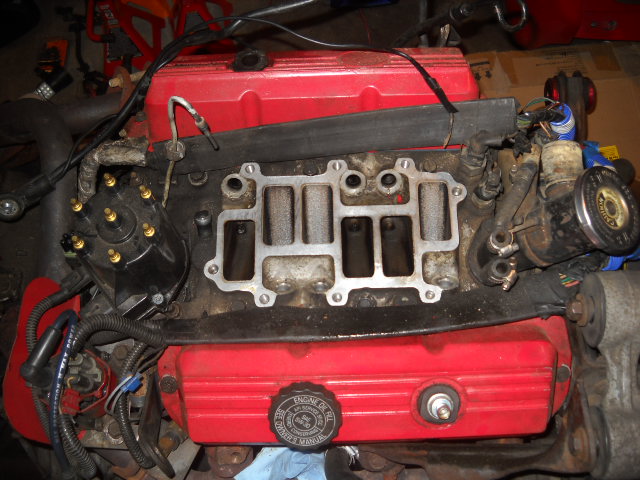
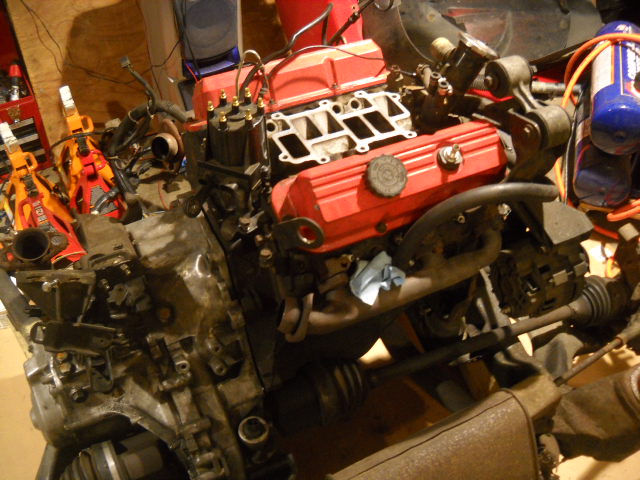
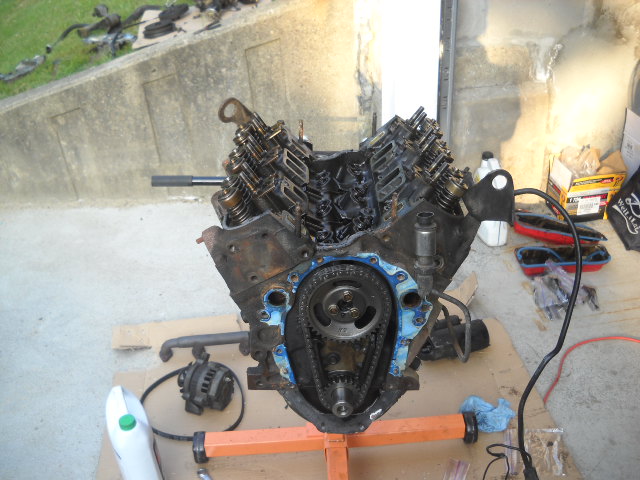
Shot of the engine bay
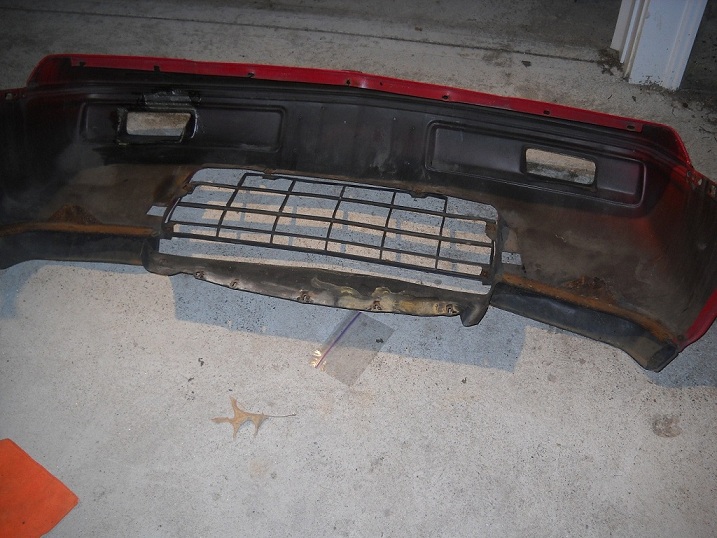
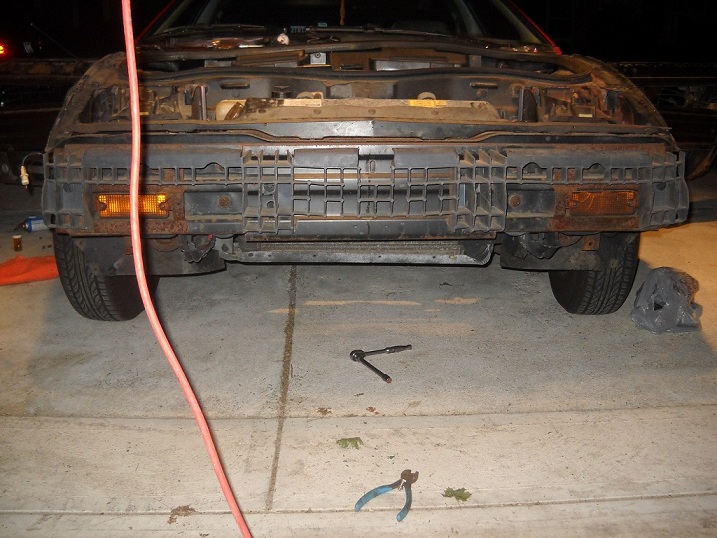
Warped front bumper but perfect impact absorber underneath. I don't know how it warped.
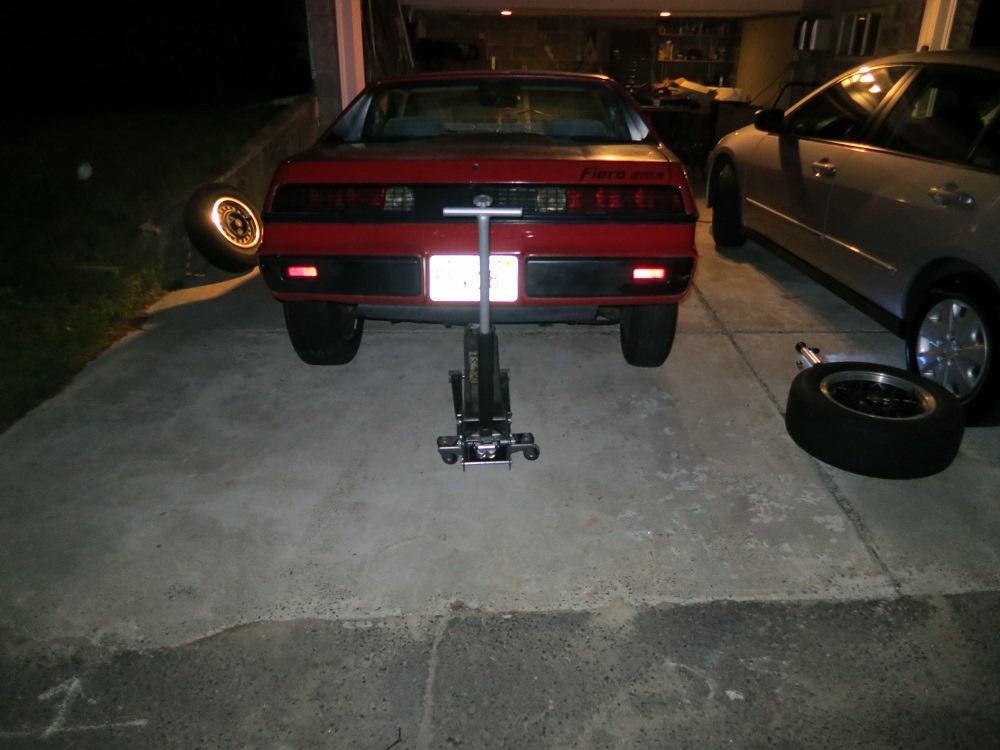
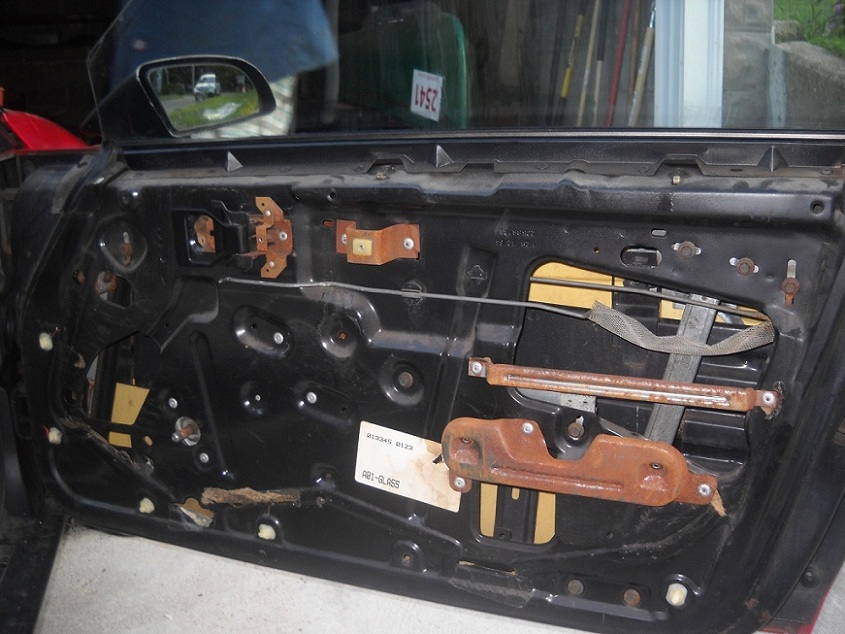
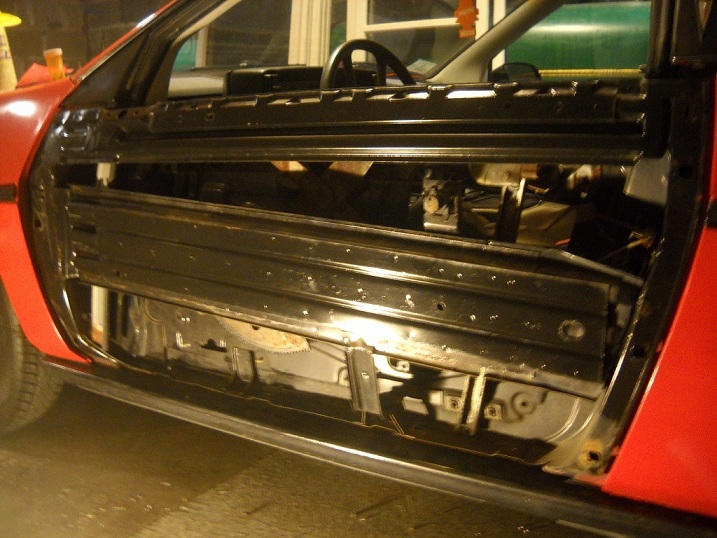
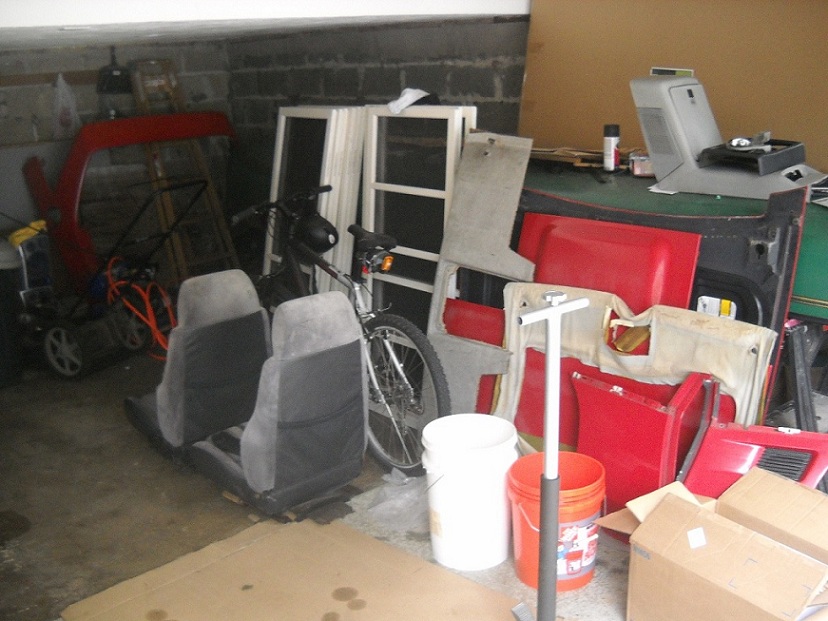
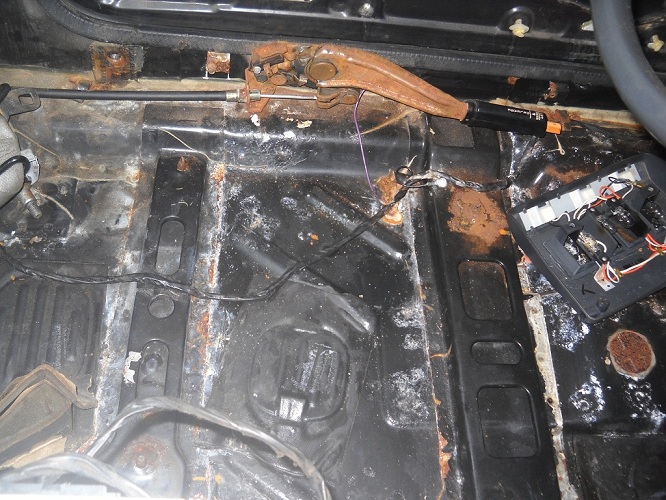
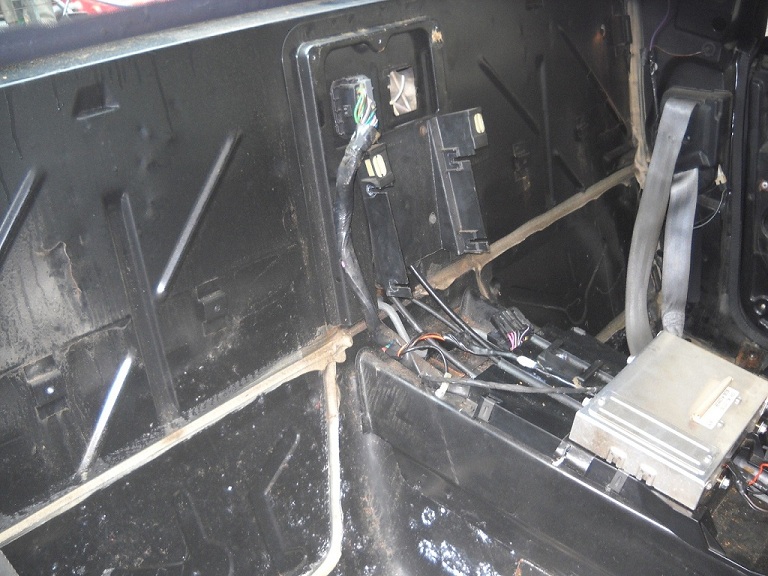
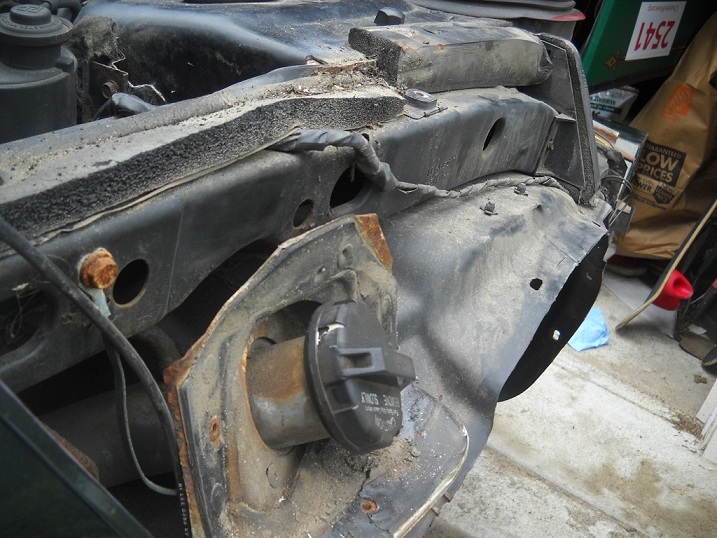
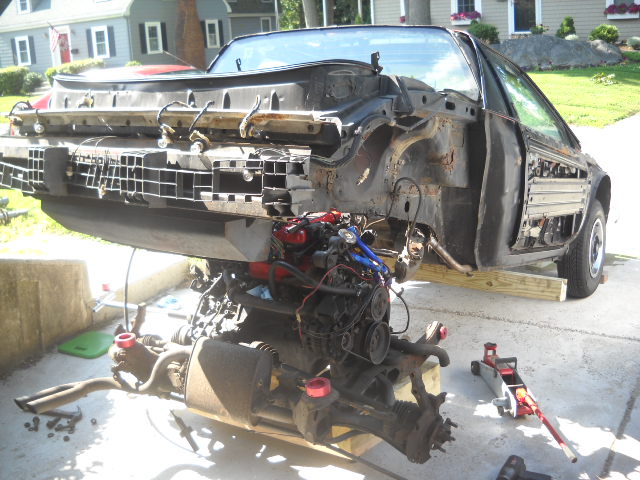
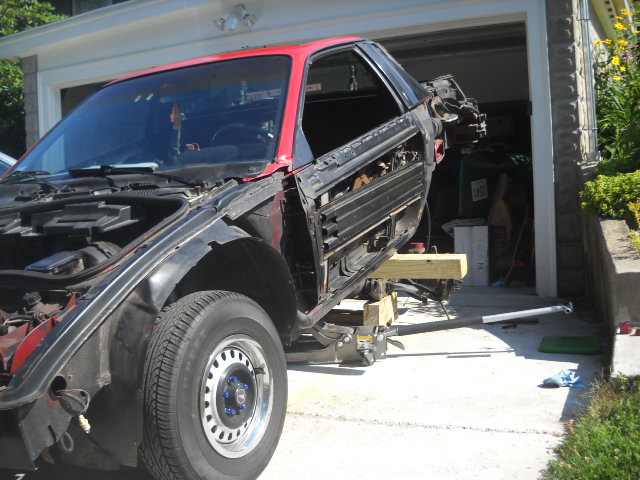
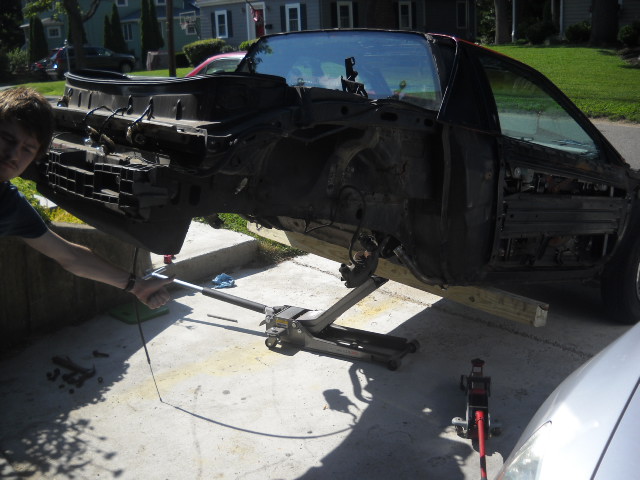
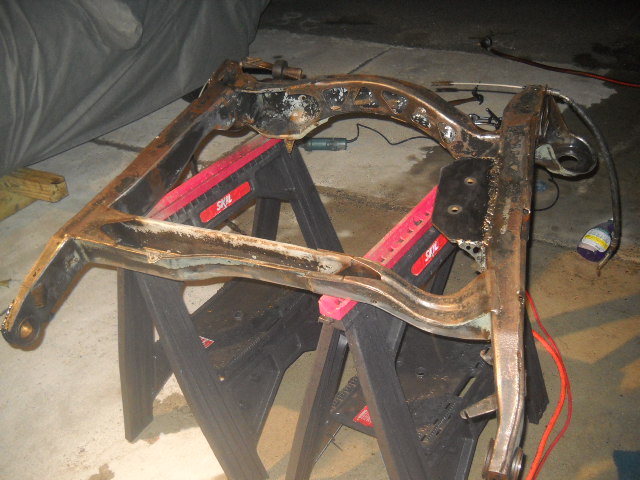
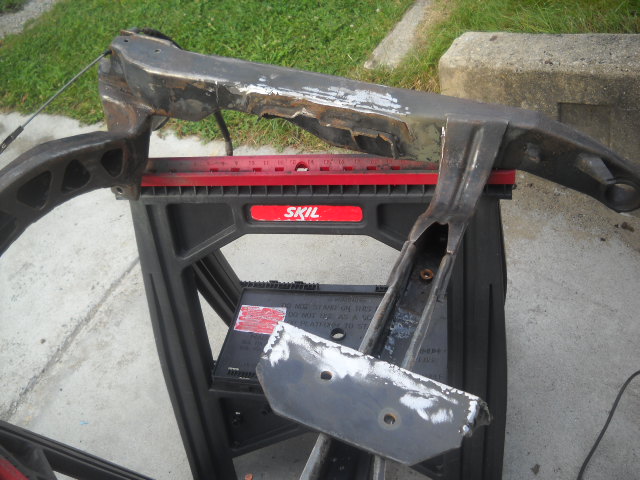
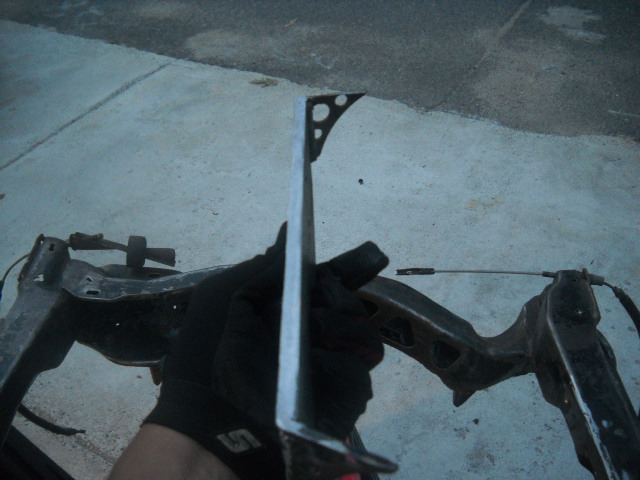
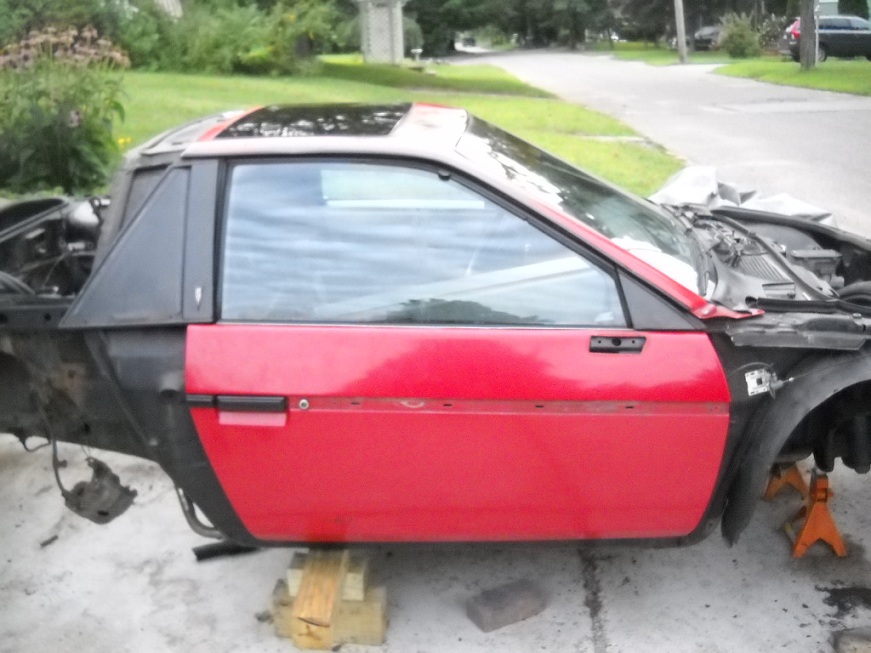
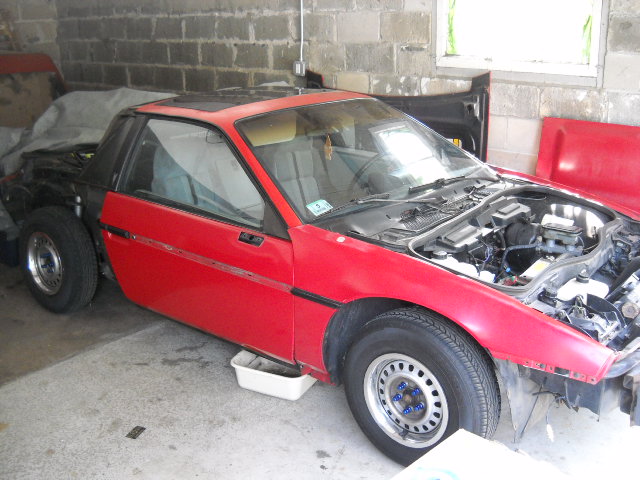
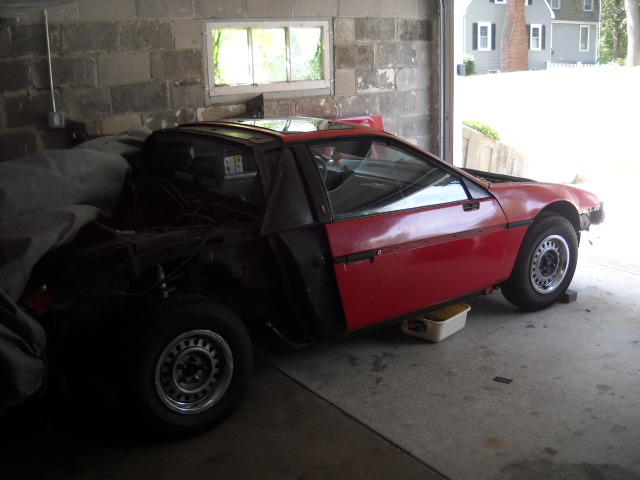
Ive taken off all the body panels but the roof panel at this point and the interior as well.
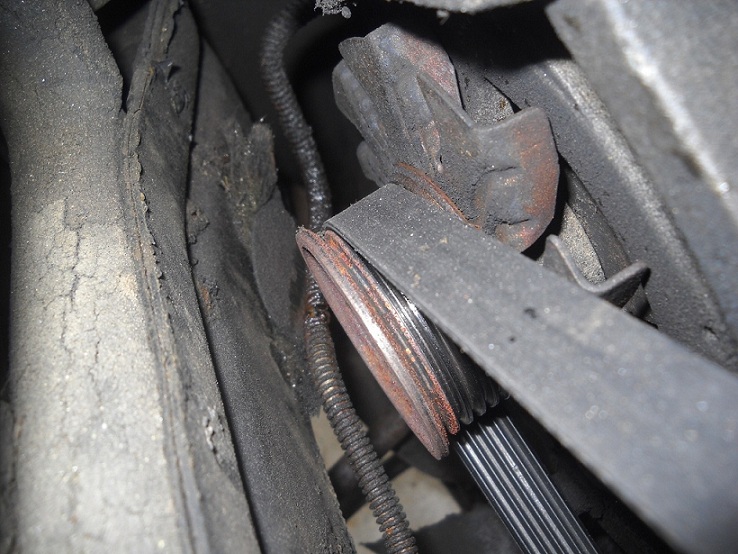
My alternator pulley cut my brake line while I was driving! That was interesting...
Not a ton of rust on the inside... The seat nuts were all frozen. I got 4 off without ruining them.
Passenger side was worse
Some rust in the battery area
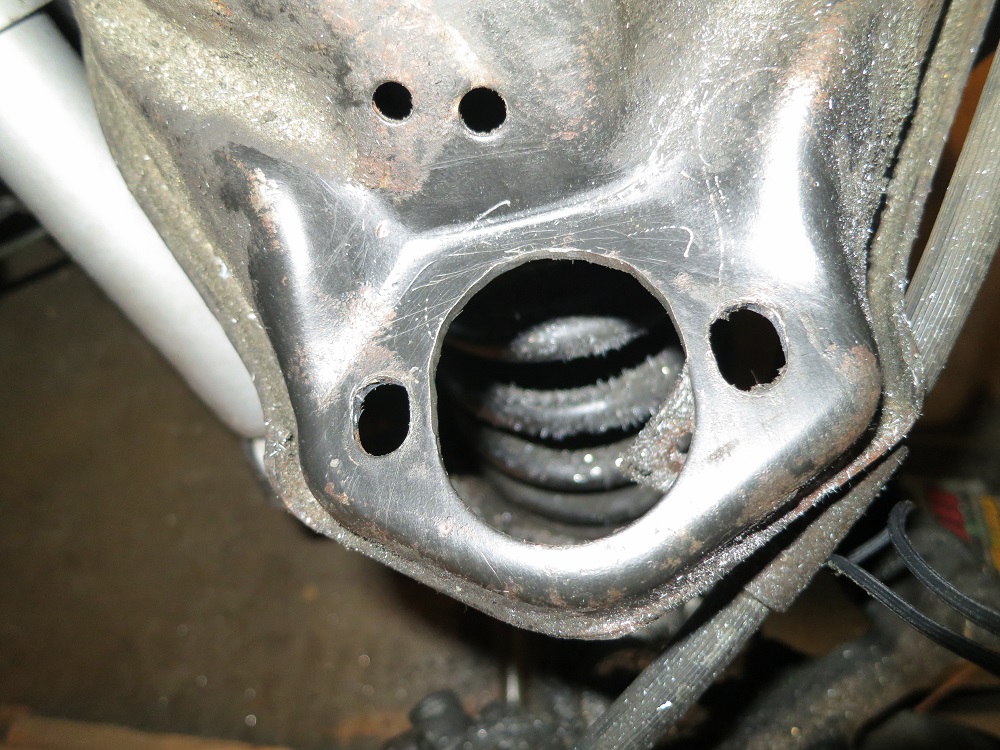
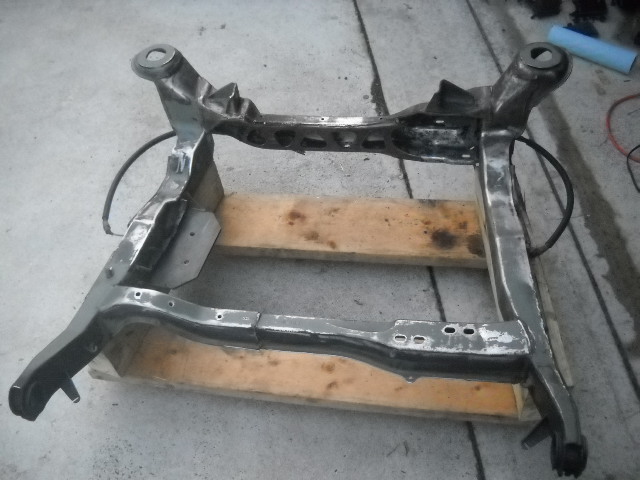
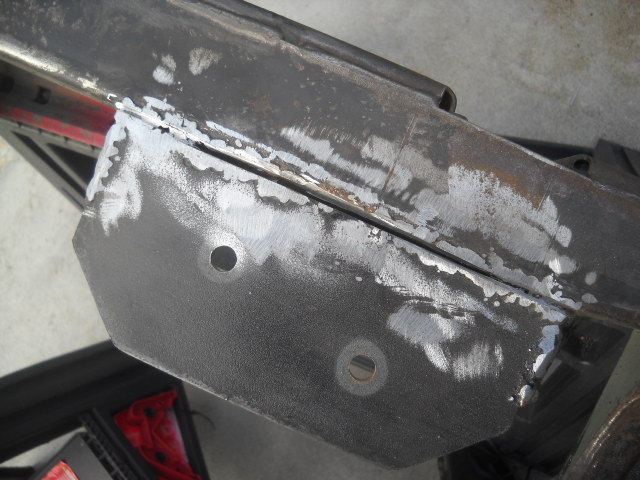
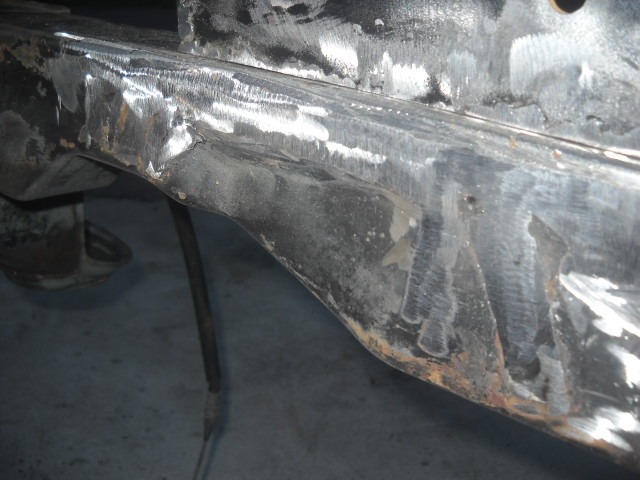
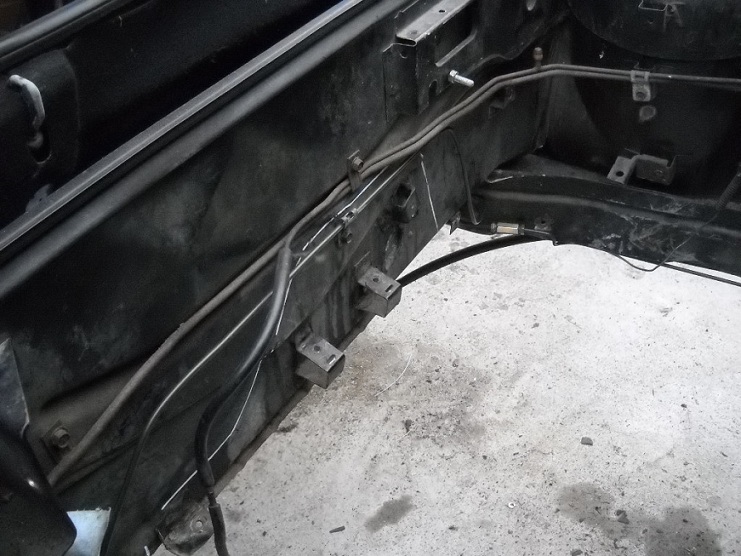
Perfect frame rails
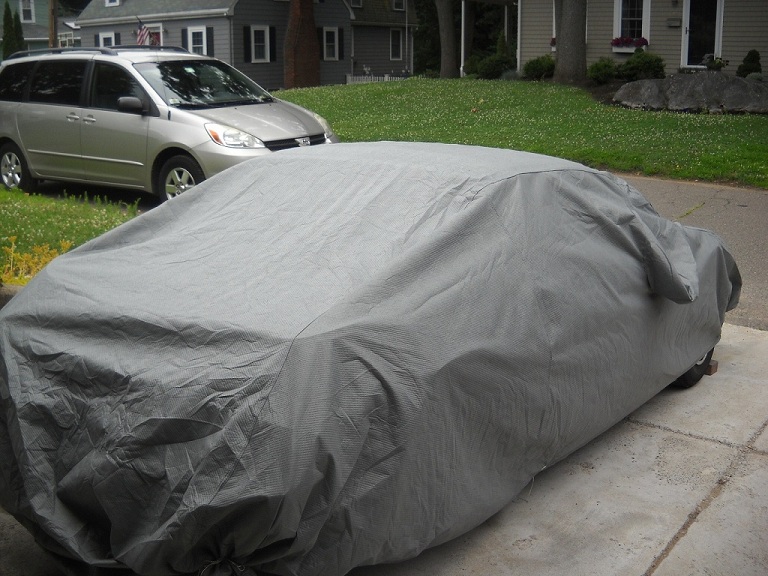
New car cover to keep the fiero outside with no body panels or windows. It is waterproof
Everything disconnected in the engine bay
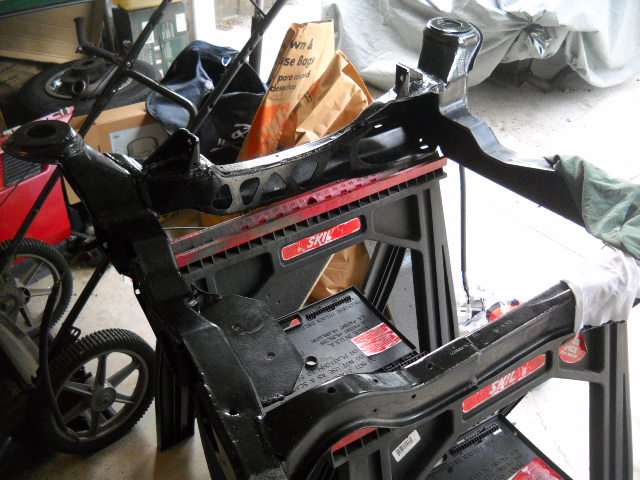
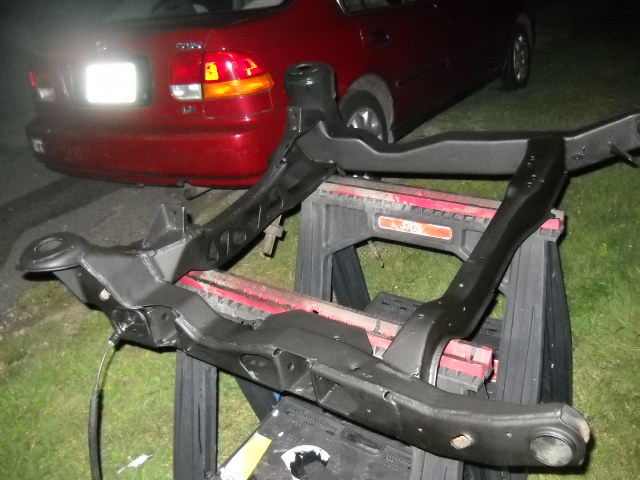
Cradle sitting on the dolly I made
I suggest flipping around the bolts in the front cradle mounts and removing the quarter panels to get at them when removing the engine. It allows easy access with an impact wrench and knocking the bolt out is easier too.
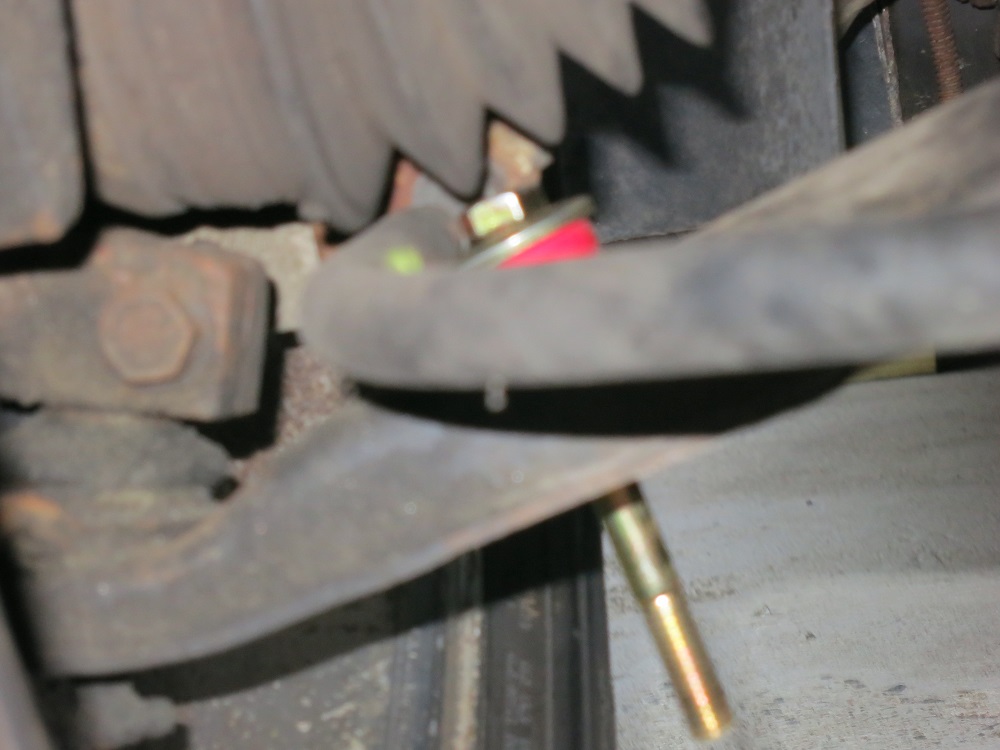
Parking brake springs are totally different. It makes adjusting the Ebrake very hard.
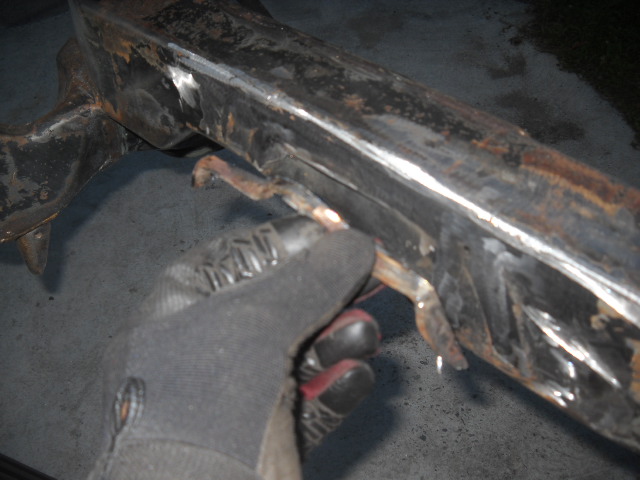
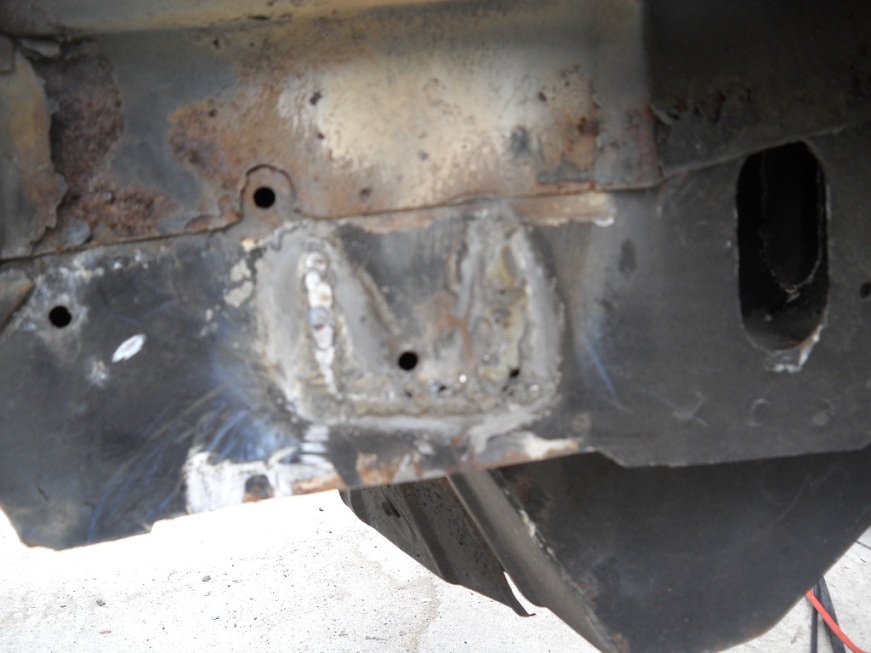
Previous owner did this on one side and didnt weld it up!
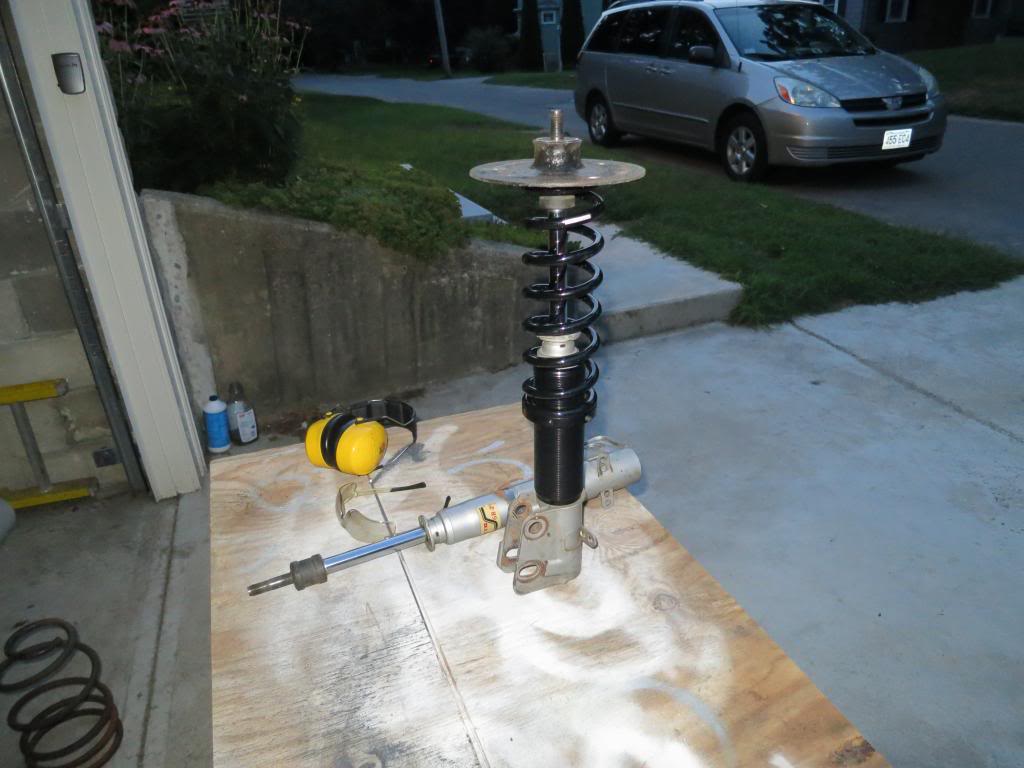
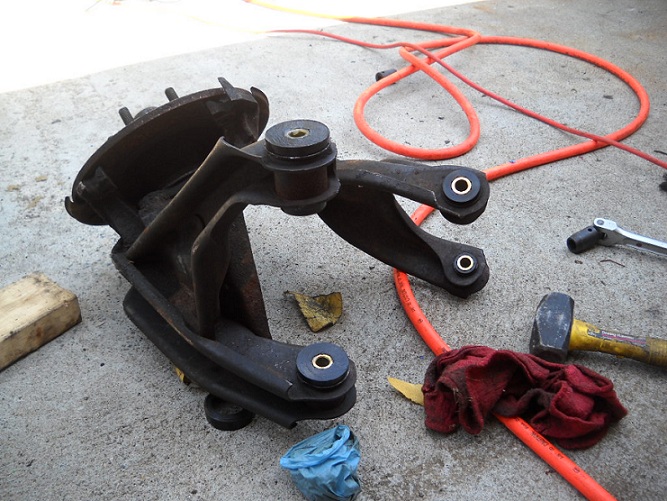
The KYB struts, I used some rubber bushings from NAPA as bump stops
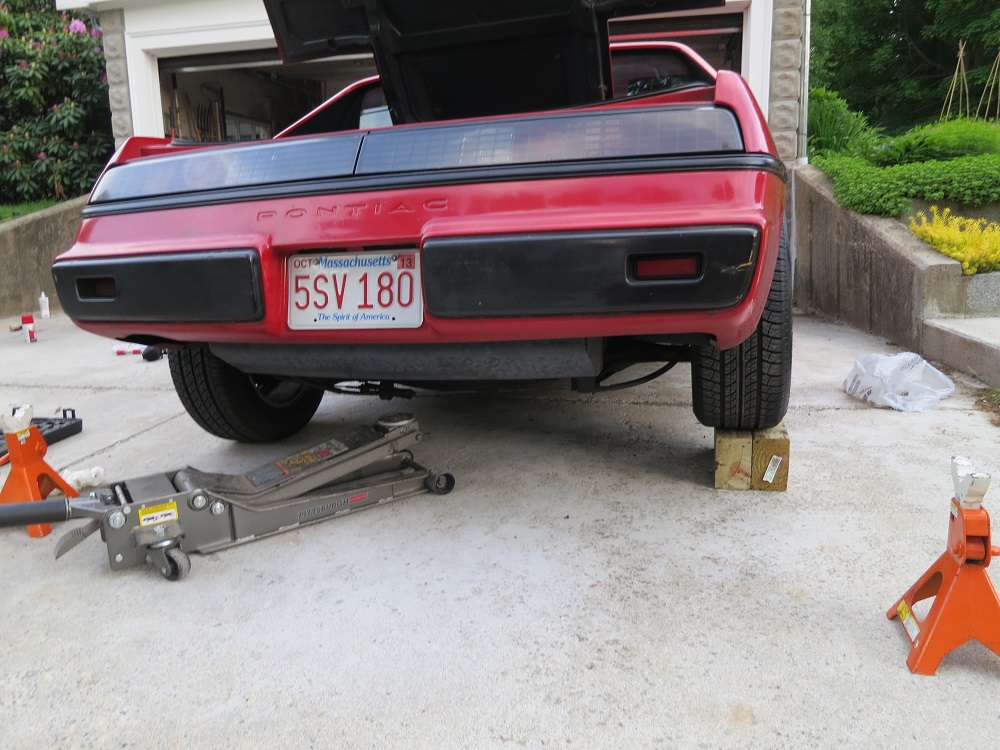
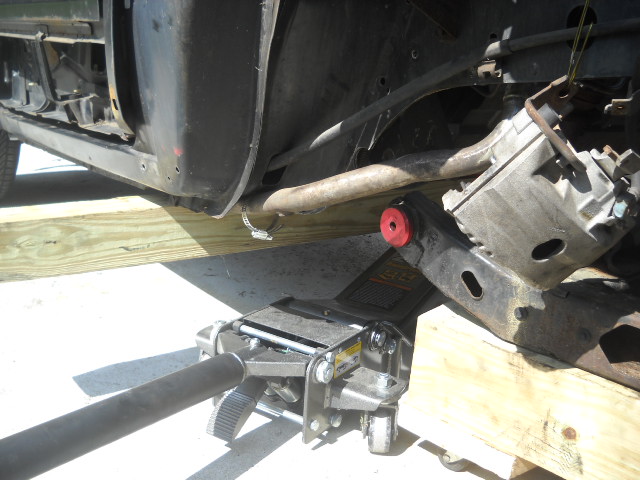
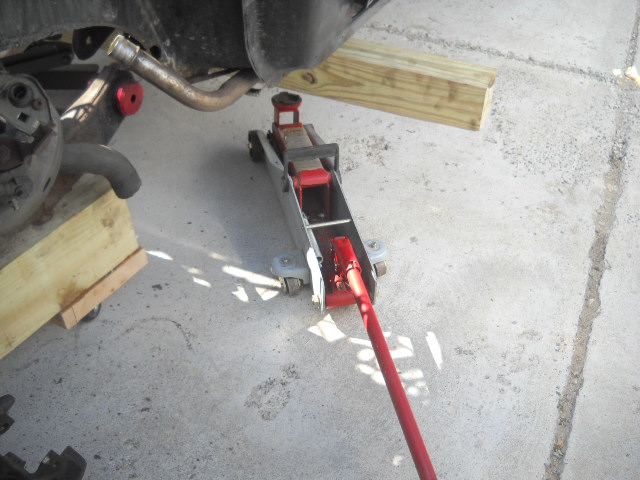
I used the main jack to support the car while I used the smaller jack to get each side of the cradle to be unloaded to slip the front bolts out
Andd its out. Takes me around an hour and a half from start to finish to pull the engine now
Thank you! I'm hoping to do brake lines, swap front brakes with the grand-am brakes, rebuild the engine, cut the front springs, install my front poly bushings, Take down dimensions of the pre-88 suspension, get rid of rust on the frame, and repaint my car. I will document it all and possibly do a custom turbo setup if my budget allows
[This message has been edited by zkhennings (edited 03-04-2014).]
Good write-up. Looks like you are well on your way to a nice ride.
When you are chopping the springs, do the research. There are lots of factors to consider. I personally have had a chopped car and it has some practical problems, such as enterring driveways, and clearing speed bumps. You also change the geometry.
BTW, consider a rear sway bar while you are at it.
I have a rear sway bar I installed a while back, I forgot to add that. And yea I have been doing a lot of research on the suspension. I want to take measurements so that I can raise the rear Arm's attachment to the cradle up a ways and Move the struts a little further inboard to get a better camber curve, and in the front I think it improves the geometry to lower it. If you jack up the front of the car, instead of gaining positive camber it gains negative camber. When you lower the car you are getting close to that place where it switches from gaining camber to losing camber. It has to do with the angle of the upper front A arm. Ideally I would like to take where the upper A arm attaches to the front crossmember and move that point down a lot until the arm is at an upwards angle instead of a downwards angle. This results in the top of the knuckle being pushed outwards when the suspension drops (positive camber) and the top of the knuckle being pulled inwards when the suspension compresses (negative camber). But I still need to work out the math to see where I want to relocate the upper arm. Making the arm shorter would cause it to change camber more drastically because angle change and therefore x directional change of the Arm would be greater with Y directional change which is just the compression and decompression of the springs. I want to make a custom adjustable upper A arm to change the set camber as well
[This message has been edited by zkhennings (edited 07-11-2012).]
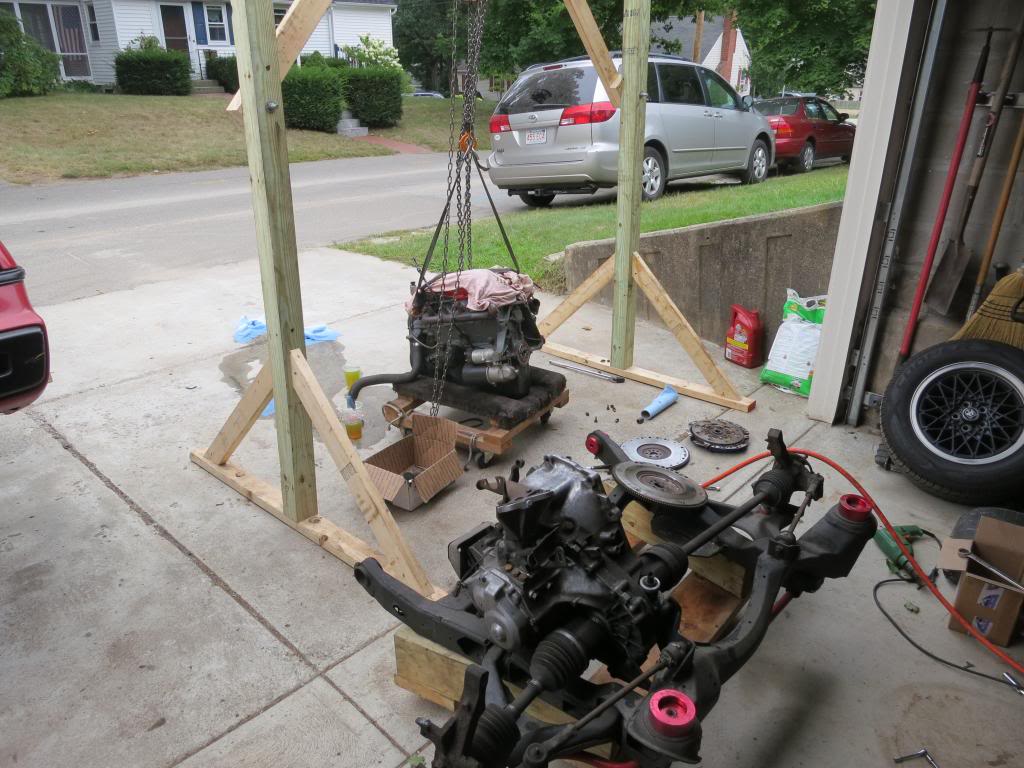
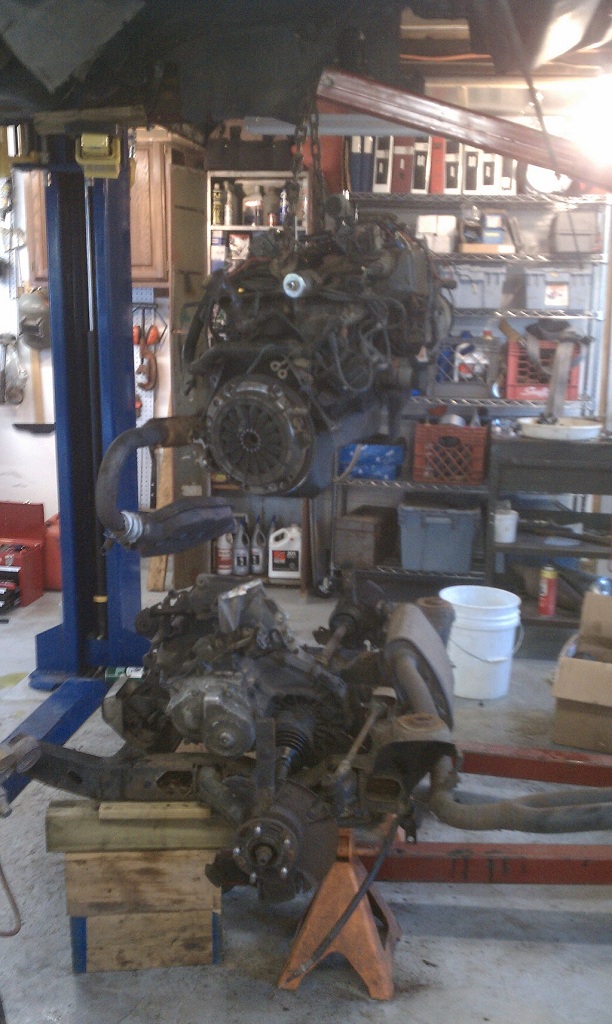
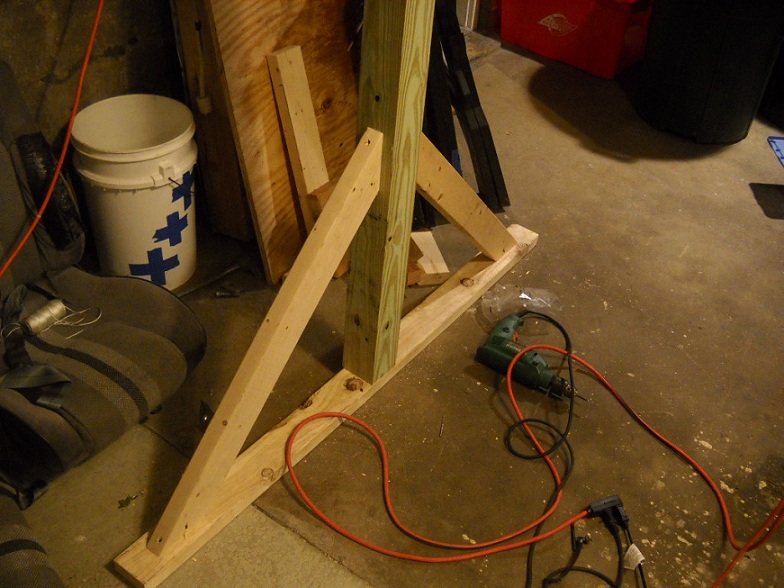
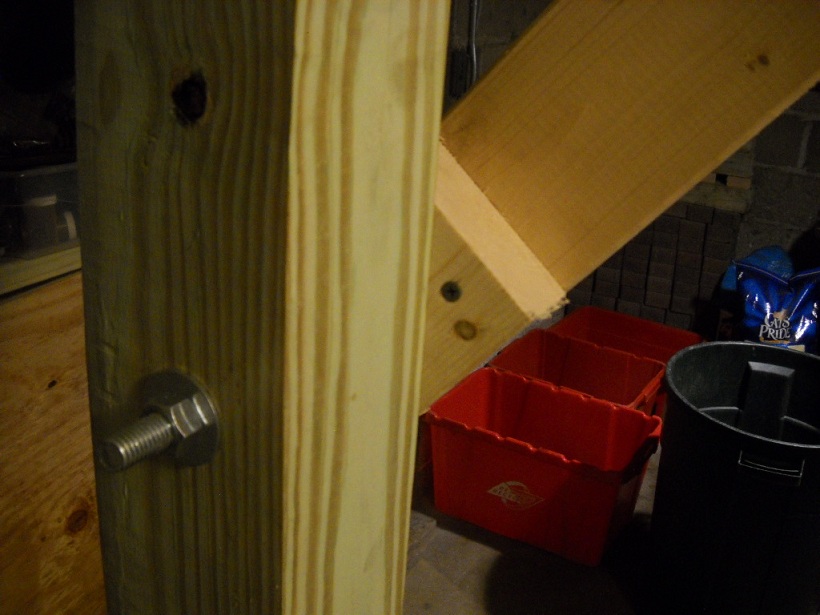
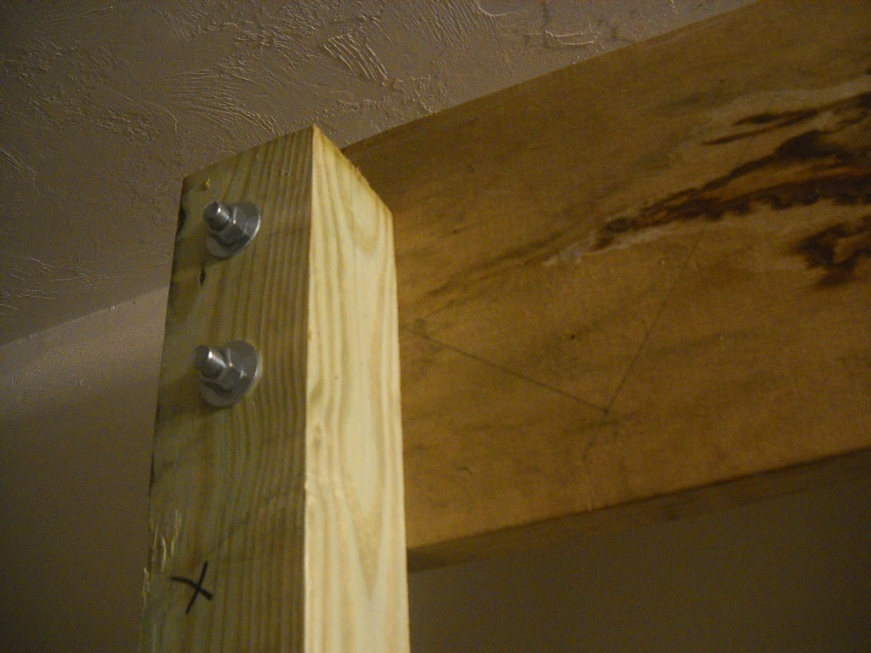
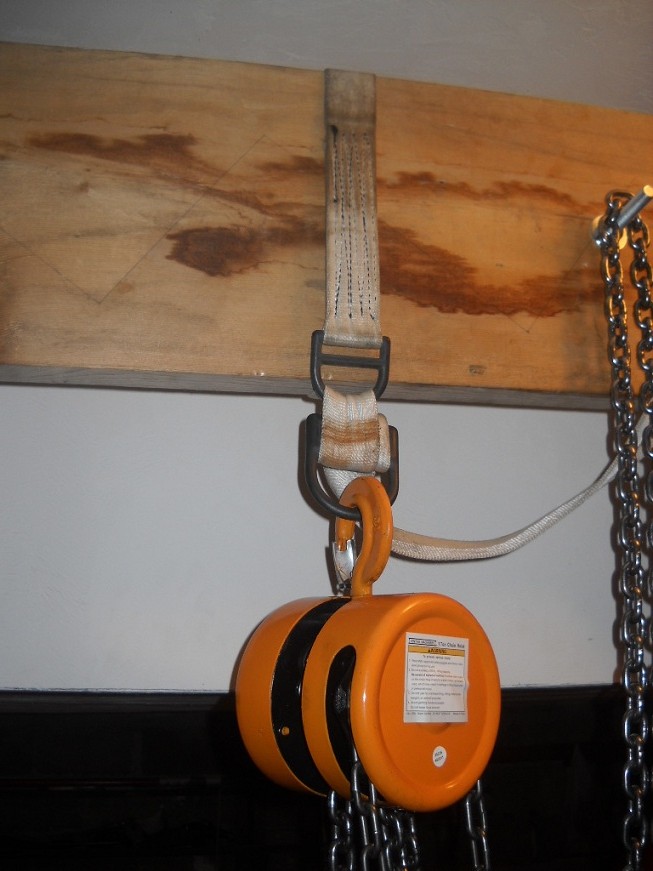
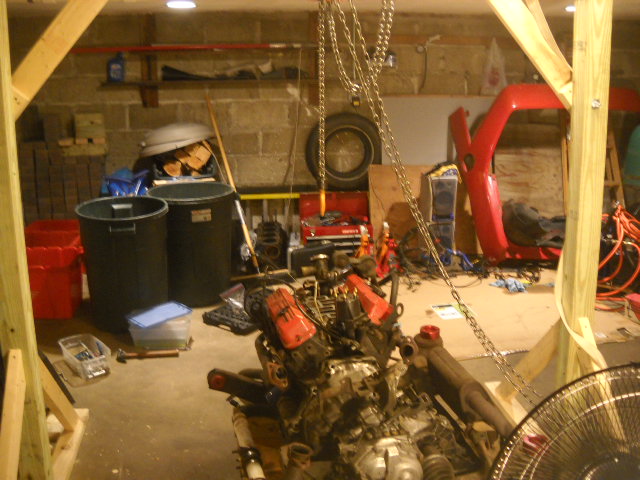
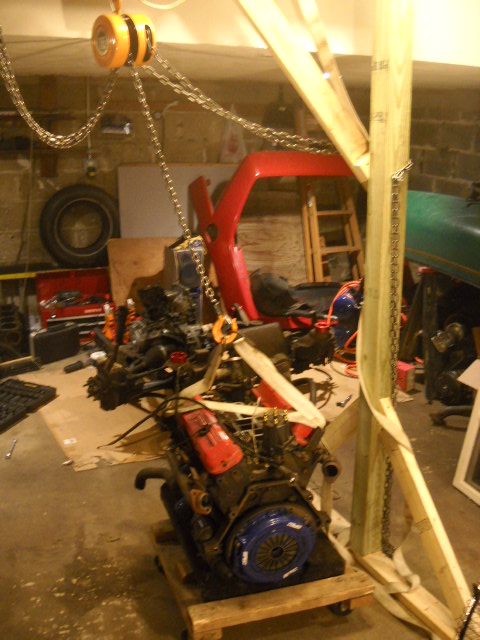
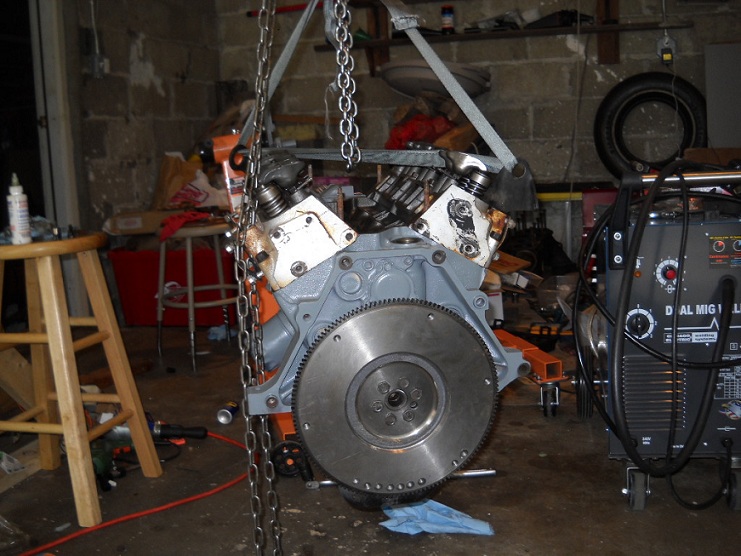
Well I decided to build a gantry. Two pressure treated 4 x 4s, a 2 x 11 that I had already, and a bunch of 2 x 4s were used along with 8 half inch thru bolts, 6 were 6 inches long, two were 8 inches. 2 x 4s were used for the base along with long wood screws. Each base triangle is 5 feet long at the bottom with 3 foot 45 degree angled supports. The webbing at the top is some weird material and the break strength is 7000 pounds. I used a harbor freight chain hoist which was actually more expensive even with a coupon than sears and home depots 1 ton chain hoist. Cost me 45 bucks and it works awesome.
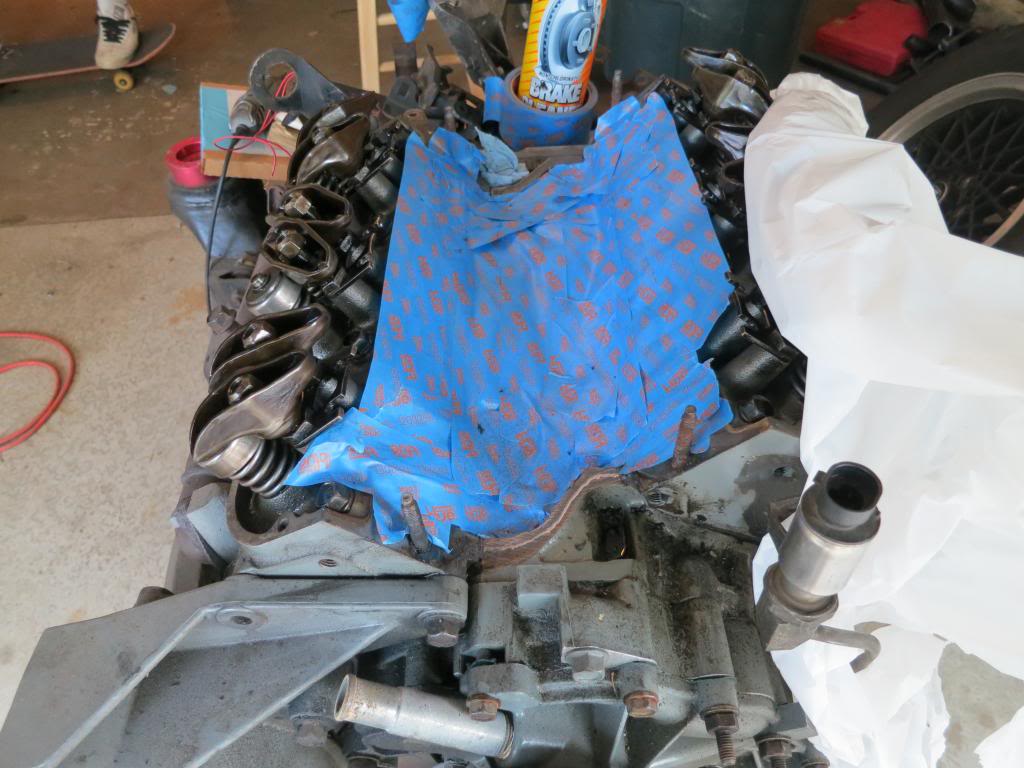
I started to tear down the engine, I took off the upper intakes and vacuum lines and things and I removed the wiring harness
I then separated the tranny from the engine. The spline is still in the clutch though
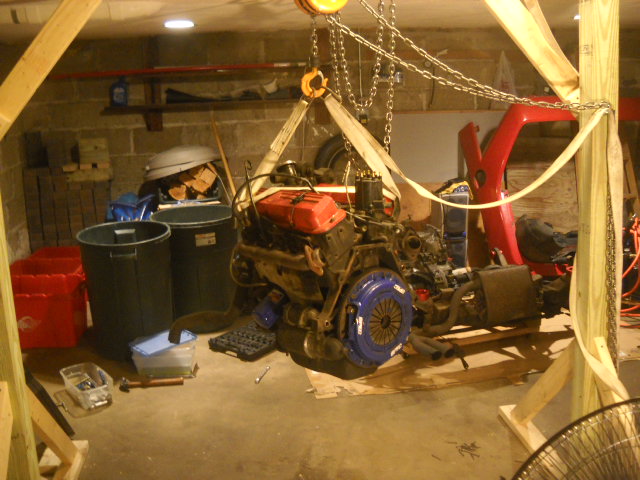
Engine is under gantry on cradle about to be pulled
And then the hoist got stuck when the engine was at the top. Directions said to pull lightly on the up side of the pull chain and then pull on the down chain to lower the load, but I fought with it for over 45 minutes before whacking it really hard and then trying again and pulling hard on the down cable and it freed itself. Lesson learned was that when you get near the peak of how high you are going to lift your load, make sure you are feeding the chain really straight into the hoist. Not a big deal.
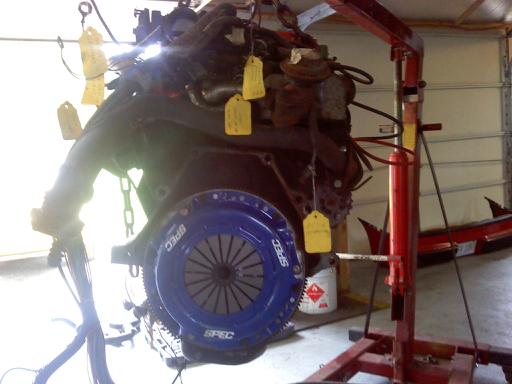
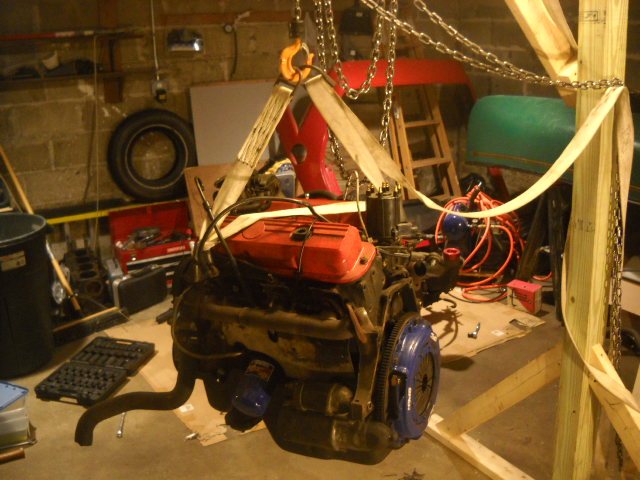
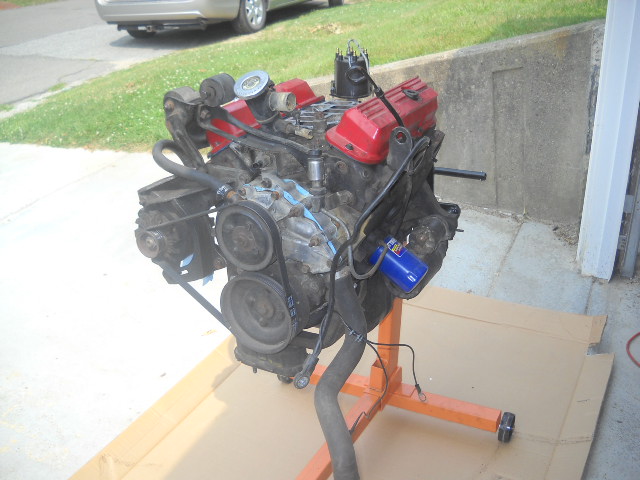
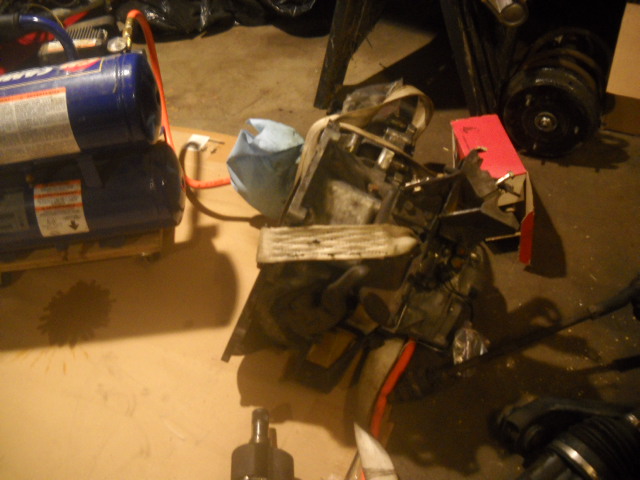
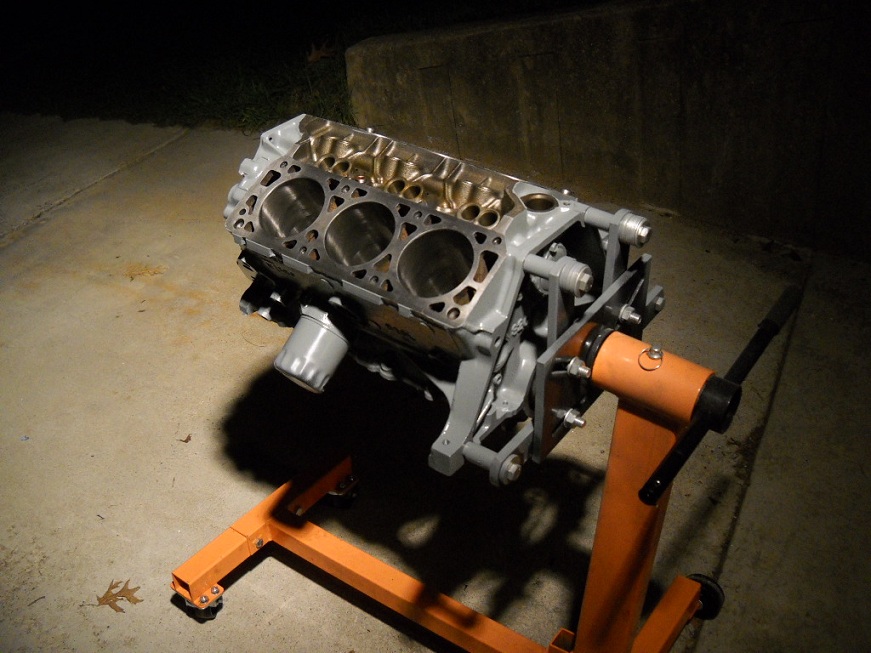
And here it sits on a dolly until I take the flywheel off and mount it on my engine stand to strip it of everything useful and clean the parts up that will be going on the new 2.8 engine.
Here is an update, I have done way more work than this but this is all the pictures I took when I did the work friday.
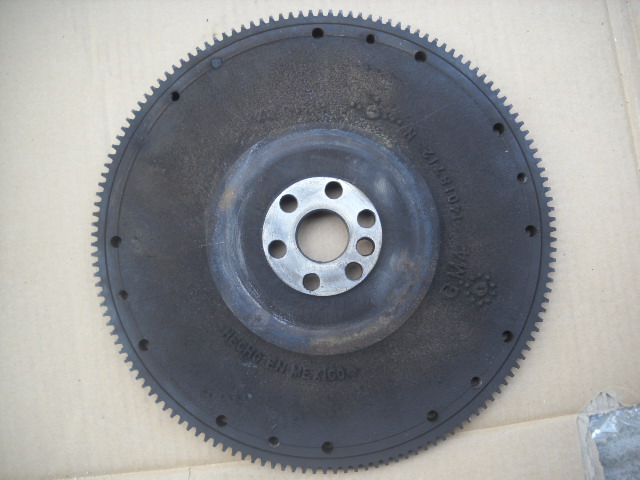
flywheel and clutch removed
mounted on the stand for removal of all parts I will need for the new engine
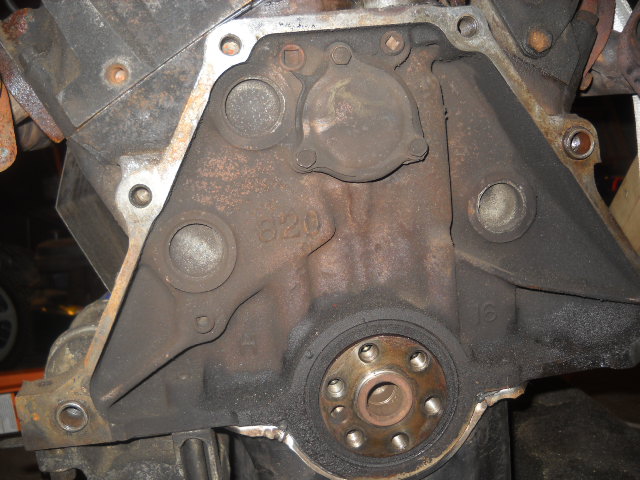
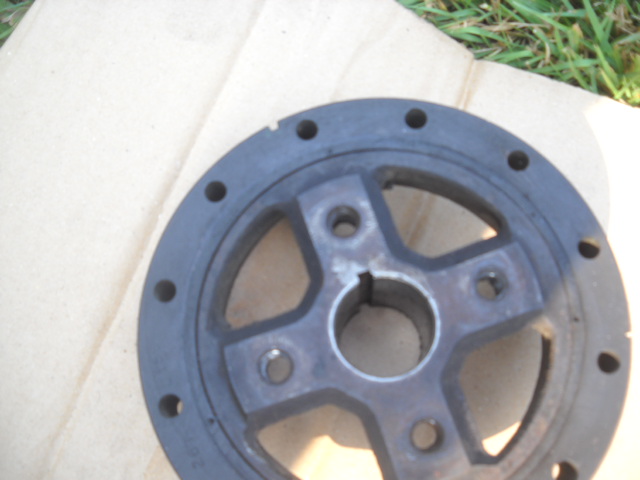
Uh oh, I have an 86 engine, maybe the lack of counter weight on this flywheel has been causing my engine vibrations (unless that is what the externally balanced flywheel should look like...)
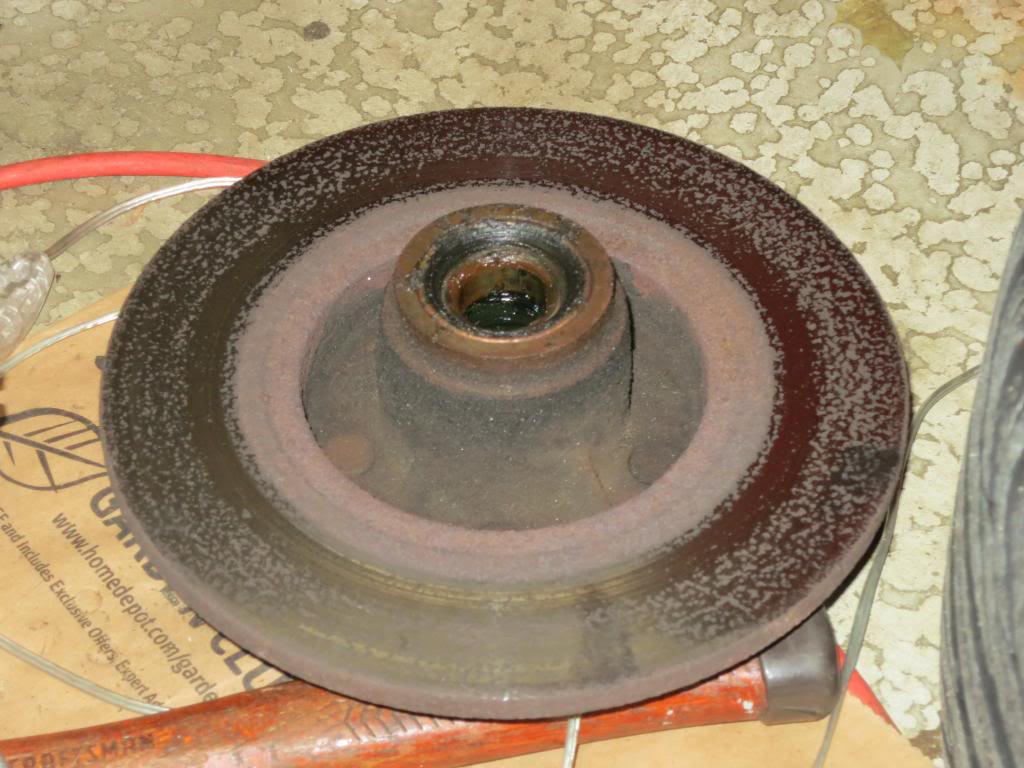
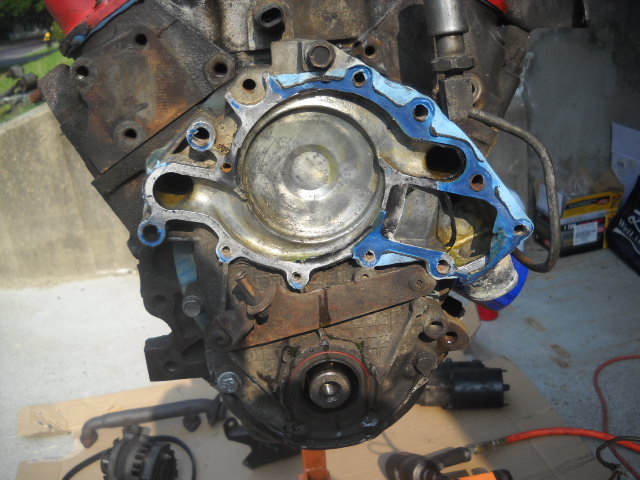
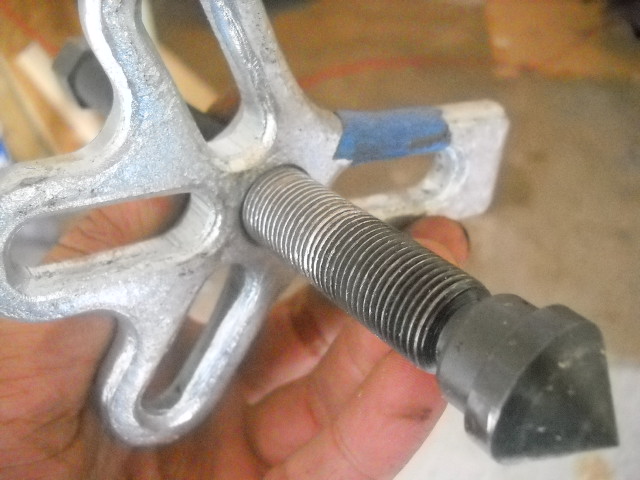
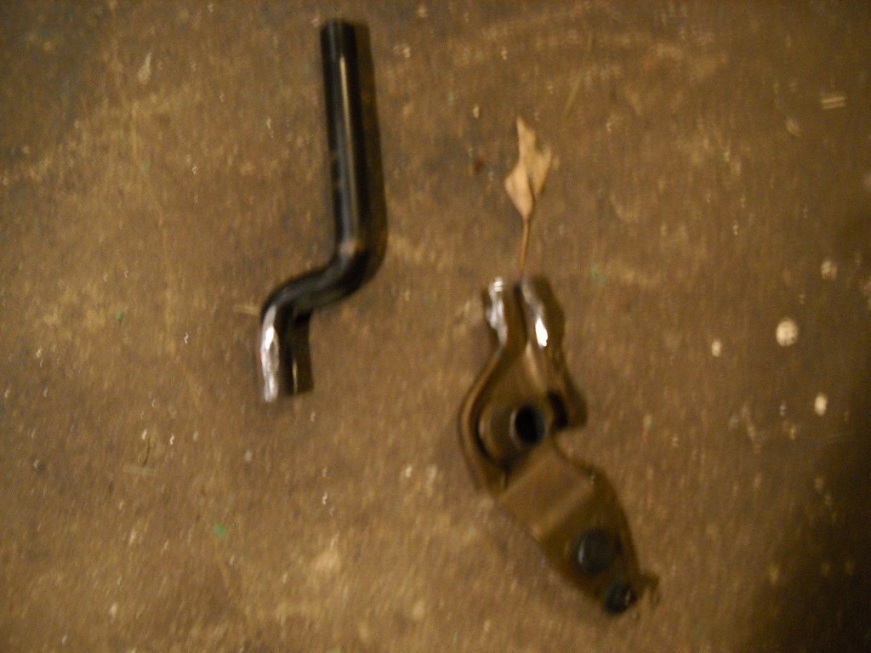
Dogbone and brackets and alternator and balancer and water pump removed. The balancer stripped my harmonic balancer puller!
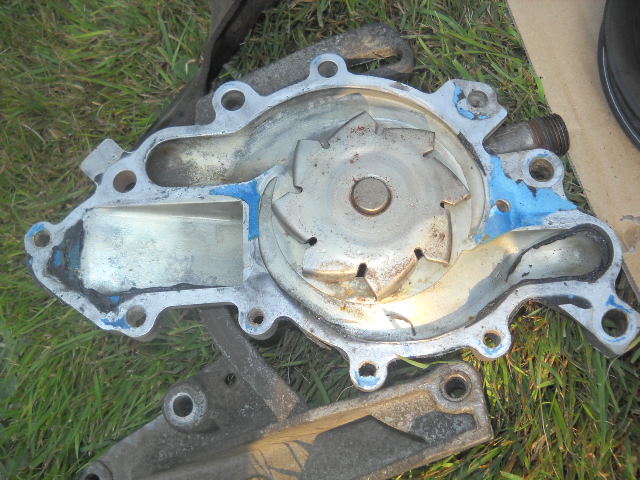
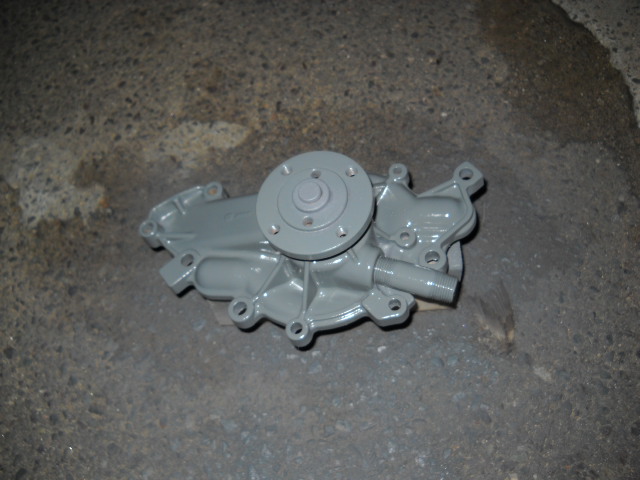
Waterpump is still clean since last time I wirebrushed it
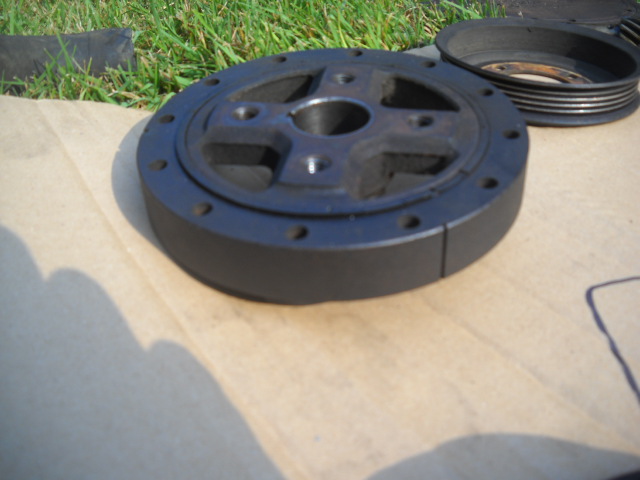
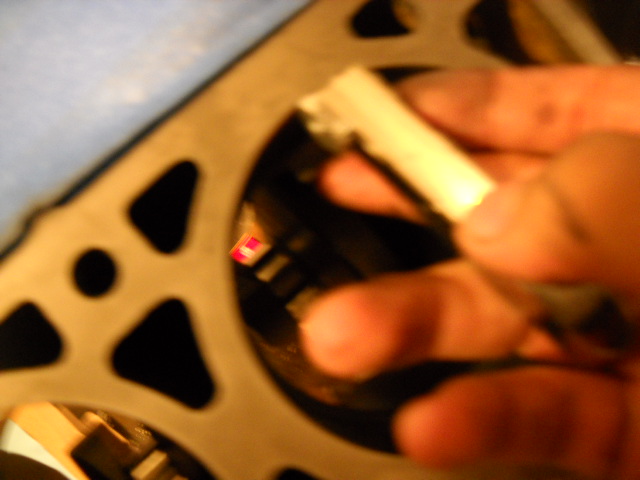
The balancer ring appears to be coming off... anything I can do about this? And is the timing mark still in the correct place?
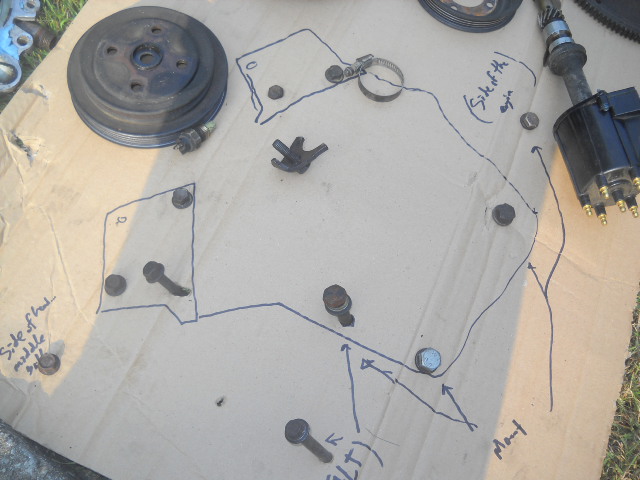
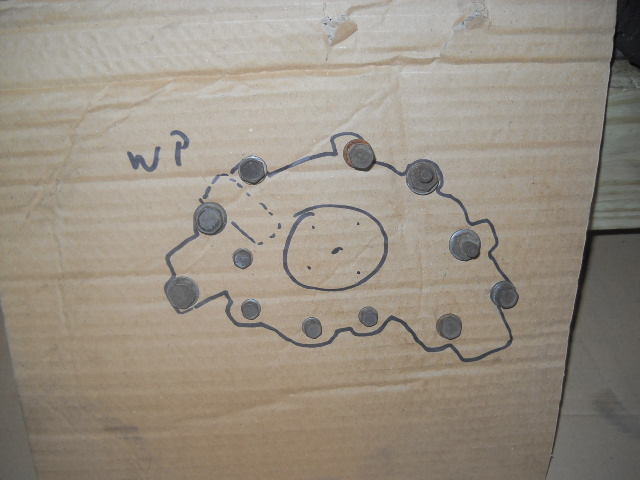
How I am keeping track of engine bolts since It will be disassembled for a while
Might reuse this timing chain and gears, they are only a year old
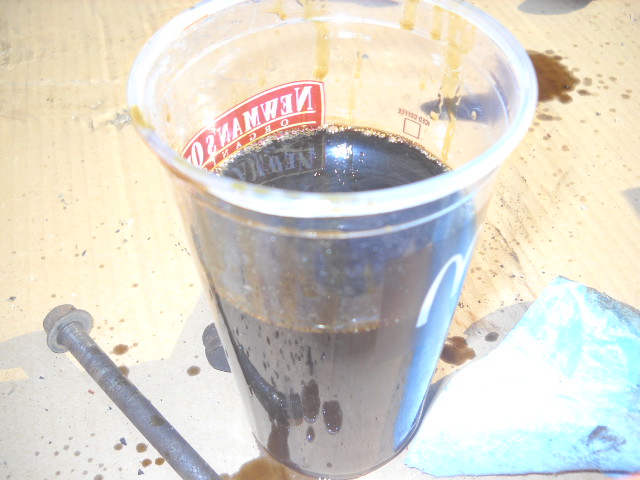
Oil had already been drained, this is how much more came out when engine was at 45 degree angle on the stand. So this is around how much oil stays in the engine (no it is not from the filter)
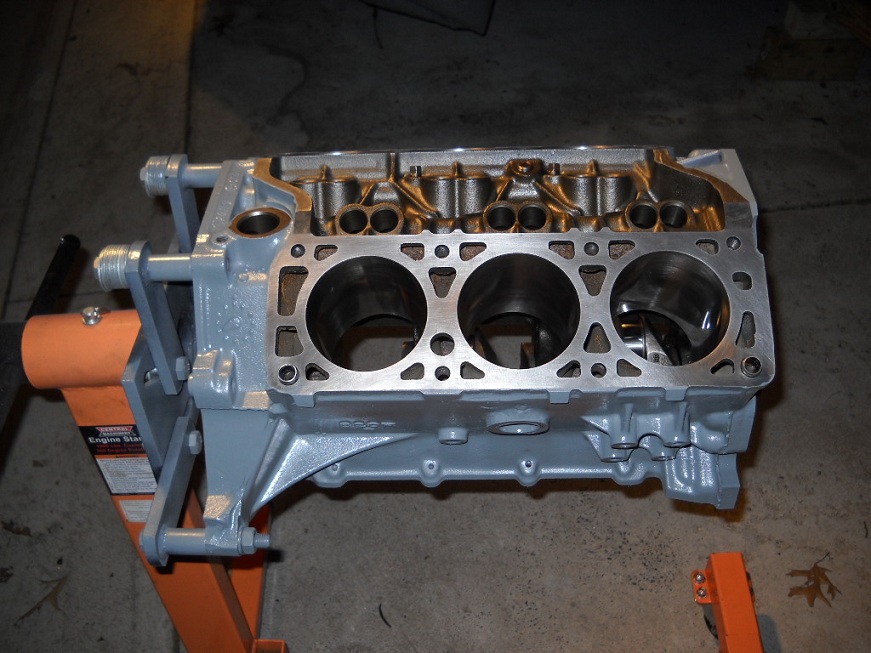
Almost all disassembled
Thought my valve stems would be dirty or oily
Accumulated parts that will get cleaned and go on new engine plus 5 month old gaskets to use for gasket matching
Engine as it sits on a dolly now
More to come tomorrow probably
[This message has been edited by zkhennings (edited 05-09-2013).]
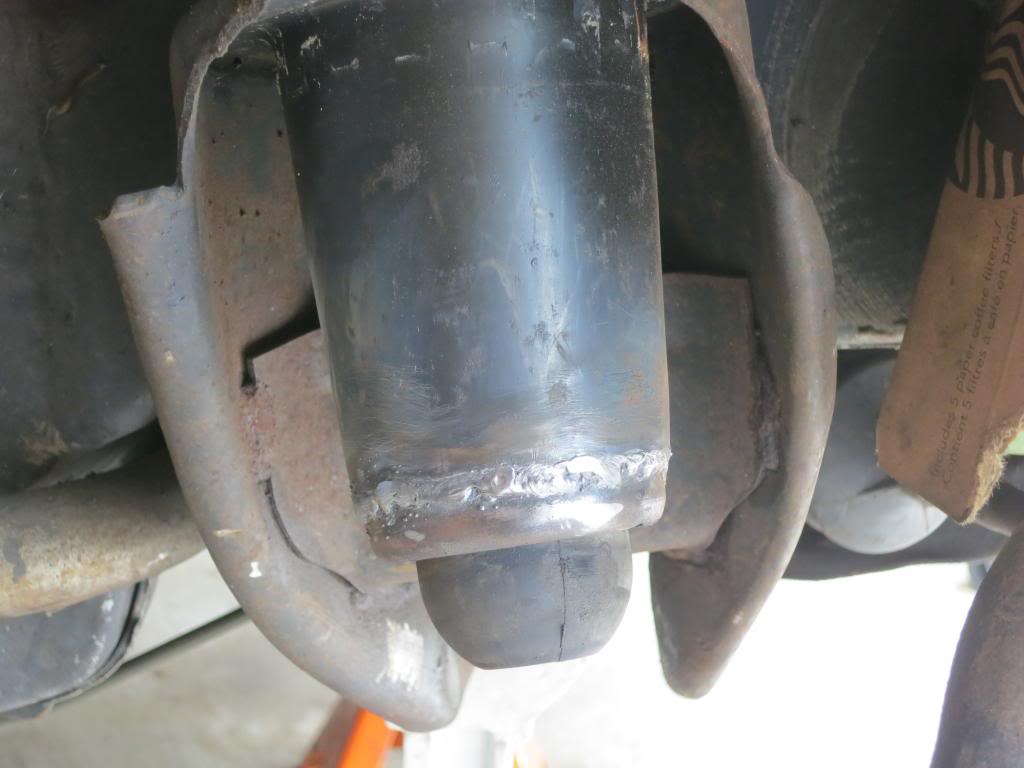
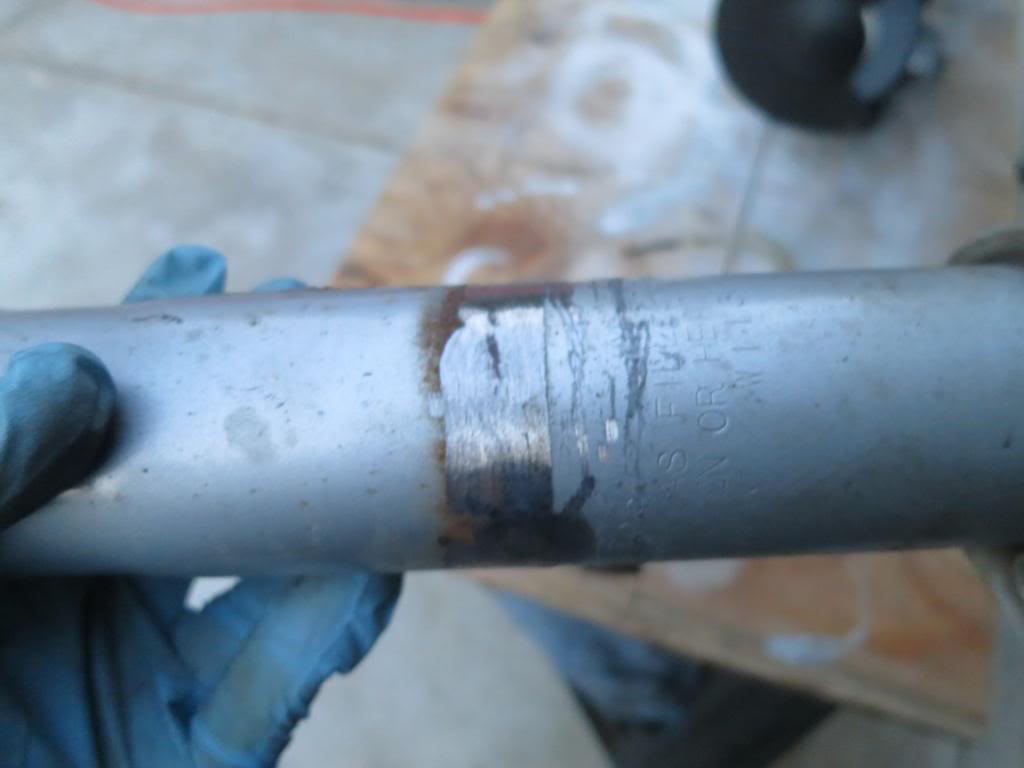
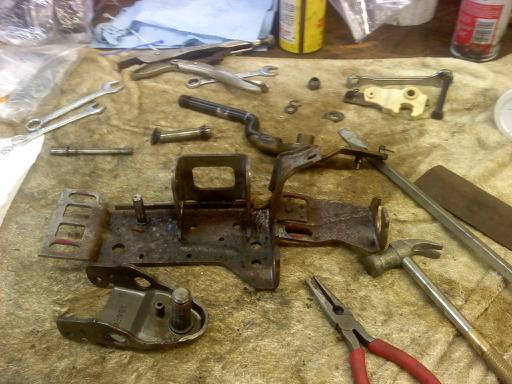
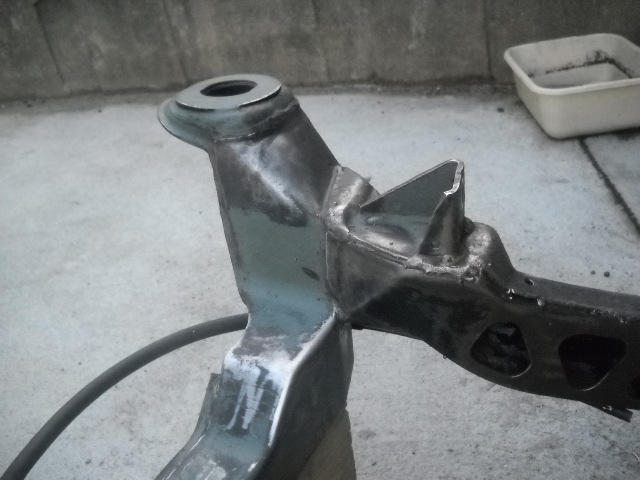
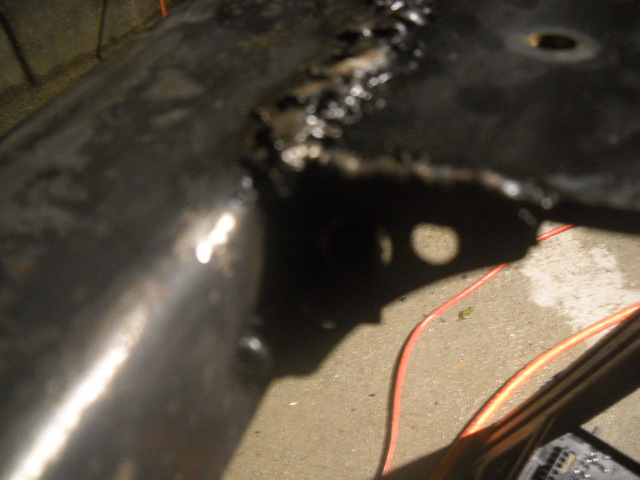
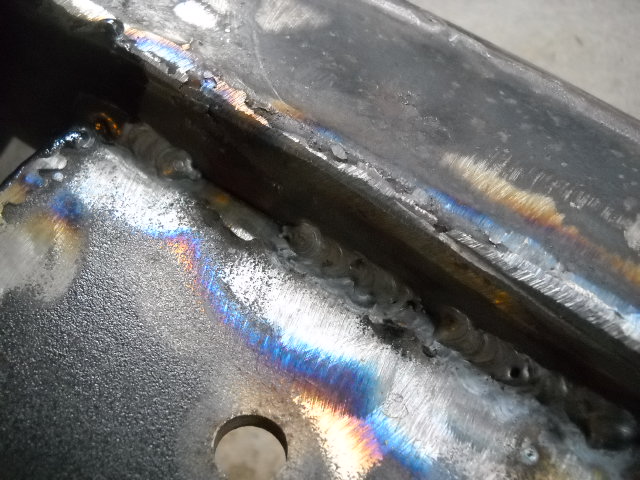
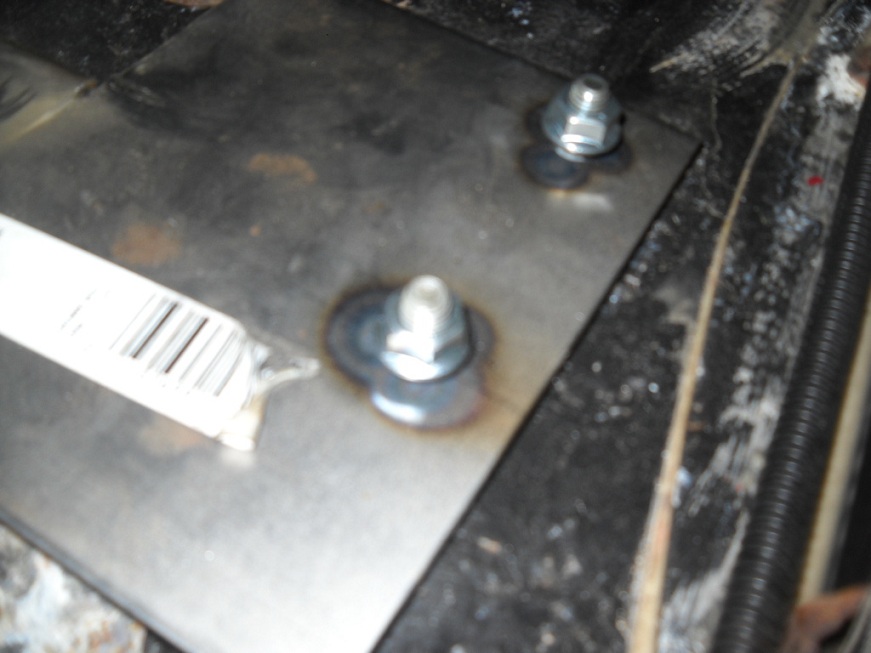
When I swapped the v6 in the engine was at a tilt, so a new engine mount was made while the engine was in the car... and we ran out of argon so the weld is ugly... but turns out when I replaced the transmission mounts that the engine is now too low at the front... So I had to cut off the mount and I still have to reweld it in the stock position.
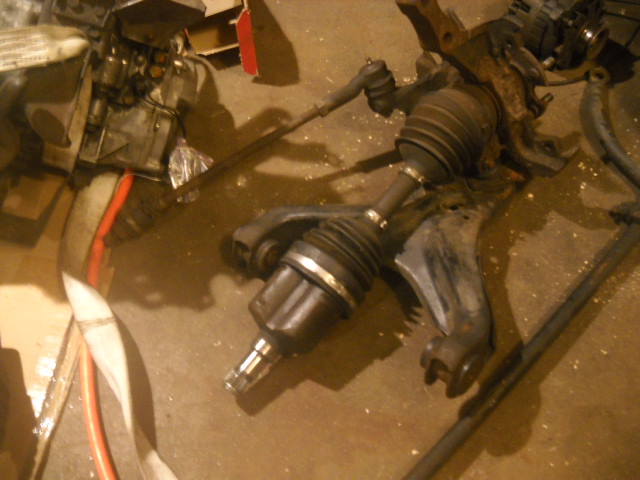
To get the axles out of the transmission, I used a 15/16ths wrench and put the circular end flat in between the cv joint and the tranny and I whacked the other end of the wrench with an open palm and both came right out. I could not get any other way to work. All ground down
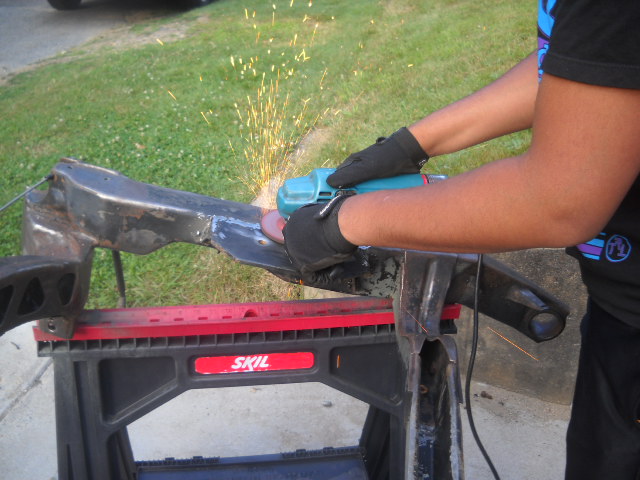
mostly cut...
Cut off
Cut off the remainder of the old mount, ground everything down, and cleaned up the mount that is going back on The little bit of the original mount that I cut off
I have some por 15 coming in the mail.
[This message has been edited by zkhennings (edited 06-11-2014).]
I have been in Canada and the Cape but I have made progress.
I replaced the bad output shaft seals on the transmission so it will actually be able to hold more than a pint of transmission fluid.
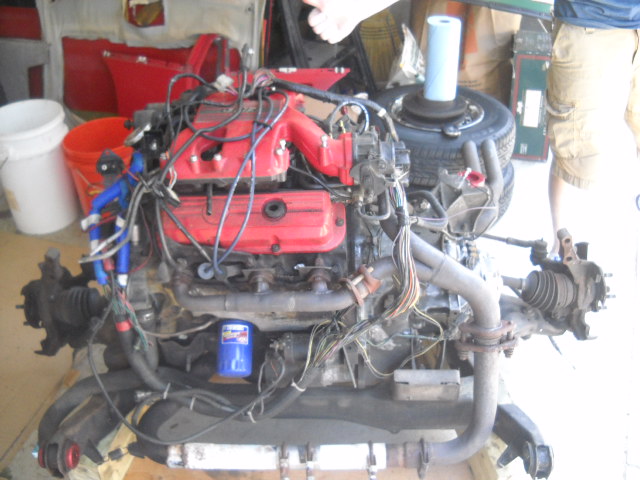
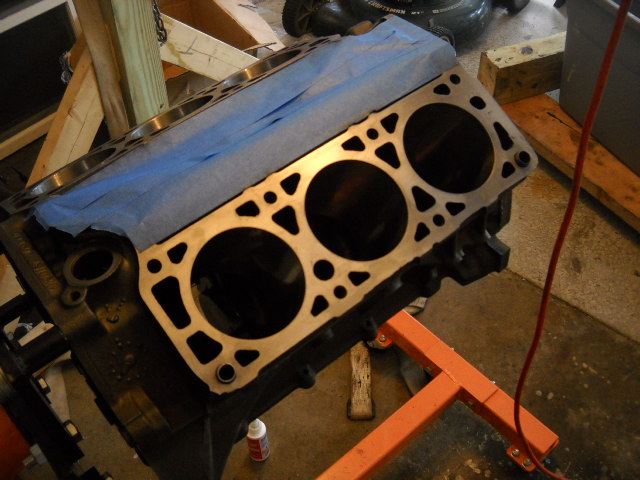
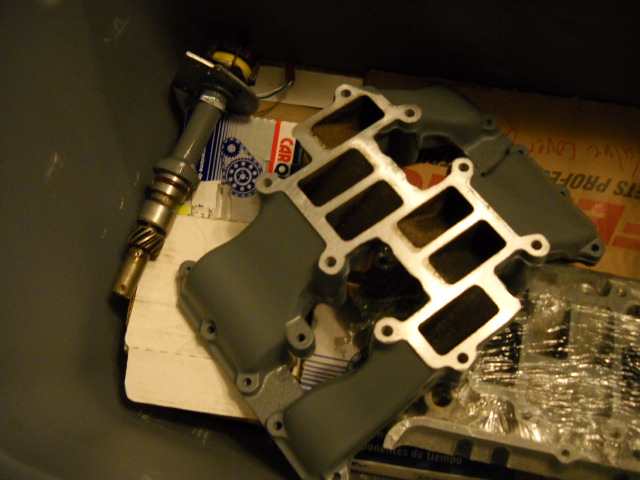
I recieved lots of parts, the new flywheel came in, my carbide burrs came in, the new short block came in with intakes and throttle body and fuel rail and all new gaskets and seals and lifters and lots of goodies. I am probably going to order the performance cam today.
Also I tig welded the engine mount back onto the cradle but slightly higher up than it was before. Today I plan on Por-15 ing the cradle and some of the chassis (if it doesnt rain) and Hopefully I can get the block cleaned and install the pistons and oil pan and oil pump and maybe paint the block. But I might be being ambitious. My exhaust manifolds and a head are at my friends house to get tig welded with his new miller welder, cost him two grand, it is super nice.
Parts coming in the mail are a 260H compcams camshaft and some outer dew wipes from JC Whitney
I had a question, can you reuse flywheel to crank bolts? They do not appear to be torque to yield like the head bolts. I was just going to use some red loctite on them.Pics will come later today when I am at home and replace the batteries in my camera
[This message has been edited by zkhennings (edited 08-07-2012).]
If you need some help at some point with anything that I might be able to do, I'd be willing to take a drive up there with my 'Ro. I only live in Pawtucket, RI.
Going to MTTI in Seekonk, MA in October, good luck on the project though! I think my buddy Tim saw your Fiero outside one day, he has a black 86 GT with red fenders and hood.
Thanks a lot, I might if it gets down to the wire!
Yesterday I installed the new crankshaft in the new block and I checked bearing clearances. I also painted 3/4s of my cradle with por 15 and hopefully the rest gets done today and I can install the pistons in the block today and paint the distributor and maybe por some of my floor pan as well.
I took pictures with my familys SLR and they are huge so I have to resize them before posting.
Camshaft has shipped and will arrive on 8/13
[This message has been edited by zkhennings (edited 08-08-2012).]
Looks like you're having fun! Keep up the good work and the good posting. I always enjoy watching others progress on their cars...keeps me motivated. Just don't let it become a burden. Are you gonna give her a build name or would that make it too personal?
I reused my flywheel bolts with blue thread locker (removable where red is usually considered permanent). Technically you are supposed to use white thread locker; high temp stuff. A mechanic friend of mine usually just torques them back in w/o any thread locker. I'm not for sure if it's considered ok to re-use the flywheel bolts though.
[This message has been edited by Reallybig (edited 08-08-2012).]
Yea I think blue threadlocker will be the way to go.
Yesterday I painted the distributer, finished por 15ing the cradle, rubber undercoated most of it, painted the lower intake, checked all piston rings for clearance after squaring them in the cylinder with a piston. 3 of the rings had a gap of a little under .010 so I used sandpaper glued to a piece of flat steel stock to take a little material off the rings. I installed all the rings on the pistons and then I got too tired to go on so I went to bed. A few pistons had some dings on them on the sides, probably from shipping, so I used some 400 grit and sanded them down to flush with the sides so they dont score the cylinder walls.
I hope to get all the pistons installed and get the oil pan and oil pump installedtoday and paint the block, maybe get the new heads dissasembled to start porting
Edit: At lunch time I went out and bought this. It will go where my cat was for the time being and I will be running side exhaust out the right side in front of the rear wheel FOR NOW. I am really dedicated on going turbocharged which means new crossover and totally different exhaust so I am not investing time or effort into making my exhaust go out the rear for now, but it will in the future, the side exhaust is temporary
[This message has been edited by zkhennings (edited 08-09-2012).]
Ordered a new oil pickup tube/screen from the fierostore because my screen is broken, also bought a 180 degree thermostat and a new O2 sensor. My EGR deleted PROM came in from Phonedawgz as well and I finished welding the exhaust manifolds and they can start to get ported. Also I took apart the front right suspension to cut the spring and install poly bushings. I also started wiring my house up for my own welder.
Still to do: Cut springs Install poly Reinstall suspension Install rear suspension and transmission on cradle Finish Por 15ing the chassis Weld in seat track nuts to the floor once welder is installed Finish engine Finish porting heads and manifolds. I might only port the lower intake manifold because I can port the other ones once I am at school. Same thing with Y pipe. Reinstall engine and reroute coolant lines Replace brake line Replace Gas Lines with rubber Put all Body Panels back on Install Dew Wipes Install Windows
So I have to do all this by the end of next tuesday... while working 40 hours a week this week... I have sat, sun, mon, tues to do the majority of work. I need to get some significant progress done this week so I can finish everything. I might be pulling some 20 hour days unfortunately. If I can get everything done to the car this week, I think I will be in good shape (dew wipes and all the fuel and coolant lines and brake line and por 15 and weld in the seat bolts and the front suspension). I think I can do it. It just sucks to go go go all the time from when I wake up at 530 till I get home from work at 6, eat, then work on my car till I need to sleep at like 1. But whatever I know I am going to be very happy when it is all complete.
I am looking forward to a couple simple things: Having a car that doesnt vibrate because of the correct flywheel HP increase from new engine/perf cam/porting work No longer worrying my engine is going to start detonating now that I have the EGR codes deleted Ride Height fixed since gas charged kyb bumped the front end up No longer rusting cradle Tighter front end from bushings Nicer looking engine and engine bay Also it should sound great with a thrush turbo muffler, no cat, and a super short exhaust plus ported manifolds and the camshaft.
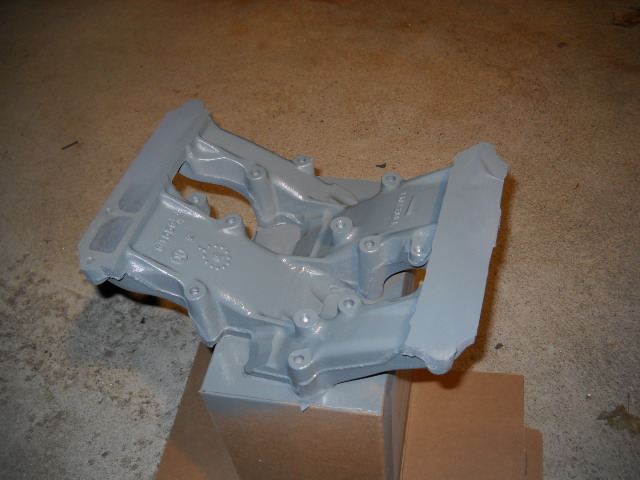
Painted Intake and other engine parts, paint is ford engine gray engine enamel first primered with an engine enamel
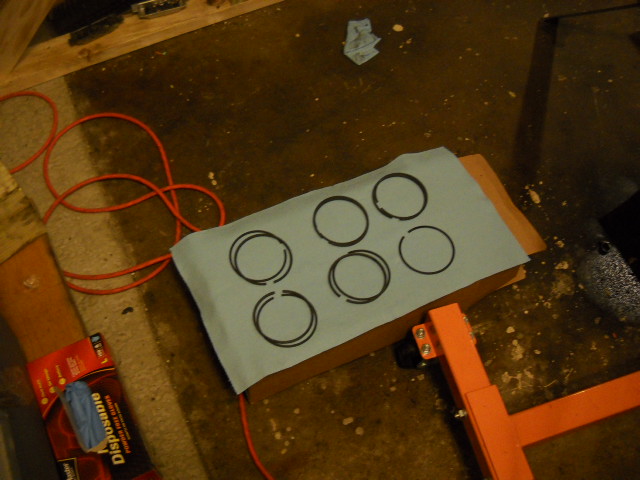
Piston rings organized as I checked them in the cylinders. A few had too small of a gap so I mounted some sandpaper to a piece of flat stock and sanded them down ever so slightly.
Checking the ring gap with a feeler gauge
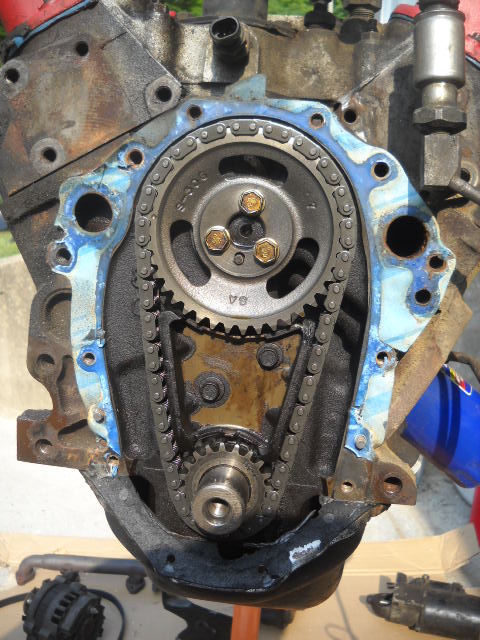
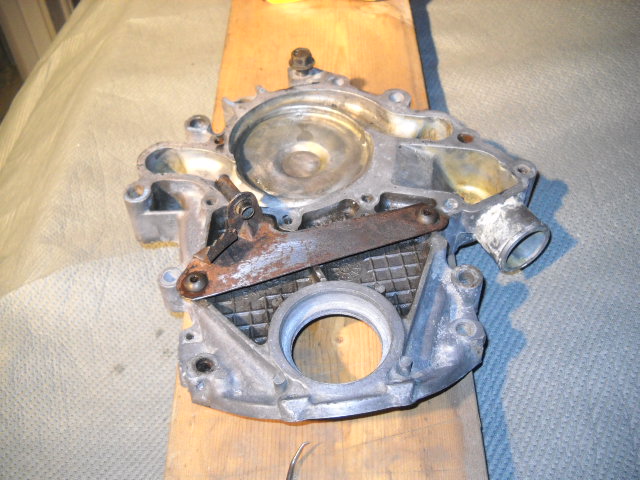
Cleaned timing cover. If you look back at the old engine on the stand you will see how dirty the cover was when I started.
Cradle now rubberized undercoated
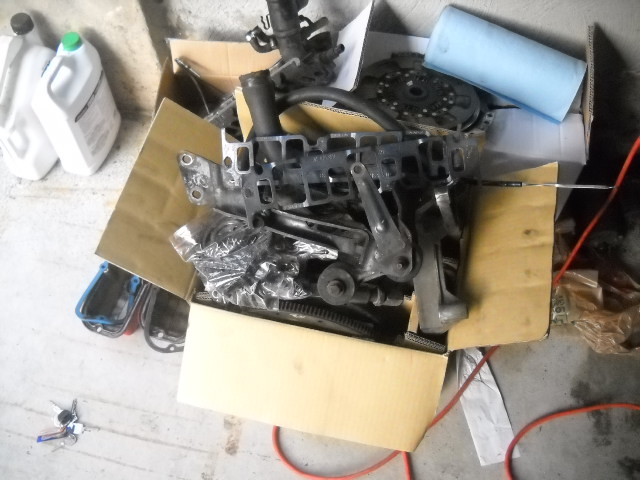
Box of parts
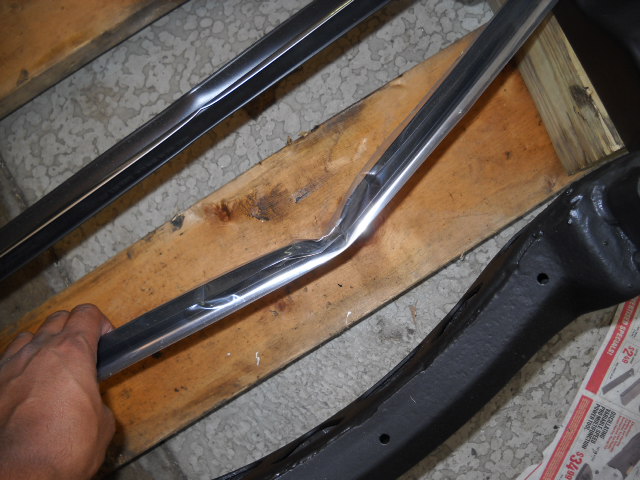
Pretty angry JCwhitney packaged my weatherstripping so poorly. I bent if back but the kink cant be 100 percent removed unfortunately.
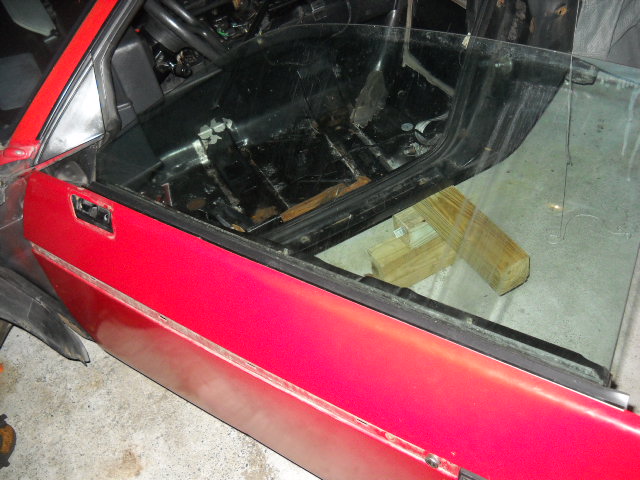
Weather stripping in place
I riveted the original hardware to the new weather stripping, then I put the doors back together and the windows back in with some quarter inch stainless hardware. It is really easy to access the hardware for the window from under the door. This is how I will take out the windows in the future, very easy. Also my inner door panels will be velcroed on.
Cut shifter and welded it down lower to shorten it. Still have to cut the threaded section off then rethread. I like the bend.
That section on the lower rear frame rail welded back up. Needs to be ground down fully Or I might just leave it because no one is going to see it.
New brake line. It is a dark dark green and has to couple with another shorter section because it was no long enough on its own and I didnt want to spend the money for flaring and stuff. I figure in the future if need to replace either piece now I can just get a premade one.
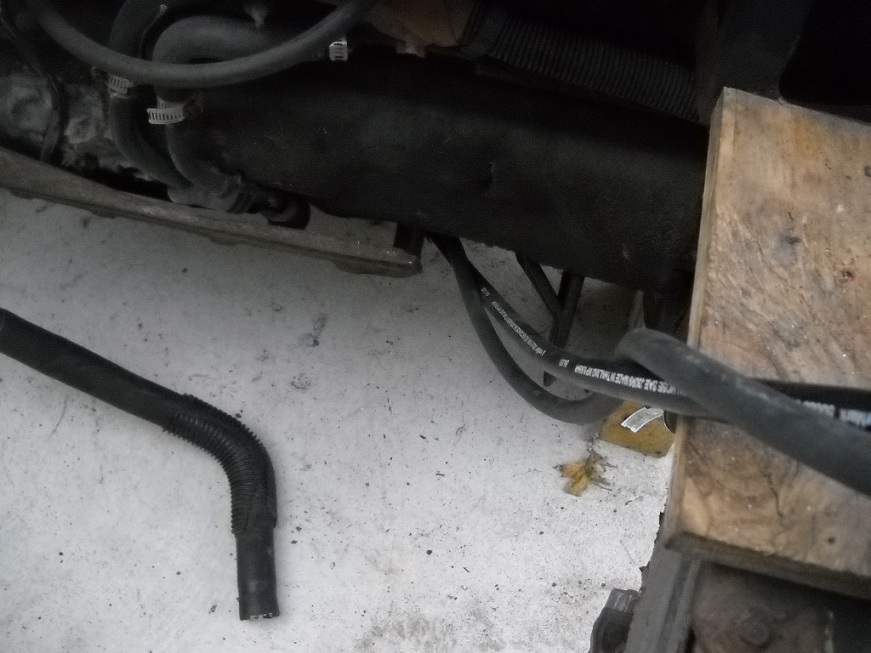
I rerouted the fuel lines opposite of how they were. They were still routed for a 4 cyl. I chopped them right after the 90 degree bend out of the tank, then used rubber line and fuel hose clamps to attach high pressure fuel line and route it the opposite way. It will clean up the engine bay a lot. they are routed behind the heat shield, and there is no longer a Cat there to get super hot.
Front suspension off, windows in. I fought the front suspension for a while. Bolts were fused to sleeves. I used a dremel and a pneumatic hammer.
I thought I got more pictures of the actual engine assembly, I plastigauged everything to make sure it was in tolerance, got a new oil pump and pickup tube. I am stupid however and just did not do a great job installing the pickup tube so I am going to take the engine back out to redo that, and redo putting on the timing cover with a sealer instead of just a gasket, and I am annoyed but whatever I am going to make a brand new engine assembly perfect and nothing less. Anyways, new flywheel and heads mounted, heads came back off for porting, I just used them to pick up the engine.
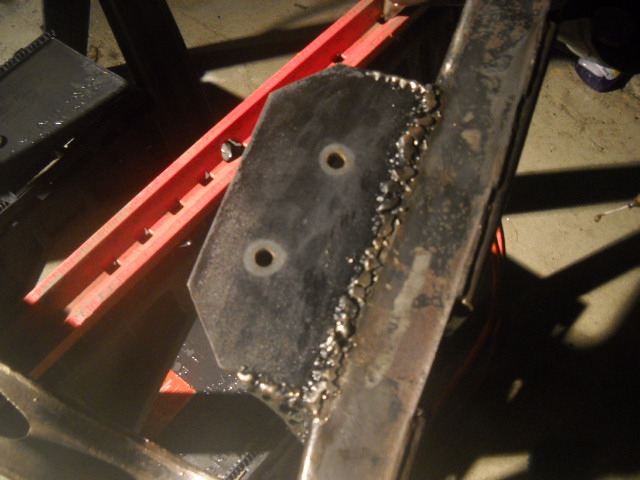
My solution for the seat bolts I ruined. I drilled holes then welded from the bottom bolts ( I forget what size I just brought the old ones with me) They are grade 10.9. The steel is 16 gauge plate.
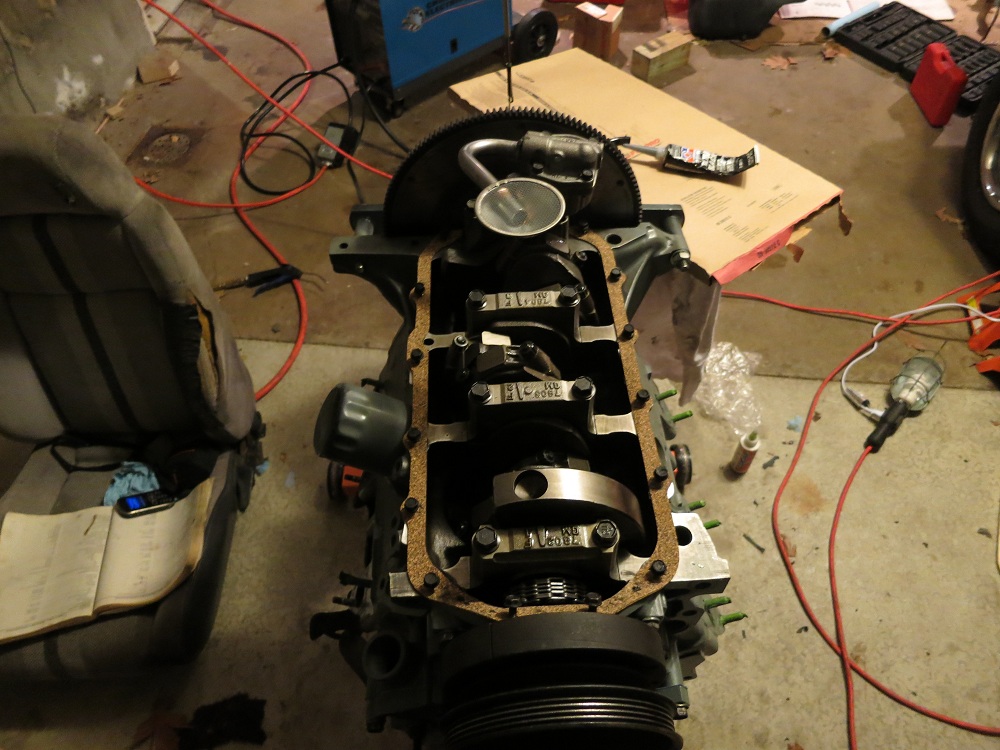
Engine and tranny mounted on the cradle
[This message has been edited by zkhennings (edited 03-20-2014).]
So I did not get a ton of pictures of the reassembly because I was working very long days as fast as I could go. But here is what I do have. I am in School right now but I get a break soon and I will work on my car a little, but then I go to South Africa for a term for my junior year project, and I will not get to continue working on my car until this winter
OK so QUESTION, Do I need those second set of poly pieces for the lower bushings? I just could not see how they would fit because I had to hammer the arms into their locations as is. I would like to leave them out but if I need them I will put them in I guess.
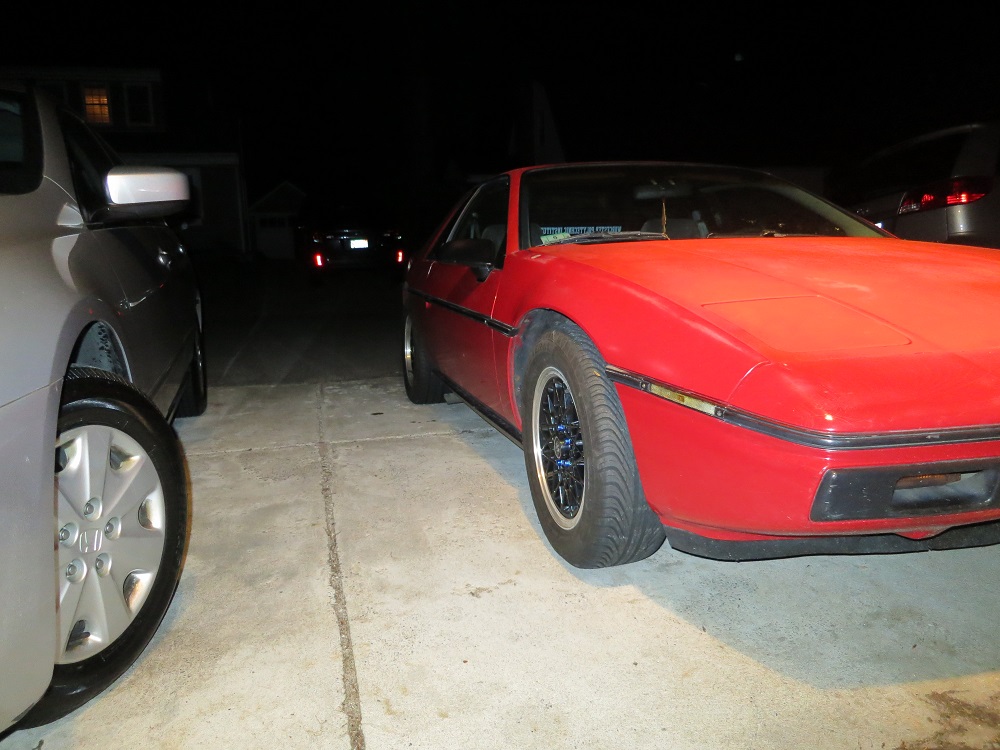
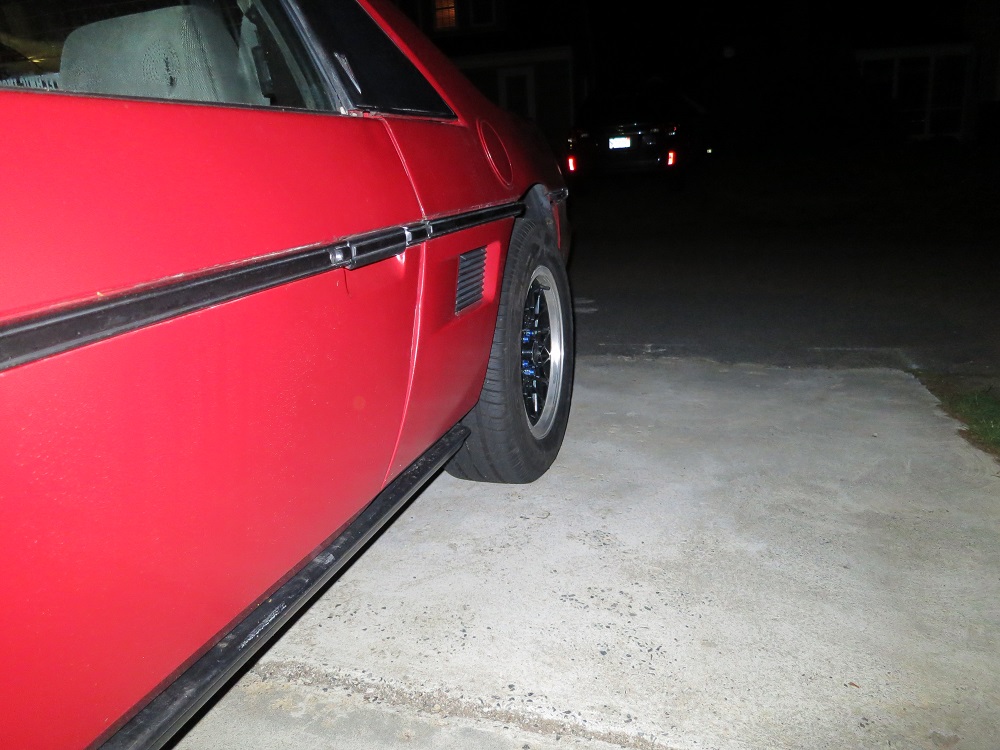
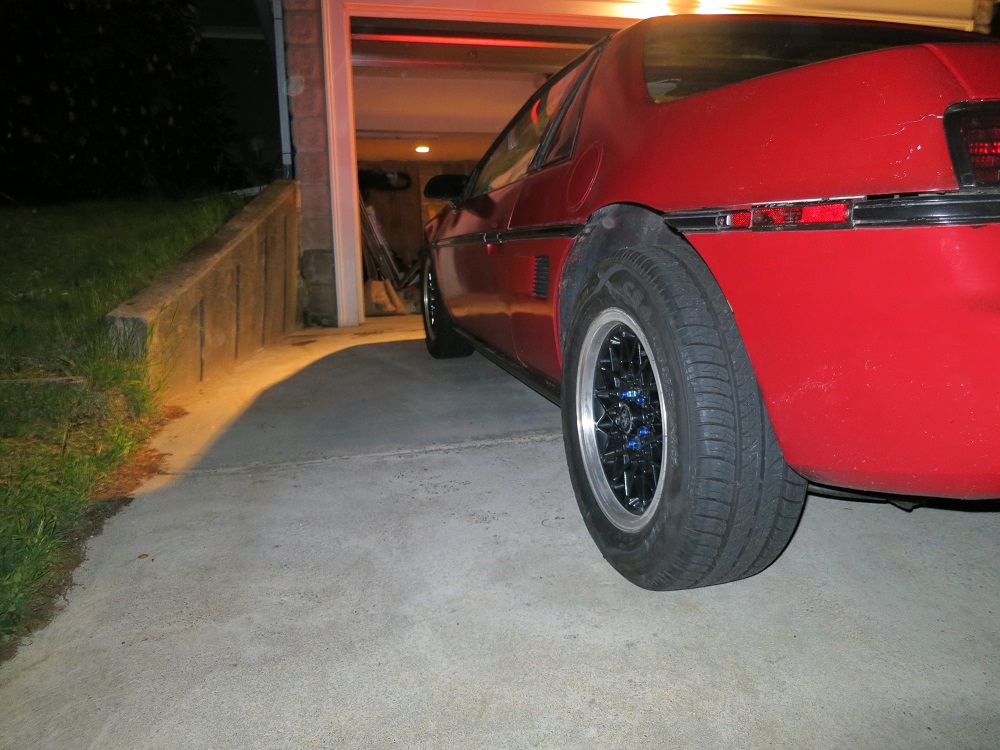
Here is how she looks right now
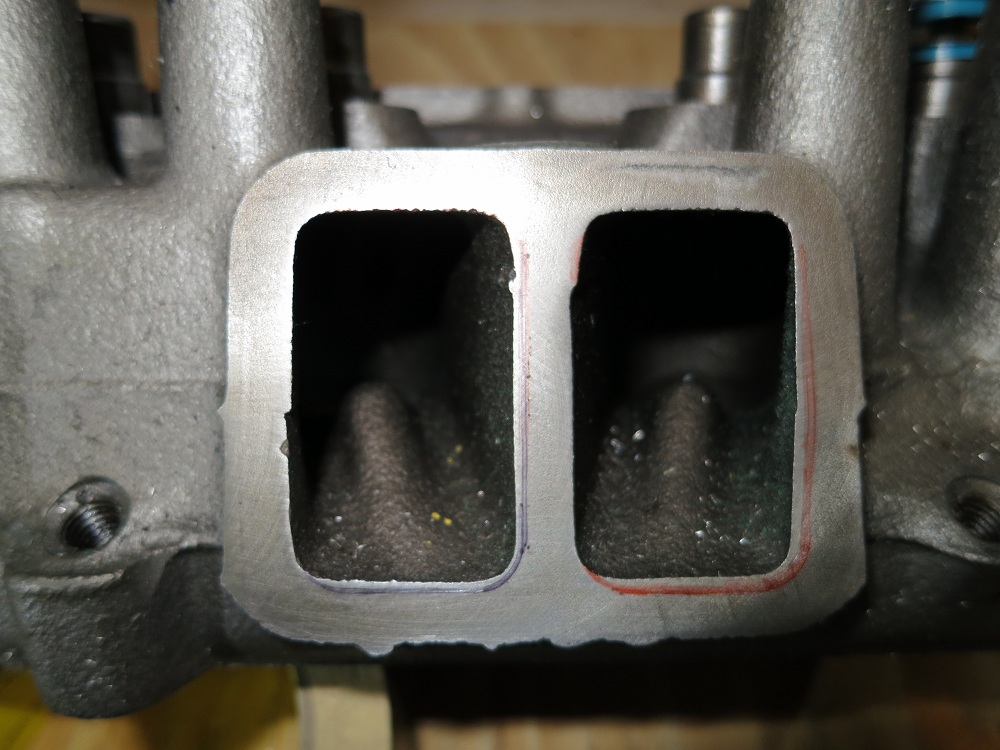
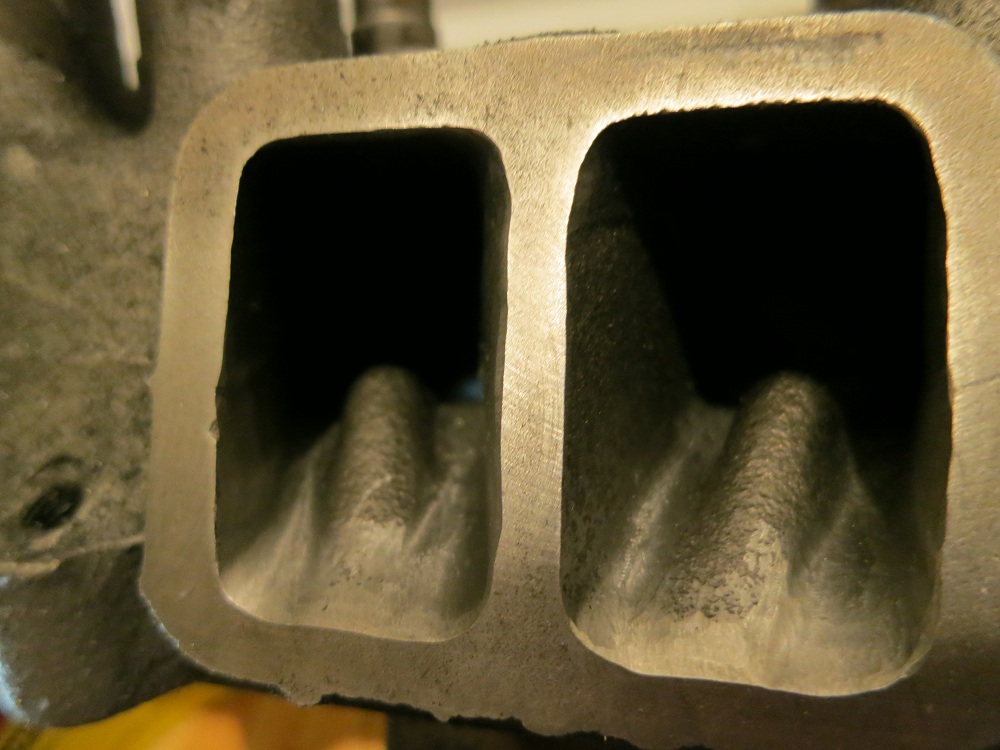
Heres some porting work I have been doing, Unported Ported
And on another note, here are some pictures from NH Speedway a few weekends ago, my roommate Ralle, he races all sorts of things but at the moment it is cars and he is racing Miatas. Here he is in his Miata. He did really well that weekend, 3 firsts and 3 second places.
And here was an awesome 944 that was driven by a very fast driver
Ok I did some porting work on the intake side of one of the heads. I just gasket matched to an intake gasket. Tell me what you guys think. BTW this is not done, this is after only the carbide burr marked
Gasket matched
Basically I opened them up to the size of the gasket then used around an inch to feather the increase in volume smooth
Well my build has not died, I just spent a term in Cape Town South Africa, which was pretty awesome. If anyone wants to read about what I did there, here is a link to my group's website...
I will have to post pictures soon, they are on my computer and camera. I did not take a ton of pictures because I was working really fast over the three weeks I had left of winter break when I arrived back in America.
But - I will list off the things I have done -
Exhaust manifolds are ported and flanges are welded on the outside. Y pipe was ported, and I welded them back up. Had to be so fast with my mig on the lowest setting or it just burned right through the y pipe.
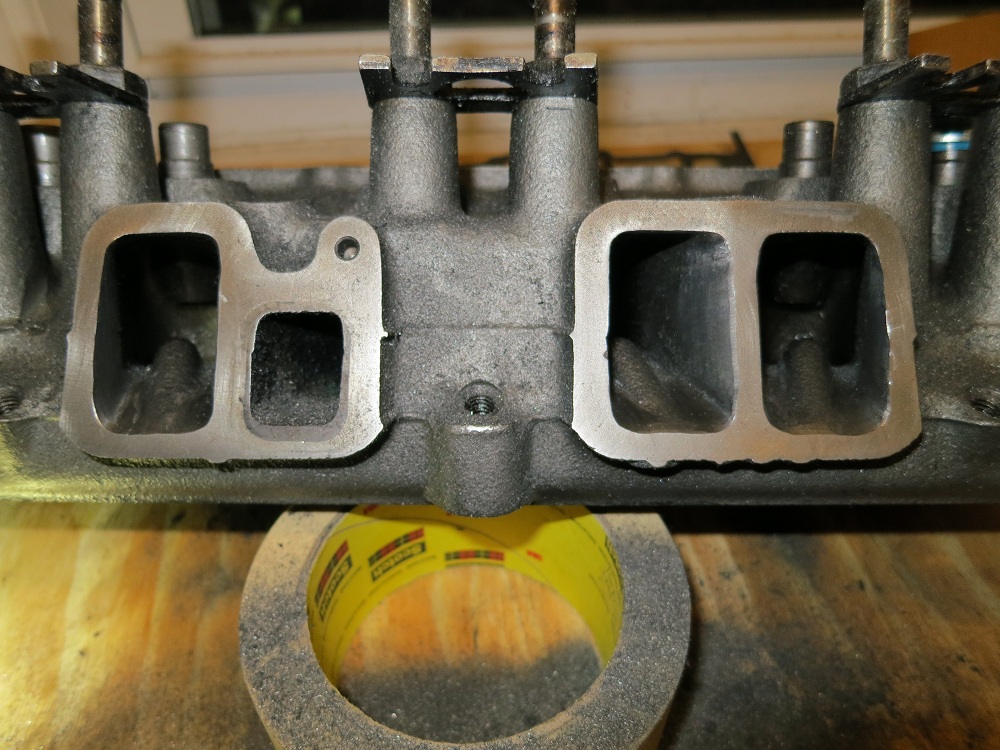
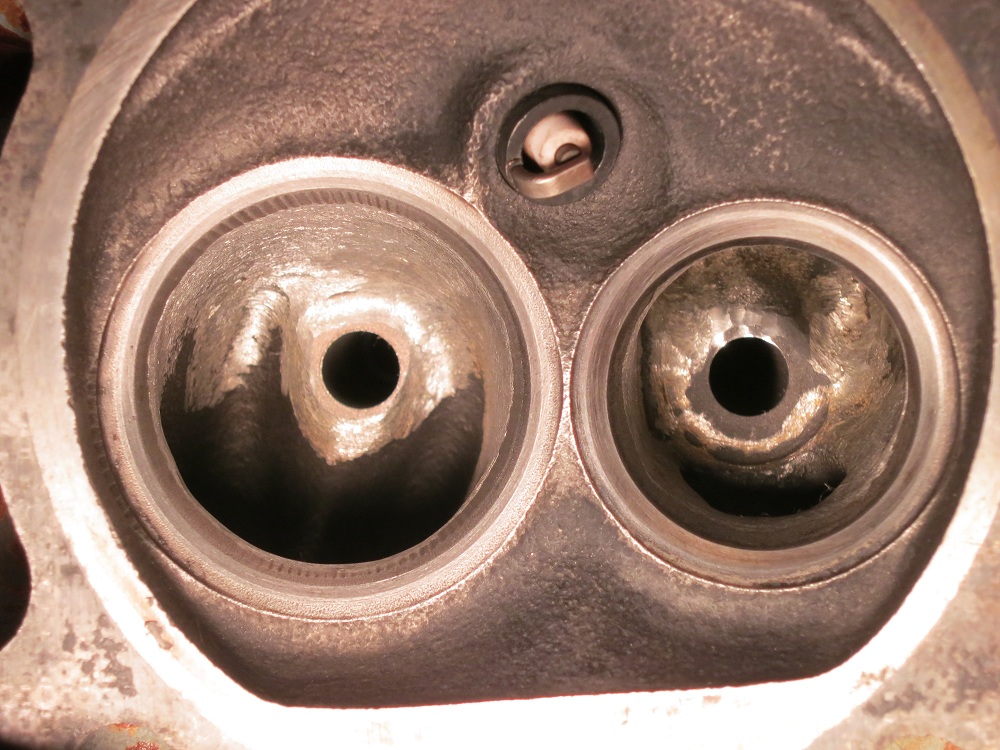
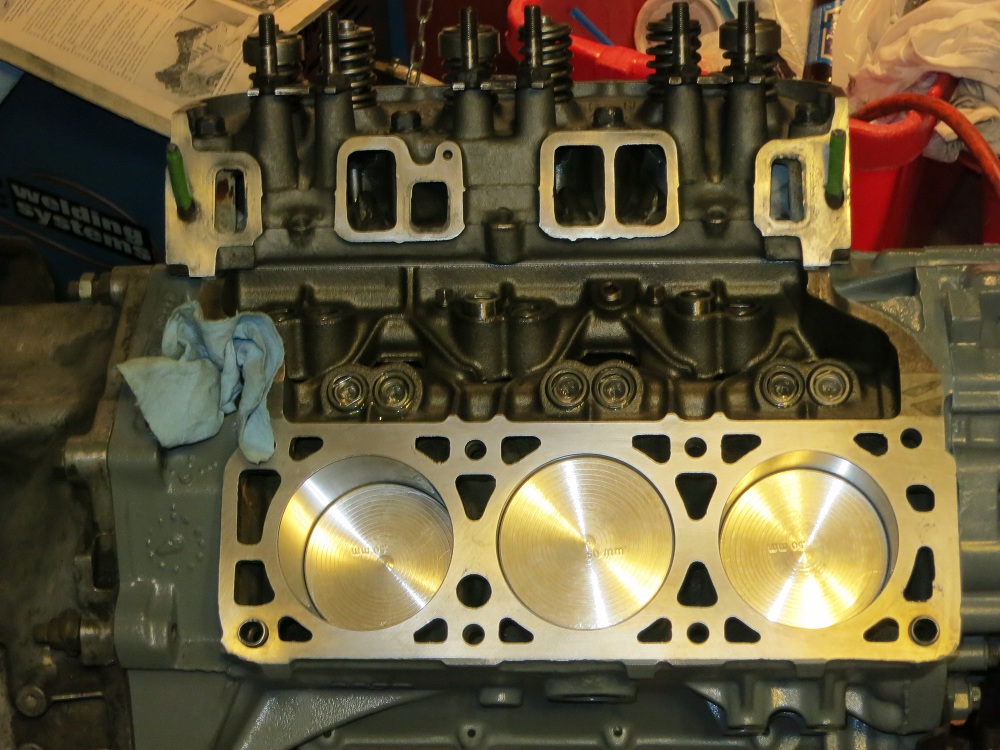
Heads have been ported, I opened up intakes to the size of the gasket and roughed them up, I did not change the size of the exhaust because your exhaust ports should be a little smaller than your exhaust manifold ports to stop pulses from entering the head. So I polished the exhaust ports and removed the spark plug hump. I opened up the bowls to almost the size of the valve seat, and I rounded any sharp edges from where the valve stem exits. I then cleaned the heads very well in a big bucket of hot soapy water to get all the metal shavings out. I reassembled them after cleaning the valve seats and valves with green scotchbrite pads, and I cleaned the heads and painted them. I used severe duty felpro headgaskets and torqued them in three steps to 90 ft lbs
Intakes are somewhat ported at the moment, I still have to work on these
I got a new timing cover and water pump, because why not on the water pump, and the timing cover had a few stripped holes for the water pump and the timing cover was just.... not nice, one of the edges was suspect from when I heated it up red hot with oxcyacetalene removing it from the original engine which it came from. So I removed the timing cover and water pump I had installed, painted the new parts, and installed everything. I used a permatex gasket sealer this time and trimmed the gaskets this time because last time I did not.
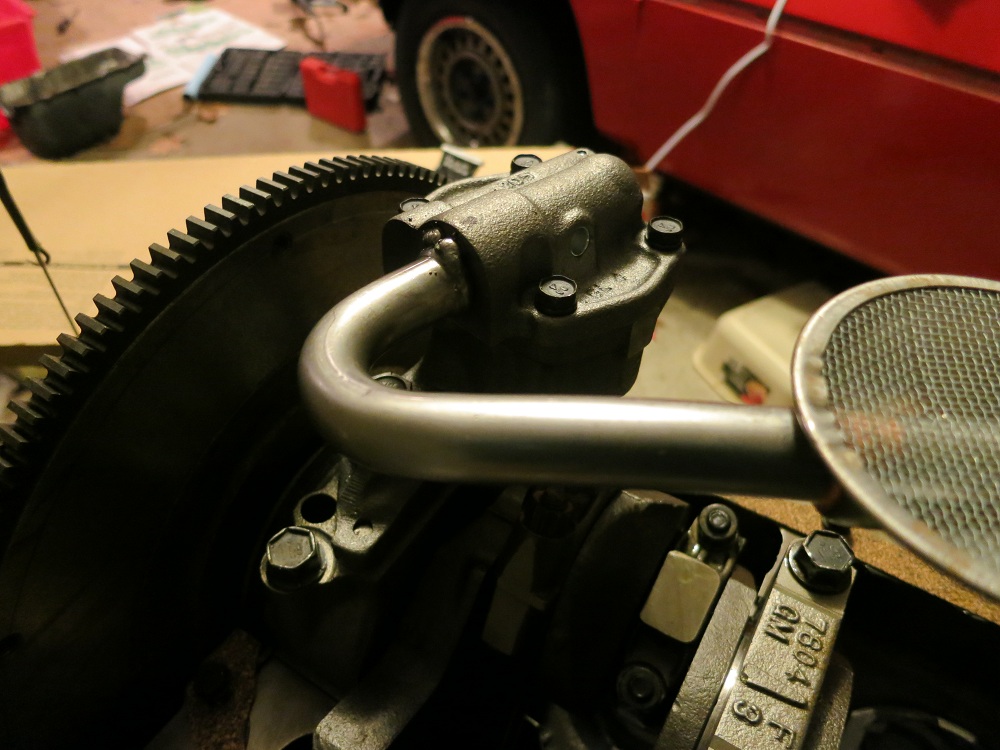
I took the engine off the cradle and put it back on an engine stand, removed the oil pan and cleaned and painted it, removed the oil pump, and replaced it with a new one. The reason being, I have these rubber jaws on my vice that have a circular slot which fit the new oil pump pick up tube perfectly, so instead of renting an oil pump screen installation tool WHICH I RECOMMEND THAT EVERYONE THAT INSTALLS A PICKUP TUBE USES I just mounted the tube in the vice which was fine, but then I hammered just the bottom half of the pump on to the pickup tube, and this messed up the bottom half of the pump a little, and I sanded everything down and made it sit flush again.... but I did not want to risk the life of my new engine and all this work with a possibly messed up oil pump, so I bought the new one and did it proper. I killed the clutch with brake parts cleaner (in a good way) because it used to get transmission fluid on it when my output seals leaked on the tranny. So hopefully the clutch will feel better than before.
So I remounted the pump with screen after measuring pan depth properly and using white grease and a 3/8 drill bit taped to the screen checked the clearance of the screen to the bottom of the pan, and then I gave it a nice tack weld.
I bolted everything back together and installed the exhaust manifolds and y pipe and then I installed the lifters with lots of assembly lube and I installed the rocker arms and pushrods (after the intake manifold gaskets) and adjusted the valve lash by spinning pushrods as I tightened them until the first sign of resistance. Then it was 1.25 turns from there, and each rocker stud has the same amount of threads showing on each one so I am confident they are all correct. On the previous engine some of them were different due to stuck lifters, which also probably attributed to my low oil pressure.
Once that was finished I poured oil all over the cam and lifters as I filled the oil pan. I ground off the gear from my old distributor and used to prime the engine. If anyone is wondering, when you prime it you have the drill spinning to the right. Due to the beveled gears on the cam and distributor shaft you second guess yourself as to which way it is spinning. I ran the pump until oil came out of the end of every pushrod.
I then re installed the oil pressure sensor tube to the block, which meant that oil poured out everywhere, which I should have expected but didnt since it is above the top of the pan. I used black rtv on the threads when I re installed it. I will tighten it up when I next see my car. Hopefully it wont leak. I also used rtv black on the plugs in the water jackets on the block and tightened those to 30 ft lbs because I could not find the torque spec for them.
I then dressed the engine a little and installed the alternator and serpentine belt, A bunch of the threaded holes in the head needed to be cleaned out a whole bunch which was annoying because the stupid high temp engine enamel is not chemical resistant until it has been heat cycled at like 200 deg F. Which means brake parts clear takes it off like it was never painted. So repainting was in order.
Once I had everything installed that would be hard to install with the engine in the car, I installed the cradle and engine into the car, and that is how she will sit until this weekend when I go home from school to work on her a little.
I also relocated the fuel filter. It sits at a 45 degree angle behind the heat shield for the Cat and it came out prefect. There was a preexisting hole which I welded a nut in front of, and then made a new bracket with some 22 gauge steel which now that I think about it, I really should paint. It fits perfectly and looks so nice, it is well protected, and the fuel lines are as short as possible with no weird bends so I am very happy about how that turned out.
I will post pictures within a week, I know pictureless threads are boring so I will post soon!
[This message has been edited by zkhennings (edited 06-05-2014).]
Hey a fellow masshole good to see that ur saving this fiero i sent u a pm on maybe u might be interested in let me know an im definitely gonna follow ur build looking really good so far
Home! And about to start work later today. Just picked up some break in oil additive made by Lucasoil with added zinc specifically designed for racing cars with flat tappet cams. You can get it at Advance Auto.
I have to...
Finish porting lower intake and other intakes Paint valve covers Get rid of charcoal canister Plug cold start on intake and fuel rail Fix up wiring harness (need to get electrical tape and heat wrap) Figure out coolant line Put rest of engine together Finish welding in bolts on drivers side Clean up passenger side Fix seat tracks Put washers on front suspension Weld Exhaust Put body back on
Hope to get it all done by before Sunday, wish me luck
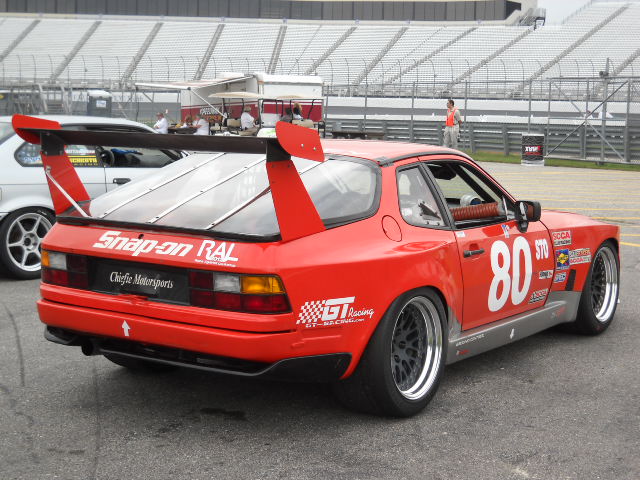
Down the road, with this car, when you want more power than the 2.8 can give, just start a 3800SC build. You have done a very good job, a ton of work. BUT! do all that work on a 3800SC and you will get 2 times the power for your money. And you just might run with that porch.
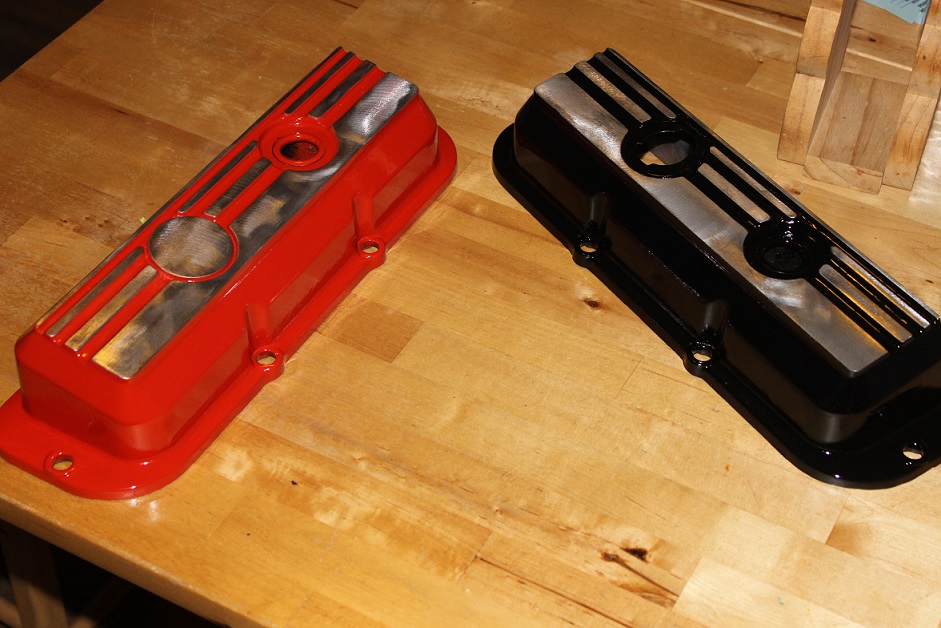
I am thinking about it! Not sure yet what the future will hold. I unfortunately took a bunch of pictures with the family camera and almost all of them have been erased besides this one... I made my valve covers different colors.... Why? I think it looks cool.
As a good tip... instead of taping off the aluminum stripes that are exposed, I put a shop towel in a sanding block like I would sandpaper, and soaked it in brake parts cleaner, then ran it across the top and it took all the paint off. Engine enamel (which these are painted with) is really really easy to take off before it gets heat cycled. I baked these in the oven once I painted them and took the paint off the stripes
So my cold start injector is deleted and there is no issues with starting.
I had the worst luck ever this weekend, I go to bleed my brakes and the 6mm line from front to back explodes. It takes so long to find a replacement because no one carries it. Finally hours later one autozone had two 6 foot pre flared sections with the wrong sized fittings. Got a coupler and the right sized fittings. Stupid fittings, 6 mm fittings wouldnt fit the 6mm line. Had to drill them out, and reflare the line. Finally got that in, bleed the rear left caliper, all is good. Then the bleeder broke off on the passenger side rear caliper. These are only a year and a half old calipers. I tried everything, welding to it, welding nuts to it, drilling it out and hammering a screw driver in there, heating it... Nothing worked
I looked on the forum and everyone had basically said on previous threads to buy a new caliper. I went and bought freeze off instead, the spray that actually freezes the bolts and cracks the rust. I did this while alternatingly heated it for around and hour, then cut an easy out to the right size and welded it to a socket, and finally it came out!
Such a successful moment. So if anyone else has stuck bleeders, I suggest the same technique. Everything else went smoothly, just a 12 hour detour really
I have around 250 miles on the new engine, I will take a gopro video soon and post.
Everything is running well, oil pressures are at 40 psi when warmed up at idle. There are no weird smells or sound and everything is as it should be.
I am going to need to get a new flywheel though because the one on the car right now is only half correct. All the holes are drilled but the weight is missing from the back. So it vibrates, not terribly, and way less than with the 88 flywheel, but still it vibrates. So that will be annoying to change. Anyone have an easy way of doing this? I would love to not have to drain all my coolant and replace it/ undo everything just to hook it back up. I need my car for getting to work this summer so it cant be off the road more than a weekend at a time. I think that could easily be a weekend job though.
I need a new gasket for the sunroof, and I need to get real dew wipes because the chrome ridge that goes over the door panels with these dew wipes messes up how the door skins get aligned.
Goals for this summer are as follows: Flywheel New rims and tires Coilovers New front springs Brake upgrade (will depend on wheels I get) Painting the floor I would like to do a roll bar with racing seats and harnesses but I don't know how feasible that is. Custom external gauge pod with gauges Fiberglass door panels New transmission (maybe f23 but most likely not) 7730 Swap
And then I want to turbocharge it or at least get that stuff going
If I cant get it done I will be making a new more stock like exhaust for my car because side exhaust is really really loud all the time.
Well with the new tires with stiffer smaller sidewalls my car was scary on the highway with the poor alignment, I slotted the upper control arms to slide the ball joints back to put the wheels in negative camber vs positive camber they were in... Also I painted my swaybar and reinstalled it.
OK! Finally posting updates as I sit in Biomechanics class. I was so sick of PIP and editing every image down to size because my camera takes pictures all around 5mb. So I got a photobucket finally! I am going back through and uploading everything through PIP again since Photobucket became greedy, PIP is now much more flexible. I still have not taken pics of my new exhaust except with my cellphone so sorry for the quality! All of these pictures are from the summer
Replacing my flywheel (which was supposed to be a brand new flywheel for 86-87) with a properly counterbalanced flywheel, now the engine is so smooth
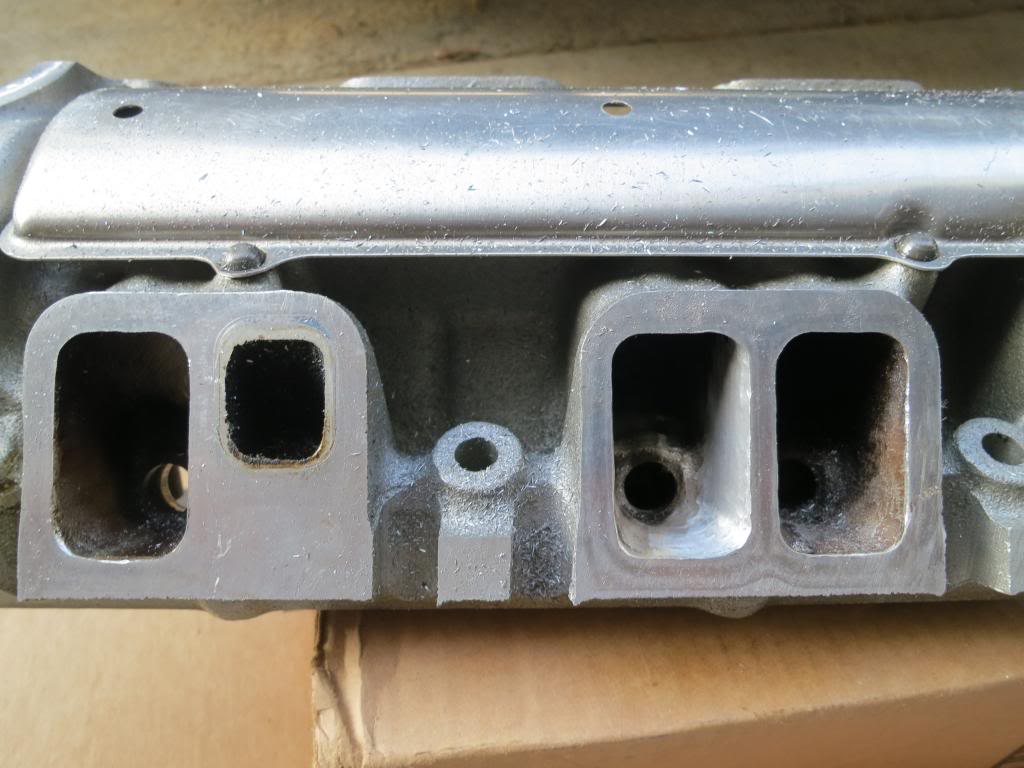
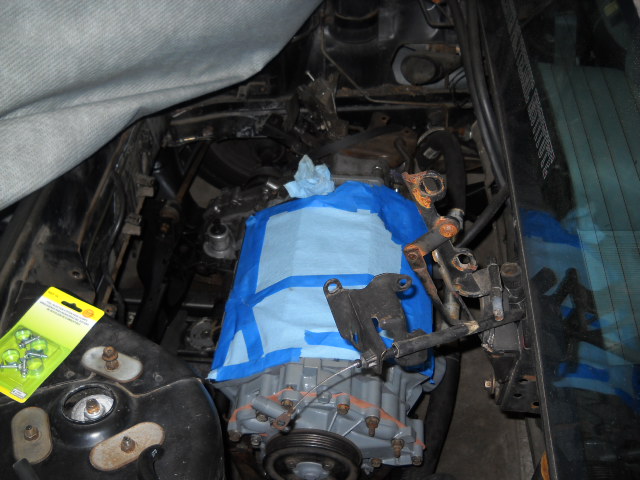
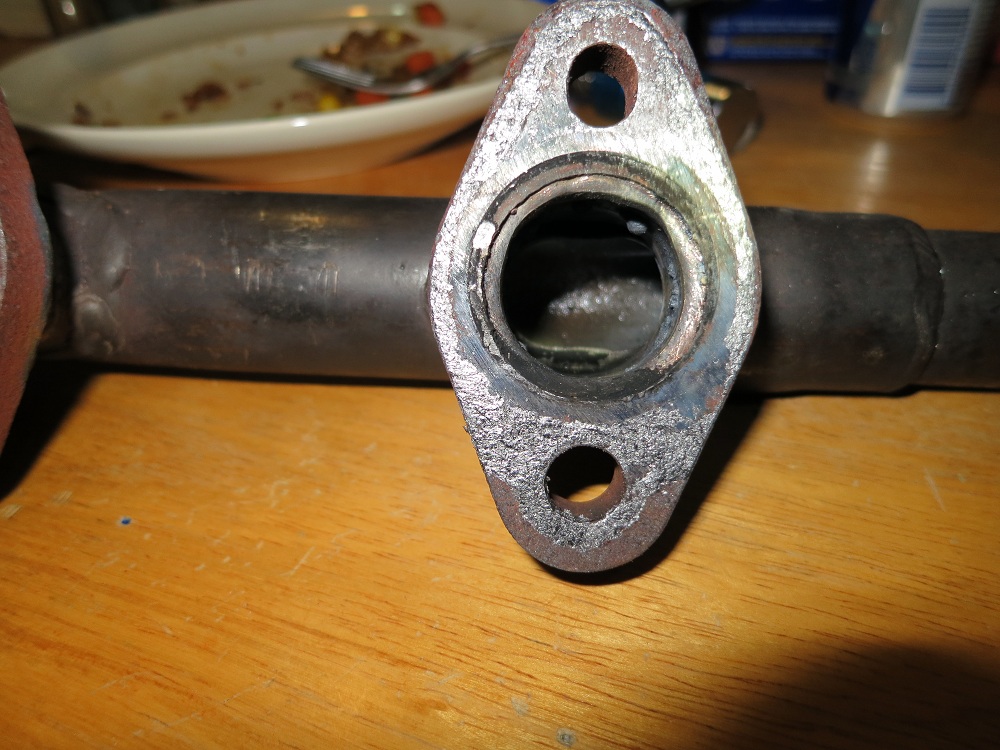
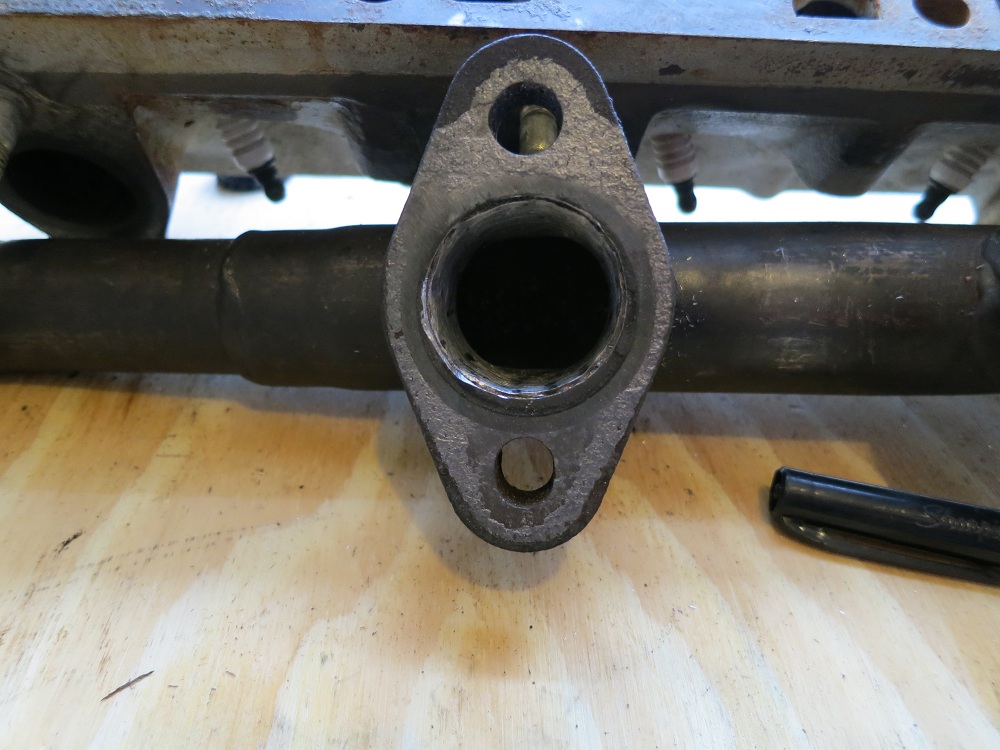
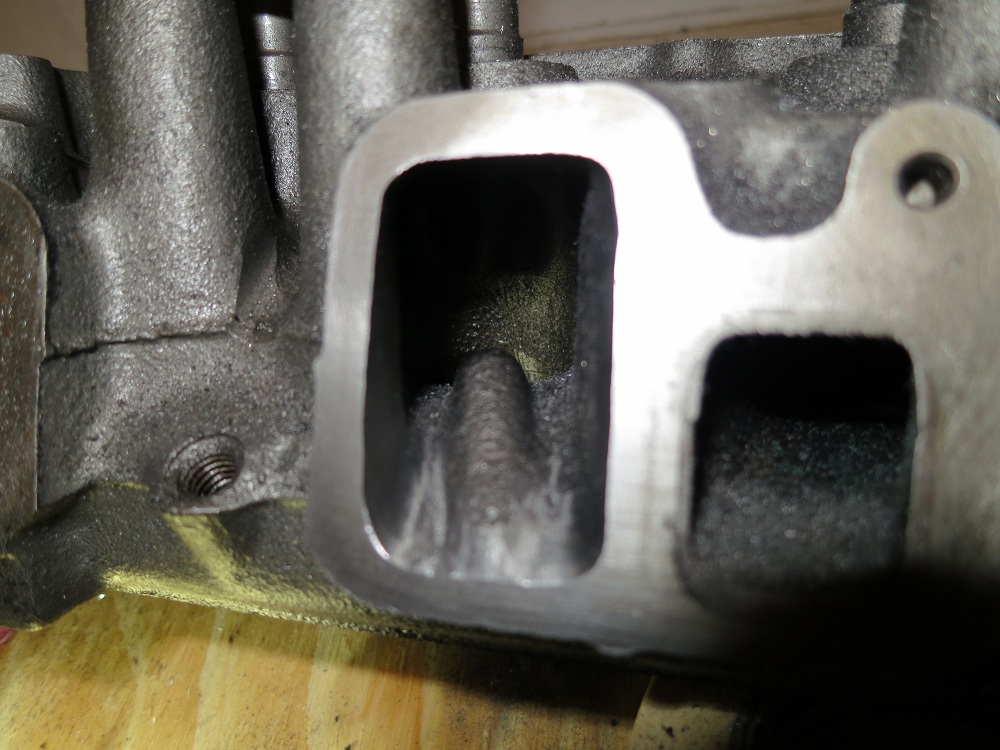
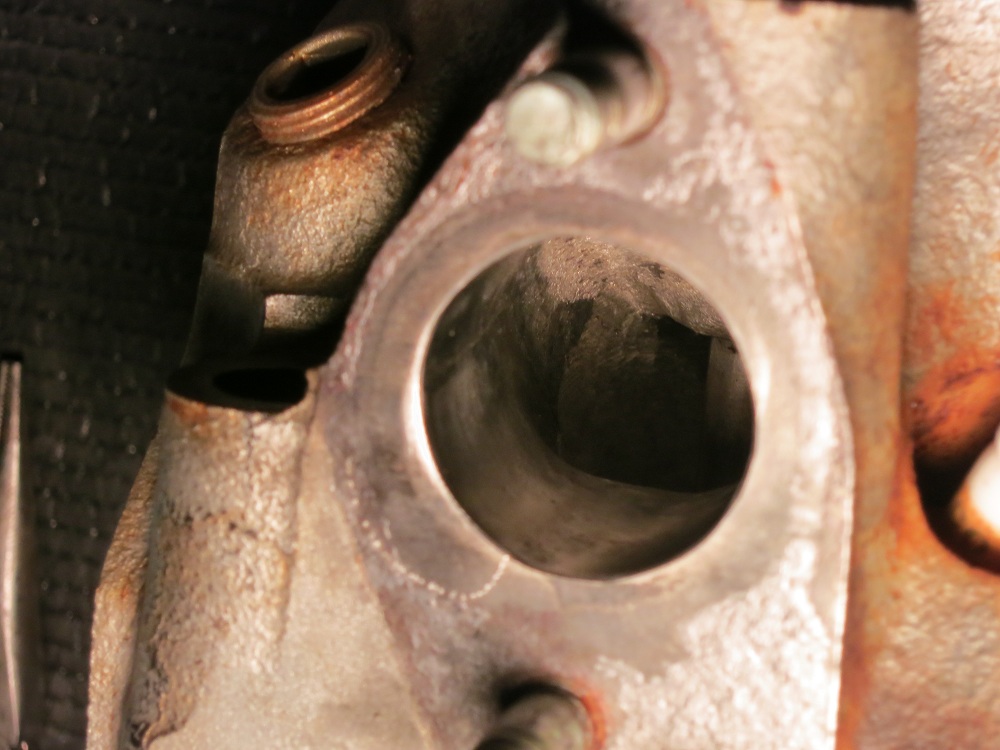
My car started leaking a ton of oil from where the LIM meets the block. I guess this happened because the heads seated. To prevent it from happening again, I ground a groove into the block and into the LIM where they meet to hold the RTV bead
I also opened up one of the ports in the LIM a little more because I could see it did not line up as well as the other 5 due to carbon buildup
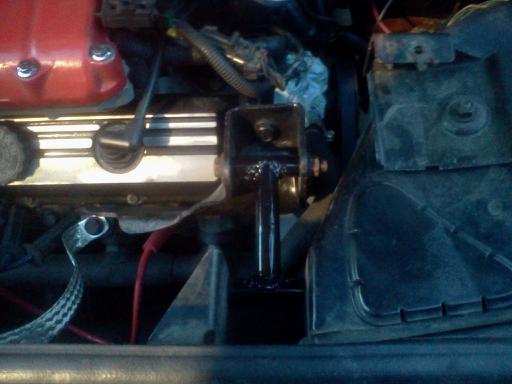
I also made a temporary solid dog bone since my old one was terrible and the engine was moving a lot. This is made from the steel sleeves inside the stock dog bone welded to some steel pipe. It is actually really square in real life but looks weird in this bad cellphone picture. You can also catch a glance of the massive ground strap I bought, it is bolted to the head, and bolted to the trunk wall. I hid the bolt head in the trunk behind the carpet (can't see that in this pic)
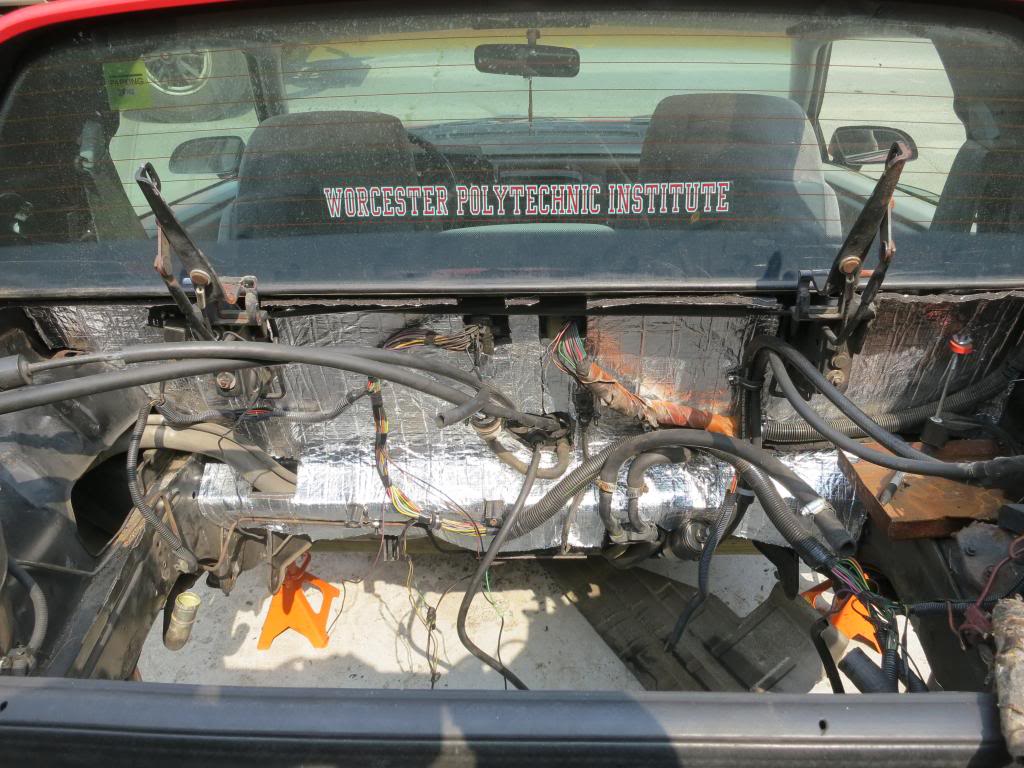
I also really cleaned up the Firewall, I twisted off all the unsightly sheetmetal brackets and replaced them all with weldable studs and secured everything with stainless cushion clamps. I also bought flanged stainless locking nuts from McMaster, which are really cool and spin on really easily. I used some heat insulation in the firewall, it is some nice brand with aluminum on both sides good up to 2500F. I made a template first before cutting it out and installing it. I need some large plastic rivets or something to really retain it well, but it stays in there. You can see here my not stock location of the fuel filter and fuel lines. The filter fits right behind the heat shield.
And thus concludes my engine/engine bay work for the summer.
[This message has been edited by zkhennings (edited 03-09-2020).]
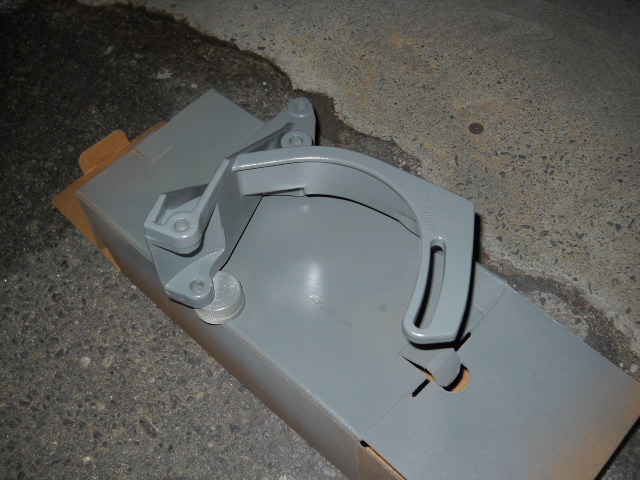
Now I'm moving onto my coilover conversion and GrandAm Brake swap. I swapped all 4 calipers with Grand Am front calipers, installed Russel stainless steel braided brake hoses, painted the calipers (well 2 of them because I decided the paint was not the best, and got the G2 epoxy caliper paint which I have yet to use).
I bought front hubs machined by Fieroguru and they worked out great! I installed new timken bearings into those and removed all the splash shields. My old rotors were gross and pitted.
I used heavy duty AC Delco rotors, and bought some nice Performance Friction brake pads. Because they are made for maybe a weekend autocrosser or racer, the bedding process included heavy braking from 100+mph down to 60mph 3 times. I also installed a full sized Blazer Master Cylinder and swapped the Fiero reservoir onto it. I also had to grind the front brackets down a little, but this is common knowledge so no picture. The brakes are great, and I have the perfect amount of pedal travel. At first I had very little travel until the brakes seated themselves. I think I will do the S10 booster swap in the future, because although I can lock up the tires fine, I have to push pretty hard. This picture is not from when the brakes were first installed. As you can see I angled the brake hoses so they are never bending at a tight radius. I retained them to the struts with cushion clamps.
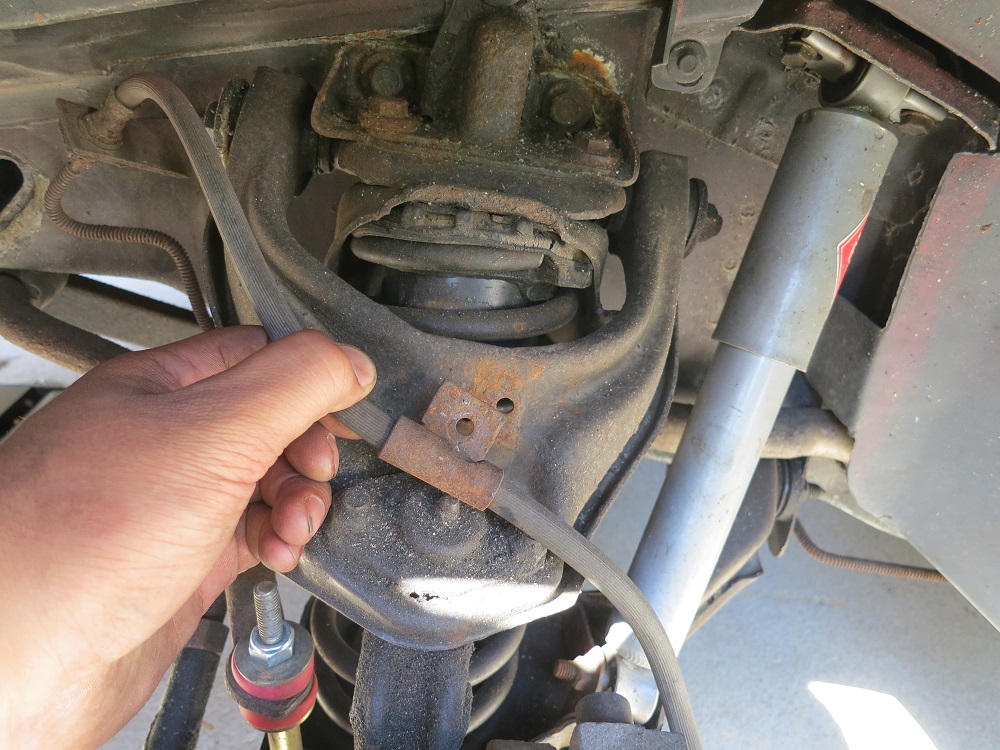
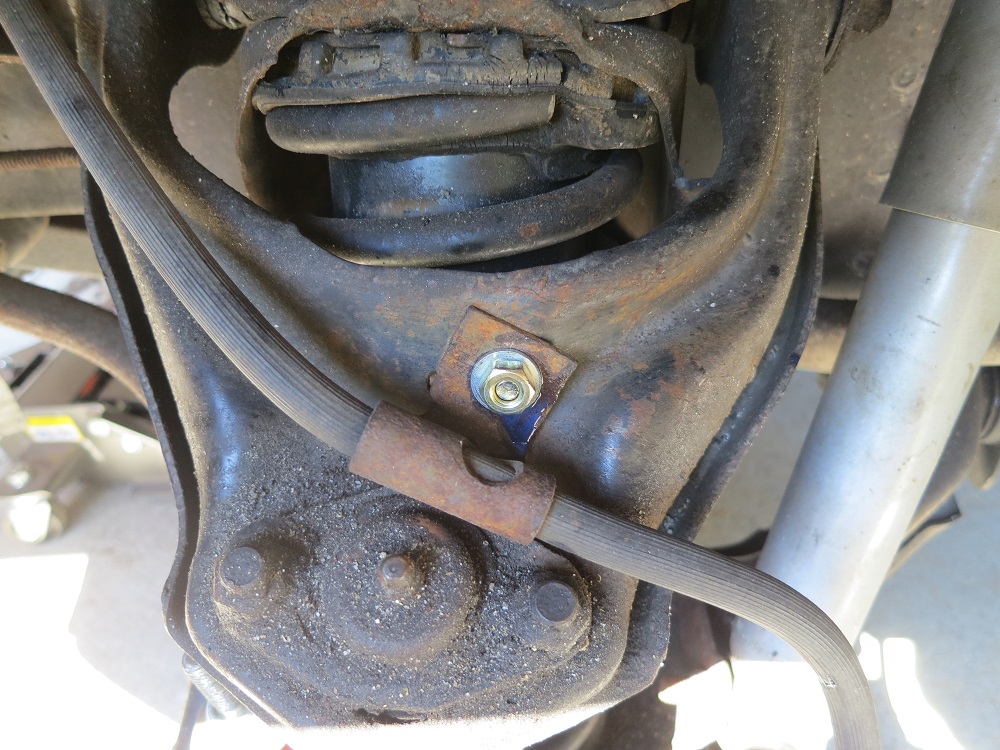
While I had the front hubs off I decided that I was sick of bottoming out all the time and cut my bump stops. I could get most of the way around with an angle grinder, but then cut the last bit with a dremel with a cutoff wheel. I put the grinding disk on the angle grinder and pressed it flat to the cone to make it nice and flat on the bottom to weld to. I cut around an inch of material from the bumpstop and welded them back up with flux core wire. I also added the cup pieces to the polyurethane bushings I had previously installed in the front suspension.
And my tools organized on my Fiero mat
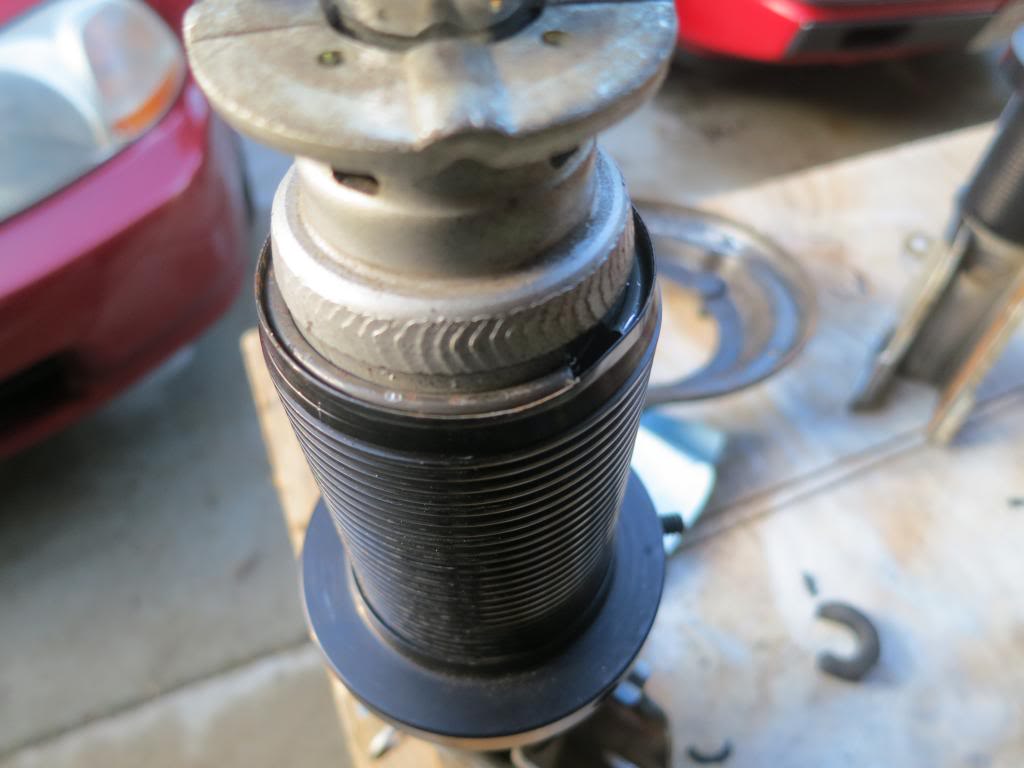
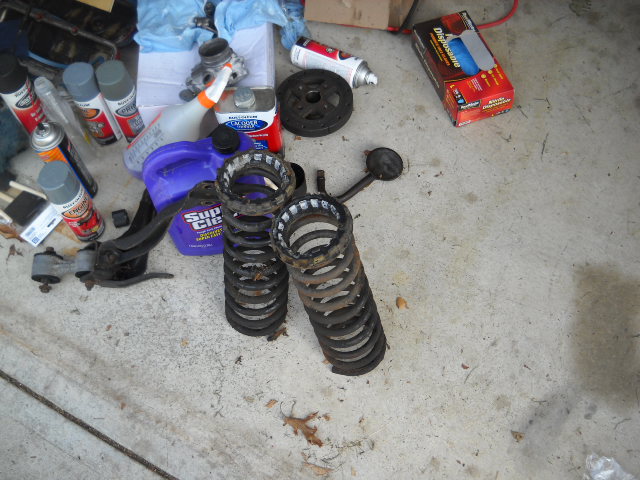
And now for the rear coilovers. I have KYB shocks up front, and struts in the rear. I bought 350# springs from summit, as well as AFCO (?) Sleeves for monroe struts from summit.
The spring perches came off wicked easy with the angle grinder, I did them all in one cut, went most of the way through, then whacked them with a hammer and they popped right off
Then I ground them down on a bench grinder and painted them with some epoxy paint I had where I exposed the metal.
Here are the parts all slid into place
Now what I did next I had to undo, because I thought I could install the top hats upside down and get some extra travel. I didn't take pictures when I redid everything with the top hats in their regular orientation. But I tacked some 2.5 inch exhaust tubing to the top hat to center the springs. They are perfectly centered, it appears off in the picture as the paint is still wet and shiny.
I trimmed the bump stop I had on the strut to gain some extra travel
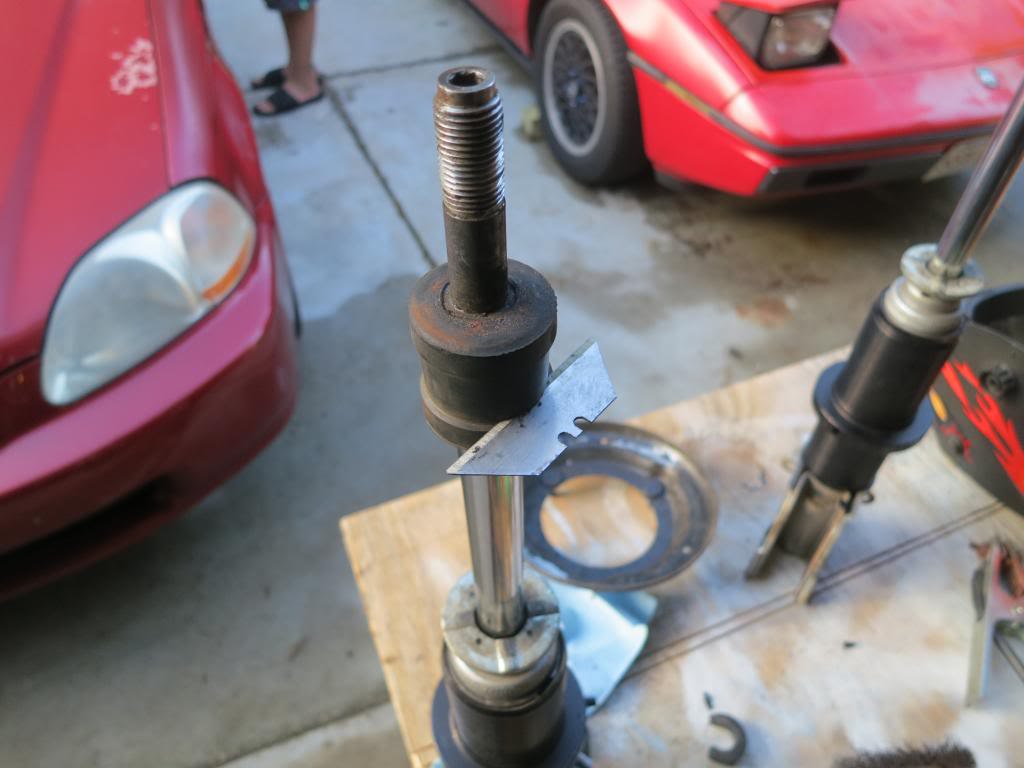
Here is the snap ring installed into the top of the sleeve. I squeezed it in there with a punch and hammer. I then RTVd over the top of it. Since then the sleeves slid down a little until they settled, they are only aluminum so I am not surprised they deformed at the bottom a little bit.
And that is that. I wish I had a picture of the ride height which I think looks very nice with the GT wheels. I also installed some camber bolts I bought from RockAuto. They came with one of the offset washers being the wrong size. I called the company who makes them to see if they could send me one, they were very unhelpful. I called RockAuto and they checked my order and immediately shipped me a whole new camber bolt for free, and it came only two days later! I was really happy and wrote them a good review.
Next up is the exhaust work
[This message has been edited by zkhennings (edited 03-09-2020).]
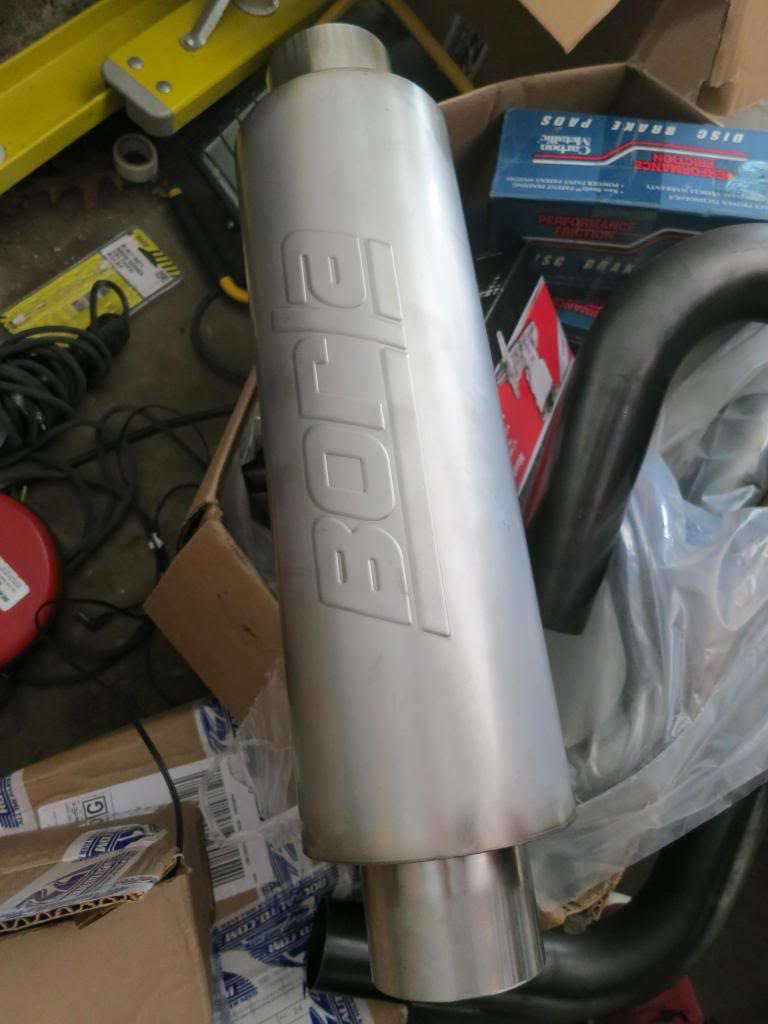
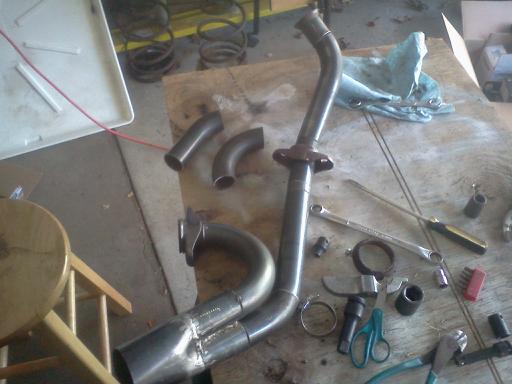
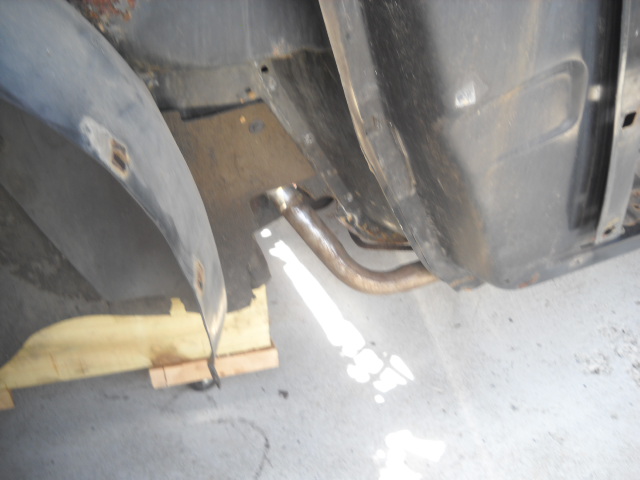
I had a side exhaust with 2" tubing and a cheap Thrush Turbo muffler and it was loud and raspy and droned like crazy. It also made it harder to change the starter and the oil, and brought more heat against the firewall and wiring. So I decided to fabricate a new Y pipe that went the other direction over the transmission to 2.5" tubing that snakes next to the trunk, through a 3" Borla XR-1 muffler with a lifetime guarantee (pretty much, million mile guarantee, 304ss). I have a flex coupling in one side of the Y pipe, and one after the Y pipe meets the rest of the exhaust. I don't have pictures of the rest of the exhaust at the moment.
So I am planning on going 3800 at the beginning of the summer once I graduate college. I will be getting probably an 03 WRX as soon as I have the money which will be my daily driver.
Because of this, I just bought mild steel mandrel bent tubing. I spent less than $100 on all the tubing and gaskets and couplings (but more on the flex couplings). I bought smooth adapters to attach the 3" Borla to the 2.5" exhaust. I went with the 3" because with the 3800 I will be using a 3" exhaust. It was amazing practice, I got pretty decent at welding the thin tubing (16ga) I painted the exhaust with high temp header paint, but it has not done amazingly, especially in the winter here. I will repaint in the spring.
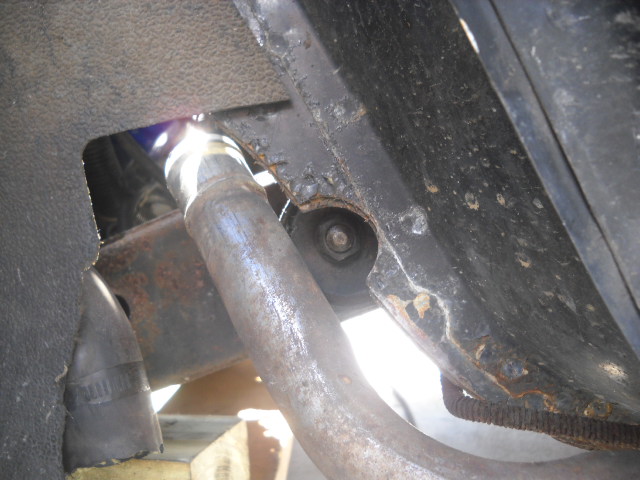
I first solid mounted the exhaust when I made it but that was a terrible idea. It sounded horrible in car, and was incredibly loud. I have since rubber mounted it with rubber exhaust mounting blocks bolted to the cradle. I made the axis of rotation of both almost perpendicular to one another, so it supports the exhaust in place with only two mounting points. The blocks are easily unbolted to remove the exhaust. I went to a local exhaust shop and picked up the blocks and steel rods that hang from the blocks for $5 a piece. They are around $15 on the internet.
For this project I did not want to be welding with .030 flux core wire. I found a great welding supply store in Boston for the hobbiest. I bought my brand new 40cf bottle outright for $100, and its only $20 to fill the tank. So much better than any of the huge industrial suppliers which is where most people I know get their tanks filled. I don't live in an area with many shops like that, I have no automotive paint stores nearby either. Just chains like autozone. Here Fieros are also expensive.
So I bought some .023 solid wire and a regulator from Harbor Freight. Honestly it works perfectly at maybe a third of the cost.
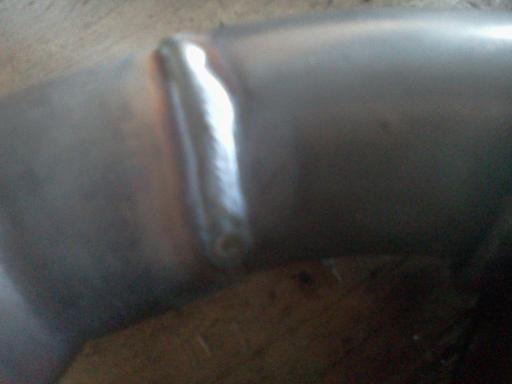
WOW! I had gotten so used to my aweful flux core that I forgot how it feels to weld when you can actually see the bead and don't get splatter everywhere! I managed to put down some nice welds on the exhaust tubing. I would weld around a third of the circumference at a time, grind it flat where I ended the bead to give a nice already sealed surface to continue. This allowed me to put down some pretty flat welds. Now here are pics and excuse the quality. The exhaust is awesome by the way. It is loud, but sounds amazing, almost exotic. I picked up a ton of seat of the pants HP from doing this (maybe 10). I have no restrictions in the exhaust, and the firewall is much cooler. I have had no problems with trunk heat even on long drives.
Box of parts including Muffler and the shape of the mandrel bent tubing I bought.
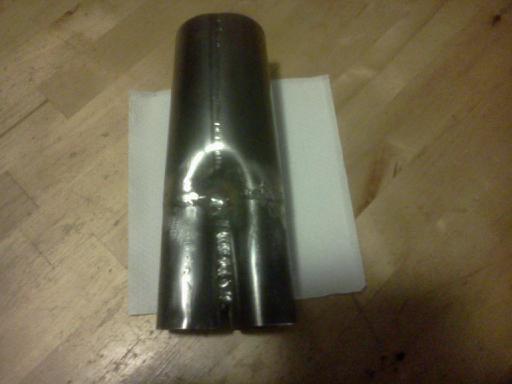
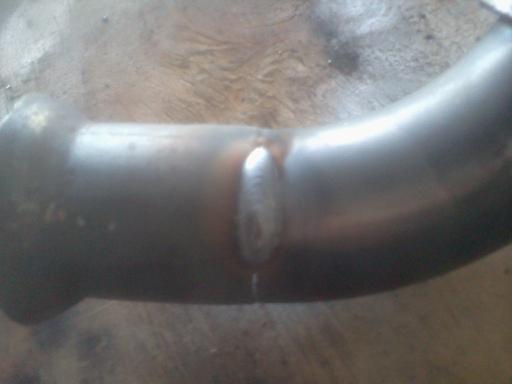
Here is what I made for where the 1.5" tubing meets the 2.5" tubing. I slipped dowels into the 2.5 inch tubing and hammered the middle together to form the shape I welded the 1.5 inch tubing to.
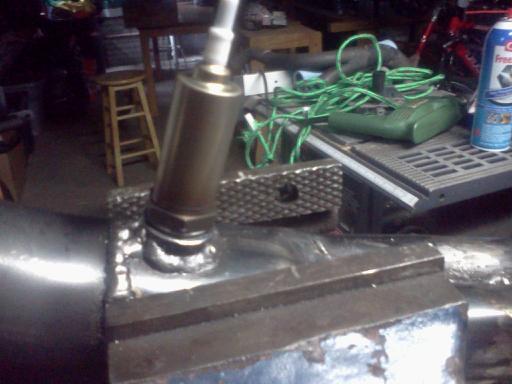
Here is the O2 sensor screwed into the bung, I made a major mistake here and screwed the O2 sensor in without letting it cool fully after welding, and it SHATTERED the thread in the O2 sensor. I had to destroy the O2 sensor to get it out and royally screwed up the thread in the bung. I was really bummed, but a quick search found that Autozone sells O2 thread repairers, which is pretty much a massive short tap with a square opening for a 3/8 inch wrench. It worked great and I was able to save the bung.
Here is how the welds came out at medium heat, lower feed, and me making loops
This picture is the tubing welded to the cup ends from the stock Y pipe. I cut them off to reuse them.
And here is the routing. The rest of the exhaust was not done at this point. I do not know if anyone else has done this before. Most likely.
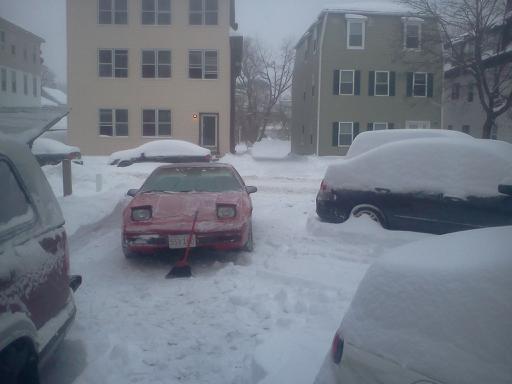
And that's all for now, I bought some snow tires and have been enjoying my Fiero in the snow
[This message has been edited by zkhennings (edited 03-09-2020).]
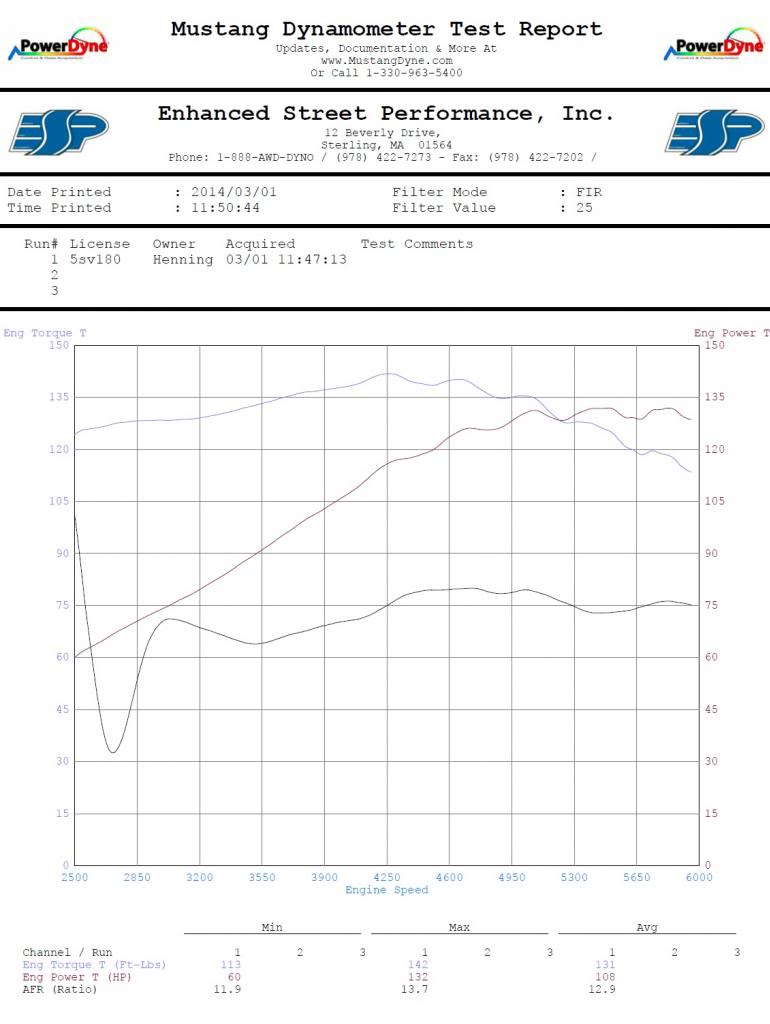
I got my car Dyno'd over the weekend at ESP in Sterling, MA. The dyno used was a Mustang Dyno. Because I am making max power at such high RPMs compared to stock, I can't wait to see if there is a noticeable increase in power when I modify my intake and bore my throttle body!
[This message has been edited by zkhennings (edited 03-09-2020).]


 Good luck with her.