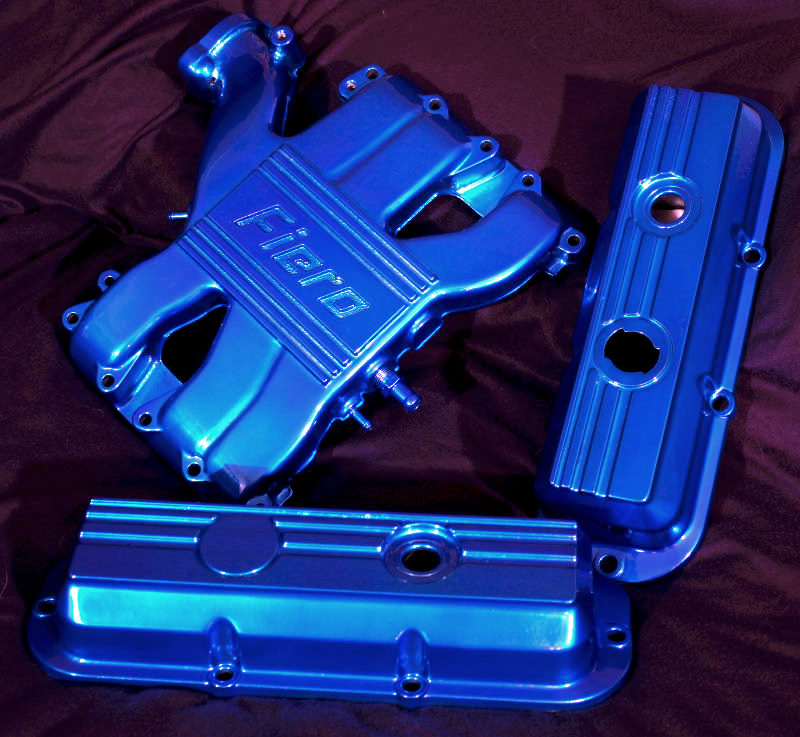
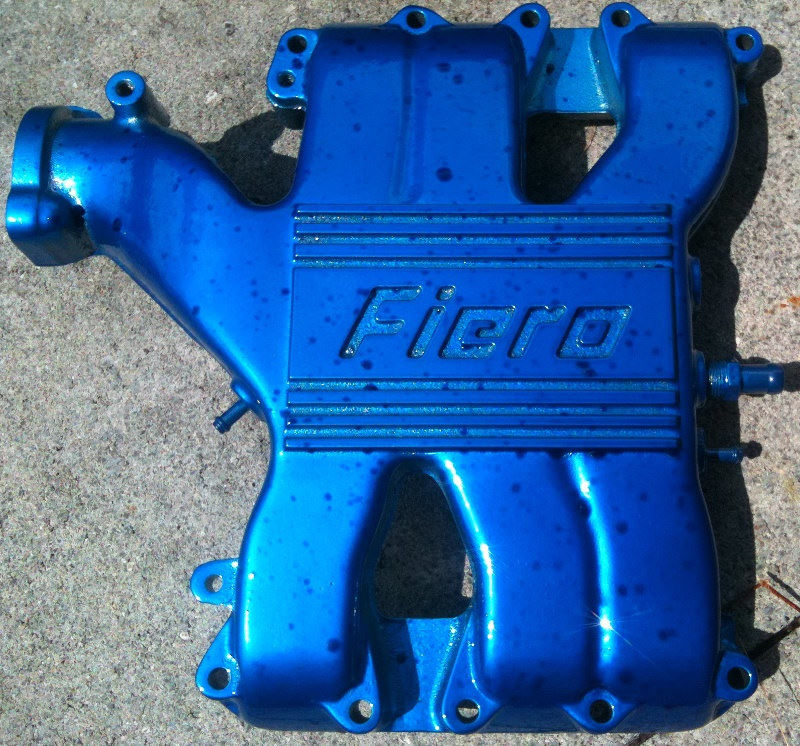
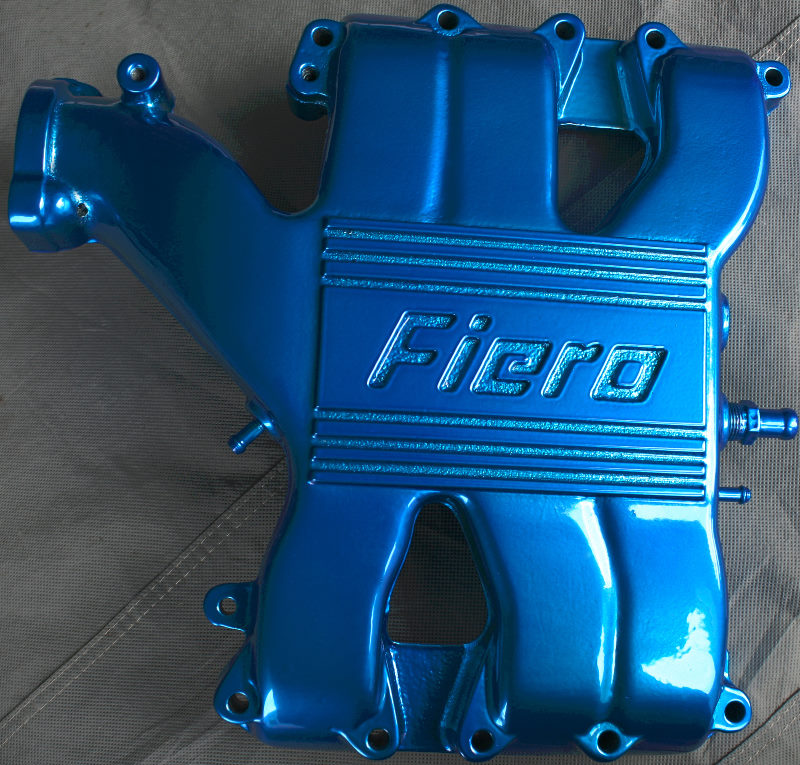
I've got a intake manifold that looks just like the color posted above. It's a 3 stage powdercoat: Silver Blue and clear with the letters in black. I have it on the car right now as I get the original one powder coated a different color... But it's coming back off in a couple weeks if your interested. PM me if you're interested.
If not, these should give you an idea of what the finished product will look like.
All the work so far looks great btw!
[This message has been edited by MC2Rush (edited 02-03-2012).]
Nothing new.... Lots of other stuff going on right now, so Fiero has been covered for a while. I am just keeping the thread from going to the dreaded archives!
Congrats on your new acquisitions and amazing refinishing of parts!
What paint did you use on the quarter window rear insert frames, was it Rustoleum black satin or ??
I guess your too busy with this build to do some RPO code sheets.
I would really like some done for my two Fiero's. Any idea when you will be back doing them? You did a terrific job with the RPO code form, it seems a shame to give-up on it now.
Hope to hear back some positive news from you. Keep up the great work! Cheers, John
------------------ Now new owner of a Black TTop 88 Fiero GT and owner of a Silver 88 Fiero GT. Also a second time owner of an 85 Fiero GT. Bought my first fully loaded Red Fiero GT new in 1985. Fiero's are Fabulous, Fix'em and have Fun! Note, Avatar picture is Mr. Bean (not me, ha ha).
Yea, its been a lot of sanding, sanding and more sanding everything! Yes, you are correct, it is Rustoleum satin black. It came out looking like the original plastic, and not like it had been painted.
As for the RPO sheet's, I have not given up, I just need to find a better ink, that does not react so bad to water. I should have something ready to go hopefully in the next couple of weeks.
I am getting ever so frustrated, that I swear I just want to throw in the towel on this restore. Every little thing has fought and fought me along the way.... I have the headlight buckets "Professionally" powder coated, and they screw them up a total of THREE TIMES! Almost ruining the Timo buckets as they were stripped of their coating between tries and started to rust....
I call a glass company, order 2 windows, and go to have them installed. The guy that came to do them the first time, spent 3 hours and got really no where, other than to get the regulators out that were corroded, I fix what I can, and replace one of the tracks, and call him out again. This time he spends 3 more hours, and has problems getting the rivets out of the tracks, as well as removing the guide from the old glass. He comes back a third time, and manages to BREAK the passenger window! It takes them 5 weeks to get another glass, and I get a call 2 days ago they are gonna come out and install it.
The latest is when I powder coated the upper plenum in Chrome, it out gassed and bubbled. It took 2 hours and all sorts of strippers and one heluva mess to get it all cleaned up and ready to go again. I heated the plenum for over an hour at 450 as recommended to make sure any trapped gas was removed before powder coating. This all done, I laid down the chrome powder on the already hot plenum, and it came out amazing! No bubbles, and a perfect chrome like finish! Before it cooled, I switched to the transparent blue to coat again, to give it a nice blue candy effect. This powder was manufactured by craftsman, and seemed a little coarser when I opened it to fill the canister. The AllPoderCoat chrome is a much finer powder.
Well, I set it all up, and started to spray, and clumps and chunks came out of the powder gun! It made a blotchy mess of the plenum, and ruined all the work up to this point... yet again!
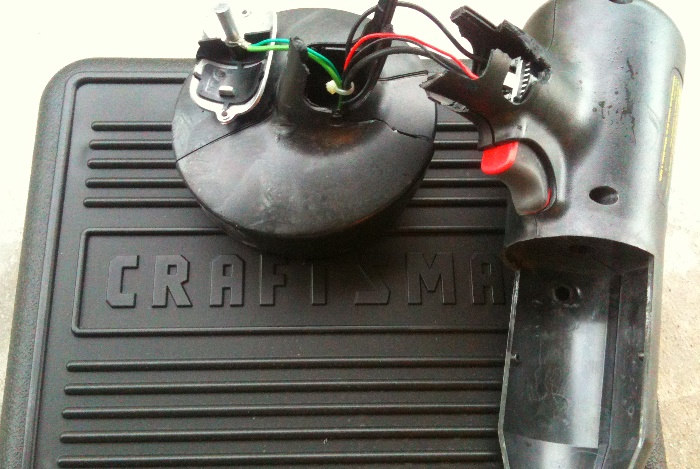
This is getting ridiculous, and frustrating.... so frustrating in fact, that I now have to have to order a replacement powder coating gun, as something "happened to it" when it started spitting out clumps of powder ruining hours of work..........
[This message has been edited by JohnWPB (edited 05-08-2012).]
Wow man ain't that a ***** ... Never fails when you are wanting to do something cool that it rains on your parade. Don't feel bad, go take a break, watch a movie, drink your favorite cold beverage, kiss your wife and kids and remember that you are blessed to be able to have such a cool project going. Then after you get sufficiently chilled out go back and kick it's ass!! hehe good luck man and peace
John, Thank you for confirming the Rustoleum satin paint on the plastic quarter window frame inserts. I will definitely give that a try, but have not had good success with rattle-can paint application as I usually get paint runs.
Regarding the RPO code tags, would laminating them be a possible solution? Spray adhesive or rubber cement could be used to mount the laminated RPO tags to the fender, just a thought.
I'm sorry to read about all the obstacles your encountering with your build and the "accident" you had with your Craftsman powder coat machine. If you purchased it with a credit card, some credit card Companies such as Visa will replace the item if it's lost, stolen or broken within six months of the purchase date. Thought I would throw that out there just in case and keep my fingers crossed for you.
I'm sure your not the only Fiero owner to encounter overwhelming hurdles, it's part of the restoration process and we just have to grin and bear it because in the end it will all be worthwhile, and we can be very proud to show-off our accomplishments.
Hang in there and keep up your amazing work! Cheers, John R.
The part I am not looking forward too, is another 2 hours cleaning off all the powder coat again
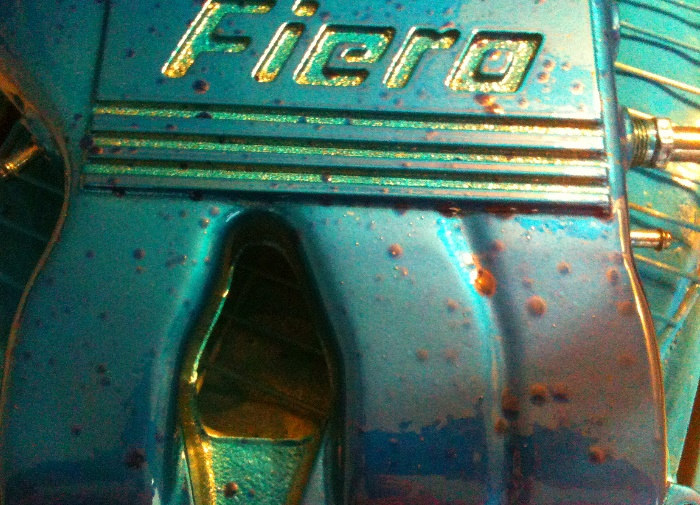
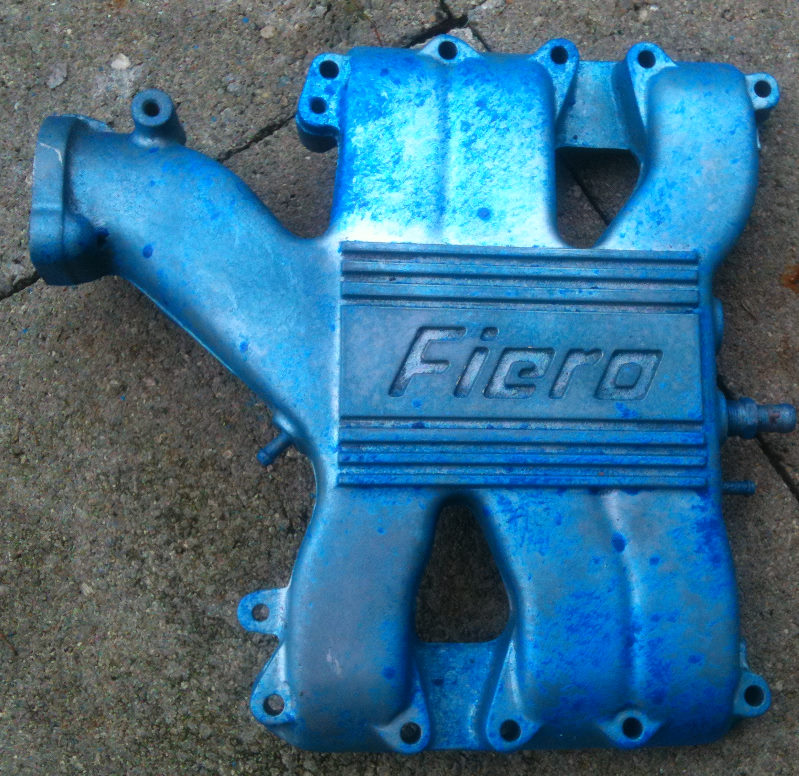
Here is a better picture of what happened to it. If it was not for the clumping of the crappy, inferior, no good for nothing clumping Craftsman powder, it would have came out correctly.
This was done by heating the part to 450 degrees for an hour, taking out of the oven, and spraying on the chrome, which melted on contact and looked great! I then switched to the blue, and with the intake hot, the clumps melted in place, with no chance of fixing it....
Originally posted by JohnWPB: .. Here is a better picture of what happened to it. If it was not for the clumping of the crappy, inferior, no good for nothing clumping Craftsman powder, it would have came out correctly. ....
I thought you got rid of that crap when you tried it at home. That was no good for sure. Get some good powder and a good gun. Also I'm not sure the parts should be that hot that the powder should melt when touching it. The baking is part of the curing process. Just a thought.
Geez... I can t believe all your luck. I think u brought some of my luck home with yah! I've never tried using powder coat. Only done tri stage with paint. Been pretty successful with the rattle can! I sure hope your next shot goes smooth. Looks like its gonna be beautiful when its done! Just breathe and go at it again!
------------------ 1984 Indy Fiero SE Pace Car Replica #770 "SE" Stormtrooper Edition Rescued, resuscitated and reversibly modified! (I'm so not done yet!) Poly all round & Black Drag DR-34s Frt: 225/45 on 18x8 (47 offset w/ 8-9mm spacer) 1.5 coils cut off 1984 WS6 springs Rear: 265/35 on 18x8.5 (45 offset) Coil-overs w/ 10 inch 300lb springs & 7 inch sleeve
Ok, I bought the ver last can of Permatex gasket remover in the tri-county area it seems! This stuff works fantastic for removing powder coating! The problem is, that it seems to have been discontinued, as in no longer manufactured! The guy at my local part store, (By local I mean just 3 stores locally, and they KNOW parts and service!) called 3 distribution warehouses, and can not get it any longer If any one wants this stuff, I suggest calling local parts stores, and googling it and buy it up while it is available!
This is what it looks like:
I sprayed the intake with it, let it sit like 5 minutes, and washed it with a good spray nozzle. This is what it looked like after the first spray down:
I repeated this about 3-4 times till all ill powder coating was off. Once you spray it once, the top layer washes right off, and the rest becomes kinda "goopy" and won't just rinse off. Thus, why I did it a few times. If you have a pressure washer, you could probably spray it on, let it sit 5 minutes, and hit it with the pressure washer to remove all of it in one shot.
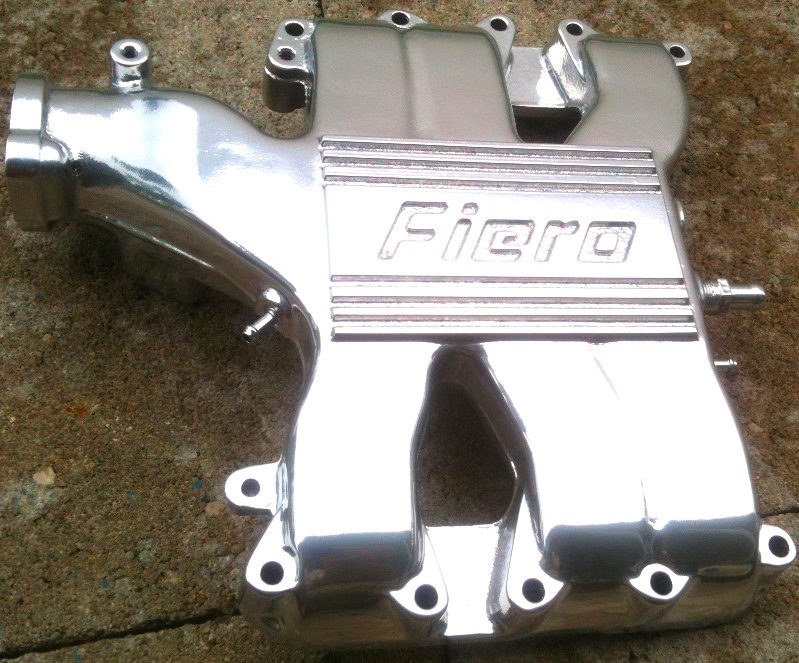
Once it was all removed, I sanded it lightly and degreased it all over again. This was like DeJa'Vu! After that, I put it in the oven at 450 for an hour, to heat it up and remove any gasses and such that created the bubbles 2 times ago when I did this! I took the part out, and with it still hot, hit it with the chrome powder coating. (The new Craftsman gun came in the mail yesterday ).
This is the result:
I have to say, for just a plastic coating, that is melted in, it really does compare fairly closely with chrome.
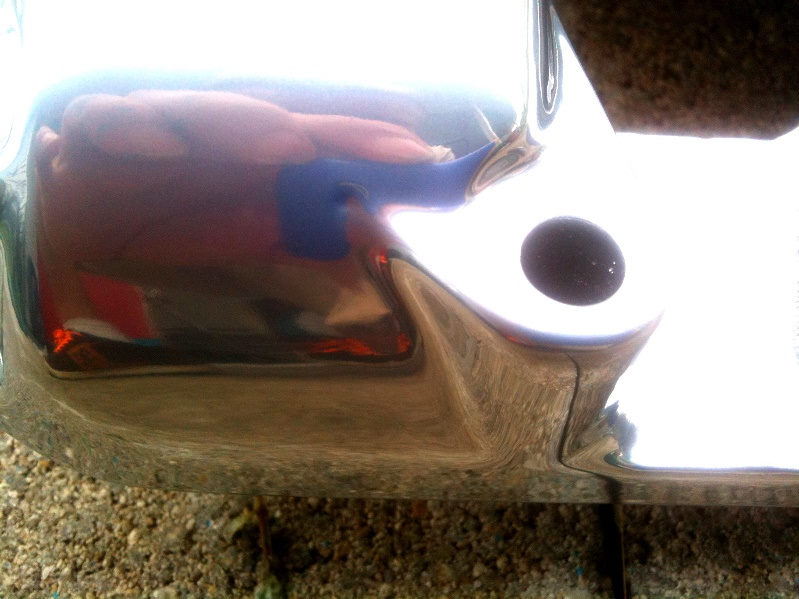
Here is a nice close up, so you can see the reflection of my iPhone, and the cement it is sitting on:
I am now waiting for the transparent blue powder to get here, tomorrow or the next day, to finish it off.
DITTO. Is the blue powder the same brand as the one before? Just think of doing this for the third time
Nah... No.... Nope... NO! NO! NO! Are you KIDDING ME! ! ! ! haha I will NEVER use Craftsman brand powder coat material EVER again.
This time I bought the same brand (AllPowderPaints.com) as the chrome I used. They have a huge selection of colors, at almost half the price of Eastman. The color is called "transparent Mountain Blue". I will put a layer on, and then go over with the final layer of clear to finish it off.
[This message has been edited by JohnWPB (edited 05-17-2012).]
Victory is MINE ! ! ! ! After all the bumps in the road, and problems, I think I finally got it LOL!
I am very happy with the results! Now I am in the process of sending the brand new Craftsman Powder Coating Gun back! I didnt notice till I started, it is cracked everywhere! This has allowed it to get out of shape so to speak, and it is virtually impossible to get the powder cup off to refill it. There were quite a few reviews saying it is of very cheap build quality, and that is an understatement. I think I just got lucky with the last gun... not so much with this one.
I have the valve covers to match in the oven curing now......
Ok, got the valve covers done... so here are the 3 all ready to go! Just need to order a upper gasket kit, and get ready to swap them out.
I was going to do the silver stripes, like the stock part that is left bare from painting.... Looking at the photo of the blue plenum like mine (Top post on this page) I decided to do it all blue instead. With the nature of the candy coating, the grooves and top portion of the cutout on the plenum reflects light differently, giving it a natural 2-tone appearance.
[This message has been edited by JohnWPB (edited 05-18-2012).]
LOOKS GOOD keep going on the posts it give me ideas for my clean up that I wouldnt think of otherwise. Your right it all in the details small thing add up.
What is neat with the candy coating, is that it really does change shades of blue, depending on how the light hits it. None of the pictures above, no matter how hard I tried to take the photo's, matches the way the parts look sitting next to me here. I did a quick video on my iPhone, to try to capture it a bit better than a still photo.
[This message has been edited by JohnWPB (edited 05-18-2012).]
Ok, long time no update, and time to keep this thread out of the archives. It has just been too hot here to work on the car, and have been waiting for Fall and Winter, which are just around the corner. The new door glass is all in, as well as new window motors, so that's at least one more thing to mark off the list
Ok, long time no update, and time to keep this thread out of the archives. It has just been too hot here to work on the car, and have been waiting for Fall and Winter, which are just around the corner. The new door glass is all in, as well as new window motors, so that's at least one more thing to mark off the list
Ok, the weather has FINALLY started to cool down here! It has energized me to get back to work on the car. Just as I start to work on it a bit, the community I live in is giving me grief about a "non running vehicle" in the driveway. I have to get it taken care of with in a week or 2.
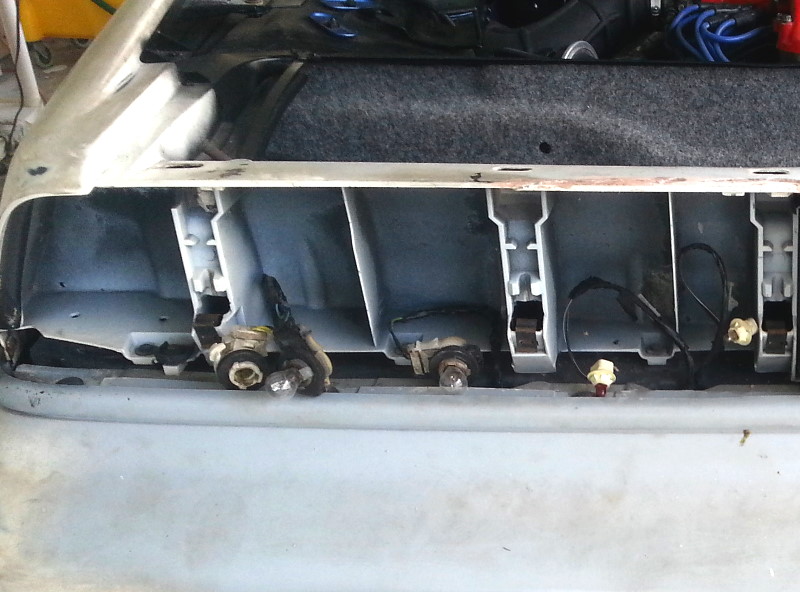
So, I decided to take it up and get it painted, so I can put everything on the exterior back together, and they can no longer say anything. I started to put the tail lights on today, and wouldn't you know it, another problem. (If you have read this thread, you know EVERY little thing I try to do, I get blocked by something... every single time). This time, there appears to be 2 lights on the left tail light assembly "missing". I think strange, looks like the fell inside the bumper or something.... As I look all around, I can not find the wiring harness, or any marks where it would have ever been attached like the other two clusters. Really!?
It's starting to get dark now, so I will wait till tomorrow, and dig deeper, and see if I can find where they could possibly be, have been, or should have been.
Ok, spent this afternoon working on getting the car to start and run correctly. Joey and his wife Jan came down, and were a LOT of help! Thank you!
Joey found that the TPS was only getting 3.1 volts, so I changed out the module for a new one, on a whim, and sure enough, the TPS is now getting its full 5.0 volts. The fuel pump is putting out around 21 PSI, a slight bit low, but good. Going back 20 minutes later, its still holding at 21 PSI, so there are no back flow problems and such.
Joey is coming back tomorrow, and we will continue to trouble shoot it.
Oh, Jan, was able to actually use her tiny hands and arms to reach up between the back bumper and wheel wells. She felt the 2 "missing tail lights" and was able to route them around the left, and now are in place where they should be! Problem solved!
Ok, digging through some boxes, I found a new Throttle Position Sensor that I purchased some time ago. I was sure that I had bought one, and just could not find it today while Joey was here. So I started digging tonight, and found it I replaced the bulbs in my two 500w halogen shop lights, and installed the TPS. Now to wait till tomorrow and hopefully get it running correctly.
For quite a while, it has just so overwhelming on what all has yet to be done. I would just look at it, get discouraged at it, and put the car cover back on it LOL. Now I am getting a bit of a "second wind" again, and actually wanting to work on the car and get it done.
[This message has been edited by JohnWPB (edited 11-10-2012).]


 Topic Closed


 I've never tried using powder coat. Only done tri stage with paint. Been pretty successful with the rattle can! I sure hope your next shot goes smooth. Looks like its gonna be beautiful when its done! Just breathe and go at it again!


 .... by the way John I'm still waiting on that CD