Pennock's Fiero Forum
  The Construction Zone
  1986 Fiero SE 3.4L pushrod build up (Page 3)

Post New Topic  Post A Reply
Email This Page to Someone! | Printable Version

This topic is 6 pages long:  1   2   3   4   5   6 
Previous Page | Next Page
next newest topic | next oldest topic
1986 Fiero SE 3.4L pushrod build up by justinchristie
Started on: 12-18-2008 02:49 PM
Replies: 232 (29112 views)
Last post by: justinchristie on 01-31-2016 04:49 PM
justinchristie
Member
Posts: 547
From: Clarington, Ontario, Canada
Registered: Sep 2006


Feedback score:    (12)
Leave feedback

Rate this member

Report this Post05-31-2010 05:45 PM Click Here to See the Profile for justinchristieClick Here to visit justinchristie's HomePageSend a Private Message to justinchristieEdit/Delete MessageReply w/QuoteDirect Link to This Post
Here are the pics of the JimmyS scoops. Before I reinstalled everything I coated the rocker panels with a fresh coat of paint.

I have a bit of an issue with the drivers side scoop, and the gab between it and the drivers door. The gap is tight, but it still fits. The door is sagging a bit, so I think I am going to reinvest into some new rodney dickman door pins to straighten it out.

I think the rear fastback clip may be off when i installed it, ...ever so slightly, ...and that might be causing the problem too.

But the door does shut, it just rubs a little.


------------------
1986 Pontiac Fiero SE 3.4L | The Fiero Blog (Since April 2000)
-----------------------------------------------------------
My Portfolio site | JustinChristie.ca

[This message has been edited by justinchristie (edited 03-18-2015).]

IP: Logged
justinchristie
Member
Posts: 547
From: Clarington, Ontario, Canada
Registered: Sep 2006


Feedback score:    (12)
Leave feedback

Rate this member

Report this Post07-06-2010 06:04 PM Click Here to See the Profile for justinchristieClick Here to visit justinchristie's HomePageSend a Private Message to justinchristieEdit/Delete MessageReply w/QuoteDirect Link to This Post
Before I install the Ferrari bumper, I need to restore the original internal bumper.

I used a wire brush wheel, and a grinder to remove the rust. I applied a coating of rust converter, and then two coats of rocker guard.


------------------
1986 Pontiac Fiero SE 3.4L | The Fiero Blog (Since April 2000)
-----------------------------------------------------------
My Portfolio site | JustinChristie.ca

[This message has been edited by justinchristie (edited 03-18-2015).]

IP: Logged
justinchristie
Member
Posts: 547
From: Clarington, Ontario, Canada
Registered: Sep 2006


Feedback score:    (12)
Leave feedback

Rate this member

Report this Post07-06-2010 06:52 PM Click Here to See the Profile for justinchristieClick Here to visit justinchristie's HomePageSend a Private Message to justinchristieEdit/Delete MessageReply w/QuoteDirect Link to This Post

justinchristie

547 posts
Member since Sep 2006
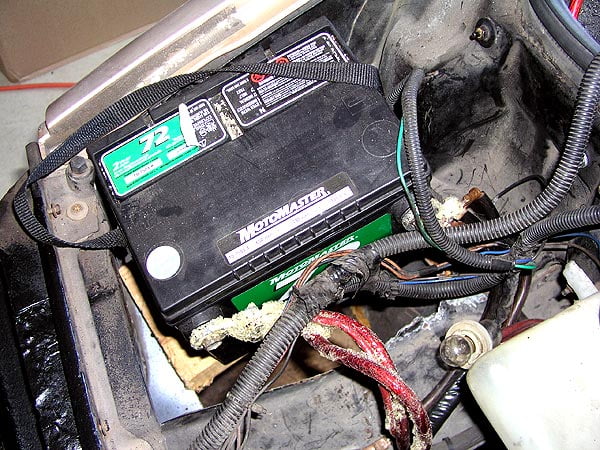
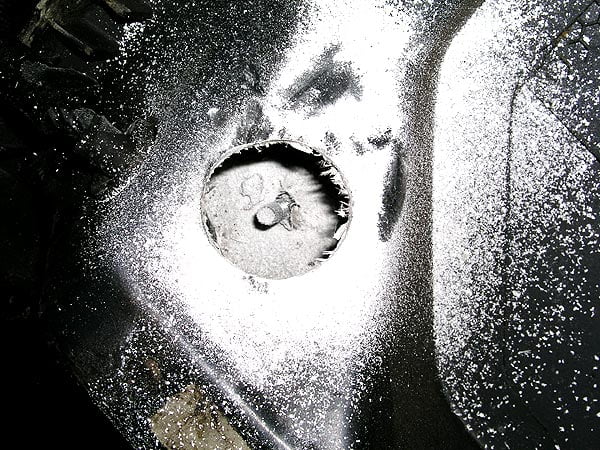
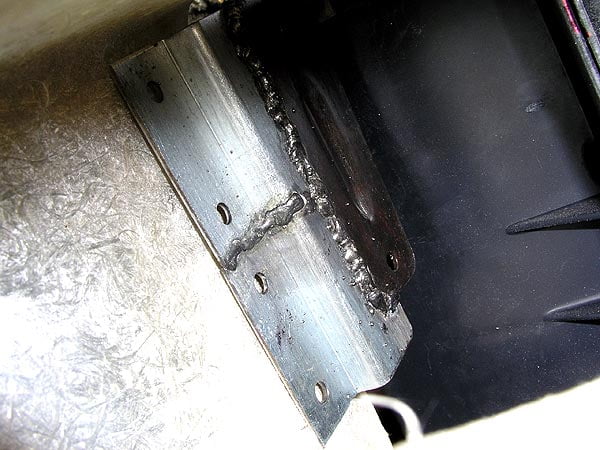
This is part of the restoration, …that I paid lots of money for a few years back, …that PISSED me off the most. The battery box that was installed, …was done so piss-poorly, …it makes me laugh.

First off, the battery box was made out of metal, ……bare metal, ….and installed without any paint or drainage holes – so it rusted.

Next, the battery was held in place with expanding spray foam. Yeah, the same stuff you put in door jams
to seal/insulate. How in the hell are you suppose to replace a dead battery when it’s glued in place with expanding foam? It was a giant pain in the arse to remove the foam.

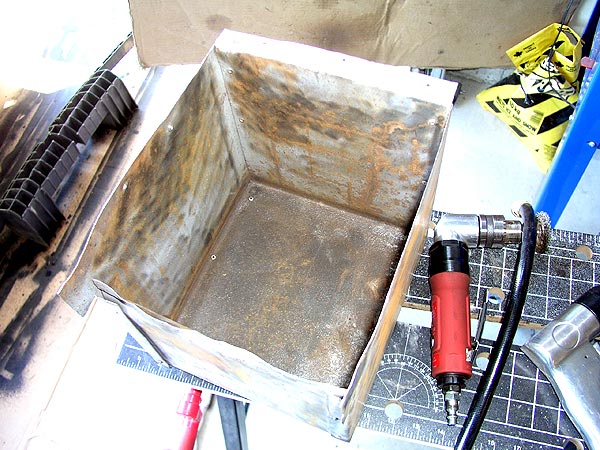
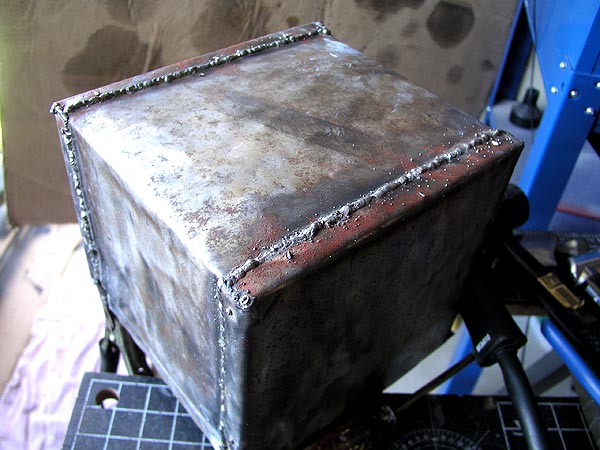
So, it needed to be fixed. I sandblasted everything, welded all the seams, and spray painted with rocker guard.


[This message has been edited by justinchristie (edited 03-18-2015).]

IP: Logged
mooseinabox
Member
Posts: 88
From: Hudson, Ohio
Registered: May 2010


Feedback score: N/A
Leave feedback

Rate this member

Report this Post07-07-2010 12:18 AM Click Here to See the Profile for mooseinaboxSend a Private Message to mooseinaboxEdit/Delete MessageReply w/QuoteDirect Link to This Post
I can't wait to see the outcome! It's looking great - keep up the great work.
IP: Logged
N3M3S1S
Member
Posts: 3865
From: Dover, DE
Registered: Dec 2007


Feedback score:    (6)
Leave feedback


Total ratings: 51
Rate this member

Report this Post07-07-2010 01:35 AM Click Here to See the Profile for N3M3S1SSend a Private Message to N3M3S1SEdit/Delete MessageReply w/QuoteDirect Link to This Post
LOL@that battery box. That sucks. Glad to see you're still cranking away at it!
IP: Logged
tednelson83
Member
Posts: 1993
From: Santa Clarita, California, USA
Registered: Jul 2002


Feedback score: N/A
Leave feedback


Total ratings: 67
Rate this member

Report this Post07-07-2010 08:03 AM Click Here to See the Profile for tednelson83Click Here to visit tednelson83's HomePageSend a Private Message to tednelson83Edit/Delete MessageReply w/QuoteDirect Link to This Post
ok, so if the battery is in the passenger headlight bucket area, where does the headlight bucket go? no pass. headlight?
IP: Logged
justinchristie
Member
Posts: 547
From: Clarington, Ontario, Canada
Registered: Sep 2006


Feedback score:    (12)
Leave feedback

Rate this member

Report this Post07-07-2010 11:03 AM Click Here to See the Profile for justinchristieClick Here to visit justinchristie's HomePageSend a Private Message to justinchristieEdit/Delete MessageReply w/QuoteDirect Link to This Post
 
quote
Originally posted by tednelson83:

ok, so if the battery is in the passenger headlight bucket area, where does the headlight bucket go? no pass. headlight?


Nope, it fits underneath the headlight - everything is fully functional. It's like a bucket that fits below the headlight.

You'll see how it works in the next few days. I'll take pics when I install it


------------------
1986 Pontiac Fiero SE 3.4L | The Fiero Blog (Since April 2000)
-----------------------------------------------------------
My Portfolio site | JustinChristie.ca

IP: Logged
justinchristie
Member
Posts: 547
From: Clarington, Ontario, Canada
Registered: Sep 2006


Feedback score:    (12)
Leave feedback

Rate this member

Report this Post07-24-2010 04:48 PM Click Here to See the Profile for justinchristieClick Here to visit justinchristie's HomePageSend a Private Message to justinchristieEdit/Delete MessageReply w/QuoteDirect Link to This Post
I haven't worked on the Fiero lately because the first 3 weekends in July have been pretty much 100% focus on this thing (which I completely finished this morning):


This is actually Fiero related because the shed will clear out a lot of garage space being taken up by lawnmowers, garden tools, and a big-honkin' snowblower - more garage space equals more room to work on the Fiero.

...tomorrow I plan to tackle that battery box installation.

[This message has been edited by justinchristie (edited 03-18-2015).]

IP: Logged
justinchristie
Member
Posts: 547
From: Clarington, Ontario, Canada
Registered: Sep 2006


Feedback score:    (12)
Leave feedback

Rate this member

Report this Post08-01-2010 07:55 PM Click Here to See the Profile for justinchristieClick Here to visit justinchristie's HomePageSend a Private Message to justinchristieEdit/Delete MessageReply w/QuoteDirect Link to This Post
I bought this DM tower bar over a year ago, and decided that it was time to install it.

[This message has been edited by justinchristie (edited 03-18-2015).]

IP: Logged
justinchristie
Member
Posts: 547
From: Clarington, Ontario, Canada
Registered: Sep 2006


Feedback score:    (12)
Leave feedback

Rate this member

Report this Post08-01-2010 07:58 PM Click Here to See the Profile for justinchristieClick Here to visit justinchristie's HomePageSend a Private Message to justinchristieEdit/Delete MessageReply w/QuoteDirect Link to This Post

justinchristie

547 posts
Member since Sep 2006
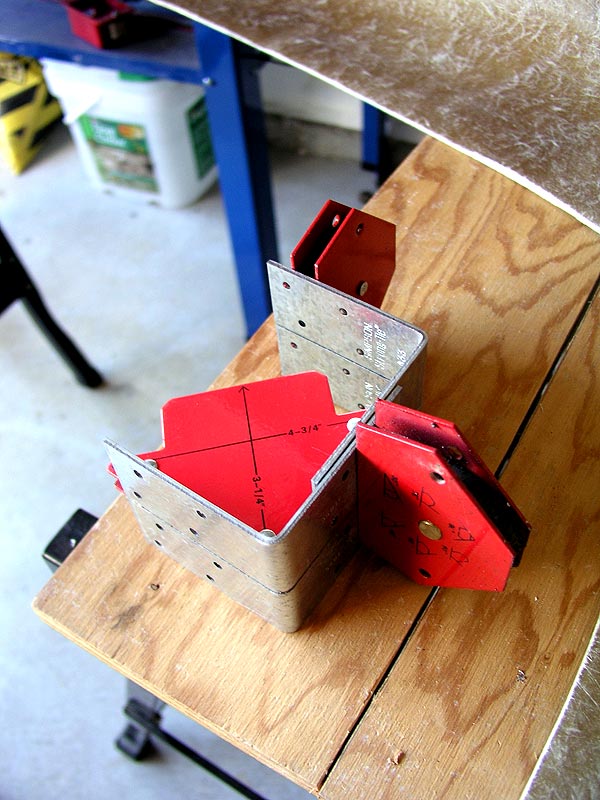
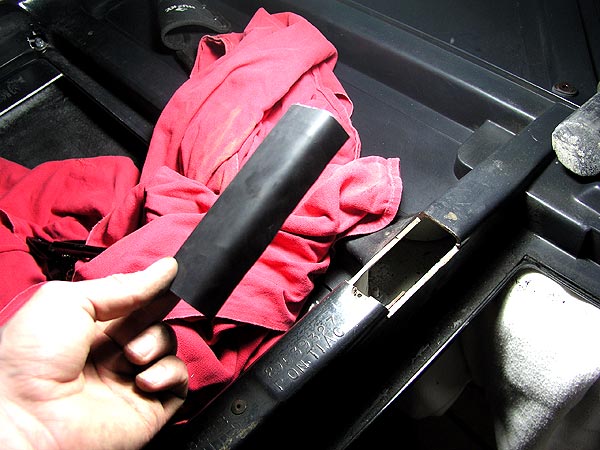
With a fresh coat of paint, and rubber padding to insulate the battery, the battery box is now complete. It just needs to be re-installed.


------------------
1986 Pontiac Fiero SE 3.4L | The Fiero Blog (Since April 2000)
-----------------------------------------------------------
My Portfolio site | JustinChristie.ca

[This message has been edited by justinchristie (edited 03-18-2015).]

IP: Logged
justinchristie
Member
Posts: 547
From: Clarington, Ontario, Canada
Registered: Sep 2006


Feedback score:    (12)
Leave feedback

Rate this member

Report this Post08-01-2010 08:01 PM Click Here to See the Profile for justinchristieClick Here to visit justinchristie's HomePageSend a Private Message to justinchristieEdit/Delete MessageReply w/QuoteDirect Link to This Post

justinchristie

547 posts
Member since Sep 2006
I finished adding all the new bolts, and then I re-attached the honey-comb support.

Next step is to re-install the battery box, and then I can add the Ferrari front bumper


------------------
1986 Pontiac Fiero SE 3.4L | The Fiero Blog (Since April 2000)
-----------------------------------------------------------
My Portfolio site | JustinChristie.ca

[This message has been edited by justinchristie (edited 03-18-2015).]

IP: Logged
PFF
System Bot
gh0st
Member
Posts: 69
From: Ohio, United States
Registered: May 2010


Feedback score: N/A
Leave feedback

Rate this member

Report this Post08-01-2010 08:18 PM Click Here to See the Profile for gh0stSend a Private Message to gh0stEdit/Delete MessageReply w/QuoteDirect Link to This Post
Awsome, keep us updated!
IP: Logged
justinchristie
Member
Posts: 547
From: Clarington, Ontario, Canada
Registered: Sep 2006


Feedback score:    (12)
Leave feedback

Rate this member

Report this Post08-03-2010 11:21 PM Click Here to See the Profile for justinchristieClick Here to visit justinchristie's HomePageSend a Private Message to justinchristieEdit/Delete MessageReply w/QuoteDirect Link to This Post
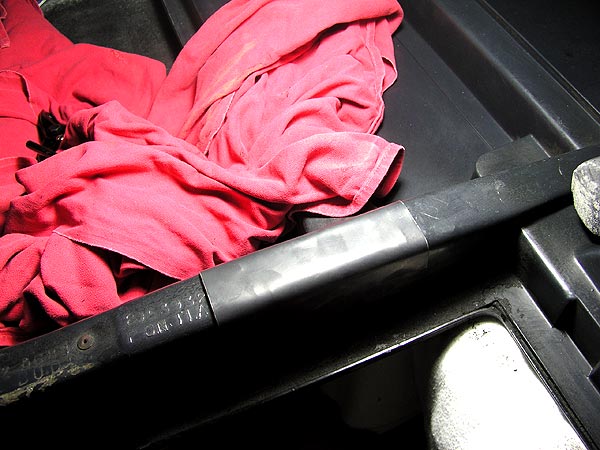
completed the battery box installation tonight. The only problem is that the battery I was using doesn't fit inside it anymore. The rubber sheets I used shrank the inner dimension by a 1/4". I'm using a piece of wood to prop it up for the time being.

It NEVER ends.

So now i need a smaller battery.....


------------------
1986 Pontiac Fiero SE 3.4L | The Fiero Blog (Since April 2000)
-----------------------------------------------------------
My Portfolio site | JustinChristie.ca

[This message has been edited by justinchristie (edited 03-18-2015).]

IP: Logged
justinchristie
Member
Posts: 547
From: Clarington, Ontario, Canada
Registered: Sep 2006


Feedback score:    (12)
Leave feedback

Rate this member

Report this Post08-16-2010 06:14 PM Click Here to See the Profile for justinchristieClick Here to visit justinchristie's HomePageSend a Private Message to justinchristieEdit/Delete MessageReply w/QuoteDirect Link to This Post
I had a chance to test fit the bumper tonight. It slides on quite nicely. There are a few fitment issues, but they are easy fixes.

It completely transforms the look of the car.

[This message has been edited by justinchristie (edited 03-18-2015).]

IP: Logged
justinchristie
Member
Posts: 547
From: Clarington, Ontario, Canada
Registered: Sep 2006


Feedback score:    (12)
Leave feedback

Rate this member

Report this Post09-08-2010 08:44 PM Click Here to See the Profile for justinchristieClick Here to visit justinchristie's HomePageSend a Private Message to justinchristieEdit/Delete MessageReply w/QuoteDirect Link to This Post
Marker light, halo, and fog light installation on the front bumper – mostly electrical and metal work:


[This message has been edited by justinchristie (edited 03-18-2015).]

IP: Logged
justinchristie
Member
Posts: 547
From: Clarington, Ontario, Canada
Registered: Sep 2006


Feedback score:    (12)
Leave feedback

Rate this member

Report this Post09-12-2010 06:22 PM Click Here to See the Profile for justinchristieClick Here to visit justinchristie's HomePageSend a Private Message to justinchristieEdit/Delete MessageReply w/QuoteDirect Link to This Post
I have completed the electrical work on the front bumper, and it is now FULLY installed. Everything is detachable as well - hence the connectors. If anything burns out, or need replacing, ...I don't have to cut anything because it is not "hard-wired". I'm a fan of keeping thing neat-and-tidy, hence all the black wire looms for looks and protection.

The HALOs look HOT, btw.


[This message has been edited by justinchristie (edited 03-18-2015).]

IP: Logged
justinchristie
Member
Posts: 547
From: Clarington, Ontario, Canada
Registered: Sep 2006


Feedback score:    (12)
Leave feedback

Rate this member

Report this Post09-14-2010 10:21 PM Click Here to See the Profile for justinchristieClick Here to visit justinchristie's HomePageSend a Private Message to justinchristieEdit/Delete MessageReply w/QuoteDirect Link to This Post
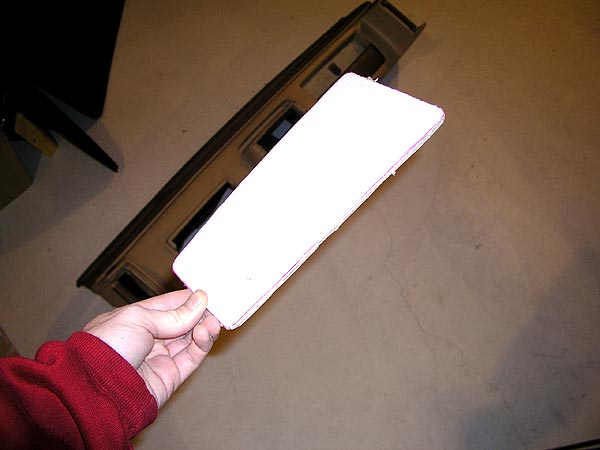
I’m getting ready to attach the mustang scoop to the rear deck-lid. I came up with an idea using cardboard – the cardboard would act as a template for drilling holes.

It seems to be turning out well. I’ll wait until the morning for better light to verify that the scoop is centered properly - seems to be right on center in the last pic.

If all the measurements are good, I will commence drilling tomorrow.


[This message has been edited by justinchristie (edited 03-18-2015).]

IP: Logged
justinchristie
Member
Posts: 547
From: Clarington, Ontario, Canada
Registered: Sep 2006


Feedback score:    (12)
Leave feedback

Rate this member

Report this Post09-18-2010 12:22 PM Click Here to See the Profile for justinchristieClick Here to visit justinchristie's HomePageSend a Private Message to justinchristieEdit/Delete MessageReply w/QuoteDirect Link to This Post
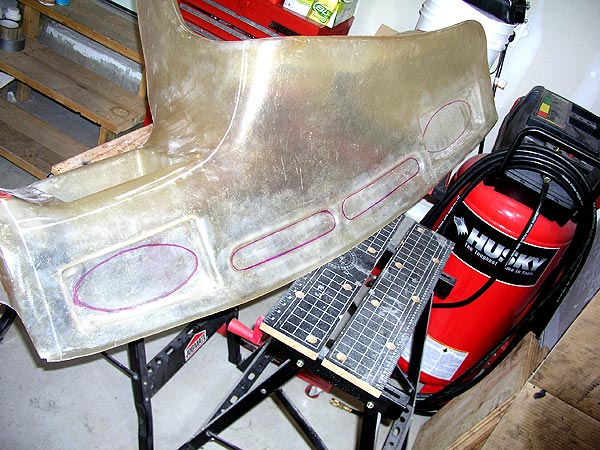
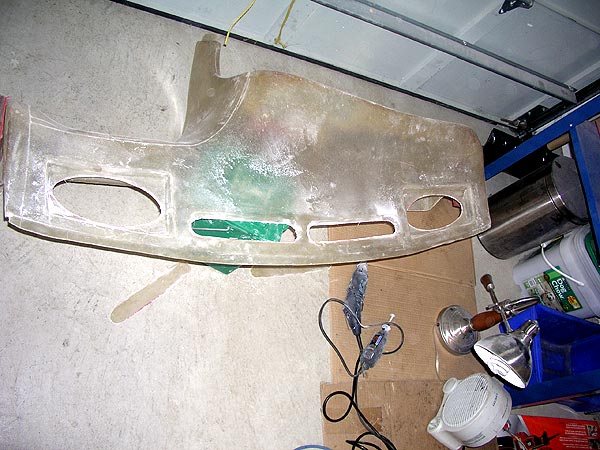
I have completed the installation of the rear deck-lid scoop. By using the cardboard template, …it made drilling the holes an easy process.

After it was mounted, I needed to make this scoop functional so it would help reduce the temperatures under the hood.

I re-purposed the old metal heat shield (where the vent is now), and used that metal to make a cover for the section that was cut out of the deck-lid. The previous owner of this deck-lid had a 3800 engine, and needed to notch out a section so the lid would close.

Pretty straight forward process if you take your time. Although my heart skipped a beat when I was drilling and cutting the deck-lid - I've only got one of them and it's very hard to find ones in good shape. I hate cutting into good Fiero parts

Turned out well though...


[This message has been edited by justinchristie (edited 03-18-2015).]

IP: Logged
fieromatty
Member
Posts: 393
From: colorado
Registered: Apr 2010


Feedback score: N/A
Leave feedback

Rate this member

Report this Post09-18-2010 08:08 PM Click Here to See the Profile for fieromattySend a Private Message to fieromattyEdit/Delete MessageReply w/QuoteDirect Link to This Post
Great buildup... Watching closely!
IP: Logged
justinchristie
Member
Posts: 547
From: Clarington, Ontario, Canada
Registered: Sep 2006


Feedback score:    (12)
Leave feedback

Rate this member

Report this Post09-24-2010 09:05 AM Click Here to See the Profile for justinchristieClick Here to visit justinchristie's HomePageSend a Private Message to justinchristieEdit/Delete MessageReply w/QuoteDirect Link to This Post
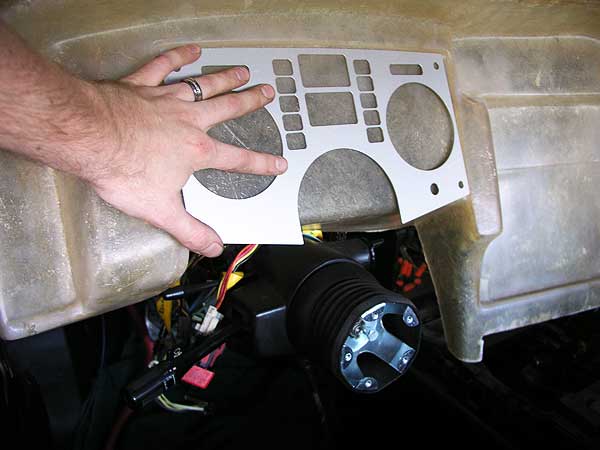
Ok, here is (where I think) a lot more people will chime in - custom dash. This is the PISA wrap-around dash.

I began to test fit it. As expected from some of the other members that have this, it will require some specific cuts and custom brackets to fit properly.


[This message has been edited by justinchristie (edited 03-18-2015).]

IP: Logged
justinchristie
Member
Posts: 547
From: Clarington, Ontario, Canada
Registered: Sep 2006


Feedback score:    (12)
Leave feedback

Rate this member

Report this Post10-03-2010 12:22 PM Click Here to See the Profile for justinchristieClick Here to visit justinchristie's HomePageSend a Private Message to justinchristieEdit/Delete MessageReply w/QuoteDirect Link to This Post
A few goodies arrived for the Fiero:

* A set of 16″ Z24 Cavalier rims with 90% tread left – picked these up for $100!;
* Amber LED marker lights that are flush mounted (I'll show you what I have in plan for these in another post); and
* LED switches with chrome aircraft guards.

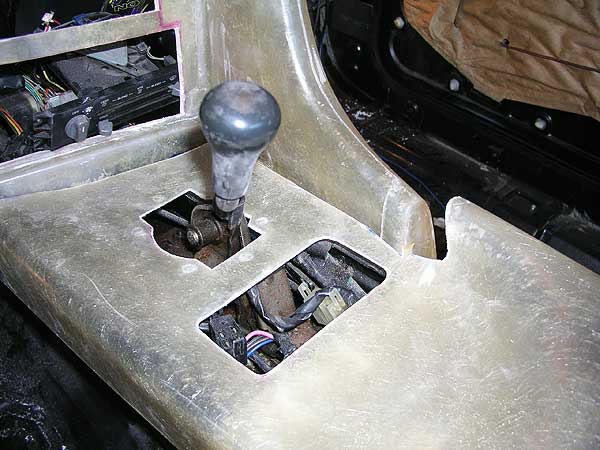
I also made some progress on the dash. I cut out the holes for the shifter and the window switches.


------------------
1986 Pontiac Fiero SE 3.4L | The Fiero Blog (Since April 2000)
-----------------------------------------------------------
My Portfolio site | JustinChristie.ca

[This message has been edited by justinchristie (edited 03-18-2015).]

IP: Logged
PFF
System Bot
justinchristie
Member
Posts: 547
From: Clarington, Ontario, Canada
Registered: Sep 2006


Feedback score:    (12)
Leave feedback

Rate this member

Report this Post10-18-2010 08:52 AM Click Here to See the Profile for justinchristieClick Here to visit justinchristie's HomePageSend a Private Message to justinchristieEdit/Delete MessageReply w/QuoteDirect Link to This Post
I began cutting out the holes for the different dash components. It’s a tedious process, but it is turning out well so far.


------------------
1986 Pontiac Fiero SE 3.4L | The Fiero Blog (Since April 2000)
-----------------------------------------------------------
My Portfolio site | JustinChristie.ca

[This message has been edited by justinchristie (edited 03-18-2015).]

IP: Logged
Navras
Member
Posts: 117
From: Jordan, NY
Registered: Sep 2010


Feedback score: N/A
Leave feedback

Rate this member

Report this Post10-23-2010 10:28 PM Click Here to See the Profile for NavrasSend a Private Message to NavrasEdit/Delete MessageReply w/QuoteDirect Link to This Post
Great build ! A lot of cool parts and additions. Ignore any notchie purists that curse you to an afterlife of brimstone; they are simply jealous of our sleek rear ends.
IP: Logged
Lou6t4gto
Member
Posts: 8436
From: sarasota
Registered: May 2008


Feedback score:    (7)
Leave feedback

Rate this member

Report this Post10-29-2010 07:13 PM Click Here to See the Profile for Lou6t4gtoSend a Private Message to Lou6t4gtoEdit/Delete MessageReply w/QuoteDirect Link to This Post
You got those Wheels/Tires for $100 !! Why can't I ever find those deals ?!
IP: Logged
justinchristie
Member
Posts: 547
From: Clarington, Ontario, Canada
Registered: Sep 2006


Feedback score:    (12)
Leave feedback

Rate this member

Report this Post10-31-2010 02:44 PM Click Here to See the Profile for justinchristieClick Here to visit justinchristie's HomePageSend a Private Message to justinchristieEdit/Delete MessageReply w/QuoteDirect Link to This Post
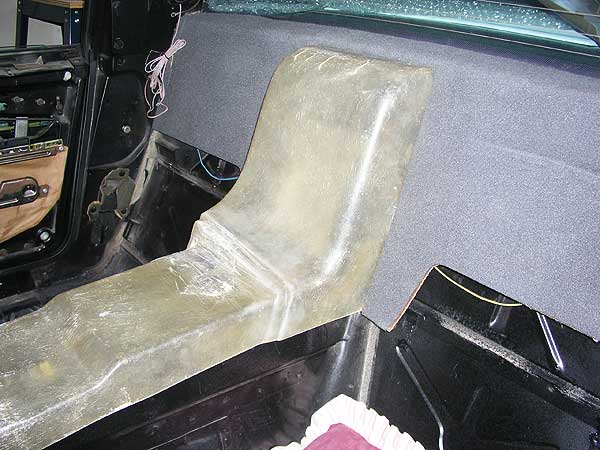
I made a few more cuts, and now it can fit inside the Fiero. I’ll need to do some trimming but the overall fitment isn’t too bad.


------------------
1986 Pontiac Fiero SE 3.4L | The Fiero Blog (Since April 2000)
-----------------------------------------------------------
My Portfolio site | JustinChristie.ca

[This message has been edited by justinchristie (edited 03-18-2015).]

IP: Logged
justinchristie
Member
Posts: 547
From: Clarington, Ontario, Canada
Registered: Sep 2006


Feedback score:    (12)
Leave feedback

Rate this member

Report this Post12-04-2010 05:42 PM Click Here to See the Profile for justinchristieClick Here to visit justinchristie's HomePageSend a Private Message to justinchristieEdit/Delete MessageReply w/QuoteDirect Link to This Post
Well, we welcomed our first child on November 3rd (daughter), and since then the wheels have fallen off the Fiero project. LOL. This is the reason for the lack of updates.

Grandma came over today to watch the little one so the wife and I could have some down time. So I got a little work done on the interior. I just cut out the radio console on the PISA dash.

So some progress is a good thing:


------------------
1986 Pontiac Fiero SE 3.4L | The Fiero Blog (Since April 2000)
-----------------------------------------------------------
My Portfolio site | JustinChristie.ca

[This message has been edited by justinchristie (edited 03-18-2015).]

IP: Logged
doublec4
Member
Posts: 8289
From: Oakville, Ontario, Canada
Registered: Jun 2003


Feedback score:    (20)
Leave feedback


Total ratings: 150
Rate this member

Report this Post12-04-2010 09:16 PM Click Here to See the Profile for doublec4Send a Private Message to doublec4Edit/Delete MessageReply w/QuoteDirect Link to This Post
Congrats on the newborn! The project is coming along nicely too
IP: Logged
justinchristie
Member
Posts: 547
From: Clarington, Ontario, Canada
Registered: Sep 2006


Feedback score:    (12)
Leave feedback

Rate this member

Report this Post12-31-2010 04:05 PM Click Here to See the Profile for justinchristieClick Here to visit justinchristie's HomePageSend a Private Message to justinchristieEdit/Delete MessageReply w/QuoteDirect Link to This Post
I had some time today to cut out the holes for the dash speakers and the HVAC vents. I used a cardboard template to help transfer the hole locations.


------------------
1986 Pontiac Fiero SE 3.4L | The Fiero Blog (Since April 2000)
-----------------------------------------------------------
My Portfolio site | JustinChristie.ca

[This message has been edited by justinchristie (edited 03-18-2015).]

IP: Logged
justinchristie
Member
Posts: 547
From: Clarington, Ontario, Canada
Registered: Sep 2006


Feedback score:    (12)
Leave feedback

Rate this member

Report this Post01-02-2011 11:57 PM Click Here to See the Profile for justinchristieClick Here to visit justinchristie's HomePageSend a Private Message to justinchristieEdit/Delete MessageReply w/QuoteDirect Link to This Post
The PISA dash is partially installed. I have drilled and mounted the upper points – near the speakers. The HVAC ducting is not in place yet. Once I get the dash roughed in, I will pull it out and install the ducts.

Sorry for the quality of the pics – my camera died and I had to use my iPhone.


------------------
1986 Pontiac Fiero SE 3.4L | The Fiero Blog (Since April 2000)
-----------------------------------------------------------
My Portfolio site | JustinChristie.ca

[This message has been edited by justinchristie (edited 03-18-2015).]

IP: Logged
justinchristie
Member
Posts: 547
From: Clarington, Ontario, Canada
Registered: Sep 2006


Feedback score:    (12)
Leave feedback

Rate this member

Report this Post01-09-2011 09:54 PM Click Here to See the Profile for justinchristieClick Here to visit justinchristie's HomePageSend a Private Message to justinchristieEdit/Delete MessageReply w/QuoteDirect Link to This Post
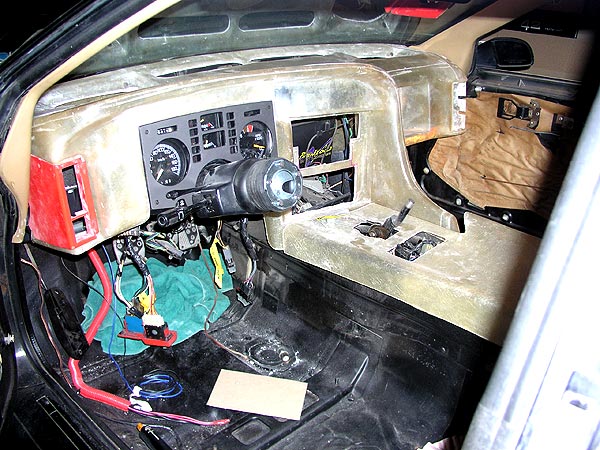
In order to successfully mount the main Fiero instrument cluster, I needed to drop the steering column. I wanted to make sure the cluster was perfectly lined up before I started making the custom mounts for the dash.

Once it was disconnected, I could properly mount the gauges. Note that the original location for the “hidden” cluster mount actually maintains alignment – but it’s “underneath” the stock location, rather than “on-top”. The PISA dash slightly lowers the main gauge cluster.

The only downside to this is if I need to change a bulb in the cluster, I’ll need to drop the steering column again. BUT the entire install remains service-able, which is my goal for this installation. I don’t want anything glassed in, or a once-over-install – everything must unscrew/disconnect, …and be rebuilt with ease.

After the cluster was completed, I used one of the old Fiero dash brackets to fabricate a new mount for the driver’s side lower mount-point. With a few extra pieces of metal, I welded together a new bracket. Next step is the passenger side mount-point, that will be next weekend.


------------------
1986 Pontiac Fiero SE 3.4L | The Fiero Blog (Since April 2000)
-----------------------------------------------------------
My Portfolio site | JustinChristie.ca

[This message has been edited by justinchristie (edited 03-18-2015).]

IP: Logged
newcoolcat
Member
Posts: 250
From: Louisville, Kentucky, United States
Registered: Dec 2006


Feedback score: N/A
Leave feedback

Rate this member

Report this Post01-15-2011 03:13 PM Click Here to See the Profile for newcoolcatClick Here to visit newcoolcat's HomePageSend a Private Message to newcoolcatEdit/Delete MessageReply w/QuoteDirect Link to This Post
 
quote
Originally posted by justinchristie:

These just came in. They are TERRIFIC quality - far beyond what I expected. The gel coat is the best I have ever seen on aftermarket fiberglass. I did not realize how BIG the 4″ LED lights were - these things are MASSIVE! I can’t wait to install these after I put the rear fastback clip on.


where did you get these from??? they look amazing!

nevermind! found the answer on the second page. awesome build though!

[This message has been edited by newcoolcat (edited 01-15-2011).]

IP: Logged
PFF
System Bot
dhobbs84sc
Member
Posts: 407
From: Connersville, Indiana
Registered: Jun 2009


Feedback score: (3)
Leave feedback

Rate this member

Report this Post01-16-2011 11:17 PM Click Here to See the Profile for dhobbs84scSend a Private Message to dhobbs84scEdit/Delete MessageReply w/QuoteDirect Link to This Post
What are you going to use on your dash? Are you going to cover it with a cloth or paint it?
It looks GREAT!! and congrats with your baby I got one on the way too Only one problem.. Im getting deployed :/
IP: Logged
justinchristie
Member
Posts: 547
From: Clarington, Ontario, Canada
Registered: Sep 2006


Feedback score:    (12)
Leave feedback

Rate this member

Report this Post01-17-2011 01:00 PM Click Here to See the Profile for justinchristieClick Here to visit justinchristie's HomePageSend a Private Message to justinchristieEdit/Delete MessageReply w/QuoteDirect Link to This Post
 
quote
Originally posted by dhobbs84sc:

What are you going to use on your dash? Are you going to cover it with a cloth or paint it?
It looks GREAT!! and congrats with your baby I got one on the way too Only one problem.. Im getting deployed :/


Congrats, that's great news. Even though you are deploying, you'll have something to look forward to when you come back.

I'm torn on what I will do with the dash. Upholstering it will cover up some imperfections, but I think painting it will make it look slick - but there is a lot of prep to do for painting. Also, upholster = lots of $$$, paint = less $$$, but more work.

I dunno......


------------------
1986 Pontiac Fiero SE 3.4L | The Fiero Blog (Since April 2000)
-----------------------------------------------------------
My Portfolio site | JustinChristie.ca

IP: Logged
couldahadaV8
Member
Posts: 797
From: Bolton, Ontario, Canada
Registered: Feb 2008


Feedback score: (5)
Leave feedback

Rate this member

Report this Post01-19-2011 07:58 PM Click Here to See the Profile for couldahadaV8Click Here to visit couldahadaV8's HomePageSend a Private Message to couldahadaV8Edit/Delete MessageReply w/QuoteDirect Link to This Post
Your car looks fantastic and your workmanship is first rate. My original plan was to do the fast-back conversion with the same rear lights and front bumper you have; really like the look of that. Of course my plans changed and I ended up selling the fast-back clip (as you know). Some day my current one will be finished and so will yours and we'll get them together.

Rick
IP: Logged
justinchristie
Member
Posts: 547
From: Clarington, Ontario, Canada
Registered: Sep 2006


Feedback score:    (12)
Leave feedback

Rate this member

Report this Post01-20-2011 06:21 PM Click Here to See the Profile for justinchristieClick Here to visit justinchristie's HomePageSend a Private Message to justinchristieEdit/Delete MessageReply w/QuoteDirect Link to This Post
 
quote
Originally posted by couldahadaV8:

Your car looks fantastic and your workmanship is first rate. My original plan was to do the fast-back conversion with the same rear lights and front bumper you have; really like the look of that. Of course my plans changed and I ended up selling the fast-back clip (as you know). Some day my current one will be finished and so will yours and we'll get them together.

Rick


Hey Rick! It's been awhile. How is the Dino coming along?

We'll definitely have to meet up once we finish our cars!

------------------
1986 Pontiac Fiero SE 3.4L | The Fiero Blog (Since April 2000)
-----------------------------------------------------------
My Portfolio site | JustinChristie.ca

IP: Logged
dhobbs84sc
Member
Posts: 407
From: Connersville, Indiana
Registered: Jun 2009


Feedback score: (3)
Leave feedback

Rate this member

Report this Post01-22-2011 02:11 AM Click Here to See the Profile for dhobbs84scSend a Private Message to dhobbs84scEdit/Delete MessageReply w/QuoteDirect Link to This Post
 
quote
Originally posted by justinchristie:


Congrats, that's great news. Even though you are deploying, you'll have something to look forward to when you come back.

I'm torn on what I will do with the dash. Upholstering it will cover up some imperfections, but I think painting it will make it look slick - but there is a lot of prep to do for painting. Also, upholster = lots of $$$, paint = less $$$, but more work.

I dunno......


Well... Wife miscarried :'(

But have you thought of maybe doing a combination? lol Personally I would paint. But you got time to decide
IP: Logged
justinchristie
Member
Posts: 547
From: Clarington, Ontario, Canada
Registered: Sep 2006


Feedback score:    (12)
Leave feedback

Rate this member

Report this Post01-23-2011 01:53 PM Click Here to See the Profile for justinchristieClick Here to visit justinchristie's HomePageSend a Private Message to justinchristieEdit/Delete MessageReply w/QuoteDirect Link to This Post
 
quote
Originally posted by dhobbs84sc:


Well... Wife miscarried :'(

But have you thought of maybe doing a combination? lol Personally I would paint. But you got time to decide


Man, sorry to hear that. If it makes you feel any better, my wife miscarried a year before we had our first. It's quite a common thing that many people don't know about. If it wasn't meant to be, it wasn't meant to be - thats how you have to look at it.

As for the dash, i'm leaning more and more towards just paint.

------------------
1986 Pontiac Fiero SE 3.4L | The Fiero Blog (Since April 2000)
-----------------------------------------------------------
My Portfolio site | JustinChristie.ca

IP: Logged
justinchristie
Member
Posts: 547
From: Clarington, Ontario, Canada
Registered: Sep 2006


Feedback score:    (12)
Leave feedback

Rate this member

Report this Post01-24-2011 11:04 PM Click Here to See the Profile for justinchristieClick Here to visit justinchristie's HomePageSend a Private Message to justinchristieEdit/Delete MessageReply w/QuoteDirect Link to This Post
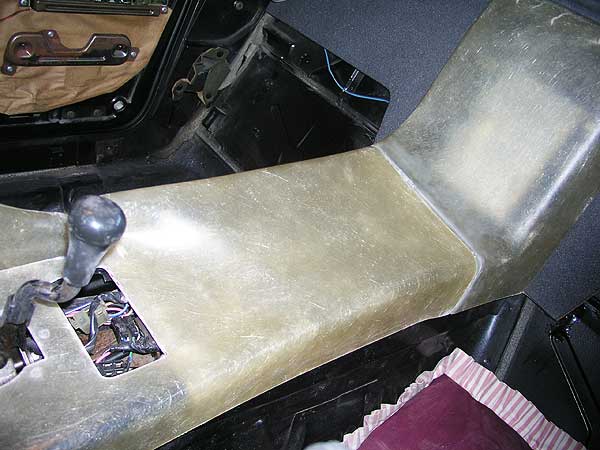
Today I finished mounting the dash to the chassis – driver and passenger sides.

With the driver’s side, I re-used the old Fiero dash bracket to mount the hood release. On the passenger side I also re-used the old Fiero bracket – I created rubber spacers to make up for the height difference. The rubber spacers also provide resistance against vibration noise and/or damage to the fiberglass.

I drilled and tapped a location near the shifter to mount the area where the dash “wraps” towards the rear.


------------------
1986 Pontiac Fiero SE 3.4L | The Fiero Blog (Since April 2000)
-----------------------------------------------------------
My Portfolio site | JustinChristie.ca

[This message has been edited by justinchristie (edited 03-19-2015).]

IP: Logged
justinchristie
Member
Posts: 547
From: Clarington, Ontario, Canada
Registered: Sep 2006


Feedback score:    (12)
Leave feedback

Rate this member

Report this Post02-03-2011 11:10 AM Click Here to See the Profile for justinchristieClick Here to visit justinchristie's HomePageSend a Private Message to justinchristieEdit/Delete MessageReply w/QuoteDirect Link to This Post
I finished installing the middle armrest console – it involved a little bit of trimming. Unfortunately it has a rather large gap on the passenger side – i’ll need to get creative to solve that.

I also started mounting the switches. I did not want the switch face-plates screwing into fiberglass only – so I fabricated up some thin metal tabs. The metal will give the screws something to grab on to. They are held in with adhesive.


------------------
1986 Pontiac Fiero SE 3.4L | The Fiero Blog (Since April 2000)
-----------------------------------------------------------
My Portfolio site | JustinChristie.ca

[This message has been edited by justinchristie (edited 03-19-2015).]

IP: Logged
justinchristie
Member
Posts: 547
From: Clarington, Ontario, Canada
Registered: Sep 2006


Feedback score:    (12)
Leave feedback

Rate this member

Report this Post02-13-2011 01:09 AM Click Here to See the Profile for justinchristieClick Here to visit justinchristie's HomePageSend a Private Message to justinchristieEdit/Delete MessageReply w/QuoteDirect Link to This Post
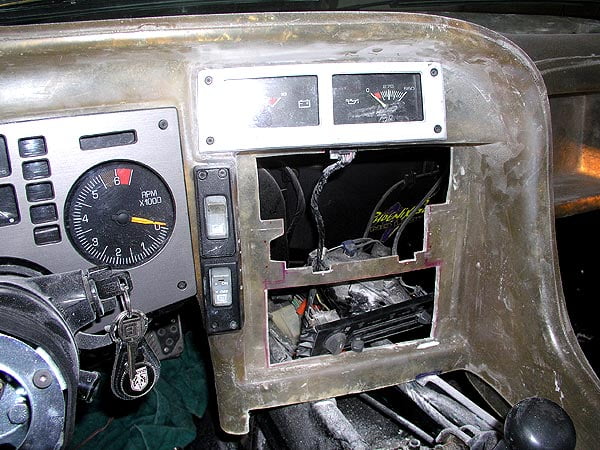
Today I added the auxiliary (AUX) gauges to the dash – voltmeter and oil pressure gauges. I re-used the old plastic housing piece because it gave a mounting fixture for the gauges.

It involved a little cutting because the pig-tail wire that plugs into the gauges was too long – it hit the fiberglass edge below the housing.

I also needed to modify the radio bezel to fit the pig-tail.


------------------
1986 Pontiac Fiero SE 3.4L | The Fiero Blog (Since April 2000)
-----------------------------------------------------------
My Portfolio site | JustinChristie.ca

[This message has been edited by justinchristie (edited 03-19-2015).]

IP: Logged
Previous Page | Next Page

This topic is 6 pages long:  1   2   3   4   5   6 
next newest topic | next oldest topic

All times are ET (US)

Post New Topic  Post A Reply
Hop to:

Contact Us | Back To Main Page

Advertizing on PFF | Fiero Parts Vendors
PFF Merchandise | Fiero Gallery | Ogre's Cave
Real-Time Chat | Fiero Related Auctions on eBay


Copyright (c) 1999, C. Pennock