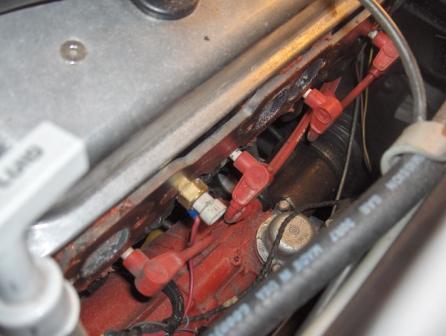
Thanks for confirming what I researched and jogged my memory on this morning. I searched and found out that the top TB port is an air passage and have since connected a line to the valve cover. When I was taking a couple pics tonight, I found the port under the TB and it jogged my memory that it went to the PCV.
I'm a little confused on the water pump port, maybe you can elaborate. My theory is this: When I bought the LT1, there was no port in that location on the water pump that came on my motor. I have since replaced the Optispark and waterpump and the replacement pump did have that port that I never used last year. This time around I also omitted the "Tee" in Winston's diagram as I am not using the TB coolant lines or the water jacket steam tubes.
It sounds like you are using it on your setup - where does it go?
Thanks, Ryan
The "line to no where" is for an air cushion ,like an expansion tank... If you have a steel head engine you may get away with not having it at all... Chuck
Thanks Chuck - I think that explains it. I pulled the old pump out of the box that came with my iron head LT1 and as mentioned nothing at that port location on the housing - not even a plug. However when I ordered the replacement pump I got one for an F-body that did have the aluminum heads...
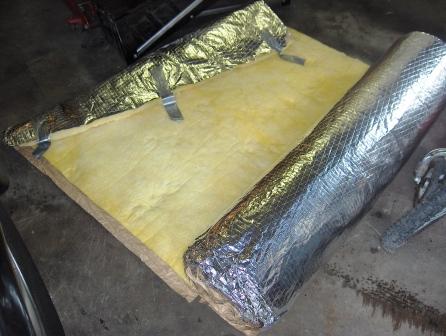
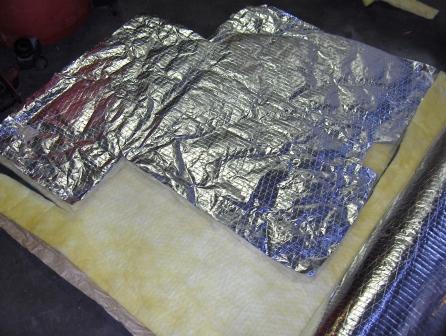
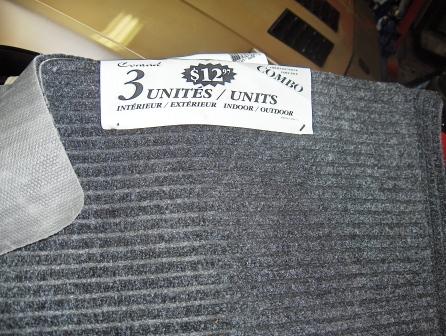
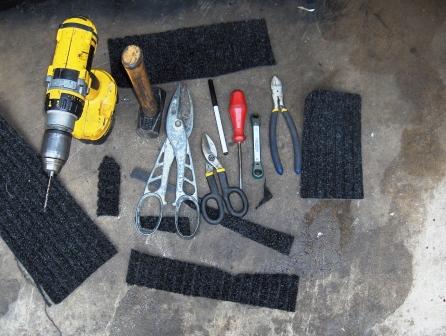
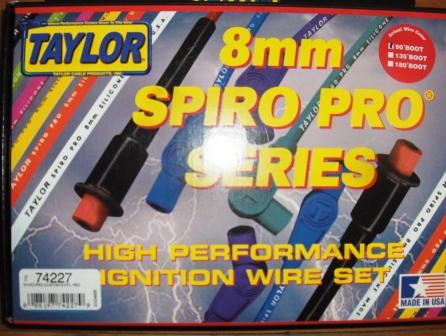
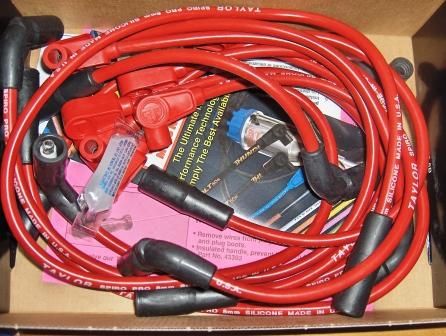
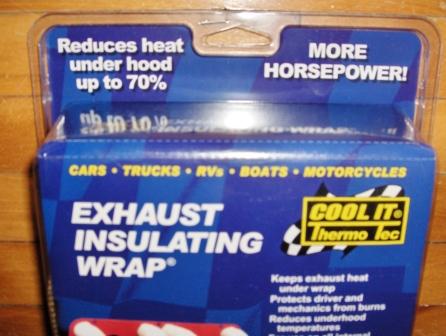
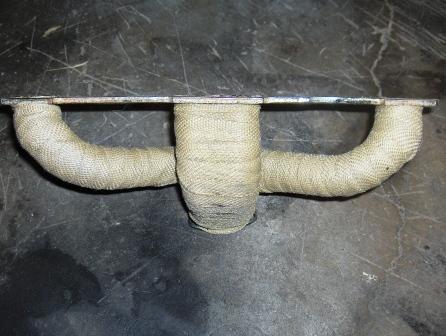
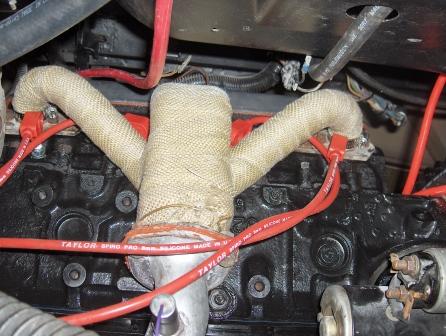
Picked up some goodies today I ordered a while ago:
I had burnt a wire and a leaking boot on the previous stock set.
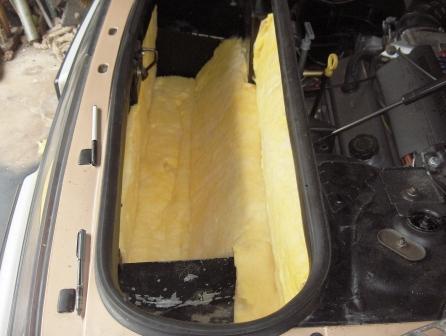
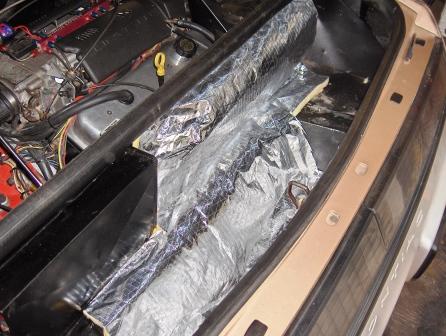
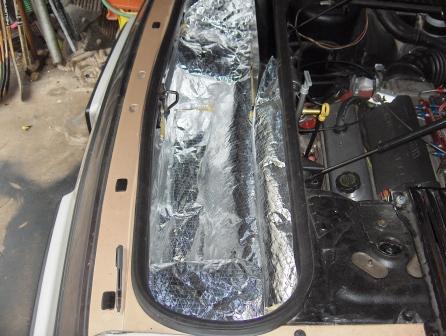
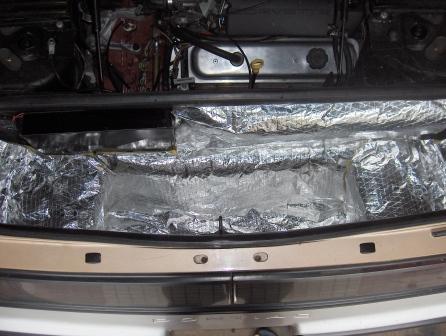
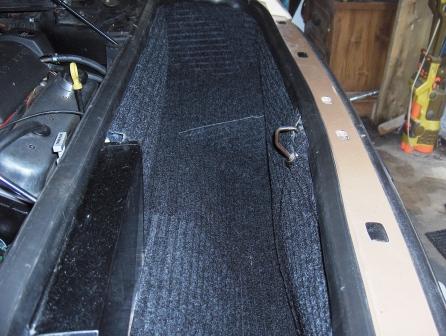
Last year, I pulled into a Tim Hortons with my truck carpet smoking and on fire. It rekindled some Fiero stereotypes for sure. Hopefully this wrap will help the naturally warm Fiero engine bay. I also built a smaller lower trunk using the old one as a heat shield, so hopefully it won't burn the custom carpet this time around
I have solved one of the custom things I had been concerned about for a while - marrying the Fiero shifter cable to the Cadillac 4T60.
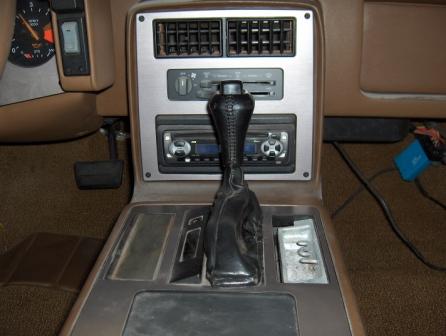
I had heard conflicting statements on the subject. One was that you will lose a first gear position since the new trans has an additional gear (overdrive). I had also read that with a little mod you can reach 1st gear just below the "1" in the console providing the cable is set up just perfectly. I had noticed when installing the new Camaro shifter, than you can move the cable (with it unhooked) one notch below "1" on the console without trouble. I wanted to be able to shift through the gears myself on occasion, so I took the extra time trying to achieve this.
Here is what seems to have worked for me:
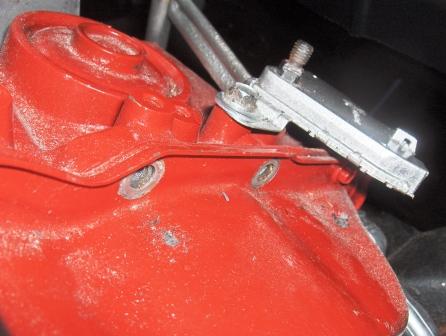
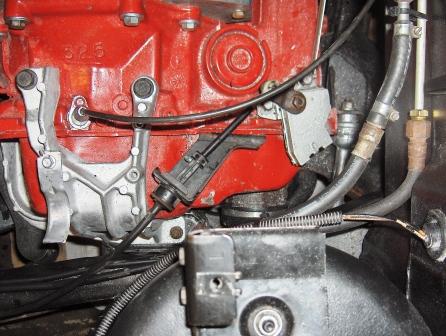
The first thing I needed to find was a mounting location on the newly rebuilt trans. I found these two 10mm bolts and carefully removed them keeping an eye on the gasket/silicone adhesive and nothing moved. They were not overly tight and remove easily without problems:
After a test fit, I realized that the holes on the Fiero bracket that seems like it would fit when held up to the bolts, did not align perfectly, so I used a 4" angle grinder to open up the rear hole to a slot:
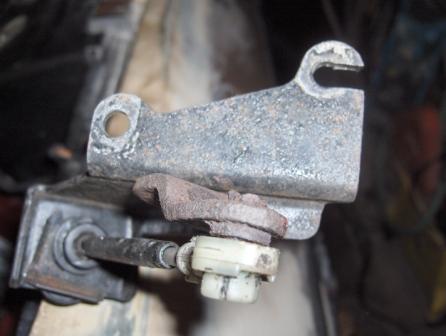
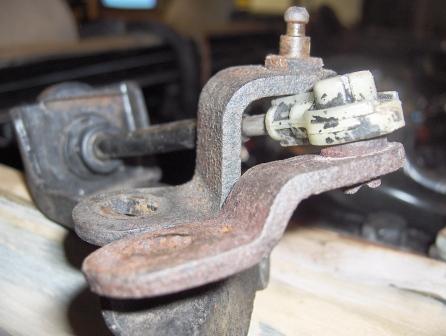
Next I realized the actuator lever on the trans was much less offset than the stock Fiero TH125c. I have seen guys sites where they cut and rewelded the lever flater - I just pryed the one off the cable and swapped it with the flatter one:
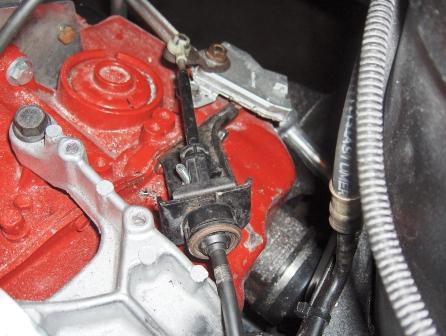
Here is an overhead shot. In order to get the best alignment possible, I used a nut as a spacer on the rear mount to get a better angle to the Fiero trans switch that was swapped on to the trans earlier. You will notice that the cable length is set up as long as possible in the bracket and the whole bracket was bent upward slightly, all in an effort to make it long enough to reach 1st gear / 7th position. When the cable is shortest it is in Park vs. longest in 1st - P-R-N-D-3-2-1
It did work but I was watching the cable moved as I shifted and they was a tendacy for the cable to bend while trying to reach first due to the cable already being set up to its longest position and partly due to the fact that the alignment still wasn't perfect. Unfortunately, I couldn't shim the bracket out any further to correct the angle as it would be too short and interfere with the trans bracket to mount. The solution was to drill the bracket and install a bolt and nut through it to provide the cable housing with a little extra support while reaching 1st gear in its longest position.
This fix allowed all gears to be engaged smoothly without regard to how lightly or slowly you moved the gear selector:
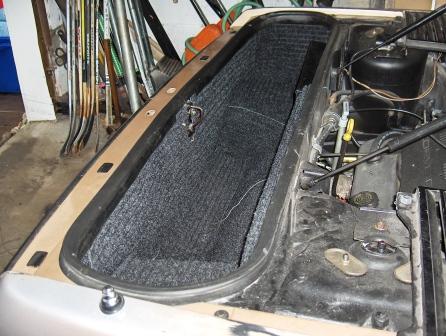
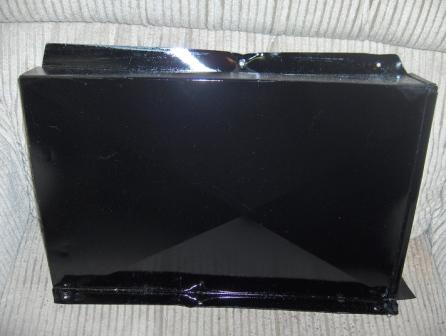
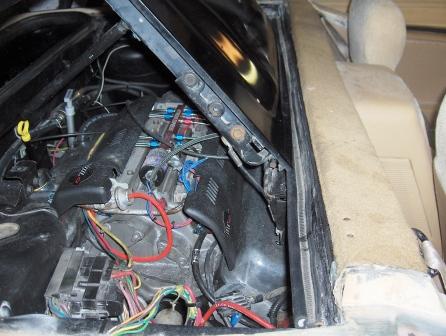
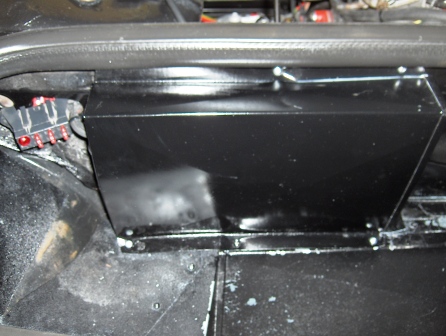
The second computer to control the LT1 is going to be located in the trunk here:
I made a sheet metal cover and painted it black to match the black / grey carpet that will be installed in the trunk:
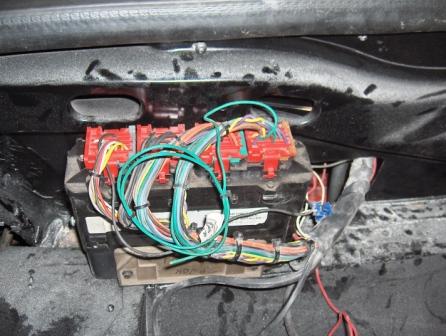
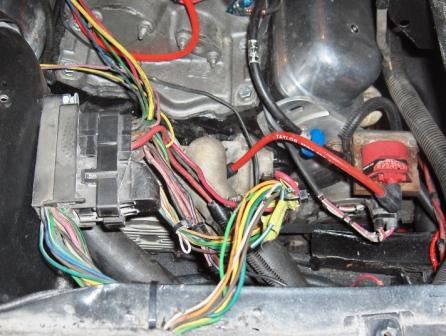
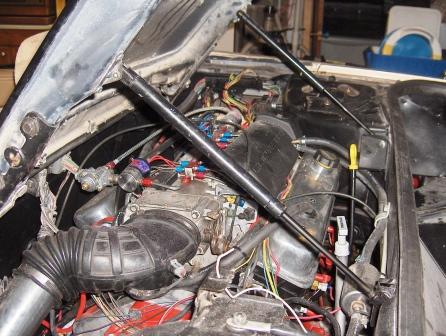
I ended up relocating this distribution block to the shock tower as the wires to the 4T60 were a touch short - they were just barely long enough with the old transmission so moving it here solved the problem without having to cut any wires:
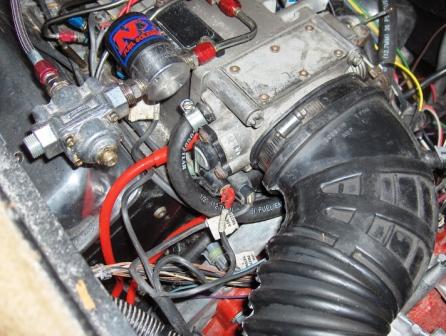
When reversing the intake - all the throttle body harness lines were easily long enough as it is closer to the computer now. The only one that would need to be extended was the EGR, but I'm not using it in my setup so it will be unused and safely tucked away:
Basically, the other than the nitrous wiring, all that is left is running a pair to the fuse box for ignition power and the brake switch.
Fiero2m8
[This message has been edited by Fiero2m8 (edited 07-20-2006).]
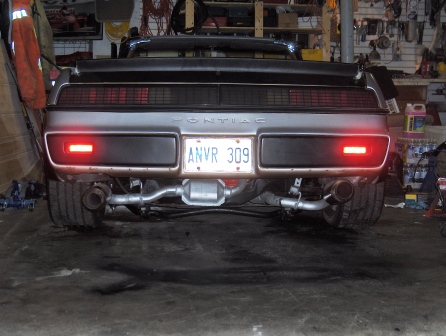
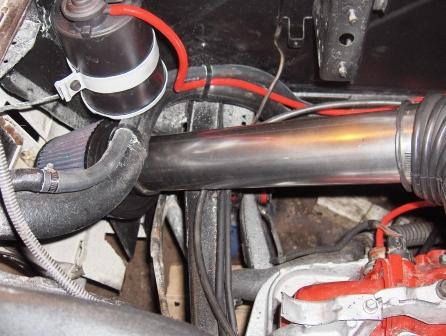
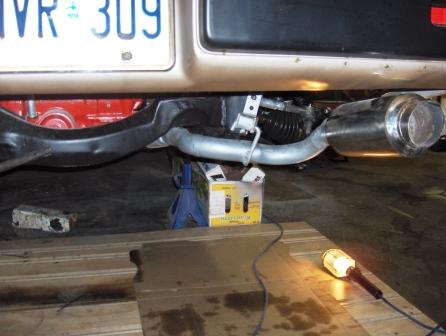
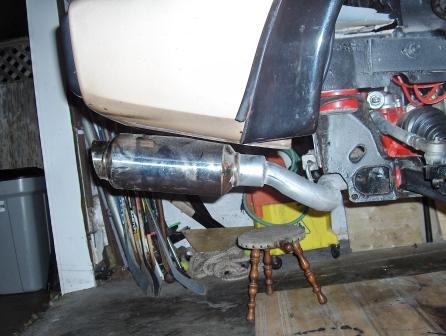
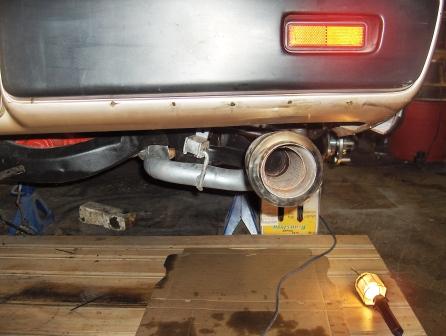
The last thing I got to tonight was re-installing the passenger side exhaust:
I will be working on wiring over the weekend.
Fiero2m8
What size pipe is that? I like the tips, think I need some. Thanks for posting your pictures I wish my coupe looked as good, the poor thing is sitting on my car port waiting for attention its not going to get for some time yet.
Headers 1-5/8" tubes Exhaust pipe 2" Cats 11" x 6" x 3-1/2" Muffler tips 12" x 4-1/2"
Other updates:
I picked up a new remote oil filter relocation kit today and got the nitrous bottle filled. It's my birthday tomorrow and I have next week off, so there should be good progress on the project.
I'm back from vacation in Wasaga Beach and finally got a little more progress on my amateur home build:
Remote oil filter kit installed with filter mounted to cradle:
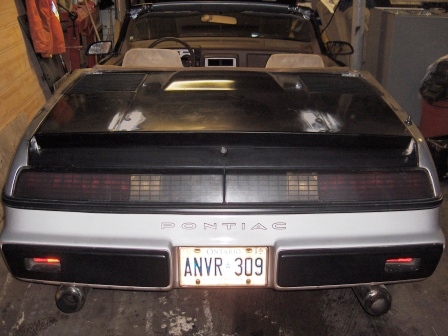
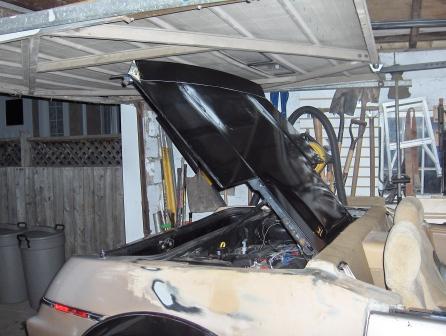
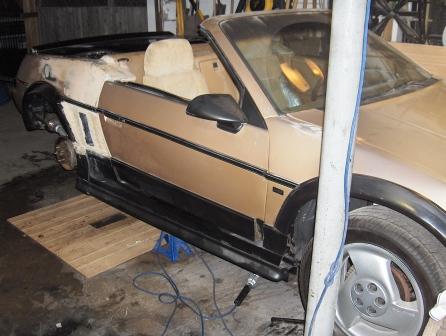
Replacement decklid installed using two prop rods in favour of the old torsion springs:
You will also notice the rubber moulding from the Camaro hatch cut and installed on my firewall:
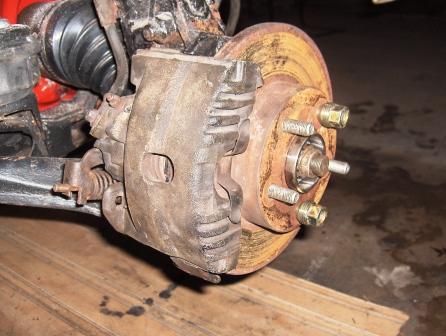
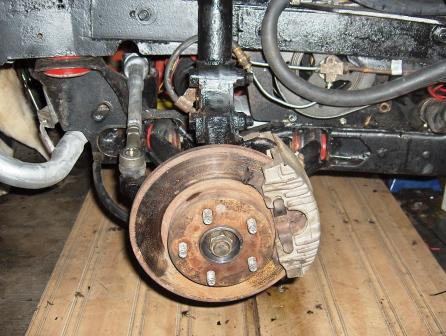
Next the brakes were re-installed with new hard lines and existing 1 year old calipers, rotors and pads: (I forsee a brake upgrade in the car's future...)
Last thing I got to last night was reconnecting the emergency cables and they work - not essential for an auto, but a nice to have:
Haven't finished routing the crossover brake line as I am considering a "H" body rear swaybar upgrade as documented here:
Any excuse to go back to the wreckers Anyone done this mod lately? If so what year / model car did you use and did you like the result?
I'm also looking for an optional install location for the Archie strut bar - the normal location resulted in a snapped stud in the head. Pictures of other solutions are also welcome.
Originally posted by Fiero2m8: Haven't finished routing the crossover brake line as I am considering a "H" body rear swaybar upgrade as documented here:
Any excuse to go back to the wreckers Anyone done this mod lately? If so what year / model car did you use and did you like the result?
I'm also looking for an optional install location for the Archie strut bar - the normal location resulted in a snapped stud in the head. Pictures of other solutions are also welcome.
Fiero2m8
Make sure the bolts you use for the end links dont stick past the bottom edge of your rim, you get a flat tire and its going to dig into the ground. It looks like the one in the link has some pretty long bolts on his install.
What kind of motor and tranny mounts do you have? I used solid mounts and my motor dosent move at all. I have been thinking of using something tied into the adapter plate and install something on it and mount it to the cradle.
Thanks Jake. I checked out your site - interesting stuff on there. I'm going to take some measurements on the ideal width in my opinion and shop the u-pick yard this afternoon. Checking clearance on the tires is a good idea - the link suggests to shorten sleeves to 1 inch which I think should work.
On another note, I am very pleased to announce that the car fired on the first attempt just moments ago Actually the second attempt, if you count the almost dead battery last night that just came off charge moments ago
I will shoot a video of it running tonight - does anyone know where I can get a free host to post my video to? Let me know and I'll post the link by the weekend so you guys can all hear it
I started it with the garage door closed but 2 neighbours applauded when I came out of the garage
Originally posted by PBJ: I hope we see it out that day. Nothing like a good trailer ride for the project
Pete
Well I had a golf tournament in Fergus that day and racing at Merritville in the evening. It wasn't from a lack of trying to have the car ready, but after driving it Friday night for the first time, I wasn't confident enough to bring it that far. I didn't consider a trailer as it's not my thing and the car is probably to low for a trailer anyways.
I did have to work out a few gremlins out first during some local break-in miles. The biggest problem was the alternator belt was flipping over like Dr. CPU's. I will post the solution as I update the build thread.
Ryan
[This message has been edited by Fiero2m8 (edited 08-21-2006).]
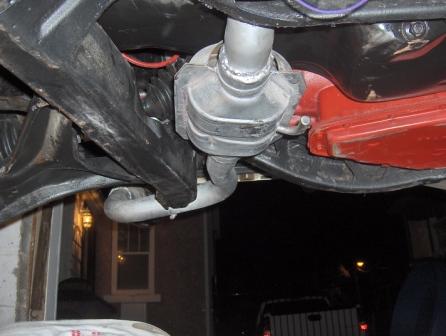
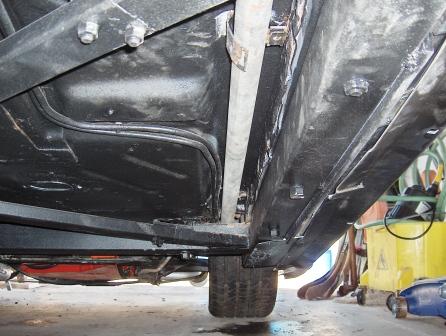
Here is a shot of the strut installed - I took the suggestion above and mounted at the adapter plate. You can't see the rear here, but it mounts at the trunk bulkhead:
Here are a few of many shots I took of the underside wiring etc. in case I get questions in the future.
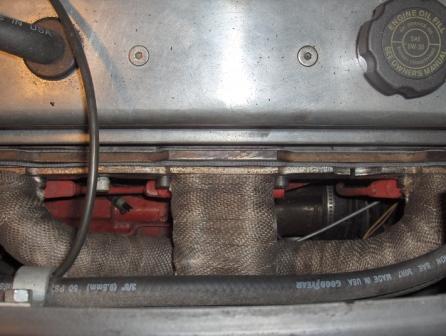
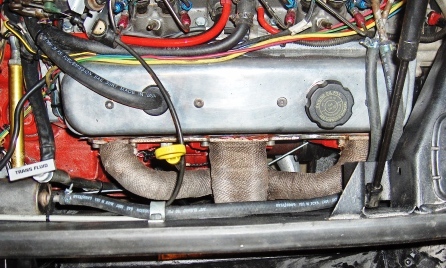
Front header and cooling crossover:
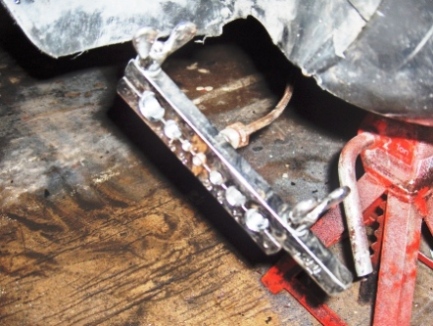
Clearance from starter to billet filter adapter:
Remote oil filter kit:
Driver's side coolant pipe, I had to replace due to a pinhole leak:
After I am done filling the cooling system using Archie's method, I run the engine up to temperature with the heater on and relieve any final air bubbles into the overflow tank with my pressure cap. As shown here it is at the highest point in the system.
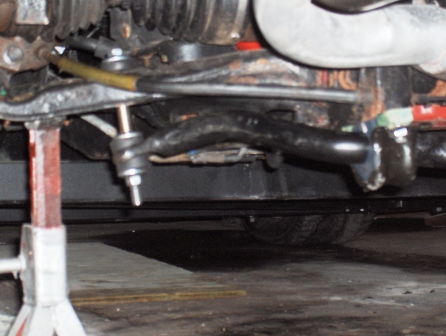
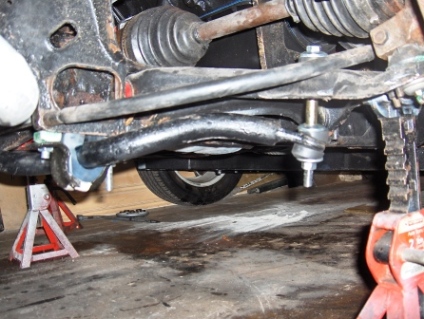
Here is my rear sway bar from the wreckers - the donor was a 1991 Buick Park Avenue. I bought Monroe end links for that car and new GM mounts and bushings for this 30mm bar.
Everything went pretty smooth as outlined in the link I posted above. There were no tire and wheel issues either as they had plenty of clearance.
The other adventure this particular night was learning how to use my new flaring tool kit to replace the brake line fitting that goes into the rear distribution block:
I am pleased to report that it was quite easy and solved the leak I had accidently self inflicted when working in the area. When bleeding the brakes, I started at the longest line (left rear) and rotated counter-clockwise around the car.
I finally solved the header clearance issue to the VSS on the 4T60. It involved adding a 3/4 spacer and two exhaust manifold gaskets. Unfortunately the speedo still isn't working, so I don't really know where to look next. I spliced the yellows and purples together from both harnesses and plugged it into the sensor as Archie's instructions describe. Maybe the speedo isn't getting 12V since it never moves?
I always combine frustrating parts of the build with easy / fun parts to keep me going.
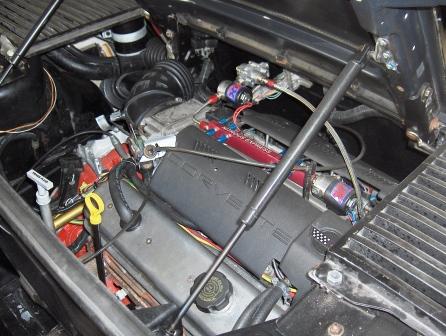
Here is the computer cover installed:
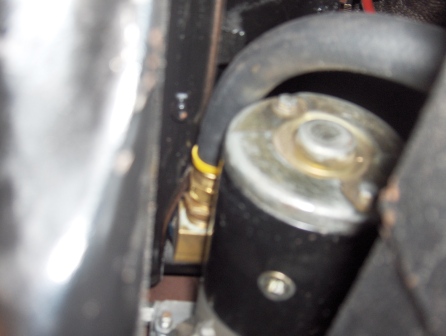
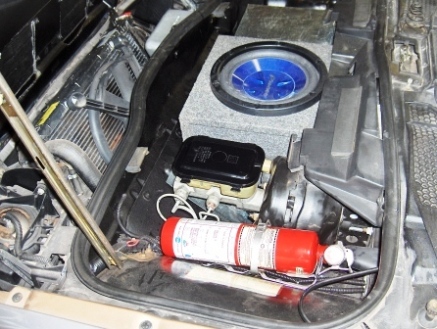
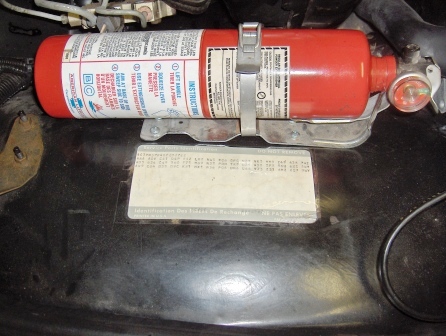
I also had several fire extinguishers laying around, so I installed one horizontally in the front compartment:
It's a 5 pound BC unit:
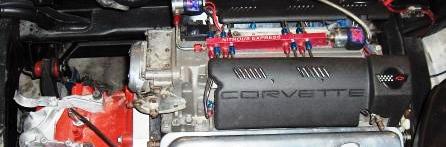
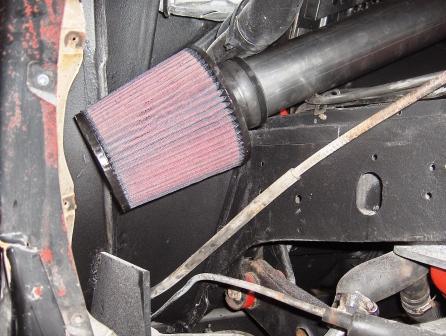
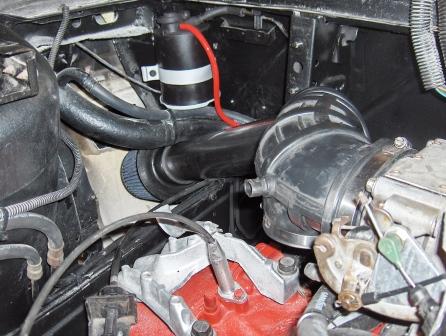
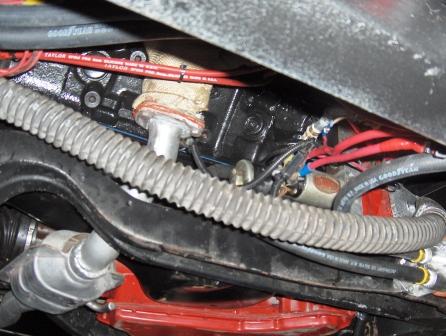
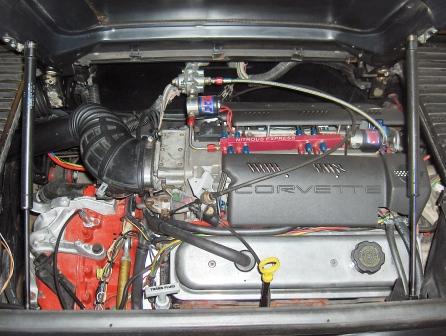
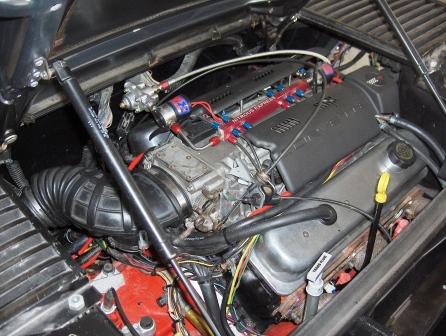
Here are a few engine bay shots of it really starting to come together:
What do you guys think? Fiero2m8
P.S. Next post I plan to show solutions I came up with to fix my V-belt that kept flipping upside down...
When you add up the widths of a LT1 with the cam driven water pump, a 4T60 and an Archie automatic adapter plate, it makes for a really wide setup to fit between the frame rails. That is why I chose to modify Archie's harmonic balancer pulley to fit the LT1, to reduce required clearance over a serpentine belt pulley. However when everything was together and running, I watched the belt flip over at high rpms - a problem that must be solved ASAP. I know some people have added a tensioner pulley with success, but I had no problems last year. I figured I screwed up somewhere this time - (my memory's good, but short )
My theory to fix the belt problem was to check these 5 things to determine causes before coming up with solutions:
1. Check for proper belt size. 2. Check pulley clearances to frame. 3. Check pulley alignment. 4. Check pulley on centre. 5. Check belt tension.
Here's what I found:
1. I was sold a 17038 belt in error (belt didn't match package) - after checking Archie's instructions and checking the alternator slot location, I bought a 15/32 wide x 39" long V-belt (15039)
2. Under load in drive, I heard a metal noise and the cause was the alternator shaft touching the frame. This was solved by grinding the overly long shaft until is was almost flush with the pulley.
3. I found the original washers I used to align the alternator, at that time I used two, I changed this to one fender washer that was thick enough to clear the valve cover, provide addtional clearance to the frame and have vitually zero offset between the two pulleys.
4. Unfortunately, my modified balancer pulley relied on the crank bolt to centre the assembly. NOT a good idea because even if you get it on perfect, tensioning the belt could move it. Watching the pulley spinning, I determined by eye that it was unbalanced/offcentre slightly causing a unwanted vibration, additional wear on my new crank, and belt bounce. I needed to improve on this Mickey Mouse design, so I asked my engine builder Rod for advice. He suggested centering the pulley using a outer sleeve over the hub of the pulley and the hub over the crank. That is the best way to centre the assembly and let the bolt do only what it is designed to do - hold it on!
A quick trip to the Metal Supermarket for a 2" piece of thick wall pipe slightly smaller diameter that the hub would do the trick. After I returned with the piece, Rod pressed it on the pulley with a 25 ton press and a little heat. It is stronger that a weld and still balanced.
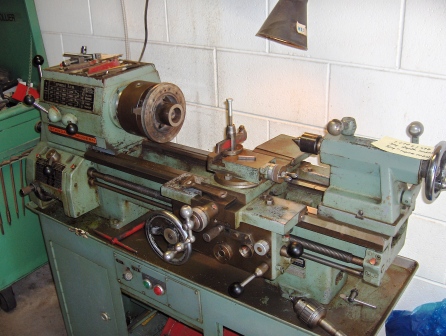
Next I called my Dad's friend Gary who has a lathe in his garage. He machined the rest of the pipe and pulley to bring all dimensions within 2 thou. The inside diameter of the pipe needed to be 1.770" and here are some pictures of that process:
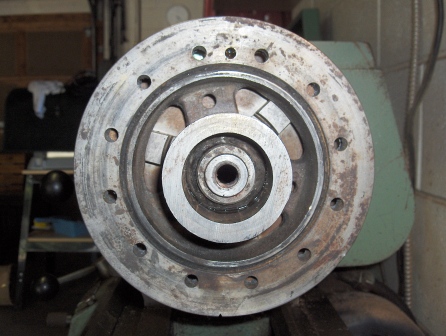
Mounted in lathe and checked outer pulley that was within 2 thousandths of an inch during a full revolution:
A good shot of the pipe pressed on the hub:
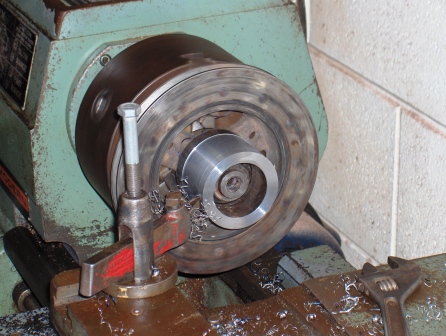
Both the outside and inside of the pipe with be machined true to the pulley:
I wanted the outside thinned a little to avoid interference with the OptiSpark distributor:
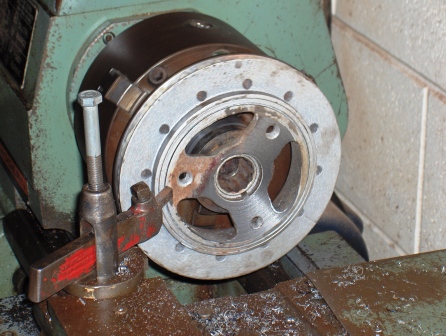
The outside a the pulley was trued up to avoid a wobble or unbalanced situation - the bonus was I gained addtional clearance to my frame rail once remounted:
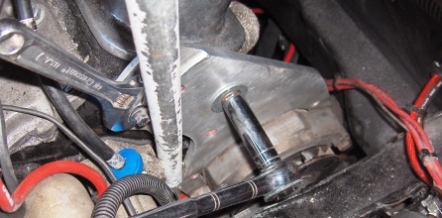
Here is a shot of it remounted - unfortunately in order to tap it on with a rubber mallet, I first had to lower the rear engine cradle bolt approx 1/2". The front engine mount sits on the lower holes that allows clearance to the crank bolt. The best part is I was able to get the belt on after mounting the balancer pulley Since the crank is internally balanced, this pulley is neutral and a quick check with my new dial indicator confirmed that it is now within 2 thou of centre on the engine, just like it was in the lathe:
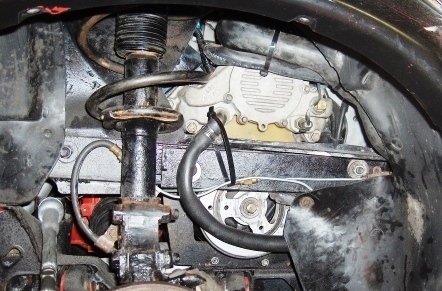
5. The research I did suggested approx 3/8 - 1/2" of deflection at the centre of the two pulleys. Here is a shot of the one man method I used. It involves prying the alternator bracket away from the water pump with a pipe. It was easy to tighten the nuts with the other hand. I like this method as it can be done by yourself from the top, even with the car on the ground:
I hope this writeup helps someones search of the archives one day
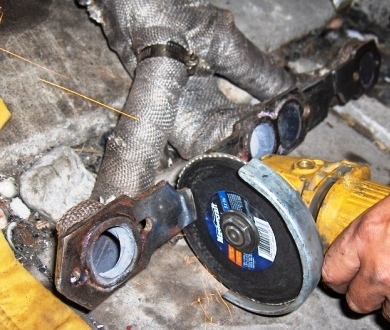
Last night I worked on a couple exhaust leaks. New gaskets on the collector were installed as the nuts came loose on the old ones. Also the rear header was leaking in the centre. The spacer wasn't leaking but the header flange was warped. I removed the header and cut the flange in two spots to allow each tube to bolt independently. Then I managed to burn my chest on a warm catalytic converter - oops, my tan doesn't look right now
Here is the header removed - you can see my spacer flange used to clear the 4T60:
Action shot showing off my multi-tasking ability...
Here is the header back on with double header gaskets - no leaks so far:
Today it's going to the muffler shop who originally built the exhaust to adjust the driver's side tailpipe tip to match the right.
With any luck, I'll bring it out to the cruise night in Welland tonight to show as a work in progress.
Went over to see Darren at Zoro Muffler, who built the custom exhaust to get the left tip to match the right. He used a little heat to straighten it up and then let me poke around under the hoist. I wish I had one in my garage!
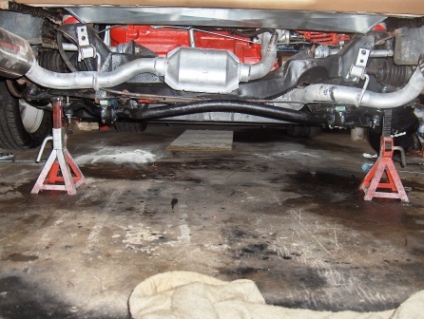
I was able to fix a couple minor leaks, improve on the strut bar mounting, and trim a few long sway bar studs that touched with pulling car onto the hoist:
Leaks were:
1. Coolant near the front of the passenger rocker tube - just tightened clamp with hose warm. 2. Gas droplet near the retun line on the tank - just tightened loose clamp.
I also asked him about the 2.5" collector gaskets that seem to leak on me over time - he suggested picking up some metal ones at a speed shop and he will put them on. I plan to check that out next week.
Here is a couple pics of the car back home with the exhaust redone at no charge - actually I gave him a Canadian Tire gift certificate, even though he said repeatly that I didn't have to do that:
I am also pleased to report that the major problem I had with the car before the engine was rebuilt and was still happening this week was finally solved at the shop today!
I had a rough idle, and a very rich bank on the drivers side right exhaust. The cat was very hot and so was the temp of that exhaust causing added heat in the engine bay. Hoping is wasn't a computer issue, I tried swapping the O2 sensors to see if the other bank ran rich/hot. Luckily it did, so I walked across the street to pickup a couple new O2 sensors and it solved the problem. Moral of this story is if you see a glowing cat, are getting poor mileage, or excessive heat - check the O2 sensors even if they are relatively new (mine were only 1 year old). Lucky for me it was a cheap fix More importantly the idle improved and the heat and gas consumption were reduced It did however foul my colder nitrous plugs on the one bank, so I put a new set of standard heat range ones in for now (since the nitrous isn't hooked up yet)
I did make it over to the cruise night at the Seaway Mall in Welland after a last minute battery purchase - don't let them tell you they are ready to go Mine barely started the motor and is on trickle charge tonight.
The Fiero was a hit at the show being the only obvious work in progress car and very unique and new for everyone to check out. I'm sure we all love talking Fieros and I met a few other local owners and directed them to PFF.
My next outing planned is the cruise night in Niagara Falls Sunday night. It has all the domestics on one side and the ricers on the other - major fun watching them take off down the strip afterwards....
So what's on for the rest of the weekend:
Hopefully seat covers, trunk insulation / carpet and a exterior comestic touch up if time permits Sunday. I went for a long haul tonight up hight 406 with my 9 year old son Andrew. We both had smiles ear to ear, although I had to laugh when he squirmed in his seat whenever I used half throttle (still haven't floored it yet while I break in the motor). All I have to say is the 4T60 is SWEEEEET!
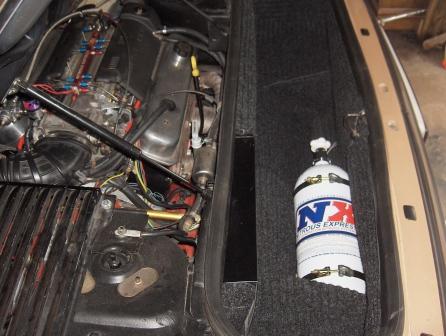
I am losing sleep over whether my trunk is too warm for my 10lb Nitrous bottle, as I currently don't have room in the front compartment. I ran a thermometer is the trunk tonight for an hour of various driving and the highest temp reach was 92 degrees F.
What do you guys think? I do have a bottle pressure guage and was wondering if anyone has installed a bottle in the trunk with success?
Originally posted by Scott-Wa: I think I've missed this thread the whole time... pretty impressive. Looks like a lot of well spent time sorting out that swap, kudos to you. The convertible top mods using the parts off the sunbird were a stroke of genius. I'm looking forward to seeing the notchback area finished off.
Shhh he got that from me.. lol
Good fit right 2M ?!?!
Just finished your pages.. eyes hurt now from all the reading.. lol
Yes Rob, your thread popped in my head when I stumbled across a Sunbird convertible at the boneyard - and yes, those windshield parts haven't been modified at all yet - so they fit pretty good. Rob takes the best pictures I have seen - kudos!
Well Gary, it has been almost 8 months since I started. So far I have still managed to keep my full time job and wife, so the project must be considered "successful" so far I was always worried that it would never get done, but this thread and comments like "I can't wait to see it finished" keep me going.
Somehow I think it may never be truly "finished" but by next spring it will certainly be less of an eyesore.
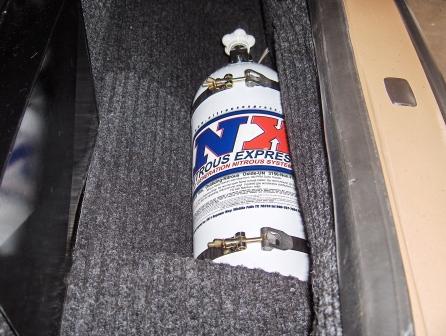
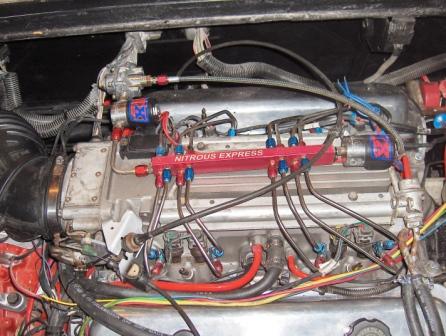
So, I managed to finish the Nitrous plumbing today
Here are the shots of that:
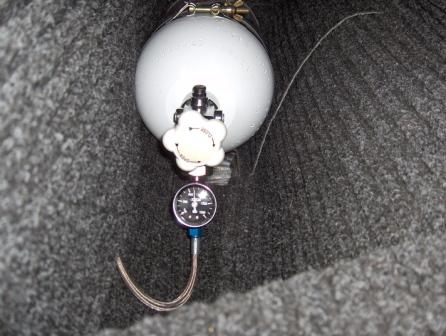
Mounted bottle in trunk ensuring pickup tube is at the lowest point in the bottle:
It fits nicely in the lower section of my custom trunk:
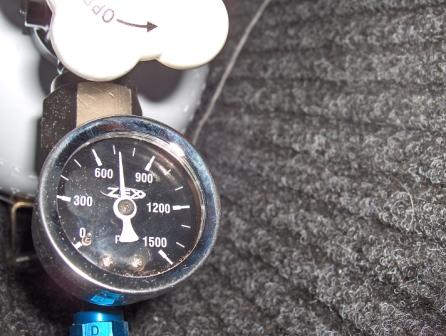
I installed a ZEX pressure guage just off the bottle that read 750psi at 70 degrees today.
That should get me in the right ballpark at 90 degrees, my guess is 950-1000 psi - I'll post results, as time will tell:
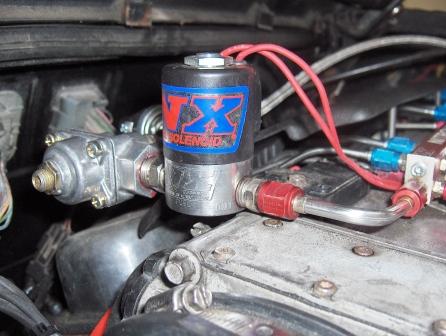
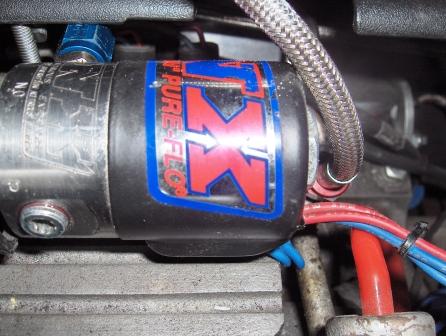
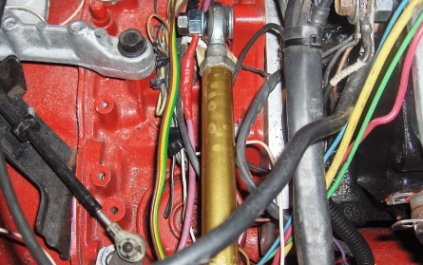
Next I used the NX sealant, (looks like red threadlocker to me) on all pipe thread fittings - the AN fittings don't need any. They advise not to use teflon tape as pieces could clog the solenoid. I relocated the fuel solenoid and added the Hobbs (fuel pressure safety) switch:
Next the schrader valve was removed with a valve tool, so I could feed the fuel solenoid at the same spot I check fuel pressure from:
All that is left on the NX kit is electrical hookups including WOT switch, relay, digital window switch and arming switch etc.
A little more bedtime reading and it should be done this week
Heading out now and will take my camera to tonight's cruise night - if I get any good shots, I'll post them on another thread.
Originally posted by Fiero2m8: Yes Rob, your thread popped in my head when I stumbled across a Sunbird convertible at the boneyard - and yes, those windshield parts haven't been modified at all yet - so they fit pretty good. Rob takes the best pictures I have seen - kudos!
Thanks.. All we need now is a way to lock the tops in the factory holes in those plates and grab something out back (on mine) I also have a Lathe and was considering a steel pin of some sorts with a side-locked thumb screw..
But whats your top going to be?
Hard-top removable? Wire formed jeep like soft top?
Rob
Agreed on those holes! For now it's going to live life as a true roadster, wearing my boat cover in the garage. In the spring, I plan to get an unholstery shop to make a tonneau cover I can keep onboard for emergencies. I would prefer a removable hard top made from a donor car as I don't like the look of the soft top folded down since you can't hide it very well.
So I see a hardtop project in the future, but probably a year or two off as this project is a 3rd vehicle (just my toy that plans to only see fair weather for now) I envision locking buckles on the rear deck like a Miata and the locking pin mechanism and handle from the Sunbird welded to a non sunroof Fiero notchie donor roof...
Maybe I'll wait till someone engineers one successfully first
Cheers, Ryan
[This message has been edited by Fiero2m8 (edited 08-20-2006).]
Hey - I finally took the time to read my thread through from the start! Not bad...when I'm done, I can print it for a nice photo album. A little pat on my own back here for me I think I'll give myself a postive rating too!
I have a problem with the driver's door sagging, prior to the roadster build and finally got around to fixing it.
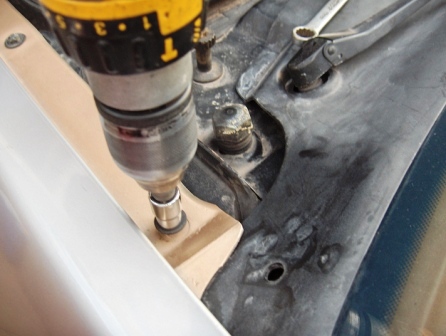
I removed the front fender bolts:
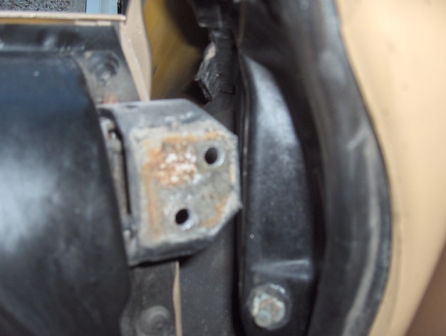
Unbolted the top hinge and drilled out the 3/8" holes to 7/16" to allow the holes to act as slots, for adjustment purposes:
Then I used a floor jack under the door and raised it until it lined up perfectly with the jam and retightened the 13mm hinge bolts:
Now the door closes with one finger just like the passenger side.
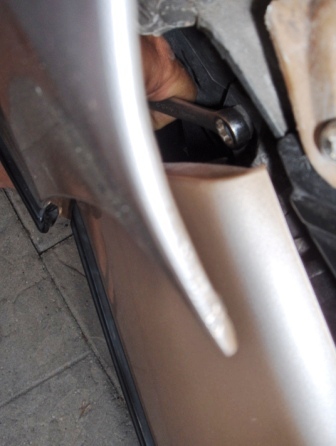
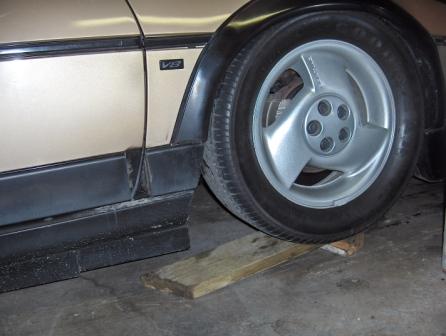
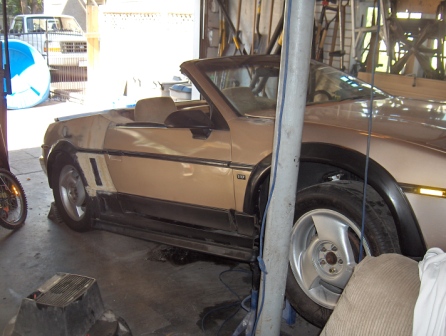
Under hard braking I heard the front right tire rubbing, so I drove that wheel up a small ramp to check the interference:
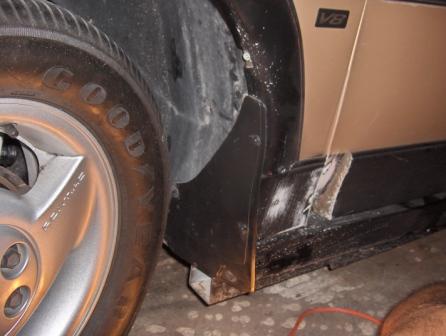
The new shocks were countered by lowering the front end 1-1/2 coils, so I trimmed the fender flare slightly for additional clearance. P245/50ZR16 seems to be the widest tire I can fit on the front and rears with stock struts:
While I had the front end jacked up, I reinstalled the mud flaps onto the wheelwheel liner to finish the front edge of the side skirts:
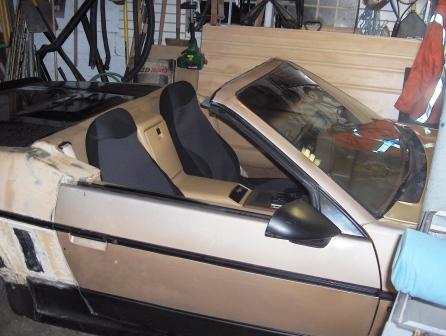
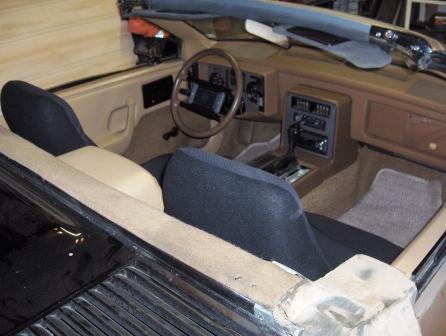
Next, I installed the temporary seat covers, I went with a Bell product in black:
They went on easy and will fit even better after they get some use:
I am satisfied with these until I can afford Mr. Mikes tan leather, probably next year:
Your wheels are off a Grand Am right? If i remember correctly, those are 16x6 in dimension. I guess my question is how did you get a 245-50-16 on a 6 inch wide rim and still maintain a vertical side wall? Oh and for someone calling themself an amateur your build certainly doesn�t show it! Great work!
that thing is cool i wana see. you driving that thing around at all. i might have to con you into meeting up on one of my trips up to the falls.
Thanks - call me when you're in town as per PM I sent.
quote
Originally posted by HitesFiero:
Your wheels are off a Grand Am right? If i remember correctly, those are 16x6 in dimension. I guess my question is how did you get a 245-50-16 on a 6 inch wide rim and still maintain a vertical side wall? Oh and for someone calling themself an amateur your build certainly doesn�t show it! Great work!
Welcome to the thread! Thanks for the compliment - I don't have any formal mechanic training, not even from high school. I like to think I'm smart enough to read books and combine that with my passion for cars to get the job done. Experience is the key, keep tinkering and when that gets boring, try something bigger you haven't done before. I played around with my cars since I got a garage....VW's, BMW's, Jeeps, and now the Fiero. As long as I remember that I'm building a toy that will be driven and not a concours show car - I should stay within my limits and be happy A nice side effect of these projects is you build a great tool collection along the way!
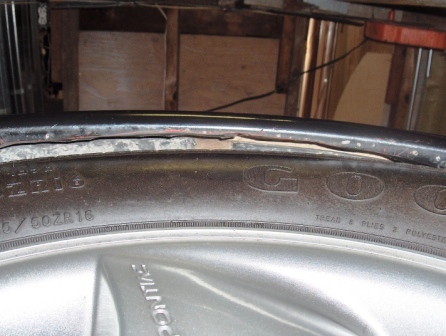
The 1992 Grand AM GT rim is 16x7 (I thought they were 6.5" so I measured them) They are Goodyear Eagle Unidirectional Gatorbacks P245/50ZR16 from a 1985 Camaro IROC-Z. Can't buy them anymore, but they are sticky and help keep the front end of the Fiero from understeering. They do stick out 1 inch from the rims and I remember the Tech at Niagara Battery and Tire throw a few curse words my way when he was mounting them
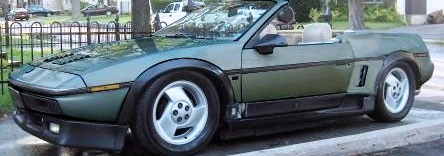
Here is an old photo showing the rims and tires on before the fender flares - I went from the 13" steel Fiero rim, to a set of 14" Sunbird rims, to these and what's next? Maybe 18's in a 5 spoke design - two sets of tires to wear out first though
Last night I was tinkering around with the wiring and found the backup light wire! After it was connected that the trans switch was off by half a position because the lights came on when the selector was between R and N and the car would start in P but not N.
The fix involved rotating the switch counterclockwise and retightening the bolts when the test proved it was in the perfect spot to start the car in neutral and see reverse lights in R.
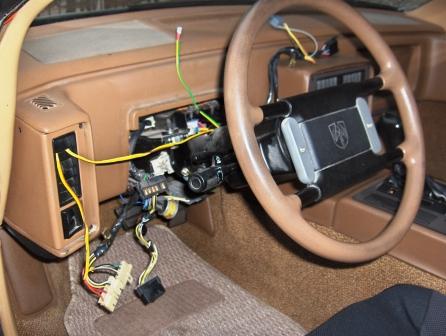
After reading some of the Haynes manual, I noticed I haven't had the instrument cluster out before (One of the few remaining things I haven't had my paws on)
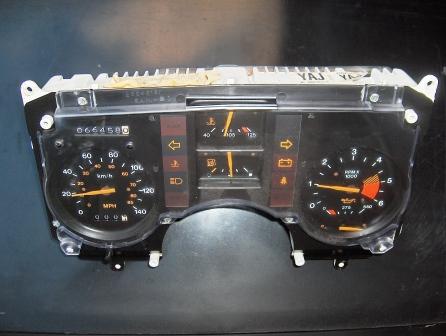
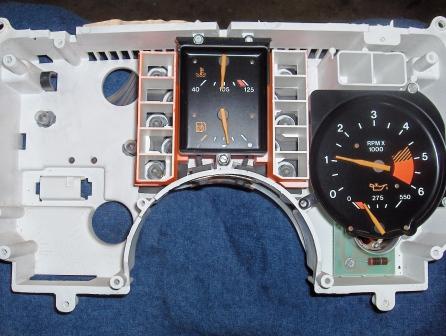
After following the steps, I completely R/R the cluster and removed the Tach while it was out. I would like to upgrade to a Tach modified for the V8 and run separate oil and voltage guages (either the Fiero ones or aftermarket, have to do some research first...) Here are some shot of the cluster, it was quite easy and only took an hour. One more thing I won't have to check the book on next time
Looks like a race car without the cluster in place:
Instrument cluster removed as a whole unit - just unplug three plugs, 2 on back and one on the bottom left:
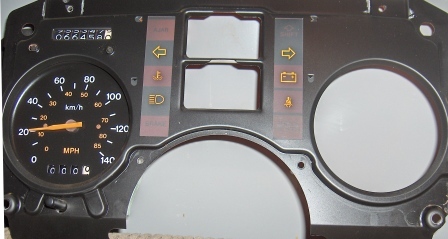
Speedo / Odometer comes off with faceplate, note the mileage in Kilometres:
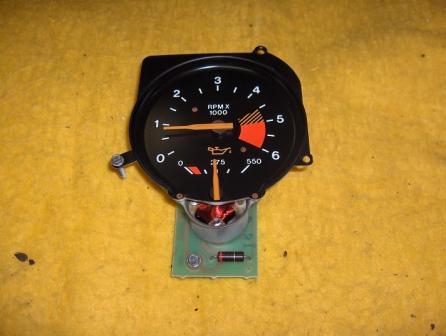
The Tach is held in by two screws - I used 5.5mm, 7mm, 10mm socket drivers, and T-15 torx for this mini project:
This Tach has the Oil pressure guage built in to it, but I think I accidently fried it the other night:
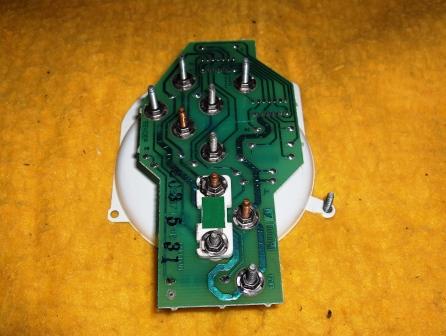
Back of Tach when mods occur for V8 swaps:
Holley sticker to cover temporary opening - at least I have a Holley fuel pump on the car
OK, you are my hero! I have had a carbed LT1 sitting in my garage for over three years until I started reading about your installation. I have started a whole new build thread for myself on my web site where I originally built a 383 SBC for my 88 Formula/GT. I have had the 88 running about 2 years and only drove it on short trips or to autocross. Now that I work 70 miles away I was driving an 87 GT with stock 2.8 and 125 and wanted something with more spunk and good mileage.
So.... I went to the local Pull-A-Part and got a 89 Buick Regal 440T4 or 4t60 for $83 with 2315 rpm stall torque converter. I spotted the car yesterday while I was in the yard picking up other stuff. I looked at the engine and trans and thought they looked awfully clean for an 89 until I found a receipt from the local GM garge for a complete drive train replacement, new V6 and completely rebuilt transmission. I was so excited I could hardly sleep, got there when they opened this morning and yanked the trans. Looks so new I was afraid someone would call me on it! I had pulled a spare cradle into the garage and started getting it ready for the swap a week or so ago and had actually bolted up a core trans to my LT1 and set it in the cradle to look at it. Now I have thre actual trans and will go full-speed forward.
I was hoping more would catch the LT1 / 4T60 disease, so we can help each other out down the road. I understand that everything is "custom" to fit in the Fiero engine bay - most people give their head a shake or do a double take and ask "How did you manage to shoehorn a V8 in there? My response is usually: "I planted it when it was smaller - you just add water and they grow to fill the engine bay!"
Tonight my 9 year old son Andrew is helping me with the Nitrous wiring - my wife calls us "Sanford and Son"


 and finally got a little more progress on my amateur home build:
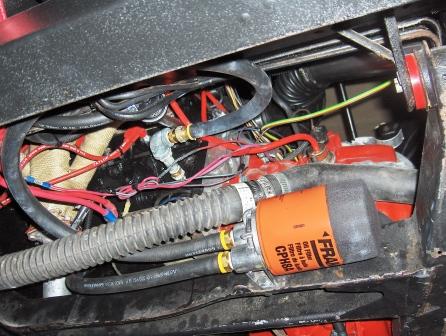


 NOT a good idea because even if you get it on perfect, tensioning the belt could move it. Watching the pulley spinning, I determined by eye that it was unbalanced/offcentre slightly causing a unwanted vibration, additional wear on my new crank, and belt bounce.