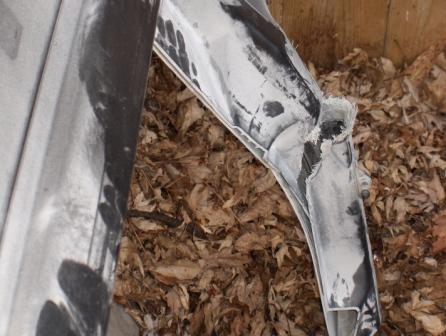
That looks alot like Spray can foam... Not really the best idea in the world....
This foam A - Gives off gases, so if you fiberglass over it and seal it, it will bubble through the fiberglass... B - The fiberglass will melt it and create a nasty mess (I would know ) C - Not the best stuff to use.....
I would have spoken sooner... But... Just don't fiberglass that before covering it.... with plaster... duct tape.... anything! Then when you fiberglass what you need, remove that piece, and gut out that foam, then install the fiberglass piece again.
Nice thread so far! Just some words from a worried fiero nut !
Thanks Custom2m4! - I've still got the crap on my fingers so I guess it's not good for fiberglass either. It's reassuring to know that with over 1800 views, members will give a "heads up" when I forget to ask ?'s. Hopefully I'll keep the stupid ideas to a minimum
On another note, I call a local Fiero owner today for a notchie decklid. Turns out he is a "former" owner that took a load of fenders, nose cones etc to the dump 2 weeks ago. However, he still has a decklid for me I'm picking up by the end of the week. When I go over I'm going to see what else is left from his 3800 choptop conversion project. I don't have much room to store extra parts, but if you're after something specific let me know and I'll check for you.
Ryan
P.S. Thanks for not rubbing the ownership of page 2 in...
[This message has been edited by Fiero2m8 (edited 04-17-2006).]
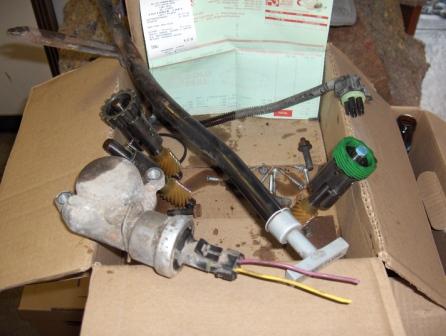
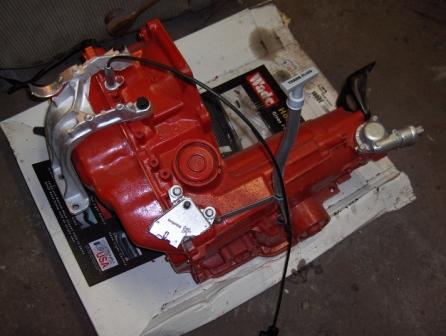
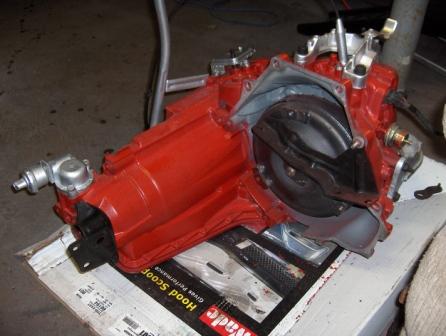
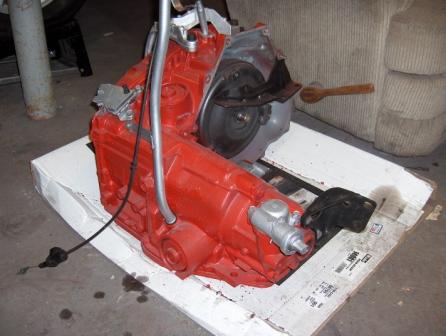
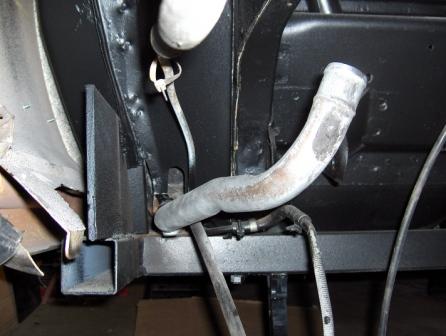
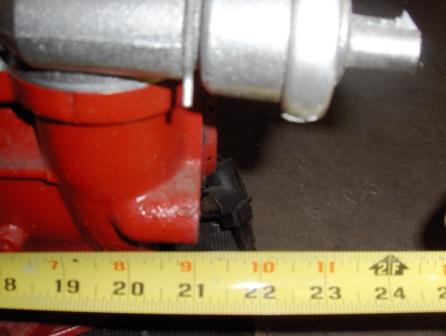
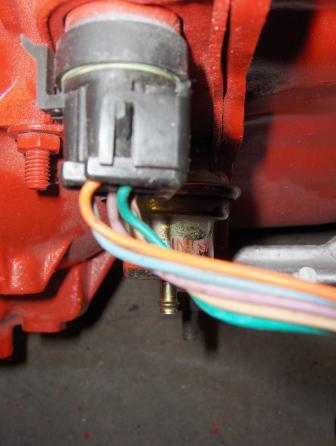
Some shots of the trans prepped with VSS, filler tube, brackets, TV cable, Park/Neutral switch and trans plug installed/painted.
The holes in the Fiero park neutral switch had to be slotted but now it is plug and play with my harness. I used the Fiero TH125 TV cable since it is longer and easy to adjust. I doubt the tailshaft bracket will work without an adapter as the SBC and Caddy holes are probably different and I am using Archie's adapter plate. The main mount will be able to be used by sloting or redrilling the cradle holes once the engine is mounted and mated to the trans. I will have to come up with a solution for the exhaust header as this governor will interfere with the header collector. The filler tube is longer than the TH125, so I may have to shorten it to match the 125's length and use the 125 dipstick inside the tube - we'll see. The VSS plug matches my harness plug.
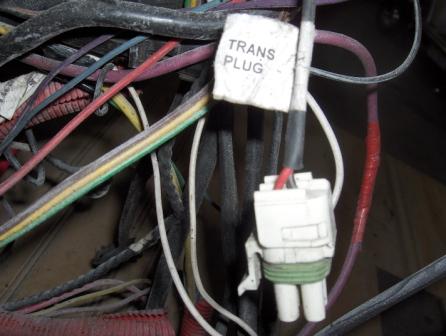
I need info on how to splice my trans plug wires (four prong) harness to the Caddy five wire plug - anyone know the colour match ups?
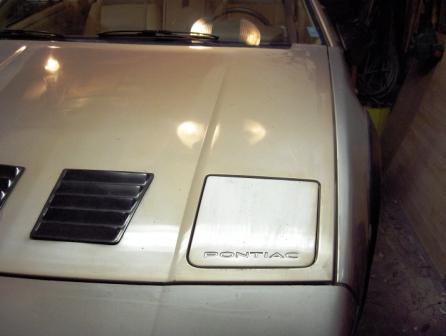
I've had a couple dozen PM's on the fender flares. As previously mentioned they were 1989 Pontiac Sunbird Turbo flares. Only the Turbo model had them. You mount them through existing screw holes in the inner lip to the wheel well liner. Since the Sunbird wheelwells are smaller, they simulate a lowered look when installed on the Fiero. Here is a picture of a Sunbird Turbo with the flares installed from the factory. I also grabbed the hood vents from the same vehicle to provide my new 4-core rad fan with an easier exhaust path.
Oh man - glad it's not my neighbourhood! I didn't even notice the drawings, I wouldn't take a picture of my car there
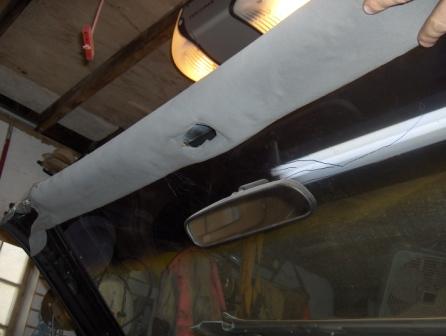
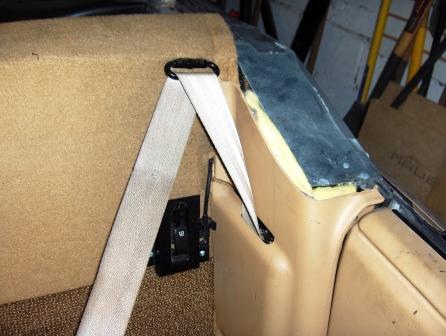
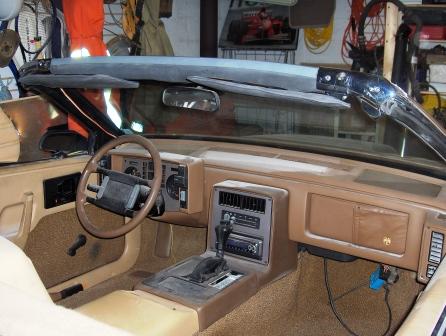
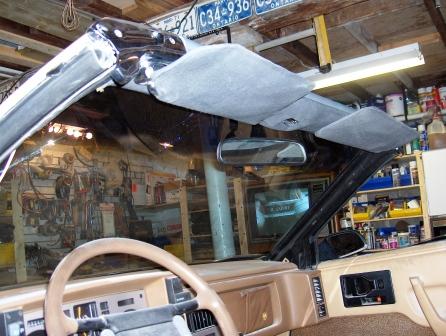
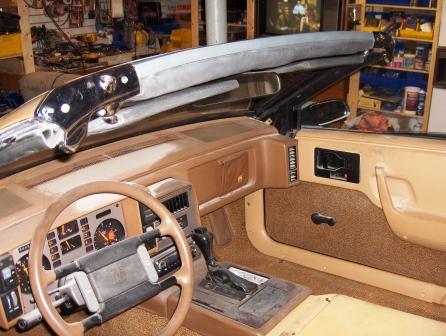
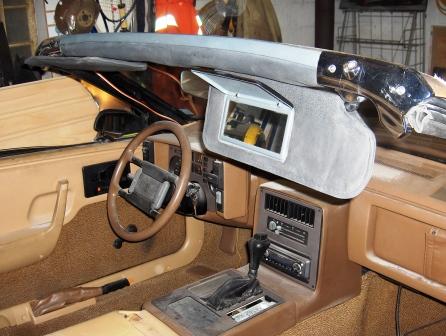
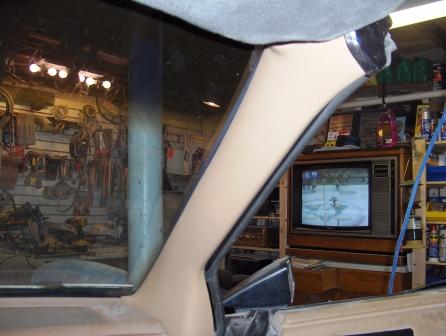
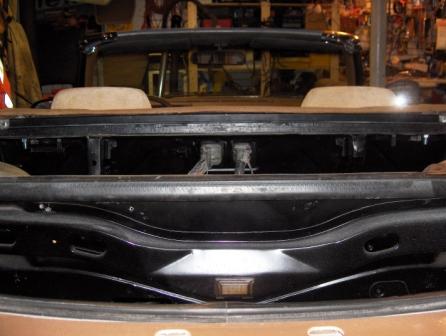
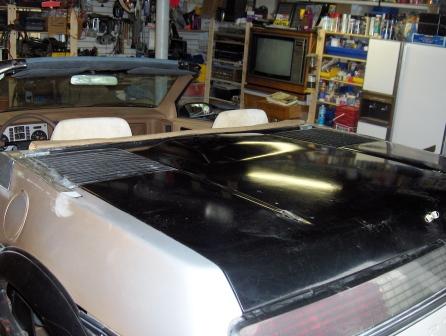
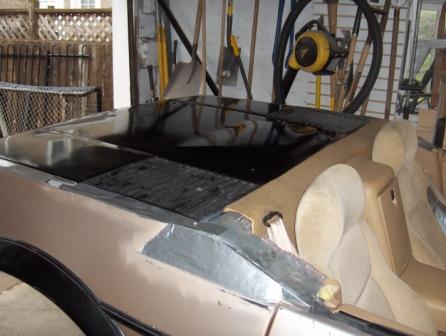
Today's progress was on the upper seat belt mounts and the windshield trim.
The upper mount was bolted through the roll bar and firewall with 4"x1/2" bolts. It operates very well and doesn't bind or twist at all. You can also see the fuel release lever has been relocated to the firewall.
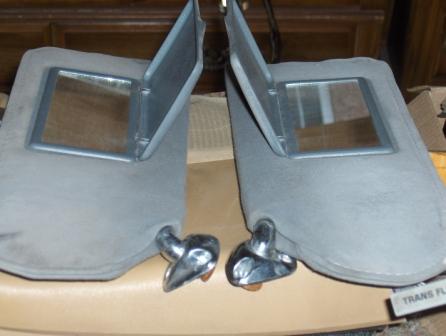
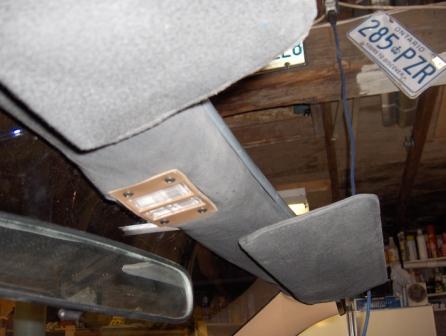
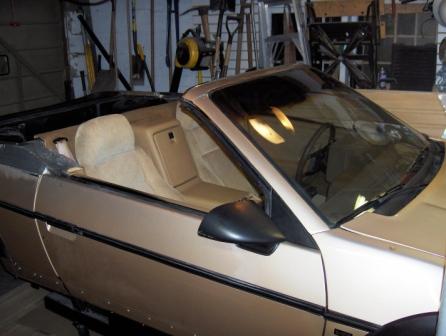
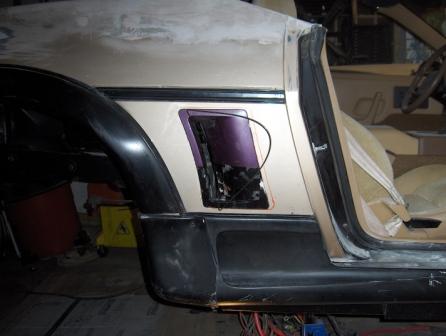
Fiero2m8 Here are some shots of the Sunbird convertible parts installed. I painted the visors and headliner with black fabric paint. Then everything was drilled and screwed into place. I was surprised how well everything fit with very little modification.
Looking good! I'm curious to see how you get that strut tower brace to work. Steven and I played with one at a junkyard once and while it looks like it just fits, you can't close the decklid. I'd say you'd either have to cut and reweld the bar to sit lower to clear the decklid, or notch parts of the decklid to clear.
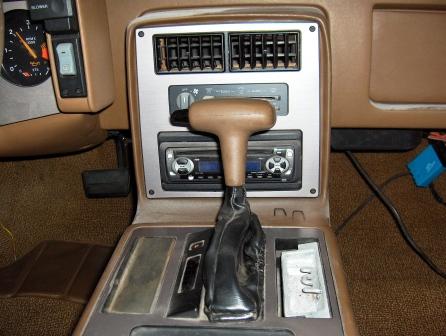
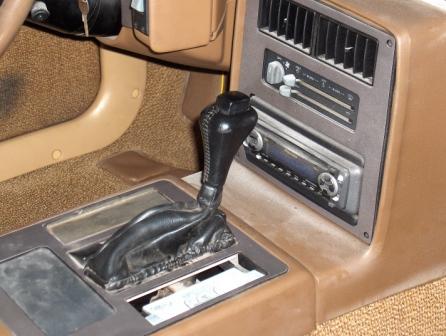
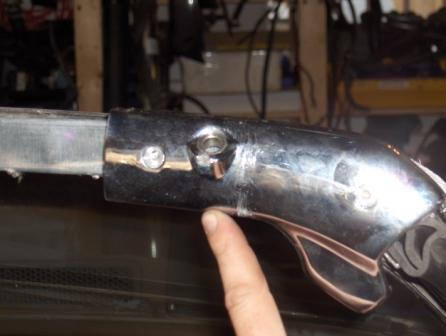
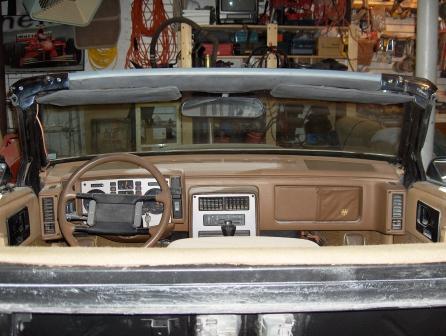
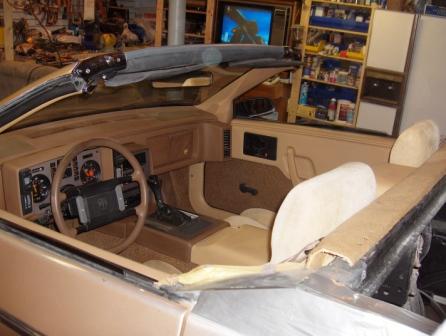
Finished up interior windshield trim by cutting panel to fit inside the chrome trim. One screw holds it in position at the top:
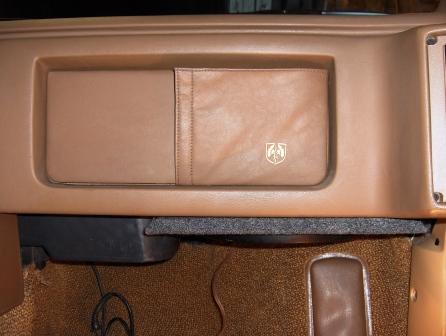
I also modified the old overhead console to fit the new interior trim. The push button map lights were removed and the door switch interior lights were installed into the headliner. They will operate from the existing harness when doors are open or the interior light switch is turned on.
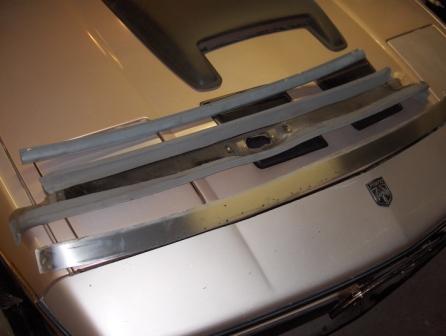
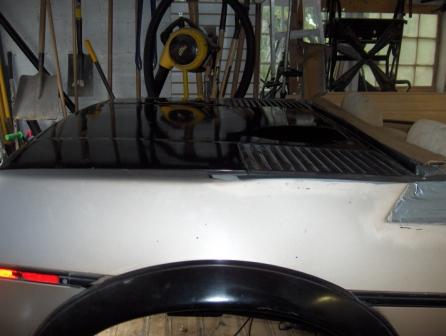
Windshield cowl and wiper arms were reinstalled with new blades:
Realigned the hood and rebolted the fenders in place:
Removed the seat covers and reinstalled the factory seats that are patiently waiting for Mr. Mikes leather this summer:
Shot from the back shows that the headrests don't stick up that far above the firewall roll bar now:
Driver's side picture:
Passenger side picture - still thinking of what the new side skirt solution with be as I need 5-6 inches of depth:
Hopefully I'll have some pics of the LT1 next week to make things more interesting. The weather up here has been great so I'm sticking with my goal to have Fiero 2m8 running by the end of May. Then I can work on the stereo, nitrous, and body mods in between joyrides...
You bastard!! You copied me Check out the link in my sig, theres some good info on my 4t60e/lt1 swap.
------------------ 1986 GT, LT1/4T60E. In the middle of cam/port, new interior, paint and waiting on new wheels. Itll blow you away!! http://hometown.aol.com/ptfiero/index.html build http://dtcc.cz28.com/Customer/LT1Fiero/index.htm
Thanks GoKart - I will post pictures of the corrections soon.
Hi Pat - yes I did email some questions to Darth Fiero and Winston at FieroLT1.com over the last couple of years. They were both very helpful. Credit is due to you as I found that most SBC swaps were manual trans and the automatics made things a little more difficult since their were less examples around.
I am glad to see you're now planning to modify your iron head LT1 with similar mods as mine (ported heads, crane cam, nitrous etc)
I referred to your site as proof the 4T60 is possible with a LT1. I especially like your cold air intake setup and would like to go with something similar in stainless for my K&N filter. + rating for you.
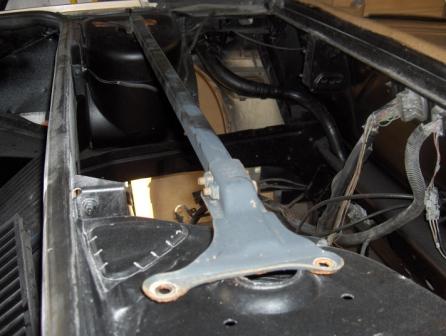
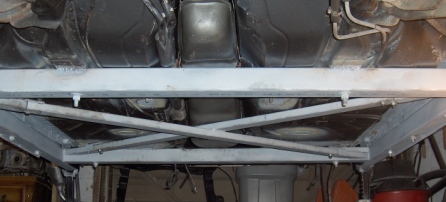
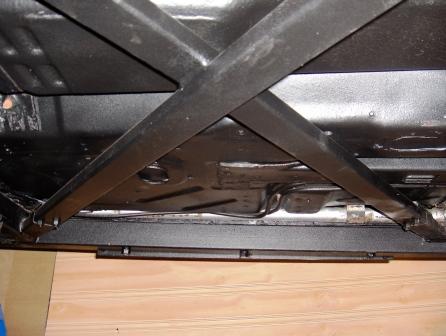
The underside of the X-Frame is as smooth as possible - bolts were trimmed before final painting:
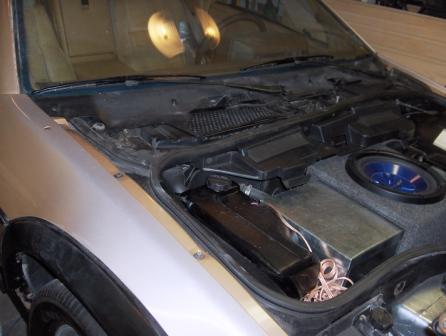
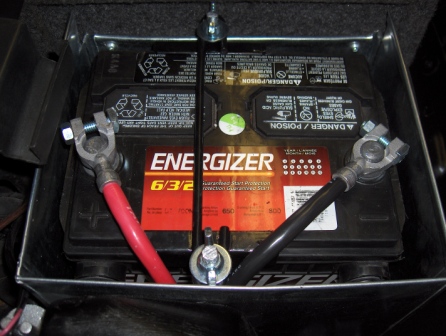
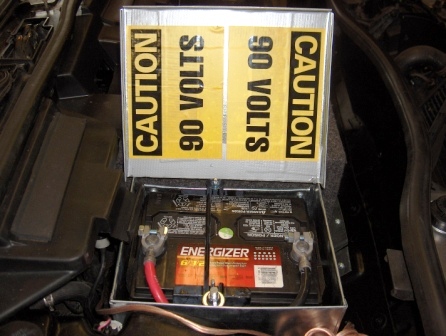
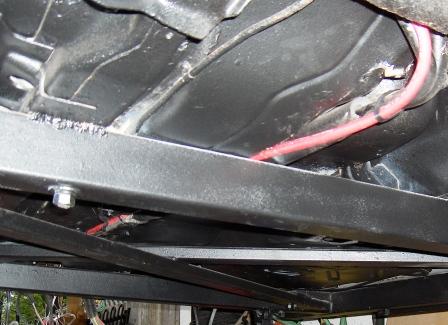
Battery tray inside box is secured so battery cannot move and cables are tightened up at the correct postitions to avoiding arcing. Inside of lid is also covered to prevent accidental sparks during removal and reinstallation:
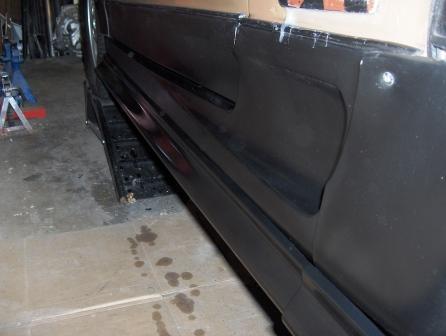
Side skirts were re-installed to match flares - I will need to add approx 2 inches to the bottom to cover the x-frame from view - then they will match the height of the front skirt on the other side of the tire:
Going to stop by at the Hod Rod shop today with my camera - still wanting on the reversed intake - I'll try to get some other pics though...
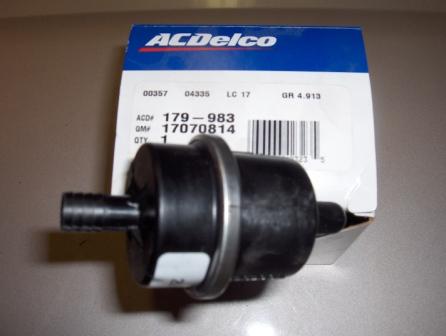
Maybe someone can help me hear - otherwise I might be able to ask Mark at Street and Performance: Below are pictures of my 4 prong plug from my custom harness that ran the stock Fiero TH125c. It has only 2 wires on it that need to be cut and married to the Cadillac 4T60 5-prong plug - Does anyone have a wiring diagram or know what the 5 wires are for, so I can splice them correctly? This is a non Electronic 4-speed overdrive 4T60 from a 1990 STS.
Red and brown only on the custom harness / LT1 92/93 ECM
Orange, Grey, Pink, Brown, and Green on the Caddy trans to choose 2 or more from
Any educated ideas or better yet advice from experience would be a plus for you...
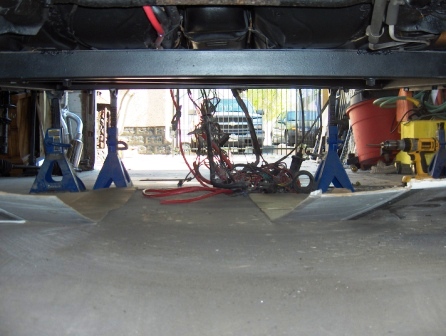
I did a start on a rag top conversion on an 84 about 10 years ago. Using standard suspension and 14 inch wheels, I had ground clearance problems with the x-frame. I'll be interested when you get it all back together with your final choice wheels--to see if you have problems with speed bumps and other road hazards. That x-frame you've installed looks massive!
[This message has been edited by Brian Lamberts (edited 05-16-2006).]
Thanks Brian - I've read many of your yahoo email posts and trust your judgement, so l'll watch for that and measure the ground clearance. The close up pictures do tend to make the x-frame look bigger on the thread. Also, the car did sit much lower on the 13 and 14" stock wheels I used to have on there. Luckily it will be for cruising friendly roads after checking the weather report I did increase the x-frame dimensions from 2-1/4" to 2-1/2" box due to less cost and extra strength for the V8. I guess time will tell how soon I will need to get new springs
Also on the transmission measures above, I forgot to mention that the extra 2" inches in length is on the passenger side, which is very good news for me so I can retain my custom shortened Pontiac 6000 axle on the drivers side and reuse the Fiero auto axle on the passenger side since I moved the entire assembly 2 inches to the left to make room for the LT1's water pump.
Fiero2m8
P.S. Before I put the P245/50R16 Goodyear Gatorbacks on I had Pirelli P225/60R16's on the 3-spoke rims that filled out the wheelwheels nicely, but made the car sit too high in my opinion. Since 18 ot 19" rims aren't in the budget this year, I may have to swap the other tires back on - stay tuned.
[This message has been edited by Fiero2m8 (edited 05-16-2006).]
One thing I was wondering, but you don't have to worry about, is why not use a double X underbody X-frame? Leave the opening for the gas tank but keeping it stiff.
Hey GoKart - sounds to me like that design would work good too. I already had to try my removeable X out to drop the gas tank and it worked just fine.
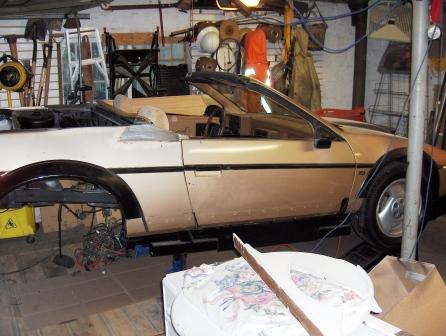
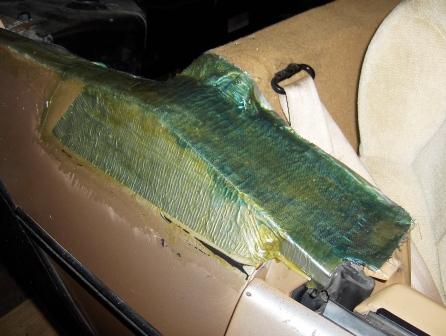
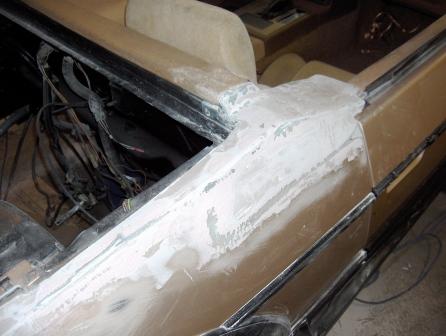
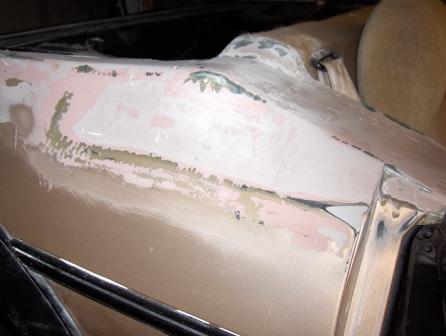
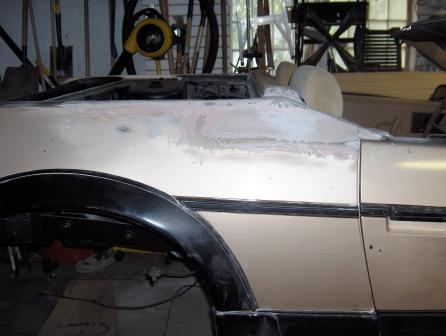
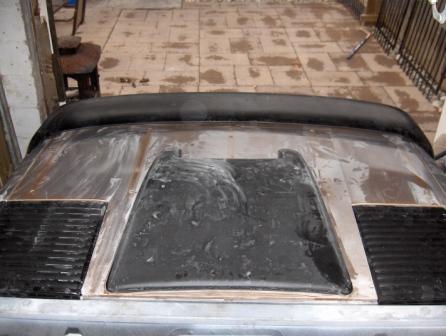
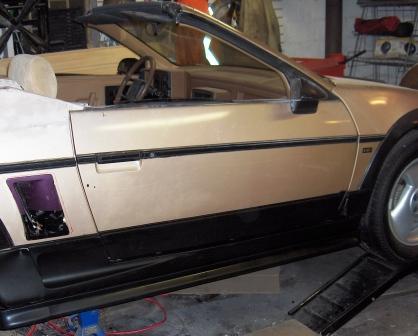
Here are some updated pictures of the B-pillar bodywork - the part of the build I detest. A lot of patience and elbow grease is required, but I got the first two layers and sanding done today.
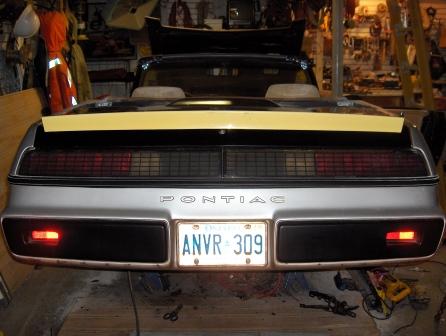
Yes it is my notchback - I bet I could sell it as a wing though
I decided with the roadster to go with a spoiler over a wing, so I removed the Lumina Z34 wing shown here:
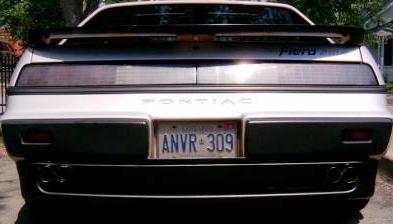
As replaced it with a spoiler off a 1986 Camaro (no 3rd brakelight in it as they were on the hatch that first year) Wrong colour but you get the idea - it requires 6 holes and is fastened with 10mm nuts with washers:
I'm also working on side scoops that I'll post pictures of soon.
Fiero2m8
[This message has been edited by Fiero2m8 (edited 05-24-2006).]
Passenger side scoop installed from a 1983 Pontiac Trans AM. The driver's side will be a little more work, but I prefer them to be the same vents on both sides, so I am going ahead with it.
I've been watching your thread with interest. You are doing a heckuva job on that car from what I can tell
Was the lumina wing mounted to your decklid? How did it fit? That picture you have there looks really nice.
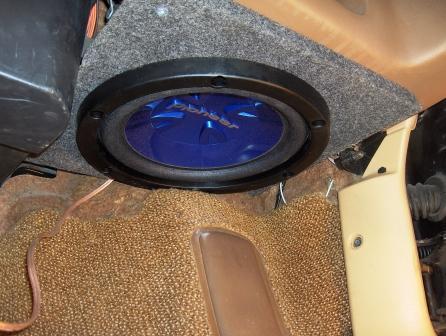
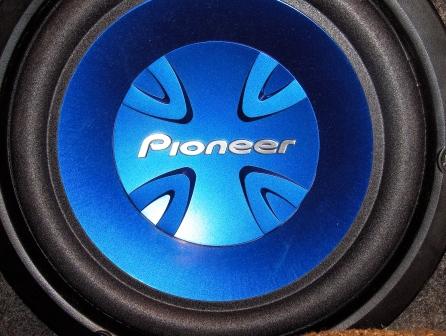
Also - how did you get enough volume to mount a 10 inch sub under the dash? I held mine up and it didn't seem like a nice fit at all. I guess I'm still not 100% of how I want to mount my 10 in my car
Thanks, Andrew
------------------ Now only mostly original 85 coupe with 41k miles ;) http://www.unmentionable.ca
Looking good! I'm curious to see how you get that strut tower brace to work. Steven and I played with one at a junkyard once and while it looks like it just fits, you can't close the decklid. I'd say you'd either have to cut and reweld the bar to sit lower to clear the decklid, or notch parts of the decklid to clear.
That one we found sure fit a lot better than his! I think it was from a later Sunbird? May have even been a Sunfire..
Originally posted by Steven Snyder: That one we found sure fit a lot better than his! I think it was from a later Sunbird? May have even been a Sunfire..
-Steven
I believe the stress bar I got was off a Buick 3800 or Cadillac 4.9, so I know it's too long but the center bar just unbolts and can be shortened. If I use it at all, it would be after the motor is in, and I was hoping to flip it upside down to solve the clearance problem - I guess we'll see...
I've been watching your thread with interest. You are doing a heckuva job on that car from what I can tell
Was the lumina wing mounted to your decklid? How did it fit? That picture you have there looks really nice.
Also - how did you get enough volume to mount a 10 inch sub under the dash? I held mine up and it didn't seem like a nice fit at all. I guess I'm still not 100% of how I want to mount my 10 in my car
Thanks, Andrew
Hi Andrew,
Thanks, I glad you're interested. My build is definitely of the home/novice/budget type compared to many on PFF, but I'm having fun with my Fiero Yes the Lumina Z34 spoiler (1992) fits easily by drilling 4 holes in the decklid - I did that on mine last year. The tricky part is the center mount. You can get the nut on but it is very close to the lock cylinder that you have to remove to do it. The other problem is the keyhole is hard to access without mods to the center support. I ended up removing the centre support completely, but it flexes a little without it.
Here are a few pics of it installed:
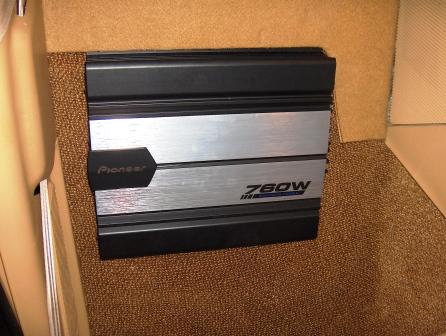
The 10" sub doesn't even fit unless the vent cables are relocated. It is a fairly tight fit and is only using limited dash space as box volume (approx .7 cu.ft) My sub box in the front compartment is just over 1 cubic foot. Since my 4 - 4x10s are only powered by the deck, I was more concerned about too much bass with the amp I am using, so if it doesn't sound good I can always remove or relocate the sub under the dash and port the front box into the cabin.
Tonight I was working on modding some Grand Prix side skirts to cover the bottom of the X-frame. I will post some pics of that this weekend.
I believe the stress bar I got was off a Buick 3800 or Cadillac 4.9, so I know it's too long but the center bar just unbolts and can be shortened. If I use it at all, it would be after the motor is in, and I was hoping to flip it upside down to solve the clearance problem - I guess we'll see...
Ryan
Ahhh, the one we found was all welded. It would've required some cutting and welding to work. Hope this works out well for you, your project looks great so far!
Thanks, I glad you're interested. My build is definitely of the home/novice/budget type compared to many on PFF, but I'm having fun with my Fiero Yes the Lumina Z34 spoiler (1992) fits easily by drilling 4 holes in the decklid - I did that on mine last year. The tricky part is the center mount. You can get the nut on but it is very close to the lock cylinder that you have to remove to do it. The other problem is the keyhole is hard to access without mods to the center support. I ended up removing the centre support completely, but it flexes a little without it.
Here are a few pics of it installed: The 10" sub doesn't even fit unless the vent cables are relocated. It is a fairly tight fit and is only using limited dash space as box volume (approx .7 cu.ft) My sub box in the front compartment is just over 1 cubic foot. Since my 4 - 4x10s are only powered by the deck, I was more concerned about too much bass with the amp I am using, so if it doesn't sound good I can always remove or relocate the sub under the dash and port the front box into the cabin.
Tonight I was working on modding some Grand Prix side skirts to cover the bottom of the X-frame. I will post some pics of that this weekend.
Fiero2m8
Fiero2m8,
Thanks for the reply! I hate to be the guy asking questions about a mod you've uninstalled in favour of a new one I've seen the Camaro lip idea before - but never a Lumina Z34 wing. It looks really nice on there, as does the lip spoiler of course.
My car has the luggage rack on it at present, which is well, pretty gross I've been exploring the options to improve the looks. My first Fiero had a plain decklid, and I think that's a nice look too - the lip is very complementary to that.
On the subwoofer - is yours a free air sub?
Anyway, thanks again. You say that this is a "home/novice/budget" type of build, but I think you're being too modest of your skills. You've got some great stuff going on there that's well beyond this novice!
Thanks Andrew. I am keeping the Z34 wing I put on my luggage rack decklid. It needs quite a bit of work but I may do a decklid build in the future with it. I just decided I preferred a spoiler vs. a wing on a roadster, but I did get alot of compliments on the other one.
The under dash sub is sort of a soft box where I used a fiberglass underpad material to line the odd shape of the dash. It should absorb unwanted noises but isn't an air tight design or a proper box. I think an 8" sub in a tube would be better suited under the dash. I've also seen a 10" in the passenger footwell area, but I didn't want mine to be seen.
A few pictures of the 1994 Pontiac Grand Prix skirts installed. They are by no means finished at the wheelwells or blended in yet, but I sprayed them with black bumper paint to get an idea how they will look. I used the harware clips to install them and screws underneath. It makes the profile lower and wider, although it is starting to look like typical Pontiac bodyside cladding the designers were so addicted to in the 80's to add "excitement"
Sorry for the delay Andrew. No to worry though you didn't miss anything as I've been too busy at work to make much progress. However I stopped by the Hot Rod shop today and snapped these pictures of the progress. Let me know what you guys think...
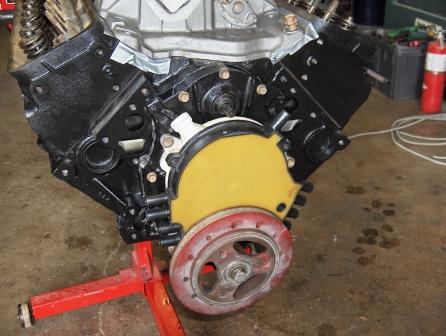
V-belt pulley installed for additional frame clearance
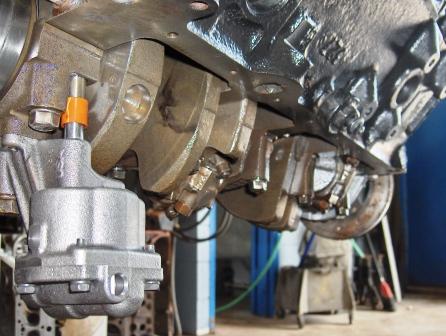
Heads are ported for larger valves and crane cam is installed
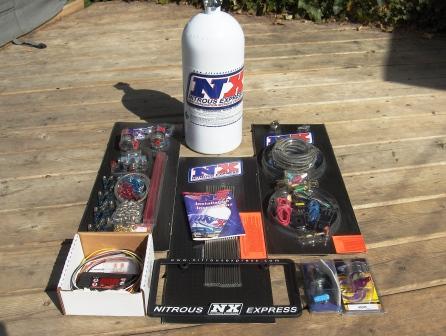
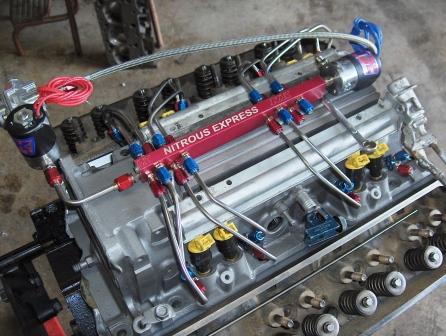
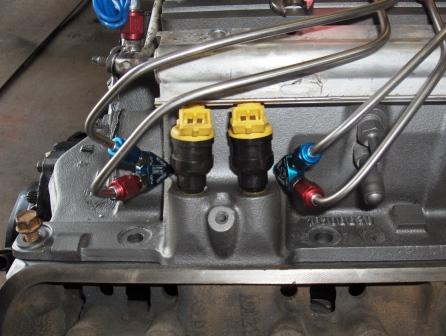
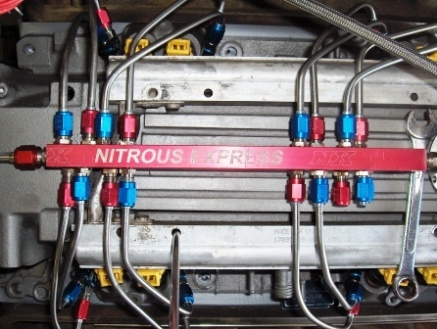
Piranha Pro nozzles and stainless tubing for Nitrous Express direct port kit
Block is .0065 inch over (365 cu in. / 6.0 Litre) with forged pistons installed and crank balanced. Notice high flow oil pump
View from top showing tight plumbing so Corvette Fuel Rail covers can be adapted to fit over nozzles


 )
) !
!