What about the flush mounted headlights? If you get tired of the photo chops let me know ;-). Took the molding off the same way you did the fender. Did you want the marker light above or below body line?
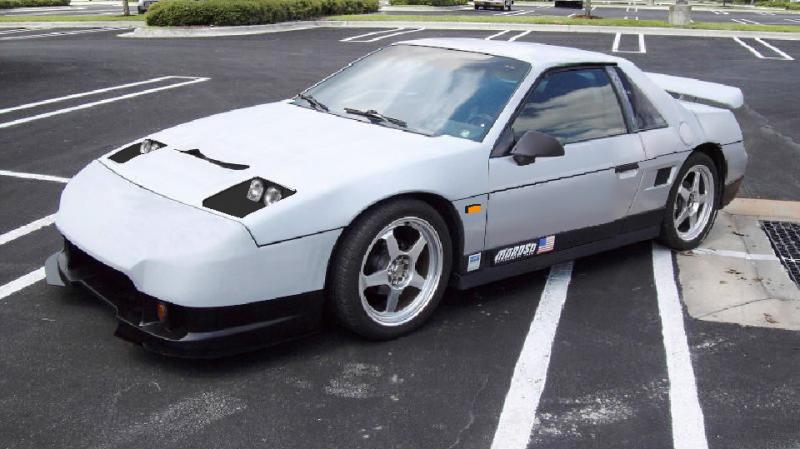
Sorry, guys. I've been doing post-vacation damage control on the Fiero. The car suffered its fair share of wear and tear, but luckily didn't suffer any major damage.
But I think in a few days, I might be able to start working on the custom intake. I bought a Buick Grand National throttle body, and a Trueleo intake manifold custom built to match. That should improve the mid to upper RPM torque a bit.
As for the photo-chops, the side markers will be installed just below the trim line. And if I do delete the side moldings all around the car, there will be no seam lines on the doors or rear quarter panels.
On an unrelated note, I finally was able to determine the highway fuel economy of my Fiero. I went on a 2-week road trip, most of which was highway cruising (70-80 MPH). I didn't keep track of the fuel economy during my vacation. So I didn't adjust my driving habits to skew the numbers. I stuffed the fuel receipts in the briefcase and kept on truckin'.
I crunched the numbers after I returned home. I drove a total of 7571 miles, and used 224 gallons of fuel. That comes out to roughly 33.8 miles per gallon. Needless to say, that was a pleasant surprise. I can thank the 5-speed manual transmission, and the 7730 ECM's lean cruise mode, for that. I think the higher altitudes were a factor, as well. Still, it's a big step up from my city fuel economy, which is about 21 miles per gallon.
Now, as an added treat, I give you some "Fiero on vacation" photos.
The high plains of west Texas:
White Sands:
The campground at the Grand Canyon:
The badlands of eastern Arizona:
And last but not least, the Grand Tetons:
[This message has been edited by Blacktree (edited 10-02-2017).]
Man that looks like some trip!! Did you have alot of fun? Its great to see a Fiero being used, most of us just play with them and then drive our boring cars everyday.
Yes, I had my share or car troubles. However, I brought an emergency repair kit. So I was able to fix some of the problems. When I was in Yellowstone, the drain valve in the radiator failed. It came apart, and drained out all the coolant. I gooped it up with JB Weld, refilled the cooling system, and was on my way. Then, the radiator fan motor fried. So I replaced it. And then the schraeder valve in the high-side A/C service port failed, and vented out all the refrigerant. The A/C problem was something I couldn't fix on the spot. So I had to suffer with it. After that string of problems, plus the persistent bad weather in Colorado (where I had planned to visit several places), I was starting to get discouraged. So I decided to head home.
I was able to fix the remaining problems after I returned home. So the car is good to go. I can always take another vacation later. I still had a lot of fun. I got to visit some truly awe inspiring places. And I got to meet some interesting people. I have no regrets.
The Fiero also got a lot of attention along the way. The car seemed to get a lot of "love it or hate it" reactions from people. Some just looked at me like I was nuts. Others openly admired the car. While I was at a gas station in Texas, a guy approached me and asked me for buying advice. He was thinking of buying a Fiero. So I helped him as best I could. He seemed surprised that a Fiero with a V6 could get 30 MPG on the highway. And while I was at a gas station in Louisiana, a guy wanted to buy the car on the spot, no questions asked. I explained to him that if I sold him the car, I'd have no transportation back to Florida. He then offered to come to Florida and pick it up! I politely declined. And once, a guy walked up, took a long look at the car, and said "well, you put a lot of work into this car, didn't you?" I also heard many stories of the "I used to have one of those" variety. And several people commented "you don't see many of those on the road anymore". It was also funny seeing truck drivers do double-takes when they look in their mirror and see my car approaching.
BTW, yes I did see two Fieros during my vacation. But they were fleeting moments, and I never got to meet the owners. One was a white base-model coupe parked outside a Taco Bell in Canon City, Colorado. I was driving past, on my way to Royal Gorge. I also saw a black SE or GT (not sure) in Wyoming (don't remember the name of the town) as I was headed east to South Dakota. It crossed an intersection as I was approaching. There were several cars in front of me, and I only got a glimpse of it.
[This message has been edited by Blacktree (edited 08-28-2008).]
I've started working on the custom intake. As mentioned earlier, I bought a Trueleo intake manifold, custom-built to fit a Grand National throttle body. The GN throttle body measures 59mm diameter, compared to 52mm for the Fiero unit. That may not seem like a lot, but it'll be able to flow 25-30% more air.
Before leaving on vacation, I covered the intake in WD40, to prevent rust. So when I returned, I had to clean off the oil. Then, I used my Dremel tool and a couple small metal files to clean up some of the rough spots. Then I bead blasted the whole thing, and sprayed on a coat of primer (to prevent rust). And today, I used some JB Weld to smooth out the seams.
Here's what the intake manifold looks like right now:
After the JB Weld hardens, I'll sand it smooth and spray on another coat of primer. Then the intake will be painted iron gray, to match the rest of the engine.
[This message has been edited by Blacktree (edited 10-02-2017).]
I didn't feel much of a difference in handling. But I don't road race or autocross the car (yet), either. So it's hard to tell. But I did notice that when driving on a wet road at highway speeds, the car makes a big rooster tail of mist.
I got the throttle body cleaned up and painted. While I was waiting for the paint to dry, I decided to polish the butterfly plate, just for the fun of it.
Here are a couple shots of the throttle body attached to the Trueleo intake.
The next thing to do is make an intake pipe. Since the throttle body is larger than stock, the stock rubber hose won't fit. I may also need to tweak the air filter can to improve airflow.
I'm going to get before / after dyno runs, to see how the new intake affects performance. So before I install it, I need to take the car down to a chassis dyno. It may be a few days before I have the time to do that.
[This message has been edited by Blacktree (edited 10-02-2017).]
Yeah, I'm replacing the alternator for the 165th time.
These remanufactured alternators have crappy bearings. They start squawking after about 12-18 months. And to add insult to injury, the replacement alternator is a special order item. Good thing it has a lifetime warranty.
Both the driving and marker lights look good! What's the plan for the door molding? Is it possable to do the same thing to the doors as you did to the front fender?
Yeah, I also had to do some custom wiring to get the side markers and turn signals to work properly. The front LED turn signals are not dual-element lights. So they won't work with the stock side marker lights. Plus they can't function as both running lights and turn signals at the same time.
I had to make some custom wiring to allow the new lights to pull double duty as running lights and turn signals. I accomplished this using relays to switch the power signals coming in from the running light and turn signal circuits. The new side markers are also connected to that circuit. So they have the same functionality.
When one or the other is on (i.e. the running lights OR the turn signals), things work normally. The trick is to make the lights blink when the running lights are on. Since the lights are already on, the only way to make them blink is to momentarily turn them off. The relays make that possible. I can post the electrical diagram if anyone is interested.
Also, I got tired of replacing the ignition coil every 6-8 months. The heat from the headers was cooking them. So today, I relocated the ignition coil to the trunk wall. It was surprisingly easy. The coil-to-distributor ignition wire and module-to-coil cable were both long enough to reach. All I had to do was extend the two wires from the coil to the tach filter. The mounting bracket is just a short piece of aluminum angle stock. There was already a mounting bracket on the trunk wall in that spot, with a hole pre-drilled in it. So I bolted my aluminum bracket to that. Piece of cake!
Hopefully, that will solve the problem. I may do the same for the ignition module. But I haven't decided yet.
Also, the Freak goes on the dyno tomorrow. I need to get a baseline run before installing the new intake setup. My last dyno run was back when it still had an automatic transmission and stock ECM. But now it has a 7730 ECM and Getrag 5-speed. So the old baseline is no longer useful.
[This message has been edited by Blacktree (edited 10-02-2017).]
Originally posted by 85SEnochie: What's the plan for the door molding?
I removed the door trim to see what was underneath. The intention was to find out how / where the door trim was attached, so I could shave off a portion of it.
But when I stepped back and looked at the car with the door trim removed, it looked MUCH better. That made up my mind. I'm going to shave all the side moldings.
[This message has been edited by Blacktree (edited 09-18-2008).]
... So I bolted my aluminum bracket to that. Piece of cake!...
If you mounted the coil on an aluminum bracket you may toast it because of a missing ground . You should run a ground wire from the coil to any steel part of the car, maybe a mounting screw of your bracket.
Hey Blacktree, who made your headers for you? I bought an '88 in March with headers that look almost identical with yours. The only problem is the guy before me had put header wrap on them and it ruined the headers. It kept so much heat in, it blew a hole about 2 1/4" out of the elbow on the #3 tube. I got it off and took it to the exhaust shop and the guy told me that the wrap changes the molecular structure of the metal, and may not hold a new weld. Anyway, I only got to drive the car another couple of weeks till I spun a main bearing, so at least it held that long. I am going to do a swap, but for now may just put in a 3.4. I would like headers to go back on it and would like to change them while the motor is out. I noticed you had put header wrap on yours too, so I hope you don't run into the same problem that I did. I was told,(and know from experience), that ceramic coating works and looks great. I used it on one of my Grand Nationals. BTW, are you going to the B.O.P. show next month at Old Town? Would like to see freak close-up.
To Turbowedge: My headers were made by the Trueleo guys. Mine seem to be holding up pretty well so far. BTW, what's the date for the BOP show?
BTW, I did my baseline dyno run today. As I expected, the numbers were higher than the last dyno run. But I didn't expect the difference to be so noticeable. Here's the breakdown:
Last Year (with TH125 and stock ECM): 123 HP / 161 ft-lb
Today (with Getrag and 7730 ECM): 138 HP / 179 ft-lb
I also started the intake swap. I have to do some custom fabrication work to install the new intake. So it may take a couple days.
[This message has been edited by Blacktree (edited 09-18-2008).]
I removed the door trim to see what was underneath. The intention was to find out how / where the door trim was attached, so I could shave off a portion of it.
But when I stepped back and looked at the car with the door trim removed, it looked MUCH better. That made up my mind. I'm going to shave all the side moldings.
I have 84 door panels on my car so thay are not the same could you take a pic of it and PM it to me I would like to see the differance too with the trim off.
[This message has been edited by 85SEnochie (edited 09-19-2008).]
Blacktree : Yes, aluminum do conduct electricity, but only at a level of 62% in the best case (compare to copper or steel). It depends on the alloy used.
Here's a progress report on the custom intake. It's installed, but the charcoal canister still isn't hooked up. The parts for that should arrive in a few days. But nevertheless, it's going on the dyno tomorrow.
Since I'm using a throttle body from another car, I had to make some modifications to make it fit. Since it has a larger opening than the stock throttle body, the stock intake hose won't fit. I decided to use 3" ID flexible duct hose. Unfortunately, the hose connection on the air cleaner canister is an oddball size (3.25" OD). So the 3" ID hose won't fit. To fix this problem, I sliced up the flange on the air cleaner box, and bent it inwards to fit a piece of 3" OD exhaust pipe. The short piece of exhaust pipe will be my new hose flange. See photo below.
The next photo shows what it looked like after welding, grinding, and a fresh coat of paint.
The sheet metal in the air cleaner canister was so thin that my welder, even at the lowest power setting, was melting holes in it. So instead of making a continuous weld all the way around, I made several tack welds and filled in the rest with JB Weld.
The next task was to make the Fiero throttle cable work with the GN throttle body. The Fiero and GN throttle valves rotate in opposite directions. Plus, the bellcranks are different. So I had to modify the throttle cable mounting bracket. Below are a couple shots of the bracket before modification.
If you look closely, you'll see 3 cable attachment points, for the throttle, TV cable (auto trans only), and cruise control. Since my Fiero doesn't have cruise control or an automatic transmission, I'm only concerned about the throttle cable.
In the photos above, the throttle cable attachment point is the one hanging down on the bottom. I had to flip it upside-down, so it was sticking up. And I also had to move it away from the throttle body a bit. The photos below show the modified bracket.
Also, the GN throttle body has a vacuum distribution block built into it. So instead of connecting vacuum lines all over the intake manifold, I re-routed them to the vacuum distribution block underneath the throttle body. This helps to clean up the appearance of the engine bay. Speaking of cleaning, I need to clean the engine. All the grime that the stock intake was hiding is now visible. But here's a quick shot, just to give you an idea how everything fits together.
Tomorrow, we'll get to see some dyno charts!
[This message has been edited by Blacktree (edited 10-02-2017).]
OK, the dyno results are in. And I think they're going to make some people a little unhappy. In the chart below, the red is the stock (ported) intake manifold and stock throttle body. The blue is the Trueleo intake and GN throttle body.
The new intake setup seems to have flattened the torque curve a little. And it appears to have shifted the peak HP upwards a few hundred RPM. But the difference is really minor. All I can say is that I'm underwhelmed.
[This message has been edited by Blacktree (edited 10-02-2017).]
Looks to me like you didn't spin it up high enough. The gains from the Trueleo webpage are mostly in the fact that the engine doesn't fall on its face after 5400 RPM or so. Link from Trueleo Page
[B 86FieroCentPa:[/B]Looks to me like you didn't spin it up high enough. The gains from the Trueleo webpage are mostly in the fact that the engine doesn't fall on its face after 5400 RPM or so...
Uh, from studying the above graph extremely close, one can safely say that more revs "Ain't Gonna make it Peak Higher."
props for all the work getting in on the dyno, but i would have expected at least some better gains than that, especially seeing how much those intake manifold cost.
Looking back in the archives I see that 2K-4K was your RPM zone of choice for your powerband. What cam specs, can it breathe in the zone where your intake and exhaust are happy? Just lookin' to see how the puzzle pieces fit.
I was more impressed with the before and after dyno numbers with the ECM change! Did you do any chip tuning with each of the modifications and runs? (I thought that polished butterfly valve would have been worth at least 3 - 7 hp)
When you did the initial ECM change did you already have the headers on? How about cam or any headwork?
I'll pick your brain further next week. Too bad the new intake didn't give you more pronounced effects.
Looking back in the archives I see that 2K-4K was your RPM zone of choice for your powerband. What cam specs, can it breathe in the zone where your intake and exhaust are happy? Just lookin' to see how the puzzle pieces fit.
If you go back to page 1 of this thread, you'll see before/after dyno charts for the Trueleo headers. The engine had the same "guts" back then, but still experienced a noticeable performance increase from the new headers. And despite the fact that the engine was built for the 2k-4k RPM range, most of the improvement was above 4k RPM. Unfortunately, the intake had no such effect. And if the stock intake was really as restrictive as everyone says, then there should have been an improvement.
I guess I did a hell of a job porting the stock intake, huh?
quote
Originally posted by Gwain: I was more impressed with the before and after dyno numbers with the ECM change! Did you do any chip tuning with each of the modifications and runs?
Keep in mind I also switched from an automatic transmission to a manual. So now, there isn't a torque converter sucking power away from the engine. I haven't done any ECM tuning. I wanted the intake and exhaust to stand (or fall) on their own merits (or lack thereof).
. . . . .
Considering how much bad publicity the stock 2.8 V6 intake gets, I had assumed that it was the weakest link in my engine. But apparently it isn't. So I'll have to find out what's holding me back.
I still have a couple tricks up my sleeve, to increase the performance of this engine. I'm sure I can squeeze a few more ponies out of it. But unfortunately, we won't know how many of those ponies are liberated by the Trueleo intake, and how many are liberated by other means. Because I really don't feel like going through the trouble of swapping intakes back and forth (and vacuum hoses, and air filter canisters, and replacing gaskets) just to get a couple dyno runs.
To make a long story short, my quest to determine the effectiveness of the Trueleo intake turned out to be a big fat mulligan.
Here's another update. Over the last few days, I shaved the door trim.
When I removed the door trim, I noticed there were a couple screws underneath that attach the door skin to the door frame. If I left the screws in place and covered them up, the door skin would be permanently attached. I decided to remove the door skins from the car, to see if these screws were really necessary. They didn't appear to be very important, so I deleted them. The rest of the door fasteners could be re-used, because they aren't in the area that's going to be filled.
In the photo below, you see the door frame with the outer skin removed. I've marked all the fasteners (except for the 4 rivets on the bottom) with arrows. The blue arrows are the fasteners that can be re-used. The red arrows are the two screws under the door trim that I decided to delete.
I decided to do the fiberglass / filler work with the door panels removed. Removing the door skins (and re-installing them) was a PITA, but it made the body work easier. I sanded all the paint from the door trim groove, plus about 1.5" on either side. Then I filled the groove with fiberglass. It took 6 layers of glass fiber mat to fill it. Below, you see the raw fiberglass.
Then I sanded it flat, and filled the low spots with epoxy-based putty. In the photo below, the putty has been applied, and then sanded. I used a marker to circle spots that needed another coat of putty.
After that, I sanded it smooth and sprayed on some primer. Below, you see the door skins ready to be re-installed. Notice the holes for the door locks.
Also notice that I left a crease along the top edge of the trim channel, instead of rounding it off. That crease coincides with the seam between the hood and fenders. I plan to carry that crease all the way back to the rear fascia, where it will meet the seam between the decklid and fascia.
My next task will be to shave the trim from the rear quarterpanels. That will involve removing the rear clip and quarterpanels. So it ought to be fun.
[This message has been edited by Blacktree (edited 10-02-2017).]


_1.JPG)