You're right. It is my work that is blocking it. You should switch to the PFF Image Poster though. This way the pictures will never be lost. It's at the bottom of the home page.
Thanks man. I like using my Flickr account. It isn't bad like photobucket. I have pictures on there that I put up in 2005 that are still available everywhere.
Don't wrap your harness till the end. You will find things you forgot and there is no advantage to doing it early. Just use some tape wraps or small tywraps to keep things in place.
The terminals can be removed from similar Metri-Pack connectors and put into your transmission connection. Take a regular sized paperclip, bend out one leg and flatten it slightly. This is the tool you need to depin the terminals from the connector. Of course take off the secondary terminal retention clip, slide the paperclip tool up the small notch hole in the front and gently pull the wire out the back. Bend the tang up slightly before reinserting the terminal into the correct connector hole.
You should have a few extra Metri-Pack connectors on your donor harness. Ones with individual seals and terminal that look the same. You will need the ground and the two back up switch wires on your tranny switch connector. Put those red plugs in the unused holes to keep the water out.
GM used a short extender on the #2 (rear) knock sensor wire. That extender went from the larger connector size you have on your harness to the one that fits the knock sensor. This helped them when assembling the engine but isn't really needed. The extension meant the person installing the harness didn't have to try to get their hand up between the tranny and the block. The connector you have is the one that plugs into the extension harness not the one that actually plugs into the knock sensor. The extension is usually nasty greasy anyways.
I cut out all the splices in the Gray and Black wires since they never seem to be in the right spots.
If your alternator plug has a Gray wire use the tool and remove it. Replace it with the plug. The Gray wire isn't used with the swap. Red to PCM, Orange to unswitched +12v.
Thanks, yeah that explains the knock sensor. I was going nuts with trying to figure that one out. Looks like the extra connector I got should fix that up. The alternator has the plug connector on it. I decided to put a new alternator and starter on it while I have everything out so hopefully those will be here this week. Yeah I have the speedo mod in my list of things to complete. I'll look at my extra connectors and see if I have the right type to re-pin that one. It looks like I am missing 1-2 wires from that harness I need.
I will have to check when I get home but I think there was one wire from the main trans harness that wasn't in any oof the conversion pinout documents. I think it is pin M a black wire. I assume this looks to be a ground wire. Is it needed, can I ground it to the chassis and be done, or should this be deleted?
It is needed and it needs to run to engine ground. Your transmission won't work without it..
I use two grounds eyelets on my harnesses. One for "power" grounds like relays and solenoids and the ground for the Heated O2 sensor and the two grounds from C500 and C203. The tranny ground should go here too. This is the Black wire grounds. Also pin 4 from the OBD2.
The second ground is the sensor and more sensitive grounds. These are the four from the PCM, pin 5 from the OBD2, the ground from the MAF. These need to go to separate bolts on the engine.
Your oil pressure connector is green thus it has only two pins. If you want to use the oil pressure sender as a backup to the fuel pump relay you will need a four pin connector.n If you want I can also sell you one of those.
Yes one of those transmission connector wires is in a spot that isn't needed.
[This message has been edited by phonedawgz (edited 07-11-2016).]
Out of curiosity is everyone just using a universal set of spark plugs and cutting them to length or is there a set off the shelf that covers most coil pack locations?
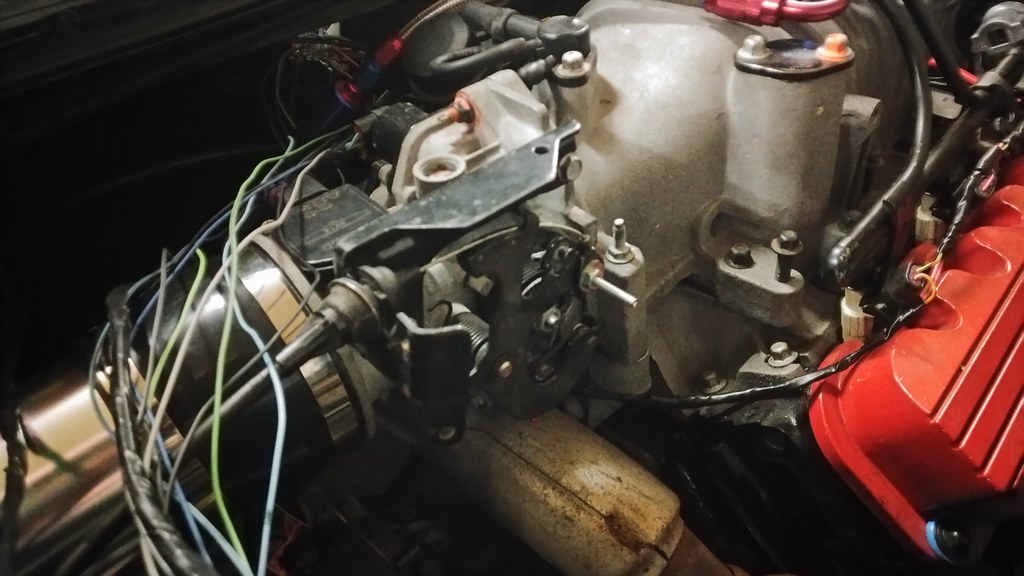
Finished off setting up the belt drive. I also switched over to another oil filter adapter. It played nicer with the low mount alternator bracket without having to use an L adapter. I tossed a new alternator on and I'm using a AC bypass pulley for now until I decide to tackle the AC as a later project.I know the usual method for coolant lines is to tap the LIM outlet, but I have decided to close both of the original ones off and will be using a T adapter off of the cooling intake and outlet.Next I need to work on the fuel pump wiring. I will be using the hotwire method but I need to look at how it was originally wired a little better. The tank wires were cut near the sending using so I have to lookup where those all go again. Getting very close to putting this in the car finally.
When you do your alternator cable, figure out where your power distribution post will end up (under C500) and start by putting the fusible link end there. Then tie it up with the excess cable being at the alternator end. Then cut it off and put a large 6GA ring terminal on the end of your cable. Solder it on with a propane torch if you don't have the proper crimp tool. Slip on the boot and you are done. It's easier than cutting the fusible link off and having to put it back on.
I went digging through my box of parts (how most of this came.) And was able to find the part of the fuel pump harness they cut off. I soldered it back on, also swapped out the delco fuel pump I put in for a Bosch one that I think is a better fit than the Ep381. Going to finish extending the last few wires I need to and then start to make the fuel lines.
Check the fit of your axle and CV boot with the Oil Filter adapter. I used that same adapter on an Auto car, and I had at best .025" of clearance. I think that adapter is best used on a Manual Transmission- no CV boot issues. I had to change mine out for a GTP style adapter.
------------------ '87 GT in Swap process: '00 3800 Series II SC, 4t65e.
Check the fit of your axle and CV boot with the Oil Filter adapter. I used that same adapter on an Auto car, and I had at best .025" of clearance. I think that adapter is best used on a Manual Transmission- no CV boot issues. I had to change mine out for a GTP style adapter.
Thanks I'll check it out. I have both styles I just liked how this one fit better with the sender.
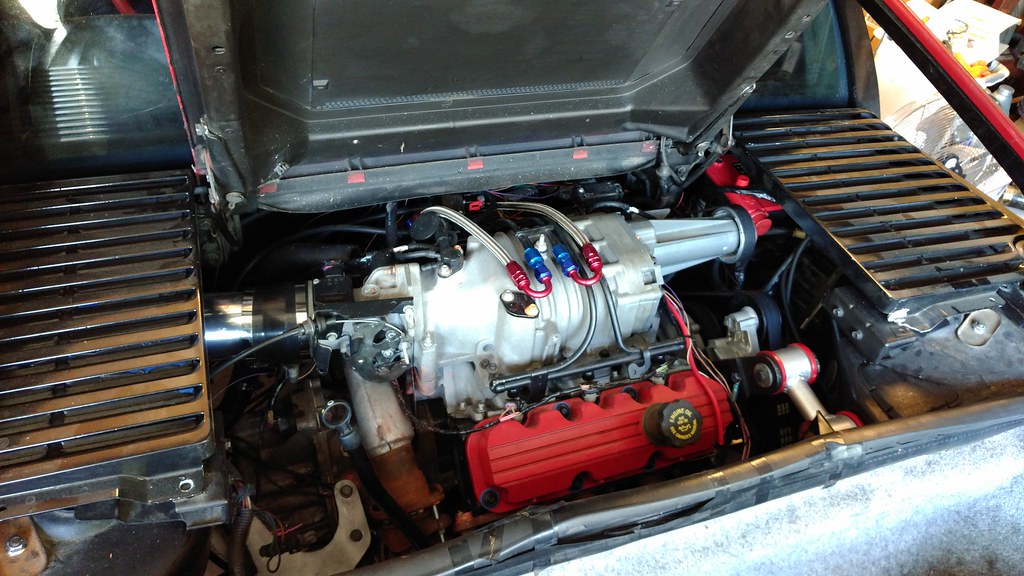
I started to put the suspension together to check the tolerance on the oil filter to the axle and found the swap axle I have is too long for some reason. I needed to put the motor in the car to check and see if I had it lined up correctly in the cradle. I am happy to report, that I have the motor in the car! this feels like a longtime coming. The dogbone lined right up so I believe I have the motor properly aligned, we just have to figure out why the axle is too long. Seems to be off by an inch to an inch and a half.
Haven't had much of a chance to work on it lately. I sent the axle out to be fixed and will hopefully get that back soon. I played with the air intake and got it setup the way I wanted. I used a generic ebay kit for a 4.7 and that seems to fit great. I also needed to get the throttle cable situated, I had an 84 4cyl cable in the car but was told it wouldn't work. I ordered an 86 6cyl cable but after looking at the 84 cable I figured out that it could be used. The 3800 sc throttle bracket does not need to be modified for it to work either. I trimmed the plastic sheathing from the cable line after the mount and trimmed back the plastic housing on the cable after the mount. This allowed me to use a bolt through the stock hole in the throttle without drilling, see the pic below.
[This message has been edited by Lancer-AM (edited 09-09-2016).]
Finally decided to quit procrastinating and do the wiring. I have almost finished it. Took about 2 hours to shorten and lengthen the wires. I finished off the ECU connectors, tonight I'll do the C500 and C203.
Just a text update for tonight. Finished pinning the ECU connectors. Double checked both ends of everything and I should be good to go there. Tomorrow I plan to wire up the C203, C500 and the Fuel pump relay. While I'm not installing AC at this time, I may do the AC relay while I am at it. This car will get AC eventually, but that is money for another time (hopefully next summer).
So the engine harness I have is from an 84. Which means it's c203 does not have pins j and k. Now since my car is an 86 those wired are present on the car side harness. I don't have any additional pins to add to this wiring harness so I am thinking I can just splice the wires directly for the time being. The only downside I see would be that I have to cut them to remove the harness. Is my thought process sound here?
Well after doing the rest of c203 I had pin H left over which I moved to K so J is the only one I will have to hardwire for now. If I come across another fiero harness in the wild I'll steal another H to use for it.
Finished the C500 harness last night. The only thing left to wire at this point is the OBDII and that is really only because I haven't decided where I want it yet. I don't think I will go with the stock location since I like being able to get to it easily and most of the time it will have something plugged into it. I only ended up asking where the F a wire went with 1 wire, but was able to fix it. I am pretty proud of myself for this so far. Of course I haven't tried to start it yet so who knows if it actually works.
Here is what I have left at this point. Making a list so I don't forget. 1. Wrap and secure harness 2. Wire and mount OBD II 3. Install Passenger Axle once it gets back 4. Reinstall Brakes 5. Install new rear struts 6. Hose clamp coolant lines 7. Mount Transmission cooler 8. Make new Transmission cooler lines 9. Add brake booster vacuum line 10. Fill Trans 11. Fill & Bleed coolant 12. Program PCM (I have tuning software for this, crossing my fingers this PCM is good) 13. Refinish and install Dogbone 14. Fill & bleed brakes 15. Cap off EGR ports (I forgot to get this done while the engine was out.) 16. Tighten Exhuast manifolds 17. Double check Fuel line fittings 18. Get muffler welded (Can't do this one myself unfortunately) 19. Add two more block to chassis ground straps
That should get me to a good point with this swap. It will still need an alignment after all is said and done. Then I can turn my attention to the interior. The skeleton needs refurbishing and I need a new climate control setup. Overall though it is coming together. I am hoping to start it soon.
Oh yeah for coolant hoses I am using these
That is Dayco 71030 Dayco 71082 2x Kat's 28114
I am going to run the heater core off the these lines by splicing in the Kat's connections.
[This message has been edited by Lancer-AM (edited 09-19-2016).]
It is ready to start! Well it would be if the stupid Jet DST would read my PCM. I know the OBD is connected ok. My Bluetooth OBD reader is able to talk to it just fine but the Jet tuner refuses to. Not sure what I'll do here. I could buy a programmed PCM or pick up HP Tuners. Just a little ticked that it isn't working right now.
Any thoughts here? I double checked all of the OBD ii connections, they are good, I changed the ground locations, my Bluetooth OBD reads great, but my tuner fails every time. Bad pcm, or bad tuner? On a positive note, I am getting good fuel pressure and the engine turns nicely when trying to start but I think VATs is preventing it from going.
Depending on your PCM you should either get two seconds of running or you should full running. Squirt some starting fluid into the intake and see if it fires. (It should even if the PCM isn't working)
The HP Tuners should be here on Friday. In the meantime I figured I would work on tying up loose ends. Got the suspension put back together, cleaned up the wiring a bit more. I had lost the clips for the transmission cooling lines, so I replaced those.I went to install the transmission cooler but looks like the guy that had it before me already installed an external cooler. I like the one I got better but for now I have other things to worry about.
Anyone have any good techniques for removing the glue from the old bulkhead connector? I'll keep working at it with a screw driver in the meantime.
I reused the old springs for now. I plan to do coilovers but that will be down the road. Installed new KYB struts, bump stops, mounts, rotors, calipers and pads. Next I need to bleed the brakes.
[This message has been edited by Lancer-AM (edited 10-06-2016).]
1. Wrap and secure harness 2. Wire and mount OBD II 3. Install Passenger Axle once it gets back 4. Reinstall Brakes 5. Install new rear struts 6. Hose clamp coolant lines 7. Mount Transmission cooler 8. Make new Transmission cooler lines 9. Add brake booster vacuum line 10. Fill Trans 11. Fill & Bleed coolant 12. Program PCM (I have tuning software for this, crossing my fingers this PCM is good) 13. Refinish and install Dogbone 14. Fill & bleed brakes 15. Cap off EGR ports (I forgot to get this done while the engine was out.) 16. Tighten Exhuast manifolds 17. Double check Fuel line fittings 18. Get muffler welded (Can't do this one myself unfortunately) 19. Add two more block to chassis ground straps 20. Secure last strap on Fuel tank 21. Reinstall heat shields
I have most of my list complete so far. I don't want to finish wrapping the harness until I make sure the engine starts and everything is working. Added a few things I had forgotten about. If the HP Tuners resolves my PCM issue, I guarantee I'll be moving fast to finish off this list.
Well for the first time in about a year my car is on its wheels!
I got the deck lid installed again, unfortunately this brought forth an issue I could see was going to be a problem, The hinge spring is hitting the supercharger. Gr.... I'm going to have to remove them and put in a strut kit.
I haven't done it yet but bending it won help me unfortunately. It is hitting the snout, I'm not lucky enough for it to hit the pulley. :P the brand x mounts mount it too far to the right and too high for it to work. It is also why I needed an even shorter axle I believe. I'm taking it to get it aligned and have the exhaust made tomorrow, so in the mean time I just removed the deck lid.
Ok so it is running. The GTP PCM was by far the right choice. I have a transmission line leaking from the case and the fitting. It is one with a check ball. I tried replacing the o ring in it but couldn't get exactly the right size. I found a replacement fitting with the check ball in stock in town. Going to go pick that up at lunch. Hopefully that will fix the leak. I don't really want to try moving the car until it is resolved.
Filled the coolant, ran the engine up to operating temp. Did not get it high enough to set off the fan. Just idling the thermostat was enough to keep it well under the fan turn on point. It has a 195* thermostat in it so I will alter the fan point in HPT. Very happy the cooling system is working well.
Ordered the parts for the exhaust. I really want a cat in the system, something about not smelling like exhaust every time I get out of the car I enjoy. I was going to go with the magnaflow system that a lot of people use but I haven't seen anyone get a cat in it and since I am having an exhaust shop weld it up, they usually don't like doing it without one either. I decided to go with a 2.5 Magnaflow high flow cat, and I want to come straight down to a y pipe where it will split into two Magnaflow Magnapacks and exit through the two 4" Dynomax exhaust tips I posted earlier. No idea what this will sound like. I figure if I don't like it, it can get me on the road and I can alway try something different later.
The stainless Magnaflows peeking out from the bottom of the car should look good.
The list today: 1. Wrap and secure harness 2. Wire and mount OBD II 3. Install Passenger Axle once it gets back 4. Reinstall Brakes 5. Install new rear struts 6. Hose clamp coolant lines 7. Mount Transmission cooler 8. Make new Transmission cooler lines 9. Add brake booster vacuum line 10. Fill Trans 11. Fill & Bleed coolant 12. Program PCM (I have tuning software for this, crossing my fingers this PCM is good) 13. Refinish and install Dogbone 14. Fill & bleed brakes 15. Cap off EGR ports (I forgot to get this done while the engine was out.) 16. Tighten Exhuast manifolds 17. Double check Fuel line fittings 18. Get muffler welded (Can't do this one myself unfortunately) 19. Add two more block to chassis ground straps 20. Secure last strap on Fuel tank 21. Reinstall heat shields
[This message has been edited by Lancer-AM (edited 10-11-2016).]
I used the longer 3" in, dual 2.5" magnaflow muffler and a magnaflow bullet cat on mine.
The muffler was going to end up sticking pretty far out from under the car so my friends convinced me to trim the trunk a little bit. I only lost 2.5" at the front of the trunk, and .5" at the rear, and now the muffler sits flat just higher than the bottom of the cradle.
I don't know if the average muffler shop is equipped to do that kind of work though.
So I thought I had run it out of fuel the other day when I was testing the cooling, now I don't think that is the case. For testing I had only put a gallon of fuel in, so I dumped another gallon in, and it refuses to start now. Very frustrating since it was firing before. I'm at work now but going to put the fuel pressure tester on it when I get home. It is a new Bosch pump, I am hoping that it hasn't kicked the bucket already especially since I hate pulling this tank. I don't think it is a VATs issue since I am on the Grand Prix PCM.
Yeah, I was crossing my fingers it was just the fuse but it was fine. I hear the pump on the key turn so I think my issue might be elsewhere but I figure fuel pressure is an easy first test. On a positive note, I think the new fitting fixed my trans leak.
[This message has been edited by Lancer-AM (edited 10-12-2016).]