Hmmmm.... been more than a year since I last posted anything. I guess I'm due for an update.
After going really slowly for a couple of years, I've now managed to get into a routine and get into the garage for 1 to 2 hours a day, for 4 to 5 days a week.
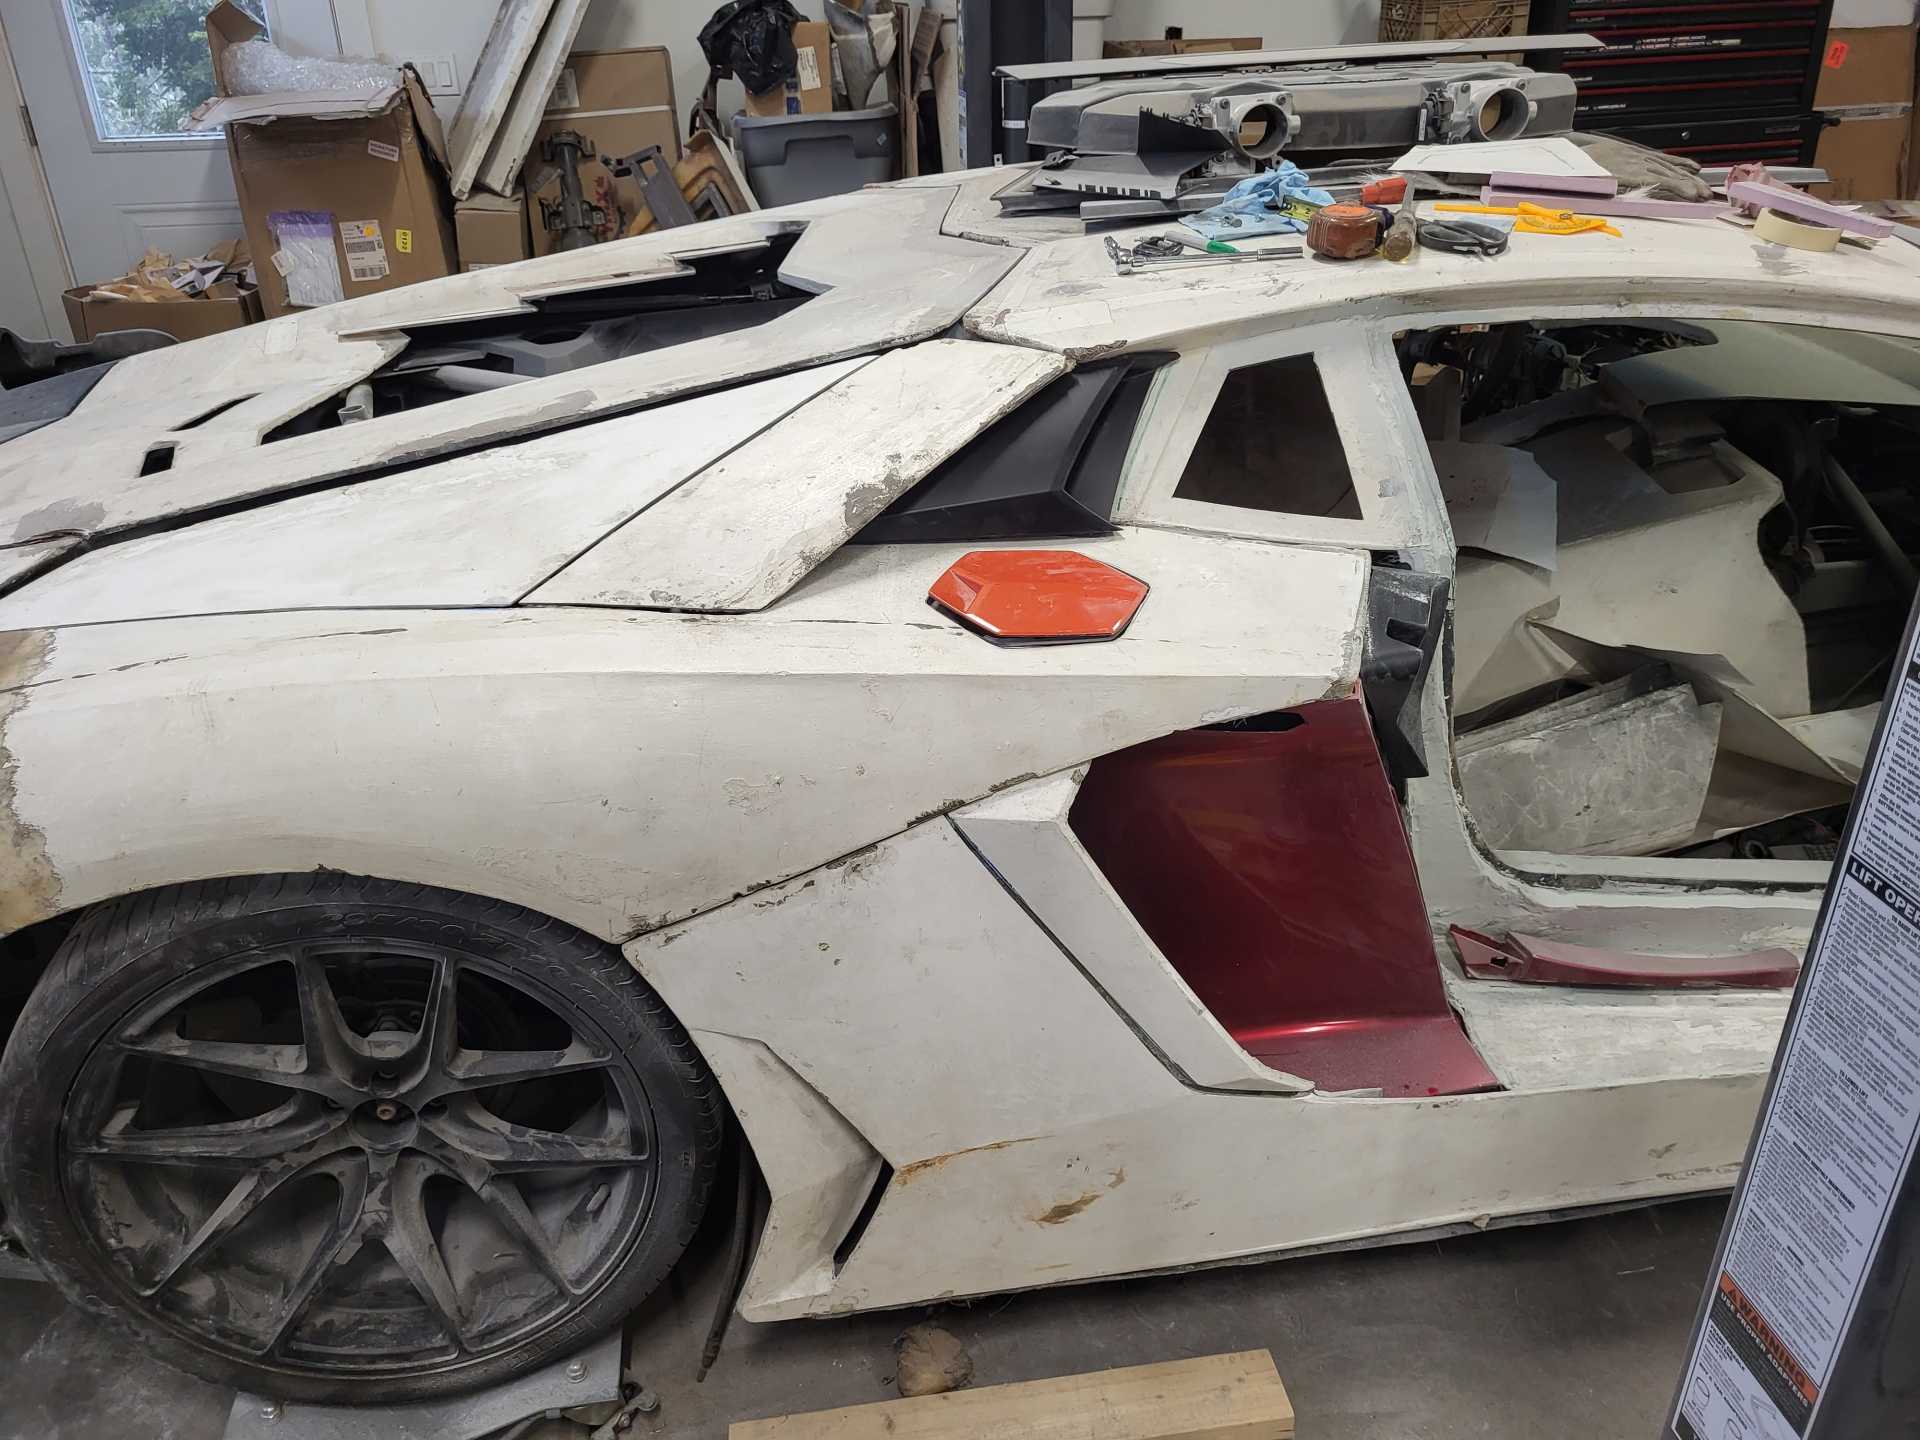
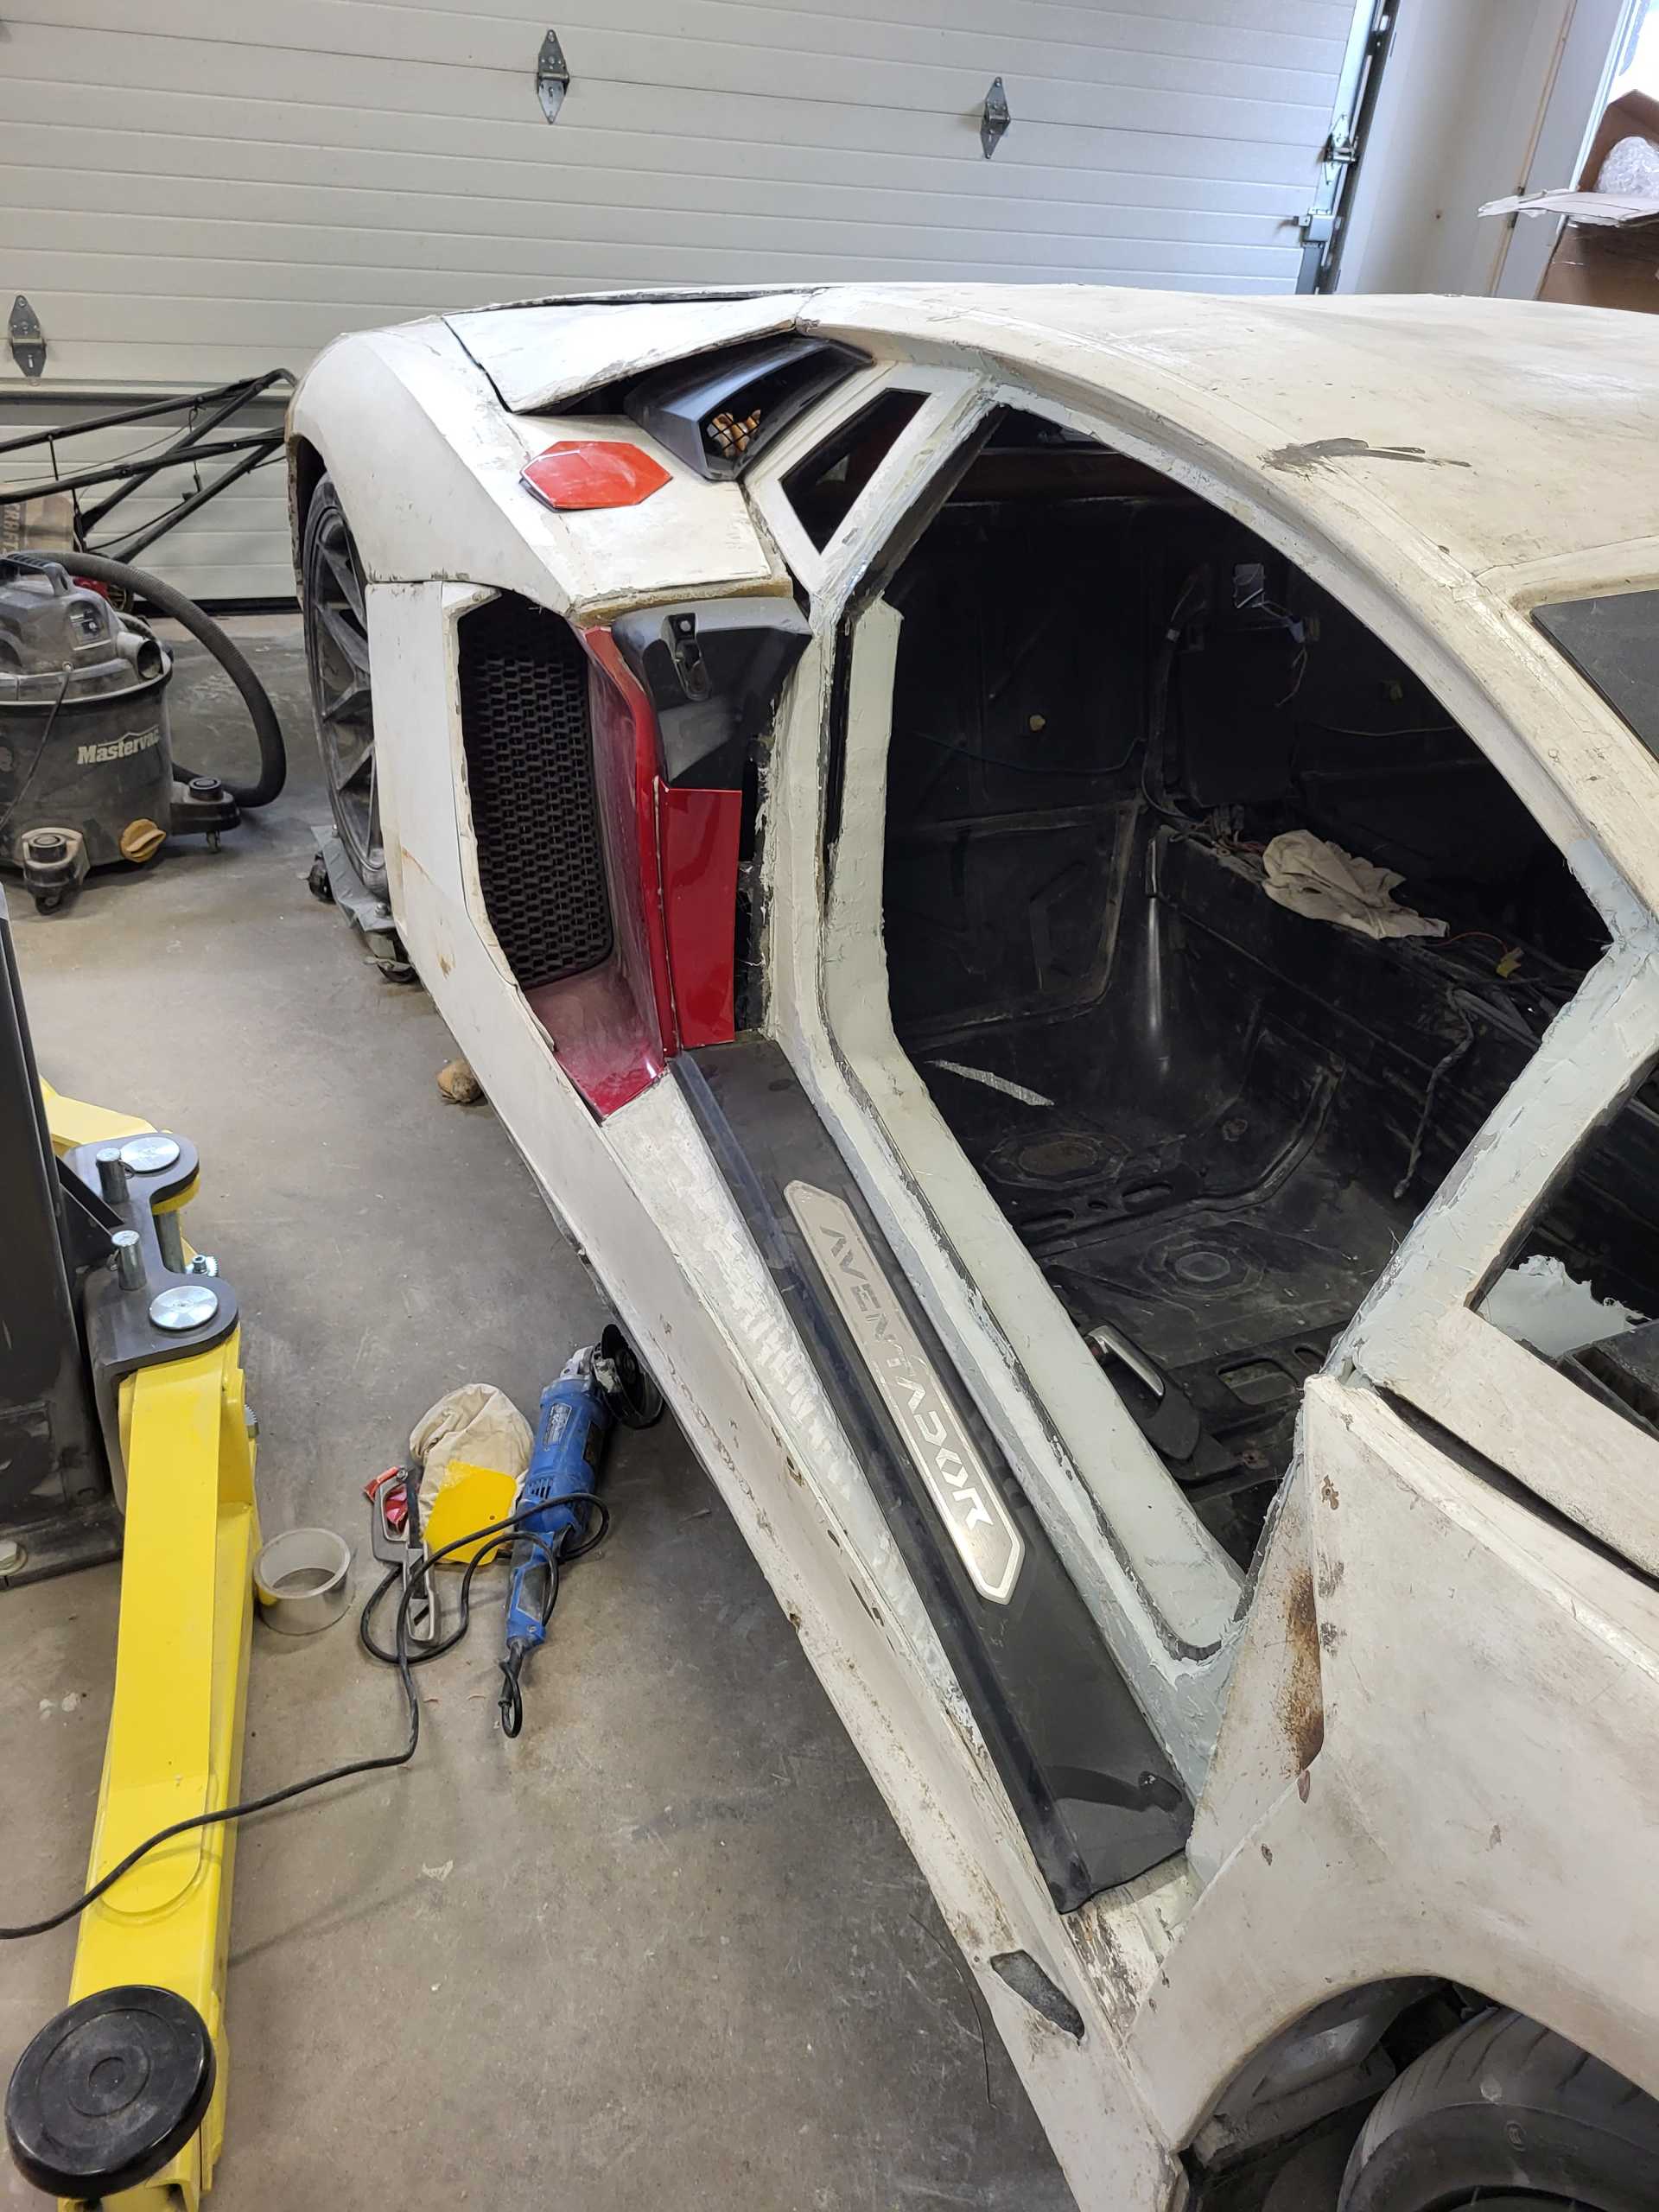
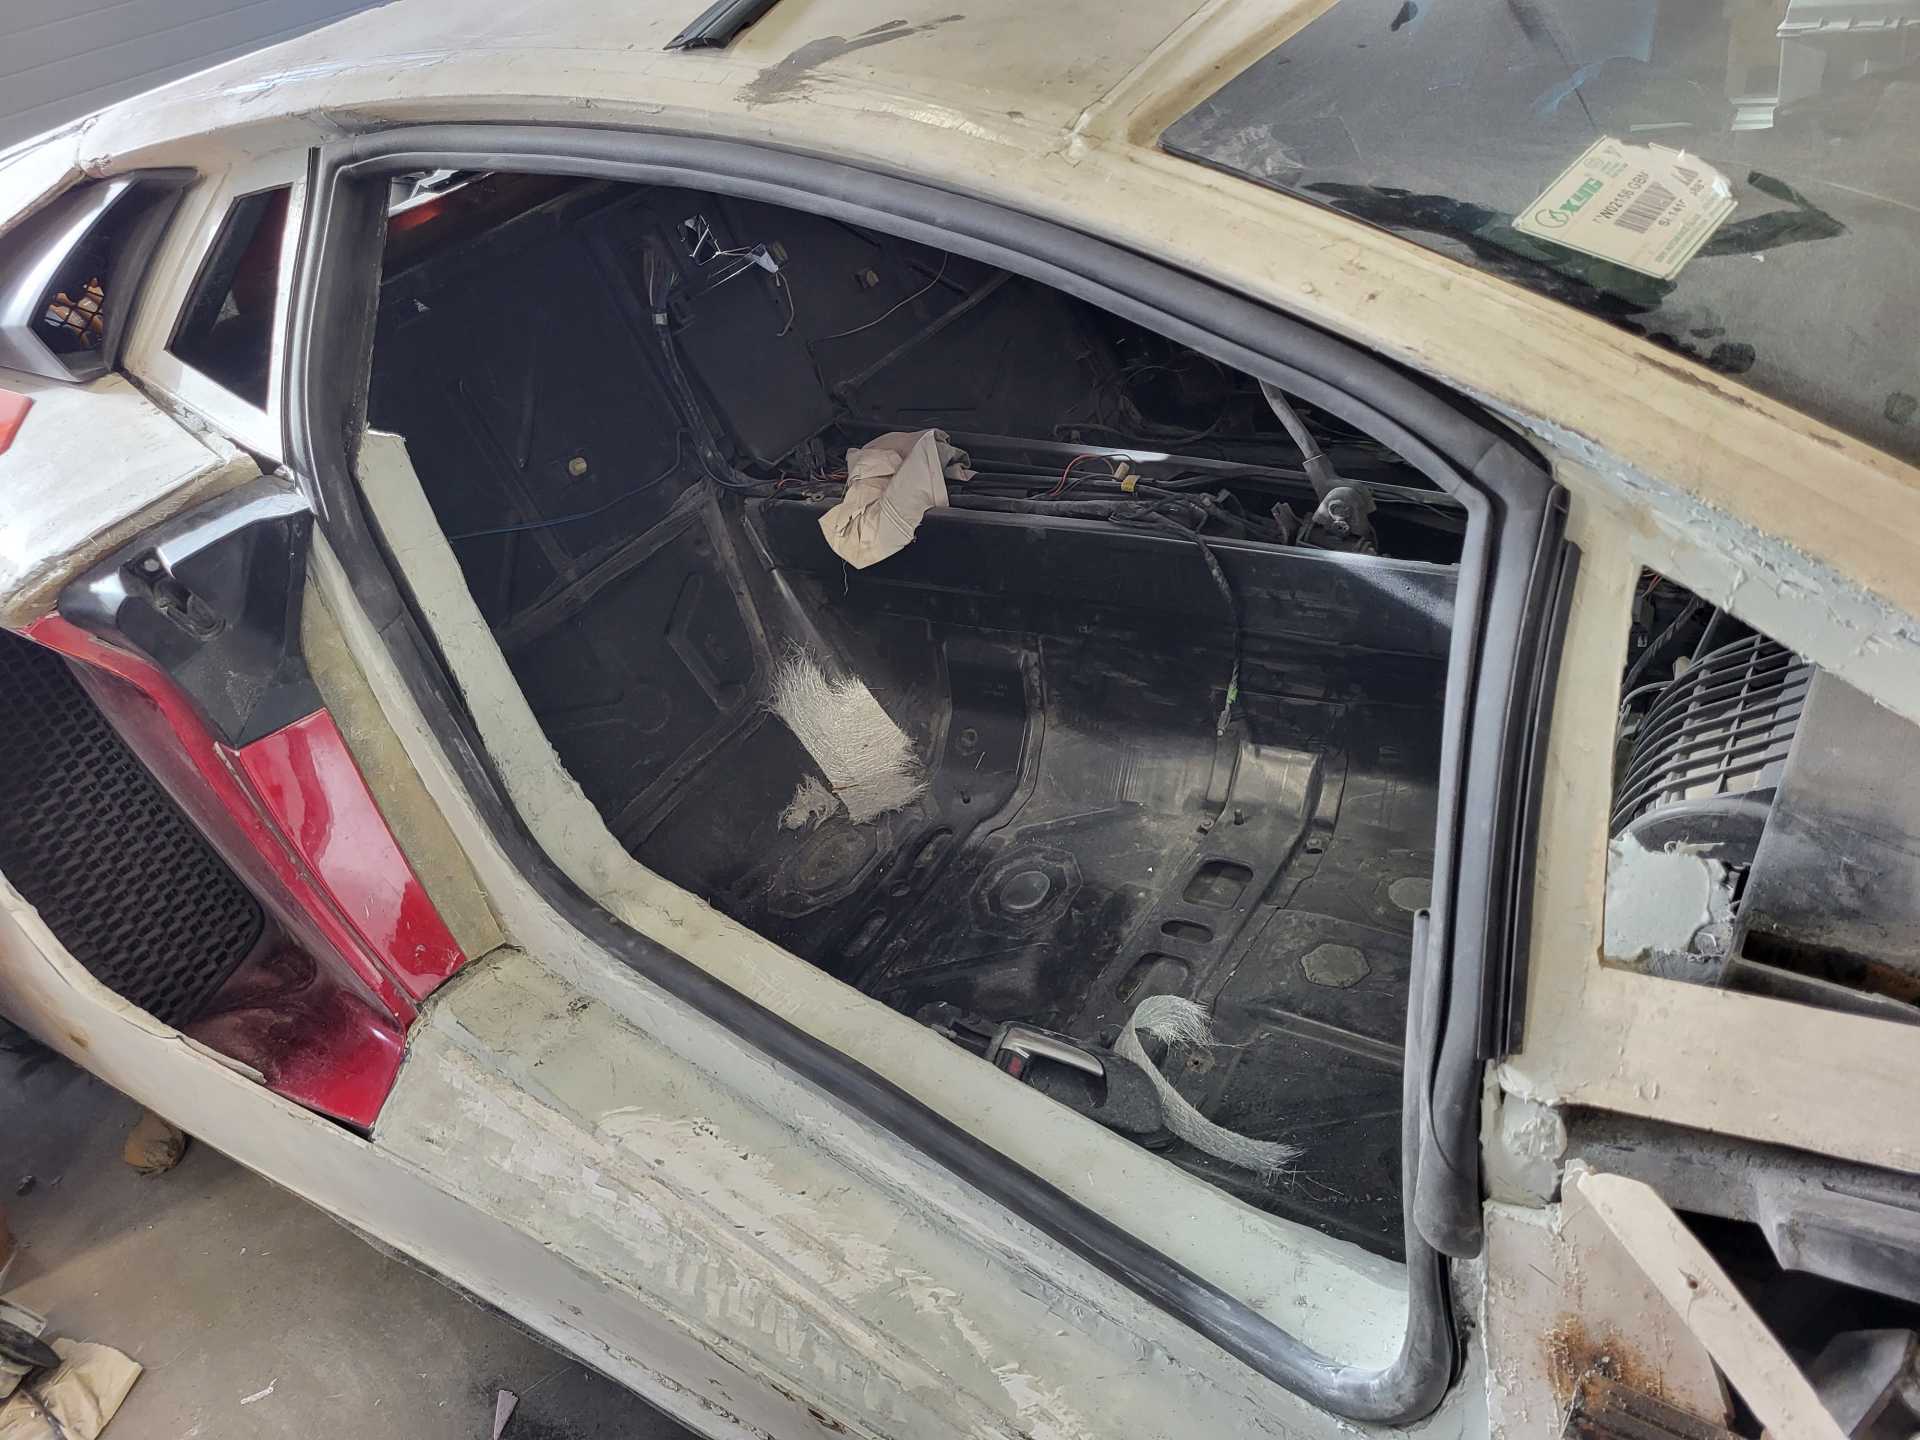
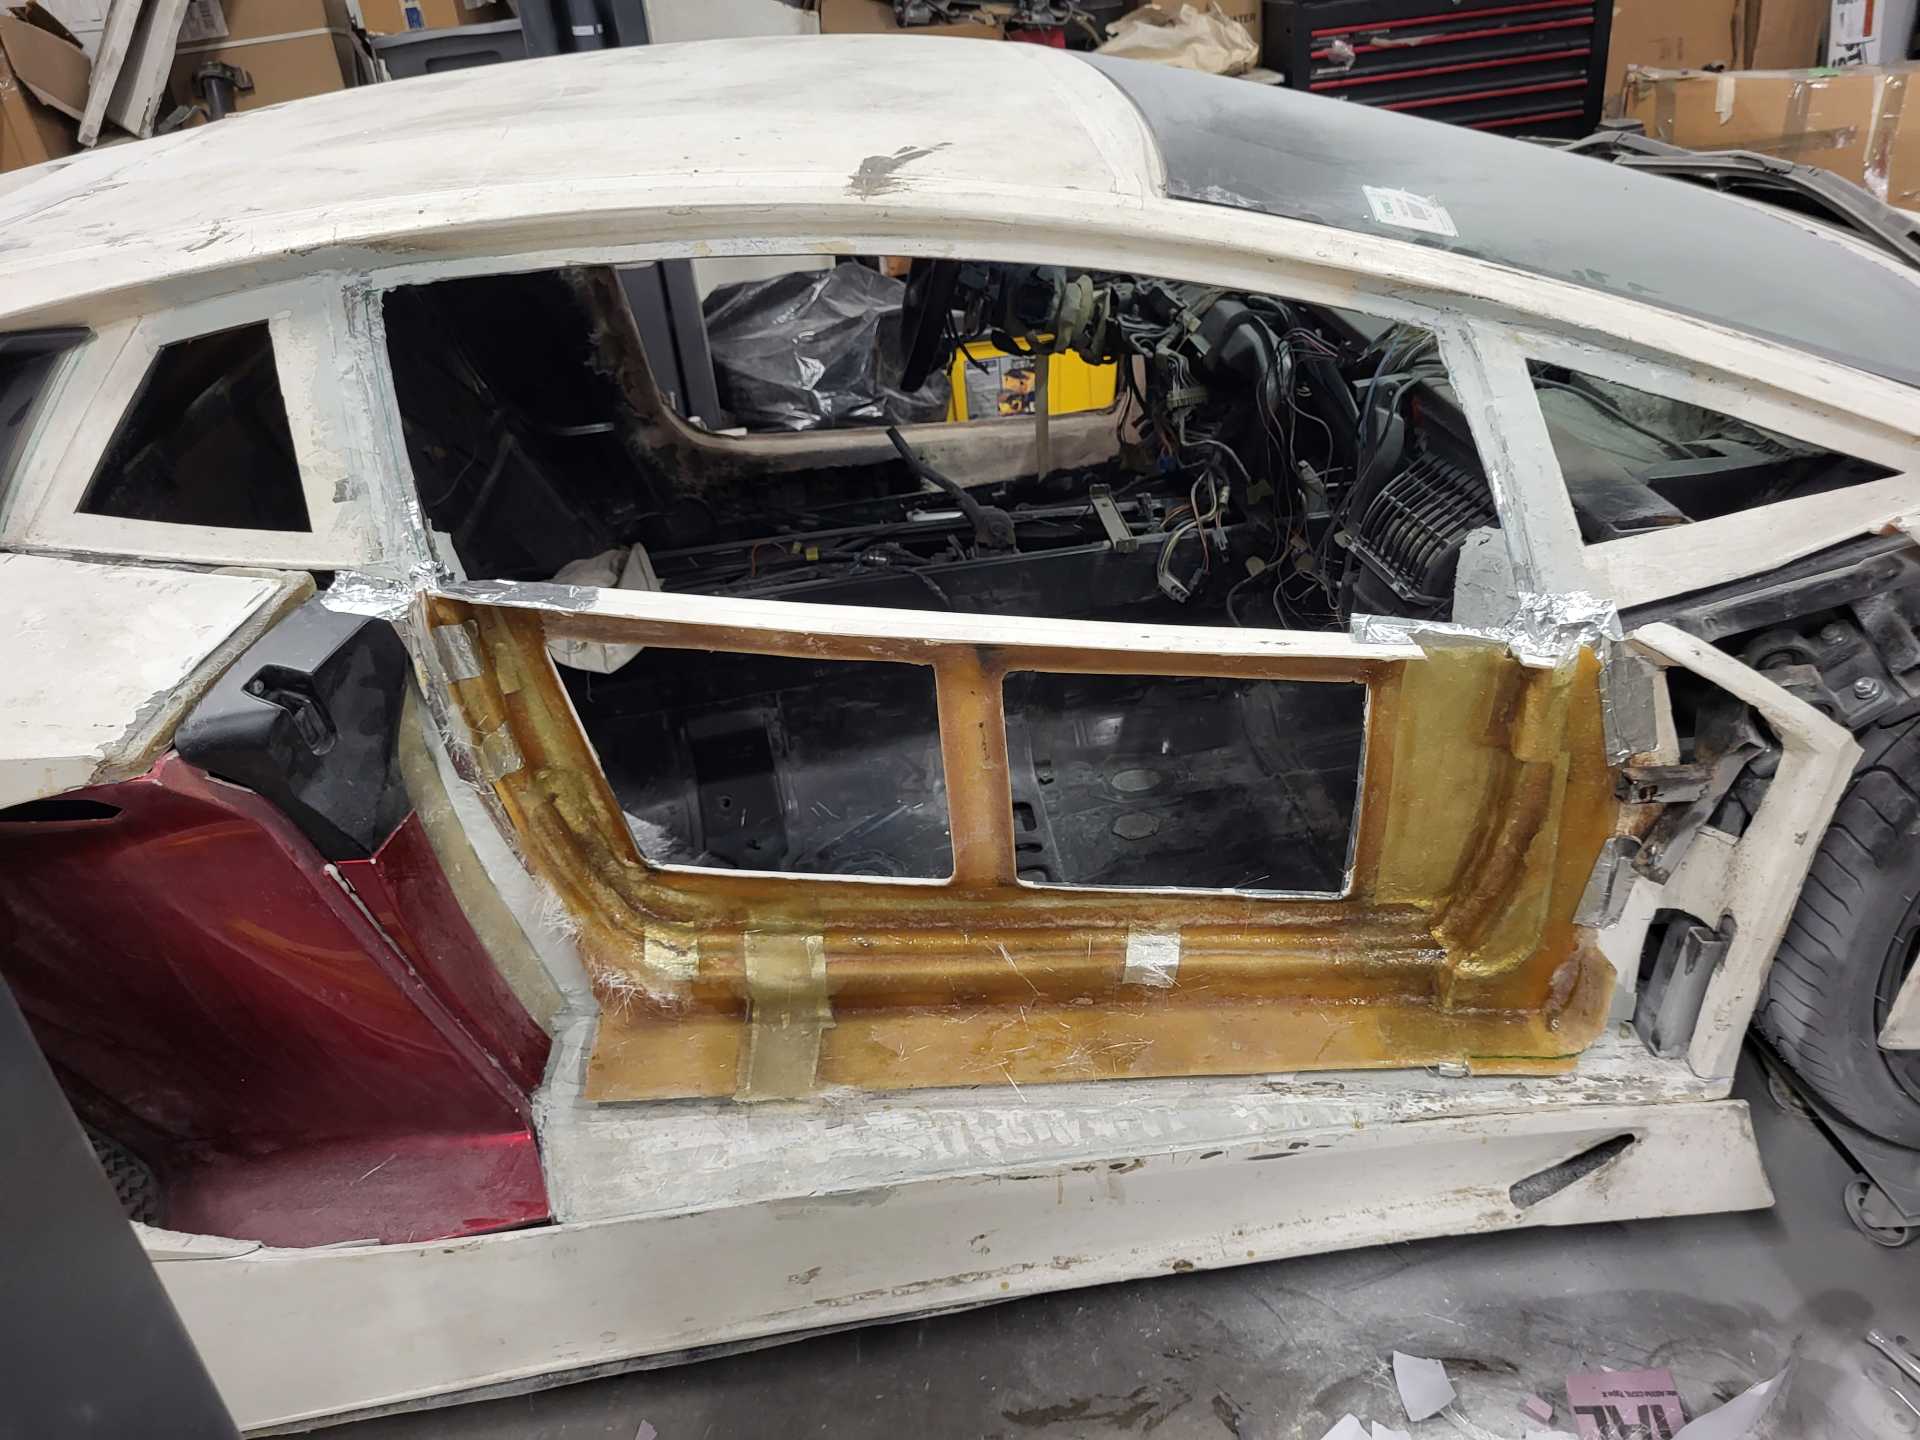
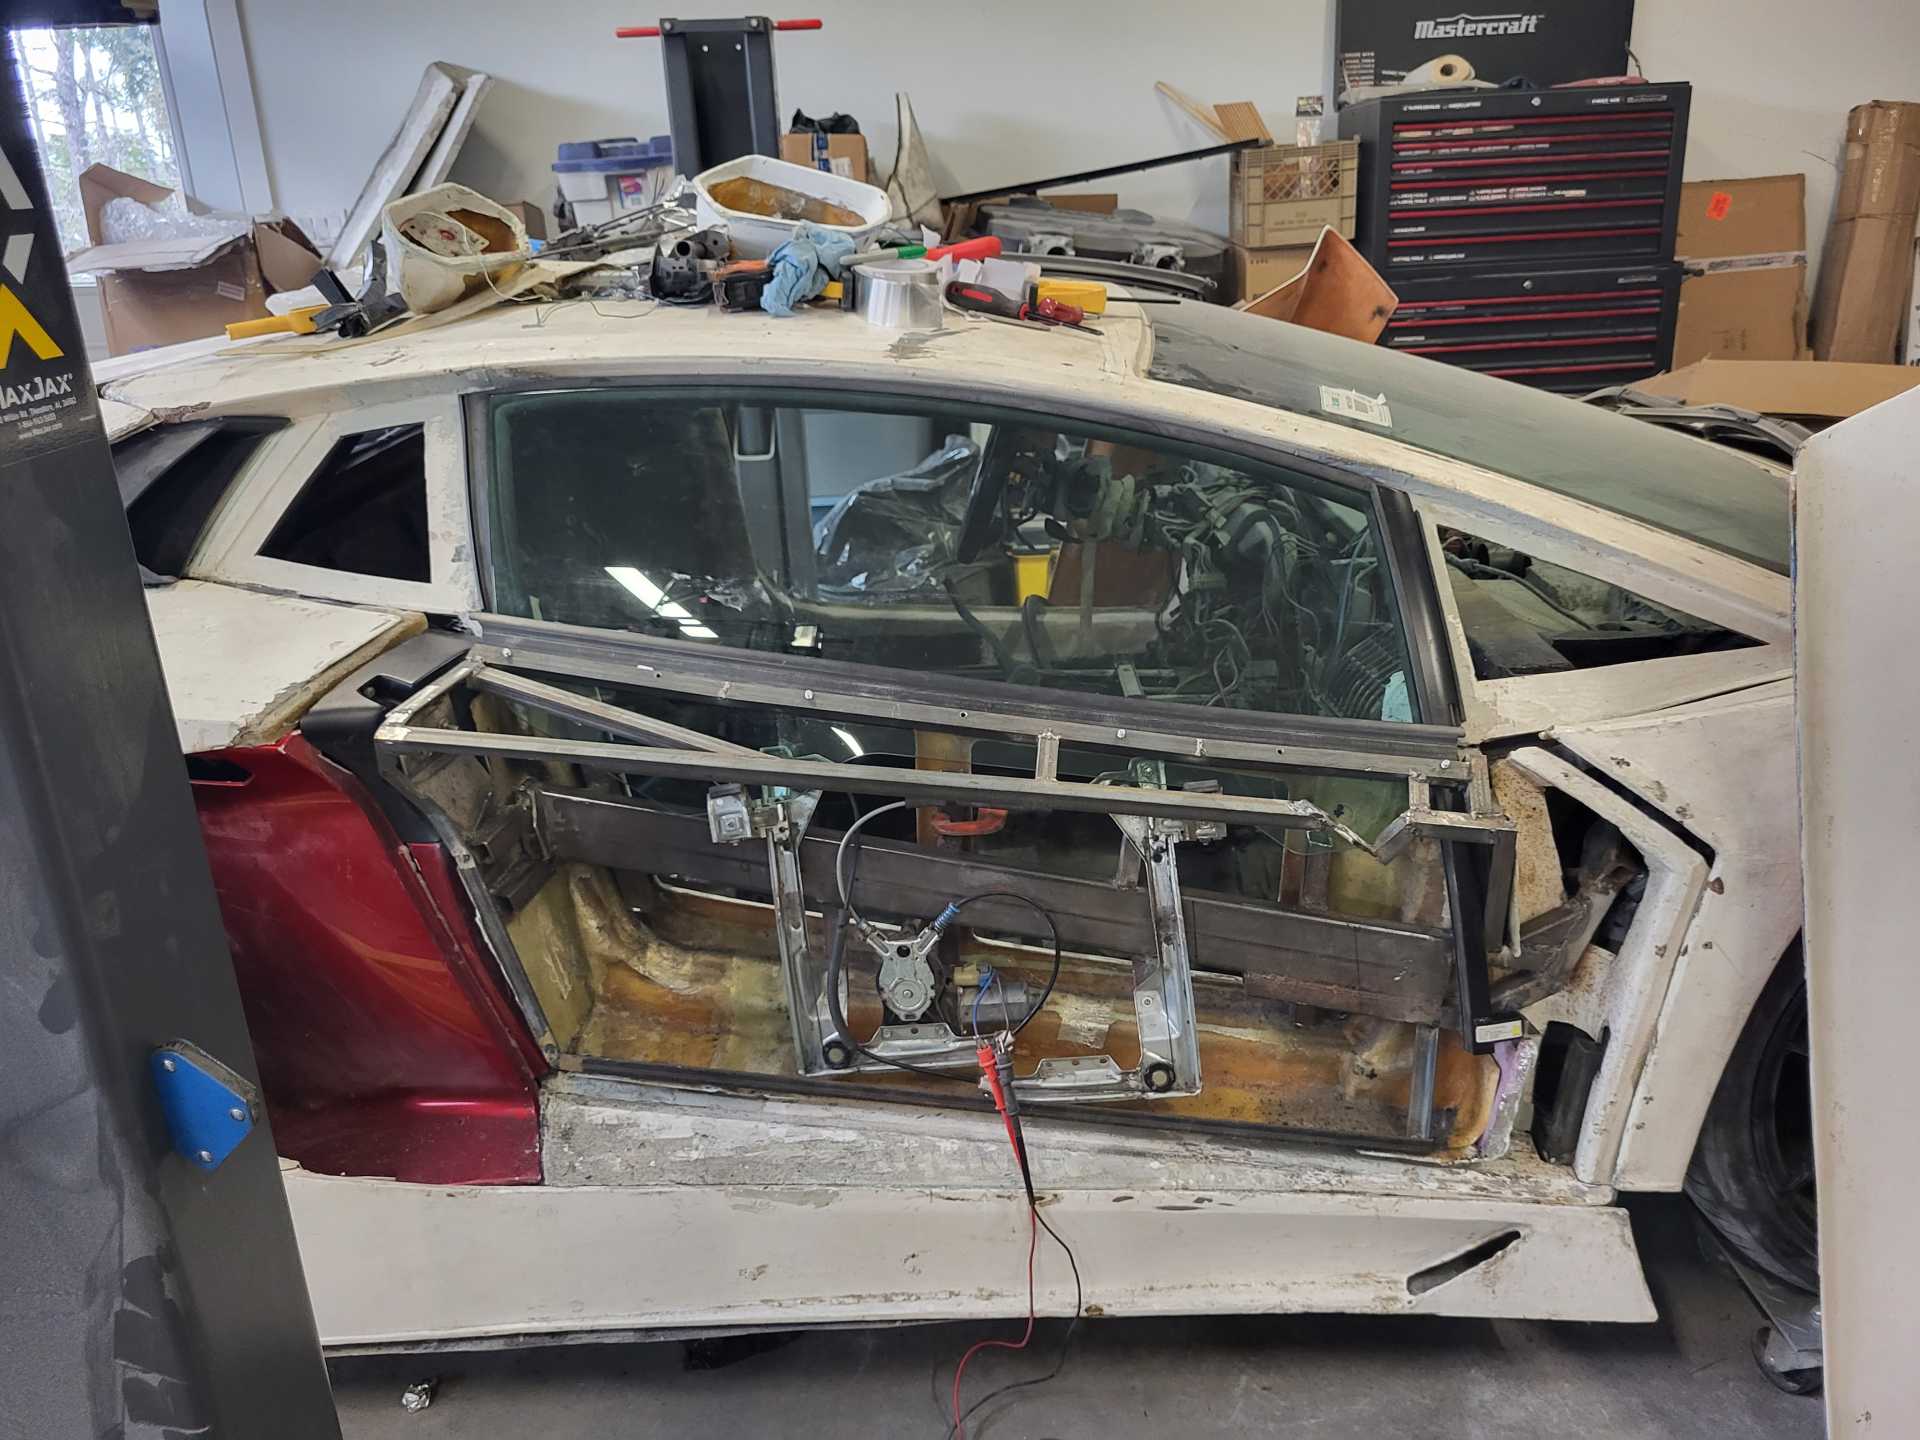
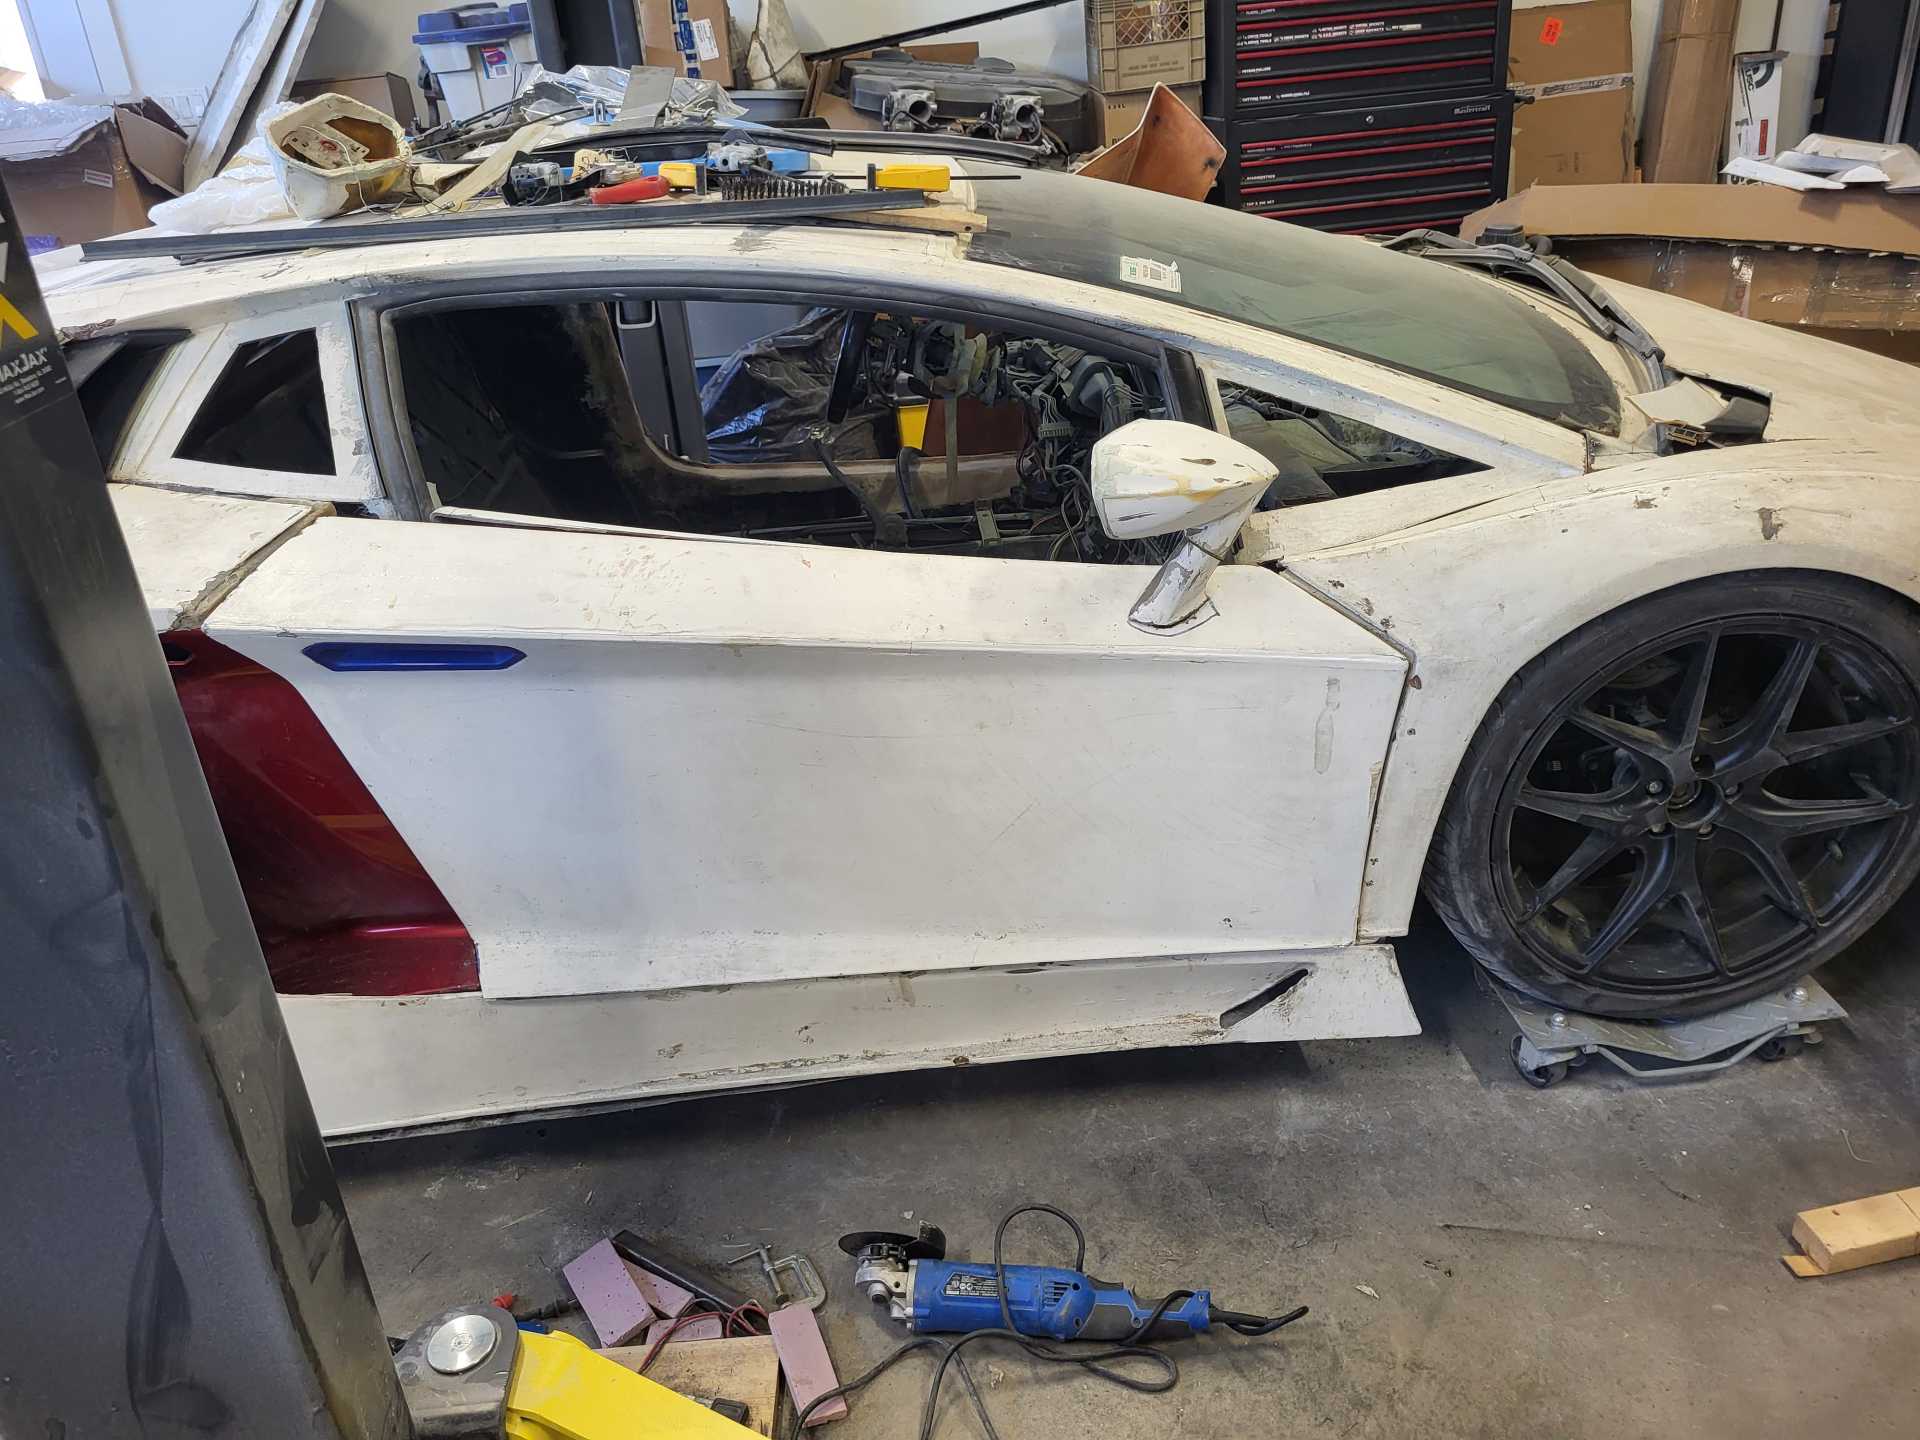
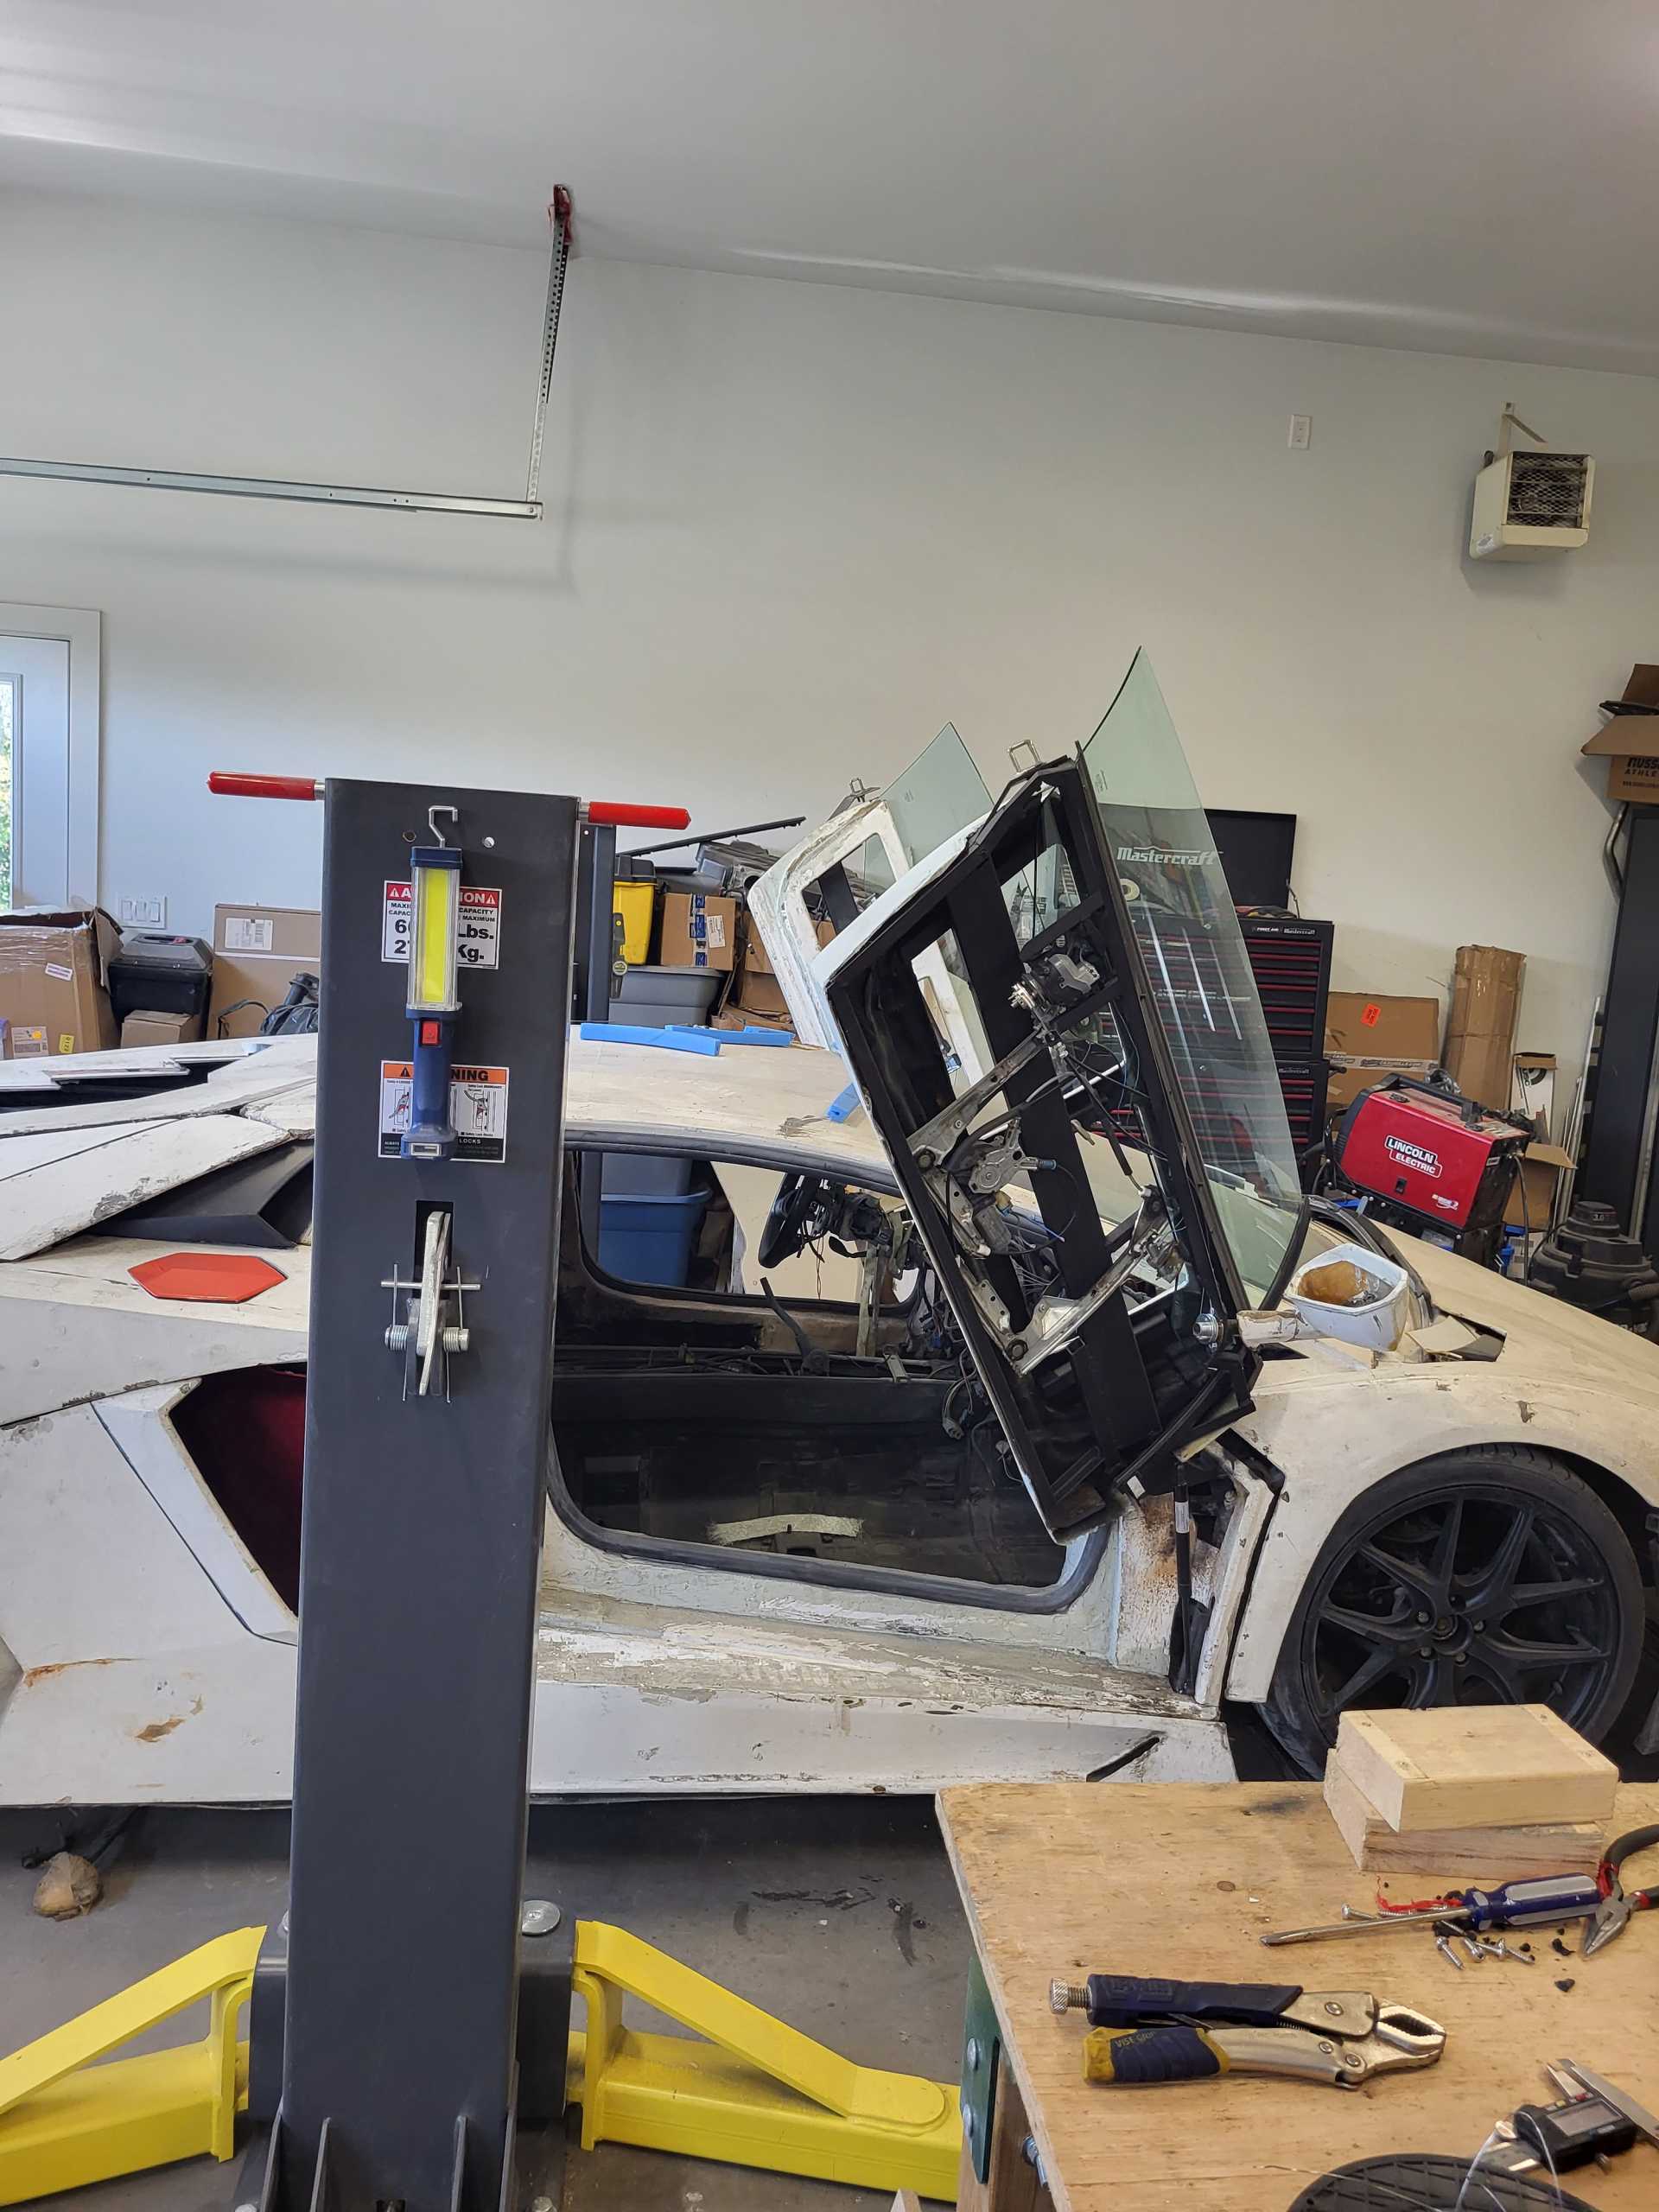
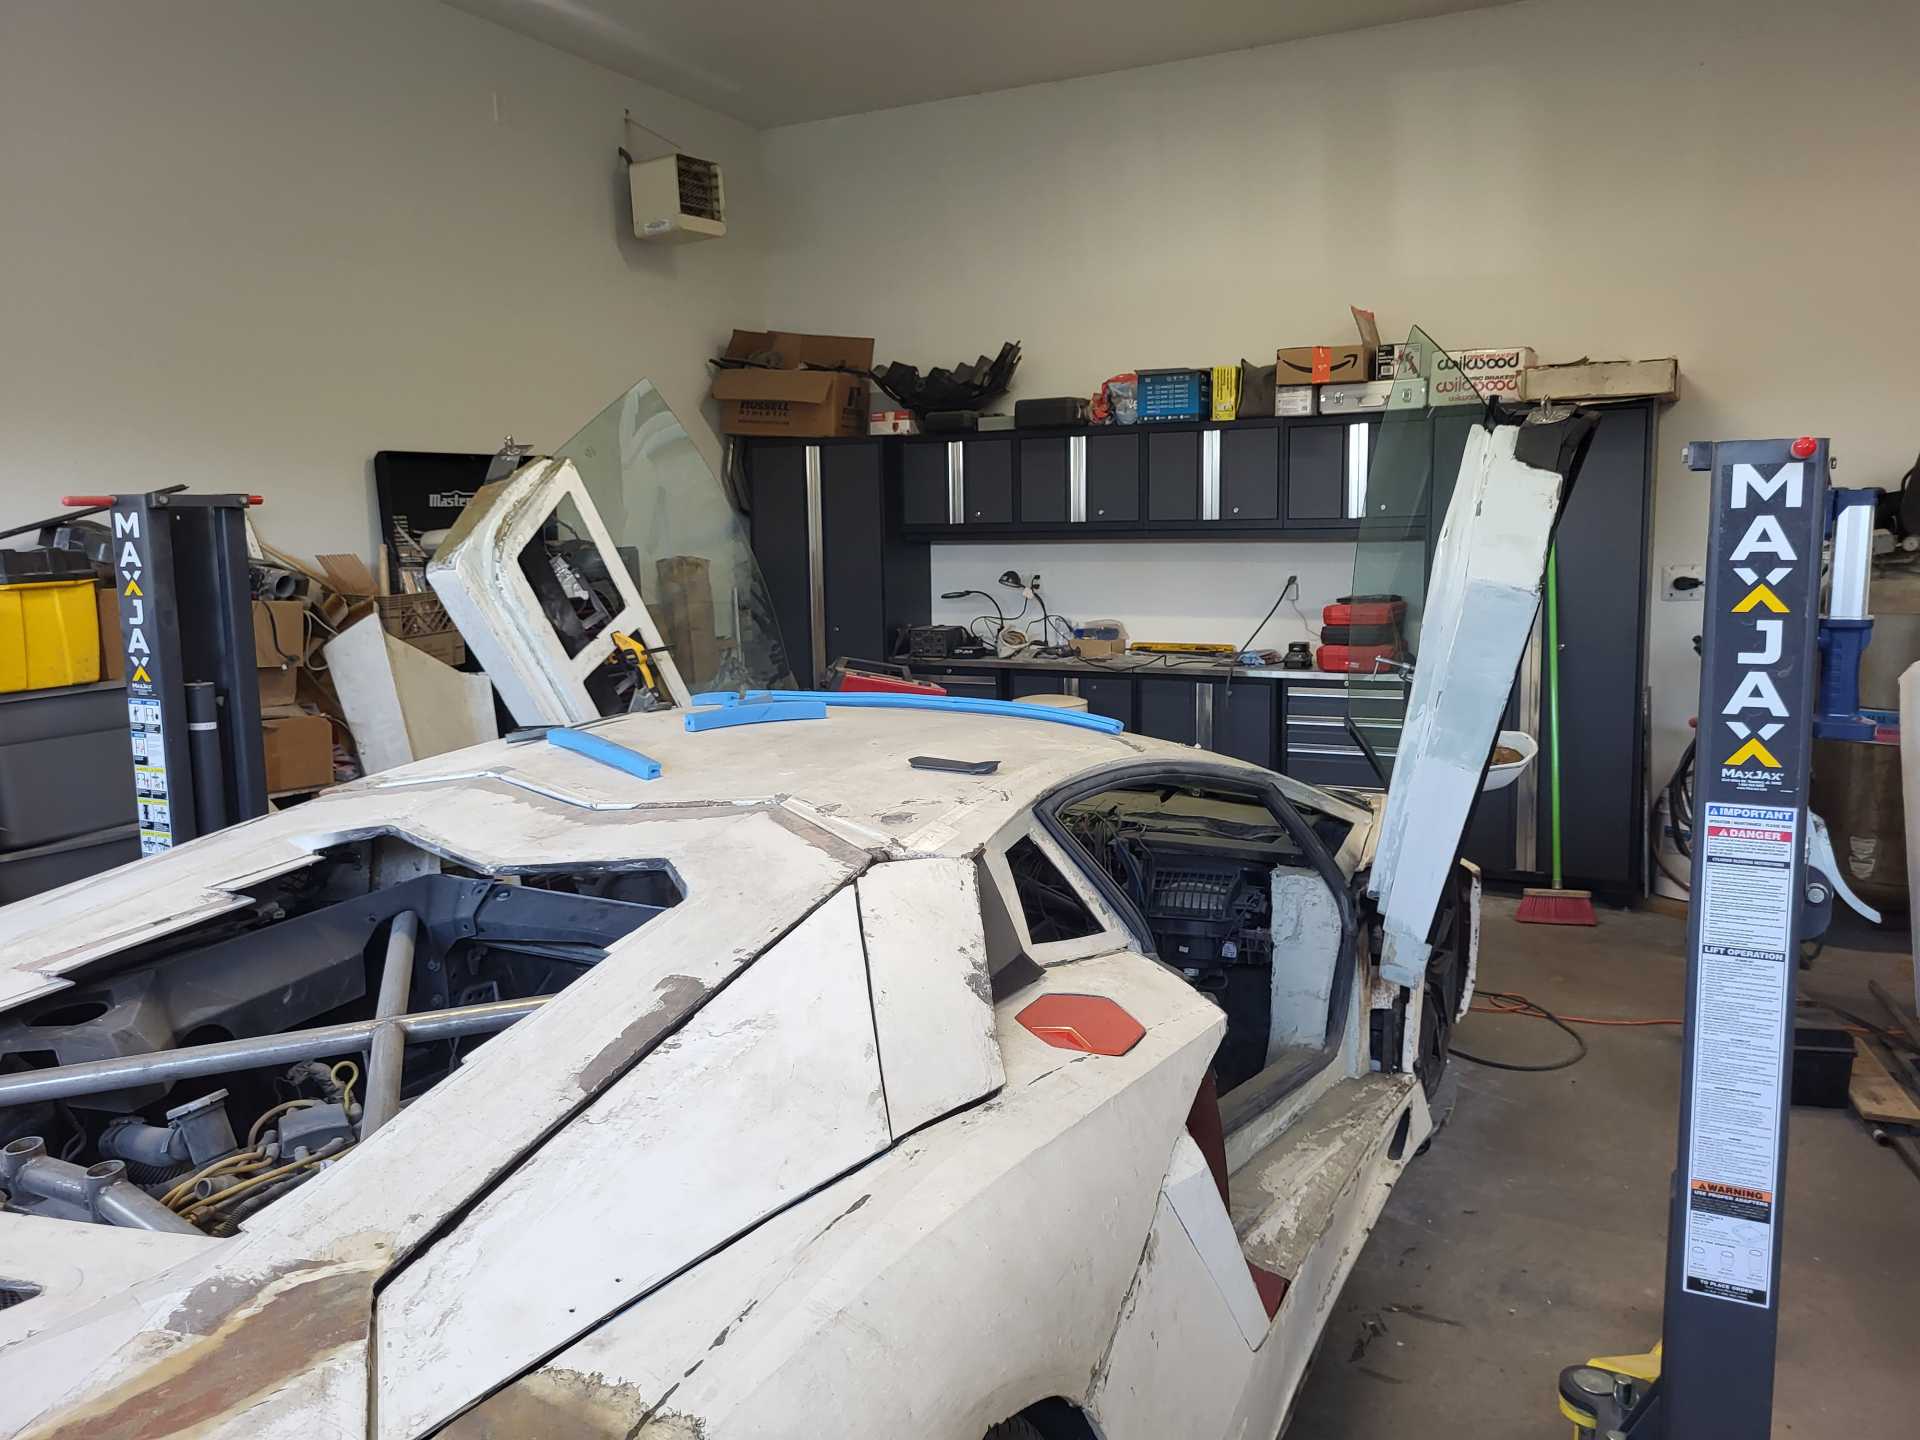
I finally completed the passenger side door frame so that it matches the drivers side. After that, I decided to start at the rear of the car and work my way forward installing all remaining parts and panels. (There were lots of bits and pieces installed.... but i don't have a list so you'll have to take my word for it. ) My goal is to get the car completed to the point where the next step will be body work and paint. I've now worked my way up to the doors. I'm currently working on the passenger side door.
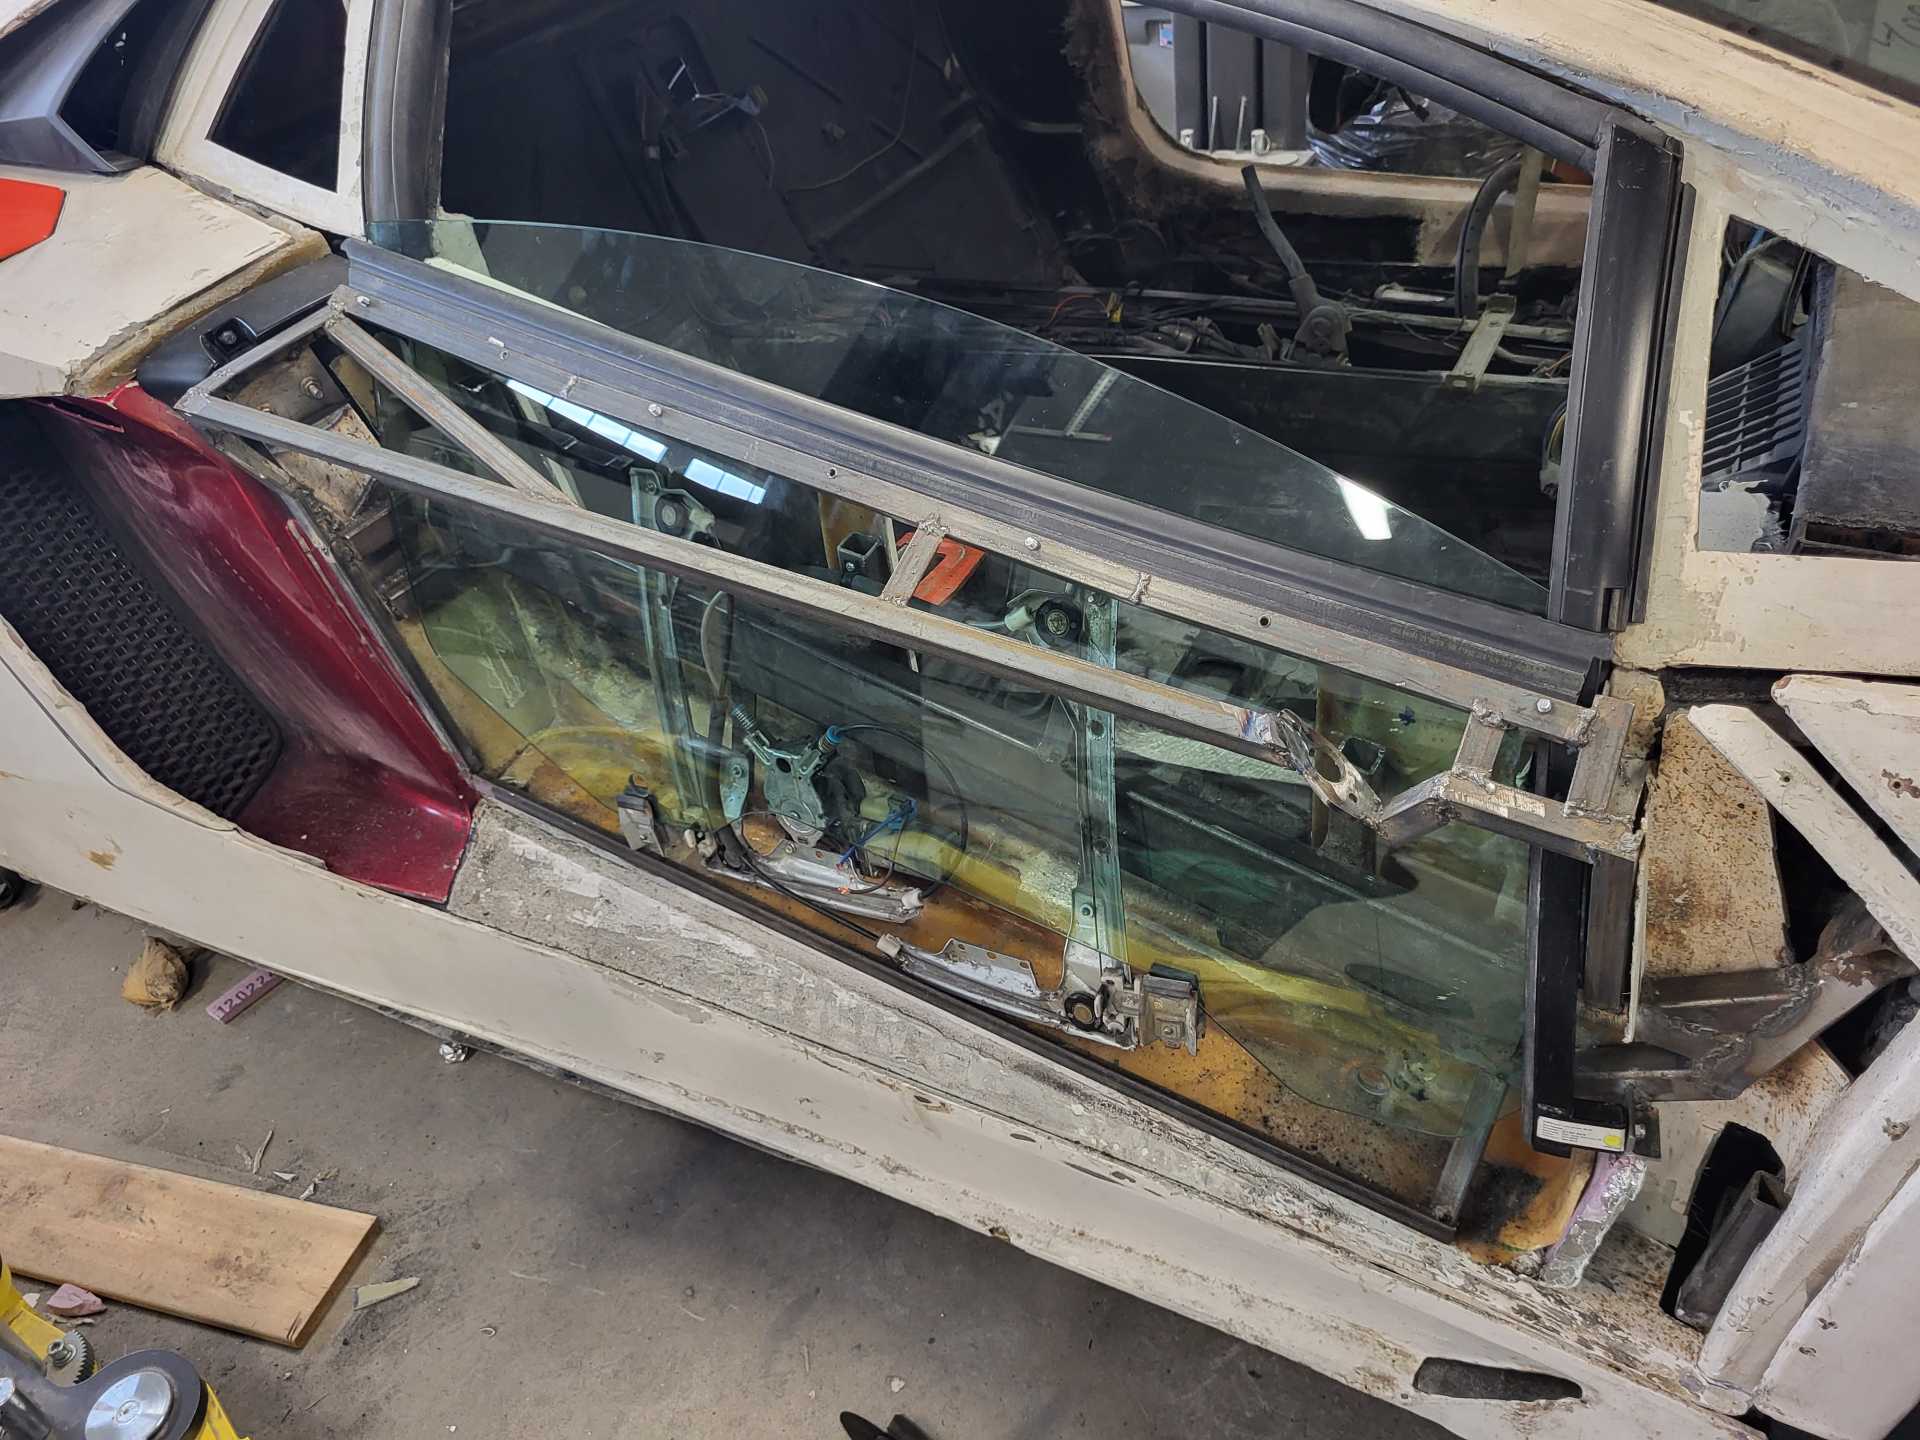
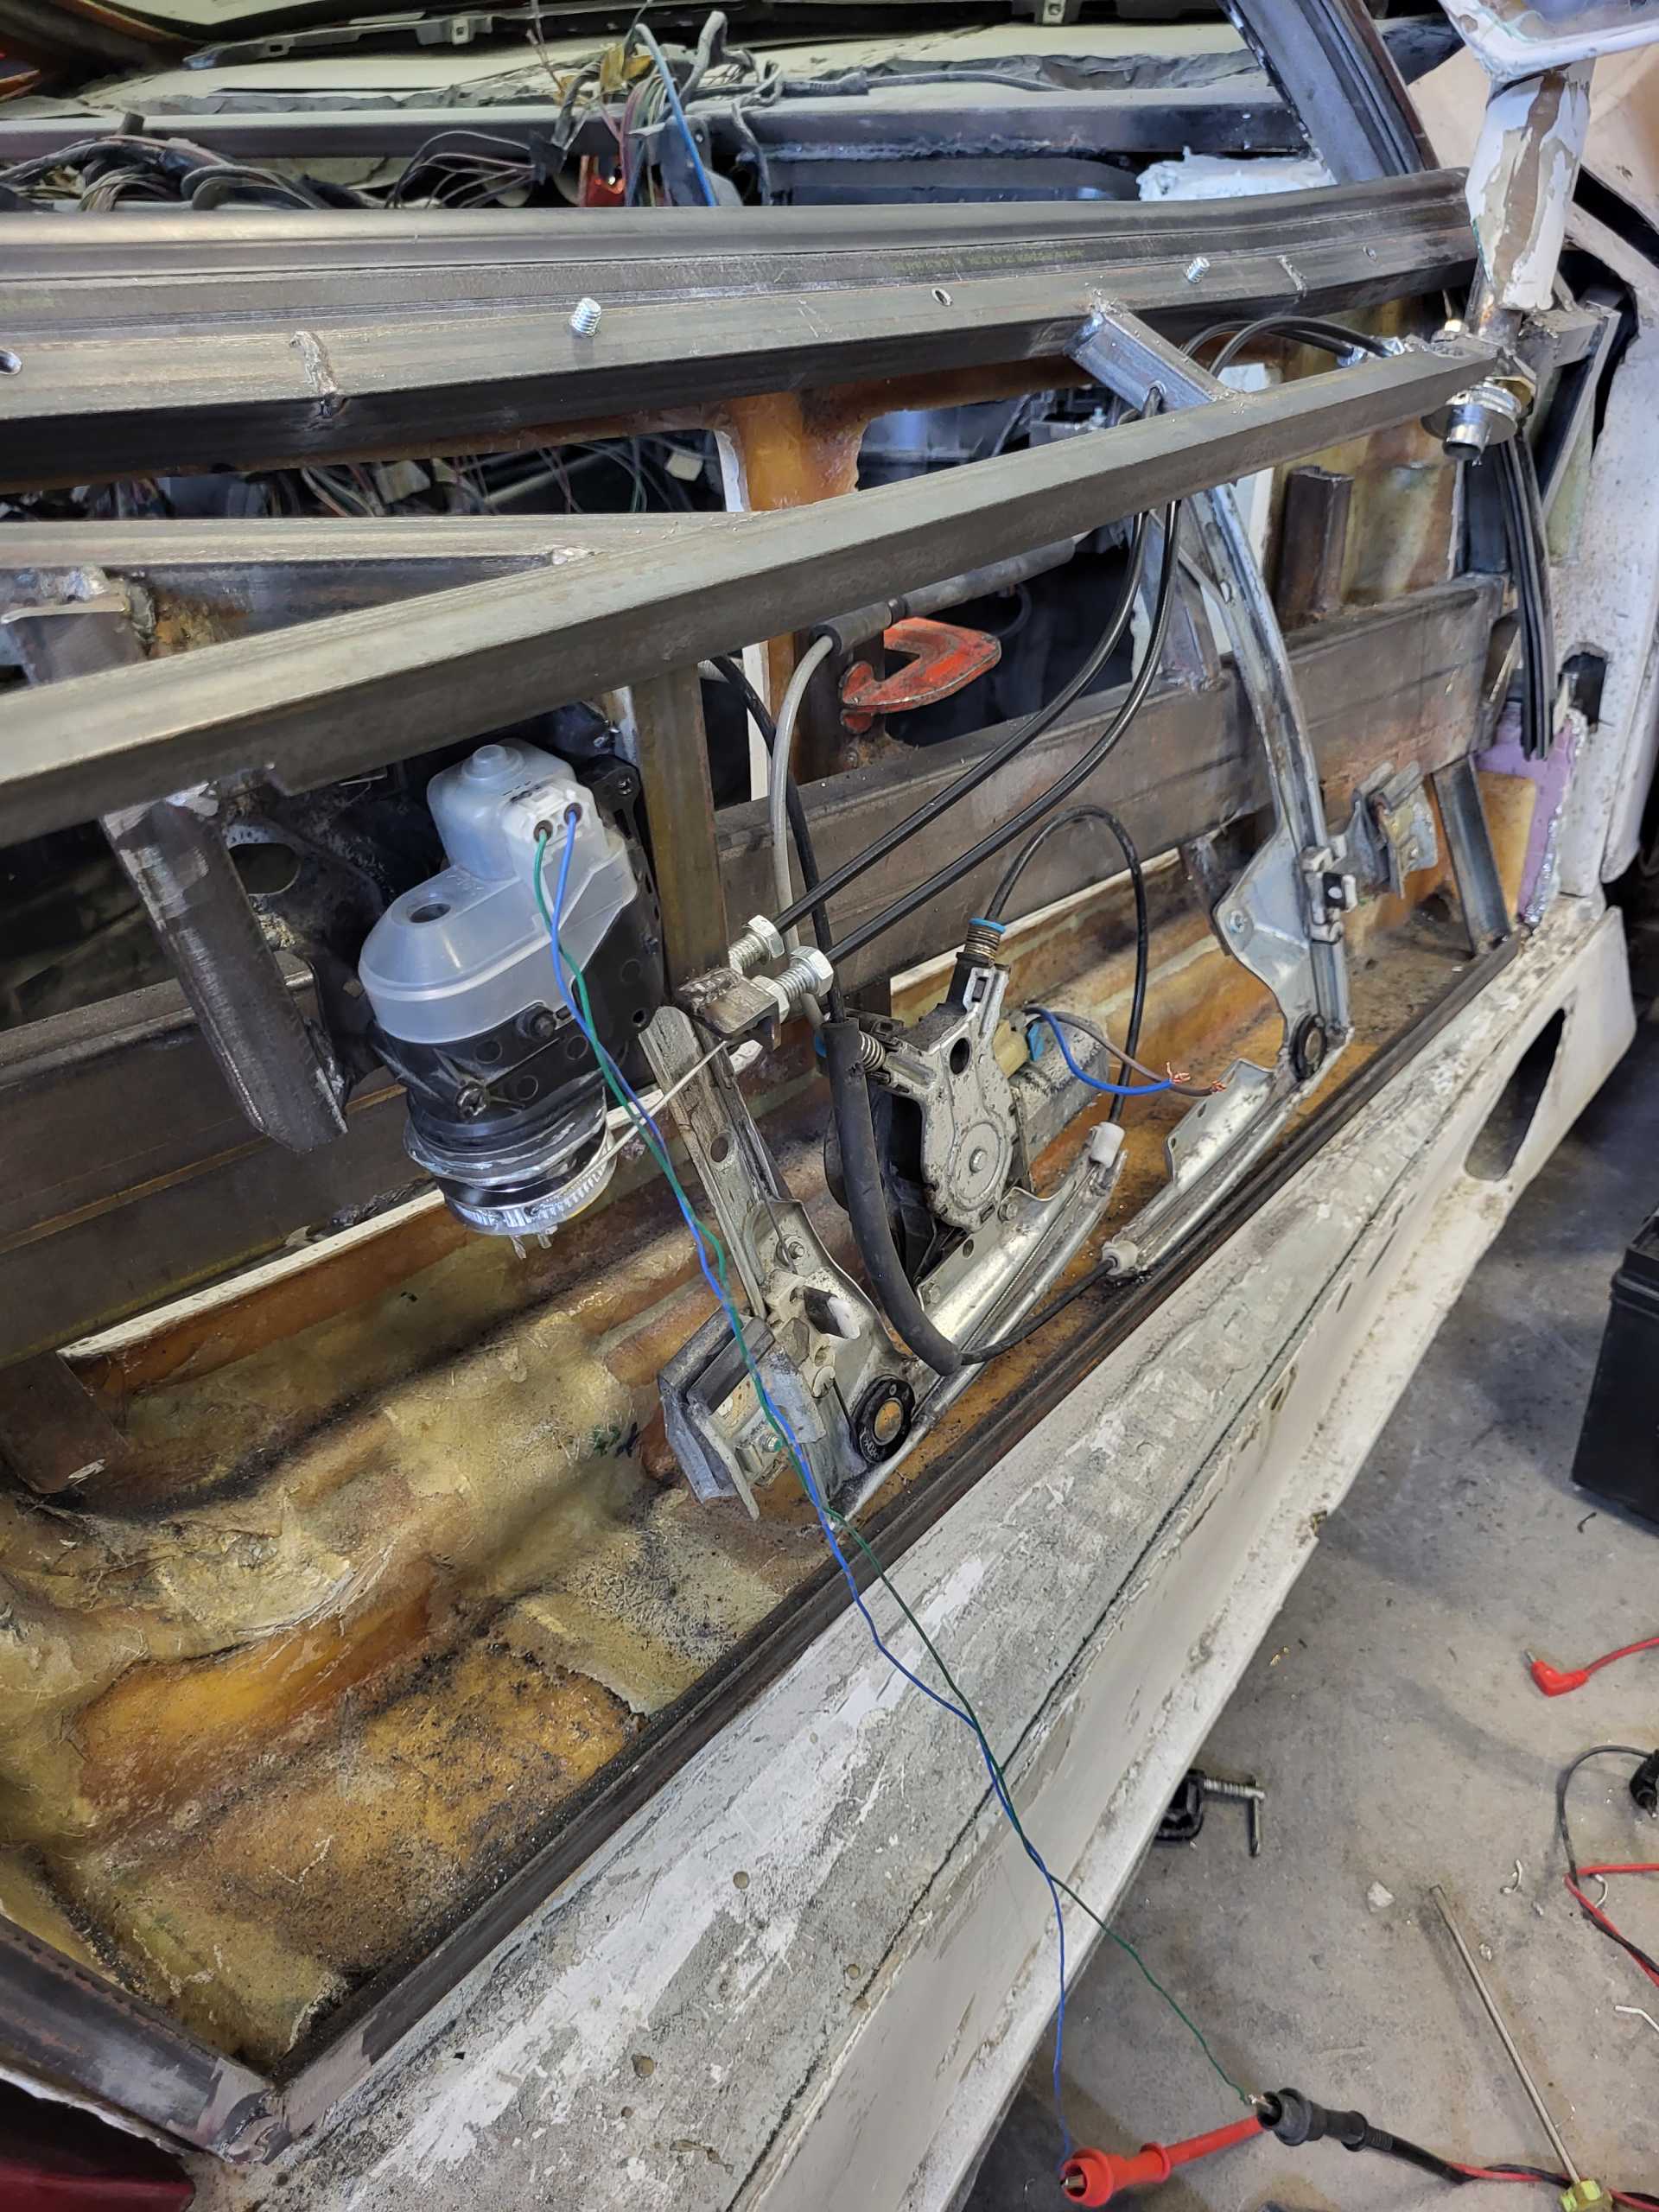
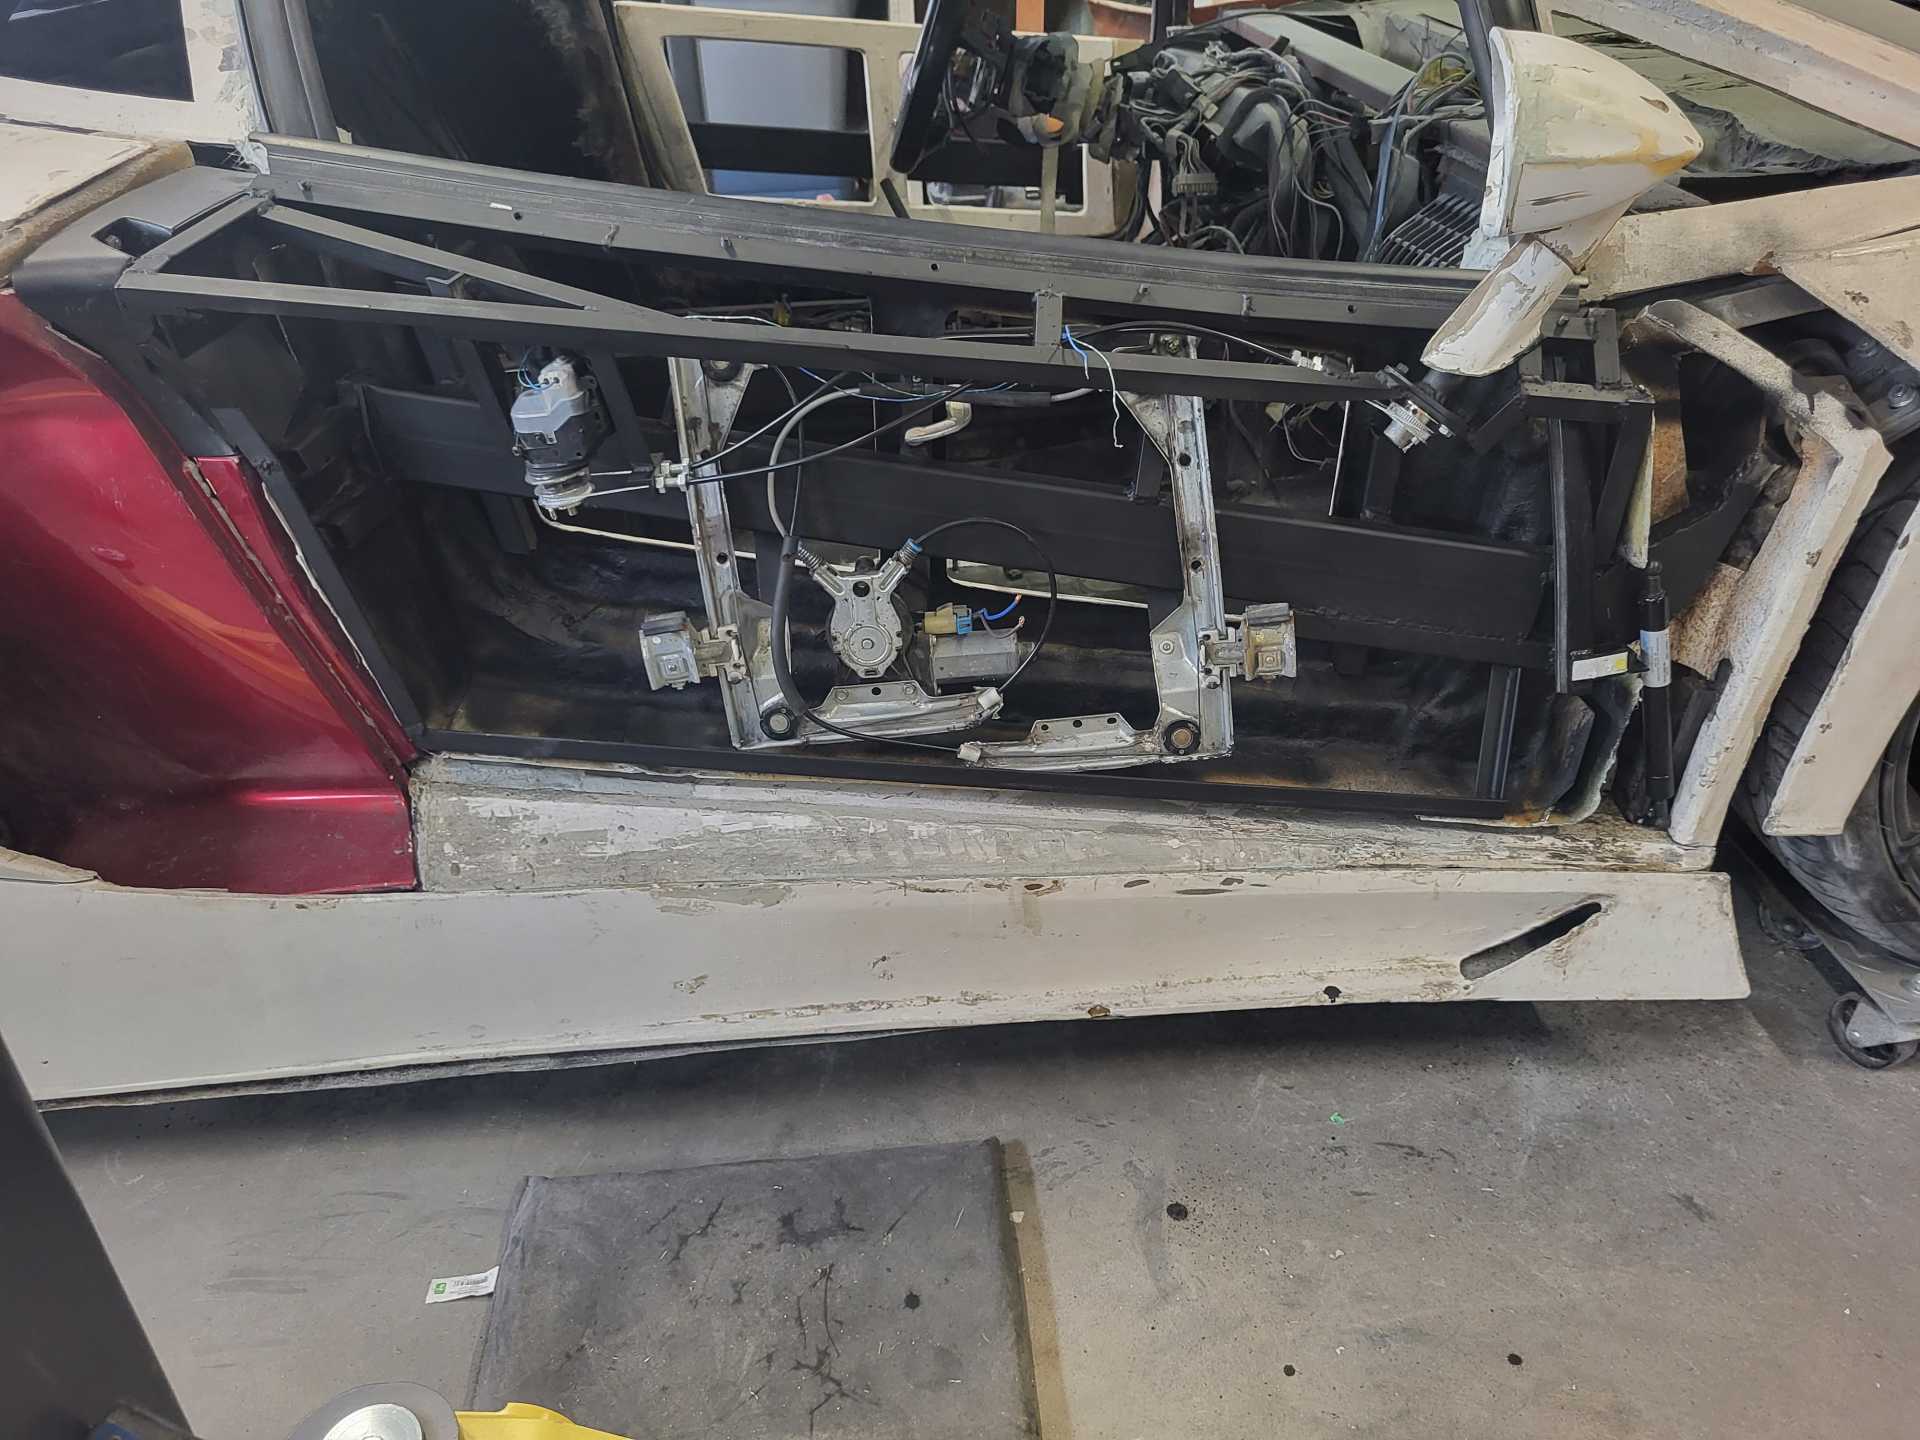
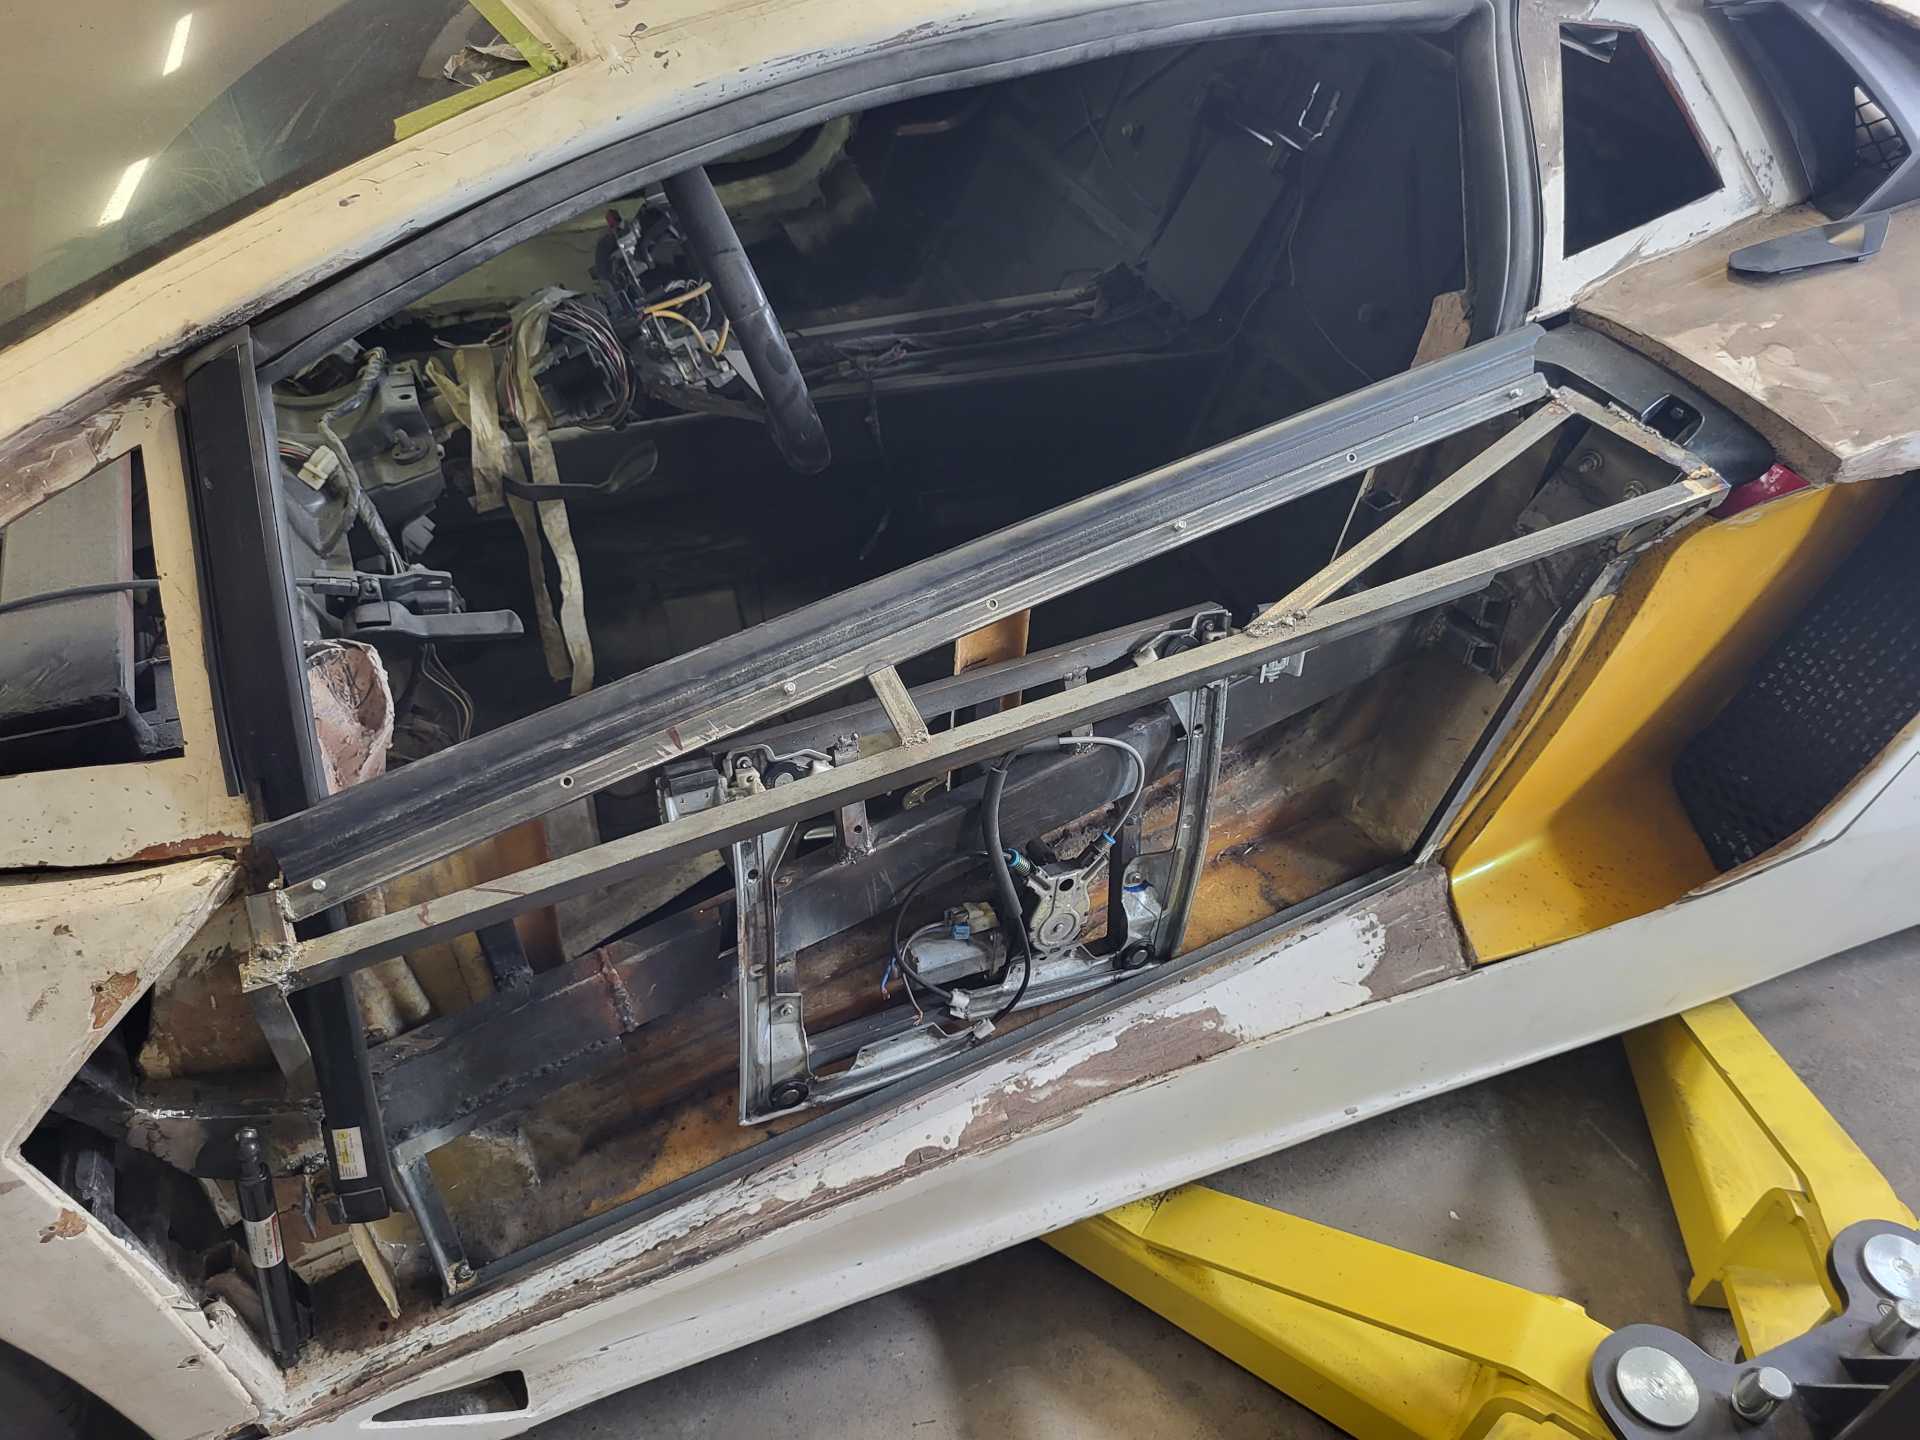
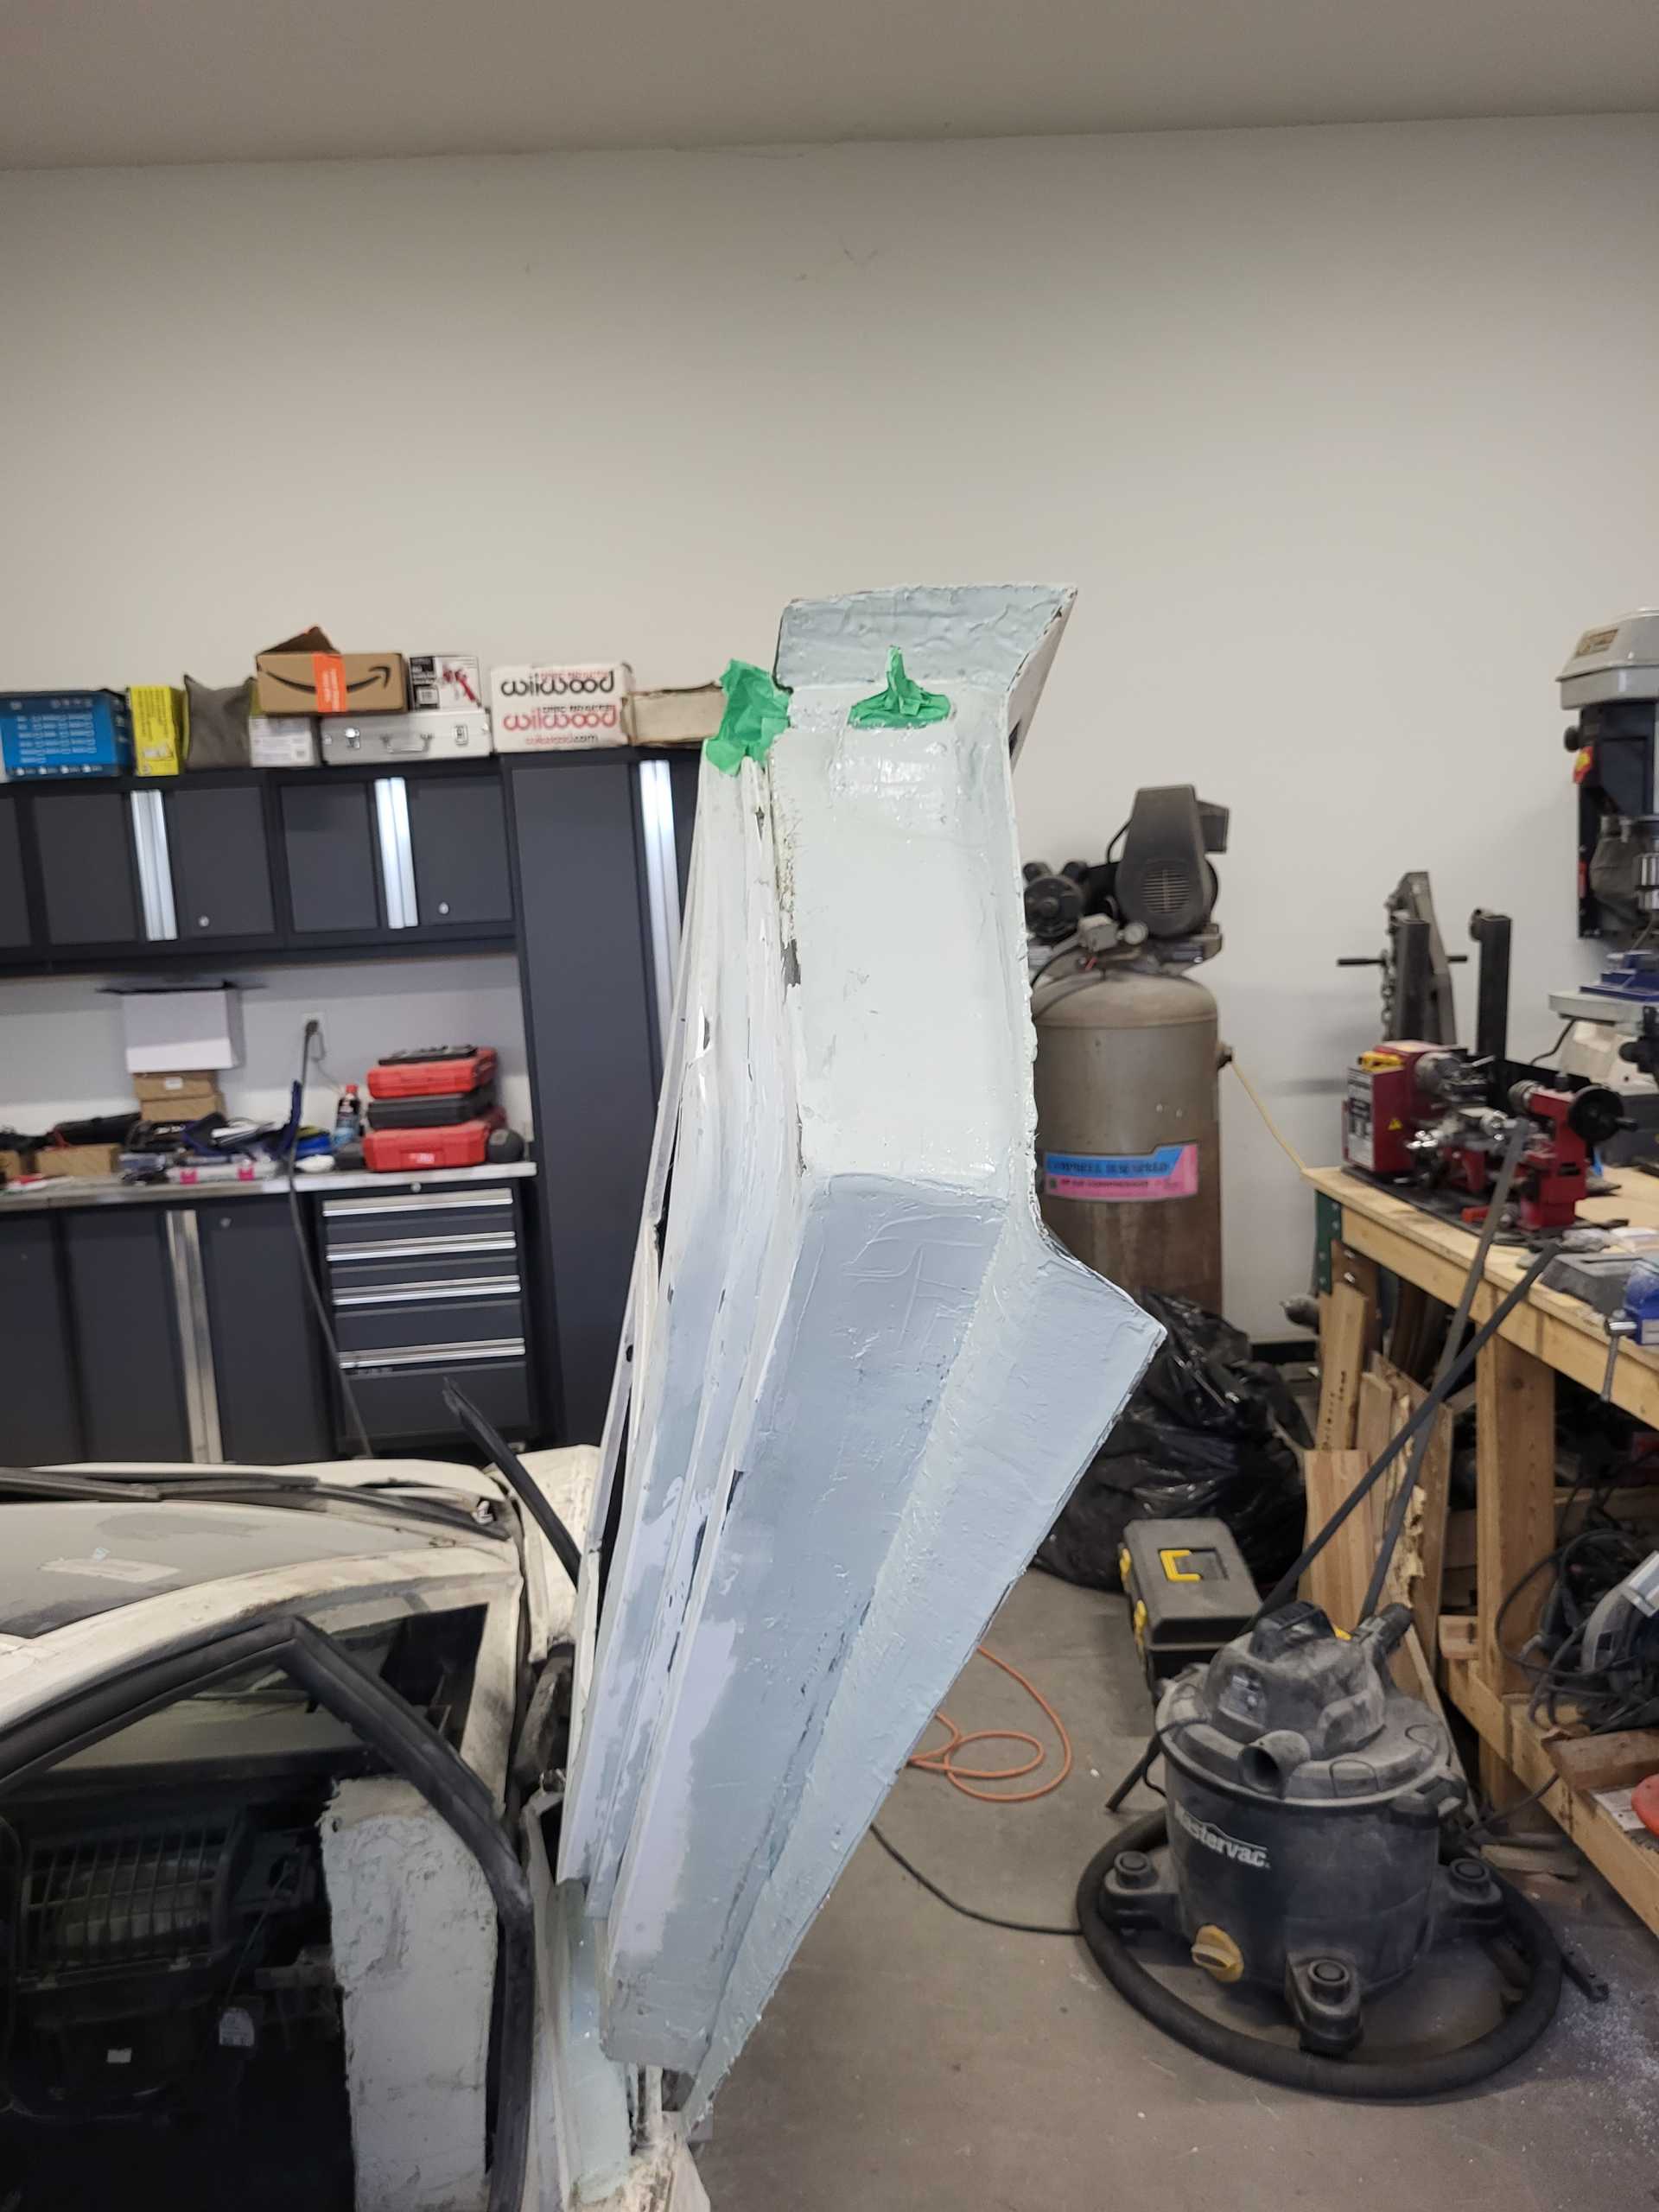
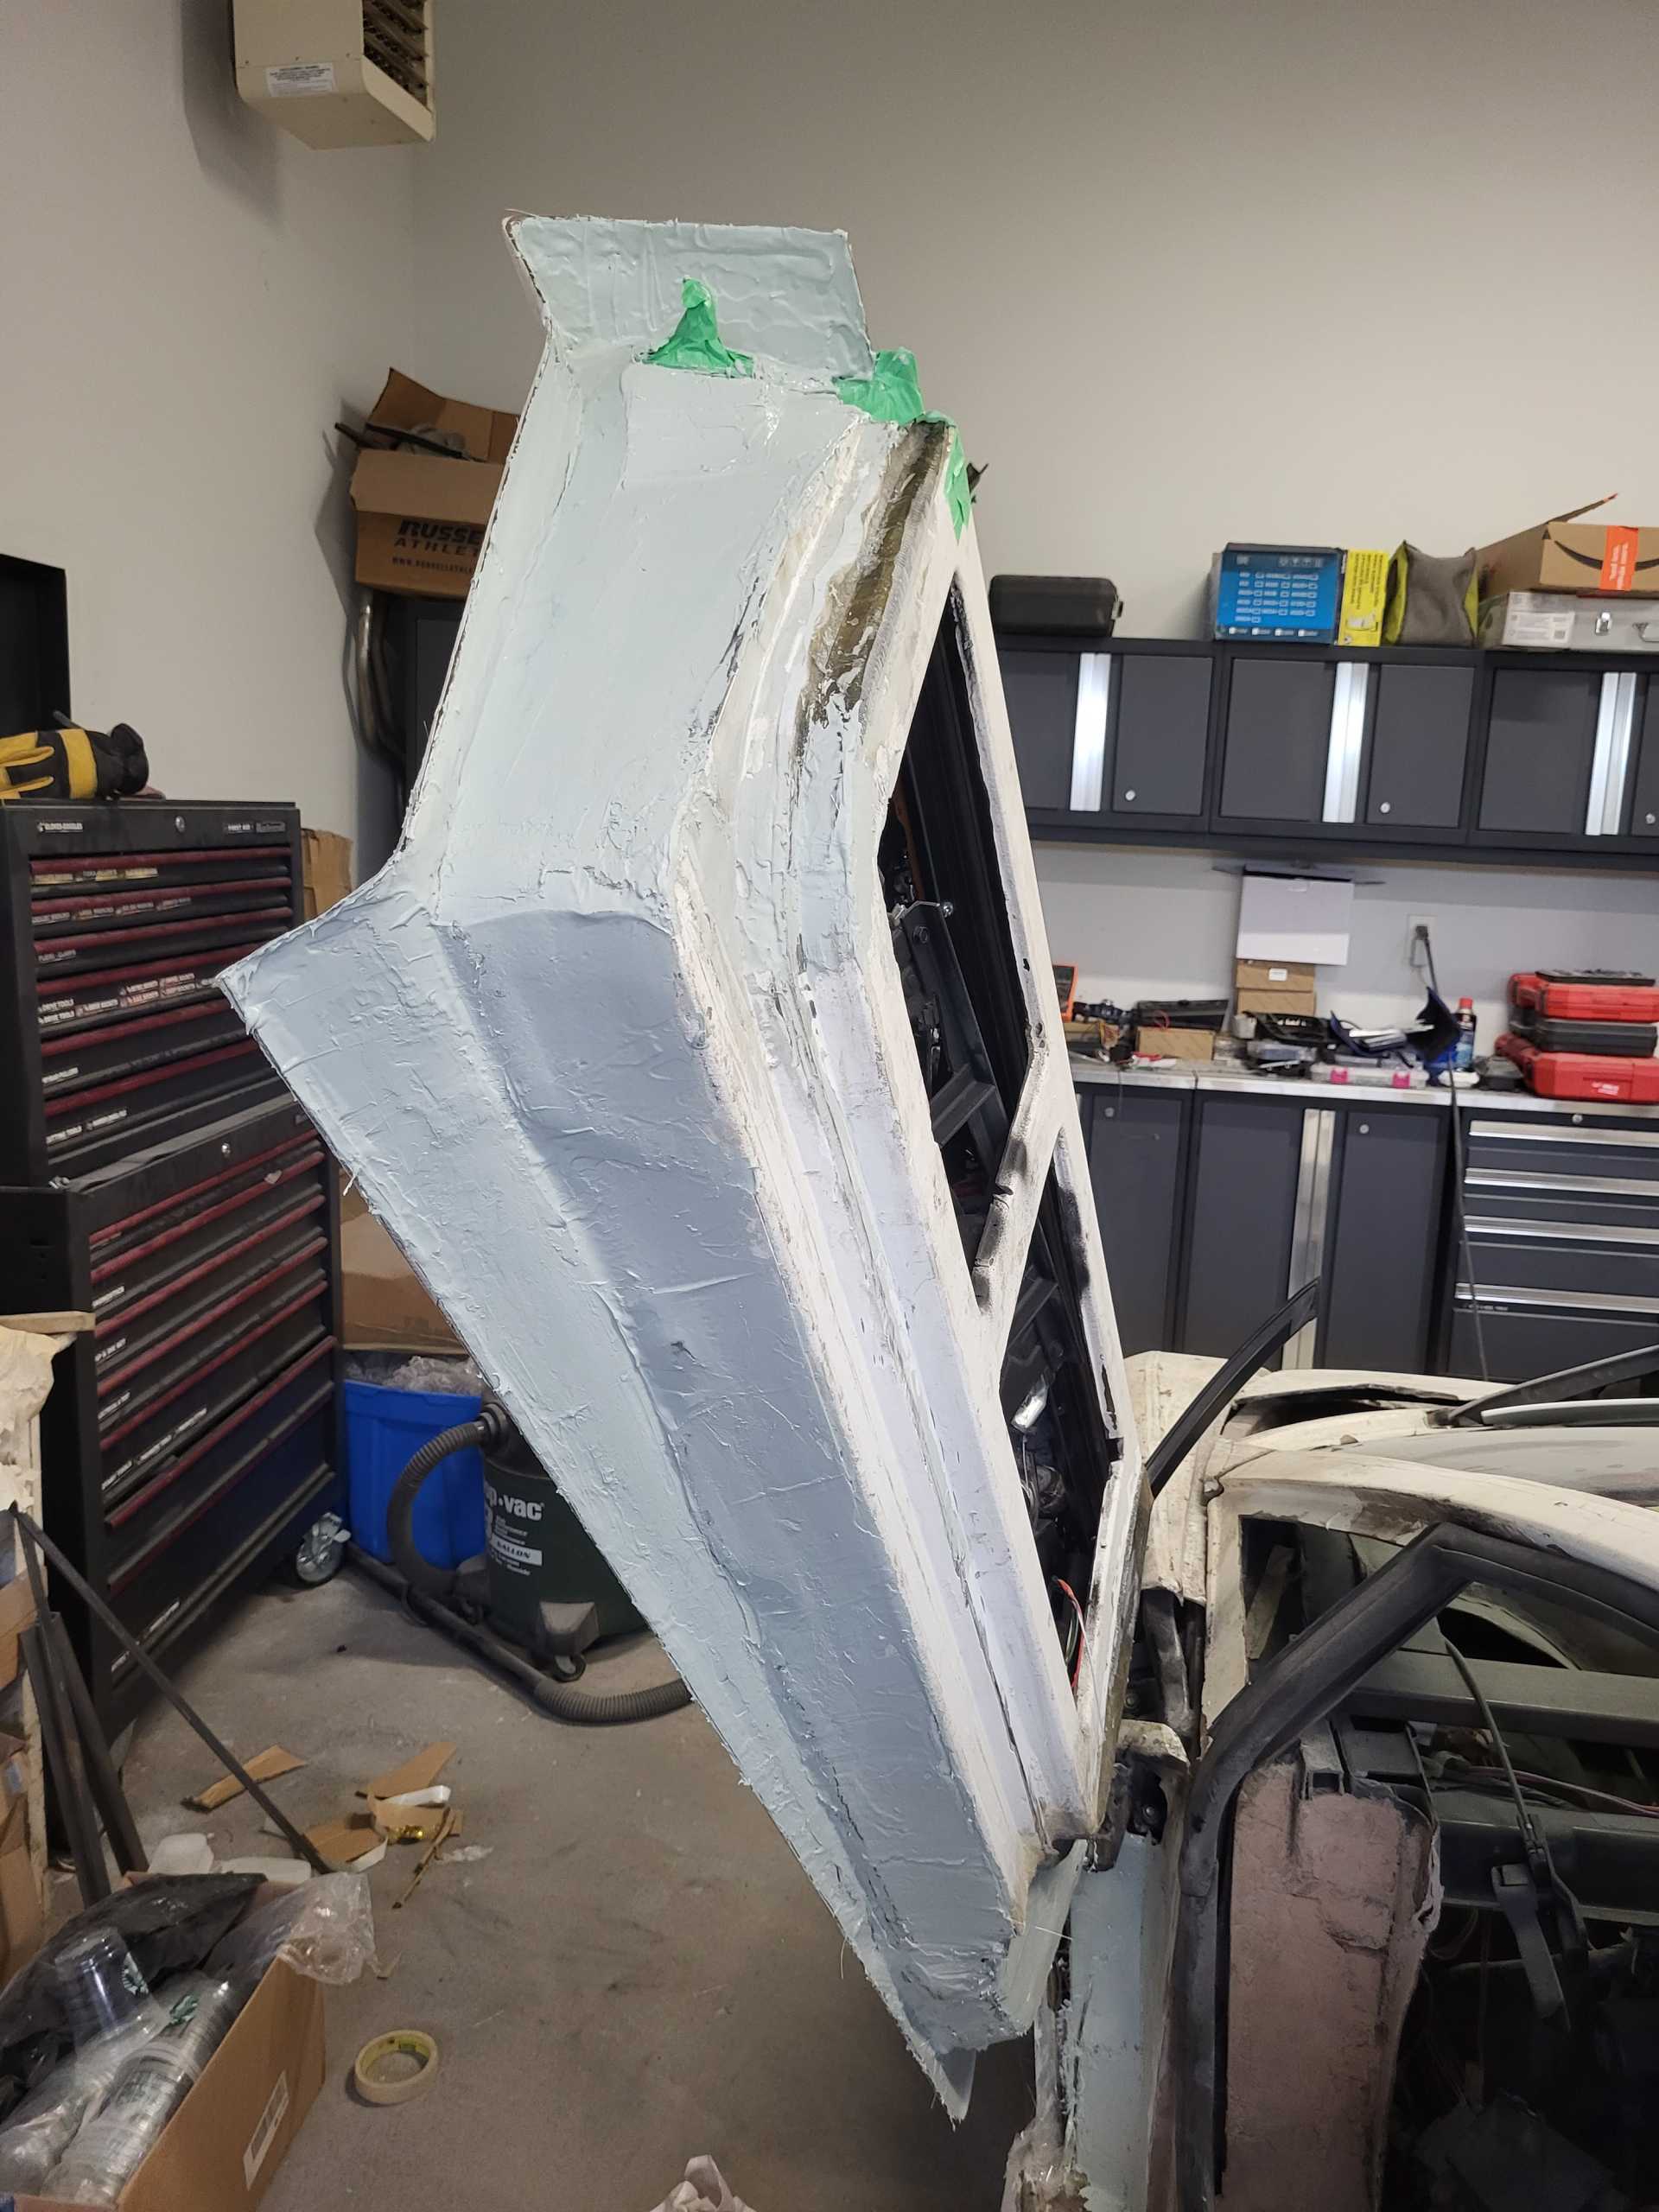
I'd already made the door hinges, so the next thing was to build the door body and assemble everything within. I modified the existing door body to fit the new opening, slightly compressing the door seal all around. I next installed the front window track and the power window regulator tracks/ motor. It took lots of fiddling to get this all aligned correctly so that the window moved up and down smoothly while being tight against the door seal. Once this was done, I was able to build up the door framing and attach the latch strike plate. With the framing in place, I mounted the outer dew wipe.
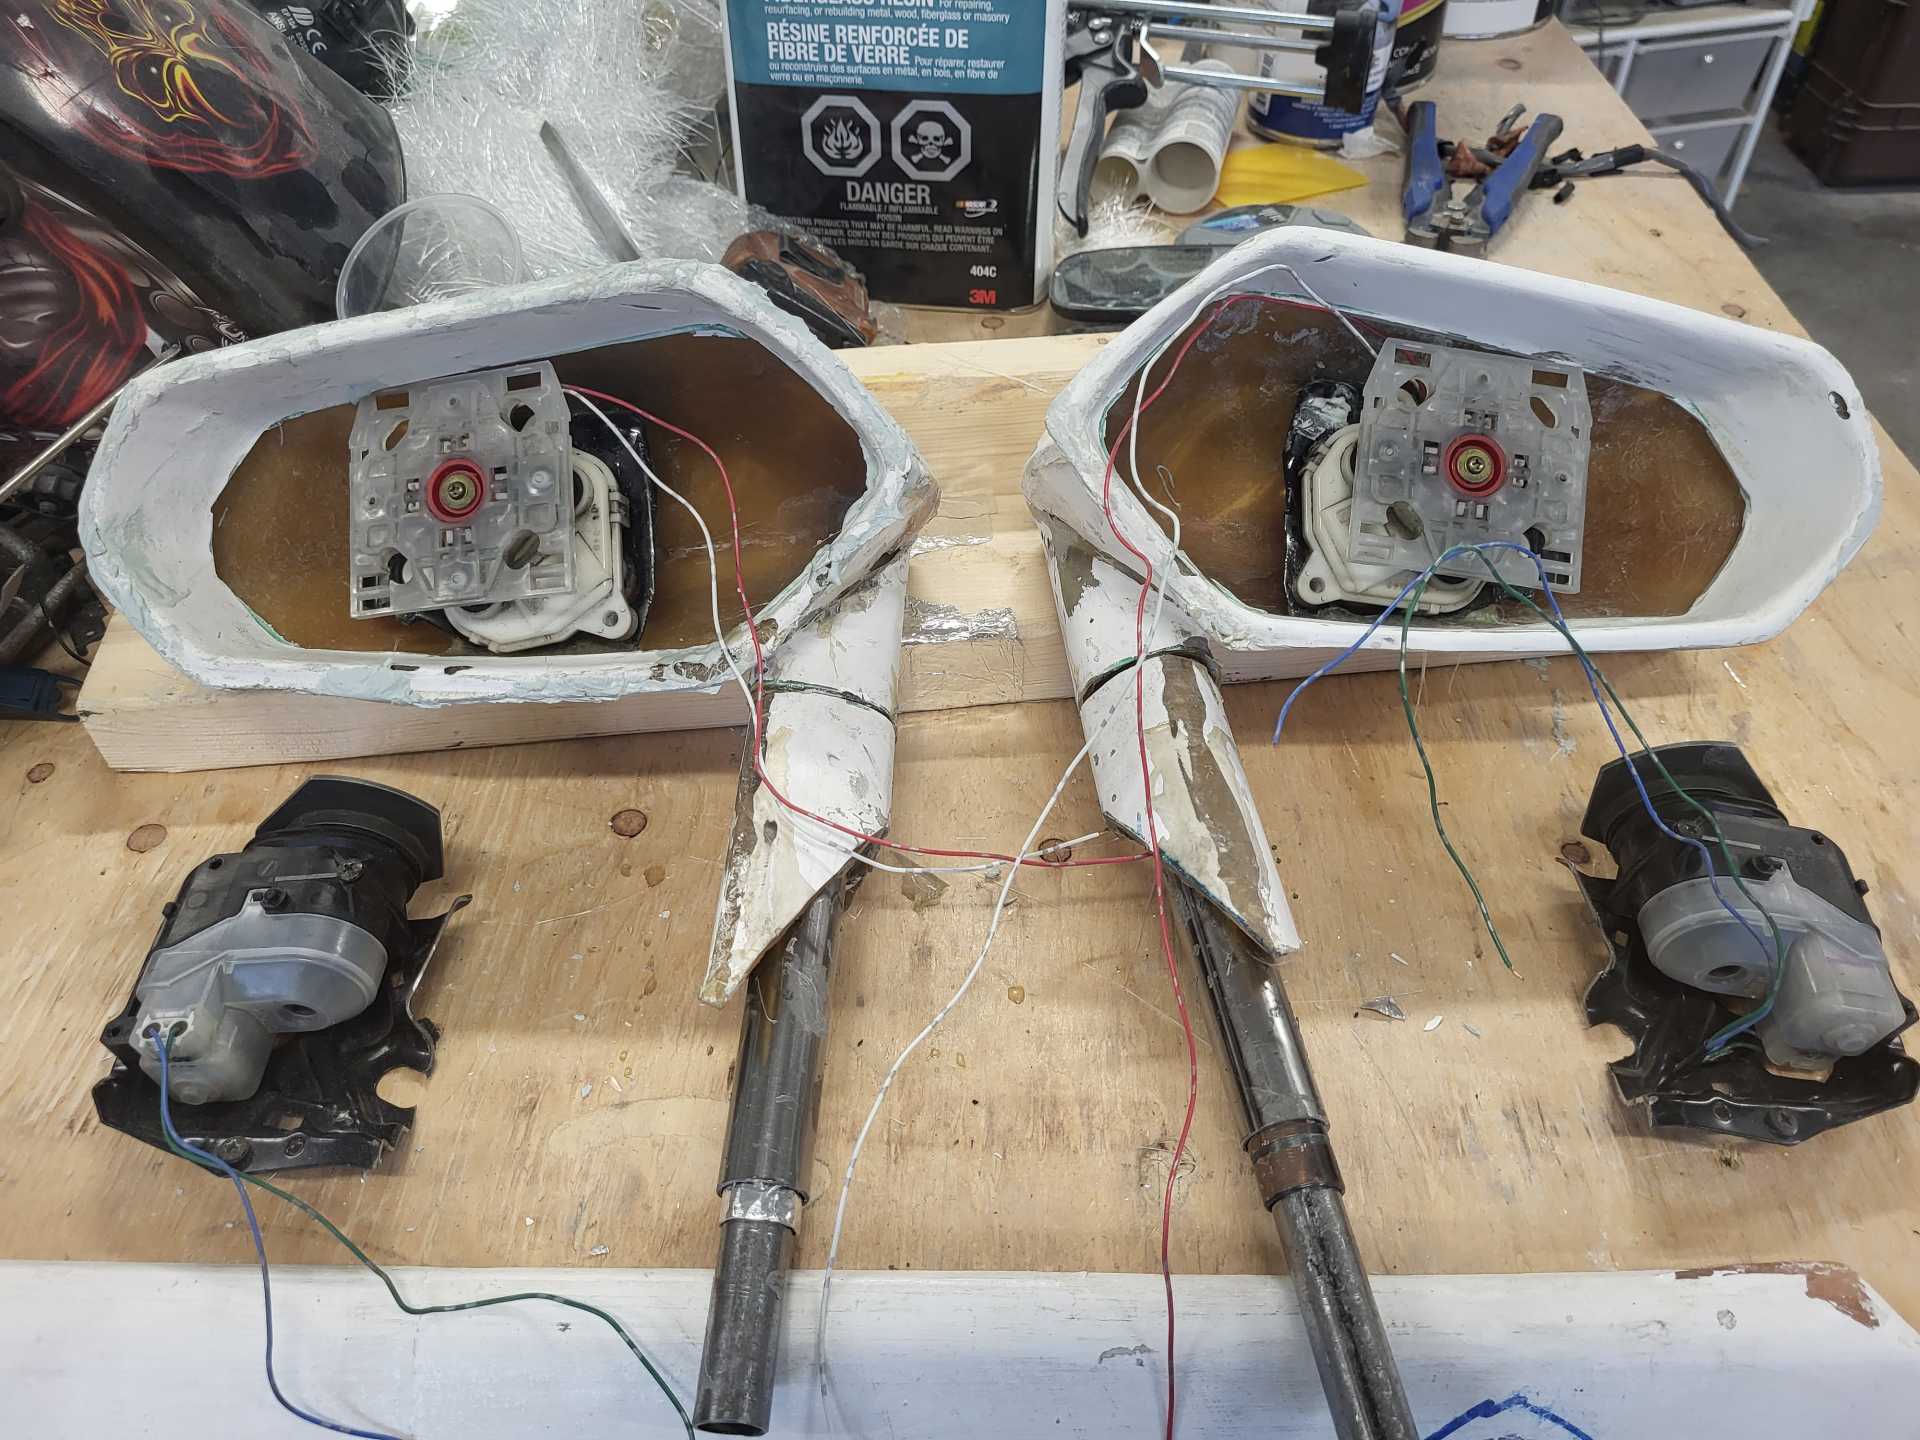
The hardest part for the door was the side mirror. For rigidity, the mirror had to mount to the door frame. I used the power mirror mechanism from a Lexus. I fiberglassed the mounting bracket to the inside of the Aventador mirror housing. I also wanted to have the folding mirror feature, but the motor from the Lexus mirror was too big for the Aventador housing. Instead, I mounted it near the rear of the door where I had a fair bit of excess room. It's connected to the folding mirror using bowden cables. It seems to work well. (See video below).
I also made an estimate of the final weight of the complete finished door and installed the corresponding gas shock. Hopefully I was close in my estimate so that I don't have to change the shock later.
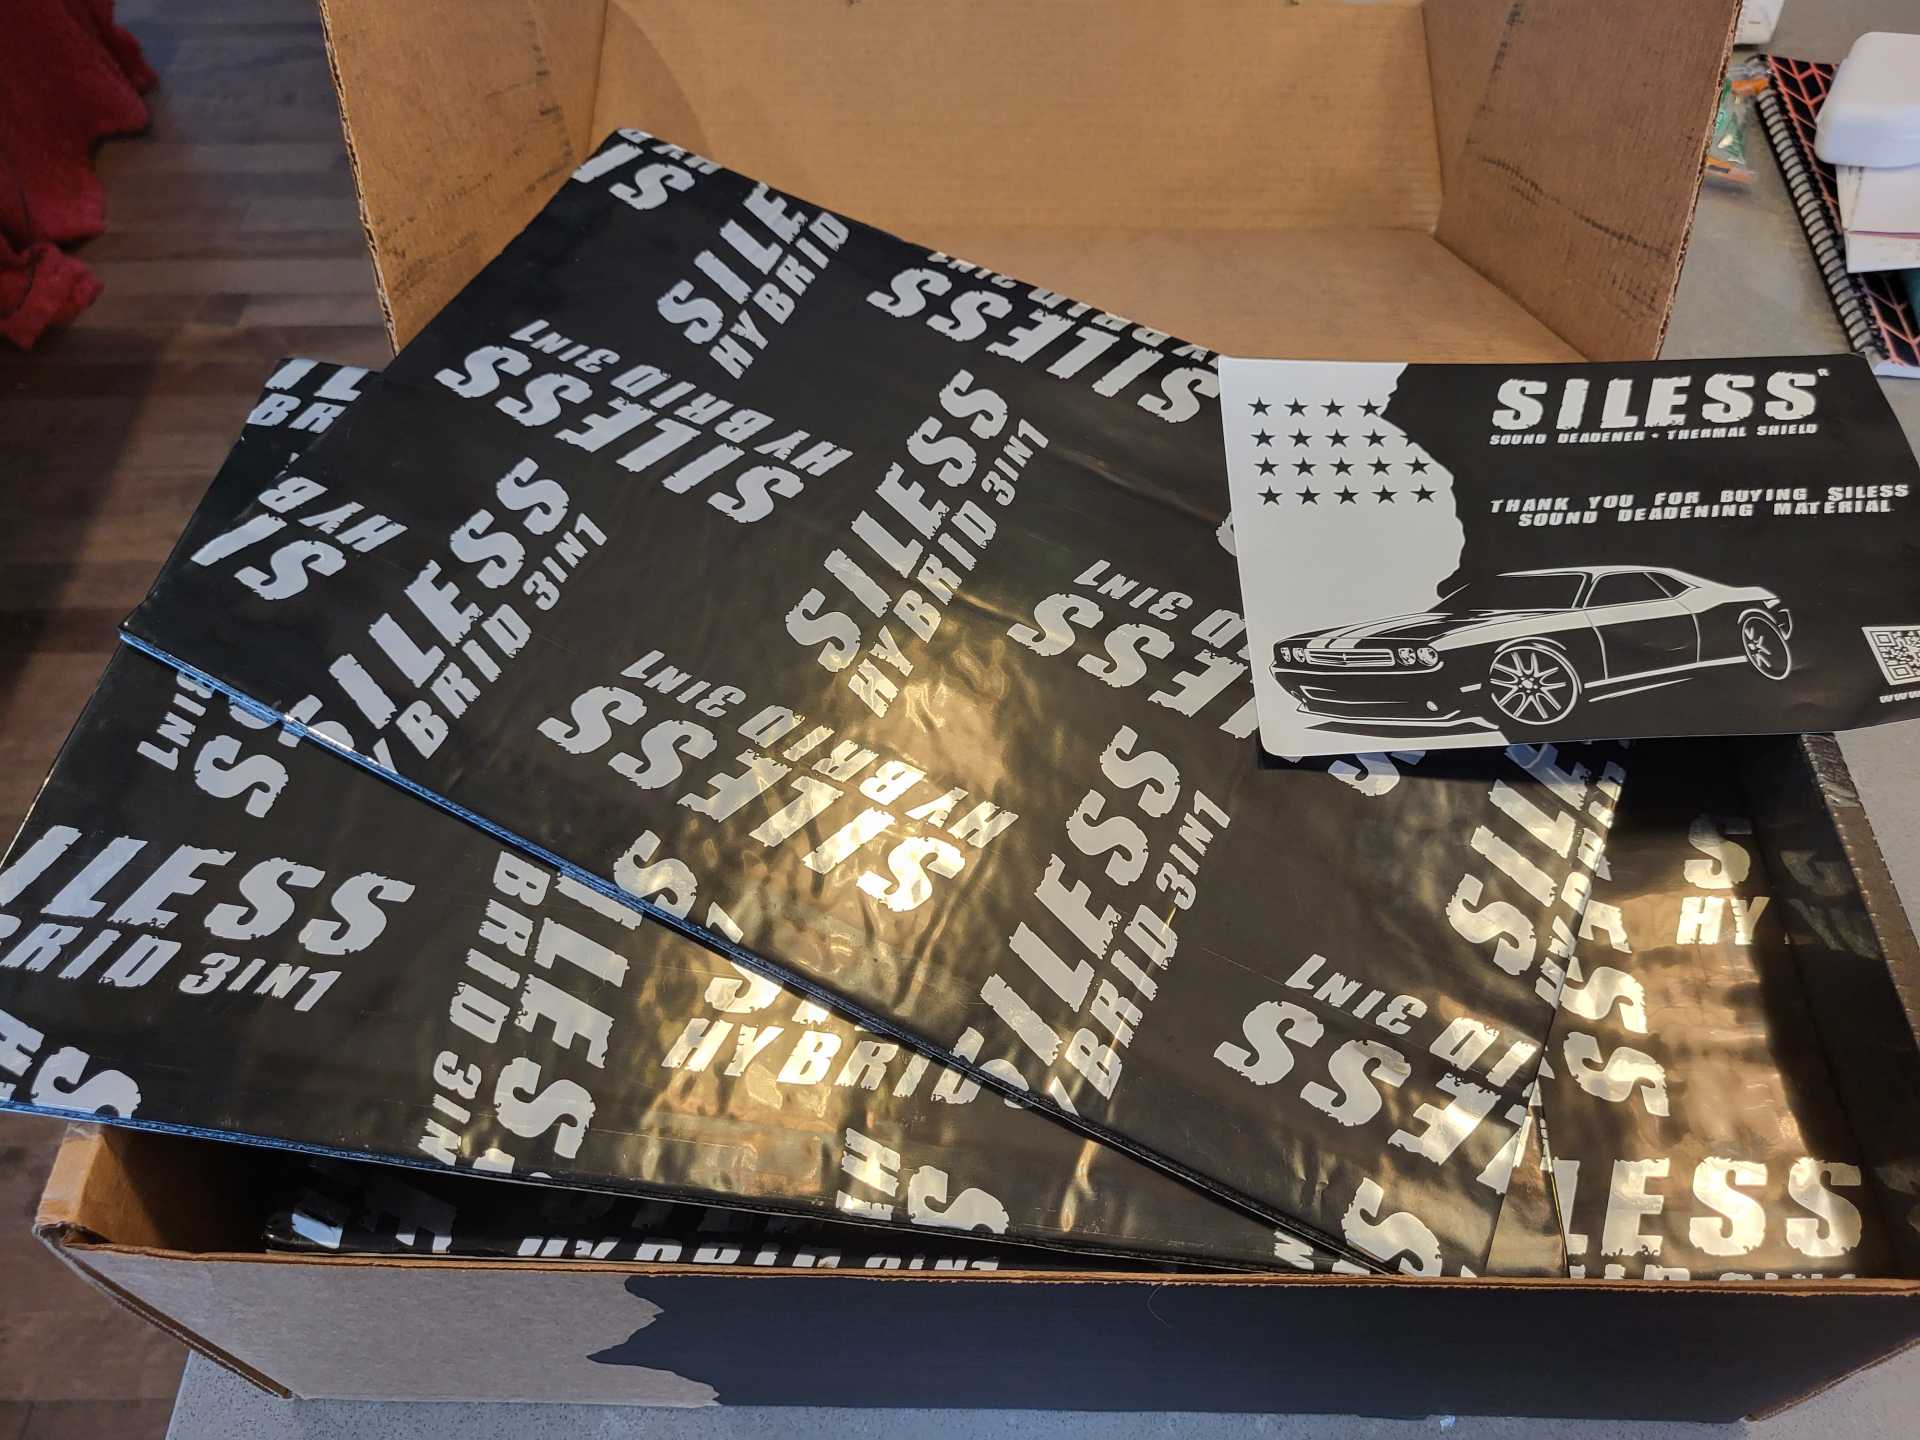
I'm now ready to run some wiring and then copy all of this work onto the driver's side. Then I'll be able to add the door skins and continue installing the front panels. Before installing the skins, I'll be adding a sound proofing material to them. It's next to impossible to install it properly once the skin is mounted, so I'll add it before hand. I'm using Siless hybrid sound and vibration damping panels.
Great progress! Very impressive work overall, glad that you have not given up on the project.
Not sure if you are familiar with the build "Project Binky" on Youtube, but they basically build an original Mini and shove the entire drivetrain from an AWD Turbo Celica into it, they essentially rebuild the entire car from scratch, I think only the dash bar is original. There are lots and lots of great ideas in that project that I think would be applicable to your build if you were looking for a highly technical and highly entertaining video series to check out for some additional inspiration.
Very glad to see you back at it! Love the folding mirrors and how you made everything work. Its always the details that take forever. Did you have the door window glass custom made, or is that lambo glass?
Very glad to see you back at it! Love the folding mirrors and how you made everything work. Its always the details that take forever. Did you have the door window glass custom made, or is that lambo glass?
shem
The door glass is oem Aventador (along with the seals and dew wipes). The windshield is from a 2001 Infiniti i30. The rest of the glass (rear glass, small ones in front and behind the door glass, and the engine bay glass) is all custom made.
I thought I'd post something new.... and this time it took me less than a year to post it!
First, I added protective paint for the inside of the door. Nothing special but looks nice.
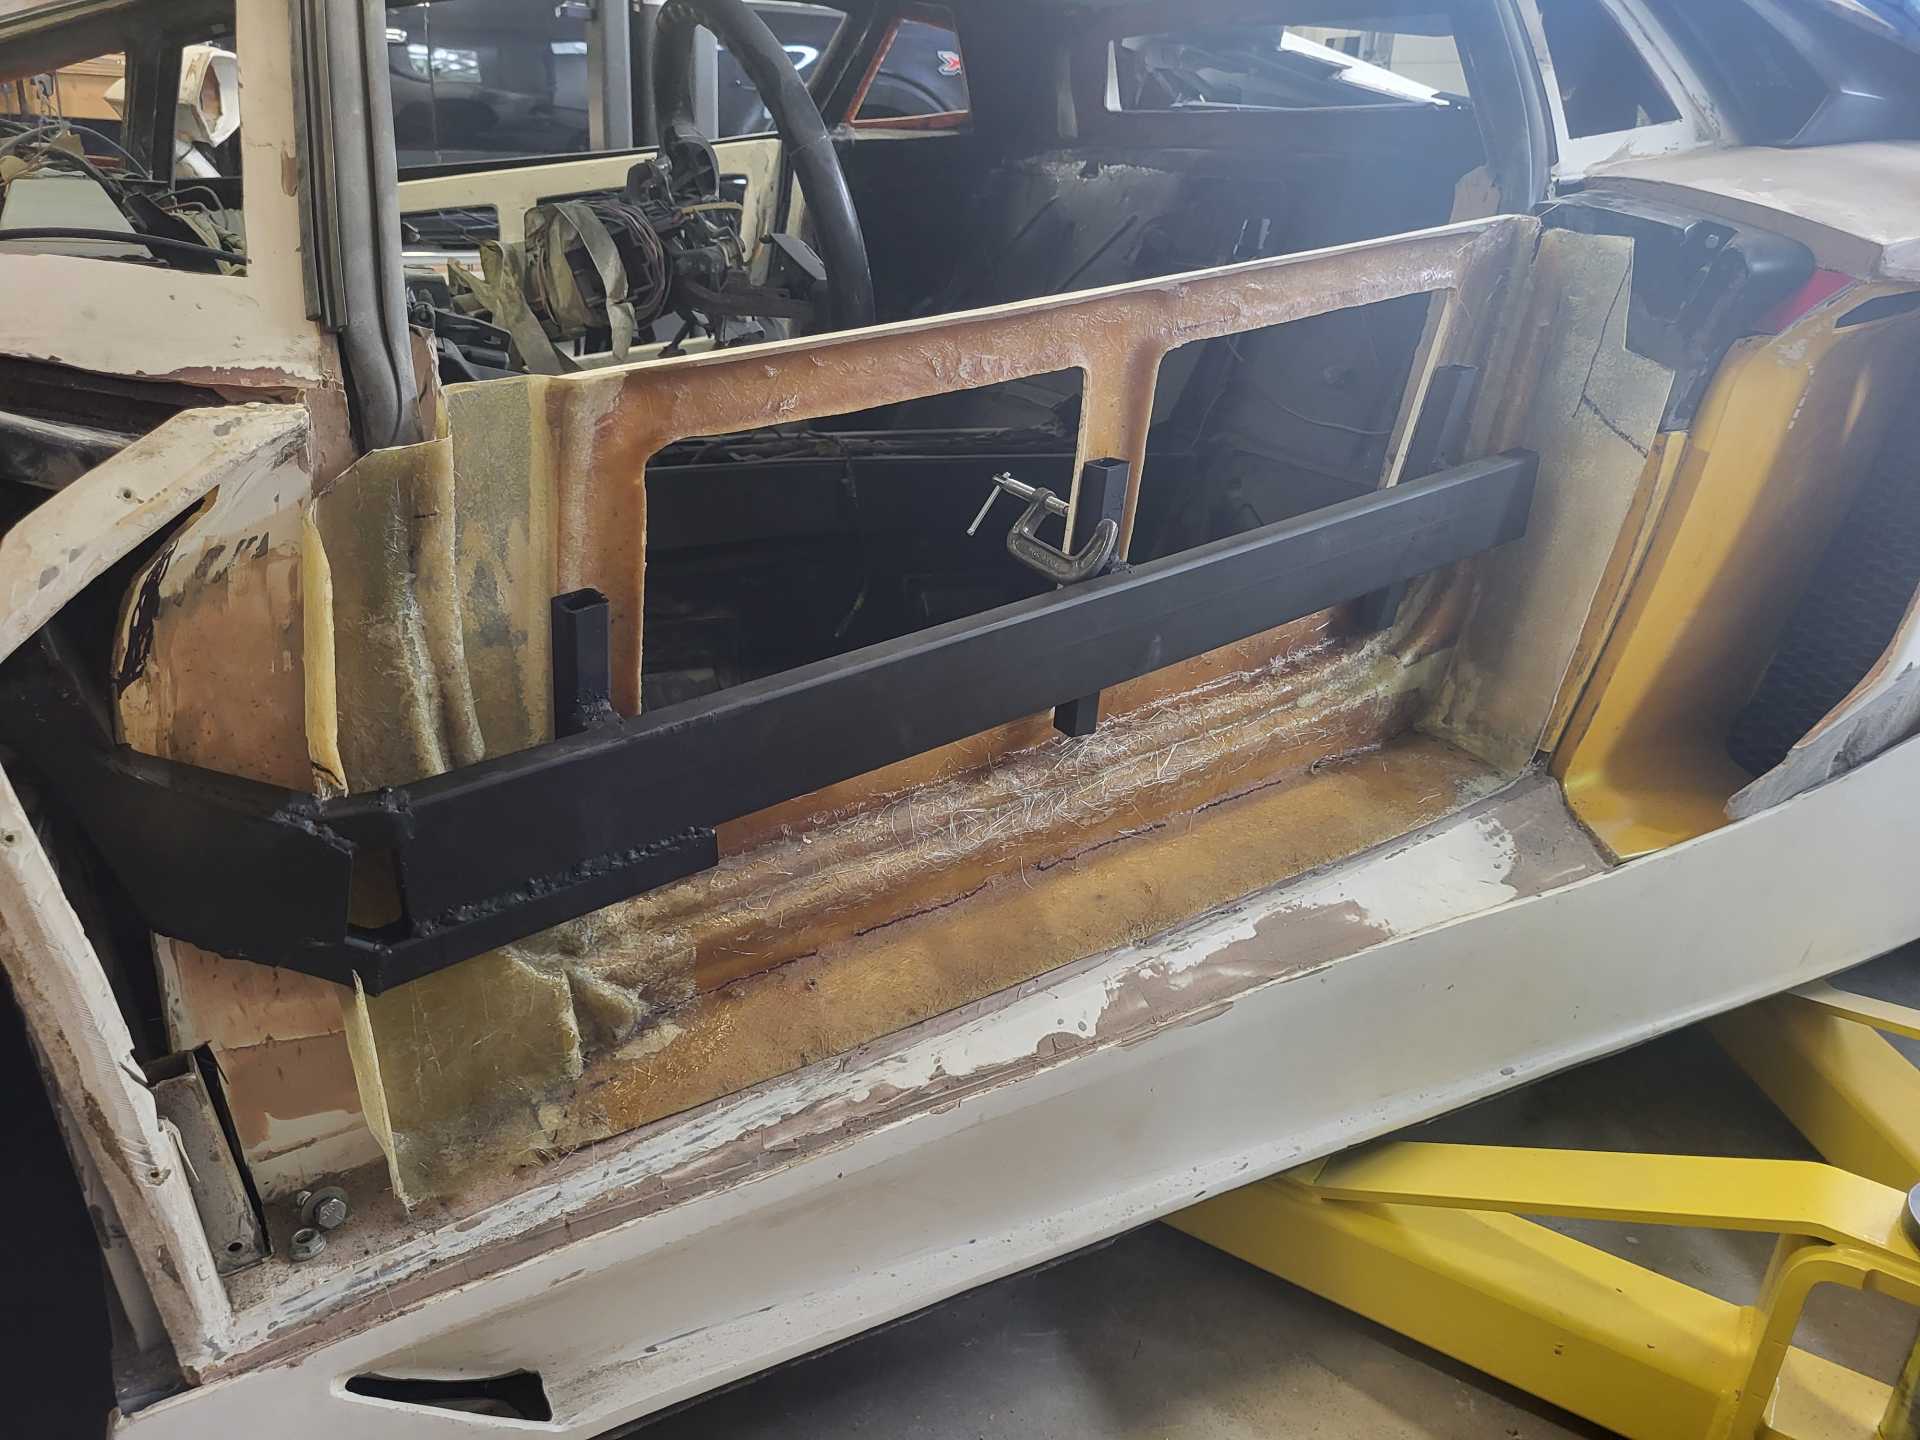
I've also built the driver's side inner door shell (starting with major mods to the one I had). It'll be modified lots before I'm done, but I need something to start with. Obviously, the passenger side door is the best reference, so I've essentially duplicated a mirror image of that. The hinge had to be adjusted so that the door opened at the same angle as the other door. Subsequently, the main support bar had to be cut and moved as well. Now that the basic door opens properly I can start adding the other components.
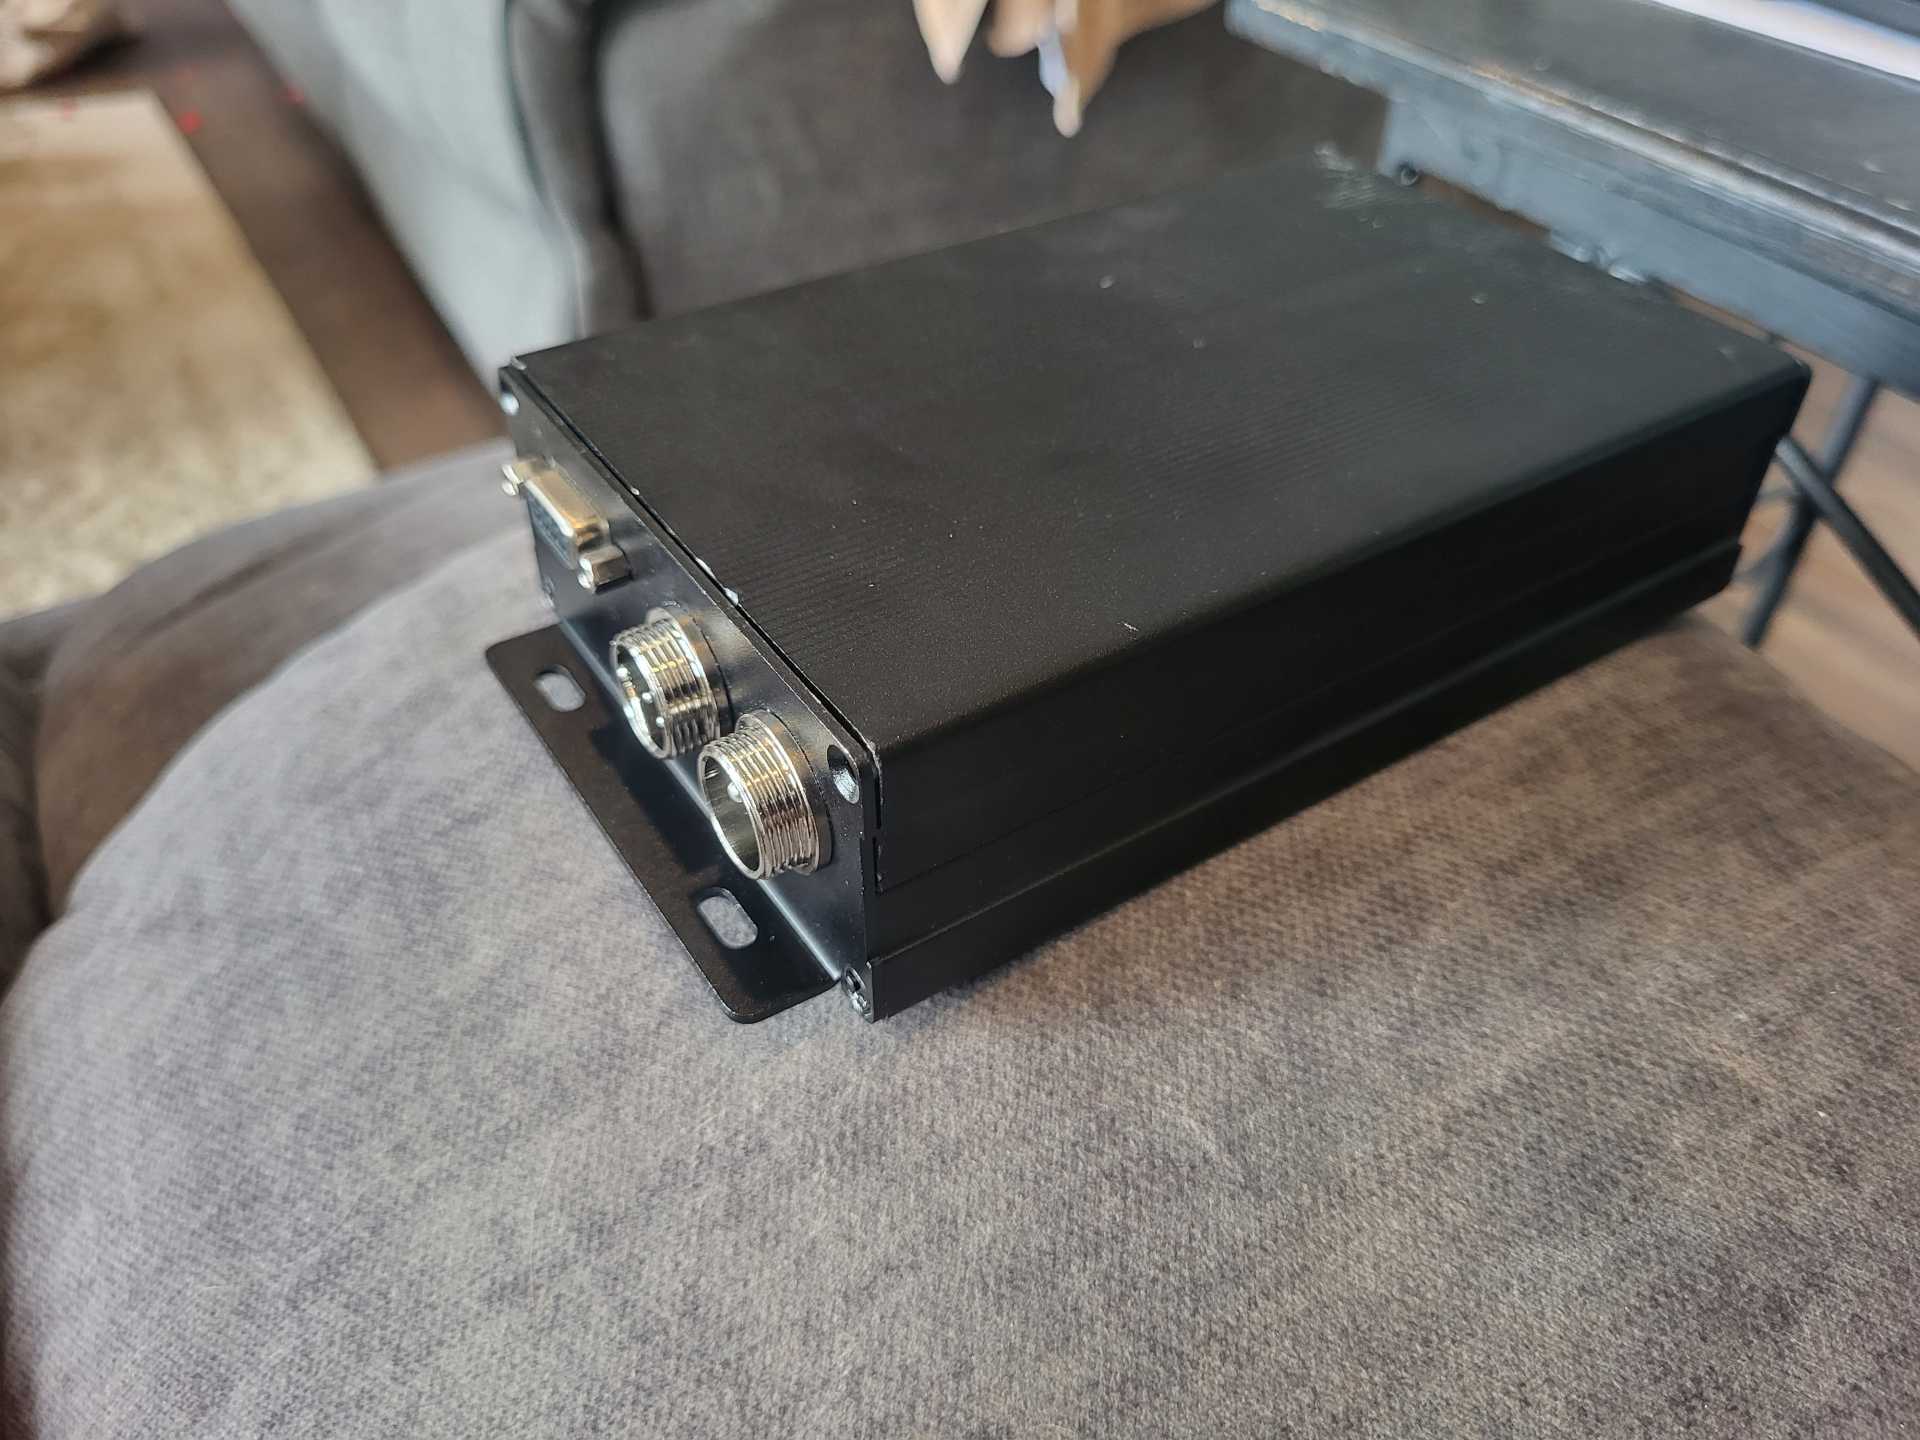
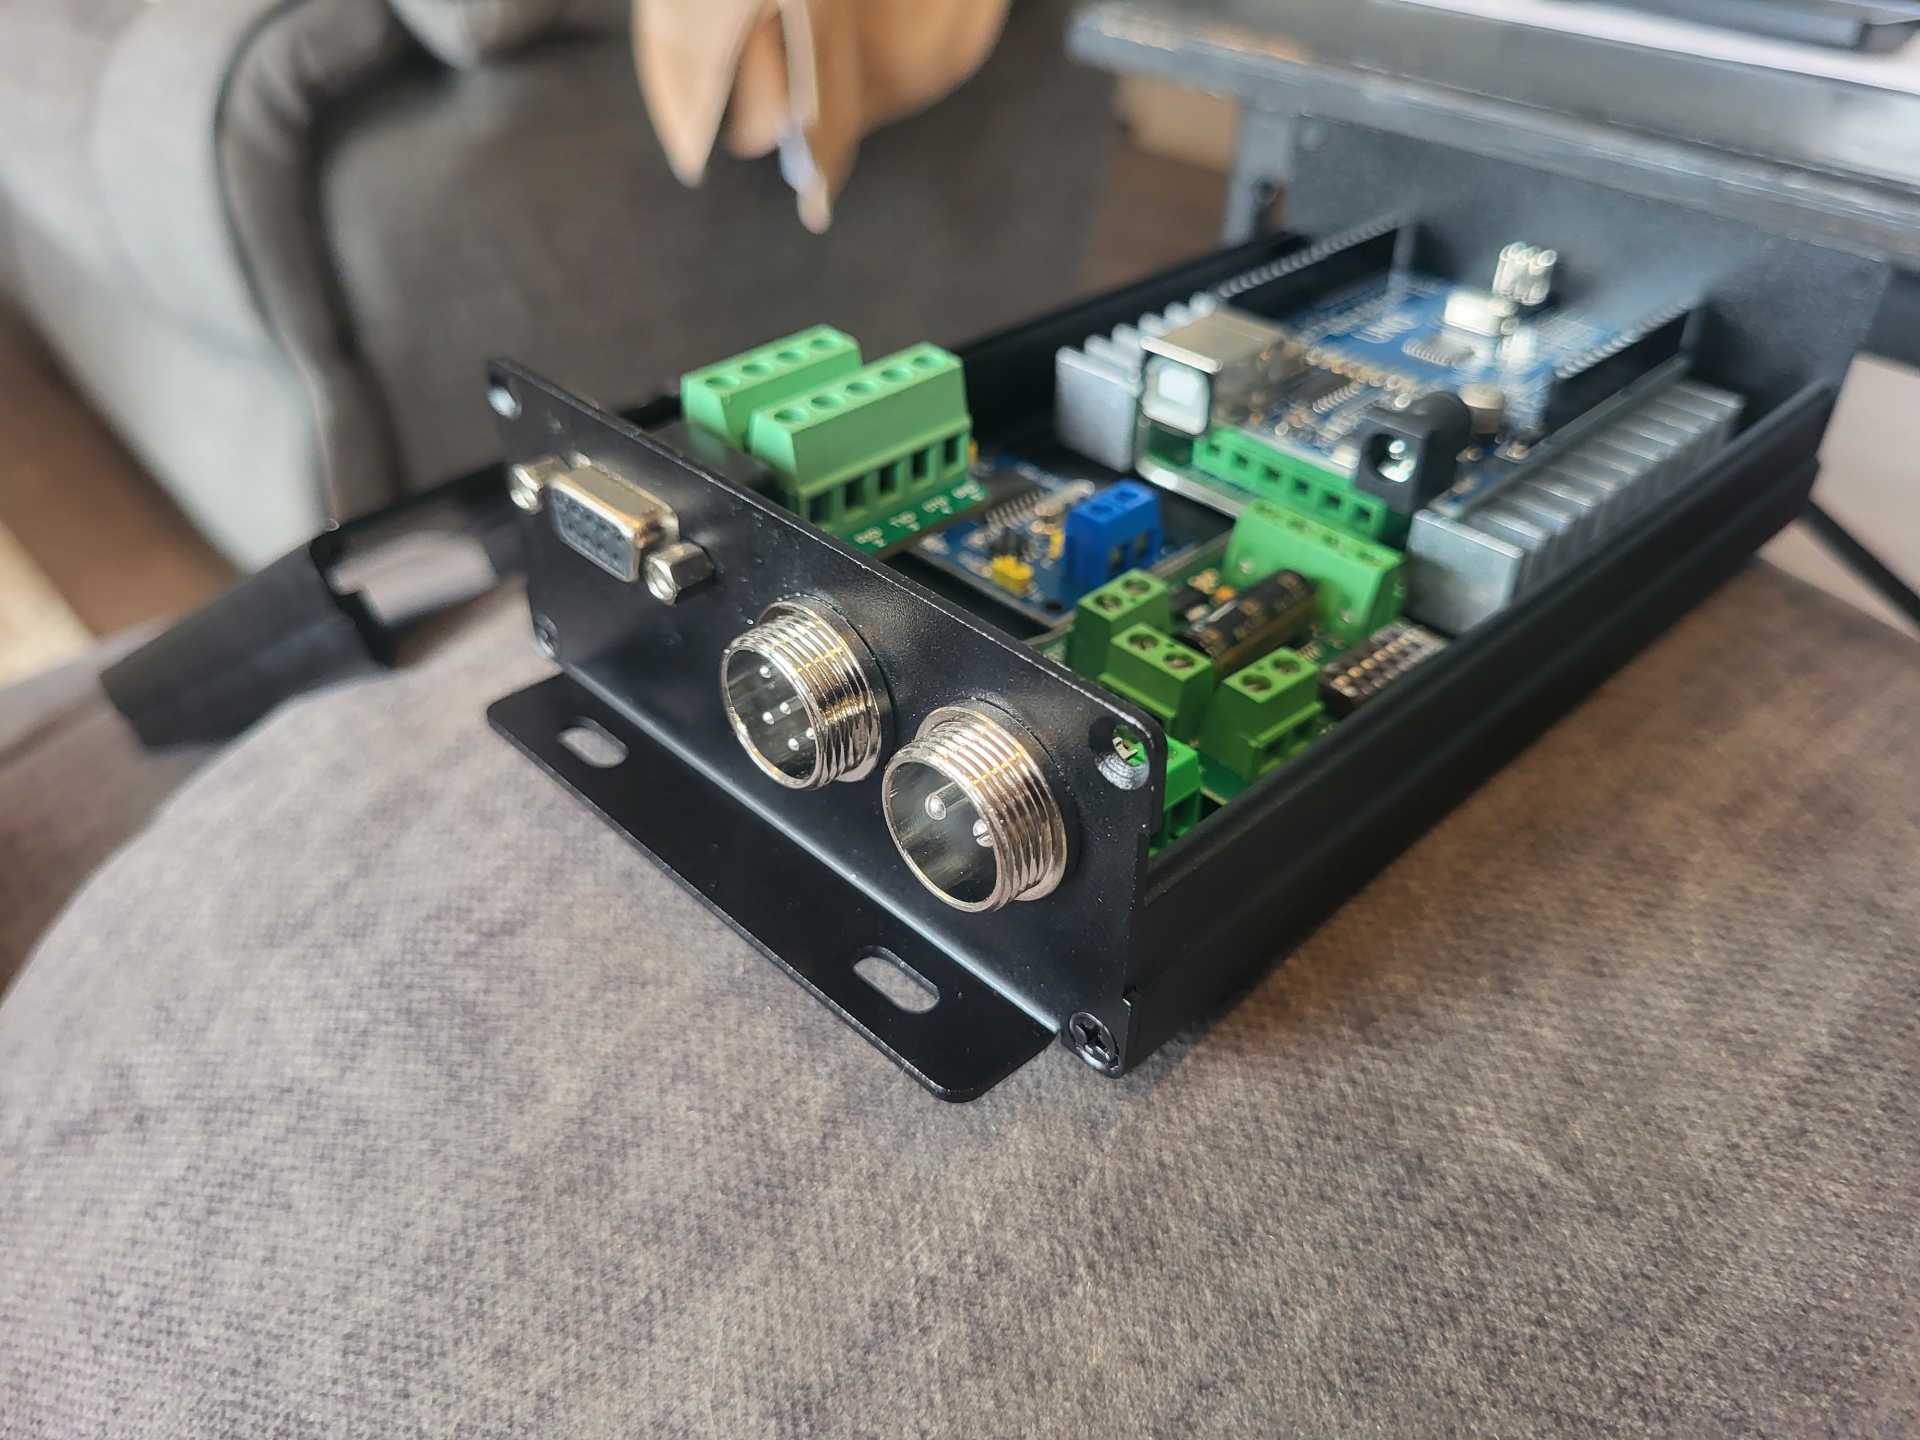
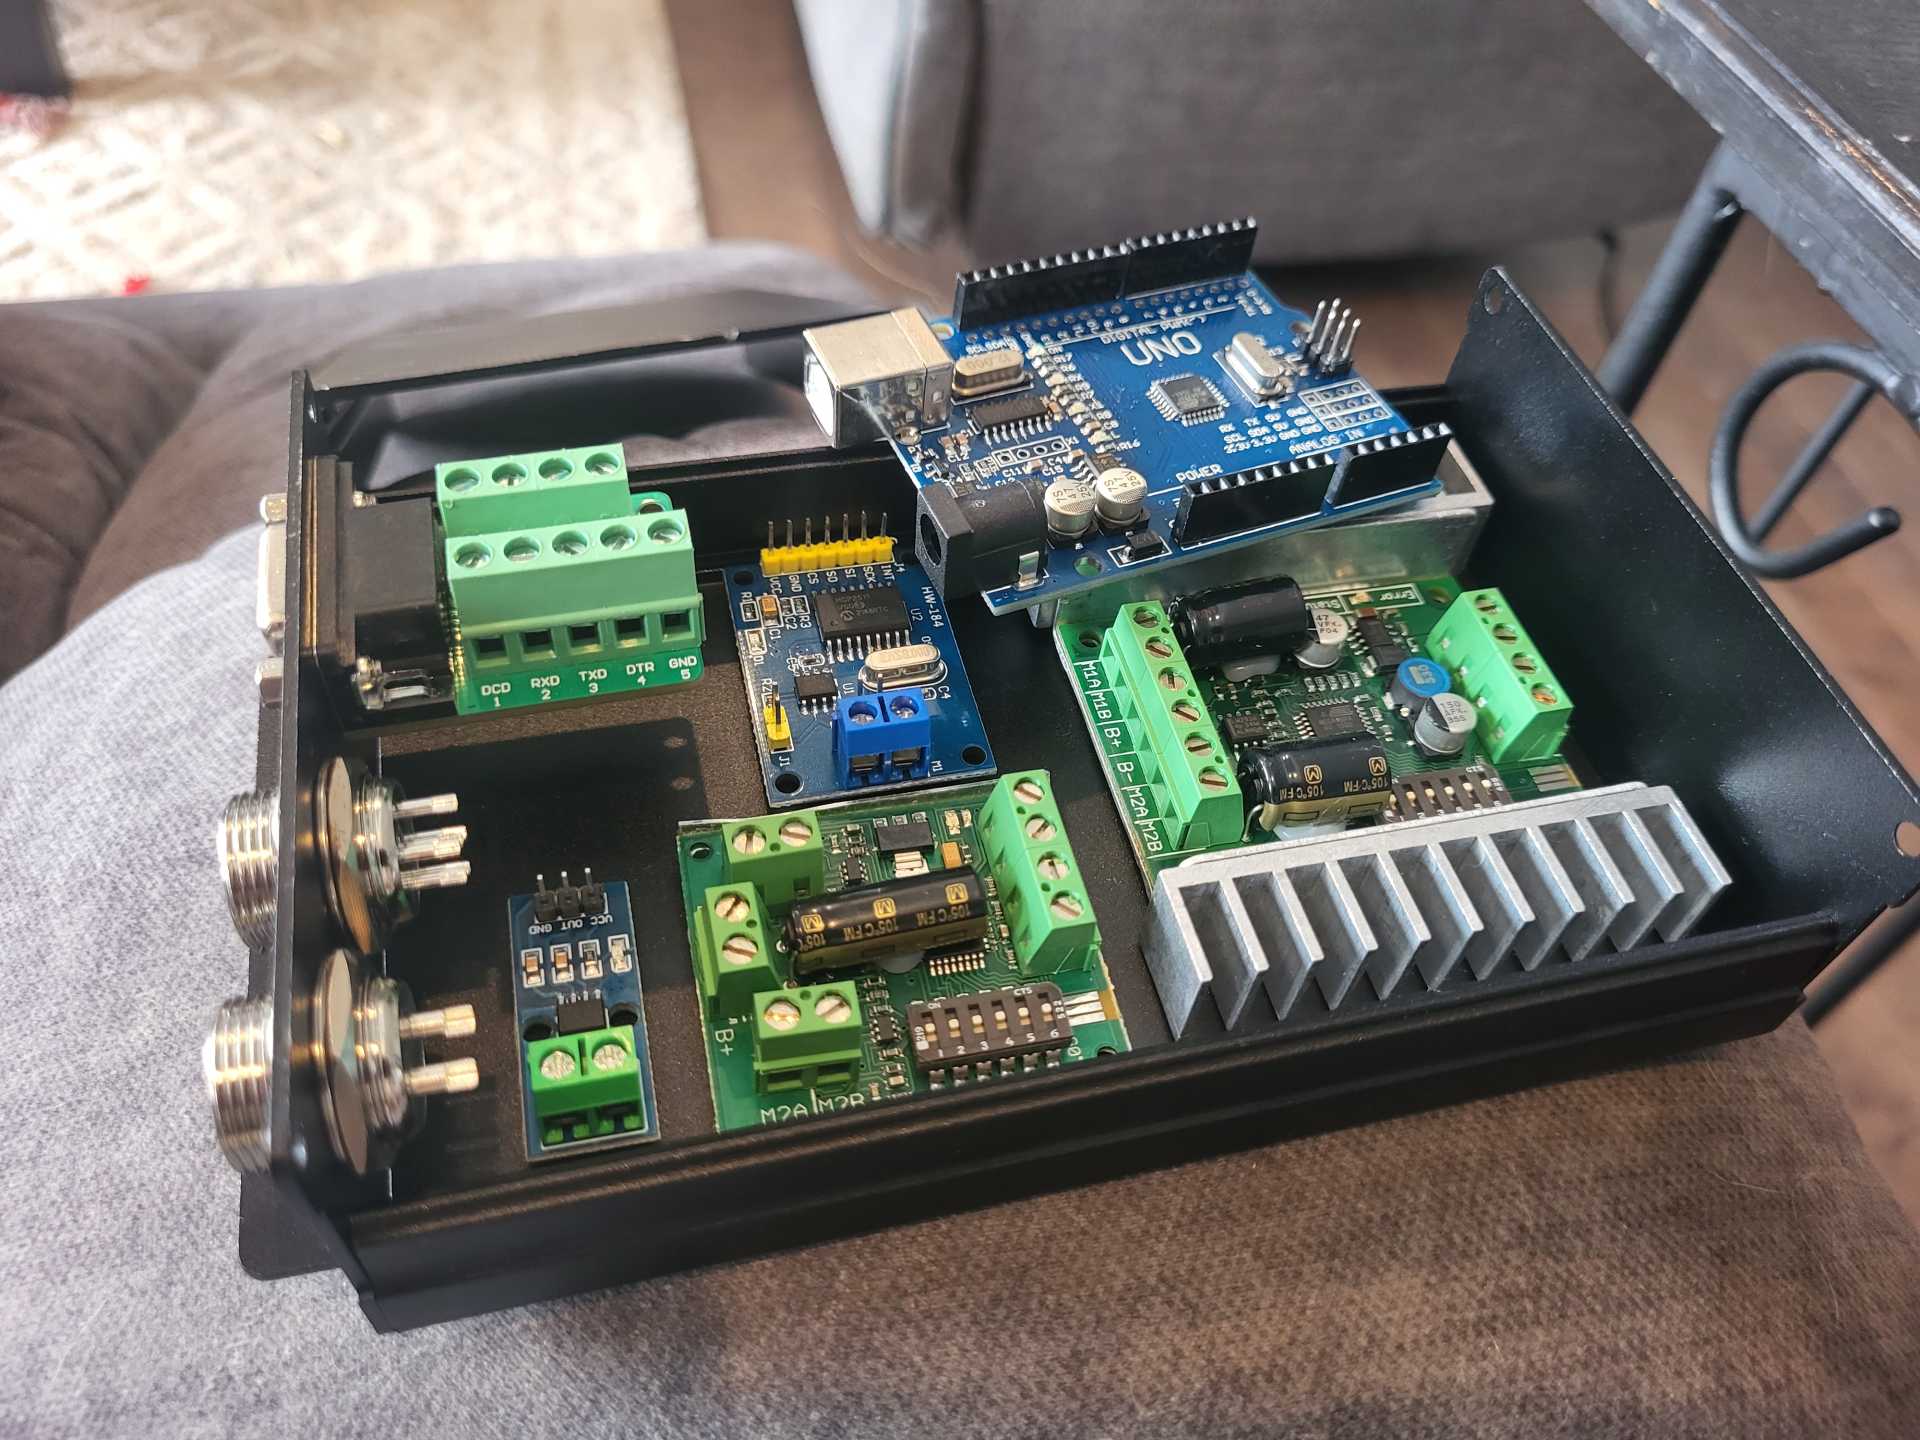
I've also started to put together the electronics for the door. This includes the microprocessor, two dual motor controllers, a current sensor, and a CANbus controller. I'll be controlling the power window, power mirror, mirror power folding motor, door release switch, door lock switch and the safety light at the bottom of the door (red light that is visible when the door is up). It's important to note (well, for me... not you...), that the glass needs to drop down about an inch or so when the door is being opened or closed to ensure it clears the upper trim. I'll probably get the windows to automatically close when the doors are locked as well. Now I just need to install the components in the electronics enclosure, wire it and write the software.
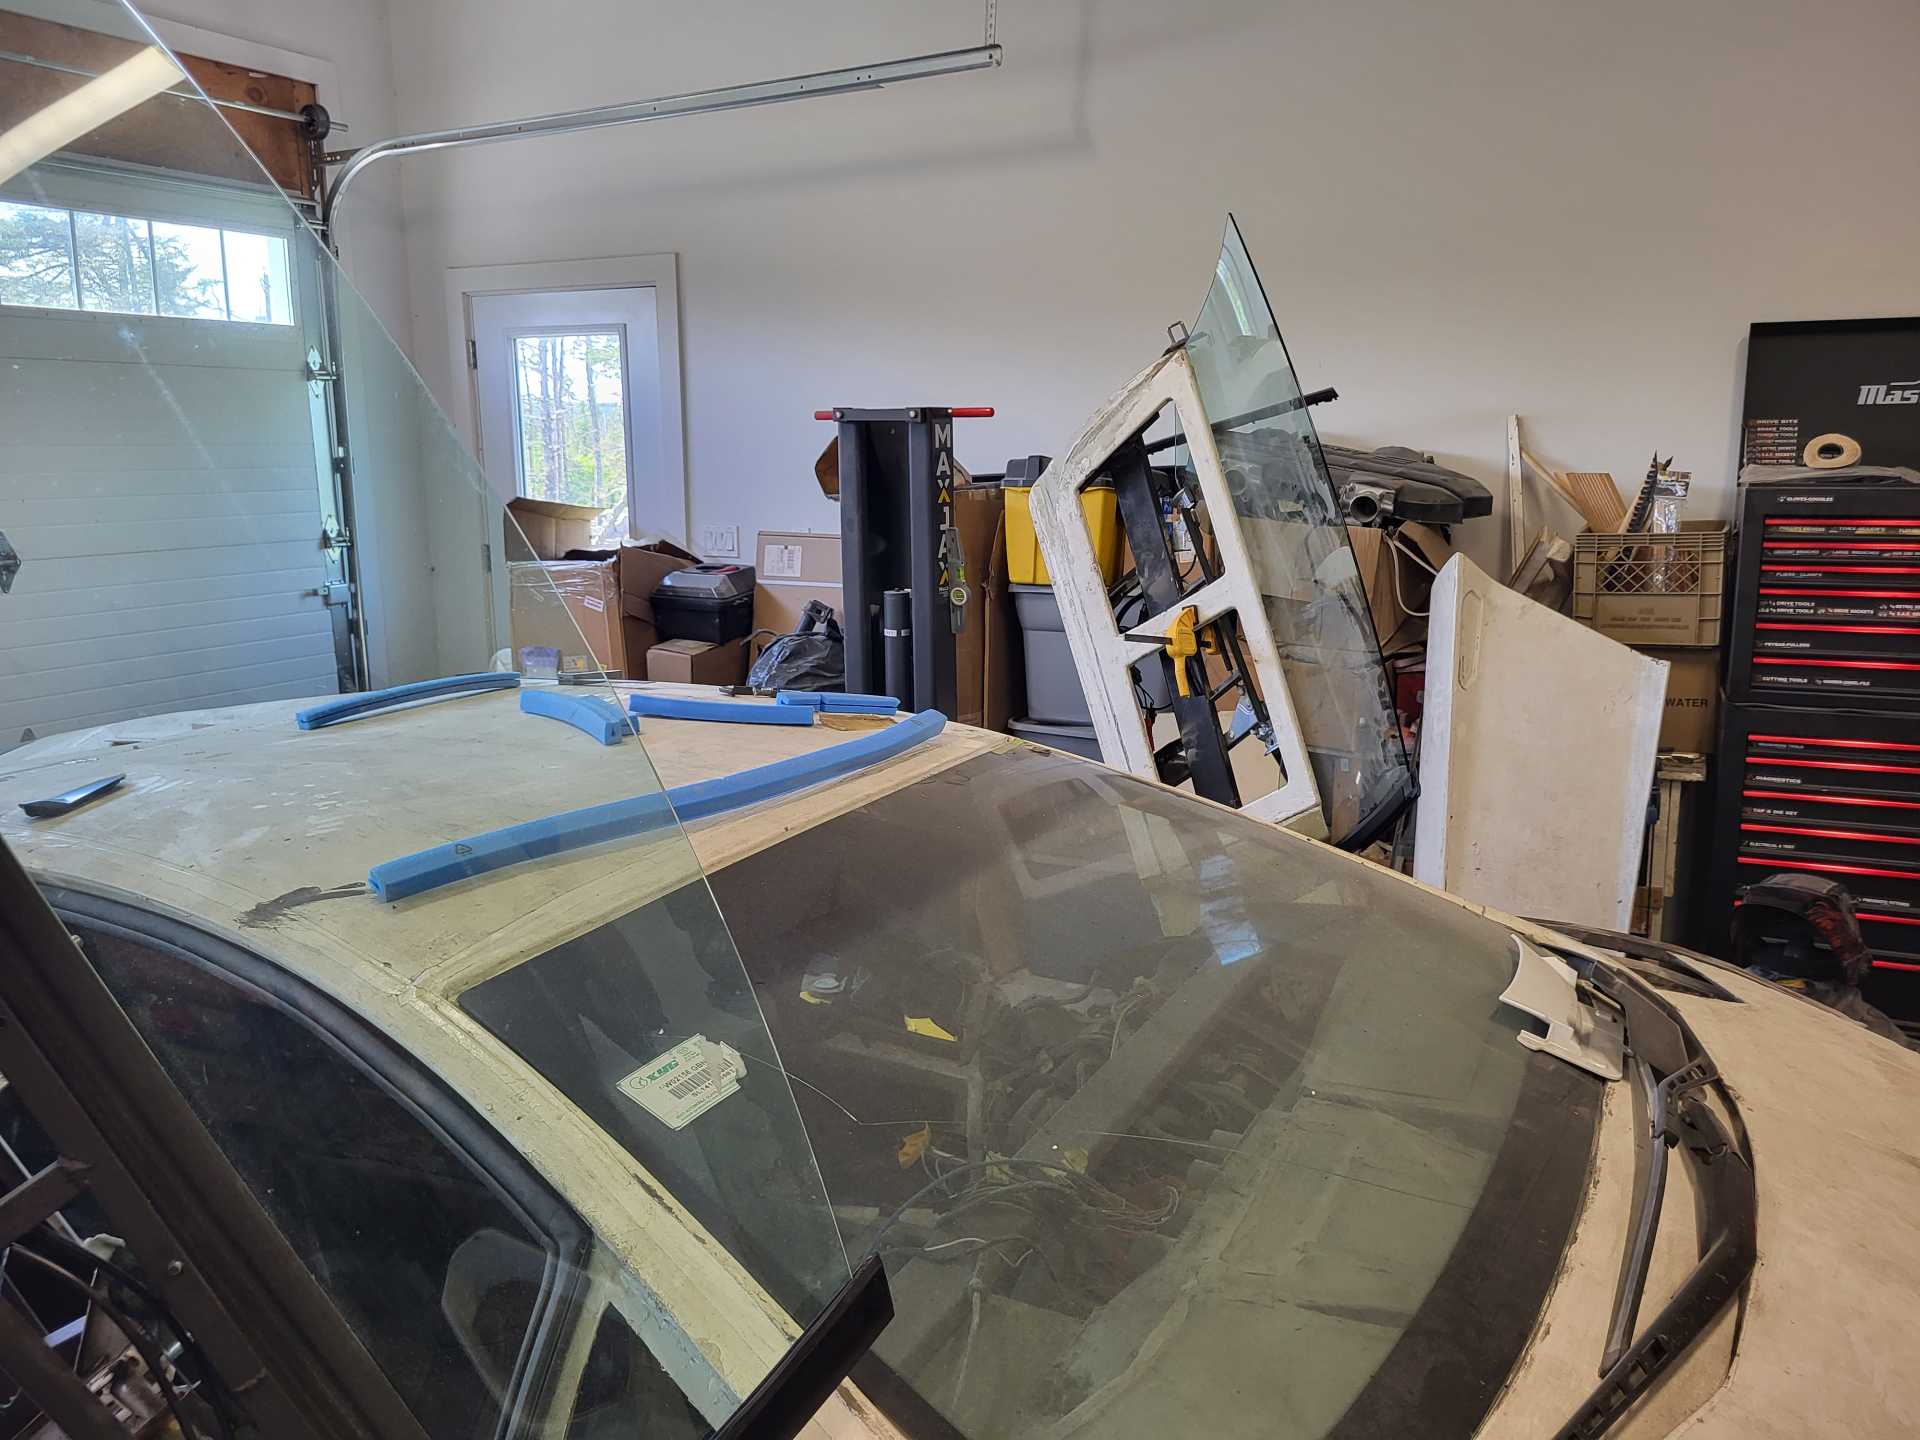
I've been working on the driver's side door for a couple weeks. This has been quite frustrating. Everytime I think I'm getting the window regulators/ tracks all setup in the correct alignment, I end up finding something that isn't quite right. I've had to cut and reweld everything numerous times. I also had to spend time reworking the door opening so that the window/ door seal doesn't have any gaps with the door and the glass. The window now operates smoothly and fits nicely against the seal. I've installed the striker plate, mounting it to a backing plate. And of course, I've added the gas shock to lift the door.
With the window up, the glass sits perfectly. Unfortunately, when the glass is lowered the back end of it is riding against the striker plate support. This pushes the glass way out of alignment so it'll need to be reworked before I move on.
I've made some more progress since the last posting. Of course, after saying that I had the window regulator working smoothly, I ended up pulling everything off the driver's side door and starting over. I'm happy to say, the window regulator issues have now been corrected, and I only lit the car on fire two times.
In addition to the window regulator, I built the main framing for the door. This just leaves the mirror (with the folding mechanism) in order to get to the same point as the passenger side.
Normally, when I install brackets that are at strange angles (like for the side mirror), I'll measure things as best I can then tack weld the bracket in place. Then I can measure how things fit and have a good reference for how much things need to be moved. With some of the more complex parts, it can take 3,4,5, or more times to get things positioned exactly. Today, I measured as closely as I could for the mirror bracket, tacked it in place, and to my surprise it lined up perfectly first try. Fits nicely in the door, no interference with the glass and perfectly matched the passenger side mirror.
Now I just need to install the fold-motor and run the bowden cables.
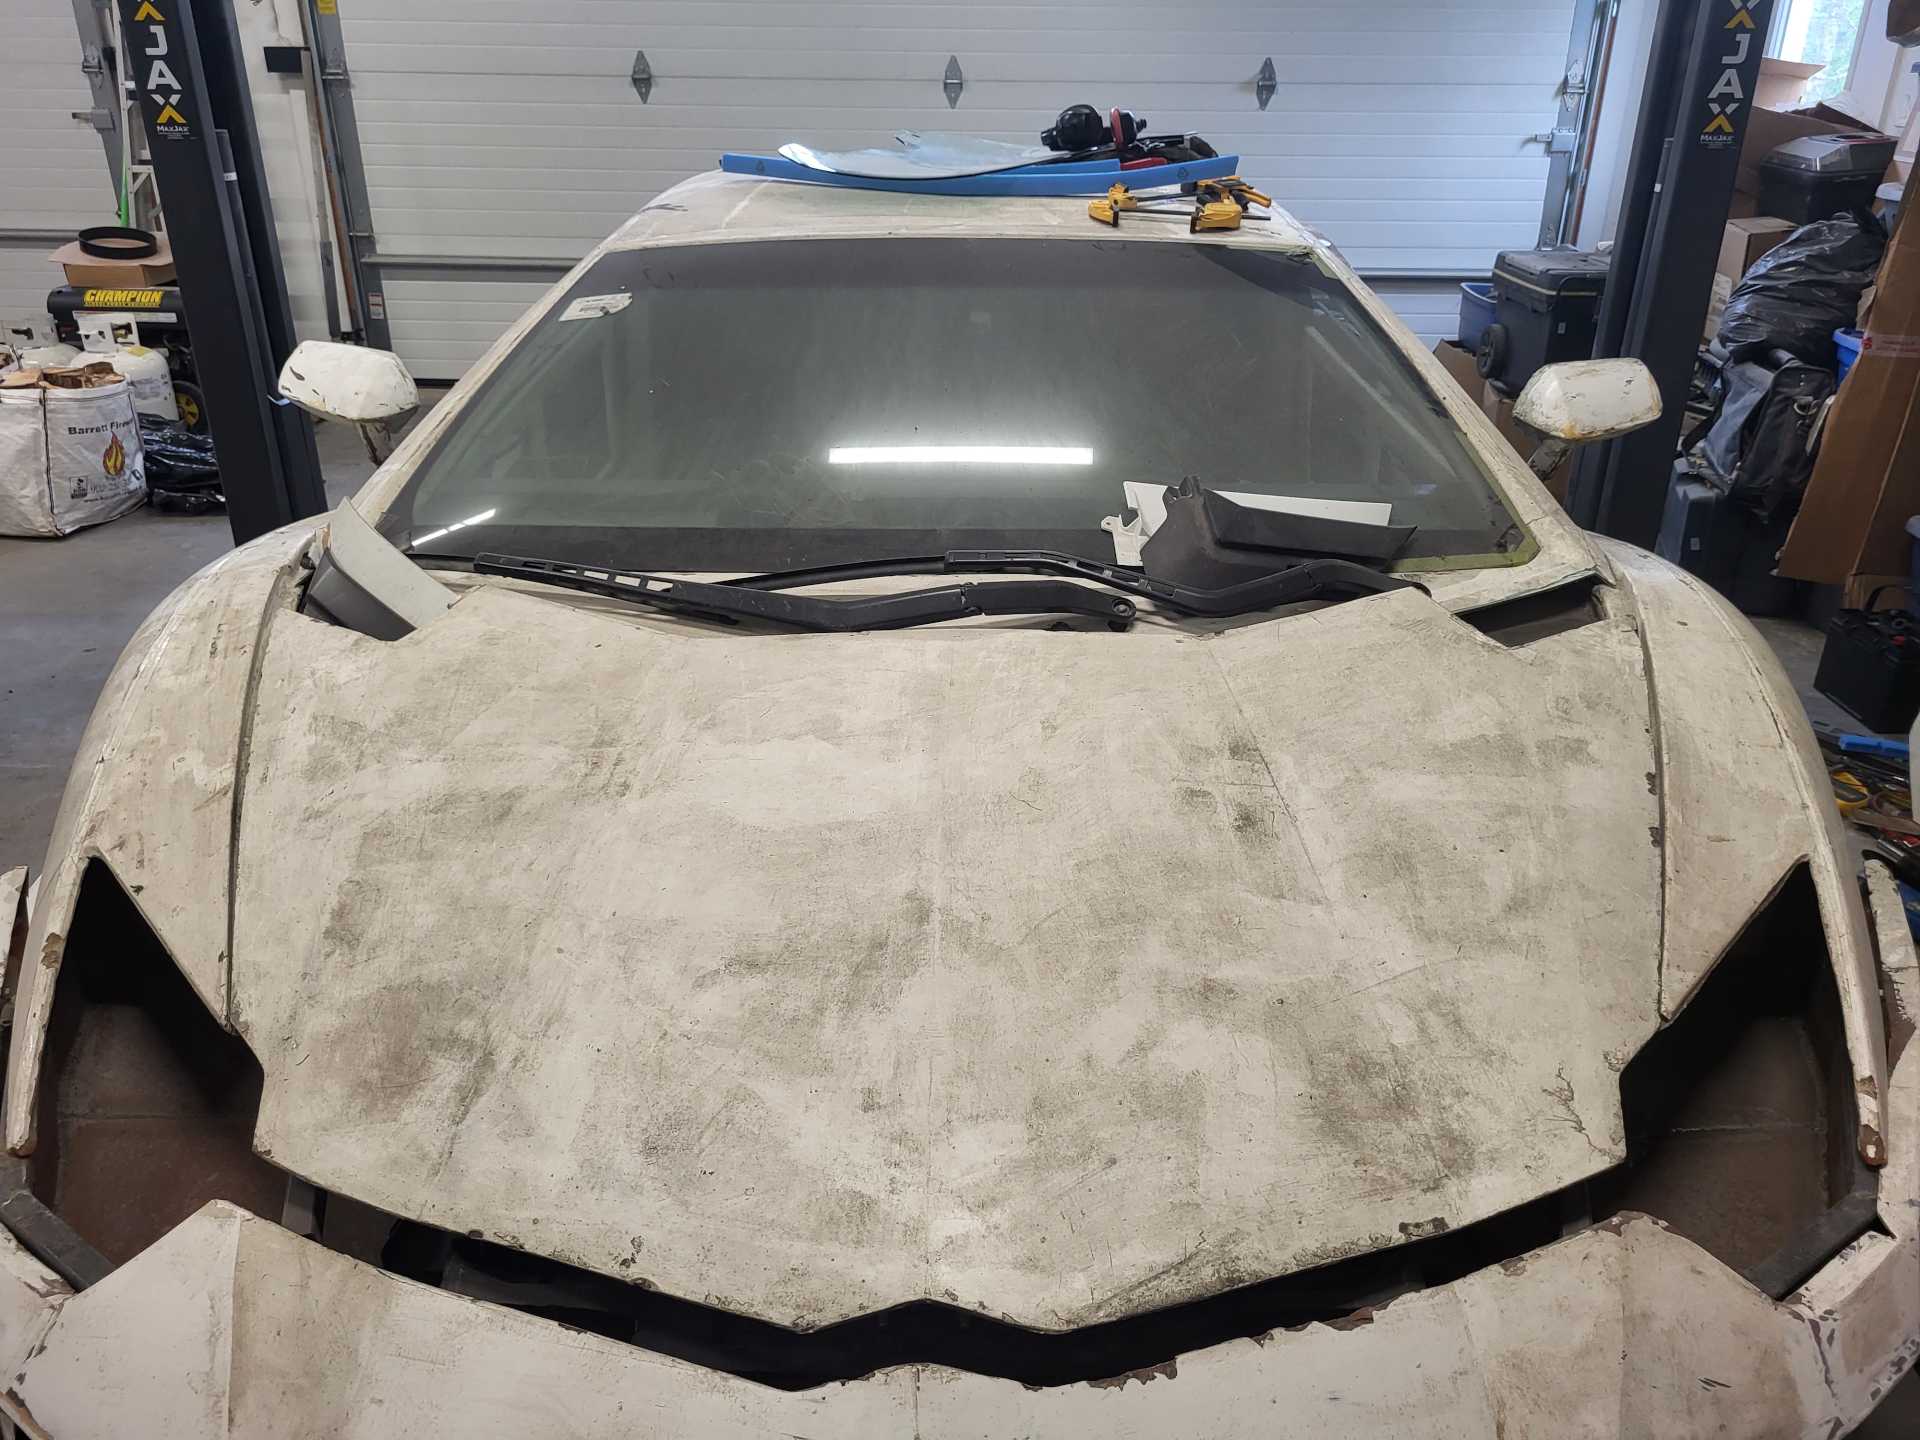
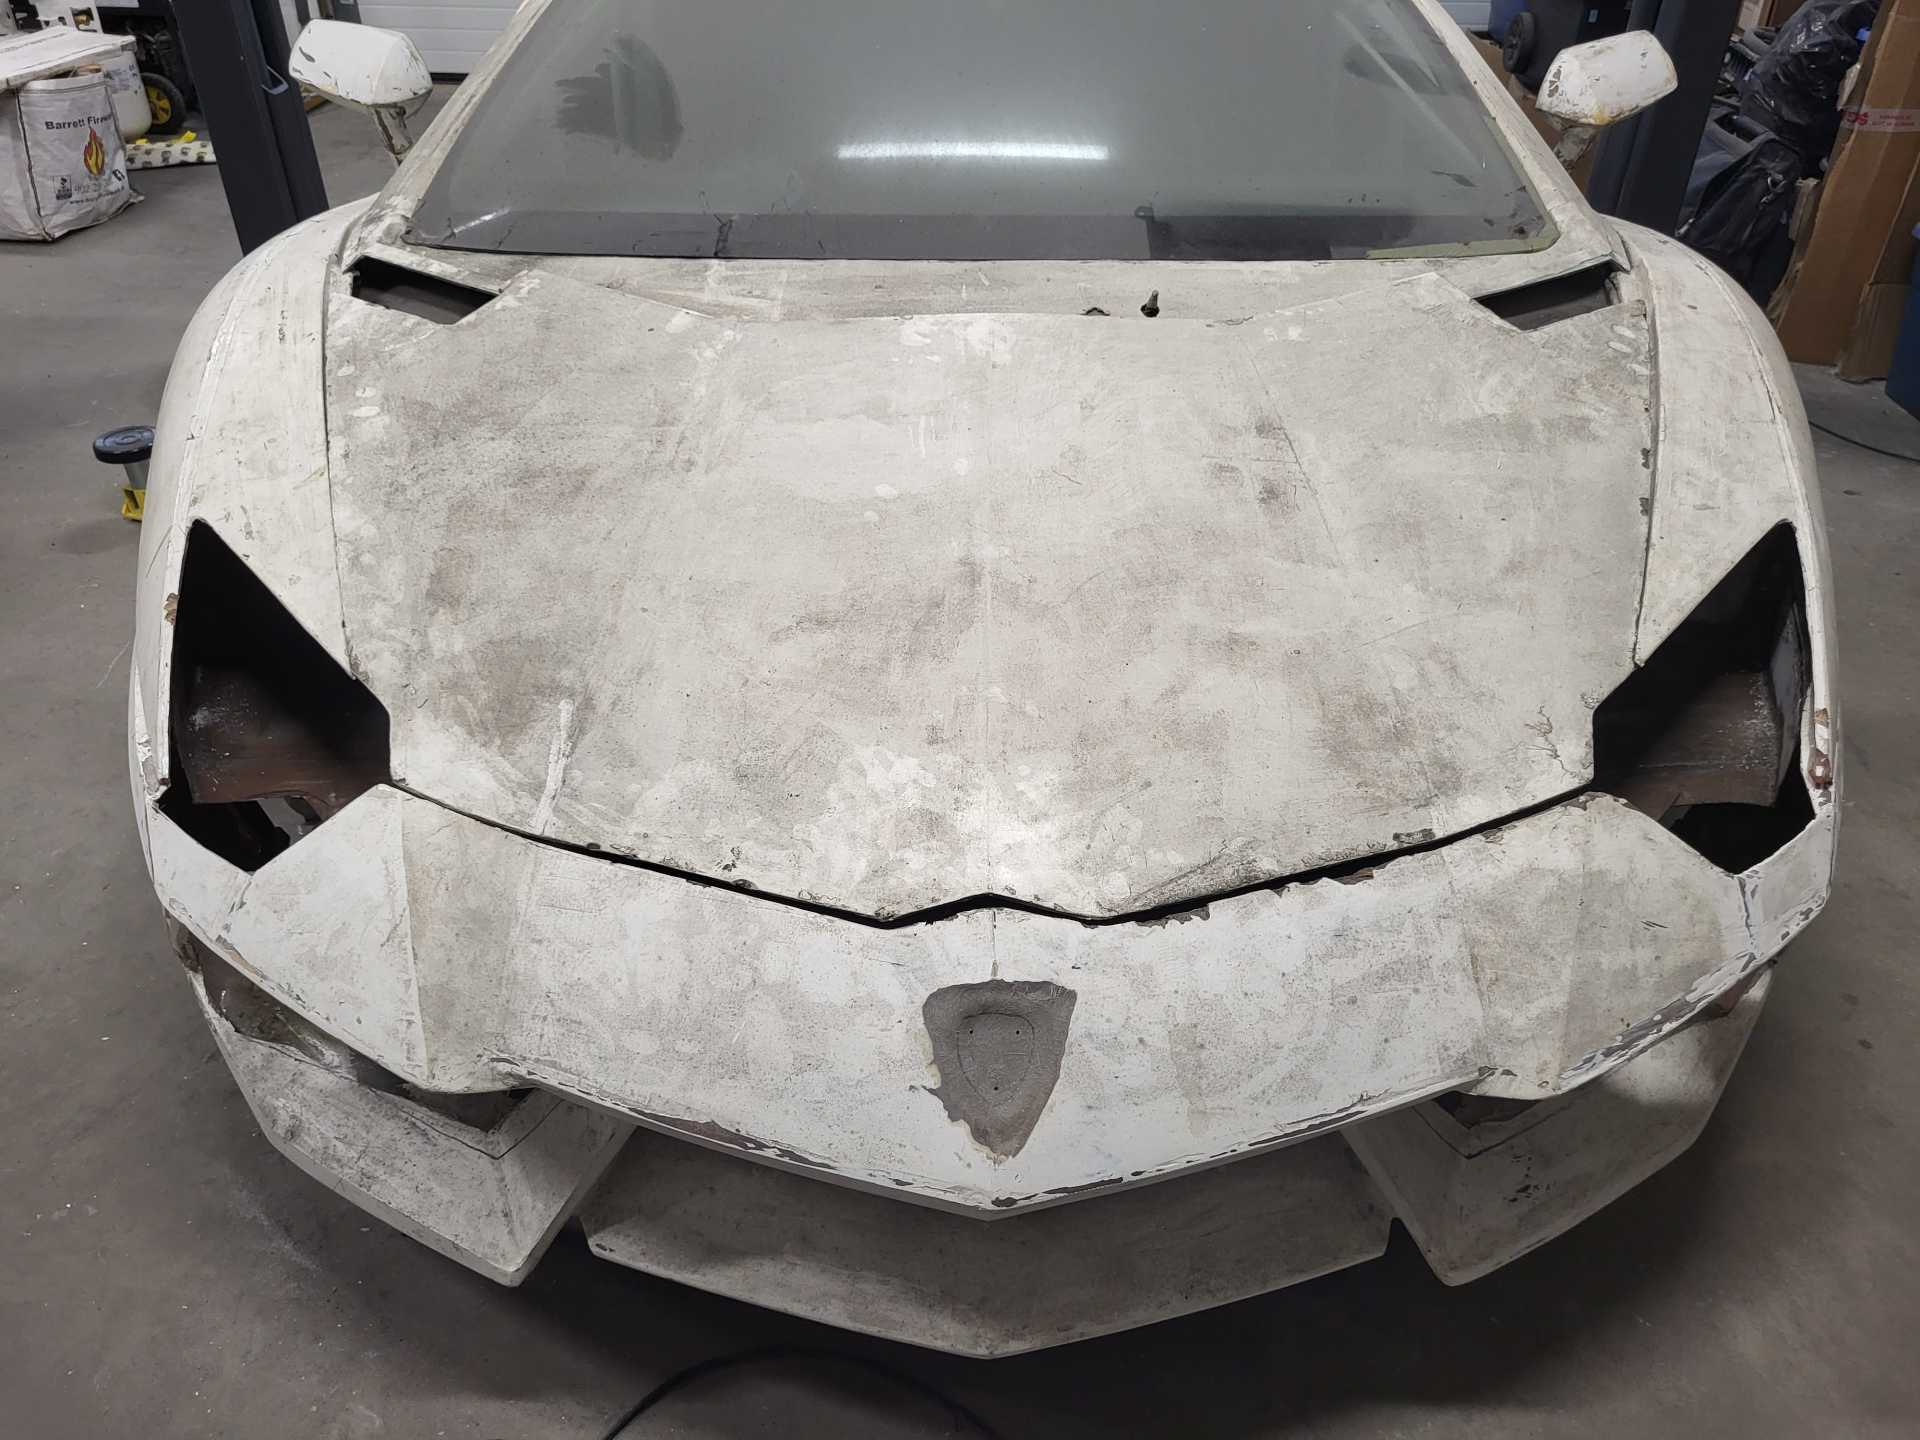
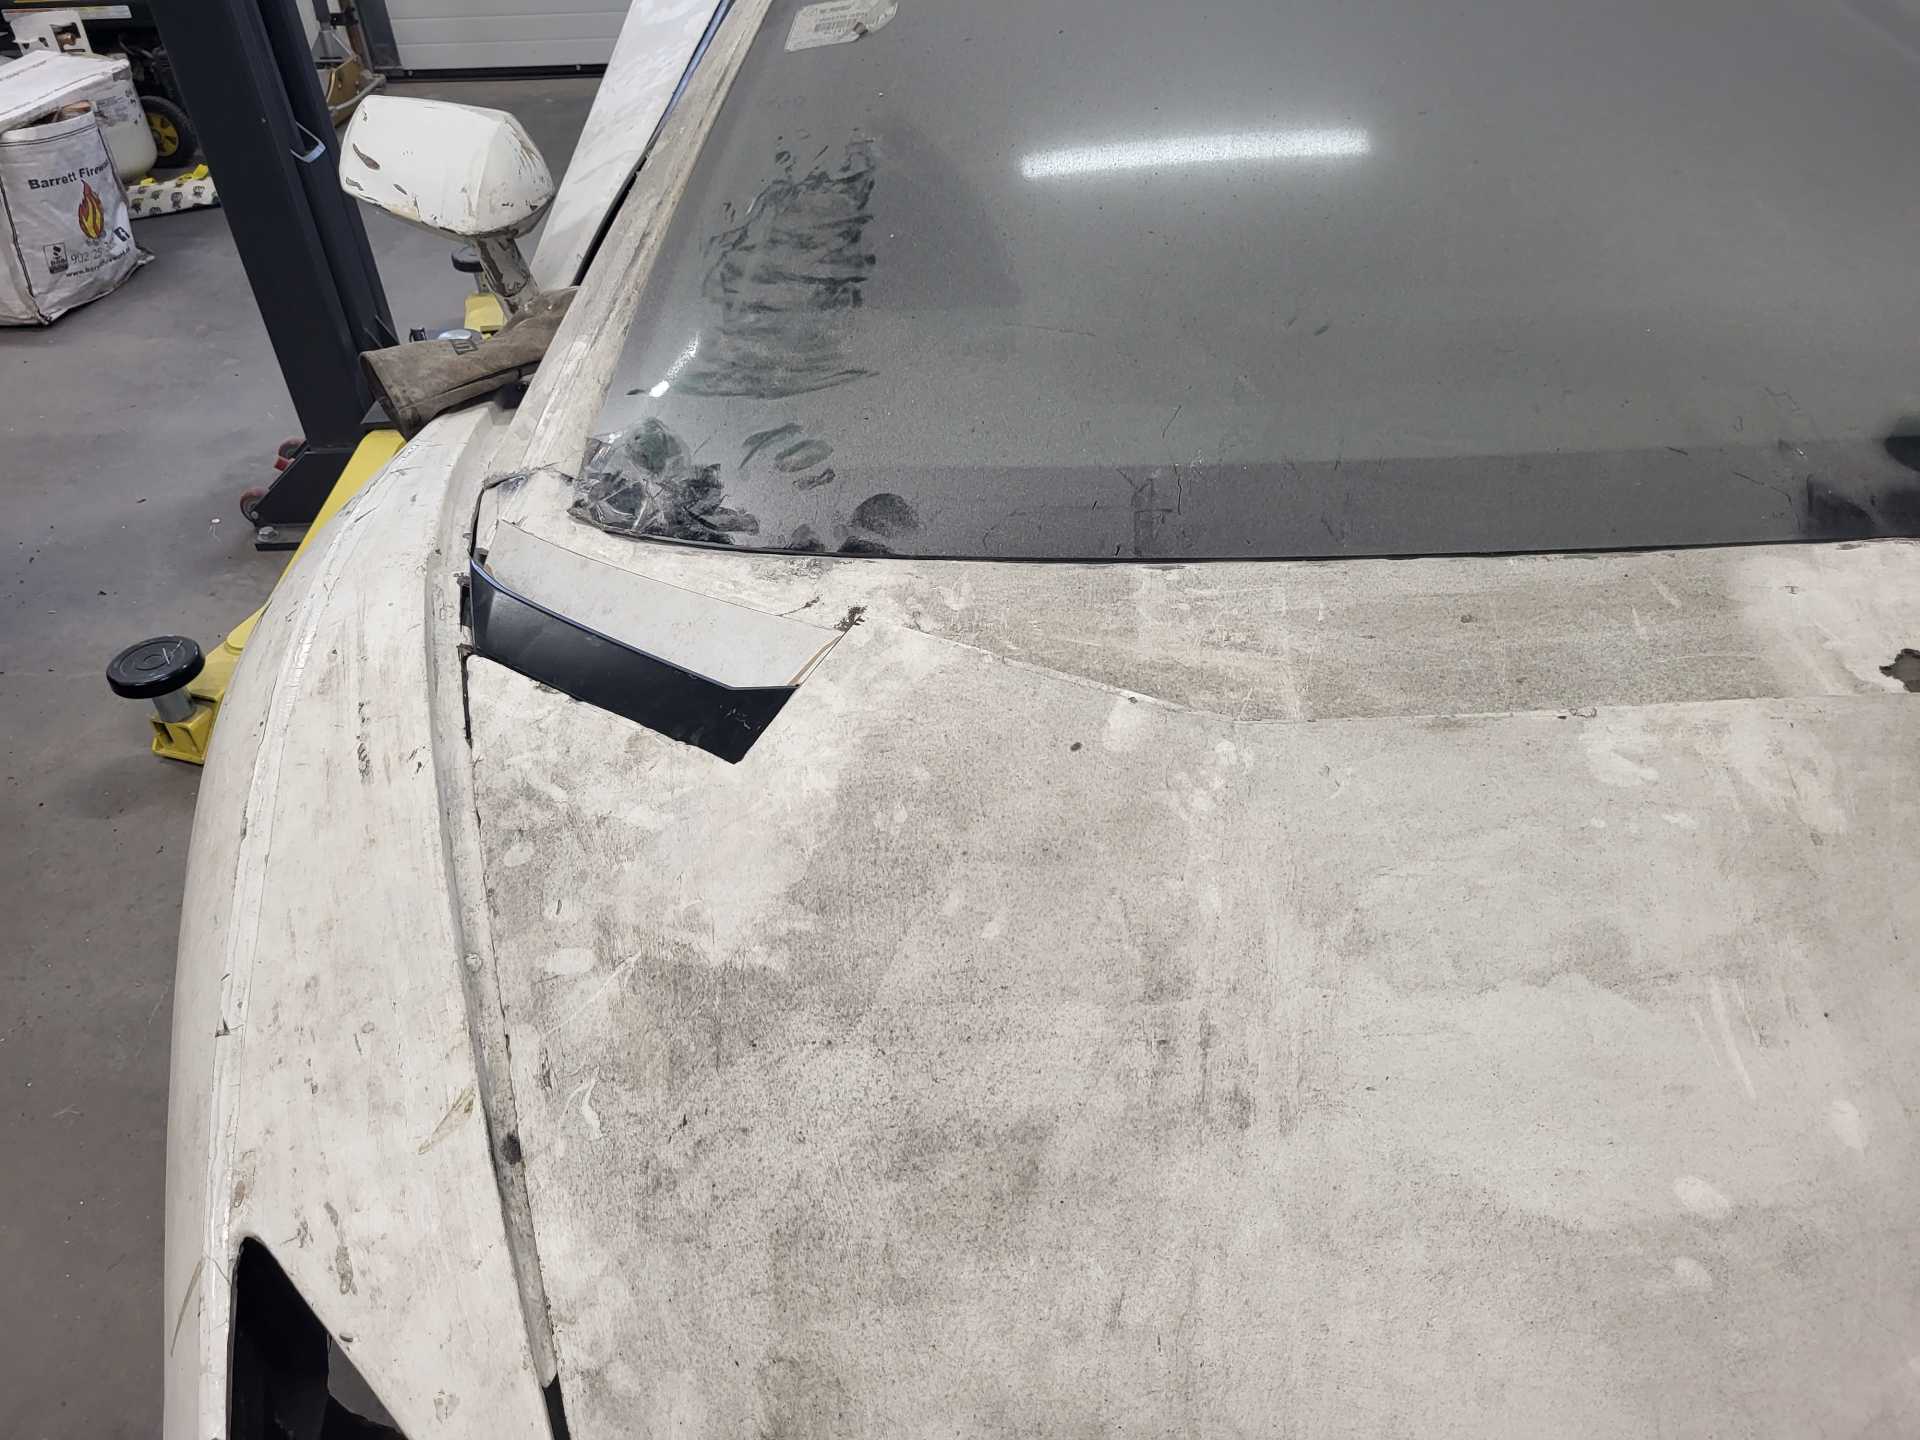
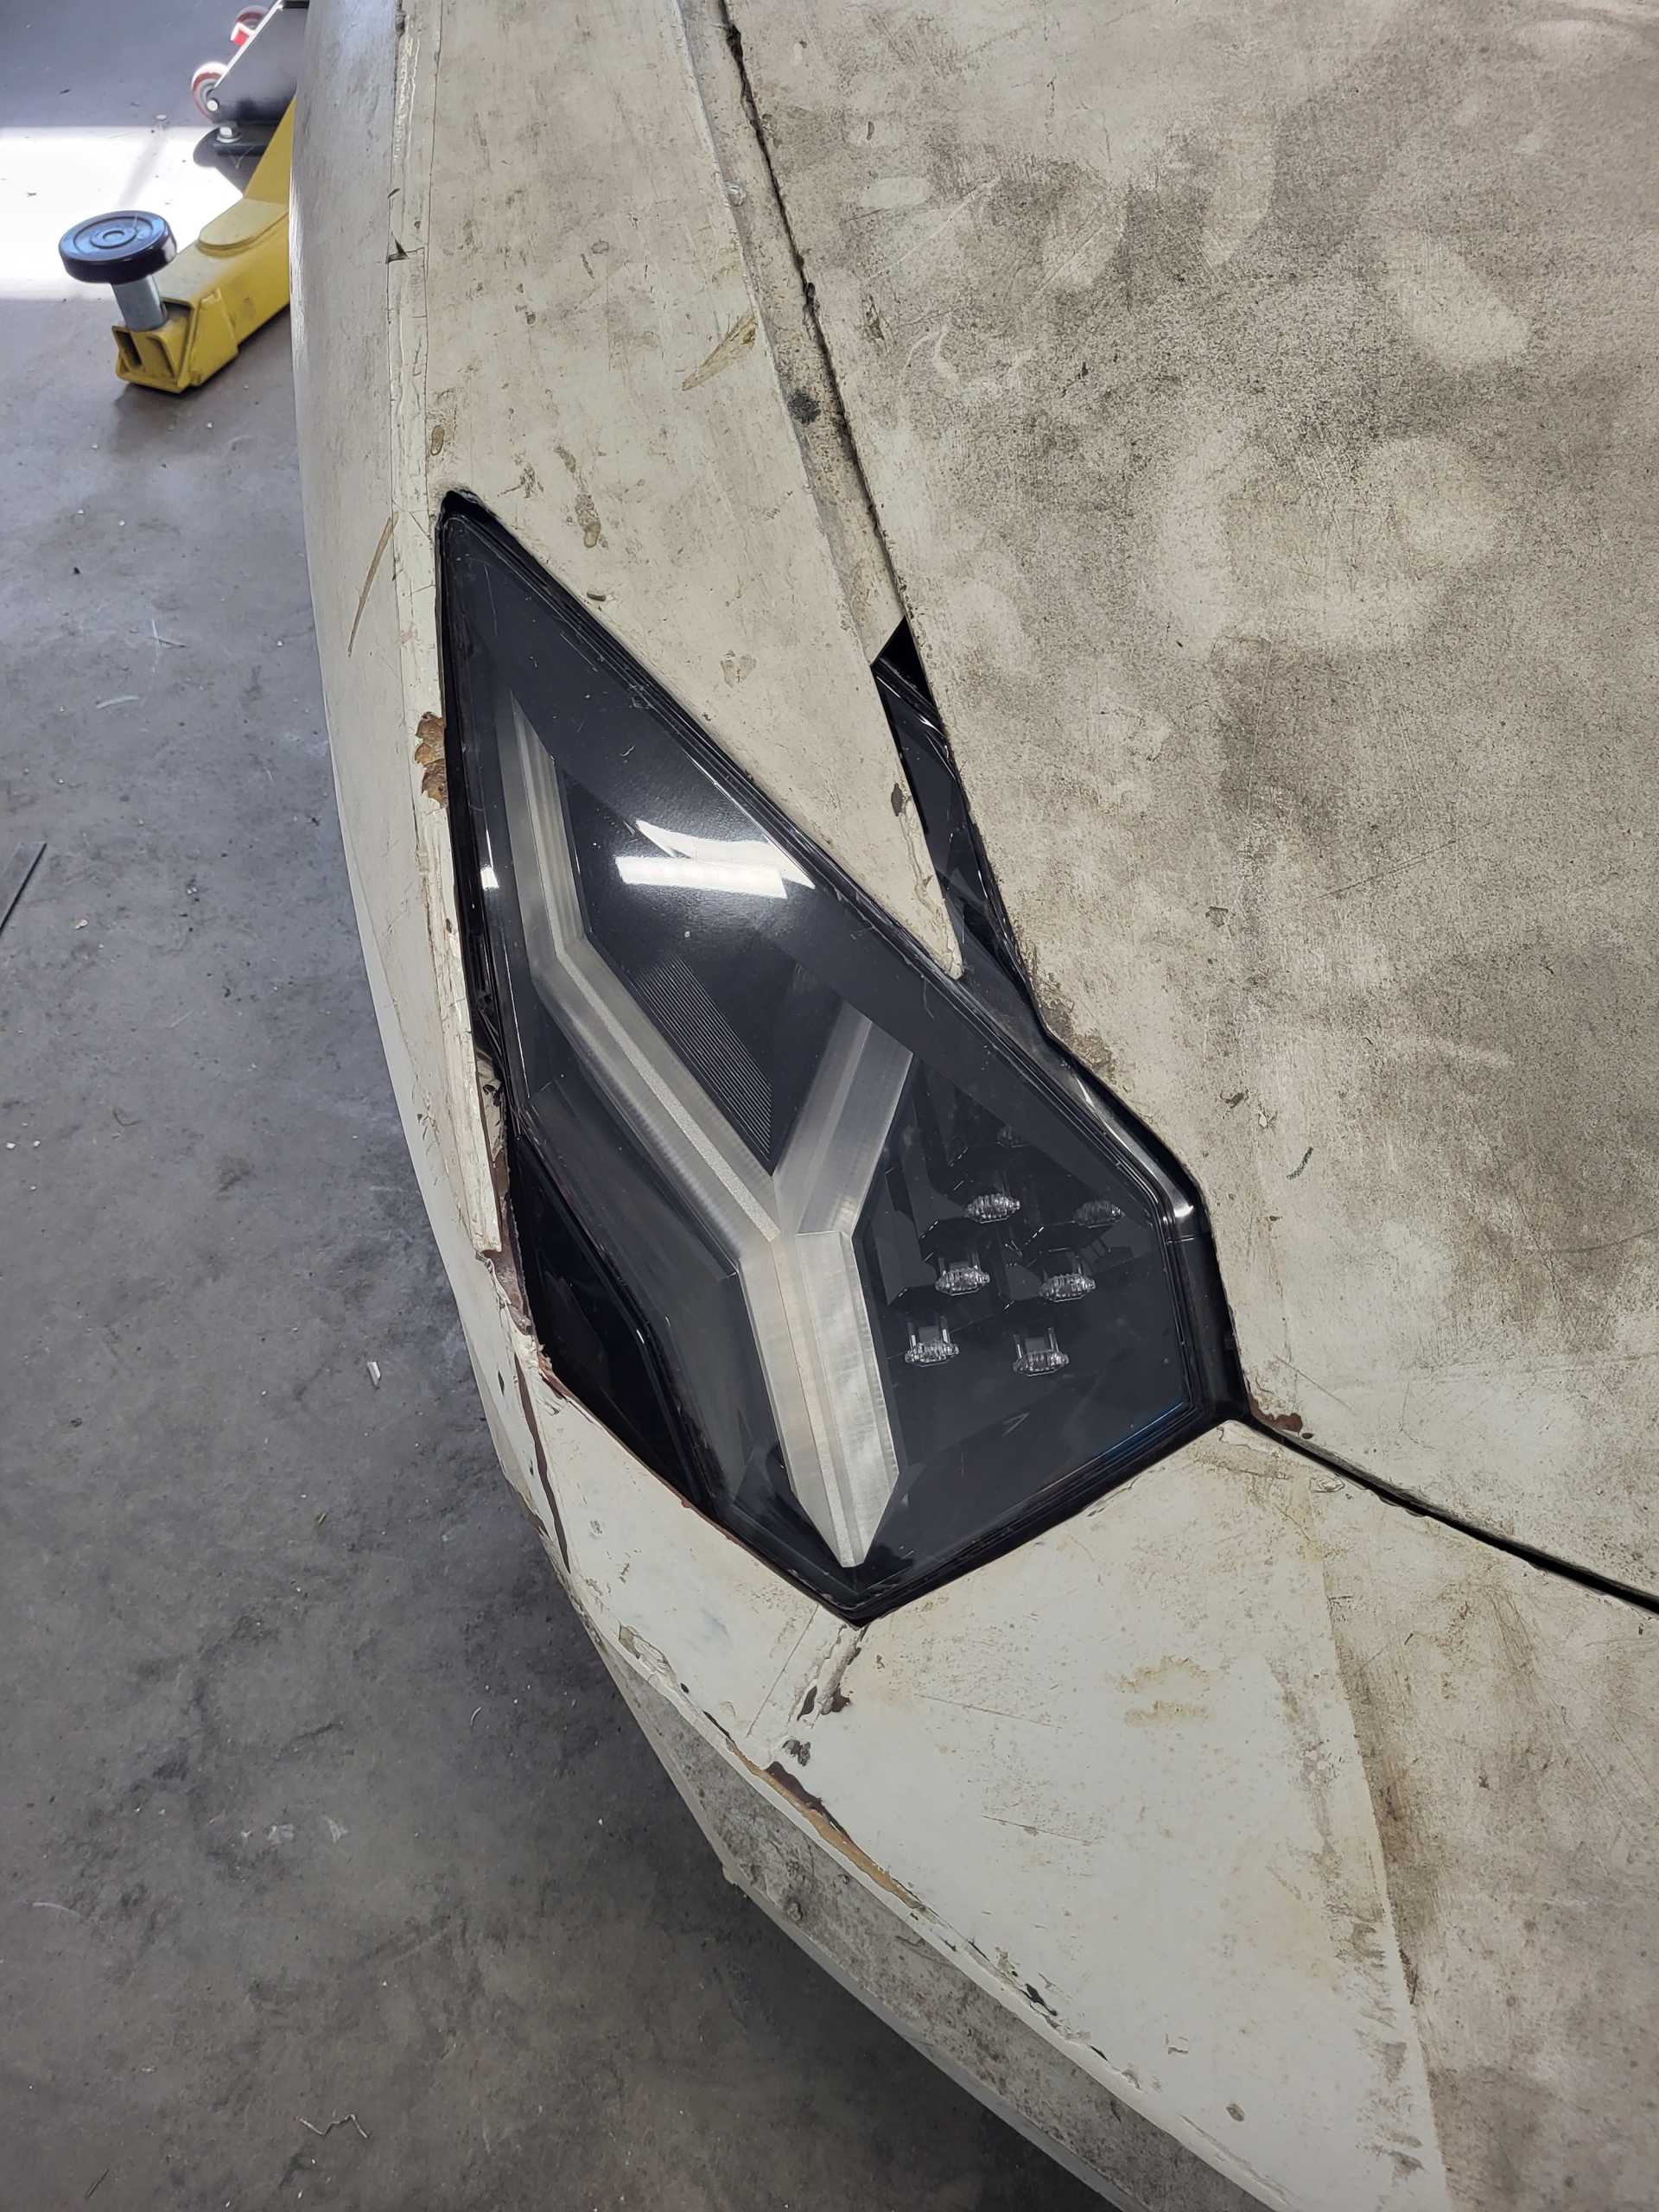
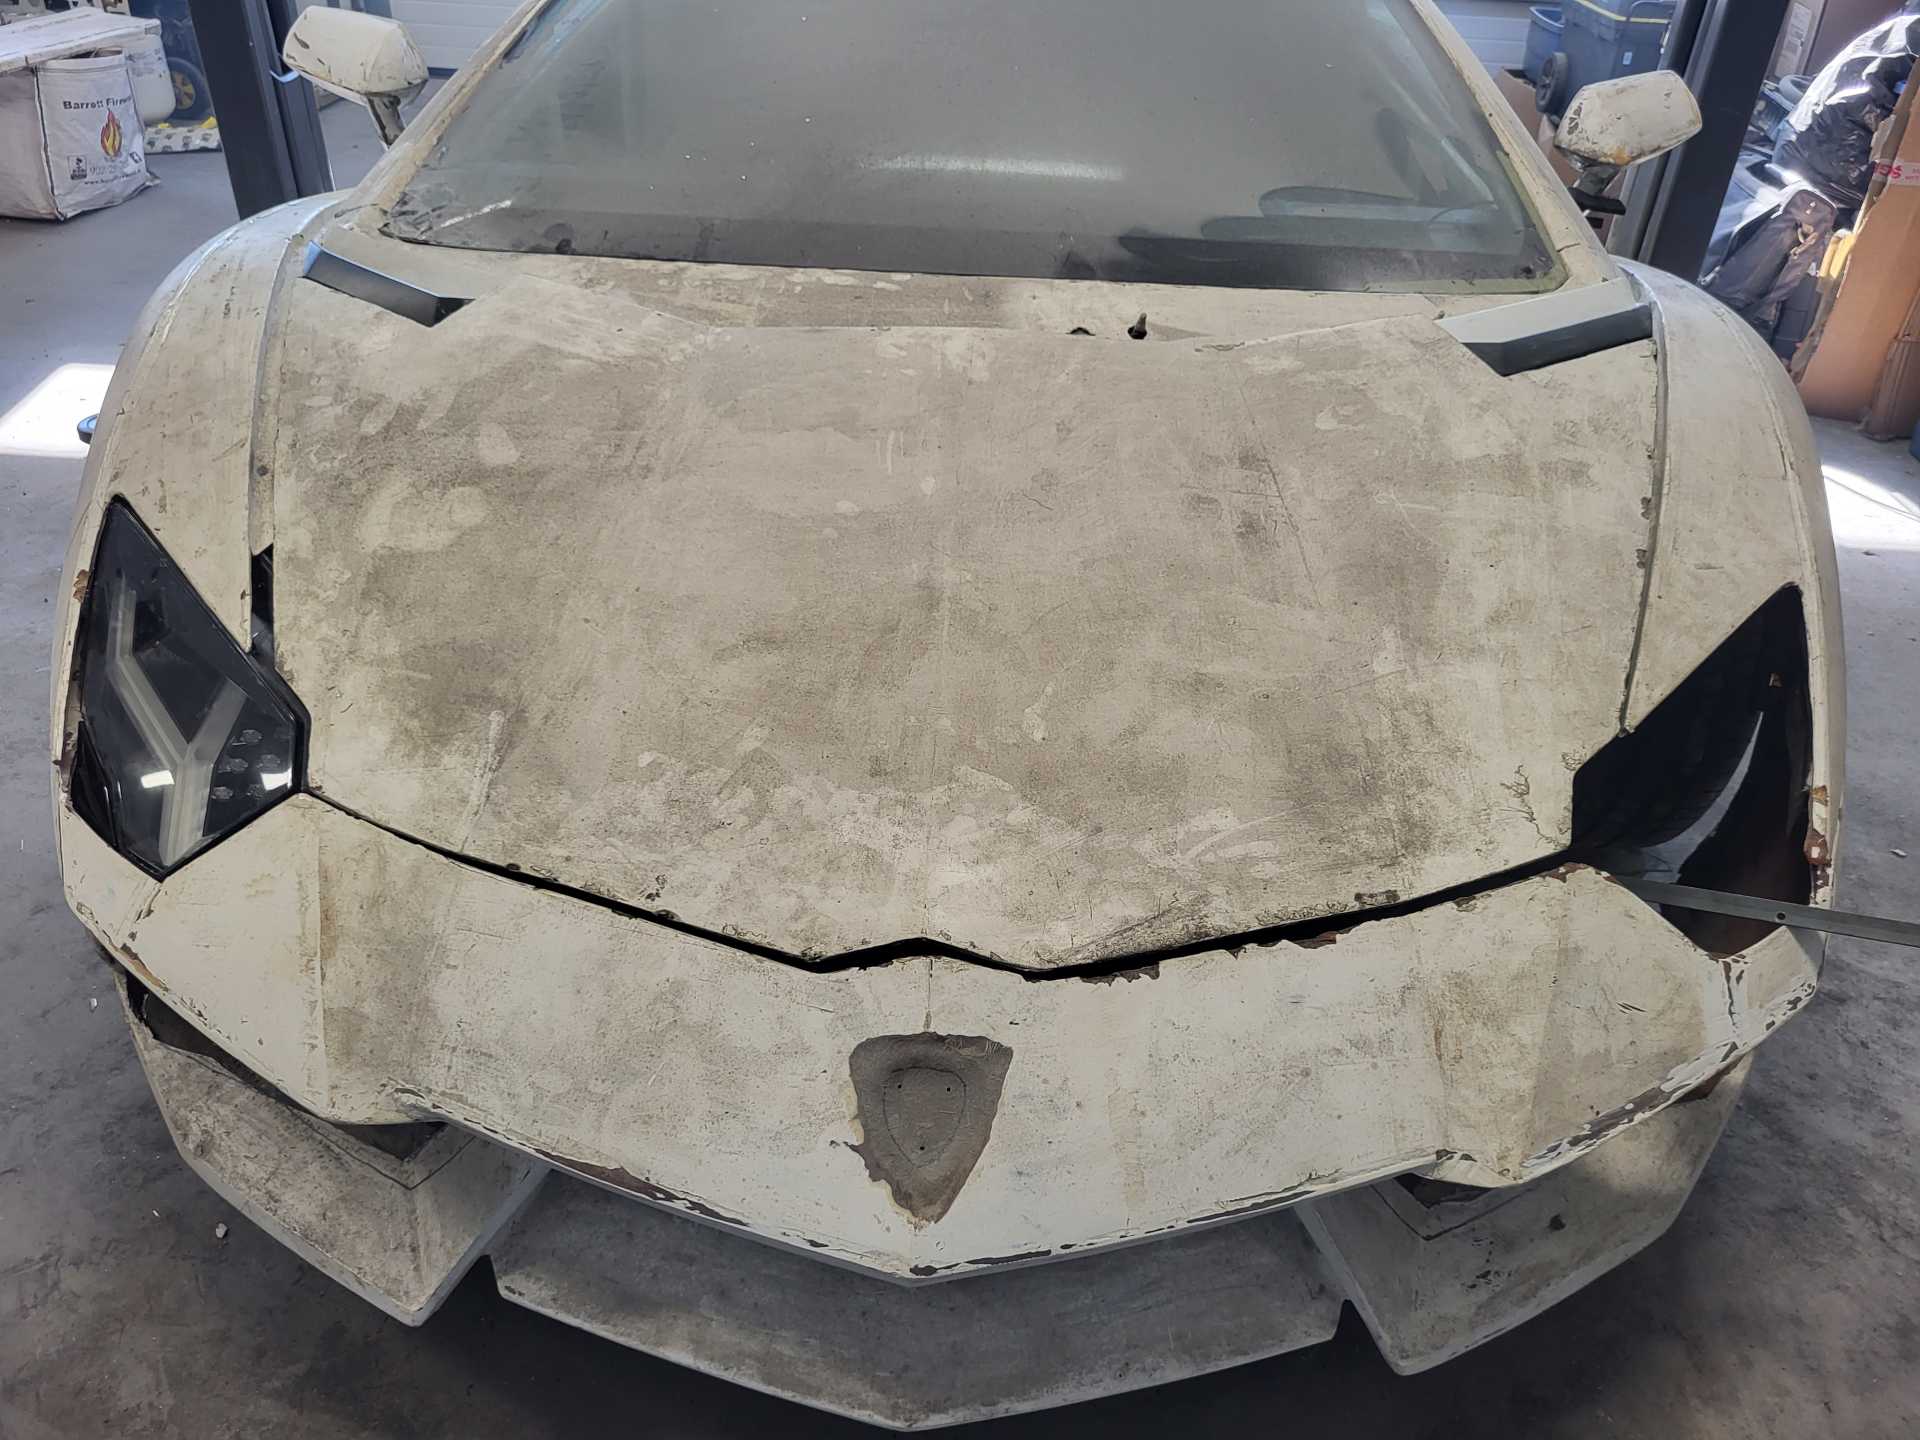
I've finally completed both doors, including fiberglassing the skins on. Basically all work inside the door includes the power windows, the power folding mirrors, sound insulation, outer dew wipe and all wiring (but not the doors actual electronic control module). I'm now working on the front of the car. This includes alignment and securing of the front bumper and fenders, installation of the vent trim at the rear corners of the hood, installation of the trunk trim and installation of headlights. Unfortunately, I only have one headlight at the moment due to their extreme cost. I ended up having to cut away almost all the front end metal in order to fit the headlights. They really are quite massive. Each headlight is held in place by three brackets. I have one front bracket completed and am working to align the rear bracket. The work continues...
Once the last bits of the front end are completed, I'll start into the fun world of body work....
First update for the year! Been a busy year, but not as much done on the car as I would have liked. I finally got most of the "coarse" work done.... everything fitted, installed and roughly gapped. I then prepped all the surfaces (which took a few months as the panels weren't created with much precision) and put on an epoxy sealer. Now finally ready for the bodywork to start!!!
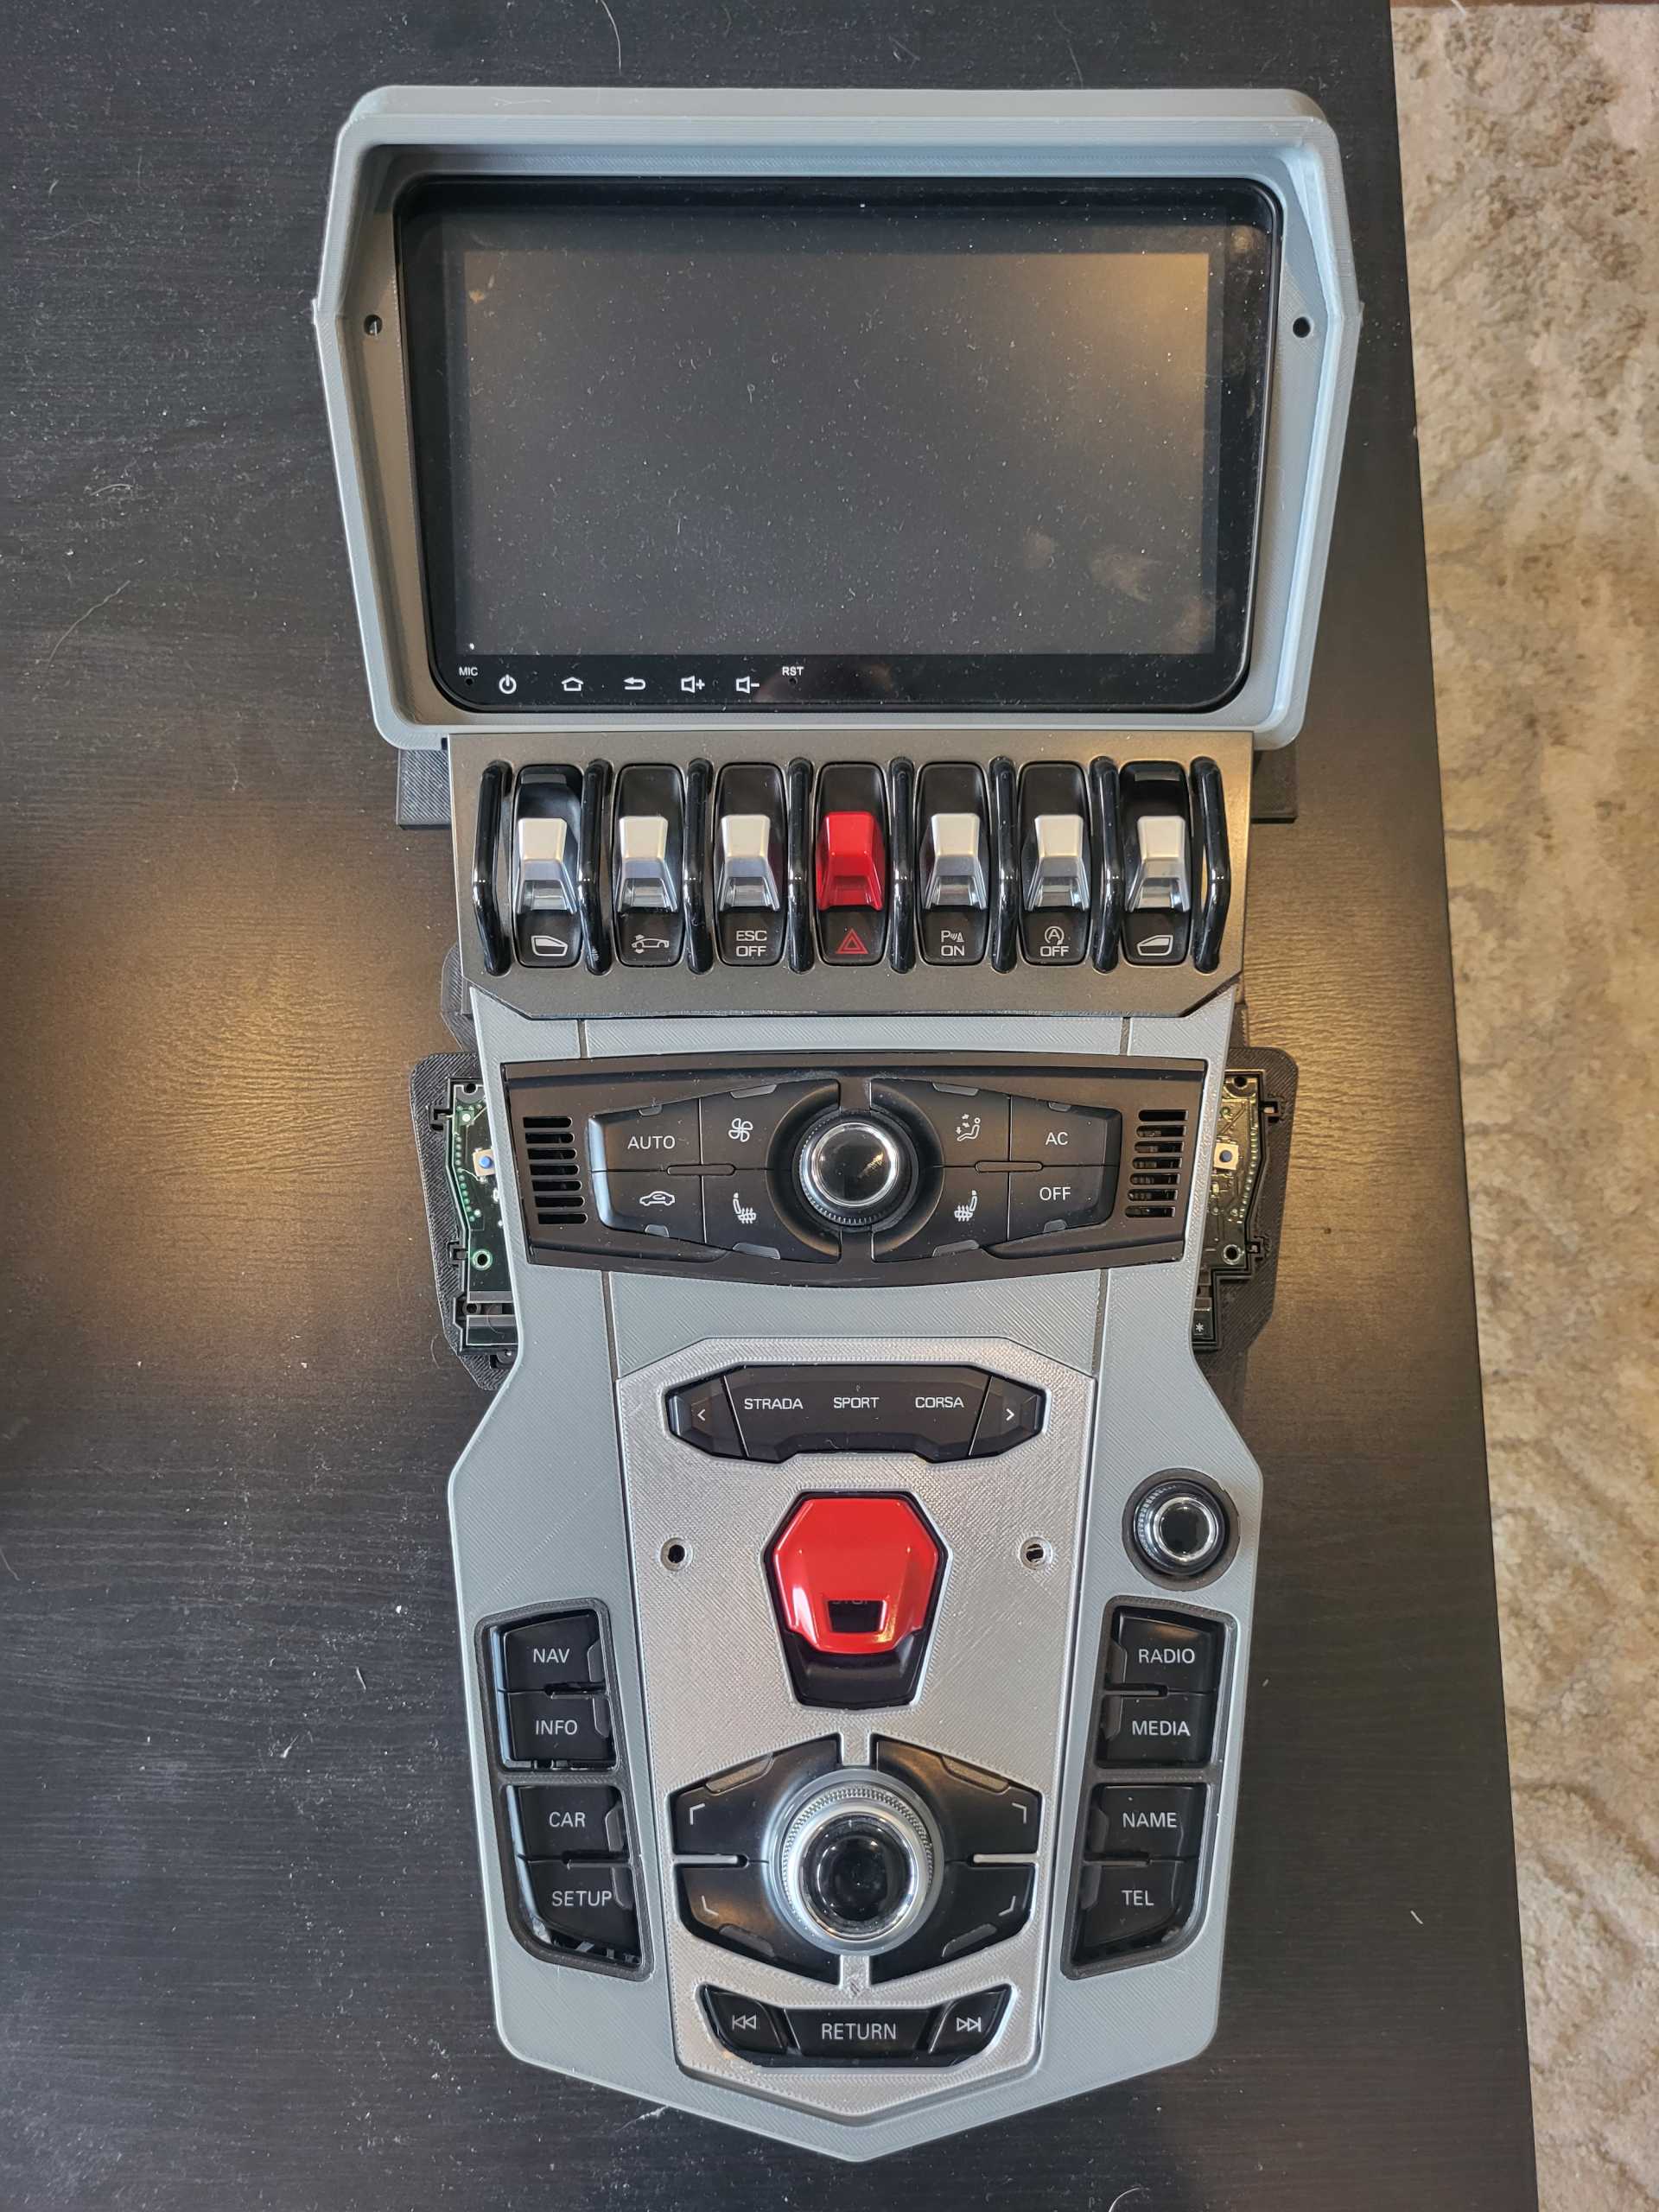
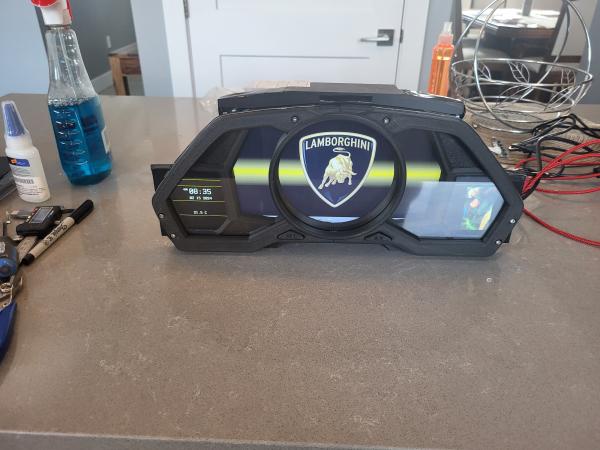
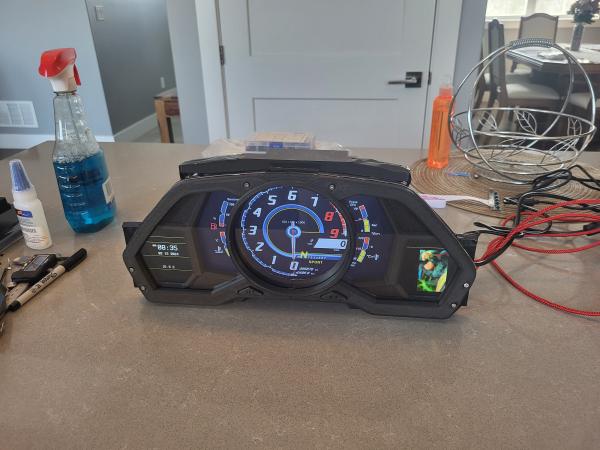
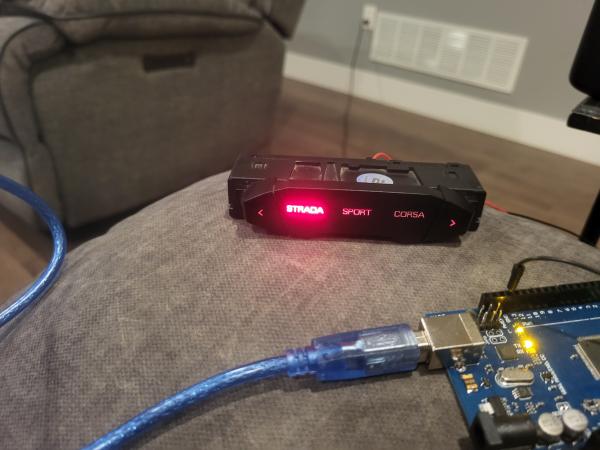
When I'm not directly working on the car, I'm usually working on some of the interior parts. I have the dash basically finished and am moving along with the center console components. I'm using a little poetic license with the console due to the extremely high cost of oem Aventador parts. I've ended up using a generic Android screen (with radio, navigation system, etc), Lamborghini Huracan switches, Audi climate controller, Aventador drive mode control switches, Aventador start button, and Audi MMI. All the associated trim is just 3d printed. The fun part is going through and hacking each component so that everything can be (or somewhat be) functional. I'm about half done with the hacking. Each component has a unique.... and almost always completely undocumented.... communication method (such as rs232, LINbus, CanBus, etc).
You're too far into the project for this info to be of much importance, but when my partner and I were building replicars, we just assembled them with the raw panels as they were provided. We later learned that the exposed interior sides of the panels would begin to deteriorate in a surprisingly short time, shedding shards of fiberglass. We contacted FiberFab and they suggested that we paint all raw fiberglass with Latex Exterior House Paint. We began doing that, and I painted the entire inside of the body on my car. Finished it in 84 and got rid of it in the mid 90s. The inside of all panels were still nice and smooth with no signs of fiberglass shedding.
You're too far into the project for this info to be of much importance, but when my partner and I were building replicars, we just assembled them with the raw panels as they were provided. We later learned that the exposed interior sides of the panels would begin to deteriorate in a surprisingly short time, shedding shards of fiberglass. We contacted FiberFab and they suggested that we paint all raw fiberglass with Latex Exterior House Paint. We began doing that, and I painted the entire inside of the body on my car. Finished it in 84 and got rid of it in the mid 90s. The inside of all panels were still nice and smooth with no signs of fiberglass shedding.


 Topic Closed


_6.jpg)


