I want to start out by saying THANK YOU; for this awesome website and all the talented members who have taken the time to post their work so others can learn and benefit from your experience. Your contributions have made my project so much more achievable.
Here is my 88 Formula that will be getting the Ls4. I am about 12 months into this build. I had planned on starting a build thread earlier but some how lost 85 pictures, so I will be skipping around a littel bit, the pictures wont be chronological.
Unloading the Ls4, the donor was a 2006 Grand Prix with 42,000 miles.
Mounted on the cradel an a trial fit.
Here are some pictures of some mounts. They are rusty looking, I haven't primed/painted yet.
I'm looking at a couple different options for a build on my 88. Did you manufacture the mounts yourself?
[/QUOTE
Yes, I made the mounts, although I was disappointed when I picked the engine up and noticed it didn't have any Ls4 mounting to work with, If it had came with some factory mounting; i don't know if I could have mounted as low as I did, looking back.
I am working through belt routing and water pump mods. I used some of that Aluminum braze rod to fasten the alum. mounting block for the grooved idler pulley. It is strong stuff but I couldn't get the small block off cap to seal with it, I had to have it tigged.
I cut and ground off this shoulder so I could mount the left hand grooved idler.
I cut apart the hydraulic tensioner to modifiy it. I lucked out when I cut through the spring and didn't cut through the tube end. I had to burn off the rubber on the spring (about 3 times) to get it cleaned off. A M10 bolt is a good fit in the cylindr section.
[This message has been edited by Jims88 (edited 03-01-2018).]
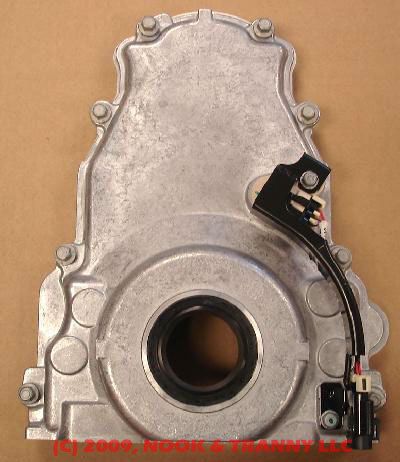
After studying what other Ls4 builders had done with alternator mounting locations, I decided the best option for me was up top, over the old battery location. I soon discovered in order to get a good wrap on the water pump, I would have ended up with the alternator to close to the fire wall. The only solution I could come up with was an auxiliary drive pulley. Mounting a pulley to the existing harmonic balancer.
So I cut out a 4"x1/4" round blank and welded it to harmonic balancer.
Centered up in a 4-jaw chuck and turned up.
Tapping the 5/16-28 threads
After looking awhile for a pulley I settled on this one.
I ended up grinding the ends of the bolts down flush on the back side.
[This message has been edited by Jims88 (edited 03-01-2018).]
Originally I wanted to turn up a simple hub and use the longer Ls7 harmonic balancer bolt and bolt it all together. I wouldn't have to worry about throwing the harmonic balancer out of balance. As I looked over the amount of shouldering material at the end of the crank to support a pulley hub I didn't think it was enough.
Does anyone have any suggestions on who/where I can get the harmonic balancer re-balanced?
Dropped the cradel out today and started working on alternator brackets. I cut out a cardboard pattern for the lower alternator bracket.
Chalked out the pattern on 3/16 plate, torched out and ground to lines.
Turned up some standoffs. The 2 longer ones ended up being 7/8" O.D x 1.895" long with a 25/64 hole, the shorter standoff was .460" long. I ended up with aprox. .025" gap between the plate and the water pump assembly.
[This message has been edited by Jims88 (edited 03-01-2018).]
Finished my lower alternator mount. The taper pedestal started out as scrap 1.4375" shaft turned down to .875"x 1.785 long. Still need to counter sink for flat head M10x100mm allen bolts.
The arrows on the left are the original factory balancing marks, the drill marks on the right are the new balancing marks. I was a little surprised I had thrown it off that much. I still have to buy a new bolt and torque it.
I finished the top alternator bracket. I will have to call around for some estimates on powder coating.
The hacked up top pattern, got me to metal, then I just folded up another pattern off the part. Now it all comes back apart so I can paint the water pump assembly and belt tensioner brackets.
[This message has been edited by Jims88 (edited 03-01-2018).]
Yes it will be spinning backwards, but like Raydar mentioned it isn't rotational specific when it comes to current output.
I am somewhat concerned about the nut working loose under load, since the alternator shaft tries to stop and the pulley works CCW to un-thread the nut, also there is no key-way on the shaft. I most likely will use some of this Penetrating Loctite for peace of mind; although Ls4 builders of the past have not mentioned it as a concern.
1, why not use an electric water pump like Archie used on my LS3 build. It moves it out of the way and you would not need to do all the cutting, welding and fab.
2, why not use a LS1,2,3 style harmonic balancer that already has two belt grooves, i am assuming that all the LS balancers fit the LS4 motor.
great job, keep it up.
Rob
Thank You Rob, BTW... 88 + LS3 Crate Motor + 5-Speed =The Stuff of Dreams!
I am making an attempt to keep costs down as much as possible, by using what I have on hand. Also for some reason; I seem to enjoy building stuff more than I enjoy playing with it, when it's done.
I did some searching at Summit and Jegs and found a lot of LS harmonic balancer options but nothing to work with LS4. I soon discovered that finding ANY LS4 harmonic balancers is becoming a problem.
Any LSx crank pulley will bolt to the LS4. If you aren't using the LS4 water pump, then the depth issue doesn't really exist. You'll need to move some accessories forward, depending on which pulley you use though. The LS4, GTO, Corvette, and CTS-V pulleys are the ones that are closest to the front cover. The truck and other LS powered cars stick out a bit further. The LS4 is the shortest there is though. If you use the LS4 water pump, you'll have to stick with the LS4 crank pulley, make some spacers for the water pump to move it forward, or use a deeper pulley on the pump (or space it out).
Any LSx crank pulley will bolt to the LS4. If you aren't using the LS4 water pump, then the depth issue doesn't really exist. You'll need to move some accessories forward, depending on which pulley you use though. The LS4, GTO, Corvette, and CTS-V pulleys are the ones that are closest to the front cover. The truck and other LS powered cars stick out a bit further. The LS4 is the shortest there is though. If you use the LS4 water pump, you'll have to stick with the LS4 crank pulley, make some spacers for the water pump to move it forward, or use a deeper pulley on the pump (or space it out).
Thank You Dobey
I like this, price though, but the Key-Way made me think it was not a press fit application? Well there is no key on the Ls4 crank anyway.
Doesn't matter. It's an A-C generator. The diodes take care of the DC polarity.
it does matter, but not for the reason you think, the cooling fan going backwards won't be able to draw as much air through to cool it. now how much that matters is a good question.
------------------ there's a Group on 60degreeV6.com for us 660 Fiero owners!
it does matter, but not for the reason you think, the cooling fan going backwards won't be able to draw as much air through to cool it. now how much that matters is a good question.
I was thinking the same thing......cooling tends to be an issue with alternator failure..
Originally posted by Jims88: The FB395's are very robust but I'm not sure how much compression to allow for a safe gap distance. Is this enough gap here?
Anyone have a suggestion?
1/2" is probably too tight given the boot and the band are not on there. With them on there you probably want to leave yourself 1/4" to 1/2". With the auto, it should be less of an issue vs. a manual.
Thank You Rob, BTW... 88 + LS3 Crate Motor + 5-Speed =The Stuff of Dreams!
I am making an attempt to keep costs down as much as possible, by using what I have on hand. Also for some reason; I seem to enjoy building stuff more than I enjoy playing with it, when it's done.
I did some searching at Summit and Jegs and found a lot of LS harmonic balancer options but nothing to work with LS4. I soon discovered that finding ANY LS4 harmonic balancers is becoming a problem.
Funny thing is that I asked Archie if using the LS4 balancer would be a better option for us LS swap guys. Because when using the dual groove balancers you have to notch the frame rail. I wanted to find out if you could swap out the LS3 for an LS4 one. I only have an alternator on my setup, not even using A/C. Im sure it has to do with spacing the Alt and A/C on the motor, but on the LS swaps, the inner belt groove (the stock A/C one) its not used, so having two of them is a waste. Someday I really want to find out if you can use a LS4 balancer on a LS3 swap and not have to notch the frame rail.
Funny thing is that I asked Archie if using the LS4 balancer would be a better option for us LS swap guys. Because when using the dual groove balancers you have to notch the frame rail. I wanted to find out if you could swap out the LS3 for an LS4 one. I only have an alternator on my setup, not even using A/C. Im sure it has to do with spacing the Alt and A/C on the motor, but on the LS swaps, the inner belt groove (the stock A/C one) its not used, so having two of them is a waste. Someday I really want to find out if you can use a LS4 balancer on a LS3 swap and not have to notch the frame rail.
Great job again.
Rob
It can be done, because is has been done. Don used the whole LS4 front accessory setup on his L92 based swap as seen here:
But as everything else, the devil is in the details.
LS4 crankshaft is physically shorter on the balancer snout by 10mm than all other LS(x) engines. So was there just enough room for the balancer to properly seat on the longer snout, did he machine a pocket washer for the snout to allow the crankshaft to protrude past the balancer, or did he cut the snout down.
Also, if you look close at his picture above and notice where the cam sensor is. That is the stock location for the LS2/3/L92 and an the black bracket/harness portion is missing in Don's picture above: So did he just remove the harness from the bracket and have enough room to allow everything to clear or did he have to do something more special.
Now I am not a fan of the LS4 balancer, because it is too large in diameter and there is zero options for non-stock replacements. Now if you step back to the mid 90's LT1 combo, those balancers had a removable crankshaft flange as shown:
Now this snout will not fit a LS(x) based engine, but someone could design a similar snout for the LS(x) family and use one of the aftermarket balancers for the LT1 with the proper spacing from the engine. Here is one of the LT1 balancers available (for reference, LS4 balancer is 8" in diameter and the crankshaft snout is about 1.48"):
[This message has been edited by fieroguru (edited 12-31-2012).]
1/2" is probably too tight given the boot and the band are not on there. With them on there you probably want to leave yourself 1/4" to 1/2". With the auto, it should be less of an issue vs. a manual.
the cooling fan going backwards won't be able to draw as much air through to cool it. now how much that matters is a good question.
That's a good point,
While trying to find a location to mount the alternator; I had wondered if the alternator would run cooler up by the passengers side vent or down low by the axle? I don't know what the maximum ambient operating conditions are for it?
While trying to find a location to mount the alternator; I had wondered if the alternator would run cooler up by the passengers side vent or down low by the axle? I don't know what the maximum ambient operating conditions are for it?
FWIW some Corvairs had reverse spinning alternators, might be able to get a fan off of one of those.
------------------ there's a Group on 60degreeV6.com for us 660 Fiero owners!
Originally posted by ericjon262: FWIW some Corvairs had reverse spinning alternators, might be able to get a fan off of one of those.
Or call up Paxton or any other centrifugal blower vendor, pretty much all the C4 kits used a backwards spinning alternator, so if it was any issue at all, it would have been included in their kits.
It has been to cold to work in the garage, so I did some inside work refurbishing my rear suspension bushings.
I made up a fixture out of uni-strut, to get my toe-links back to their original lengths before disassembling them. I had to turn up some bushings for the new trailing arm bushings.
I found it worked well for me to turn off the shoulder of the bushing; then cut a slit in the bushing for compression, so they could press into and center up in the the lateral links easier. For piece of mind I used Loctite to help secure them. The ones in this picture were the old ones I practiced on first.
[This message has been edited by Jims88 (edited 01-31-2013).]
Now I will start on the exhaust and coolant lines.
I ordered some U-bends and mufflers from Summit and exhaust tips from Ebay. I cut out the exhaust flange from 3/8" stainless, but I am going cheap and doing the rest of the exhaust in aluminized steel.
The clearance between the cradle and the trunk heat shield wall, is kind of tight at 5-1/2" or so. I originally wanted to go with a 3" downpipe and Y into two 2.5" tailpipes.
Trying to find a muffler with a small enough O.D. to fit and provide ample clearance for movement, was proving to be difficult. I was shooting for about 1/2" all around. Maybe my 1/2" clearance is more than necessary, I'm not sure; I just don't want to hear any clunking noises back there.
In order to get the mufflers flush with the bottom of the cradle, I ended up going with the stock 2-1/2" down pipe and Y into two 2-1/4" tail pipes.
I ended up purchasing two of these. They were low cost and the diameter was only 3-1/2"
I opened the box and found the classic glass-pack design. Well for $13.00 what did I expect? I was pleasantly surprised to see they were made in the U.S.A though.
I wanted more than 3 rows of baffling holes so I disassembled them and replaced the baffling with some of this perforated exhaust tube.
Here is a comaprison bettween the 2-1/2" and the 2-1/4" weld on bullet mufflers and the baffle tubes.
I used some of this ceramic high temperature material for packing. It is soft and has the texture of cotton balls so I wrapped one layer of the perforated tube with some heavy boat glass to try and protect it some. I am by no means a muffler engineer so this is just an experiment.
When I tried to Tig some tack welds I got a bunch of yellow flames and soot shooting out of my joints. So I had to preheat the joints with my torch to burn up the masking tape I used to compress the packing.
I used a piece of angle iron to keep everything straight while I made some tack welds.
A trial fit, The perforated tube on the left I just stuck in there because it was handy at the moment.
Done with down pipe. Not the prettiest Tig welds but good enough.
Making/modifying your own muffler is pretty cool. I might have to look into that if I decide to add some additional "muffling" to my current setup (magnaflow - which uses the same perforated tubes)
Some excellent fabrication skills here and a great V8 engine choice for an auto. IMO the alternator will burn out if you don't change the unit or at least the fan. You can solve the potential cooling problem with your alternator by using a marine alternator or possibly the fan from one. There are also some auto alternators that have operated in reverse rotation like the Corvair and some import units. Maybe a reverse rotation fan can be adapted? Anyway great job!
------------------ " THE BLACK PARALYZER" -87GT 3800SC Series III engine, custom ZZP /Frozen Boost Intercooler setup, 3.4" Pulley, Powerlog manifold, Northstar TB, LS1 MAF, 3" Flotech Afterburner Exhaust, Autolite 104's, MSD wires, Custom CAI, 4T65eHD w. custom axles, HP Tuners VCM Suite. "THE COLUSSUS" 87GT - ALL OUT 3.4L Turbocharged engine, Garrett Hybrid Turbo, MSD ign., modified TH125H " ON THE LOOSE WITHOUT THE JUICE "
Dennis what youre saying makes sense, I am curious to see just how long the old one lasts before it stops working though. Thank you for some solutions, in the meantime I will investigate some of your suggestions.
I liked how Rickady88GT added more muffling to his exhaust tips; so I had to borrow it too. I cut the one 12" weld on bullet muffler in 1/2 and welded on the tips.
I wasn't sure what kind of tig rod to use, to join stainless steel to carbon steel then I found this guy. He is very skilled at his craft and he has a lot of cool DIY projects. Anyway I ended up using 309 filler rod.


.JPG)


.JPG)
.JPG)
.JPG)


.JPG)


 ...cooling tends to be an issue with alternator failure..


_1.JPG)
.JPG)
.JPG)
.JPG)
.JPG)


_1.JPG)


.JPG)
.JPG)
_2.JPG)
_1.JPG)
.JPG)
_1.JPG)


