I found this handy swivel muffler hanger at Napa. I did a search on header paint and some of the forum members seemed to have good luck with this stuff. I just hope it works better than the header paint I used back in the 70s?
I sent my ECM and TCM off to Darth Fiero for tuning. Ryan asked me some great questions, so my tune would come out right. I had a lot of questions too, his informative answers were a major bonus to me, so I could get a handle on those "gray areas." Needless to say, I was very pleased with my service from Sinister Performance.
I noticed where Ryan mounted the ECM/TCM on Tom Slick's build. It looked like a good location for keep things cool, so I mounted mine in the same location. I mounted mine on some 1/4" nylon and stand-offs.
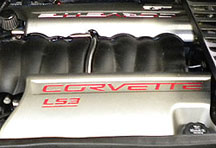
Worked on some miscellaneous things, torqued new harmonic balancer bolt, all water manifold bolts/idler pulley bolts. Swapped out valve covers and re-worked valve cove venting hoses. Re-located oil dip stick.
I edited this picture, with the correct valve cover vent line routing
Drilled rear rotors, I'm using fieroguru's 13" brake up grade.
The DOD and Oil Pressurs Sensor were deleted off the Tune, so I made an adaptor fitting from a 16mm x 1.5 oil drain plug (Napa 704-1067) I drilled out the drain plug and silver brazed a cut down 1/4' NPT coupling. To adapt the 88 Fiero oil pressure sensor. It may have been easier to eliminate the Fiero oil pressure sensor, but it was easier for me to do it this way. I didn't want to deal with any more wiring modifications.
Like others have done, I fabricated a Coolant Filler Neck. I made a cardboard pattern off the end of the cylinder head and laid it out on 3/8 aluminium plate. The tube was 1-3/8x1/8 wall.
[This message has been edited by Jims88 (edited 03-01-2018).]
I removed the 88 cruise control module and picked up the wires to tie into the LS4 cruise control. There is a good chance it may not work, but I don't want to rework the wiring harness later.
Pin A, GRY, Cruise ON Pin G, BRN, Brake Switch (open when pedal depressed, not sure if I need it but grabbed just in case) Pin L, DK/Blu, Set/Coast Pin M, GRY/BLK, Resume/Accelerate
Started working on the Accelerator Pedal and associated wiring. I liked the idea Rickady88GT had; mounting the accelerator pedal in the trunk.
Notched out for the Accel.Pedal wiring connector.
Trial fit of the pedal and wire routed.
Purchased an 1/4' Aluminum machine screw and drilled it 3/32'' for a cable Bulkhead fitting.
Some finished views, I will have to come up with some kind of protective guard once I get the carpet in.
Originally posted by Jims88: Started working on the Accelerator Pedal and associated wiring. I liked the idea Rickady88GT had; mounting the accelerator pedal in the trunk.
That is a great idea. Putting this one away in the database for my next swap.
I have the wiring laid out for the most part, so when I drop the cradle I can start re-wrapping the harness. Before I drop the cradle I worked on the shift cable and linkage. I thought this looked like a good solution and almost purchased it. http://www.westcoastfiero.c...ersion_hardware.html
Instead I rummaged through some garage attic "junk" and found a gear drive I thought could be modified to work. I needed to fabricate a shift link, so I measured the 88 Fiero shift arm and it was 1-5/8" center to center, the selector shaft is 1/2" O.D.
I cut the Ls4 shift arm down and welded it to one of the gears. I ended up mounting the gear on top of it, so I would have clearance for the gear selector switch below. A tube nut/bearing shaft was turned up to fasten it all together.
I cut down the standoffs to narrow the whole thing up.
It worked?!
[This message has been edited by Jims88 (edited 03-01-2018).]
I dropped the the fuel tank , wire brushed off the loose rust and treated the tank with Paint & Etch. I used galvanized paint to recoat the tank.
I removed the wire-wound resister from the fuel level sending unit and soaked it in LimeAway to clean off any build up. The preferred readings are 0 Ohms and 90 Ohms, I ended up at 5.5 and 88.8
I installed the new fuel pump with a filter and it was basically plug and play, I used the existing Fiero rubber piece at the base of the pump. The one in the picture was the new one that came with the pump.
I received my Champion radiator and started modifying the Fiero mounting brackets to fit. Length and width were an exact match to Fiero radiator.
I ran into some clearance problems with the Fiero radiator mount around the filler cap and radiator inlet.
I trimmed back the Wellnut studs for piece of mind, since the new radiator was wider.
Trimmed the existing rubber mounts.
Back in place.
Cleaned and painted the engine bay. The section I sealed around in the trunk area, is where I cut out the square corner. I needed more clearance for the oxygen sensor and I just got tired of it being in the way when I was test fitting the engine.
[This message has been edited by Jims88 (edited 03-01-2018).]
Jim, what paint did you use for your tank? Primer? Not sure what "paint & etch" is. I'm about to paint mine, and I'd like it to look as good as yours.[/QUOTE]
Sorry about the confusion, I some how came up with my own pet name, its really called "Prep & Etch". A Forum member posted his experience with it awhile back and I have been using it ever since. I purchased 2 gallons at Home Depo, kind of pricy at about $20.00 per gallon. I use one gallon for soaking parts and then recycle it, that is the one marked "Dirty".
The paint is bright galvanizing compound. I sometimes would coat metal parts, with "metal etching primer" after using the "Prep & Etch" and sometimes I just paint with out primer, like I did when I repainted my tank.
I am just a hobby painter, so I don't know for sure if you need to use Primer after a phosphoric treatment. Maybe another member can shed some light on that.
For an experiment, I soaked an old break rotor in a 5 gallon bucket with lid in "muriatic" acid overnight, to remove the heavy rust scale. I used rubber gloves, face shield and respirator, nasty stuff I know but it does a great job on rust removal.(Although thin rusty parts will disappear if your not keeping watch).
Then I washed the rotor with dish soap and water, let it sit awhile so it could " flash rust". The phosphoric acid I read somewhere needs a little rust to work with? I then soaked it in the Prep & Etch. The rotor in the picture has been sitting in my unconditioned garage for over 2 years and it still looks pretty good.
[This message has been edited by Jims88 (edited 12-31-2013).]
Thanks Jim. Did you neutralize the solution with something like baking soda and water or just wash it off with water? I read a bit about the phosphoric acid process. Sounds like you wouldn't need a primer, but I might try it with one just to be sure. My garage is a bit cold right now, but once I can get the temperature up, I'll give it a shot.
I purchased a set of stainless steel transmission cooler lines from the Fiero Store, since mine were rusted and leaking. They are high quality lines, after I unfolded them from the shipping box; I couldn't figure out how to install them? So I did a search and discovered what I thought would be a simple swap, turns out to be a major PITA.
Dropping the front cross member is not a project I planned on doing, I want to drive the car this YEAR.
I discovered some guys just replaced the steel lines with flexible braided steel hose or just rubber transmission hose front to back.
Since I had already purchased the Stainless Steel lines, the only way I could get them installed was to cut them in two
I swaged up a couple SS couplings out of a piece of scrap 3/8" SS tube.
I ended up cutting the line here and silver brazing it back together. My front cross member looks rusty, I do plan on refurbishing it some other time.
After I finished brazing the lines back together I pressure checked and soap bubbled for leaks.
I replaced some rusty coolant clamps and fabricated a couple of clamps to the transmission lines.
Silver brazed on S.S. 3/8" hose barbs, the Fiero lines are 5/16" Ls4 transmission line are 3/8".
[This message has been edited by Jims88 (edited 08-06-2014).]
The '88 is a little bit worse than the early car for crossmember removal, but I think you also could have disconnected the steering shaft from the rack and been able to install the lines without cutting them... especially with the car up on 4 jack stands as shown.
The '88 is a little bit worse than the early car for crossmember removal, but I think you also could have disconnected the steering shaft from the rack and been able to install the lines without cutting them... especially with the car up on 4 jack stands as shown.
Thank You Will, Looking back I think that would have worked.
Purchased a battery relocation kit from Norm's Fiberglass. http://www.normsfiberglass.com/ The workmanship was top notch on the fiberglass battery tray.
The kit came with 2/0 cable, the OEM Ls4 is 2 gage. After comparing the two side by side, I was surprised how much "fatter" the 2/0 was verses 2 GA. I decided to add some extra length to my existing 2 GA. In hindsight I would have ordered the kit less cable to save a few $$. I drilled an 1/8" hole in the center of connector, so I could tell when the connector was flooded with solder. I then cleaned it with brake clean; coated the connection with dielectric grease and shrink wrap.
The fiberglass flange was the same width as my steel ruler, so lay out was easy. Making the cuts.
Here is where I ran into interference on the trial fit. The back end was up on jack stands the front was sitting on the wheels. I poured a little water in the coolant tube and "trapped water" where the rubber insulator for the coolant tubes is located. Then I heated and gently tweaked it. Sorry about poor picture quality.
I eventually drilled out the cable holes to accommodate a 1" rubber grommet, not shown in this picture though.
I'm happy with the way it turned out. The instructions say to use the spare tire to secure the battery. Since my Ls4 is tail heavy, compared to stock I am going to put as much weight up front as original.
I found a thick body flange for the ground connection under the coolant reservoir.
Worked on my heater tube compression fittings. I could have used a 1/2" brass FMPT union, but I wanted both of them to look about the same. I used a short piece 1/2" copper tube to join them. This one is the 5/8" compression by 5/8" hose barb for the 88 Fiero heater supply line.
The 3/4" return line was a 3/4' compression 90 elbow/ 1/2" MPT x 5/8" hose barb.
I noticed some elongation where the long bolt passes through the 88 Knuckle. I thought this was a little strange, since my Formula only has 53,706 miles on the odometer? I know someone in our community installs repair bushings for this problem, but couldn't find the link to post it. Mine wasn't elongated to bad, so going up in diameter on the through bolt would clean it up.
The difference between the OEM M12 bolt and Grade 8 1/2" bolt wasn't much. The 1/2" bolt is .026 larger in diameter than the M12.
I pushed the 1/2" bolt through a trailing link, the bolt went through with little difficulty and no damage to the bolt threads. The inner bushing separated about .025" or so.
I mounted the knuckle to the rotary table and squared it up, with the elongated hole at the bottom.
To prevent these teeth from gnawing into my knuckle. I made up a pair of precision washers, from a couple of 3/8" grade 8 washers to protect it. Now I just have to wait and see how this experiment pans out?
I purchased flanged bolts for the cradle toe-links and trailing links. These bolts are 10 mm longer than the OEM 70mm bolts, so I added a washer to take up the extra threads. I like how the bolt shank passes through, both sides of the cradle bracket.
Trial fit with extra bolt threads trimmed off.
[This message has been edited by Jims88 (edited 08-23-2014).]
Ditch the bushings altogether and go with rod ends in the lateral links.
The rod ends add more rigidity to the knuckle assembly and look cool too, but some of the pictures I've seen, look like they rust up rather quickly. So I wonder what there life span will be?
[This message has been edited by Jims88 (edited 09-01-2014).]
I love the bolt shank mod, I might have to do that!
As for the rod ends, mine have been in use for a little over 1 year and 14K miles. The car never sees the garage, so they have been exposed to the elements every single day (even through the winter). I also drive the car in the rain or shine, but not in snow or when the roads have salt. Mine have rusted, but they started out with a black-oxide treatment. If the car wasn't a daily driver and could stay indoors during wet times, the finish would last longer.
For my next set, I will probably try to find some stainless steel ones. They are not as strong, but the lateral links don't see the same impact loads as say the trailing link would.
[This message has been edited by fieroguru (edited 08-24-2014).]
Use Pro-Werks sealing washers or an equivalent product. If you're really worried about service life, start off with sealed rod ends (e.g. from New Hampshire Ball Bearing - NHBB). Otherwise, concern about corrosion and service life are non-issues.
Use Pro-Werks sealing washers or an equivalent product. If you're really worried about service life, start off with sealed rod ends (e.g. from New Hampshire Ball Bearing - NHBB). Otherwise, concern about corrosion and service life are non-issues.
Use Pro-Werks sealing washers or an equivalent product. If you're really worried about service life, start off with sealed rod ends (e.g. from New Hampshire Ball Bearing - NHBB). Otherwise, concern about corrosion and service life are non-issues.
On mine, its the body that is rusting, not the ball - its chromoly.
The Pro-Werks sealing washers for rod ends are an interesting solution to keep out contaminates. Didn't know they made such a thing. This one is greaseable or self lubricated and sealed but not stainless.
Use Pro-Werks sealing washers or an equivalent product. If you're really worried about service life, start off with sealed rod ends (e.g. from New Hampshire Ball Bearing - NHBB). Otherwise, concern about corrosion and service life are non-issues.
I'm having trouble pulling up a photo right now, but that's a normal rod end wearing some seals that are way more advanced than the ProWerks washers. I've seen the seals before, but they're only available for metric rod ends.
Greasable rod-ends are probably not a good idea for automotive use, as the grease can capture and hold grit and contamination between the ball and race. The exception being extremely well sealed units like ball joints.
[This message has been edited by Will (edited 08-25-2014).]
I cut the original GXP half shafts in half and made adjustable couplers to mock up the axels, so Constant Velocity could fab up a pair of custom shafts. http://www.cvaxles.com/racing.htm
[This message has been edited by Jims88 (edited 03-01-2018).]
Fabricated the top hats for the coil over springs. I liked the internal centering idea, so I used it too. It allowed me to use the 88 bump stop and bump stop washer. I rigged up a spindle to mount the bump stop on, to "spin sand" it down to fit the I.D. of the 2-1/2" exhaust tube.
I cut out the bump stop washer with a 2-1/2" hole saw.
The bump stop has a bullet shaped end, so it looks like it should work well centering up the spring. The spring is rated at 300 Lbs
[This message has been edited by Jims88 (edited 01-31-2015).]
Worked on coolant hoses. I noticed fieroguru used this hose on his LS4 swap, I purchased one to see how it would work on the passengers side return line, to the thermostat housing inlet. It worked perfectly, I just had to shorten it up and add one 90 degree elbow, with the 1-1/2" end.
I had a piece of 1-1/4" copper laying around so I made up a union. I soldered on a .0625" copper wire to retain the hose.
This section wasn't looking so good; didn't need it anyway, so I cut it out. The inside of the tube where the factory installed the drain plugged looked kind of ruff too. Silver brazed another hose retaining ring on the cut end.
I modified the 88 cross over drivers side tube to work. I used a Gates 21532 hose.
5/8" supply and return heater hoses cut to length.
All together.
[This message has been edited by Jims88 (edited 09-01-2014).]
I filled the coolant system to check for leaks and discovered a leak on my 3/4" return heater tube. The leaks were at the steel clamp locations. I picked up a piece of 3/4" O.D. tube and swaged it into a long coupling and had it tig welded.
Back in place and leak free!
When I was attempting to set the rear camber to -1.0 deg. I found I couldn't get the passengers side any more than -.05 degrees. A search revealed the 88 knuckles sometimes has interference problems with after market struts. So I had to grind some clearances on the knuckle and my strut. Camber then came into factory specs.
[This message has been edited by Jims88 (edited 12-28-2015).]
I made a set of wood blocks with jacking screws, to get a level surface to attempt a rough alignment on. Setting up on the brake rotors isn't the best idea, they could warp but the conveyance of getting to everything made it worth the risk to me. If I had a set of old rotors I would have used them instead.
This is how I did it based on some searches on YouTube and Pennocks. When I did the search, quite a few members complained about paying for poor alignments multiple times. So getting my rough alignment as accurate as possible is my goal, until I can locate a reliable professional source. I have never done this before, so please feel free to add comments to correct anything that doesn't look right.
I found the axel centers and scribed centerline marks to the blocks.
I marked an aluminum bar with my tire O.D. and radius. Then centered it up on the line.
To get my parallel lines, I measured the front and rear wheel widths as close as I could at the base of the rotors.
The front was 1/8" narrower at 59-7/8" than the rear 60", so I added an extra 1/16" to the front string on each side. I used 2.0" for the mason string parallel lines.
I set the rear at 1/32" toe-in on each side, to get a 1/16" rear toe setting and set the front to 1/16" toe in on each side, for a 1/8" front toe setting. I had a level set up on the steering wheel and had to level the steering wheel each time I made a front toe adjustment. I jounced the suspension between all adjustments and double checked measurements.
Now maybe I can mount the wheels.
Originally posted by Steven Snyder: Front: Motegi MR-116 17x7 (48mm offset) 215/45/17 Hankook RS-3 Rear: Motegi MR-116 18x9 (45mm offset), 275/35/18 Hankook RS-3
I liked what Steve Snyder did with his tire/wheel set up. I used the same offsets but different tires. Continental Extreme Contact 215/45/17 front, 275/35/18 rear. The rears will stick out the fender a bit.


_2.JPG)


_3.JPG)


.JPG)


_1.JPG)


.JPG)


_4.JPG)

.JPG)
_1.JPG)


_2.JPG)
_1.JPG)


_1.JPG)
_1.JPG)
_1.JPG)

.JPG)
.JPG)
.JPG)

.JPG)
_3.JPG)
.JPG)


.JPG)
_1.JPG)
_2.JPG)
.JPG)

_2.JPG)


