Pennock's Fiero Forum
  Technical Discussion & Questions
  New problems, new solutions - Building a Frankenstein's '85 (Page 4)

Post New Topic  Post A Reply
Email This Page to Someone! | Printable Version

This topic is 6 pages long:  1   2   3   4   5   6 
Previous Page | Next Page
next newest topic | next oldest topic
New problems, new solutions - Building a Frankenstein's '85 by Boostdreamer
Started on: 02-09-2012 11:23 PM
Replies: 224 (10530 views)
Last post by: Boostdreamer on 05-12-2014 09:42 PM
Boostdreamer
Member
Posts: 7175
From: Kingsport, Tennessee USA
Registered: Jun 2007


Feedback score:    (24)
Leave feedback


Total ratings: 98
Rate this member

Report this Post06-20-2012 10:43 AM Click Here to See the Profile for BoostdreamerSend a Private Message to BoostdreamerEdit/Delete MessageReply w/QuoteDirect Link to This Post
I was getting bored of sandblasting so I started working on separating the engine from the cradle. My catalytic converter was cut out and stolen so the only exhaust connection that wasn't welded was where the headers connect to the Y-pipe. Even though I had been hitting those bolts with PB Blaster for several days and I even sandblasted them to remove any rust, they were frozen solid. Well, I'm not using those headers or those bolts so I just cut through the bolts with my dremmel. I removed the EGR and got all the exhaust springs off and I started loosening the motor mount nuts. I also removed the axle nuts and popped the driver's side axle out. That axle seal is bad so it needs replacement. I ruined my Napa seal trying to put it in. Had to get another one. This time from Autozone (see previous pic). For some reason, it looks like my new axle blew up. It only has a few miles on it but grease is everywhere.


Jonathan

IP: Logged
Boostdreamer
Member
Posts: 7175
From: Kingsport, Tennessee USA
Registered: Jun 2007


Feedback score:    (24)
Leave feedback


Total ratings: 98
Rate this member

Report this Post06-26-2012 07:13 PM Click Here to See the Profile for BoostdreamerSend a Private Message to BoostdreamerEdit/Delete MessageReply w/QuoteDirect Link to This Post
Now that the exhaust is free, I started to work on the inner restriction of the Y-pipe. I did it a bit differently than any other member's posting that I have seen. I was concerned with cutting the tube in half and getting it back together correctly and at the right angle. This was an idea and experiment and I feel like it was a success. I began by trying to estimate where the inner tubes might be. That was a pure guess. Then I drew a triangle with a sharpie and cut along the lines with my 4" grinder with cut-off wheel. I made sure not to cut all the way through the final corner so I could peel the panel back and then fold it back in for welding later. Even though the pic turned out blurry, you can see that I did pretty well with the placement of the cut. The restriction was just inside the cut! It is hard to tell how much I cut out by the pics so I stuck my finger in there to show I had to reach back in there to touch the cutout. I did all my inside work with a Dremmel and the little cutoff wheels. I started by making some cuts into the restriction and then I continued by pulling and pushing the wheels against the cuts. So basically, I ground the metal out with the face of the cutoff wheels.


Jonathan

[This message has been edited by Boostdreamer (edited 06-28-2012).]

IP: Logged
Boostdreamer
Member
Posts: 7175
From: Kingsport, Tennessee USA
Registered: Jun 2007


Feedback score:    (24)
Leave feedback


Total ratings: 98
Rate this member

Report this Post07-01-2012 05:01 PM Click Here to See the Profile for BoostdreamerSend a Private Message to BoostdreamerEdit/Delete MessageReply w/QuoteDirect Link to This Post
Here are the nose badges that a member made for me. I'm not sure if he wants me to identify him so we'll just have to wait to see if he jumps in and claims responsibility. Anyway, I think they are extremely cool and I really appreciate all his hard work. They're gonna look great!


Jonathan

[This message has been edited by Boostdreamer (edited 07-13-2012).]

IP: Logged
Boostdreamer
Member
Posts: 7175
From: Kingsport, Tennessee USA
Registered: Jun 2007


Feedback score:    (24)
Leave feedback


Total ratings: 98
Rate this member

Report this Post07-01-2012 05:04 PM Click Here to See the Profile for BoostdreamerSend a Private Message to BoostdreamerEdit/Delete MessageReply w/QuoteDirect Link to This Post

Boostdreamer

7175 posts
Member since Jun 2007
My big project for today was finally getting the rubber bushings out of the cradle. I had worked on them before without much luck. I decided that I needed something that would chip away at the rubber more than something that would cut it. I decided to try these drill bits for wood. They worked like a charm! Lowe's $9.81.


Jonathan
IP: Logged
Boostdreamer
Member
Posts: 7175
From: Kingsport, Tennessee USA
Registered: Jun 2007


Feedback score:    (24)
Leave feedback


Total ratings: 98
Rate this member

Report this Post07-01-2012 05:10 PM Click Here to See the Profile for BoostdreamerSend a Private Message to BoostdreamerEdit/Delete MessageReply w/QuoteDirect Link to This Post

Boostdreamer

7175 posts
Member since Jun 2007
Here are some pics thru the process. I used the 1/4 inch bit to dig around the inner sleeve then I was able to knock it out with a hammer. Then I moved up to the 1" for the control arms and the 1-1/2" for the cradle bushings. The rubber in the control arms just got ripped out but the cradle needed extra trimming with a serrated blade knife then I hit it with a 2" wire brush cup.


Jonathan
IP: Logged
Boostdreamer
Member
Posts: 7175
From: Kingsport, Tennessee USA
Registered: Jun 2007


Feedback score:    (24)
Leave feedback


Total ratings: 98
Rate this member

Report this Post07-12-2012 10:27 PM Click Here to See the Profile for BoostdreamerSend a Private Message to BoostdreamerEdit/Delete MessageReply w/QuoteDirect Link to This Post
Bought some stuff.

Timken rear hubs part number 513011K from AutoZone $56.93 and $57.06. I don't know why the tax was different at opposite ends of the street.


Pop rivits for the split in my trunk and passenger side floor. Home Depot $12.04


A bolt kit and all thread to hold my hubs together. Home Depot $9.43 Stainless self-tapping screws for body and battery tray. Lowe's $5.96


Two wax applicators and two buffing bonnets. AutoZone $9.58


Jonathan
IP: Logged
Boostdreamer
Member
Posts: 7175
From: Kingsport, Tennessee USA
Registered: Jun 2007


Feedback score:    (24)
Leave feedback


Total ratings: 98
Rate this member

Report this Post07-12-2012 10:39 PM Click Here to See the Profile for BoostdreamerSend a Private Message to BoostdreamerEdit/Delete MessageReply w/QuoteDirect Link to This Post

Boostdreamer

7175 posts
Member since Jun 2007
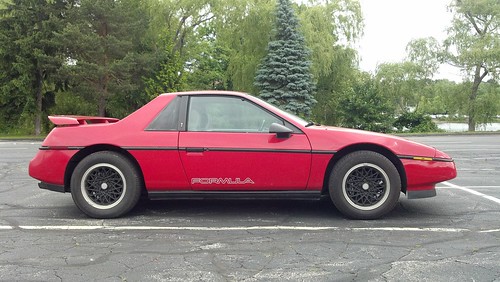
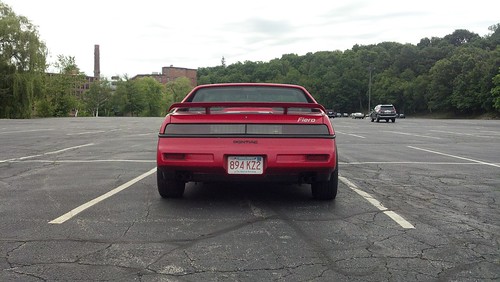
I spent a few days in Colorado last week so I didn't work on the car at all obviously. This week it's been rainy so I decided to try to buff the paint on the Formula. I'll be putting these red panels on my car. The paint really looked good in the seller's photos. Unfortunately, he had wet the car for the pics. Some places were worse than others but I'm happy with the results I'm getting so far. This car will be a good looking 10 foot car until I can paint it.

This shows some of the worst of the paint. There is also some spiderwebbing but I can't do much about that.


Here's the drivers door. Lots of scratches!


This is where I started. You can see the faint horizontal scratches left by the rubbing compound.


This is after using my little buffer with polishing compound.


Here is a "before and after". The quarter was done but the door wasn't.


This is what I've done so far. It got dark so I don't know if it will look as good in the sunlight. I may have to go over it again in the daytime.


Jonathan

[This message has been edited by Boostdreamer (edited 07-12-2012).]

IP: Logged
CrazyDragn
Member
Posts: 1400
From: Kingsport, TN 37663
Registered: Aug 2009


Feedback score:    (15)
Leave feedback

Rate this member

Report this Post07-13-2012 08:22 PM Click Here to See the Profile for CrazyDragnSend a Private Message to CrazyDragnEdit/Delete MessageReply w/QuoteDirect Link to This Post
agaiin very nice

------------------
Notchie to Fast Back Conversion

IP: Logged
CrazyDragn
Member
Posts: 1400
From: Kingsport, TN 37663
Registered: Aug 2009


Feedback score:    (15)
Leave feedback

Rate this member

Report this Post07-13-2012 08:29 PM Click Here to See the Profile for CrazyDragnSend a Private Message to CrazyDragnEdit/Delete MessageReply w/QuoteDirect Link to This Post

CrazyDragn

1400 posts
Member since Aug 2009
 
quote
Originally posted by Boostdreamer:

Here are the nose badges that a member made for me. I'm not sure if he wants me to identify him so we'll just have to wait to see if he jumps in and claims responsibility. Anyway, I think they are extremely cool and I really appreciate all his hard work. They're gonna look great!


Jonathan


I know you know him, I wonder if he woulld do onefor me,,,,,,ask him PLEEEEEEEEAAAASSSSEEE
IP: Logged
Boostdreamer
Member
Posts: 7175
From: Kingsport, Tennessee USA
Registered: Jun 2007


Feedback score:    (24)
Leave feedback


Total ratings: 98
Rate this member

Report this Post07-13-2012 08:46 PM Click Here to See the Profile for BoostdreamerSend a Private Message to BoostdreamerEdit/Delete MessageReply w/QuoteDirect Link to This Post
 
quote
Originally posted by CrazyDragn:


I know you know him, I wonder if he woulld do onefor me,,,,,,ask him PLEEEEEEEEAAAASSSSEEE


Would you want the exact same thing or something different. I don't mind asking for my number one fan! What did you think of the Y-pipe fix?

Jonathan

IP: Logged
CrazyDragn
Member
Posts: 1400
From: Kingsport, TN 37663
Registered: Aug 2009


Feedback score:    (15)
Leave feedback

Rate this member

Report this Post07-17-2012 10:49 PM Click Here to See the Profile for CrazyDragnSend a Private Message to CrazyDragnEdit/Delete MessageReply w/QuoteDirect Link to This Post
 
quote
Originally posted by Boostdreamer:


Would you want the exact same thing or something different. I don't mind asking for my number one fan! What did you think of the Y-pipe fix?

Jonathan


I liked the Y pipe fix - very nice.

I would like to see if he woulld do the same carbon fiber but in back and instead of the pegasus - do a Ferrari Prancing horse.....
no names andno ferrari of fiero names - just no names and ony the prancing horse..........
------------------
Notchie to Fast Back Conversion

[This message has been edited by CrazyDragn (edited 07-17-2012).]

IP: Logged
PFF
System Bot
IMSA GT
Member
Posts: 10263
From: California
Registered: Aug 2007


Feedback score:    (8)
Leave feedback


Total ratings: 252
Rate this member

Report this Post07-18-2012 11:55 PM Click Here to See the Profile for IMSA GTSend a Private Message to IMSA GTEdit/Delete MessageReply w/QuoteDirect Link to This Post
 
quote
Originally posted by Boostdreamer:

Here are the nose badges that a member made for me. I'm not sure if he wants me to identify him so we'll just have to wait to see if he jumps in and claims responsibility. Anyway, I think they are extremely cool and I really appreciate all his hard work. They're gonna look great!


Jonathan


I'm glad you like them and I don't mind letting the cat out of the bag
IP: Logged
IMSA GT
Member
Posts: 10263
From: California
Registered: Aug 2007


Feedback score:    (8)
Leave feedback


Total ratings: 252
Rate this member

Report this Post07-18-2012 11:57 PM Click Here to See the Profile for IMSA GTSend a Private Message to IMSA GTEdit/Delete MessageReply w/QuoteDirect Link to This Post

IMSA GT

10263 posts
Member since Aug 2007
 
quote
Originally posted by CrazyDragn:
I would like to see if he woulld do the same carbon fiber but in back and instead of the pegasus - do a Ferrari Prancing horse.....
no names andno ferrari of fiero names - just no names and ony the prancing horse..........


So you want it in black carbon fiber, no lettering, and only the horse? No outline around the edges or anything? What color do you want the horse to be since it is traditionally black but obviously you won't be able to see a black horse on a black background.

Here is an example of the horse:

[This message has been edited by IMSA GT (edited 07-18-2012).]

IP: Logged
CrazyDragn
Member
Posts: 1400
From: Kingsport, TN 37663
Registered: Aug 2009


Feedback score:    (15)
Leave feedback

Rate this member

Report this Post07-19-2012 05:52 PM Click Here to See the Profile for CrazyDragnSend a Private Message to CrazyDragnEdit/Delete MessageReply w/QuoteDirect Link to This Post
 
quote
Originally posted by IMSA GT:


So you want it in black carbon fiber, no lettering, and only the horse? No outline around the edges or anything? What color do you want the horse to be since it is traditionally black but obviously you won't be able to see a black horse on a black background.


I guess the traditional yellow carbon fiber back ground , black horse, S. F. at bottom, I guess just ike the original style, would that be easier? CauseI really do lie the original look.....

------------------
Notchie to Fast Back Conversion

[This message has been edited by CrazyDragn (edited 07-26-2012).]

IP: Logged
Boostdreamer
Member
Posts: 7175
From: Kingsport, Tennessee USA
Registered: Jun 2007


Feedback score:    (24)
Leave feedback


Total ratings: 98
Rate this member

Report this Post07-27-2012 09:35 PM Click Here to See the Profile for BoostdreamerSend a Private Message to BoostdreamerEdit/Delete MessageReply w/QuoteDirect Link to This Post
Here's an update on what I've been messing with.

First thing is the driver's side axle seal. I had tried it before and ruined my new seal. This one went in without any problem. I was using a 2" PVC coupler and a BFH to drive them in. Looking back, I may have used the wrong end of the coupler the first time. I did not realize that the ID of the two ends of the coupler are different. One end is an almost perfect fit but I still went ahead and dremmeled it out just a hair. I also coated the outside of the seal with black high-temp RTV. So I did several things differently this time. Used Timken seal, used RTV, used a driver that fit flush with the outer edge of the seal. I don't know what the magic ingredient was but that was the receipe!


Second thing I was working on was seeing what I could do about the white oxidation on my red paint. It wouldn't compound out so I used some sandpaper to remove it. Unfortunately, because those areas are so rough, in order to get rid of the white, I had to go deep enough to go past the red.


As you can see, it will still shine up. I don't know much about paint and body work so my question is, should I do the rest of the bad places like I did this spot or should I leave them alone until I'm ready to paint?


Third shot is what happens when you sandblast your engine and you don't get in a hurry about painting it. To be honest, I kinda like it. It may be the separation between the block and the trans or maybe it's the color. I may have talked myself into painting the engine orange.
IP: Logged
CrazyDragn
Member
Posts: 1400
From: Kingsport, TN 37663
Registered: Aug 2009


Feedback score:    (15)
Leave feedback

Rate this member

Report this Post07-28-2012 01:39 PM Click Here to See the Profile for CrazyDragnSend a Private Message to CrazyDragnEdit/Delete MessageReply w/QuoteDirect Link to This Post
I see you have your low mount for your alternator on there - nice.

------------------
Notchie to Fast Back Conversion

IP: Logged
Boostdreamer
Member
Posts: 7175
From: Kingsport, Tennessee USA
Registered: Jun 2007


Feedback score:    (24)
Leave feedback


Total ratings: 98
Rate this member

Report this Post07-28-2012 03:33 PM Click Here to See the Profile for BoostdreamerSend a Private Message to BoostdreamerEdit/Delete MessageReply w/QuoteDirect Link to This Post
 
quote
Originally posted by CrazyDragn:

I see you have your low mount for your alternator on there - nice.


As far as I know, that's the stock location.

Jonathan

IP: Logged
Boostdreamer
Member
Posts: 7175
From: Kingsport, Tennessee USA
Registered: Jun 2007


Feedback score:    (24)
Leave feedback


Total ratings: 98
Rate this member

Report this Post07-28-2012 10:00 PM Click Here to See the Profile for BoostdreamerSend a Private Message to BoostdreamerEdit/Delete MessageReply w/QuoteDirect Link to This Post

Boostdreamer

7175 posts
Member since Jun 2007
Any thoughts on the paint question?

Jonathan
IP: Logged
Boostdreamer
Member
Posts: 7175
From: Kingsport, Tennessee USA
Registered: Jun 2007


Feedback score:    (24)
Leave feedback


Total ratings: 98
Rate this member

Report this Post07-29-2012 05:09 PM Click Here to See the Profile for BoostdreamerSend a Private Message to BoostdreamerEdit/Delete MessageReply w/QuoteDirect Link to This Post
 
quote
Originally posted by Boostdreamer:

Any thoughts on the paint question?

Jonathan


I guess smooth and shiny is better than rough and dull. Either way, it's going to be two-tone until I paint it.

Jonathan

IP: Logged
CrazyDragn
Member
Posts: 1400
From: Kingsport, TN 37663
Registered: Aug 2009


Feedback score:    (15)
Leave feedback

Rate this member

Report this Post07-31-2012 06:20 PM Click Here to See the Profile for CrazyDragnSend a Private Message to CrazyDragnEdit/Delete MessageReply w/QuoteDirect Link to This Post
 
quote
Originally posted by Boostdreamer:


As far as I know, that's the stock location.

Jonathan


OOOhhhhh, thats the 2.8 - - - - - I thought that was the 3.8, my bad

I'd say paint it with a high temp tollerant paint, maybe the color your going to paint your car.

[This message has been edited by CrazyDragn (edited 07-31-2012).]

IP: Logged
Boostdreamer
Member
Posts: 7175
From: Kingsport, Tennessee USA
Registered: Jun 2007


Feedback score:    (24)
Leave feedback


Total ratings: 98
Rate this member

Report this Post08-10-2012 09:28 PM Click Here to See the Profile for BoostdreamerSend a Private Message to BoostdreamerEdit/Delete MessageReply w/QuoteDirect Link to This Post
I finally got around to getting my picture taken in the engine bay. I may have had too much fun with it!


Here's Kilroy (it's really me!)


Muscle Car!


Jonathan
IP: Logged
PFF
System Bot
Boostdreamer
Member
Posts: 7175
From: Kingsport, Tennessee USA
Registered: Jun 2007


Feedback score:    (24)
Leave feedback


Total ratings: 98
Rate this member

Report this Post08-10-2012 09:33 PM Click Here to See the Profile for BoostdreamerSend a Private Message to BoostdreamerEdit/Delete MessageReply w/QuoteDirect Link to This Post
I got a little work done too. I got the empty cradle back in the car and all four wheels back on. Now I can roll it in and out of the garage for cleaning, sandblasting, painting, and parts swapping. I also took the hood and deck lid off. These will be replaced by the red panels from my Formula one of these days. LOL


Jonathan
IP: Logged
CrazyDragn
Member
Posts: 1400
From: Kingsport, TN 37663
Registered: Aug 2009


Feedback score:    (15)
Leave feedback

Rate this member

Report this Post08-11-2012 10:12 PM Click Here to See the Profile for CrazyDragnSend a Private Message to CrazyDragnEdit/Delete MessageReply w/QuoteDirect Link to This Post
Now it's time to take off that rear clip!!

------------------
Notchie to Fast Back Conversion

IP: Logged
Boostdreamer
Member
Posts: 7175
From: Kingsport, Tennessee USA
Registered: Jun 2007


Feedback score:    (24)
Leave feedback


Total ratings: 98
Rate this member

Report this Post08-13-2012 10:24 AM Click Here to See the Profile for BoostdreamerSend a Private Message to BoostdreamerEdit/Delete MessageReply w/QuoteDirect Link to This Post
A Crazy Dragn got into my garage and took my rear clip off! Really! I've got pics to prove it!


Jonathan

[This message has been edited by Boostdreamer (edited 08-13-2012).]

IP: Logged
CrazyDragn
Member
Posts: 1400
From: Kingsport, TN 37663
Registered: Aug 2009


Feedback score:    (15)
Leave feedback

Rate this member

Report this Post08-13-2012 09:45 PM Click Here to See the Profile for CrazyDragnSend a Private Message to CrazyDragnEdit/Delete MessageReply w/QuoteDirect Link to This Post
 
quote
Originally posted by Boostdreamer:

A Crazy Dragn got into my garage and took my rear clip off! Really! I've got pics to prove it!


Jonathan


LOL!!!
IP: Logged
Boostdreamer
Member
Posts: 7175
From: Kingsport, Tennessee USA
Registered: Jun 2007


Feedback score:    (24)
Leave feedback


Total ratings: 98
Rate this member

Report this Post08-14-2012 07:35 PM Click Here to See the Profile for BoostdreamerSend a Private Message to BoostdreamerEdit/Delete MessageReply w/QuoteDirect Link to This Post
Today, I took the mirrors off. That required a little ingenuity since the windows are electric and the car is torn apart. These windows have not been moved in about 15 years but when I jumped current to the motors from my battery, they both went up and down smoothly and quietly. That allowed me to take the passenger side door panel off once the mirror was off. The car didn't come with a driver's side door panel.

I finished taking the ruined rocker panels off. I also had the driver's side front wheel well liner still on the car so it came off too. Now the car is completely naked. I intend to rattle-can the frame but I'm happily surprised at how good it looks now. I've still got to clean it up a bit more but it's coming along.

I've been straightening some of the metal where I've found it bent. Just minor stuff but it might as well be as good as I know how to make it. Another thing I've been doing is filing any sharp edges or corners. I hate those unexpected bites that cars can give you! I'm sure I won't get them all but most of the fangs have been removed.

Back to it!
Jonathan
IP: Logged
Uniquekind
Member
Posts: 51
From: Maynard, MA
Registered: Jul 2005


Feedback score: N/A
Leave feedback

Rate this member

Report this Post08-15-2012 12:34 AM Click Here to See the Profile for UniquekindSend a Private Message to UniquekindEdit/Delete MessageReply w/QuoteDirect Link to This Post
If it's possible could you get a picture of both sides and the front and back of the spaceframe for me? I'm looking for the pic to be taken at squating/kneeling height dead center at a distance (from the sides at least) that fills most of the frame of the picture. I'm working on a photoshop project, and I can't find any good shots of the spaceframe at the height I need... almost all pics are from standing height. I'd appreciate it even more if you could get me hi-ish res ones.

Great work btw, the project looks like it's coming along nicely!

Edit: I'm looking for pics of the spaceframe to match up with and superimpose to these:


[This message has been edited by Uniquekind (edited 08-15-2012).]

IP: Logged
Boostdreamer
Member
Posts: 7175
From: Kingsport, Tennessee USA
Registered: Jun 2007


Feedback score:    (24)
Leave feedback


Total ratings: 98
Rate this member

Report this Post08-15-2012 07:16 AM Click Here to See the Profile for BoostdreamerSend a Private Message to BoostdreamerEdit/Delete MessageReply w/QuoteDirect Link to This Post
I'm not sure if I have enough room but I'll see what I can do.

Jonathan
IP: Logged
Boostdreamer
Member
Posts: 7175
From: Kingsport, Tennessee USA
Registered: Jun 2007


Feedback score:    (24)
Leave feedback


Total ratings: 98
Rate this member

Report this Post08-16-2012 06:25 PM Click Here to See the Profile for BoostdreamerSend a Private Message to BoostdreamerEdit/Delete MessageReply w/QuoteDirect Link to This Post
Uniquekind, here's your shots.


Jonathan
IP: Logged
CrazyDragn
Member
Posts: 1400
From: Kingsport, TN 37663
Registered: Aug 2009


Feedback score:    (15)
Leave feedback

Rate this member

Report this Post08-18-2012 10:17 PM Click Here to See the Profile for CrazyDragnSend a Private Message to CrazyDragnEdit/Delete MessageReply w/QuoteDirect Link to This Post
I never thought naked could be so sexy

[This message has been edited by CrazyDragn (edited 08-18-2012).]

IP: Logged
Boostdreamer
Member
Posts: 7175
From: Kingsport, Tennessee USA
Registered: Jun 2007


Feedback score:    (24)
Leave feedback


Total ratings: 98
Rate this member

Report this Post08-20-2012 01:34 PM Click Here to See the Profile for BoostdreamerSend a Private Message to BoostdreamerEdit/Delete MessageReply w/QuoteDirect Link to This Post
I saw this thread and it made me curious.

//www.fiero.nl/forum/Forum2/HTML/124499.html

I decided to check mine and this is what I found:


But my fins look pretty clean. Luckily just dry loose stuff that I can vacuum.


Jonathan
IP: Logged
PFF
System Bot
Uniquekind
Member
Posts: 51
From: Maynard, MA
Registered: Jul 2005


Feedback score: N/A
Leave feedback

Rate this member

Report this Post08-20-2012 09:54 PM Click Here to See the Profile for UniquekindSend a Private Message to UniquekindEdit/Delete MessageReply w/QuoteDirect Link to This Post
Thanks!
IP: Logged
CrazyDragn
Member
Posts: 1400
From: Kingsport, TN 37663
Registered: Aug 2009


Feedback score:    (15)
Leave feedback

Rate this member

Report this Post08-20-2012 10:07 PM Click Here to See the Profile for CrazyDragnSend a Private Message to CrazyDragnEdit/Delete MessageReply w/QuoteDirect Link to This Post
Oh my, do you remember mine.......Whew, Mine actually caught on fire WHILE I WAS DRIVING!!!! It was a mess. Appearently a mouse had built a nest in mine causing alot of damage, I;m glad thats over!!

------------------
Notchie to Fast Back Conversion

IP: Logged
CrazyDragn
Member
Posts: 1400
From: Kingsport, TN 37663
Registered: Aug 2009


Feedback score:    (15)
Leave feedback

Rate this member

Report this Post08-20-2012 10:11 PM Click Here to See the Profile for CrazyDragnSend a Private Message to CrazyDragnEdit/Delete MessageReply w/QuoteDirect Link to This Post

CrazyDragn

1400 posts
Member since Aug 2009
 
quote
Originally posted by Boostdreamer:

Muscle Car!


Jonathan


I hope that is real muscle and not just sagg, cause that would just be dissappointing, LOL

------------------
Notchie to Fast Back Conversion

[This message has been edited by CrazyDragn (edited 08-20-2012).]

IP: Logged
Boostdreamer
Member
Posts: 7175
From: Kingsport, Tennessee USA
Registered: Jun 2007


Feedback score:    (24)
Leave feedback


Total ratings: 98
Rate this member

Report this Post08-21-2012 10:29 AM Click Here to See the Profile for BoostdreamerSend a Private Message to BoostdreamerEdit/Delete MessageReply w/QuoteDirect Link to This Post
At 44 years old, I have to fight the sag every day! LOL I've been trying to loose about 10 pounds and I've been working out like a madman but the scales isn't very encouraging. I have gotten stronger and slightly more pumped and cut, though. I've been avoiding counting calories but that's prolly what it's going to take. I'm eating small meals about every three hours and doing about a ten minute workout before each. I have found that this works as good as a big cardio workout once a day. Naturally, my cardio fitness is slipping but I was just doing it to shed the weight anyway.

Jonathan
IP: Logged
Boostdreamer
Member
Posts: 7175
From: Kingsport, Tennessee USA
Registered: Jun 2007


Feedback score:    (24)
Leave feedback


Total ratings: 98
Rate this member

Report this Post08-21-2012 10:36 AM Click Here to See the Profile for BoostdreamerSend a Private Message to BoostdreamerEdit/Delete MessageReply w/QuoteDirect Link to This Post

Boostdreamer

7175 posts
Member since Jun 2007
 
quote
Originally posted by CrazyDragn:

Oh my, do you remember mine.......Whew, Mine actually caught on fire WHILE I WAS DRIVING!!!! It was a mess. Appearently a mouse had built a nest in mine causing alot of damage, I;m glad thats over!!


I remember you telling me about it but I didn't get to see any of the damage. I was worried about mice too. Especially since my car has been open without driver's door panels, the carpet, headliner, seats, and jute padding are all gone but there is still a smell in the car. I figured there had to be something in the air ducts. I don't know if that will be the fix. I'm getting pretty detailed with the cleaning anyway. After it is all shiny again, I'll spray some Lysol before I put the padding and carpet back in.

Jonathan
IP: Logged
Boostdreamer
Member
Posts: 7175
From: Kingsport, Tennessee USA
Registered: Jun 2007


Feedback score:    (24)
Leave feedback


Total ratings: 98
Rate this member

Report this Post08-21-2012 11:34 AM Click Here to See the Profile for BoostdreamerSend a Private Message to BoostdreamerEdit/Delete MessageReply w/QuoteDirect Link to This Post

Boostdreamer

7175 posts
Member since Jun 2007
Here's my evaporator's compartment all cleaned up. This is the standard I'm shooting for on my entire car.


Jonathan
IP: Logged
Boostdreamer
Member
Posts: 7175
From: Kingsport, Tennessee USA
Registered: Jun 2007


Feedback score:    (24)
Leave feedback


Total ratings: 98
Rate this member

Report this Post08-28-2012 07:35 PM Click Here to See the Profile for BoostdreamerSend a Private Message to BoostdreamerEdit/Delete MessageReply w/QuoteDirect Link to This Post
I started painting part of the cowl and botched it. I had to sand it off and start over. That made me want to practice. I knew I was going to need primer since I went down to bare metal. I realized that I had Rustoleum spray paint and Duplicolor primer. After reading both labels, I learned that they should not be used together. I researched the situation on-line and confirmed it. I also read that Rustoleum is softer than Duplicolor. I don't want soft. I also had trouble with Rustoleum spray paint once. It was prolly my fault but it all had to be sanded off. That particular project was a road bicycle frame. I decided that I should practice and finally re-paint that bike frame.

I sprayed two light coats of primer by starting with hitting the tight corners, nooks and crannies, and small details. Then I filled in the flat spots between them. After two coats, I wet sanded, shot another coat, and wet sanded again.


Then I sprayed the Duplicolor gloss black. I did two light coats, color sanded, then two glossy coats. I'm pretty happy with the way it turned out. There are a few small places that will need sanding then I'll have to polish the whole thing.


I also learned that this paint requires seven days to cure! That means I need to get busy painting all the stuff that I've sandblasted. That stuff will need cure time before I re-assemble it.

Jonathan
IP: Logged
CrazyDragn
Member
Posts: 1400
From: Kingsport, TN 37663
Registered: Aug 2009


Feedback score:    (15)
Leave feedback

Rate this member

Report this Post09-03-2012 02:46 PM Click Here to See the Profile for CrazyDragnSend a Private Message to CrazyDragnEdit/Delete MessageReply w/QuoteDirect Link to This Post
sheuw, I thought there for a second you were going to reframe your intire car with that - whaat a relief - LOL

------------------
Notchie to Fast Back Conversion

IP: Logged
CrazyDragn
Member
Posts: 1400
From: Kingsport, TN 37663
Registered: Aug 2009


Feedback score:    (15)
Leave feedback

Rate this member

Report this Post09-23-2012 09:06 PM Click Here to See the Profile for CrazyDragnSend a Private Message to CrazyDragnEdit/Delete MessageReply w/QuoteDirect Link to This Post
updates updates!!!

------------------
Notchie to Fast Back Conversion

IP: Logged
Previous Page | Next Page

This topic is 6 pages long:  1   2   3   4   5   6 
next newest topic | next oldest topic

All times are ET (US)

Post New Topic  Post A Reply
Hop to:

Contact Us | Back To Main Page

Advertizing on PFF | Fiero Parts Vendors
PFF Merchandise | Fiero Gallery | Ogre's Cave
Real-Time Chat | Fiero Related Auctions on eBay


Copyright (c) 1999, C. Pennock