I enjoy reading build threads from other people so I thought I'd start my own. At the very least it will be fun for myself to keep a build diary.
The car in question is an '87 GT that I've actually had for almost 9 years now. It was in quite a bad condition already back when I bought it.. The engine gave up the first year I had it and it turned out to be much easier and cheaper to get a 3.4L Camaro engine compared to finding a Fiero engine here in Sweden, so I swapped in an engine from a '95 Camaro. The car was my daily driver for about 2 years, but due to needing a bigger car and the lack of a garage, the Fiero was left sitting outside and unloved under a tarp for all this time.
Now that I've moved back out to the country side I finally have a garage again and it's time to freshen up the old Fiero, starting with the interior. I've already done some work on it during the past couple of months so the first post is more of a recap of what was done.
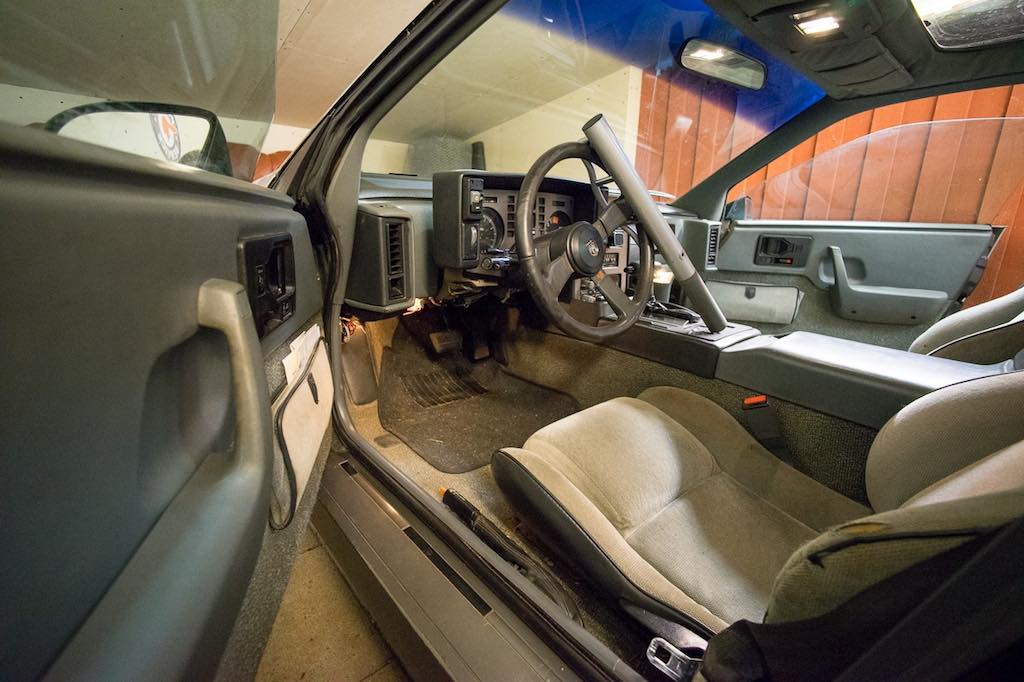
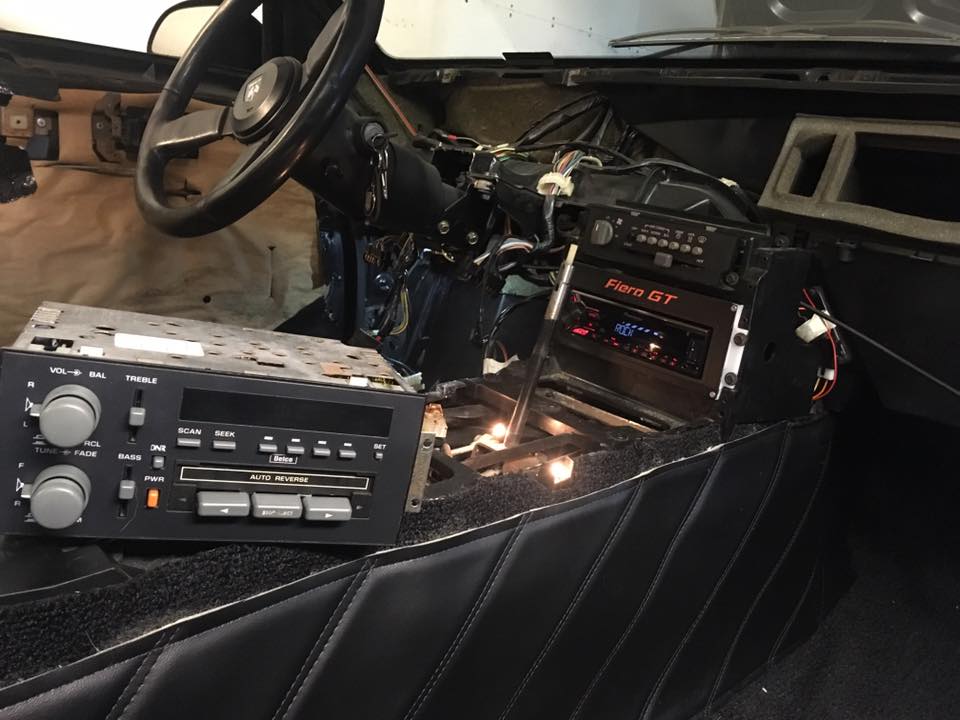
So this is what I started with:
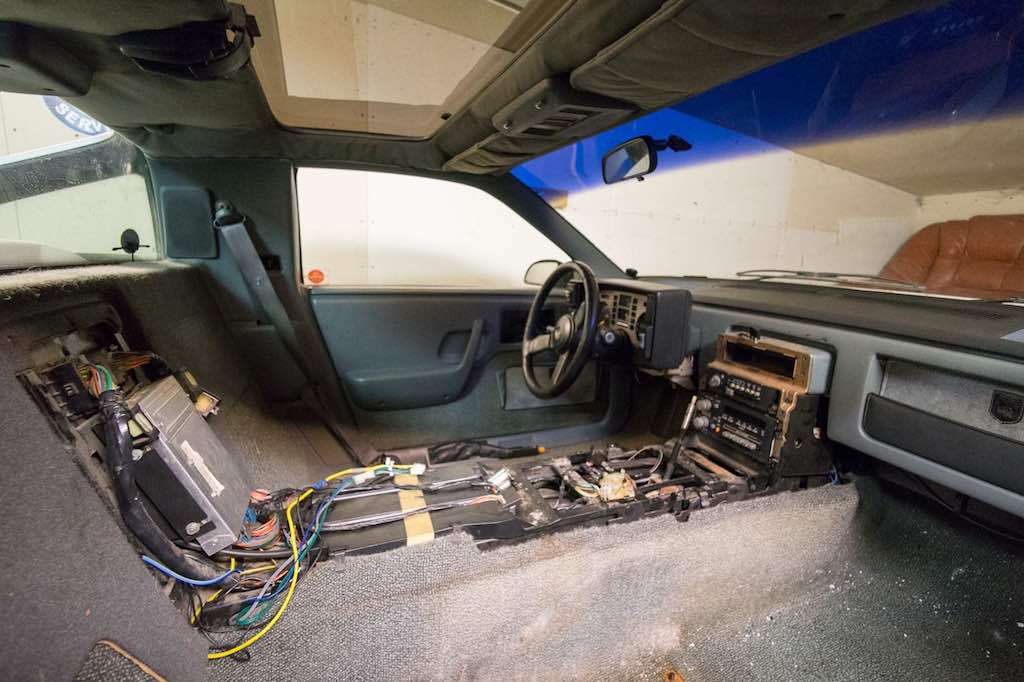
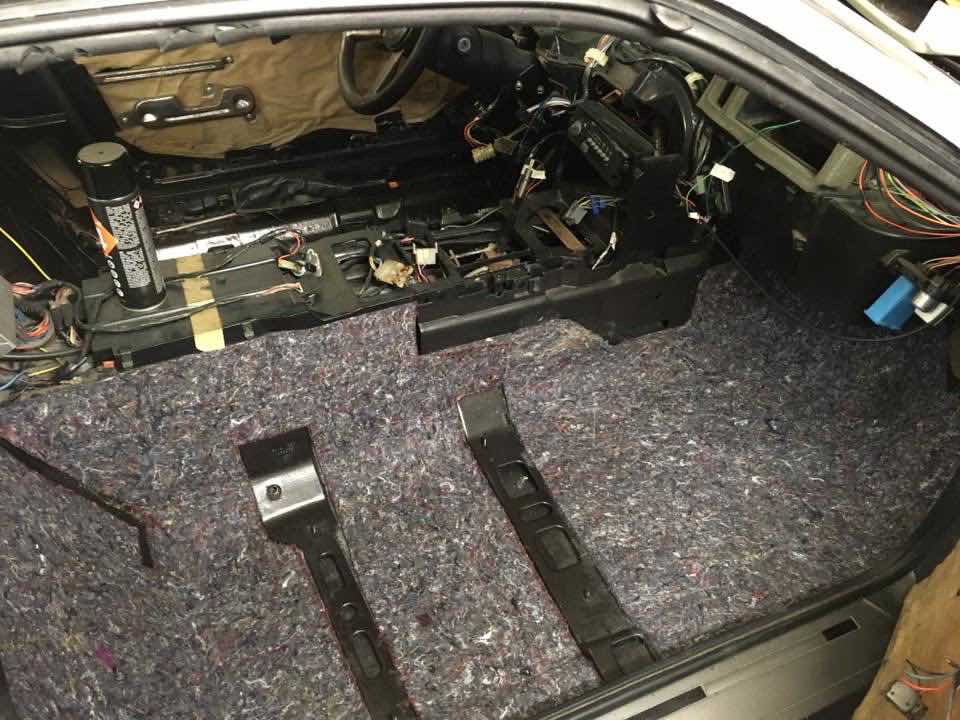
Stripping everything out.
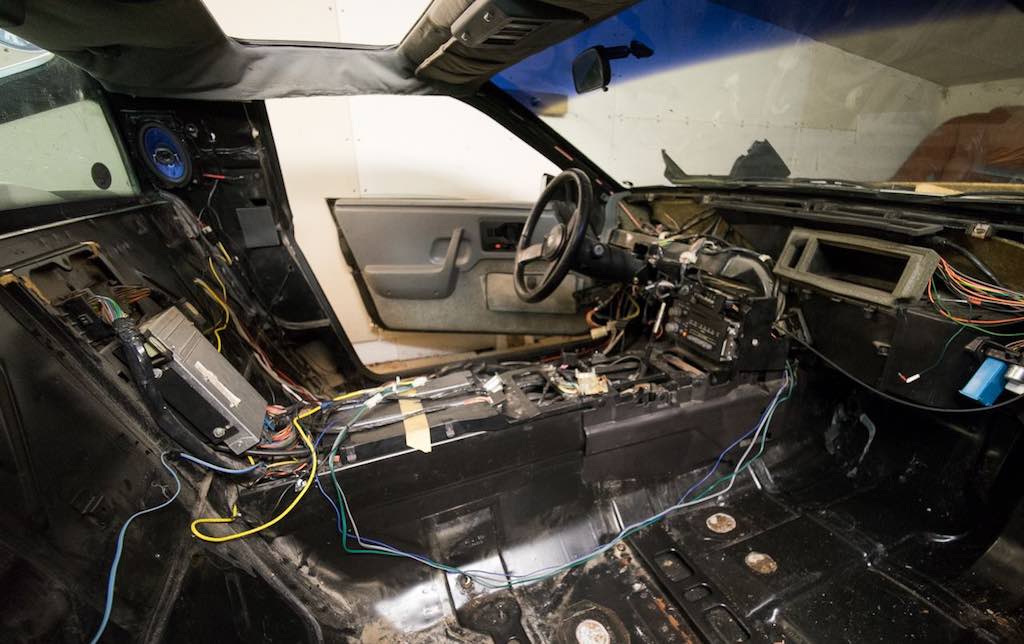
Too many cables! Got rid of old non working car alarm and the old aftermarket subwoofer. Floorpan was cleaned up and new sound deadener material was put in. The old stuff turned out to be the source of the cars "interesting" smell, glad to get rid of that!
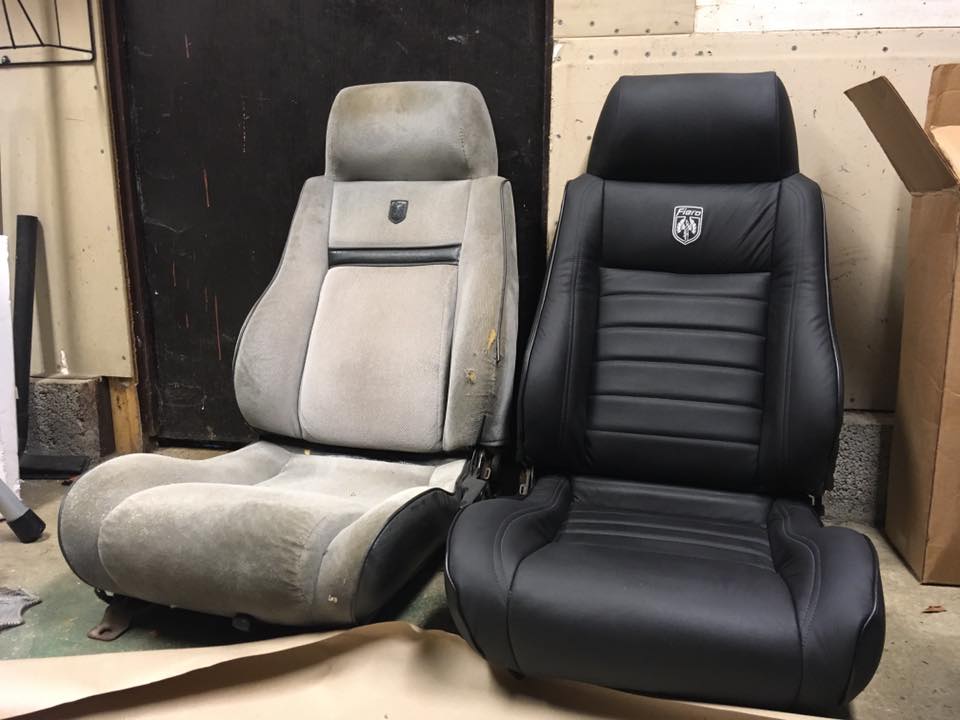
Mr.Mikes upholstery kit on the chairs:
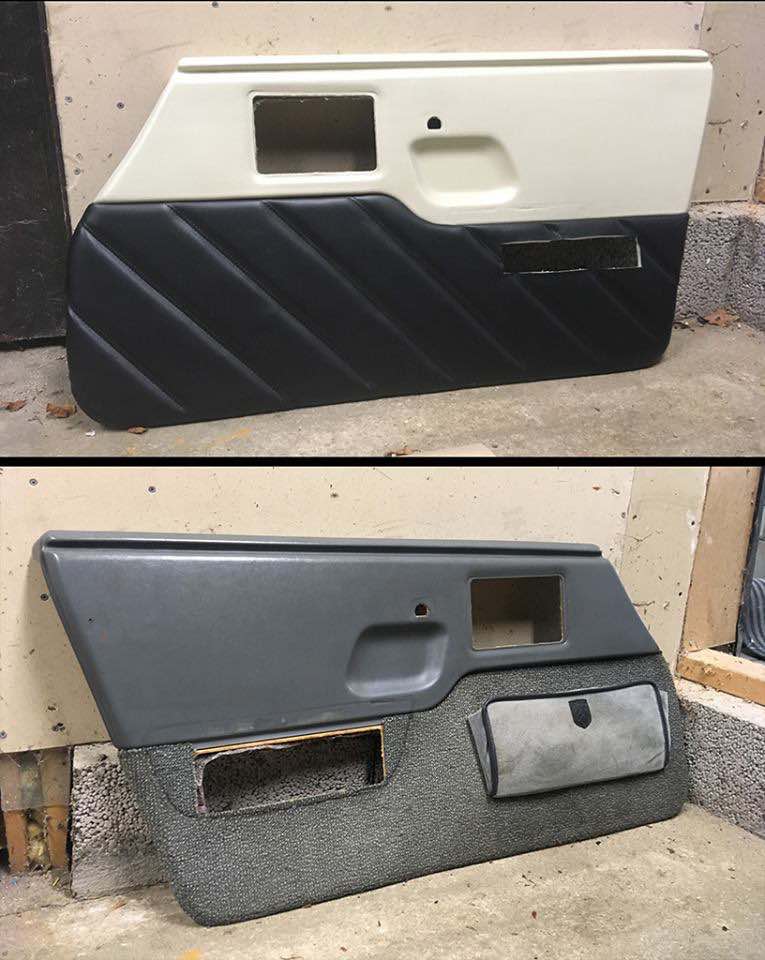
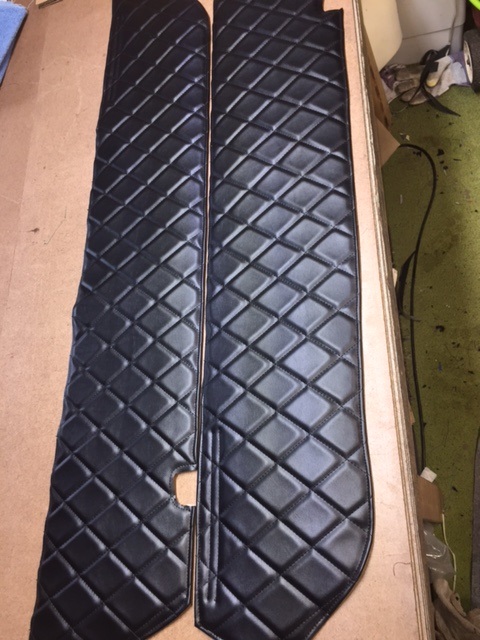
Door sides. Lower door panels from Russ, fits great and looks great!
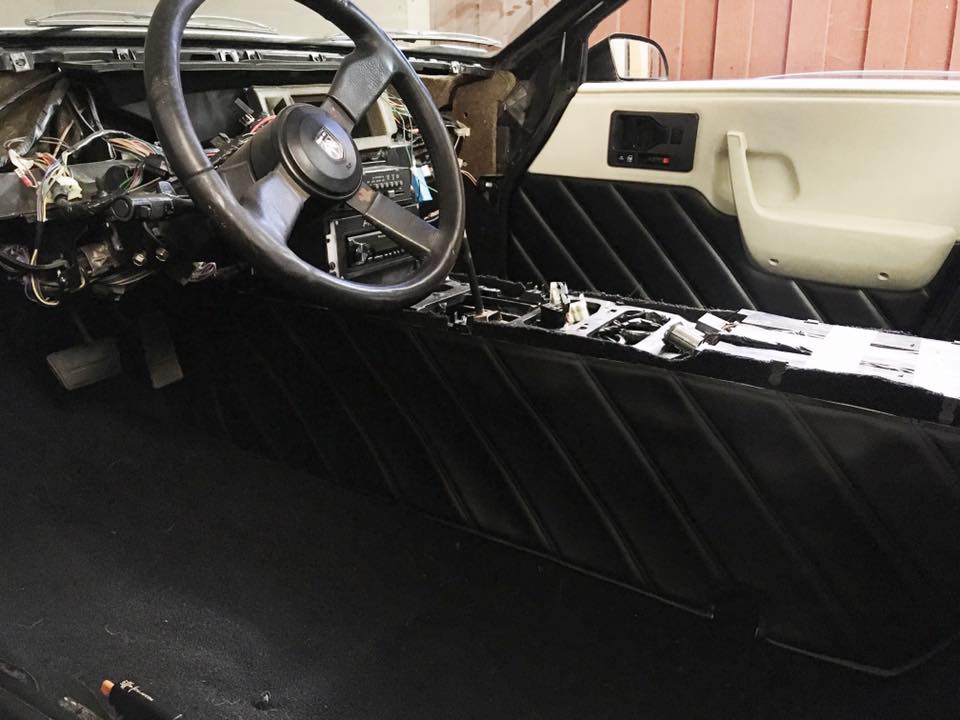
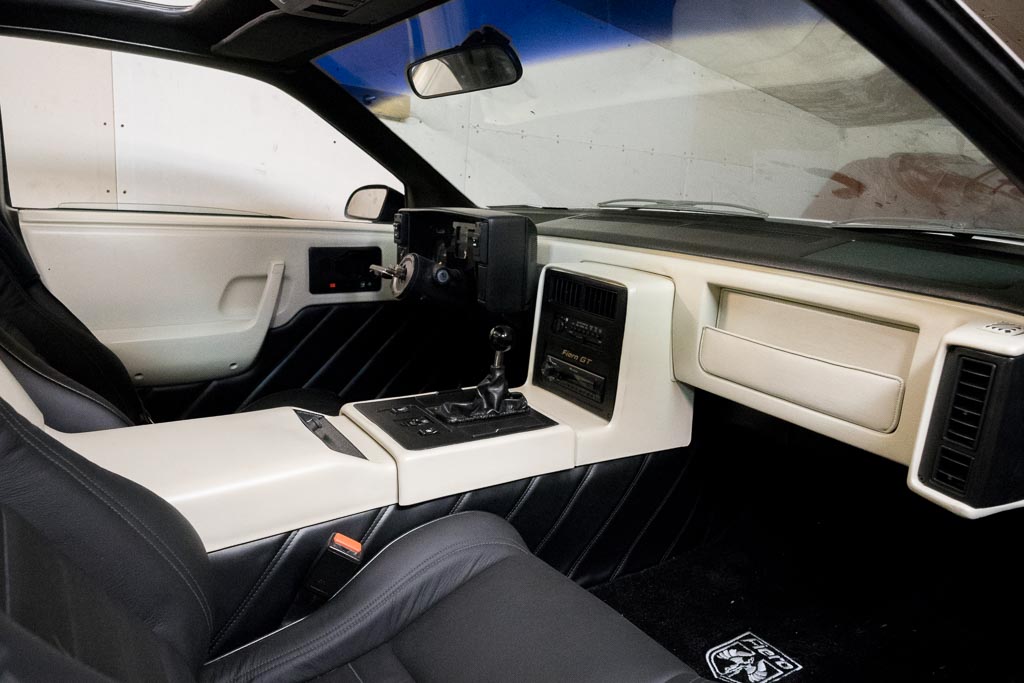
Installed black carpet from a roll. Also visible is the awesome console cover from Russ.
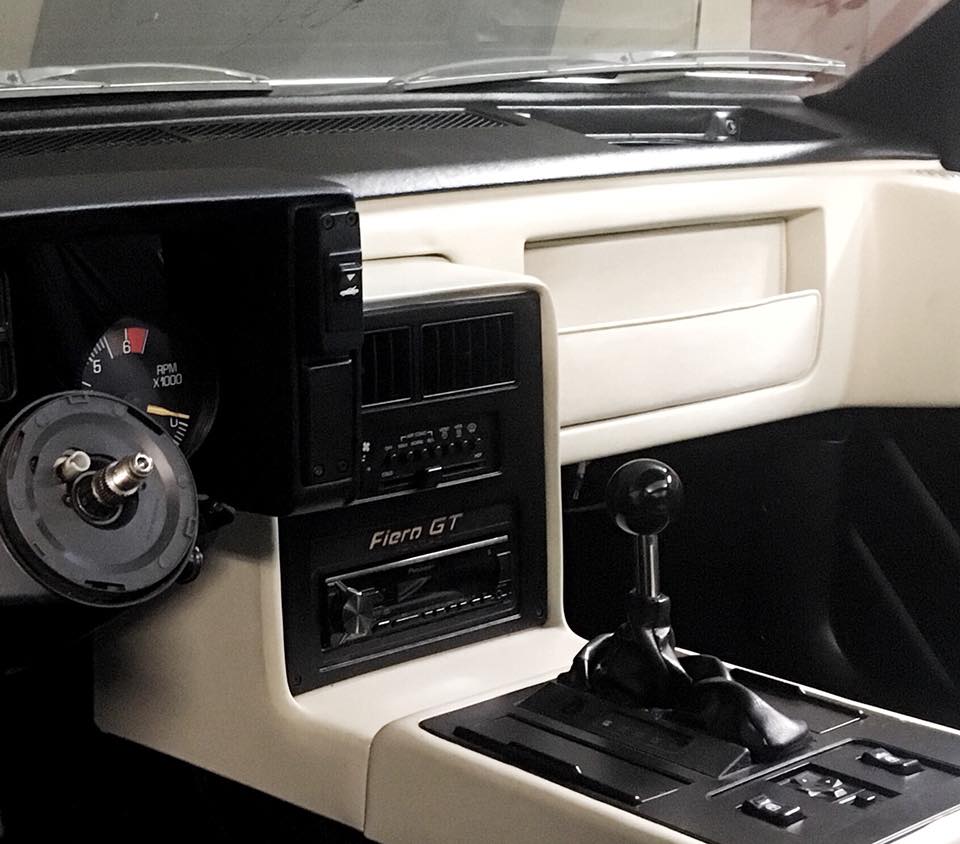
Time for that old radio to retire
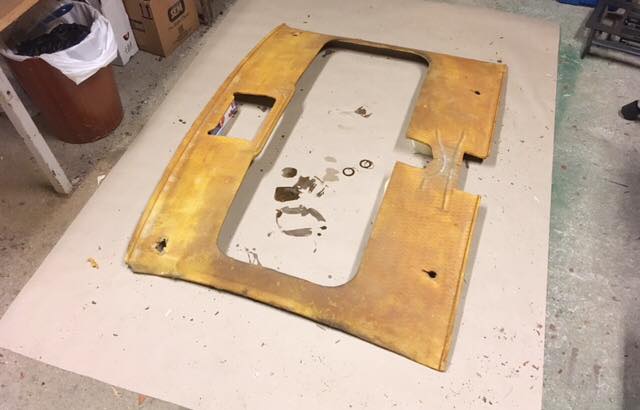
Many things were broken and had to be fixed; weatherstrips, new dew wipes, power locks needed fixing, cracks in dash corners, warped console items, sagging headliner and so on. Luckily it turned out I was far from alone with these issues so finding information on how to fix them was quite easy (this forum is fantastic!)
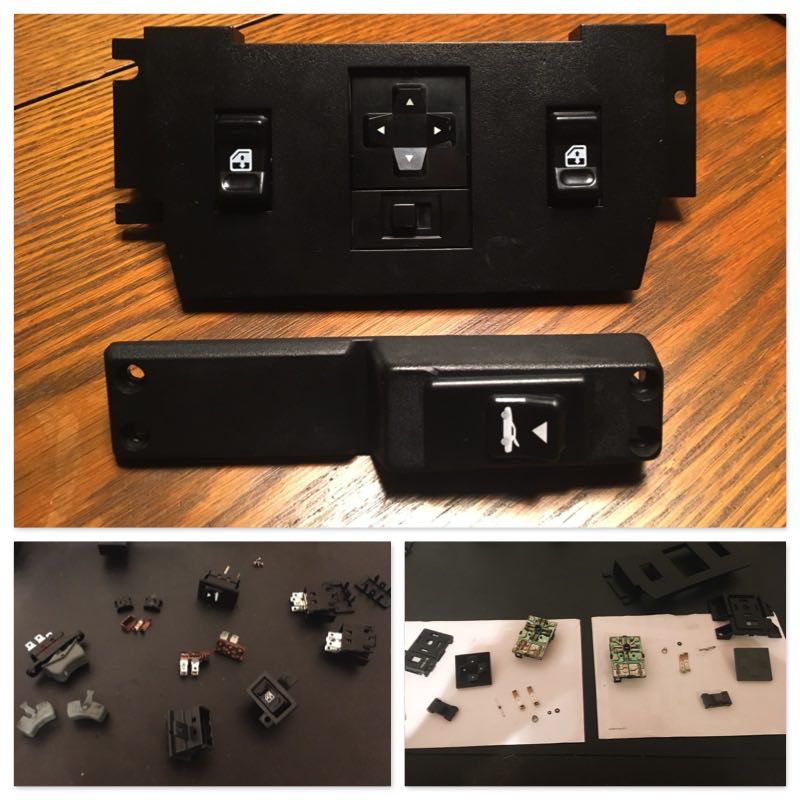
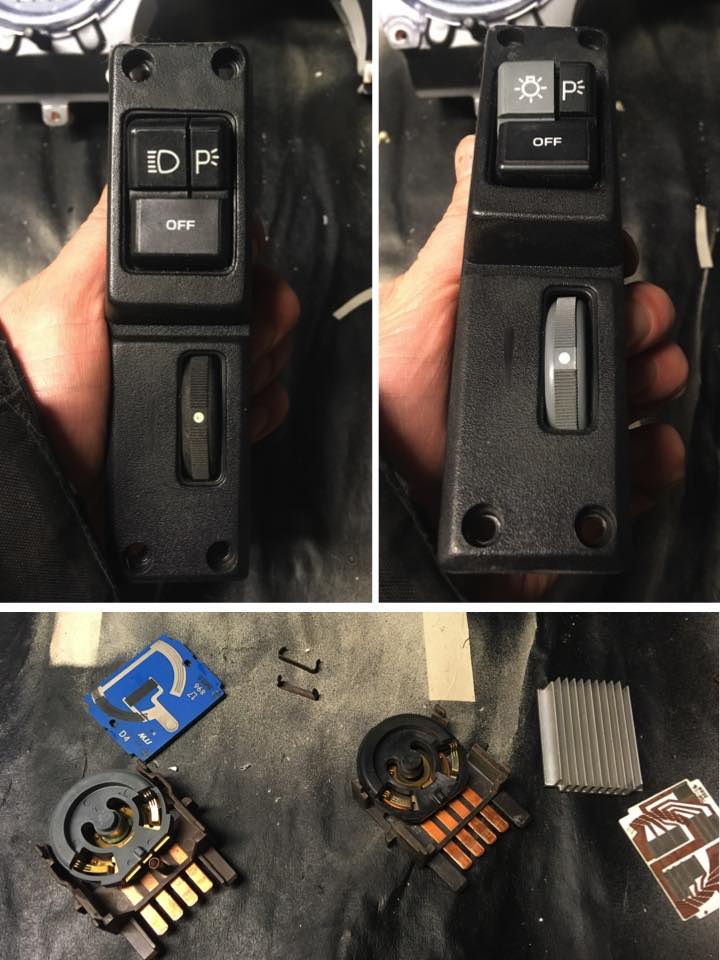
As I was going for a black/creme color scheme I needed to replace the stock grey buttons. Black buttons from a Camaro and Trans AM worked fine. Replaced AC controller with one from an '84 Fiero.
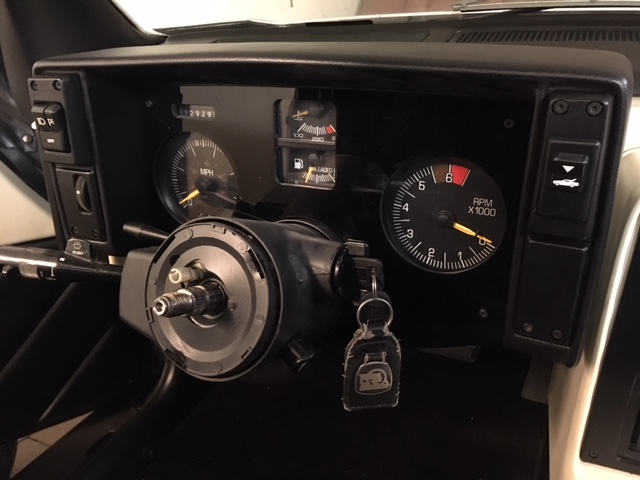
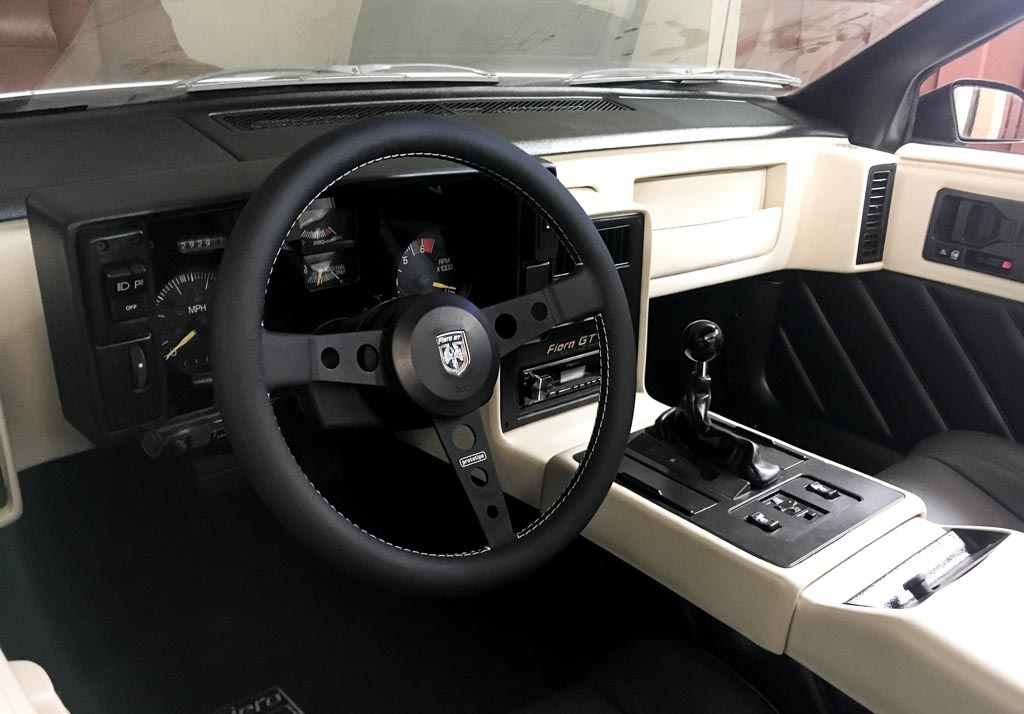
This is the result so far. I am quite pleased with it. There are still some minor things to do inside, mainly a new steering wheel and replacing the ignition lock.
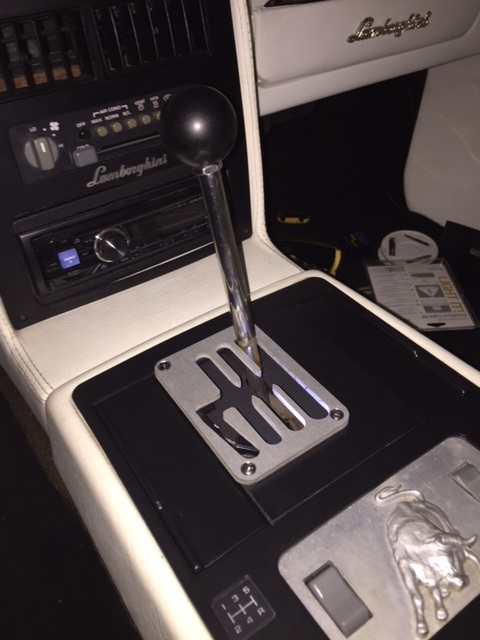
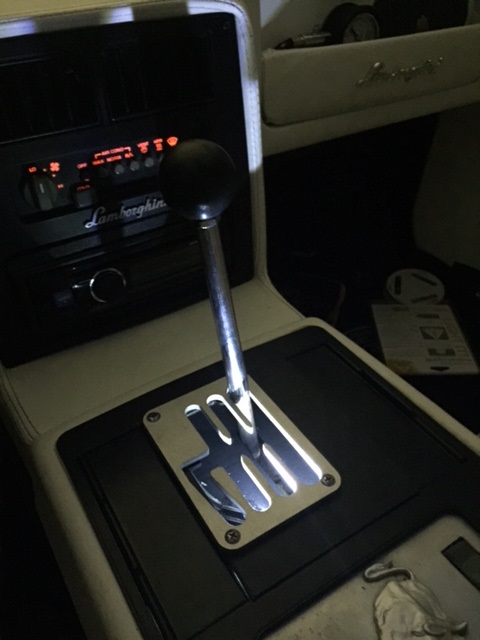
The lexan trim panel from Tom works wonders on the instrument cluster! I do have the other pieces as well but haven't yet decided if I will use them or not. I also really like the replacement manual-look shifter from Rodney.
The plan is to start working on the exterior once I am completely done with the interior. I have a feeling that will be a larger task than the interior..
Do you have a source for the Camaro/Trans Am black window switches? I have found them on Ebay but they are pricey considering I only need the caps and will be discarding the actual switches.
Thanks, -Van
edit: oops I see you are in Sweden. My bad
[This message has been edited by VanGTP5000 (edited 01-13-2018).]
Van, I seriously doubt you have anything to complain about as far as cost of parts compared to our Swedish compatriot.....
That color scheme really looks good, by the way! Although, what happened to the fuzzy soft "Seat covering" in the second picture? Seems to have disappeared in the later pics......
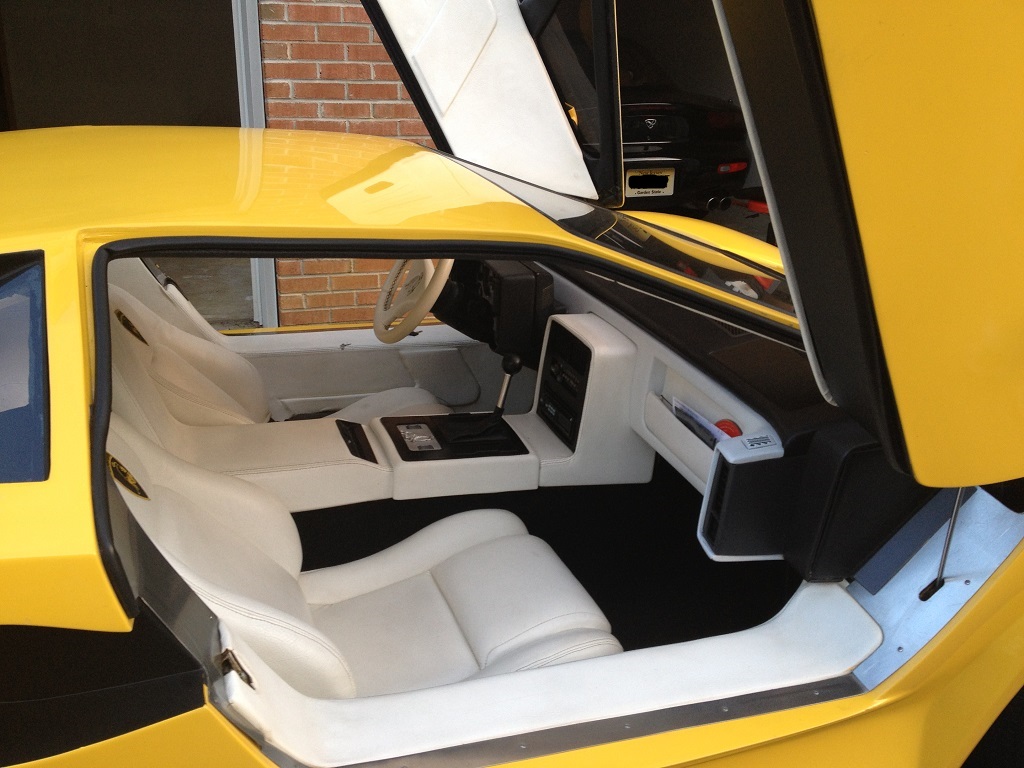
Van, I love your interior!! Well, actually, the whole car is mighty impressive Those white seats really fit well with the rest of it. That gated shifter sure looks nice. Got me thinking about the feasibility of making something similar but with just the one "lane" and keeping an auto gear indicator (but not necessarily the stock one).
Hehe yeah Fiero parts aren't really that common over here. Shipping and import tax really hurts when ordering parts, but hey, what can you do
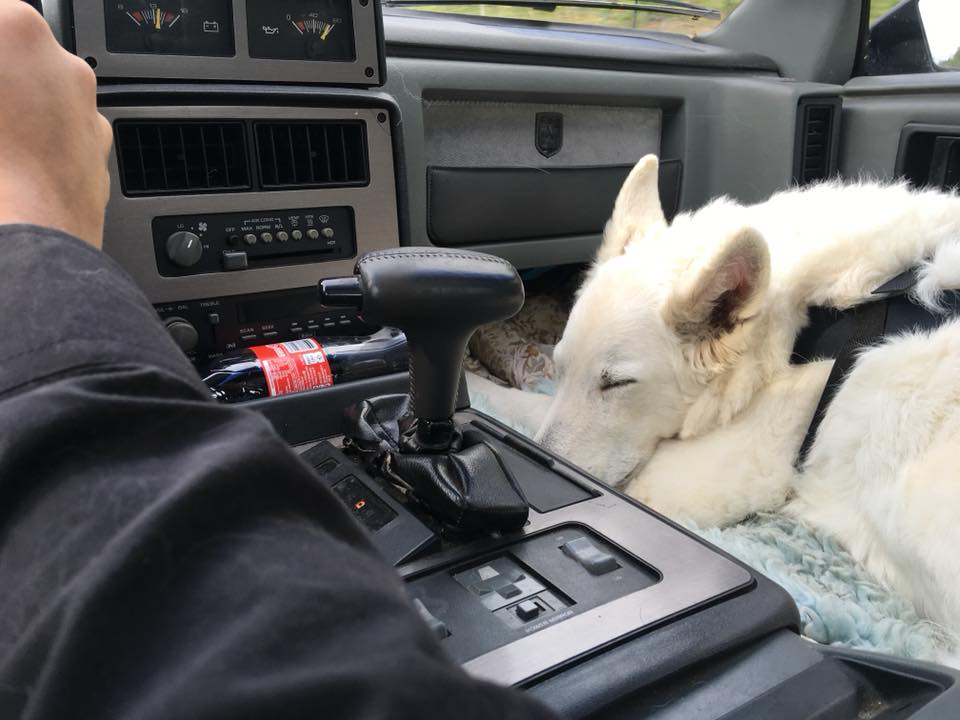
That fluffy seat coverer used to always go with me in this car back when she was young and I was driving this car regularly. The passenger side was all flattened out so she could either sit or lay down making the car effectively a 1 seater + dog bed car But, I figure the Fiero is going to be a dog-free zone from now on so I let her come with on the last drive before starting to pull the interior out. In all fairness, they are much more comfortable in the back of the big Volvo anyways.
quote
Originally posted by cvxjet:
Van, I seriously doubt you have anything to complain about as far as cost of parts compared to our Swedish compatriot.....
That color scheme really looks good, by the way! Although, what happened to the fuzzy soft "Seat covering" in the second picture? Seems to have disappeared in the later pics......
[This message has been edited by agranlund (edited 01-14-2018).]
Van, I love your interior!! Well, actually, the whole car is mighty impressive Those white seats really fit well with the rest of it. That gated shifter sure looks nice. Got me thinking about the feasibility of making something similar but with just the one "lane" and keeping an auto gear indicator (but not necessarily the stock one).
Thank you very much Anders. That is a big compliment coming from you because I love your interior!!! The white seats are a labor of love for sure. I do not recommend them for the faint of heart lol.
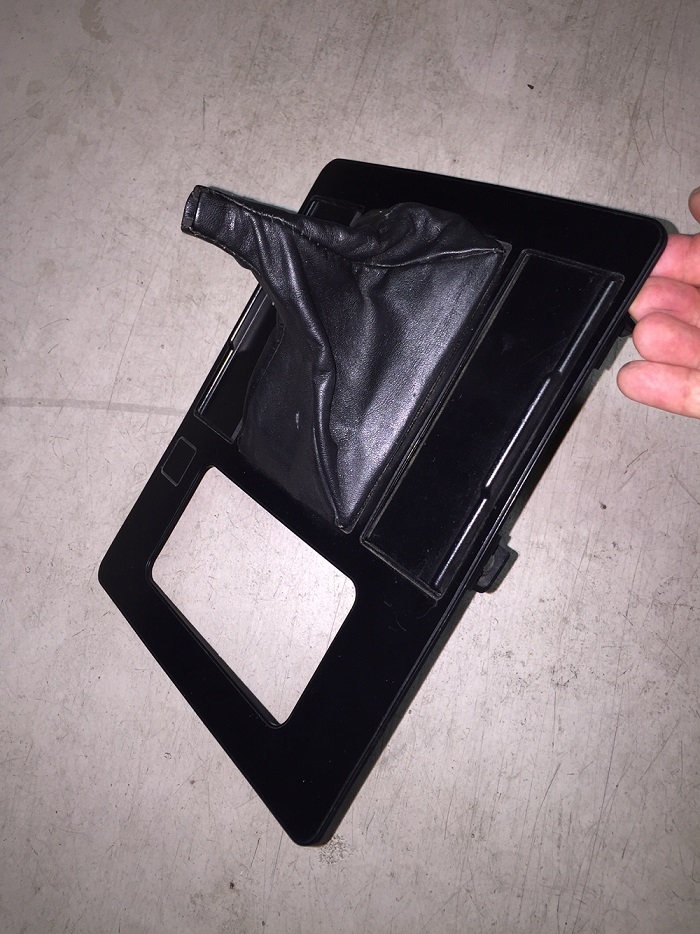
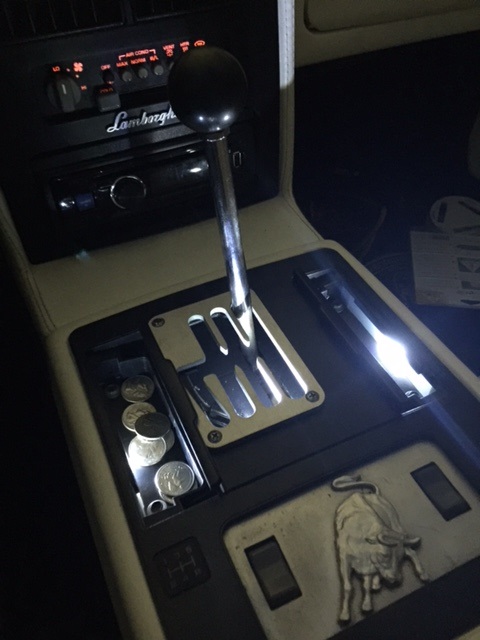
If you look carefully, my gated shifter is only one "lane".
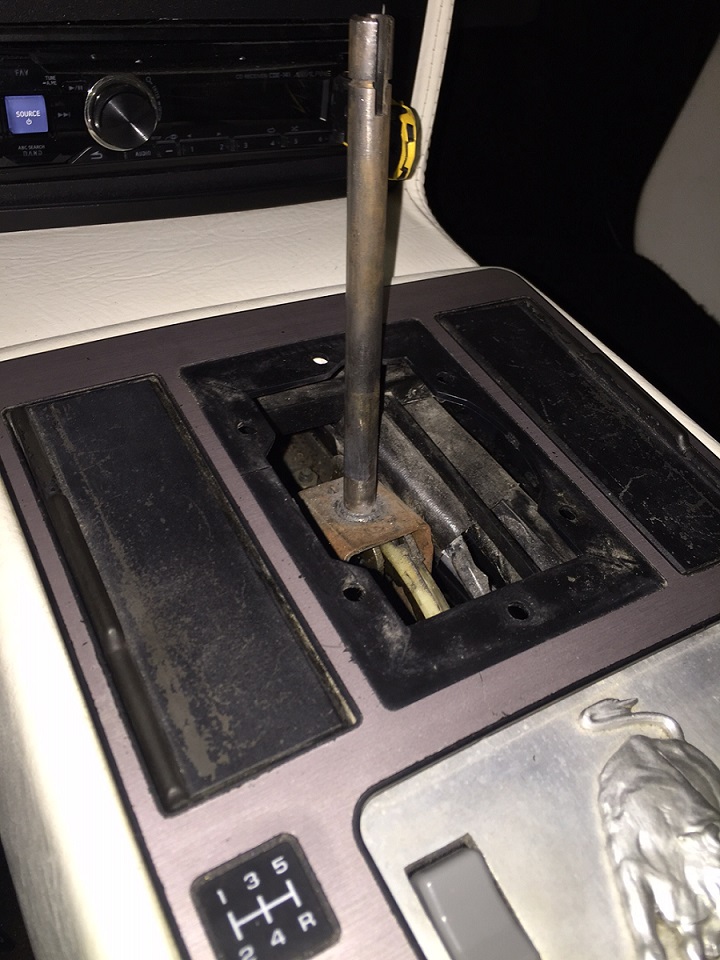
I had originally seen something like this:
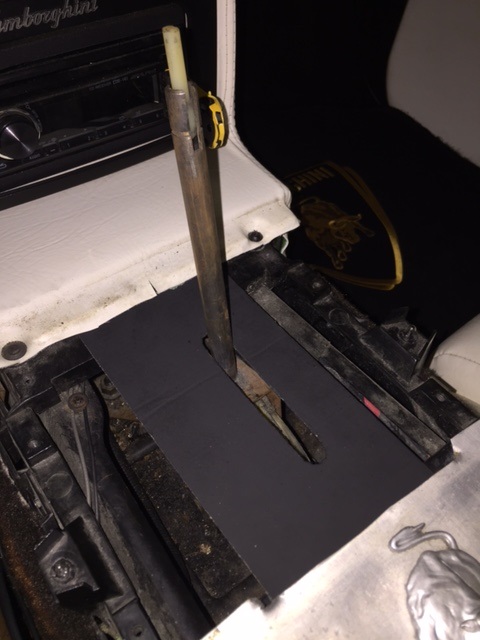
But wanted more of a simulated look. I knew that if I went with an open gate design, I would have a "black hole" for loose change and anything else to fall into the shifter mechanism.
My solution was to install a "catch plate" below the gated shifter plate:
Not exactly the most elegant design but it does the trick.
I also removed the ashtrays and molded in spare change compartments with LEDs that work in place of an interior dome light because my roof is so low. Just open one or both ashtrays and plenty of light is provided.
Do you have a source for the Camaro/Trans Am black window switches? I have found them on Ebay but they are pricey considering I only need the caps and will be discarding the actual switches.
Thanks, -Van
edit: oops I see you are in Sweden. My bad
Stumbled onto this last night and pulled the trigger!
My old ignition lock was missing the black plastic trim piece, and I only had a single key for it, so I spent a good hour replacing it with a new lock from the Fiero Store. Most of the time was spent fighting with the lock plate snap ring.. Except for that it was a fairly straight forward procedure. This video really helped to explain all the necessary steps: https://www.youtube.com/watch?v=aF9JBl6-2ZE
Can't wait for the new steering wheel to arrive hopefully sometime next week!
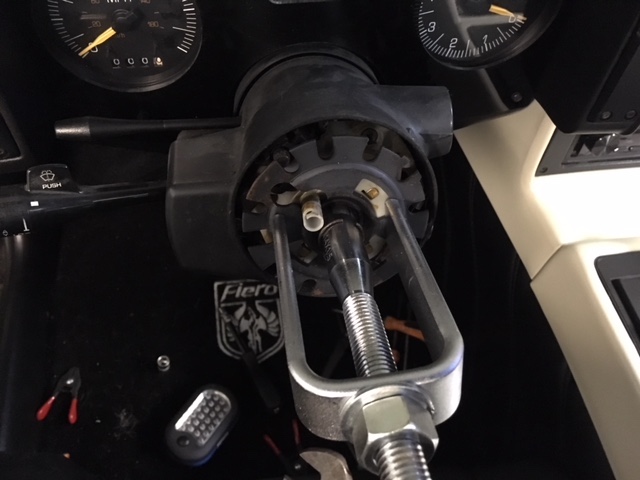
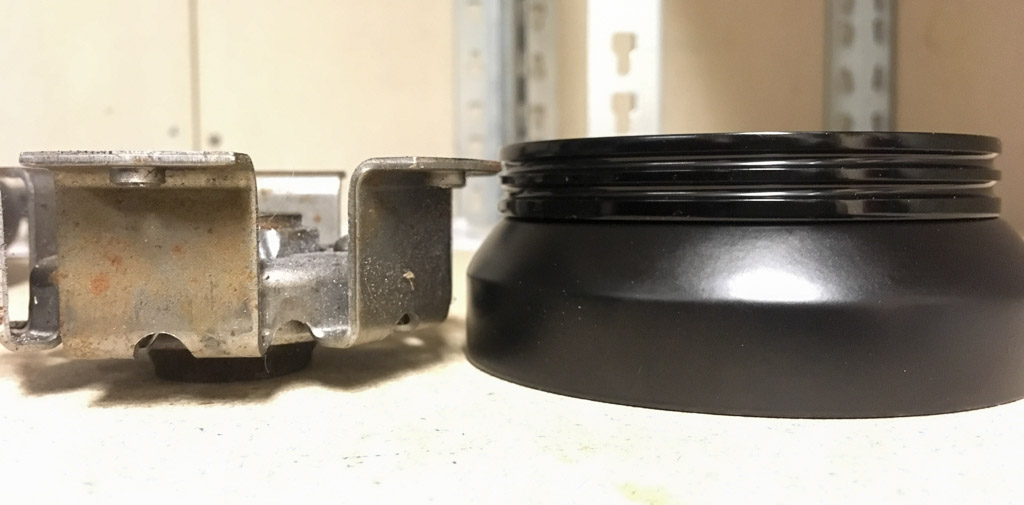
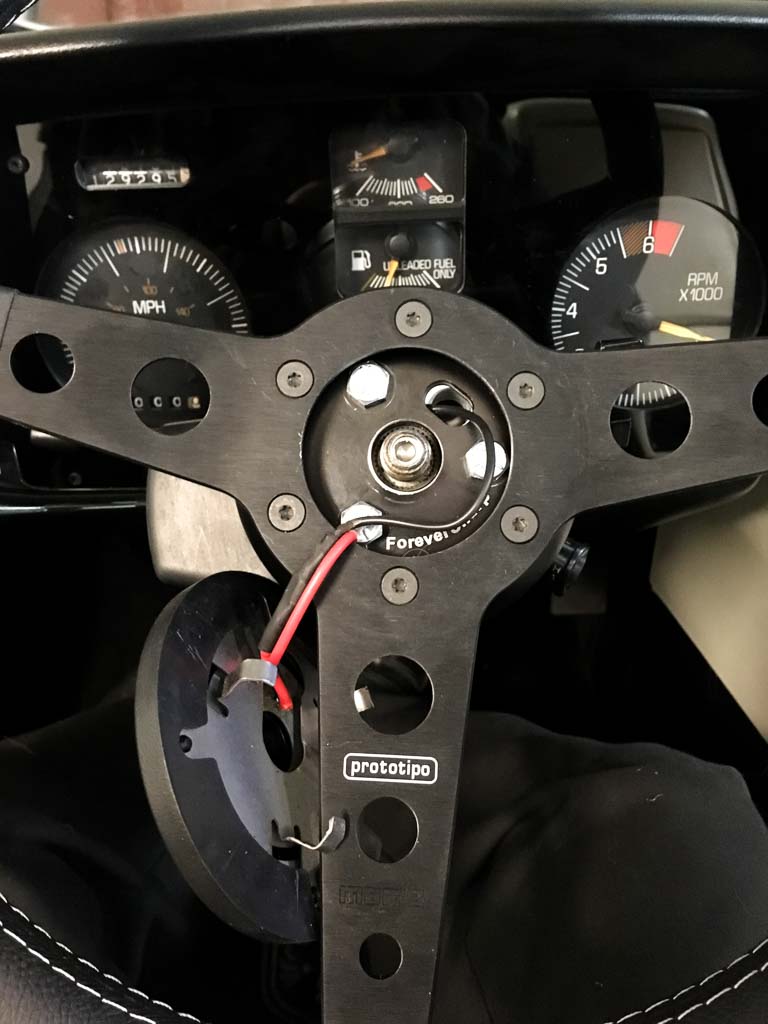
Finally got a new steering wheel installed. It's a Momo Prototipo, and I'm using the original Fiero horn button. I was planning on using an aftermarket horn button with the Pontiac logo but I like how the original looks on the wheel so I will keep it like this:
The adapter is from Forever Sharp and with the shortest spacer it sits at about the same distance as the original wheel:
It was a bit of a pain to hook up the Fiero horn button though.. Had to solder wires to the button since the usual horn pin did not work with the spacer. Perhaps the horn pin could work with a different spacer, the one I bought was a 2-in-1 type and the horn pin should work if using the pattern that was not for my steering wheel.
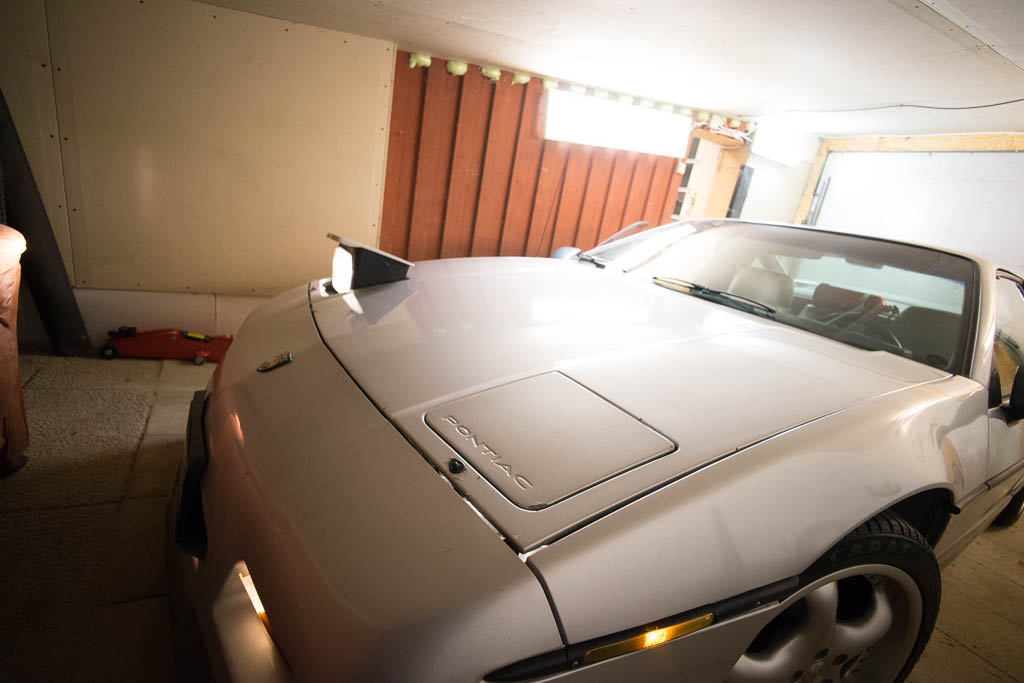
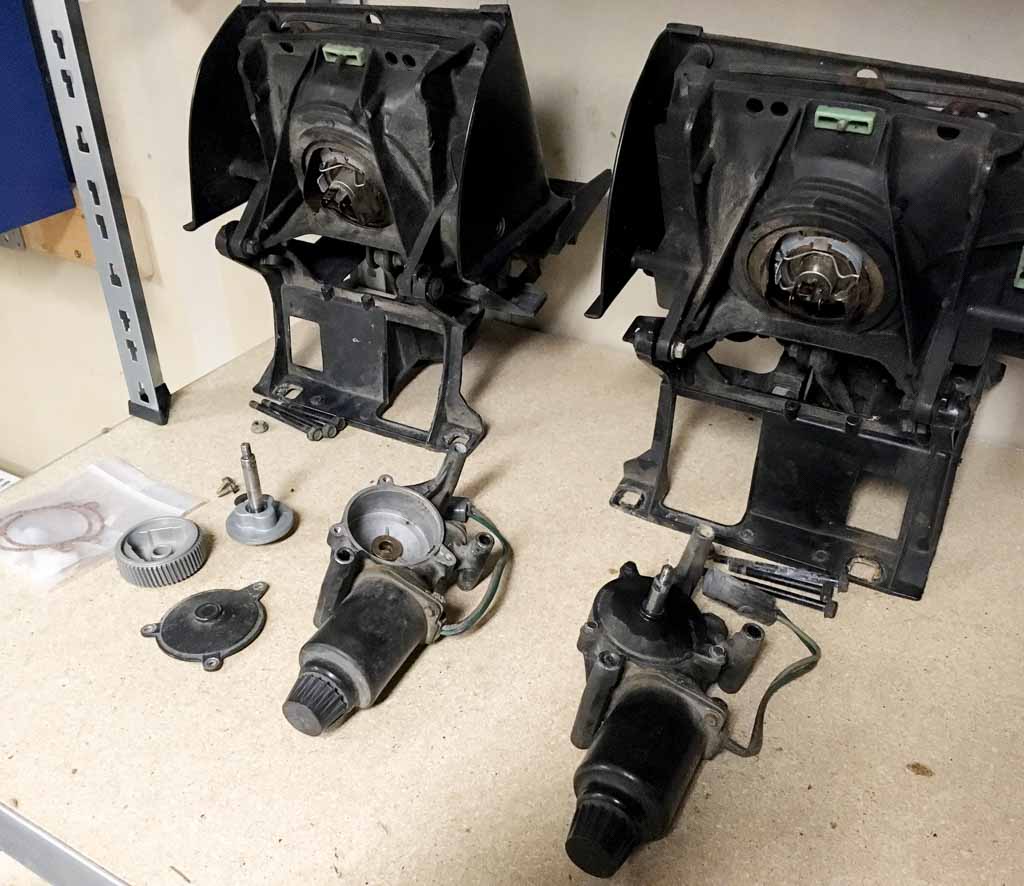
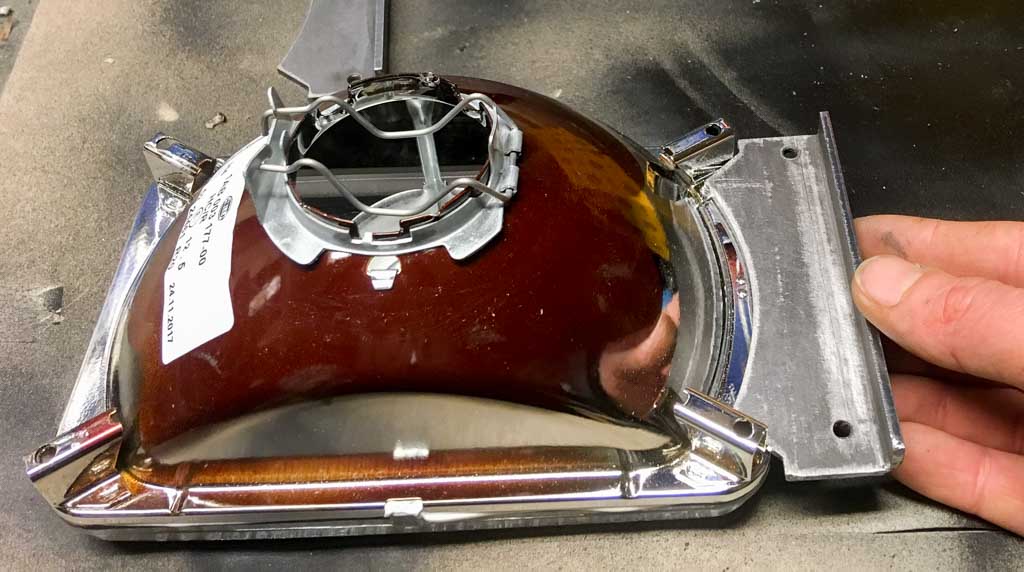
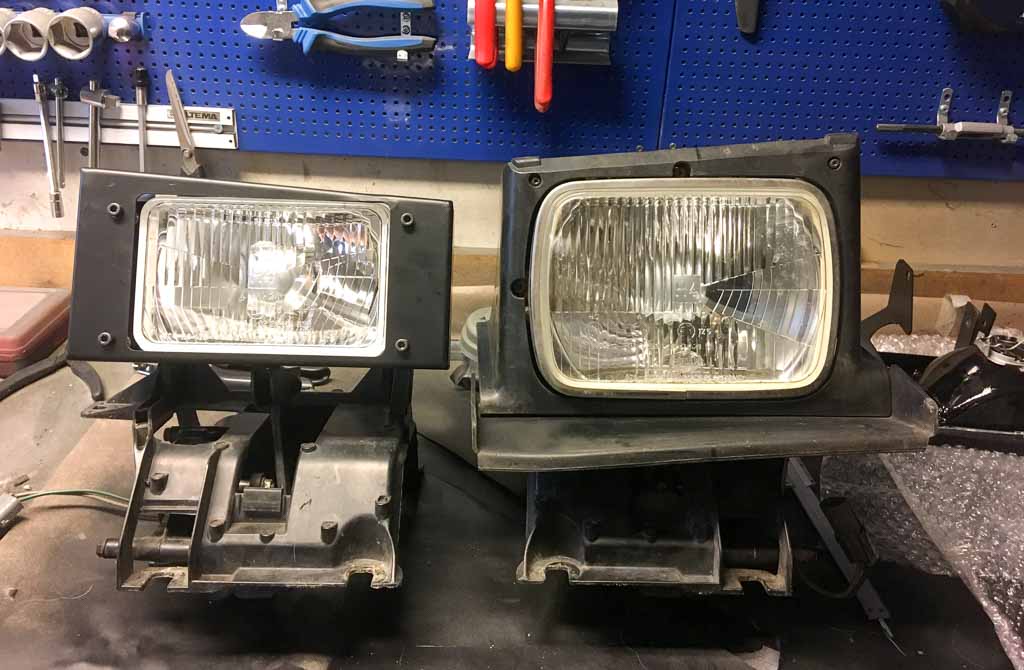
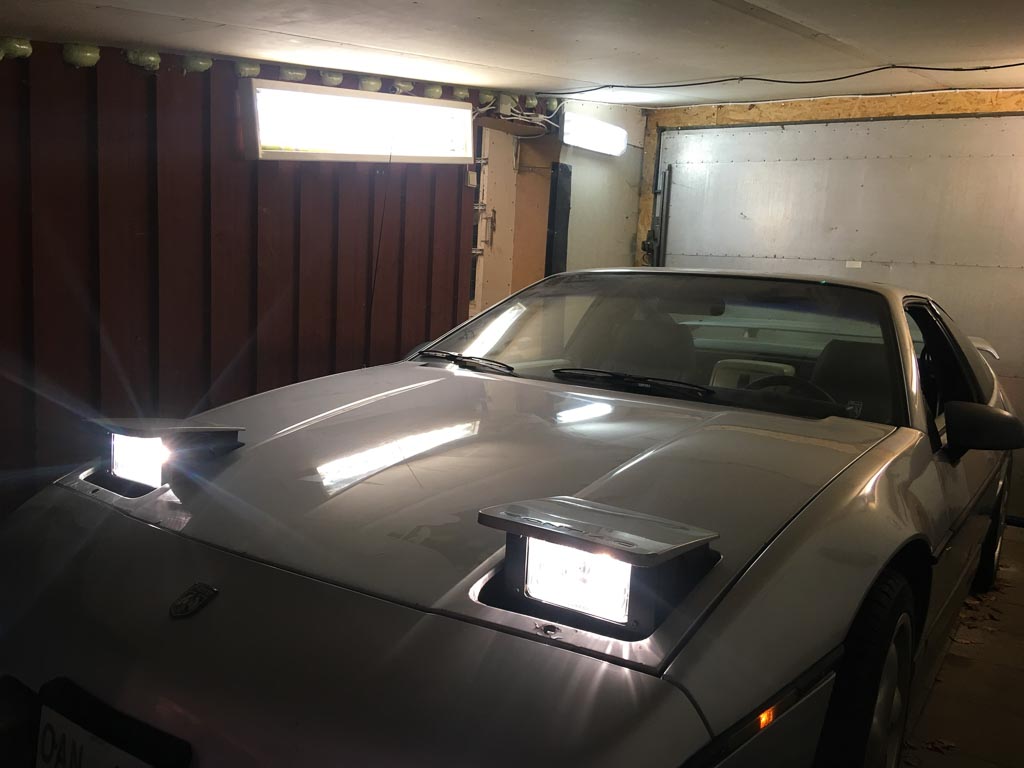
Finally got around to fixing the headlights, and installing low profile buckets!
Sad one-eyed before picture:
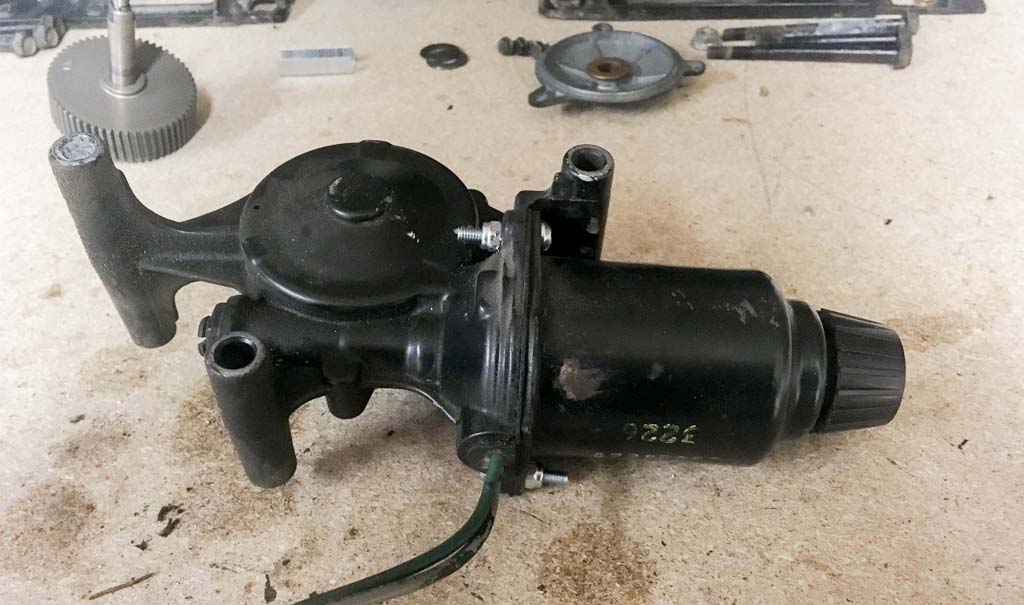
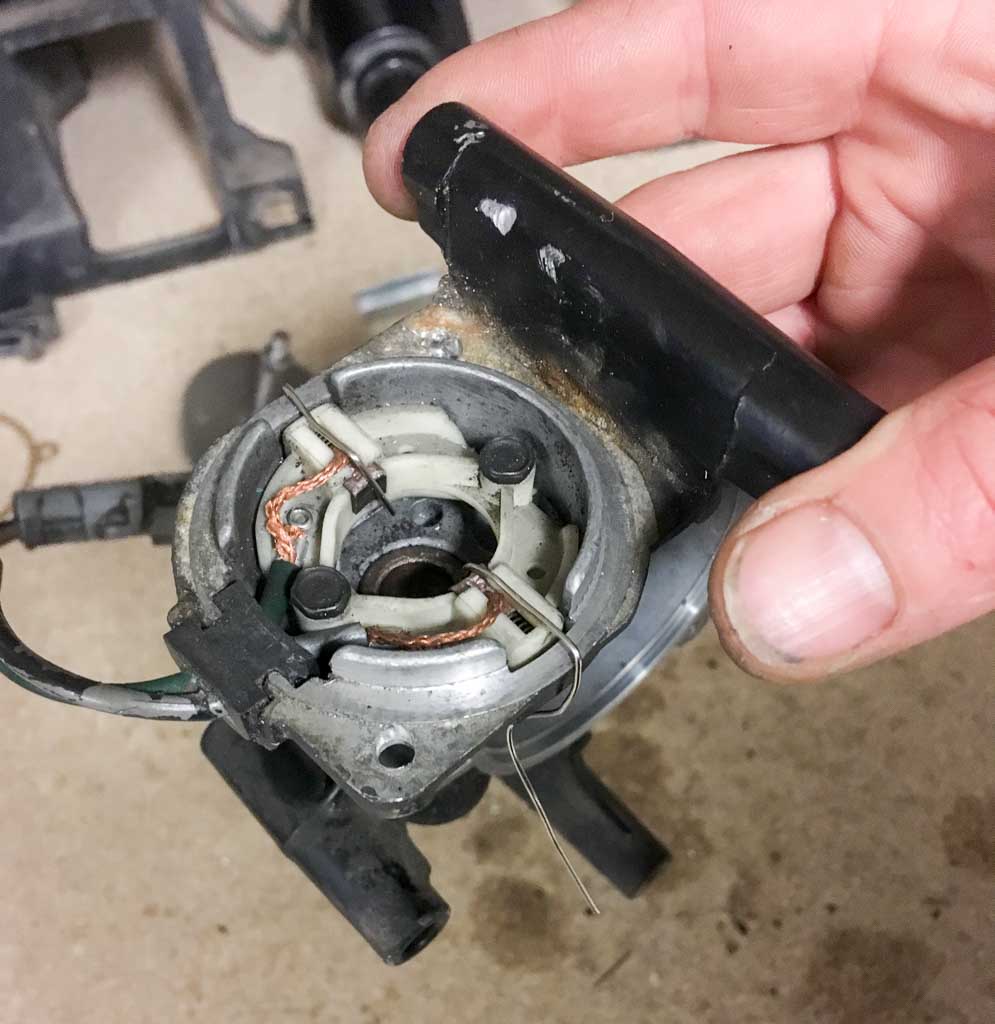
The side which was malfunctioning would go up ok but when turning off the lights the motor would just keep going. No surprise there, it was a worn out plastic gear. I rebuilt both sides with new bushings and metal gears from Rodney while at it.
Of course I snapped the head of both screws on the passenger side.. Had to drill them out and put some new bolts to hold it together.
Thank you paperclips for helping me hold things together when putting the motor back together
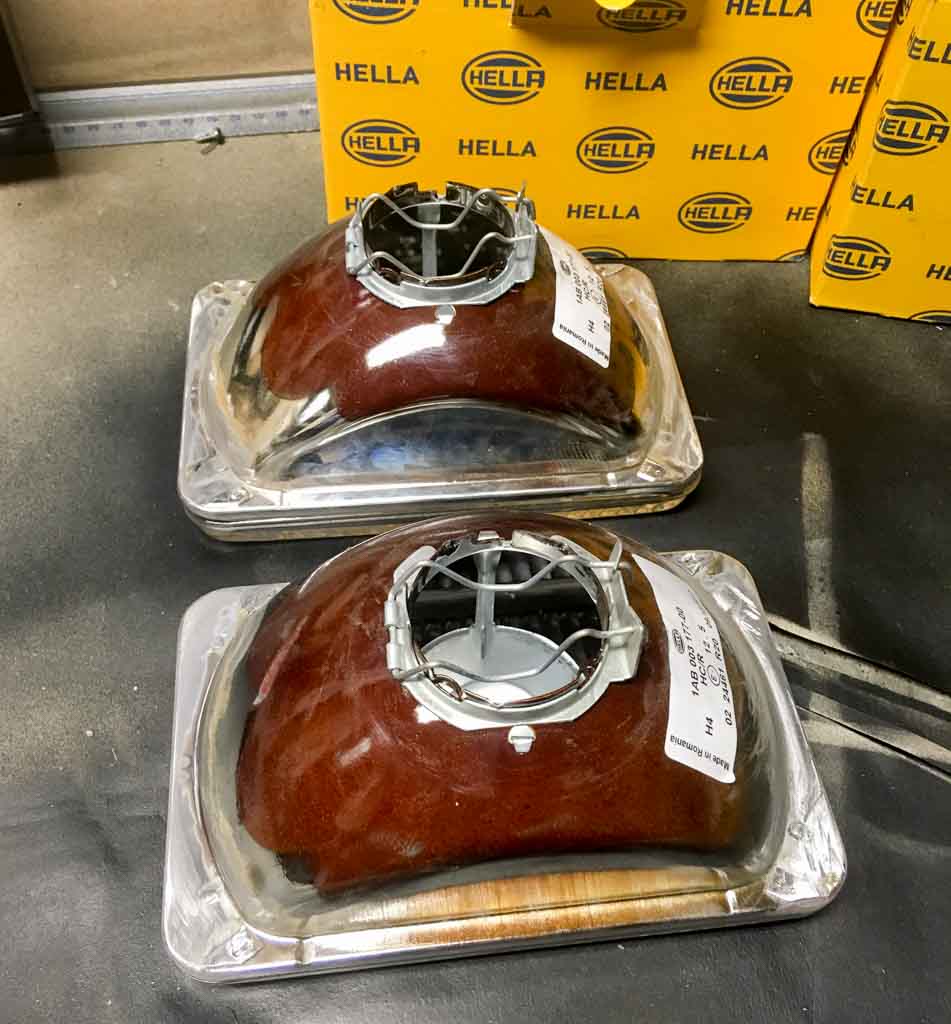
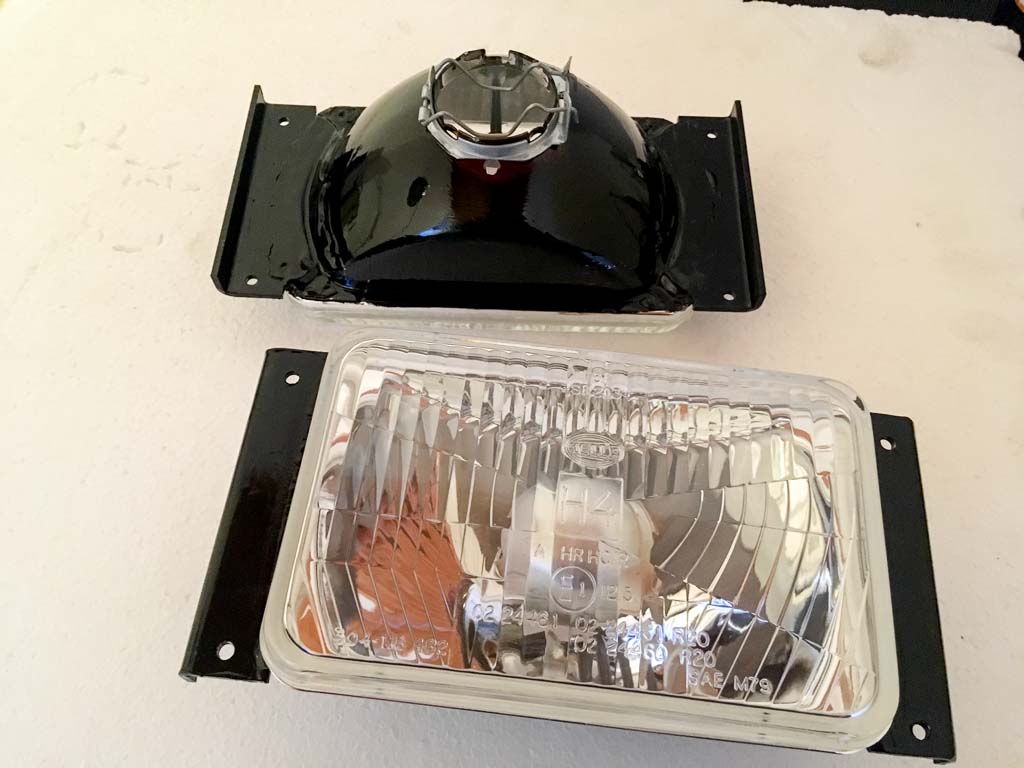
On to the new headlight buckets I got from Danyel! I wanted E code lenses just to avoid any potential issues at the yearly inspection. They usually don't really check or care but better safe than sorry. Found a set of Hella 4" x 6.5" that fit very well with some modifications. Just the original mounting tabs that interfere with the new bracket but those are easy to cut off. Hella part number: 1AB 003.177-001
Finally, both headlights are working and it looks a great deal better than the stock headlights. Thank you Danyel! I am very happy with the low profile buckets.
Thank you! Seeing how the car looks now it is a little strange that it did not come with this size headlights fron the factory. They look much more proportional with the rest of the vehicle compared to stock
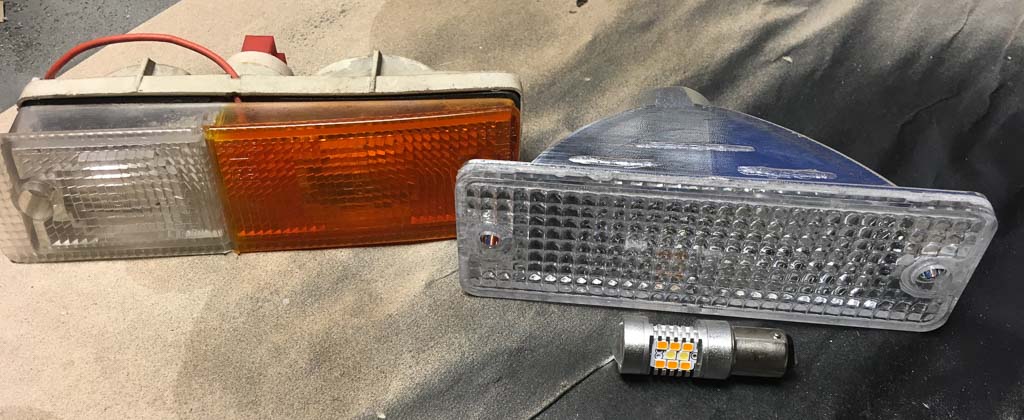
Got some more lighting fixes done on the front end of the car. It had very poorly fitting park/turn signal housings from some other car installed, probably by whoever first imported the car and converted it to Swedish specs. Rules on exterior lighting are quite convoluted in Sweden and there are exemptions you can get if you moved to Sweden and brought the car with you instead of importing it while living in Sweden. Model year can also make a difference.. But for this car, it must have amber blinkers and continous lights in the front must be white (or yellow for fog lights).
I got myself a pair of Fiero transparent lenses and amber/white switchback leds and hoping this should be ok.
Originally posted by FIER086: Where did you get those LED turn signal light bulbs from and do you just plug them in or do you have to modify anything?
You will need a LED compatible flasher as well, and perhaps resistors. I think you can get these things from pretty much anywhere but I ordered a kit from Blacktop Racing because I needed the clear housing anyway: https://blacktop.racing/fie...-switchback-led-kit/
I got a pair of resistors as well and ended up needing to use them. They can get hot so make sure to mount them somewhere where there is no risk of them melting plastic or wires. Additionally, because I had a non-standard (for Fiero) two-bulb setup for park/signal lights I had to get rid of the existing wiring and replace it with stock bulb sockets that I got from the Fiero Store.
In your case I guess you would just need to plug the new bulb into your existing socket, replace the flasher unit under the dash, and potentially wire in the resistors.
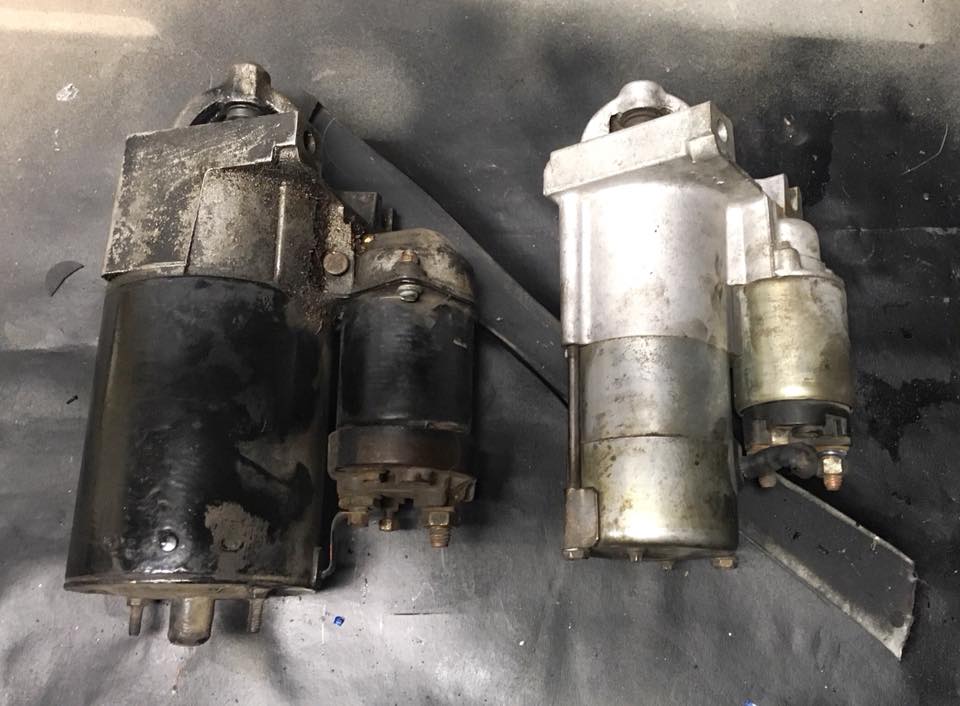
Trying to solve some starter issues. The old one had a habit of quite often just making a loud click and then nothing when turning the key. It would succeed in cranking and starting the motor after a few tries.
The new starter is nice and small and weighs a good deal less than the stock one.
Unfortunately the problem persists even with the new starter and this leads me to the following theories: - Both the original starter and the "new" one from the wrecker has the same issue
Or.. the problem is not the actual starter but instead one or more of these: - Battery is no good - Bad ground - Bad connection to battery positive - Auto gearbox neutral safety switch (although I am unsure if I should even hear the solenoid click if that was the case)
The current battery is old enough that I felt it worth to just replace it no matter what so I have a new one in the garage waiting for me to get a moment to work on the car. I'll go through and clean up connections, possibly replacing the large positive cable to starter and the grounds.
I noticed there was a workflow for troubleshooting the starter system in the service manual by measuring voltage at various points so I'll give it a go and follow that one. These should be some good first steps I hope.
Anyone else who have had similar issues? A single loud click (which I assume is the solenoid engaging) but no crank, and after a few tries like that it would crank ok? If so I'd love to hear what turned out to be the issue for you
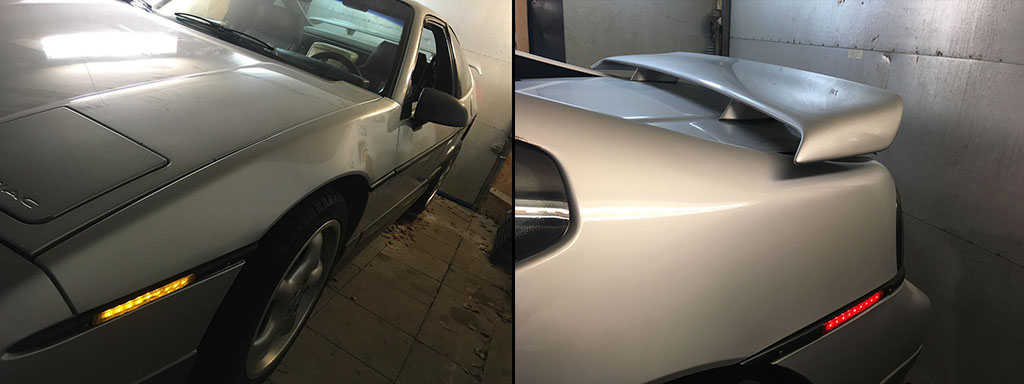
Winter is finally over and I took the car out for the first drive this year, it feels like a brand new car inside! I'm really happy with how it turned out. The exterior is quite rough and is in need of attention so that is next up.
I had issues with the old starter, and the same issue with a new starter. In the end, replacing all battery cables, ground straps, and cleaning the contact areas did the trick. And as a nice bonus, my windows go up and down a lot faster now..
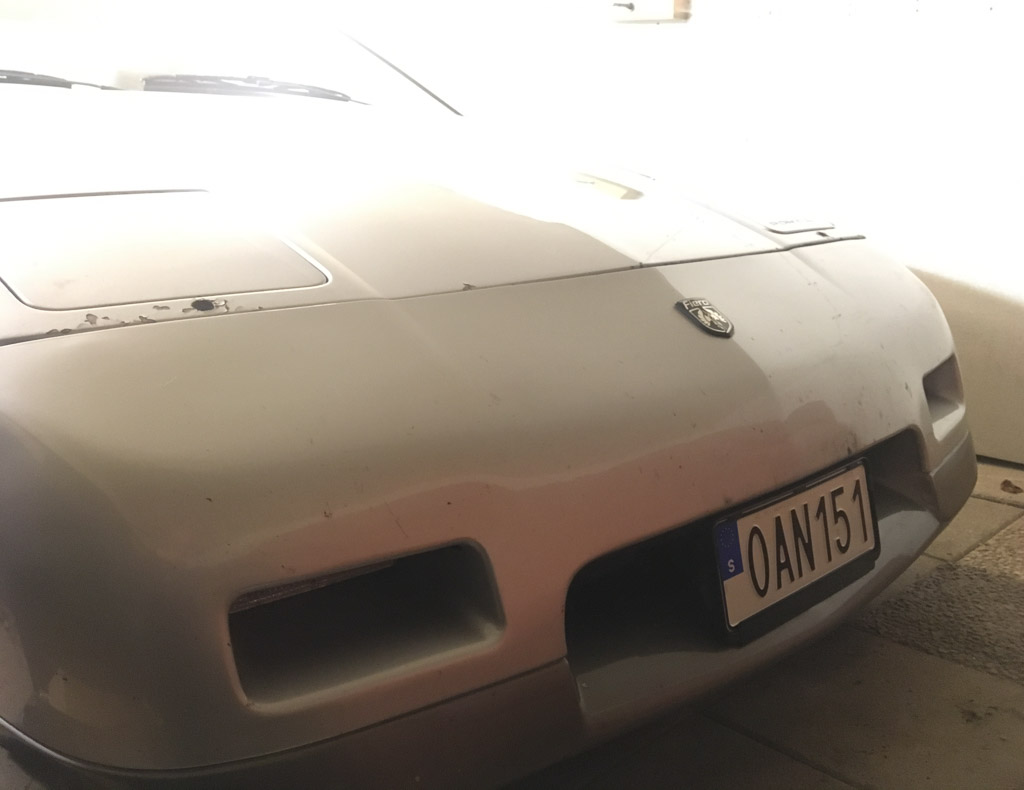
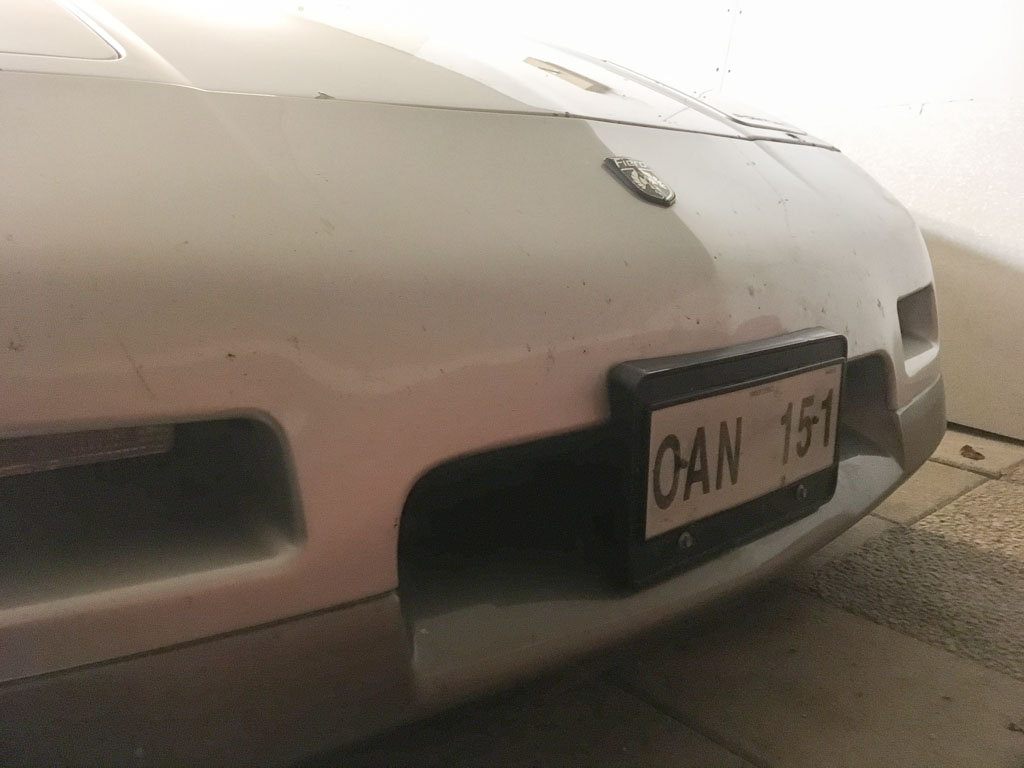
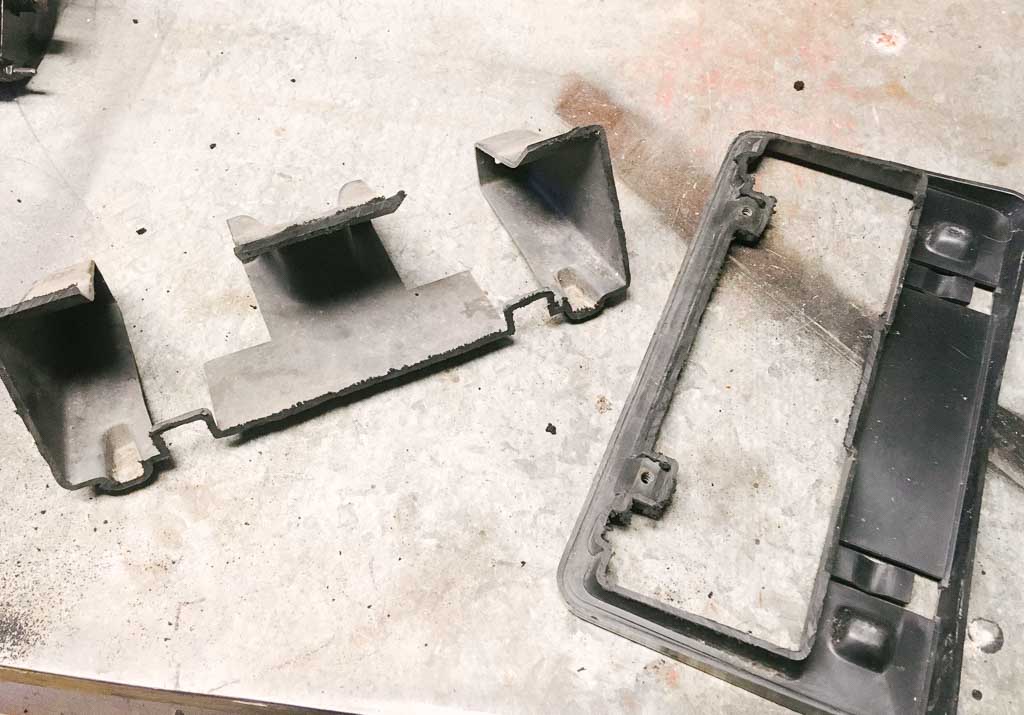
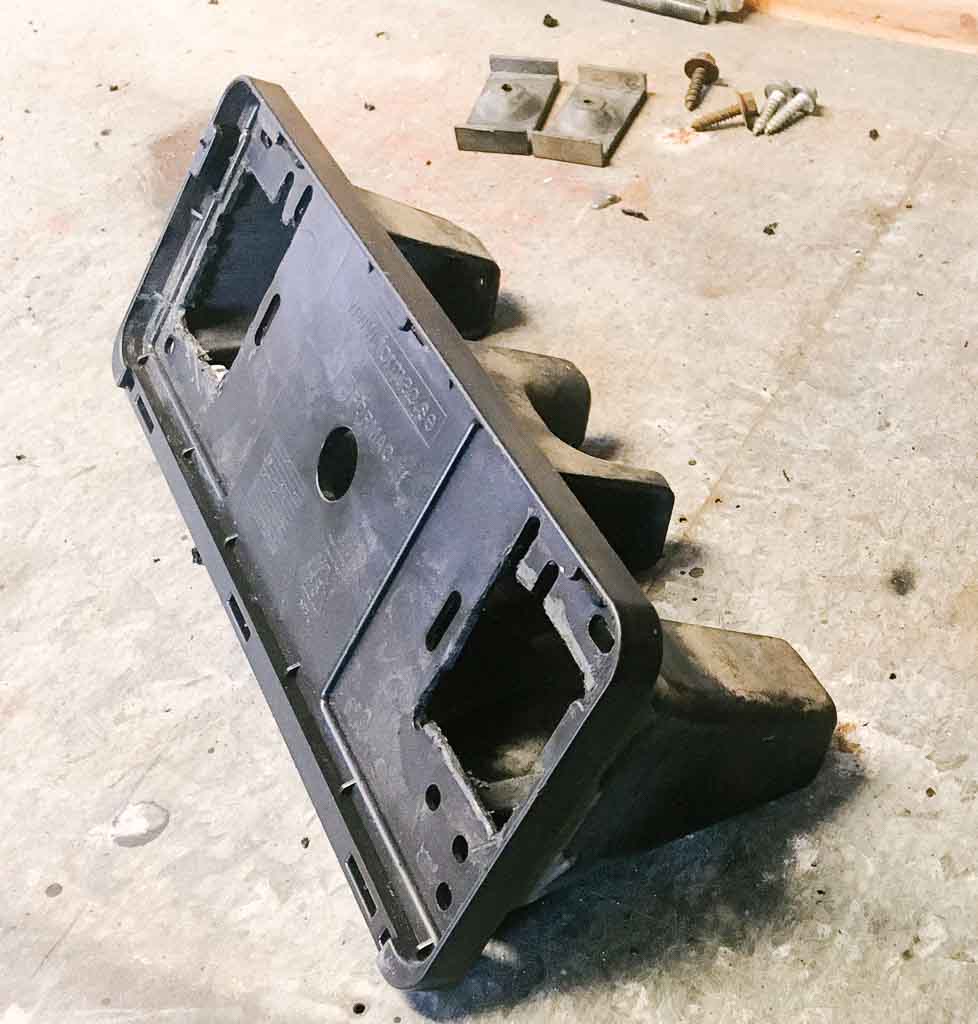
Also modified the front license plate holder. Normally, we have quite large license plates here but if you have an American car where the normal plates won't fit we get "USA plates" which are much smaller. These plates are not as tall as the American ones so the stock license plate holder looks quite large. (I'd rather not have the plate at all, but I tried that once and the police was not terribly impressed with that...)