Cool. nice work. A + for you. I was wondering how much this project is going to cost you. Me and a buddy are looking in to makeing one for our high school project. We already have a motor from a fiero because were getting ready to do a 3800 swap. When ever you have blue prints you wanna sell let me know please. This will save me and my buddy trav alot of time. We are not to bright anyway. Thanks
Just waiting on the spindles to arrive and the end of the month for some more money to appear. I'm working on the headers/exhaust system while waiting.
IP: Logged
08:30 PM
FieroHarry Member
Posts: 1809 From: Virginia Beach VA Registered: Apr 2001
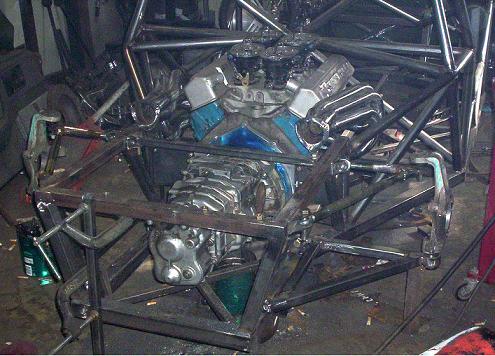
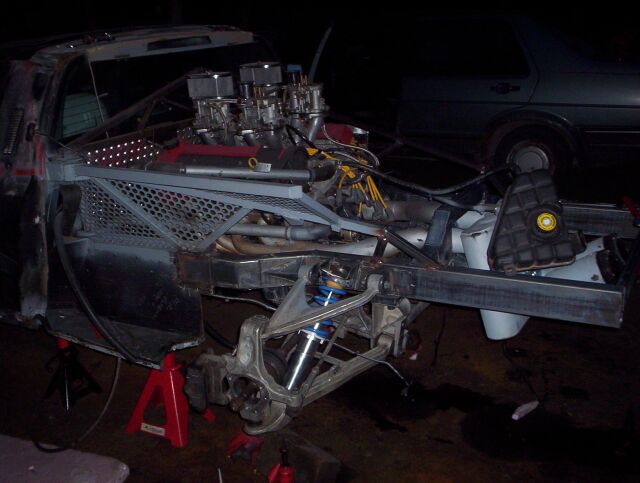
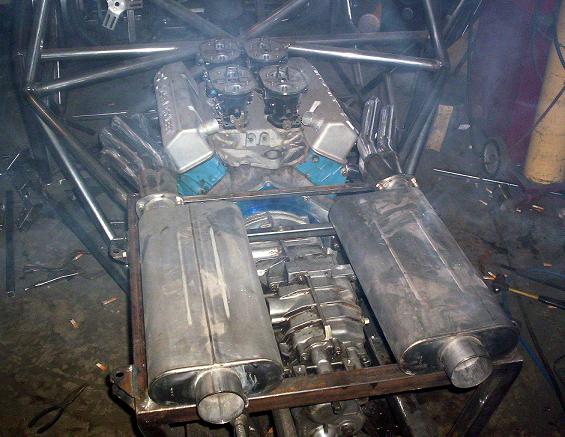
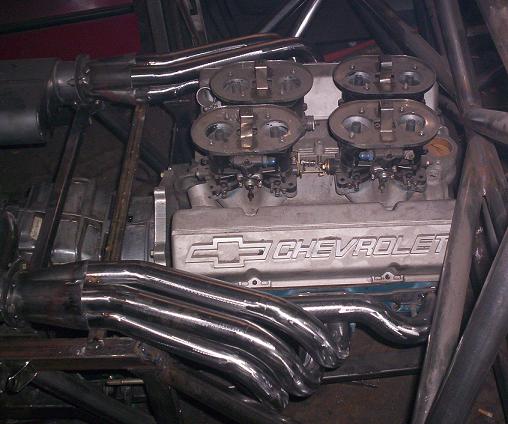
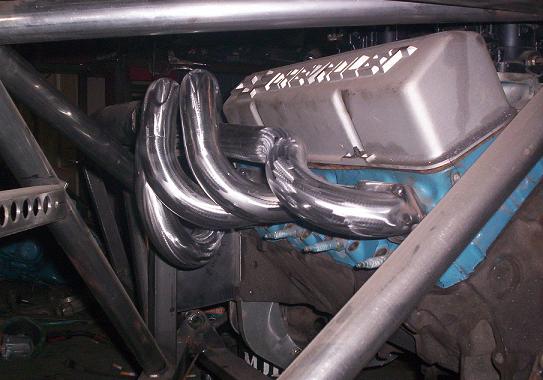
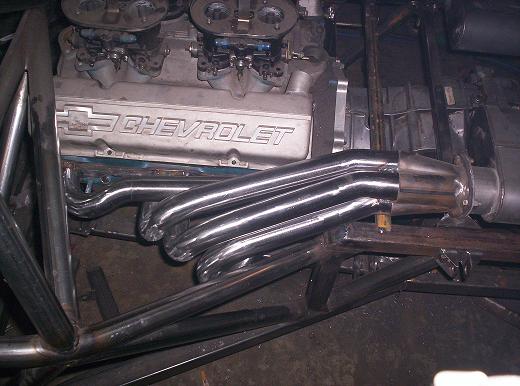
Ran out of welding fluid so I couldn't finish the exhaust system, but here are some pics anyway. Headers are 1 3/4 inch, mufflers are Edlebrock RPM. Got one of my spindles in friday, the other should be here tuesday, so I can finish the rear suspension next weekend.
IP: Logged
05:24 PM
PFF
System Bot
Apr 1st, 2005
bubbajoexxx Member
Posts: 1630 From: Ontario Canada Registered: Aug 2003
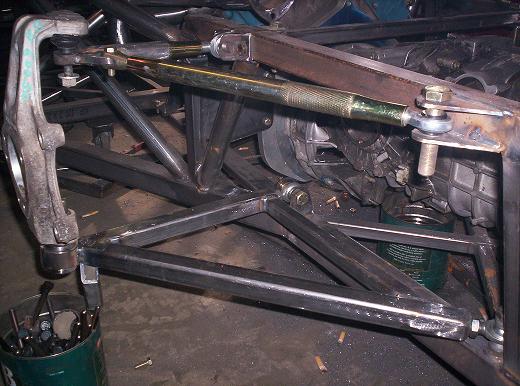
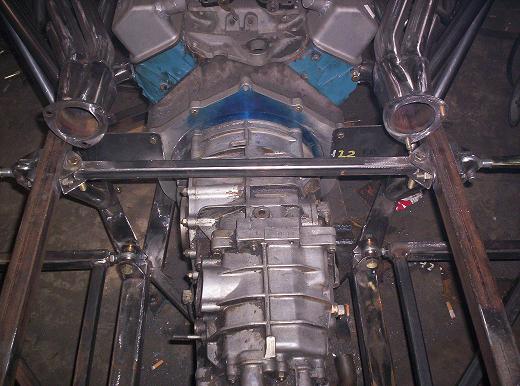
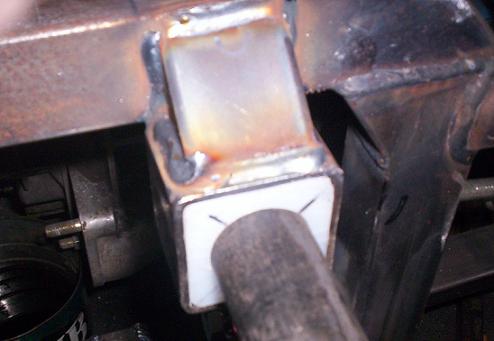
Yeah, just a bare block and junk heads. I started the re-do on the rear suspension today (switching to C5 spindles). This is a bolt-in tie bar between the upper a-arm pick up points. I did this so I could pull the engine/trans as a unit.
IP: Logged
08:28 PM
bubbajoexxx Member
Posts: 1630 From: Ontario Canada Registered: Aug 2003
Yeah, just a bare block and junk heads. I started the re-do on the rear suspension today (switching to C5 spindles). This is a bolt-in tie bar between the upper a-arm pick up points. I did this so I could pull the engine/trans as a unit.
why are you putng the uprights on the wrong side calipers go towards the front of the car as in this pic
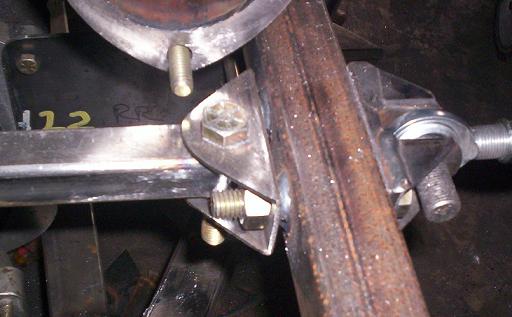
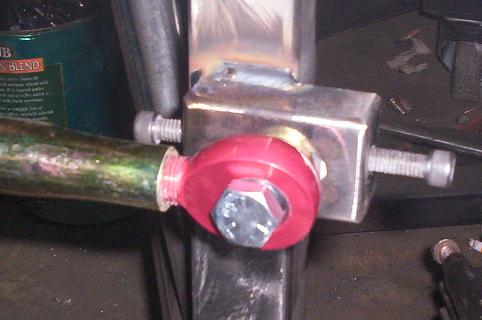
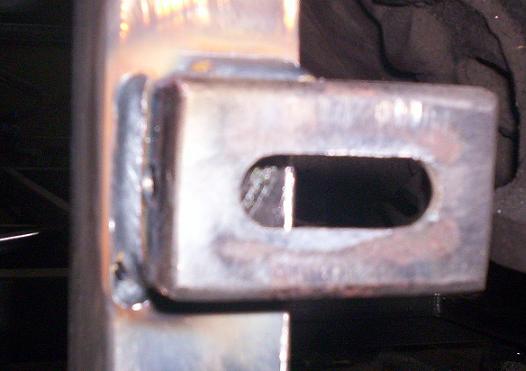
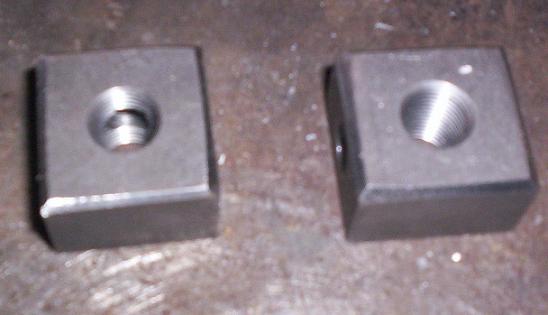
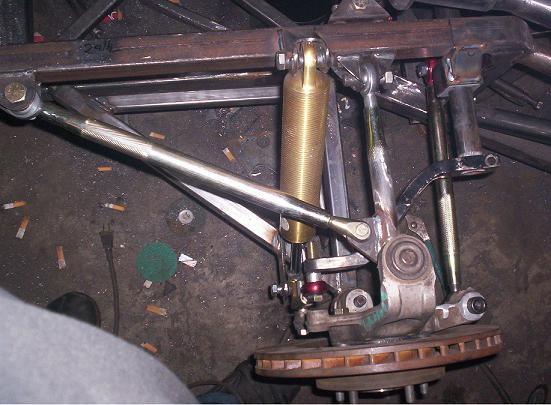
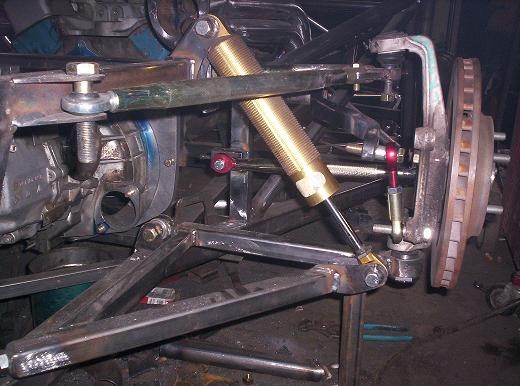
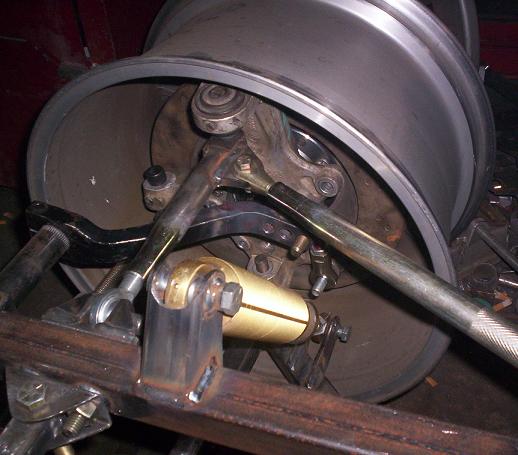
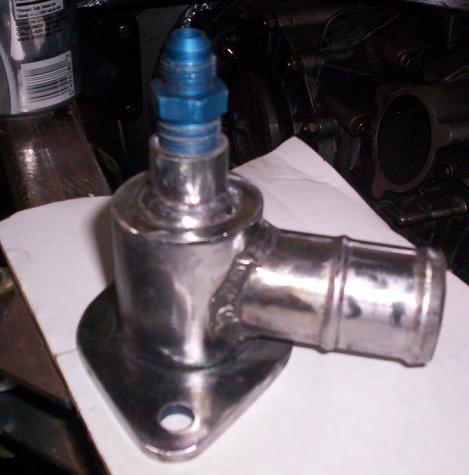
Finished up the rear suspension. In order to be able to adjust the suspension by changing the upper a-arm brackets and because I kept the steering arm on the spindle, I had to make a bracket that would allow the toe link length to be adjustable. This is the bare bracket installed: These threaded blocks slip in behind the bracket. The allen bolts on the ends of the bracket prevent any possibility of movement. This is one of the anti-roll bar mounts. The bearing insert was made from UHMW. Pics of the suspension: I have to make a longer link for the anti-roll bar. The lower end of the linkage is mounted on one of the caliper bolts directly on the spindle. I can do this because there is no rubber in the suspension.
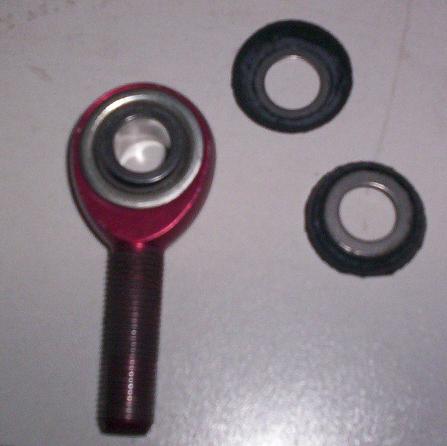
These are Ultra-seals. They go on each side of the rod end. Use a little teflon grease and these seals and the rod ends won't squeak and will last a long time.
[This message has been edited by gusshotrod (edited 04-09-2005).]
IP: Logged
08:45 PM
Apr 10th, 2005
Will Member
Posts: 14305 From: Where you least expect me Registered: Jun 2000
Originally posted by gusshotrod: These are Ultra-seals. They go on each side of the rod end. Use a little teflon grease and these seals and the rod ends won't squeak and will last a long time.
Where do you get yours? I've gotten them from the Chassis Shop before, but I wasn't impressed. The ones I got degraded rapidly and the rubber started cracking.
IP: Logged
09:50 AM
Will Member
Posts: 14305 From: Where you least expect me Registered: Jun 2000
Finished up the rear suspension. In order to be able to adjust the suspension by changing the upper a-arm brackets and because I kept the steering arm on the spindle, I had to make a bracket that would allow the toe link length to be adjustable. This is the bare bracket installed:
I'm curious about why you didn't set up your toe link with a barrel style adjustment...
I haven't seen any cracking on the seals I've used, first I've heard of it. I had some on a tubular front end on another Fiero for four years and they still look good. Doesn't mean the new ones won't crack. I used the slots because of easily repeatable settings. I don't want to reset the bump everytime I change the geometry.
IP: Logged
02:01 PM
Will Member
Posts: 14305 From: Where you least expect me Registered: Jun 2000
Repeatability... you mean 'cause the pivot stays in the same place all the time?
I would have thought that a barrel style adjustment would have good repeatability as well... run it all the way down, then extend 3.5 turns or whatever...
i used some seals like that from speedway. some of them cracked and peeled off as well after about a year. lost a couple of joints. this is on 88 rear toe links.
what kind of heim joint is that as well?
oh, and i got to say again . . . this is incredible!
IP: Logged
09:29 AM
Will Member
Posts: 14305 From: Where you least expect me Registered: Jun 2000
Will, I misunderstood your question. What do you mean by a "barrel style" adjusment.
A sleeve with a left hand thread rod end in one end and a right hand thread rod end in the other... like the '88 toe links.... just turn the sleeve to change the length of the link.
he was really trying to make the pivot point of the toe link adjustable so that he could move the upper arm in or out for camber changes and still be able to have correct bumpsteer settings. and there is allready a barrel adjuster to change actual toe.
now if im wrong (again) i will really be
[This message has been edited by ricreatr (edited 04-11-2005).]
OK, I understand now. The toe link is adjustable for length in the manner you described. I also needed to be able to move the inner pivot. Two different adjusments for two different bump patterns. There is also an adjustment for height on the steering arm. If I change the camber curve with a shorter upper arm, the toe link also has to get shorter. In order to maintain toe, the inner pivot has to move also. This will get rid of a "C" pattern in bump steer. The outer height adjustment will take care of a straight slant in the bump steer.
OK, I understand now. The toe link is adjustable for length in the manner you described. I also needed to be able to move the inner pivot. Two different adjusments for two different bump patterns. There is also an adjustment for height on the steering arm. If I change the camber curve with a shorter upper arm, the toe link also has to get shorter. In order to maintain toe, the inner pivot has to move also. This will get rid of a "C" pattern in bump steer. The outer height adjustment will take care of a straight slant in the bump steer.
Cool
IP: Logged
06:57 PM
Boricuasoy Member
Posts: 312 From: killeen, TX , Fort hood army base. Registered: Aug 2003


 can't wait to see the finished project