On a back lit Cluster (ex. 86 SE 2M6) - Has anyone ever changed the color of your needles? How'd you do it? Secondly for those who bought a car in great condition or new, are the needles suppost to be a "normal" orange or a "faded out" orange.
------------------ Sk8rfiero 85 2M4coupe 86 SE 2M6 85 SE 2M6
I have not done it yet but will do it this weekend. have seen that if you use a sharp knife you can take away the orange and after that paint it with your choise of color.
If I�m wrong. Please tell me before I do this, this weekend...
IP: Logged
02:53 AM
AusFiero Member
Posts: 11513 From: Dapto NSW Australia Registered: Feb 2001
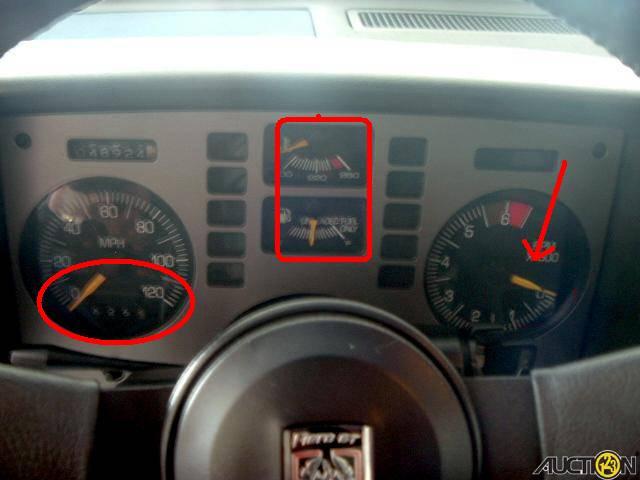
My question is: how can you be sure your gauges are accurate if you pull the needles off and put them back on? Is there a correct procedure to put needles back on??
My question is: how can you be sure your gauges are accurate if you pull the needles off and put them back on? Is there a correct procedure to put needles back on??
Its been about 3-4 years ago since i did my white faces on my 85 2M4 (not back lit), but I believe all I did was note where the needle was when the key was in the accessory position.This will put the needles to there normal resting place. Once I put the new faces on i connected the cluster back up turned the key on & stuck on the needles in the same position as I had noted.
------------------ Sk8rfiero 85 2M4coupe 86 SE 2M6 85 SE 2M6
IP: Logged
09:16 AM
Wichita Member
Posts: 20696 From: Wichita, Kansas Registered: Jun 2002
I painted mine red. It's not too hard to recalibrate the needles when you put it back on. With the ignition on, but not the engine, place the needles on zero for your speedo and tach. Sometimes it take a few tries, but they are set right.
I pulled mine off and sanded them down to clear. Then I painted them with a mix of blue and a clear glowing paint. If I had to do it over again I would have left them clear or painted them white, the blue works but visibility is low. Clear or white would look awesome in the dark.
IP: Logged
09:48 AM
SLagrec1 Member
Posts: 241 From: Troy, Michigan Registered: Aug 2003
We've done them twice now. First to restore them to the original vibrant (not the faded yellowish) orange. Then we got ambitious and re-did the entire I/P gauges & needles in blue. Here's the links we used for information.
but if yor remove them, when replaceing them, how do you know where to place them on and have the gauges read correctly? i would think its near impossible to get them in the same place as they were before removal i was thinking of just tapeing off the gauge then trying to do it with out removing the needle like by running sand paper ion the underside of the needle then just hitting it with a small brush with out removing anything
[This message has been edited by $Rich$ (edited 04-22-2005).]
IP: Logged
05:37 PM
Fastback 86 Member
Posts: 7849 From: Los Angeles, CA Registered: Sep 2003
Its not that hard, Rich. When you turn on the key, the speedo and tach should both go to 0. Turn on the key, then put the needles back on pointing at 0. For the gas gauge, wait until you have exactly half a tank or something like that before you do this. I don't know about other peoples cars, but when I turn on the key, my Temp gauge goes to 0 and my oil pressure gauge goes to 0. The only tricky one is the Voltage gauge, but its notoriously inaccurate anyway. Just turn the key one and make a note of where its pointing. Put it back where it was after you paint it.
IP: Logged
05:56 PM
shawnkfl Member
Posts: 2457 From: Largo, Florida Registered: Oct 2004
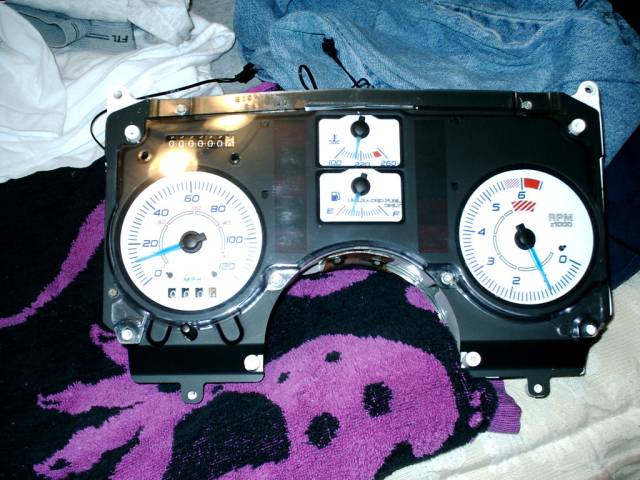
i took them off just by pulling straight up steadily. scraped the orange paint off with a razor knife. (light pressure) taped the top and sides. sprayed with flourescent blue paint (from a hobby store) let dry and spray with flat white. let dry. remove tabe and that's it. turn on acc. and place them at 0
here's how they look.
those are reverse gauges from ebay too.
i also took off the black metal trim around the gauges and painted that flourescent blue.
IP: Logged
06:59 PM
PFF
System Bot
KEV Member
Posts: 2590 From: Green Isle, MN Registered: Dec 2000
i took them off just by pulling straight up steadily. scraped the orange paint off with a razor knife. (light pressure) taped the top and sides. sprayed with flourescent blue paint (from a hobby store) let dry and spray with flat white. let dry. remove tabe and that's it. turn on acc. and place them at 0
here's how they look.
those are reverse gauges from ebay too.
i also took off the black metal trim around the gauges and painted that flourescent blue.
Nice job..!!! That helps me out alot with my restore on booth my 85GT & 88GT..thanks for the pic's they look great!!
------------------
IP: Logged
07:04 PM
Weponhead Member
Posts: 1264 From: Keymar MD USA Registered: Nov 2003
forgot to mention.....if you use flourescent spray paint. LIGHTLY dust it. just enough to cover the part. the more paint you put on, the darker it gets. i bought mine from tower hobbies on the net but you can get it from hobby shops if you have any local to you. it's a b***h taping off those tiny needles but the effort is worth it. grab some from a junkyard from any car and practice on them first. it will help. trust me.
Thanks to everyone for the responses, I ve picked up some flourescent orange paint @ Walmart (craft dept) for $0.44 . Hopefully in the next couple of days I'll get time to use it. I'll also be redoning the automatic shifter indicator. I replaced the bulb the other night & all the letters lit up white (no matter what position the shifter was in) I'll take pictures as I go & repost the outcome. Thanks again John
------------------ Sk8rfiero 85 2M4coupe 86 SE 2M6 85 SE 2M6
IP: Logged
12:10 AM
Whuffo Member
Posts: 3000 From: San Jose, CA Registered: Jul 2003
The back of the needle has a pattern of ridges molded into it - these are to evenly distribute the illumination so the pointer lights up evenly from end to end. If you scrape off the paint you're also removing these ridges.
A better plan is to remove the old paint with a plastic-safe paint remover. I used Goof-Off when I did mine and it worked, but will soften the needles if you use too much or leave it on too long. Q-Tips work well for this operation.
I'd recommend choosing a bright color that contrasts with the dial markings; the first time I redid some needles I painted them red. This looked great during the day, but at night they lit up the same color as the dial markings and were almost invisible. I changed to white with a little yellow and that's working well for me. The darker the color you choose, the dimmer the needle will be at night.
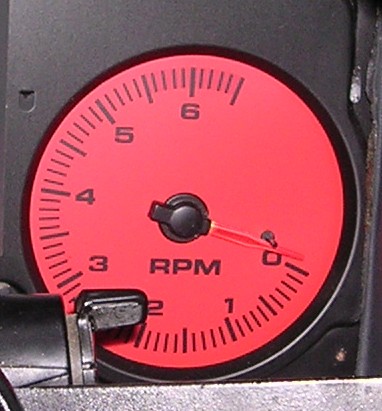
ya, bu pull the peg out that the tach needle rests against when the ign. is off, and see where the needle goes, it ends up at about the 2 o clock position so if you just pull the needle off while the ign is offf, the tach wont have the correct resistance then its re-installed
IP: Logged
10:28 AM
4BanGinFun Member
Posts: 1321 From: keswick Ontario Canada Registered: Oct 2001
heres mine i took them off and scraped the orange off and painted them blue then the centers silver i still want to get the white face gauge set with blue numbers