Looking good. I like the body color strut towers too. I ran into the bubbling body filler problem on lisas car too, but only around the headlite covers. Its still not exactly rite, I think moisture somehow gets inside and swells the filler, maybe from panel sweating inside.
IP: Logged
05:03 PM
rynelson85 Member
Posts: 2178 From: Wichita, KS Registered: Aug 2002
Roger, Ive painted 4 Fieros so far and all have had problems with bubbling around the front side of the he adlight doors. And 2 have had problems around the sunroof. Its either caused by water or small cracks caused by the headlight doors closing over time. I hope igot it figured out on Jens car.
Should have the car pretty much done this weekend except for the side scoops and rockers which still haven't showed up. I'll post more pics Saturday.
------------------ Earl Sessions 1985 Fiero w/ 1998 Supercharged 3.8 V-6 Best ET: 12.689 @ 105.91mph "NO Juice....Just BOOST!"
You mean we screwed up???? Nah! That chust can't be (can it)?? Ha! What or how did you notice this problem? Was it real soft? Also, what does this polyester filler look like? Is it flexible and does it stick to most stuff? As much as I would like to, I can't take credit for the hood problem. But, I have a black 86 that I bought a while back and it has hood bubbles all over. When I pop them, I find that the "Bondo" or whatever was used didn't adhear to the grey primer underneath. Never saw that before. We talking the same thing on Jen's hood? Jim
quote
Originally posted by NOS3800:
The fillere was probably not mixed properly. If there is any swirls, it will not harden. The way the filler came out, that is what I suspect. Just a few patches remained soft. I used a polyester filler to repait it. Flows real smooth and easy to sand. We use it on all our finish coats because it fills nicely with the minimum of air bubbles.
IP: Logged
01:37 PM
Apr 5th, 2003
rogergarrison Member
Posts: 49601 From: A Western Caribbean Island/ Columbus, Ohio Registered: Apr 99
any filler you use HAS to be applied on a bare surface be it plastic or metal. The only exceptions are spot putty which can be put on small paint and primer flaws. "Icing" can be put over sanded paint, but not primer. If you got filler coming off/bubbling, and theres primer under it, thats the problem.
IP: Logged
02:28 PM
Fierochic88 Member
Posts: 4993 From: Staunton, VA Registered: May 2001
As far as the air dam it was applied to the bare surface...the rest of the car I can't speak for as the other stuff must have been done before I purchased it.
I would have to say the filler in the nose wasn't mixed right. There are downsides to working in the middle of the night. A lesson learned for next time.
Jen
IP: Logged
10:18 PM
Apr 6th, 2003
rogergarrison Member
Posts: 49601 From: A Western Caribbean Island/ Columbus, Ohio Registered: Apr 99
That was mostly for tmf's problem. As for the headlite area of hood, that seems to be a factory defect. Ive run into it several times on different cars. The area in the same place on the vette does it too. No body work there, but i got a few bubbles just around the hood where headlite covers are.
IP: Logged
01:17 AM
87GTBro Member
Posts: 1223 From: Edinburg,TX,USA Registered: Oct 1999
I keep coming back here to see completed pics of the car, but I am disappointed every time. How long do we have to wait? I wanna see it put back together!! :-)
------------------
IP: Logged
03:53 PM
My7Fieros Member
Posts: 3357 From: Germantown, TN Registered: Jun 2000
I keep coming back here to see completed pics of the car, but I am disappointed every time. How long do we have to wait? I wanna see it put back together!! :-)
LOL...you're reading my mind! When are we gonna see more pics!!!!
Sorry for the delay guys. The car is done for the most part but i am waiting on some scoops and other things that is preventing me from putting the car together. I spent this weekend wet sanding the car with 1000 grit wet sand paper and buffing it all to aa mirror like finish. Looks really good. the batteries died in my digital camera so no pics today. Will have some tommorrow for sure.
The reason the filler didn't harden is probably because of improper mixing. When i baked the cover in the booth after priming it bubbled. I stuck a knife in it too see how deep it went and it went in a good inch. We filled it with some flexible body filler. Hopefully it will hold. the lower cover is VERY heavy. I have to be REAL careful carrying it around so that it doesn't flex.
The Hood bubbles i dug out and it appears to have originated in the plastic.
------------------ Earl Sessions 1985 Fiero w/ 1998 Supercharged 3.8 V-6 Best ET: 12.689 @ 105.91mph "NO Juice....Just BOOST!"
IP: Logged
11:21 PM
Apr 7th, 2003
rogergarrison Member
Posts: 49601 From: A Western Caribbean Island/ Columbus, Ohio Registered: Apr 99
devil, have you tried 3M #00868 DA paper? Its #1200 grit you use on your DA and a water squirt bottle. You can wet sand flat areas 10 times faster. I can wet sand, or dry sand a hood with new urathane the next day or two in just a few minutes. Regular buffing brings it up like glass.
IP: Logged
10:07 AM
PFF
System Bot
Along For The Ride Member
Posts: 76 From: Oley, PA, USA Registered: Sep 2001
Roger is right.....I also have a 6" wetsanding velcro pad for wetsanding paper. The setup I have is made by Mirka, but works just like 3M, and it's fabulous! Saves tons of time, and I think will give you a better, smoother finish to buff out. The pad spreads out the pressure of the sandpaper, which will give you a better finish overall.
If you don't have one of these setups, I highly recommend one!
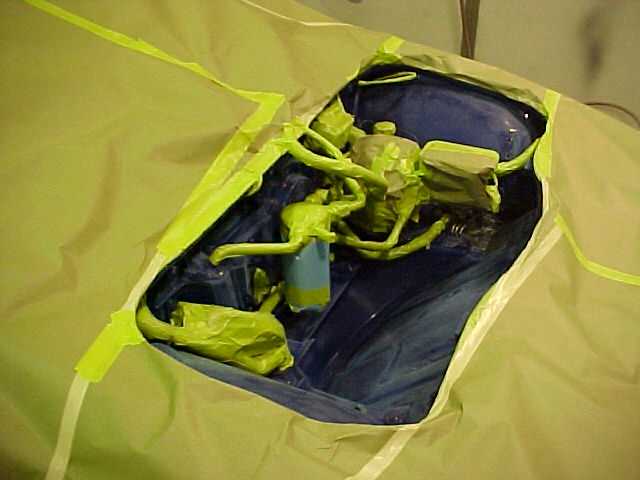
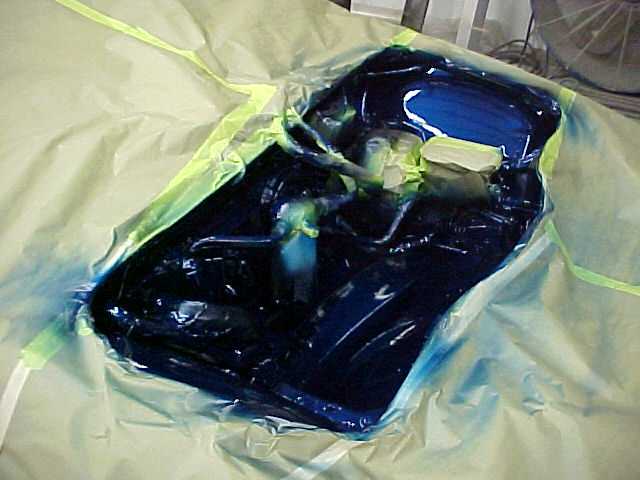
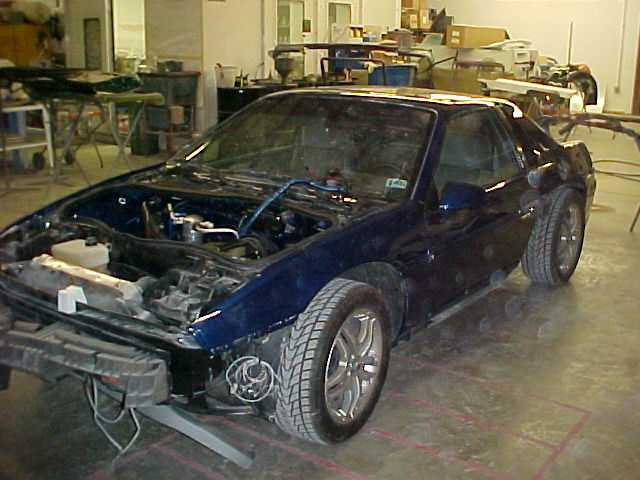
I have tried that system but jus couldn't get used to it. i like the old school way. I will tell you that the new way isn't jus faster but alot cleaner! I jus can't get used to using the DA on a freshly painted surface. Especially on edges. Heres the lastest pics. This weeknd i also painted th front compartment All taped up and ready to paint. What a pain to tape up! All pretty and shiny! Heres the rest off the car waiting for its side scoops!
Tommorow i paint the black.
------------------ Earl Sessions 1985 Fiero w/ 1998 Supercharged 3.8 V-6 Best ET: 12.689 @ 105.91mph "NO Juice....Just BOOST!"
IP: Logged
07:38 PM
Fierochic88 Member
Posts: 4993 From: Staunton, VA Registered: May 2001
Well Jen, I can see right away one thing we are doing wrong. The paper we use to mask has writting on it and is white. Tink it makes a difference? I'm wondering about the nose filler. I'll bet that "off brand" stuff Matt bought just isn't up to par with the good stuff I use. LOL I told him ya gotta pay more then $2.50 a tube for good stuff. Seriously though, that baffels me. I can see swirrels not hardening as the catalyst just didn't mix but an inch deep in some spots has me worried. Is it too late to do it all over again? Your ex-mechanic and body man
When you guys did the nose filler, did you do it in layers or just fill it all at once? I don't know about other epoxies or fillers, but my Duramix (4056 for SMC & FGlass) recommends not making any layer more than 1/4" thick- and to let each layer cure completely before applying the next. <just another thought...>
Hey TooMany...how bout flying down here with that ultralight and picking up this damn front cover and dropping it somewhere. Like Bagdad or sumthing. I put the cover on the car tonite and it fits so crappy that it stress cracked on one side where it meets the fender. And guess what else i noticed?more bubbles. I'll have to repair the cover onthe car i suppose. I really don't want to tear the whole cover apart and redo it. I am honestlly getting sick of looking at the car . I think we may be ok fixing it this last time as it bubbled in a diffent spot as before. And the cover has been sitting outside in the sun and its been in the oven a couple of times to see if it happens anymore.
One more thing...i noticed sumthing kinda funny about the car and the way it sits. I won't say anymore about it here. Ask Jen when you get a chance.
------------------ Earl Sessions 1985 Fiero w/ 1998 Supercharged 3.8 V-6 Best ET: 12.689 @ 105.91mph "NO Juice....Just BOOST!"
Hey TooMany...how bout flying down here with that ultralight and picking up this damn front cover and dropping it somewhere. Like Bagdad or sumthing. I put the cover on the car tonite and it fits so crappy that it stress cracked on one side where it meets the fender. And guess what else i noticed?more bubbles. I'll have to repair the cover onthe car i suppose. I really don't want to tear the whole cover apart and redo it. I am honestlly getting sick of looking at the car . I think we may be ok fixing it this last time as it bubbled in a diffent spot as before. And the cover has been sitting outside in the sun and its been in the oven a couple of times to see if it happens anymore.
Just finished Jamie's 86GT front cover for the second time. When it was preped, a few spider cracks were covered, not fixed. When I shot it, I saw them right away. Took the DA and a good bit of hand sanding to get it down to the base. Someone learned a lesson on this part of prep work. I'll be by with my 50 cal mounted to the plane. Just put Jen's cover out in the parking lot tonight and I'll make it into swiss cheese. LOL But most importantly, (read this part carefully now) "I" didn't have anything to do with the prep work or any body work on that car so don't be mad at me. I'm out of that business. LOL Yea, I feel bad for ya. Redoing stuff like that is a pain and gets to ya after a while.
Jim...wasn't it done at your house? And don't you share the same DNA? Therefore I must hold you accountable! As for the stress crackes i swear i sanded that part done to the plastic and built it back up. I think moving the fenders around to make the alignment look better may have screwed it up for me when i put the cover back on. The cover is REAL tight!
Anyhow...hope to have it fixed this weekend and WHERES THE SIDESCOOPS!
------------------ Earl Sessions 1985 Fiero w/ 1998 Supercharged 3.8 V-6 Best ET: 12.689 @ 105.91mph "NO Juice....Just BOOST!"
Jim...wasn't it done at your house? And don't you share the same DNA? Therefore I must hold you accountable! As for the stress crackes i swear i sanded that part done to the plastic and built it back up. I think moving the fenders around to make the alignment look better may have screwed it up for me when i put the cover back on. The cover is REAL tight!
Anyhow...hope to have it fixed this weekend and WHERES THE SIDESCOOPS!
Hey!! Seems you had a bit of trouble with the front cover too eh? I have my nose molded as that one did and it cracked 2ce. Not all the way, just the right corner, then after getting it set, the left side. Grr. Its all good now and you can twist it like rubber, no cracks! Good thing to hear I wasn't the only one with problems there
Looking great, can't wait to see it done!
IP: Logged
10:17 PM
Seanpaul Member
Posts: 1320 From: Santa Rosa, North CA. Registered: Mar 2003
Hey lil'D...Is that primer or filler I see on the door..?
I used a long time ago do some Porsche work, and we would sand the car. Spray one cote of primer, then sand it down, and where the sport of primer remain, we would have to add filler to even the surface out...
We did this mostly on flares...do you have to do this one the fiero???? Could you kindly outline the prep process for the fiero...
Do you have to prep the poly in a different style than the fiber..??
IP: Logged
10:19 PM
skitime Member
Posts: 5765 From: Akron, PA, USA Registered: Aug 2000
I considered molding my chin spoiler in too but decided against it for three reasons. First you would run into the problems you mentioned. Second even if you do sucessfully bond and paint it you still run the risk if bumping it and cracking the seam again. Third, if you ever damage the spoiler and it is not bonded on you can easily remove just the spoiler and repaint or repair it. The spoiler is low and driveways are a serious risk. Just my two cents.
------------------
Red 88 GT T-Top 3800 Supercharged White 88 GT Stock Please give me a rating if you appreciate my contribution. History of Skitimes Car
No offense, but I think the molded in airdam looks so much better then the bolted on look. It looks factory. If it was done correctly, you wouldn't have any of the problems you speak of. If it gets damages in a accident, you would have to repair the lower airdam either way. JIM, Did you weld the right front half of this car on?!?!? We GOTS PROBLEMS!!!
No offense, but I think the molded in airdam looks so much better then the bolted on look. It looks factory. If it was done correctly, you wouldn't have any of the problems you speak of. If it gets damages in a accident, you would have to repair the lower airdam either way. JIM, Did you weld the right front half of this car on?!?!? We GOTS PROBLEMS!!!
See, there you go again. Askin' me if I did this or that to the car. I know nuttin' honey!! I'm gonna fly over your house tonight, so be listening for me. LOL. I stand behind my work. So far behind that you can't see me. And "NO" I didn't weld anything to either side. Do you think I'm nuts? (Don't answer that). Jim
IP: Logged
01:01 PM
skitime Member
Posts: 5765 From: Akron, PA, USA Registered: Aug 2000
No offense, but I think the molded in airdam looks so much better then the bolted on look. It looks factory. If it was done correctly, you wouldn't have any of the problems you speak of. If it gets damages in a accident, you would have to repair the lower airdam either way.
Non taken. I figured it might look better and that is why I considered it myself. I guess time will tell if the bonding is a good idea. So far Jncomutts' bonded nose was repaired 3 time while only being in the shop and Jens was repaired once or twice still being in the shop. The real world outside the shop will be even tougher along with the heat and cold and ramps. Nothing more upseting than having a piece of filler fall out or crack on a show car. Jen and Jmcomutt, I am truely hoping you have no problems with this. As both of you know I expressed this personally to you. Heck if it holds up I might try it too.
[This message has been edited by skitime (edited 04-10-2003).]
Honestly Ski, I'd say stay away. I'm even thinking about going back to a stock bumper for the time being.
I had more problems with the REAR bumper than the back trying to graph on a lower section from another car. That project got ditched. I think the best bet is using a front bumper from another car that appeals to you, and making that fit.
IP: Logged
08:24 PM
Apr 14th, 2003
Along For The Ride Member
Posts: 76 From: Oley, PA, USA Registered: Sep 2001
sorry i haven't posted latly but we are getting busy at work and since this is a "side" job of sorts i haven't been able to do much. Actuall the only thing that needs done is the front cover redo and the hinge straps replaced on the rear hinges. Oh and the side scoops! But me can't do what me don't have! When do you need the car back? :P
------------------ Earl Sessions 1985 Fiero w/ 1998 Supercharged 3.8 V-6 Best ET: 12.689 @ 105.91mph "NO Juice....Just BOOST!"
IP: Logged
11:17 PM
Apr 25th, 2003
Along For The Ride Member
Posts: 76 From: Oley, PA, USA Registered: Sep 2001
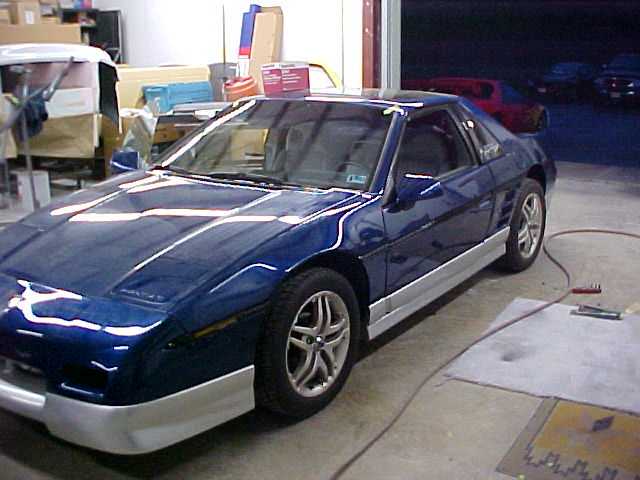
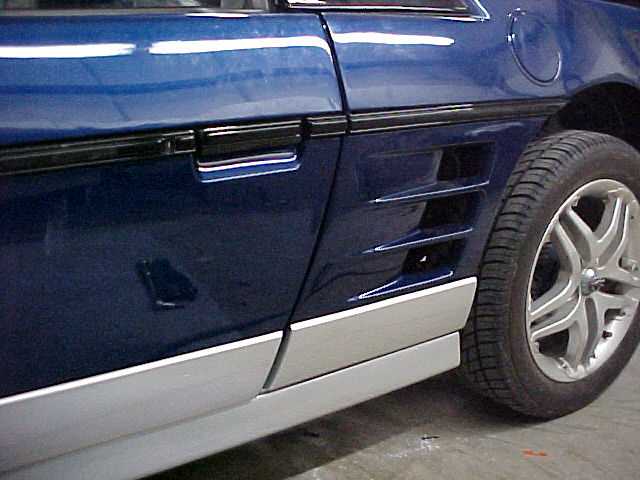
Almost done...heres the lastest pics, Well i finally got the scoops this past monday and had some problems prepping them for paint but was able to paint and mount them today. Jus need to get the trunk hinges done and thats about it. She'll be home Sunday!
------------------ Earl Sessions 1985 Fiero w/ 1998 Supercharged 3.8 V-6 Best ET: 12.689 @ 105.91mph "NO Juice....Just BOOST!"
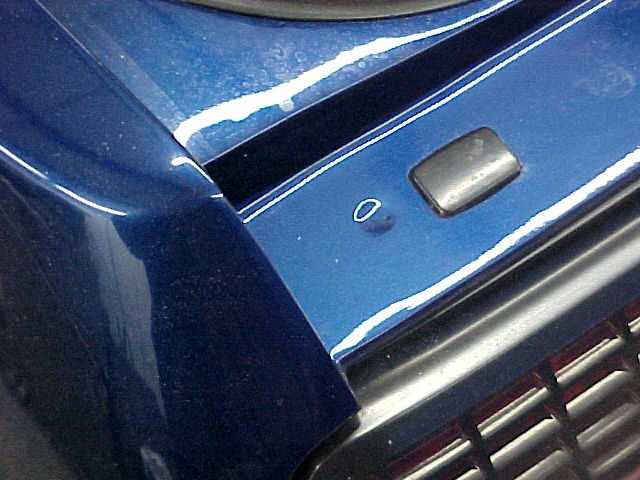
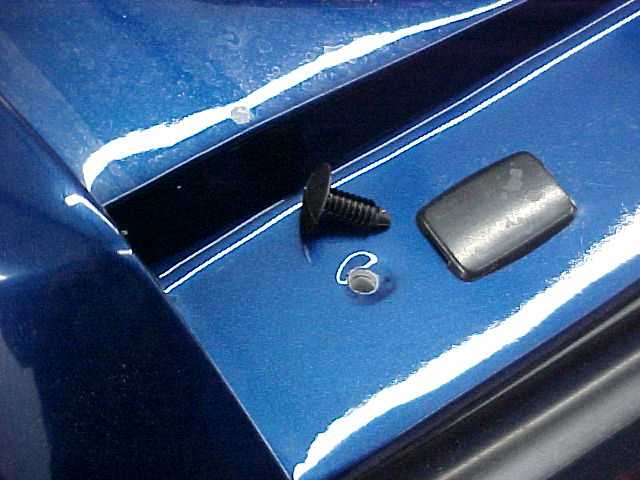
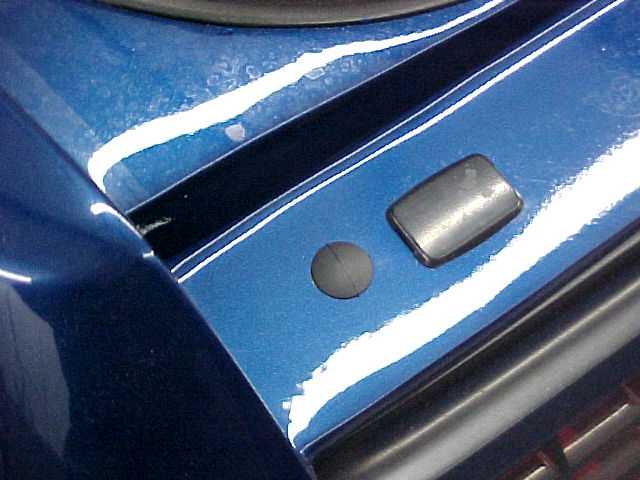
Heres a neat trick to help keep uyour new paint job looking new. I hate seeing wear on new paintjobs like where the bumbers on the rear decklid rub the paint off on the tail light mounting panel. So heres what I came up with... [img] drill a hole and stick a push in clip TaDAAA! fresh newness! Mine has stayed looking this way for 5 years.
------------------ Earl Sessions 1985 Fiero w/ 1998 Supercharged 3.8 V-6 Best ET: 12.689 @ 105.91mph "NO Juice....Just BOOST!"
[This message has been edited by lildevil (edited 04-25-2003).]