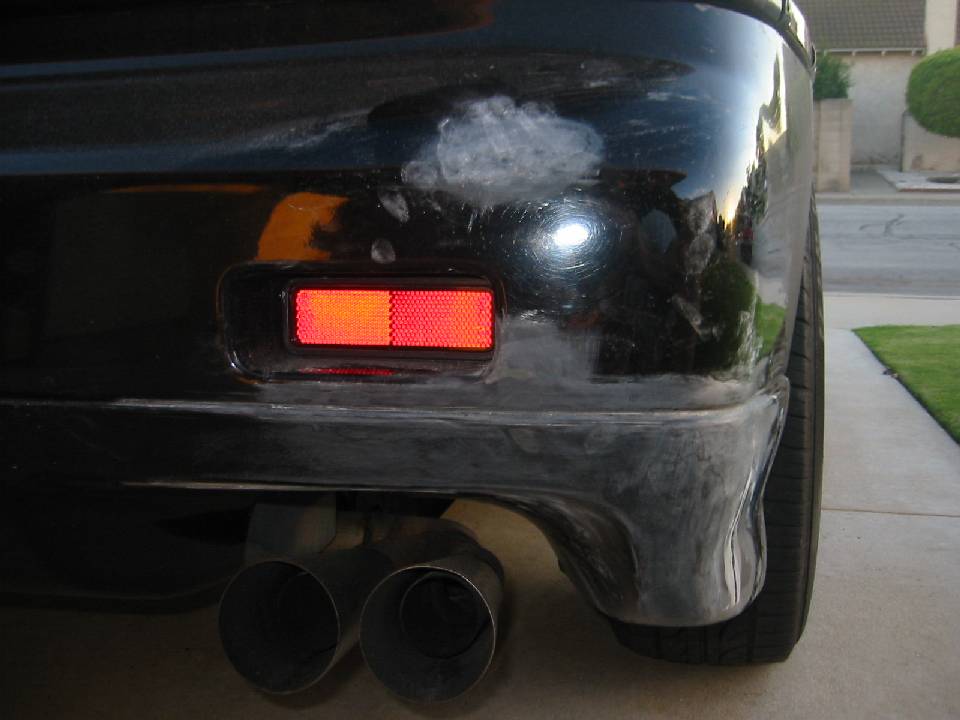
Today's update. I worked about 2 hours on the rear fascia. I had no trouble sanding out the paper towel fragments in just a few minutes. I easily blended the primer over the two small scratches I sanded out. I also sanded smooth the horizontal crack inside the groove line which I repaired earlier. I might have cut through the primer in a few sections...with the primer being clear it's hard to tell, but I'll check it again later and may have to put a light coat back in the groove.
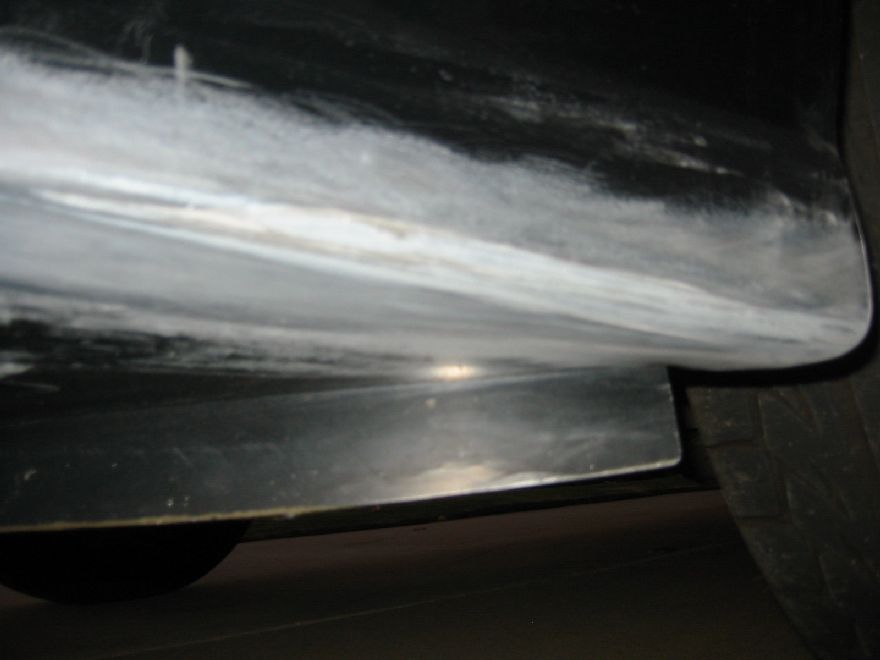
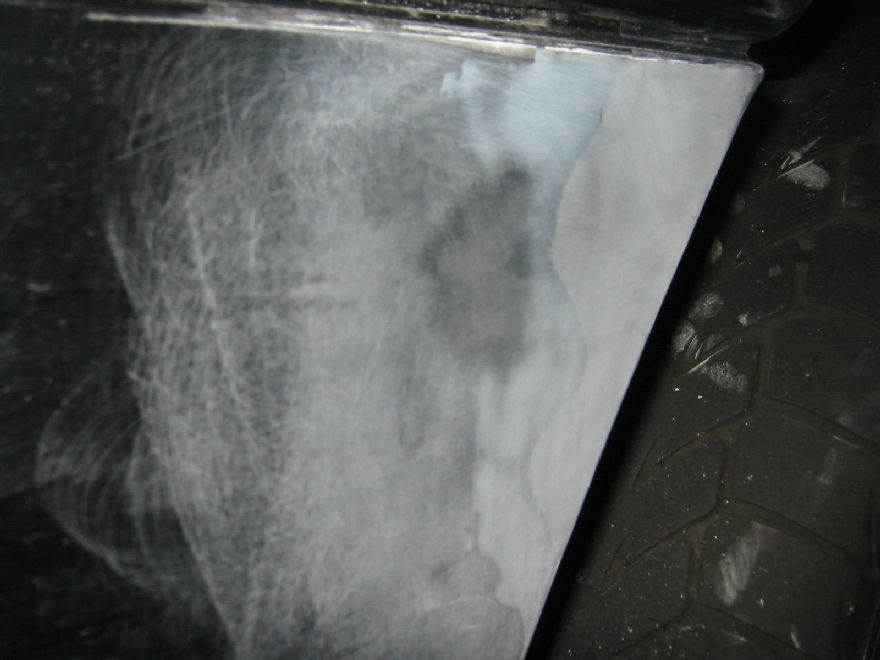
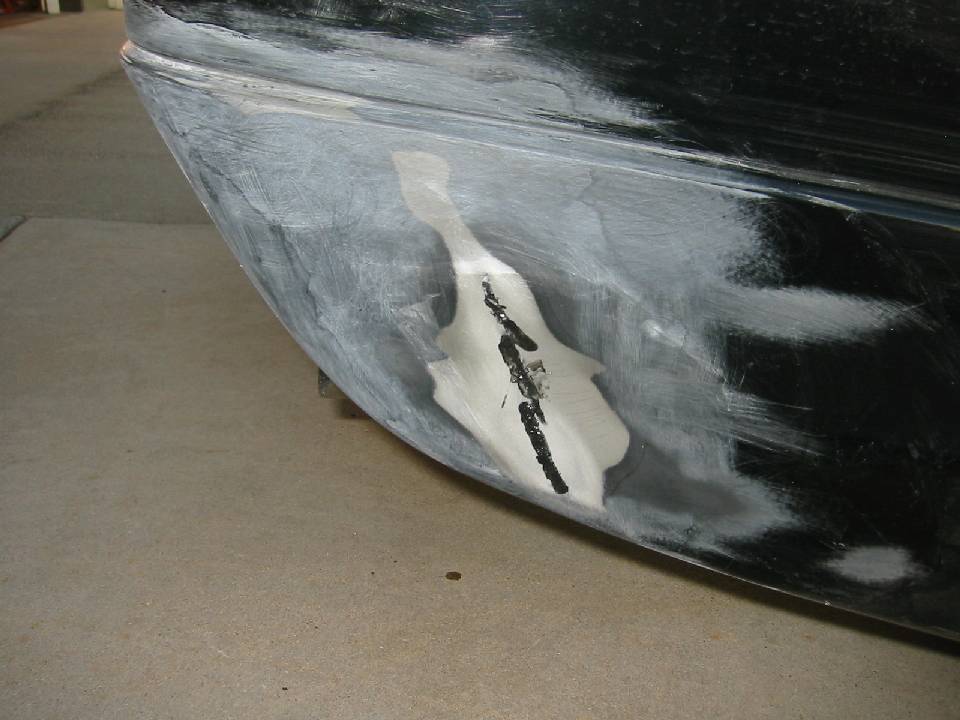
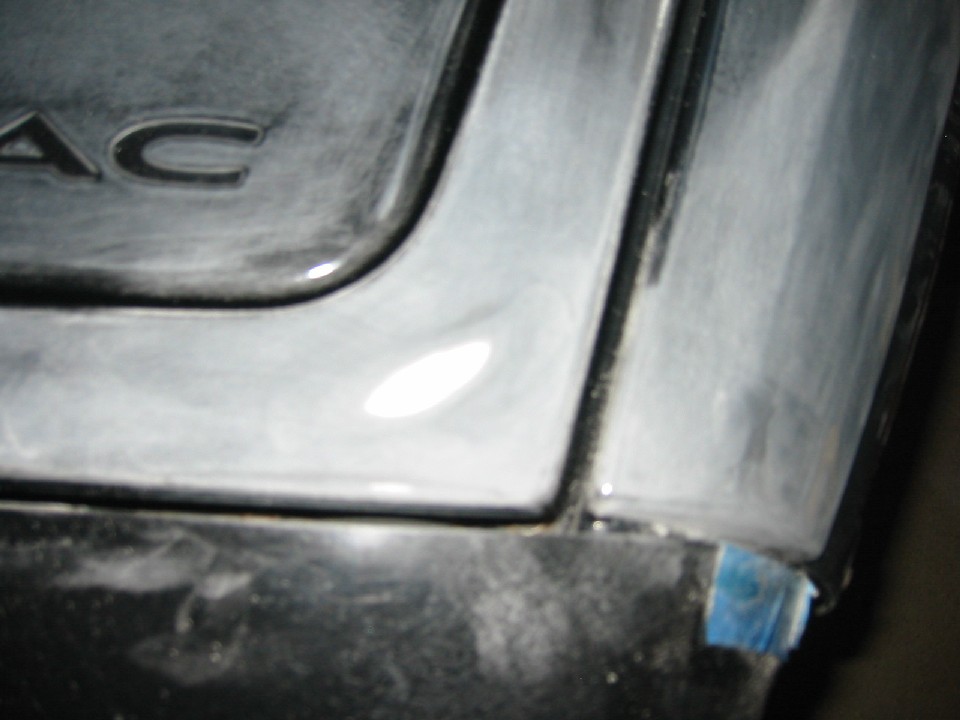
The majority of my time was spent sanding on the big vertical repaired cracks on the side. It seems like the repair compound shrunk because I noticed that there was a dip right where the compound was. Not only was the repair material lower when the fascia had primer, but even after I sanded the areas around the repair all the way back to bumper material, the compound was still lower and the areas just next to the cracks was slightly higher than the rest of the bumper. I ended up sanding down a bit of the material just next to the repaired cracks and then to the repaired cracks I added more repair compound. My reasoning is, I'd prefer the repaired area to be even (to slightly lower) than the rest of the bumper so I can put a light layer of primer on. If it's the same level as the other areas of the bumper then I can't blend the primer. I'm letting the repair compound dry overnight, then I'll sand everything smooth and it will be ready to reprimer.
[This message has been edited by reinhart (edited 11-02-2010).]
I V'd it to a 45 degree angle. My objective was to make sure it wouldn't pull back through. With that angle, it shouldn't fall inside the fender, barring a destructive sharp blow which would probably damage any other part of the fender as well.
Thanks for the picture. It seems exactly the same as I did, except you used filler and I used only the bumper compound. I am thinking the flex bumper repair will give more than your filler, so I prefer that, plus mine's the same substance all the way through where you have to worry about two substances expanding or bonding together.
Look at the photo again. I angled it out to an oval about twice the size of the original hole. Read the email sent with the photo. I did not use filler I used SEM "flex weld" on both sides, reinforced with chopped mat & just used a tiny amount of catalyst-hardened putty to fill pinholes & small imperfections. The second photo plainly shows the SEM on the top of the beveled hole. Looks nothing like filler. ~ Paul aka "Tha Driver"
IP: Logged
07:03 AM
rogergarrison Member
Posts: 49601 From: A Western Caribbean Island/ Columbus, Ohio Registered: Apr 99
Did you use a block or backing pad to sand the bumper repair. I see a lot of people sanding with their hand and leaving the repair like a hump when its painted.
When I patch a hole in a urathane bumper, i dish or V out the top just at an angle like you did. I also dish out the inside slightly. That makes the 'plug' so it cant pop in or out easily. I sand the inside of the repair for a few inches past the plug with like #80. Then I wipe a thin layer of flex filler over the whole area and while its STILL WET, apply a piece of fiberglass mat larger than the plug into it and then squeege more of the same batch of flex filler into and over that to reinforce the area. Ive never had a plug fall out of a hole like that. Ive plugged them in cars, boats and planes with that method. If the panel is SMC or ABS, i do the same method using fillers for those materials. Ive repaired pretty big holes in boat hulls from rock or log strikes, but just used more layers.
IP: Logged
11:25 AM
reinhart Member
Posts: 1136 From: Orange County, CA Registered: Mar 2002
I worked another two hours today. Spent about 30 minutes with the rear fascia and the rest on other parts.
The driver side fender. I was extremely happy with how this turned out.
The edge of the front fascia by the wheel well came out perfectly as well.
The hood came out nice as well.
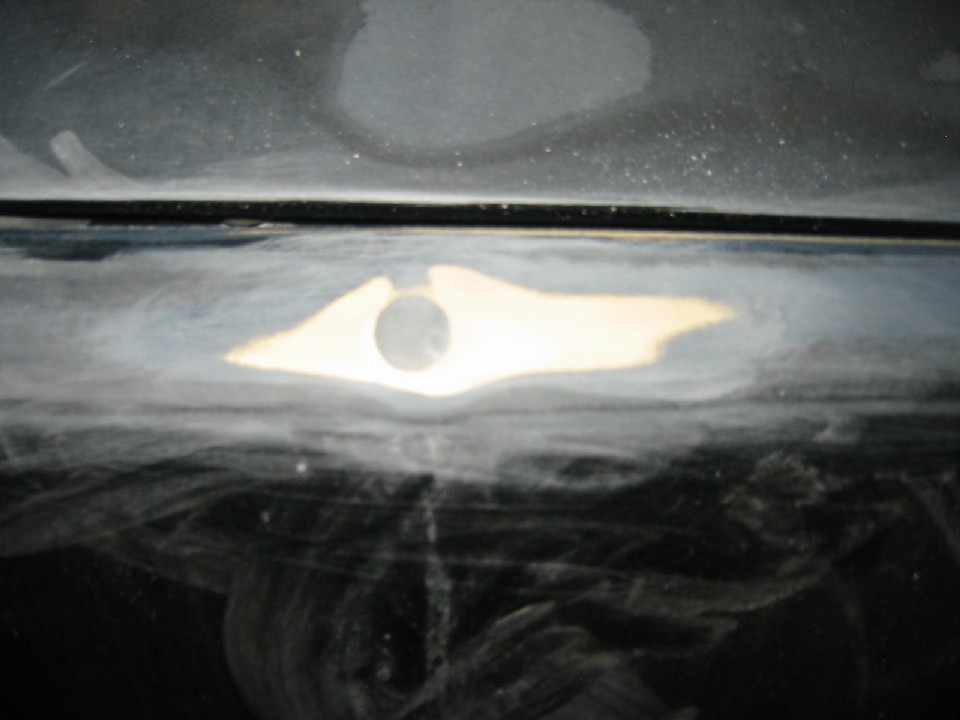
The passenger side fender feels nice and smooth and I couldn't see any flat spot where the antenna was so I think we're good here. That was my concern from block sanding that it'd be flat there. I'll check again in better lighting.
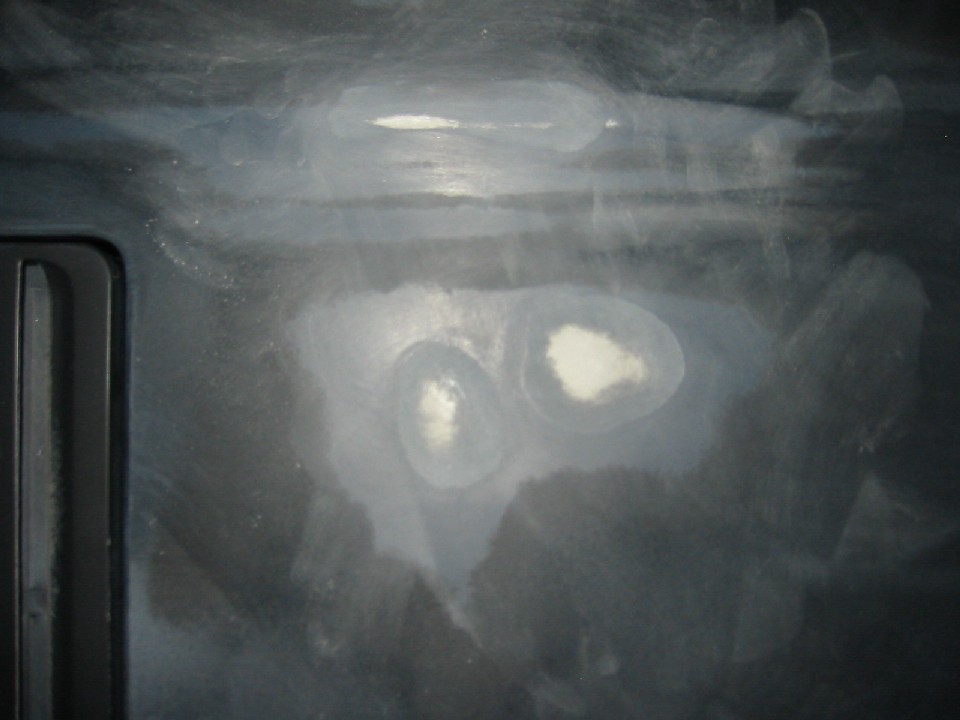
I was able to blend the three decklid sand-throughs but as I was blending one of them, I cut through another spot, so I'm going to have to re-primer that.
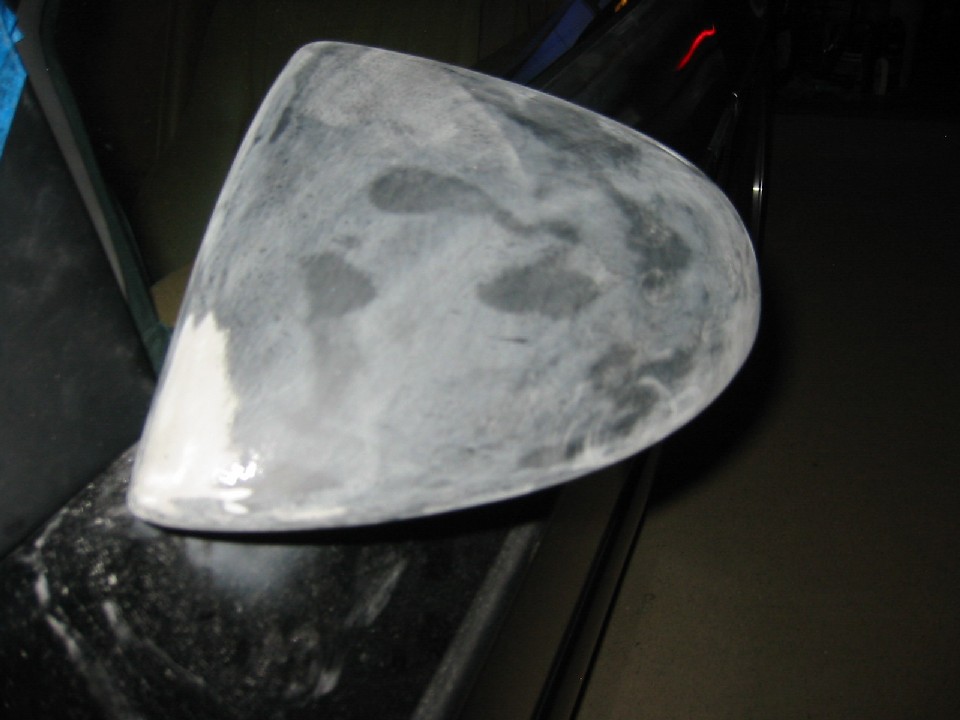
Drivers side mirror came out nice on the outside and bottom but I am going to recoat the inside. This mirror didn't dry very smooth and I had to sand a lot to get out some bumps and runs.
So today I had success sanding down 4 areas. Two areas I need to redo. Also the front fascia edges sanded down smooth but they aren't rounded correctly relative to the rest of the curves, they have dead flat spots where they were sanded down. I sanded the rest of the primer off and put on some bumper repair compound. I am going to sand that smooth and then reprimer.
The rear fascia I sanded smooth again but it just doesn't feel right by the crack repair. I'm still working on that.
[This message has been edited by reinhart (edited 11-03-2010).]
IP: Logged
04:26 AM
reinhart Member
Posts: 1136 From: Orange County, CA Registered: Mar 2002
I really don't like this clear primer because I can't see whether I have cut through it, although it's is really easy to sand down, which is nice considering all my boo-boos.
IP: Logged
04:29 AM
rogergarrison Member
Posts: 49601 From: A Western Caribbean Island/ Columbus, Ohio Registered: Apr 99
Thats what I was saying, it clearly is somewhat of a problem...no pun intended. Why not just get yourself a quart of regular primer (2 part or whatever) to use for the final coat when you think its about done.
IP: Logged
07:36 AM
Nov 4th, 2010
reinhart Member
Posts: 1136 From: Orange County, CA Registered: Mar 2002
Roger, at this point I don't want to go back and buy another type of primer to reapply. If I were to apply it where the other primer is, then I'd have to resand which is going a step backwards. I've already finished sanding and final prep of about half of the areas, and there's really only a few spots I'll be reapplying (mainly the rear fascia). Obviously, if I could go back in time I wouldn't have bought this type of primer.
Theres absolutely nothing wrong with Sherwin-Williams automotive paints. Theyve been in business 100 years, and I think they may know something about it
PPG and Dupont on the other hand may know all about it too, but they reem your azz paying for it. I personally draw the line at buying paint that cost more than the car did. Of course if youve spent $60K on the car and have money to burn, by all means buy it. People buy $250 jeans too that arent any better quality than $19 Levis. But who am I to say you cant pay for that little satin label in the waistband if you want.
Theres absolutely nothing wrong with Sherwin-Williams automotive paints. Theyve been in business 100 years, and I think they may know something about it
Roger; he's using 4th Dimension & Acme. I doubt they're worth putting on anything but a go-cart.
quote
Originally posted by rogergarrison: PPG and Dupont on the other hand may know all about it too, but they reem your azz paying for it. I personally draw the line at buying paint that cost more than the car did.
If I went by that mantra I'd never paint nine tenths of my cars. Just because I buy (or trade) for a car for a few hundred bucks, doesn't mean it's not worth rebuilding & painting. Look how many good running Fieros you can buy for less than a grand.
quote
Originally posted by rogergarrison: Of course if youve spent $60K on the car and have money to burn, by all means buy it.
I don't have 60k (or half that) in any of my cars, & they all have better paint than Acme. They all have PPG epoxy primer too. I probably have $400 in paint & primer alone on my BMW.
quote
Originally posted by rogergarrison: People buy $250 jeans too that arent any better quality than $19 Levis. But who am I to say you cant pay for that little satin label in the waistband if you want.
Yeah & that $29 pair of Levis are made in freakin' CHINA!!! I don't send my money to that communist dictatorship with the world's worst human rights record (I don't buy $250 jeans, either). ~ Paul aka "Tha Driver"
IP: Logged
05:50 PM
Nov 5th, 2010
reinhart Member
Posts: 1136 From: Orange County, CA Registered: Mar 2002
Hey guys, I'm definitely not an expert but my understanding is one of the reasons the cheaper paints are cheaper is they don't have as much variety of colors. For instance I couldn't get a dupont light changing color in their entry level paint, they may only have 10 basic colors in their entry level line of paint. So the paint manufacturer can offer a cheaper paint but then upsell because if you want a more complicated color then you "need" their expensive brand. In my case I'm getting black which is black. Nothing complicated about that one. If I bought top of the line black it may not be that much different in appearance because it's still black.
Second, I love this car but its going to be a daily driver that will likely get bumper and door dings no matter how careful I am parking it. If i were going to be a trailer queen that's one thing.
I have a feeling that even entry level paint will be better than what came out of GM. I highly doubt GM was buying $200/quart paint for the Fiero. I was very happy with the factory paint even after 20 years, until it started fading and peeling, so if this repaint looks at least as good as that I will be VERY happy with it.
From what I've read, preparation is 80% of the paint's appearance. Given this is my first paint job and all, chances are, any visual defects will be from what I did, not from the quality of the paint.
Driver, I enjoy your perspective and I don't doubt your work is top notch, but you seem to think that anything that isn't done your way it's going to suck. One thing I've learned in life is that there's almost always more than one way to skin a cat. There's a lot of good paint jobs that didn't use PPG epoxy primer. That said, your input is appreciated and even if I don't always follow it, I'm glad to hear it. I can always learn for next time.
IP: Logged
02:53 AM
reinhart Member
Posts: 1136 From: Orange County, CA Registered: Mar 2002
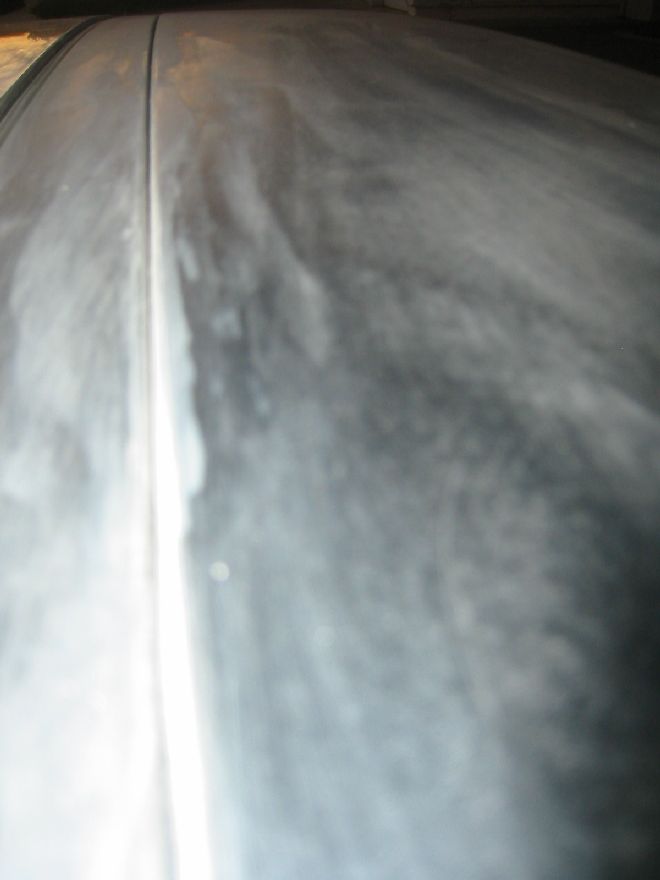
I made some good progress today. I spent about two hours sanding down primer. I finished the roof area, the right mirror housing, the pillars, the fender-to-hood edges. I also sanded down the bottom edges of the front fascia where I had applied bumper repair compound to restore the rounded edge. When I finished, it looked better but I still wasn't happy so applied a bit more (less than the first time) which I will sand down again and hopefully it will be perfect. The repair compound also had some areas where there must have been air trapped so I filled those. I didn't do any work on the rear fascia today.
Overall, I am happy with my progress today. If I'm not forgetting anything, I just need to finish the front and rear fascias and the left fender along the wheel well. Once I finish those areas, I need to reapply primer on the fascias and a few other spots. 70% of the areas I primed are done and won't need any more primer or sanding.
[This message has been edited by reinhart (edited 11-05-2010).]
IP: Logged
03:07 AM
rogergarrison Member
Posts: 49601 From: A Western Caribbean Island/ Columbus, Ohio Registered: Apr 99
I use Diamont (BASF/R&M) for high end cars. Its nearly half the price of PPG. I use Dimension 4 Sherwin Williams for used cars or people that dont want to spend a fortune. Like he said, the Dem 4 is only available in one formula with no variants like Diamont and other brands have. If it dont match, it just dont match. Others give you some flexibility especially in hard to match colors. I just repaired a new Volvo and used the Diamont to ensure a good match (it was dead on) and cost me $35 for a can. If it was a used car I could have just used Dem 4 and had the paint for less than $20. PPG price is more like $60. The last time I bought PPG was a customers choice. It was $85 for a can to paint a new gas filler door for a Ford Probe. My charge to paint and clear his door was $200. To me thats moronic and yes, he did flip out. It dont matter which brand you use if the prep is done right. How it holds up is dependent on the clear topcoat. If your doing the whole car, using the paint that matches best dont make any difference. My old Dodge is restored with the Diamont base and clear. It looks like the day I painted it except for some road rash thats going to happen to any car you put 15,000 miles a year on. It will still look the same in another 10-20 years unless I decide to change colors or something. My paint cost me less than $200 for the base and clear. I did my Sebring with Dem 4 for even less, maybe $125 for base and clear. I can put up either of them in any car show with pride. I will never see the need to use PPG or Dupont paint on any of my own cars ever.
Hey guys, I'm definitely not an expert but my understanding is one of the reasons the cheaper paints are cheaper is they don't have as much variety of colors. For instance I couldn't get a dupont light changing color in their entry level paint, they may only have 10 basic colors in their entry level line of paint. So the paint manufacturer can offer a cheaper paint but then upsell because if you want a more complicated color then you "need" their expensive brand. In my case I'm getting black which is black. Nothing complicated about that one. If I bought top of the line black it may not be that much different in appearance because it's still black.
Second, I love this car but its going to be a daily driver that will likely get bumper and door dings no matter how careful I am parking it. If i were going to be a trailer queen that's one thing.
I have a feeling that even entry level paint will be better than what came out of GM. I highly doubt GM was buying $200/quart paint for the Fiero. I was very happy with the factory paint even after 20 years, until it started fading and peeling, so if this repaint looks at least as good as that I will be VERY happy with it.
From what I've read, preparation is 80% of the paint's appearance. Given this is my first paint job and all, chances are, any visual defects will be from what I did, not from the quality of the paint.
Driver, I enjoy your perspective and I don't doubt your work is top notch, but you seem to think that anything that isn't done your way it's going to suck. One thing I've learned in life is that there's almost always more than one way to skin a cat. There's a lot of good paint jobs that didn't use PPG epoxy primer. That said, your input is appreciated and even if I don't always follow it, I'm glad to hear it. I can always learn for next time.
The thing is, how much time will you have in this paintjob? And how much difference in the cost of this paint & a better quality is there? My main concern is with the clear. I had a supplier recently sell me some CRAP Five-star clear that YOU COULD NOT BUFF AFTER TWO DAYS. Had to sand & re-claer the WHOLE car, & it was a HUGE '65 Chrysler! The cheaper clears will also not hold up as well. Why do I spend $400 for Sikkens clear on my top-end jobs? It lasts longer & resists chipping better. I've seen a florescent bulb drop form 30 feet up on a rounded corner of a 1/4 panel - DENTING the 1/4 - & NOT EVEN SCRATCHING the clear. I used Nason (Dupont) clear on my BMW & other cars & it's very good clear for a little over $100 a gallon. I really don't trust that Acme clear. After all: that's the same company that the coyote bought all his hardware from trying to catch the roadrunner, & they never worked out as claimed. EDIT: I just hate to see someone put so much time & effort into something only to have it screwed up by poor quality paint. It's TWICE as much time to strip it off & do it again the next time. Also: black is not black. Some are blacker than others. Cheap blacks have different tints that aren't really black. Imron has a green tint to it, if you put it up by other blacks. Just mentioning this in case you ever have to do a repair: you'll need to make sure to use the same paint. ~ Paul aka "Tha Driver"
[This message has been edited by Tha Driver (edited 11-05-2010).]
IP: Logged
10:44 AM
reinhart Member
Posts: 1136 From: Orange County, CA Registered: Mar 2002
Driver, do you think this Acme clear coat is better or worse than the factory clear coat?
It is part of S-W's Finish One line and is $65 / gallon. It doesn't matter to me if I have to wait longer than 2 days to final buff. I may wait a few weeks anyway just out of exhaustion.
IP: Logged
03:24 PM
rogergarrison Member
Posts: 49601 From: A Western Caribbean Island/ Columbus, Ohio Registered: Apr 99
I sand and buff Finish One the next morning after spraying it. I would wait a day or two though. Depending on drying conditions, if you do it too soon, you may have to go back over it lightly in a week or so. The ONLY clear I ever had a problem with was House of Kolor, that wasnt hard even after a year. I had the Diamont clear on my Ferrari kit when a guy in a parking lot ran his Cavalier bumper up the nose 2 feet over top of the hood till his wheels were off the ground. His insurance paid to paint the front half of the car. I did a little wet sanding and buffed it all out to where you couldnt tell he even touched it. All the touch up I did was a few little nicks i brush touched right at the edge of the front about the size of some stone chips. Someone here bought my car and if it hasnt been repainted, he can still see those touch up spots on the right front now that I told him.
Ya, ill agree there are different blacks. Just like any other color, each make of car has its own black. GM black is not the same as Ford or Dodge black. Kia black is almost a dark blue. Any black that has clear over it is 'grayer' that straight black single stage. No black is as deep and dark as single stage black, wet sanded and buffed.
At least in the 60s-70s, GM used R&M paint. I dont know for sure now, but I think they use PPG now and we all know how good their clearcoat jobs are. Of course Ill give benefit of the doubt since factory only puts one coat of clear on.
[This message has been edited by rogergarrison (edited 11-05-2010).]
Driver, do you think this Acme clear coat is better or worse than the factory clear coat?
It is part of S-W's Finish One line and is $65 / gallon. It doesn't matter to me if I have to wait longer than 2 days to final buff. I may wait a few weeks anyway just out of exhaustion.
I've never used it, but I doubt it's as good as what the factory used. Before shooting the car, I would put some on a scrap piece & see how it sands & buffs. Well actually I wouldn't use it at all. I'd spend the extra $45 & use Nason. The problem I had with the 5-star was after 2 days, it was too hard to buff at all. There was no way to buff out 2000 grit scratches - the only paint I've ever seen that I couldn't buff out. ~ Paul aka "Tha Driver"
IP: Logged
07:21 PM
Nov 6th, 2010
reinhart Member
Posts: 1136 From: Orange County, CA Registered: Mar 2002
When I posted yesterday, I had forgotten that I still needed to sand more on the rocker panels. So I also did that today and spent some time sanding the front fascia lower lip. I am pretty happy with the right side but the left side didn't come out quite perfect so I added a little more of the flexible bumper repair. It's pretty close and I'm sure I'm the only one that can even tell but I am trying to get the body perfect.
I also found a couple small dings in the right mirror housing that I filled with catalyzed putty.
So now I'm down to just the front lip on the front fascia and the side repair on the rear fascia. I also might go over the rocker panels once more. They ended up coming out pretty nice and flat, although I also may re-prime the underside as that seems to have a few small pinholes still. The top of the rockers needed almost no sanding at all.
The plan is to finish sanding those areas, then re-prime (about 5 areas), re-sand, then mask and scuff the rest of the car that hasn't been sanded yet, then I'll be ready to enter the paint phase. I'm well over 100 hours now but feel like I can see the light at the end of the tunnel.
[This message has been edited by reinhart (edited 11-06-2010).]
IP: Logged
01:39 AM
reinhart Member
Posts: 1136 From: Orange County, CA Registered: Mar 2002
I am also thinking I will sand the edges of the rims and re-clear while I'm in the paint booth. I can cover the wheels when applying basecoat and then uncover and shoot a few layers of clear along with the rest of the car. I can either reclear over the gold or I might leave that covered and just do the edges.
IP: Logged
01:48 AM
PFF
System Bot
Nov 8th, 2010
rogergarrison Member
Posts: 49601 From: A Western Caribbean Island/ Columbus, Ohio Registered: Apr 99
Id just sand and polish the rim lips, dont bother with clear. First time you put wheel weights on, it will cut the clear anyway and cause them to corrode. You can use higher priced stick on weights. Thats what I use an EVERYTHING. The Alloy rims on my van were trashed from salt and neglect. I just sanded and polished them and they look like brand new...with no clear.
What I do is remove any weights and mark on the TIRE where they are. Put the wheel on a driven axle with it off the ground on a jackstand and front wheels blocked. I put it in drive and give it enough gas to get into 2nd gear. Then BEING CAREFUL with your clothes, hands and whatever, take a folded piece of #36 sandpaper and hold against the spinning wheel. It will cut off all the clearcoat and surface defects pretty fast. Then I go over the same wheel with #80, then #180. If you want it chrome like polished- use whatever wheel polish is appropriate. I like a 'turned' look myself, so I use a red scotchbrite pad to 'polish' it. You can clearcoat them at that point if you want...I prefer leaving them bare for easier care. My rotted aluminum wheels now look like they just came out of the showroom after just a couple of hours work.
* all the clears are harder to buff and sand the longer you wait. I painted a car about 4 months ago and the guy just got enough more to buff it out. I wet sanded with 1200/1500 and buffed it up like glass in about 5 hours. It would have taken a little less time and compound if id done it a few days after it was painted though. I painted my Dodge about 4 years ago now, and I can still sand out a scratch and buff it back up with no problem. Ive found the factory GM clear dont take much abuse. I get ladies cars all the time that I have to sand and buff from just dragging coats and packages across the roof and trunk lids. Its really soft stuff. I did have to reclear the trunk on my Sebring when I ran it into the bottom of the garage door before it was open all the way....
[This message has been edited by rogergarrison (edited 11-08-2010).]
IP: Logged
01:08 PM
Nov 9th, 2010
reinhart Member
Posts: 1136 From: Orange County, CA Registered: Mar 2002
It was a pretty busy weekend for me so I didn't get any Fiero work done until today. I was able to finish up the front fascia to where I'm happy with it. I was adding a little material to the front edges which had been scraped up. I had to add flexible material and sand several times to get the curvature the way I wanted it so it looked correct. Here's the after shots.
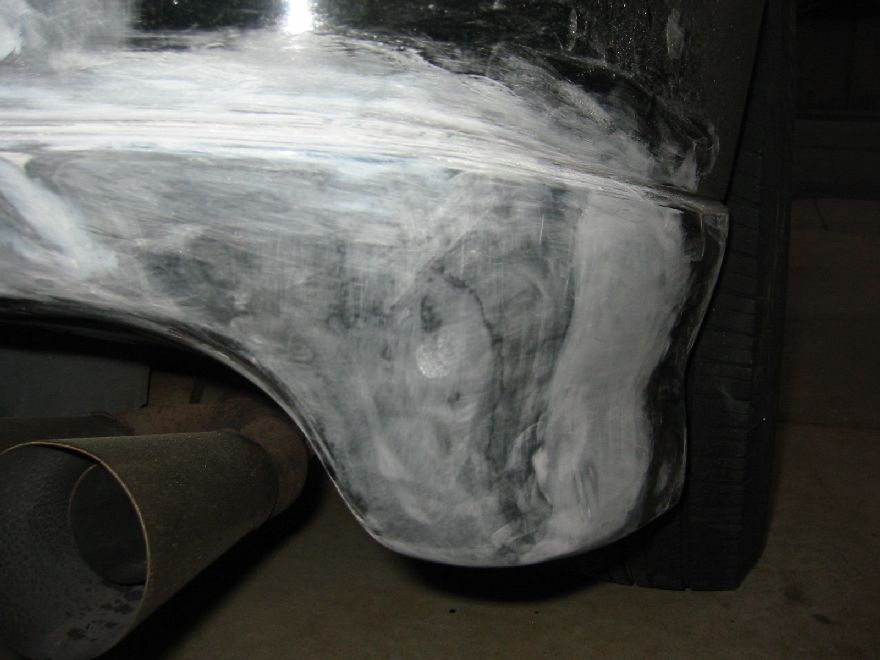
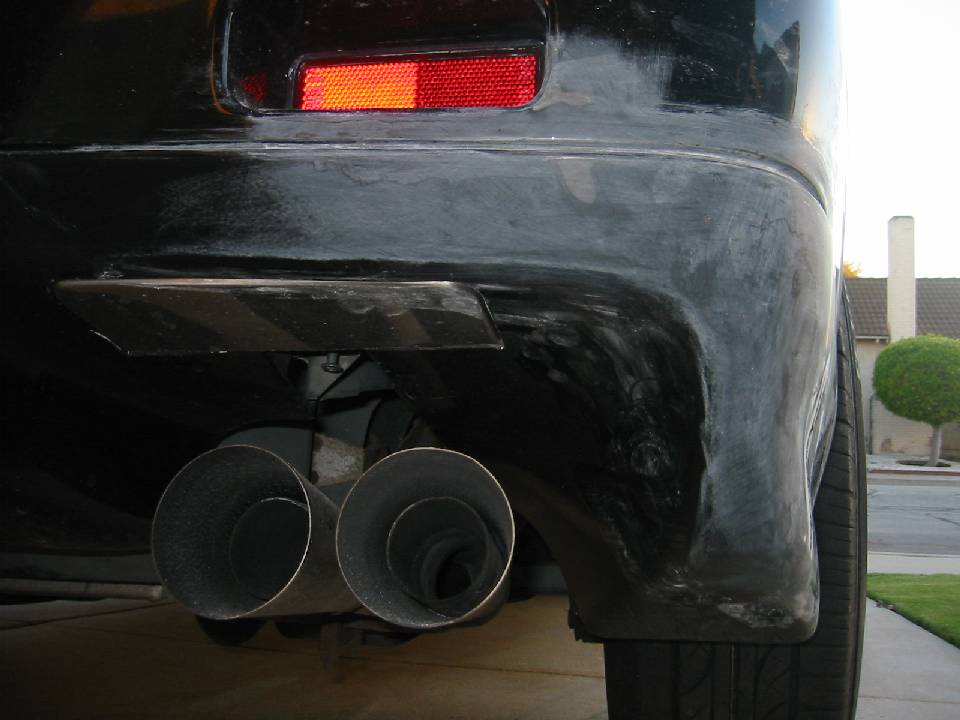
I also spent a little time on the rear fascia. So I figured out the issue I'm having getting it just right is the repair material sands out faster than the surrounding bumper material leaving a low river where the repair lines are when I try to sand the panel level. So I separated it into two steps. 1) get the bumper material where I want it and 2) then bring up the repair lines to sit even with the bumper. Previously I was trying to bring up the repair areas to the same level as the bumper and then trying to sand them both together which was not working. Today I think I got the bumper itself where I want it now, so I just added some repair material to bring the repair lines up to the same level as the neighboring bumper area. I'm letting that dry overnight and then I'm going to sand the repair material even and hopefull that will finish that.
So things are moving along well. I expect to be able to wind the fascia up tomorrow and then I'm going to try to sand down the rim edges and/or I might do round two of the primer, touching up the handful of areas I worked on.
Thanks for the tip Roger, that procedure sounds like it should work well. I only use stick on weights now so I'm good there. I would like to retain the clear coat like it was from the factory so I'm going to try to put it on in the paint booth. It seems like it stuck pretty well from the factory other than the wheel weight damage. I'm hoping I won't have to sand it all off to bare aluminum, if I can keep a layer of clear then I should be able to just paint over that and not prep it. Any idea on how to get the new clear coat to stick well if I have to sand to the aluminum? Once I hit the paint booth, if the clear coat painting doesn't turn out well then I can always sand it to bare aluminum.
[This message has been edited by reinhart (edited 11-09-2010).]
IP: Logged
01:21 AM
rogergarrison Member
Posts: 49601 From: A Western Caribbean Island/ Columbus, Ohio Registered: Apr 99
The wheel clear is not thick at all, any sanding takes it off. Eastway does make a special clear for bare aluminum, but I dont think anyones really had a proble with regular urathane clear sticking to it. When you get it all down to bare aluminum, its scratched enough to hold paint pretty well by itself. Ive tried sprays that supposedly make paint stick to bare metal and chrome and never seen anything that worked. I just avoid the whole thing by leaving them bare and just cleaning them once in a while. The wheels on my Dodge are original AR Torgue Thrusts and have no clear on them. Theyre almost 5 years old and sitting out all the time and thru winter, they still look just fine. Every once in a while I just run a scotchbrite pad around them. Cleared wheels still corrode under the clear even if the clear on the outside isnt broken. I get a lot of Jags and BMWs with leaking tires. They will be flat in a week and its leaking right thru the alloy. The only fix ive found is new wheels or installing tubes in the tires.
IP: Logged
09:17 AM
Nov 10th, 2010
reinhart Member
Posts: 1136 From: Orange County, CA Registered: Mar 2002
I spent more time working on the rear fascia repaired area. I got it pretty darn close but the perfectionist in me decided to add a tad more repair compound in a couple places, but it's definitely closer. I am letting that dry overnight and need to resand tomorrow.
Meanwhile, I spent most of the session working on the rims. The clearcoat seemed pretty thick to me Roger. I was using an 80 grit paper and wasn't making much progress after 20 minutes so just grabbed a grinding disk and held it next to the spinning wheel and that did a good job of removing the clear coat. I also used a dull screwdriver as well. Once that was done I used the sandpaper and went all the way up to a 1000 grit. It looks pretty good. So I'm still debating whether to clear coat or not. I think I will but if I don't like the result I can always sand it back off. I spent about 2 hours just doing one wheel, so still have 3 more to go! The rears I noticed were a lot harder to work with because the valve stem gets in the way. I ended up trying to tape them out of the way but they'd still catch on the paper or my fingers.
Tomorrow I'm going to try to get the rear fascia finished up and if that goes well, I'll re-prime the areas that need it and while that sets I can play with the three remaining rims some more.
IP: Logged
04:13 AM
rogergarrison Member
Posts: 49601 From: A Western Caribbean Island/ Columbus, Ohio Registered: Apr 99
I start out with #36, clear is gone and most defects are gone in 5 mins... and finest I used was #180 for the machine looking finish. Takes me about 30 mins a wheel to complete one. I do lots of them for dealer. First one I ever tried doing, i tried using a grinder, then a wire brush in a drill...both of those failed completely and left weird marks in the rim.
[This message has been edited by rogergarrison (edited 11-10-2010).]
I spent more time working on the rear fascia repaired area. I got it pretty darn close but the perfectionist in me decided to add a tad more repair compound in a couple places, but it's definitely closer. I am letting that dry overnight and need to resand tomorrow.
Meanwhile, I spent most of the session working on the rims. The clearcoat seemed pretty thick to me Roger. I was using an 80 grit paper and wasn't making much progress after 20 minutes so just grabbed a grinding disk and held it next to the spinning wheel and that did a good job of removing the clear coat. I also used a dull screwdriver as well. Once that was done I used the sandpaper and went all the way up to a 1000 grit. It looks pretty good. So I'm still debating whether to clear coat or not. I think I will but if I don't like the result I can always sand it back off. I spent about 2 hours just doing one wheel, so still have 3 more to go! The rears I noticed were a lot harder to work with because the valve stem gets in the way. I ended up trying to tape them out of the way but they'd still catch on the paper or my fingers.
Tomorrow I'm going to try to get the rear fascia finished up and if that goes well, I'll re-prime the areas that need it and while that sets I can play with the three remaining rims some more.
After priming & sanding a little (no shiny primer), you can finish with catalyst-hardened putty & re-prime. It's a LOT easier to get right. As for the wheels, I've never used 36 grit - on anything for that matter (I use 40 to start on filler). 36 is way too rough; it leaves DEEP scratches. But I haven't done any wheels with clear, that I didn't just blast & re-paint. The wheels I've sanded & polished were not cleared from the factory. Once you get them down to 1000, polish them with Mothers aluminum polish & they'll look like chrome. That is, if the 1000 has gotten out all the other scratches. ~ Paul aka "Tha Driver"
What would you be if you were attached to another object by an inclined plane wrapped helically around an axis? Screwed.
IP: Logged
03:09 PM
rogergarrison Member
Posts: 49601 From: A Western Caribbean Island/ Columbus, Ohio Registered: Apr 99
My deep dish wheels look great after the #36 and #180 sanding. They look like new wheels. The only scratches are the ones like any machined wheel looks like, including factory machined finish. Ill get you a pic if you want tommorrow, its dark out now. They had peeling clearcoat, very deep salt corrosion all over and gouges. I dont think they were ever washed. Anyone that wants to redo ruined wheels with 1000 is welcome to spend a day on each wheel if they want. My times more valuable than that. At $25 @ hour labor, I can buy new wheels for less than that. My customers are thrilled with a $50-$100 a set for refurb.
[This message has been edited by rogergarrison (edited 11-10-2010).]
IP: Logged
05:56 PM
reinhart Member
Posts: 1136 From: Orange County, CA Registered: Mar 2002
So I got the rear fascia sanded pretty good. I got back to putting primer on. I made a discovery. The primer I used isn't clear like I thought after I applied it last time. It's grey, but I hadn't stirred the raw component can before I poured it out. I stirred the mixture of the two components but not the individual components. When I looked at the open can, it just looks nice and consistent and smooth so didn't realize it needed to be stirred. This time I was kind of looking at it and noticed down near the bottom were some clouds, so I decided to stir it and lo and behold it was grey. I guess the grey is all the high build particulates. So I put some of the grey primer on the newly sanded areas I was planning to prime: front fascia, rear fascia, rocker panels, decklid, etc. and also went back and reprimed the areas I primed before that I thought I was done with: fenders, spoiler, etc. I guess I'm kinda back at square one so I'll be back to sanding tomorrow.
So as I was sitting there looking at the can, noticing that primer snafu, I was thinking Driver is going to have a field day with this!
Why would I have a field day? Both Roger & myself said we had never heard of clear primer. I'm thinking, however, that you need to sand off ALL the "clear primer" you put on, as it won't be very stable & will probably lift when you paint. At least you will be able to use a guide coat now. ~ Paul aka "Tha Driver"
IP: Logged
04:30 AM
PFF
System Bot
rogergarrison Member
Posts: 49601 From: A Western Caribbean Island/ Columbus, Ohio Registered: Apr 99
The mix isnt right with your primer then. You need to sand it all off or try washing it off with a laquer thinner rag. Dont soak it though, you could affect your filler. You DONT want any trace of it left on the car. Chances are very good it will react with anything you put over it like Driver said (did I just say that ? )
BTW heres a photo of my GT40 wheels after I did redid them with my method. They had sat in a muddy field for nearly 30 years when I bought the remains of the car. The floor pans were competely non existent. They had pits in them almost as deep as a dime and were nearly black/ gray with oxidation. I had to buy new center caps because the originals fell apart by touching them.
IP: Logged
11:17 AM
Nov 12th, 2010
reinhart Member
Posts: 1136 From: Orange County, CA Registered: Mar 2002
Well the good news is I had already sanded the clear primer out of the major repair areas (front and rear fascia). The spoiler and rockers are really the only major areas that have the clear. I already grey primered over them.
I sanded out the spoiler pretty nicely today. If the clear primer was going to react, wouldn't it have reacted when I applied the primer I put over the spoiler and rockers? It seems pretty stable to me, so I'm not sure what to think. If I have a layer of normal primer over the clear primer, shouldn't that lock anything that could react? The new primer sands out exactly like the clear primer. In fact if I were blind I wouldn't know the difference. My best guess is the particulation at the bottom was just the "high-build" particulation. I actually didn't want high build anyway so not sure that's such a bad thing.
[This message has been edited by reinhart (edited 11-12-2010).]
IP: Logged
05:58 AM
reinhart Member
Posts: 1136 From: Orange County, CA Registered: Mar 2002
Well I spent about 5.5 hours today sanding down the primered areas.
Rear fascia came out really nice. I do want to go over a couple low spots when I do my next primer session but it is 10x better than it was before.
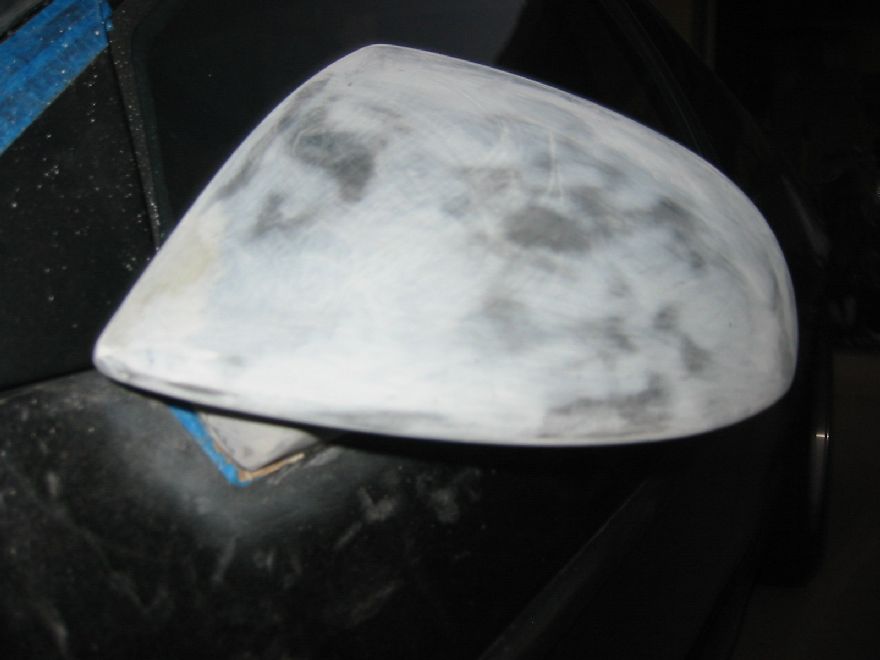
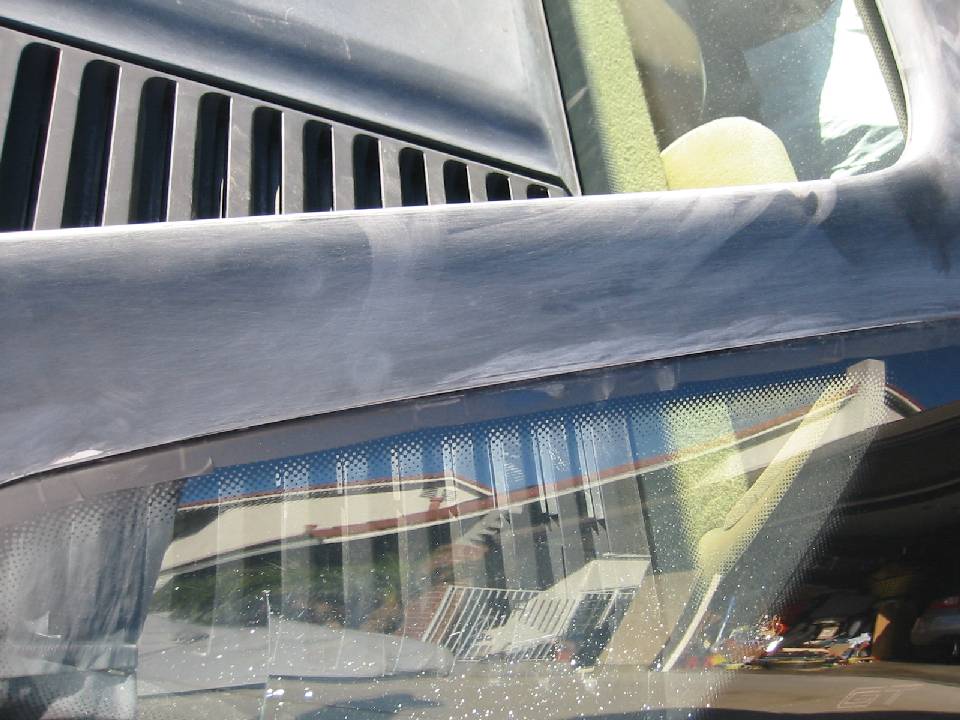
Mirrors:
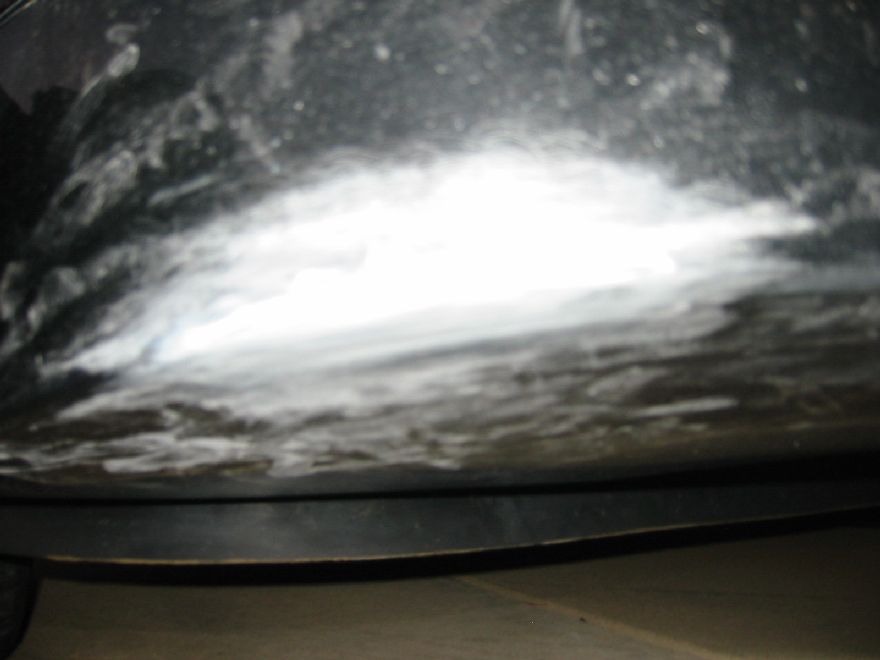
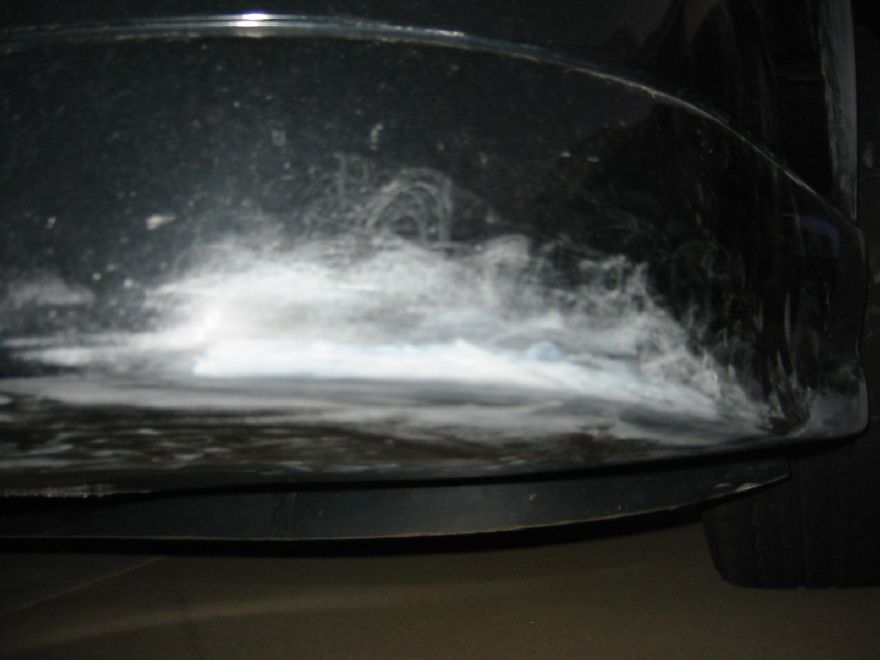
Front fascia. I want to add a tad more to the right side but the left is done.
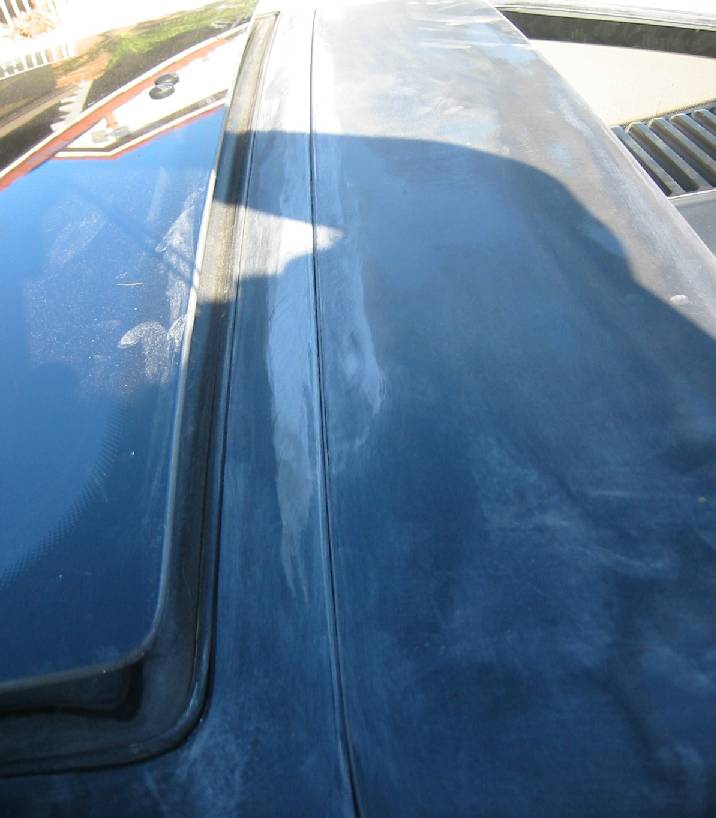
Roof:
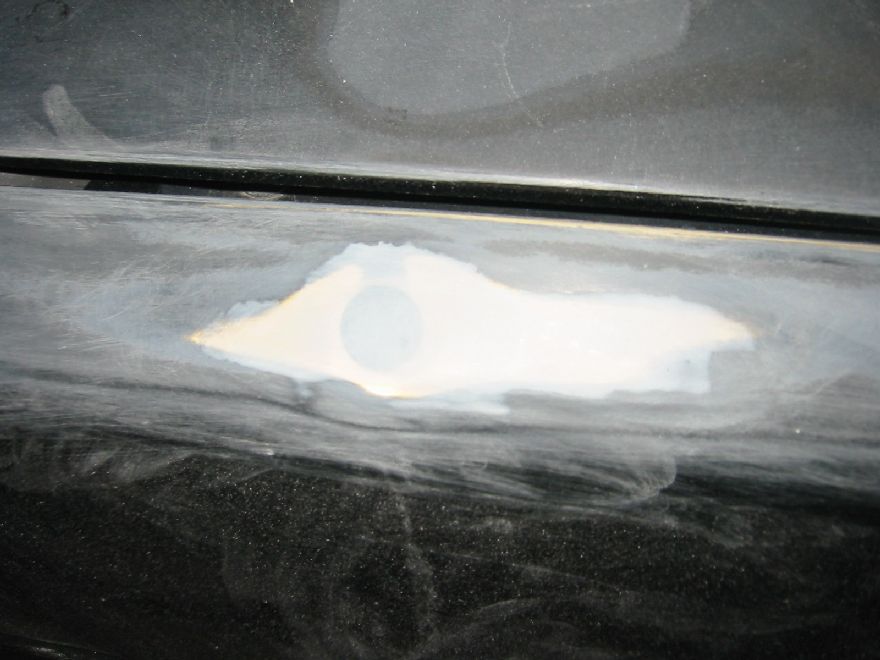
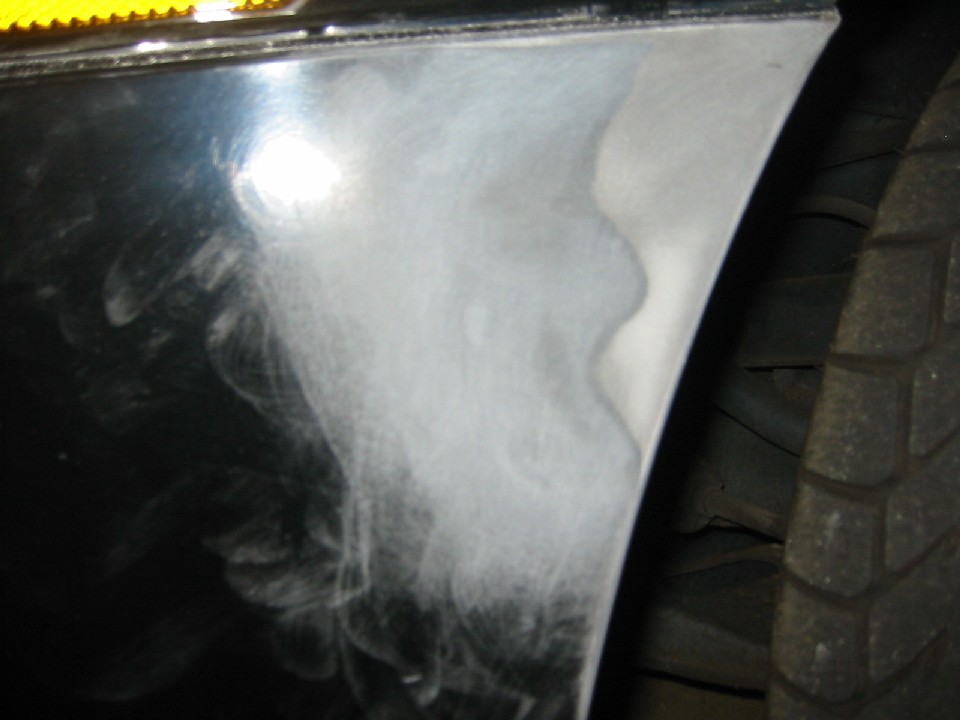
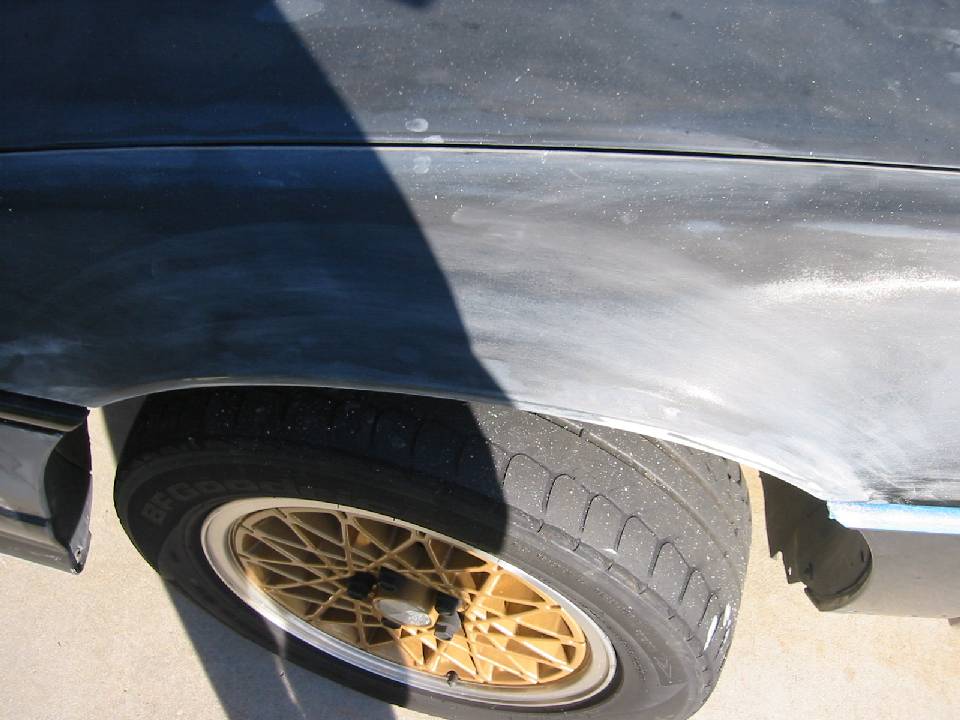
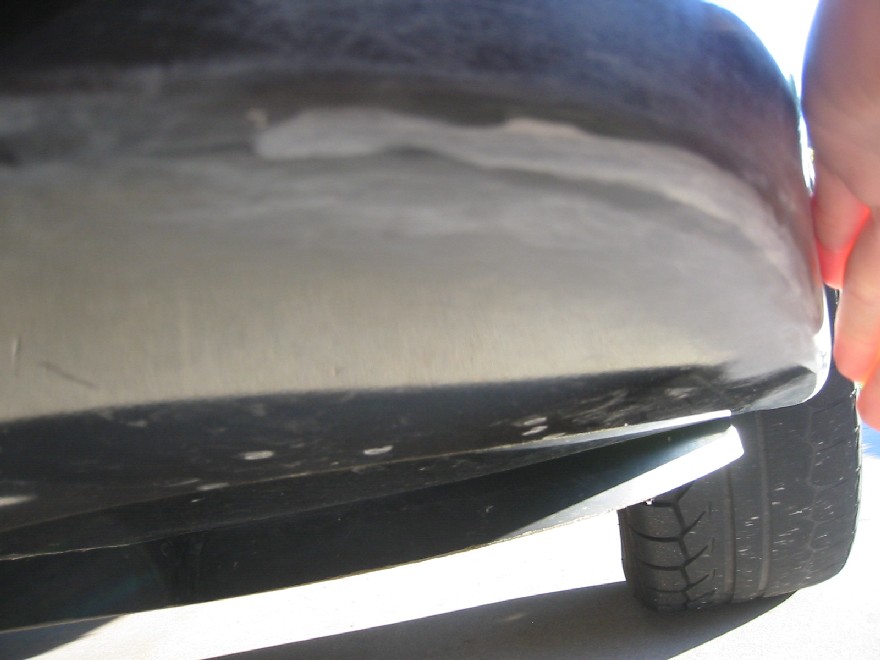
Right Fender. I ended up sanding a lot of the material away so you can see through it but it follows the fender line perfectly.
I finished sanding the spoiler but didn't take any pictures yet because I may put one more layer of primer on the spoiler. I haven't done much work on the rocker panels yet. I am definitely going to have to do at least one more primer session to hit the rear fascia low spots as well as a low spot on the right quarter panel.
I also need to get back on the wheels as I bought some 40 grit paper now and we'll see how fast that cuts through the clear coat.
IP: Logged
06:07 AM
Nov 13th, 2010
reinhart Member
Posts: 1136 From: Orange County, CA Registered: Mar 2002
I spent about 2.5 hours sanding on the spoiler and one rocker panel, both of which I'm pretty much done with. I do want to add primer to a couple spots, but other than that I'm very happy. I need to finish up the other rocker panel and then I'll be ready to put on the primer in the places I need to. Seems like I'm kind of spinning my wheels here because I'm stuck in between priming and sanding now.
Originally I was hoping to be ready to paint this Monday but I'll probably be shooting for the following Monday. The paint booth place said Monday's are quietest. Also I asked if there were any hooks or places to hang hooks from in the booth and was told no so I'll have to be creative to paint everything, most likely using 4x4's and cardboard to fabricate stands. I have gorilla tape which I can use to tape 4x4s on end which should make good stands for the fascias and spoiler. I'm thinking I can bolt the mirrors to an empty plastic tub and set the tub on a 4x4 also taped to the ground. Rockers I can probably put the ends of two 4x4's inside each one stood on end and taped to the floor. I'll mock everything up before I go to make sure it will work and can be easily assembled on site.
[This message has been edited by reinhart (edited 11-13-2010).]
IP: Logged
01:11 AM
rogergarrison Member
Posts: 49601 From: A Western Caribbean Island/ Columbus, Ohio Registered: Apr 99
I use a lot of folding plastic sawhorses, cardboard boxes you can punch holes in to hold mounting hardware, coathangers, and pieces of scrap metal/ wood to fasten parts to. Take a box of screws and a drill driver.
As to the primer, this is why I prefer laquer primer...i can prime, sand, prime , sand over and over many times in a short time. Lighter coats can litterally be sanded 10-15 mins after applied. I do lots of blocking damaged panels flat, and that may need a part reprimered a dozen times or more. Id never get done if I always had to keep waiting for 2 part primers to dry. The stuff I have done with it dont sand the same as laquer either, usually has to be wet blocked or sanded to keep from gumming up paper. Laquer primer sands dry into a fine powder so you dont have to deal with water at all. Other than Corvettes, nearly all my work is on metal cars and my primer etches into the metal to get a good grip. Anyone who doubts it, leave some laquer primer in an aluminum paint gun. It will eat the inside of the cup. I keep primer in a gun at all times, and have to replace the gun a few times a year. I buy cheap Harbor Freight throw away guns for that.
I know your getting excited now that your getting close to shooting it. Im sure your going to be pleased with yourself when your done.
IP: Logged
07:53 AM
reinhart Member
Posts: 1136 From: Orange County, CA Registered: Mar 2002
I've been pretty happy with this primer. The outside coating looked and felt really hard when it dried but was really easy to sand and is very soft. I can press the fascia in very easily and the primer doesn't show any signs of stress. I'd say the difficulty sanding is about the same as the factory paint.
IP: Logged
06:30 PM
Nov 17th, 2010
reinhart Member
Posts: 1136 From: Orange County, CA Registered: Mar 2002
I didn't get any work done over the weekend but today was able to spend 2.5 hours sanding down the lower rocker panels and also the front upper rocker panels. I am ready to reprimer the areas that need it now. I should be able to get that done tomorrow but will let it dry overnight and will be able to sand the primer Thursday. I hope to have a chance to work on stripping the clearcoat off the edges of the rims tomorrow.
IP: Logged
04:30 AM
Nov 19th, 2010
reinhart Member
Posts: 1136 From: Orange County, CA Registered: Mar 2002
Daylight savings change is really killing my productive hours. It's getting dark at 4:45 now. Three weeks ago I was able to work until 6:00.
Anyway I was able to get the primer on today. I spent about 2 hours working (cleaning and then primering). I've found if I let the primer sit about 15 minutes after I mix it up, it thickens a bit more and doesn't drip as easily as it was last few times I applied it. The only problem is after less than an hour it was coagulating in the mix bucket. The things I applied to in the first few minutes came out amazing. I did the fuel door and it was absolutely flawless. It looked like I sprayed the primer on. Towards the end, the primer got thick enough that it started ruining the foam roller I was applying the primer with, causing it to dissintegrate.
So I did get everything done before it got dark. I reapplied primer to the fuel door, spoiler, rocker panels, right corner of the front fascia, fenders, and rear fascia. Basically I reapplied about 75% of the places I did before. So when I put it that way it sounds like I'm not making any progress but I feel like I am. Tomorrow I should get a good sanding session in.
IP: Logged
02:56 AM
rogergarrison Member
Posts: 49601 From: A Western Caribbean Island/ Columbus, Ohio Registered: Apr 99
Ya, the catalyzed stuff starts hardening pretty quick. Ive never had any stay liquid for an hour, so your doing good, lol. I dont even mix my clear until the minute Im ready to spray it, and only mix it a gunfull at a time. Dont mix up the whole batch to spray at one time like you normally do with the regular paint. I had clear harden in the gun before and the gun was junk (and it wasnt a cheap knock off gun). The temp you use it also has an effect on hardening time. Outside in the evening is giving you some extra time. In a hot garage in the summertime it can harden in 15 minutes.


 )
)