You only need the driver side. You can just lightly tight one bolt to it. Shouldn't take you more than 2 min to take it off. When I drove my car to the bodyshop I had even the fromt hood off. When I arrived at the shop I also realized that I drove about 10 miles without a tag. Forgot to put that back on. Glad no cop were around.
Driver, why would that cause clearcoat overspray? If anything wouldn't it be thinner there since I'm only putting one coat on at the end whereas the outside parts of the mirror housing would have two layers? Thanks for your feedback.
I was talking about the coats of clear you spray on the car, dusting back behind the mirror & causing dry overspray spots. Very hard to melt in with another coat of clear from the back. You could do like roger said & wet sand them, but it'll be far easier to paint them off the car. ~ Paul aka "Tha Driver"
Roger, I'm a bit confused on this....so you're saying the issue is that if I shoot one coat of base coat on the inside of the mirror first that from shooting the inside, I'll get overspray on the outside of the mirror, which will result in an uneven finish on the outside?
Those are some good tips. I was planning to pre-tape but hadn't considered cutting the paper to size. I think I will cut the paper to fit the windows before I leave. Is newspaper fine to use? How many sheets of thickness do you use (obviously 1 sheet isn't enough)?
What I'M talking about (not roger) is that when shooting clear on the outside (the whole car), you'll get an overspray buildup on the inside area of the mirror, which will result in a very rough surface which won't melt in with a coat of clear from the inside. Newspaper is NOT recommended. It'll soak up the paint & stick making a hell of a mess. ~ Paul aka "Tha Driver"
IP: Logged
04:41 PM
rogergarrison Member
Posts: 49601 From: A Western Caribbean Island/ Columbus, Ohio Registered: Apr 99
What Im saying is you will have a rougher surface from overspray with 6 coats of paint from the outside than you would with just 2 coats sprayed from the backside. Ive never had a problem getting it to melt back into fresh paint and Ive never had to rub out the backside (towards the window) of a mirror. Theyre smooth and shiny enough left alone if you paint them right. Some people get their car smooth enough, they never rub out the outside. I didnt color sand or buff any of my Sebring. Shot the paint and its done, better than OEM. I show it once in a while just for the hell of it. I didnt want to waste my time sanding and buffing it since its a daily driver.
I do agree with using masking paper....not newspaper. Its not expensive and has a special waxed coating to keep paint from bleeding thru. The shop your painting at surely has a tape machine...just use some of theirs and throw them a few extra bucks. I get 2 rolls of 18" for $12. I think theyre 60 yards long. Lots of people get away with newspaper...ive even used it in the past myself. Not that big a deal except if your 2 toning something or masking off bare plastic parts where you will def mess something up. I know a guy who shot his car and painted the lower trim (Grand AM) another color and used newspaper. After painting the second color, most of the newspaper stuck into the first. It was a nitemare getting it all off, then having to repaint it.
IP: Logged
06:30 PM
Oct 21st, 2010
reinhart Member
Posts: 1136 From: Orange County, CA Registered: Mar 2002
What I'M talking about (not roger) is that when shooting clear on the outside (the whole car), you'll get an overspray buildup on the inside area of the mirror, which will result in a very rough surface which won't melt in with a coat of clear from the inside. Newspaper is NOT recommended. It'll soak up the paint & stick making a hell of a mess. ~ Paul aka "Tha Driver"
Driver, can I do a quick 400 grit hand sand on those inside mirror areas when I'm ready to do a quick shot of clear at the end? I guess that would be sanding base coat is that a problem?
IP: Logged
02:42 AM
reinhart Member
Posts: 1136 From: Orange County, CA Registered: Mar 2002
Here's the update for the day. I decided to work on the rear decklid instead of the rear fascia. This is the last area that had any clearcoat damage other than a one square inch area on the top of the front fascia. I removed the spoiler and sanded down the decklid.
In the area where there was clearcoat damage, I ended up sanding down a few spots to panel so will have to put a little primer in that area. Also I noticed that even after sanding the decklid, there are still gasket marks where the spoiler was. Very strange! I'm getting pretty good at knowing what areas to hand sand and what to use the machine on.
Quick question. Why is it that the areas where I machine sand there are no scratch marks but the areas I used red scotch-brite there are scratches? Should I be concerned or is this normal and won't show up when I paint?
IP: Logged
02:59 AM
reinhart Member
Posts: 1136 From: Orange County, CA Registered: Mar 2002
So your going to paint with the mirrors mounted ? Its nearly impossible to get the inside of the mirror by the glass that way. If you have them already off, suggest you paint them off. You can make a scrap metal bracket screwed to a sawhorse to hold them. When I paint them on, I roll the widows down when Im thru and spray the back (towards window) with a coat of color and clear with very low air pressure, then spray just some reducer around the area to melt it back in. This is 'blending' but its blending new paint with other uncured new paint, which is easy and wont show. The only trick there is not to wet it down much with reducer or it will run.
Roger, how do you address the probem that has been raised about the overspray from painting the outside getting on the inside? Do you just paint right over the 6 layers of overspray or do you sand the inside back down with 400 and then spray the inside as you described?
I was planning to use about 30 psi pressure to paint the entire car, what setting do you put the pressure on for the inside mirrors?
Also regarding the blending using the reducer, where do you spray the reducer? Just the area where the outside and the inside sprays meet only? What a one inch wide strip?
Driver, can I do a quick 400 grit hand sand on those inside mirror areas when I'm ready to do a quick shot of clear at the end? I guess that would be sanding base coat is that a problem?
You don't want to sand the base coat. If you ever HAVE to (& plan to shoot just clear over it), I'd use 1000 wet. But when you sand base, you really need to shoot more base over the sanded area - If you're doing that you CAN sand it with 400 wet. Just take off the mirrors & hang them & shoot them & don't screw around with all this overspray/sanding/blending/BS. As for the scratches using scuff pads, I don't think they'll be a problem. But then I NEVER just scuff something OR paint it without sealing with PPG epoxy primer. Maybe roger can chime in on that since he's said several times before he does "scuff & douche" jobs all the time. ~ Paul aka "Tha Driver"
IP: Logged
04:10 AM
rogergarrison Member
Posts: 49601 From: A Western Caribbean Island/ Columbus, Ohio Registered: Apr 99
Since you already have them off, just do them separate. If you blend overspray in with reducer, you just spray a LITE coat of reducer anywhere the overspray lands. With the air turned down just enough to spray a pattern, it shouldnt be more than a square foot or two. On acrylic enamel jobs, I used to do, I finished a job by spraying a coat of about 10 parts reducer to 1 part reduced paint to gloss it up and even out the metallic. That dont work too well with urathane though.
For painting SMALL areas, I never had a big problem with overspray . I painted all my door jams yellow in the Dodge using only 18" wide paper around the openings. You can then lay plastic over the interior if you really want too. I did completely seal off door openings at one place that wanted the jams and exterior shot all together at once because the overspray then would be pretty heavy obviously. On the Dodge, I just turned down my air pressure just to where it had a pattern and sprayed the doors and the jams... All with the new black vinyl interior and dash. I just wiped any dust off with a damp cloth.
Yes I do the quickie douche jobs for people (like used car dealers) because they wont pay $2000 to paint a $3000 used car. Scotchbriting a good finish works just fine. I painted my new Sebring by just scotchbriting and spraying. Paint was perfect, just wanted to change the color. Some people dont even scotchbrite a car or part before painting. Ive seen guys at dealerships just spray a coat of adhesion sealer then paint it. 6 months later, I wash off all the paint thats peeling with a power washer and repaint it. Never had a vehicle peel that was scotchbrited. I also scotchbrite airplanes for paint in the areas that are in good condition like under the wings. Does great around rivets that sandpaper wont get. The scratches from the scotchbrite are what you want to see...thats what the paint sticks to. You dont want to see any shiny areas. The paint covers them easily. In fact I use a scotchbrite to polish my bare cast aluminum wheels...then go back over them with aluminum polish.
On the taping question, I mean you run a strip of just 3/4" tape all around the part your masking, just by itself. Then you stick your paper and tape on that. Lets you mask the edges much more accurately than with paper hanging on it.
[This message has been edited by rogergarrison (edited 10-21-2010).]
IP: Logged
05:01 PM
PFF
System Bot
Oct 23rd, 2010
reinhart Member
Posts: 1136 From: Orange County, CA Registered: Mar 2002
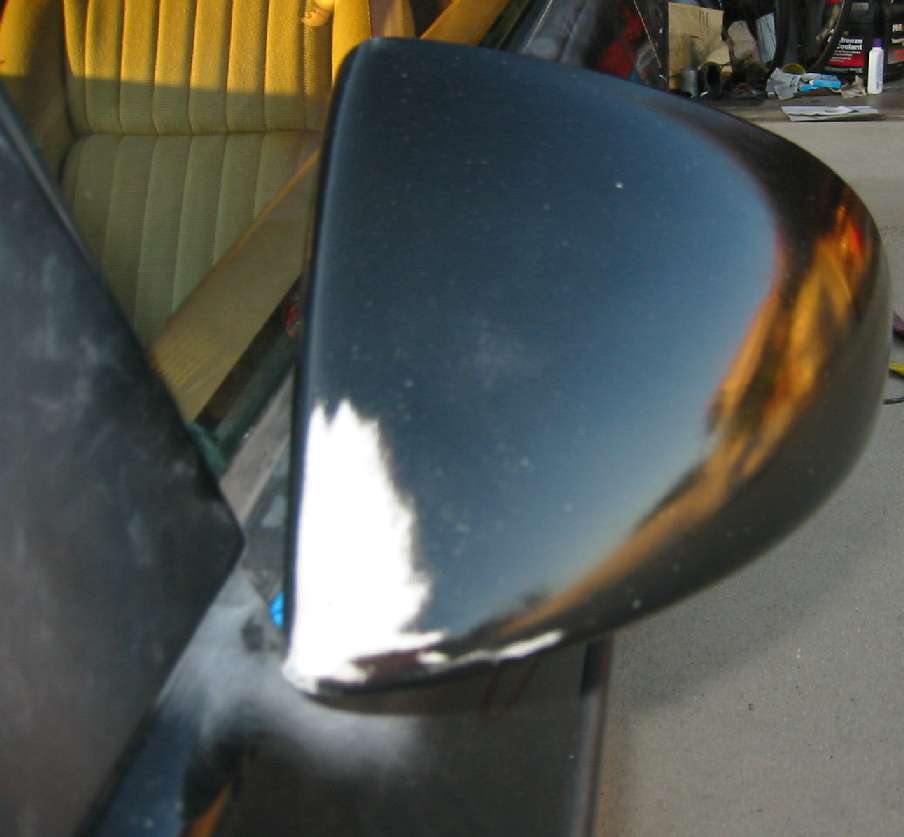
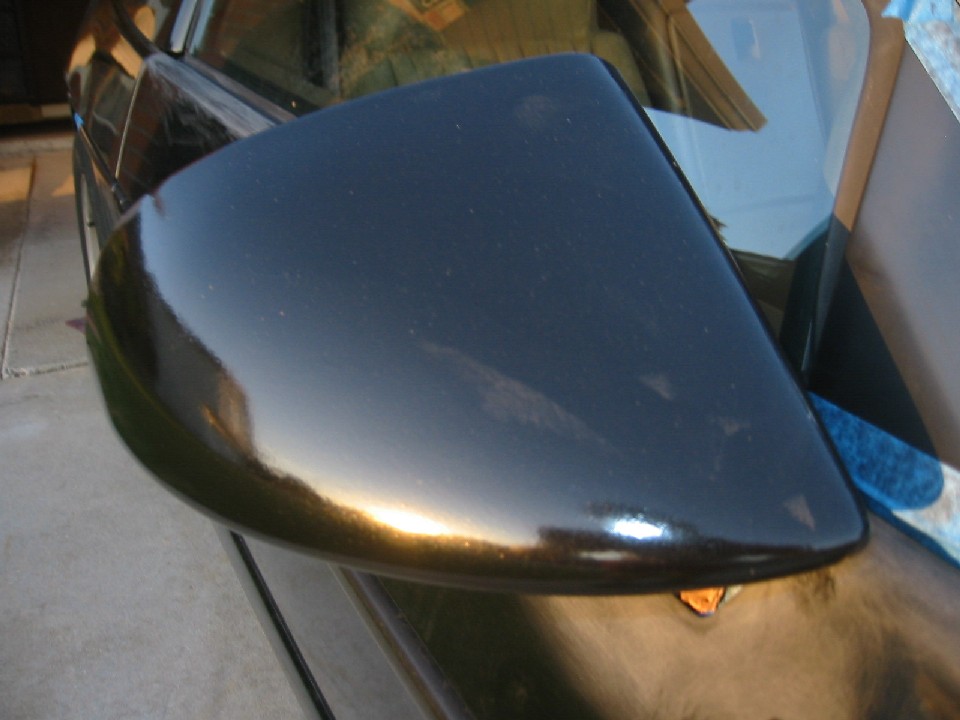
Thanks for all the good advice guys. After thining about the situation and your wisdom, I am going to try to paint the mirrors off the car. Where were you all when I threw out that great idea of removing just the gaskets on page 2? ;p
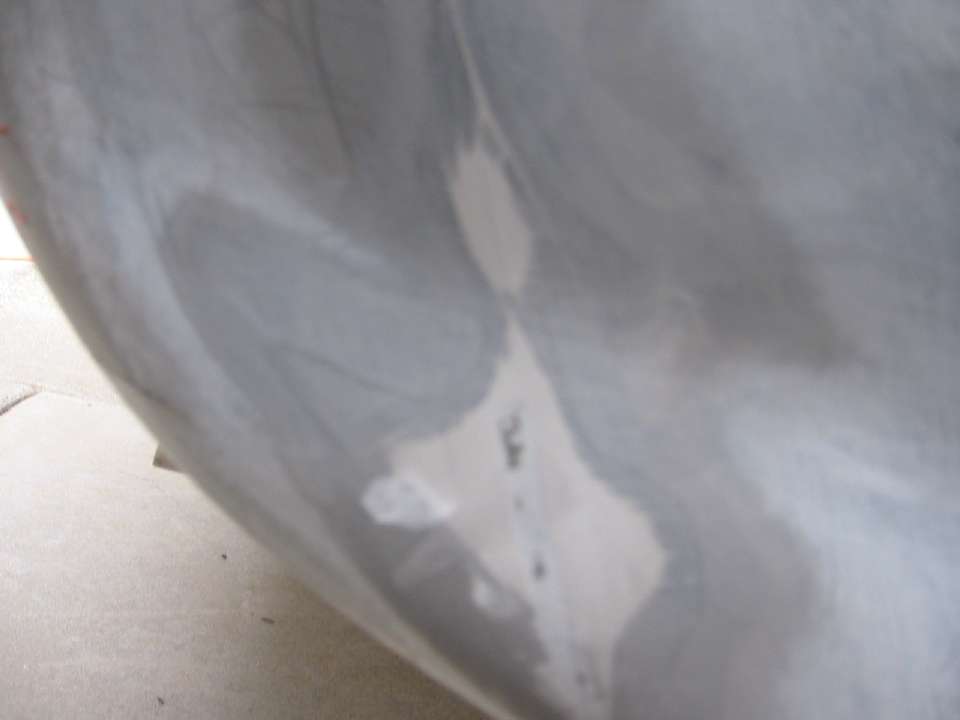
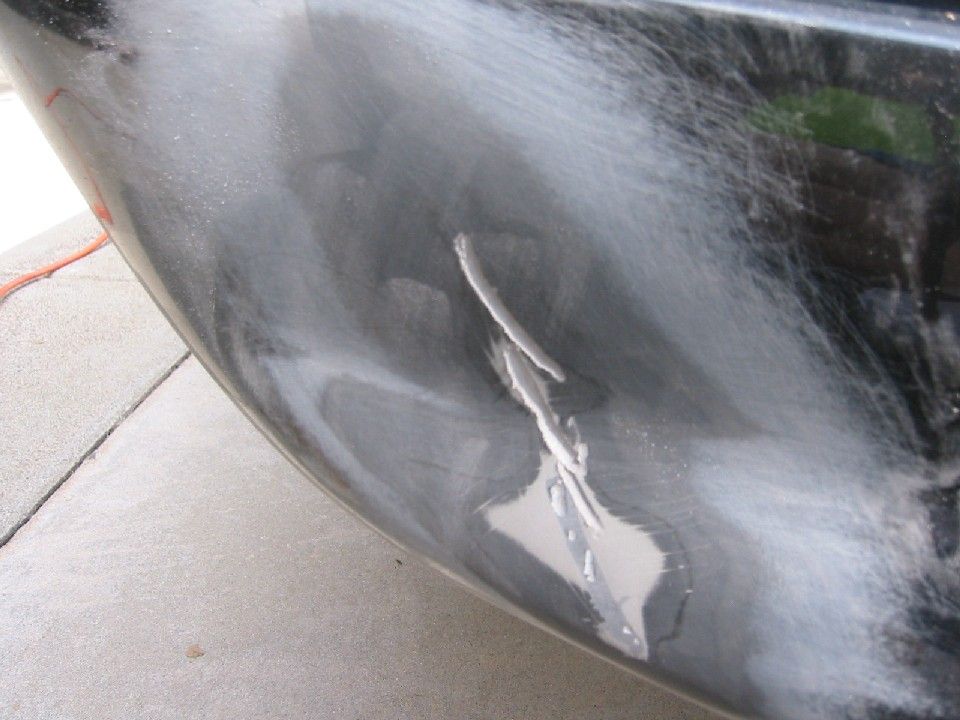
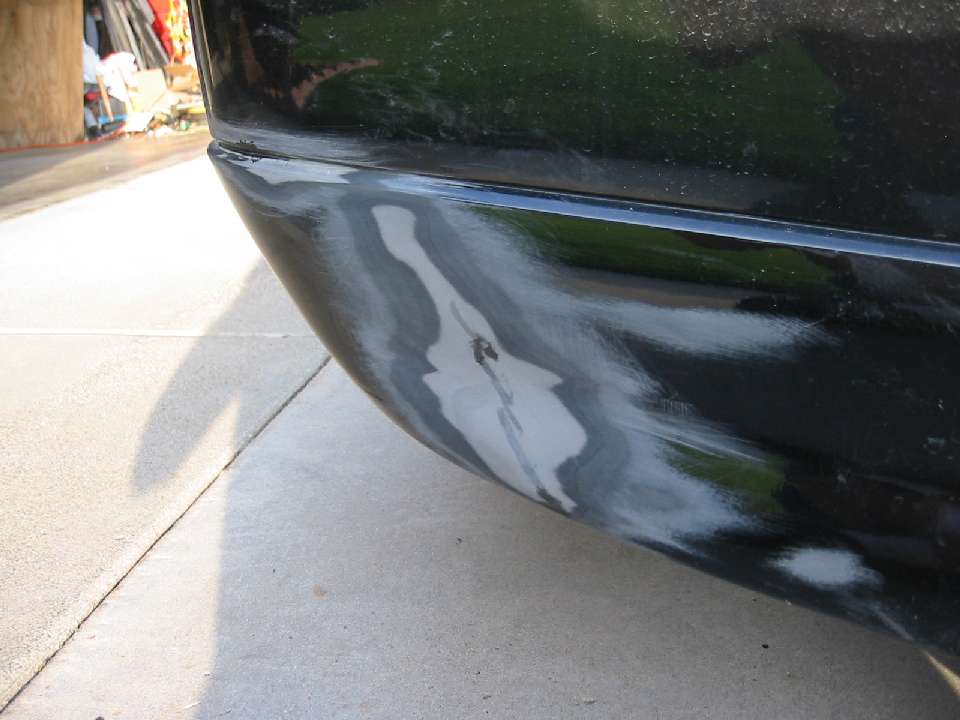
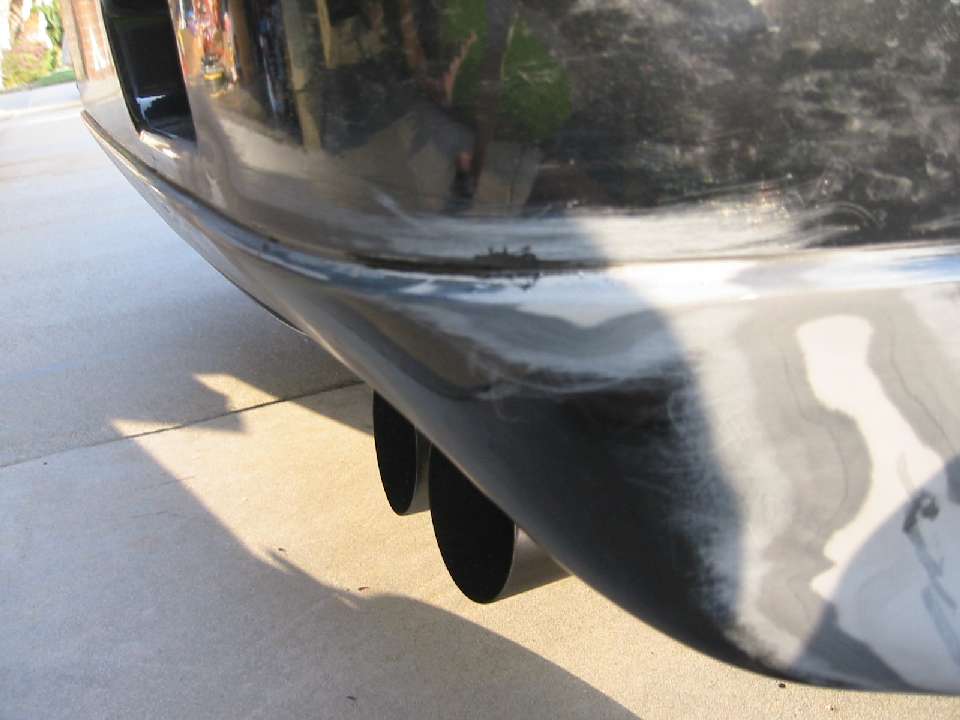
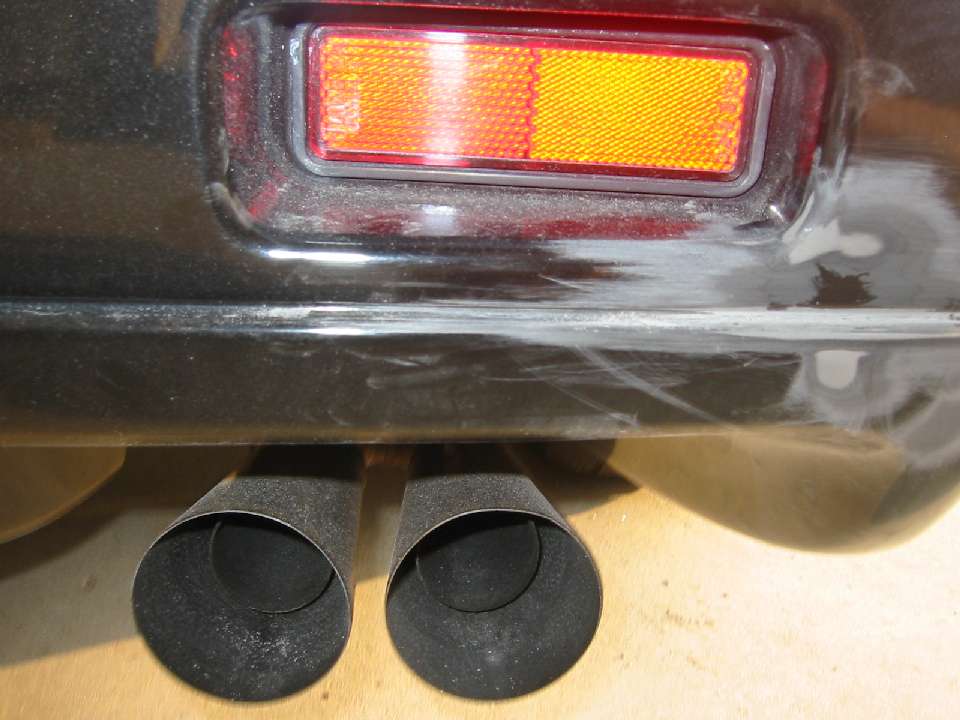
So I got some good work in the last few days. Thursday, I worked on the rear fascia. A few weeks ago I had already repaired one large tear that went through the bumper to the back. There were a ton of deep paint cracks on the front side that I needed to sand down. I went to work and did that. Had to go all the way down to the polyurethane.
Once I had ground it down, I noticed there were still cracks showing and when I pushed on the inside out, could see cracks in the bumper material.
Those cracks were not all the way through to the back but were deep enough to bother me. So I decided to groove the front.
And then filled it in and sanded.
I also sanded down the grooved area that had the huge crack which I also repaired weeks ago.
There was a small paint crack near the marker light too.
Added a little more repair compound to the groove and the side cracks.
That was it for Thursday. I spent about 5 hours working on the rear fascia.
Friday I spent another 5 hours working. First I did a final sanding on the rear fascia where I had added a little more bumper repair material.
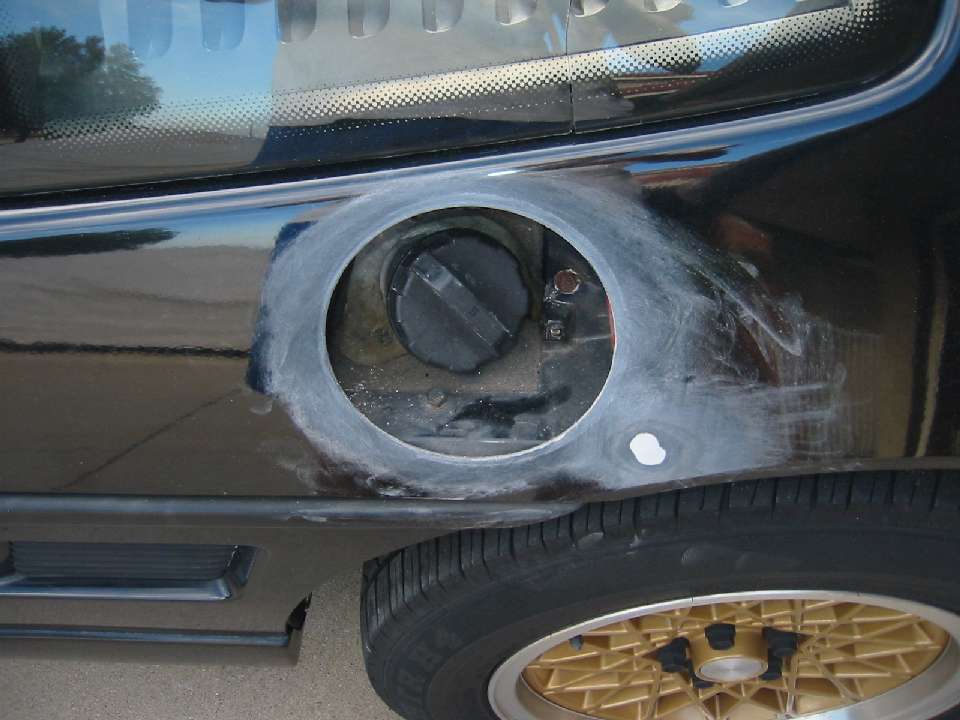
Then I started working on the gas cap surround. The lip had started peeling years ago. There was never any contact, it just started peeling in several places. This is another area where the factory paint adhesion was severely lacking (the rockers was the other that comes to mind).
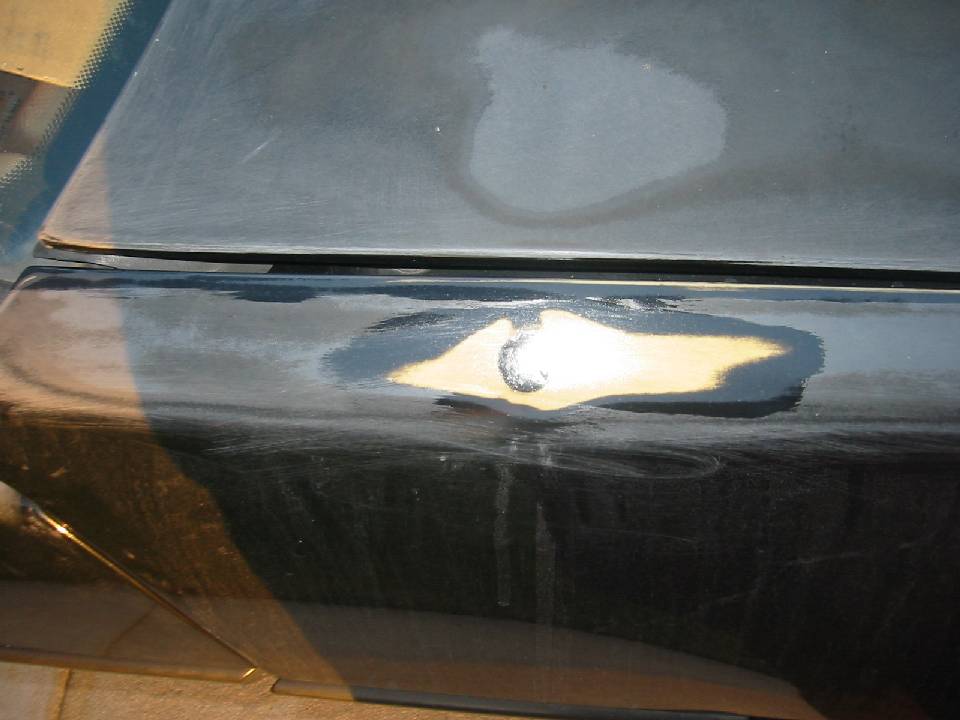
I removed the door and surround. Unfortunately I had a little trouble getting the release cable released and my screwdriver slipping and scratched the quarter panel. Consequently I had to sand the scratch out and it went all the way to SMC. Here's a picture of the area sanded down.
Here's the surround. You can see how badly the paint was peeling.
I wanted to remove all the paint and start over since it was peeling so bad. It turns out that I was easily able to scratch off the paint with my fingernails. My nails started getting tired and I also used a blunt screwdriver but could have easily stripped off all the paint with just my nails.
The door was also peeling on the inside so I'm not sure I trust the factory paint on it either. I ended up sanding most of the outside off and roughed up the inside.
Here's a picture of the surround after I scraped the paint off and the door with most of the paint removed.
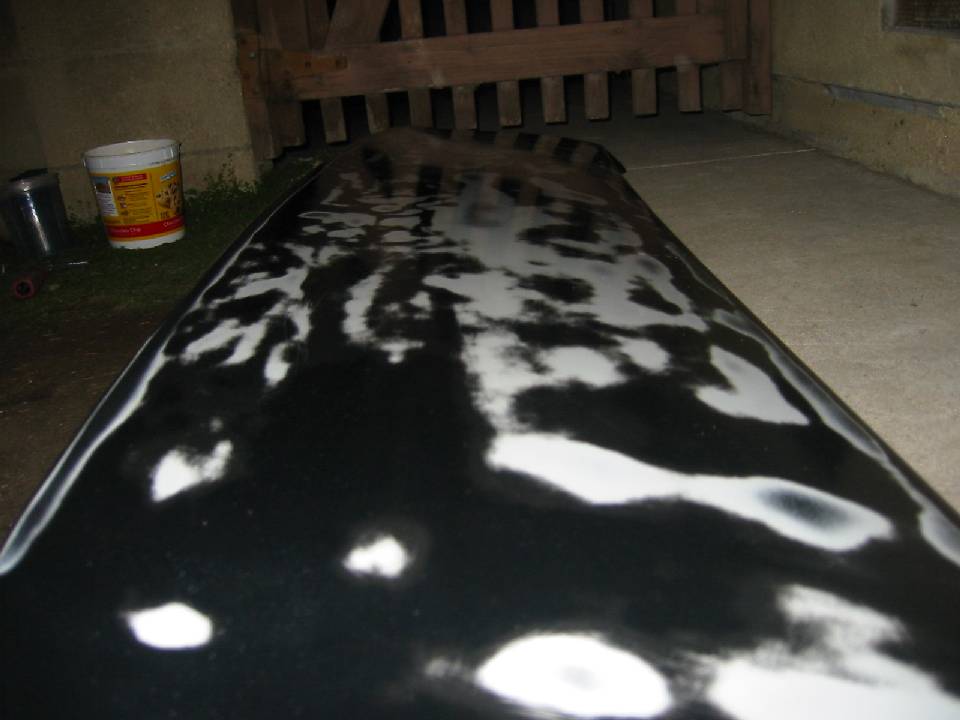
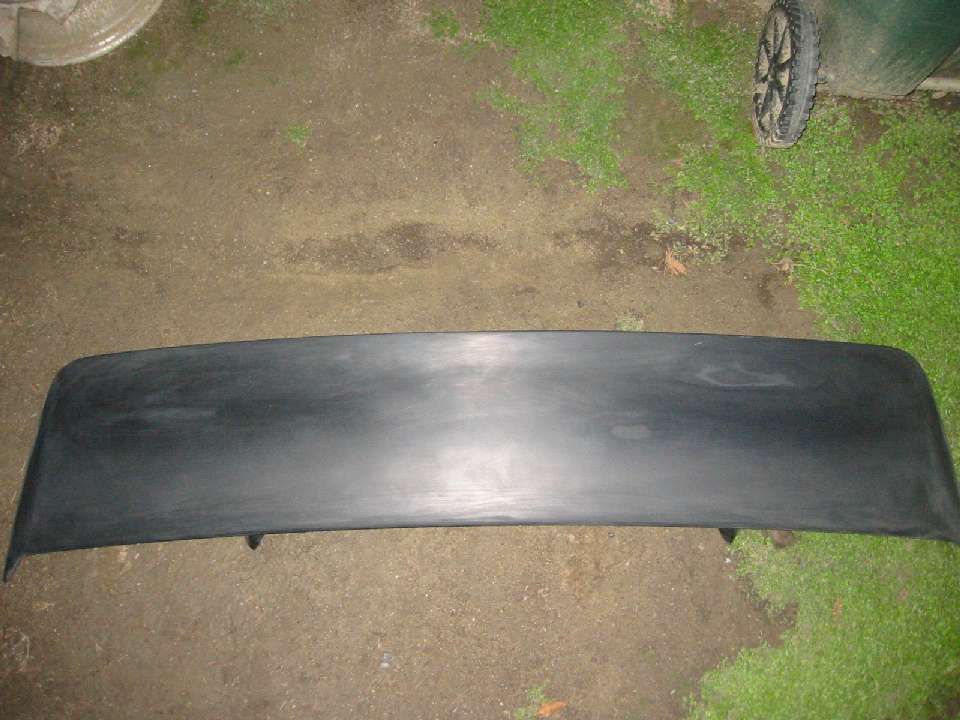
Then I got to work on sanding the spoiler down. I had previously used rattle can paint to cover up some bad clearcoat peeling which at the time was the only part of the car that had any clearcoat damage. I had really overapplied the rattle paint and it took a lot of work to sand it off. I used a DA on the flat part but the rear half bends upwards and I couldn't get the DA on that section. I started with 150 grit paper and then moved to 80 grit. That paint was just caked on and kept forming paint marbles on the paper. As I was going through paper like a bandit I discovered I could scrape the marbles off and reuse the paper multiple times. Finally I got down to where I was sanding factory paint. It was getting dark so called it a day. I spent about 2 hours just sanding the rattle can paint off and that was using 80-150 paper. Amazing! I need to spend a little more time on it when I can see better to make sure I got all the original clearcoat peel off since I had just painted right over that with the rattle can paint.
Here's a picture of the spoiler at the end of the day.
IP: Logged
04:08 AM
Oct 26th, 2010
reinhart Member
Posts: 1136 From: Orange County, CA Registered: Mar 2002
I spent another 2.5 hours sanding the spoiler today. I remember spraying a lot of that rattle can spray, but I must have laid down at least 6 coats, because it seems like there's no end to it. I am using 80 grit paper too! It's painfully slow because it keeps gumming up the paper and I have to scrape off the sand paper every 10 seconds.
Once I get the spoiler done I think I'll be ready to put the primer on the places that need it.
[This message has been edited by reinhart (edited 10-26-2010).]
IP: Logged
03:35 AM
rogergarrison Member
Posts: 49601 From: A Western Caribbean Island/ Columbus, Ohio Registered: Apr 99
I know its kind of late now, but you can help keep your sandpaper from gumming up by using Wet or Dry black sandpaper with soapy water. Your running into the reason I tell people NOT to touch up their cars with spray can paint if you ever intend to do an all over paint job.
IP: Logged
04:29 PM
Oct 27th, 2010
reinhart Member
Posts: 1136 From: Orange County, CA Registered: Mar 2002
I got tired of being so meticulous and decided to fight the spray paint with more brute strength. Just let the DA sander with 180 grit do the work and wasn't as concerned about cutting through the paint. I did cut through in several places but just wasn't making much progress with hand sanding. Even with the DA, it was still very slow cutting through. I spent about 2.5 more hours working on the spoiler yesterday almost entirely with the DA and it's just about done now. Fortunately I did not use the spray paint on the underside or I'd never finish prepping the spoiler.
Here's a picture of the spoiler after yesterday's session.
Roger, thanks for the wet sanding tip; I am reluctant to wet sand black paint because I'm having enough trouble identifying which layer of paint i'm on. If it were another color paint I would do just that. and I definitely learned my lesson about using spray paint!
IP: Logged
06:00 PM
rogergarrison Member
Posts: 49601 From: A Western Caribbean Island/ Columbus, Ohio Registered: Apr 99
Something like that is the only time I wet sand anymore. I dont know what your planning on the primer, but whatever your going to use, anytime you have all the separation layers of different paint you want to use at least a lite coat of primer or sealer. Theres always the chance those 'break' lines may show thru the final paint otherwise...especially black.
IP: Logged
06:39 PM
Oct 28th, 2010
reinhart Member
Posts: 1136 From: Orange County, CA Registered: Mar 2002
Thanks Roger about needing the primer. I sanded the spoiler another 2.5 hours today. Again I used the DA almost entirely. It's spotted with about half of the spoiler down to fiberglass and the other half factory primer now. Rather than mistakenly leave any bad paint on there, I decided, when in doubt to keep sanding. I am going to have to primer the top anyway so figured it wouldn't make much difference. Anyway I'm pretty much done with it now (finally) and it looks pretty smooth, not wavy from what I can see.
Quick question, if I apply primer, what's the soonest I can sand it? I'd like to sand as soon as possible to avoid having to sand it once it sets hard to make my job easier. I think I read 30-60 minutes somewhere...is that about right? I'm going to be using a brush to apply and it's catalyzed two-part primer. I assume it'd be better to have a DA 180 surface so I'll go over it with 180 before I prime. (I had 80 grit hand sanded in some places.)
[This message has been edited by reinhart (edited 10-28-2010).]
IP: Logged
05:16 AM
rogergarrison Member
Posts: 49601 From: A Western Caribbean Island/ Columbus, Ohio Registered: Apr 99
Ill let Driver answer since your using catalyzed primer. I dont use it myself and the few times I tried it it took an hour or 2 before it dried and was very ez to run. The primer I use you can mix as thick or as thin as you need it and I can sand it usually withing 15 minutes. It dont apply on a Fiero, but the primer I use (self etching primer-surfacer) 'etches' itself onto metal surfaces for a better grip.
Thanks Roger about needing the primer. I sanded the spoiler another 2.5 hours today. Again I used the DA almost entirely. It's spotted with about half of the spoiler down to fiberglass and the other half factory primer now. Rather than mistakenly leave any bad paint on there, I decided, when in doubt to keep sanding. I am going to have to primer the top anyway so figured it wouldn't make much difference. Anyway I'm pretty much done with it now (finally) and it looks pretty smooth, not wavy from what I can see.
Quick question, if I apply primer, what's the soonest I can sand it? I'd like to sand as soon as possible to avoid having to sand it once it sets hard to make my job easier. I think I read 30-60 minutes somewhere...is that about right? I'm going to be using a brush to apply and it's catalyzed two-part primer. I assume it'd be better to have a DA 180 surface so I'll go over it with 180 before I prime. (I had 80 grit hand sanded in some places.)
You'll have to read the tech sheet on the brand/type of primer you're using. With the PPG epoxy primer I use, you have to wait at least overnight before you can sand it & better to wait several days (it's sticky shtuff). Some folks say you can't sand it, but I do all the time, using 400 wet before shooting paint. If I have something that really needs blocking, I shoot the hi-build over the epoxy. The epoxy makes everything stick better in spite of what Roger says over & over. Using a brush is probably a mistake. If the spoiler is not wavy, you'll make more work 'cause you'll HAVE to block the brush strokes out whereas if you sprayed it on you wouldn't need to block. If it were me, I'd shoot the PPG epoxy, let it dry for a week, & wet sand with 400 on a stiff sponge pad & shoot the paint (since you think the spoiler is not wavy). No reason to make more work for yourself... ~ Paul aka "Tha Driver"
IP: Logged
01:56 PM
rogergarrison Member
Posts: 49601 From: A Western Caribbean Island/ Columbus, Ohio Registered: Apr 99
Thats great except he dont have any way to spray the primer at home. Any primer thats thin enough to go thru a spray can nozzle wont fill anything. So ya, just about anything he primers needs sanded with a backing pad.
I notice Roger is now saying you need to prime or seal the part if you have feathered edges on the different layers of paint/clear. That's what I've said all along. If you use the PPG epoxy primer, & have the car smooth & not wavy, you can shoot the primer & 30 minutes later start shooting the paint. It's not like the other primers where you HAVE to sand them to get paint to stick. The PPG epoxy primer is the best sealer you'll ever find. If the car is not quite slick enough to paint, you can sand the epoxy (give it several days to cure) with 400 wet & have a really slick smooth surface for painting (this is what I do on the high-end jobs). ~ Paul aka "Tha Driver"
IP: Logged
02:05 PM
PFF
System Bot
rogergarrison Member
Posts: 49601 From: A Western Caribbean Island/ Columbus, Ohio Registered: Apr 99
Ive always said that sanding thru mulitple layer paint needs primed. I dont know where you got it I didnt. I have said over and over that if you just scuff sand or scotchbrite the paint, it dont need primered at all. My Corvette and Sebring had good paint that I wanted to change the color. I scuffed them and shot basecoat with absolutely no primer at all. My Coronet had to have a cheap paint job stripped off the original paint and left a lot of feathered paint. I primered the whole car.
Another reason I wont use the 2 part primer....I dont have the space or time to let a car set here drying for a week before I can paint it. City code also wont let me park it outside while the primer is drying. So id primer a car and have to go on a weeks vacation so I could paint it when I come back. I just hope I dont have to primer anything on it a second time. I cant afford to take a month to spray paint..after the body work is done. Id have to charge around $10K for an all over.
(end of this conversation)
Sorry: I thought you had said in several different threads that you didn't need primer over old paint. I know you did say "Paint will stick just fine over a properly sanded old paint job..." - I guess you meant if you didn't sand through any layers of paint that had to be feathered you didn't need primer... So now I guess you're saying the OP needs to prime his whole car (like I suggested from the beginning). If he uses PPG epoxy (& the car is smooth & flat) he won't have to go back & sand the whole car again. He can shoot right over the epoxy 30 minutes later. I DO have time to let primer dry properly. I have plenty of other things to do while it sets up. Edit: & BTW I don't charge folks to sit on my butt while the primer dries, so my paint jobs don't cost anywhere near $10,000. ~ Paul aka "Tha Driver"
[This message has been edited by Tha Driver (edited 10-28-2010).]
IP: Logged
06:22 PM
rogergarrison Member
Posts: 49601 From: A Western Caribbean Island/ Columbus, Ohio Registered: Apr 99
But the point of primer is to fix small flaws before you paint. If he has anything showing thru, hes going to have to sand it. As I understood him, hes only got a place to paint for a few hours. Hes not going to have time for it to dry and sand and still paint it before he has to get out. If he just uses your primer as a 'sealer', hes going to have to be sure everything is smoothed out and flat before he puts anything on it. Whats he going to block sand first, the body plastic....?
If he gets the body smooth - & he can do so using 180 on the DA & catalyst-hardened putty in the chips/etc. - he can prime with epoxy & paint the same day. As for the small areas that he repaired (like rips in the bumpers), he can brush primer on them (epoxy primer & then catalyst-hardened putty if needed will work there too) & block out those small areas. But to brush primer on the entire wing (or body), is backing up IMO. Especially when the wing appears to be smooth & well feathered. ~ Paul aka "Tha Driver"
IP: Logged
11:08 PM
Oct 29th, 2010
reinhart Member
Posts: 1136 From: Orange County, CA Registered: Mar 2002
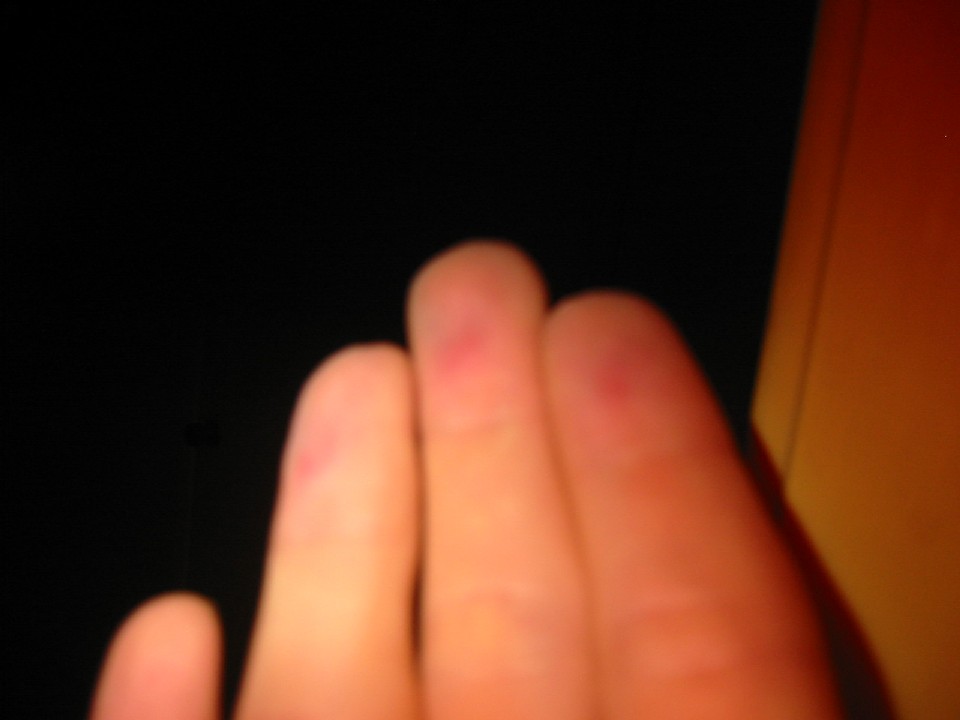
Wow, my fingers are sure taking a beating from all this sanding. I took a picture of my fingers after another 2.5 hours session yesterday.
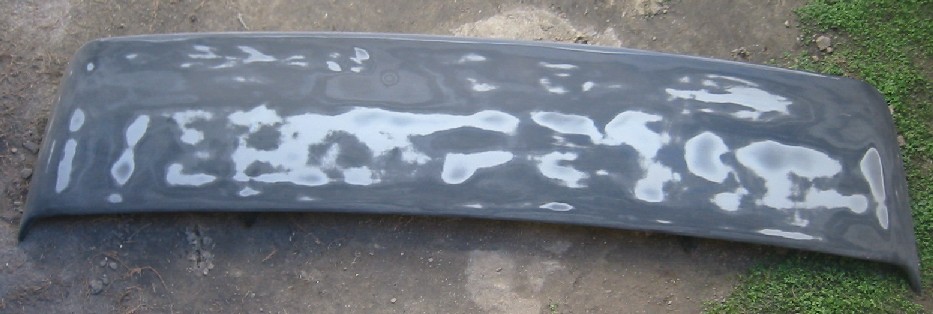
Here's the progress I made on the spoiler yesterday.
Today I put in a marathon session of 5.5 hours sanding down the spoiler and finally finished it. I am very happy with the progress I made and I feel I'm done although I might sand a tad more once I get more light tomorrow. I have put in about 20-25 hours on just the spoiler now, crazy because that's more than I spent sanding the rest of the car that I sanded thus far.
I also scuffed the underside of the spoiler and stantions using a red scotch brite and DA 400. So here's a final shot of the spoiler, which I rinsed off for the final picture (it is a tad damp in the picture and makes the black look darker).
I believe that the gray is the factory primer. I had thought it was the fiberglass but I sanded through that in just a few spots and thus I believe it is gray primer and the fiberglass underneath is black. So in reality, I got down to about 49% gray primer and 49% black base coat with maybe a couple places where the black fiberglass is showing through (mainly along the centerline). Does that gray primer seem right? Is the fiberglass/SMC black here? It's white on the hood and roof.
So this is a picture of the final product...What's the consensus guys, do I need to primer or can I go 400 grit and paint over it? It seems like there's a disagreement after the previous day's picture where the layering was a bit more uneven than it is now, but with the picture here, what do you guys think? It is very smooth and flat and there's for the most part just a one coat difference across the entire spoiler (primer or last level of base coat). I was planning to put a light coat of the catalyzed primer on and then sand down to 400 grit. Driver, I am not going to buy any more primer than what I already have, so it's this 2-part primer or nothing, I know the epoxy is good but the paint stores want more for that primer than the paint which makes no sense to me. If I paint over it as is, will 1) the paint stick to the spoiler and 2) will the layering seen here show through the new paint? If either is no, then I need to put that light coat of catalyzed primer on, sand and then paint over that. I don't mind doing that if it will help adhesion, but if it's just creating more work then I'd rather not spend any more time primering and then resanding it.
And, no I don't have a paint booth or compressed air. I am going to rent a booth and I get a three hour slot to do everything.
Thanks guys, I do appreciate the advice and would be totally lost without your valued input.
[This message has been edited by reinhart (edited 10-29-2010).]
IP: Logged
04:36 AM
rogergarrison Member
Posts: 49601 From: A Western Caribbean Island/ Columbus, Ohio Registered: Apr 99
It looks much better now and Ill guess it will prob be fine to paint over without any of the break lines showing thru. My only concern is it may be rippley and you cant feel that, especially if your going to go black. Did you use a backing pad for the sanding or not ? Using a DA is 'almost as good'. If its not bad, you can also just be sure to use a backing pad when you color sand the clear after your done. Using a bare hand can sand waves and ripples into it that will show in the reflection of the finished job. You will need primer on anyplace thats bare plastic or fiberglass...if not that spot may 'fuzz' up when you basecoat it. I do a lot of panels just DAing with 320 and painting right over that but usually dont go thru several layers.
IP: Logged
11:21 AM
reinhart Member
Posts: 1136 From: Orange County, CA Registered: Mar 2002
I used the DA on the accessible areas until spots started breaking into the primer layer. Because of the rattle can paint job, some areas were not as thick as others, so if I had kept just using the DA, I would have cut way into the body of the spoiler trying to get the old paint spots out.
So instead, I went by the paint layers and started hand sanding the areas that were still layered with that rattle can paint. No I did not use a backing pad. I used the paint layers as my guide. I assumed that the spoiler was flat out of the factory, thus if I hand sanded down to the same layer everywhere it would remain flat.
I think in the picture you can see the few spots that broke through to black fiberglass so you're saying I need to at least hit those with a light coat of primer? It sounds like it would be safest to primer the whole thing and then sand it back to 400?
How would I block sand the upward rolling contour at the rear 5 inches of the spoiler?
[This message has been edited by reinhart (edited 10-29-2010).]
Here's the problem(s): 1) The spoiler is not SMC, it's plastic. There are different opinions on what type but it's different from any of the other panels on the car. IMO the only good primer to use is epoxy, or a primer specifically for plastics. The same is true for the RIM & RRIM panels: epoxy primer is the best (only) thing to use IMO. The only SMC panels are the 2 tops, front hood, & decklid. 2) Although you pretty much have everything down to original paint, anywhere you don't you risk the edges lifting when you shoot it. Do you have any idea what type of paint was put on it the last time it was painted? (other than your spray can shtuff) 3) As Roger said, if anything is hand sanded without a pad or block you risk making it wavy. Even if you sand down to the bare part (be it SMC, RRIM, plastic), the part itself is soft & can easily be cut down into dips. A metal car is different. You can sand everything down to metal & you know you're not cutting the metal down. You can block the curved edge with a fairly stiff sponge pad: just curl it with your grasp & sand in 45 degree angles in both directions. If you absolutely are not going to use PPG epoxy primer, I don't know what to tell you. Like I said from the very beginning, since you're really cheaping out on paint it doesn't really matter how good a job you do, it's never going to be right. And like I tell everyone else: after all the time it takes to do a paintjob, do you really want to half-azz it? Do you have any idea how much MORE time it's going to take to strip off all that paint & do it right when you're ready to do that? How much is your time worth? The only solution I see to prime the bare spots without any kind of delivery system & not spend another unGodly amount of hours sanding is to shoot the whole car with PPG epoxy when you get it to the booth. At least you'll have a good solid base to shoot paint over, with BETTER ADHESION than any other solution (yes I said it again). My fingers usually bleed far before I'm finished sanding prior to buffing, So I know where you're coming from. Understand why paint jobs cost so much money now? HTH, ~ Paul aka "Tha Driver"
"Political correctness is a doctrine, fostered by a delusional, illogical minority, and rabidly promoted by an unscrupulous mainstream media, which holds forth the proposition that it is entirely possible to pick up a turd by the clean end." - R. J. Wiedemann LtCol. USMC Ret
IP: Logged
04:03 PM
reinhart Member
Posts: 1136 From: Orange County, CA Registered: Mar 2002
2) Although you pretty much have everything down to original paint, anywhere you don't you risk the edges lifting when you shoot it. Do you have any idea what type of paint was put on it the last time it was painted? (other than your spray can shtuff)
Yes it was factory paint which I rattled canned over. And after 20 hours I'm confident I got all the rattle can paint off.
quote
3) As Roger said, if anything is hand sanded without a pad or block you risk making it wavy. Even if you sand down to the bare part (be it SMC, RRIM, plastic), the part itself is soft & can easily be cut down into dips. A metal car is different. You can sand everything down to metal & you know you're not cutting the metal down.
I started using hand sanding when I got to fiberglass because I didn't want to cut into the spoiler itself.
quote
You can block the curved edge with a fairly stiff sponge pad: just curl it with your grasp & sand in 45 degree angles in both directions.
Thanks for the tip.
IP: Logged
05:18 PM
rogergarrison Member
Posts: 49601 From: A Western Caribbean Island/ Columbus, Ohio Registered: Apr 99
I also use a 1/4" thick rubber backing pad with the 320/400. As he said you go up and down at 45* angle one way, then the other way on those inside curves. All plastic (whether its SMC, fiberglass, ABS, etc) is inheirently wavy to start with and no amount of blocking will make it 100% flat. Soon as you park it in the sun, it will warp one way or the other. My rear hood corners would rise up almost an inch when it was cold out and lay perfectly flat in the summertime. So too much of an attempt to make it perfectly flat is just wasted time. Older all fiberglass bodies on Corvettes are pieces of total crap from the factory. They actually take points off at major Corvette shows if the body is not wavy...the way it came. It def wont hurt if you can get a light coat on the whole spoiler, then just sand that lightly.
IP: Logged
06:13 PM
PFF
System Bot
Oct 30th, 2010
reinhart Member
Posts: 1136 From: Orange County, CA Registered: Mar 2002
Well I spent 3 hours today getting the car ready to primer. I sanded a bit more on the rocker panels and the gas cap door. I found a few places on the front fascia underside corners that had small scrapes from the ground which I sanded away a bit. I also did some taping off near where I'll be applying primer in areas I won't be painting.
So it's supposed to rain in the morning tomorrow but dry out by noon and not rain anymore for at least a week. So tomorrow I'm planning to do the primering in the afternoon.
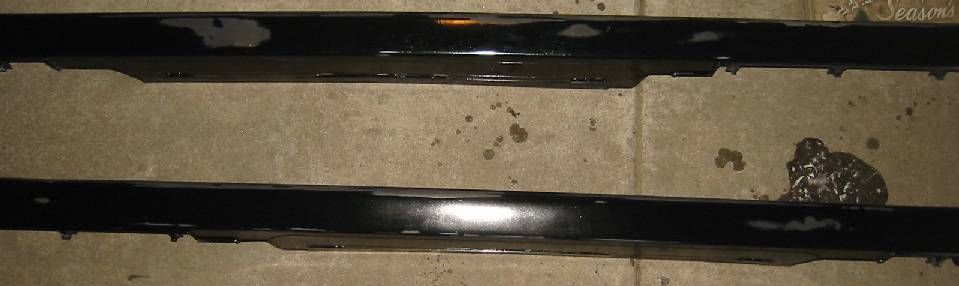
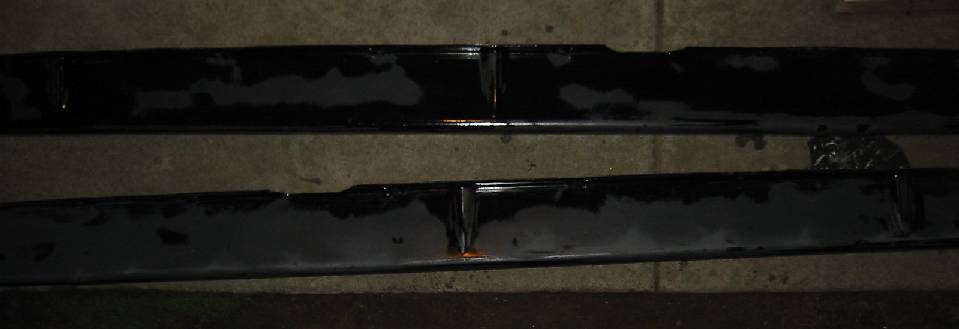
I'll be primering: 1) Upper front rockers 2) Lower rockers 3) Spoiler (top) 4) Gas cap door (front and back) and surround (front only) 5) Rear fascia (Right rear corner) 6) Miscellaneous spots on hood, decklid, roof, front fascia, Left fender (edge), Right fender (antenna hole), quarter panel near gas cap
For the spots, I am just going to cover the bare surface and feather into the paint. That will save me a lot of sanding time.
I was thinking about half a quart of primer would do it.
IP: Logged
01:41 AM
Oct 31st, 2010
reinhart Member
Posts: 1136 From: Orange County, CA Registered: Mar 2002
So Saturday, as expected, we had morning rain but it was sunny the rest of the day. I spent about 3 hours doing final prep to primer which included sanding down some parts again, taping off areas near where I'd be primering, degreasing anything that would be getting primered.
I mixed up 10 oz of the primer which was just right, even accounting for some spilling. I didn't realize that primer is so sticky and it turns out that this kind primer is clear which I wasn't expecting either. I actually had to double check that I used the right stuff because I never heard of clear primer. The primering only took about an hour and fifteen minutes.
There were a few minor issues. One being the foam brush I was going to use started dissintegrating from the chemicals so I tossed it and used just a foam roller pad which worked really well. I was able to make broad strokes across the rockers and spoiler without leaving any brush strokes and then dab with the end to get small areas.
One thing that is strange is that on the spoiler and rocker panels and gas cap door, the primer went on with a sandy/tapioca like consistency with little granuals of primer (I could see the granuals there as I was applying the primer) while the rest of the parts it went on and dried almost perfectly smooth without granuals. I did the same final prep and degreasing on everything so I'm not sure why this is. I used the same batch of primer for everything and I did filter it before using it.
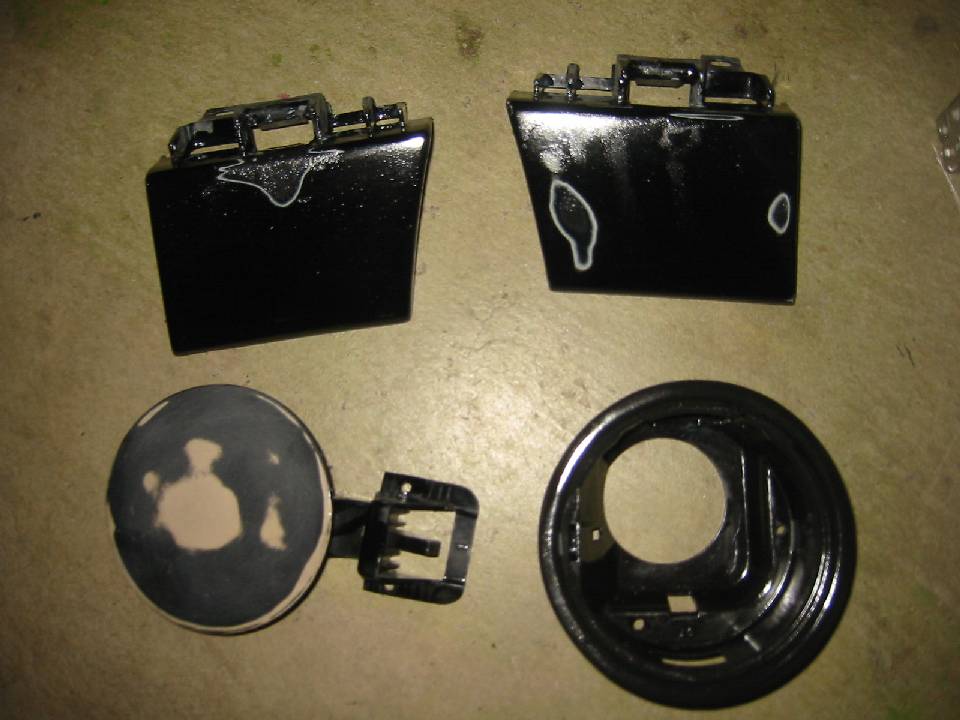
The gas cap surround dried smooth but the outside of the door had a lot of that sandy consistency but the inside of the door didn't have much. Here's a picture of those parts after primer (I had already lightly sanded the gas door for a minute or two so it's no longer shiny).
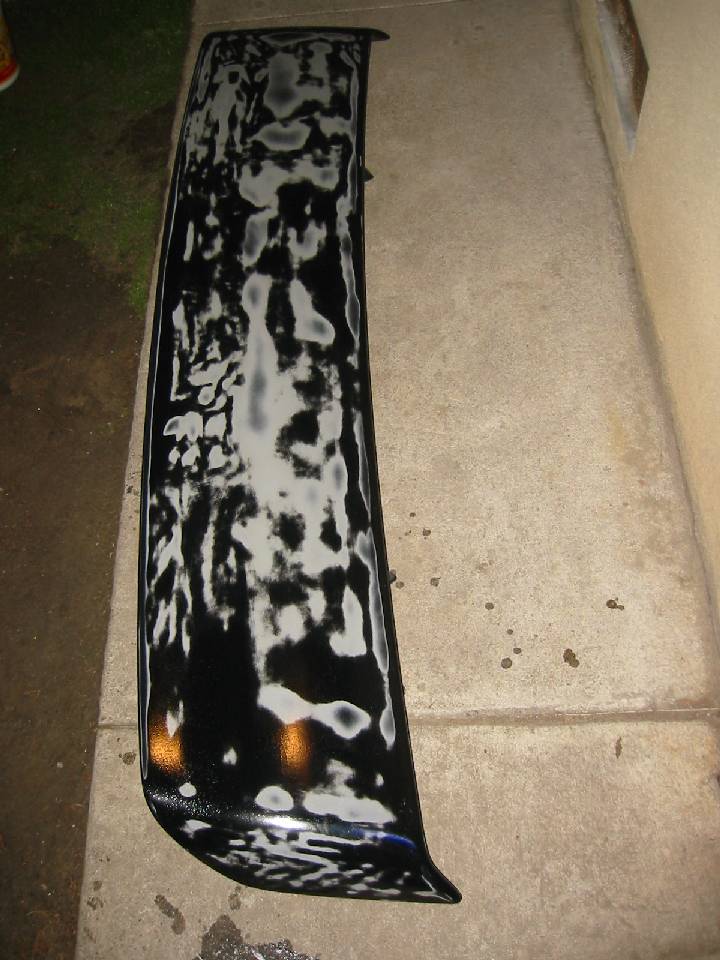
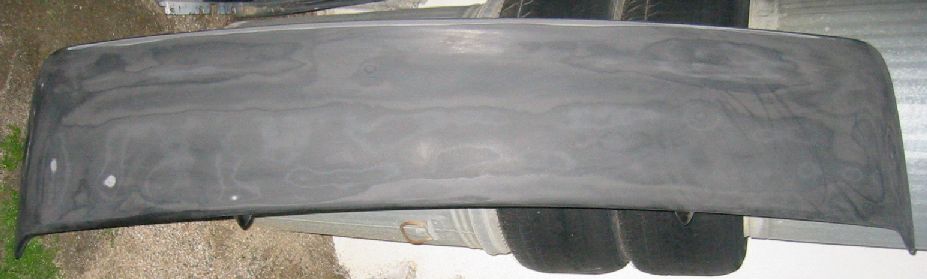
The spoiler and rockers had that sandy consistency.
Here's some pictures of the spoiler.
And the rockers:
The scratch by the gas fill area came out perfectly smooth.
I had a little problem on the rear fascia. When I was putting the primer on, it started dripping and I tried to wipe it off with a paper towel but the towel dissintegrated. Fortunately those areas I wiped didn't need primer so I can sand them away.
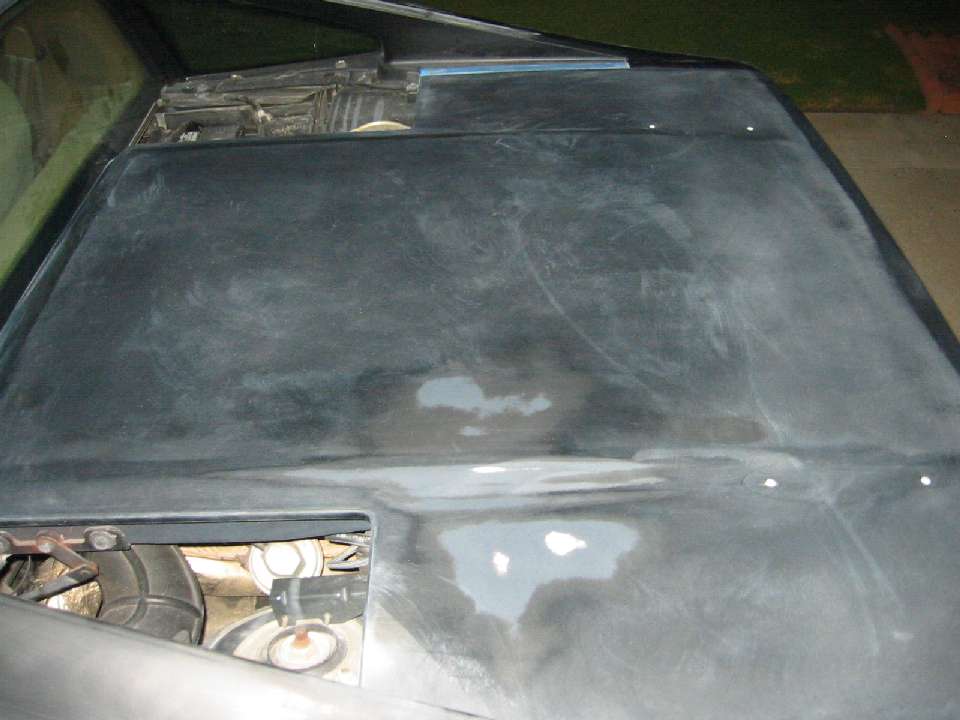
The decklid came out nice.
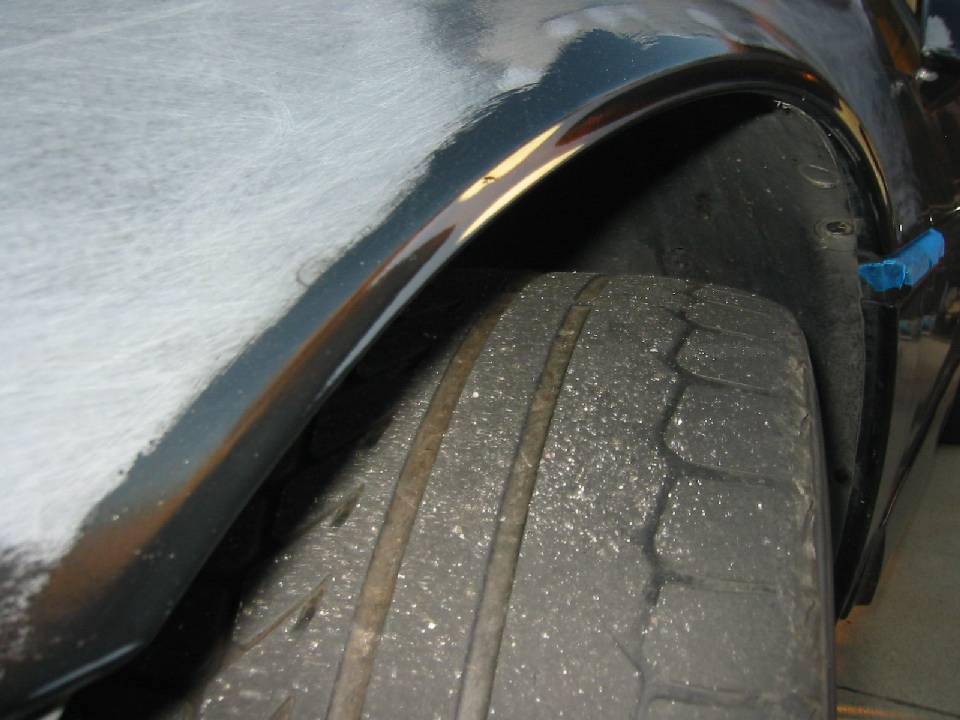
Left fender also came out really nice.
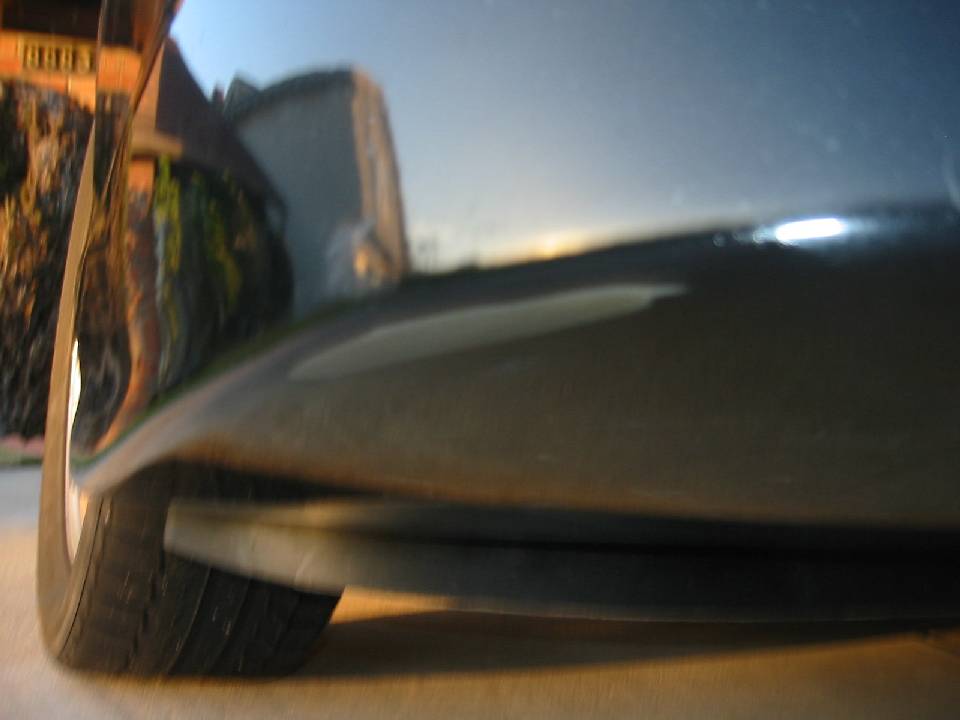
The underside of the front fascia.
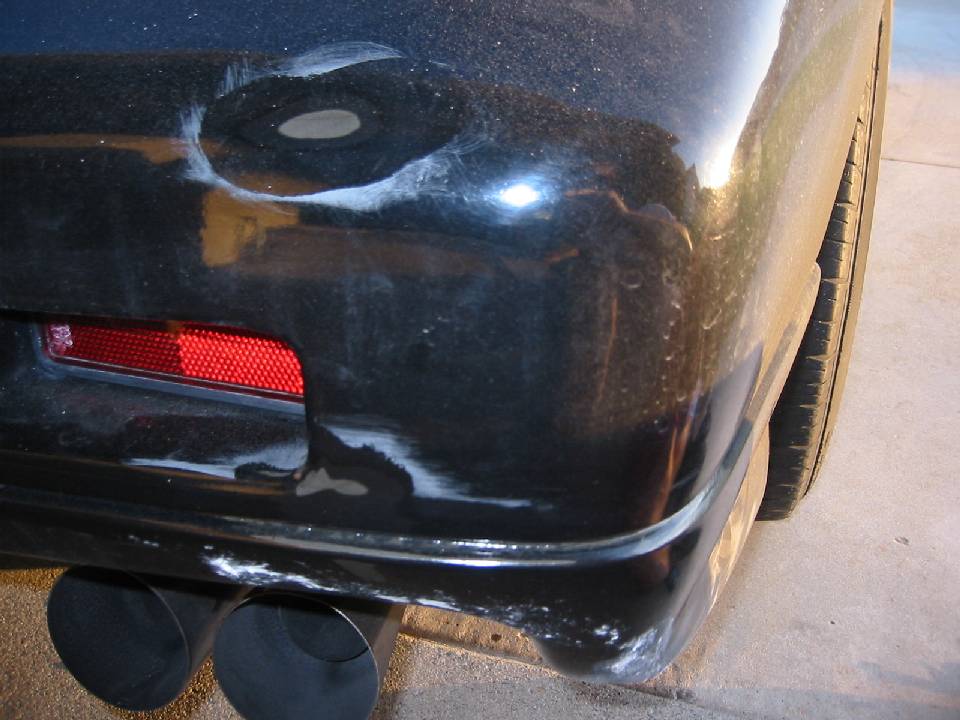
Edge of the front fascia by the wheel well.
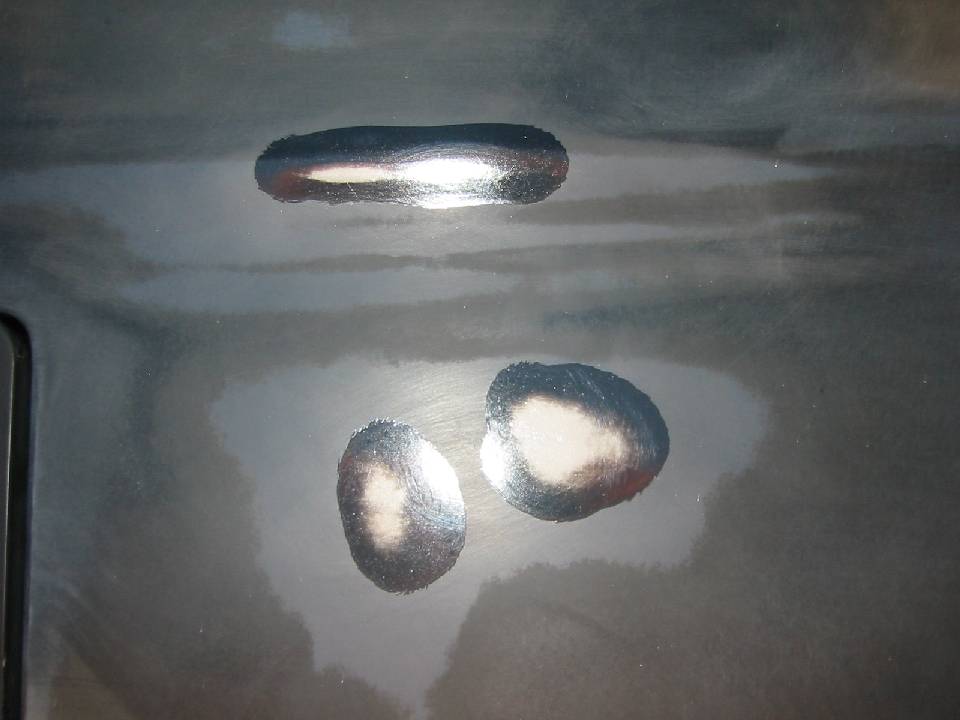
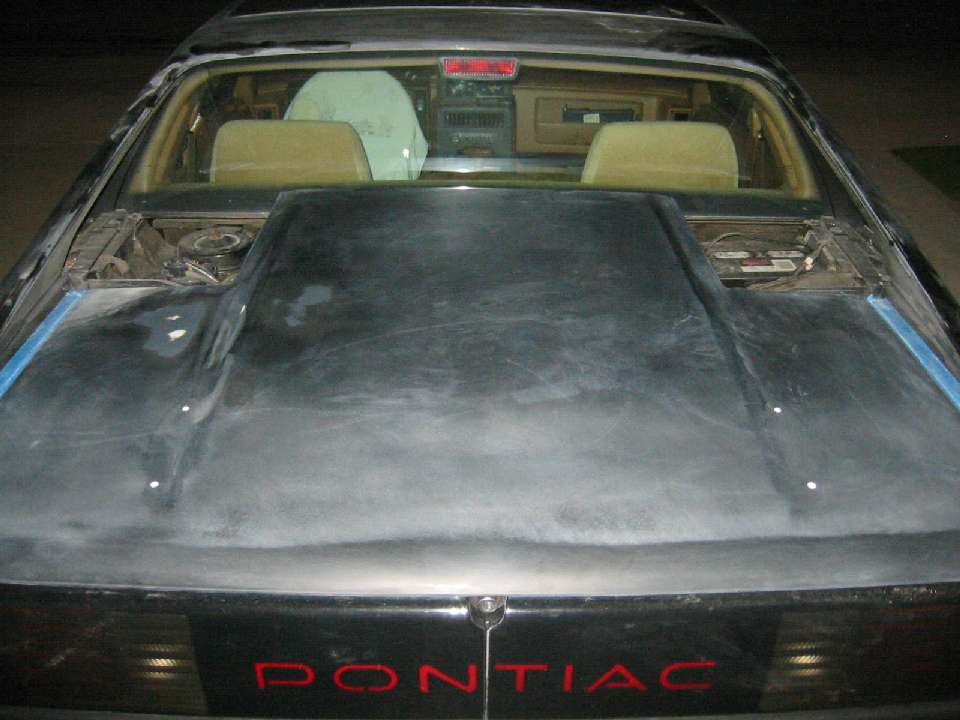
The spot on the hood.
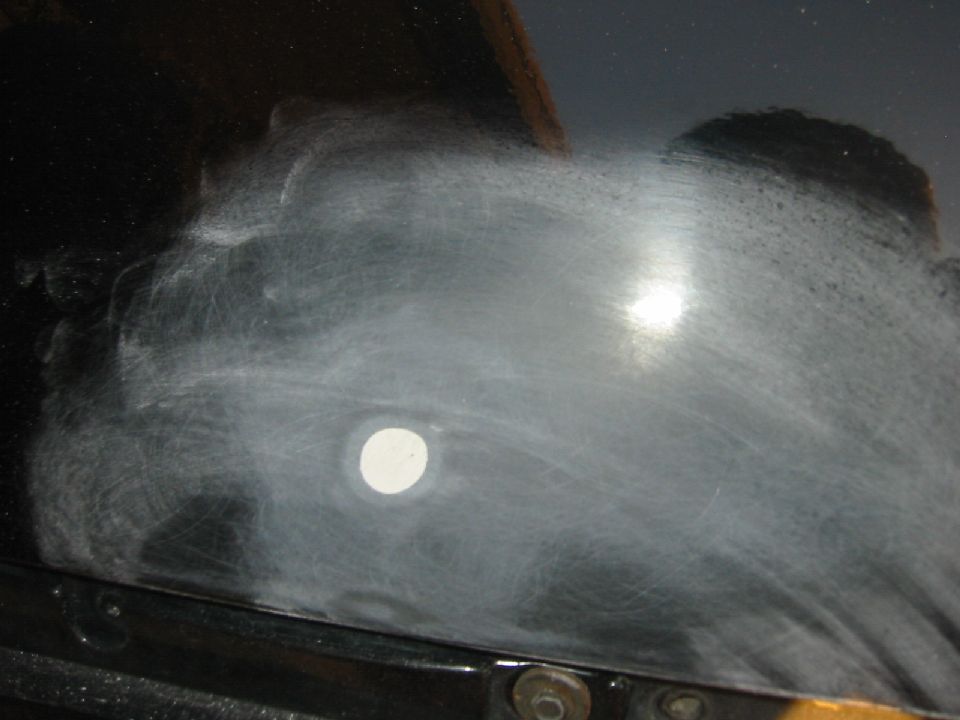
The antenna hole on the right fender.
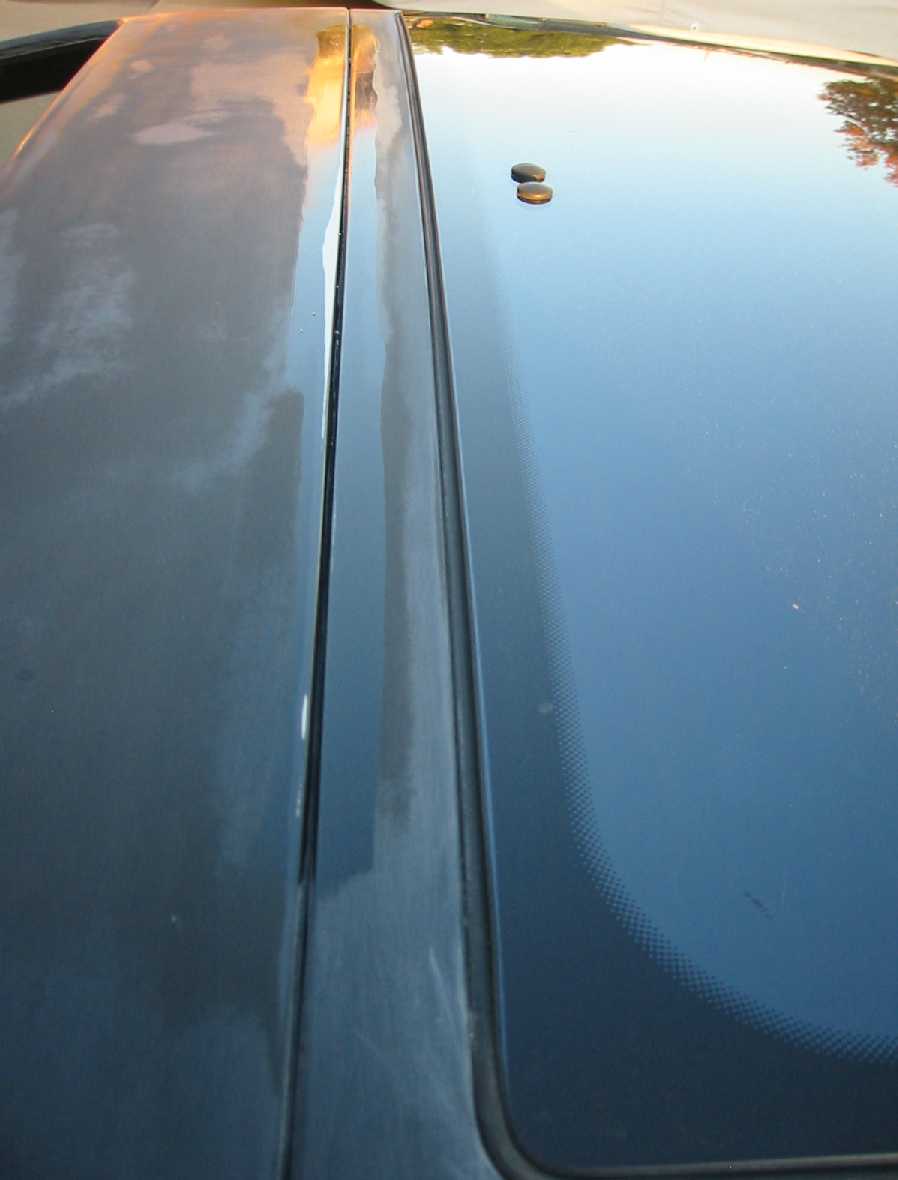
Left quarter drip rail.
Right quarter drip rail.
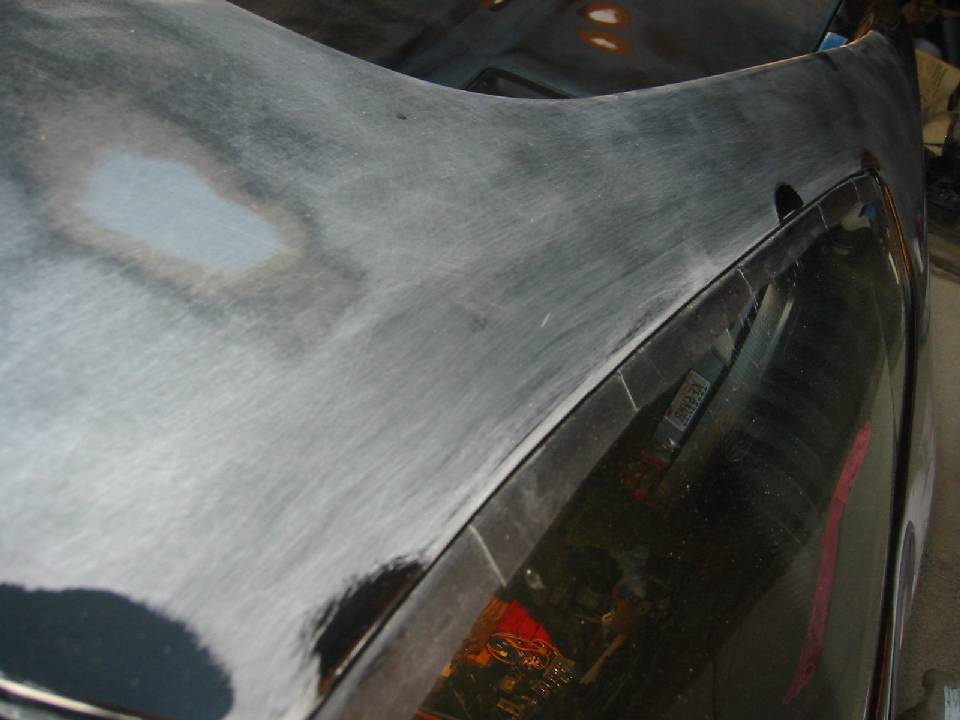
The roof crack.
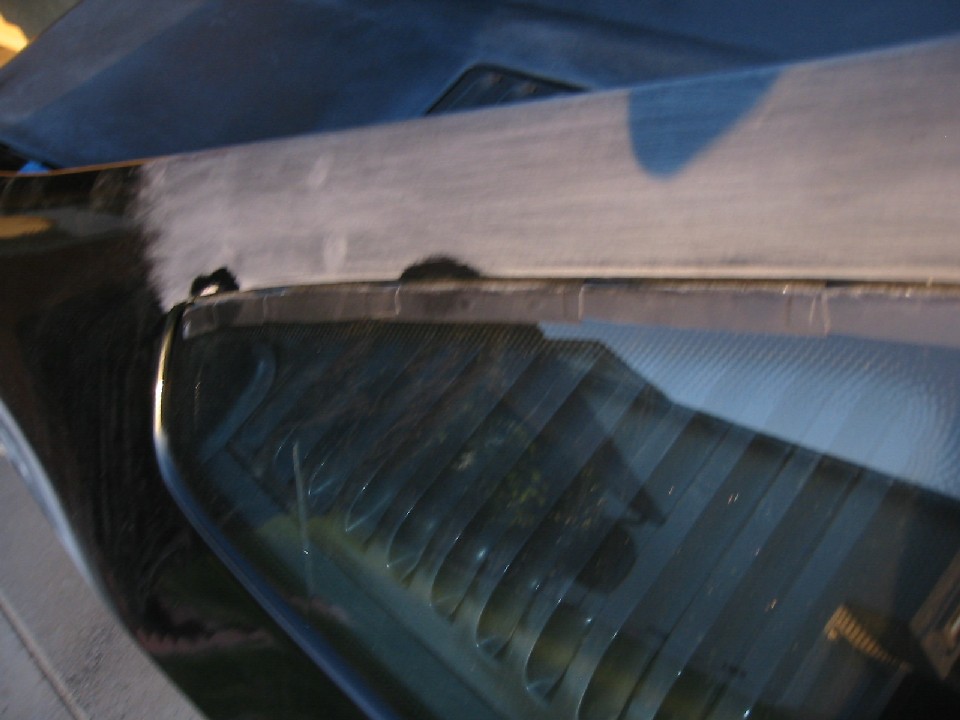
Left A-pillar.
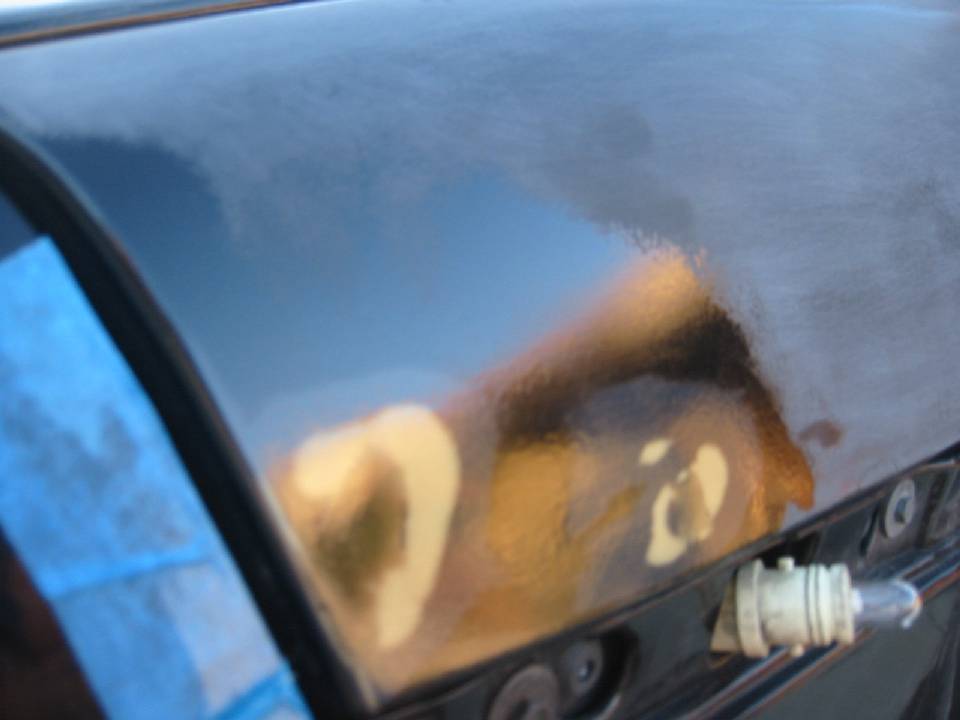
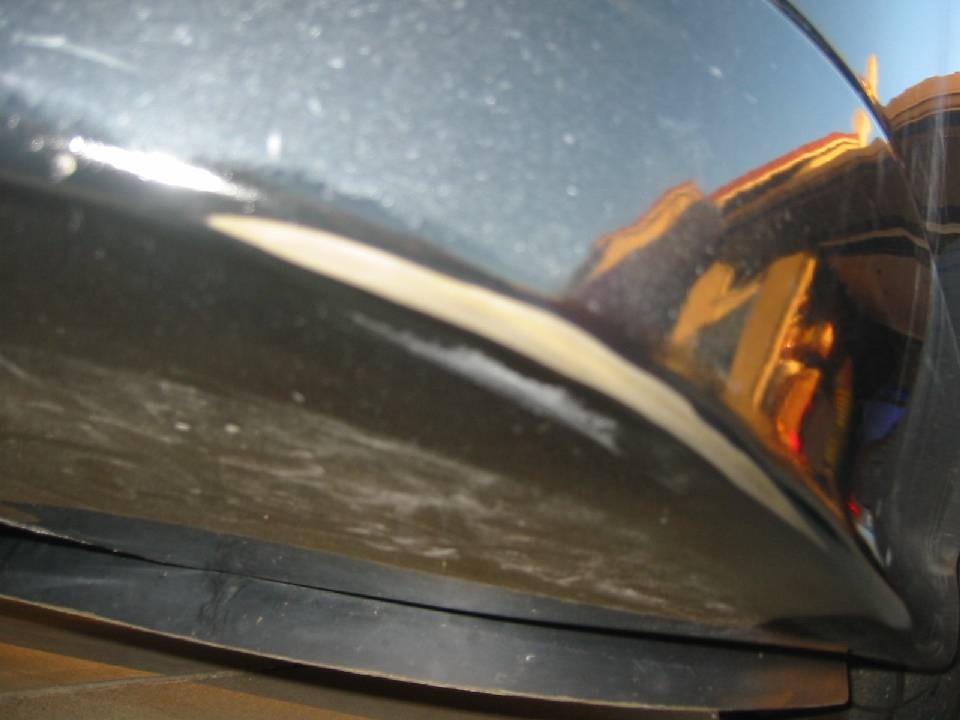
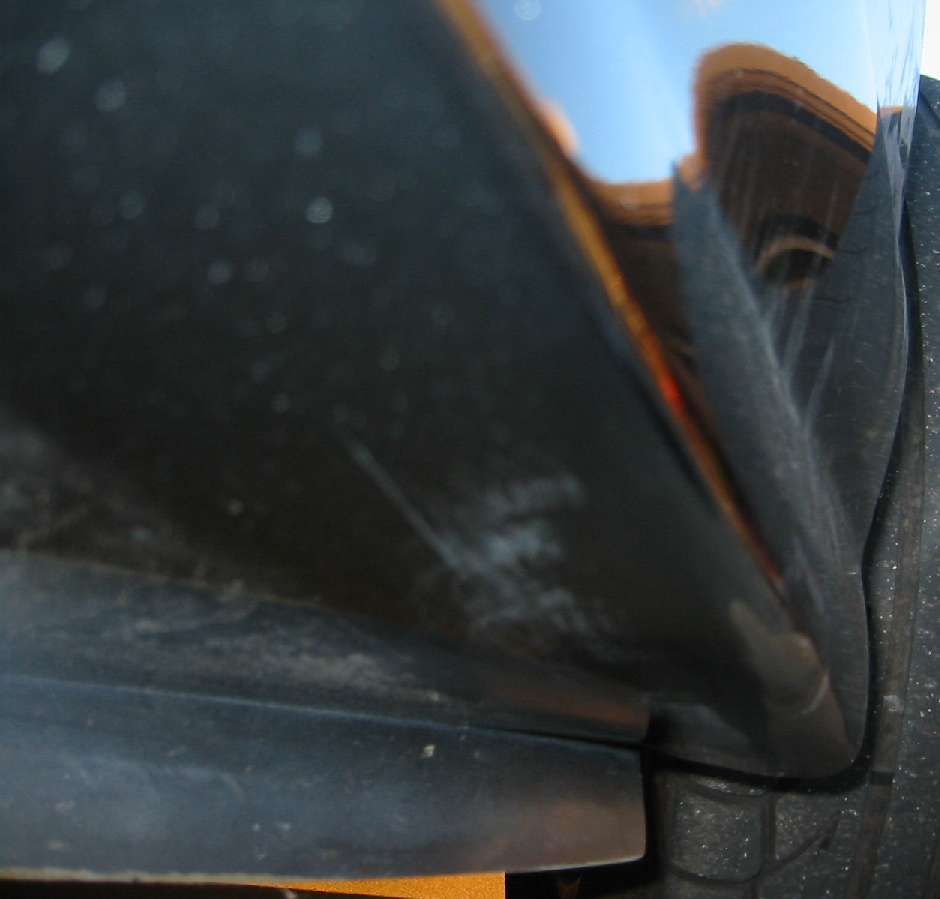
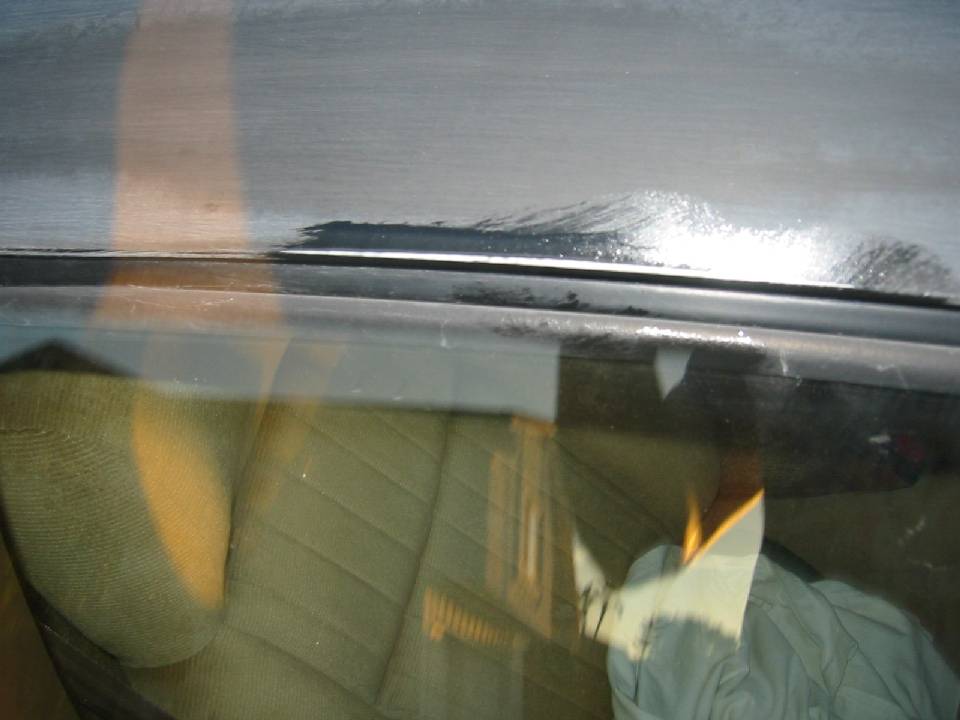
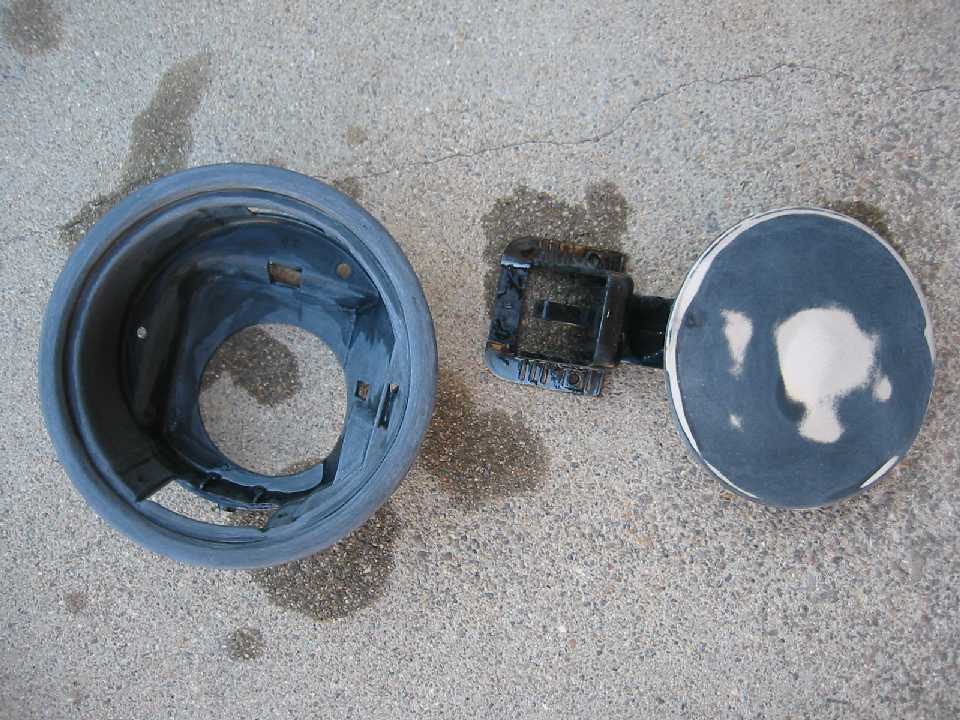
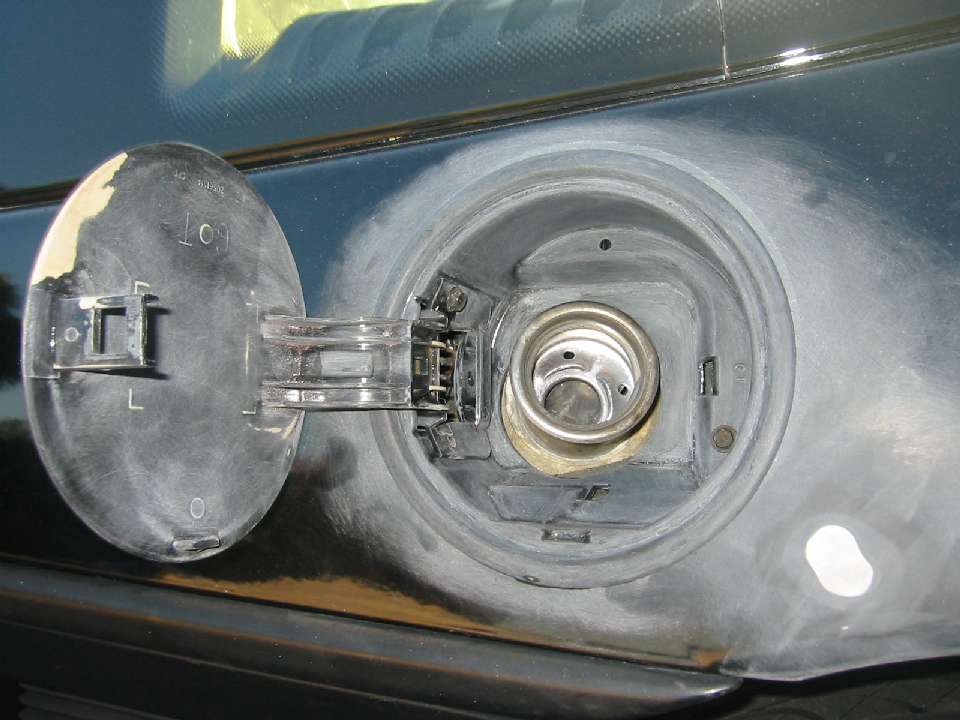
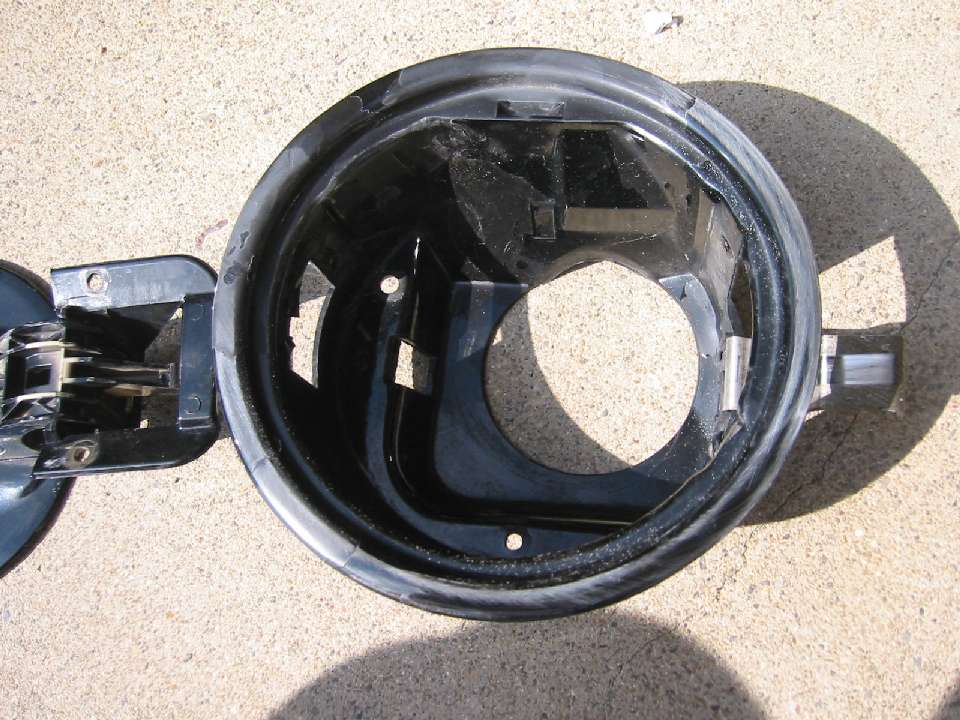
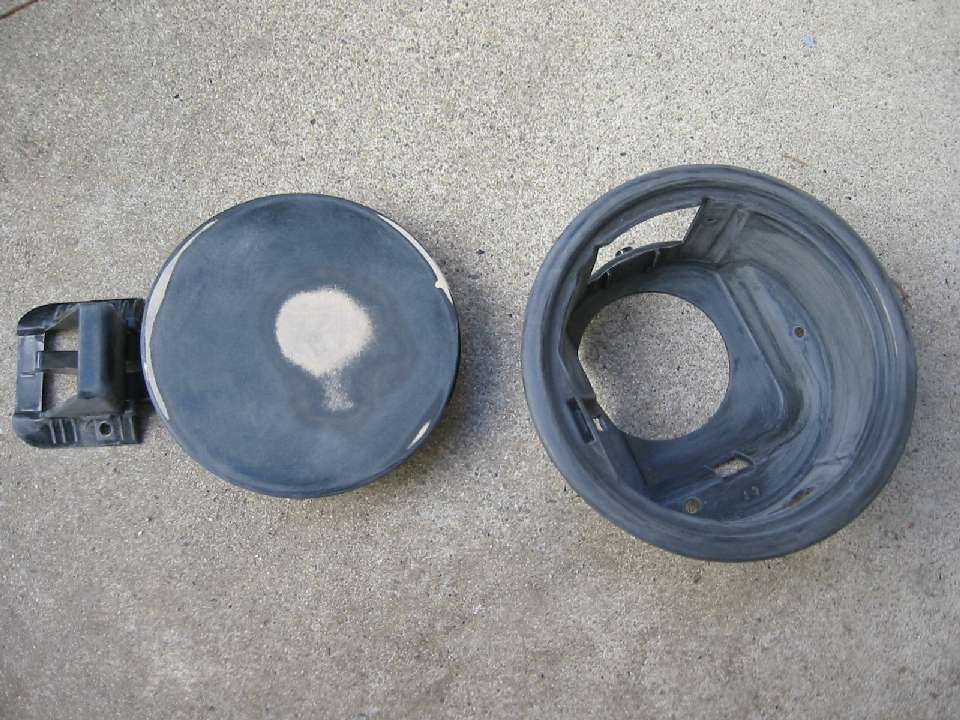
The mirrors (yes I'm still planning to remove them to paint).
I ended up working late Saturday night for 3.5 hours because I was so excited. I feel like I'm finally making progress since I had been stuck on the preliminary sanding phase for so long. I was anxious to get started prepping the primered surfaces for paint. I spent about 1.5 hours working on the sandy surface of the spoiler and got it sanded nice and smooth using 400 DA and 320 hand sanding. I didn't take a picture yet since I need to do the underside still and there were a few drips I need to sand smooth.
I finished sanding the gas door and surround pretty quickly. Here's a final picture.
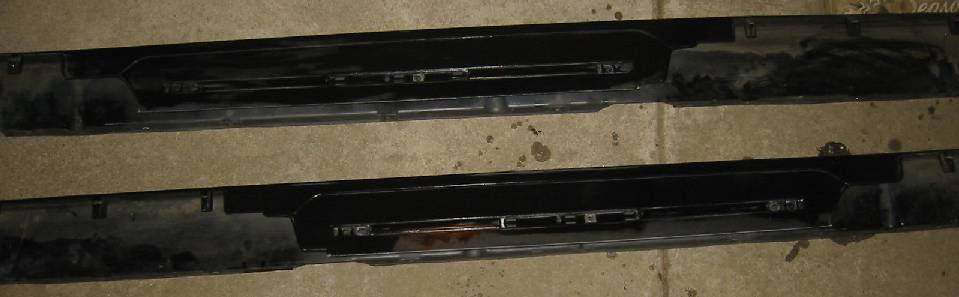
I also spent some time on the upper and lower rockers and made good progress on them.
I also worked on the car for an hour Sunday evening and was able to blend in the two scratches one on each quarter panel.
Here's the gas cap area sanded and installed, including the sanded quarter panel scratch.
Here's the right quarter panel sanded, it only took about 10 minutes to sand and blend it. I never took a before picture but here's the after.
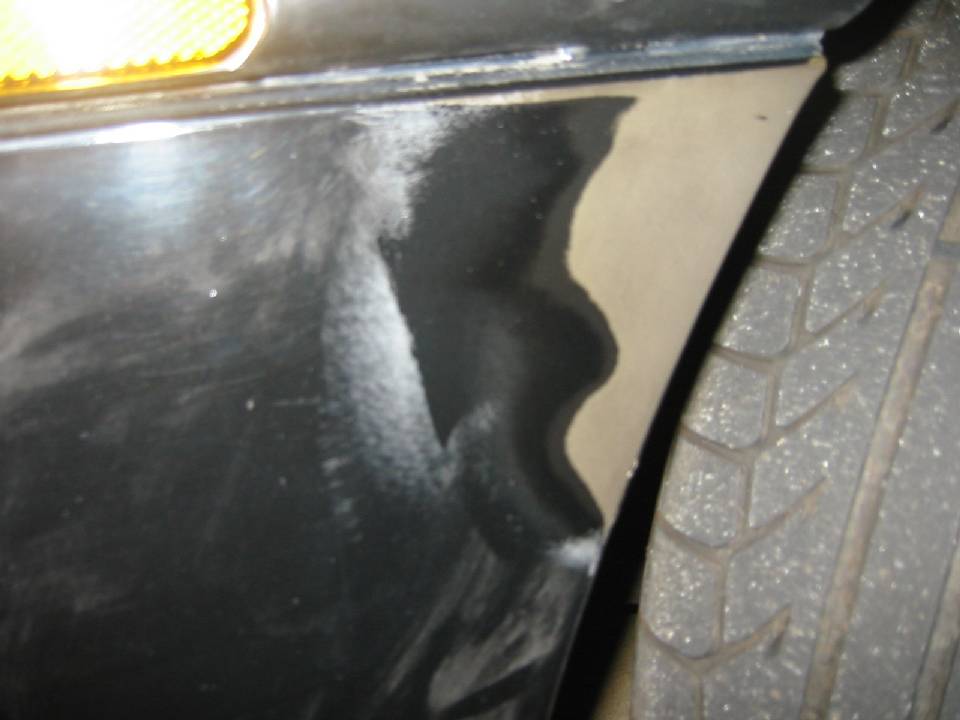
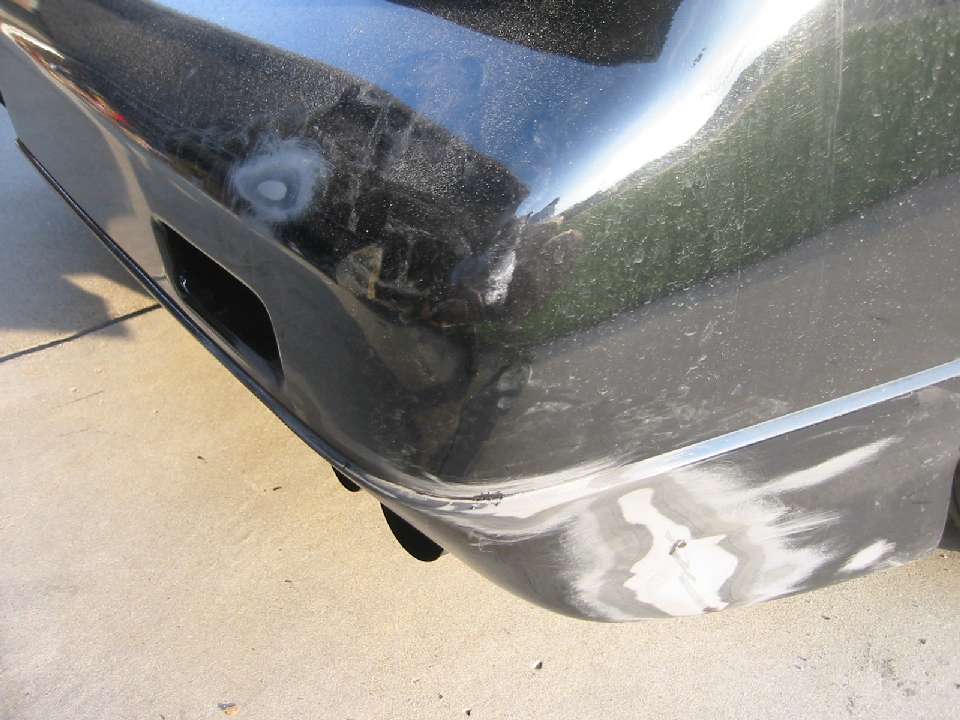
I also spent some time this afternoon sanding on the rear fascia and was able to sand out most of my mistake of getting paper towel stuck onto the bumper. I am a bit concerned that the cracked area I repaired on the side is bulging a little. I'm not sure if it's from the primer causing the repair compound to swell or if I applied it a bit thicker over the repair, but I am certain it was flat before I put the primer on. I am block sanding but I think I may need to reapply primer on this area if I sand through to the bumper before it's flat.
Overall, I'm very happy with how the primer process went. I made some mistakes and there were some unexpected sandy texturing on a few panels, but the primer is proving very easy to sand out. It sands about the same as the paint and clear coat did and looks a lot like clear coat when it's sanding off. I spent just 4.5 hours sanding primer and was able to finish the gas cap and surround, two scratches on the quarters, most of the spoiler, most of the upper rockers, and about 40% of the lower rockers. I think it will be between 5-10 hours more sanding to finish smoothing and blending the rest of the primered areas, so overall not too bad.
If anyone can explain the sandy texture mystery I'd be interested to hear a plausible reason those areas did that.
[This message has been edited by reinhart (edited 11-01-2010).]
IP: Logged
05:16 AM
rogergarrison Member
Posts: 49601 From: A Western Caribbean Island/ Columbus, Ohio Registered: Apr 99
Ive never seen a clear primer either. Myself, I prefer red oxide because you can easily see the flaws as you sand. I assume the clear turns white like clearcoat when you sand it and flaws show up as remaining clear. I think 80% of people use gray primer, but I see a lot of adhesion problems that only show up on gray that never do on red or black oxide. Every newer car you see with peeling OEM paint shows gray primer. GM had a huge problem with light metallic blues and whites....whole cars peeled to primer in less than 5 years. Mopar Plum Crazy Purple also was bad. I guess it was something in the pigments that reacted (or didnt) with the compounds in the primers.
Anyways, looks like your coming along good. Good luck on the rest, looks like most of the time consuming stuff is done and rest goes pretty fast. When I color sand for buffing, if theres no time limitation, I like to sand, then buff one panel at a time. If your going to do that though, remember the longer you wait, the harder the paint gets. When I do one panel at a time, it seems to take a lot less time....but it is psychological, than sanding it all, then buffing it all.
Yeah in over 40 years of painting cars I've never even heard of clear primer. To be truthful, I wouldn't trust it. The texture is probably tiny air bubbles that formed as the roller tried to pull up the primer behind it. I've seen that before. Or, if they formed after it was rolled on, they may be air bubbles from over-cooking (if you mixed the primer too "hot"). In either event they need to be sanded completely smooth, which will probably take off all the primer. As for color of primer, Roger is talking about laquer when he says red is better. The PPG epoxy I use (in any color) is sooooo much better for adhesion than the laquer primers he uses. Also, we use a "guide coat" of flat black misted over the primer, to show imperfections as we sand. Doubt that would work on clear primer. Clear primer? Can't believe I'm even typing that combination of words. I don't trust it at all. How can it fill imperfections? Sounds more like a sealer to me. Another thing: You should have "V"ed out the antenna hole from the top & filled it before smoothing out & priming it. Otherwise it will swell or shrink & you'll see the round hole after it's painted. If you PM me your email, I'll send you a couple photos of one I just did. ~ Paul aka "Tha Driver"
"Looks like we have a "D2IK" situation." (Damn If I Know)
IP: Logged
03:41 PM
reinhart Member
Posts: 1136 From: Orange County, CA Registered: Mar 2002
Ive never seen a clear primer either. Myself, I prefer red oxide because you can easily see the flaws as you sand. I assume the clear turns white like clearcoat when you sand it and flaws show up as remaining clear.
Yes that is how it works. You can see on the gas lid picture how just a little scuffing got it looking cloudy while the other parts were shiny still.
quote
Anyways, looks like your coming along good. Good luck on the rest, looks like most of the time consuming stuff is done and rest goes pretty fast. When I color sand for buffing, if theres no time limitation, I like to sand, then buff one panel at a time. If your going to do that though, remember the longer you wait, the harder the paint gets. When I do one panel at a time, it seems to take a lot less time....but it is psychological, than sanding it all, then buffing it all.
Is the color sanding you refer to (before the paint hardens), using 1500 grit paper or using a polishing compound or?
[This message has been edited by reinhart (edited 11-01-2010).]
IP: Logged
04:57 PM
reinhart Member
Posts: 1136 From: Orange County, CA Registered: Mar 2002
"FP415 is a two component, low VOC primer surfacer. This primer offers a high film build, excellent gloss holdout, and excellent sanding characteristics."
quote
The texture is probably tiny air bubbles that formed as the roller tried to pull up the primer behind it. I've seen that before. Or, if they formed after it was rolled on, they may be air bubbles from over-cooking (if you mixed the primer too "hot"). In either event they need to be sanded completely smooth, which will probably take off all the primer.
It seems like the panels I did first are the ones that had that texture, so maybe your "hot" theory is right. Although I'm not sure what that means exactly, the catalyzation from mixing the two substances hadn't settled down yet?
No like I was saying I was able to sand it down pretty easy on the spoiler for instance and the primer is still on, although I don't know exactly how thick it is still but I did put it on pretty thick.
quote
Another thing: You should have "V"ed out the antenna hole from the top & filled it before smoothing out & priming it. Otherwise it will swell or shrink & you'll see the round hole after it's painted. If you PM me your email, I'll send you a couple photos of one I just did.
I'm confused, didn't I do that? I think that's covered on page 2 of this thread. What did I do wrong? I V-d the front and reinforced the back with the bumper repair compound.
You guys know why the rear fascia seems to have swelled a bit on the area I repaired?
The photo above (on the first page) shows a nice round hole. Didn't notice it before. Really needs to be tapered out more than that. I sent you a pic of the one I just did. It may be OK, but I really hate to see you have to go back in & fix it, if it swells or shrinks. (you might then have to try my method of blending clear, & open a whole 'nother argument ) It's hard to say why your bumper swelled. Any chemicals get on it? Heat? Are you sure you had it "flat" to begin with? Could be something to do with a reaction to the primer, but I doubt it. ~ Paul aka "Tha Driver"
[This message has been edited by Tha Driver (edited 11-01-2010).]
IP: Logged
09:03 PM
Nov 2nd, 2010
reinhart Member
Posts: 1136 From: Orange County, CA Registered: Mar 2002
The photo above (on the first page) shows a nice round hole. Didn't notice it before. Really needs to be tapered out more than that. I sent you a pic of the one I just did. It may be OK, but I really hate to see you have to go back in & fix it, if it swells or shrinks.
I V'd it to a 45 degree angle. My objective was to make sure it wouldn't pull back through. With that angle, it shouldn't fall inside the fender, barring a destructive sharp blow which would probably damage any other part of the fender as well.
Thanks for the picture. It seems exactly the same as I did, except you used filler and I used only the bumper compound. I am thinking the flex bumper repair will give more than your filler, so I prefer that, plus mine's the same substance all the way through where you have to worry about two substances expanding or bonding together.
Now whether it swells or shrinks over time, well that wasn't something I heard mentioned in the threads I got the info from. I imagine that if that happens then I have issues with the rear fascia repair, fender crack, etc.; and the antenna hole will be the least of my worries. But I imagine that you'd still have that same problem on your repair too right?
quote
(you might then have to try my method of blending clear, & open a whole 'nother argument )
Oh goody!
quote
It's hard to say why your bumper swelled. Any chemicals get on it? Heat? Are you sure you had it "flat" to begin with? Could be something to do with a reaction to the primer, but I doubt it.
I am pretty certain it was flat before applying the primer, but now that I think about it, I did put a bit extra primer over the repair area.


 (end of this conversation)