ehh get use to it driver and roger go at it about paint all the time. i maybe a new register but ive been on this site for a long while and im shur they've had quite a few threads about paint. in the end both have a point id use laquer for old school jobs keep it authentic but anything new id use new paint but what ever what do i know about paint. (actually i know nothing about paint except trying to paint a room that has oil based paints on it is hard to get primer to stick to it fyi)
IP: Logged
11:06 PM
Oct 1st, 2010
reinhart Member
Posts: 1136 From: Orange County, CA Registered: Mar 2002
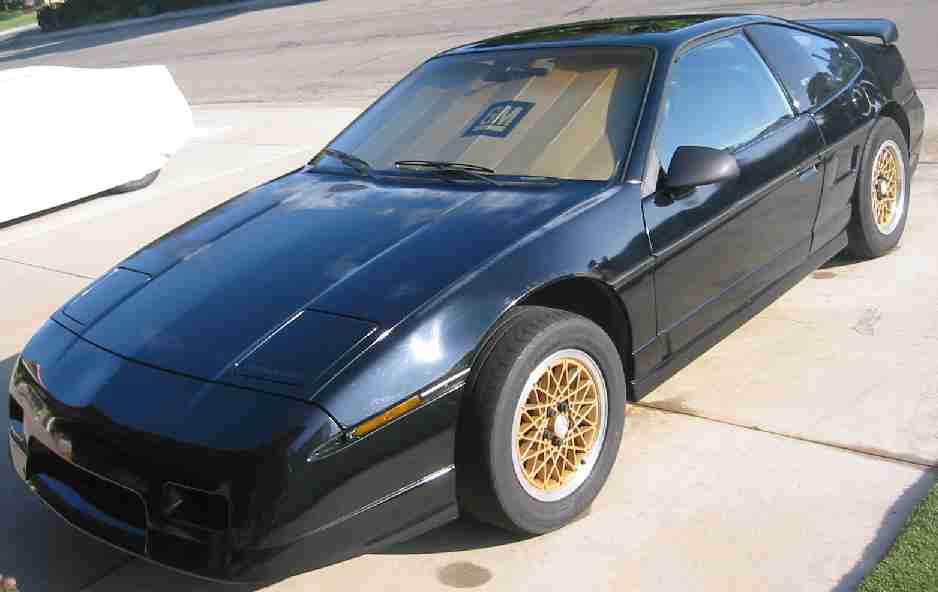
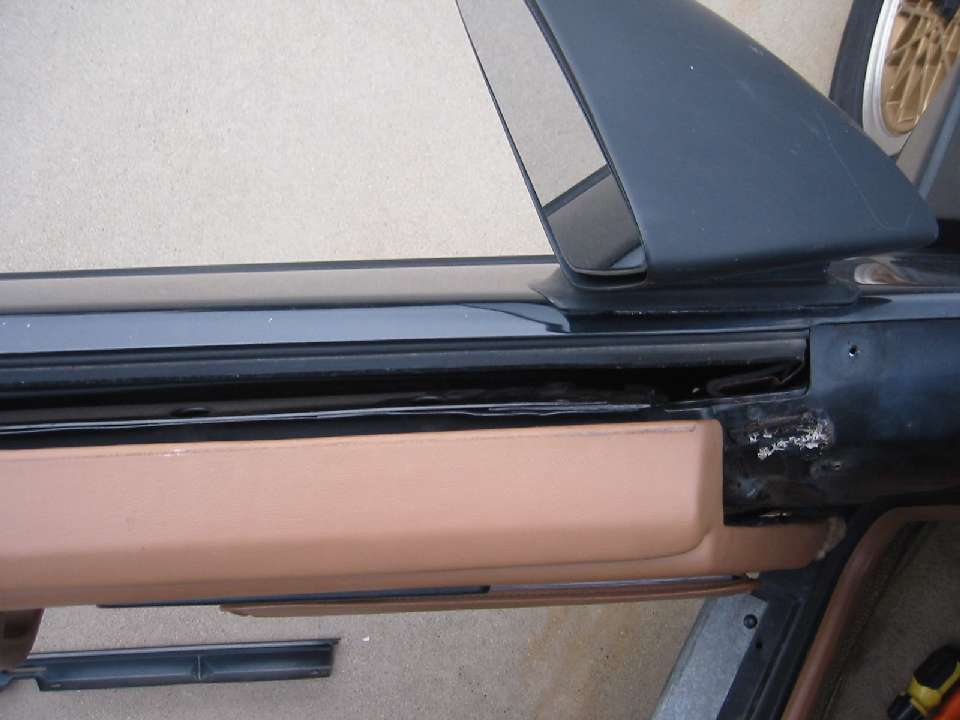
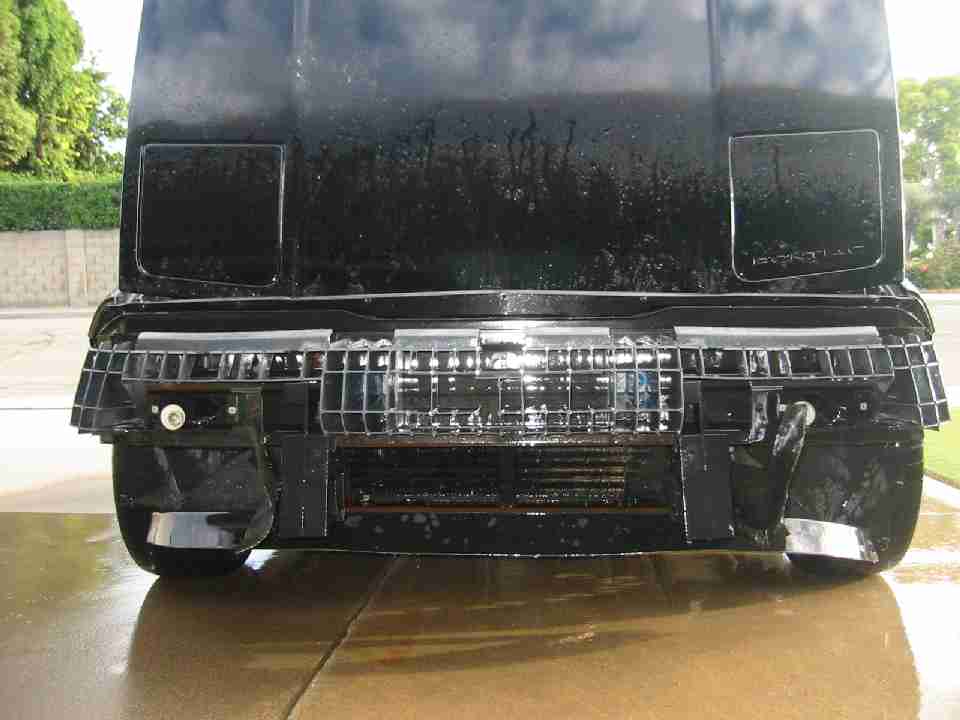
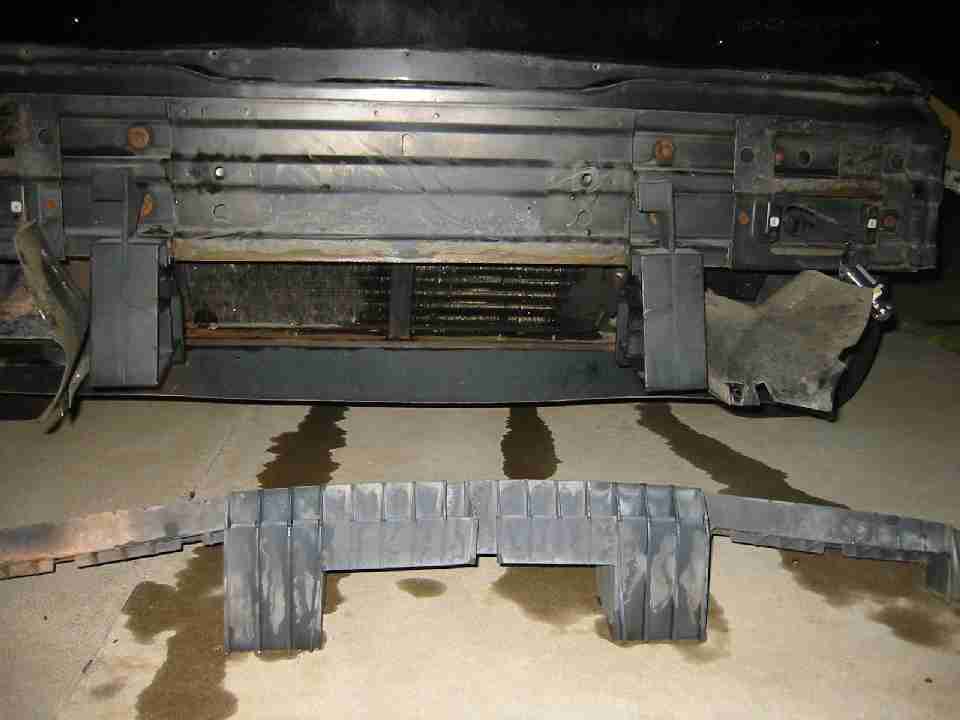
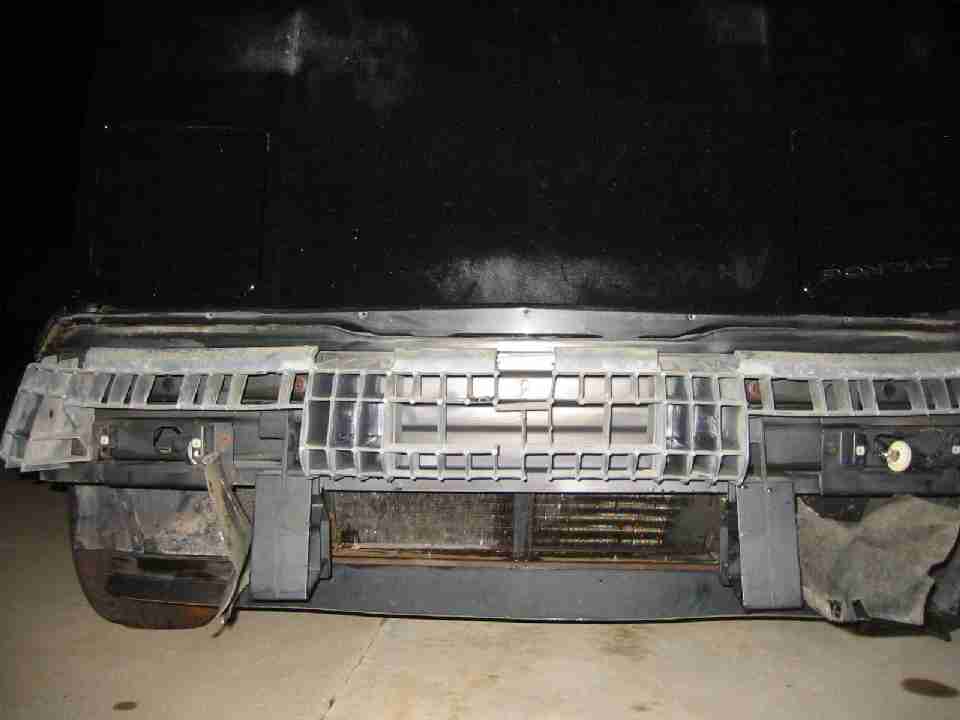
This week, I got a few things done. First I pulled the front off the car.
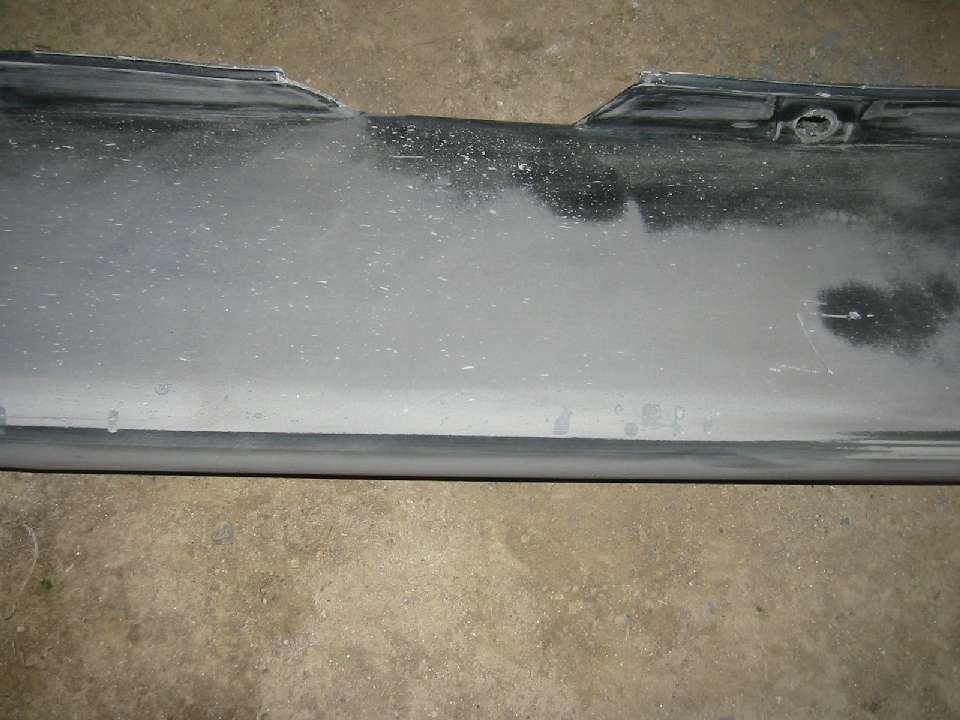
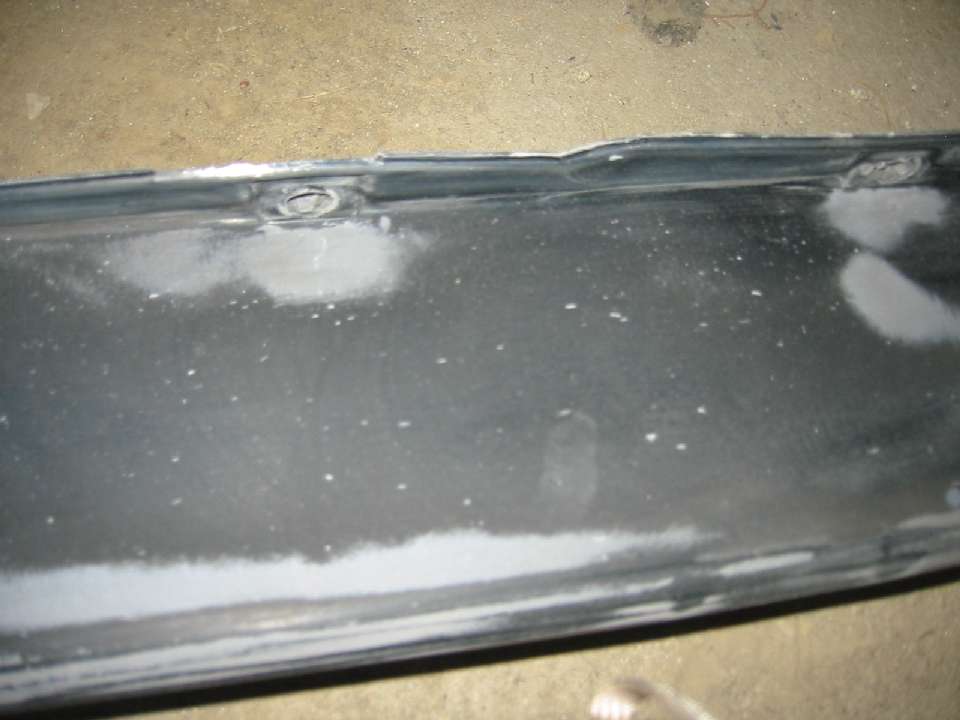
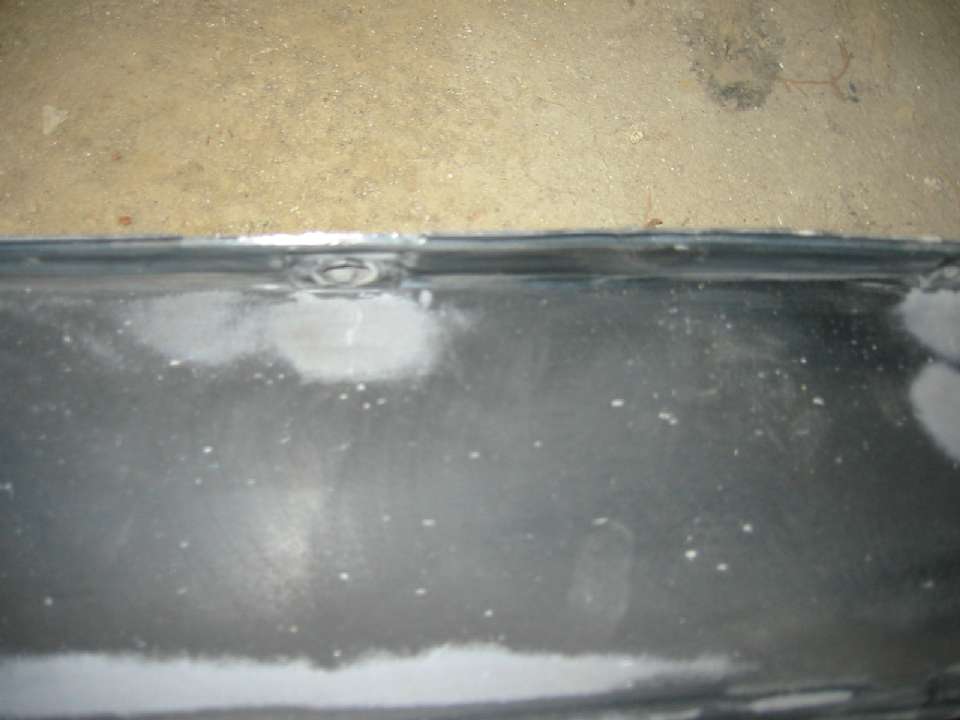
I inspected the front bumper which was in perfect shape with no cracks or spidering in the paint. I also wanted to repair a crack in the driver's side fender. I unbolted and lifted the fender away from the frame.
Sanded the inside of the fender and applied more flexible rubber bumper repair and fiberglass mat fibers.
I ended up going back and adding more repair material since I wasn't happy with the repair but forgot to take a picture.
I grooved the outside of the fender crack.
Filled it with the flexible bumper compound.
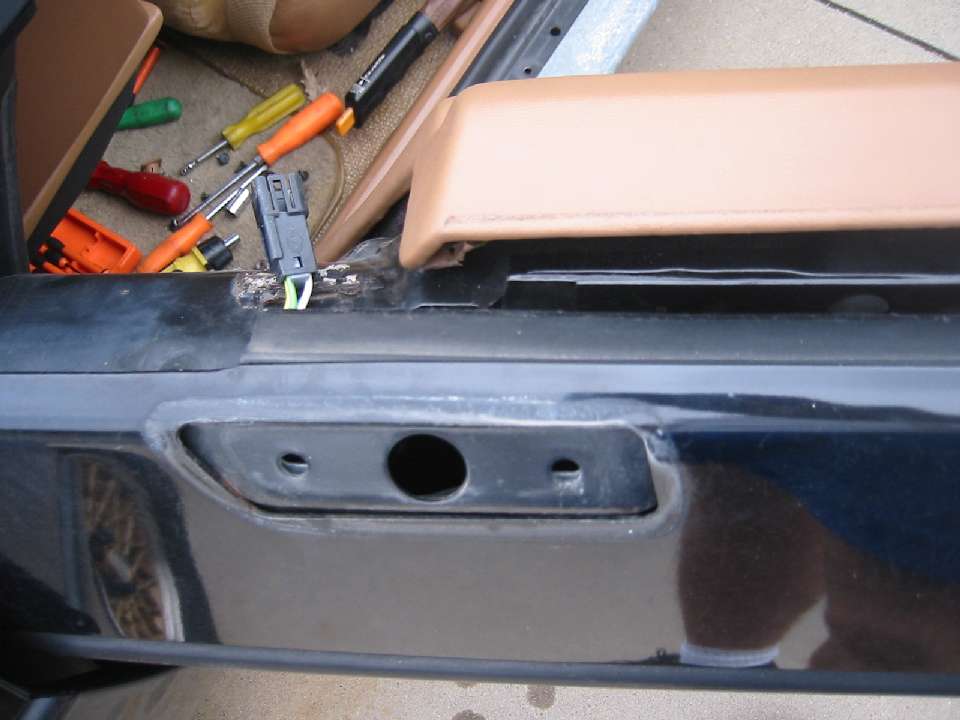
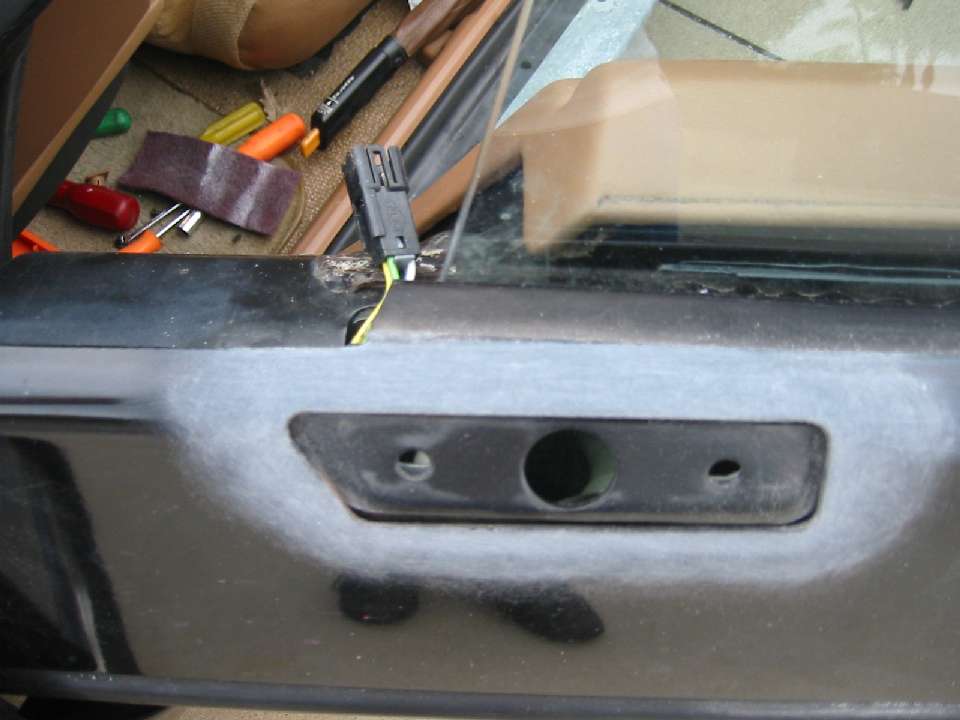
While that was setting, I went back to the front. I removed the absorber, which surprisingly enough was still firmly attached by the plastic fasteners and hadn't worked loose much like the rear.
I sanded off some of the rusty areas and repainted them. Then I reattached the absorber with nuts and bolts.
Then I put everything back together.
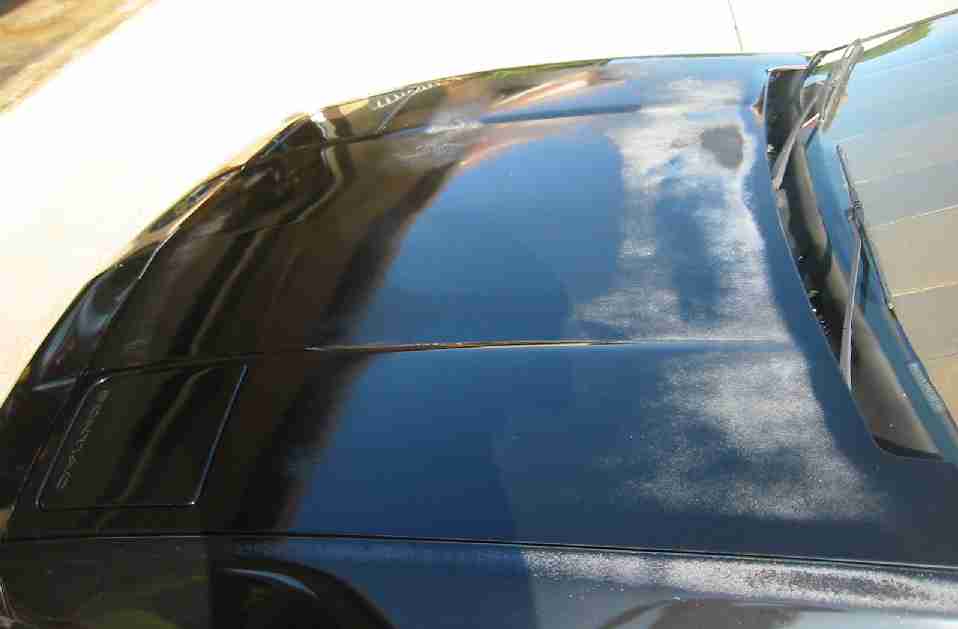
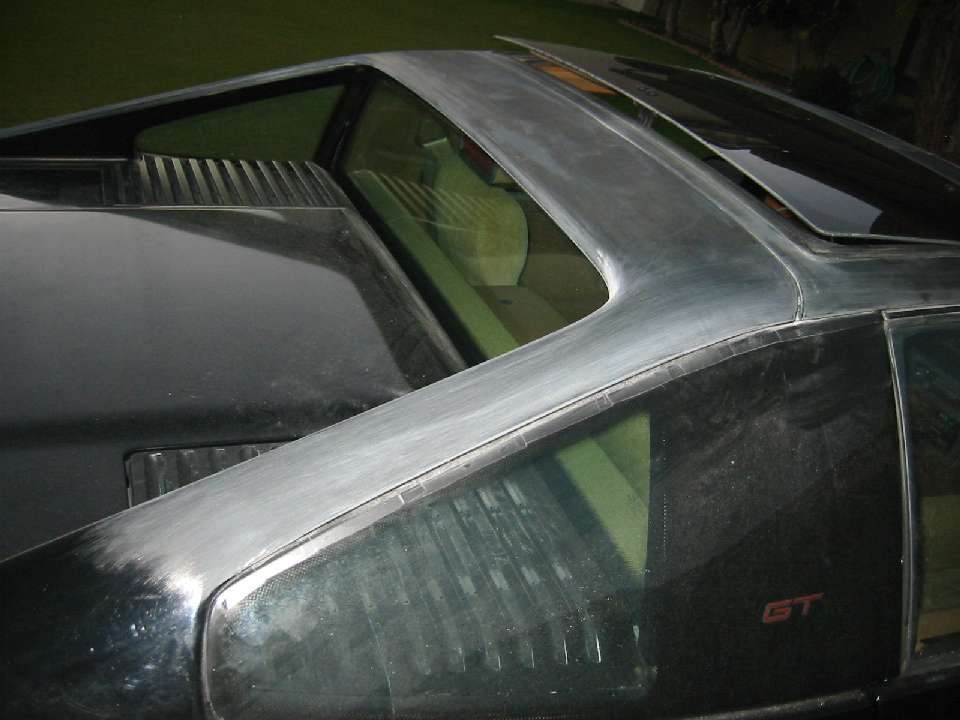
If you notice the metalic sunscreen is really in poor shape. I ended up taking care of that a little later.
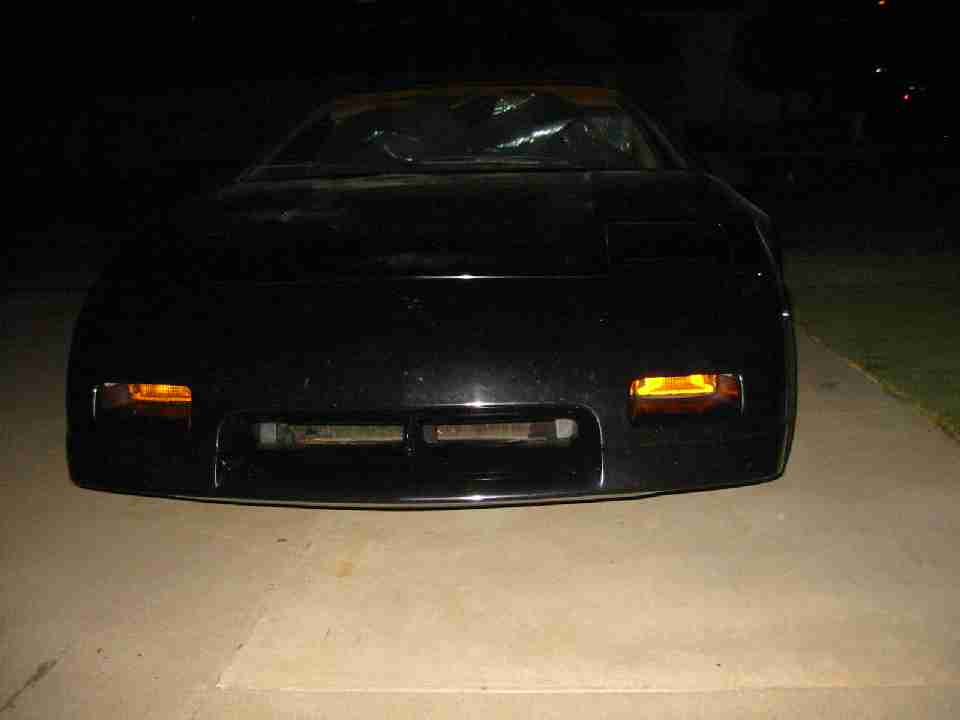
So the frame on the car is in great shape all around. Almost no rust anywhere and there was no damage anywhere I found. The body panels have all been cleaned up and any cracks fixed now. Next step, I need to start the fun process of sanding.
[This message has been edited by reinhart (edited 10-01-2010).]
IP: Logged
02:52 PM
reinhart Member
Posts: 1136 From: Orange County, CA Registered: Mar 2002
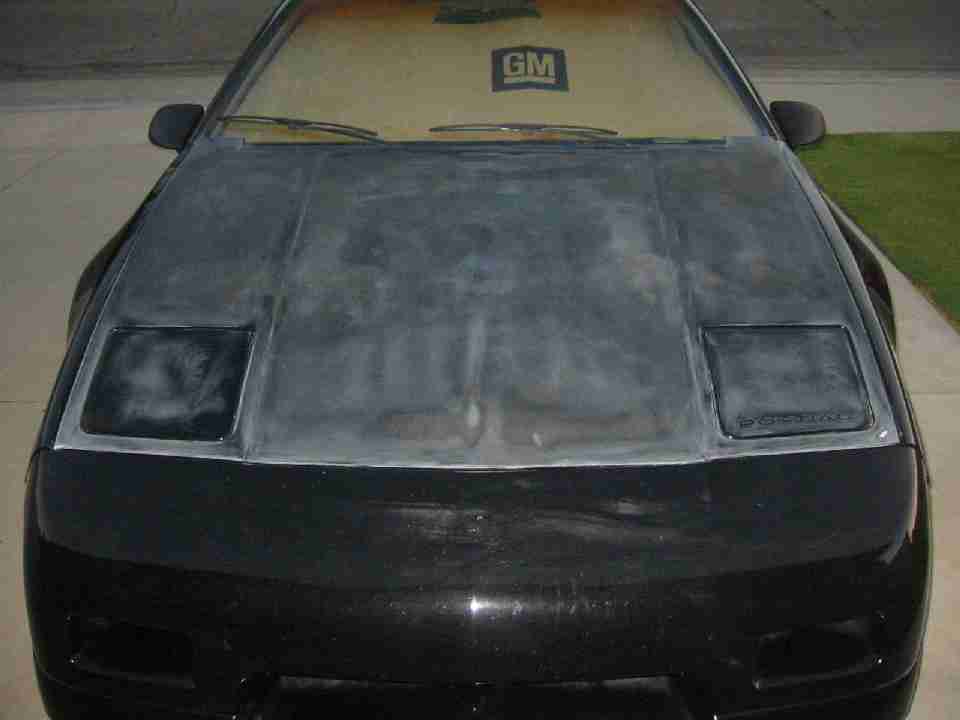
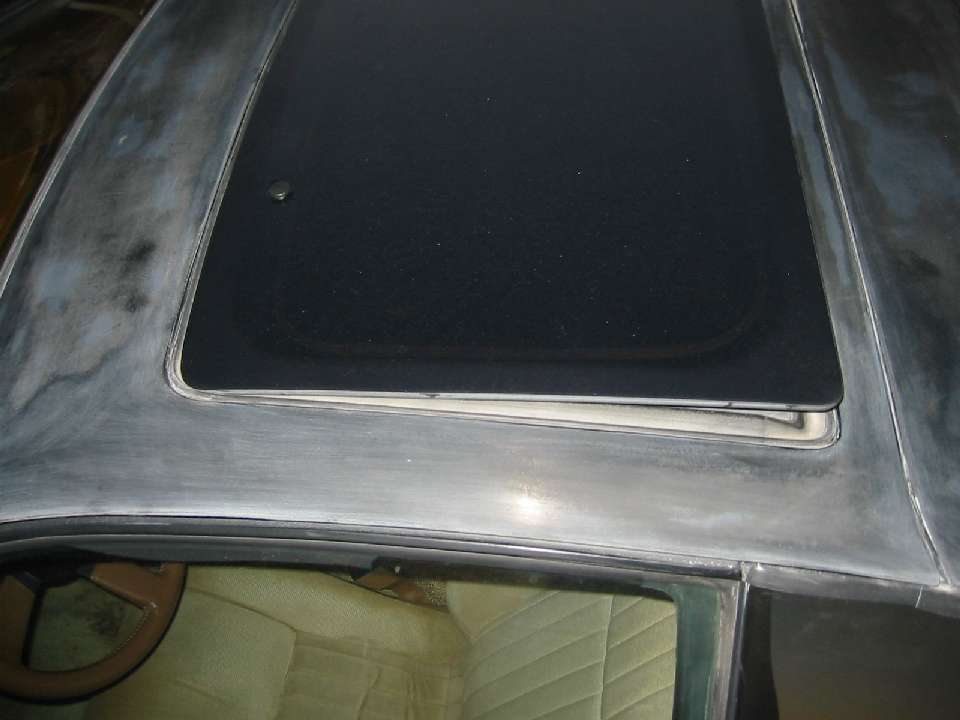
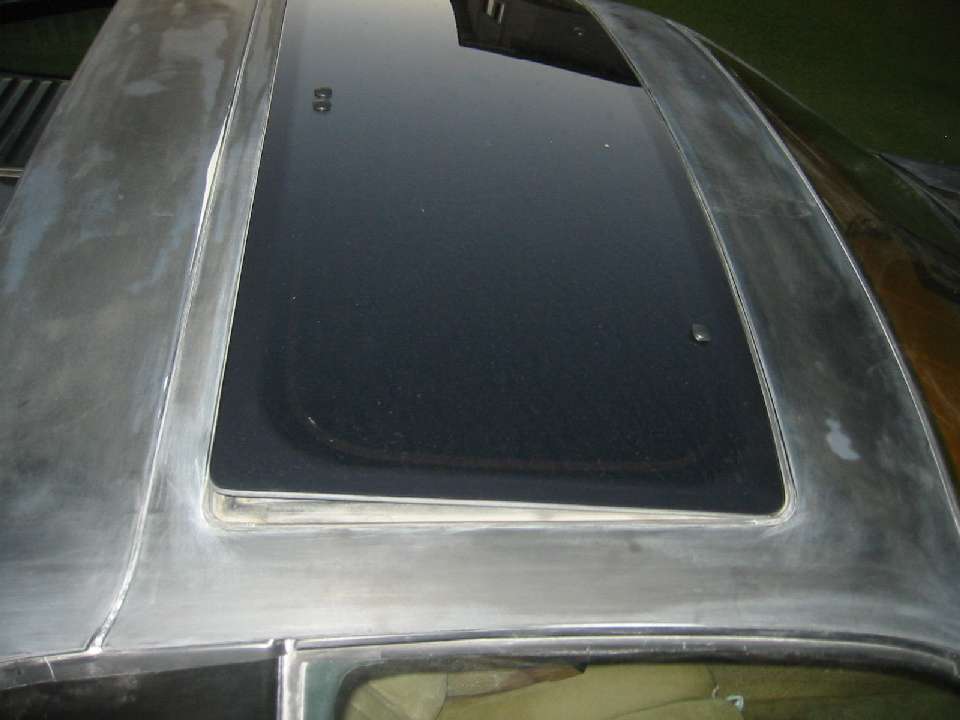
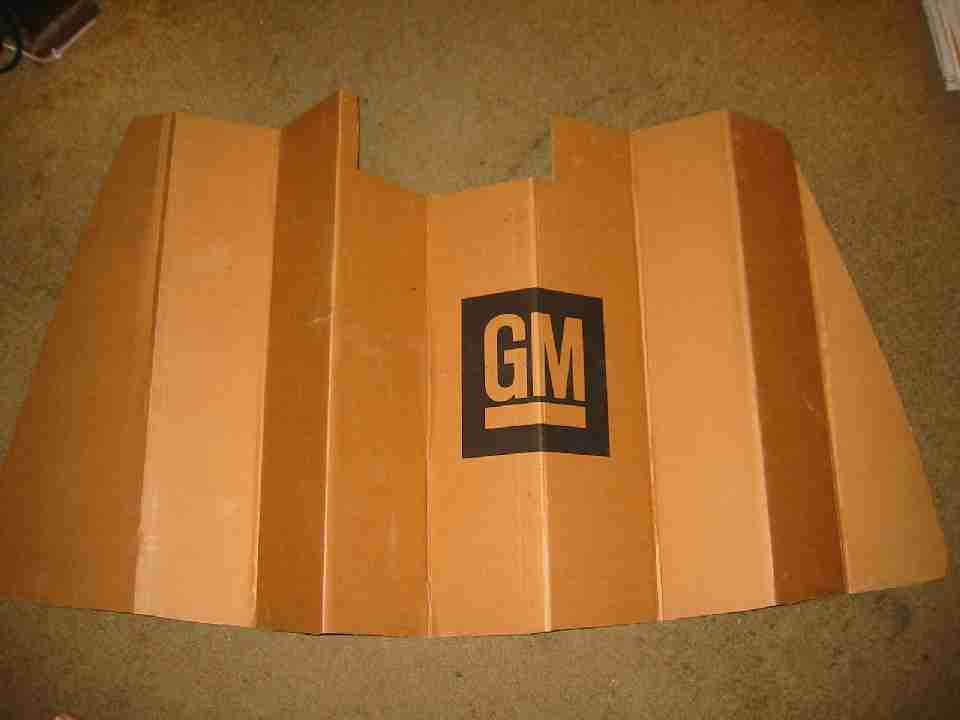
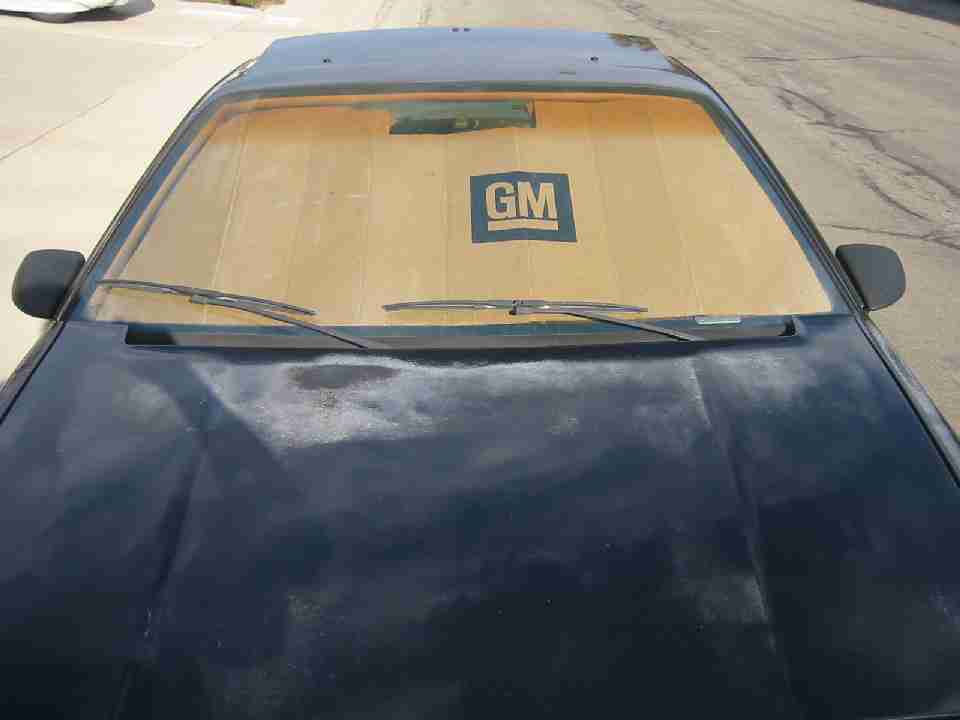
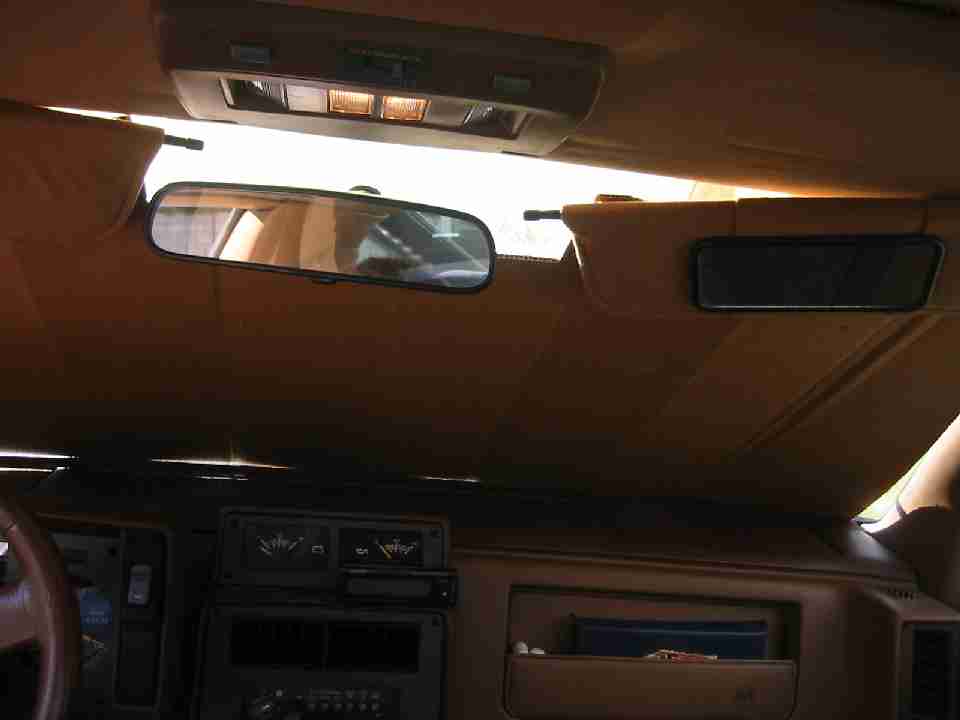
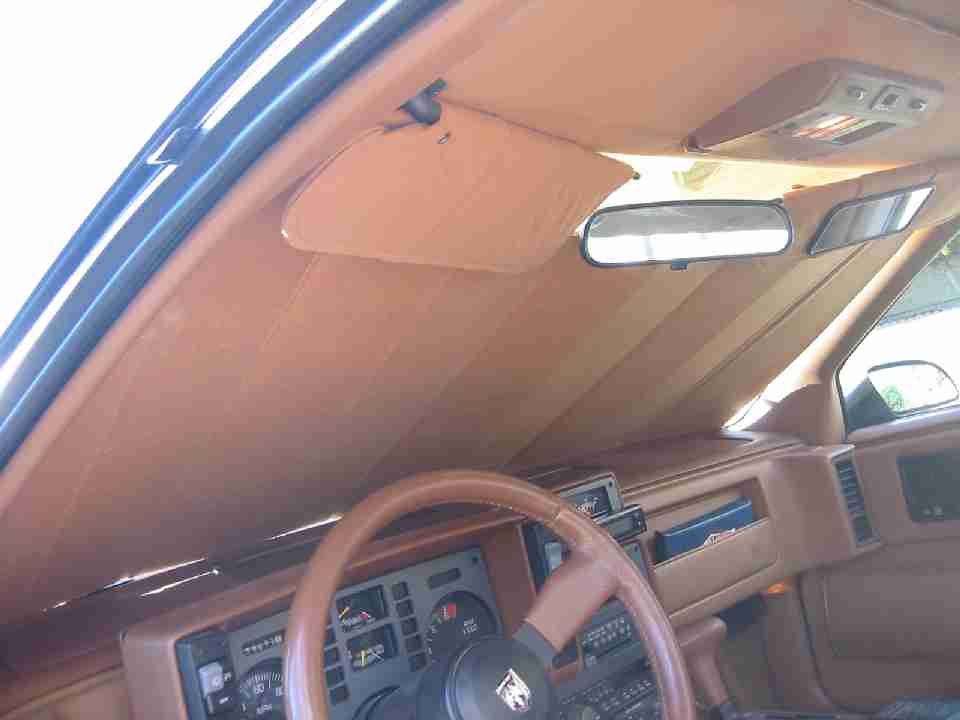
I love those cardboard sunscreens that we used to be able to buy almost anywhere. About two years ago they suddenly disappeared from the face of the earth. I reluctantly bought a metallic bubble type sunscreen, which seemed pretty good for about 6 months, then started coming apart and drooping down. I had to prop it up with a long stick and a slurpee cup to keep the thing in the windshield. One of the great features about the cardboard ones is I could get the jumbo one and then cut it to fit perfectly. I did that with the metallic one and it started coming apart pretty quickly.
So I had this box lying around for a few years.
It gave me an idea. An hour later....
Installed in the car...
It fits perfectly and doesn't allow a ray of sunlight in the cabin. I love it!
[This message has been edited by reinhart (edited 10-01-2010).]
IP: Logged
03:04 PM
rogergarrison Member
Posts: 49601 From: A Western Caribbean Island/ Columbus, Ohio Registered: Apr 99
Good idea, lol. I have one I bought made out of vinyl that has a spring steel ring around the edge. you twist it a couple of times and if folds into halves each twist. Its aluminized so it reflects sun away. Fits and works great, but Ive only used it a couple of times in years. At home I have shade trees to park under. Id guess its great for saving interior if you have to park in the hot sun all the time though. A girl friend had one on the inside of the A pillar of her BMW. It folded up like an accordian and you just pulled it over to driver side and clipped it. Mercedes used to have venetian blinds in back windows that automaticly closed when you turned off the ignition. Leave it to the Germans....
IP: Logged
03:33 PM
mrfiero Member
Posts: 9003 From: Colorful Colorado Registered: Mar 99
I'm glad the interior survived in much better shape than the exterior. As far as rust (or lack thereof), it was a Colorado car it's entire life. Between October 1987 (when it was built) and sometime in 1990 (when my friend bought it) it travelled a total of 9930 miles. It sat in a warehouse full of other Fieros from 1990 until April 1997 (when I bought it) and during that timeframe travelled another 100 miles....I bought it in April 1997 with 10,028 miles. Between April 1997 and June 2004 I drove it a little more than 9000 miles and it was garaged the majority of the time. When it had to sit outside I used no less than 4 car covers to protect it. When I sold it to the guy you bought it from in 1997 it had approximately 19,500 miles (I can't remember the exact mileage).
Anyway, the point is that there is no rust because it has never been to a rusty state or driven in conditions where rust could occur (winter driving, etc.). It did have some very minor surface rust on some of the exposed metal (screw heads, spindles, etc.), but nothing I would consider "capital R" rust). Since it has been in California for the past 6 years (and presumably inperpetuity) I don't anticpate any rust issues ever on this car.
It really pains me to see the paint in such rough condition, but I am glad that you are making her whole again. Please do a good job.....she deserves it! This is the only car I have ever owned that I truly regretted selling. I'm secure enough to say I actually cried when the guy drove it away (sad, but true! ). In retrospect, I'm glad that I did sell it when I did.....I would have likely lost it when my restaurant failed 4 years ago, so I wouldn't still have it anyway. At least I know the person who has it and that he is giving her the attention she needs, although you really should have kept her garaged so the paint wouldn't have faded so quickly!!!
I have to know.....how many miles are on it right now?
[This message has been edited by mrfiero (edited 10-01-2010).]
IP: Logged
10:18 PM
reinhart Member
Posts: 1136 From: Orange County, CA Registered: Mar 2002
Hey Mike, can't you read the odometer in that last picture I posted? ;p It's at 59Kmi now. The interior is pretty much perfect like it was when I bought it. I even stowed the original floor mats and I always cover the steering wheel when I park it. I did park it outside and considered covering it but since it was a daily driver, it didn't make much sense to pull the cover off twice a day and I assumed that it had been covered before I bought it so the factory paint would at least last 8-10 years. The paint looked good when I bought it except for: that right rear corner which you told me was the corvette backing into it, the paint coming off the fender rocker panels in sheets (still don't know what happened there other than the mudflaps that were installed sometime in Colorado, but that wouldn't explain the manner the paint was coming off), the underside of the lower rockers from the cover cord rubbing probably, and a few misc scratches that had been touched up. I got those rocker panels that came with the car painted and installed when I first got it. The three inch crack in the drivers side front fender was the only damage I caused since I owned it.
You are following along so I won't be able to cut any corners in the process, not that I would anyway. btw, let me know if you ever come across those original keys we talked about.
IP: Logged
11:33 PM
Oct 2nd, 2010
mrfiero Member
Posts: 9003 From: Colorful Colorado Registered: Mar 99
Whew! Only 40K miles since I let her go.....that's great news to me. I had this vision of it having 180K miles and just ratty as hell. The interior on that car was gorgeous when I sold it.....glad to hear that you have maintained that while driving it. My friend (who owned it before me) installed "FIERO" mudflaps on it at some point and then removed them prior to me buying it. The very first time I washed the car that big chunk of paint flew off. It was sickening, but nothing I could do about it. I did include a new molding when I sold the car.....did the guy give it to you? I also included a brand new (NOS) drivers side quarter window since it had a star crack/chip in it. That happened the one time I parked it on the street......a street sweeper went by and shot a rock right at the car. I was pissed!
And yes.....I am to blame for the paint rubbing off on the lower rockers. The cord to the car cover rubbed it in a few spots when the wind got crazy. The biggest thing that upset me about that car was the damage to the right rear fascia. I had put it into one of my friends storage units (the same guy I bought it from) and someone bumped it with a Hugger Orange '77 Corvette (still had paint transfer marks on it when I pulled it out of the unit). I had no way of knowing who did it and only discovered it when I washed and waxed it.
Anywho.....I plan on driving my Bugeye out to the California Coast Run in a few weeks and would love to stop by and see the car and chat with you. I have several sets of Fiero keys and will bring them all along so we can figure out which ones go to that GT. LMK if that's OK with you.
IP: Logged
12:28 AM
reinhart Member
Posts: 1136 From: Orange County, CA Registered: Mar 2002
I just said I did get those rocker pieces and repainted and installed them right when I got it. :-) I still have the quarter window as well. Problem is I need the other side now, since that one cracked too. I was counting on that guy on here that was developing the exact replicas but that stalled out after he already did 95% of the work to get them to us. I actually just tossed the box today that had your name on it. I have a reproduction window as well (same side haha) and I combined them into the same box.
That'd be cool. Perfect timing....I should be right in the middle of sanding so it will look its worst! What part of CA are you coming to? Send me a PM when you get close to leaving and I can give you my contact info. And we'll figure out the dates you'll be in the area.
IP: Logged
12:50 AM
reinhart Member
Posts: 1136 From: Orange County, CA Registered: Mar 2002
Quick update on the build. I got my order of sanding discs yesterday and I was just about to wash and degrease the car to start sanding today, when it started pouring rain. I ended up doing some organizing and cleaning instead. I was trying to find my dusk masks but I must have tossed them because I couldn't find them anywhere. I'll have to pick up a few more so I won't inhale all the sanding dust when I start. It only rained a few hours but was dark when it stopped. I should be able to get some sanding done this weekend.
IP: Logged
12:53 AM
Oct 3rd, 2010
reinhart Member
Posts: 1136 From: Orange County, CA Registered: Mar 2002
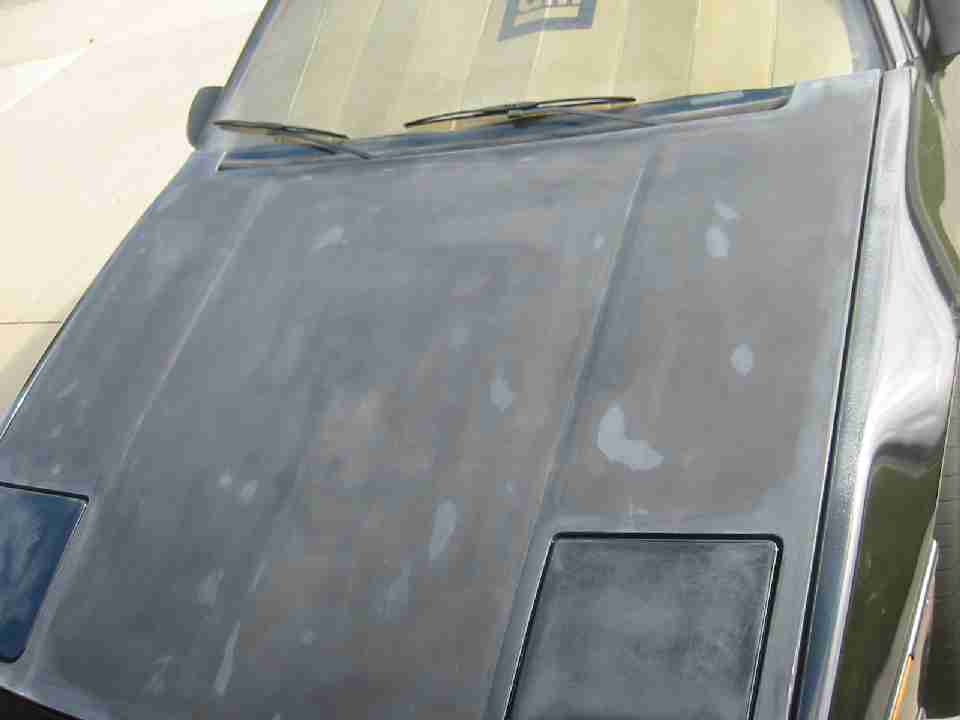
I made some good progress on the hood yesterday. The clearcoat is totally messed up so I am having to get down to the base coat to get a paintable surface. The DA cuts through the paint far more quickly than I was expecting. I thought it was going to take more time. I burned through the paint in one spot near a headlight door so I'll have to primer that.
IP: Logged
03:16 PM
mrfiero Member
Posts: 9003 From: Colorful Colorado Registered: Mar 99
I just said I did get those rocker pieces and repainted and installed them right when I got it. :-) I still have the quarter window as well. Problem is I need the other side now, since that one cracked too. I was counting on that guy on here that was developing the exact replicas but that stalled out after he already did 95% of the work to get them to us. I actually just tossed the box today that had your name on it. I have a reproduction window as well (same side haha) and I combined them into the same box.
That'd be cool. Perfect timing....I should be right in the middle of sanding so it will look its worst! What part of CA are you coming to? Send me a PM when you get close to leaving and I can give you my contact info. And we'll figure out the dates you'll be in the area.
Too bad on the passenger quarter window. Back at "Wheatstock" in 2003 (?) I bought a pair of NOS quarter windows and sold the passenger one for what I paid for the pair. I never got around to installing the drivers side so that is why I threw it in with the deal when I sold the car. Your best bet would be to find another NOS one for the passenger side otherwise the two will be mismatched and will look off. Either that or buy a pair of reproductions and just not use the NOS drivers window. Just my opinion, but that way both sides will look the same.
I'll be driving to San Simeon from Denver and plan on driving around LA for a day to sightsee, so dropping by Fountain Valley won't be out of the way at all. The Coast Run is the weekend of Oct 22-24th, so I will be in the LA area Sunday afternoon through Monday the 25th. I'll PM you with the particulars later.....I still haven't quite nailed down my itenerary yet.
IP: Logged
03:38 PM
PFF
System Bot
Oct 4th, 2010
reinhart Member
Posts: 1136 From: Orange County, CA Registered: Mar 2002
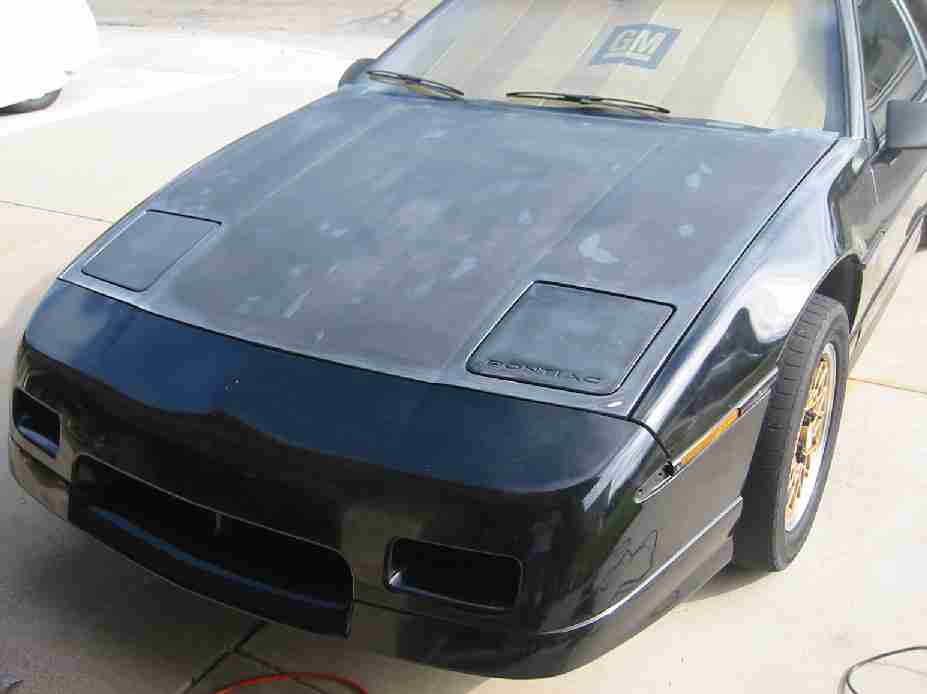
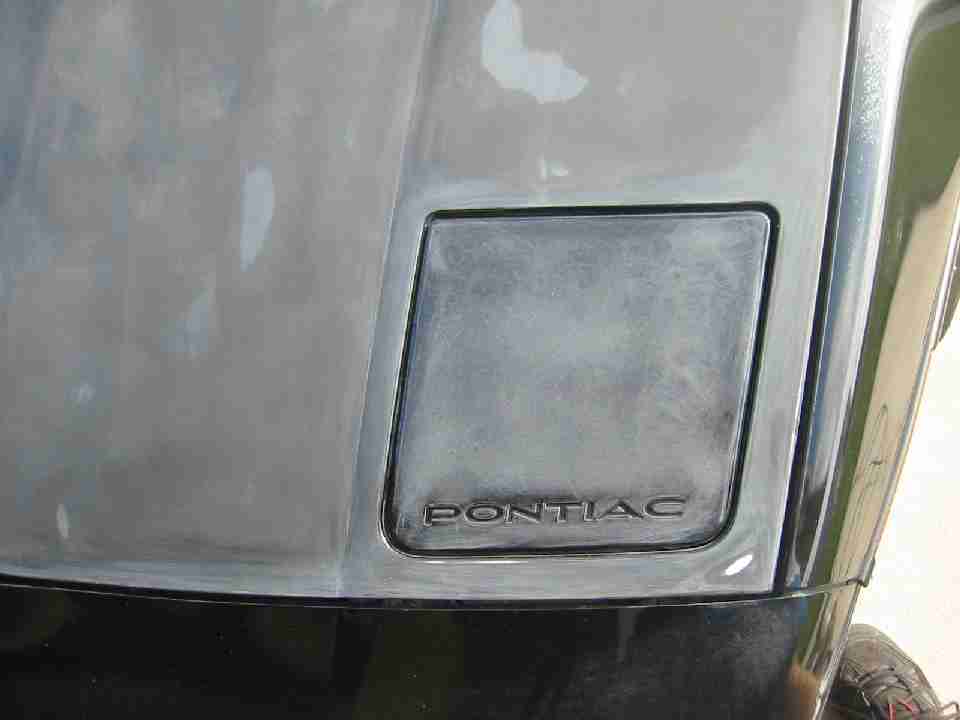
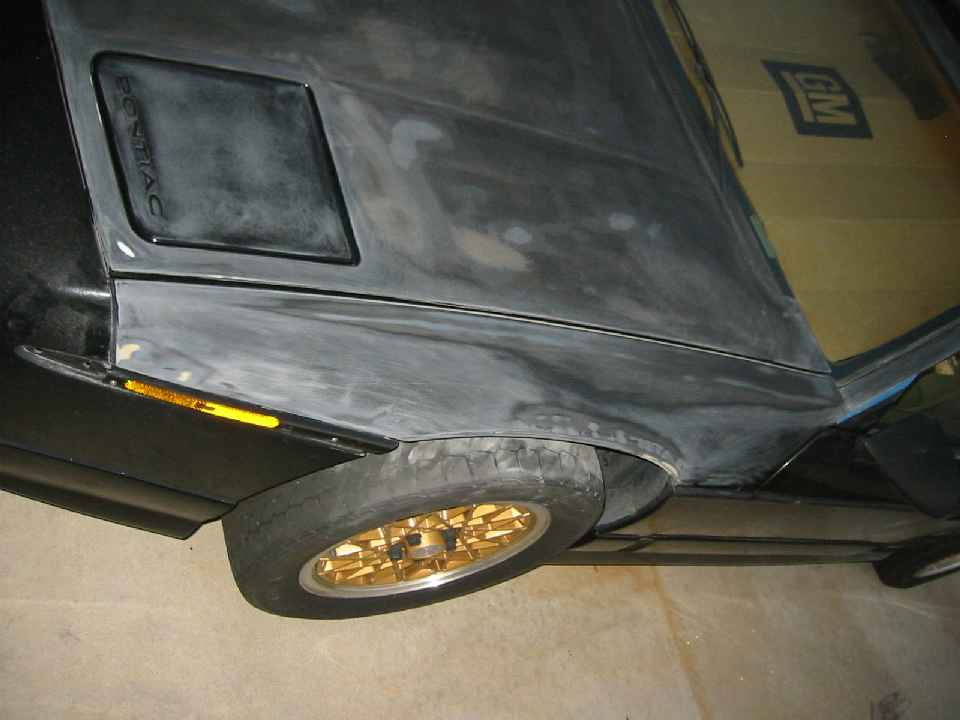
So I took some pre-sanding pictures of the car. To be honest it was hard to start sanding it.
It doesn't look so bad, maybe I shouldn't repaint it?
Sharp looking car!
On second thought....
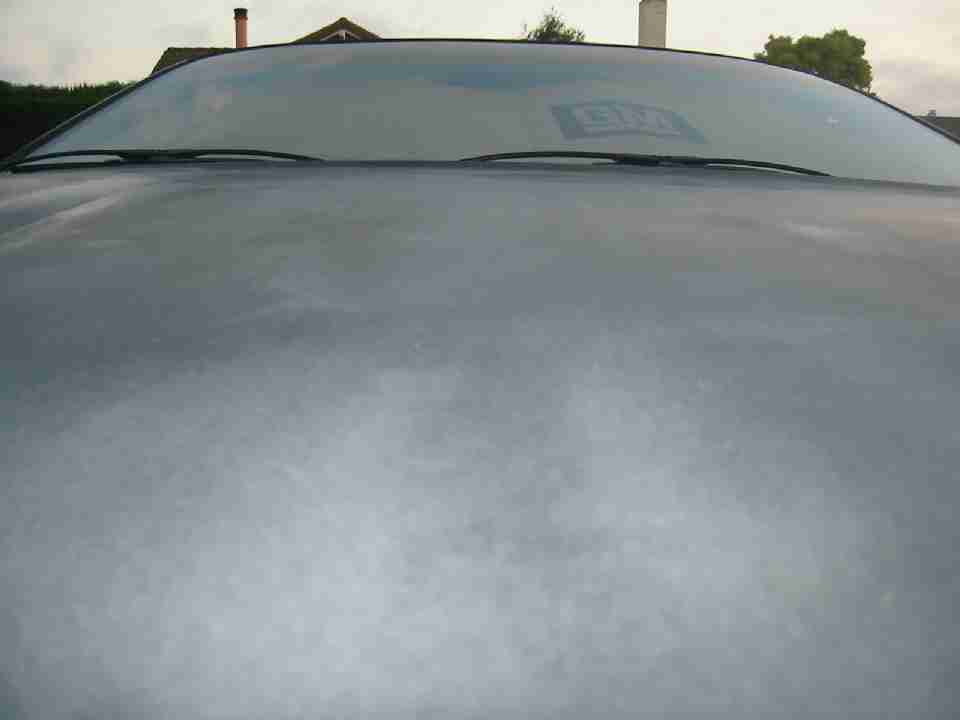
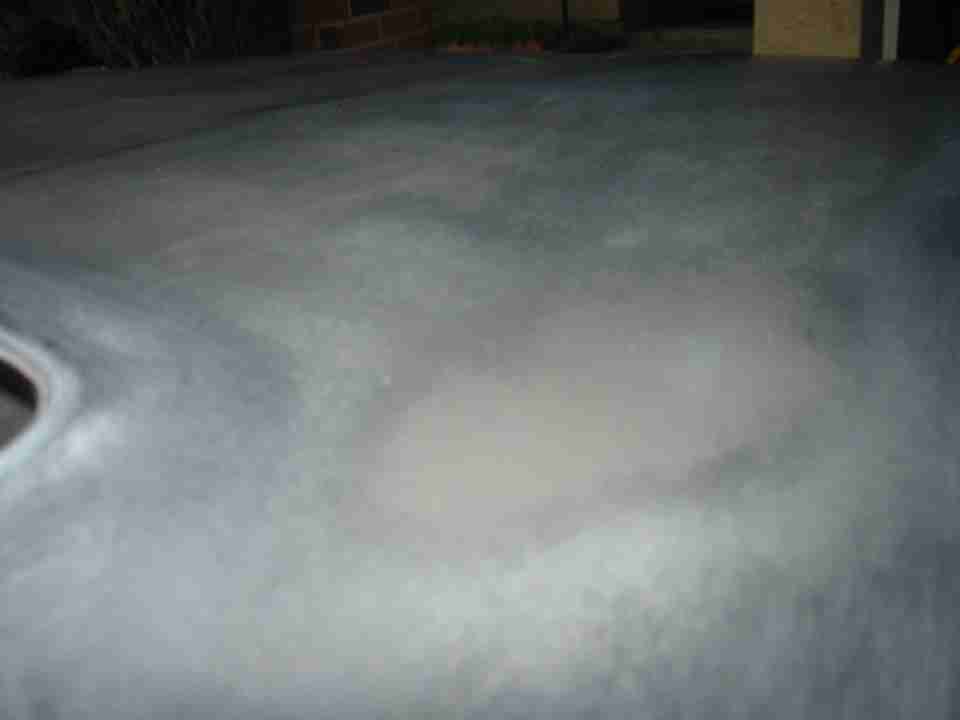
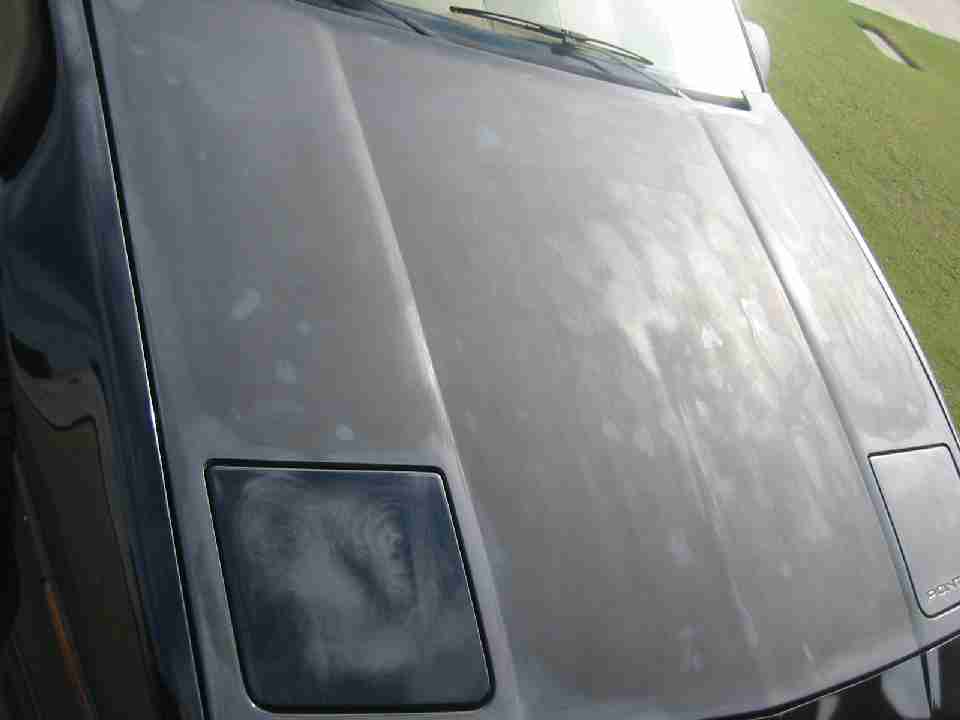
So after the first day of sanding the hood...
The paint still had some cracks so I sanded more today. I used a DA sander with 180 followed by 400. I hand sanded the edges with 150 and followed with 320. Here's the final product after five hours of sanding the hood.
I love the way this one looks.
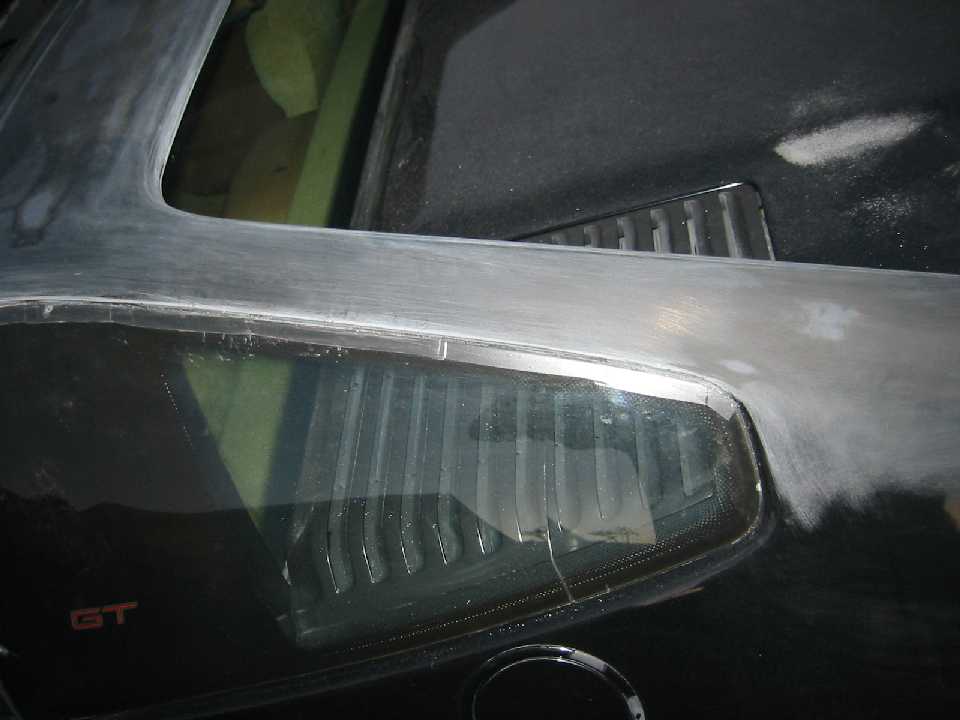
Some more close ups.
I still need to do a little more work around the headlight openings. I handsanded with 320 sandpaper but I'm waiting for a maroon scotch-brite I ordered to arrive to finish up getting rid of those directional scratches.
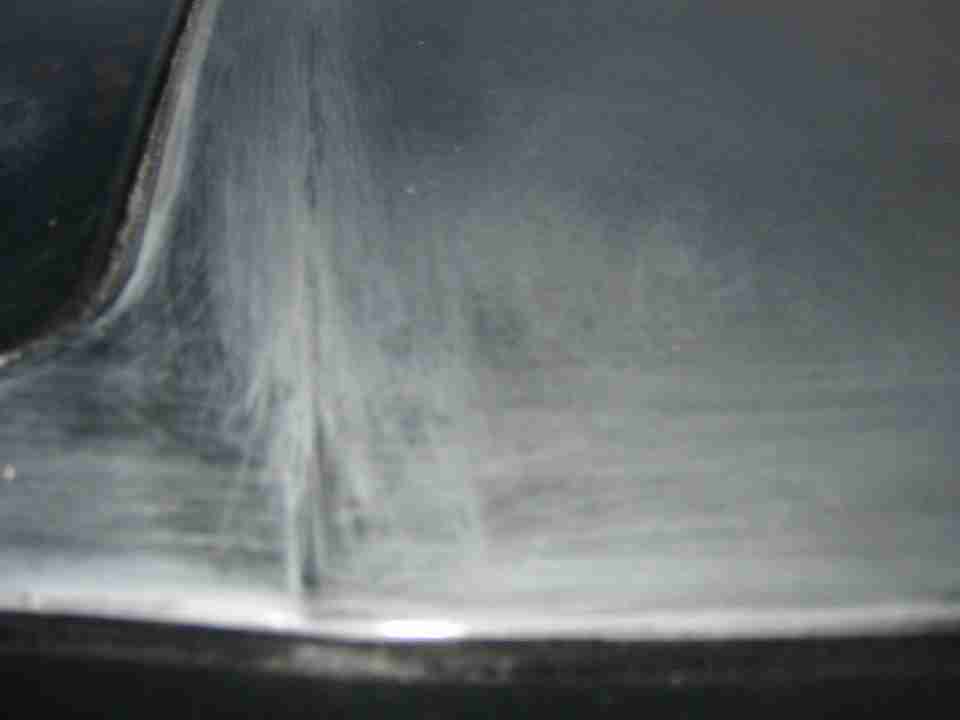
I made a mistake within the first few minutes of sanding. I thought I could use a DA on the corners and here's what happened.
I still need to remove the headlight doors and sand those and get the edges.
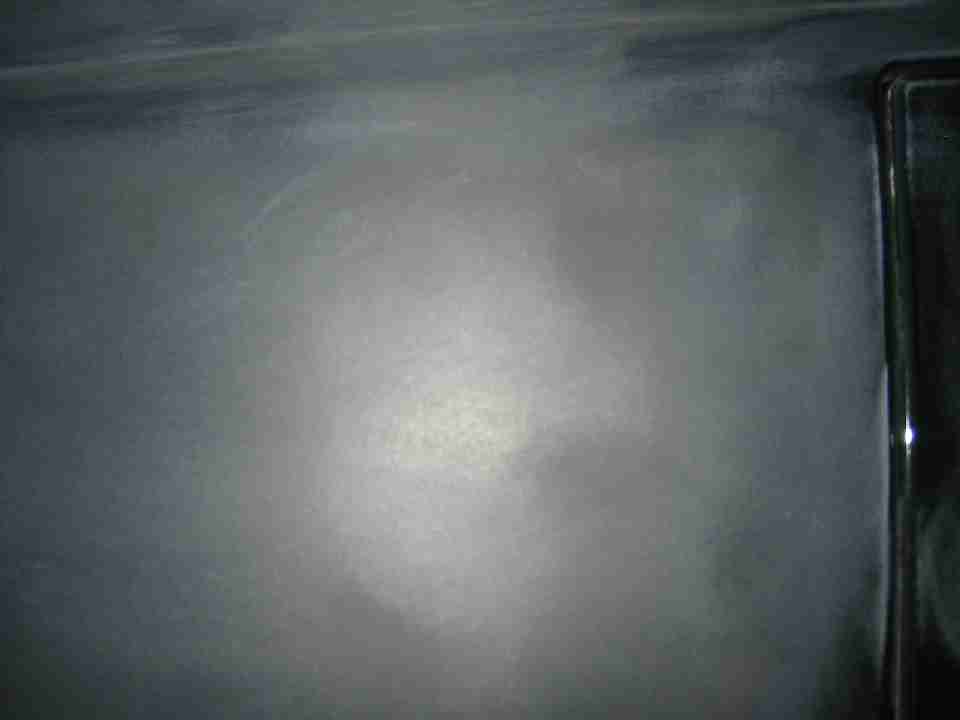
I had to cut a lot deeper into the paint than I expected. I think I went to primer or base coat everywhere to get rid of these microscopic cracks I kept seeing. Maybe those are ok but I figured better safe than sorry.
I'm planning to primer just that headlight corner where I hit SMC. Any thought on this? What do you experts think about the sanding job? Any criticisms since I still have the rest of the car to do I wouldn't mind some critique on the sanding. Thanks for reading along.
IP: Logged
04:43 AM
rogergarrison Member
Posts: 49601 From: A Western Caribbean Island/ Columbus, Ohio Registered: Apr 99
A lot of times, you can get into corners closer by opening the part (door, hood, trunk). Theres always going to be a lot of hand sanding though. Make sure you keep the DA as level as possible or you dig 'cat eyes' into the plastic that have to be primed and blocked out.
I also take out the headlite doors. That way you can sand and paint all around the edges. Its hard to do with them still mounted. Its only a few bolts. You take out the star screws holding the bezel on the sides and the doors have 10 mm bolts.
[This message has been edited by rogergarrison (edited 10-04-2010).]
You can not only remove the headlight doors, you can pull the covers off of the mechanism with only two plastic rivets holding them on. You know my take on the primer: prime the whole car car with PPG epoxy (DP) primer to seal it, & for BETTER ADHESION of the paint. If you want it really slick, let it cure for a few days & wet sand it with 400. If the car is smooth, you don't have to sand the epoxy at all; just keep shooting paint right over it (give it 30 minutes to flash off). If you don't prime it AT ALL (except on the bare SMC), you need to wet sand it REALLY WELL with 400 or 320 dry on the DA. Still, it's gonna take a LOT of sanding to get it smooth. I'd prime the whole car. HTH, ~ Paul aka "Tha Driver"
Pardon my driving; I'm reloading.
IP: Logged
12:50 PM
reinhart Member
Posts: 1136 From: Orange County, CA Registered: Mar 2002
I think I mentioned I'm planning to remove the headlight doors, not only to sand but to paint. I didn't remove them yet because I am still using the car as a daily driver and I didn't have the scotch-brite yet anyway. I think I'll also be removing most of the side moldings. I can access the fender ones very easy through the wheel wells. The door ones always seem to break the fasteners so if I pull those I'll have to buy new fasteners. The plan is to just do a light coat of high-build catalyzed primer on the corner by the left headlight door where I messed up. The hood is sanded very smooth and should be a good foundation for the new paint.
My thoughts are paint with the following parts off the car: both bumpers, the spoiler, the headlight doors, the gas cap and surround. I'm also going to paint the mirrors gloss black so I will remove the gaskets that fit between the mirrors and door. Then I feel it will paint the door as if the mirror were removed and also the mirror will get a good coat and I won't have to worry about painting the mirror off car and figuring out how to paint all around it. The only thing I'm still debating is whether to remove the lower rocker. I don't know how I would spray the underside with it on the car but I also don't really want to drill out the rivets and try to find new rivets and a gun. If I pull the lower rockers I think I'll remove the four fender rockers as well. I'd leave the door rocker panels on the door.
Today its raining so didn't do any sanding but might get a little in later.
IP: Logged
06:08 PM
30+mpg Member
Posts: 4061 From: Russellville, AR Registered: Feb 2002
So the weather was very weird this week. We had rain off and on most of the week until Friday. I did some more sanding after the rain had passed.
I pulled off the two drip rails. They came off very easily except for the last metal clip at the rear of them. That didn't come off very easy and I was worried about damaging them but they finally came off with the help of a small screwdriver. I started at the front but perhaps it works easier starting from the back.
I spent about 4 hours since the last update sanding the roof and fenders and quarter panels.
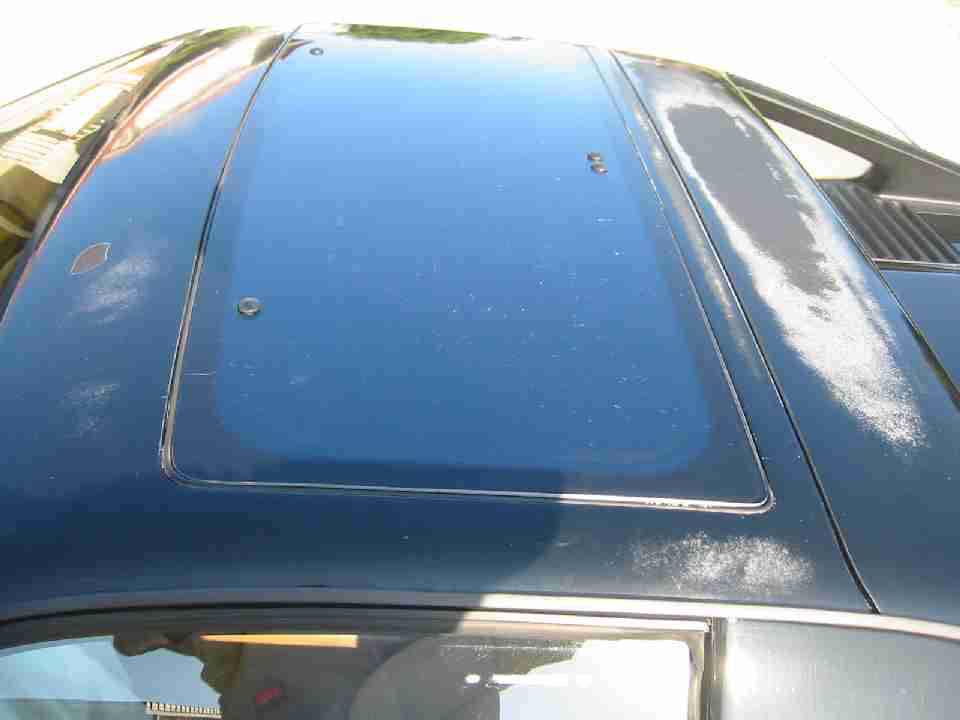
There was a small spot in front of the sunroof where the sun had burnt all the way through basically to the panel. I barely scuffed it up and noticed I was seeing the panel starting to barely show through.
The only areas that still have some clearcoat damage is part of the decklid and a small spot on the front fascia. The sides of the car should be a pretty fast prep. I'll just need to scotch-brite those.
I bought a rivet gun and some rivets today and I think I will remove the lower rocker panels to prep and paint them.
[This message has been edited by reinhart (edited 10-10-2010).]
IP: Logged
12:11 AM
rogergarrison Member
Posts: 49601 From: A Western Caribbean Island/ Columbus, Ohio Registered: Apr 99
Around the sunroof opening is a spot that typically deteriorates pretty bad. I think its because water can set there. Ive seen many Fieros with rot around it clear into the glass fibers.
IP: Logged
10:30 AM
Oct 11th, 2010
reinhart Member
Posts: 1136 From: Orange County, CA Registered: Mar 2002
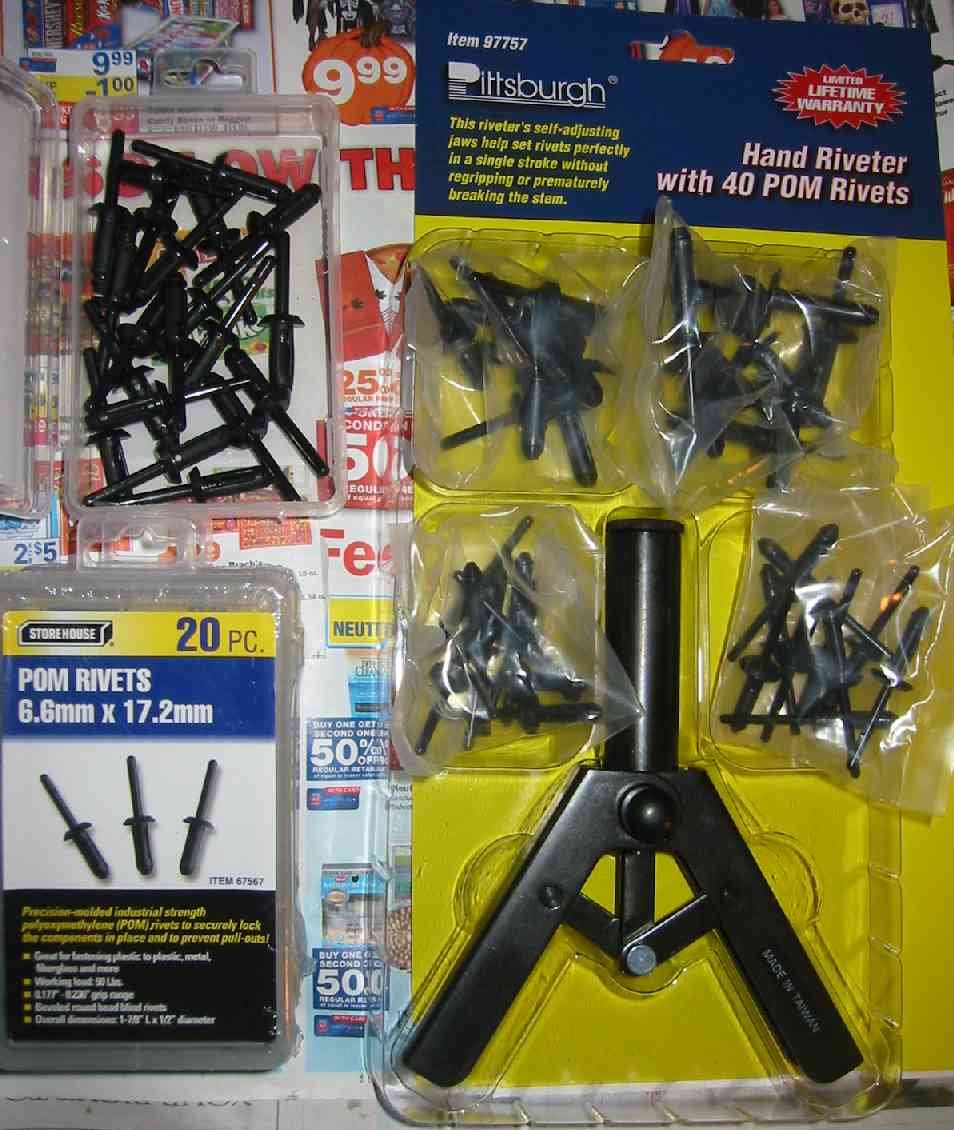
Yesterday, I punched out the center of the rivets on the passenger side rocker panel and struggled with getting the rivets out using several methods, so now I'm going to drill the centers which should allow the front ring to separate from the rest of the rivet and they should come out the back. I hate rivets! I'm going to replace these metal ones with plastic rivets when I reinstall so they won't be so hard to remove next time.
IP: Logged
04:47 PM
rogergarrison Member
Posts: 49601 From: A Western Caribbean Island/ Columbus, Ohio Registered: Apr 99
Got all the rivets out of the passenger rocker. The three on the sill were so easy. The seven on the bottom were very hard to drill out. After removing all of them, I still couldn't get the rocker off. Is it just it being clipped to the upper rockers with one clip in the front and one in the back?
One in the front & two in the back, IIRC. You have to push in with a screwdriver & pull down on the part. It can be a real pain, but it's really easy once you get the technique down. ~ Paul aka "Tha Driver"
Did you hear about the flu epidemic in China? The entire 4th grade missed work!
I painted a fiero a few years back and I used the paint form advanced auto called duplorcolor and it was premixed base coat /clear coat. Just strained it and poured it in my gun. best paint I ever used. 22$ a quart. I believe that it is all in the prep work. Just like painting a room in your house if you do not wipe down the walls before you paint it will not trun out looking very good.
I painted a fiero a few years back and I used the paint form advanced auto called duplorcolor and it was premixed base coat /clear coat. Just strained it and poured it in my gun. best paint I ever used. 22$ a quart. I believe that it is all in the prep work. Just like painting a room in your house if you do not wipe down the walls before you paint it will not trun out looking very good.
That's laquer. You don't want to use that. Base/clear urethane is 10 times better & doesn't cost that much for Dupont Nason - which is fine for a daily driver. ~ Paul aka "Tha Driver"
Jay Walking: Jay Leno: Who lives at 1600 Pennsylvania Avenue? Ummm, I don't know. Jay: Who lives in a pineapple under the sea? OH! Sponge Bob!
IP: Logged
05:02 PM
Oct 14th, 2010
reinhart Member
Posts: 1136 From: Orange County, CA Registered: Mar 2002
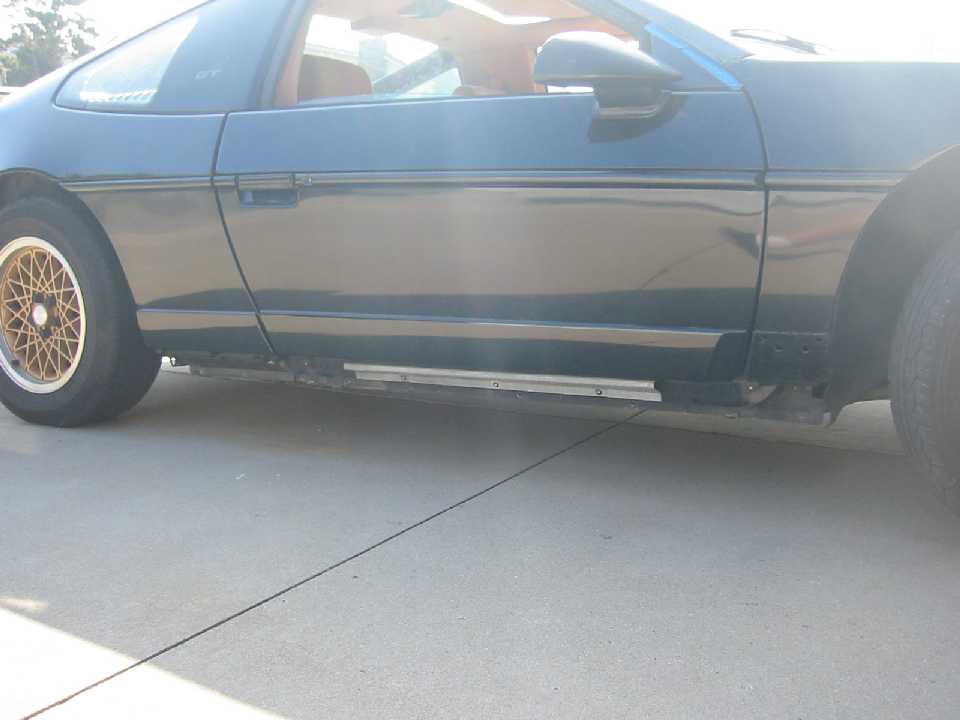
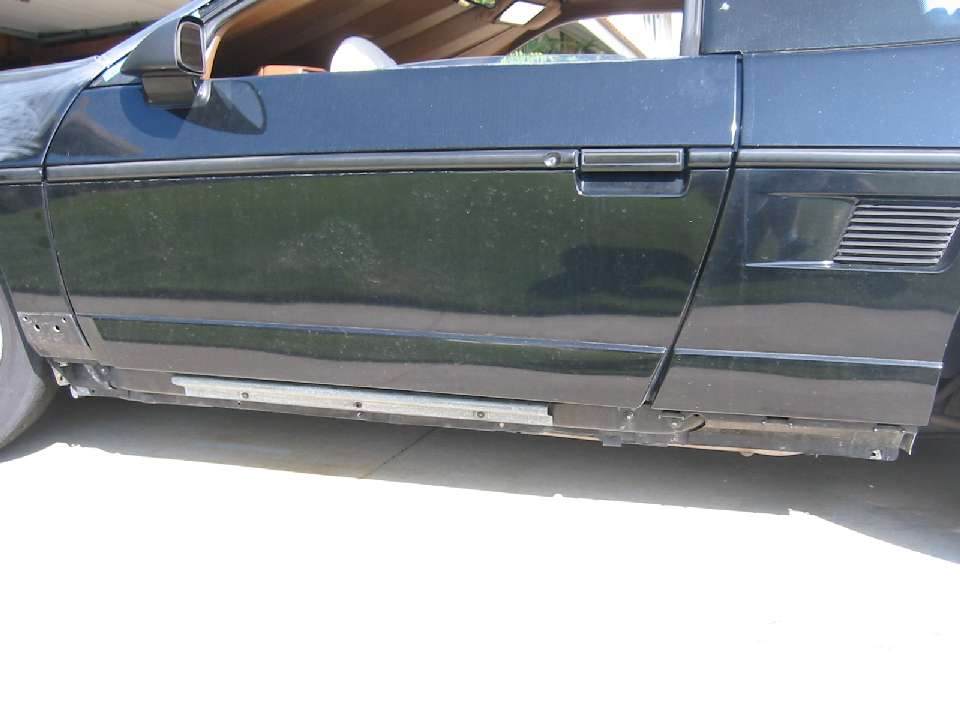
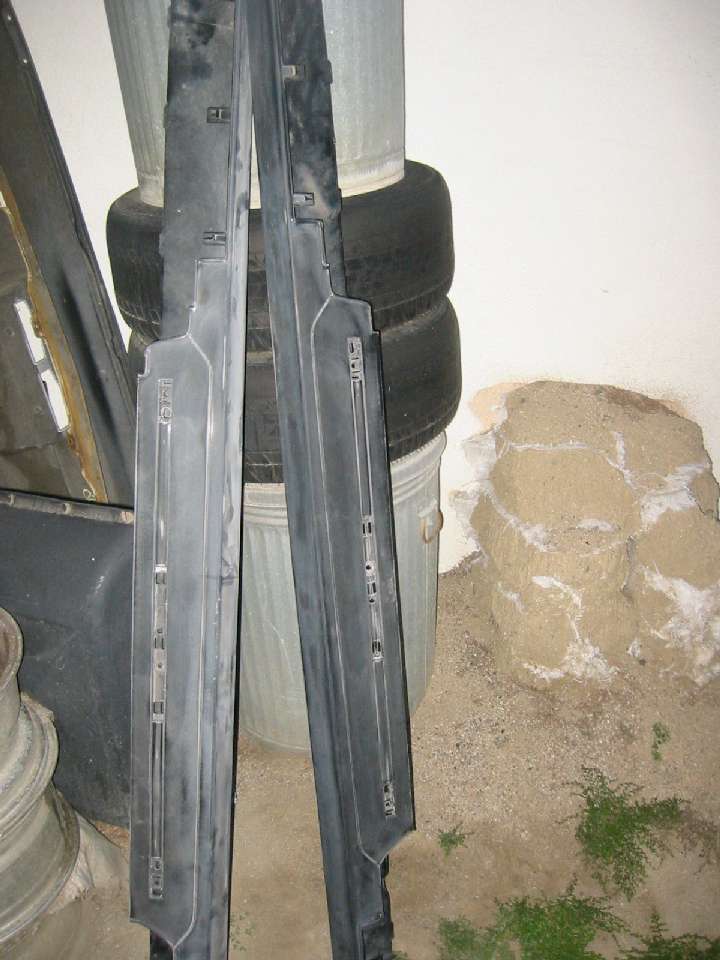
Ok I have made some good progress since the last update. Finally got those darn rockers off, and for the most part without destroying anything too badly. It took about 7 hours to get the lower rockers and the small front upper rockers off. I applaud those that can get them off in 30 minutes each, although the 88 metal rivets are likely a lot harder. I don't understand why you'd use metal to attach the plastic part. I'd rather have the weaker link be the rivet than the panel if there were contact.
Here's the car sans lower rockers.
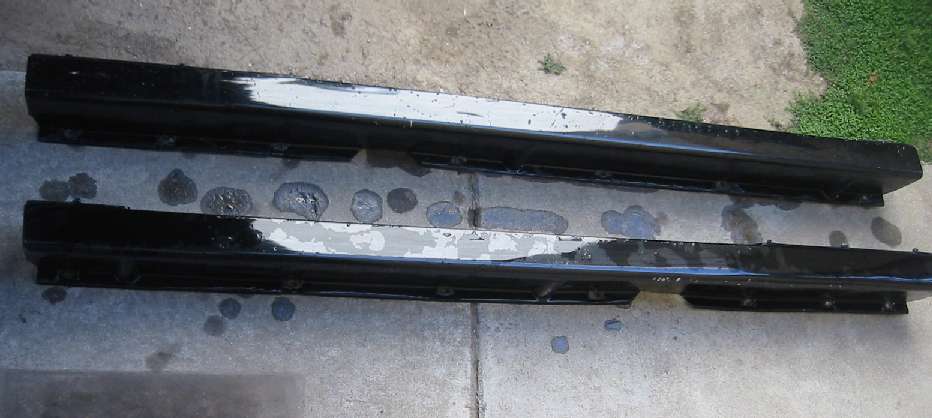
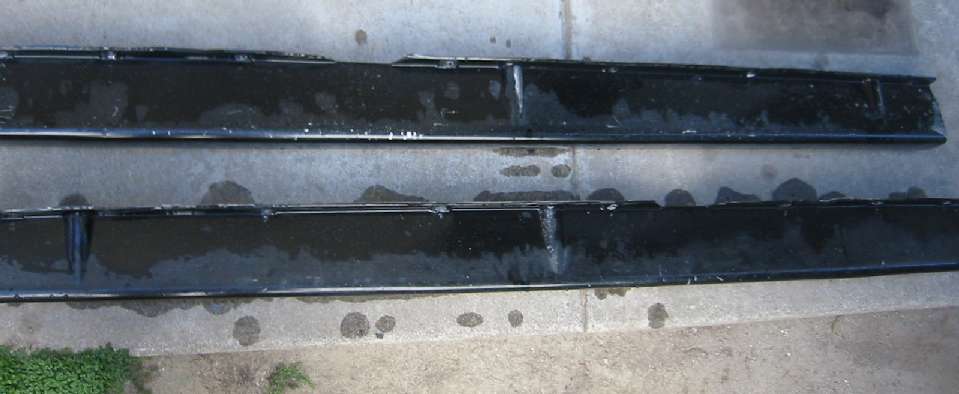
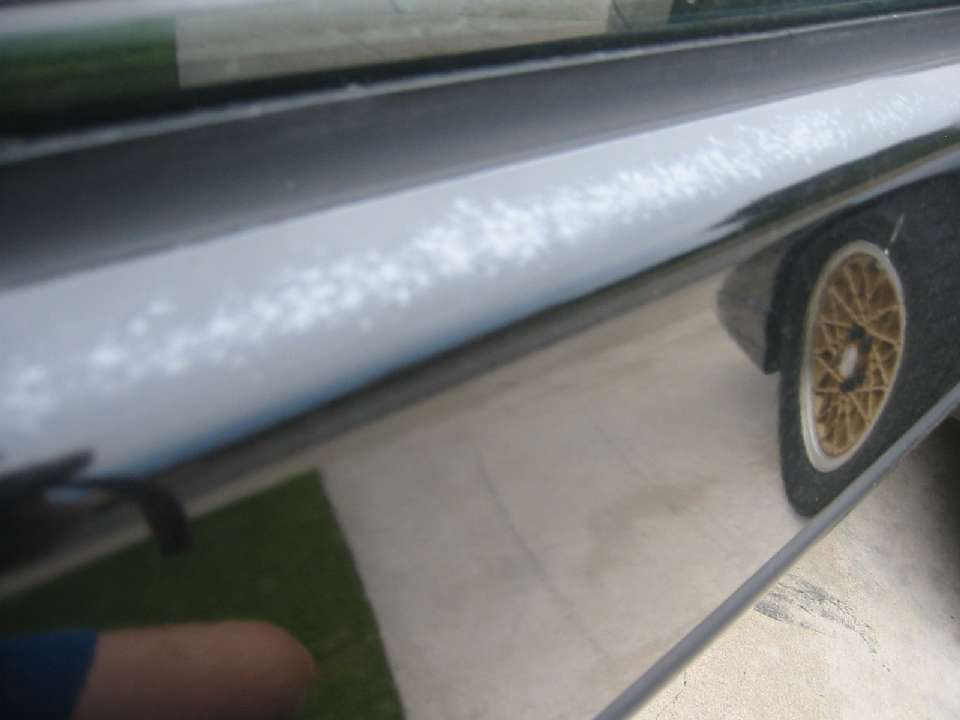
Here's a few pictures of those evil rocker panels. The large white areas in the first picture is just the reflection, the paint was pretty shiny still on the sides.
I damaged one of the upper rockers trying to pry the lower out of the notch. These were the pieces that I had repainted when I bought the car due to the infamous mud flap incident that caused the paint to flake off. I'm still not sure why but the rockers seem to have paint adhesion problems. The lower rockers had a lot of paint damage as well. Anyway, I wasn't too upset over damaging the paint on these uppers because I wanted to strip off most of the paint to start fresh anyway on these since they were flaking on the wheel well part.
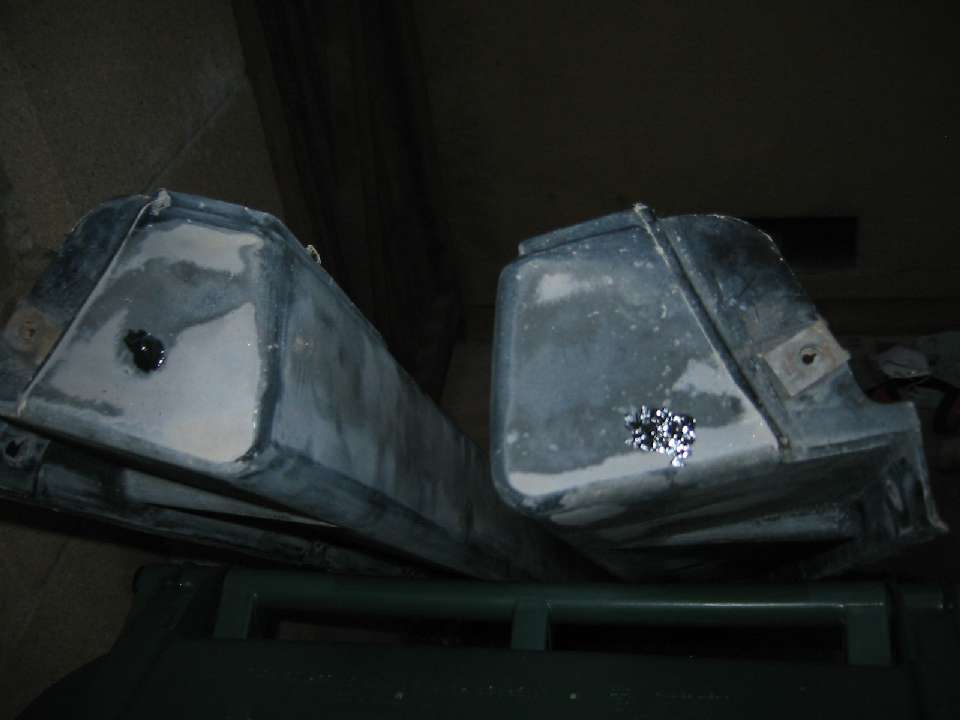
There was a little bit of deformation on the lower rocker covers. I used a heat gun to fix them. Left Before. Left After.
Right Before. Right After.
I sanded down the lower rockers to get them ready for primer. I'll need primer on these due to the extensive paint damage on the upper edge (shoe rubs) as well as the underside and wheel well edges.
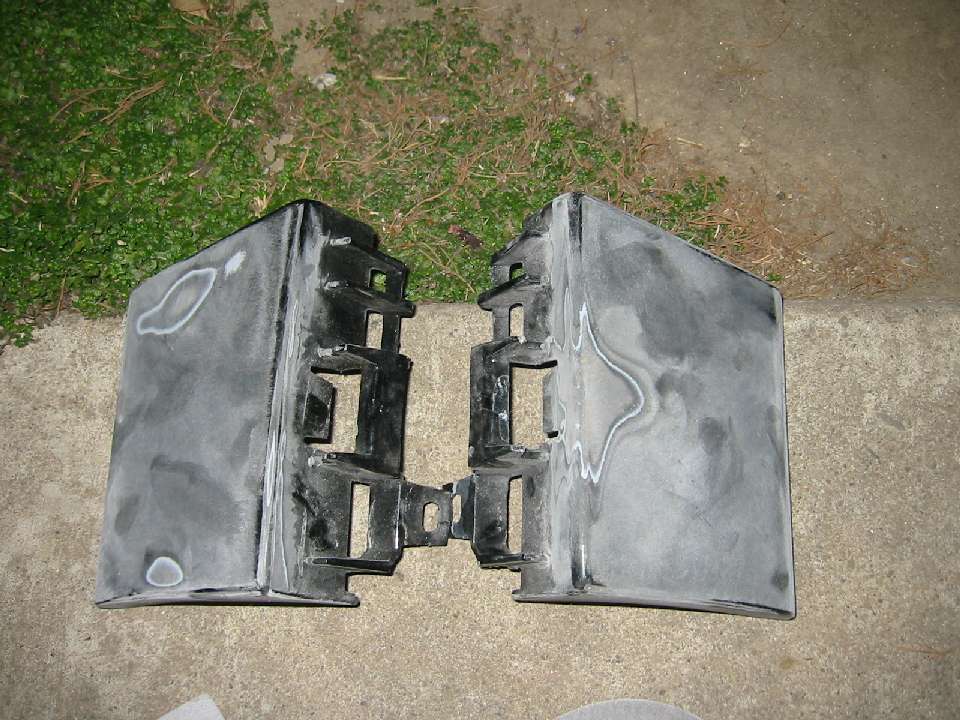
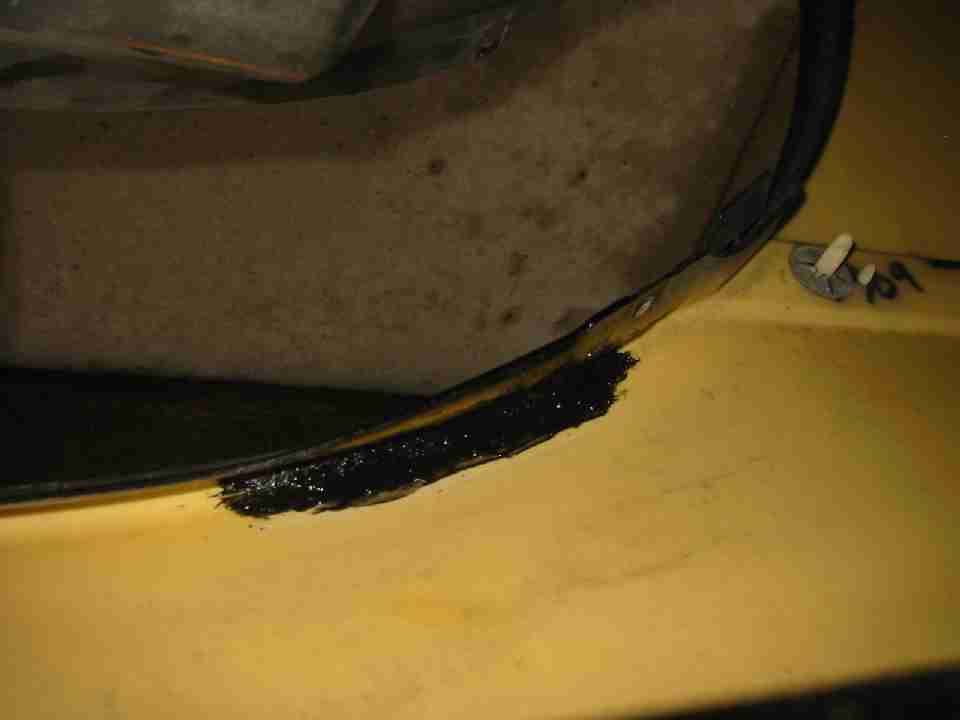
I also wanted to fix the mud flap holes in the edges. 2 holes in one and 1 hole in the other. Those infamous flaps weren't even installed the same. Here's the rockers with more of the great Bumper Repair Compund I've grown to love. I picked up a third tube of that stuff today.
I didn't bother reinforcing the back with fiberglass matt like I did when I fixed the bumpers and fenders. The holes are so small I don't think it's necessary but I'll check them for strength later. I'll need to sand those fill areas smooth when it hardens. Then I'll be ready to primer the rocker panels.
I also sanded the upper rockers I removed. I'll need to fill the area where I damaged the paint a little higher than the surrounding areas. Here's a picture after sanding.
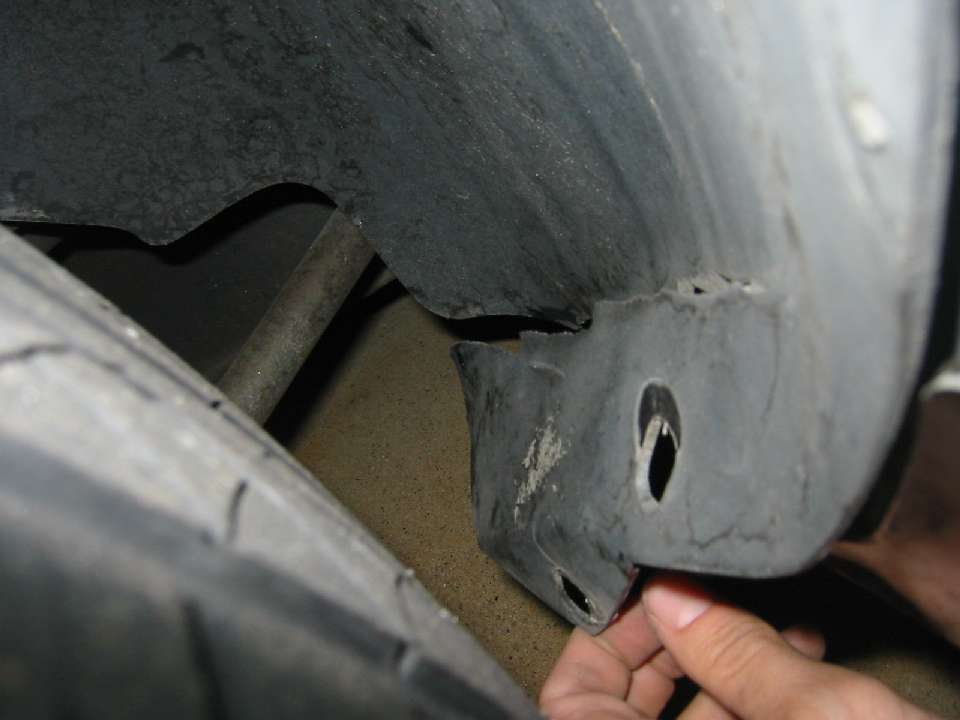
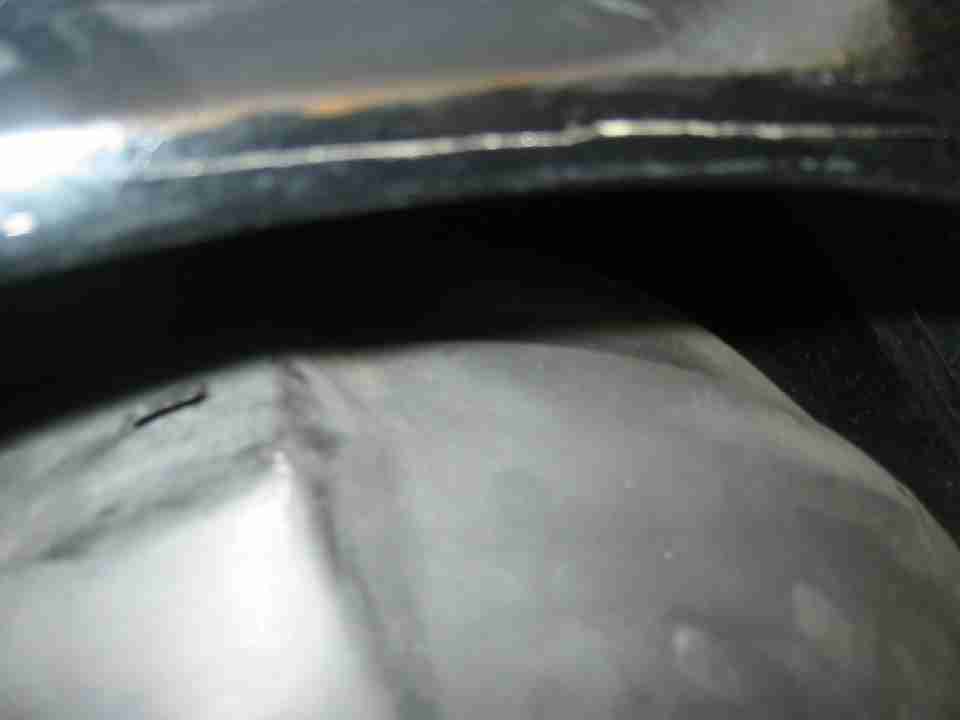
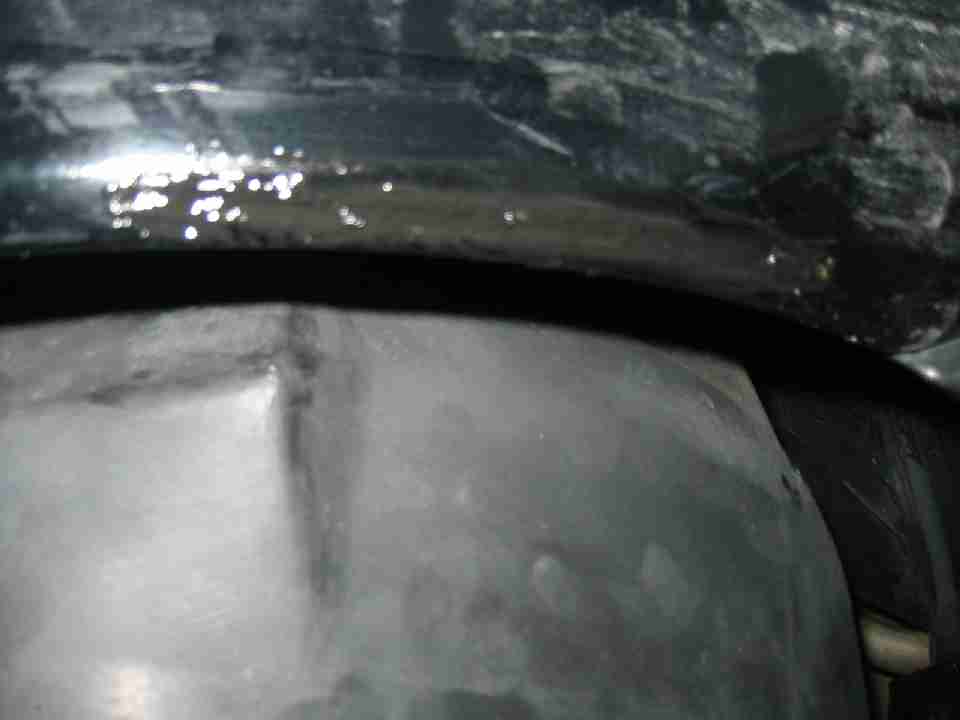
I noticed a crack in the RR wheel well when I was removing the bolts to get to the rocker. Anyone think the flexible bumper repair compound will work on it? I think I'll give it a shot after I finish painting the car. That can be done later.
So anyway finally got past that rocker roadblock. I have about 35 hours into the project now. I think I should have about 15-20 more hours left until I'm ready to paint, most of which will involve sanding now. Clearcoat damage on the decklid and spoiler and tops of door panels. I'm thinking 5 hours for those areas. After that, I'll start taping off the rub strips. Then I need to move on to primering the areas I fixed or sanded through to bare panel, which I think will take another 5 hours. After that, the whole car needs to be red scotch-brited, which I think will be another 4 hours. Then I can do a final tape off to paint.
For paint day, the plan is to remove the fascias, lower rockers, front upper rockers, and spolier. I'm planning to put the fascias and rockers on 4x4's or cardboard stands (taped to the floor). What's the best way to paint the spoiler to be able to get both sides of it? I can't be sure there will be any way to hang it from the ceiling so assume I can't hang it. Anyone have any ideas?
[This message has been edited by reinhart (edited 10-14-2010).]
Ive hung the wing on wire. Ive found it easier to use 2 sawhorses, and put one of the mounting bolts on each end thru a small piece of scrap metal screwed into the sawhorses. Then I can paint the bottom and the top with right side up. Simply a matter of whats easiest to you. On the sawhorses, it cant blow around from the paint gun air pressure.
IP: Logged
11:18 AM
Oct 19th, 2010
reinhart Member
Posts: 1136 From: Orange County, CA Registered: Mar 2002
Thanks Roger, I think I might implement some version of the sawhorse idea except with two 4x4's. Might be able to attach each set of stantion studs to the square end of the 4x4 and tape the other square end to the ground. When I take the spoiler off to sand the decklid I'll test fit and see if that will work.
quote
Originally posted by rogergarrison:
Ive hung the wing on wire. Ive found it easier to use 2 sawhorses, and put one of the mounting bolts on each end thru a small piece of scrap metal screwed into the sawhorses. Then I can paint the bottom and the top with right side up. Simply a matter of whats easiest to you. On the sawhorses, it cant blow around from the paint gun air pressure.
I spent about three more hours sanding the lower rockers a few days after I posted the pictures. The filled holes are nice and strong when I push on them. I also spent more time sanding them all over. There were a few spots I wasn't happy with which are better now. I think I'm finally done with those.
[This message has been edited by reinhart (edited 10-19-2010).]
IP: Logged
04:52 AM
reinhart Member
Posts: 1136 From: Orange County, CA Registered: Mar 2002
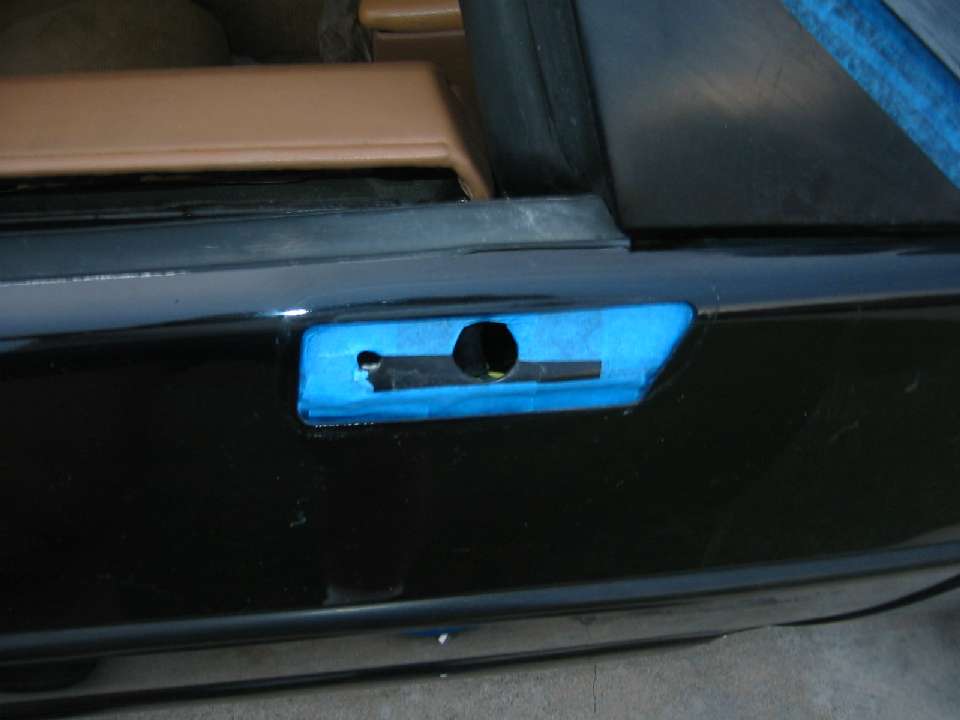
I got some more work done. I worked on the doors. Two issues I wanted to take care of. 1) Removing the mirror gaskets so I can paint the door panels and mirrors with them mounted on the door. 2) Sanding off the bad clearcoat on the upper lip.
I started on the left door. I had to pull the inner door in order to remove the mirror. I found I was able to get the inner dew wipes off by just pulling the top hald of the inner panel but since on both doors I dropped screws trying to reattach the inner dew wipes, I had to pull the whole panels anyway. Here's the door with the inner dew wipe out.
Mirror removed:
I sanded the area around the mirror opening while I had the mirror out since it would be easier now then once I remounted the mirror.
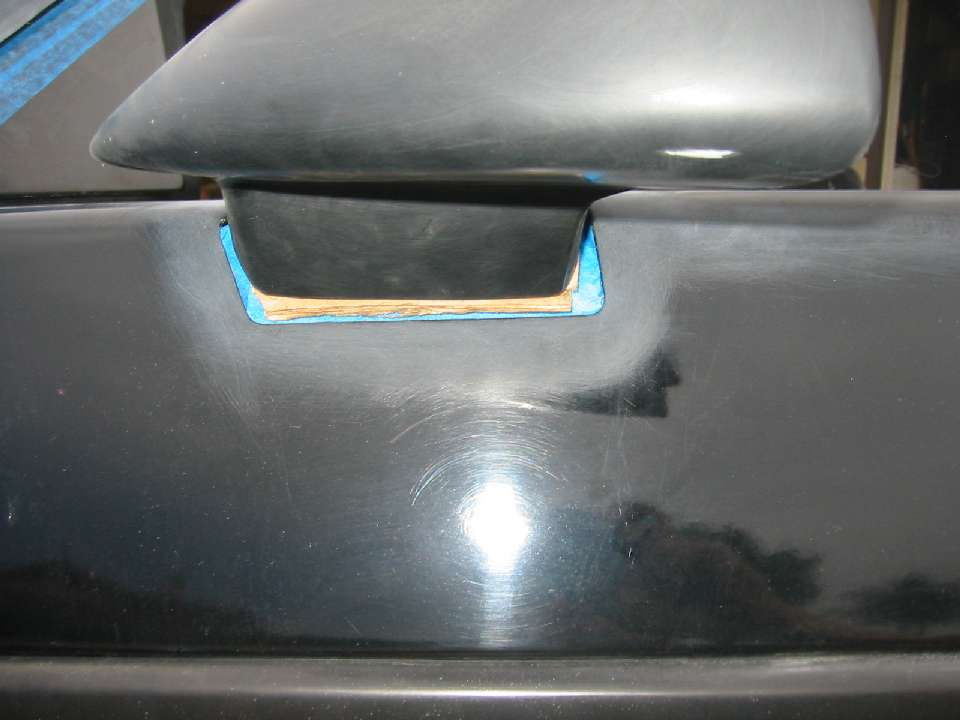
I taped off the frame inside the mirror opening.
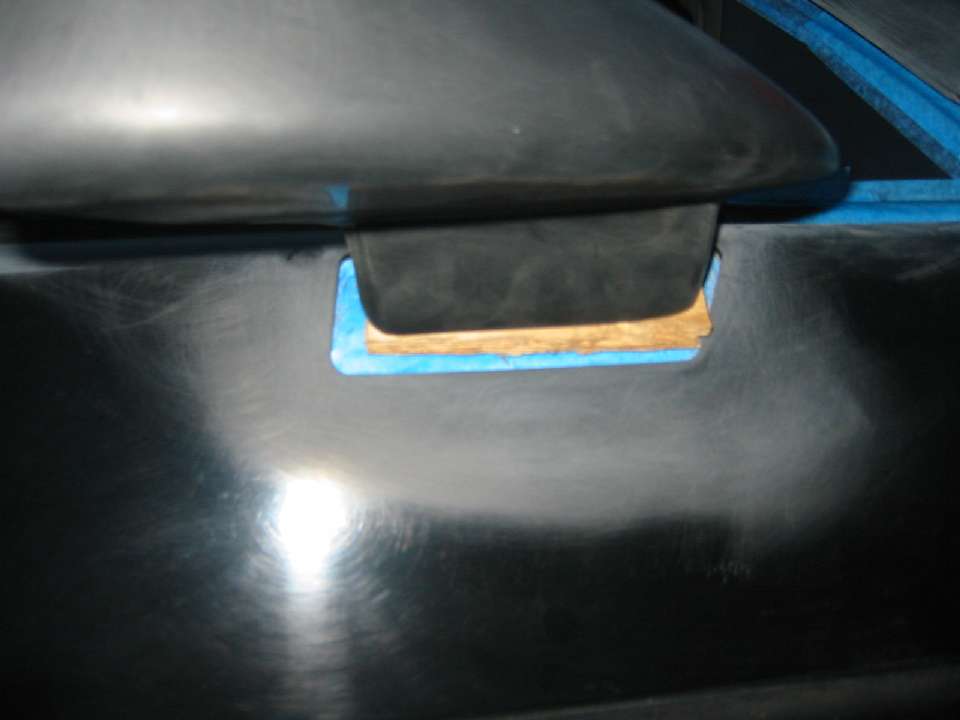
I remounted the mirror without its gasket. Little problem, without the gasket the mirror was touching the door skin at the top.
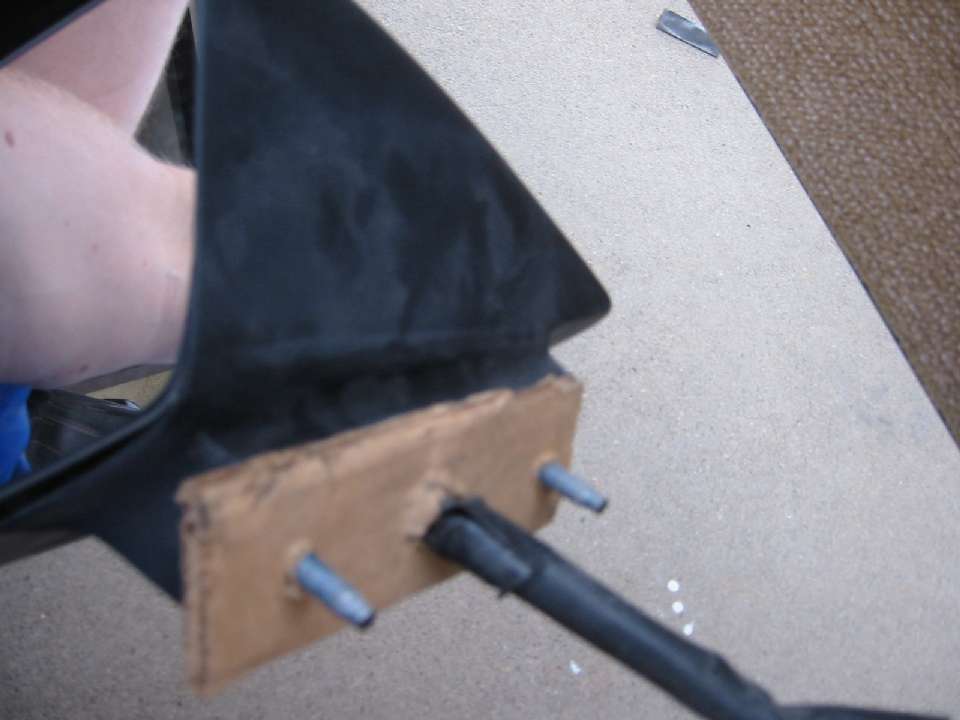
Decided to make a gasket out of cardboard:
Worked perfectly:
I now have room all the way around the skin and mirror for when I paint.
I sanded the door skin upper lip while I had the mirror off.
Here's the right door skin clearcoat damage.
Taped off the frame where the mirror opening is.
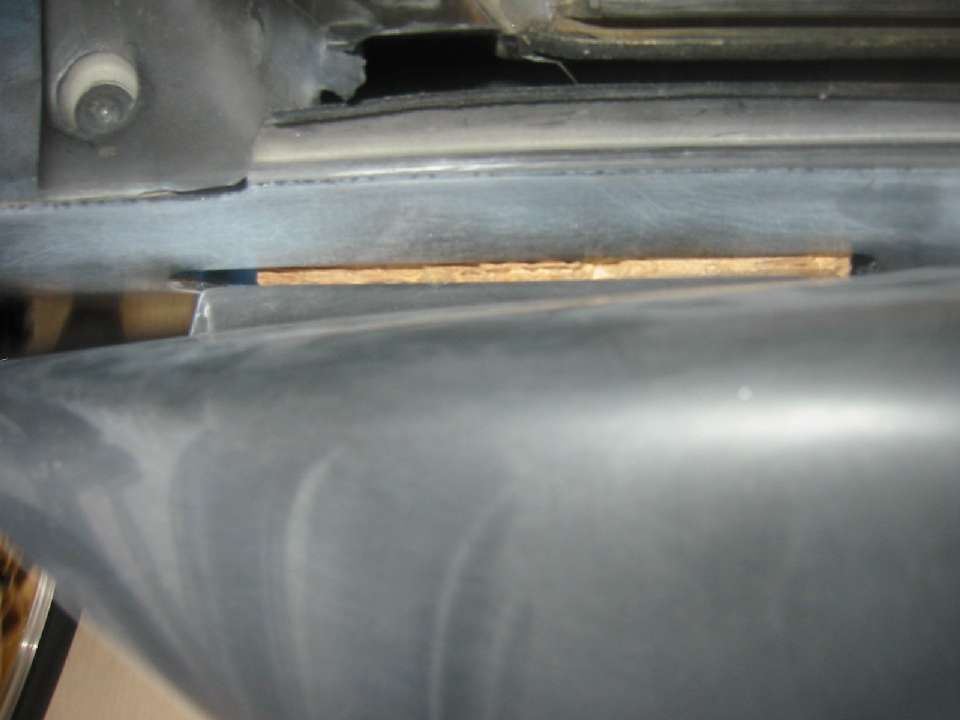
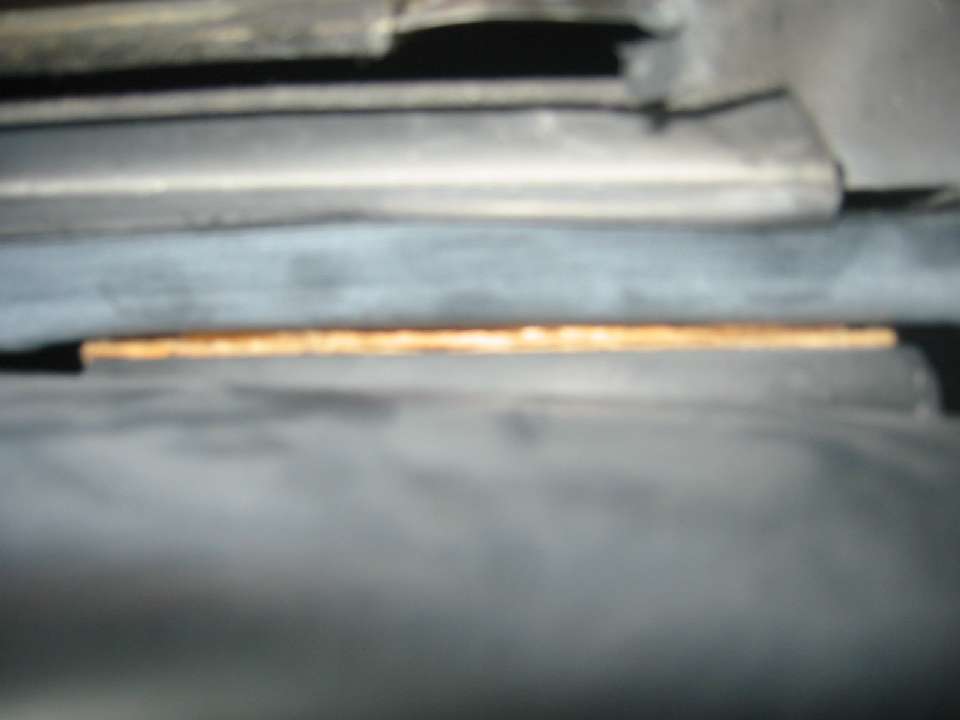
Then I removed the rubber gasket and remounted the mirror with a cardboard gasket.
Here's the clearance on the top.
I also sanded the lip while I had the mirror off.
I spent about 5 hours working on the doors today which is far more than I expected. I think I'll work on sanding down the rear fascia next. It's supposed to rain off and on this week so that might slow my progress.
[This message has been edited by reinhart (edited 10-19-2010).]
IP: Logged
05:09 AM
rogergarrison Member
Posts: 49601 From: A Western Caribbean Island/ Columbus, Ohio Registered: Apr 99
So your going to paint with the mirrors mounted ? Its nearly impossible to get the inside of the mirror by the glass that way. If you have them already off, suggest you paint them off. You can make a scrap metal bracket screwed to a sawhorse to hold them. When I paint them on, I roll the widows down when Im thru and spray the back (towards window) with a coat of color and clear with very low air pressure, then spray just some reducer around the area to melt it back in. This is 'blending' but its blending new paint with other uncured new paint, which is easy and wont show. The only trick there is not to wet it down much with reducer or it will run.
The time you spend trying to tape off all around the door with the window down & cover the interior, you might as well take off the mirrors (AND the door skins for that matter) & have them where you can get around them to paint easily. ~ Paul aka "Tha Driver"
It was already on fire when I got here.
IP: Logged
02:01 PM
rogergarrison Member
Posts: 49601 From: A Western Caribbean Island/ Columbus, Ohio Registered: Apr 99
I tape off the window like normal. Paint the car, take off the paper on the window and roll it down. Stick a strip of wide paper along the window rubber letting the paper lay on the door top and over the inside and spray with the door open from the interior side. Takes 10 mins to do both sides. I use low enough air pressure the paint wont go more than a foot away from what I spray and all the over spray is going out away from the car. Theres no need to mask off all the interior, its just overkill. If your really anal about getting any inside, just throw a sheet of plastic over it...another 2 minutes.
Well whenever I'm shooting anything with the door open, I tape off the whole door opening - 'cause I'm REALLY ANAL about getting overspray on the interior. ~ Paul aka "Tha Driver"
Which do you most can't the least? What I most can't the least, would be do not a bad job but always a good.
IP: Logged
04:55 PM
Alex4mula Member
Posts: 7410 From: Canton, MI US Registered: Dec 1999
...I spent about 5 hours working on the doors today which is far more than I expected. I think I'll work on sanding down the rear fascia next. It's supposed to rain off and on this week so that might slow my progress.
This reminds me when I painted my red car. I spent about 80hrs just preparing it. I wanted to paint it myself but didn't have the right space, so at the end I took it to a place to just shoot the paint. I saved a lot but I'm not sure I may want to go over this again.
IP: Logged
07:46 PM
reinhart Member
Posts: 1136 From: Orange County, CA Registered: Mar 2002
So your going to paint with the mirrors mounted ? Its nearly impossible to get the inside of the mirror by the glass that way.
Oops...I hadn't considered that. I was trying to visualize how I would paint all around them and it seemed like a good idea at the time. I'm wondering if before I begin to paint base coat, I can start with the inside of the mirrors with the glass down (top of interior door panel's taped off). Then roll up windows and close doors, paint as normal. Then after finishing the final clear coat, remove the masking off glass, roll down window and shoot the clear on the inside of the mirrors. If I do it this way, I wouldn't have to do the reducing trick which I'm sure I'd mess up. Is one coat of base and one of clear enough?
I need to drive the car 40 minutes to get to the paint booth so driving without mirrors is not the smartest idea and I have limited setup time at the destination. Probably 5 hours before booth time, most of which will be to remove the fascias, and do final tape off of the glass, and do a final degreasing.
Doing it that way you would probably get a build-up of clear overspray behind the mirror. I'd take the time to take them off & hang them. Take a helper with you if you're that pressed for time.
IP: Logged
08:34 PM
Oct 20th, 2010
reinhart Member
Posts: 1136 From: Orange County, CA Registered: Mar 2002
Driver, why would that cause clearcoat overspray? If anything wouldn't it be thinner there since I'm only putting one coat on at the end whereas the outside parts of the mirror housing would have two layers? Thanks for your feedback.
IP: Logged
03:21 AM
rogergarrison Member
Posts: 49601 From: A Western Caribbean Island/ Columbus, Ohio Registered: Apr 99
I do the inside last. Since you only need to do one coat of base and clear on it (who wet sands and buffs the inside of the mirror housing), you will have a lot less overspray than you would doing them first then painting up to 6 coats of base and clear, then coming back to clear the back of mirror.
If you do get some rough overspray on the back and do the mirrors last, you can just wait for an hour or so for the clear on the car to start setting up and take some wet sandpaper to smooth it up first before hitting it with your 1 coat of base and clear.
I still recommend....especially since there off anyway, taking them off to shoot them. You shouldnt have a problem driving it without them attached. Cars up till the 60s didnt even have them except as options.
IP: Logged
10:39 AM
rogergarrison Member
Posts: 49601 From: A Western Caribbean Island/ Columbus, Ohio Registered: Apr 99
Also, you can save a lot of masking time by pretaping. Just run a strip of 3/4" tape around everything your going to tape off before you leave. Then you only have to put the paper on it. I also use a single edge razor blade to cut around the window (or part) like 1/4-1/2" inside the pretape after I put the paper in place with one side taped. Then just run another strip of tape around the other 3 sides. Makes unmasking easier too. May seem to take longer cutting the paper to fit, but it also eliminates wrinkles that will hold dirt and dust. Pretaping windows, i can paper up all of a Corvettes windows in 15-20 mins. On your bumpers, just put enough of the nuts on it to secure them. Most newer cars only have 1 nut or bolt on each corner. I just pulled the front bumper off a new Caddy by taking out 2 sheet metal screws and 4 push in 'christmas trees'.


 ). In retrospect, I'm glad that I did sell it when I did.....I would have likely lost it when my restaurant failed 4 years ago, so I wouldn't still have it anyway. At least I know the person who has it and that he is giving her the attention she needs, although you really should have kept her garaged so the paint wouldn't have faded so quickly!!!