Robert do you mean the one on the outside of the seat or inside, Driver or passenger side? All the pieces are not there for the interior, bought it with a blown duke in it.
I own page two on my own thread!! LOL
[This message has been edited by HTXtremes (edited 11-04-2007).]
IP: Logged
07:43 PM
Nov 25th, 2007
Fierofreak00 Member
Posts: 4221 From: Martville, NY USA Registered: Jun 2001
Very cool build. Can't wait to see the roll bar. I had a guy that does cages for a living do my race car. He swore he would NEVER do another Fiero again. Guess it was hard getting the hoop and other pieces in due to the large hump. Again very cool project.
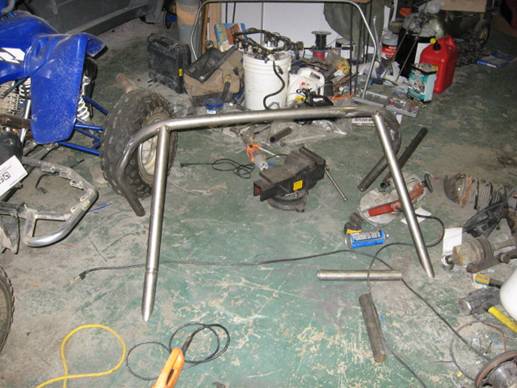
Sorry for the Delay all!! I have now got a piece of 1.75" by .083" wall Chromoly tubing bent to rough shape for the roll bar!! I don't have any pics yet and it might be a while before I am able to post any, my camera has went A-wall!
I will bring in the new year the right way this year, working on my car!
I am going to see if I can get the roll bar mocked up in the morning.
IP: Logged
07:34 PM
Jan 2nd, 2008
Fierostarvin Member
Posts: 292 From: Hazleton Iowa Registered: Mar 2006
Originally posted by HTXtremes: Sorry for the Delay all!! I have now got a piece of 1.75" by .083" wall Chromoly tubing bent to rough shape for the roll bar!!
You're going to pre-heat that Chromoly tubing before welding, aren't you? It should be at least 200-degrees F before you strike an arc.
This is the first time I've seen this thread. Keep up the good work!
[This message has been edited by WAWUZAT (edited 01-02-2008).]
IP: Logged
08:02 PM
PFF
System Bot
HTXtremes Member
Posts: 345 From: Mansfield, AR Registered: Sep 2007
WAWUZAT, I'm going to tack it all together, remove it, and take it to a professional, to get it welded up. Like I said in an earlier post, I'm not a welder and will not put something this important in the hands of an amateur!
Thank you all for your complements and support in this adventure! Without your feedback i would never know if this thread was being enjoyed.
IP: Logged
11:28 PM
Jan 7th, 2008
Amida Member
Posts: 2362 From: Seattle, WA. USA Registered: Jul 2003
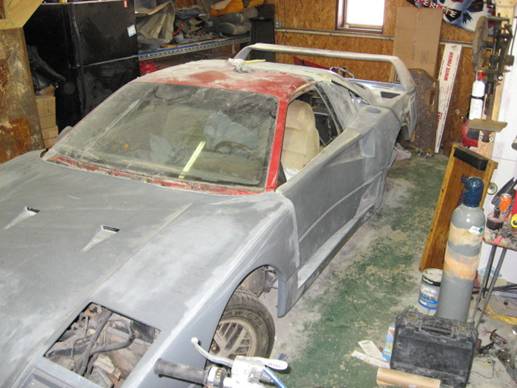
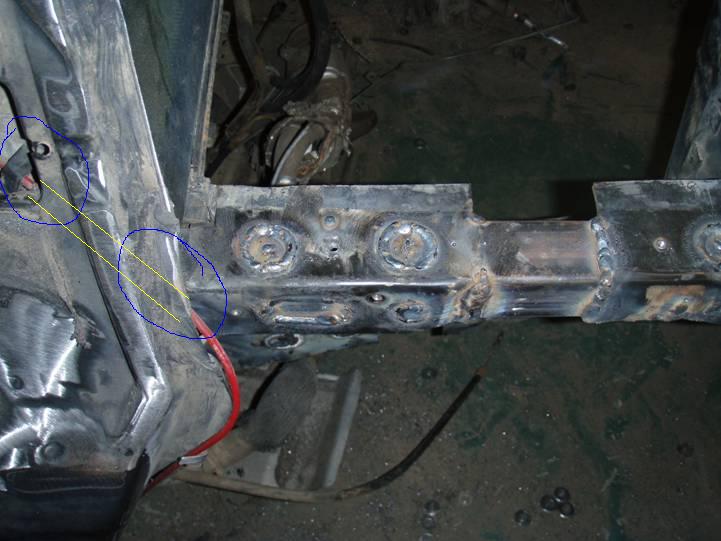
Oh yeah In this picture you can see where I relocated the fuel door cable. New route of cable is between yellow lines. A 3/8" drill bit and a small length of stainless tubing gave me a cleaner look. Besides if I ever have an issue with the cable it will be easier to replace now.
A frame jig would be so handy for stretching to rid of the guess work. I remember when I did my stretch I probably measured & checked level a hundred time before welding. I like how you did yours with the long tubes inserted into the rails. I took instruction from IFG's website & capped the rails with 1/8" plate on the outside as well.
IP: Logged
11:18 AM
Jan 8th, 2008
HTXtremes Member
Posts: 345 From: Mansfield, AR Registered: Sep 2007
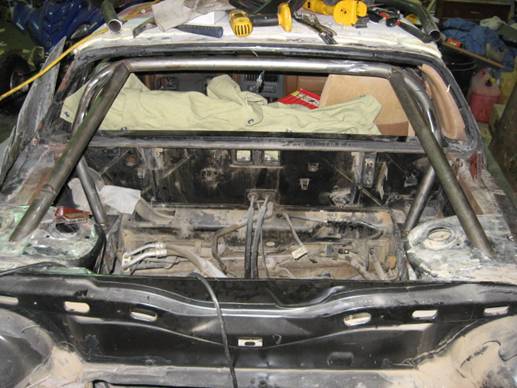
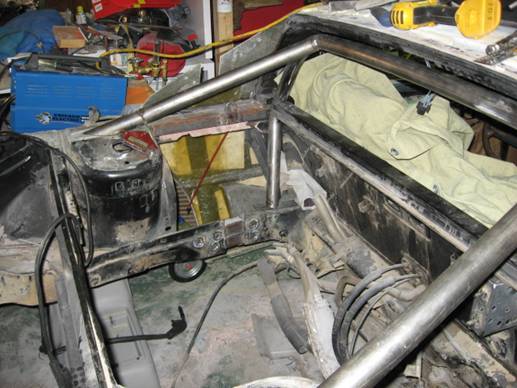
Yeah Amida I was at first planning on capping the outside of the frame rails until i decided to install a roll bar. The roll bar I am putting in should strengthen it up allot. The main hoop will be tied into the top of the car as well as the lower and upper frame rails, welded solid to the rear window sill, then from the top of the hoop to the strut towers, from this bar I will also put in an X brace from side to side over the engine of 3/4" mild steel tubing.
Also forgot to say I've seen many frame streches where no one thought about what the ends of the tubing in the center of the rails is doing under load. That is why I put all of the spot welds all the way around the frame rails on every one of them.
Main hoop did not turn out as planned! I'm going to bend a new one, the shop that bent the first one for me did not know what they were doing! Some bends were over bent while others under, and bends on opposite sides do not line up. The guy even kinked the pipe in one of the bends. The bad part is this is a shop that builds and sells High dollar IMCA modified chassis, built to order. I could have done a better job with a conduit bender from work.
[This message has been edited by HTXtremes (edited 01-08-2008).]
IP: Logged
11:54 PM
Feb 2nd, 2008
HTXtremes Member
Posts: 345 From: Mansfield, AR Registered: Sep 2007
Well I've got some new parts and some still on the way.
List of parts that are here;
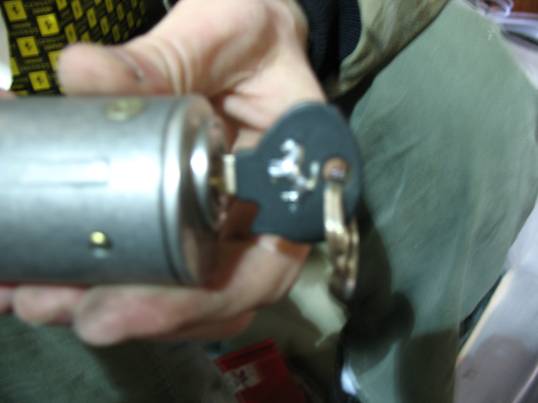
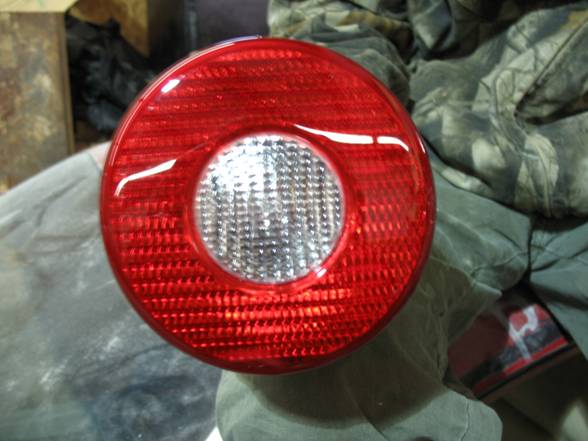
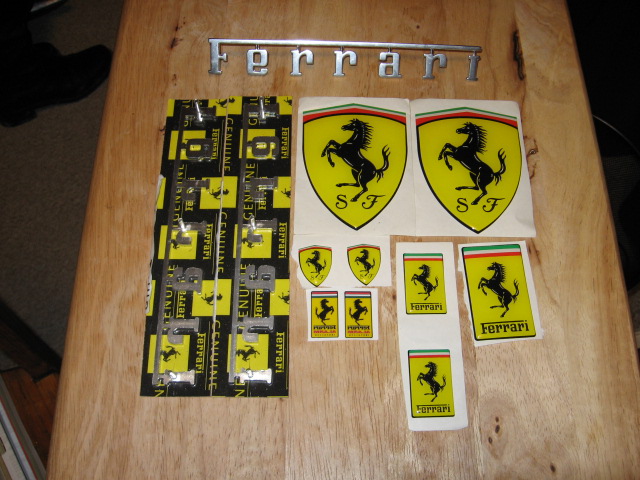
Brand new NOS Ferrari 360 Tail lights (look allot nicer then the stock F40 tails) Ferrari 355 ignition switch Ferrari Mondial T door handles (have the same shape as the vents in the hood) Parts on the way;
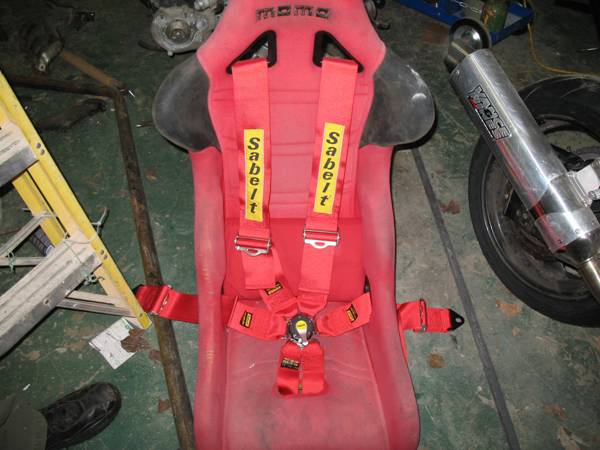
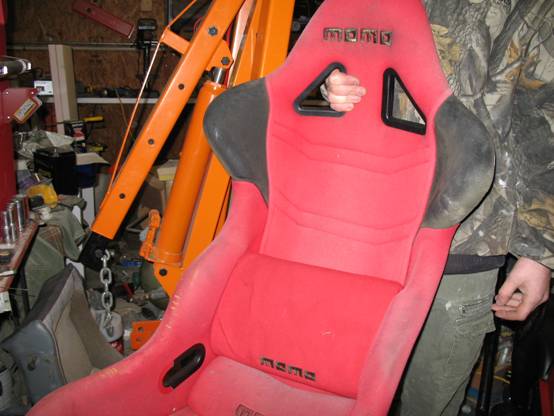
MOMO thousand lakes fiberglass race buckets S2000 starter button (thanks Paul) Flywheel and clutch from a stock G6 6 speed
Previously acquired pieces;
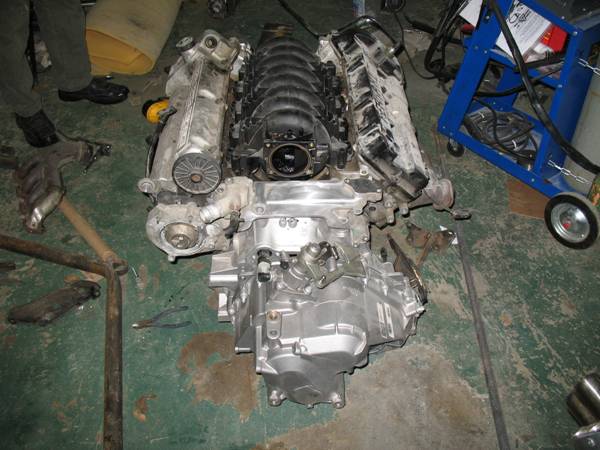
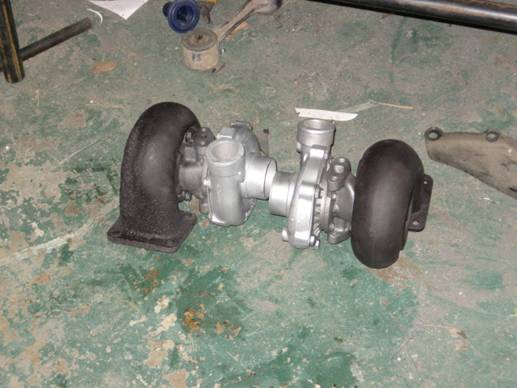
Sabelt FIA 6 Point harnesses 4.0 Olds Aurora DOHC 32 valve engine 2006 G6 6 speed tranny Custom cut and tempered rear window (to clear the roll bar) Two T3/T4 turbos '97 Cadillac N* intake with stainless fuel rail (in the process of removing the molded in bracket bosses)
Parts looking at buying;
Complete air over shocks in front and air over struts in the rear (I wanna be able to lift the front of the car a few inches to clear when entering and exiting parking lots) Compomotive wheels (17x13 in rear and 17x9 in front) Michelin Tires (335/35zr17 rear and 235/45zr17 or 245/40zr17 in the front) 12" rotor upgrade kit 90mm Hella headlights VDO gauges with 220 mph speedo
I'm going to buy a new camera soon so I can post up some new pictures
IP: Logged
11:38 PM
Feb 3rd, 2008
Mr.PBody Member
Posts: 3172 From: Cincinnati, Ohio, USA Registered: Oct 2006
Pictures will be coming by the truck load as soon as I can get a new camera. LOL
As for progress I found out that a 2 lb spool of wire for a mig welder will only last about 2 hours. Spent a couple hours, well it would've been longer, tonight welding on brackets and filling holes in the engine cradle tonight. I capped off the front ends of the cradle and am filling all unneeded holes. Got the idler bracket welded up tonight, now I've just got to start grinding all welds down to get a smoooth finish on everything. I'm looking at using the stock radius rod end for motor mounts, then install Prothane bushings from Summit, Complete rear kit is just $60. Complete front kit for an '88 is about $40, to me this is cheep as dirt.
[This message has been edited by HTXtremes (edited 02-04-2008).]
IP: Logged
12:30 AM
Feb 16th, 2008
HTXtremes Member
Posts: 345 From: Mansfield, AR Registered: Sep 2007
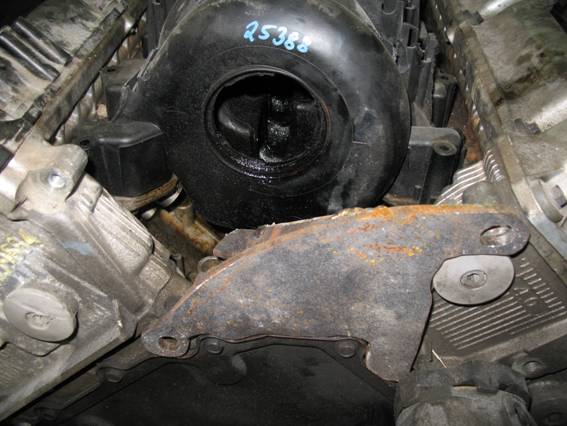
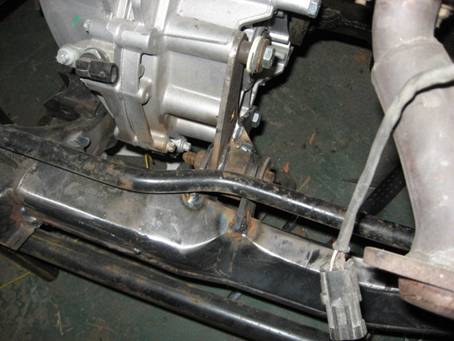
Last night and today I've been welding up a storm. Boxed in the rear cross member on the cradle, (where the stock tranny mount was) and made the front tranny mount utilizing some of the suspension pieces for the mount. I cut the ends off of the rod that travels from the spindle to the front of the cradle. I'm welding these ends to the brackets that will be bolted the the motor and the tranny.
IP: Logged
06:55 PM
Feb 17th, 2008
HTXtremes Member
Posts: 345 From: Mansfield, AR Registered: Sep 2007
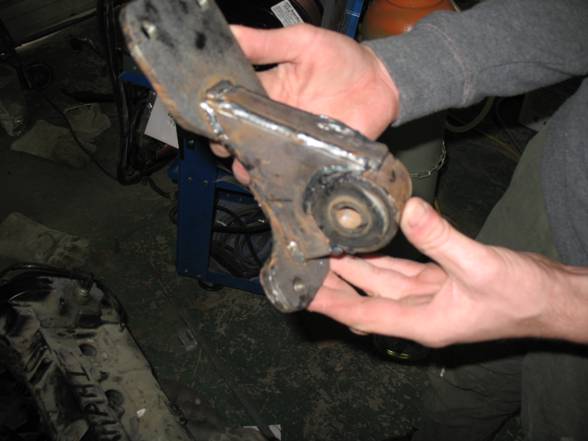
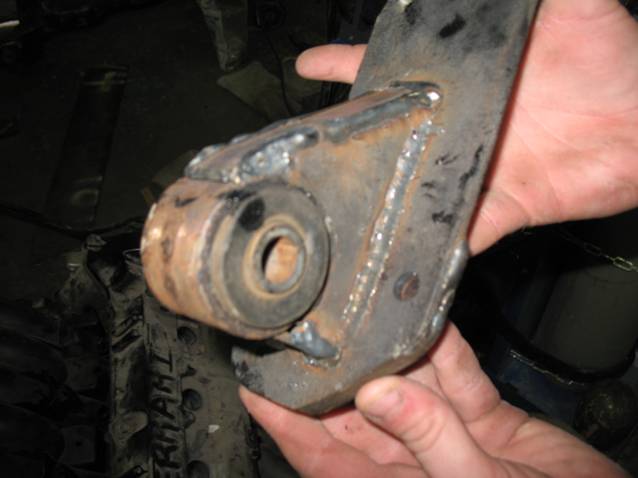
Ok here are a few pictures from this weekend, Be advised all parts that have been welded still need to be smoothed out for the final finish before painting. One of my former students came out to interview me for his college English literature class assignment, he took a few pictures to put in with the interview. LOL Made me feel good that he thought highly enough of me to want to interview me.
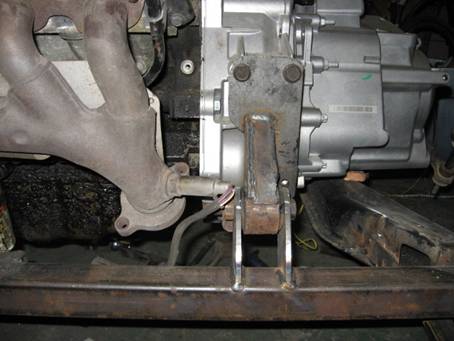
Here is the front tranny mount for the G6 6 speed
Next is my new seats that are going to get redone
Boxing in the rear cross member on the cradle, (used part of the dogbone mount from strut tower)
Got you email. I love the seats. I went with red leather for my F40 build but really like those too. Are you mounting the 360 lights directly to the rear screen? I'll be using abs plastic to make the figure eight around the lights what will you go with? I purchased some screen from Home Depot but it's way to flimsy for the rear screen IMHO. Will start searching the net today for a substitute. The Home Depot screen will be good for the front though, check it out next time your in there. It's around $6.50 for a sheet 8 x 3 foot or something like that. Keep it up.
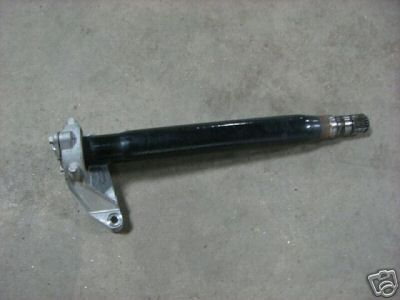
Got a Jack shaft for the 6 speed in today. It came off of a Cobalt SS with a 5 speed. Kinda funny all the parts had Saab on them.
Michael, I'm going to mount the lights behind the fiberglass panel, only letting the lens protrude, and space the mesh grill about half an inch off of the fiberglass giving the tail a smoother more finished look. I will also cut out most of the center of the glass panel between the tail lights. I'm going to use thin sheet metal, like the real thing, for the figure eight bezels around the lights and for the trim around the screen. Well this is kinda my plan, but you know what they say all plans do change.
James
[This message has been edited by HTXtremes (edited 02-21-2008).]
Got a Jack shaft for the 6 speed in today. It came off of a Cobalt SS with a 5 speed. Kinda funny all the parts had Saab on them.
Michael, I'm going to mount the lights behind the fiberglass panel, only letting the lens protrude, and space the mesh grill about half an inch off of the fiberglass giving the tail a smoother more finished look. I will also cut out most of the center of the glass panel between the tail lights. I'm going to use thin sheet metal, like the real thing, for the figure eight bezels around the lights and for the trim around the screen. Well this is kinda my plan, but you know what they say all plans do change.
James
James,
I like your plans for the lights. For now I am going to keep mine looking stock. I agree about plans, keep your mind open to all ideas and continue to make the car your own. That quickly became my rule of thumb, if I counldn't have an EXACT F-40 replica I was going to make the F-40 replica I wanted. Working on the LM style light buckets at the moment and cutting the openings in the body. Keep it up.
michael
IP: Logged
05:35 PM
fiero-iwan Member
Posts: 352 From: Eindhoven,Netherlands,Europe Registered: Mar 2003
You are creating a true work of art. Keep up the good work!
Hope you find time to work on your F40. Thx for helping me with the shipping of my F40 across the pond to Holland.
This guy is doing a great job setting up international shipping from the seller to me. He helps me at no cost, thats outright friendlyness for you, hard to find these days.
fiero-iwan, having met James I can verify that he is a great guy, he has went out of his way to help me when I was in hard times. He is also a whiz on engines, and just about everything I've thrown at him so far. The only real problem I have with him is that he won't just give me his F40
Brad
IP: Logged
11:11 PM
HTXtremes Member
Posts: 345 From: Mansfield, AR Registered: Sep 2007
Tell you what Brad if you really want it I'll give you my car for what I've got in it! Might take a while to add up the boxes of receipts from the last year, but I'll get a price if you want one! LOl
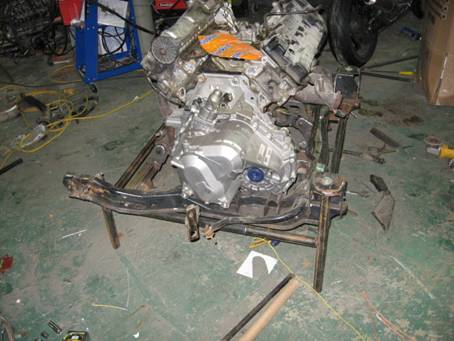
Ok, I stole a camera from our office today so I could get some pics for the thread.
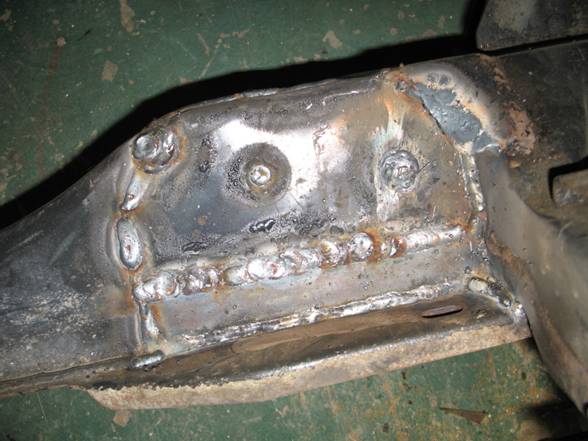
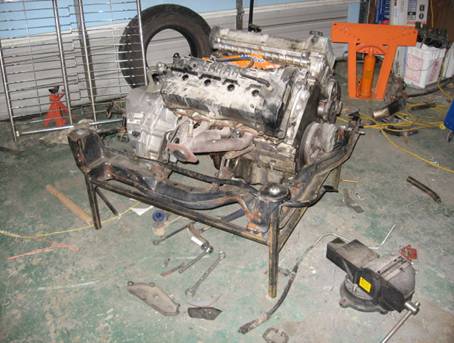
Just keep in mind I'm not a great welder by any means, I'm learning as I go, but how are you ever going to learn if you don't jump in there and try right?
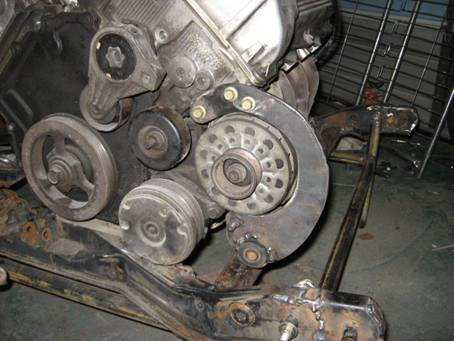
first off we have the work stand I built, it utilizes the stock mounting points of the '88 cradle
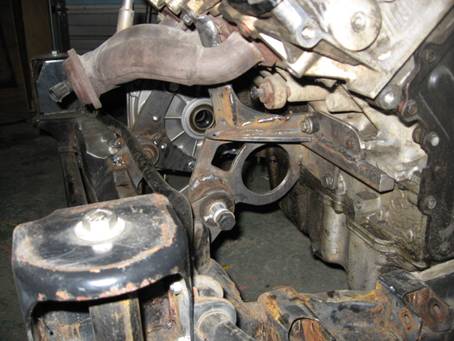
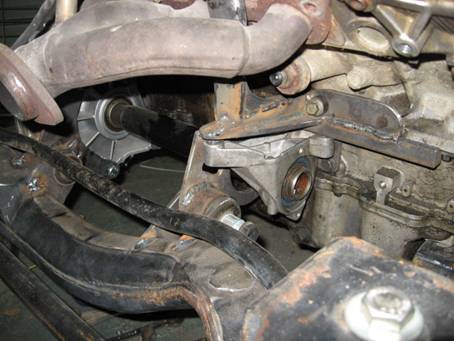
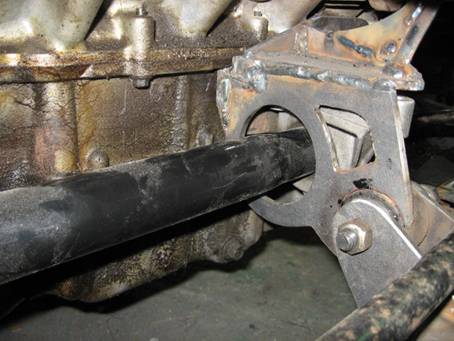
next few pictures are of the passenger rear motor mount and jack-shaft mount
with jack-shaft in place
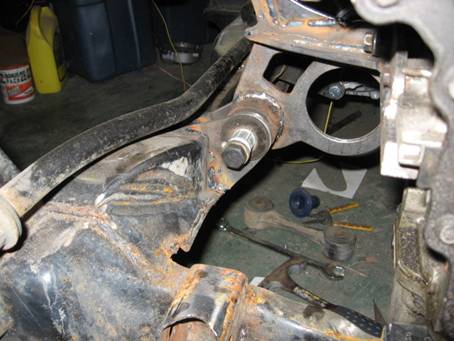
rear tranny mount
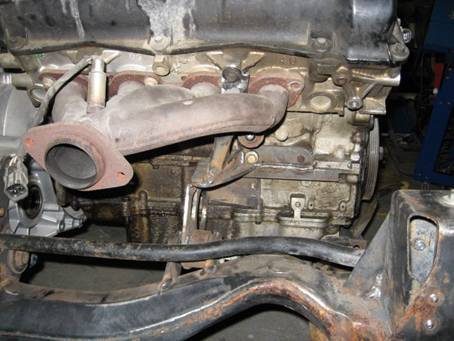
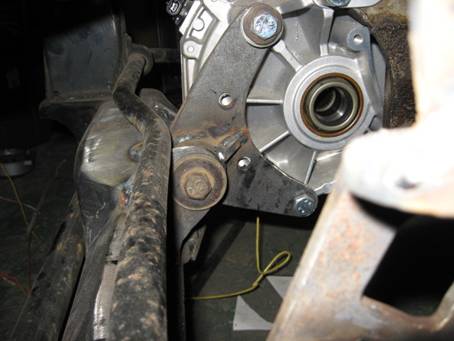
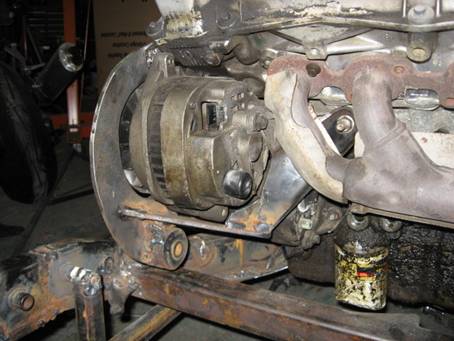
Passenger front motor mount and new alternator mount
last two picture are of the front tranny mount
IP: Logged
04:31 PM
Mar 5th, 2008
HTXtremes Member
Posts: 345 From: Mansfield, AR Registered: Sep 2007


 still trying to find a place to get my roll bar bent up to my specs.


 I'm looking at using the stock radius rod end for motor mounts, then install