It's definitely not flexed, as it is thick fiberglass. The problem is to make the hole round, I would have to cut material from the top or bottom of the hole, thus removing the lip that curves inward. Then if I can do that sucessfully, there will still be a gap on the left and right, because, as of now, it is already wider than the light before cutting anything.
Or can you can safely put a shim on either side of the bulb or mount, to keep the gap the same all the way around? I'm not sure. I would contact Archie, with all that exoperience he'd have some thoughts.
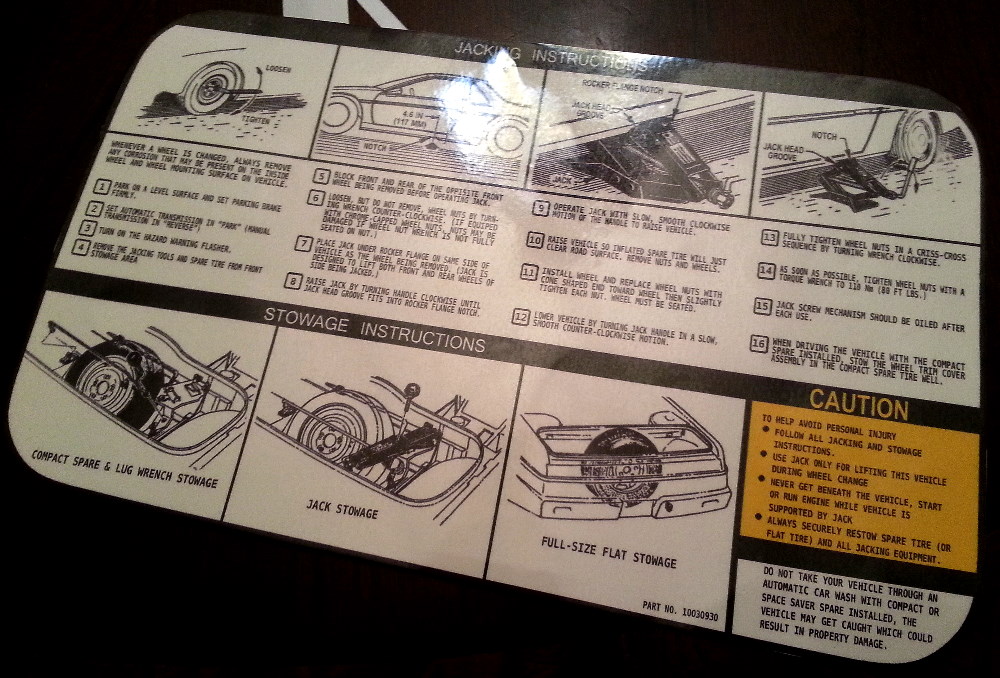
Well, on to some stuff I can do indoors Being I have painted just about everything on the car, as well as under the decklid and hood, new stickers were in order. I have spent countless hours, I honestly do not want to know how many!) re-creating just about every sticker for the car. From jacking instructions, Coolant filling procedures, Emission stickers, fan warning and on and on.
Here are a couple printed out on a vinyl that is made for ink jet printers, that has a peel off backing. I then covered that in a transparent laminate. This gives the stickers a nice gloss over them, much like the factory stickers.
Here is one that goes under the decklid:
. . . And here is one that goes under the front hood:
I am most certainly not keeping the car "true to stock", but I think replacing the stickers will give it a bit of an extra touch.
Oh, I almost forgot, CaptnDean called me, and we are going to head to the junk yard and browse around. We keep looking for Fiero's, but we never find one. Anyways, he has an idea for some fog lights, available in the junkyard. He says they are a better option for the ones that I mentioned in the previous post. Better quality & cheaper, that's fine by me!
Are you going to be recreating and selling these stickers in any way?....I would love to get some for my rebuild.
Are you going to be recreating and selling these stickers in any way?....I would love to get some for my rebuild.
Absolutely! after all the work I have put into these... but at this time I just have the 86' emissions sticker done. Each year is very different, and gonna take quite a few hours to do each one of the others.
[This message has been edited by JohnWPB (edited 09-08-2013).]
Well, on to some stuff I can do indoors Being I have painted just about everything on the car, as well as under the decklid and hood, new stickers were in order. I have spent countless hours, I honestly do not want to know how many!) re-creating just about every sticker for the car. From jacking instructions, Coolant filling procedures, Emission stickers, fan warning and on and on.
Here are a couple printed out on a vinyl that is made for ink jet printers, that has a peel off backing. I then covered that in a transparent laminate. This gives the stickers a nice gloss over them, much like the factory stickers.
Here is one that goes under the decklid:
. . . And here is one that goes under the front hood:
I am most certainly not keeping the car "true to stock", but I think replacing the stickers will give it a bit of an extra touch.
Oh, I almost forgot, CaptnDean called me, and we are going to head to the junk yard and browse around. We keep looking for Fiero's, but we never find one. Anyways, he has an idea for some fog lights, available in the junkyard. He says they are a better option for the ones that I mentioned in the previous post. Better quality & cheaper, that's fine by me!
Omg... very nice! If you do decide to repro skme other years... sign me up for a purchase cause those are amazing!
I wish you were not so darn far.... I would love to see this little fellow in person. However if you and I just stood around and put our heads together... oh lord the projects that would arrise! If you had seen my firebird while you were up in GA you would understand...
Your attention to detail is so impressive! ------------------ 1984 Indy Fiero SE Pace Car Replica #770 "SE" Stormtrooper Edition Rescued, resuscitated and reversibly modified! (I'm so not done yet!) Poly all round & Black Drag DR-34s Frt: 225/45 on 18x8 (47 offset w/ 8-9mm spacer) 1.5 coils cut off 1984 WS6 springs Rear: 265/35 on 18x8.5 (45 offset) Coil-overs w/ 10 inch 300lb springs & 7 inch sleeve
Everything is the previous owners fault!
[This message has been edited by redraif (edited 07-18-2013).]
I am headed back to Frazee for the 4th Annual Tyler Shipman Memorial Car Show one week from today! WooHoo! Will be great to see everyone again.
also, a bump to keep my lazy procrastinating as..... er.... thread from the archives......
I hope you can drive it to Frazee for the fifth... cool build my friend.... dont forget to take pics of the 4th and also send the pics from the third annual please... ahhh ... How about sending a CD of the 3rd and 4th pics
Omg... very nice! If you do decide to repro skme other years... sign me up for a purchase cause those are amazing!
I wish you were not so darn far.... I would love to see this little fellow in person. However if you and I just stood around and put our heads together... oh lord the projects that would arrise! If you had seen my firebird while you were up in GA you would understand...
Your attention to detail is so impressive!
Yes, I wish we did live closer! As for the stickers, I will be doing all of them! So far I have the emission stickers for all 6Cyl's for 85,86, 87 & 88. I still need scans / high resolution pictures of the 4 cyl's stickers for all 5 years. Just the emissions sticker is the one that changes based on year and engine. (Coolant fill & fan warnings have 2 versions in the stickers I did to cover all years)
You can find the ones I have done for purchase on my website at FieroStuff.com
[This message has been edited by JohnWPB (edited 09-16-2013).]
Unfortunately no.... I can come up with Lots of reasons. excuses Spending money on other stuff, and it has been far too hot to work on it much. It won't be long now and it will finally start cooling off a bit. THEN I will start to make some progress again I hope!
Unfortunately no.... I can come up with Lots of reasons. excuses Spending money on other stuff, and it has been far too hot to work on it much. It won't be long now and it will finally start cooling off a bit. THEN I will start to make some progress again I hope!
Funny..... this sounds very familiar
------------------ 1984 White Fiero Sport Coupe (Juliet) in restoration https://www.fiero.nl/forum/Forum1/HTML/089093.html 1988 Red Fiero Standard Coupe (Bella) in restoration 1990 Black Buick Reatta (Noir) 2002 White Chevy Impala base(Haylie)
[This message has been edited by 1984whitesc (edited 09-09-2013).]
So, I got a new Electronic Dye Cutter to cut out the reproduction stickers that I am doing for the Fiero more precisely. It surprises me with the detail that it can cut things out with! I have been using it on all of the stickers I am making.
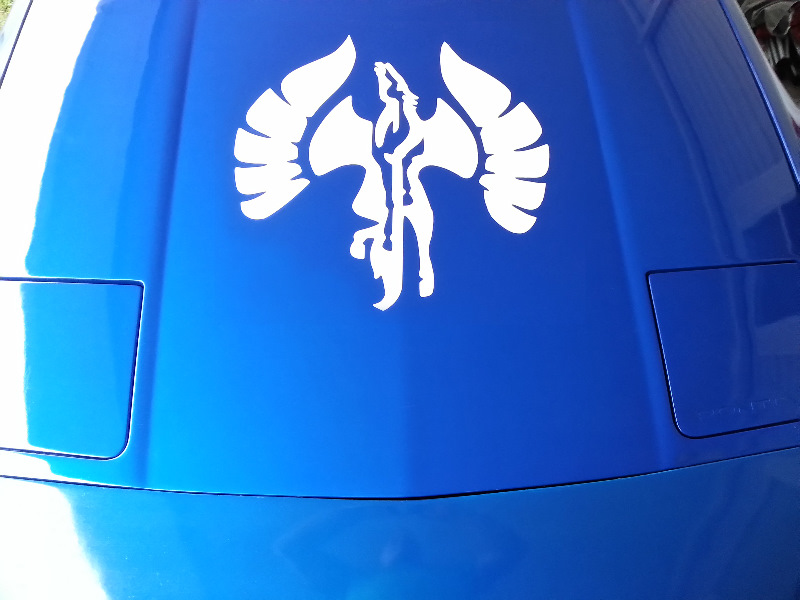
I figured I would try to see if I could do something a bit larger and more "substantial" On the way home from work today I stopped at Target & bought a roll of white contact paper (AKA thin vinyl sheeting with an adhesive back). From the time I got home, to having this on the hood was about an hour. I messed a couple times and had to make changes to the blade depth, & cutting speed, as I had never worked with vinyl before. I had to do this in 3 sections. Even thought the cutter can handle material up to 10 feet in length, it can only do 12" in width.
Here it is on my hood as a test fit. I am not sure if I like it or not yet..... I will keep it on there for now, and see if it grows on me
I must agree with 2 !/2 that it's too much. A subtle ghosted image looks much better, especially on a brilliant colored paint job like you have. If you don't bring your car up to Daytona, you will find a burning bag of dog poop on your front steps. Haha
I was more testing out some different things I could do with the dye cutter. I am not that fond of the look myself. The best part is the fact that I can just peel it right off. Doing the "ghost effect" would be permanent, and not something I want to do on top of my new $3,000 paint job at the moment.
The car has a LONG way to go to be road worth unfortunately. Again, I wish there were a more active Fiero community here. I would love to throw a BBQ and have everyone over to help me put this thing back together. The interior is gutted, and the car has not driven more than 2 miles since I towed it home. It is nerve racking to think about taking it on a 4 hour road trip. I have a lot of vacuum leaks that I have not tracked down, and the fan is not kicking on. It's a lot of stuff, and I will do my best to get it up to Daytona. Regardless if the Fiero makes it or not, I will not miss the show!
Well I just put out a call for help, asking for assistance to try to get this car done before the Daytona show. It is all little stuff for the most part. If anyone is in the area, your assistance would be greatly appreciated!
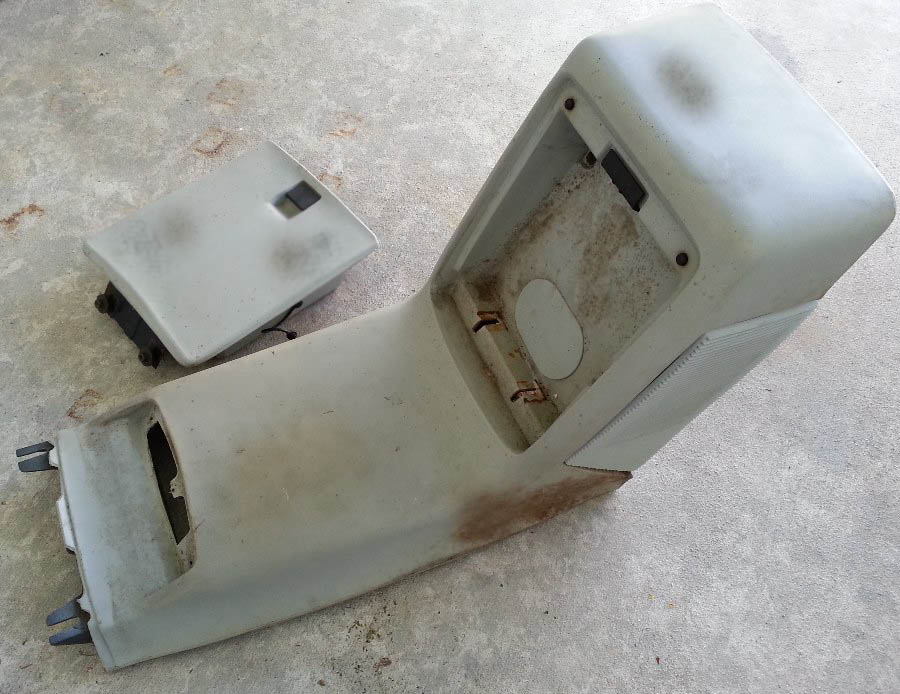
Well I finally got a new replacement center console! CaptnDean was nice enough to bring one over the other night. Sorry Dean, but I have to say this is one of the saddest center consoles I have seen! I know beggars can't be choosers, and I am grateful, it just means a lot of work!
I guess I should start with what the console looked like when he dropped it off the other day, and go from there.
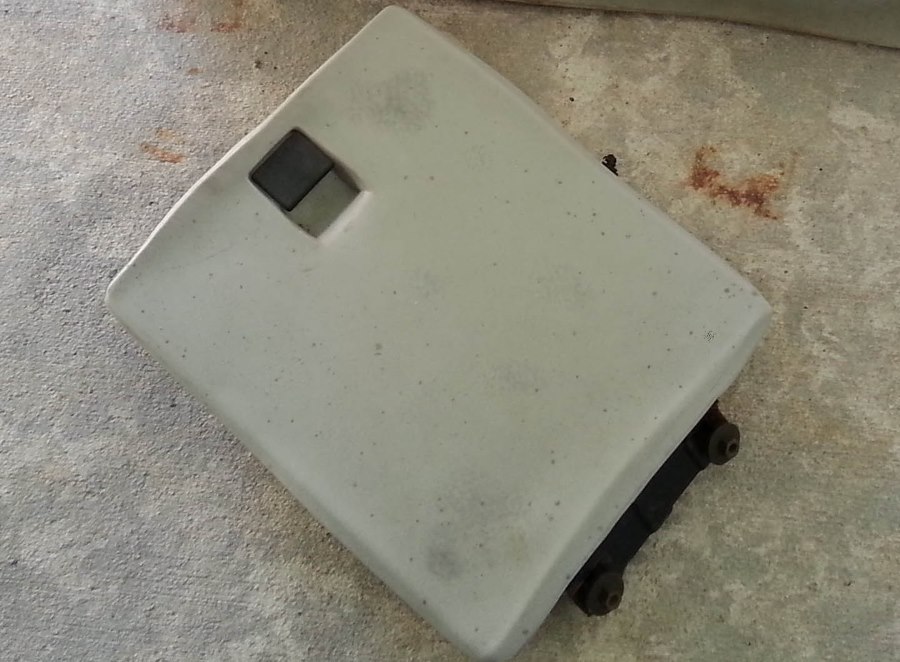
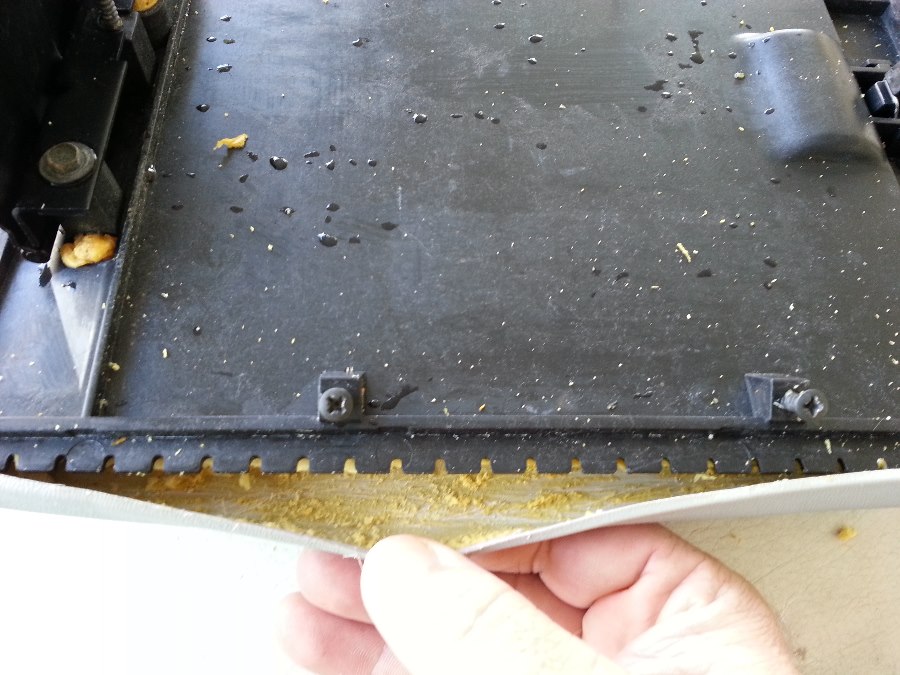
I decided to start with the glove box door first. As you can see it is warped pretty bad around the edges.
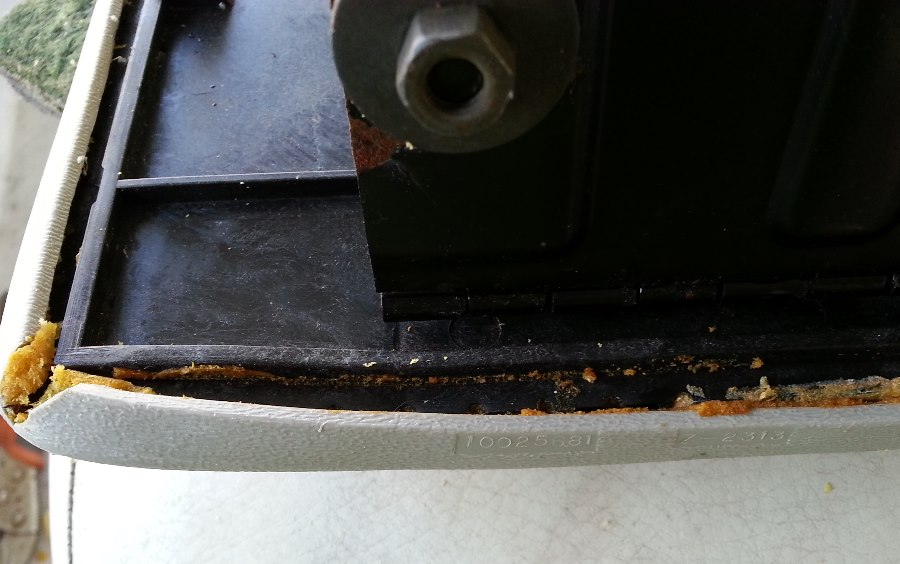
It seems when the foam that is underneath the vinyl gets old, it expands. As you can see in this picture, this causes the edges of the rubber to pull away from the back of the door, and become completely detached. This combined with the swelling of the foam underneath the rubber, makes the edges really uneven.
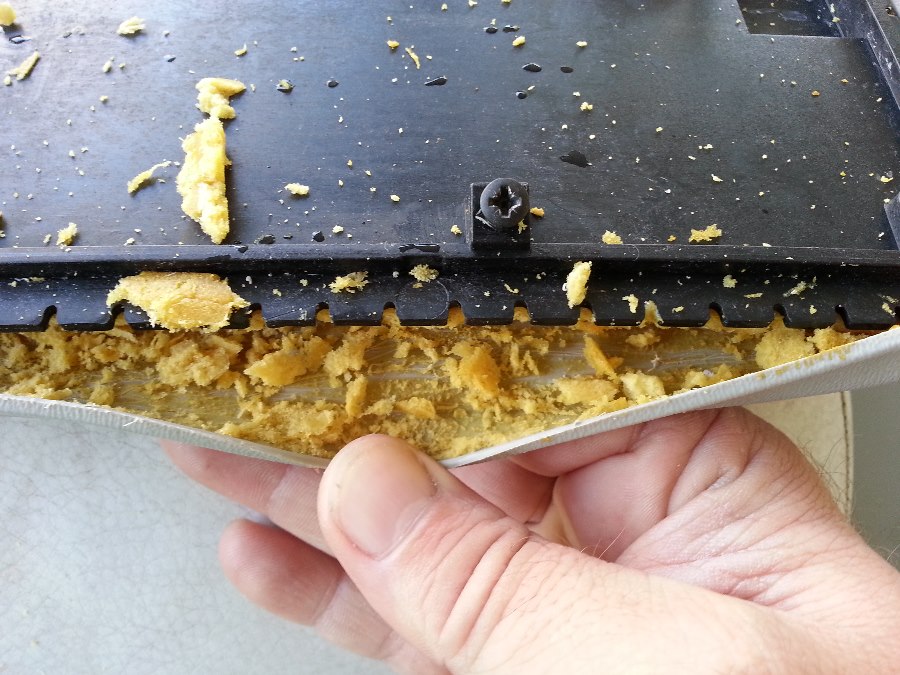
A started by peeling the rubber back, and cleaning out some of the foam.
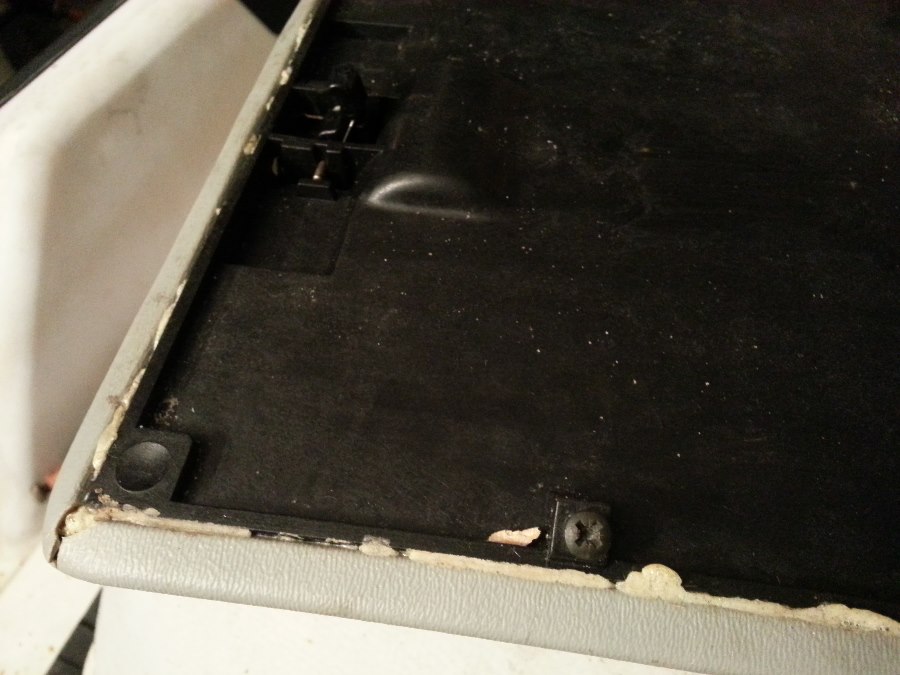
Removing the bulk of the foam, allows me to stretch the rubber back around the back of the door and glue it in place. Here it is all cleaned out, and ready to be glued.
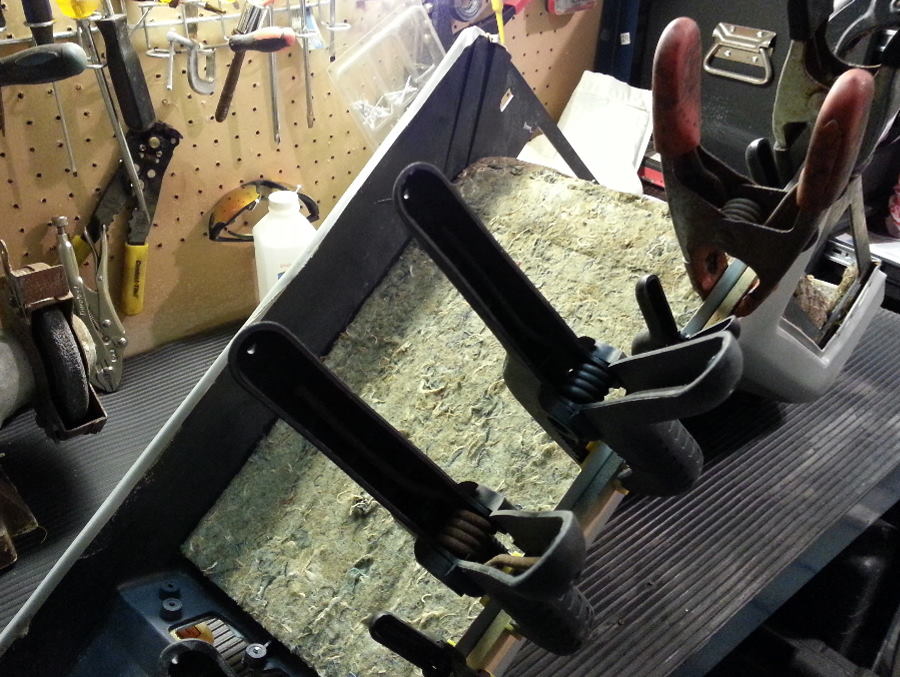
I used Gorilla Glue, which is perfect for this. You put the glue where you need it, and clamp everything up to hold the edges nice and straight and in place. As the Gorilla Glue dries, it swells and fills in all the nooks and crannies, holding the rubber in the correct shape, and bonding to everything to hold it together at the same time.
I was in a hurry, and unfortunately didn't take any pictures of how I clamped everything together. I will try to get some when I tackle the rest of the center console.
Here is the back of the center console door, after gluing. You can see some of the Gorilla Glue where it seeped out while drying, it looks much like the foam that was in there already.
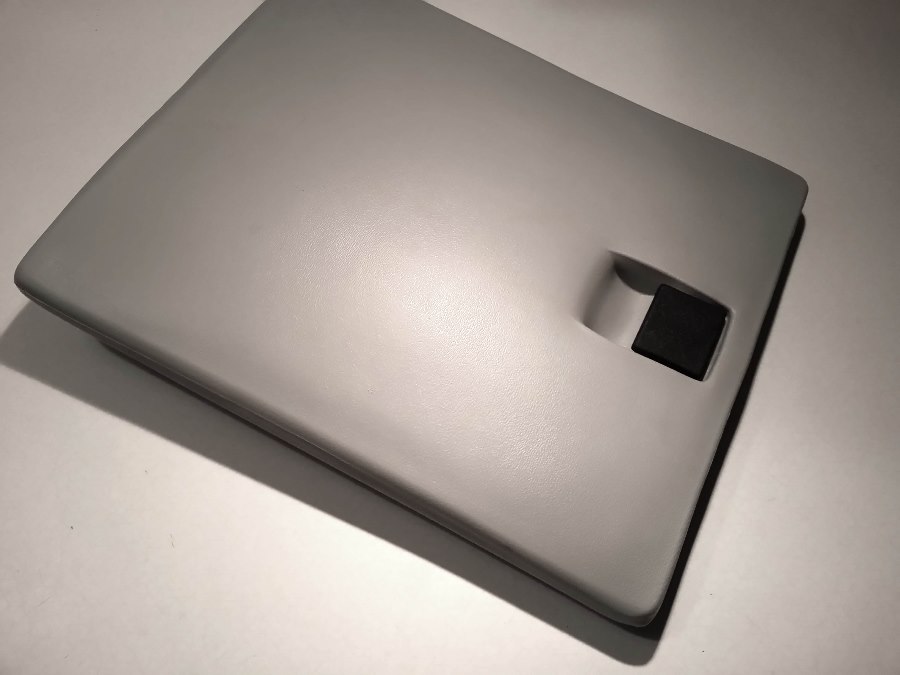
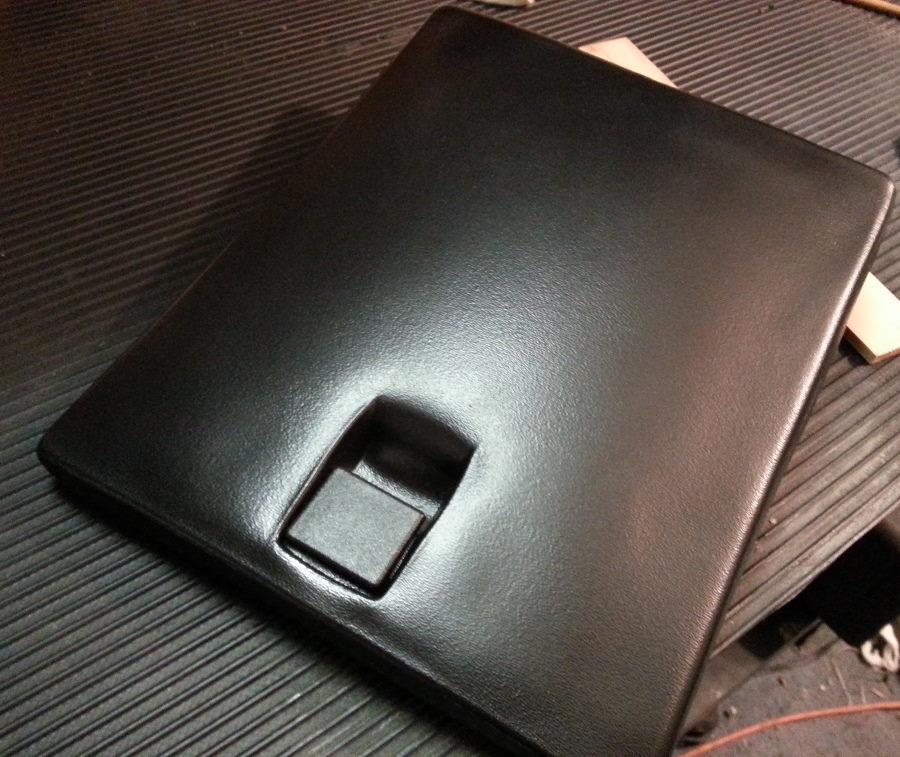
Lastly, I cleaned it the rest of the way up with a lot of different stuff! Bleach, to remove the mold, then rinsed and Dawn detergent with a scotch bright to clean further, and lastly a Magic Eraser to git rid of a couple of blemishes. Here is the final result, a clean door, with nice flat edges as they were intended to be 30 years ago!
I will put some more images as I do the rest of the center console. My final intend is to change the color of the center console to black, and I will detail that step by step as I do it.
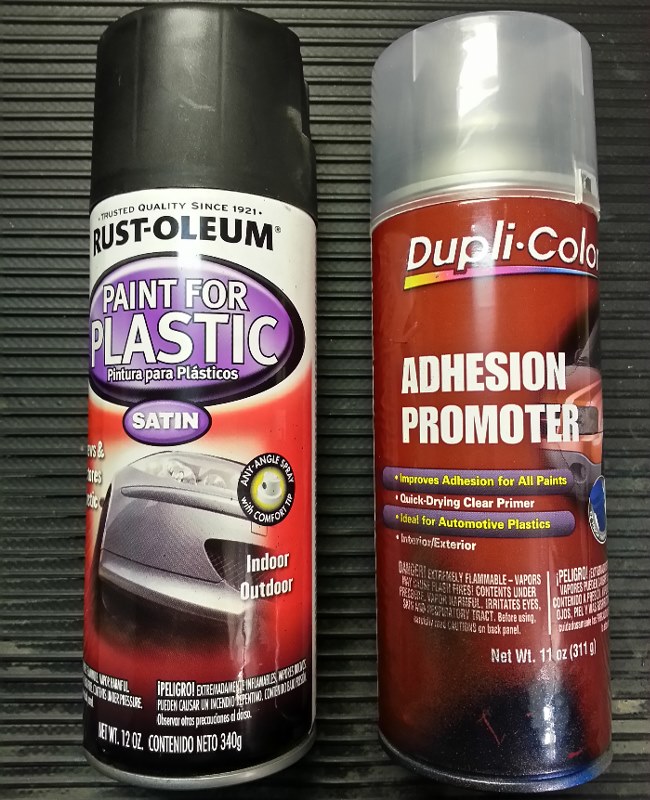
I used the glove box door as a test for the rest of the parts of the center console. I cleaned it first with bleach to disolve the mold. Then with dawn to get any grease and gunk. I then let it dry and and wiped it down with alcohol. I then used a tach cloth to get any dust particles. Next, I sprayed it with Dupli-Colors adhesion promoter. After drying, I used a semi-gloss paint for plastic, as I did not want a really shiny look to the parts:
Here is the final result:
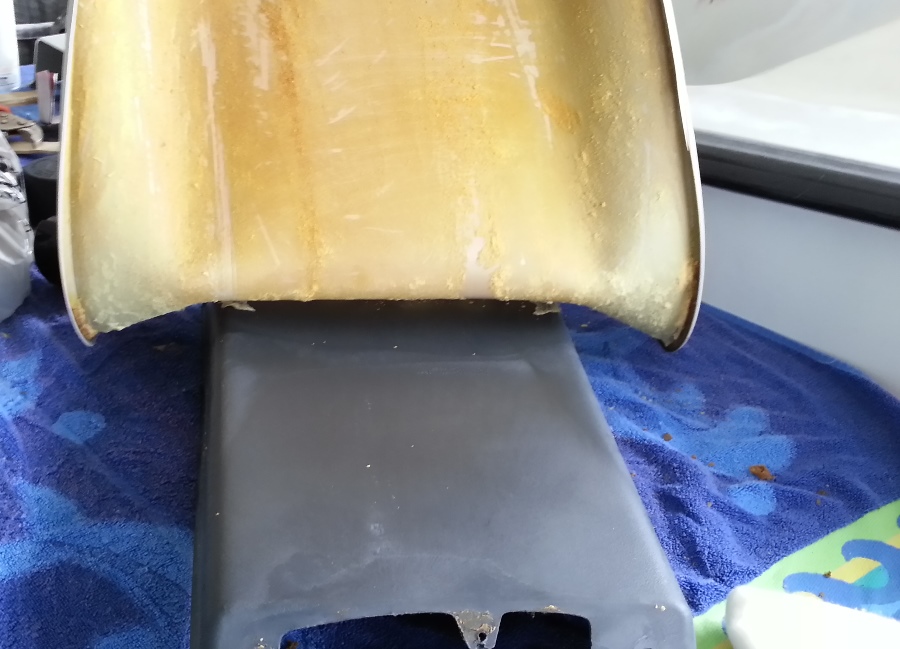
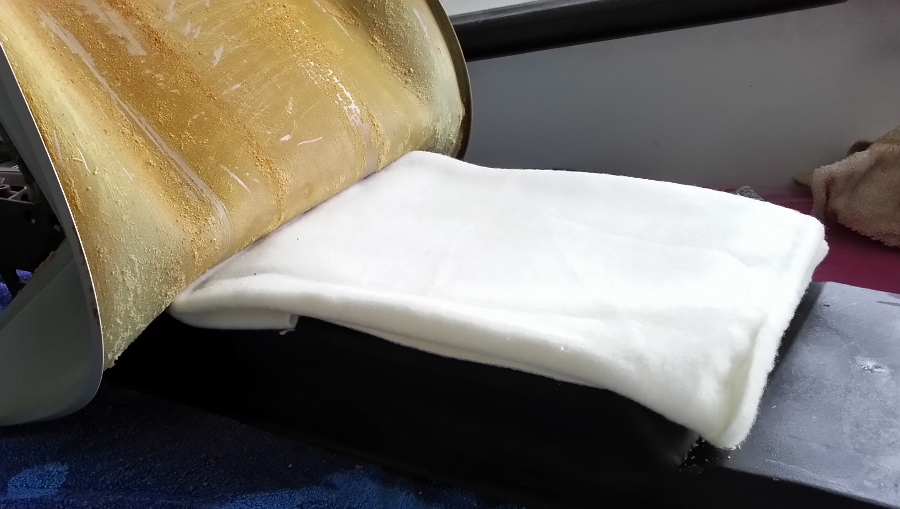
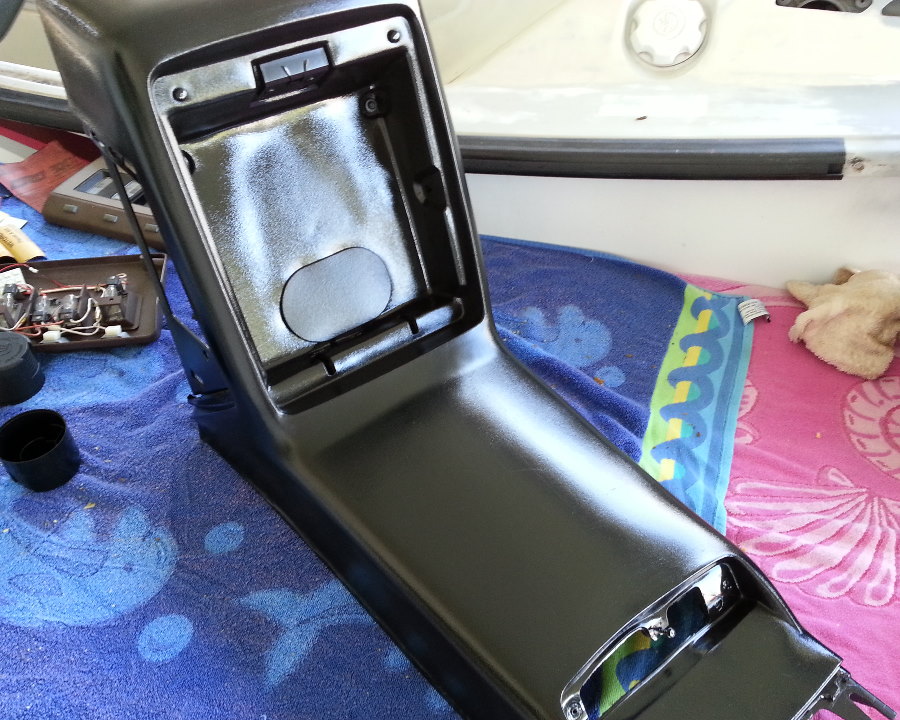
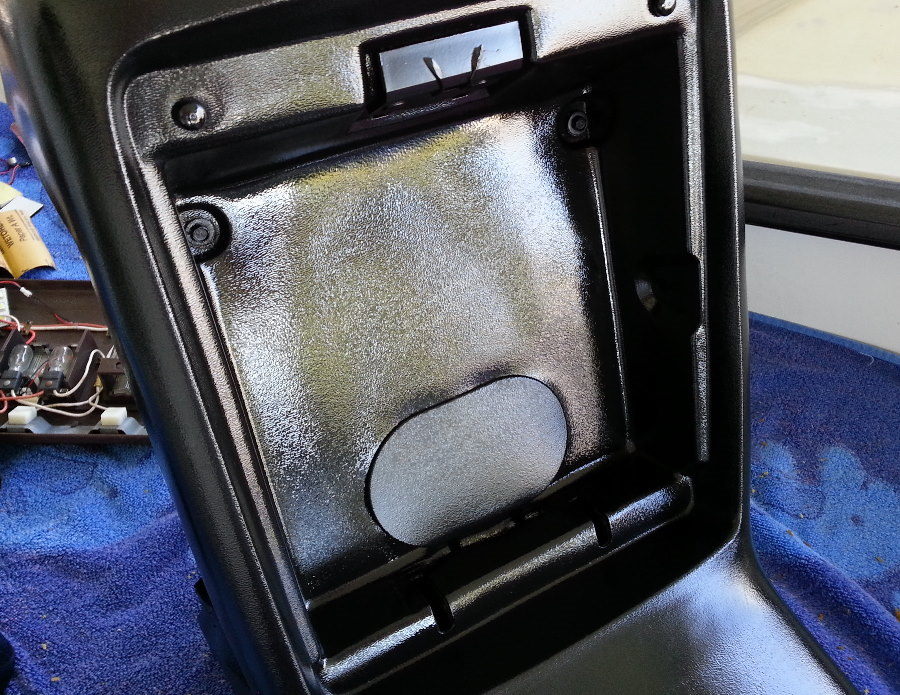
Now it was time to start working on the center console itself. The foam from age, heat and God know what, had swelled to twice its original thickness. There was no way I could get the edges back around the frame like it used to me. I took all the foam out of the lower part of the console. I then used some cotton batting made for upholstery to give it some cushion, just thinner that the swollen original foam.
After this, I was able to wrap the vinyl back around the skeleton, and glue it in place.
Next, finish up the rest of the console, and get it ready for paint.
[This message has been edited by JohnWPB (edited 03-02-2014).]
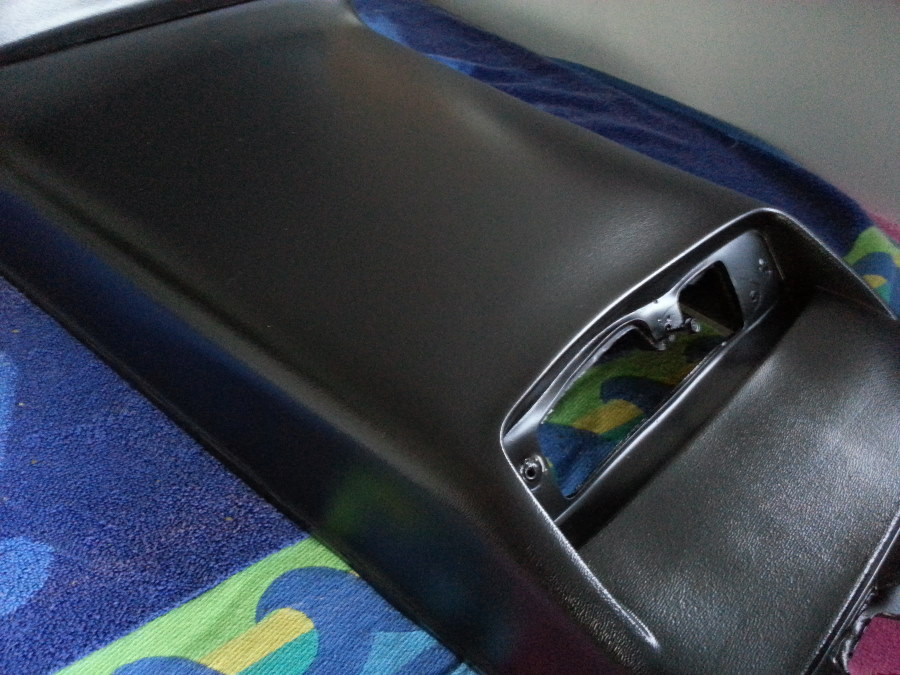
Finally all the glue is dry, and I can get it finished. I posted the paint I am using in the last post. It is supposed to be a "Satin finish". Well it turns out it is a very high gloss finish for some reason. It made the center console look like it was dipped in varnish! Trust me, even the glossy picture does not show just how glossy it turned out! This photo actually shows a little better just how glossy it came out.
Mild panic set in, as I had spent so much time on this console, and there is no way I wanted something that was that glossy and tacky looking in my car. I was not sure what to do. A trip to the Home Depot solved it. I found a clear matte finish in a rattle can. I gave it a quick misting of that, and the gloss started to subside, THANKFULLY!
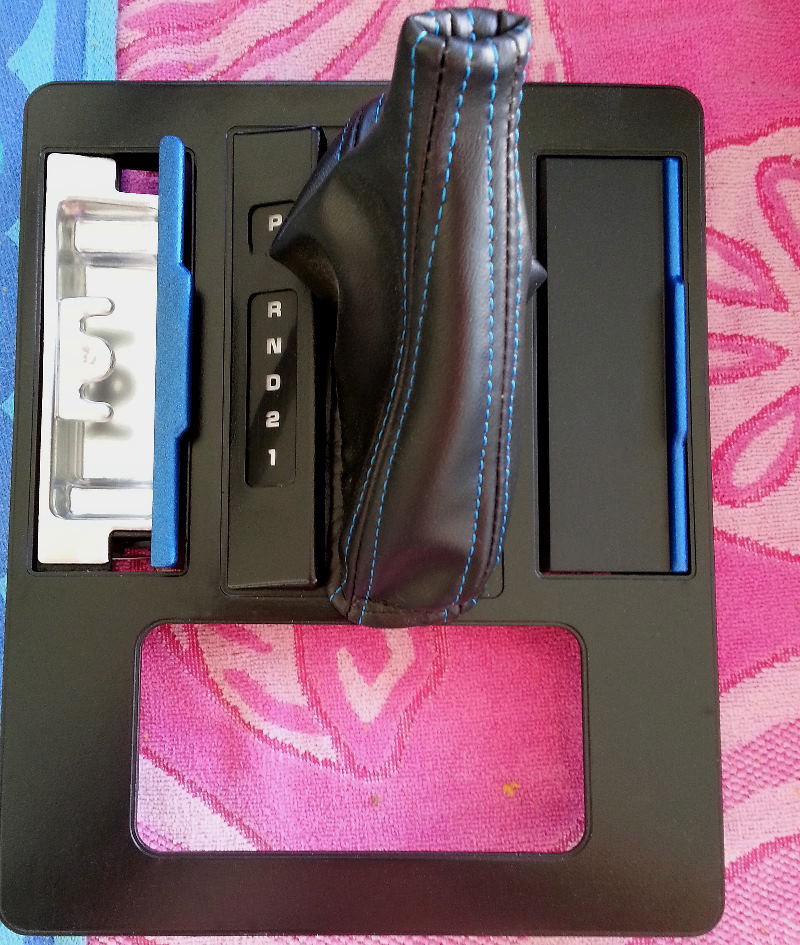
I attached the glove-box door, put on the "air vents" for the computer that I painted in a blue to match a lot of the trim in my car, and it is starting to look like something finally!
I am eventually going to go with a custom interior, but in the mean time, I want to get it back together and finally on the road! I want my own Fiero! Just about the only ones I have ever actually driven are Tyler's Toy (NOT complaining ) and his sister Cassies car. I am looking forward to the helping hands coming on the 15th to help me get her together for Daytona!
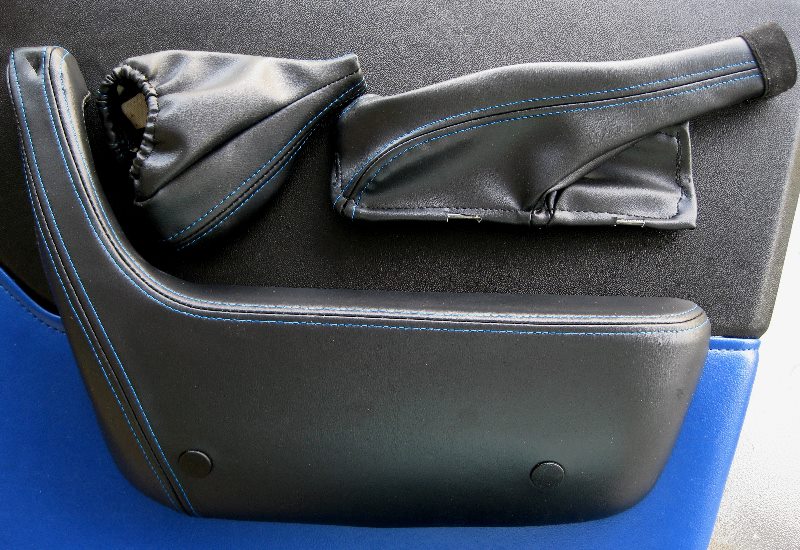
I was hoping painting the vents would not look overkill. I think it is just the right amount, without being over the top. I did it in an attempt to tie in with the rest of the interior; the door panels, and the stitching on the arm rests, shifter and sun visors.
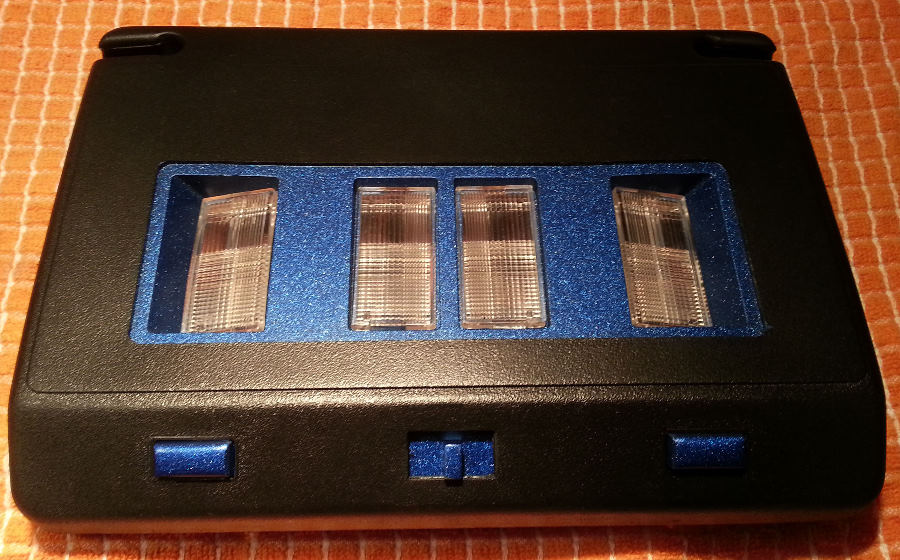
Carrying on a little further with the black and blue theme on the interior, I added a little bit of blue to the center dome light console. Now I just need to get the plate for the Performance Sound, as the one on mine was missing.
I am trying to figure out if I want to do the ash tray doors in blue, or if that would just be too much.......
I say leave the ashtrays normal and paint the lower power window/mirror switch plate blue.And maybe the cigarette lighter plate blue too. Just my opinion. I am making a new lower plate now.
[This message has been edited by fierogtlt1 (edited 03-09-2014).]
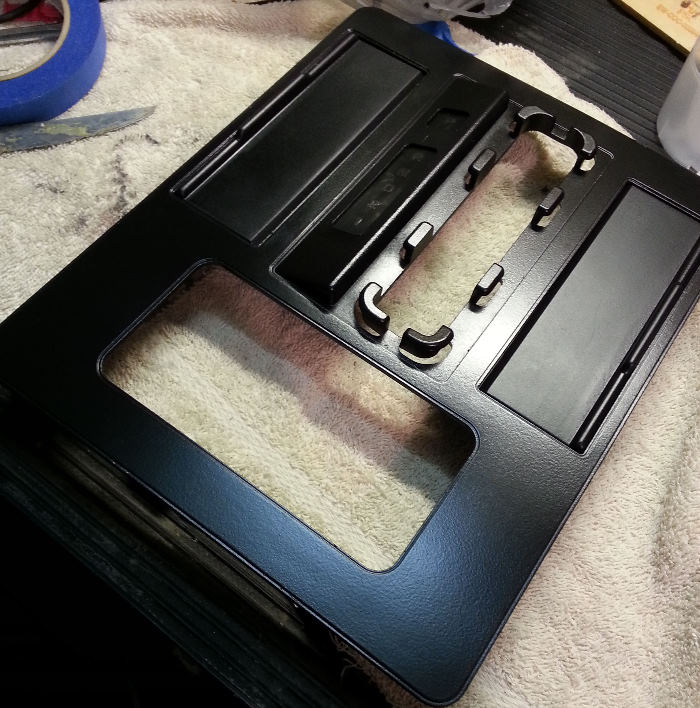
Still working on all the little stuff! I painted the shifter surround, as I just didn't like that silver plastic look. I did all of the other face plates as well, around the A/C, gauge cluster, Aux gauges ect. They came out fairly decent:
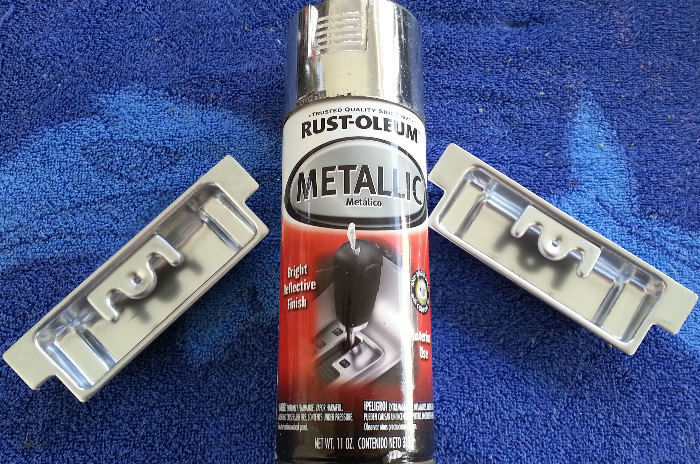
Next was the ash trays. They were rusted and pitted beyond belief. I sanded and use a Dremel wire wheel as best I could. Then I hit it with rusty metal primer, a thin coat. I did this about 6 times to build up a nice thickness that seemed to hide all the pitting and such. Sprayed it with some adhesive promoter, and topped it off with some silver metallic paint. I have never been a fan of the stuff, as it never seems to turn out the way you would want. This was the one exception I think, as they really turned out nice! Not worried about paint melting or burning, as I quit smoking 3 years ago They are just for show really.
[This message has been edited by JohnWPB (edited 03-11-2014).]
You know what might look good is a thin pin stripe of the blue around the outside edge of the shifter surround, kind of like the blue stitching is a thin line. leaving the rest of that area black. Just that little recessed outline edge maybe? Would kind of match the piping on your seats too.
Are you lighting up your shiftter indicators and dash blue?
[This message has been edited by 2.5 (edited 03-11-2014).]
I had actually thought about doing that, or maybe the ash tray handles in blue as some sort of tie in. As for the dash and shift indicator lights... but of course!
I had actually thought about doing that, or maybe the ash tray handles in blue as some sort of tie in. As for the dash and shift indicator lights... but of course!
Originally posted by 2.5: You know what might look good is a thin pin stripe of the blue around the outside edge of the shifter surround, kind of like the blue stitching is a thin line. leaving the rest of that area black. Just that little recessed outline edge maybe? Would kind of match the piping on your seats too.
I totally agree with that, and in concept it sounds great. Well..... in reality, I tried to it, with no success. It is such a THIN area around the edge, around an 1/8th of an inch or so. I tried masking the area off many many times, and just could not lay the tape down and keep it perfectly 1/8th of an inch end to end. The lip is not deep enough that I could put the tape vertically either... I tried.
So, I went with my original thought, and just made the handle / ridge of the ask tray doors blue instead. I am happy with the way the look came out. Again, just a subtle bit of blue to tie in with all the rest of the interior.
[This message has been edited by JohnWPB (edited 03-25-2014).]
Progress... I found out today that my Fiero was retarded.... yes, literally. Joey came over and helped me today, and determined that it was 17 degrees retarded to be exact. So he watched the laptop, and I turned the distributor till we got it at 10 degrees retarded. That way when the ALDL cable is disconnected, and it reverts to 10 degrees, it theoretically should be in perfect time.
After Joey left, I bolted the drivers seat in, and installed the instrument cluster to keep an eye on things. It ran great, and I got to take it out for it's first real drive today! There are still a LOT of little issues, but it is coming together!
It's looking more and more like this thing may make it to Daytona this upcoming weekend!
[This message has been edited by JohnWPB (edited 03-25-2014).]
When everyone was over here to help me get my car ready for Daytona this year, we found that the quarter windows I have appear to be too short. Chuck went over and compared them to his quarter windows and said that they were way smaller than the ones on his car. I contact Chris Cook about the windows, saying the appeared to be too small. He asked for pictures of the windows. I put a video up in YouTube instead for him to get a good look at trying to position them:
He contacted me back and said the video does not show much, and that the gap appears to be less than 1/2 inch, and that is normal. What does anyone else thing when looking at the video?


 Topic Closed


 Being I have painted just about everything on the car, as well as under the decklid and hood, new stickers were in order. I have spent countless hours, I honestly do not want to know how many!) re-creating just about every sticker for the car. From jacking instructions, Coolant filling procedures, Emission stickers, fan warning and on and on.


 I really like the vents painted in blue..