Ok, not much of an update, other than what is to be done, not what has been done
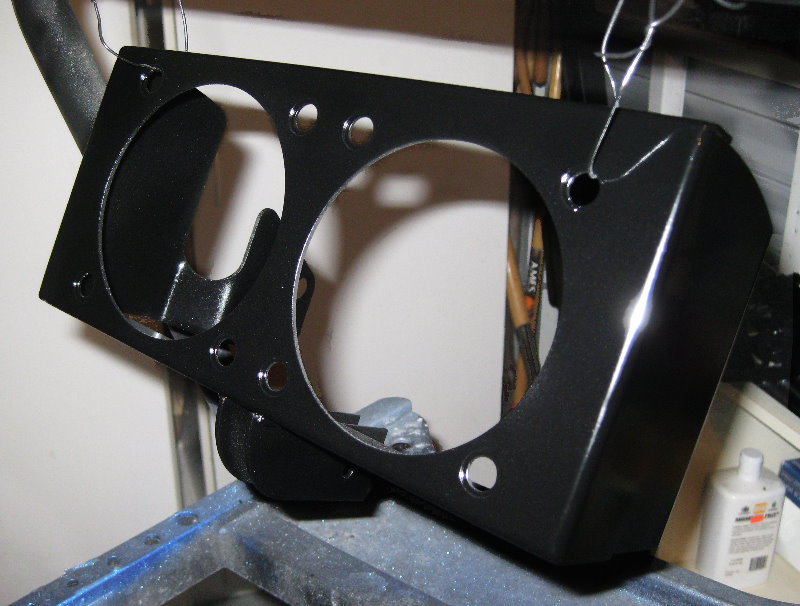
Well, after working on this custom center console, I got to thinking, the dash is still going to look very stock in comparison. DIY_Stu was telling me about Archie moving to a new shop, and he was unloading some stuff, including a fiberglass dash cover. So I had a look, and ordered one.
It is a slide over cover, that covers the instrument cluster "pod", and has a nice spot to install a full size glove box. It was manufactured to just slide over the existing dash. I am going to remove the upholstery from my stock dash (It's pretty cracked anyways, so no loss there) and permanently affix this cover to the stock dash, making a drop in replacement dash. With some cutting and fabricating, I intend to mount some nice 6" round speakers where the 4 x 6 ones were. I also am going to change the knee knockers....errr.... A/C vents to round ones, and relocate them a bit.
I figure if I am covering the original instrument cluster, and doing some fabrication, I may as well swap out the instrument cluster entirely So I started looking around, and I just purchased a digital dash from mattwa out of a Cavalier Z-24. It is a pretty easy swap, as it uses all the same sensors as the Fiero, and is a wire-to-wire swap for the most part.
My plan is to remove the bezels and such from the digital dash, and put a smoked Plexiglas cover over the whole thing. I will have some additional "Dummy lights" along the top of the dash showing when the CarPC has power, when cruise control is on ect ect. I also have a back up sensor system that I will put behind the glass as well. It shows the distance to objects behind the car when backing up.
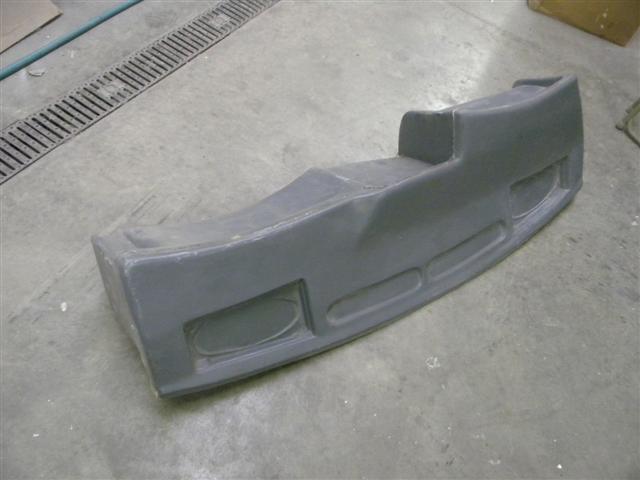
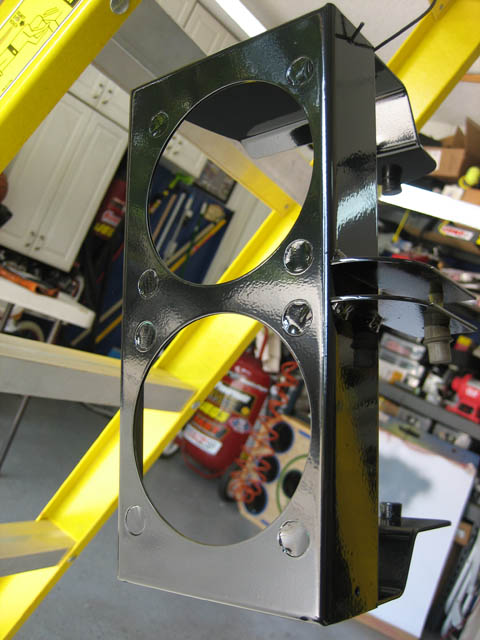
This is the dash cover from Archie:
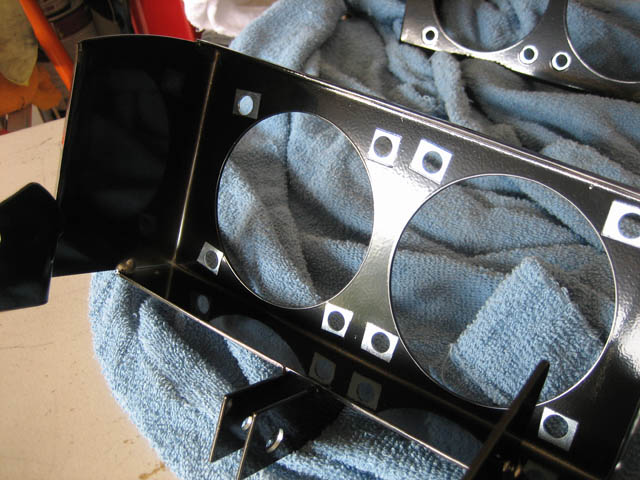
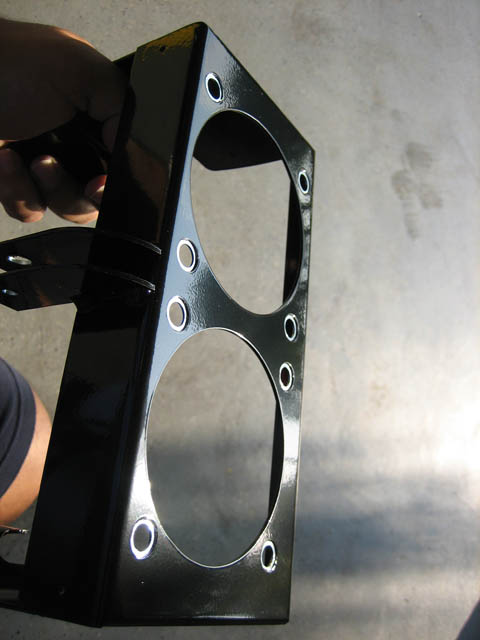
From the top:
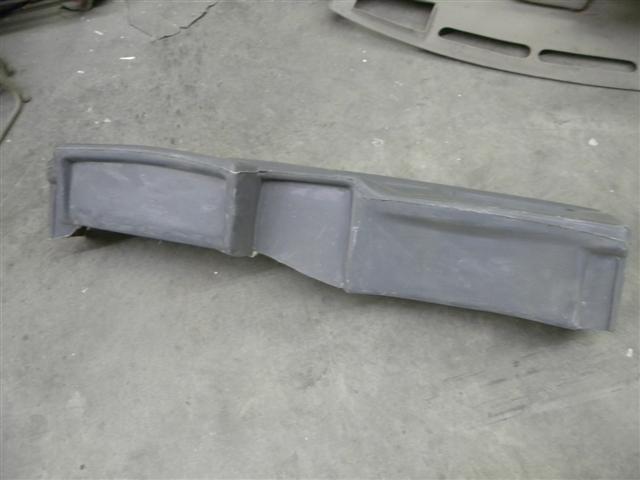
Front of the dash:
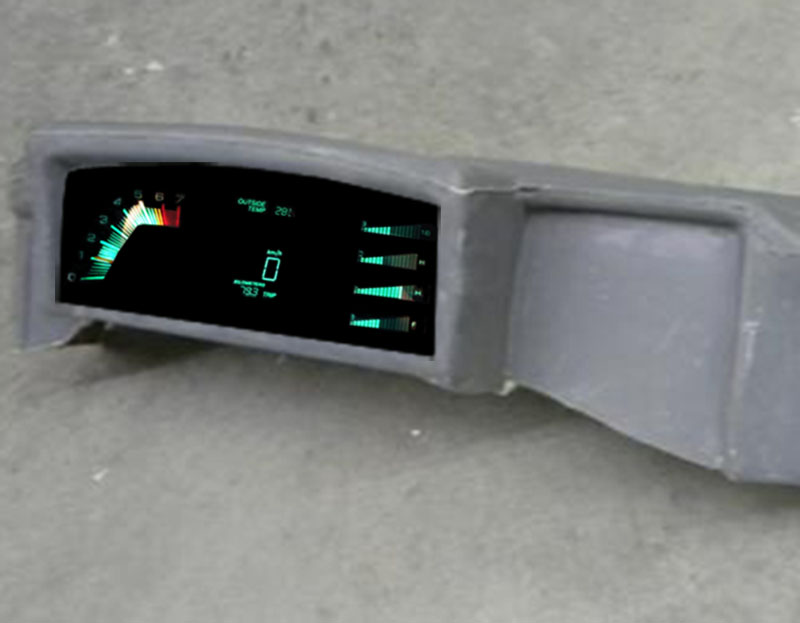
This is a quick PhotoShop job, on how I am planning to install the cluster in it:
I am also putting a blue gel (The plastic sheets they put on stage lights to change colors of lighting colors on a stage) over the gauges, to make the dash more blue instead of the existing teal.
I still have a lot of fabrication work to do, but It is all starting to come together as to how it will all be done now.
[This message has been edited by JohnWPB (edited 04-17-2011).]
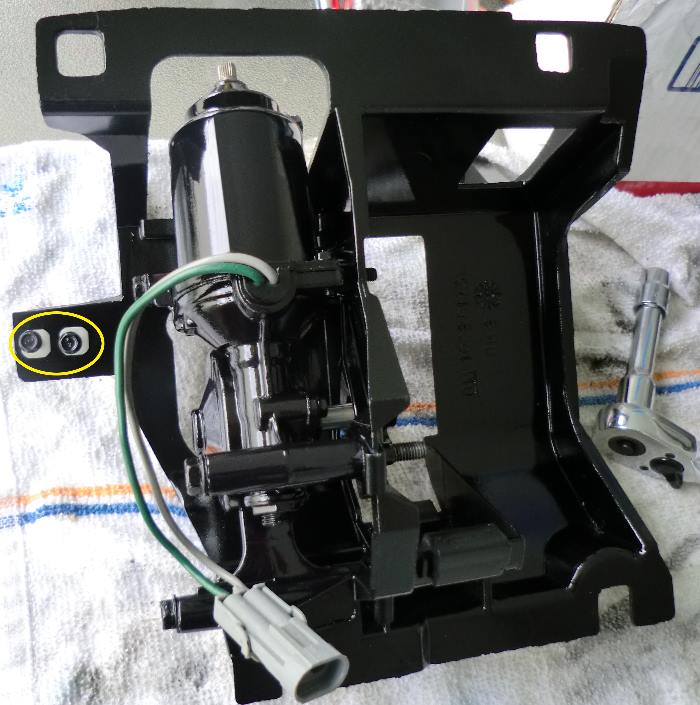
I purchased a 2nd generation set of headlight motors from mrfiero, with the complete wiring harness. Neither of my motors worked, and figured it would just be best to go with the gen2 instead of repairing my gen1 motors.
I spent a bit of time this afternoon cleaning up the motors, sanding a bit, and removing black paint from the plugs and the wiring that was on there from the previous owner. I then taped everything off, and hit them with some rattle can black lacquer paint.
I will soon be getting a set of Fiero1Fan's headlight buckets, then re-wrap the wiring harness with all new wire loom. Once that's done, get them in the car, and check headlights off the LONG list of "To-Do's" list
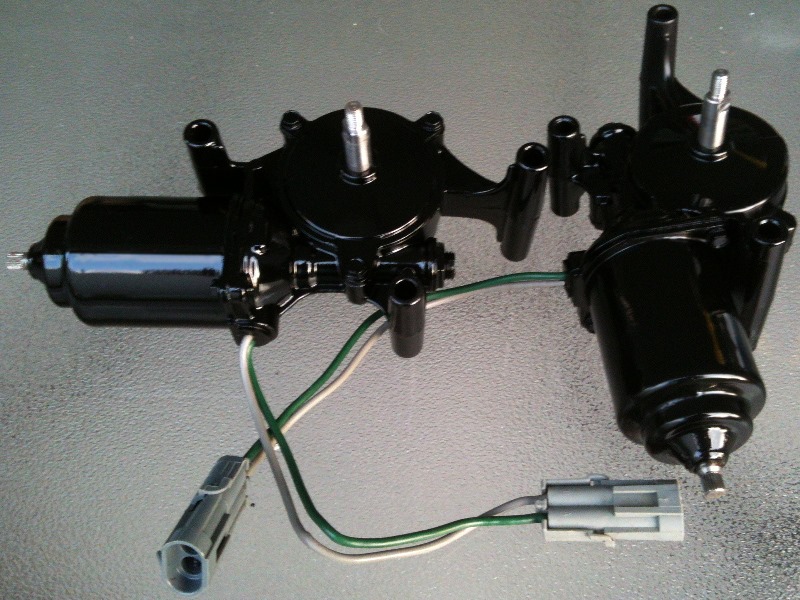
Here's what the motors look like now with a bit of elbow grease applied generously
And the motors installed in the housings. (Still waiting to get the Timo headlight buckets)
[This message has been edited by JohnWPB (edited 08-06-2011).]
It is has been HOT here, as well as most everywhere else this summer really..... I do not have the luxury of an air-conditioned garage, so I am waiting till the weather cools down a bit to get back into the Fiero for the most part.
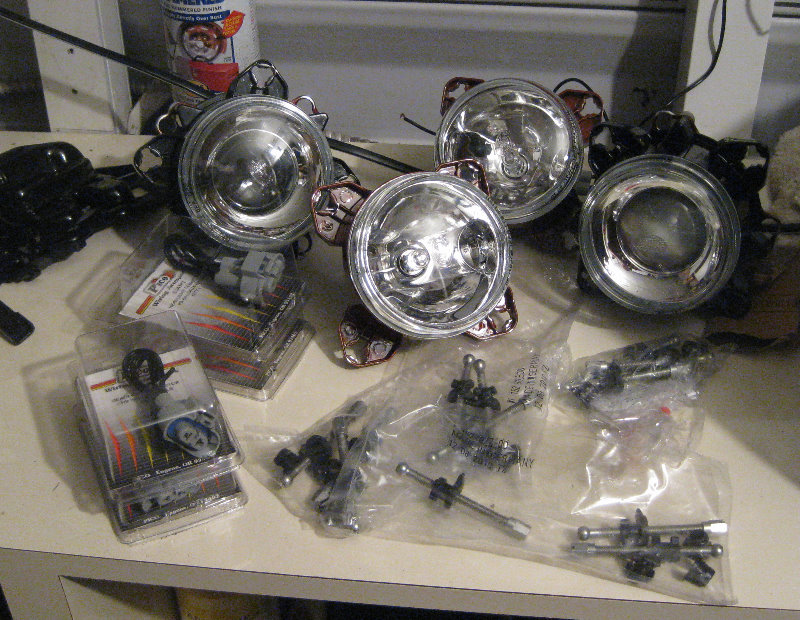
In the mean time, I just got back from Frazee, attending the 2nd Annual Tyler Shipman Memorial Car Show. DIYStu brought up, and hand delivered a set of Timo's buckets to me. It is the last piece of the puzzle, as far as the headlights are concerned. I purchased a set of Gen2 headlight motors, complete Gen2 wiring harness, the headlights, plugs, painted up the motors and mounting ect ect... Now that I have the buckets, I should be able to put it all together.
I sanded down the bare metal buckets with some really coarse sand paper, to scratch them up a bit. I then cleaned them real good with some TSP to remove any oil ans such. I then hit them with self etching primer yesterday. This morning, I painted the first coat of black on them, and this evening the second coat. I will let them cure a couple of days, and then wet sand them down, and hit them with one more coat, before topping it off with a generous coat of clear.
Here are the buckets with the 2nd coat of paint: (Fairly smooth for not sanding the paint at all yet)
The lights and hardware all ready to install when I finish up painting the buckets:
Well not much of a build thread so far, more of a "getting everything ready for the build thread". Now that I have all the parts, and direction where I am wanting to go, I hope to start seeing some visible progress soon!
Above, I detailed how I painted the headlight buckets..... big mistake
After they dried for a few days, in a hot shed I took a buffer wheel, on a medium speed, with car polish to give them a nice glassy shine. I had barely started when EVERY layer, the primer, paint and clear started to peel off like the surface had been sprayed with Pam cooking spray before I painted them!
I can see now way, that they I could possibly have painted them any better, or with better prep. So, lesson learned, I will never try to paint stainless steel again in the future. At least when it has been galvanize coated. They are now at the Tolliver Powder Coating here in West Palm Beach, and should be ready for pick-up in a couple of days. I gave them instructions on masking off the area where the headlight bolt holes are counter sunk for clearance.
[ 1 week ago ]
I got the headlight buckets back, paid for the work, and went to the car and unwrapped them. The first thing I noticed is the fact they did not mask off the counter sunk mounting holes! I told them they forgot, and he says he does not remember any mention of masking anything off, and he had to go check with someone on how to handle it. As he left, I noticed my work order behind the counter from a few minutes ago when I paid for them. I reached over and grabbed it Right there on the work order was a nice hand drawn sketch, and arrows pointing to the 8 holes to mask off. When he returned he started to say something about they were not responsible, when I handed him the work order. He changed what he was saying really fast haha! He said they would have to sandblast them, and re-do them.
I called a few days later and they said they would be ready on Friday afternoon. I stopped by Friday just before closing, and they were sitting right where I left them in the "received parts bin". I was not happy to say the least, he said that someone changed the schedule, and they would be painted next week sometime now. I let him know how unhappy I was, as it was going on 2 weeks now!
[ Today ]
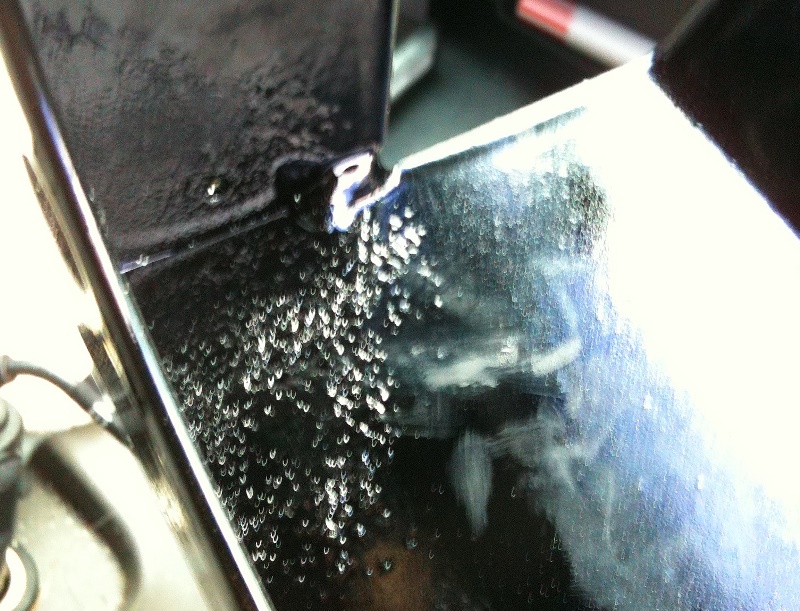
I got a call at 8am saying that they were done. I went on lunch and picked them up. As I unwrapped them, I think the first words to him were "are you serious?!?!" I wanted to throw them against the wall of something LOL! I was quite truthful, and told him that is the worst powder coating work I had ever seen.
Here, you be the judge: (Forgive the crappy cell phone pictures)
Not pictured are 3 runs and drips on bucket#1, enough of a drip that it is almost a 1/2 long!
Inside of bucket #1
Outside of bucket #2
It is VERY hard to tell from the photo's above, but the buckets were glass smooth, Zink galvanized steel. From the pictures they look as if they were almost rust buckets when they started!
I talked to a manager, and he assured me that they would correct this, and would put a rush on it to have them done ASAP. As he was looking at the job they did, I had this feeling that when I left someone was gonna get really really chewed out. You could just see it in his eyes and expression while he was looking them over.
So, now I sit and wait, and wonder how they are gonna look this time.......
[This message has been edited by JohnWPB (edited 09-07-2011).]
Well I called them last Wednsday, and they said they could not mask off the counter sunk holes! Are you kidding! This is what your company does for a business LOL! They said they were going to sandblast them (3rd time now) and to come pick them up, and they would refund my money.
So, I just picked them up and I am LIVID! They blasted away all of the galvanized Zink coating! On top of that, I think they left them outside for a week, and now they are rusting! I called Fiero1Fan in Germany, and he said they absolutely will need re-galvanized. If any speck of rust is on them, and they are powder coated again, it will continue to rust underneath.
To top it off, like this isn't enough... they bent the H E Double L out of them! I am just fuming right now!!!! I called them back, and am trying to resolve this in some manner, and he asked me to send him photo's in email. So I just sent the pictures to the manager.
This photo shows how bent up they are now:
(Pictures will be posted shortly, PFF Image poster is acting up... AGAIN!)
( EDIT: I had to use Image Shack for now, as PFF Image Poster just refuses to work today )
This Photo shows how bent up they are now:
This photo shows just how nicely rusted they are:
A far cry from what they looked like well over a month ago when I dropped them off:
[This message has been edited by JohnWPB (edited 03-06-2014).]
Well, decided to get back into working on the car, I was waiting till the weather cooled off a bit, but that does not seem like it is going to happen any time soon! 85 today, and 78 tonight.... I do wish I had a air-conditioned garage to work in!
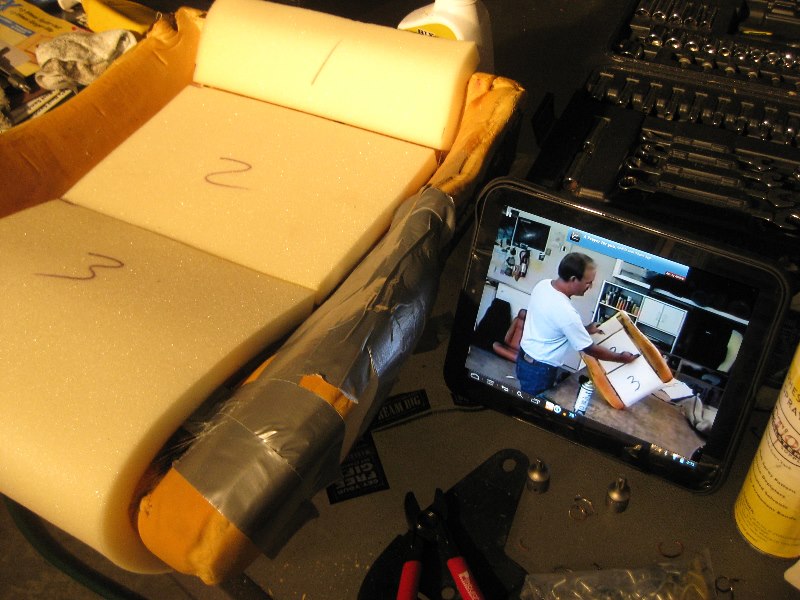
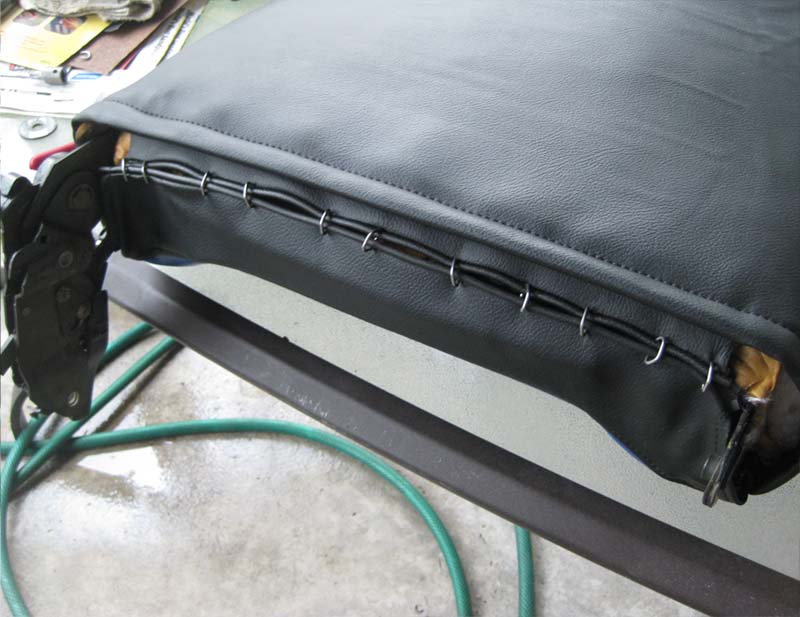
Anyhow, I started to cover the other seat with my Mr. Mike's seat covers, and he was there with me, helping me out every step of the way I got the bottom done, and will do the back of the seat tomorrow.
Here is what I started with:
While I had everything apart, I took the time to sand down the frame rails, and primer and paint the rails, bolts and such with Semi-Gloss black. Nothing worse than putting the beautiful new seat covers on, and see rusty frame rails and bolts underneath the seat!
(My $99 HP TouchPad with Android CM7 installed )
[This message has been edited by JohnWPB (edited 11-19-2011).]
Here is a closer photo of the seat rails. As I mentioned, I have seen SOOooo many beautiful interiors posted on the forum. New dash, new seats, new headliner, carpet and on and on....and in the same photo, rust on the seat rails. While I had the seats apart, I painted up all the hardware.
Fastening up the lower part of the back of the seat:
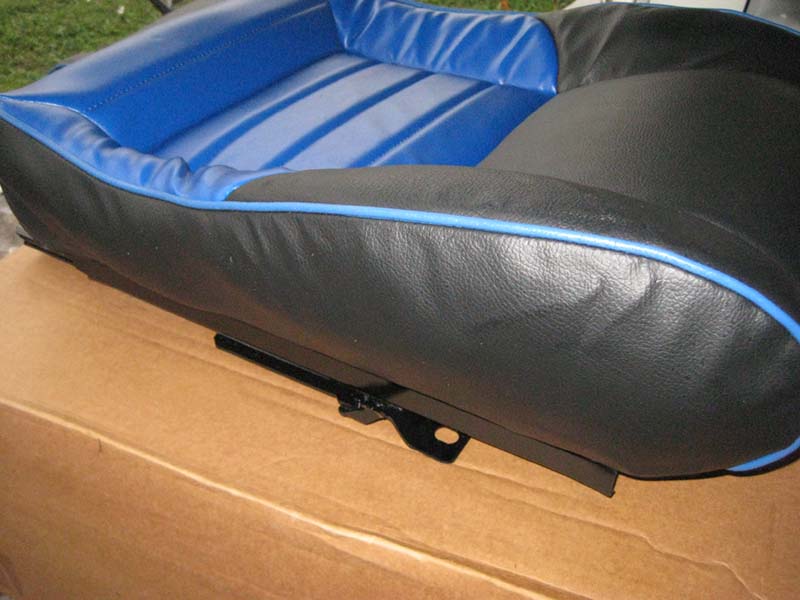
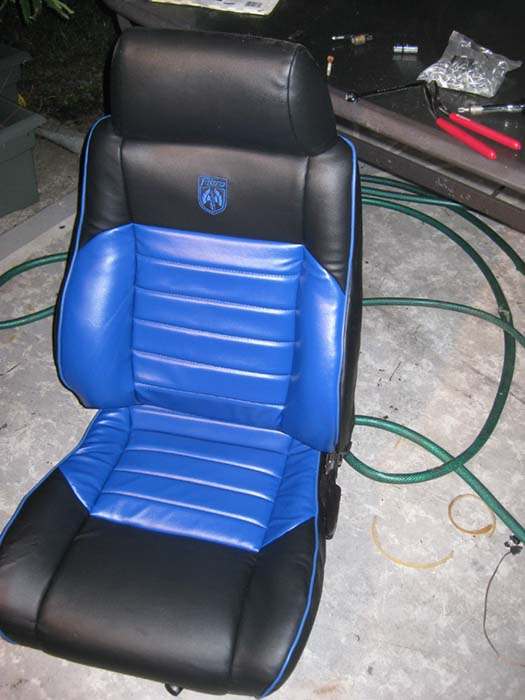
And all finished...
Here is the completed drivers seat, all put back together and ready to install.
Just another thing I can cross off on the VERY long list of things to do!
Now, to head to the mall, and post that I need the covers for the reclining mechanism for both seats
[This message has been edited by JohnWPB (edited 11-18-2011).]
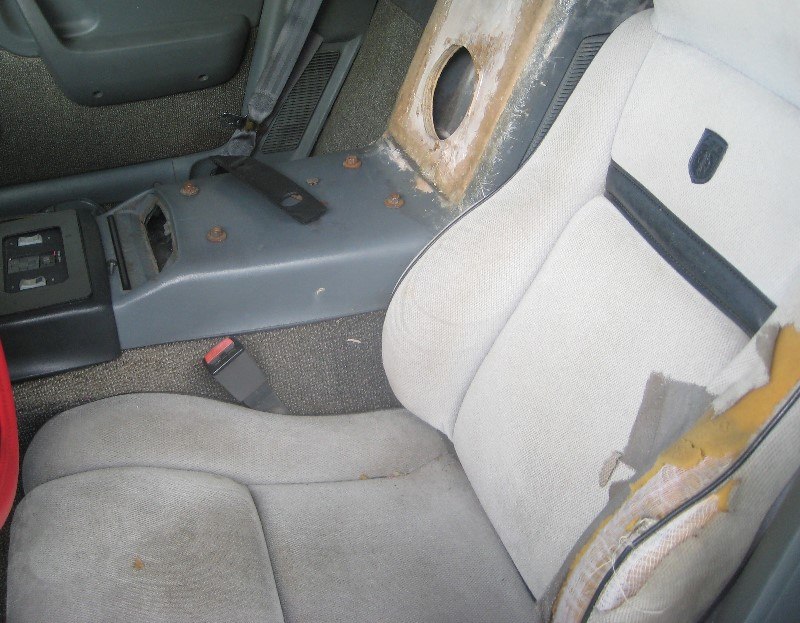
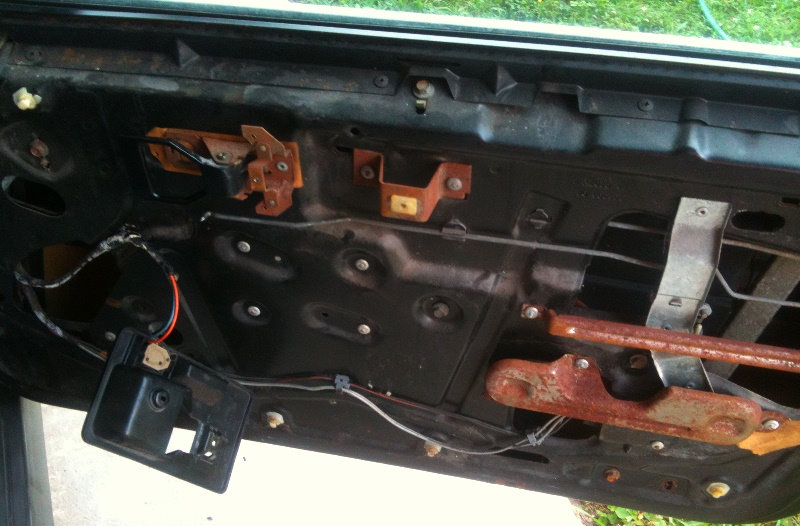
Ok, working some more on the interior.... I took the door panels off, and found some rusted up bits. It will never be seen, after the door panels are back on, but decided to sand up the rusted bits, and then primer and paint in a semi gloss. This will prevent the rust from getting worse. I am not sure of this is the case, but hopefully, coating the rusted bare metal, will also git rid of that "rusty smell" LOL. I have nothing to base this on, but I do think that rusted metal has an odor to it, so it can't hurt!
Here is the door when the panel was first removed:
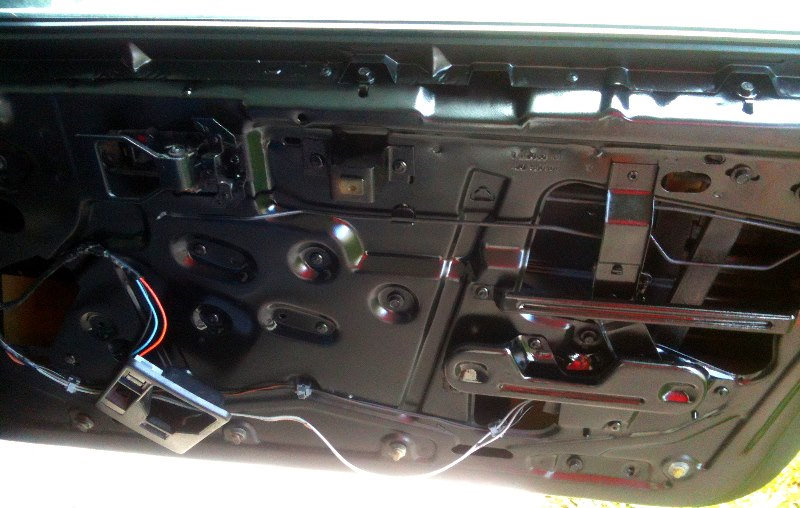
And here it is all cleaned up, primered, and a coat of paint: (The red parts that are showing in the photo, is actually a reflection of the bright red T-shirt I was wearing when I took the photo! LOL )
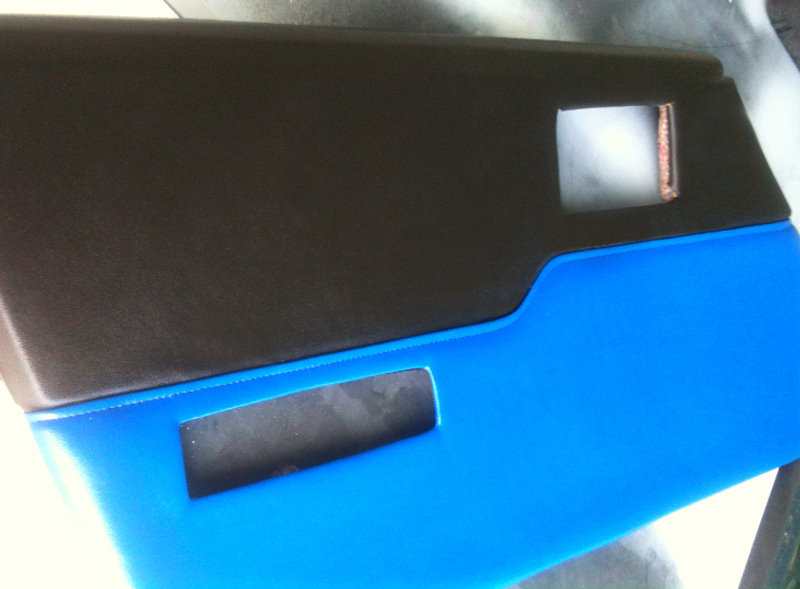
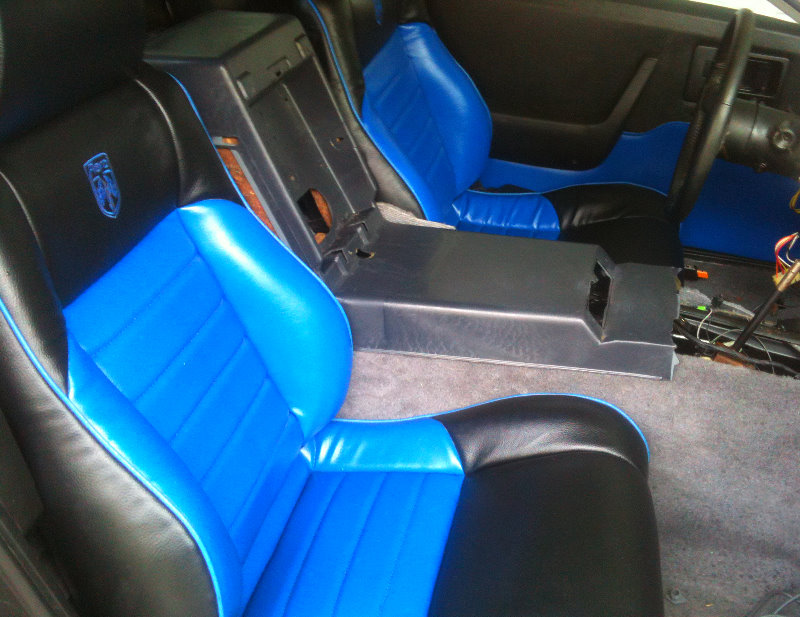
I finished up recovering the door panels. The bottom part is Mr. Mike's lowers in Electric Blue to match the seats, and I did the top part of the door in Black AllSport vinyl.
So, with the seats done, and the door panels in place, I set the seats in the car to get my first idea of how the interior is going to look....
TONS more work to do of course, but a little at a time I guess......
[This message has been edited by JohnWPB (edited 11-21-2011).]
He said he would bring pictures didn't he? We wouldn't want to have him get all that hard work dusty, on a long drive from WPB to Frazee. Assuming, of course, he can find the keys.
------------------ 1988 GT Manual Medium Red Metallic Gray Leather K Beck LEDs
PK, I know I am gonna get a lot of flac about having an automatic transmission, but that is what I intentionally went with. In South Florida, the stop and go traffic is brutal. I would literally be shifting non stop. Ya would get the nice humm at the top end of 2nd gear, just about to up shift, and bam, brake and down shift instead....
This car is not gonna be for racing, but for pleasure and taking to an occasional show. I love the feeling of control with a stick shift, don't get me wrong, but more so when on the open road. My best friend has a Mini Cooper 'S' and I make him let me drive it every chance I can get Man that is a fun little car!!!! But for use as a daily driver, in rush hour, twice a day, I opted for an Automatic.
PS and with no stock cup holder, I would be spilling my iced tea all over the place!
PPS: PK, are you feeling alright man? You did not mention IMSA in your post?!?!? Someone call 911 ! ! !
oh damn, the traffic is that bad out there? what is the traffic in surrounding areas? in say like Ft Lauderdale? looks like i need to research every aspect of living before i make a final decision of where to move.
oh damn, the traffic is that bad out there? what is the traffic in surrounding areas? in say like Ft Lauderdale? looks like i need to research every aspect of living before i make a final decision of where to move.
Traffic in Fort Lauderdale is going to be even worse than West Palm. Miami is even worse. I live in Fort Myers and the traffic here is even bad. My work is only 15 miles away and it takes me 45 min to an hr to get there.
I would go crazy with a manual trans. I go crazy enough as it is just trying to use my cruise control.
[This message has been edited by JimmyS (edited 11-24-2011).]
Not wanting to hijack the thread but it all depends on your own decisions on where to live and work. We're in Miami (between downtown and midtown) and walk to work or take the bicycle. My wife's car gets used mostly for shopping (until the new Publix is open nearby and we can do that by walking, too) and the Fiero only for fun. If you feel you need to have a McMansion in the suburbs and commute insane distances, then you have a traffic problem.
quote
Originally posted by JimmyS:
Traffic in Fort Lauderdale is going to be even worse than West Palm. Miami is even worse. I live in Fort Myers and the traffic here is even bad. My work is only 15 miles away and it takes me 45 min to an hr to get there.
I would go crazy with a manual trans. I go crazy enough as it is just trying to use my cruise control.
They say it's all in the little details.... well I should be covered then! The parts may be little, but the time to do them is crazy! Stripping, sanding, primering, sanding, painting ect ect....
Anyhow, been working on stuff behind the quarter windows of the car a little at a time.
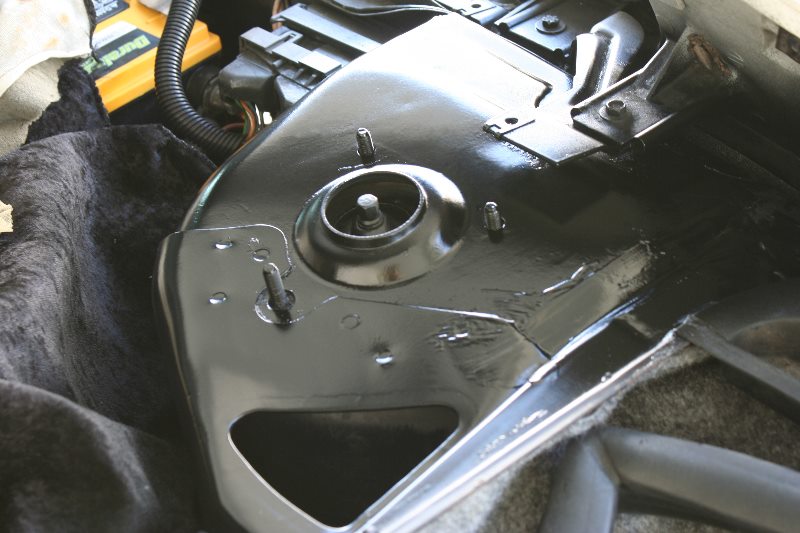
Firstly The shock mount area, before:
and After: Both the left and right looked the same)
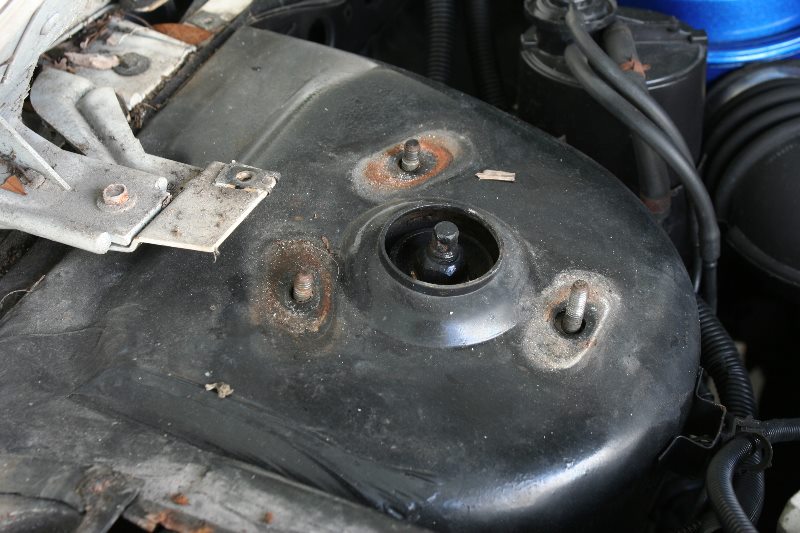
Next all the little nuts, bolts, screws and the washer cap thingies. The vacuum canister was in really bad shape when I started... I was surprised that it came out as good as it did!
I finally put a passenger and drivers side seat cover mechanism pair together. One was tan, the other was gray... Not any longer
Lastly, at least for now, are the quarter window rear inserts. The had turned almost gray from years of sun and engine heat.
A closer shot showing the nice satin finish:
[This message has been edited by JohnWPB (edited 01-18-2012).]
awesome work John. I'm so glad I came across this thread. you do some beautiful work. Ok tried to edit my capitalization, but the touchpad is fighting me... lol!
i wanted to see the gas needle thread but the link will not redirect and gave me a dead page.
------------------ 1984 Indy Fiero SE Pace Car Replica #770 "SE" Stormtrooper Edition Rescued, resuscitated and reversibly modified! (I'm so not done yet!) Poly all round & Black Drag DR-34s Frt: 225/45 on 18x8 (47 offset w/ 8-9mm spacer) 1.5 coils cut off 1984 WS6 springs Rear: 265/35 on 18x8.5 (45 offset) Coil-overs w/ 10 inch 300lb springs & 7 inch sleeve
Nice job with the paint! Looks like a professional job.
Thanks for the compliment, it has been a lot of trial and error trying to use a rattle can to get good results. One day I will buy a compressor big enough to use a real paint gun
quote
Originally posted by redraif: i wanted to see the gas needle thread but the link will not redirect and gave me a dead page.
I have it bookmarked, and would not work. Took about 10 minutes to find it searching! The title of the thread did not work as a search. Sometimes I just do NOT understand how the PFF forums work. The tutorials are to help others when they are trying to do stuff.... how they are supposed to find it, I have no clue haha!
I have it bookmarked, and would not work. Took about 10 minutes to find it searching! The title of the thread did not work as a search. Sometimes I just do NOT understand how the PFF forums work. The tutorials are to help others when they are trying to do stuff.... how they are supposed to find it, I have no clue haha!
Awesome... thank you! I would have tried to search but I had no clue what exactly to search... And with the habitual odd titled threads that exist seeming to never match what the thread is about... ugh! Don't get me started on the issues I have trying to figure out the favorites tab... I registered in 05, and I just found out how to find my favorites a month ago! LOL!
Now if I could figure out why I have not been able to see any PIP pics in 3 days... maybe I could enjoy the forum again! Work and their darn use of explorer... grrr... not sure what changed in the past 3 days... and the Wifi is so spotty that the touchpad can't keep a lock...
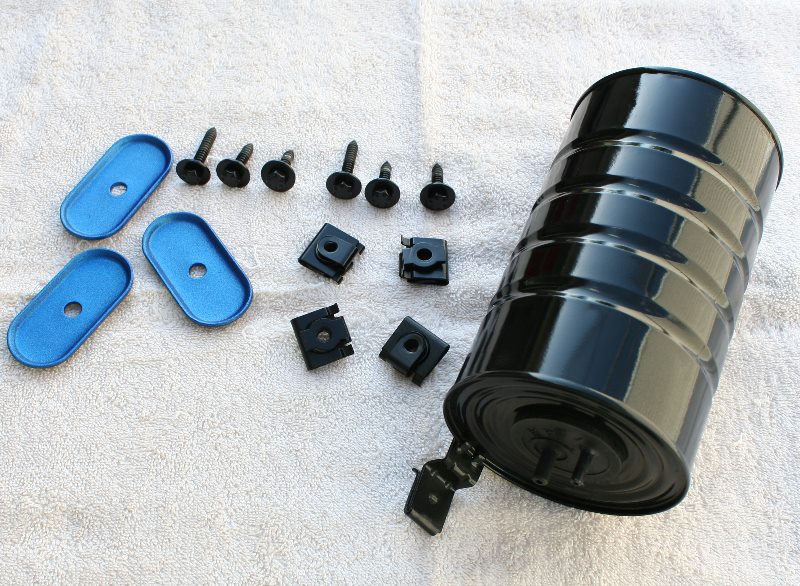
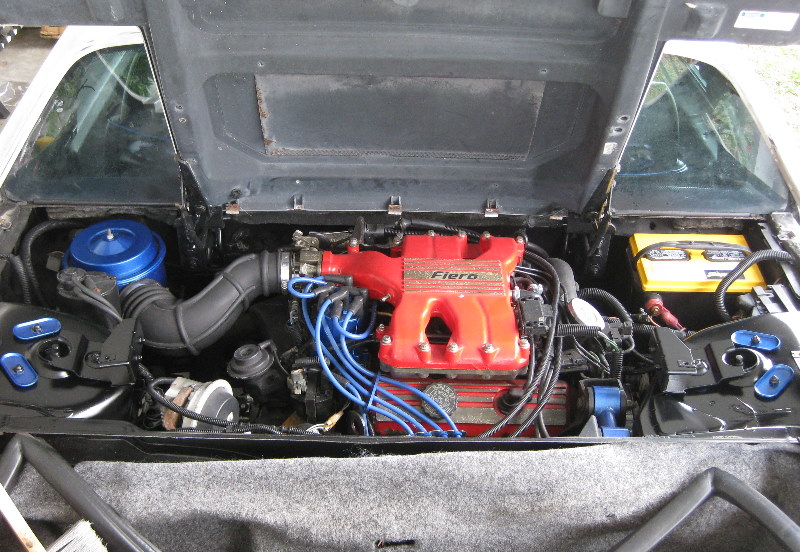
Ok, still plugging away at the engine compartment. I got the strut towers, washers and all that painted up and done.
Here is a photo of where it stands now:
When I walk outside, and open the decklid, I notice what catches my eye first that needs to be done. Slowly, over time, less stuff is catching my eye
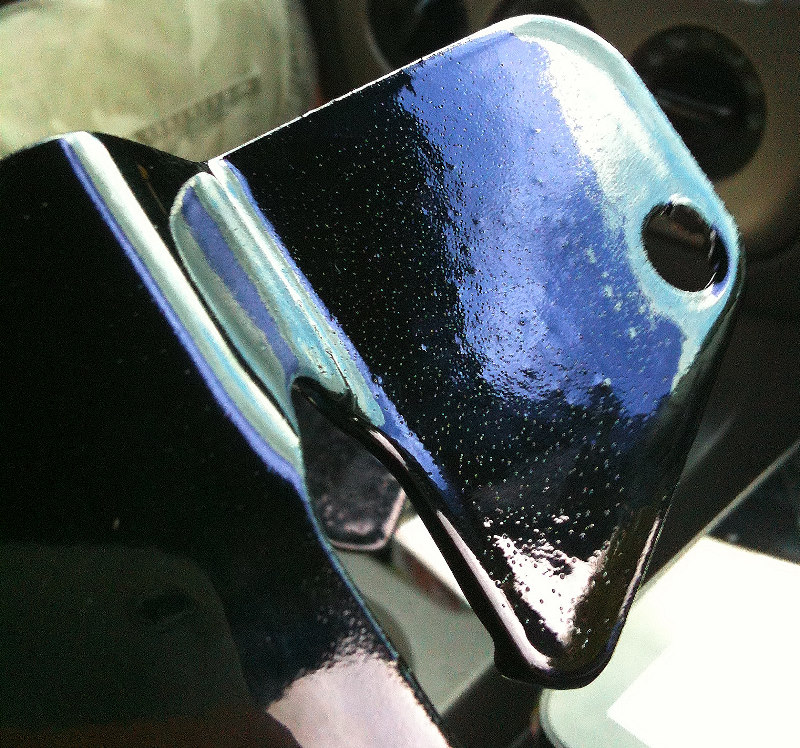
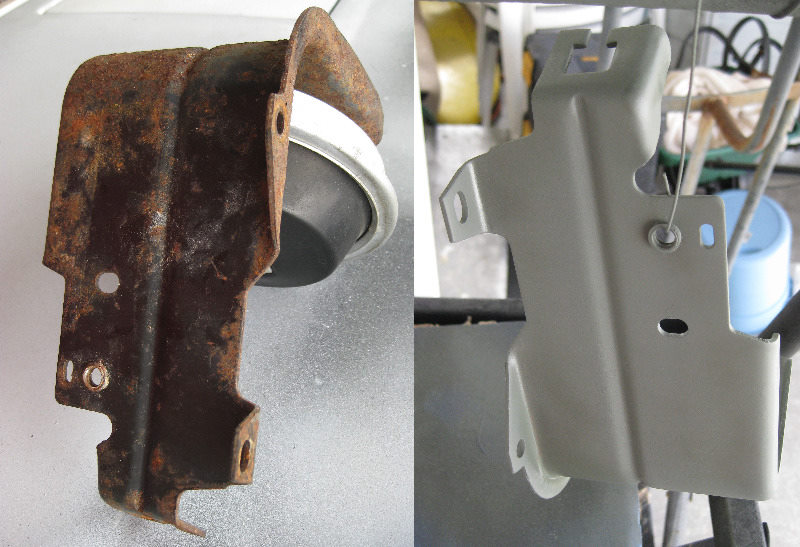
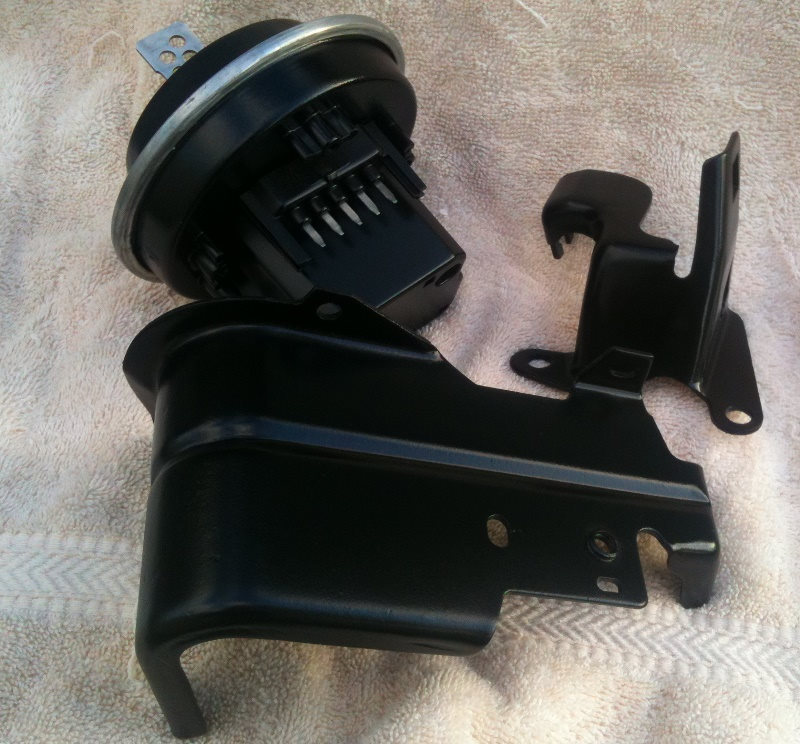
The cruise control vacuum thingy for the cruise control was next on the list. The bracket was pretty rusted up, and it's something I forgot to do when the engine was out and the inside of the compartment was painted. The bracket was really rusted, but with some cleaning, grinding and primering, it looks like it will come out good.
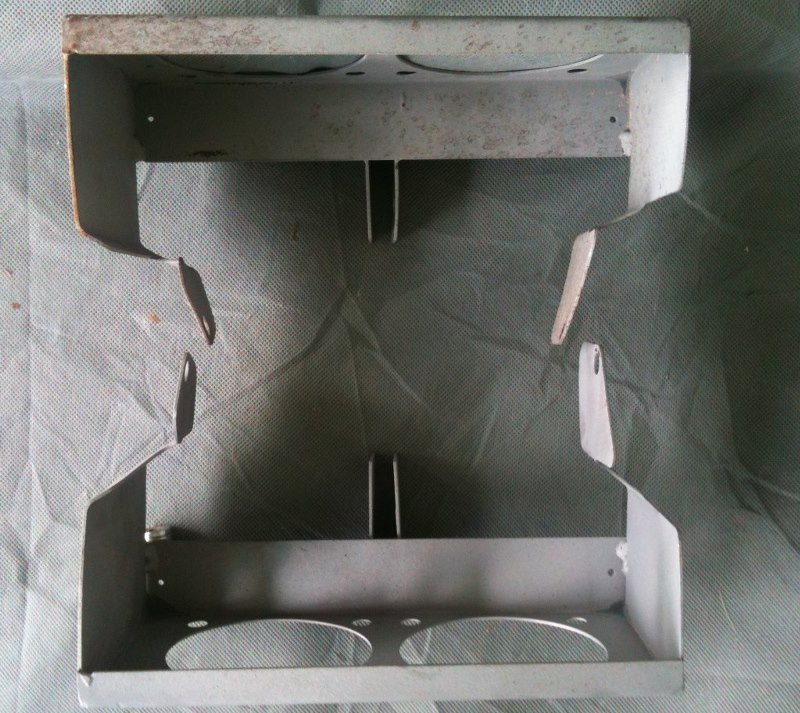
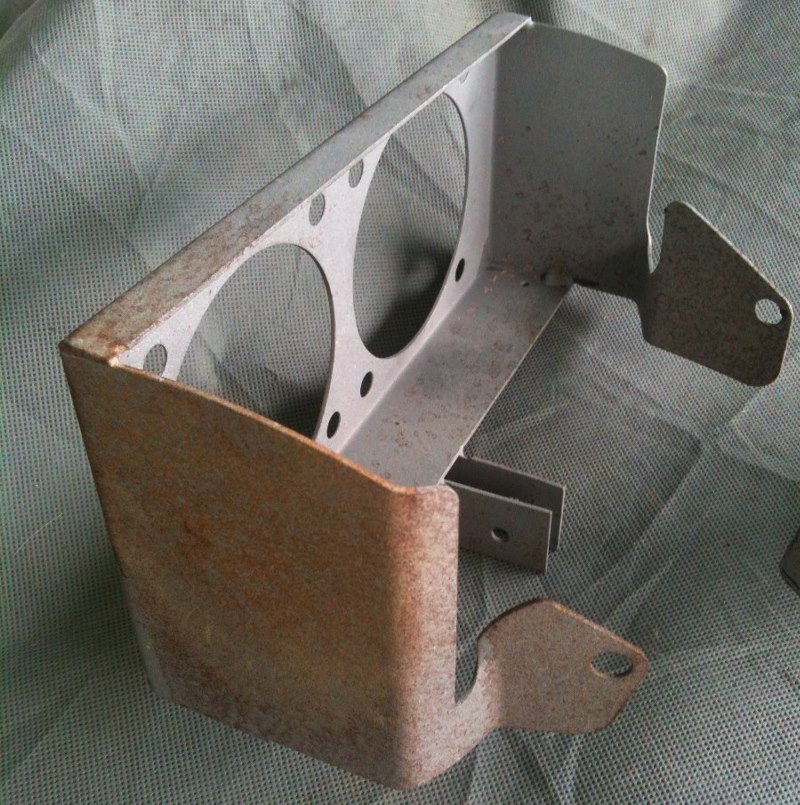
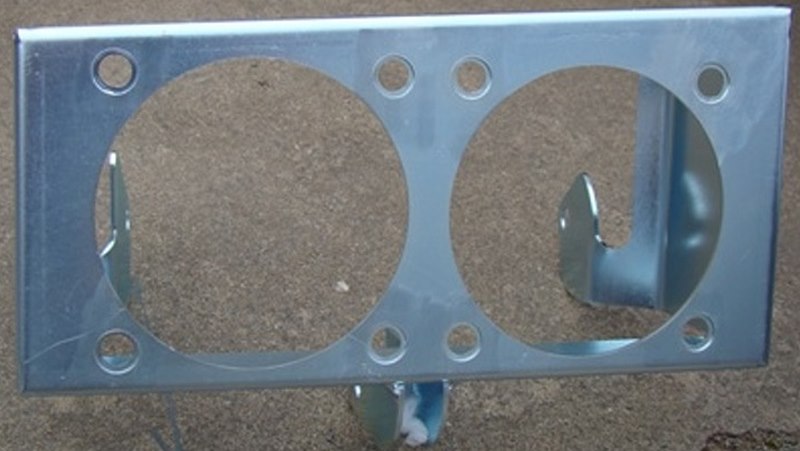
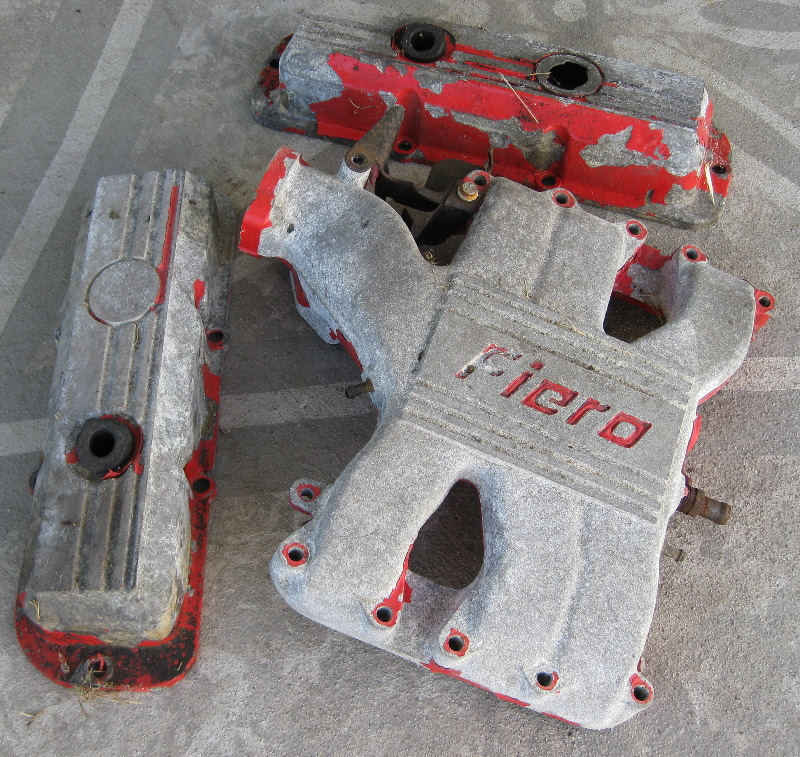
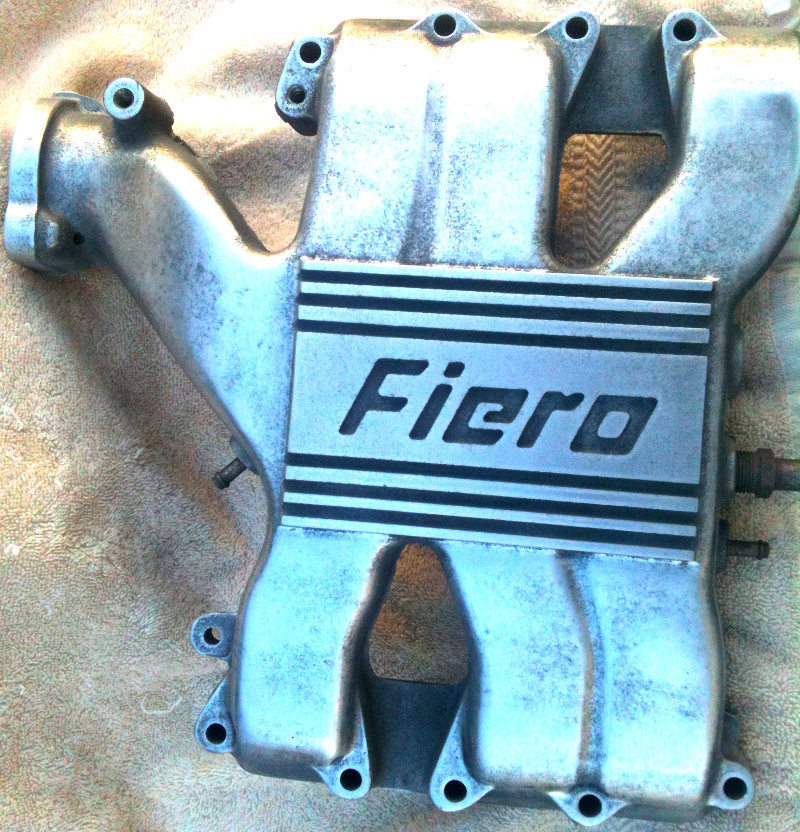
Next on the list of things to do, is the Upper plenum and valve covers. I bought a set in the mall, so I can have them completed, then just swap them in, instead of leaving the engine open while they are being done. Here is what they looked like 2 days ago, just before I took them to get them hot dipped. I will get them back on Monday. They are some of the worst I have seen. I don't know if this engine was sitting at the bottom of the Atlantic Ocean or something!
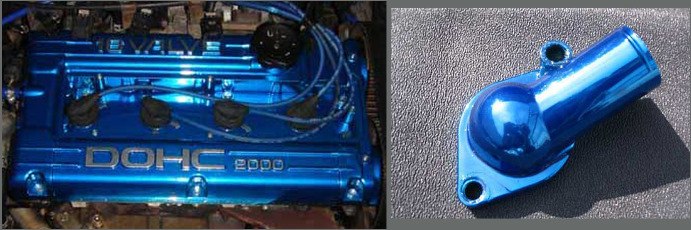
When I get them back, I am gonna do my best to grind the plenum down, and try to get it as smooth as possible. When done, I want to get them powder coated in an amazing blue I found. It is a 2 stage process, first you have to do them in reflective chrome, then a translucent blue over the top of that. It looks to be a lot of work, but if it comes out like this, it will be worth it!
Step by step, John. Looking good and I'm sure it will continue to look better and better. You must, repeat MUST bring your machine to Frazee for the 5th annual. Pictures alone will not be acceptable.
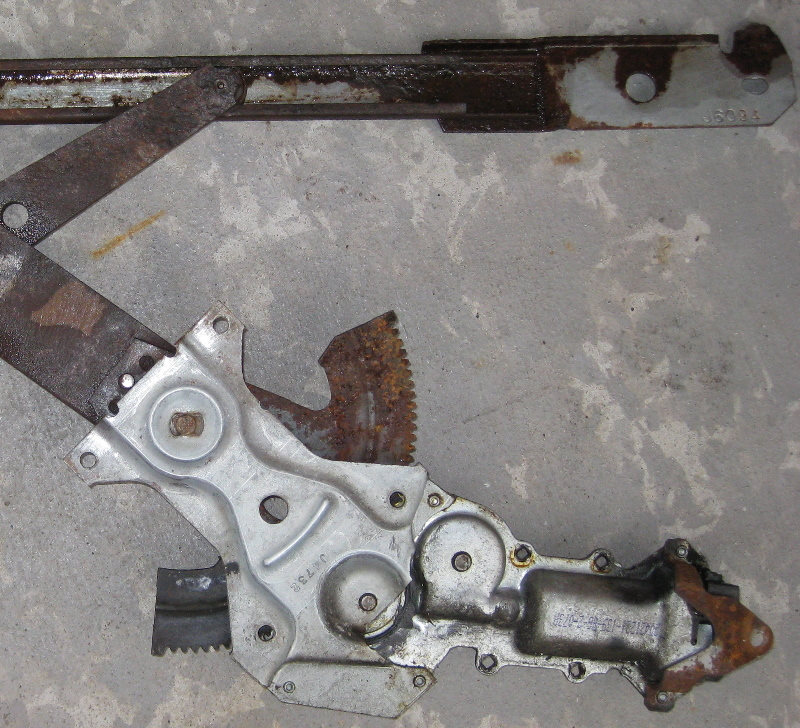
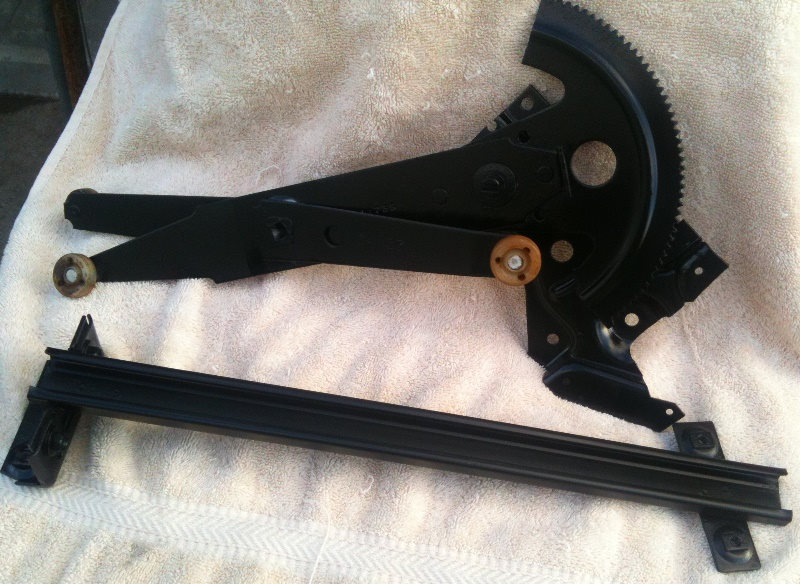
I had the glass installer out to install the new drivers and passenger glass I purchased from them. When he got the door apart, the regulars were REALLY rusty. There was no way to continue, and install everything back when he was here. I took the regulators apart, motors off ( and almost lost my thumb in the process...LITERALLY )!
The passenger side is too far rusted to repair, and a new one is in the mail from InfinateWIll.
I have the drivers door regulator all ground, sanded, primer, painted and greased up, and all ready to go back in:
Hopefully with freshly cleaned, painted and greased tracks, and new window motors, they will be significantly faster than before!
I continued working on the A/C vacuum canister, bracket, cylinoid and such, and have those completed. I just have to let the paint cure a couple more days before I reinstall everything.
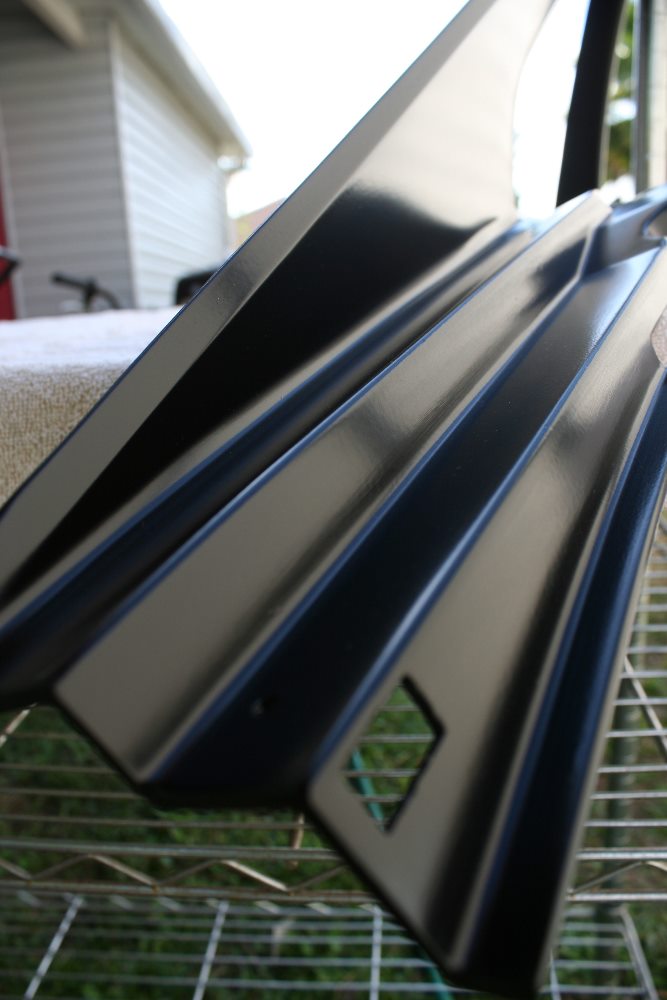
I have been grinding and sanding away on the upper air intake, to get it nice and smooth to be powder coated transparent blue, like in the photo's a couple posts up. It is more time consuming than anything else, and just work on it in between other items I am working on.
Slowly but surely, it's getting there.....
The next small project will be the brackets for the throttle cable, and a few other items that were not done while the engine was being swapped. As mentioned before, I walk out, open the decklid, and see what catches my eye that has not been done yet, and work on that. When I get that piece / section, rinse and repeat.
[This message has been edited by JohnWPB (edited 07-19-2014).]


 Topic Closed