Got the getrag rebuilt and re-installed. I have tons of pics that I will post shortly. While doing the rebuild I also replaced the upper and lower clutch fork bushings. Got them both from the fierostore. The upper one is good. The lower one is not. Its quite a bit sloppier then the worn out original one and is causing problems with the fork contacting the bellhousing and getting stuck. So back out everything comes yet again (#13 cradle drop? ). Since I can't find another source for a good replacement bushing I will be making my own. I will be doing that this weekend and will reinstall the trans one last time next week. Good thing I have access to a lathe.
While the engine is out I will also be replacing the waterpump yet another time. This time with a new one from NAPA. This makes #4 and hopefully the last one for a while. With less then 4k on the swap there is no reason for me to be replacing these pumps so often. Wish me luck.
One other thing coming in the near future. I'm finally getting around to re-doing the exhaust system. Now that I know everything works its time to finally ditch the 2.8 muffler and do something a little different. I have a good design and most of the parts here now. I will be using a different set of exhaust manifolds for the new design. I'll pick those up next week after the car is back together. Once thats done I will setup a time to go to the shop and use the welder to put evertyhing together. I'm excited for this change.
[This message has been edited by Fieroseverywhere (edited 03-24-2010).]
Way past time for an update. The main reason for the delay was the loss of the computer most of my pics were stored on. No only have I lost all the pics I've already posted in this thread, I also lost many that I had not gotten posted yet. All of the pics for the getrag rebuild are gone. Thats really too bad. There were hundreds and they would have made a good thread all by themselves.
I do have pics of the new exhaust system and a couple other changes I made. I'll start with those.
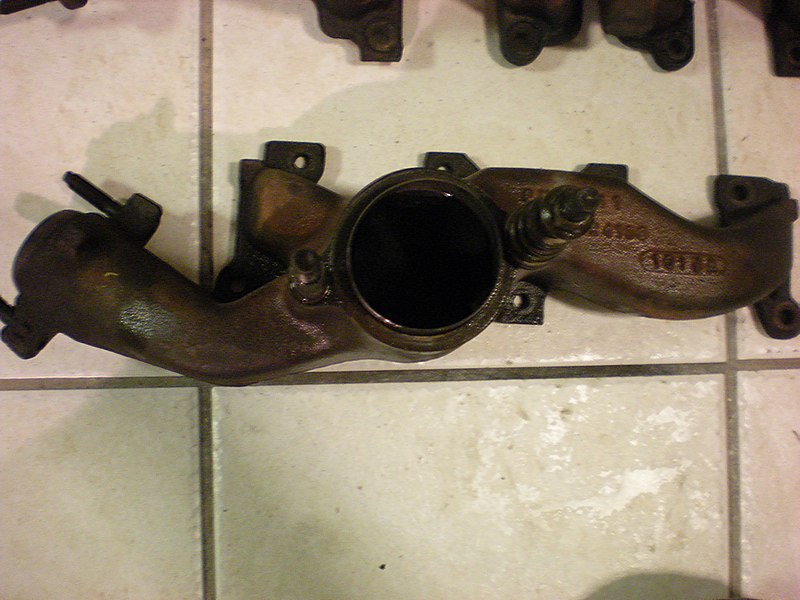
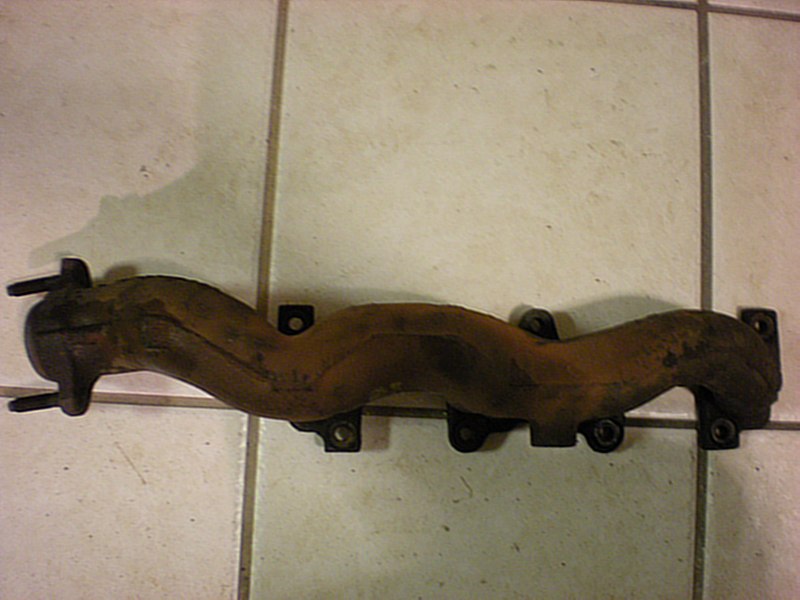
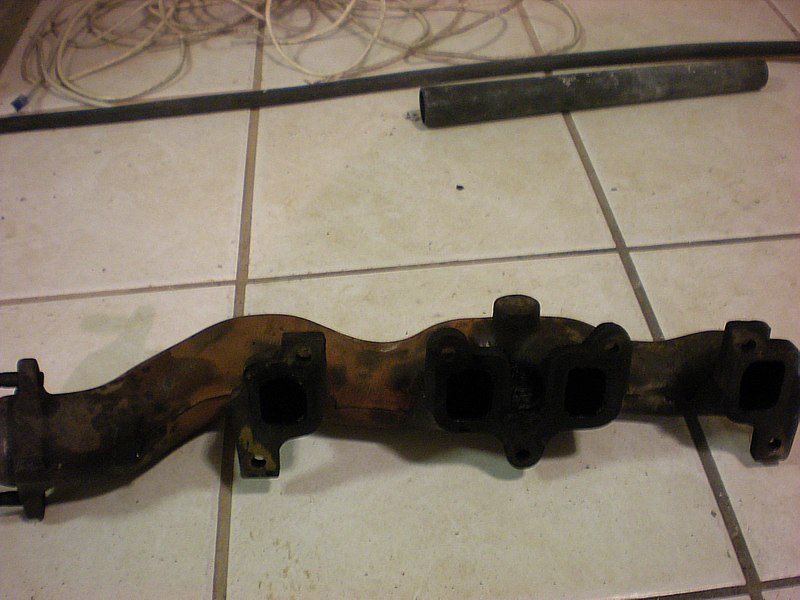
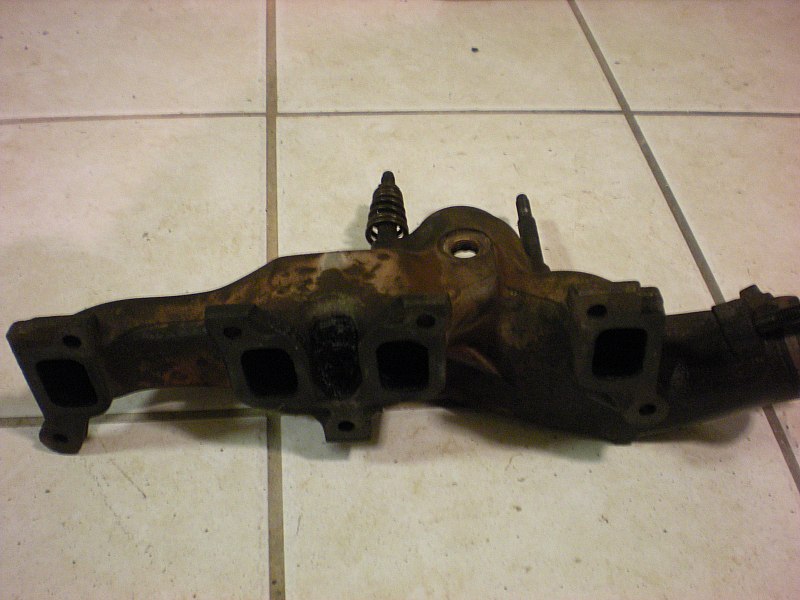
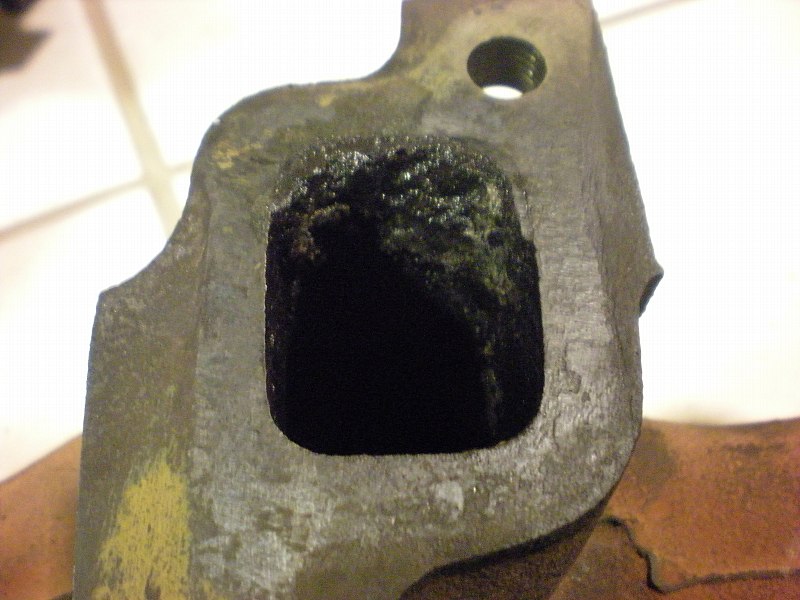
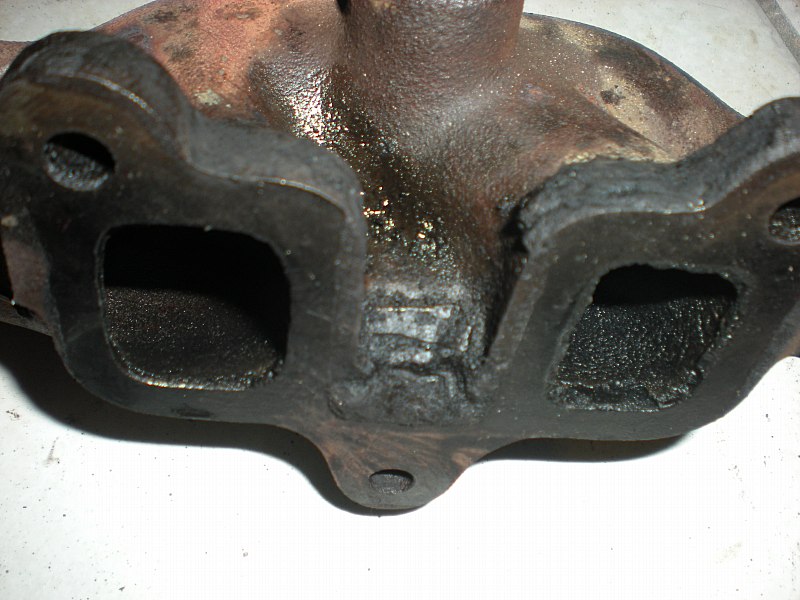
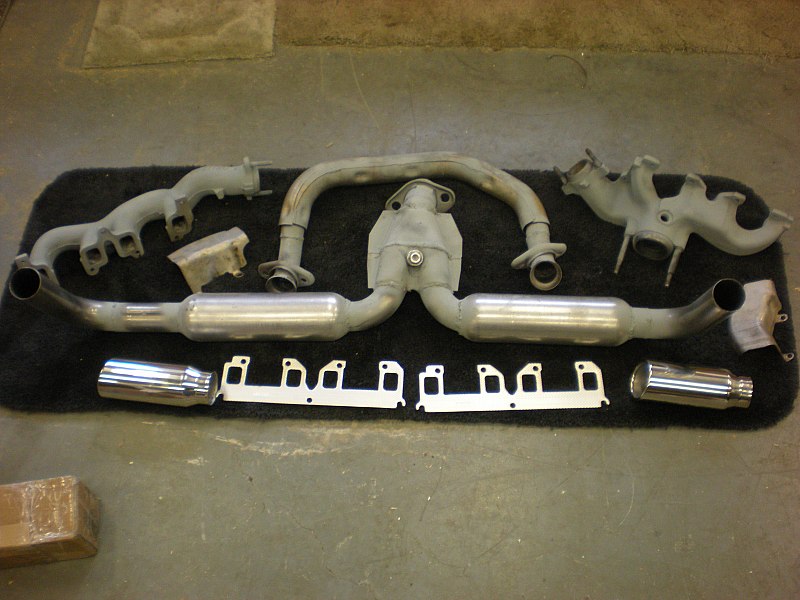
First I went to the wrecking yard to find the new set of exhaust manifolds that I wanted to use. I chose a set of cast iron manifolds off of a 92 deville. They looked like crap, as most yard items do before cleanup...
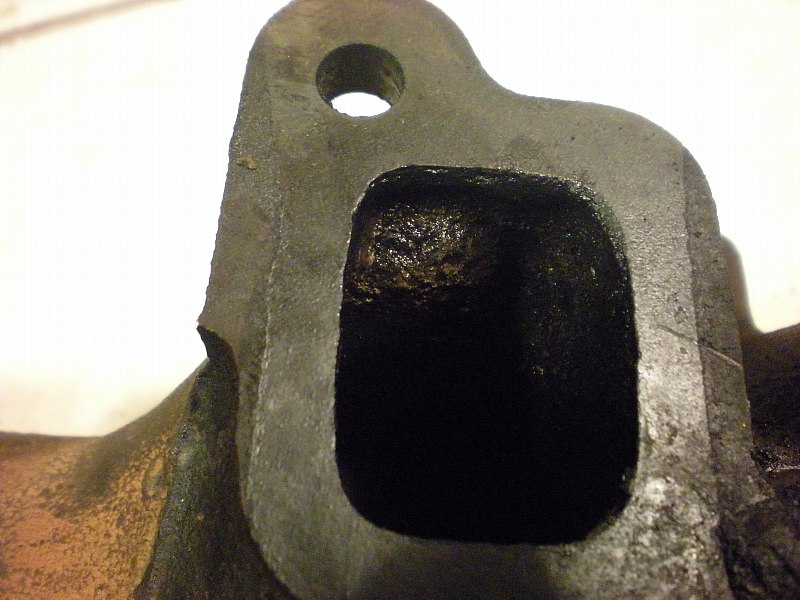
They had huge carbon deposits inside. I spent many hours cleaning them up.
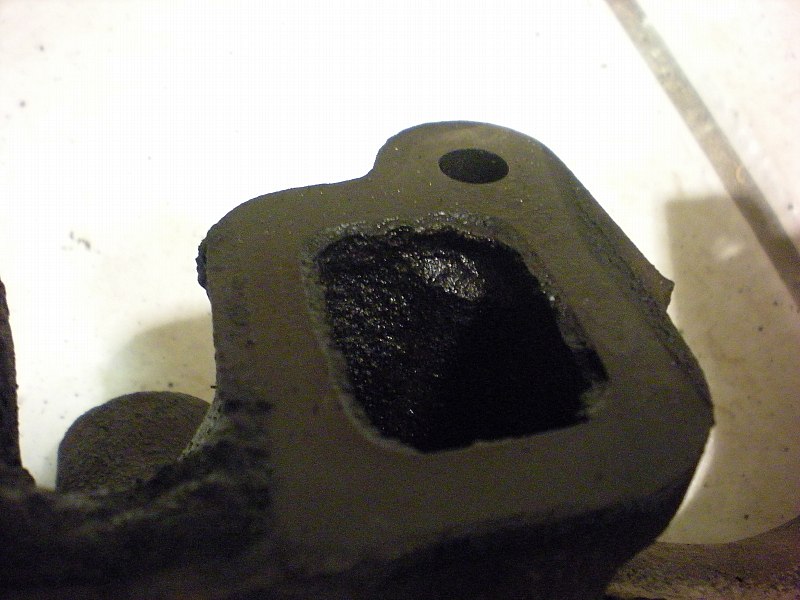
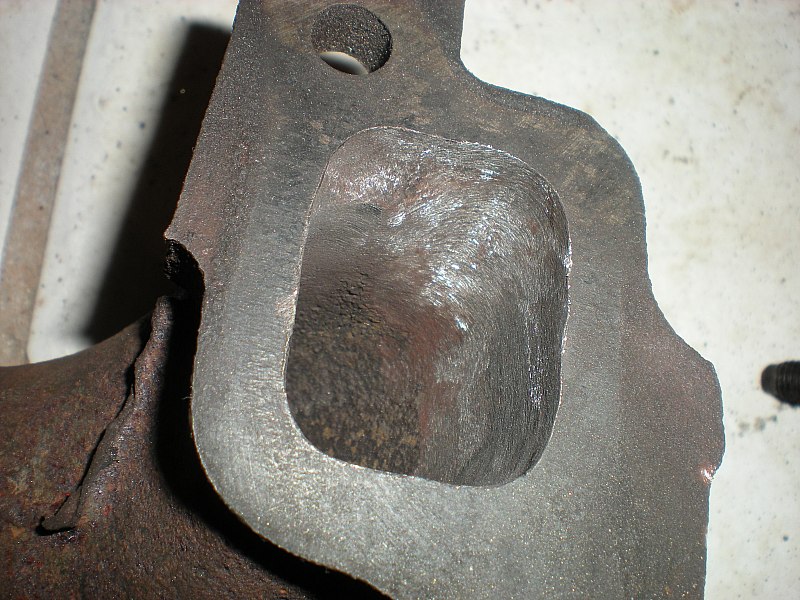
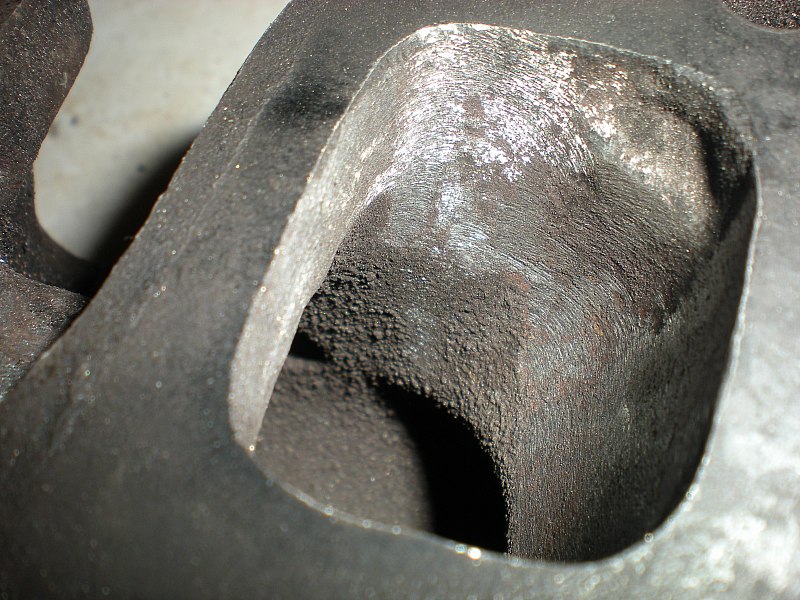
After a few hours with the die grinder most of the carbon was removed. I also spent some time smoothing the transitions for better flow. They were also matched to the gasket. They are as good as I'm going to make them.
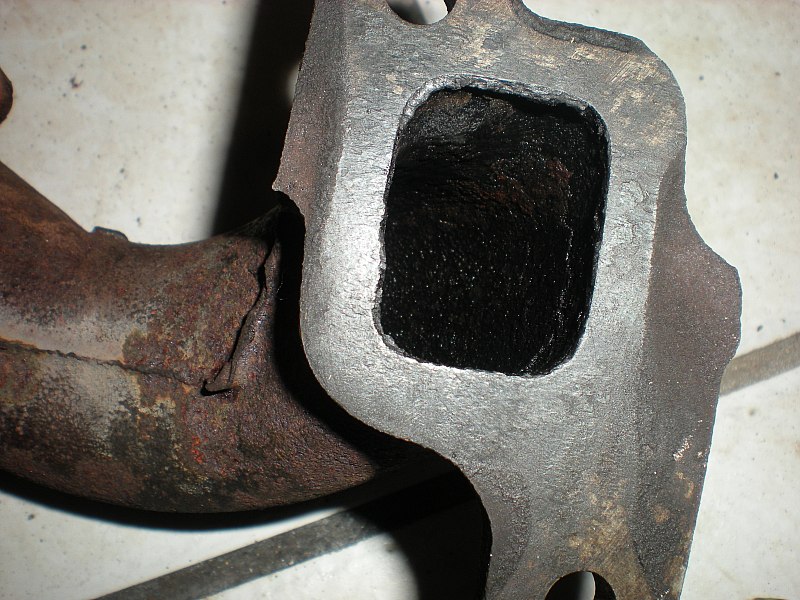
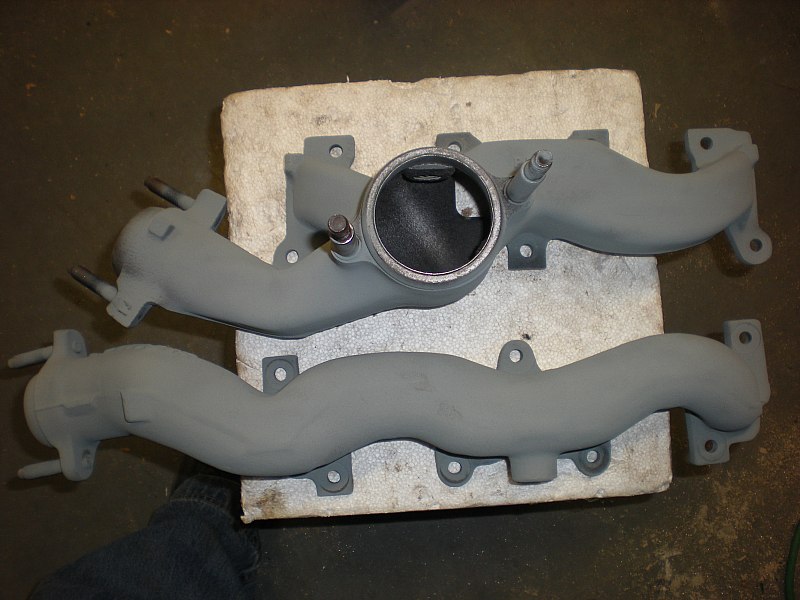
They turned out well in the long run...
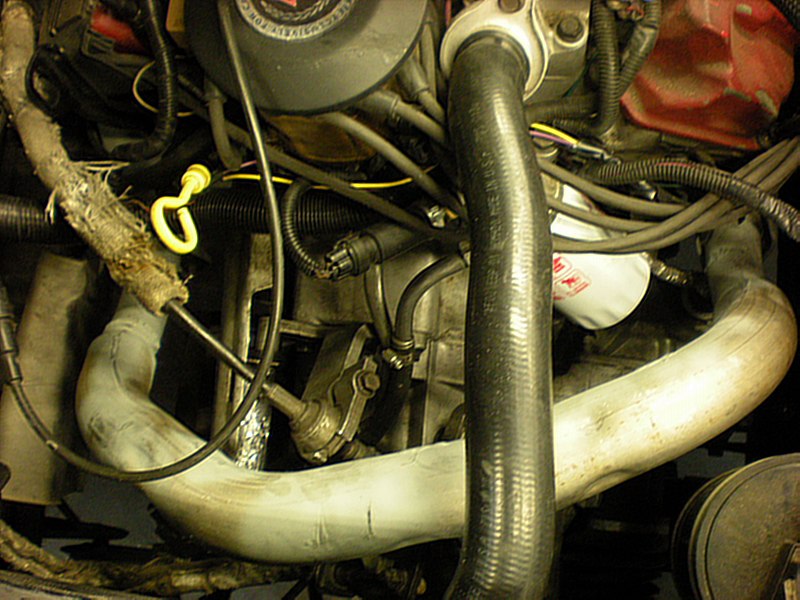
That was the easy part. Now to eliminate the fiero muffler and redesign the setup. I wanted it short and sweet. I don't have pics of the build left. Here is a pic of the entire completed setup though. Also a pic of the new crossover pipe, modified to clear the getrag cables.
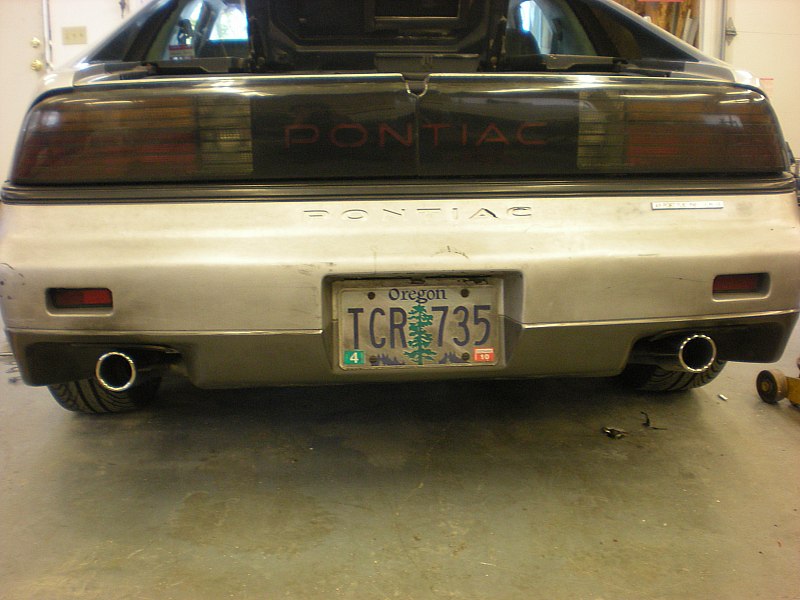
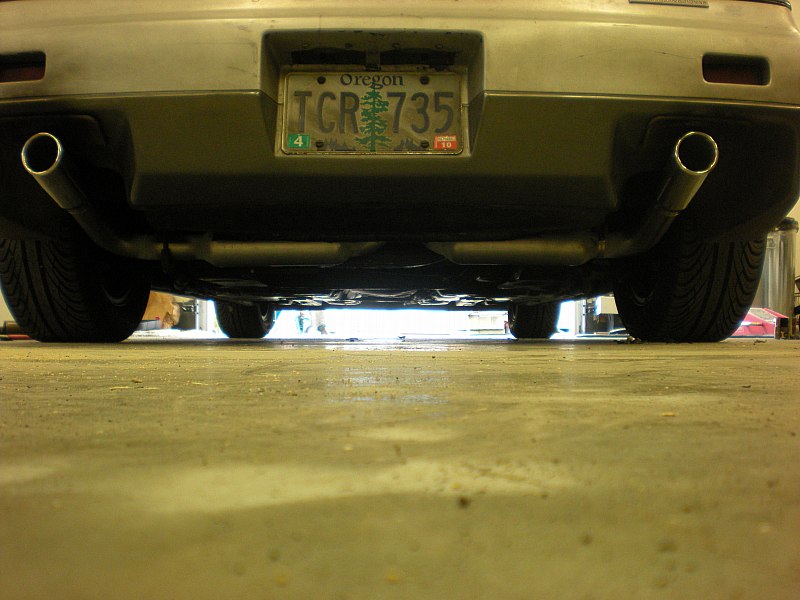
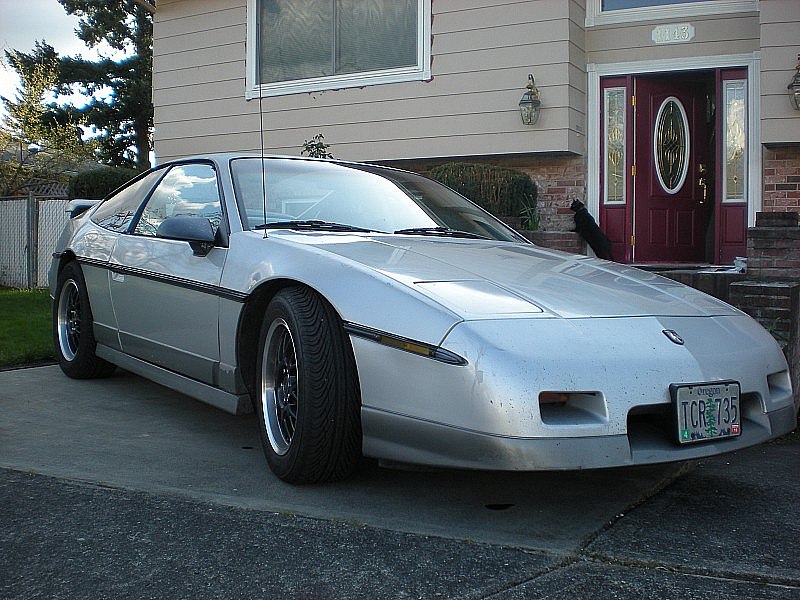
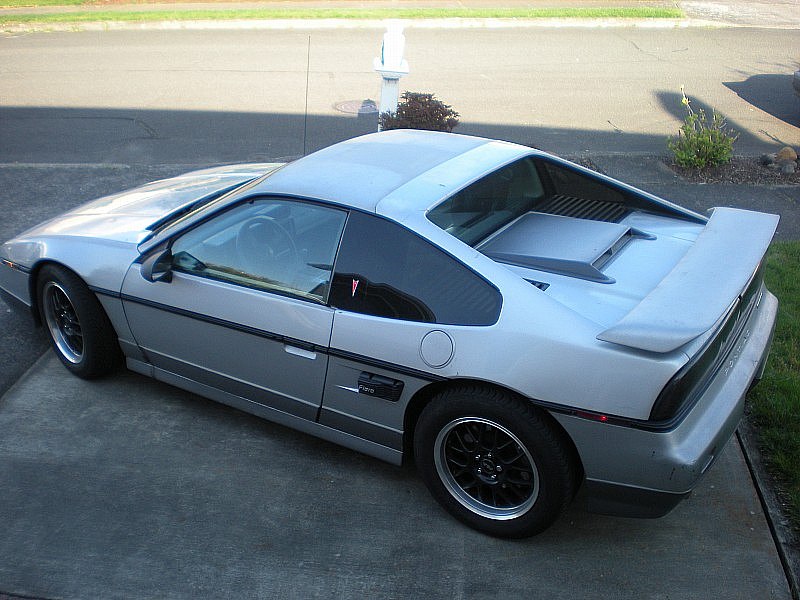
And a couple on the car...
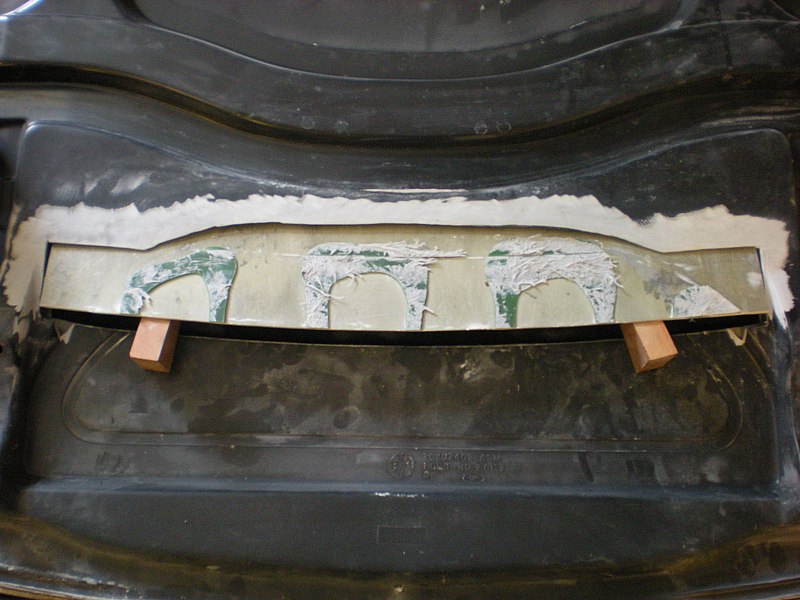
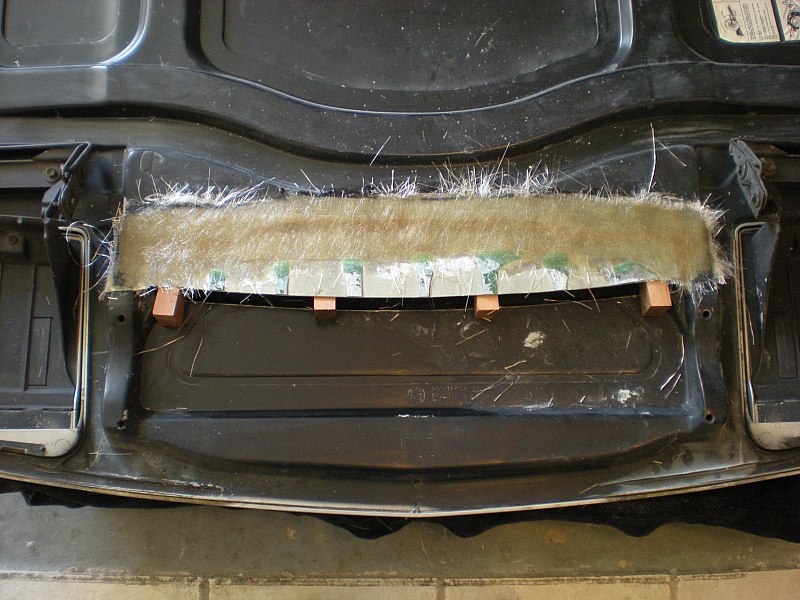
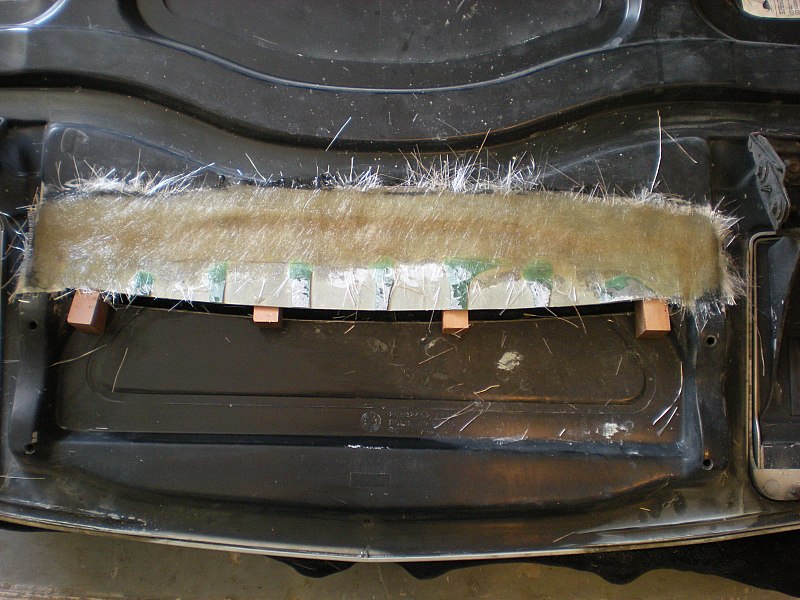
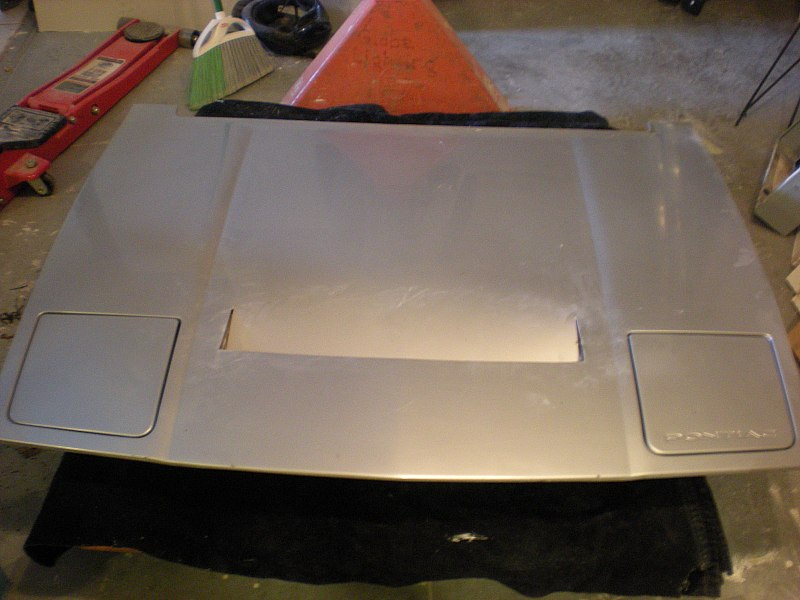
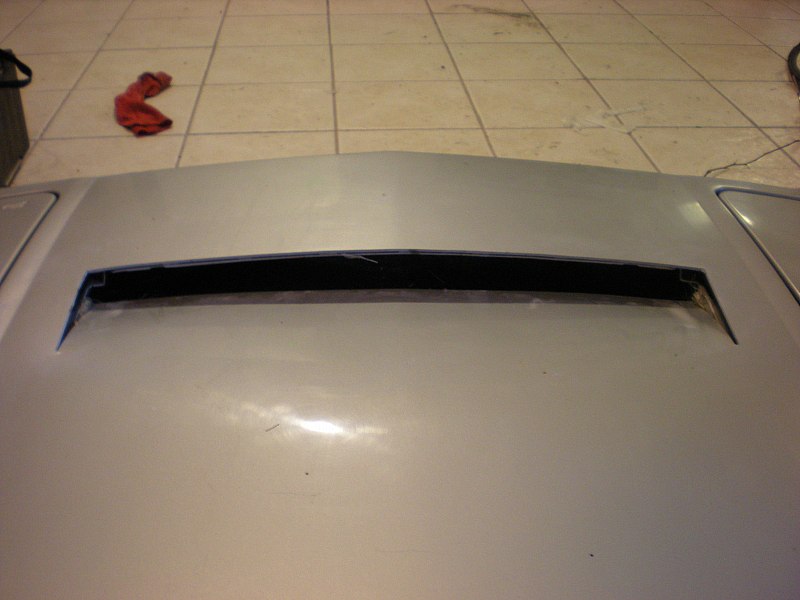
The next major project was the beginning of a hood vent. Its still not complete at this point but its functional. Finish work will be completed this spring after some work on the garage has been completed.
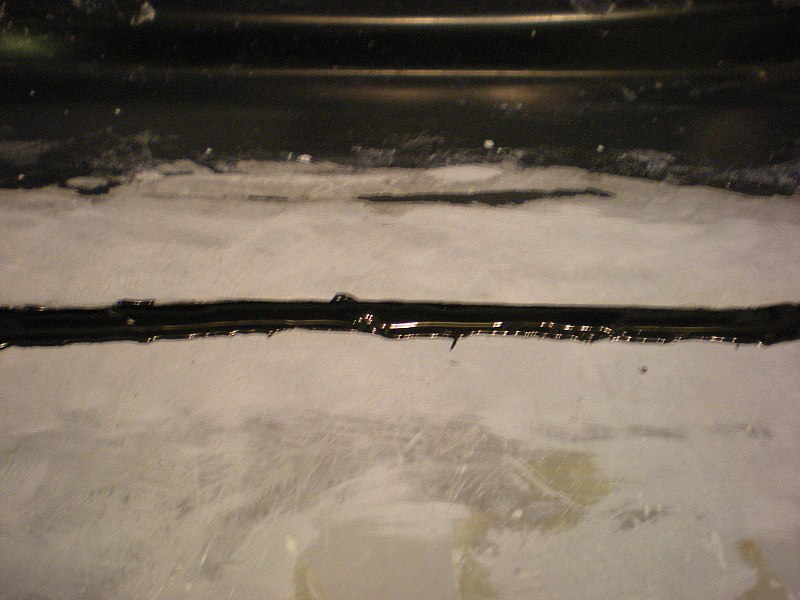
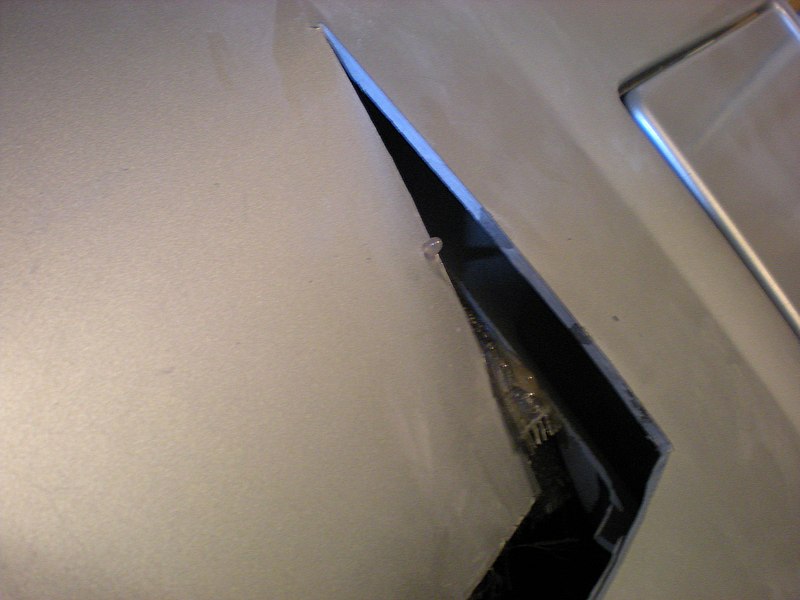
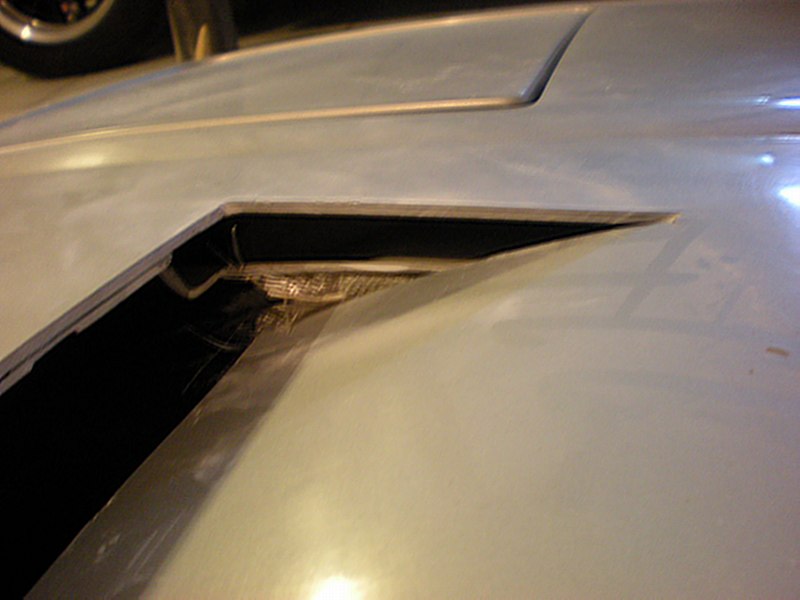
Glass work done. Still have to fill the corners and add the mesh to finish it off. The car feels much more stable at high speeds now. Well worth the trouble.
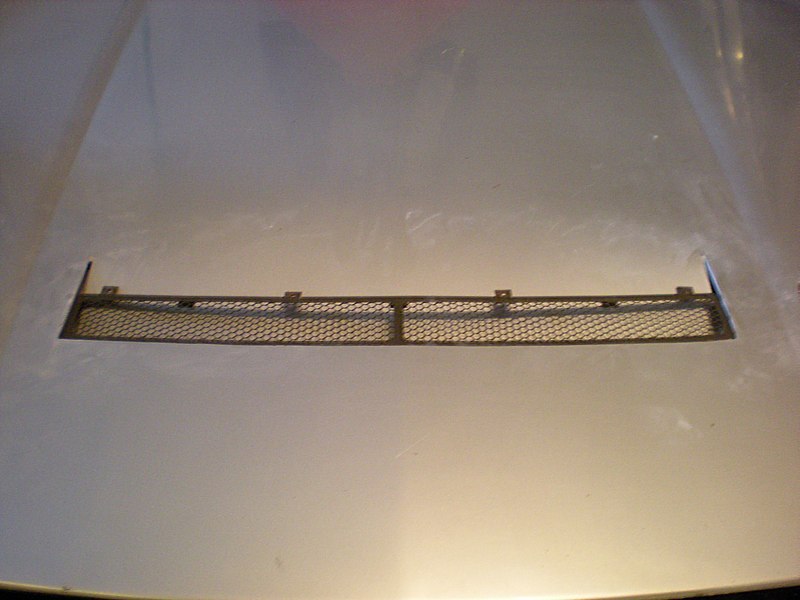
The mesh I'm going to use will be a fiero dash defrost vent. It fits very well in the hood.
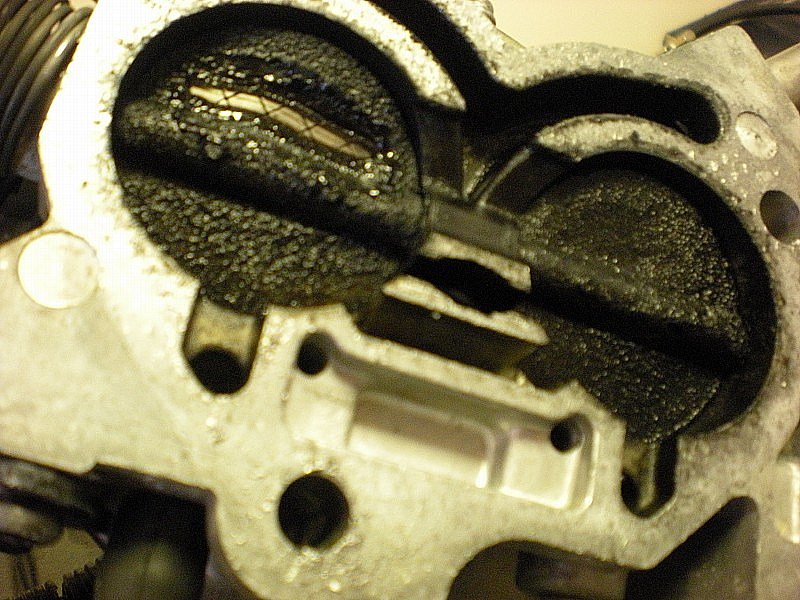
I also spent some time fighting an emmisions problem. It ended up being several issues stacked on top of each other. The car did finally pass though. One of the issues was the EGR valve itself. It somehow burned up and stuck in the open position. This lead to a massive amount of carbon buildup inside the cylinders and intake manifold. It was ugly!!
Underside of throttle body. Keep in mind this was after 4000 miles on a freshly hot tanked and rebuilt motor.
I spent quite a bit more time since then just working out the bugs. The car had quite a few. Now though, it runs like a dream.
I'll have to get pics when its fully complete but I started working on a set of LED marker light. The rear are complete but I still need the bridge rectifiers to complete the front. I'll post pics when done. Total cost was $16 dollars.
Most recently I installed a set of Rodney Dickman Master and Slave cylinders for the getrag trans. This is by far one of the best upgrades this car has ever gotten. As always the parts are top quality. The car shifts better then it ever has, and I mean EVER! It is truely a pleasure to drive now.
A month ago I also accepted a new Job with a new company. The job came with a big pay raise which is nice. Even nice though I now have access to 2 Lathes, 2 mills, 2 welders (MIG & TIG), metal shears/breaks, band saws, grinders, fiberglassing materials, a hose crimping machine, tons of GM connectors and pins, and more scrap aluminum then I can ever use. More intensive projects will be along in the near future you can be sure.
Still have lots planned for this little lady. For now though, here are a few other pics to leave you with...
Later.
[This message has been edited by Fieroseverywhere (edited 02-17-2011).]
I was just wondering if this thread had hit the archives yet. Since it hasn't I guess I'll post the soon to come updates here.
Progress over the last couple years has been slowed but not stopped. My daughter (she's 16 now ) is running track almost year round and life in general has been busier but I find time when I can
A few changes done...
Rodney Dickman Ultimate getrag shift kit added along with new shift cables and shifter rebuild. Amazing, simply amazing. One of the favorite mods I've ever done to this car. A few minor changes and repairs as I found the weak points. Mostly I'm just picking away at rebuilding and replacing parts that are showing their age. Mostly the more boring parts of working on a project car (especially one you drive every day). There can't be that many left at this point.... right? I'm not much for repairs. I prefer to modify.
Broke one transmission mount, 2 engine mount struts, replaced the catalytic converter, installed C6 exhaust tips, new hinge pins for the drivers door, replaced/replacing all locks, fixed broken wires for drivers power window, cut the hood and installed the fiero dash vent with machine screws (its cool, i'll post pics soon), and probably lots of other things I can't remember anymore. You can't own a fiero and only drive it. You have to work on it too. They just seem to require more attention than other cars. I've got ~20,000 miles of wheel time now. I still drive her almost everyday. I love my car. I love driving it and I love that every bolt in it was turned by me at some point.
Earlier this week my coolant reservoir blew its top and had to be replaced also. Coolant all over the windshield and, well, everything else. I guess I found a drawback to the hood vent.
On a good note I've just ordered a pair of ASA AR1's in 17x8 for the rear. This along with a new set of tires and some minor suspension changes coming over the next couple weeks. New tire sizes are 225-50/16 front and 245/45-17 rear. Still lightweight but a little more width in the rear. Then I start the body work. The new job (hehe, 3.5 years now ) is doing great and with a place to do proper fiberglass work I will be starting that after the suspension.
I have a special project in the works for the hood. I plan to start the body work there. I think it will be an "automatic" favorite on the forum.
I'll post a few pics next weekend of the new stance. Later
Edit: ebcaues a cnt tpye tdey
[This message has been edited by Fieroseverywhere (edited 07-19-2014).]
A lot has happened in the last couple weeks. Some good, some not so much.
The good: Time and budget have allowed some work to be done on the car. A bigger budget then I was expecting too. I'm trying to make a big push on the bodywork but there are a few other mechanical things I want/need to change first. For me bodywork takes a back seat to the function of everything else. He he, fiero joke, back seat I remember those...
The bad: The 4.9 blew a head gasket. It started with a bad radiator cap and lead to an overheat. Head gasket toast. A new one is going in tomorrow. Bad tie-rod end has put off the final alignment also. Its better but not great. Front wheels need to be rebalanced again because a caliper shaved a wheel weight. 12" brakes, 16" wheels.
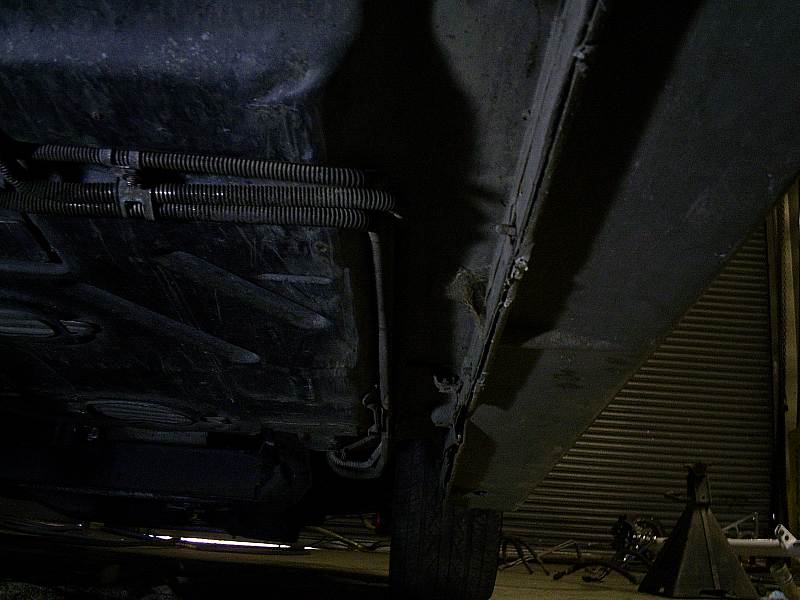
Time to get started... ^^^^ 17 X 8 rear wheels ^^^^ Everything disconnected as usual. Its only been a couple years since it was out so almost everything went smooth.
Another problem to deal with. The engine mount bracket is bent... It doesn't look like much but its enough to put a dent in the oil pan and cause a leak. Everything is caked with oil. I will repair and strengthen the bracket at work on Monday. I would have done it sooner but I can't get the bracket off til the engine is off the cradle.
And of course the torn trans bracket... Replacing with the stronger versions made by Rodney.
With everything disconnected I only needed the correct pallet. I had to move the other 4.9 to get it.
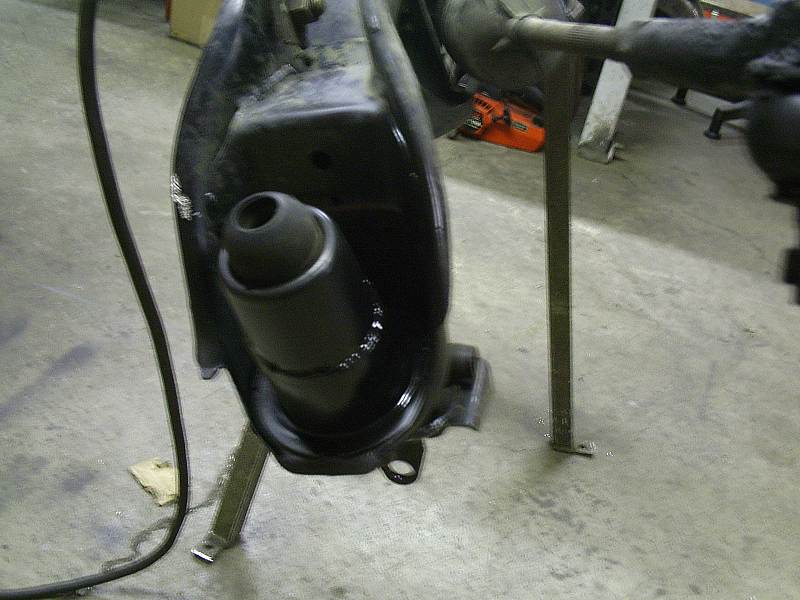
Out she comes again. I've stopped counting how many times at this point.
I never posted this before. This is the strut tower modification for the 88 cradle swap. Ground out to clear the welds on the adapter brackets.
While its out I decided to do some work on the engine bay Before: After: Subtle changes only. Can you spot them?
Some of you might have noticed the deck lid is gone. Well, it followed me to work one day... I am in the process of building a deck lid air-box and a few other mods. Again subtle.
The wife came home. Oh yeah, I got married. Forgot to mention it. Almost 3 years now. She loves to drive the fiero and tries to take it to work sometimes.
Last thing I did last night was remove the exhaust. The manifolds and crossover pipe also followed me to work today. They were in need to some time in the blast cabinet. They also spent some time with a grinder.
When I got home today they got the finishing touches. They still need to be cured. VHT flame proof silica-ceramic header paint. flat black.
Well, she's a bit of a mess right now but I'm working on it. Its been a daily driver for a few years so don't expect too much. As you can see the paint on the valve covers did not hold up. I haven't decided if a color change is in order yet. Definitely a new type of paint. What works best on magnesium? Anyone know?
Big day tomorrow. I'll post pics when I can. Later.
[This message has been edited by Fieroseverywhere (edited 08-15-2014).]
As you can see the paint on the valve covers did not hold up. I haven't decided if a color change is in order yet. Definitely a new type of paint. What works best on magnesium? Anyone know?
Definitely can't use regular engine paints. I've got a baked on engine paint, but I'm sure I'm running on borrowed time before chunks fall off. I didn't do my research until after it was painted. Fortunately the engine will be coming out sometime in the next year when I do the body kit, so I plan of sand blasting and properly painting/powder coating everything at that point.
For the valve covers, you need to follow a special procedure:
You need to start by degreasing the magnesium by scrubbing it with an alkaline cleanser. Then apply a chromic acid treatment (you have to be really careful with this!). The acid gets neutralized and rinsed off. Next you use a zinc chromate spray primer followed by a zinc chromate spray paint.
A 115lb dog makes a great security system for your fiero lol! I guess I know who to ask about 4.9 swap,sounds like you had a little practice.
He's a cool dog. Very mellow. He just likes to hang out with his people. I've only heard him bark a handful of times. He will bark once when something is out of the ordinary outside. Best dog I've ever had by far. Akita's are an amazing breed.
I can't find the pic of him in the fiero. I'll have to take a new one.
quote
Originally posted by Neils88:
For the valve covers, you need to follow a special procedure:
You need to start by degreasing the magnesium by scrubbing it with an alkaline cleanser. Then apply a chromic acid treatment (you have to be really careful with this!). The acid gets neutralized and rinsed off. Next you use a zinc chromate spray primer followed by a zinc chromate spray paint.
Thanks for this. I knew it was a procedure. I will see what I can come up with. I was considering an epoxy paint as I think it will last longer. We have cases of the zinc chromate primer at work that I can use.
I may just send a few parts to be powder coated. I was trying to find a old thread. It was a forum member that was offering powder coating for other members. He was located in my town. If I can find the thread again I will try to contact him. Maybe he still does it? His name was Excelon or something.
A little update while I'm here... 3 of us spent a very long day working on the car yesterday. We got a ton done. The goal was to start with the engine on the cradle and end with it rebuilt and on the engine stand. We almost did it too.
I don't know of I'll have time today but I have about 50 more pics to post. The house if getting an appraisal tomorrow as the final step before the refinance. There is a lot of final cleanup to do. Another busy day. Yay.
Later
[This message has been edited by Fieroseverywhere (edited 08-17-2014).]
The wife is headed to brunch with the ladies. I decided I have enough time to post the pics from yesterdays work. I'm not going to do much explaining on this post since its mostly stuff I've posted before.
Here goes...
This is a block off plate we made out of 3/16 nylon. We built a set to cover the exhaust ports in the heads before pressure washing the engine. Just trying to keep the water out.
Time for a bath. It was really dirty and way past due.
What a difference a couple cans of degreaser and a pressure washer can make.
Time to strip the 4.9 down... again.
Valve covers off...
The intake manifold. Quite a bit of carbon in there. Definitely running rich.
Heads coming off... I broke my breaker bar (he he) so I had to improvise a new one.
The combustion chambers do not look very good. Thick carbon deposits and the valves are rainbow colored. There is also some white deposits on the back of some of the valves. Probably coolant in the chambers. Looks like the head gasket was leaking for a while. Some of the piston tops also have thick carbon buildup.
Other then that the engine is in good shape. No bad valves so I don't have to tear the heads apart. It just meant it was going to take quite a bit longer to get everything cleaned up.
The heads..
With the heads and intake off it was time to move to an engine stand. Since there were 3 of us we decided to do this by hand. We won't be doing that again. It worked fine but was really unnecessary. The short block probably only weighs 125-150lbs.
Here is the dented oil pan. It was riding on the mount bolt.
Under the oil pan looks good though.
Back outside for another bath.
Now the tedious and time consuming task of scraping and cleaning everything. This took entirely too long. Some of the deposits were really stuck on.
Torquing the oil pan bolts with a new gasket and pan.
New head gaskets. Corteco white seal. Hopefully they will hold up better then the graphite ones. Only time will tell.
Heads going back on...
Torqued to spec, in sequence to 37ft lbs - 74lbs - then 90ft lbs.
At this point its almost 1 in the morning. We had been working since 9 am. It was a very long day. Since we were calling it a day we set the intake on to help keep the dust out. Work will continue shortly.
We would have finished completely if it hadn't been for all those deposits. It just took waaaaaaaay too long to get everything clean again.
Later.
[This message has been edited by Fieroseverywhere (edited 08-17-2014).]
I'm assuming you used new head bolts. Where did you find them? I've been trying to find a place that sells new 4.9 head bolts, but can't find them anywhere. It's the only reason I have done a full rebuild of my 4.9.
Engine looks great now! can't wait to see what you do next with it
No reason to use new ones. These are still in great shape. They are not torque to yield.
Once again I forgot to measure them while they were out. And only yesterday this time! I just checked the best I can with only the heads on.
20 bolts total, 17mm head . Thread: M12 x 1.75, grade: 10.9, length to shoulder is approx 6"-6.25". 10 have flanged shoulder. 10 have studs on top for the rocker support nuts. Studs are 1.5" with m10 x 1.5 thread.
If you find some suitable replacements let us know!
For some reason I thought I had read that they were torque to yield. I'm going to keep looking for a replacement set anyway, but good to know I can use my old ones. I'm going to be adding a turbo to my 4.9...just nice to know that I can do the full rebuild when things go wrong in the tuning
Despite what has been stated on the forum this is NOT a difficult motor to rebuild.
Except for the aluminum block and cast iron cylinder sleeves it rebuilds like any other engine.
Be careful with the head bolts. Remember they thread into aluminum. Use heat and wd40, etc the first time especially. The 10 outside bolts can/should be lubed from outside the block. The inner ones aren't usually a problem. 9 of them can be lubed after the intake is off. Be extra careful with the one you can't lube.
Its best not to rotate the engine with the heads off. This can sometimes push the sleeves out and require re-sealing. Some short M12x1.75 bolts and a some large washers can hold all 8 sleeves in place if you don't want to disturb them. If they don't leak, don't "fix" em.
The sleeves can be removed cleaned and reinstalled with new o-rings and Hylomar. Just keep the cylinder sleeves in their original place and orientation if you must remove them. If you put them back in the same place and orientation you won't have to do this>>>>> After re-install check the cylinder sleeve height above the deck height. For this you will need a dial indicator or another accurate way to measure the .008"-.020" over deck height range.... On second thought, just don't remove them.
EDIT: Oh. Don't swap them between motors either. Its even more of a PITA.
[This message has been edited by Fieroseverywhere (edited 08-21-2014).]
I'm still looking for a set of steel Allante rocker bridges. Anyone have a set?
Intake on and torqued to spec in sequence.
Putting on the rockers I managed to break one of the smaller bolts. Its one that goes here... Replacements were ordered from fastenall. They are a flanged M6x1.0 1.25" long (~30mm) 9.8 grade. For reference purposes only.
Working on the deck lid scoop. This will be used for the air intake. It will be molded into the deck. Still a ways to go on it.
A bit of work on the lip also...
Valve covers repainted. Glass bead blasted, zinc chromate primer, red enamel, black enamel, sanded ribs, 3 coats of clear. They turned out pretty good. Next time I will brush on the black like I did the first time.
Started work on the air intake pan. 2024 aluminum, 3" deep, tig welded, custom fitted pan. This will be secured to the deck lid with a foam seal. With the scoop molded in I will have to remove this pan to clean/change the air filter. For the air cleaner I will be using a 15" x 8.25" oval air cleaner assembly mounted inside the pan. To space out the throttle body to the top of this pan I will use a velocity stack. Should get good, cold airflow but still be in a short package.
Back to the engine. Slowly putting it all back together after cleanup. Lots of time into cleanup. Only a few minor changes, mostly to hiding and straightening up the wiring.
Straightened and reinforced engine mount. Too much material was removed from the center. This lead to it bending at the edge of the gusset. I added 2 more gussets to the outside. I also added 1/4" to the bottom to raise the engine slightly.
More engine work. Progress shots...
That is it for now. Waiting on a new clutch release bearing, throttle body gasket, and flywheel resurface. A new clutch will be going in as the release bearing has seized and worn the pressure plate fingers too much to reuse. I will also be starting on some interior work soon and ordering hardware/software to start tuning. Lots more to come. The car will probably be in the garage for at least another month while it gets its upgrades.
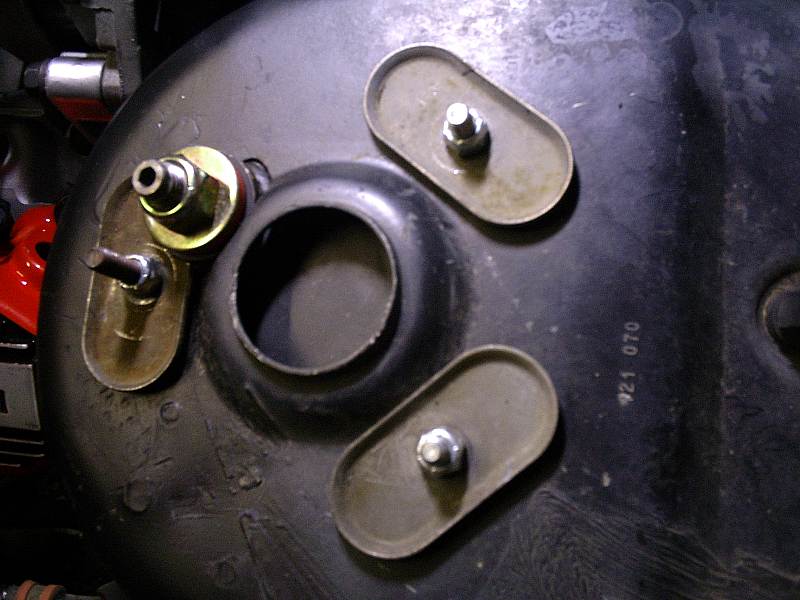
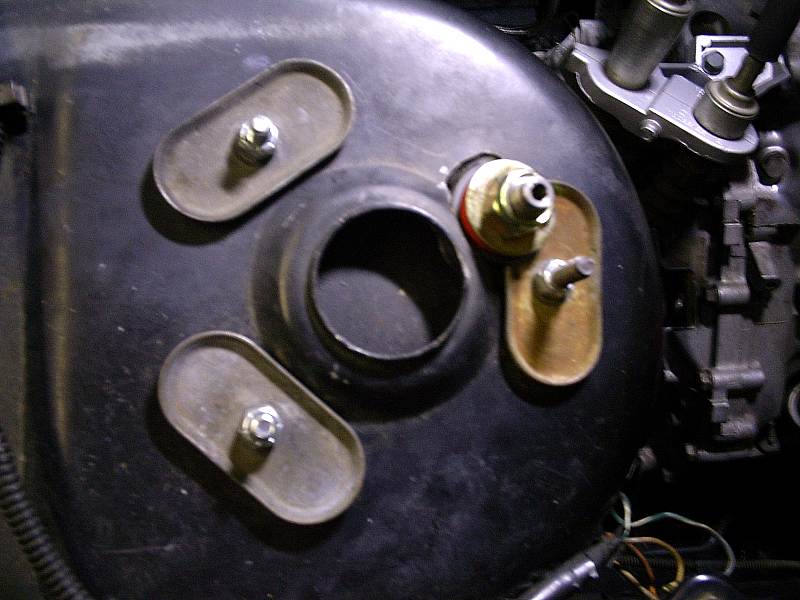
Red = Map sensor. The stock 4.9 bracket can be modified to work here. It just clears the throttle cable bracket. Makes the vacuum hose much shorter. Doesn't work well with stock 4.9 intake snorkel.
Yellow = EGR solenoid. Stock bracket modified. Shortening the vacuum hoses looks much nicer but also makes it harder to put them on.
Green = CTS coolant temp sender. This needs to be switched to a 3 wire unit if you want a working gauge.
Easy solutions for mounting of these sensors. The stock brackets can not be used in their stock form.
[This message has been edited by Fieroseverywhere (edited 08-31-2014).]
Thanks! I was really trying to make it look good again.
While I'm here I'll post a small update.
Got the flywheel back from the machine shop today. Freshly resurfaced. They gave me all kinds of questions about it. They were impressed with the quality and knew immediately that it was billet steel but couldn't figure out which engine it was for. Like most places they were not familiar with the 4.9. They were quite interested in it though. They want me to bring the fiero in once its running again. Anyway, $45 dollars for the resurface. They do very nice work!
Also got the new mufflers in today. I am trying to quiet it down a little bit without changing the basic design of the exhaust. There isn't much out there in the size I was looking for. These fit the bill perfectly. Flowmaster HP2 Laminar flow design mufflers in T409 stainless (painted). Straight through design but supposedly much quieter then a glass pack or such. Looking at the design I can see how they would be. We will see. These are the "shorties". 12" case length, 17" overall, 2" inlet/outlet, 4" thick, 5 1/2" wide at seam. They also come in an 18" case length and polished T304 stainless. Flowmaster Super HP2
inlet side...
outlet side...
Engine is complete. All heat shields added to exhaust manifolds. I also added the seal for the new decklid intake.
Also got the new release bearing installed. Just waiting on the new flywheel bolts now and I can mount the engine/trans to the cradle. I also mounted the airbox to the decklid today. I forgot to get pics though. I'll try to get some tomorrow. More to come, hopefully soon. Later.
[This message has been edited by Fieroseverywhere (edited 09-04-2014).]
Air pan mounted to the deck lid. With adjuster bolt and knobs for removal.
Mounting back to the cradle.
One of the welds was broken so I decided to re-do the engine strut. I went a completely different way and used the Fiero Guru method. 88 suspension link with poly.
Reinforced engine mount. Raises the engine 1/4". It braces against the cradle also. Under hard acceleration it should act as a solid mount but under normal driving its still poly mounted. Its experimental. We'll see how it goes.
Mounted back on the cradle.
Zero lash end links.
New Rodney Getrag brackets.
Rear bracket.
First the old broken front bracket. It was completely split. hmmm. New front bracket.
Starting work on the exhaust. I think these mufflers are going to work out great!
Continuing work on the decklid. Starting to see a finished product coming out. Still lots of sanding to go though.
Also got my fierostore order. Door panels, wall panels, window seals & felt guides, door insulation & water shield, floor mats, trunk seal, ect. Still waiting on headliner, visors, and door speakers. Also got in the subs and amp, slave cylinder rebuild kit, inner and outer tie rods, and Moates tuning hardware. Going to be busy on this for a while. Later
[This message has been edited by Fieroseverywhere (edited 09-19-2014).]
Time for an update. I should be posting a great update at this point but unfortunately that is not the case.
I guess I'll pick up where I left off last. The engine was just about ready to go back in and tuning and interior parts were coming in.
I finally got a free evening and a friend to help me out. So we decided to put the 4.9 back in the car. It went pretty smooth and we managed to do it in 3 hours while drinking some beers and catching up. A nice relaxed pace.
It was a couple more weeks before I could get back to it. I spent time where I could to slowly connect everything. Me and the wife also took a trip to the beach for our anniversary. Cape lookout on the Oregon Coast. Its a 2 1/2 mile hike out to the point but totally worth it. This pic was taken about 1 mile into the hike.
After a couple weeks I had everything hooked back up and I was ready to start the exhaust. There ^^^^ is the 17x8 wheels. 16x7 225-50 front, 17x8 245-45 rear. I really like the way it came out.
New decklid hinge clearance. The motor was raised 1/4" to level it better.
Headlights by Projectorretrofit.com This is a loner set while we work out a trade. I'm not going into the details yet.... Stay tuned on this one.
New mufflers. I had to do a bit of modification to make everything fit. I still have a full trunk. I also fired it up a few times to check the sound levels at different stages of the build. I was surprised how much those mufflers really did. Slightly quieter then the glass packs but the sound quality if drastically improved. Since I wasn't very happy with my welding that day so I painted everything with VHT silver. Everything that can be seen from outside the car looks great. No leaks but not very nice looking welds at all. Oh well.
I also spent some time on the clutch again. The slave did not want to bleed for some reason. I took a few days as I ended up having the gravity bleed the master and slave both for a couple days. It did finally start working like it should. Still not exactly sure why I was having problems though.
Finally the big day arrives when I can start it up and pull it out of the garage. I'm really starting to go through withdraws. I really want to drive my car again. I even got some shots of the completed headlight install. Way better then the stock headlights. The quality is fantastic and Rick really knows his optics. I would highly recommend his products to anyone interested. She fired right up. Not a second thought. Idle steadied, temp came up just as it should, no leaks, all fluid levels holding, basically perfect. All was good. I remembered that I needed to cure the exhaust paint and started following the directions on the can. Idle in neutral for 10 minutes, cool 10 minutes, idle 20, cool 20. Go for a test drive.
While the car was cooling for its second time I decided to break out the timing light and ran off to the garage to get it. Suddenly I heard a loud SNAP! !?!? What the hell was that? Why is the car suddenly leaking coolant from the #8 cylinder area? IT WASN'T EVEN RUNNING!!! Broken hose? No. Thermostat housing? No. Heater core hose? No. Time to jack it up and climb into the shower of coolant (that was still leaking). **** ! ... **** , **** , **** !! How did that happen? Just what I needed. A crack in the block.
I spent the next couple weeks ignoring the car. I was not prepared to deal with this particular problem.
I finally got around to pulling the engine again (17 times now?). At least it goes quick with the right tools. It was out in 1hour 45 minutes this time. No beers, no playing around.
There's the culprit..
Absolutely nothing wrong on the head side or with the gasket or dowel pin. The head is straight and true still Well, that thoroughly sucks! Since this is a family forum I will not tell you what I really said... repeatedly.
So I redoubled my efforts on the decklid. I really need a win here. I finally got it home and back on the car. Still quite a bit of fit & finish to go but at least its making good progress.
That seems like an odd place to crack to me. What do you think?
I'm open to options on a fix/replacement. At the moment I'm leaning towards welding the block and re surfacing. I know a fantastic welder that basically Tig's aluminum all day long. With the design of this engine that is not actually the combustion chamber as it would be in other engines. But I'm still hesitant.
I'm not usually one for this type of thing but I need help. Anyone have any opinions and/or advise?
EDIT: Here is a reference pic before the heads went back on... Definitely no cracks there. I inspected everything thoroughly. What would cause a crack to happen like this?
[This message has been edited by Fieroseverywhere (edited 11-06-2014).]
Nice method using the jigger. I used the same thing back in 2001 putting back the engine in my old 86GT. It was a great tool to lift in place the cradle to its mounting points.
Good thinking on Rodney's getrag tranny bracket mounts. His web-site says they are made thicker...I guess that's a plus with your engine swap.
Ok. The car is going down for the winter. Since the engine is in need of replacement and/or major work I am going to take my time on getting it done. I will fix the engine and start on the interior work. Its going to be a while on the next update. There are some thing I don't want to post until they are complete. Stay tuned....
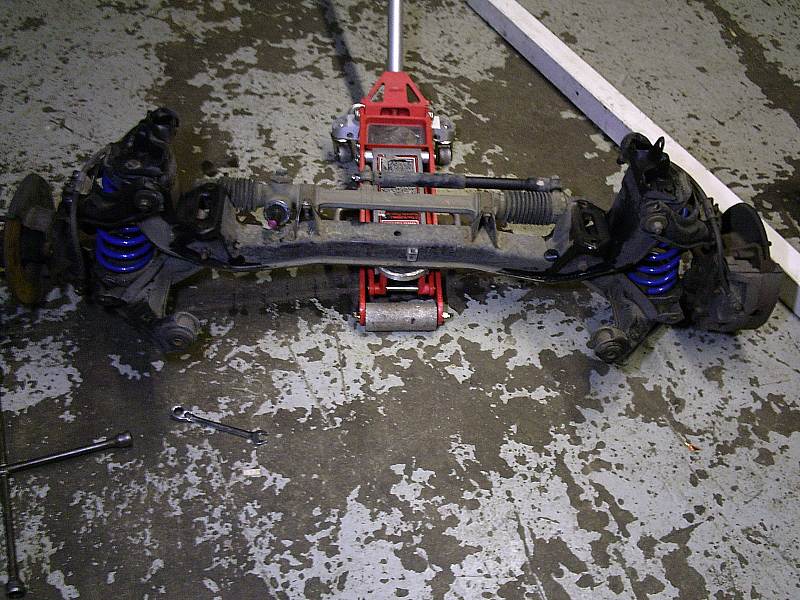
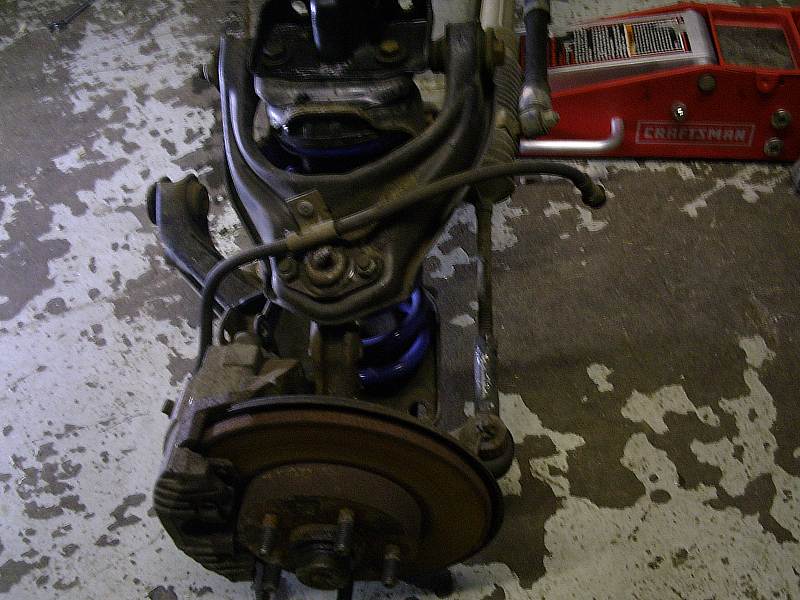
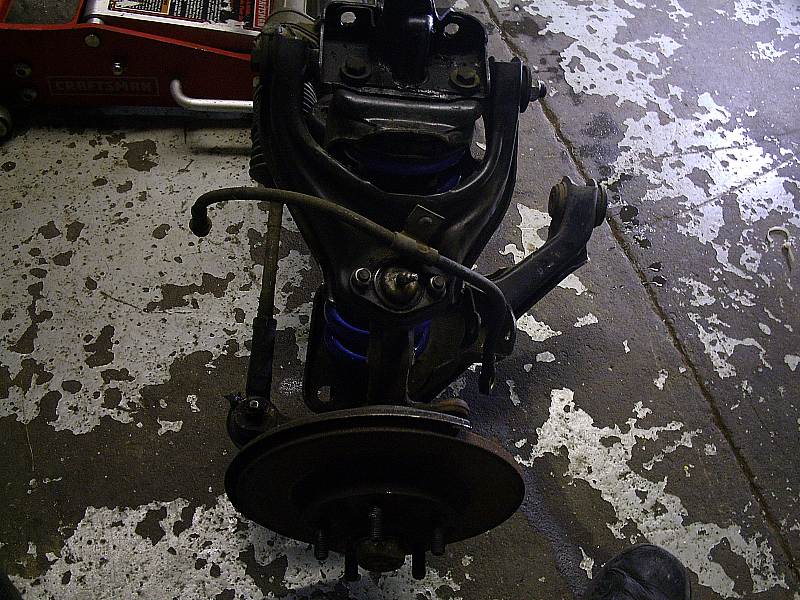
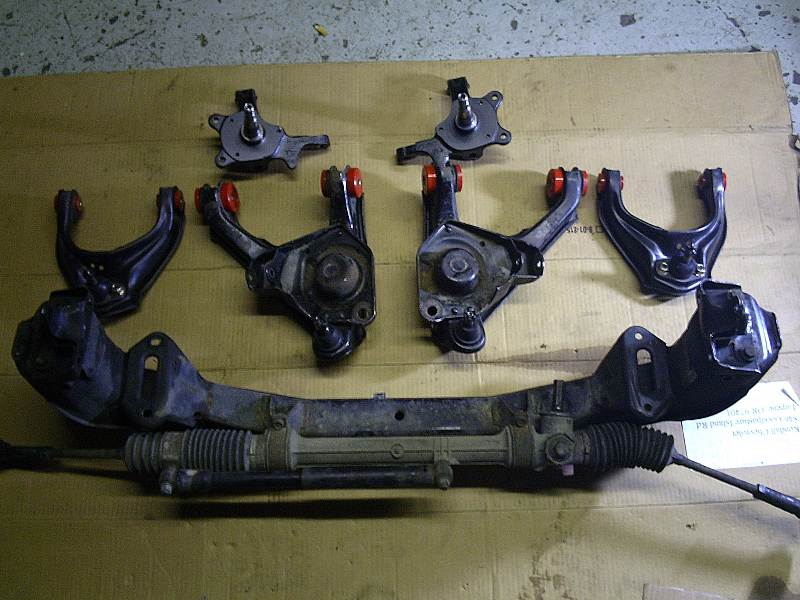
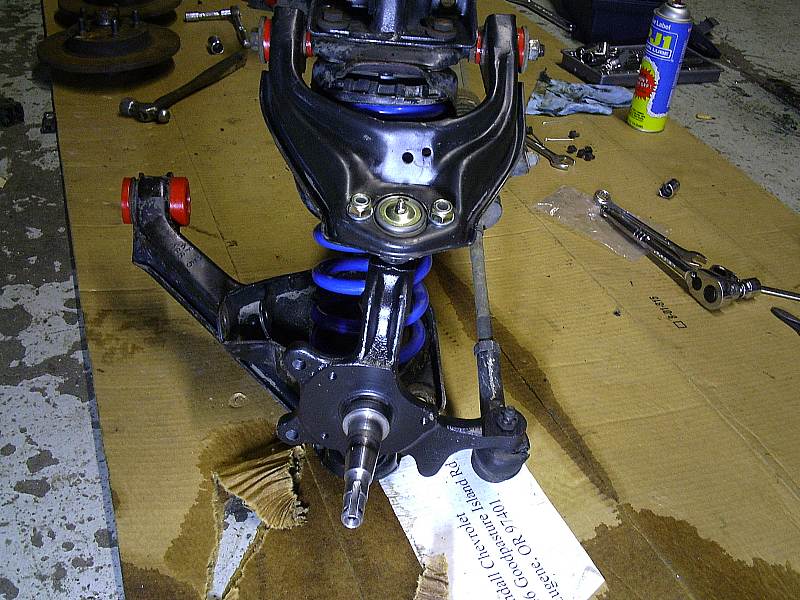
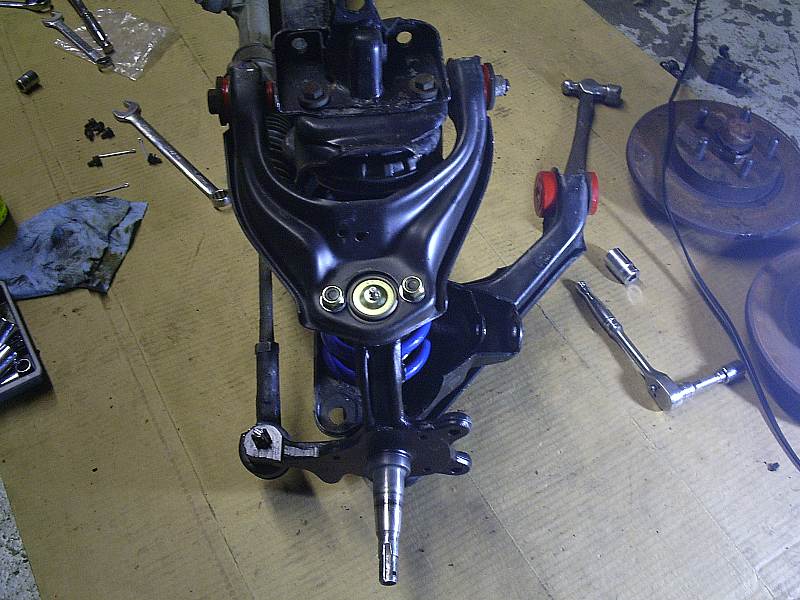
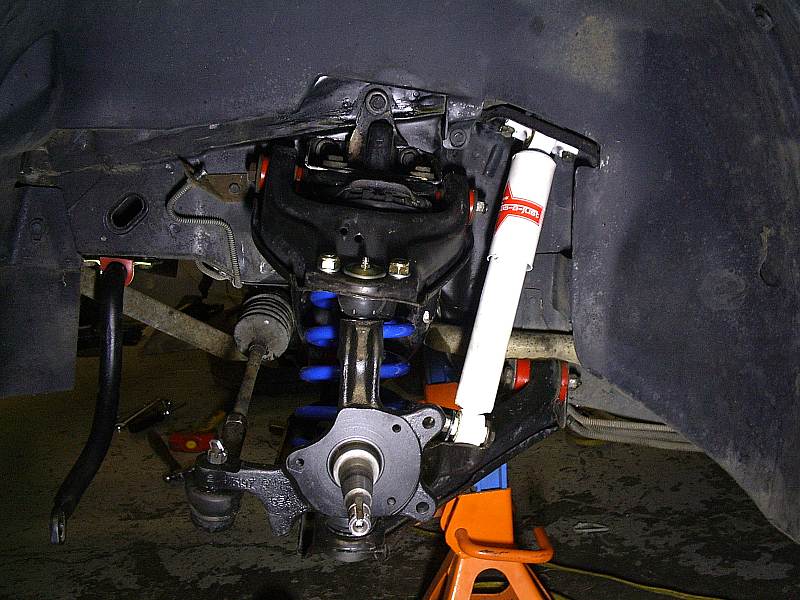
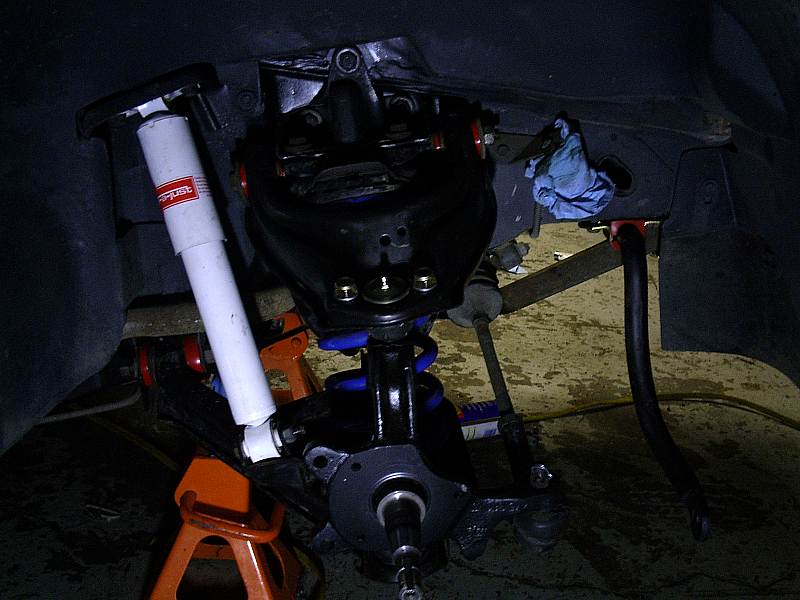
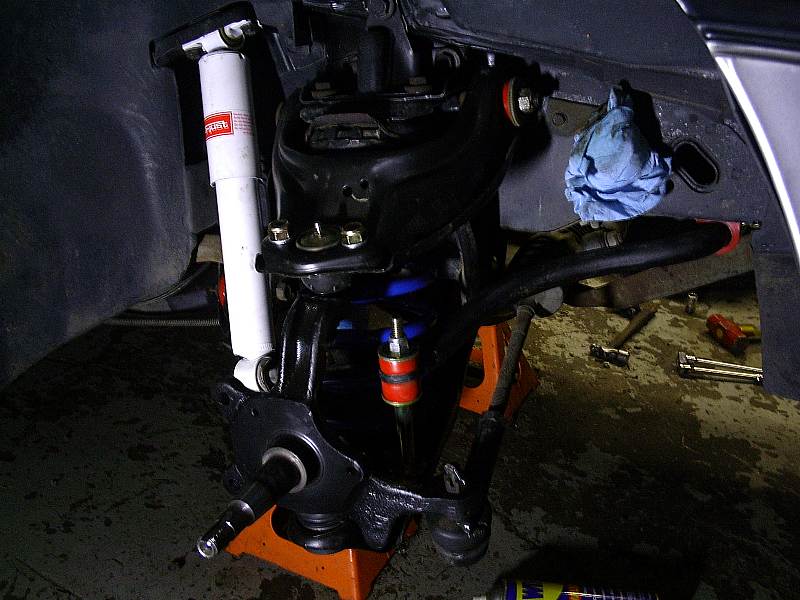
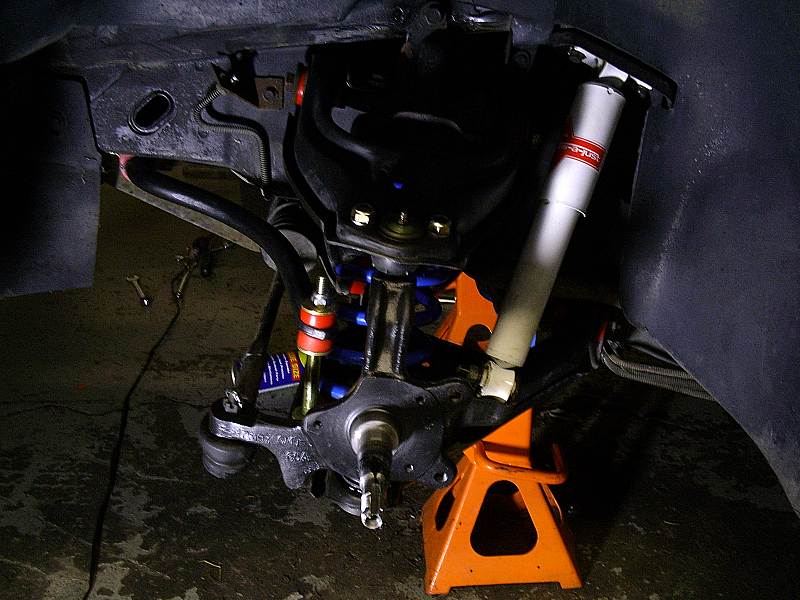
Don't know if you caught this, but in these photos of the front suspension, you have the front upper control arms installed on the wrong sides. They should be installed with both of the holes (the ones where the bracket of the brake hose bolts to the control arm) to the rear (shock side). The car will have no caster, which can be a disaster (pun intended)! That caster has to be there for the wheel to recenter, and for high speed stability. Just wanted to make sure you caught that before driving that bad boy. Oh, and I'm sorry about the block man, you've put a LOT of work into the engine alone. I know a break will do you good, and I hope you all are doing well.
Best, Dave
quote
Originally posted by Fieroseverywhere:
Ok update time again. I think this is getting repetitive.
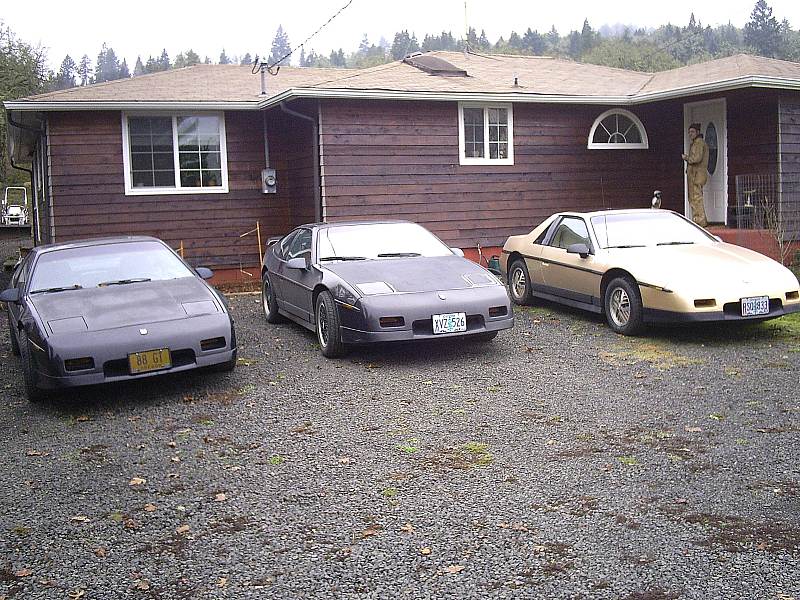
First off I thought this was a good pic. Twin black 88GT's (one auto one manual) and a Gold 86SE V6 auto.
And here are those pics of the top of the strut towers that I promised so long ago. It just took forever to get decent pics of them.
Ok now for the actual update.
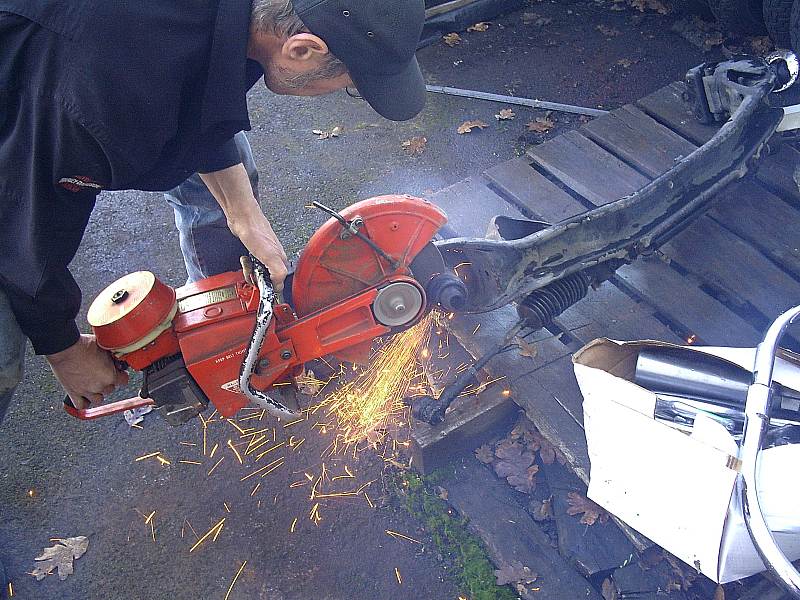
First off I removed the front crossmember as the begining of the work. In order to do what I had planed there was not other way. I had never done it before and although it wasn't too bad I hope I never have to do it again. I started by puting the car on jackstands and removing the wheels. Next I removed the front spare tub and unbolting all of the brake lines and coolant tubes from the crossmember. I then unbolted the shocks, seperated the brake hoses from the hard lines, and removed the rear lower control arm bolt. Next up I unbolted the braces that go from the crossmember to the lower radiator support. All that was left now was the 10 bolts that actually hold in the crossmember. There are 3 on each side above the upper control arm and 4 under the car just behind the front lower control arm bolt. I positioned a jack under the center of the crossmember so that I could easily lower the crossmember after the bolts were removed. I then realized that I forgot to remove the bolt that connects the steering arm to the steering rack. OOPS. If you ever have to do this make sure you remove this bolt before unbolting the crossmember. What a PITA. After that it dropped right out with no problems.
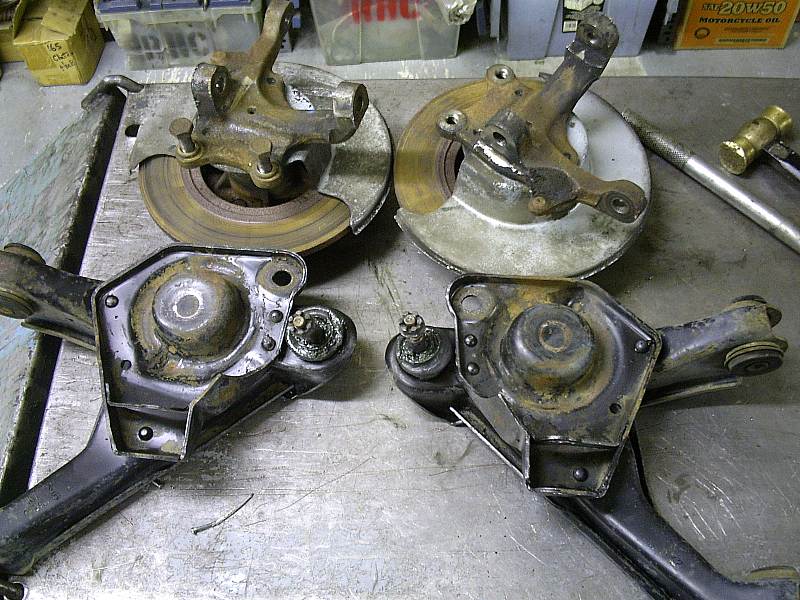
We took the crossmember next door to the real shop so I could get to work on it. Dad worked on pressing out the ball joints and replacing them with new ones from Rodney. Next up we pulled the old rubber bushings our the the control arms so they could be replaced with poly. You can tell from looking at the lower control arms that the previous owner had not raised the bump stops. I'm sure they hated the ride. I know I would have. Before
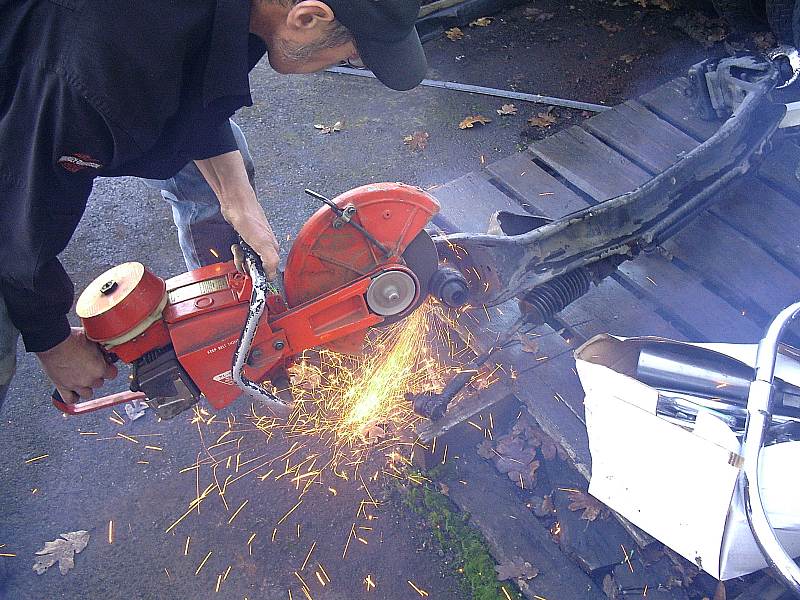
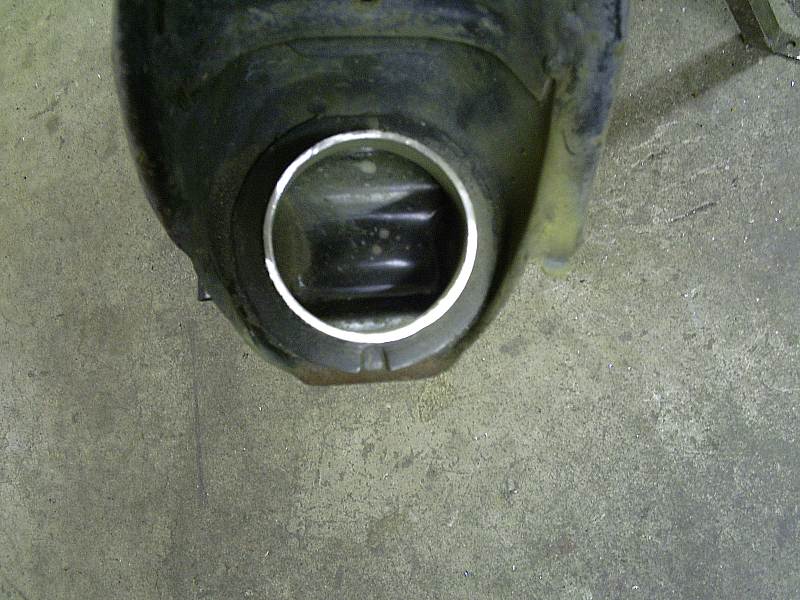
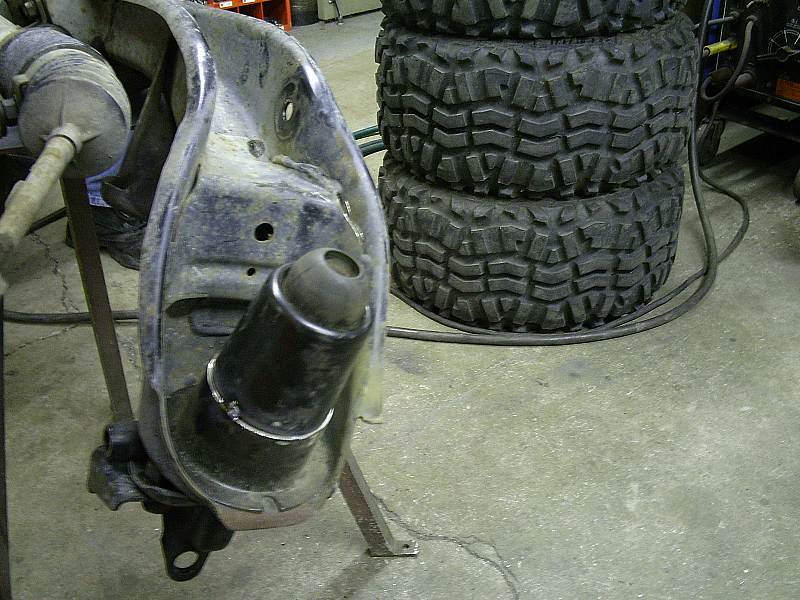
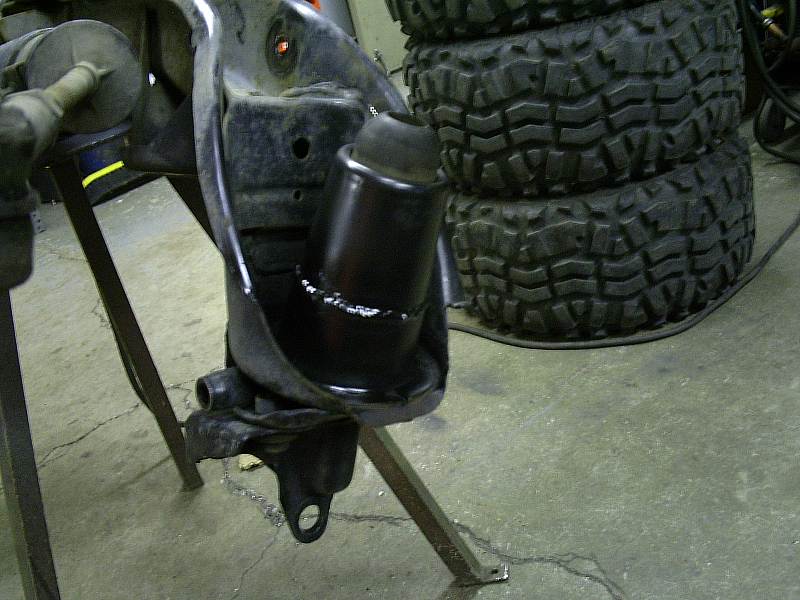
While we had everything in the shop we raised the bumpstops. I figured you guys might get a kick out of how we did this... Gas power chop saw! Gotta love power tools. Bumpstops cut and about 1 inch of metal removed, now we weld them back together followed by zinc primer (sound familiar?) and paint.
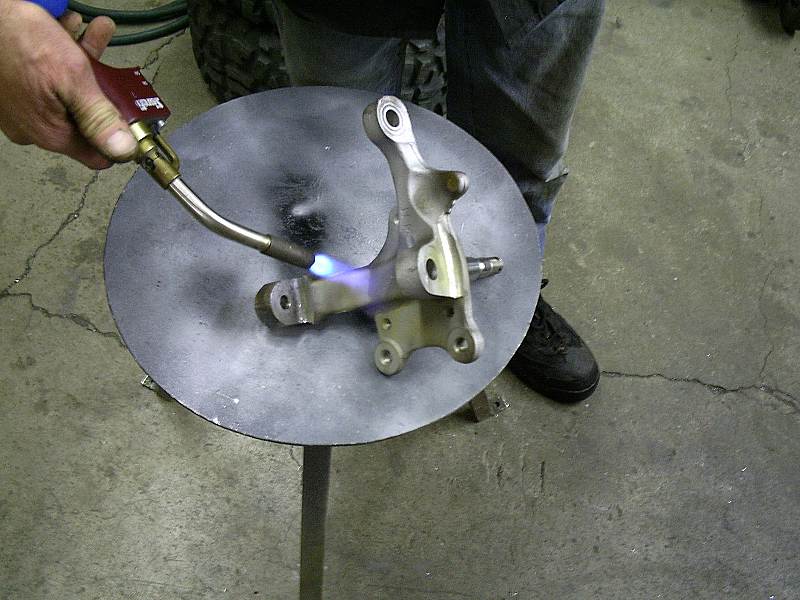
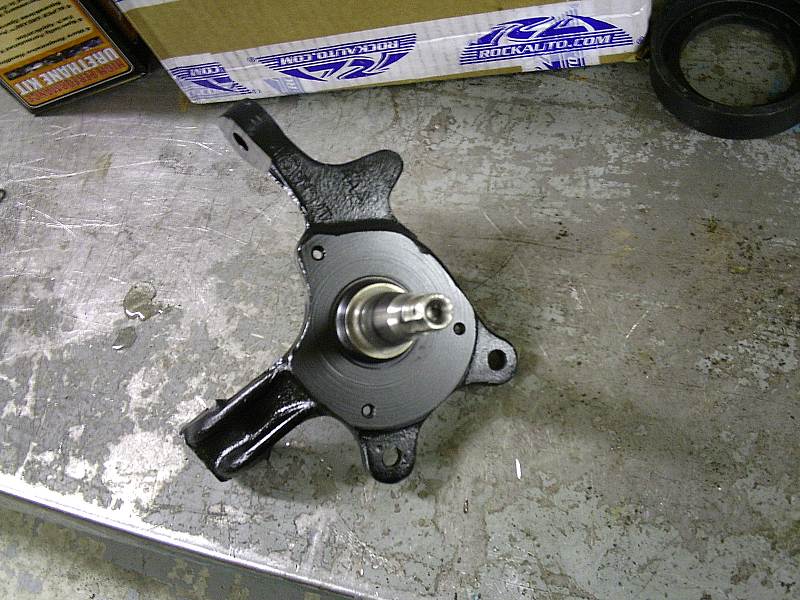
We finished up the poly install and I took the spindles to the glass beader. One thing to note is anytime you glass bead something you must remove the moisture before you paint it. We do this with a propane torche. After paint I was pretty impressed with how they turned out. Almost like new.
That was about it for friday. We took the parts back accross the street to they could be put back into the car.
Saturday morning I got started on reassembling the crossmember. It went back together very well. Its so much easier to do this stuff while the crossmember is out of the car. Just not worth the time to remove it.
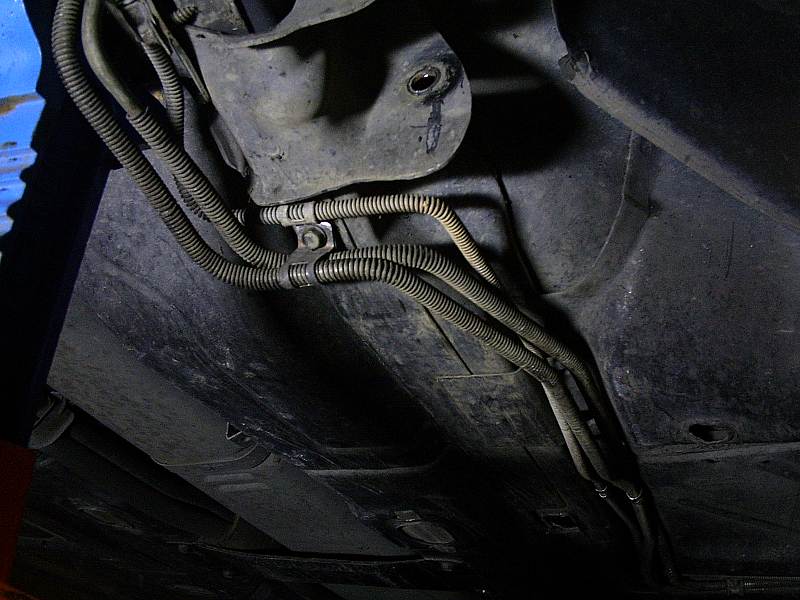
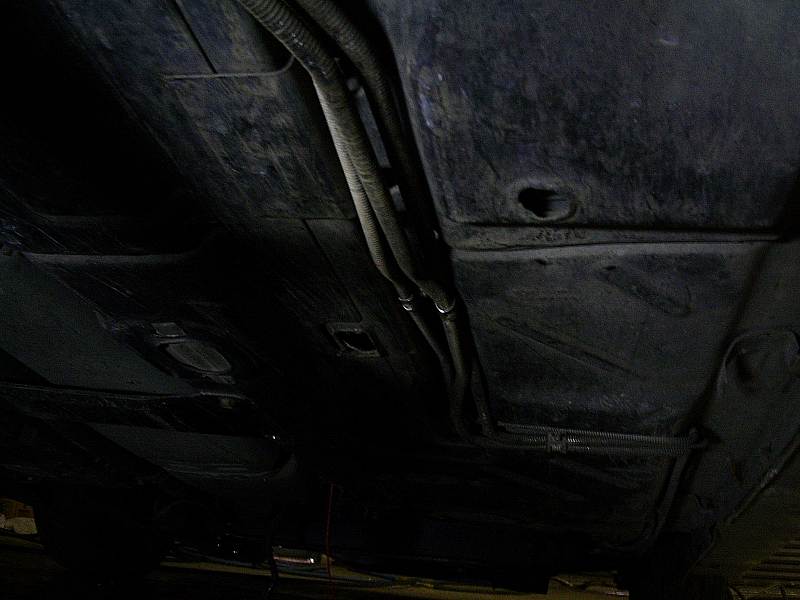
With the crossmember ready to go back into the car I started working on replacing the clutch line and adding the auto radiator to tranny cooler lines which I am using as an oil cooler. I removed the clutch line and found that someone had cut about 6 inches off of it and reattached the fitting. Guess thats why it looked so funny in there. I replaced the line with the one I pulled out of the parts car. With that out of the way I took a look under the car to see if I would run into problems installing the auto trans cooler lines. With a little grinding and bending of the little mounting brackets I was able to get them to fit right next to the clutch line. I was even able to re-use the original bolts that hold it all in place. Sorry about the pics, the lighting in this part of the shop is almost non existant.
With that done I also replaced the bent coolant tubes with better ones from the parts car. The pics didn't turn out at all for those though. Then It was time to bolt the crossmember back in. It went in much easier then it came out but again I forgot to attach the bolt from the steering column. Doh! Finally got it back together by taking the steering column loose from the inside of the car. Good thing the interior is not back together yet. Dispite the self inflicted frustration I think everything came out well.
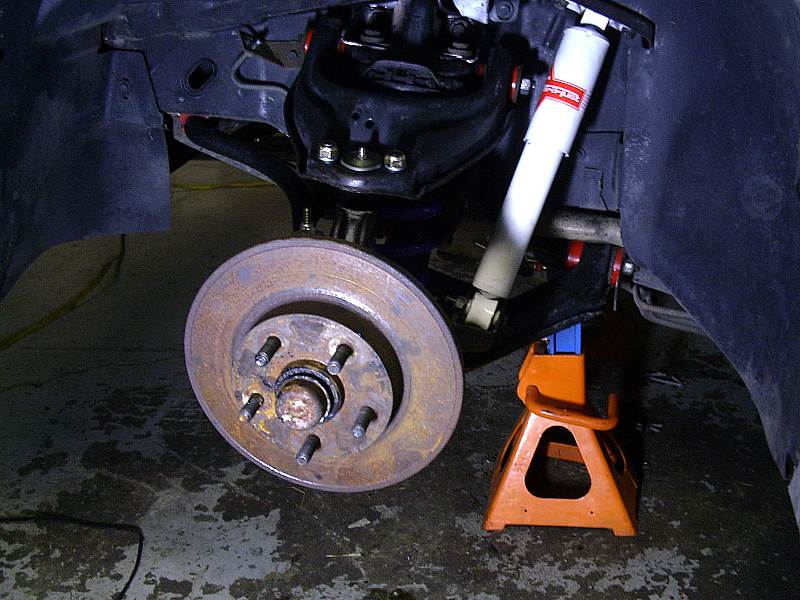
Looks like shite now but soon the new 12" rotors will show up to replace these ugly things.
That was it for this trip. I will be doing a couple things to this car this weekend on top of installing the new tires on my daily driver. Since I had about 4 choices for a 215/60-14 I went with these. Yokohama AVID T4 http://www.tirerack.com/tir...Compare1=yes&place=1
Car is coming together. I'l should be driving her in a couple months.
More to come as time allows.
[This message has been edited by DaveC (edited 12-29-2014).]
I edited my last post to say "where the bracket of the brake HOSE bolts to the control arm". Before it said "....brake CALIPER...." Oops! Yeah, check out the pics of the entire crossmember when you first removed it and you'll see what I'm talking about. Cheers!
I edited my last post to say "where the bracket of the brake HOSE bolts to the control arm". Before it said "....brake CALIPER...." Oops! Yeah, check out the pics of the entire crossmember when you first removed it and you'll see what I'm talking about. Cheers!
Dave
Thanks Dave. I'll have to look into that. I don't think they have ever been changed from those pics. My alignment specs do have caster within spec as far as I've been told. I'll talk to my alignment guy and figure this out. Eagle eyed forum members rock!!
Small update. The car is back up and running. Didn't do much to document the change because its basically just pics I've already posted before. I did put in a set of Koni shocks yesterday. I think I need to stiffen them up a bit more but so far I really like them over the KYB. Also added the front zero lash end links. I really like them. Seems to make everything more responsive.
I'm going to make a 250 mile trip this weekend to do some final testing and tuning and visit my dad. If all goes well with the used engine I should be able to get started on the interior soon. Wish me luck!
The good news is the car is NOT dead. The project will continue... Later.
[This message has been edited by Fieroseverywhere (edited 03-18-2015).]
I edited my last post to say "where the bracket of the brake HOSE bolts to the control arm". Before it said "....brake CALIPER...." Oops! Yeah, check out the pics of the entire crossmember when you first removed it and you'll see what I'm talking about. Cheers!
Dave
Crap!! Your right!!! By my own pics you have proven I put them on reversed. And they have been reversed for over 7 years and 20k miles. And I just put on new front shocks yesterday.
See, I'm not a mechanic, I just act like one! Thanks again Dave. You just added even more work for me to take care of, luckily.
[This message has been edited by Fieroseverywhere (edited 03-18-2015).]
Crap!! Your right!!! By my own pics you have proven I put them on reversed. And they have been reversed for over 7 years and 20k miles. And I just put on new front shocks yesterday.
See, I'm not a mechanic, I just act like one! Thanks again Dave. You just added even more work for me to take care of, luckily.
Well somebody had to give you more to do. It's a Fiero after all....Sheeez!!! Seriously though, it's good to know you were able to get the thing dialed in safely.
Well somebody had to give you more to do. It's a Fiero after all....Sheeez!!! Seriously though, it's good to know you were able to get the thing dialed in safely.
Hive Five, Dave
I guess that means I need yet another alignment shop. Since both of the ones I've been to missed this major detail. I'm sure glad you pointed it out. I have a set of tie rods here that need to go in. I suppose that's the weekend project now followed by another alignment. I have yet to have this car over 100mph which is a good thing it appears. I also know why this particular fiero handled so well in parking lots. He he.
The missing clue for why the old block broke... Notice the "threads" near the top of the hole. I now believe this was caused by a bent head bolt. Costly mistake. Double check them all before reinstalling.
Starting the interior work. Going for updated stock look. Also finally time to put a real stereo system in. Minor surface rust and a slight bend at the mirror mounting point. Looks like someone backed the mirror into something. Easy fix.
Windows seals were toast.
The windows are OK. Some scratches on the passenger side.
New lights for the garage!! Finally I can see... everything. I may have been overcompensating for the lack of light these last few years. Oh well. EDIT: correction; this pic was taken before the new lights were installed.
First up the rear wall panel. Out with the old...
In with the new...
Played with some plastidip on the mirrors. Pretty cool stuff. Easy to spray, nice finish, removable. Nice. Once I sand and prep the mirrors properly I will re-shoot them.
Time to start painting. I went one shade darker on the grey (well the black too but that was just faded ). First batch of grey parts...
And first batch of black...
A few parts needed to be re-shaped. Shift and radio surrounds, center console, etc. Actually I was pretty surprised how good everything actually was. Really everything just needed paint. I started out using clamps but found a much better way...
First color on the dash.
Color comparison
Beginning the stereo install. No screens just sound. No crazy amount of power either. Just good clean sound. Pioneer DEH-80PRS in FMK550 mount. This is a good mount. Moves the stereo up to the top of the opening and adds a pocket for a phone. Works with double din opening or 1.5 din if flush mounted behind the trim. No cutting of the skeleton required.
The skeleton needed to be rebuilt around the stereo area. Quik steel is great for this. JB weld also make a product that works well. After initial shaping and curing it is sanded into shape, painted, and drilled and tapped with new holes.
Second color on dash and second batch of black parts. That took almost 6 weeks to get this far. Everything was cleaned, wire brushed (brass fine bristle), adhesion promoter, and paint. I underestimated how big this project actually is. Getting close now though.
Gauge pods. Amazing what some paint and new trim can do.
Back to the sound system. I made an aluminum mount plate for the amps... yeah, two of them. A Pioneer GM-D1004 for the front and rear channel. This thing is tiny. Its a class D 45x4rms and measures 8"x2.5"x1.5". It also has a signal sensing circuit so a remote wire is not necessary (it has one if you want to use it). And all of this while only needing a 15A internal fuse. Crazy how fast technology moves. A few years ago there was no way I could have gotten an amp under the dash let alone two. The other amp is a PYLE (literally!) to power the subs. Its cheap and crappy but I'm still not sure on a few details of the install so I'm not putting out any more money til its sorted.
The mount plate was attached to the bracket where the blue dinger used to be attached. The dinger was relocated to the wheel well on the right side. Speaker and RCA's were routed through a hole in the middle towards the stereo on the left side. Power and ground stay on the right. Power comes from a power distribution black fed by 8ga wire directly off the battery. Ground is also 8ga. New 16ga twisted pair speaker wire was routed to all 6 speakers (4 two ways).
I made adapters for the front speakers. Now they are Infinity reference series 4x6 components. The adapters are simple abs sheet. They are bolted in with stainless machine screws and nylocks.
The covers were also painted to match the dash. Before and after.
Mounting the stereo.
Dash going back in.
Aux gauges back in. Test fitting the radio surround. Its not painted yet. ^^^ with new trim.
Completed wall panels. Map pockets moved to rear wall. Dynomat added to doors, roof, and B pillars. This completes the sound deadening I started 7 years ago.
And today the headliner and trim pieces went back in. Also new sun visors.
Only a few pieces to finish. Getting close now! Once I get it done I will get some pics outside in the daylight. The new garage light tend to washout the pics.
I didn't get any pics but I did take apart the front suspension and reverse the upper control arms. Also installed some koni shocks up front.
That's it for today. So much done in the last couple months its hard to remember. At least the tedious part is over now. Later guys.
[This message has been edited by Fieroseverywhere (edited 05-25-2015).]
And I forgot to post a pic of the headliner, sun visors, and the now black dome light. In the 7 years I've had this car it has never had a headliner. It seems weird now. Later.
Looking great! Good job on this whole project, Engine, interior, body mods, is there anything you can not do to a Fiero? Be glad I don't live closer, you would have me arrested for stalking.
Looking great! Good job on this whole project, Engine, interior, body mods, is there anything you can not do to a Fiero? Be glad I don't live closer, you would have me arrested for stalking.
Thanks!! Apparently I can't put upper control arms on the right side. he he. Its a long project when your the only one doing almost everything. I've had to learn alot of things along the way to get this far. This is the first car I've ever built and not just repaired.
If you lived closer I'd take you for a ride and a beer. We don't call the cops here. Thanks again Davy.
Drivers door panel cut for non power mirror. There is just barely enough room for this to fit. The FS door panels are slightly shorted on that top section.
Shift surround completed. The stainless plate I received was for an auto trans. In order to make it look right I decided to go with a rubber shift boot. For that to work right I needed to make myself a trim ring to fill the extra gaps. I think it turned out pretty good. What do you think?
And finally the door panels mounted. I went with a couple woofers mounted. They are Earthquake Sound SWS6.5x. 6.5" shallow mount (1.75") woofer 100w rms. Less then a 2" mounting depth but still have over 1.25" of excursion each direction due to the woofer design. The doors were covered with dynomat and the inner door panels got new jute insulation spray glued on. I made every effort to silence any rattles that may come up. Also new window seals and felt guides were added and adjusted to keep the glass from rattling. So far it sounds amazing. Since I'm not running a huge amount of power out of them I believe they are going to work well in the long term. Also mounted is a sub woofer volume control where the cig lighter used to be.
And finally the seats back in the car. The interior work is almost complete. Just waiting on the LED dash lighting to show up.
That was a much bigger project then I anticipated. Still managed to get it done in under 2 months. Whew.
If anyone has any questions please don't hesitate to ask. I may not have gotten all the details in the posts. Later guys.
EDIT: Stereo install specs.
Head unit: Pioneer DEH80-PRS (internal amp disabled, active capable) Front Speakers: 2@ infinity refrence series 4x6 component plates 45w rms Rear speakers: 2@ retro sound R652-N 2 way 6.5" 50w rms Woofers: 2@ Earthquake Sound SWS6.5x 100w rms Front/rear amp: Pioneer GM-D1004, 4 channel 45w rms x 4 @ 4 ohm Woofer amp: Pyle PLMRMP1A, 2 channel marine amp 100w rms @ 4 ohms(supposedly, I doubt it though) Speaker wire: Belden 8471 RCA cables: 2 Monster Cable @ 3ft; 1 unknown brand @ 3 ft.
[This message has been edited by Fieroseverywhere (edited 06-07-2015).]


 ). Since I can't find another source for a good replacement bushing I will be making my own. I will be doing that this weekend and will reinstall the trans one last time next week. Good thing I have access to a lathe.
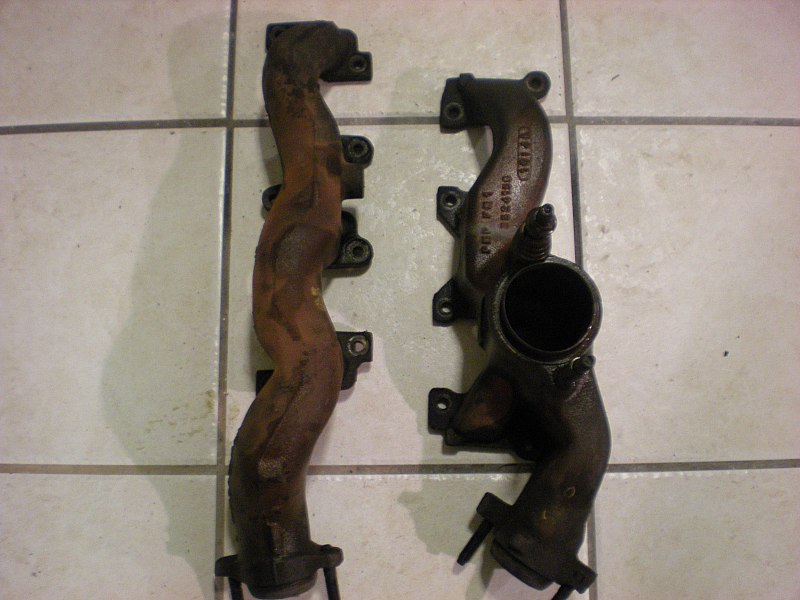


 ) is running track almost year round and life in general has been busier but I find time when I can


 I didn't do my research until after it was painted. Fortunately the engine will be coming out sometime in the next year when I do the body kit, so I plan of sand blasting and properly painting/powder coating everything at that point.


 It's the only reason I have done a full rebuild of my 4.9.
 I just checked the best I can with only the heads on.


 How did that happen?