Underside of chassis after sanding but before paint:
After with POR-15:
Final touch up coat of paint on all the calipers:
Greased all new tierods and balljoints. I had to raise the front of the car a little more to do the lower control arms since I was using a large grease gun:
However, I have 90 degree zirc fittings on the rear so no issue there:
Unfortunately after swapping out a leaking flex brake line, I noticed the caliper threads are stripped, so I a need a solution for that before the brakes can be bled
Today was a very good day for Fiero2m8 and the Roadster. Fixed the right rear caliper by drilling and tapping for a 7/16-20 x 1-1/8 Banjo bolt I bought (a "HELP" brand) The flex hose was modded to fit the bolt and as you can see in the picture bolted right up. Bleeding the brakes took awhile by myself, but I did have a one man bleeder kit and the order is RR, LR, RF, LF:
Next the VSS governor was reinstalled after I rebuilt it. Alot of people have asked about this, so here again are the covers - the red electric one came on the 4T60 and I had to swap for one similar to the Fiero style:
The only difference is the height of the cap from the Fiero - I got mine at the boneyard of a late eighties midsize Buick:
Here is my new location for the Red Top Optima. The battery tray is above the left Frame rail and it sits under the Driver's side vent. One of the neat features is the top of the battery is bolted to the hinge box through the GM negative port. The holes are already there from the old decklid springs, so I just used a small socket extension to tighten this solid ground. (I am also attaching a short heavy guage top post cable as well):
Here the hold down is installed and the amp cable with its 100amp fuse is connected to the positive GM mount using a top post converter. You will also notice the K&N Filter is relocated - It may not be as cool an area, but it will definitely be a cleaner and dryer place for it:
Here is the latest view of the engine bay from behind the car - I have another upgrade in mind that involves wiring so detailing will come later
I seem to take rims on and off so often, I use a 12V impact gun to change rims and centre caps:
Of course, the rims are still properly torqued to 100 ft/lbs before I set the car back on the tires:
Car fired right up and sounds great! I refilled the auto trans fluid and warmed the engine to operating temp. Tomorrow I'll be ready for the test drive and make an appt at the alignment shop. I checked and set the front and rear suspension ride heights and they are set the same (25-1/2" from the concrete to the fender flares front and rear). It appears that mission is accomplished of raising the ride height a half inch to gain some additional ground clearance for the X-frame.
Thanks for looking and keep an eye on my newest project in General Fiero Chat section:
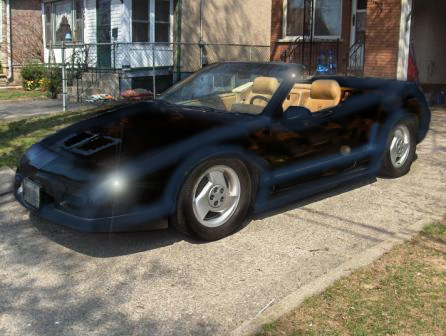
First drive of 2008 today - one day shy of earth day Here are some shots as in the driveway as it moved out of its winter storage garage today:
Recut the front fender flares and fastened them temporarily to their new position with a couple screws - test drive will double check then don't rub. I need to add more trans fluid but I noticed a couple drops on my carboard overnight - time will tell if it's a leak or if I'm a sloppy filler 4 wheel Alignment is booked for Wednesday - any tips on what I should be saying for specs or should I just watch them carefully?
Last night I took the first test drive of the year to Beamsville Tim Hortons and back. Everything operated beautifully - the new flywheel lets the Chevy Hi-Torque starter sound like it's supposed too! The car starts immediately and sounds great with no exhaust leaks. Watched the gas guage drop as I drove (a 1/4 tank for a half hour drive!) Set a new $ record filling the tank - $35 Canadian (DOH!) Tons of power and torque - all guages read normal and the speedo is working again I'm going to take a video sound clip of the startup and engine running and will post the link on this thread.
Here's the next upgrade that I put off for a year since it's wiring A used MSD Digitial 6 plus box with a new GM plug and play harness adapter. It should work nicely with the Nitrous system with timing retard and rev limit functions, not to mention the greater spark output that will nicely match the MSD Optispark and coil.
Here it is - actually, they aren't that bad to wire now that I downloaded the instructions and wiring diagrams.
Fiero2m8
P.S. - Winkie - The 4" exhaust muffler tips are made by APC - I will post how they sound sound - I saw them today at Canadian Tire in the "Tuner" section
[This message has been edited by Fiero2m8 (edited 04-22-2008).]
Originally posted by Fiero2m8: Next the VSS governor was reinstalled after I rebuilt it. Alot of people have asked about this, so here again are the covers - the red electric one came on the 4T60 and I had to swap for one similar to the Fiero style:
The only difference is the height of the cap from the Fiero - I got mine at the boneyard of a late eighties midsize Buick:
Fiero2m8
Question here. The silver one looks exactly like the one in the TH125. So you are saying there are some 4t60s that has that one but the cap is taller? i.e. same looking but different than the TH125? I'm just starting my 4t60 swap so would like to know. Thanks
That is one bad a$$ Fiero!! When are you going to spray some primer on that car so we can see those new body lines come to life??
I know! I drove to Hamilton in it last night and got that comment about 50 times, so now that the mechanical stuff is almost done and I can drive it, I'll be working on making it appear less embarassing by making it one colour soon...
BTW I only got 225KM on my first tank of HWY miles - I think that's 12-13 MPG although I have 3.73 gearing that didn't help (that and the 50 foot burn outs )
quote
Originally posted by Alex4mula:
You need to hear this with a good subwoofer (I have a 100W amped 8" ENERG unit hooked to my PC). It sounds very good!
Thanks for the tip - I almost didn't post it cause it sounds like crap on my laptop. I just tried hooking up external amped speakers and it made a big difference. I was blaming the camera because I used my old one - I'll shoot a launch one day with the new camera and post it here.
Alexmula - yes the Fiero cap and the 440T4 look identical to the Fiero one except the height of the cap. I got the newest 4T60 I could find (1990 so it had the pulse style cap) but the look for 85-87 years for this VSS cap. Plus for you Alex4mula as your signature gave me the idea to change mine.
Originally posted by Fiero2m8: Here's a first startup video I shot on the weekend
Holly mercy... that thing sounds like a MO*&^%$#%^&@ER That's a great sound track. I would love to see the faces of the kids in the background when they heard the thunder Ahhhhhhhhhhhhhhhhhhhh LOL
quote
Originally posted by Fiero2m8: I drove to Hamilton in it last night and got that comment about 50 times, so now that the mechanical stuff is almost done and I can drive it, I'll be working on making it appear less embarassing by making it one colour soon...
LOL - yes, even funnier is the dog's running and hiding thinking thunder or fireworks are on the way!
So I took the Fiero to Niagara Battery to use my alignment gift certificate - appointment at 8:30am. An hour later they call to say the "car's too low to drive on". Damn, so I called Central Motors Pontiac (who did the last one) and the Service Manager agreed to "git er done" so I drive from Niagara Falls to Fonthill. Two hours later, I get a call, "Car's too low"! This is after I raised the car 1/2 inch from last year - then I remember the last time it was aligned I didn't have the X-frame
So I go there and said I needed them to book me in with a competitve GM dealer who has an infloor unit for that afternoon. They came through with an appointment at John Bear Pontiac in St. Catharines at 2pm. Before I brought it there I trimmed the rear fender flares to make room for the camber correction.
Upon arriving I met and interviewed the two alignment Techs and decided to go with John - he was my age, liked the project and knew what a Fiero was!
15 minutes later John comes in the waiting room and says "Car too low" I said "show me" and we solved it by lifting the front of the Fiero by a half inch to clear one of the hoists Then I asked to stay for the duration and he said no problem. Starting with the rear wheels and starting with camber, he removed and replaced the wheels a bunch of times until in spec. Then John cursed having to cut the heat shrink off my KWAGNER style shortened toe links, but he was able to set this with the wheels on. After he moved to the front, checked Caster that was still factory set, then worked on Camber by adjusting the upper bolt joint mounting nuts. Removing a wheel a few times on each side and tweaking got it in spec, then the toe was set and the steering wheel centered. The road test proved that the suspension upgrades were worth the effort now that the alignment was done. I think I'm going to try removing the rear sway bar though - with the 350in/lb springs, I don't think a need it anymore (at least not one that big). John spent 2-1/2 hours on my alignment and booked 1.5hrs (which was nice given their shop rate is $92/hr!) I would highly recommend finding a shop that will let you hang with the Technician (not easy these days due to safety regulations)
Sorry guys, I forgot my camera to get pics of it on the rack but I do have a scan of the printout saved from the computer. It was a Hunter DSP600 machine - if anyone is interested here is a link to details on the alignment computer.
Please don't flame my settings - I love how the stance looks and now I can drive down the highway with no left or right pull, a centered wheel and no twitchiness or rear wheel steer in the corners.
I would not hesitate to bring another Fiero for an alignment here. Fiero2m8
[This message has been edited by Fiero2m8 (edited 04-24-2008).]
Well, I started the Roadster that was parked on the street today after moving it this morning from the driveway. When I shifted into reverse it made a clunk noise kinda like the sound/feeling a worn U-joint makes. I know it shifts a little hard due to the shift kit, but something didn't seem right - when I shifted into Drive, the trans let go as if I'd snapped an axle! Only good news is I didn't get stranded anywhere and only had to push it about 10 feet back into the driveway. Better wait till I'm less frustrated to further investigate what is probably an internal problem
Good news - I got the Roadster back on the road this weekend Transmission is fine, I was lucky enough to find it was a driver's side axle problem. When I raised the suspension with the adjustable coilovers, my very short axle didn't like the approach angle. I ended up rebuilting the axle with two new axle boots (that had started to leak anyways) and lowered the rear 5 turns to match the new ride height of the front suspension.
Here are the pictures:
Axle removed without touching Camber or removing hub nut:
Picked up new axle boot kits - Inboard is 90 Seville and Outboard is 85 6000 w/light duty brakes. I don't bother explaining what I'm doing anymore except to say, "I'm building my own custom axle" The counter guy at Automotive Warehouse shocked me when he returned with the boot kits and said "You puttin' a Northstar in a Fiero?" I smiled and said "LT1 with the Caddy tranny, however to answer your question, yes I have a N* Fiero too"
New boots installed, with supplied grease and banded, with ride height tweaked on both sides:
While the car was raised, I removed the rear sway bar to compare handling. Then I gave it an oil/filter change and the K&N filter a clean/reoil:
Burnt a 1/2 tank of gas test driving it Saturday and so far no new issues or leaks.
Fiero2m8
[This message has been edited by Fiero2m8 (edited 05-12-2008).]
Thanks once again to Bubbajoexxx, I received his damaged chin spoiler to add to the Roadster project. Here it is before it was removed from Shrek:
I started on the backside - after the broken pieces were in place, I used fiberglass cloth and resin to strengthen the underside without much regard to appearance:
Since the chin spoiler is made from fiberglass, I used a long strand fiberglass to easily repair and strengthen the corner with the holes in it, while the top got smooth resin:
While I had everything out already, I redid the front fender flares with short strand fiberglass to the roughened aero nose:
This long weekend was a little chilly but I've got to git er done, so sand, sand, sand:
After a couple of fiberglass coats, I finished with filler that will mostly be sanded off:
I decided to keep the marker lights for safety - they look a little strange right now, but I think once the fender is all black, it won't stand out so much:
I'm hoping to have the car in grey high build primer by the weekend, so I can finally see the project in one colour:
It will then match the Fiero behind it Many have commented that my fiberglass work will crack (although it hasn't in the last two years so far). Therefore I decided to paint the car myself (Rat rod style) and won't be disappointed if it cracks later. This should provide a good test for forum members to observe - if it holds up, I can always get it professionally resprayed in the future...
Well I found a way to add yet another colour to my bodywork
After I washed it
I think I'm going to like it on there once it's painted. It fit perfectly BTW - How does it look to you? I "might" move the license plate to the holes on the driver's side chin spoiler or relocate somewhere else....hmmm
I LOVE IT! I think it looks great with the side skirts! Great work.....I can't wait to see this thing all one color......are you gonna prime it any time soon??
Thanks - I was working on the bodywork today but I haven't taken pics yet. Here are some of the other minor things I worked on this weekend.
The MSD digital window switch was blocked in by the new battery location, so I relocated it to the firewall here for access to the buttons and display:
I am redoing the trunk carpeting and have decided to conceal the nitrous bottle in the lower section. I'll carpet the upper section with a removable false floor. Here is everything removed except some heat insulation that has to stay so the carpet doesn't catch fire:
I got around to wiring the MSD Digital 6 plus spark box. The dials were set up to retard the timing 6 degrees during the 150 shot of NOS and I set the soft rev limit at 6500 rpm. It also has retard timing start and trans brake rev limiter features that I am not currently using:
I mounted the box on the passenger side firewall close to all necessary wire connections:
Archie's strut bar was bolted to the trunk from the adapter plate and it was moving the whole trunk, so underneath I go looking for a place to attach it from the engine to the cradle:
This spot worked out well - I used 10.9 grade bolt through the cradle. I don't have to worry about snapping the bolt in the block like I did a couple previously in the cylinder head because the engine tries to pull rearward while the stut bar holds it forward with this setup:
The Nitrous feed line was reconnected, routed to the trunk and all the wiring was wrapped. I noticed the transmission pan started leaking, so a new gasket is on the to do list.
Also, while forum member GoKart Mozart was in Niagara-on-the-Lake this weekend, he gave me a call and dropped by for a visit. It was nice meeting you Dan and I enjoyed showing you the project. I was also more than happy to give you your 1st ride in a V8 Fiero We learned on that test drive (with the new chin spoiler installed), speeding on the highway causes the headlight doors to open automatically
Fiero2m8
[This message has been edited by Fiero2m8 (edited 05-25-2008).]
Well, slight hijack now. Made it home after a great weekend. I'll continue on the Memorial Day thread. It was good meeting you and seeing the cars. Thanks for the ride, too. Can't wait to see what it'll do when you get the false floor done... Wish I had more time but the wineries were calling. We made it to 3 and brought home 7 bottles... I know it'll be hard to bring both but you know you'll have an extra driver if you need one, just hope you get the headlight door issue fixed. I'll buy the first round at the 25th.
Just a few minor things done this weekend as I was out of town. The washer pump was finally replaced - I damaged the original one a couple winter's ago forgetting to drain summer fluid from the reservoir:
Also got a new trans pan gasket from Precision Transmission. Glad to report the fluid after a few years was still in excellent shape:
The cork gasket was put in place after the mating surface and pan magnet were cleaned:
Pan bolts were torqued to spec and the trans refilled. I topped it up after test driving as you have to measure the dipstick with the fluid hot:
Cheers, Fiero2m8
[This message has been edited by Fiero2m8 (edited 06-02-2008).]
Well the Roadster stranded me for an hour last week and wouldn't start hot. My guess since the engine temp wasn't overheated that the new MSD box doesn't like to get warm. It's the only change I've made recently and the instructions suggest not to install in an enclosed area (like a glovebox) I'm planning the relocate it to the opposite side of the firewall behind the passenger seat. In that location, I should be able to adjust it easier and it should stay cooler. I'll post the results either way.
Brought the Roadster down to cruise night on Lundy's Lane in the falls Sunday night. It's amazing how much attention the engine bay gets! It certainly makes the effort of doing everything myself a rewarding worthwhile experience for me.
Well since the mechanical issues seem to be solved, back the the bodywork. First I finally got around to finishing the shaved look, by filling the "Pontiac" in the headlight door with plastic filler:
The same procedure is being used on the rear bumper cover, but it needs a few coats to get it right:
You can see that I've started painting the silver skirts black. My goal is to get all the ground effects completed this week even though the chin spoiler still needs a lot of finish work. The first coat of primer on all the modified body panels is coming soon. This will improve the appearance a little, BUT show me just how much more sanding I've got ahead of me yet...it feels like I've been sanding for years The black satin is going to give it a Ratrod look and feel.
Well the no start when warm condition came back - I may have fried another ignition module. I did get the car out to Mapleview in Burlington on Wednesday and Seaway Mall in Welland on Friday though.
The Roadster is down to two colours now with a coat of filler primer added this week:
awesome build, it gives me hope that mine will be done soon, 2 points i want to ask you about. i love the flares, did you have to do any real modifications to get them to fit, and second that brace you built for underneath. do you have dimensions on that.
now back to the car. i too have taken out the body molding, and mine showed alot of stress on both sides of the door handle. i ended up drilling several holes, then filled with fiberglass filler to fix that problem. hell the panel will come off first..but since you shaved your handles you probably wont have that problem. also are you going to mold the lower portion of your front bumper together. i think it would be cool to cut the middle out, put a large billet grille in there. maybe one of those photo shop gurus can mark something up, but thats just a thought, whatever you do will look great just like the rest of your work.
great car, great work and my wife is mad at you because i was suppose to go to bed 45 minutes ago before i started to read your build..lol
[This message has been edited by seegeer (edited 06-28-2008).]
awesome build, it gives me hope that mine will be done soon, 2 points i want to ask you about. i love the flares, did you have to do any real modifications to get them to fit, and second that brace you built for underneath. do you have dimensions on that.
now back to the car. i too have taken out the body molding, and mine showed alot of stress on both sides of the door handle. i ended up drilling several holes, then filled with fiberglass filler to fix that problem. hell the panel will come off first..but since you shaved your handles you probably wont have that problem. also are you going to mold the lower portion of your front bumper together. i think it would be cool to cut the middle out, put a large billet grille in there. maybe one of those photo shop gurus can mark something up, but thats just a thought, whatever you do will look great just like the rest of your work.
great car, great work and my wife is mad at you because i was suppose to go to bed 45 minutes ago before i started to read your build..lol
Thanks! The Sunbird Turbo flares are a cheap simple mod IMO. Here's a pic - All I did was trim back the side mouldings with some snips and cut the bottom edge wherever you want them. I just used the existing screw holes in the lip to fasten to the wheelwell liner the tension holds them tight to the fender. I'm surprised more guys don't do this mod:
This is the only picture I kept of the x-frame (it wasn't my design)
I like your idea on the mod to cut the center out and recess a grill - plus for you! It might give me a better spot to install the front plate as well. As far as molding the chin spoiler to the bumper, probably not as I'll need it to be removeable for repairs. I've already used it as a shovel bringing the Roadster to my weekly beach volleyball game (scooped up alot of gravel). Either tire/rim swap or longer springs are in the plans so I'm not too low in the nose:
Everyone at cruise nights asks about the "softtop" Here's my current "stow and go" model to keep the thunderstorms out:
No tools required, just roll up windows and close door on them, then tuck in at firewall Here's a picture of the "spare" installed (yes I have two tops). Definitely an upgraded tonneau cover is planned but the functionality of this one can't be denied - LOL
Ryan
P.S. Tell your wife I'm sorry - (I can relate staying on the forum too late)!
Well, I had a little ordeal this past weekend. I decided to relocate the coil from the alternator bracket to the frame so the new ICM won't get so hot in the future. As I'm loosening the nut from the alternator pivot stud - SNAP, it breaks off flush with the cylinder head! Now I've got a much bigger problem and was unable to even drive the car. After I cooling off period when I was fearing the motor needs to be dropped to fix I looked at my options... Easy-out (never going to work as the stud has been in there since the 90's and it twisted in half before turning in the head). So the other choice was to drill and tap a new bolt. Hardest part was fitting a cordless drill in there, but once in I CAREFULLY drilled with a cobalt bit hoping not to drill too far. Then tapped a M10x1.5 bolt to reattach the alternator bracket - here is how it looks now:
After all that, I was able to mount the coil and ICM here and the coil wire still reaches:
Then I trusted my handywork and drove to Sherkston Beach for the afternoon with no issues. First time on the beach with the car and I got more gawkers than ever parked with the LT1 Camaro's from New York State. On the cruise home I rolled over the odometer to 68,000 KM's (it's something fun to watch that is missing on new cars). So far this season I've driven about 900km even with the price of gas @ $1.39/L Hopefully I can get back to bodywork soon.
well i caught hell again from you reading your build on our vacation....lol.. i can really relate to you when u come across set backs like that broken bolt, i recently had some trouble with my body work, as far as your car goes, have you ever considered a removable hard top, something like that off of an mr2 or miata, for the front if you cut the front out, maybe you could build an induction box in the front, its hard to describe, plus thanks for the plans on the cross brace spence
Yes, I have considered a removeable hard top and may still attempt one in the future. In the meantime I've been working on the front air dam. I started by opening up the hole with a sawzall and trimming it up with the angle grinder:
I decided rather than just a grill across the opening, I would install side diverters to the rad. This design might solve the headlight doors opening at speed. I made a template with cardboard and cut them out of an aluminum grilled sheet Bubbajoe gave me. I also tested out a location for the front plate bolted to the metal crossbar behind the bumper:
Here's a shot with the aluminum installed and more finish work and sanding on the repaired chin spoiler completed:
Now it's sprayed with a coat of filler primer. I'm open to suggestions on the plate location (wish we didn't have to run one here) as it's currently in the windshield:
Well I finally decided that the rear marker lights had to go. I cut the molding at the edge of the tailights and grinded the rest of it down. With the marker lens removed I fiberglassed the holes with cloth, then long strand filler. After it cured, short strand fiberglass filler and finally a skim coat of body filler was sanded on both sides. Now it's primed and ready for finish work with the rest of the quarter panels. Here's a few pictures of the progress:
I will probably remove the front marker lights as well. Since they are also indicator lights, I need to find some suitable replacements at the wreckers I like first:
Also I found some aftermarket Neon rims that I liked but they were already sold. Still looking to replace the one on the car as I've currently got them advertised for sale.
looking good, i definitly like that opening, i posted some markers lights im going to use in my post, you can get them from ebay for 11 bucks shipped...


 that thing sounds like a MO*&^%$#%^&@ER