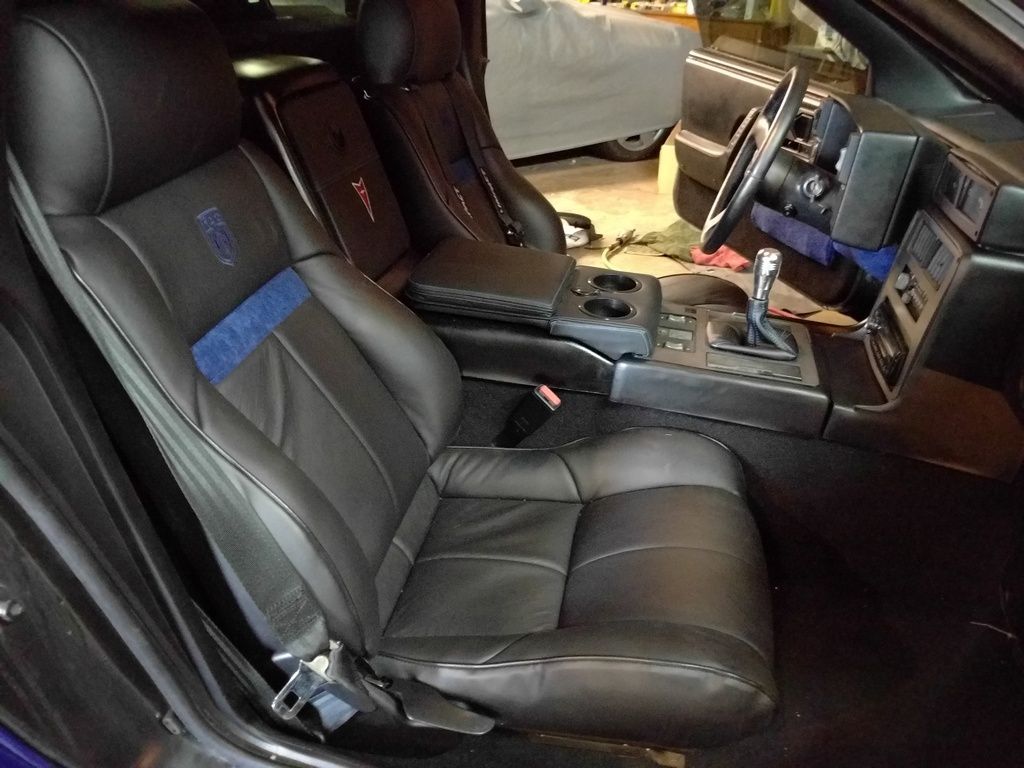
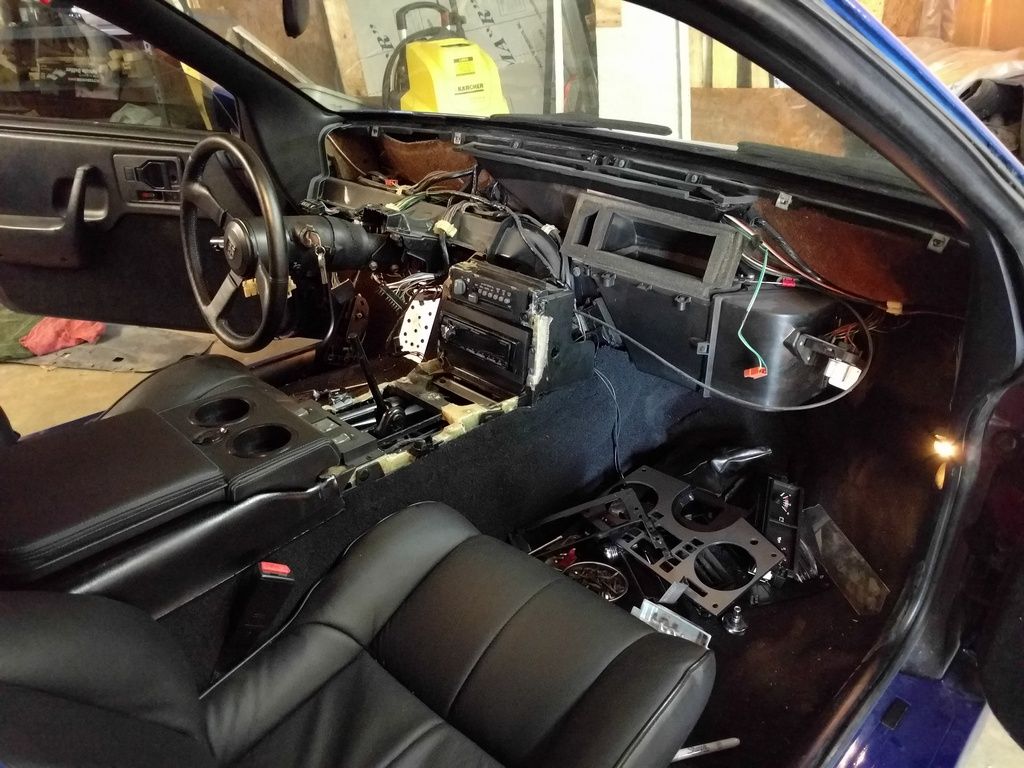
I love it when a project seems to gain some forward momentum. I feel like I am at this point with the interior. It's coming along nicely.
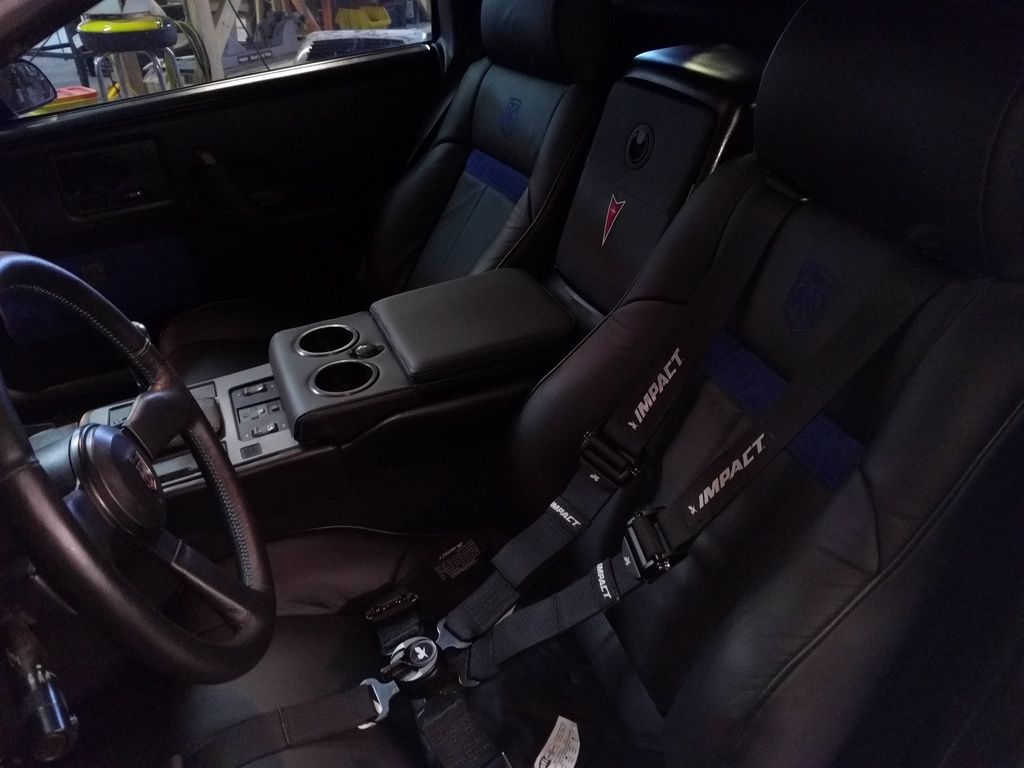
I am going to put a 5 point harness in the car, but I needed to figure out what to do about the shoulder mount points.
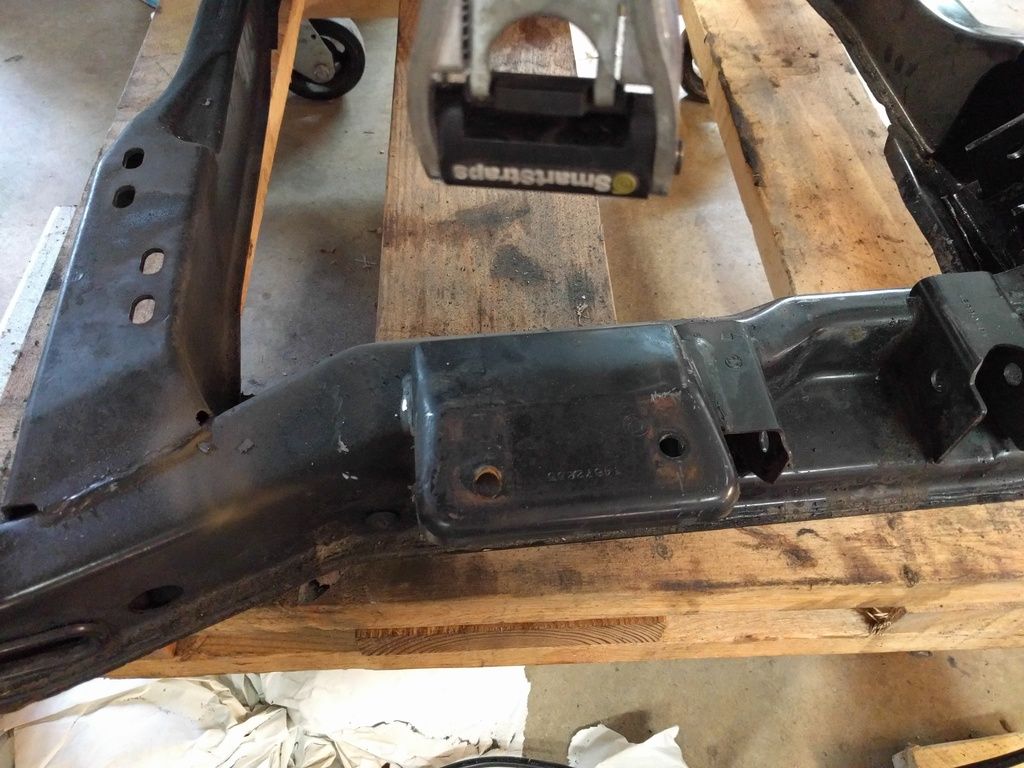
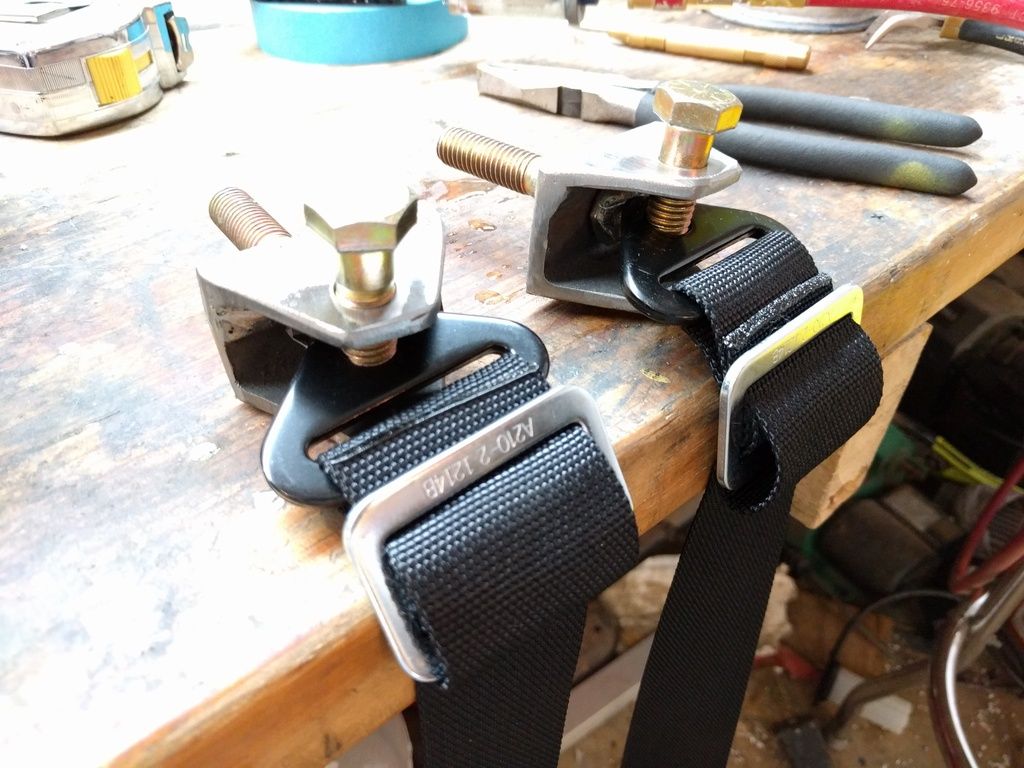
It's got bolt in mounting points, BUT the manufacturer's instructions specifically say to NOT mount them flat. They need to be in line with the pull of the belt
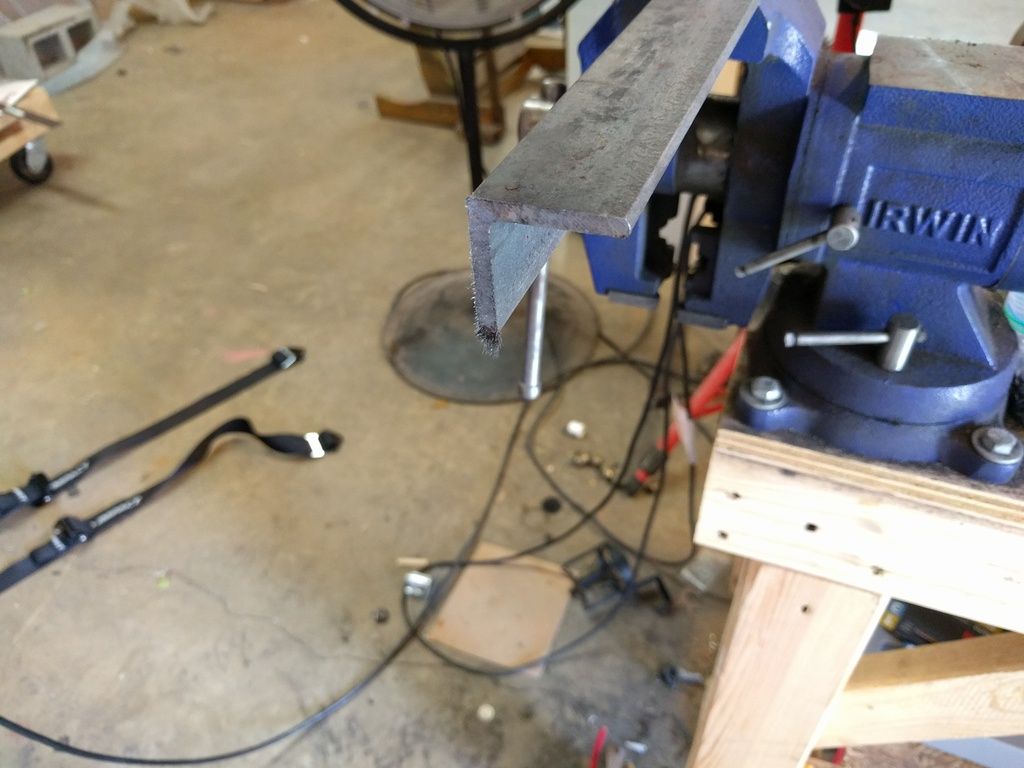
So I decided to build some mount brackets. I used 1/16" angle iron and another piece of 3/16" steel. I rough cut some 3" pieces
I drilled a hole in the piece for the mounting bolt, now it's time to weld them up
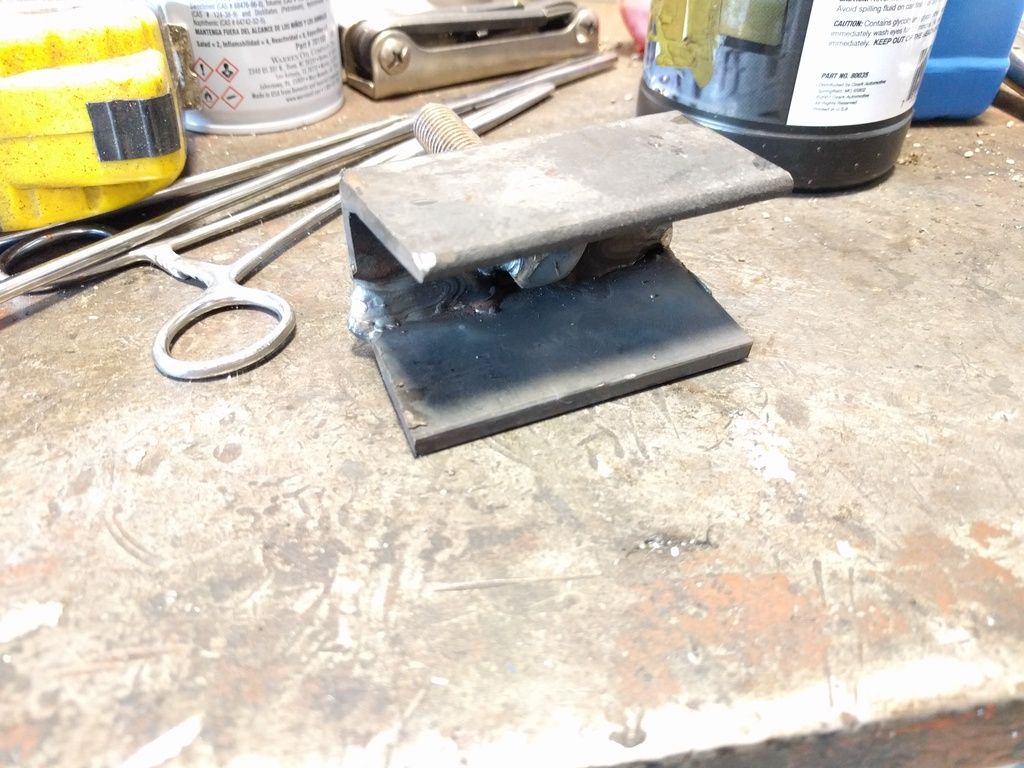
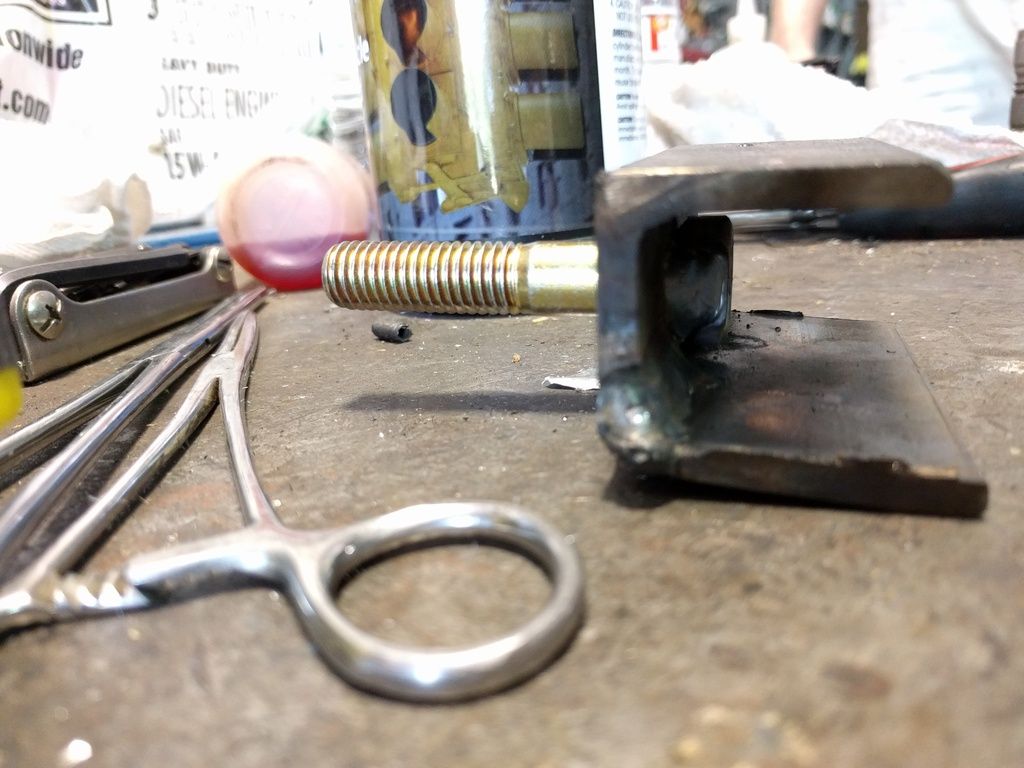
I welded the bolt in place as well. Should make it much easier to mount it.
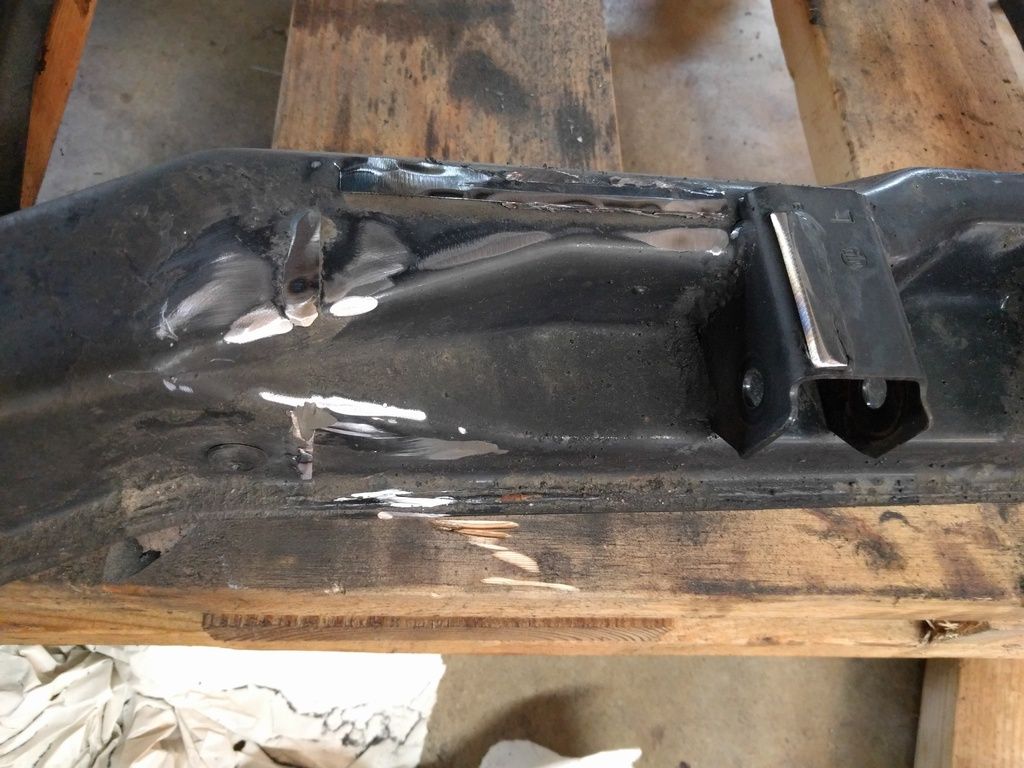
Welding done on the pair, time to drill the through hole.
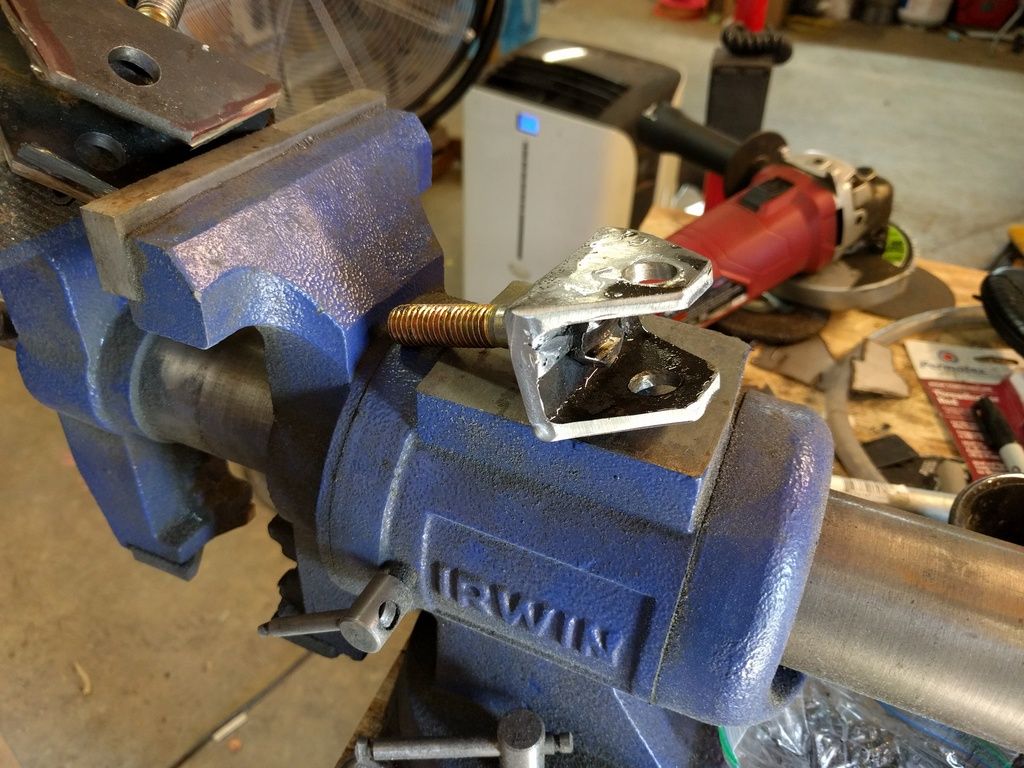
I shaped them with the grinder and sander
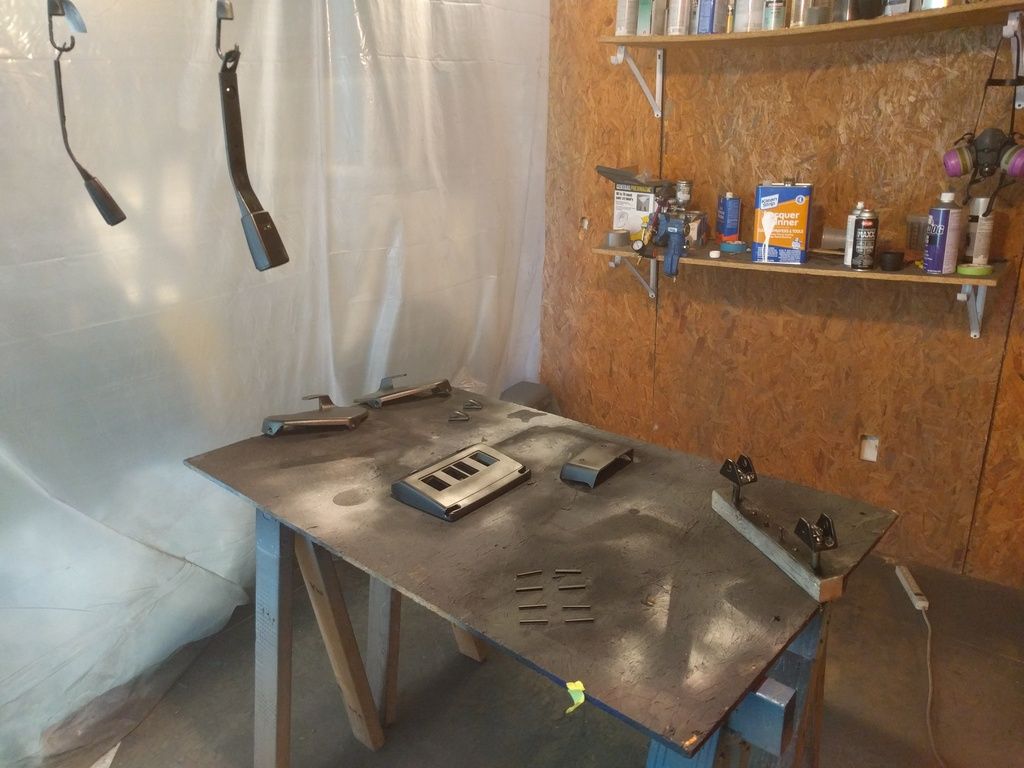
Done and ready for paint
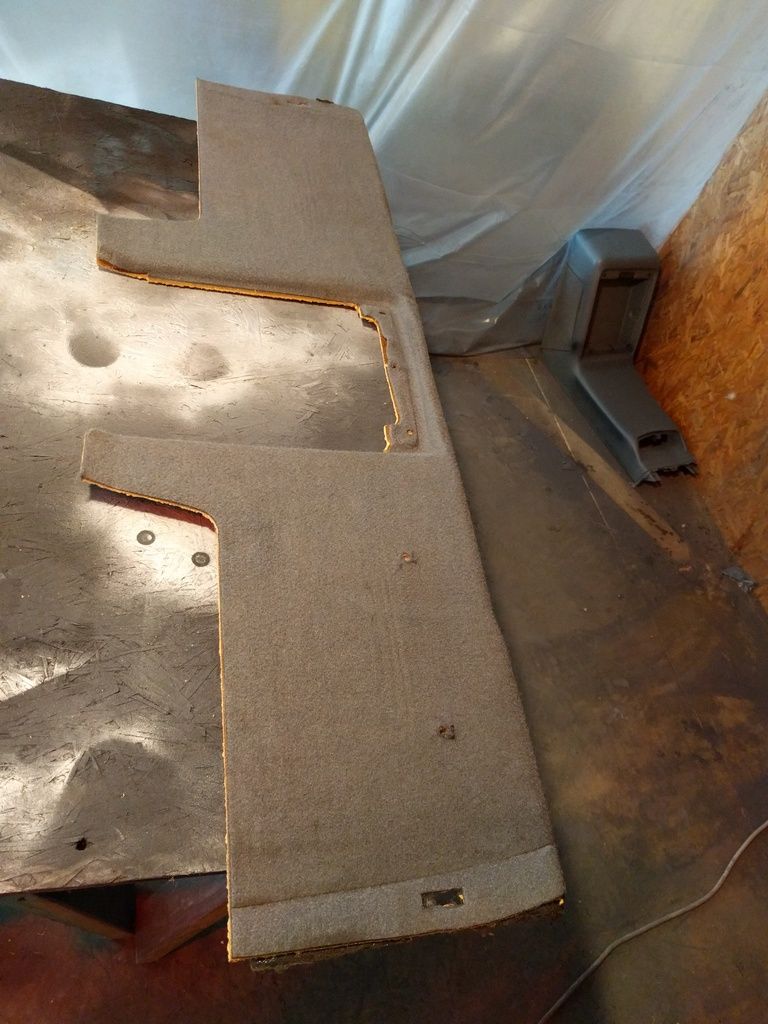
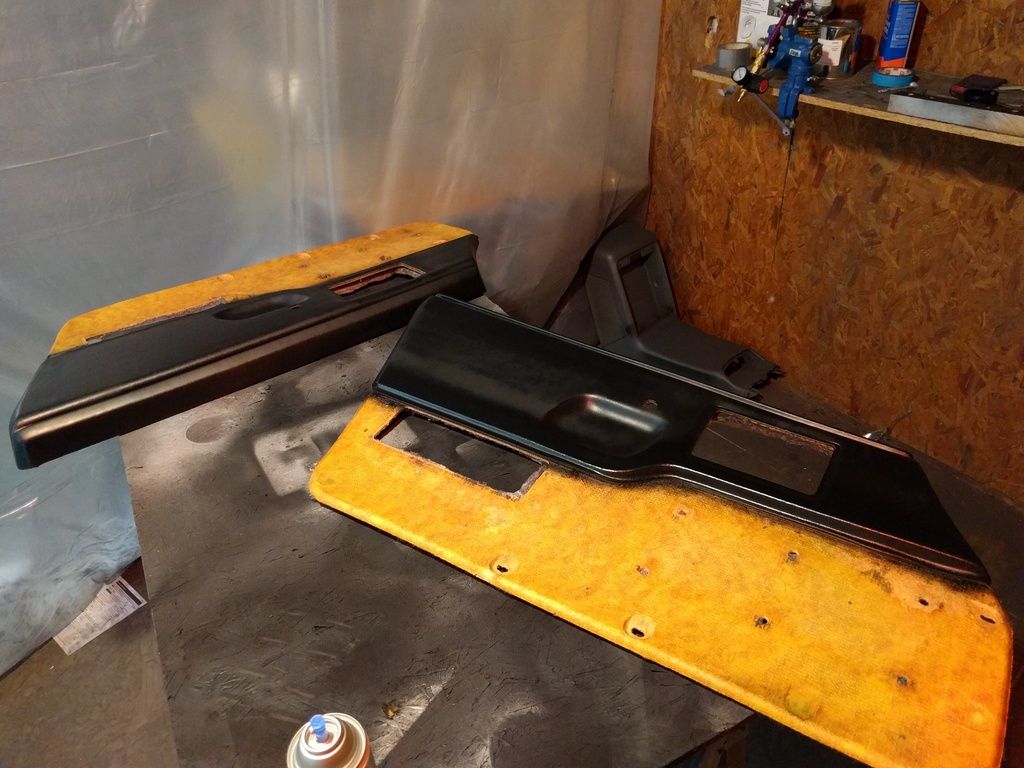
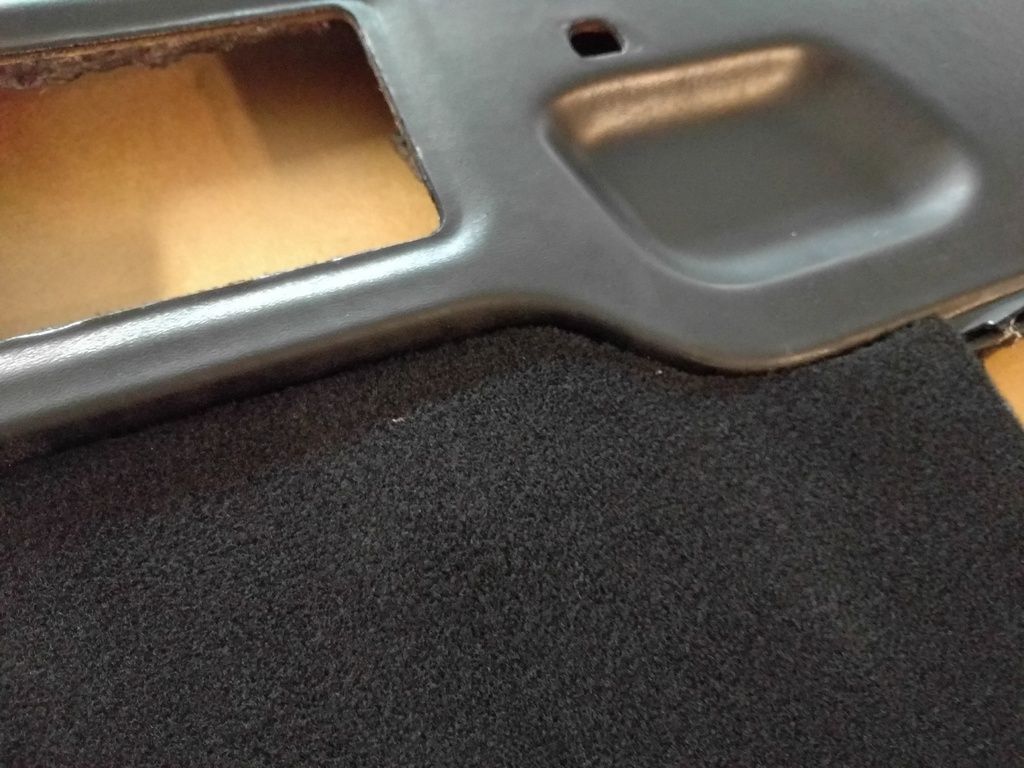
Next I turned my attention to the back panel. I was going to re-cover it, but that was a lot of work and adding more bulk and weight that I didn't want to do.
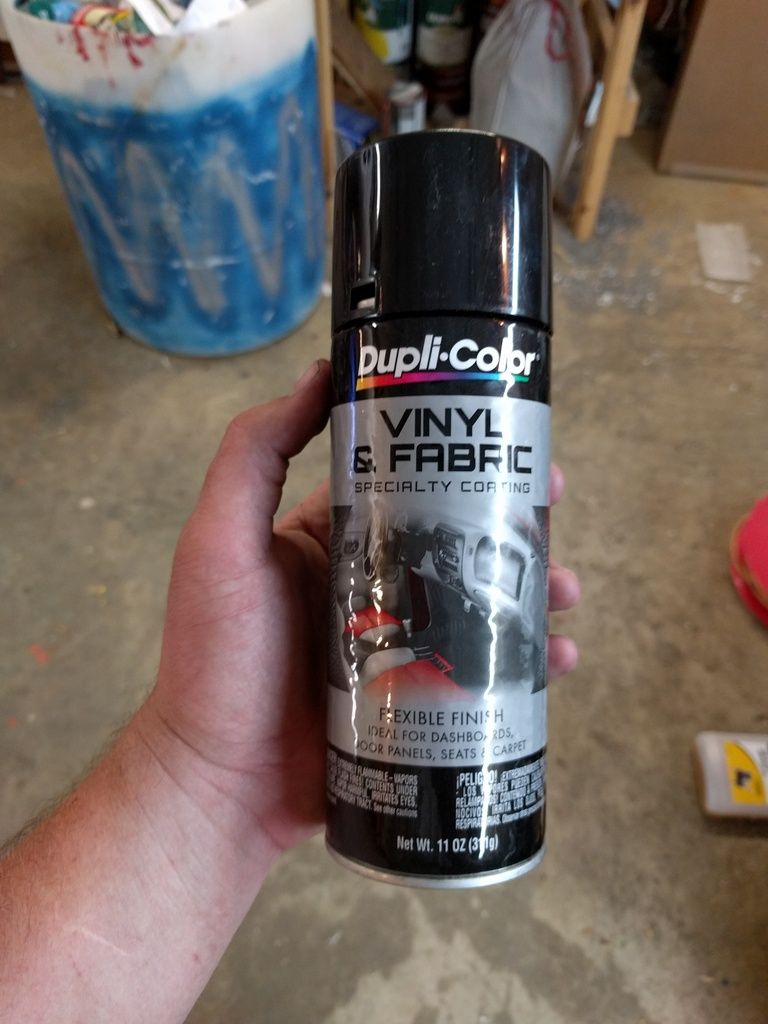
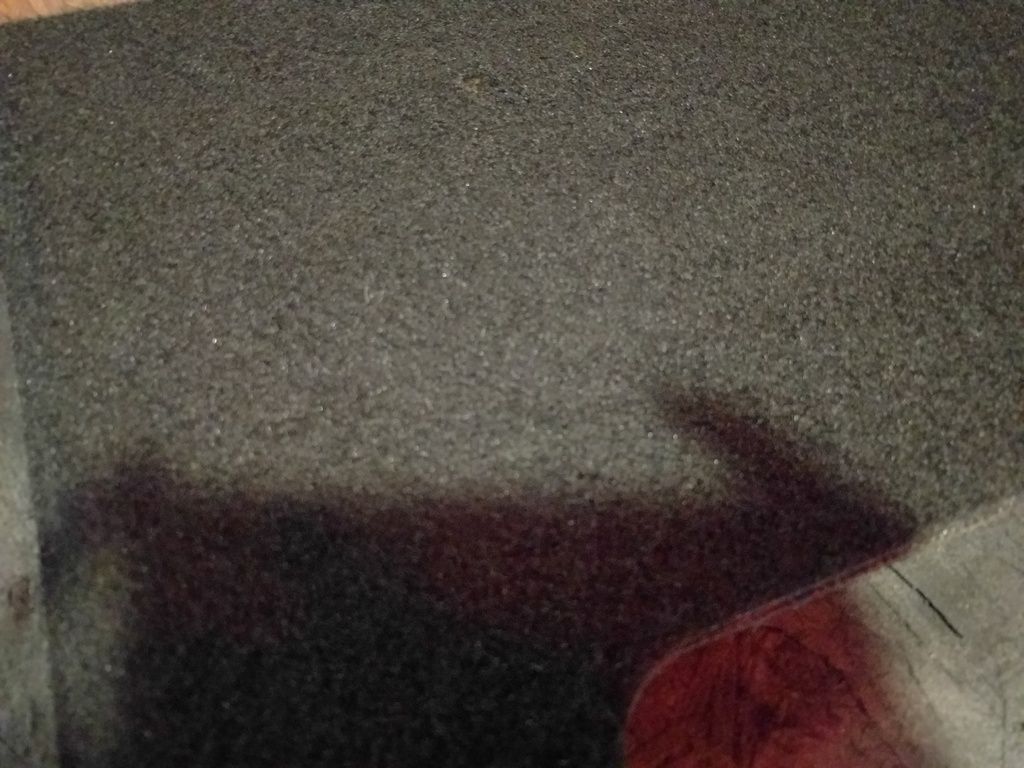
So I found a product that was exactly what I needed. It's basically a sprayable dye.
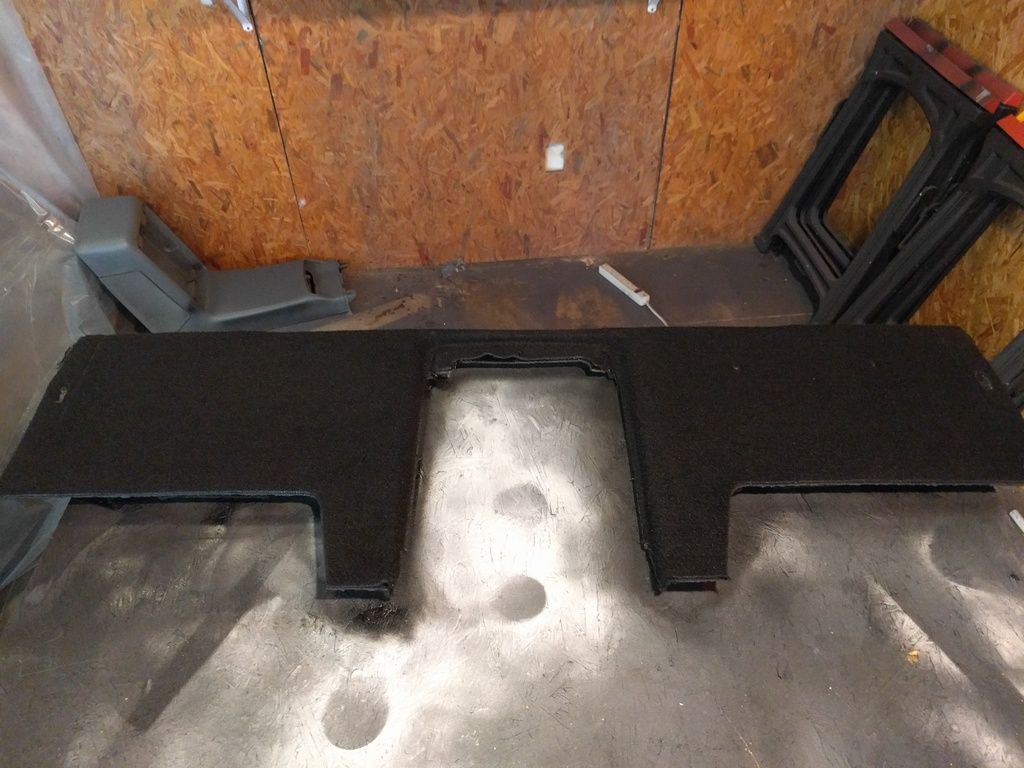
The results are really nice. It's not quite as soft as it was before, but for that piece of carpet it's just fine.
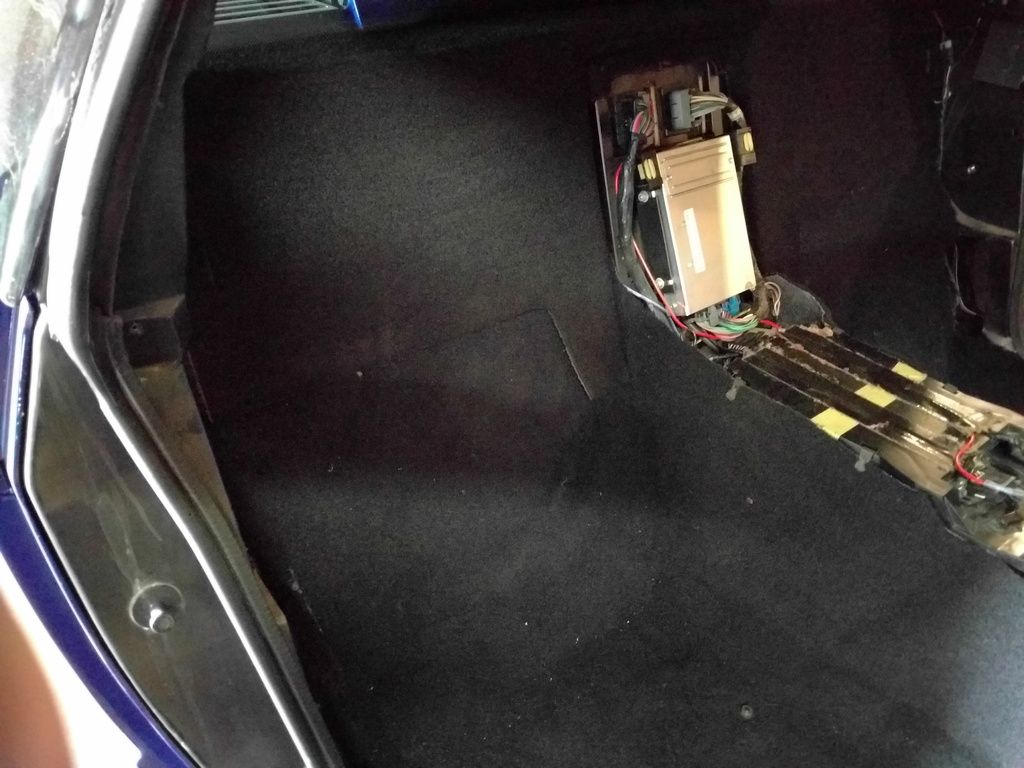
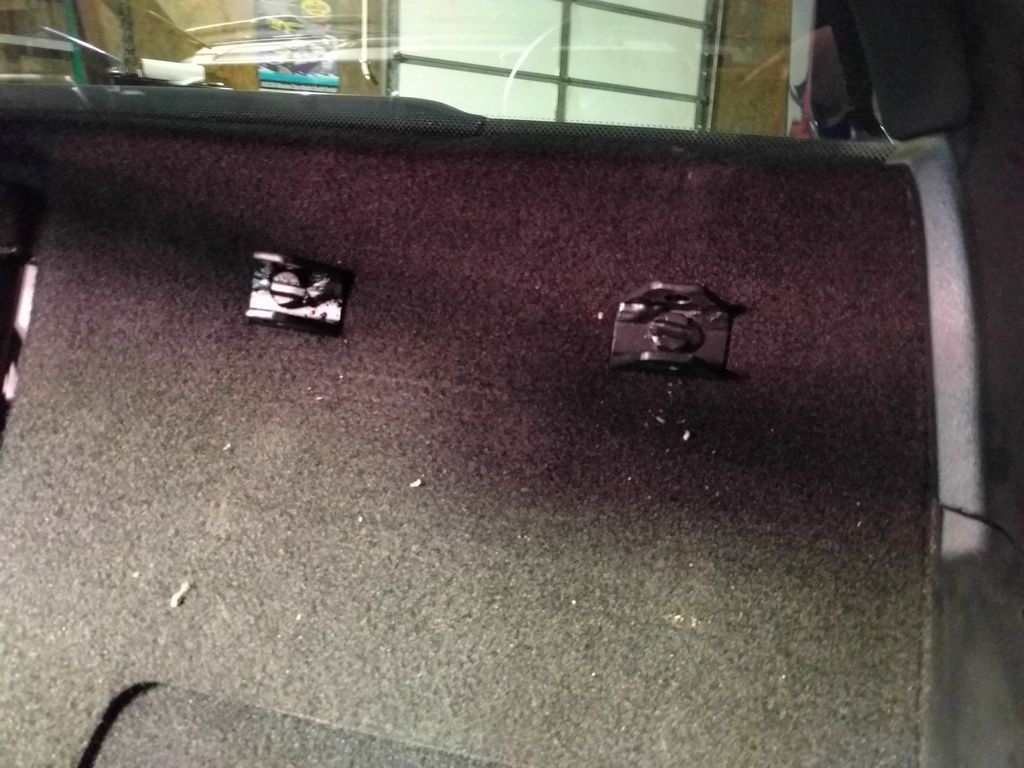
I trimmed and glued in the carpet. I'm hoping it lays down a bit better after it sits in the car for a while. I may need to steam it or something. It's not quite as lumpy as it looks in this picture, but it's certainly not perfectly flat. If I were a smarter man, I would have marked where the seatbelt hole on the inboard side is, but I'm not a smart man. I'm looking forward to that little hunt.
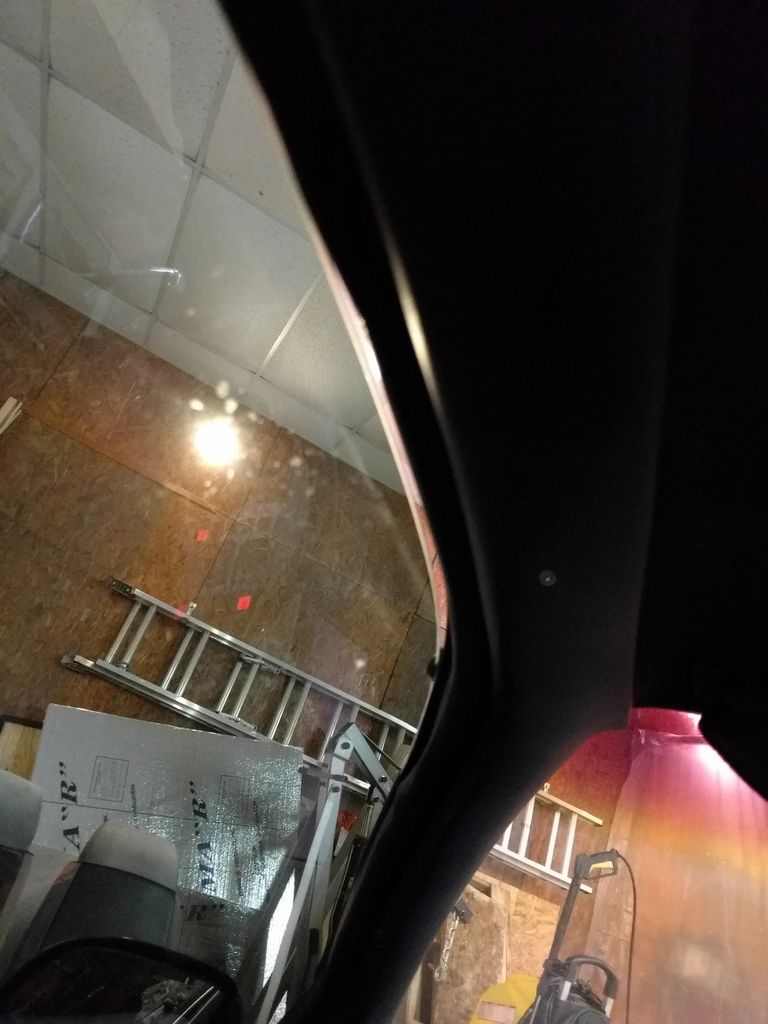
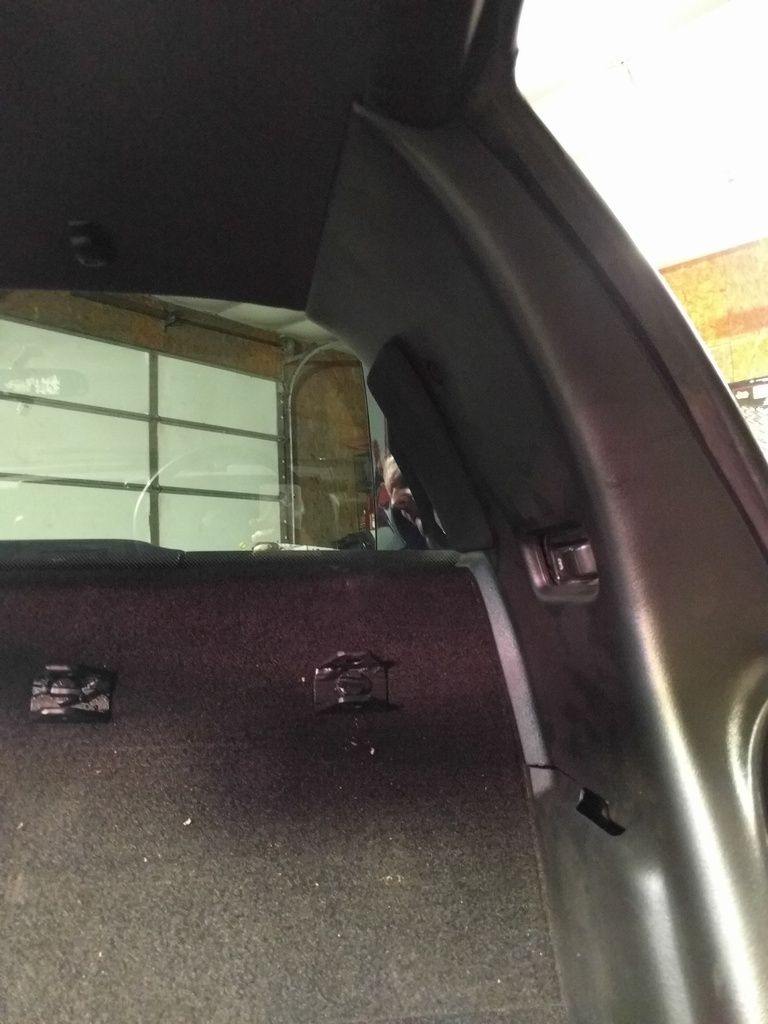
The painted back panel matches nearly perfectly
I also installed my new headliner and sunvisors. The old one is in great shape but is the wrong color. If anyone needs it, let me know.
Tomorrow I put more of the interior plastic in place. I'm waiting for speakers to put the B pillars back in, but other than that it's about ready. I still will need to pull the dash and do up front, as well the the doors, but overall this interior project is going quickly!
A little more progress today, but not much. The neighbor called in a favor and I spent most of my day painting tractor wheels. I'm his "paint guy".
Speaking of painting, this is the biggest work I did today.
Remember when I said I felt like the project had some forward momentum? That was until I replaced the driver's side door seal
Yes the window is all the way up. Yes the seal is seated all around. Yes my life sucks out loud right now. Of all the tasks I have done on this car, adjusting the window glass is one of my least favorite. I'm kinda waiting on Russ to get back with me about the door pockets. Obviously I need to pull the door panels to adjust the glass, and I'd like to pull the door panels ONCE to do the glass and at the same time redo them with the new upholstery parts.
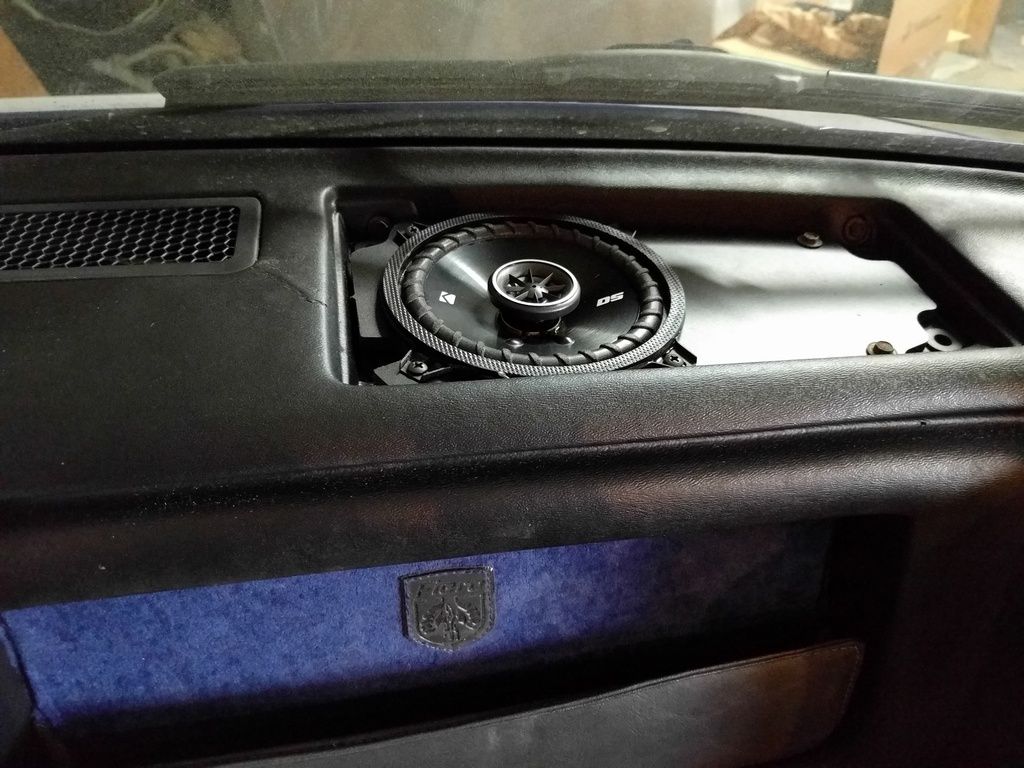
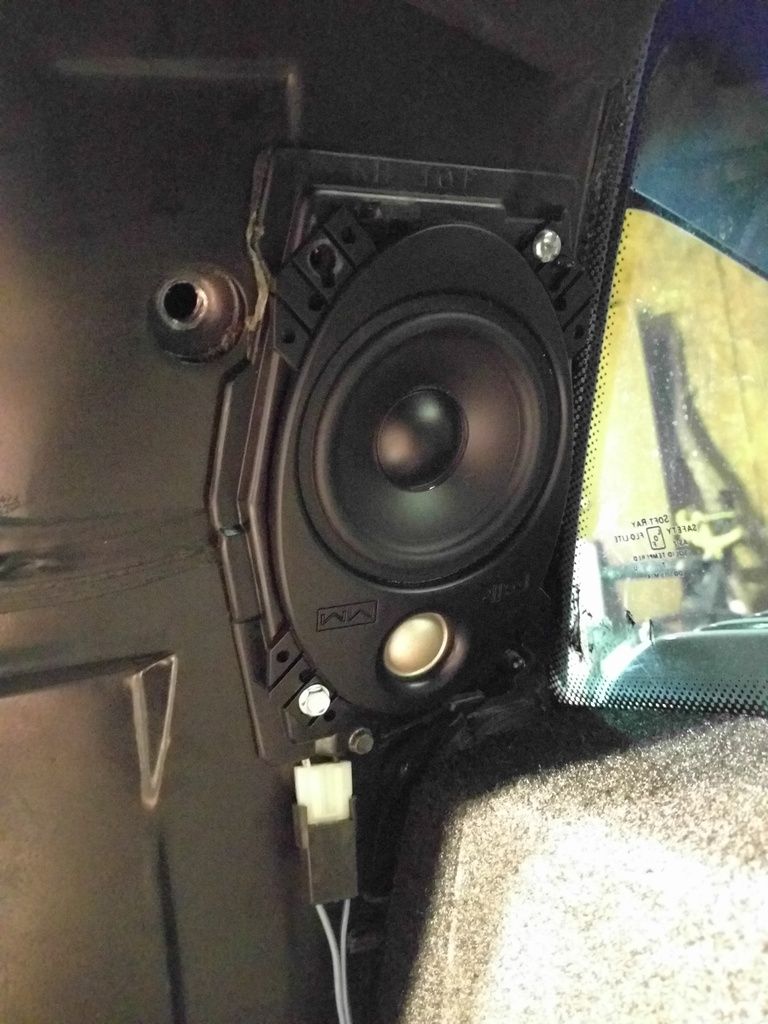
More interior work done today. I installed new speakers. They're Polk speakers that convert the 4x6 into a round woofer plus separate tweeter. I haven't run them yet, but I'm expecting at least an improvement over the worn out paper speakers that were in there.
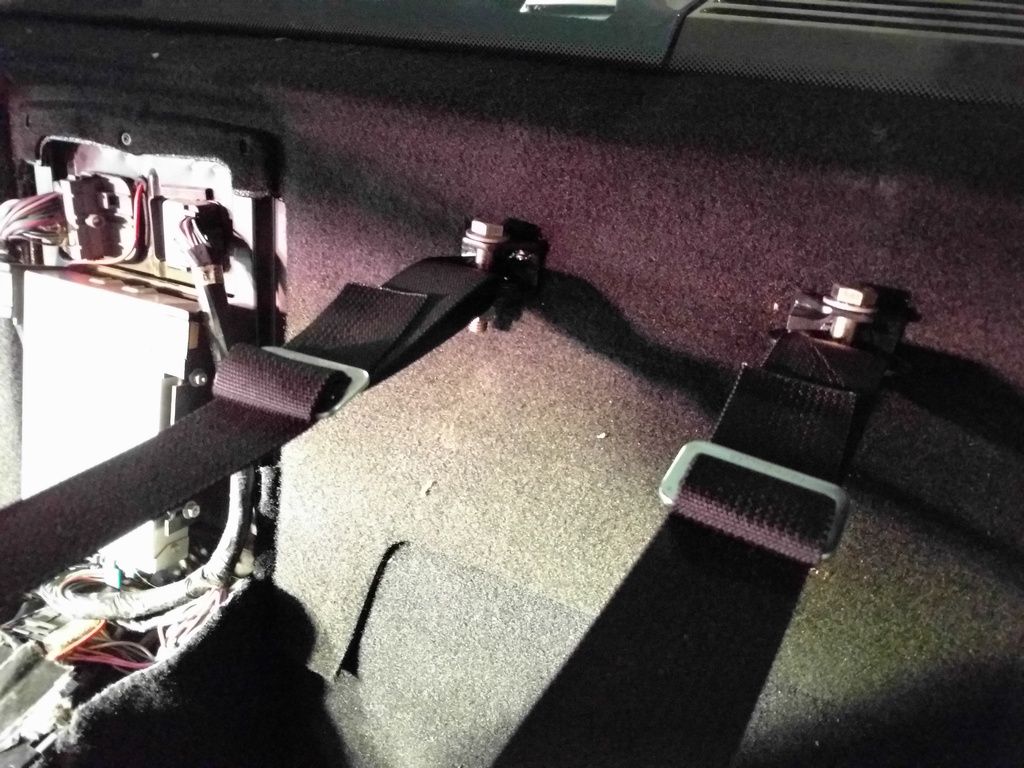
After I did that I put in a few of the little pieces (coat hooks, 3rd brake light cover, dome lights, etc) and the driver's side B pillar. Then on to the major project for the day-- the 5 point harness and driver's seat. First I mounted my brackets
I'm not going to show the firewall side for two reasons. One, it's nearly impossible to get the camera in there to get a good picture anyway, and two-- I don't need twenty guys who all need to show that they're smarter than me and tell me how I did it wrong. The way I figure it, if I hit something hard enough for these mounts to fail, chances are the belts wouldn't have helped anyway.
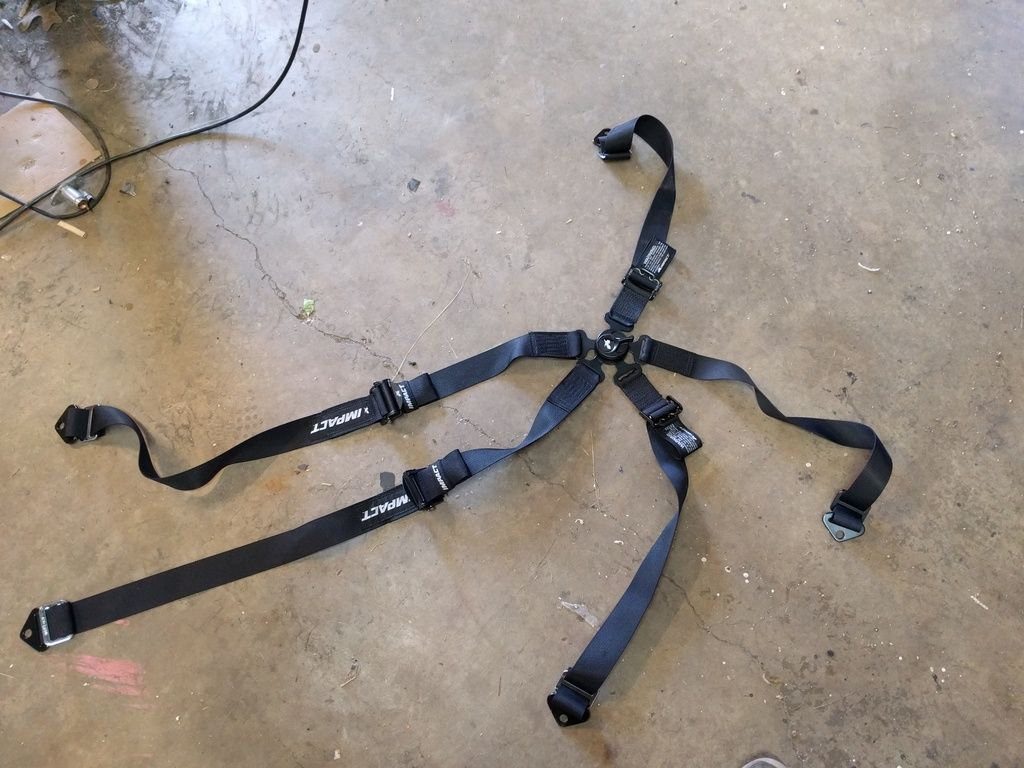
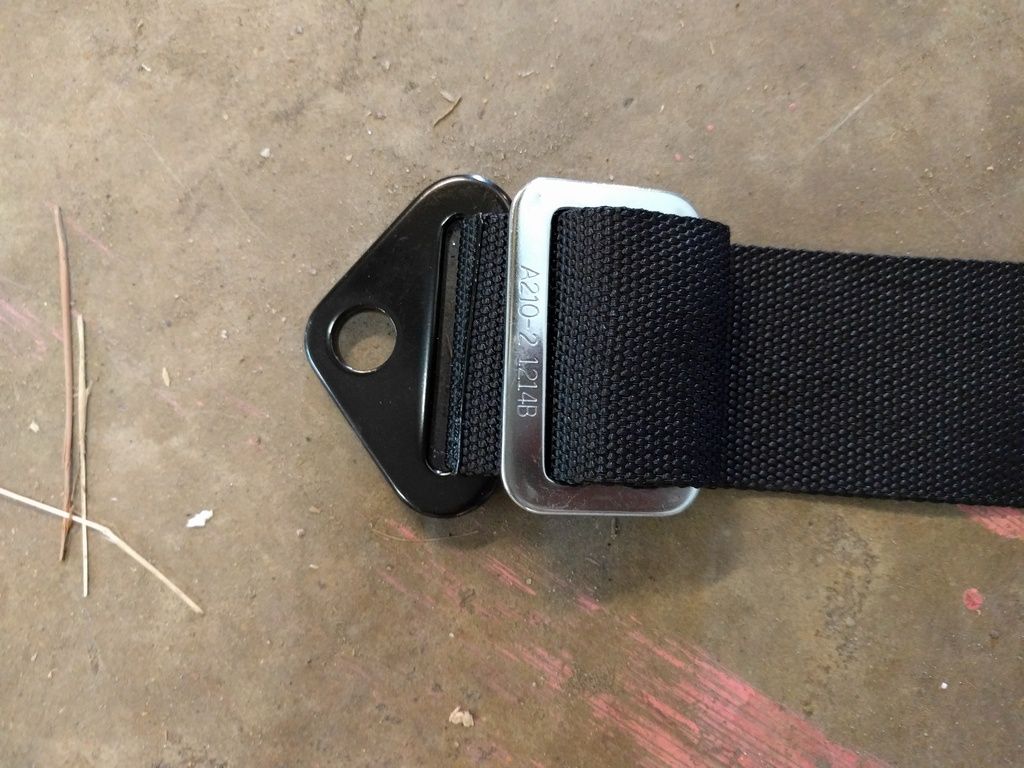
Rigged the belts
Didn't get a picture, but I also drilled the floor for the ball belt. It was uneventful, and I don't anticipate it going anywhere.
Doneskies!
Tomorrow I will reinstall the passenger side stuff, and then I might get around to adjusting that driver's side window to get it to seal. I'm dragging my feet for two reasons. I hate adjusting windows, but I am also waiting for Russ to finish some pieces, and hopefully I can get away with only pulling the door panel once.
I spent an ungodly amount of time this weekend adjusting the driver's window. I finally got it to seal, but it still isn't right. At this point I'm done screwing with it for now and will take what I've got (a dry car).
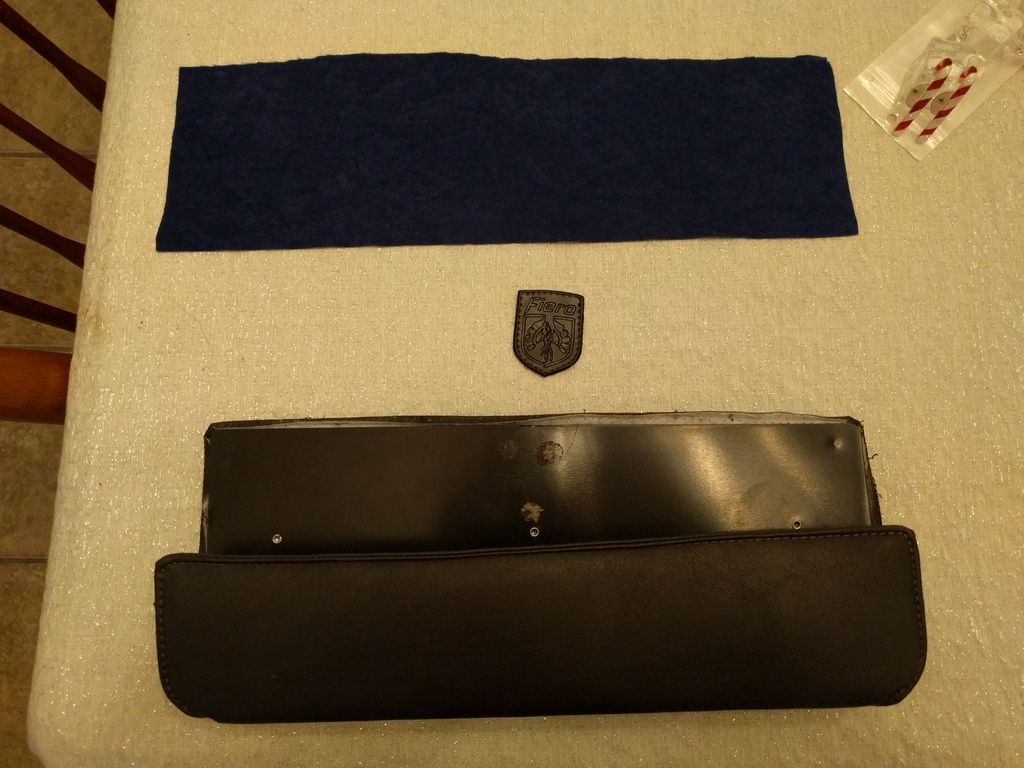
I did get some other stuff done on the interior. I bought a spare map pocket and got down to changing the backing fabric on it to my accent suede.
I hemmed the bottom and then sewed on the badge.
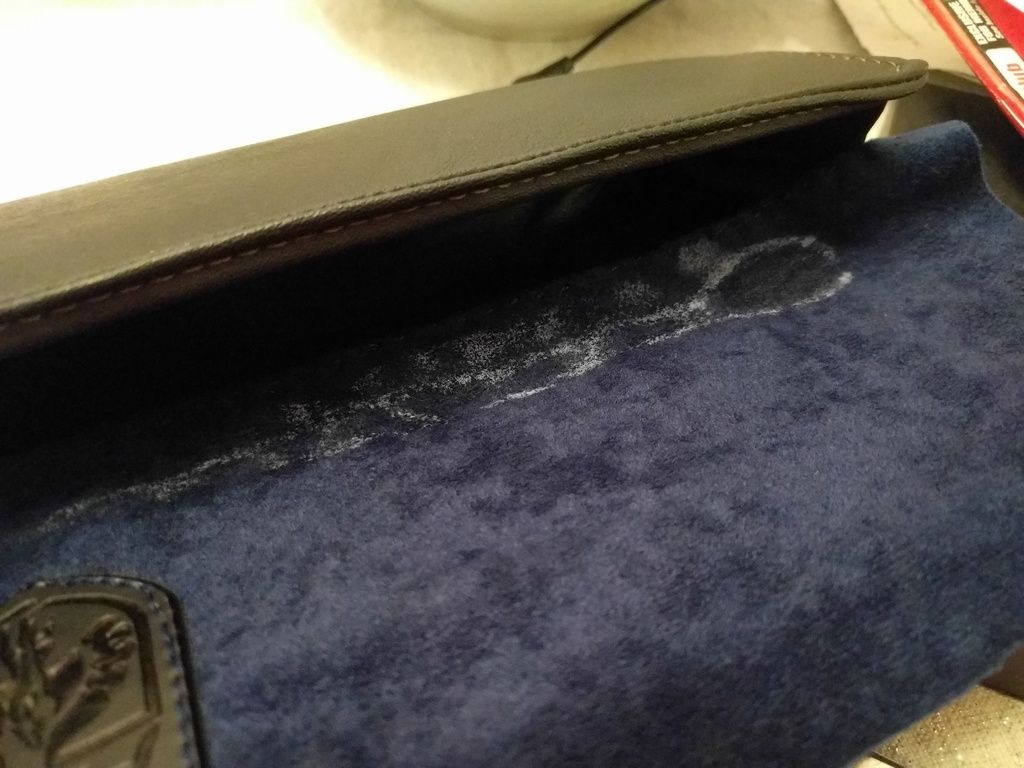
At this point it went horribly wrong. I decided to use super glue to attach the hemmed bottom to the plastic frame. I figured the material was heavy enough it wouldn't bleed through. I was very wrong.
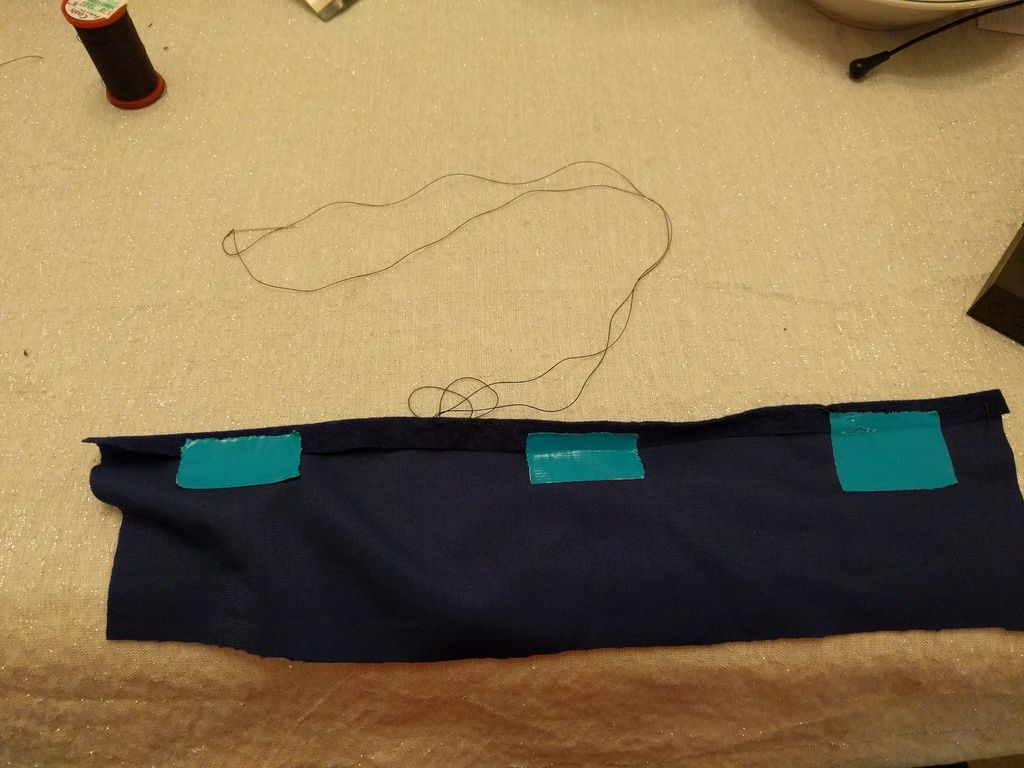
So I had to remove the piece and start completely over with a new piece of suede. I was smarter this time and used double sided tape.
The groove isn't as noticeable in person as it is in the picture, but it is definitely there. Overall I'm happy with it. I wish I had used more tape to close that groove, but I don't wish it enough to cut the stitching and do it over.
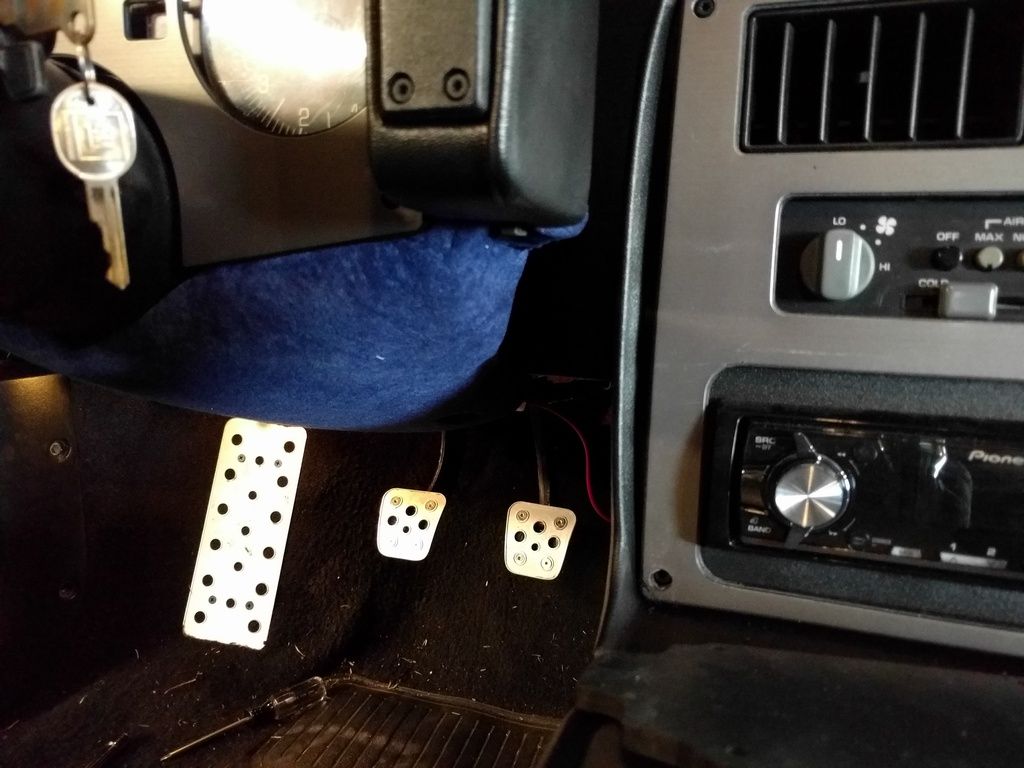
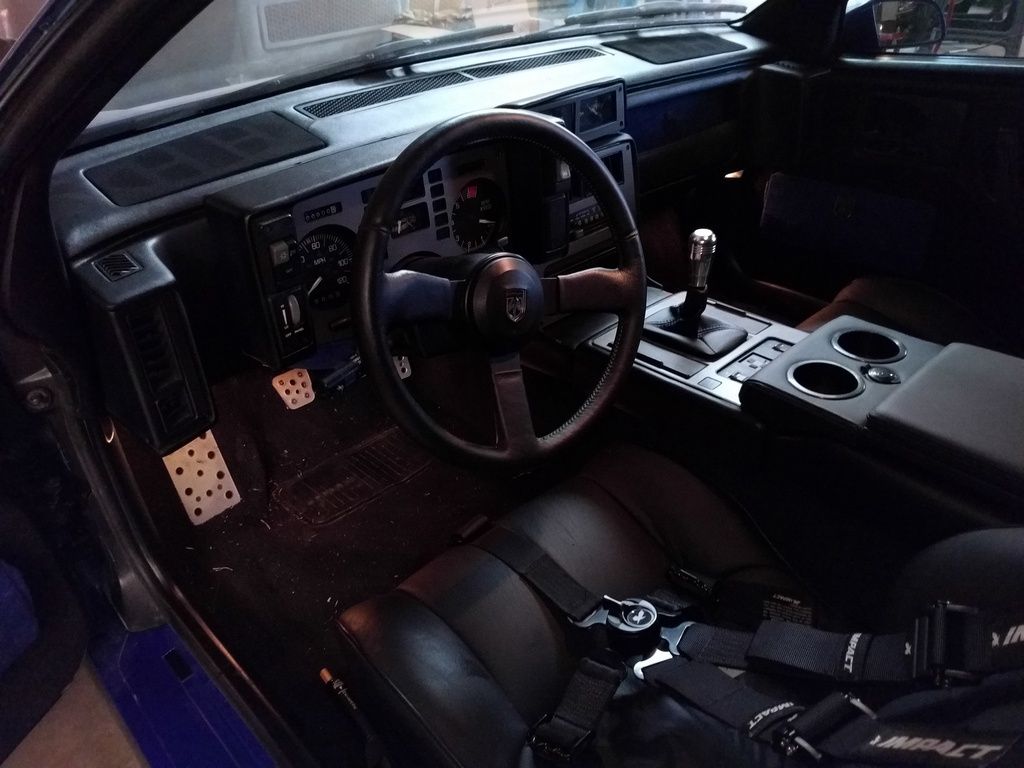
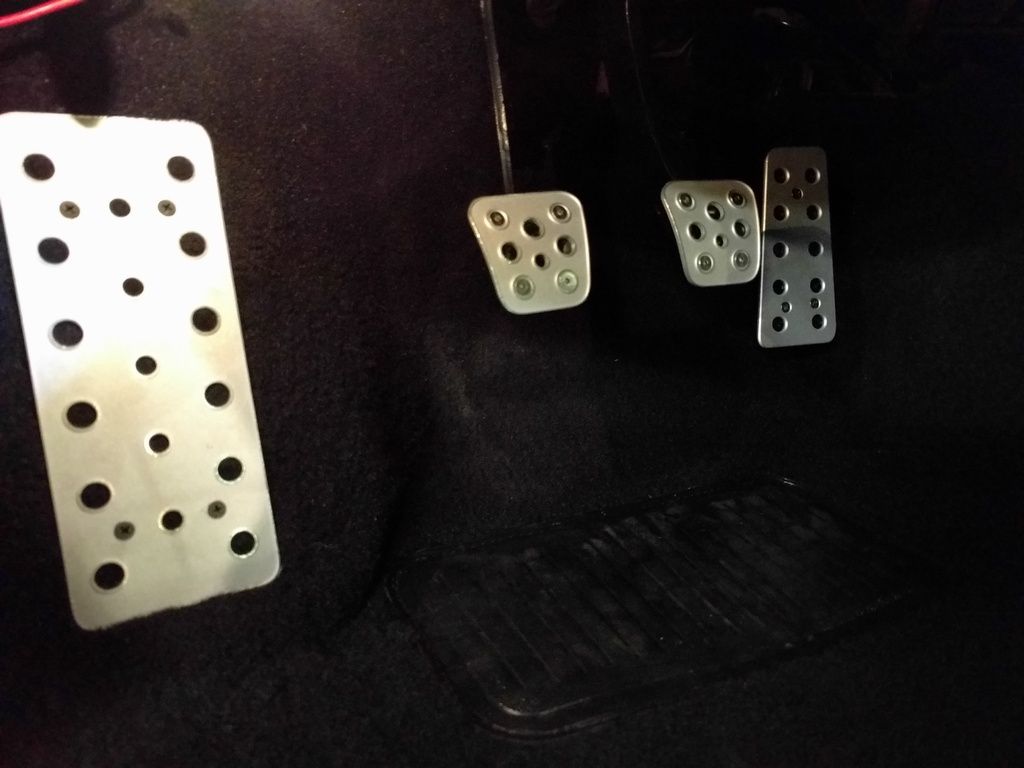
With the carpet in the car it was time to redo the pedals. The gas pedal was broken, the clutch pedal pad was missing, and the brake pedal pad was worn perfectly smooth and slick. The broken gas pedal was an obviously needed fix, but the the smooth brake pedal cover I have had issues with my food slipping off the brake if I didn't plant my foot firmly. I bought a set of the aluminum race pedal covers from TFS.
Not only do they look pretty damn good, they have a LOT more grip. The edges are rough and should grab my shoe well. The downside is I do not want to drive this car bare footed!
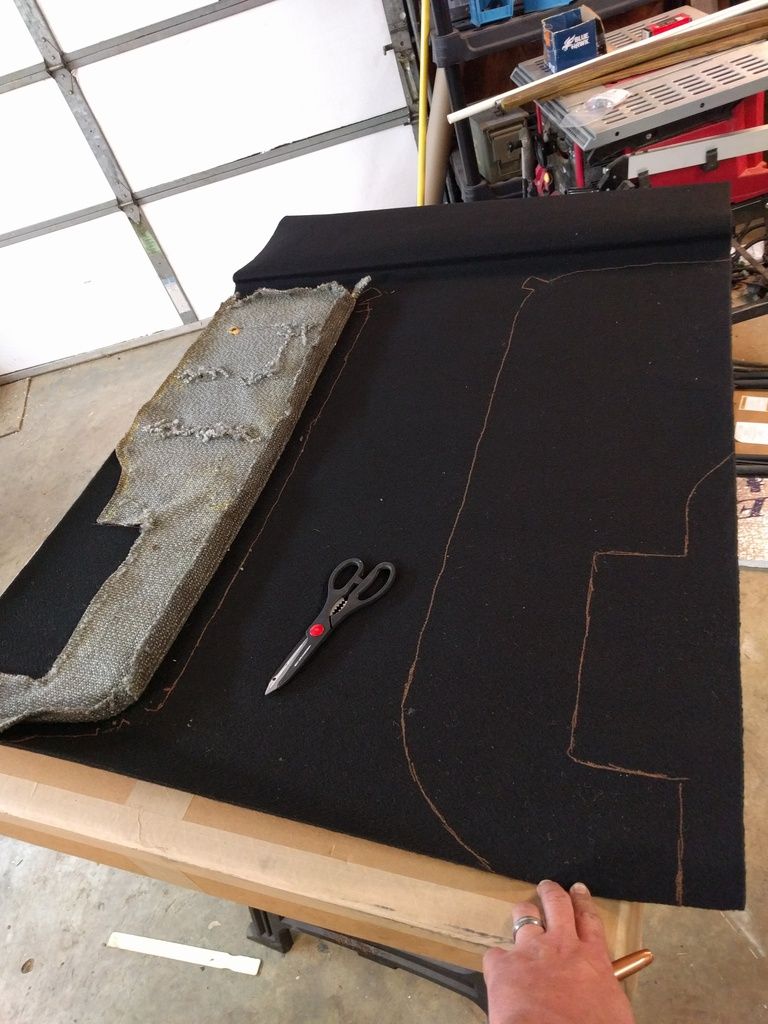
I pulled the door panels off and stripped them of their carpet. At first the carpet was a BEAR to get off, but it got a LOT easier when I soaked it in lacquer thinner. Now not only did I get the carpet off, I did so cleanly enough to use it as a template for the new carpet.
I sprayed the vinyl with that vinyl and fabric paint I used on the back carpet panel. I am really impressed with this stuff, and wish I had found it earlier in this process. I still have all the gray panels I pulled out of the car, and I'm REALLY considering repainting them with this stuff and swapping the interior again. We'll see.
Only thing left to do on the interior is finish the doors, then get after the dash. I'm really getting close to done with it, and I couldn't be happier!
A little bit of work today really made it feel like I did a lot. I re-carpeted the door panels. This process went MUCH faster than expected. I had figured it would take the better part of a day to get it done, but really it took a bit over an hour start to finish.
I took the old carpet and used it as a template.
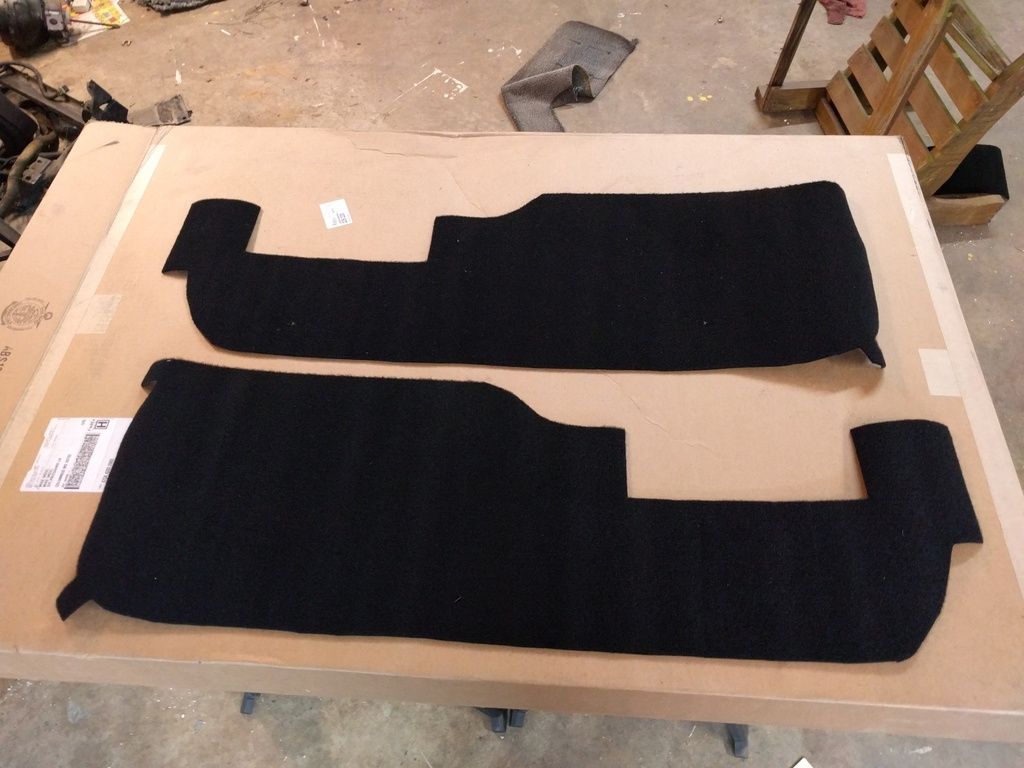
I cut them out and they were pretty close on initial fit up. It just took a bit of trimming and they were perfect
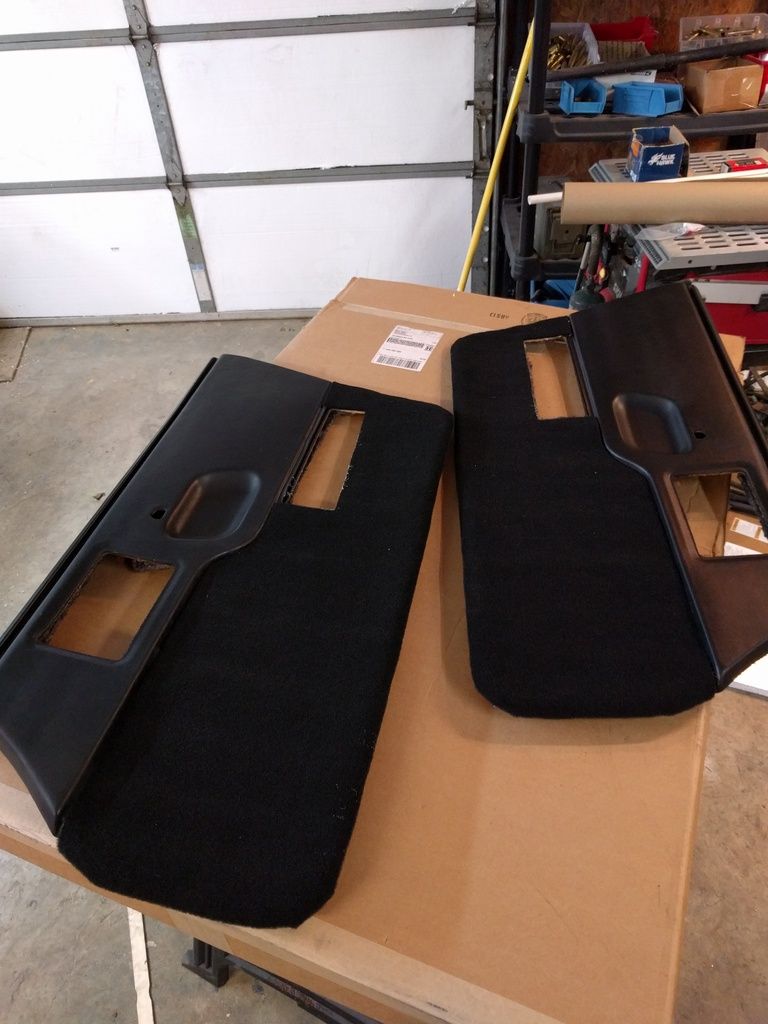
I glued it down on the front and let the glue set up. I used carpet and upholstery spray glue. It worked perfectly. Once I got the front glued down and set, I worked my way around the back tacking it down and clamping. The glue only took maybe 5 minutes to set up, so it was a very quick process.
And done!
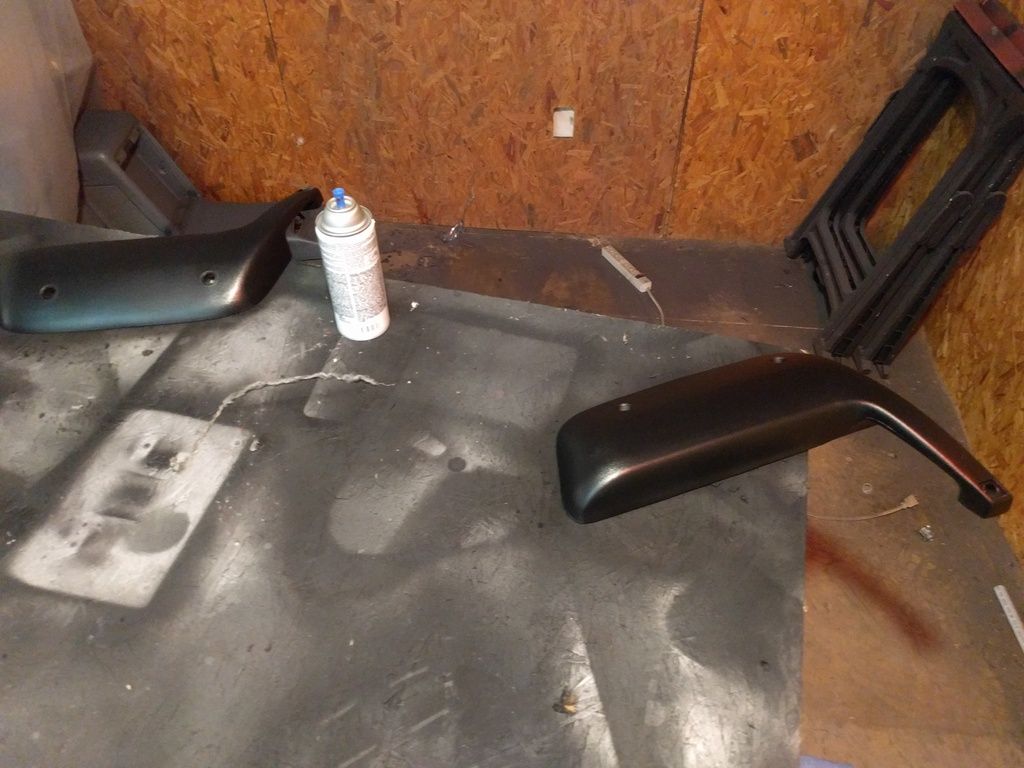
I need my car put back together for a race this weekend. I'm hoping to get my new leather armrests by then, but as a hedge I went ahead and painted my vinyl ones. I hope to not need to use them, as I am not goign to put the car back together until I get my new pieces or Fri evening, whichever happens first. Hopefully I only need to put the door panels back on once.
I did a bit more work on the interior, putting panels back and such. Nothing worth taking a picture of, but the next phase of the interior will be to pull the dash board and center console and paint them. After that the interior will be done, and with it the cosmetic restoration of the car.
On Friday I flew up to Lincoln, Nebraska and picked up my transmission. It's a 60 degree F23 from an 02 cavalier, EXACTLY what I was looking for. 72k on it, and it is in great shape. Now I need a flywheel and clutch and I'll be in good shape! No pics of the trans yet, but you all know what an F23 looks like. I plan to clean and paint it, so I'll get some pictures of that process.
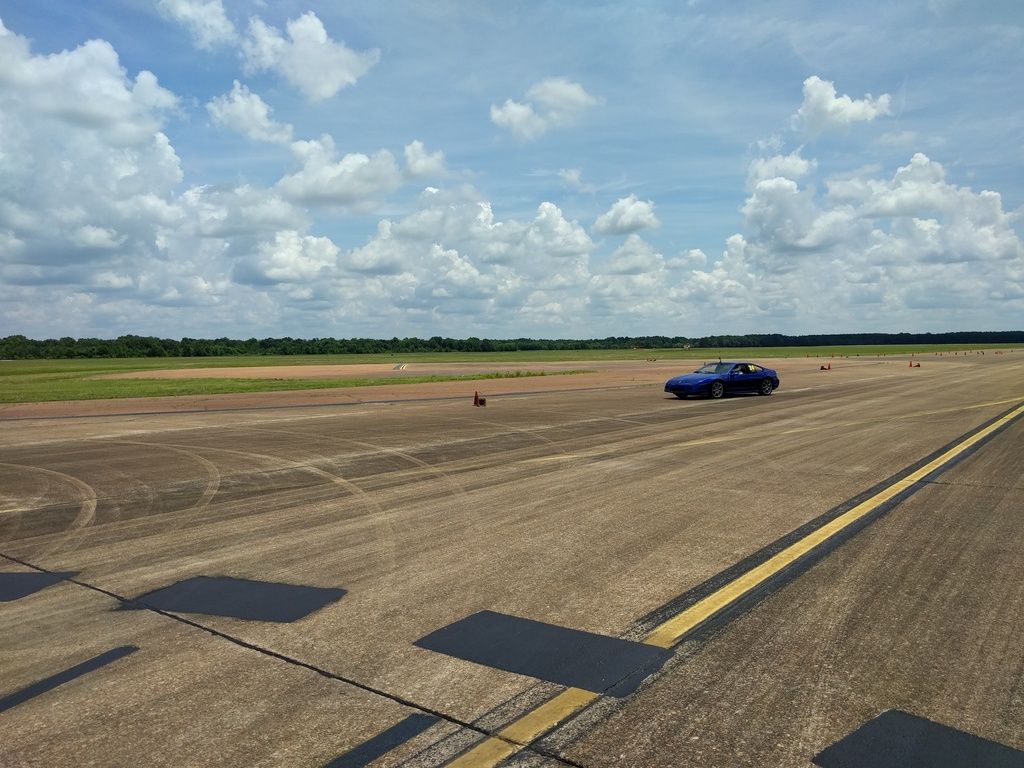
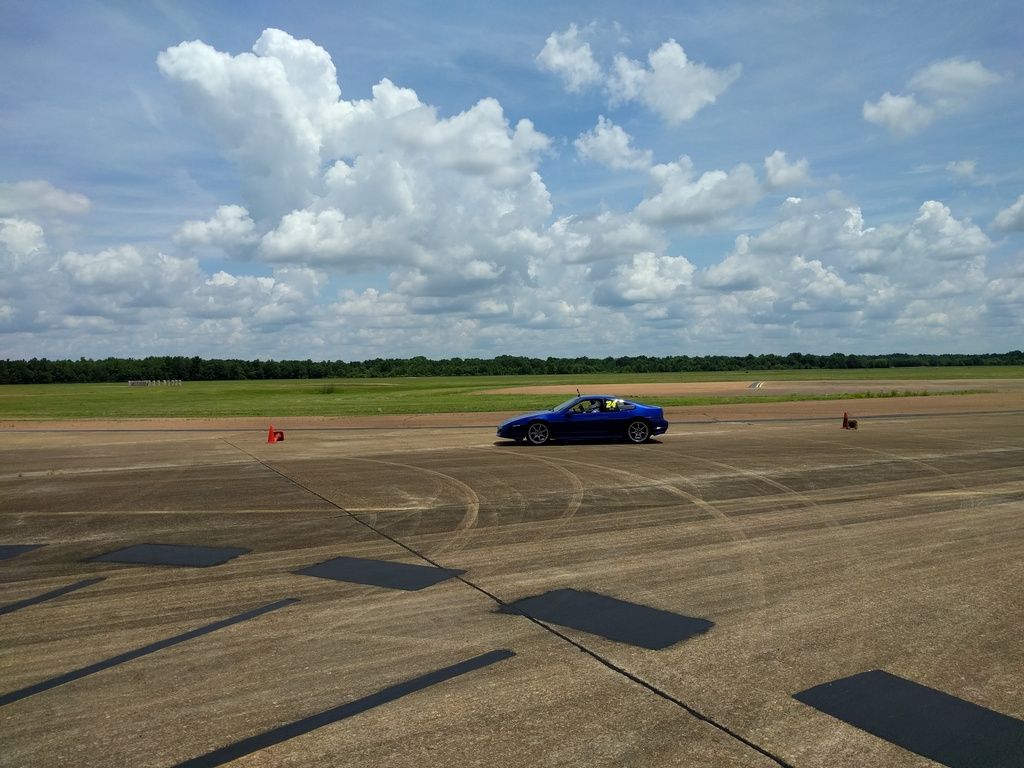
This weekend was race weekend! I am uploading some Youtube videos, but I also loaned the car to another club member whose car was broken down. This gave me a chance to get a couple exterior shots of the car driving. It's a rare time to see the car moving under its own power without me driving it.
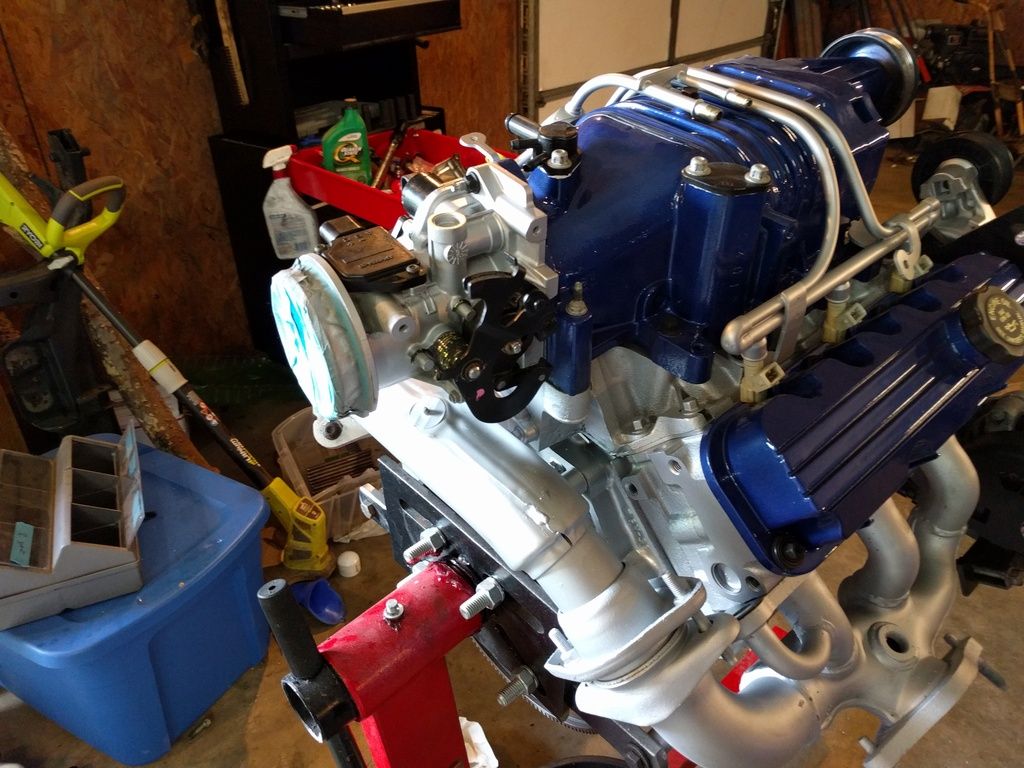
After I got done racing today I got back home and started working on the swap. I got all the accessories bolted on, valve covers, supercharger, and fuel rails. Aside from a few small things it's all put back together.
I still need to disassemble, clean, paint, and reattach the throttle body. I also have a 3.4 pulley that needs to go on. I'm moving right along with the swap, but I still have a way to go. But I did have one of the BEST moments of my swap so far. After I got it put all back together I ran a compression test. To refresh, my previous test before the top end rebuild was 75, 120, 100, 100, 75, 130 (in cylinder order). I was dreading this compression test, as it was a make or break point on this swap. It could have been the end of this swap, or at least the "start over" point. I hooked up the tester, cranked the starter, and repeated 6 times........................................
150 all around!!!!
I'm so happy, excited, thrilled, releived I can't even explain it. I took a major risk with this engine with the number of miles that are on it, and I think I got a winner. Hopefully this engine will be stout and still have plenty of life left in it once I get it in the car.
Not a lot of progress on the car. Still waiting on the upholstery stuff to come in, and haven't gotten around to pulling the dash yet.
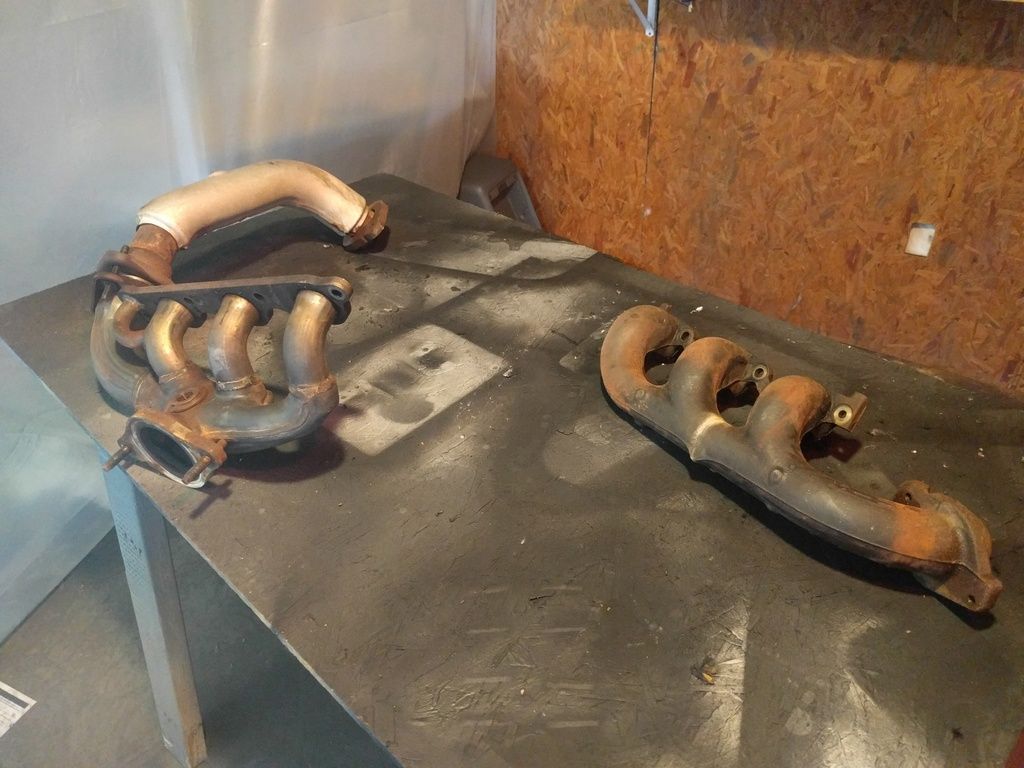
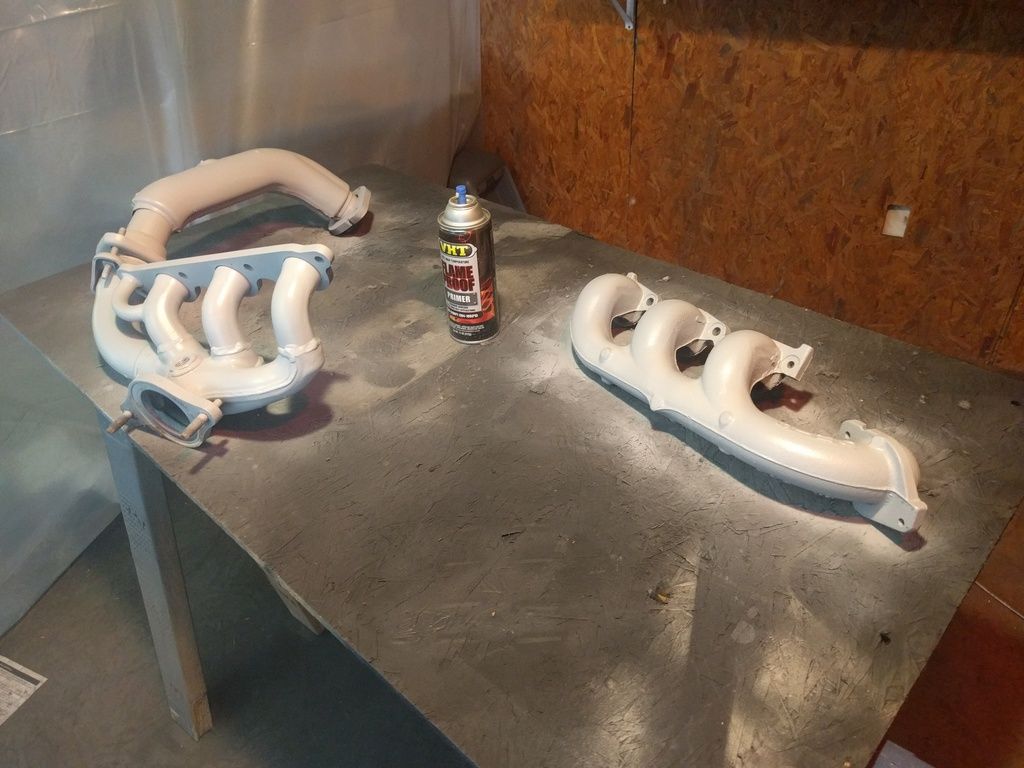
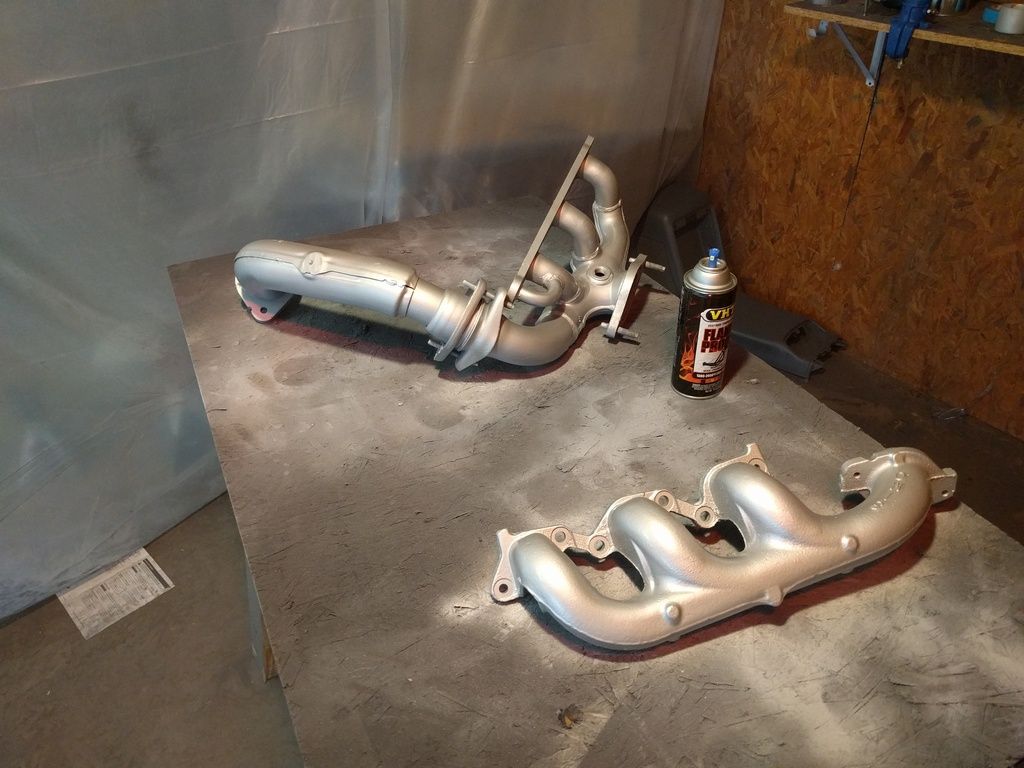
I did get the exhaust painted for the engine though
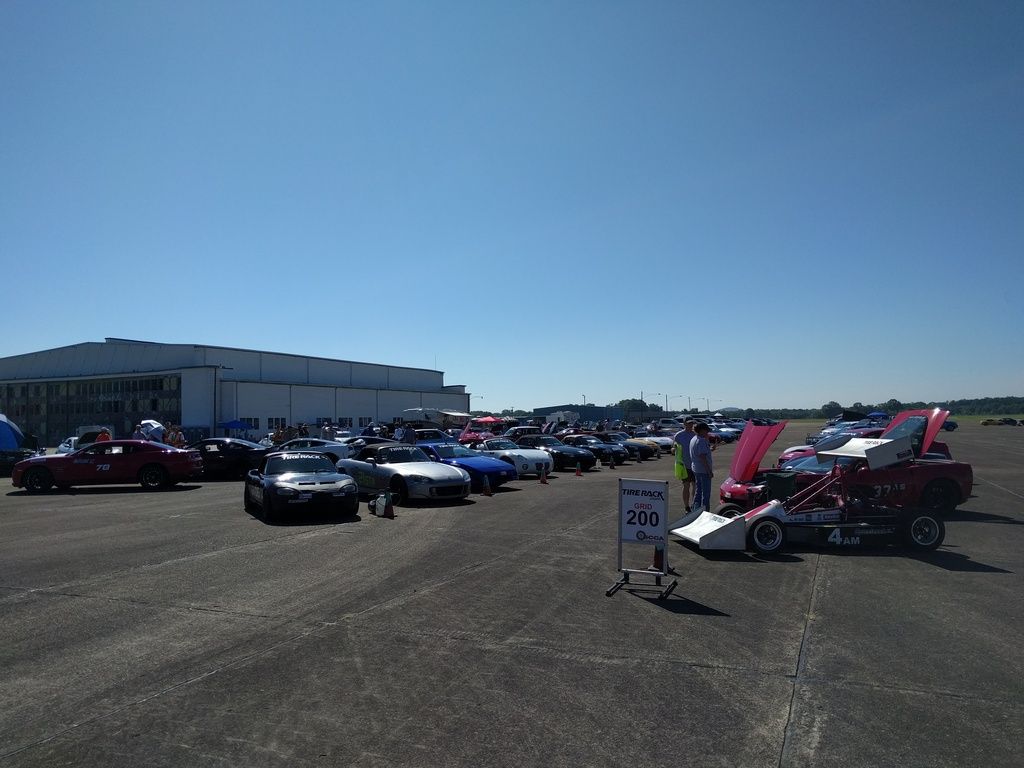
I also participated in my first national level SCCA autocross event. Our local club hosted it at Grenada, MS and it was an absolute BLAST. Something is ass backwards though when I spend thousands of dollars at a sponsor's business and I need to run their stickers. I thought it was supposed to work the other way around
We had something like 100 cars there, 13 in my class.
I didn't finish last, but damn close. I'm getting better at pushing the car, and it exposed the brakes as a major issue. They're not bad when cold, but once they heat soak they're GONE. I'll be upgrading them shortly. I'm really glad I trailered the car there, because it was not in driveable condition to get it home.
[This message has been edited by Napoleon_Tanerite (edited 06-21-2016).]
The car and engine look great, good job! Have fun driving the crap out of it because that's what where supposed to do. That 3800 would make mine a lot more fun.
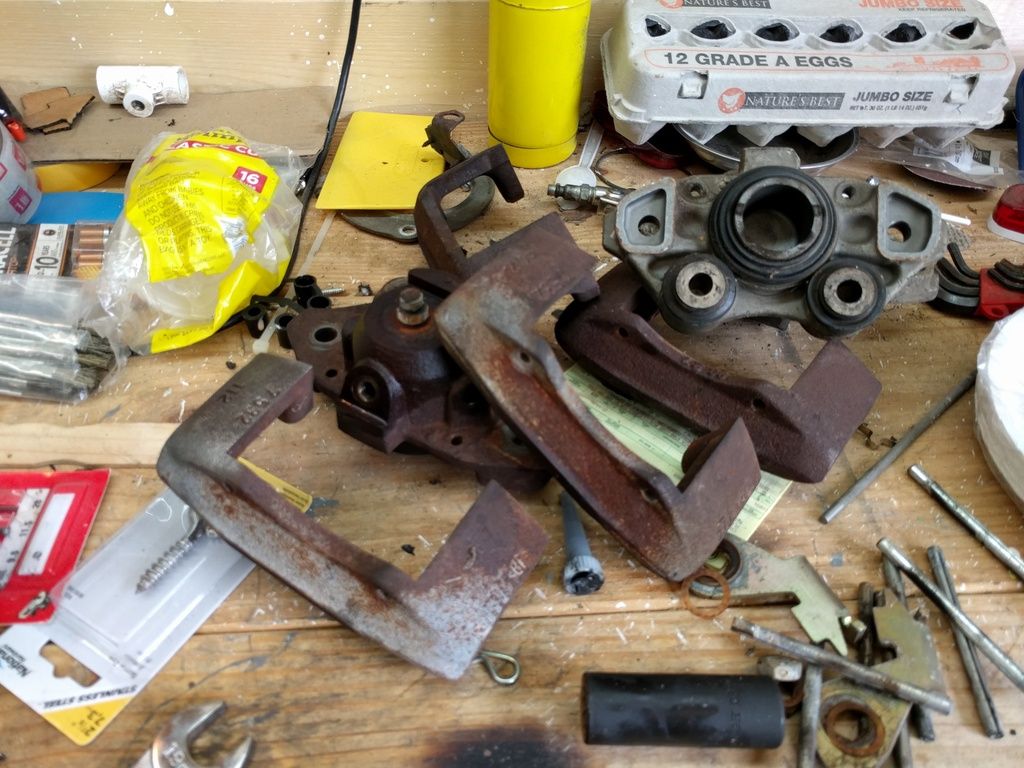
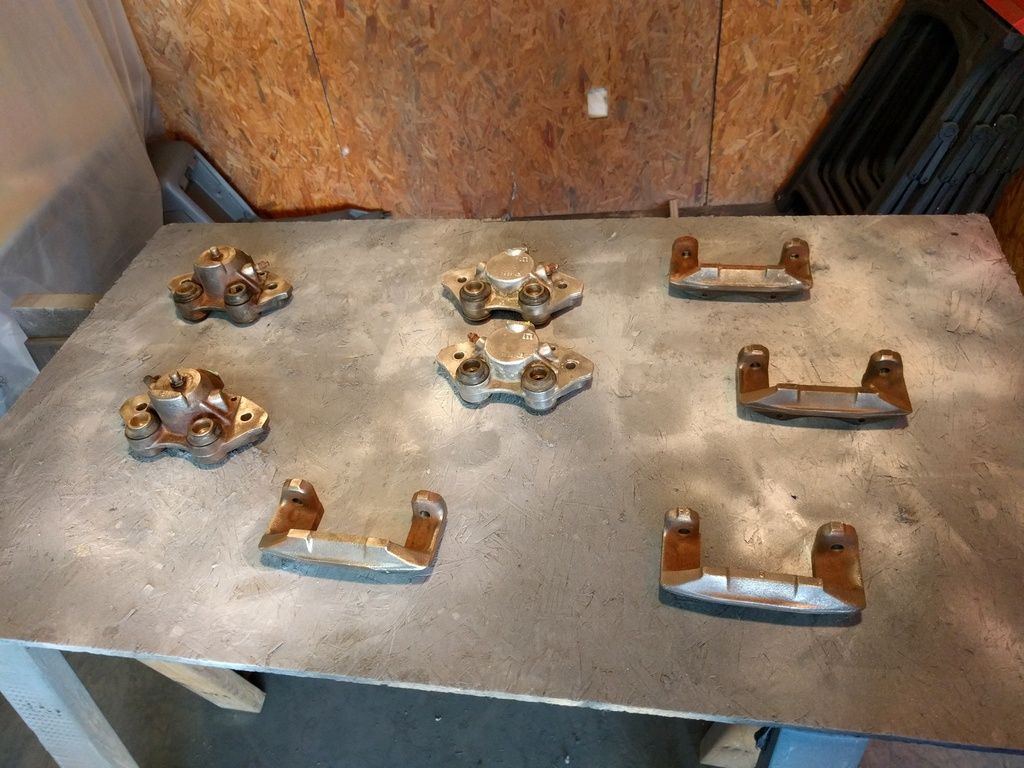
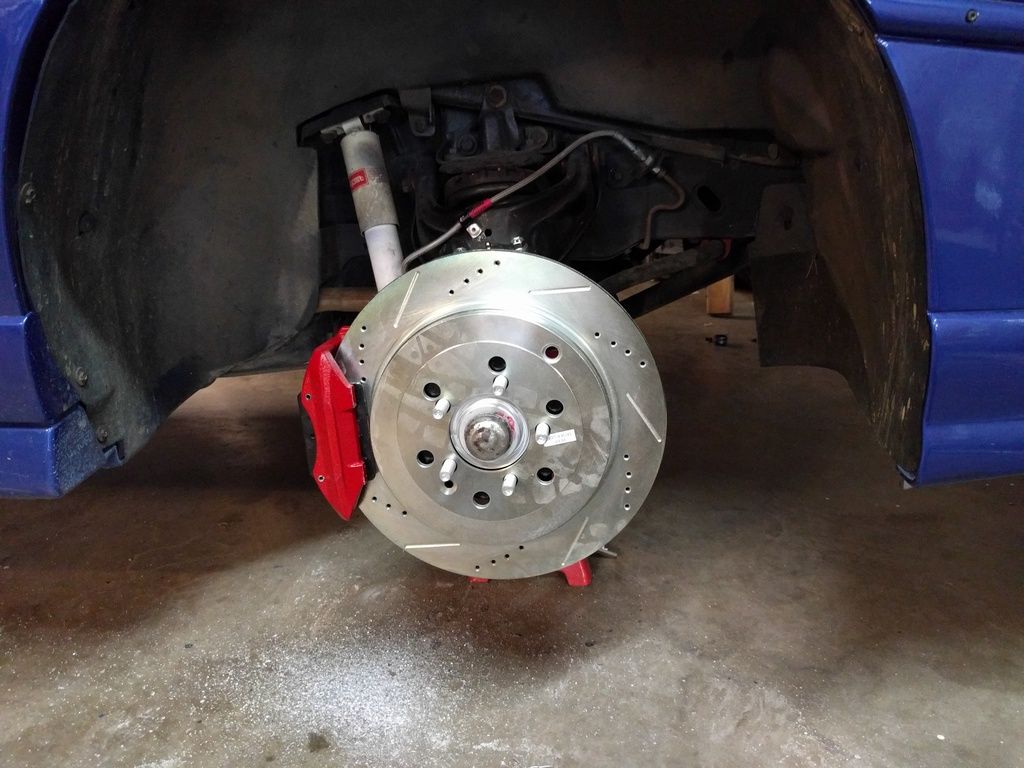
I got to work on my brake upgrades. I took my 88 calipers apart and they went where just about everything goes-- into the paint booth.
A quick shot of red paint and it was time to put them together. I used a set of Hawk HP+ pads. I've got experience with Hawk and I'm a big fan. I also used a new set of bleeders to replace the corroded ones that were on there.
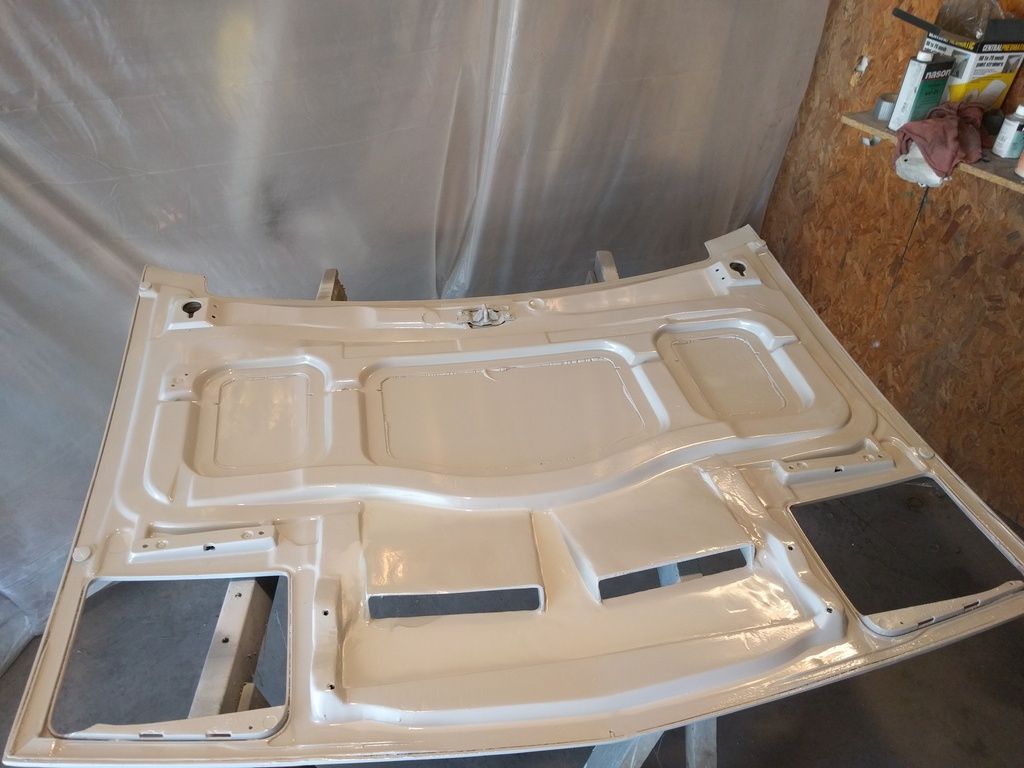
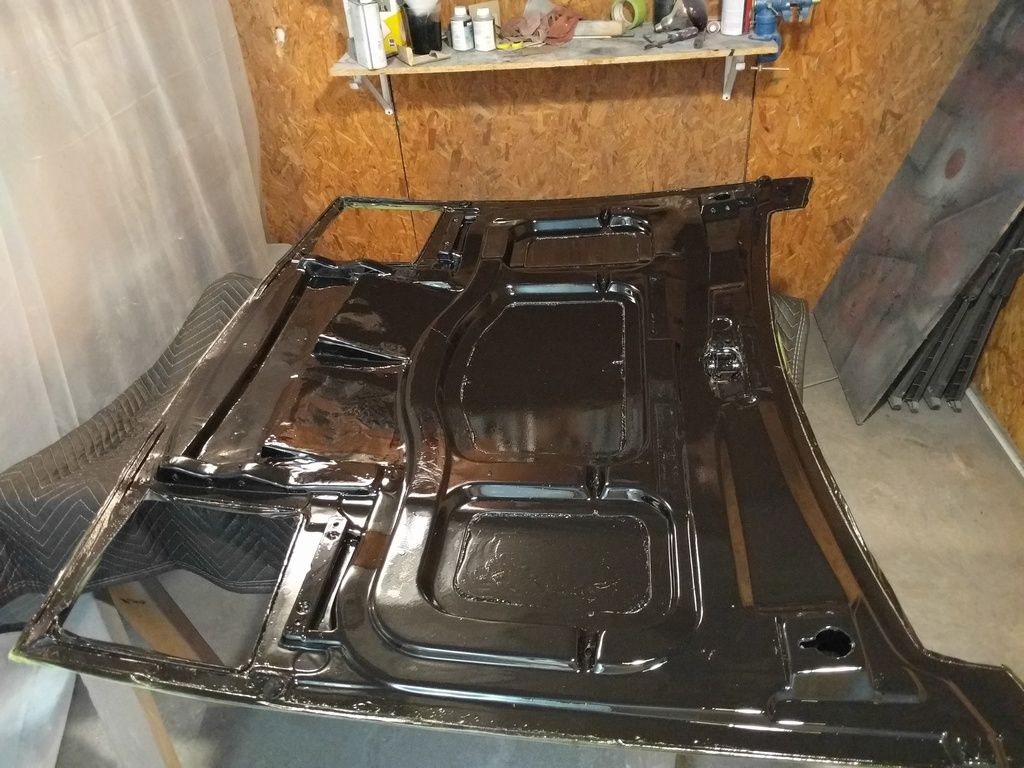
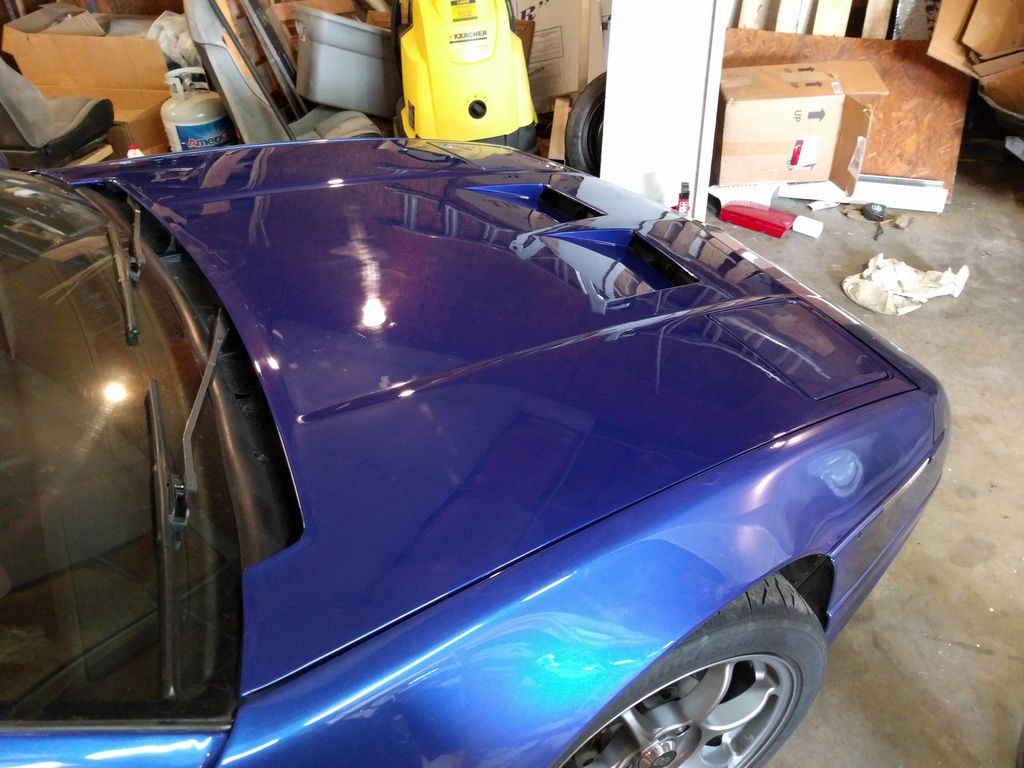
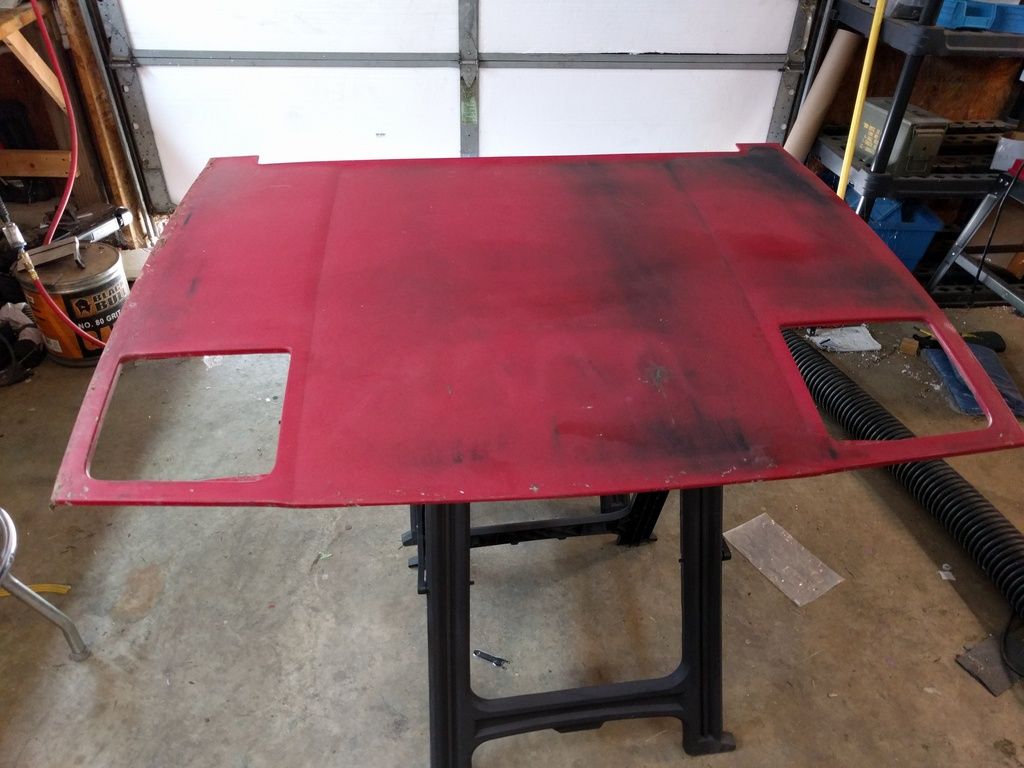
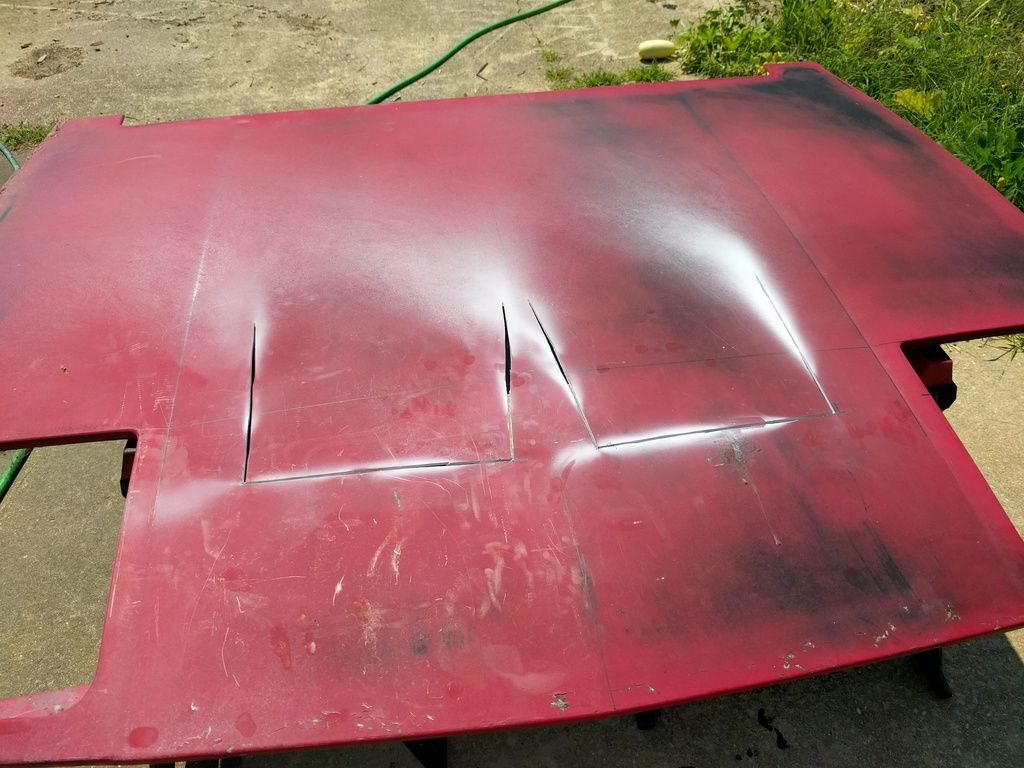
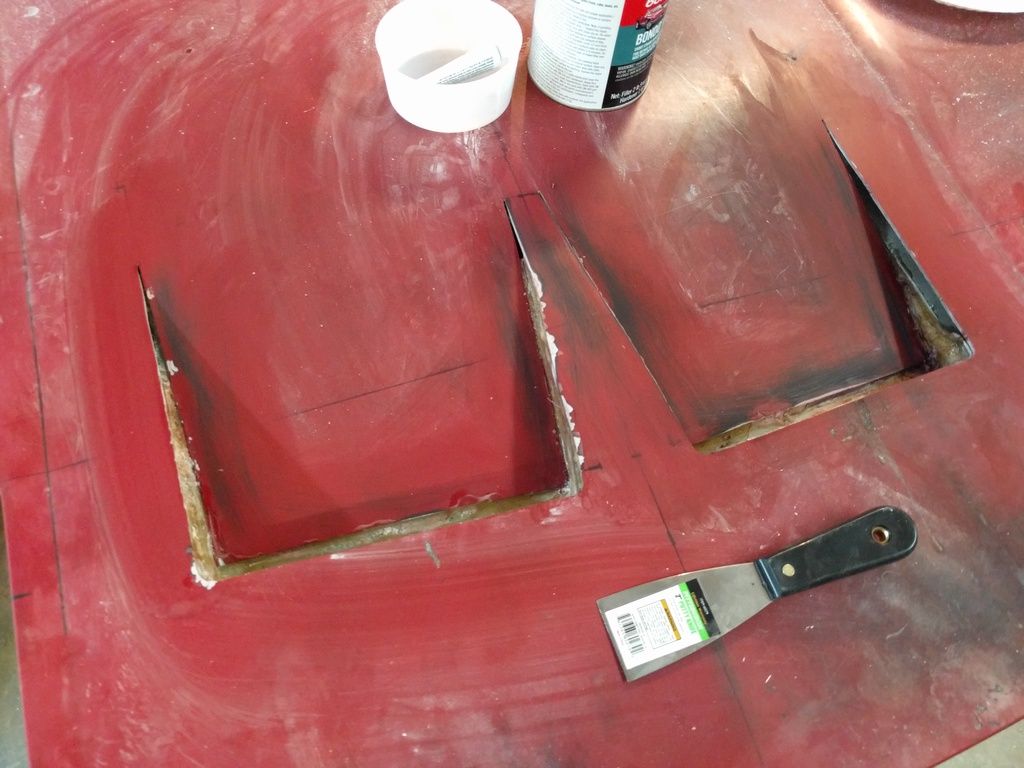
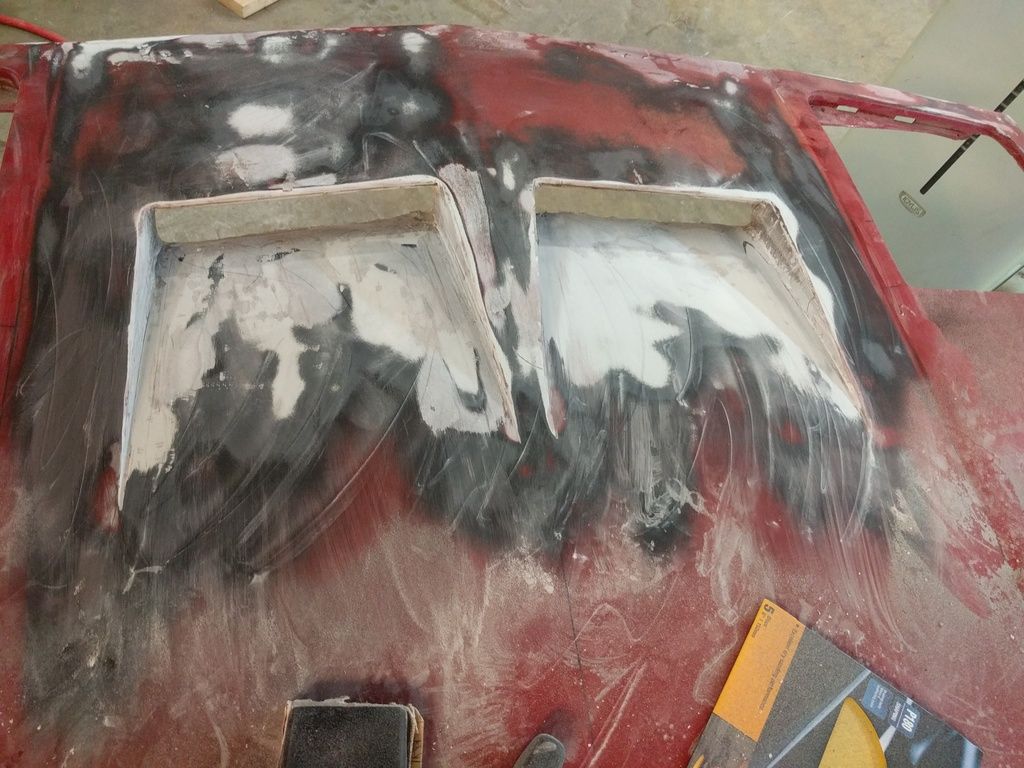
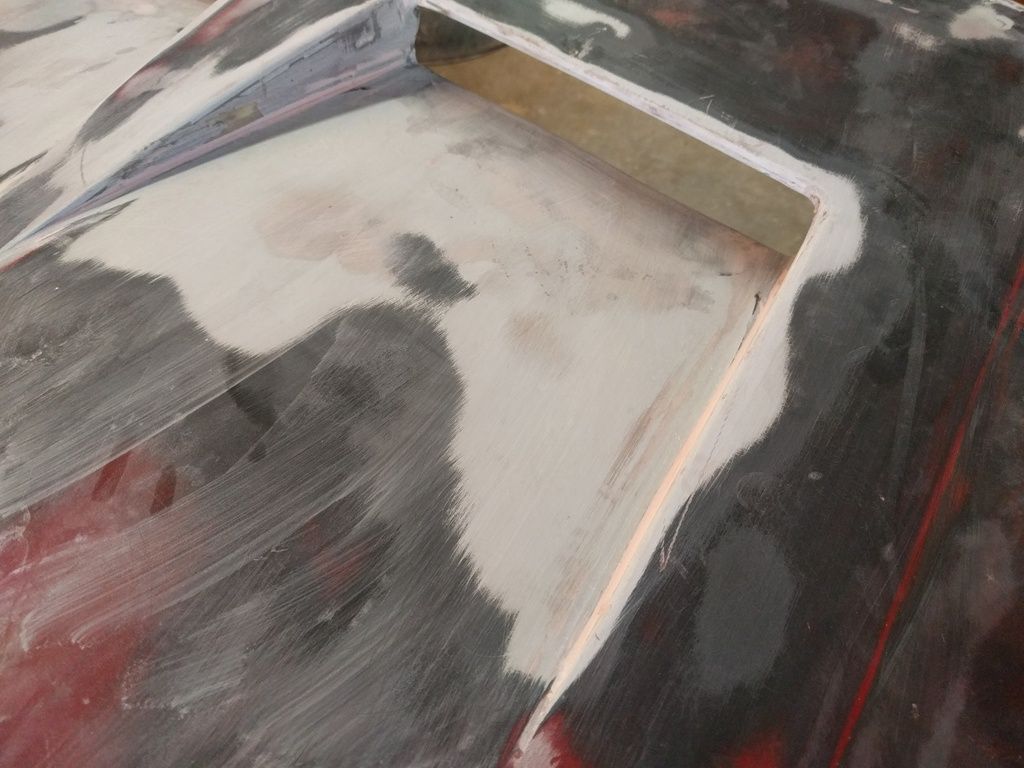
Another piece of that 88 coupe that I had plans for was the hood. Well, I finally got around to it today.
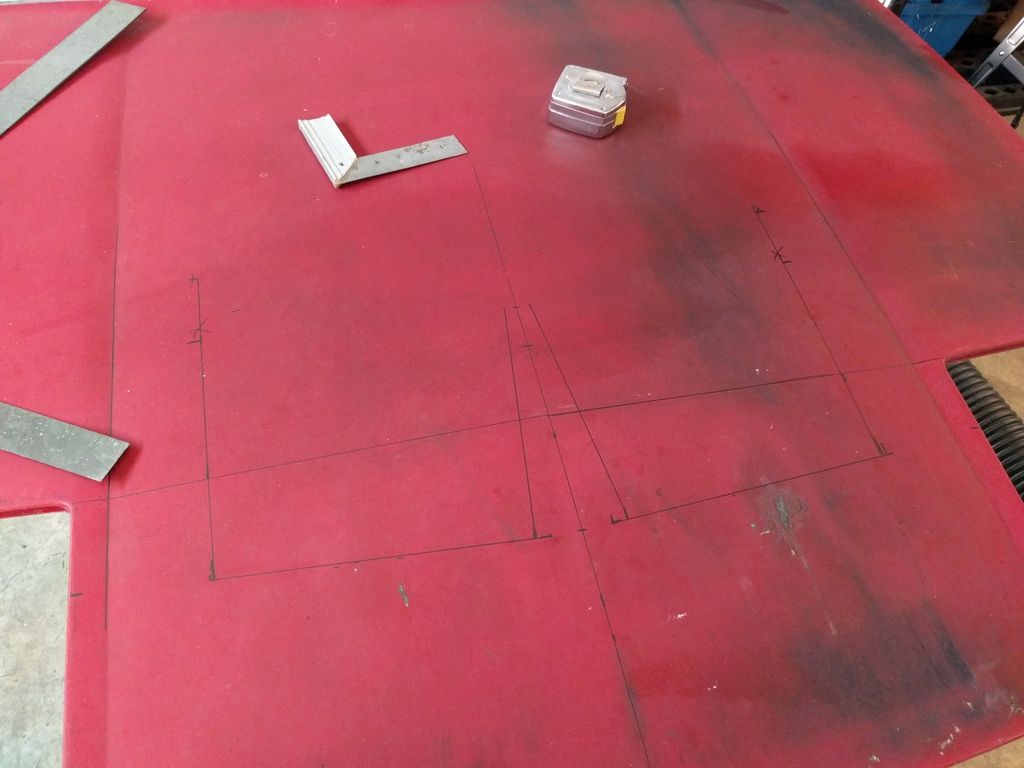
I measured it out a bunch of times to make hood scoops
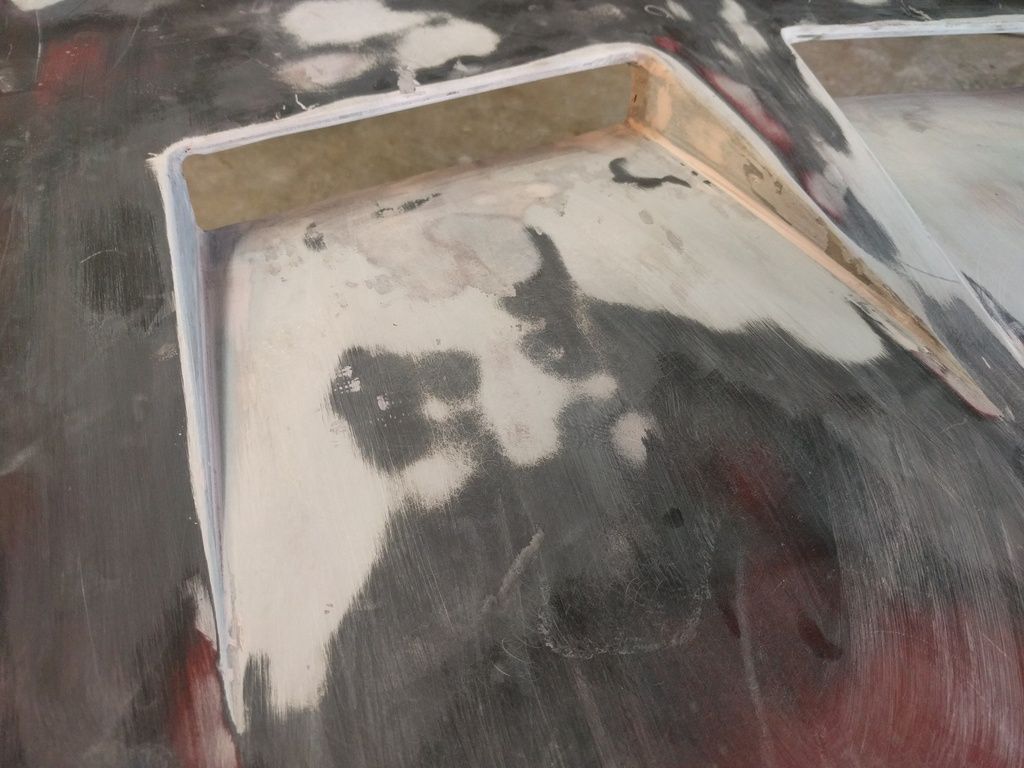
I cut it with an angle grinder. I had to be careful. That SMC doesn't put up much of a fight against the grinder and it's really easy to take too much off.
I also removed some of the structure on the underside. I had thought this was steel, but turns out it's SMC as well.
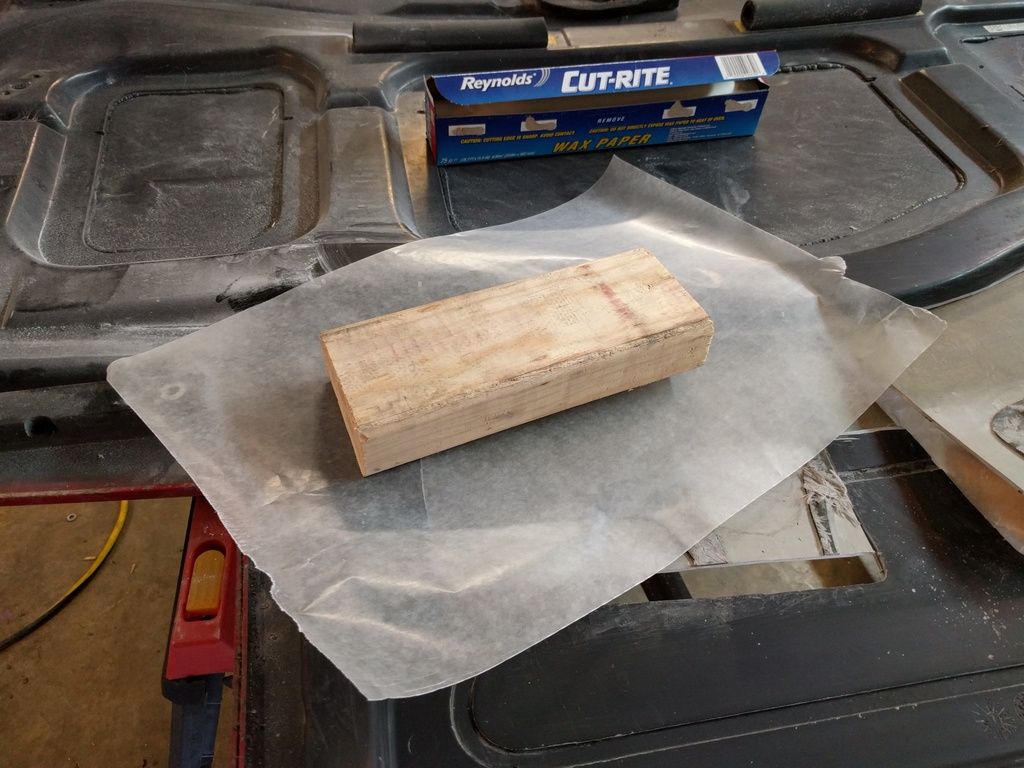
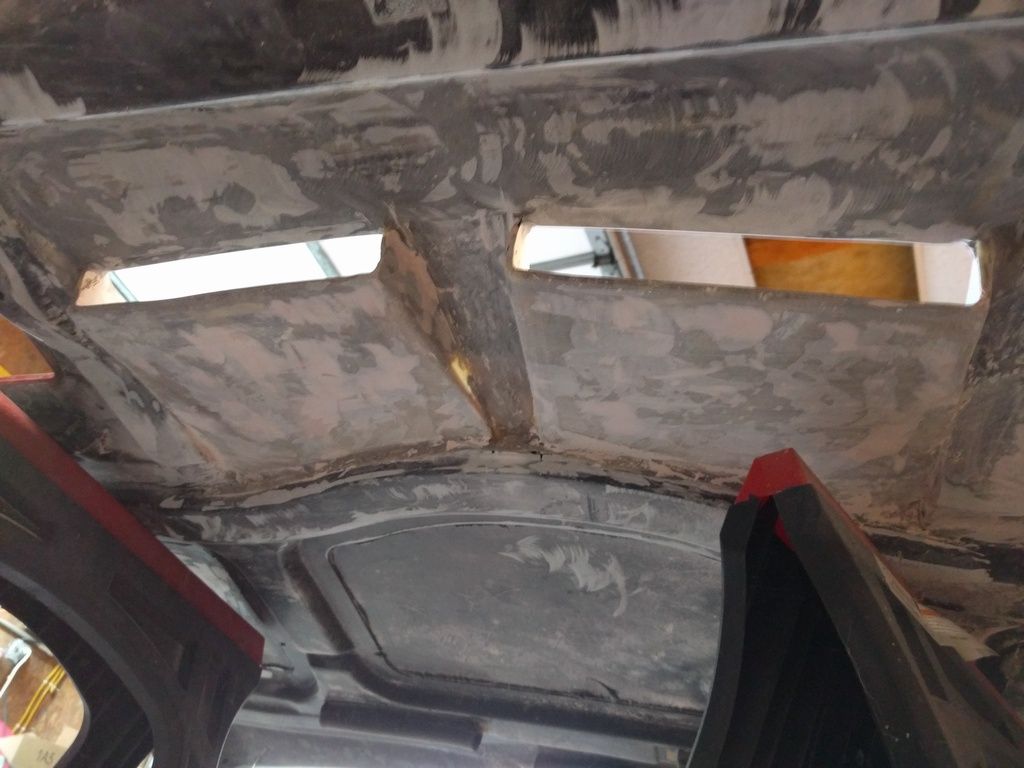
I used some very precise bucks and truly space age mold release material
Rough glassed it in
Now I wait for the glass to cure. I'll fill it in with some glass reinforced filler and shape it. I'm looking forward to how it will look. It seems like my 87 is becoming more and more of an 88 as I move along.
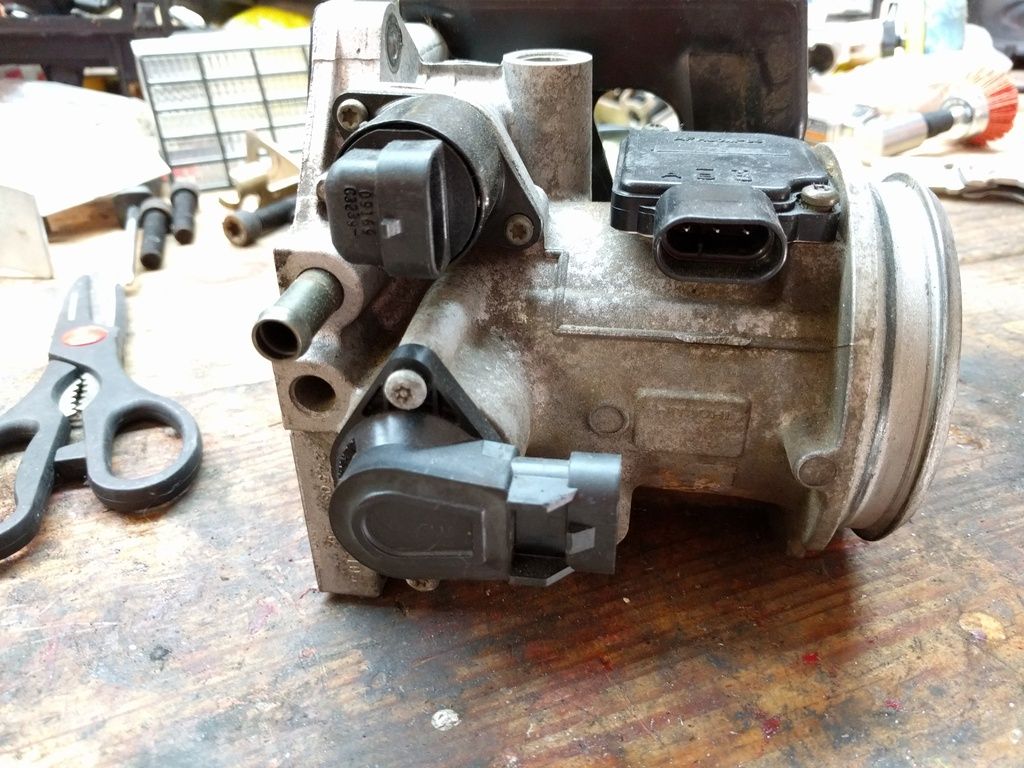
I also did some work on the engine. I disassembled the throttle body and painted it. I took a bunch of reference pictures so I know how to put it back together.
Tomorrow I do more work on the hood. I'm still waiting on the brake parts to come in to mount the new setup on the car. It's going to be a tight turn. The parts are shipping monday, so probably a wed arrival, and I want to race on Sat. Shouldn't take too long, but I've said that a LOT of times.
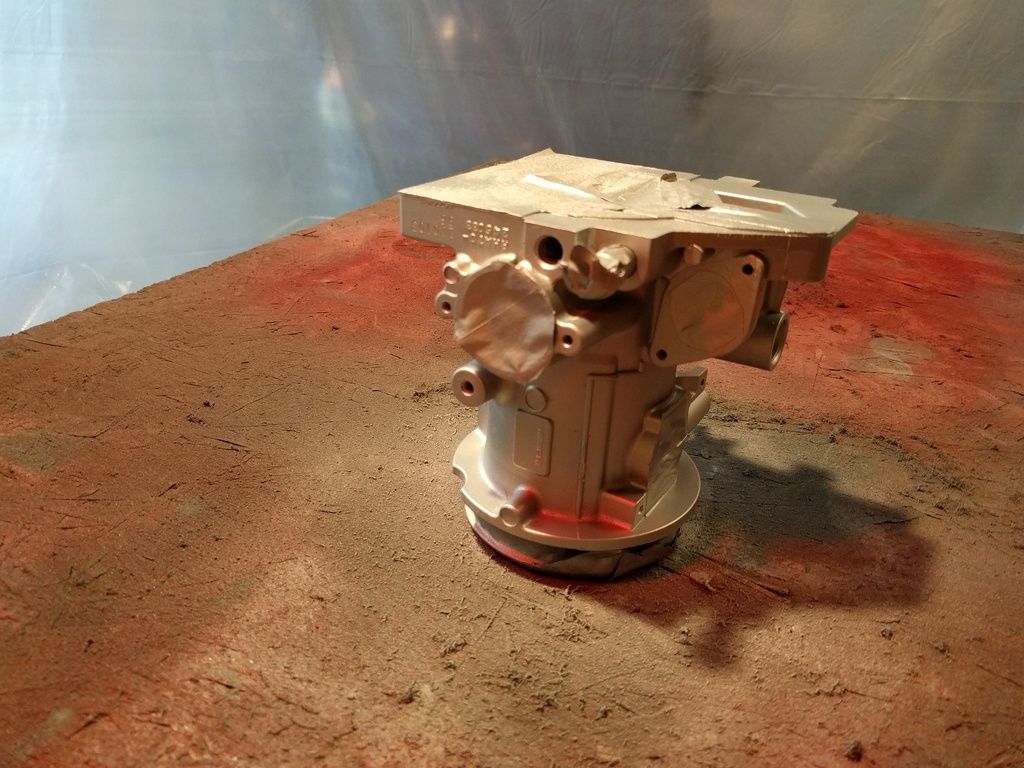
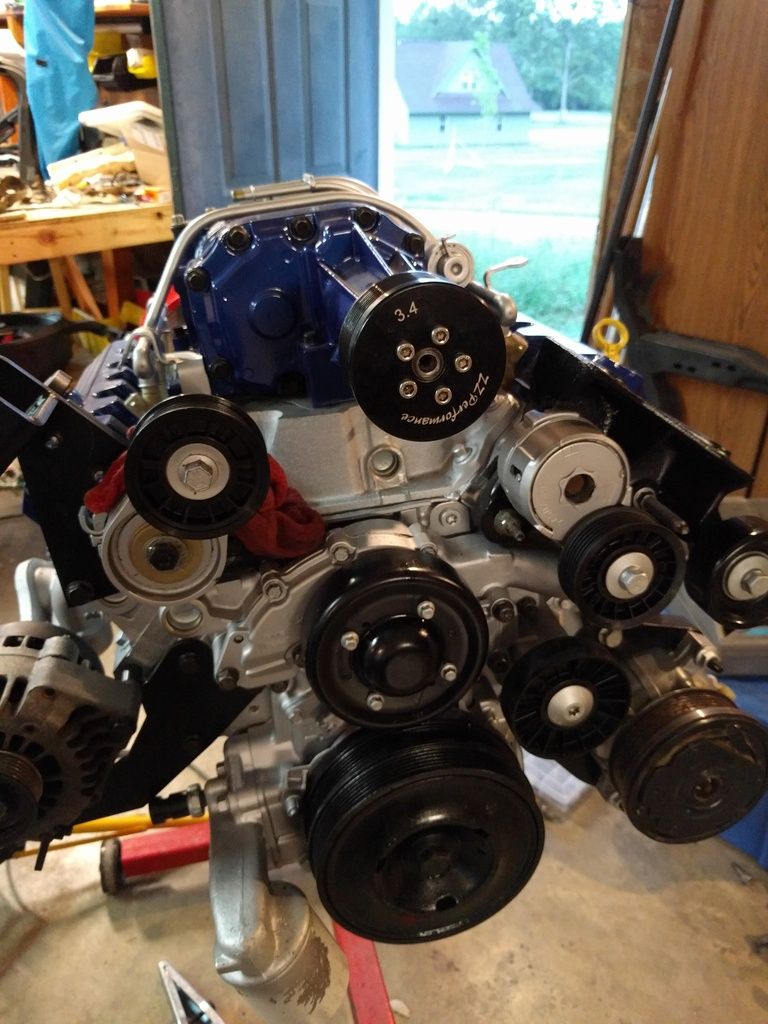
Here's the latest. I got the throttle body painted up, reassembled and put back on the engine.
That was the last major thing that still needed to go on the engine. Now it's belts, hoses, harness, etc.
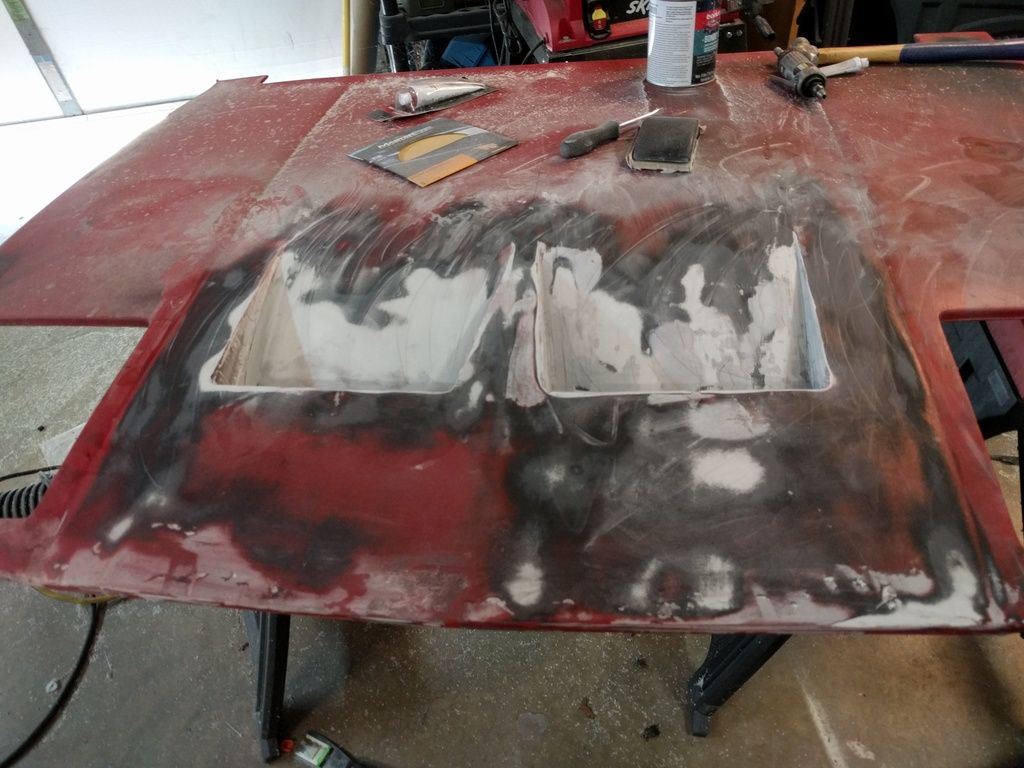
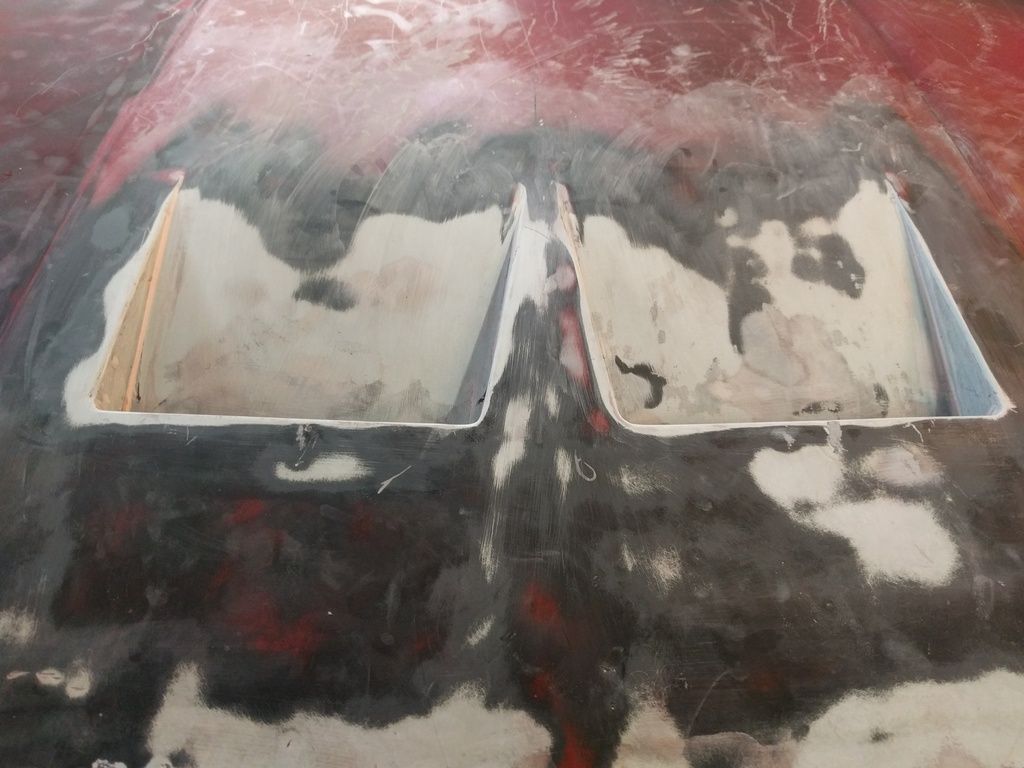
Work continues on the hood. I am in the process of filling and sanding it to shape the scoops properly. It's getting there, but it's a lot of sculpting
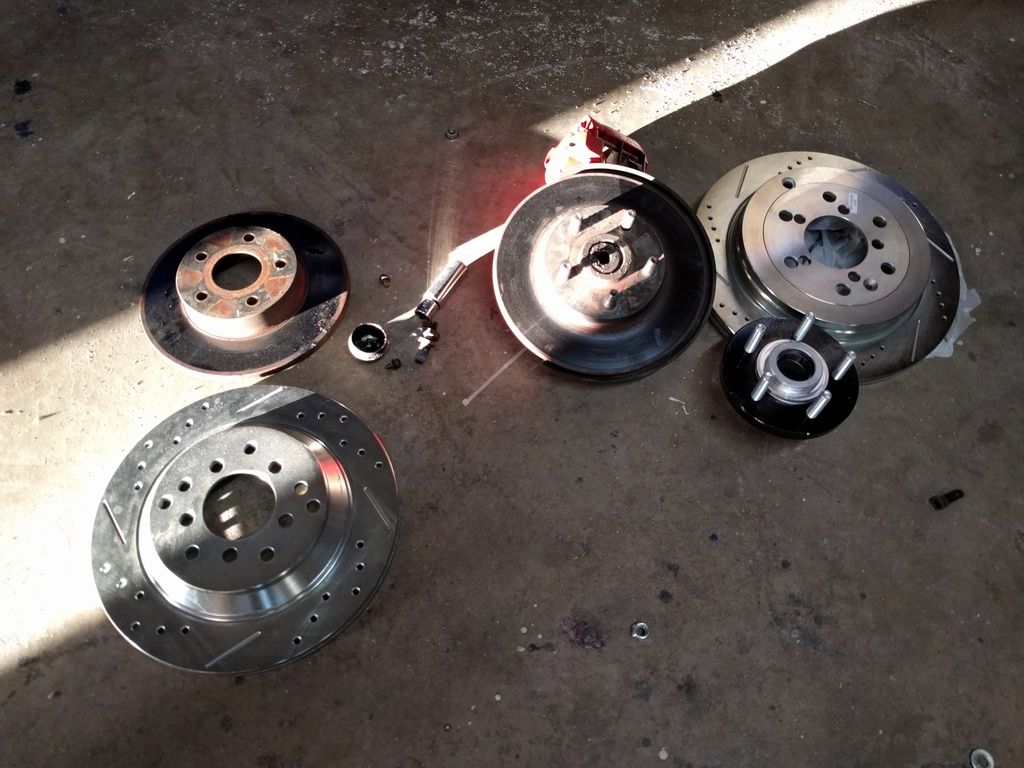
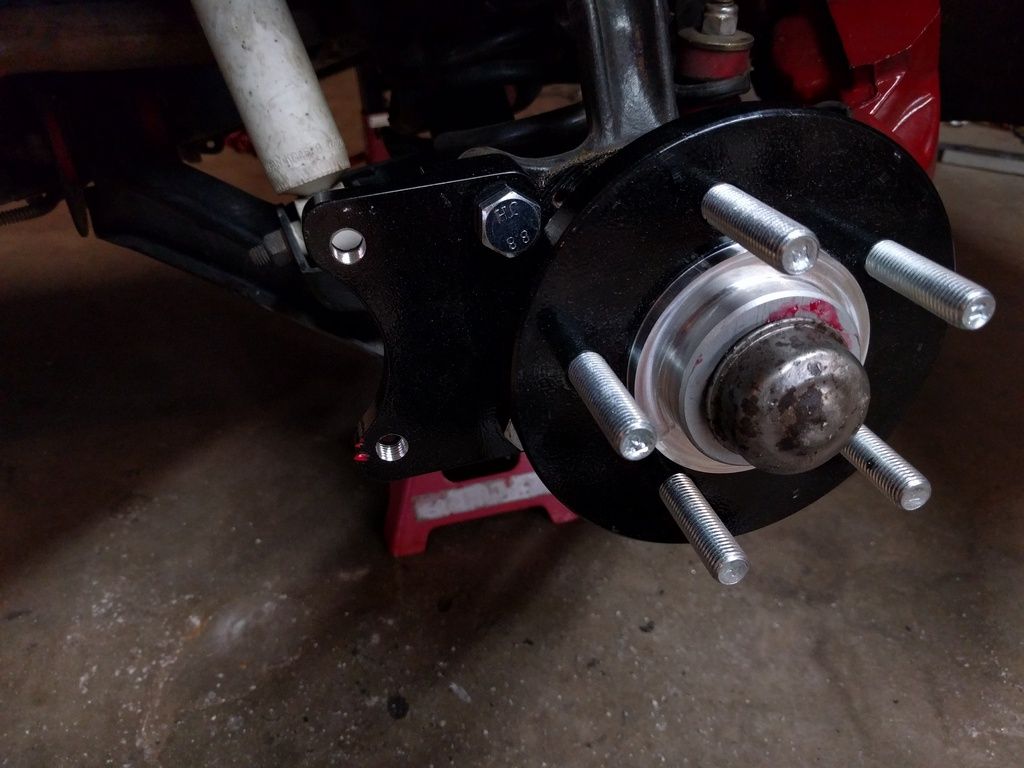
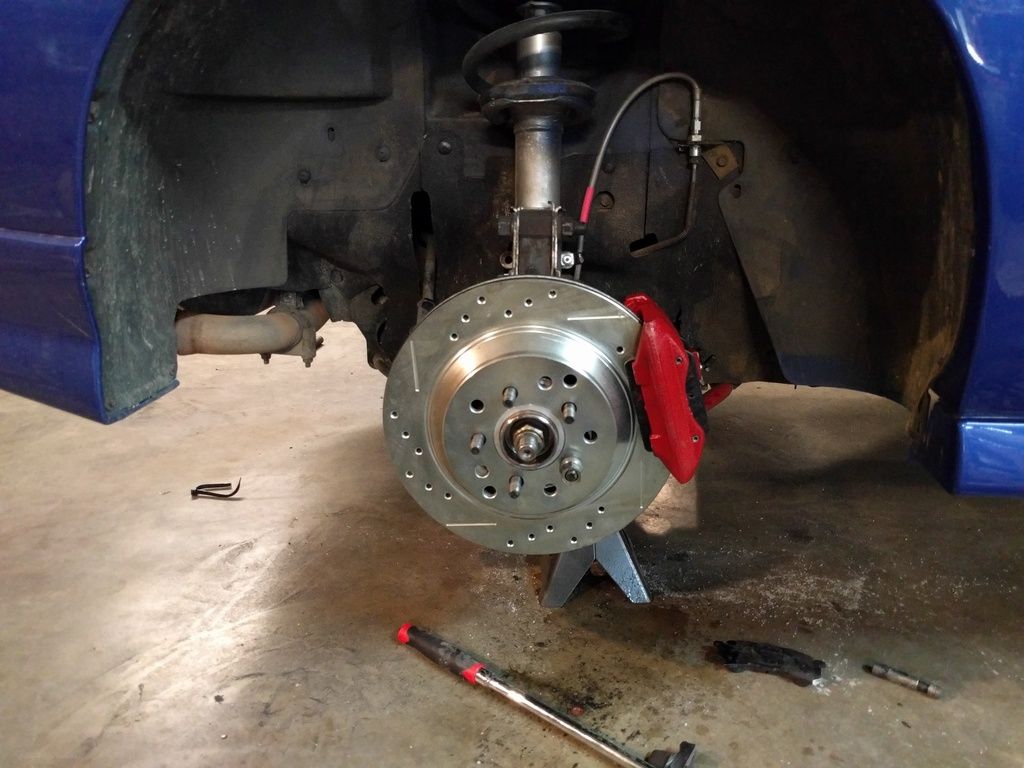
Brake parts came in too. Quite a substantial step up I'd say!
I'm still working some bugs out of the system. I think there may still be some in air in there. The pedal is long and soft, but when it grabs man it REALLY grabs. I'll get another bottle of fluid and bleed it some more.
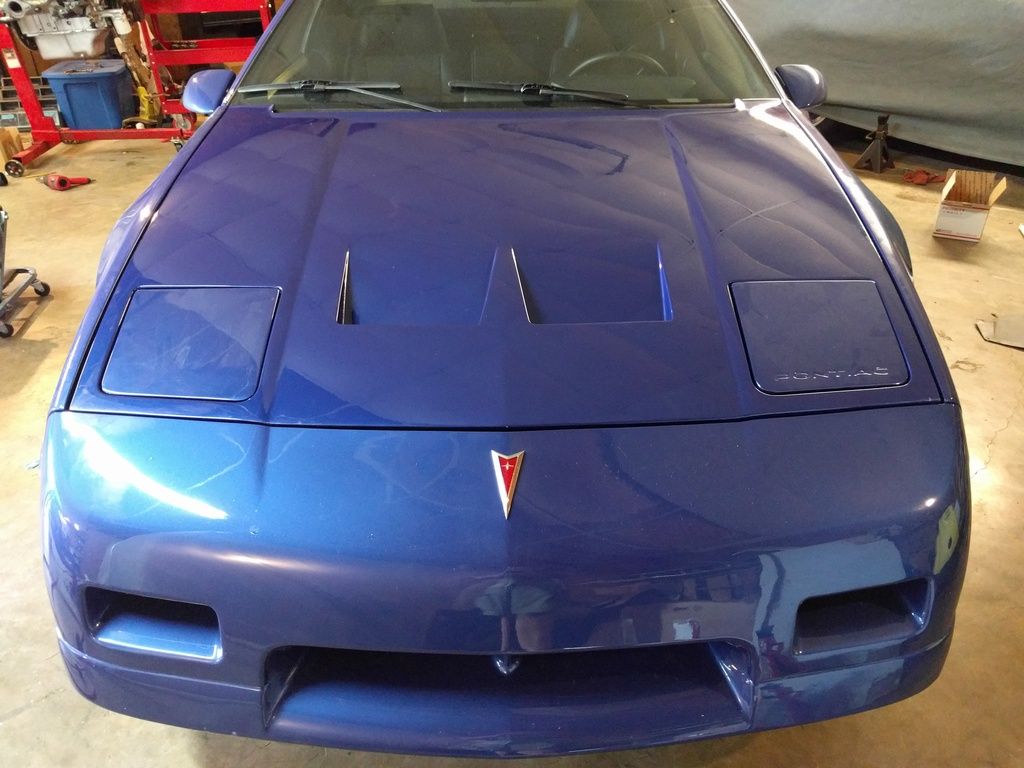
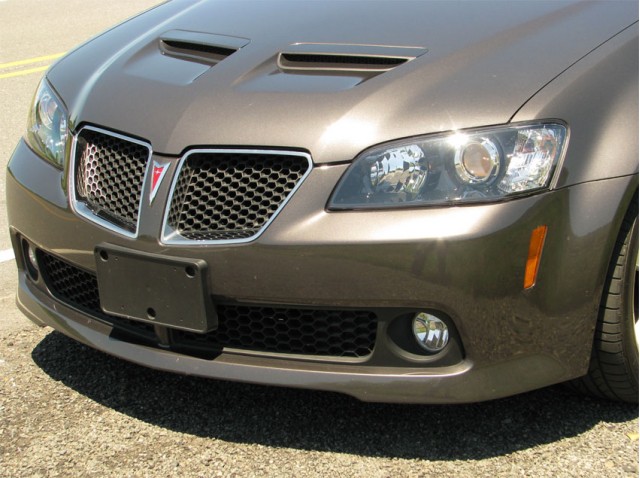
Quick update-- I've done a lot more work on the hood. Lots of filling, sanding, filling, sanding, etc. It's messy itchy work, but it's starting to really look nice. I like how it still looks like classic Pontiac. My inspiration for the look was the scoops on the G8
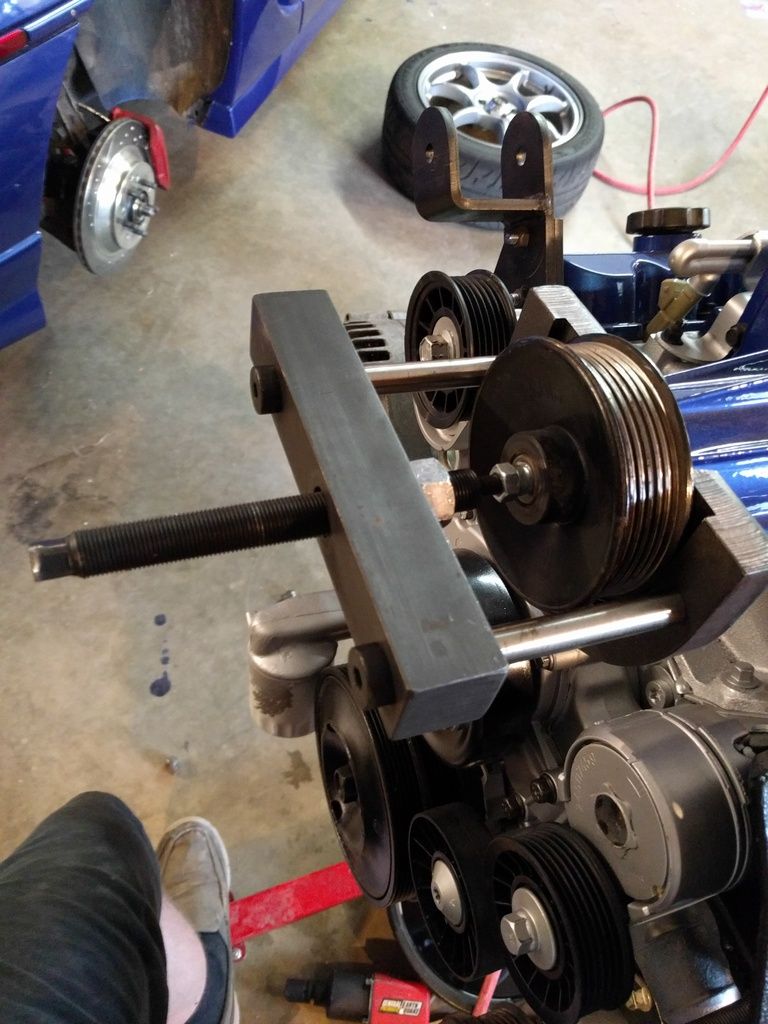
The engine swap is almost ready to mount to the cradle (once I get a set of mounts). I swapped the pulley out for a ZZP modular system running a 3.4
After I took this pic I realized I had the puller set up wrong. That pulley did NOT want to come off, but I got it.
I've got the harness being built now. I still need belts, hoses, and vacuum lines, but other than that it's pretty much ready.
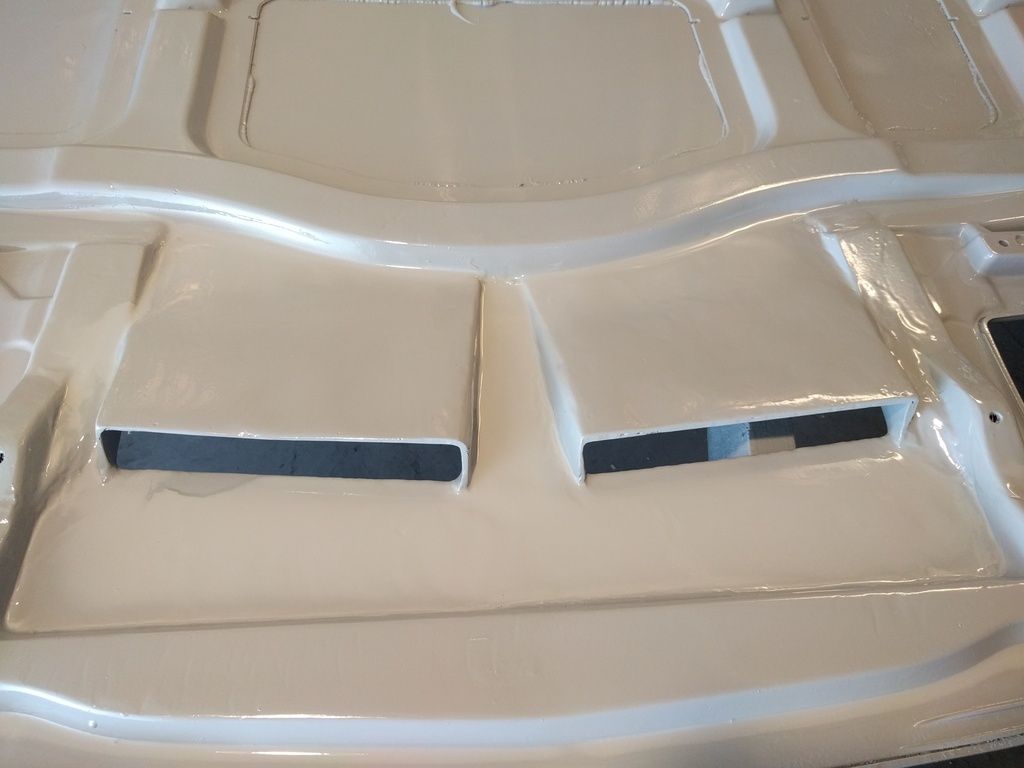
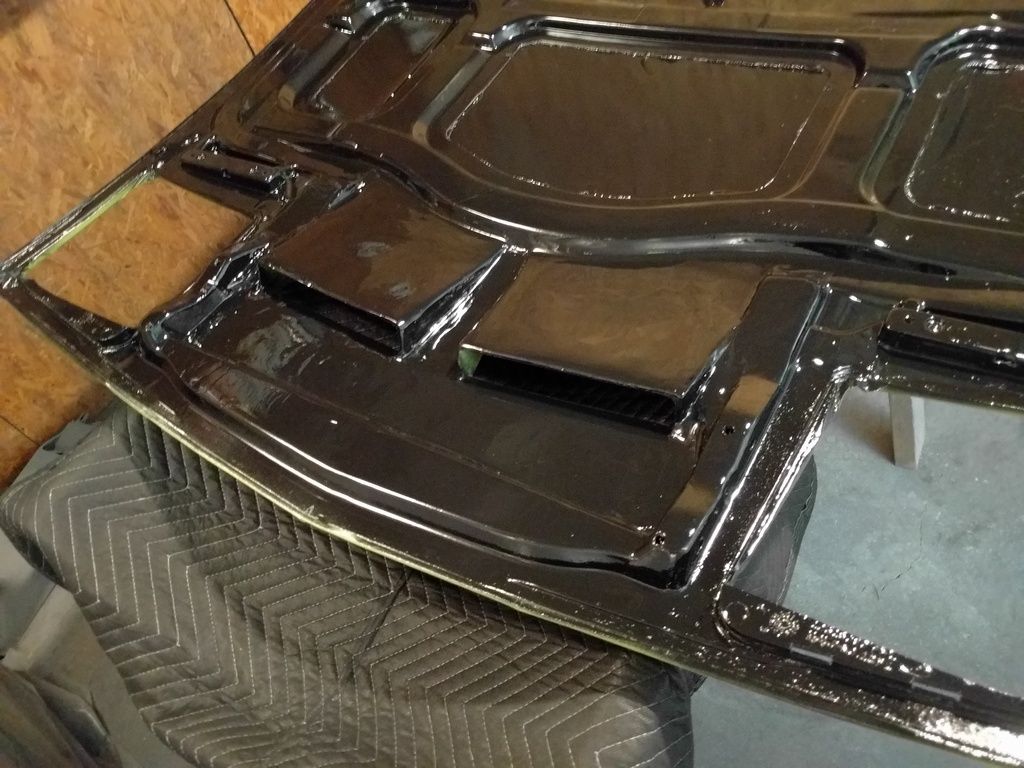
I've also been working on the hood. I spent a lot of time working on the underside to get it looking decent. It isn't perfect and probably never will be, but will look decent enough.
Just a bit more touch up work and it will be ready for primer and paint. I'm going to test fit it on the car tomorrow to make sure it lines up properly with the radiator. I measured it the best I could, but I want to make sure it fits before I go finishing it.
Glad the pulley puller worked out for you. I hear horror stories how hard the pulleys can be to get off the superchargers, and am pretty sure I am gonna leave mine as is. When you send the puller back, I may just stick it up in the mall for sale.
The hood is looking amazing. I really like that look. It is one thing I have not tried to tackle. I have had 2 different parts cars now that went to scrap, and thinking back I could have used either one of their hoods to mess with cutting up and trying to do it. If I screwed it up, no loss whatsoever. Ahhhh hindsight.....
I just have to know what your using to clean and prep things like your throttle body and break calipers. No matter what I do the paint seams to pedal back off. I can only assume that I'm not getting things clean enough.
Thanks and if you dont mind I have a few questions about your f23 swap before I get completely committed in mine.
I've been working nights this week, so I've had time in the mornings to work on the car.
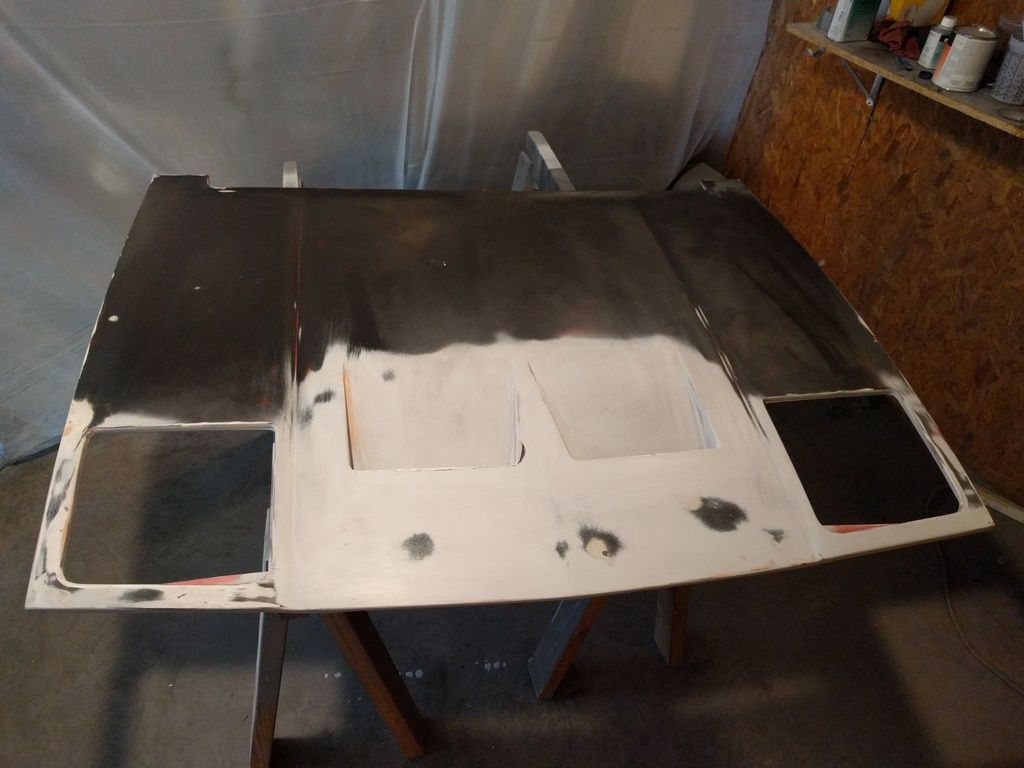
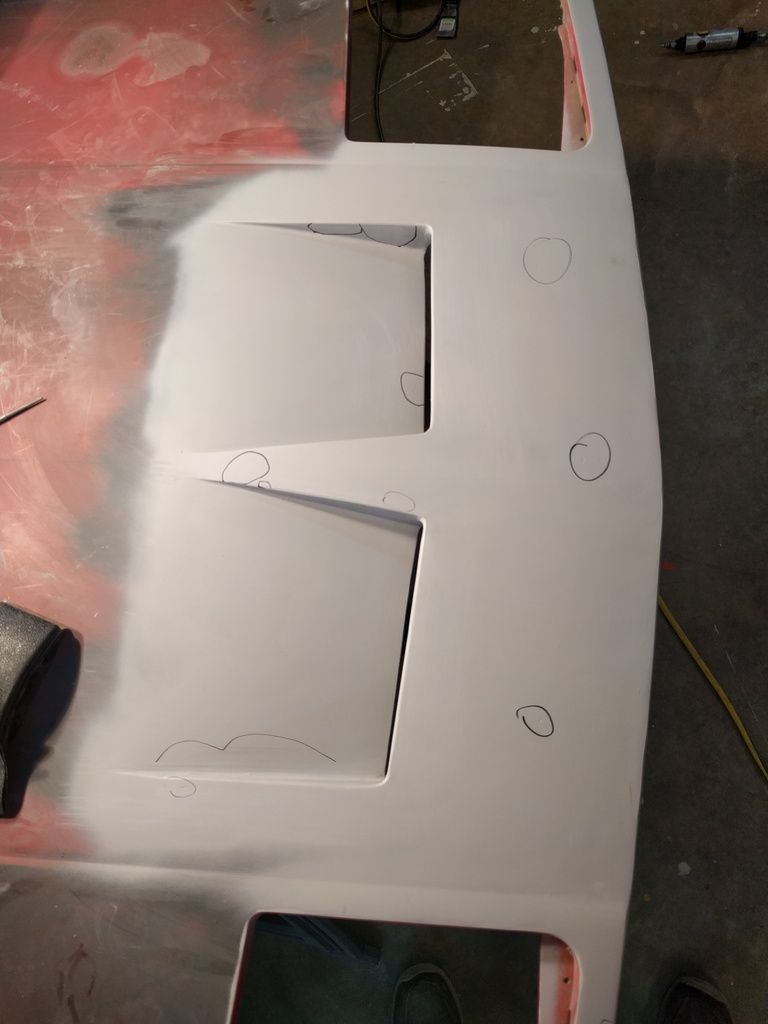
With the primer dry from yesterday I marked everywhere I still needed to fill
A bit more filling and sanding and now the hood is ready for primer and paint. The underside isn't perfect, but it's good enough to paint up. I figure it won't be noticable with the hood closed anyway, so who cares.
I also started work on the last phase of the interior.
I'll probably regret doing this
Cleaned and dried everything
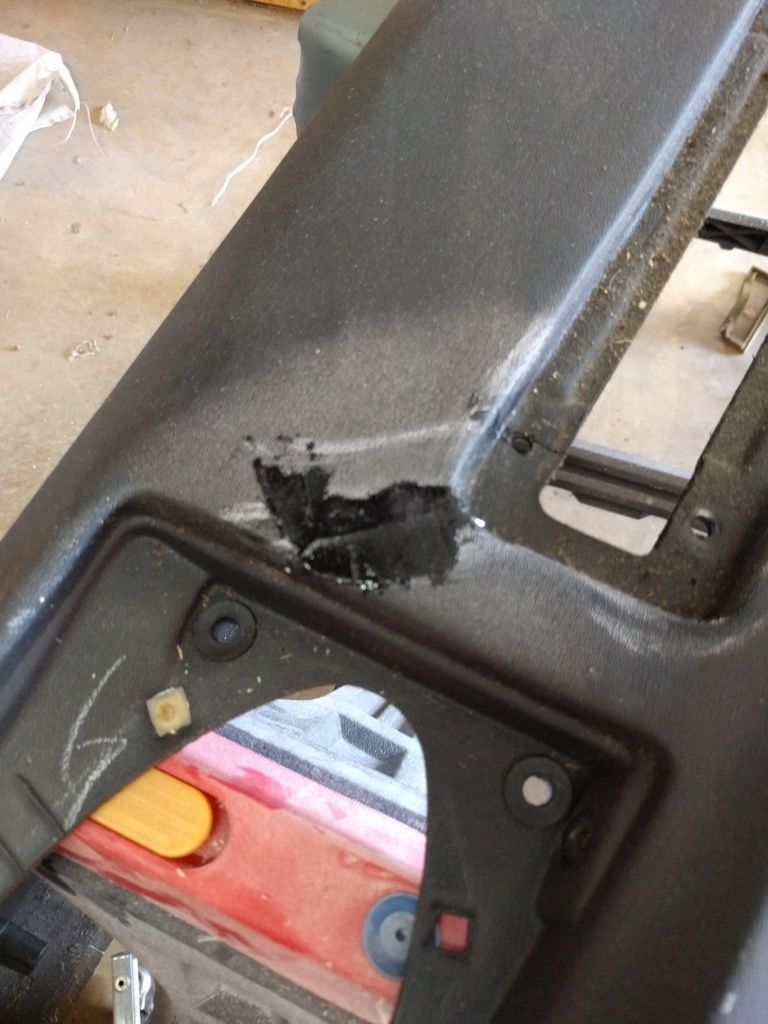
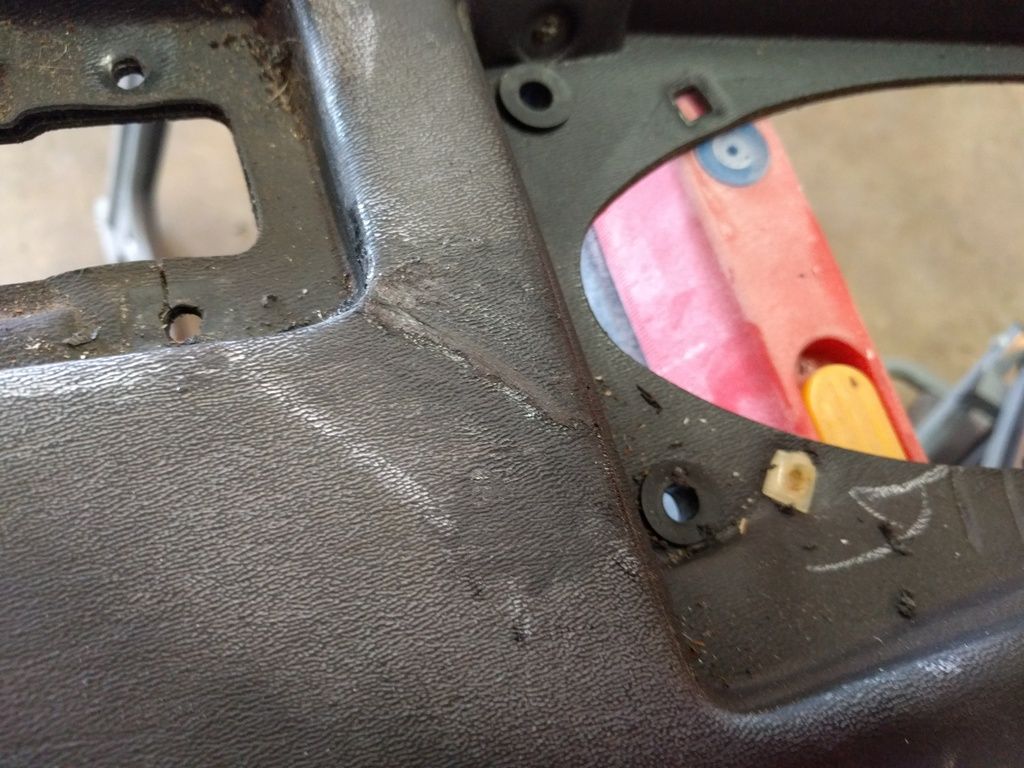
The dash was cracked (as they all are) so I glued the crack together and used some bumper repair material to fix it
I also replaced the corner of the dash below the AC vent with the same stuff
It's not perfect and will never be invisible, but should look better than a big gaping crack
Now this next part is going to be controversial. If you have a tender, easily hurt butt you should look away now.
Now before you start hollering "THAT'S FRAUD" remember this--
1. No, it's not fraud unless I try to sell the vehicle while misrepresenting the mileage. Due to the age of the car it is exempt from all mileage disclosure laws.
2. What exactly does the odometer represent at this point? Every part of the car has been inspected, refurbished, or replaced. In fact, I'm thinking I'm going to re-zero this again once I finish the engine swap. At that point the mileage will probably be far more representative of the age of the car than what was on there before.
I got word from Russ that my interior pieces are done. This should line up nicely with me finishing the remainder of the dash and console pieces, so by next weekend the interior should be DONE, which means the entire restoration is also DONE!!!
I just have to know what your using to clean and prep things like your throttle body and break calipers. No matter what I do the paint seams to pedal back off. I can only assume that I'm not getting things clean enough.
Thanks and if you dont mind I have a few questions about your f23 swap before I get completely committed in mine.
I scrub everything with purple power degreaser and then blast it with brake cleaner. Adhesion is decent, but not indestructible.
If only there was a yard.... where they took junk cars.... that you could pull parts from....
I have seen one Fiero in the yards here in the past 5 years. I have spent many Saturdays going from yard to yard, as well as a couple other people I know here doing the same. There are MANY eyes on the junk yards around here, and we let each other know if we every find anything. We were SO excited to get a call from one of my friends contacts at one of the yards saying they had just put a Fiero in the lot. We hurriedly rushed up there the next day, to find out it was a parts car that he and I took everything off of, and had hauled away for scrap..... 2 months earlier! Where it sat for 2 months, and WHY they put it out in the yards, as there was NOTHING left on it.
There just are NO Fiero's getting junked around here.... it sux!
[This message has been edited by JohnWPB (edited 07-13-2016).]
I have seen one Fiero in the yards here in the past 5 years. I have spent many Saturdays going from yard to yard, as well as a couple other people I know here doing the same. There are MANY eyes on the junk yards around here, and we let each other know if we every find anything. We were SO excited to get a call from one of my friends contacts at one of the yards saying they had just put a Fiero in the lot. We hurriedly rushed up there the next day, to find out it was a parts car that he and I took everything off of, and had hauled away for scrap..... 2 months earlier! Where it sat for 2 months, and WHY they put it out in the yards, as there was NOTHING left on it.
There just are NO Fiero's getting junked around here.... it sux!
Well just do what I did... buy an 88 coupe and part it out. Mine about paid for itself and I still kept the cradle, brakes, hood, and a bunch of other stuff.
Thanks for the input on paint prep. By the way, I am loving your work on this. Pretty close to my plans for my formula. But way different paint plans. I am going for more of a stealth theme, deep gunmetal with light metal flake and powder coated burnt aluminum colored wheels. I am loving the black interior, I am trying to visualize about the same with dark grey accents.
[This message has been edited by Steepdiver (edited 07-14-2016).]
I considered a color scheme similar to what you're planning. Some sort of gunmetal grey with black wheels. I think it would be an awesome look. My biggest advice on changing the interior color is planning. It goes pretty quickly if you make as many decisions in advance as you can. One of my biggest goals on this project has been limiting down time for the car. Getting that parts car really helped because I was able to have a lot of things prepared in advance so it was a swap instead of a bigger job.
Your biggest challenge with the interior will be the seat belts if you plan to change the color. You can not dye the material, so it will need to be replaced. I sent my passenger side to seatbelt planet for a refurbishment of the mechanism and a swap of the webbing. For just ONE side it cost me nearly $300. If you are not comfortable with this cost, plan your color scheme accordingly. One thing out of color scheme can ruin the look of the interior, so make sure it all flows. This is where the planning comes into play. Feel free to contact me if you have any questions, I've got what I believe to be a good handle on this at this point.
thanks for the offer. Be careful i may take you up on it. My bigest questions right now center around the trans though. thimking an F23 out of a cobalt SS. The geat calulators i have run it on say i should have a top speed of around 162 at 6000RPM though that may be unrealistic for a uilt 3800SC engine. Still strugaling with planing the shift cales at the moment.
I truly belive that owning one of these cars you almost have to be a masacastic fool. But dam it is fun. I Just cant ever seem to leave wellenough alone with it. By the I am loving the hood mods.
Not all F23s are created equal. The ONLY F23 variant that will bolt up the the 3800 (or the Fiero 2.8) is the 2002 Cavalier version. Everything else will require either an adapter plate or moving the internals from the Cobalt trans over to the Cavalier housing.
I have read that you can swap the bell housings from the cav onto the others i belive they were calliing it the hybrid f23 swap if this is not correct advice would be helpfull.
I was looking for a gearing that was a little better for a built 3800sc engine. But some input from you might be helpfull in my decision as you are running the F23 i belive. Mainly do you like it or wish your gearing was a little better?
Well, it's done. I finished the interior, and with it, the restoration of the car. It's not perfect, and I'm sure I'll have a few things to tweak and touch up, but the car is done. Everything on the car has been inspected, repaired, refurbished, or replaced. From here on out everything I do to the car will be an upgrade from the factory.
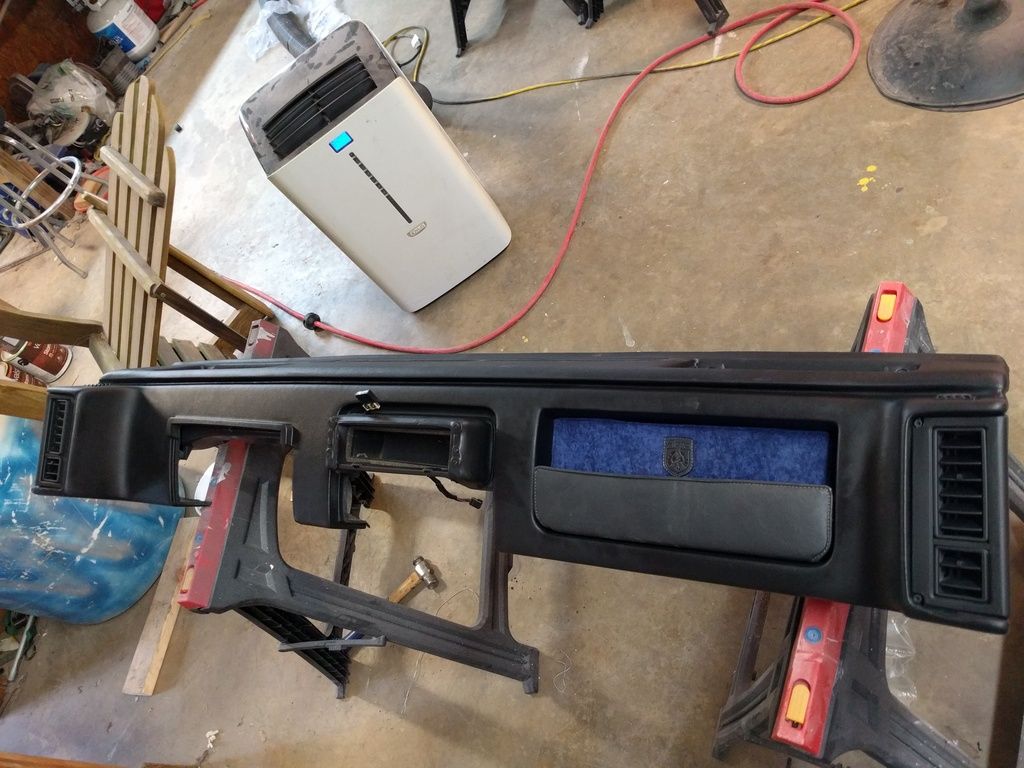
So first off I reassembled the dash using the map pocket I made a few weeks ago.
With the dash in I installed the new speakers. I went with 5.25s in the front to replace the worn out factory speakers. They sound much better. It's not an earth shaking sound system in the car, but it is more than enough for what I like.
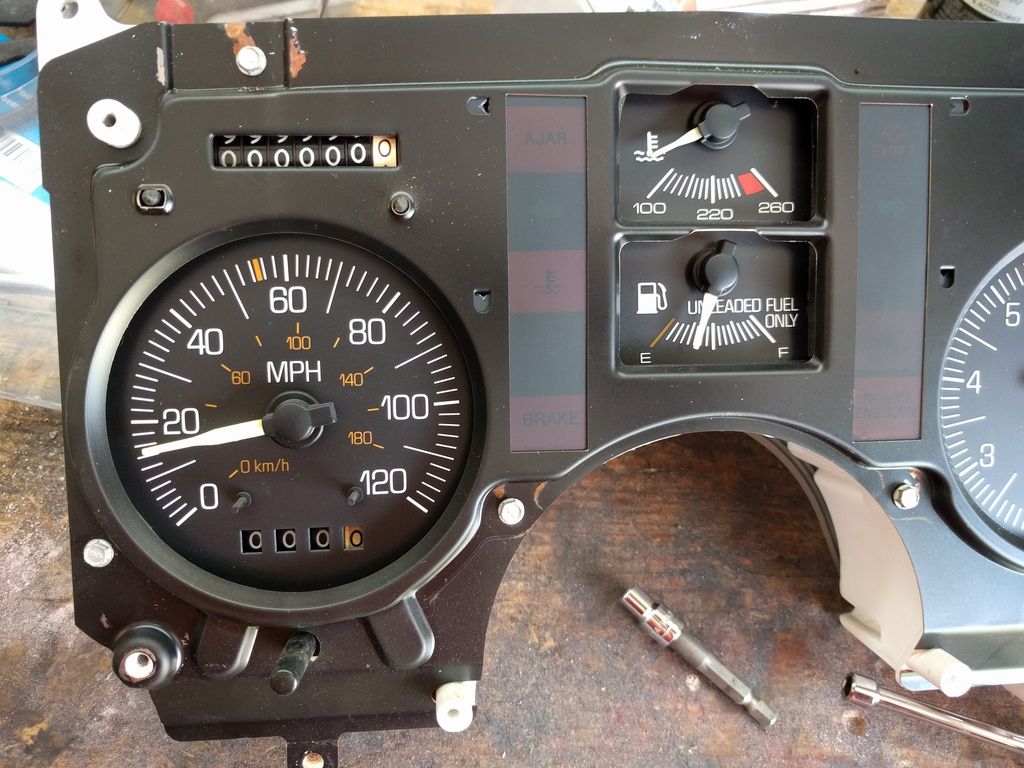
I reinstalled the instrument cluster and put my wrapped knee plate under there.
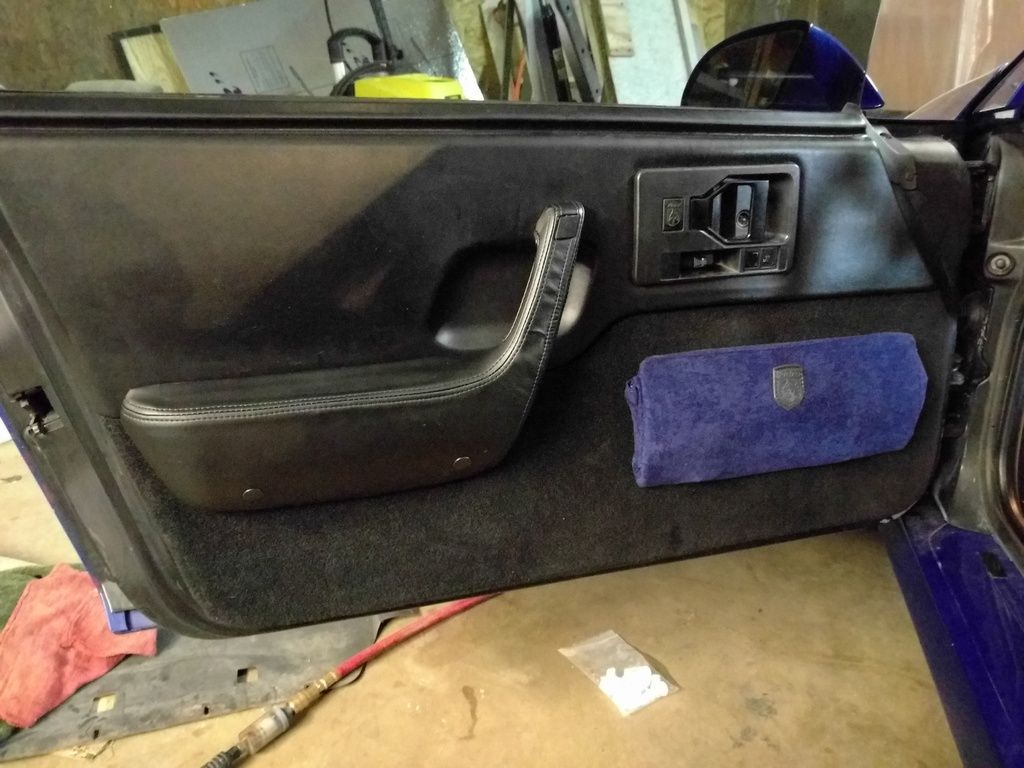
Door pockets and leather wrapped arm rests from Russ88TTop. I also had him do a shifter boot and ebrake boot to match my color scheme
The whole view. Yes it needs to get vacuumed out still, but I'll get that later
If you reference the pictures on the first page of this thread I think I accomplished my goal. The interior matches the color scheme of my GTO, but remains very much a Fiero. I am extremely happy with how it turned out. Maybe one day I'll put a G1 dash in the car or something, but that's WAY down the road. For now I'm going to focus on performance improvements (namely finishing the engine/trans/cradle swap) and we'll see where I want to go from there.
The car looks very nice. I like it alot, and think you have hit exactly what you were trying for. Keep us posted on that engine/trans swap. With the exception of the gaugecluster and colors i think we are headed in very similar paths. Your just further along then me and i am doing the work in the oposit order. Performance first then intierier finishing with the body.
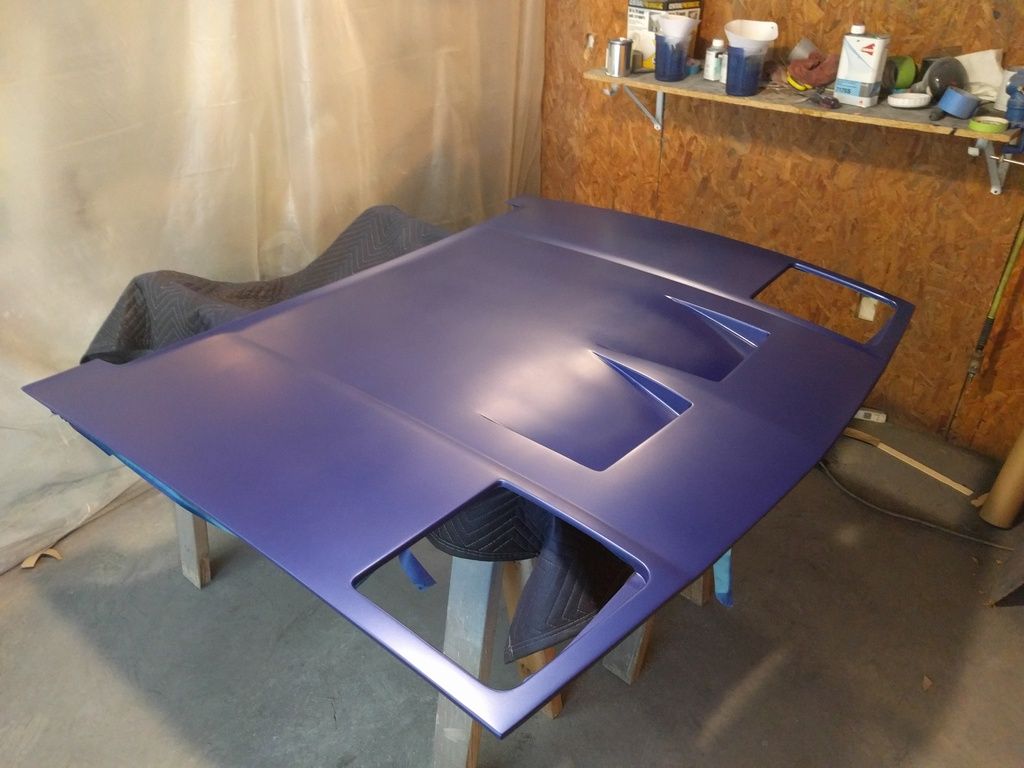
Work continues on the hood. I got most of the sanding and such done and started priming. I used the same epoxy primer I used on the rest of the car. I basically FLOODED the underside of the hood with it and it filled a lot of slop.
Once I get the top side primed and sanded I will paint the underside with a simple black enamel, and probably get some replacement stickers from John
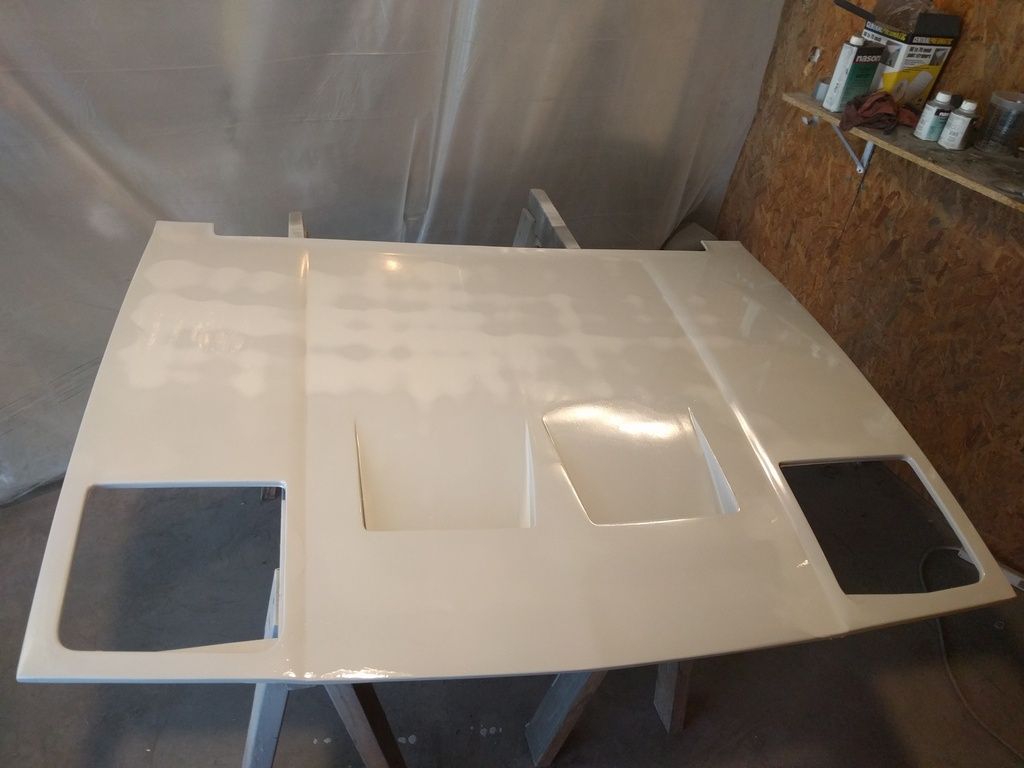
Top side looks pretty decent. Hard to believe how poor of condition it was in before I started on it.
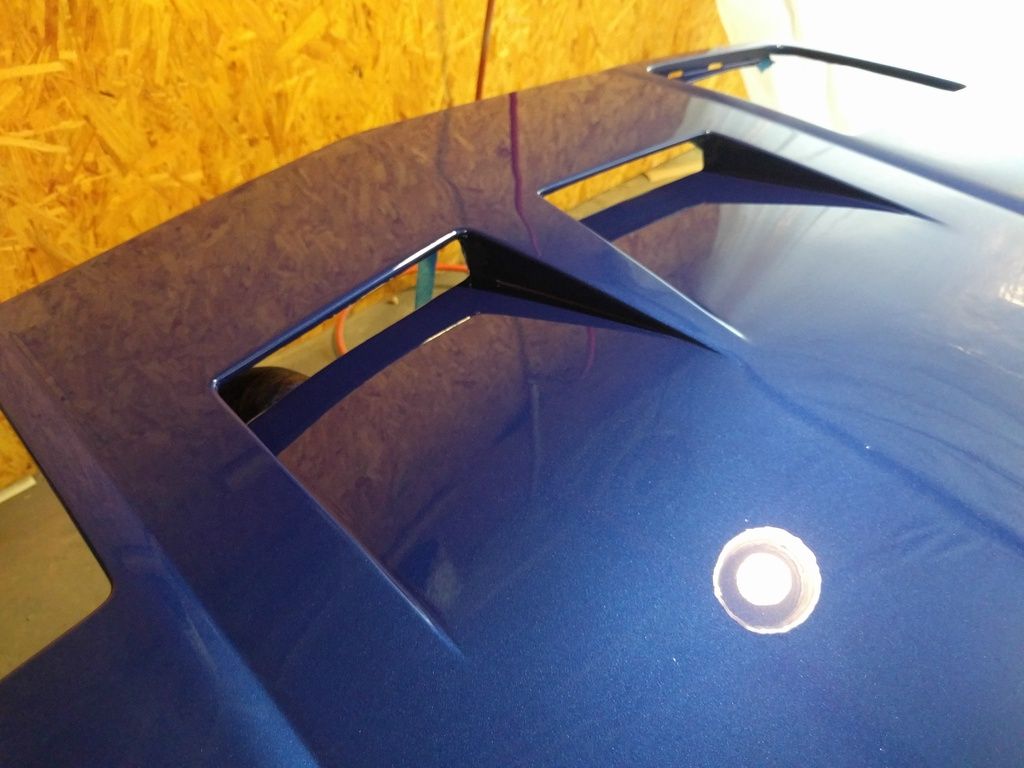
It's going to take more block sanding than I intended. I laid it on a bit too thick on top. No worries, that's what 80gr is for. Overall I'm happy where this project is going, but I do wish I had put less taper between the scoops. They look better in person, but do look a bit weird compared to other scoops on other cars. Too late now.
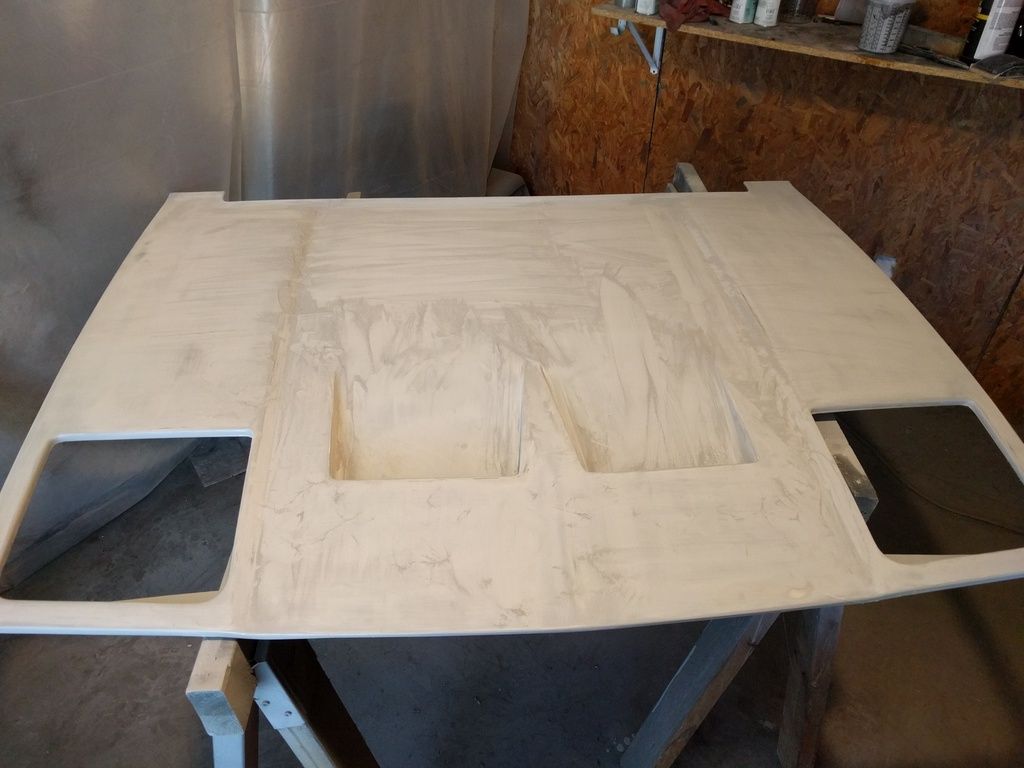
I dry sanded it to 80gr to smooth and shape everything, sprayed it again, then dry sanded it at 180gr before spraying a third coat of epoxy.
I needed to wet sand it, but instead of making a colossal mess in my shop I set up an elaborate arrangement outside to beat the MS heat
I then wet sanded it with 320 and then 600
It's not perfect, and it never will be, but it looks pretty damn good for a shade tree body man. Even with the flaws the prep work is far better than what I did for the rest of the car (benefit of experience) and based on what I have seen, better than the prep work done at the factory on these cars. Tomorrow I will mask off and paint the underside, followed by doing the top. Hopefully I will get this hood done and mounted by this weekend.
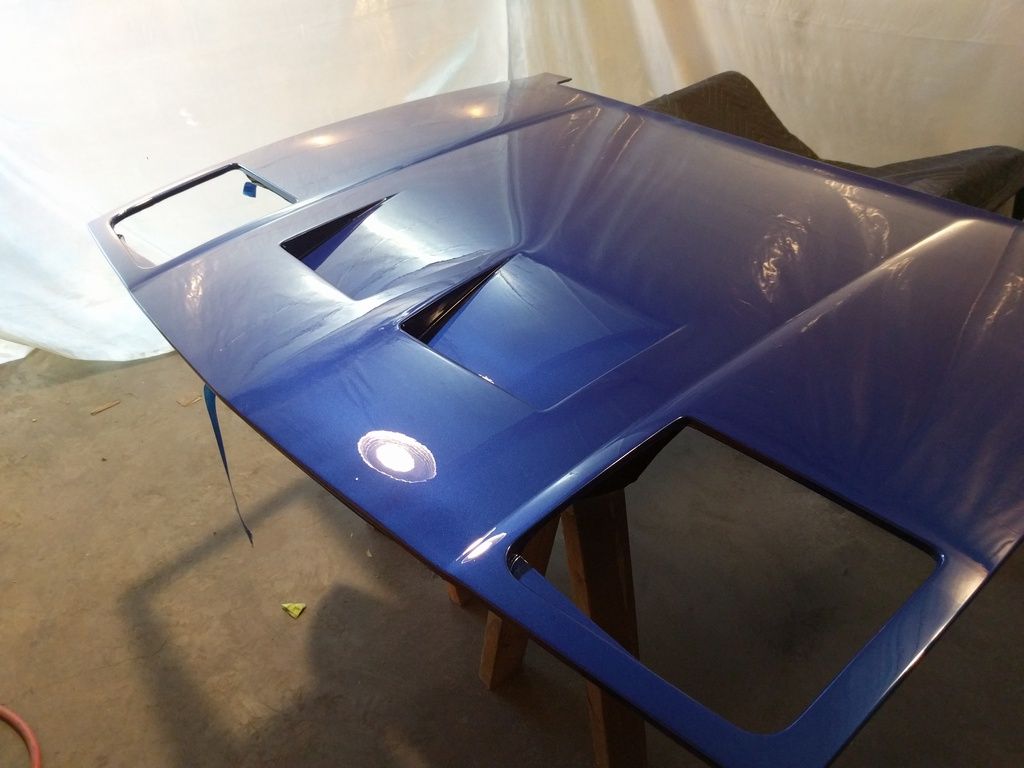
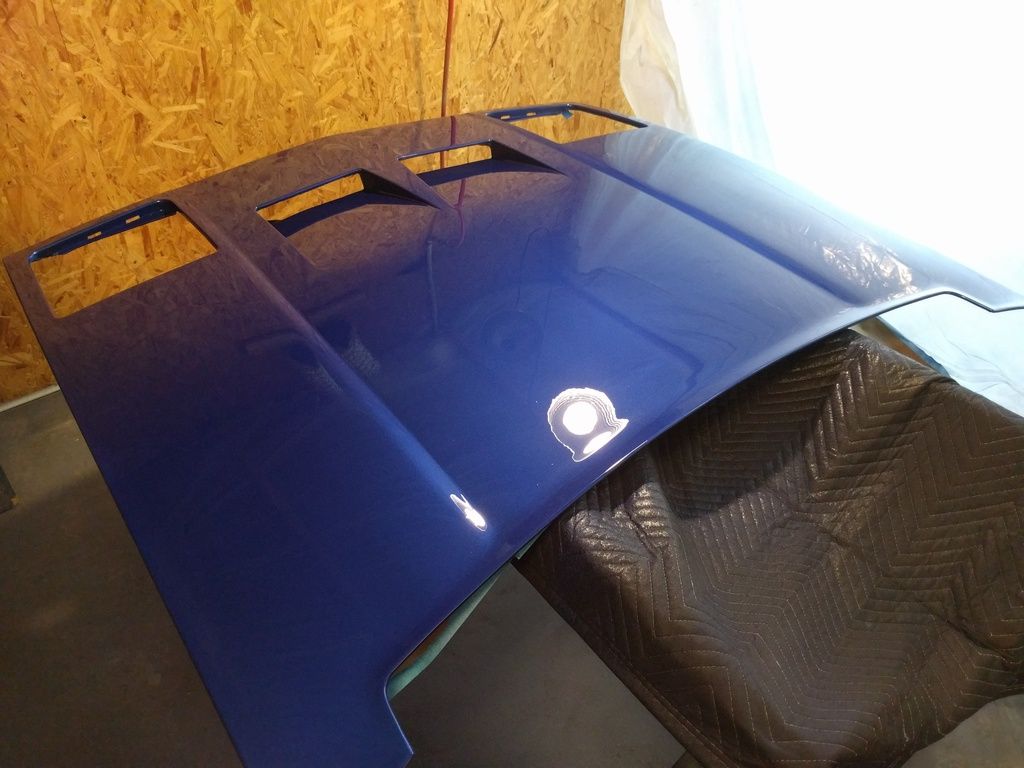
The hood is finished, and it turned out BEAUTIFULLY!
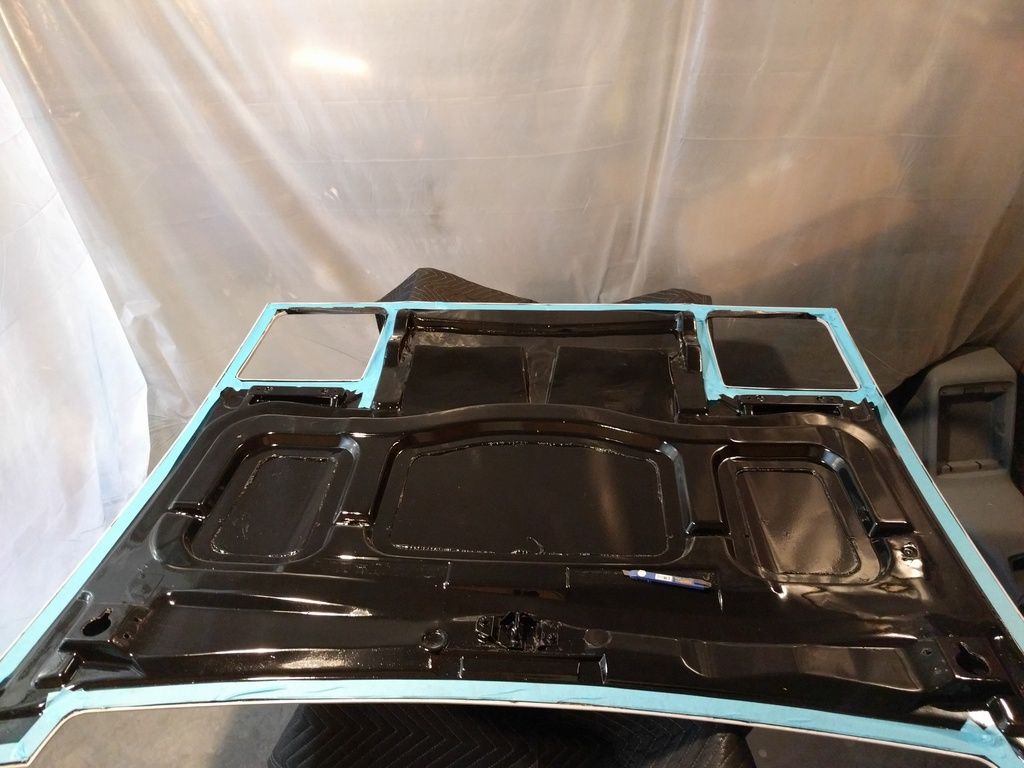
Yesterday I painted the underside with some black enamel. I have a ton of it on hand and it's easy to work with. I never took the time to make the underside perfect, so it does have some imprefections, but I really dont care. It turned out better than I expected, and I'm happy with the result.
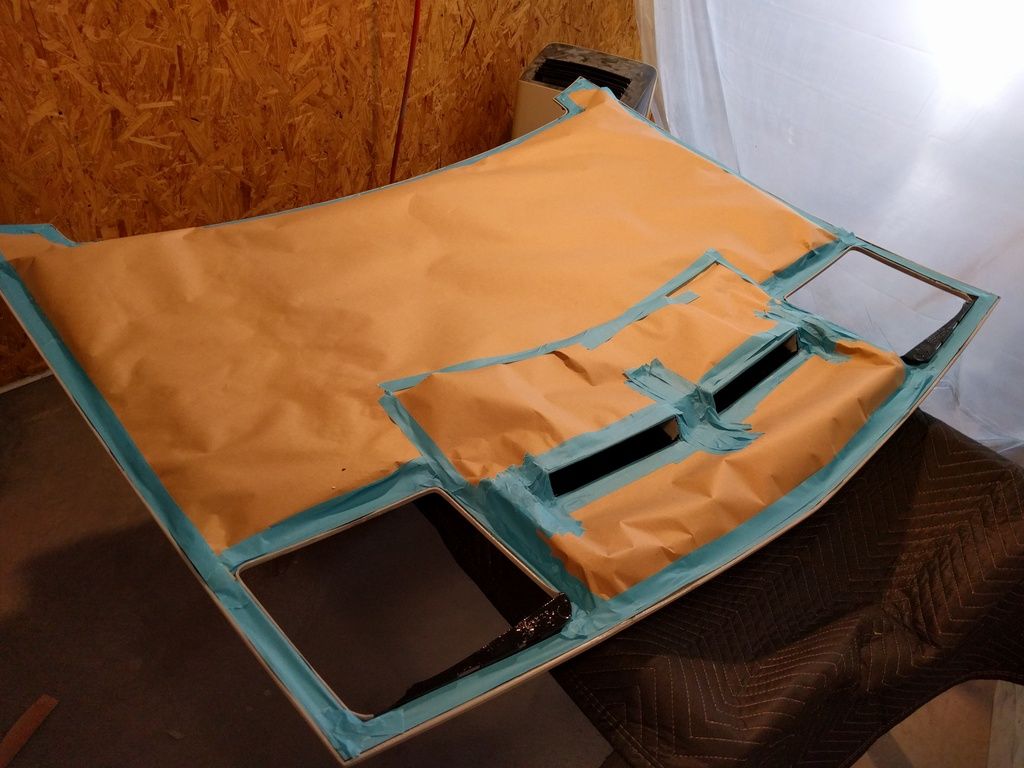
After letting it cure for 24 hours or so I masked it off, maybe a bit overkill. Unfortunately not all this tape stayed stuck, so there may be some overspray on the bottom. Easy fix if necessary.
Then I laid down the base coat. I'm glad I bought a whole pint because I used every drop.
And finally I put on four coats of clear.
There are a few imperfections in it, including a hair that I noticed fell on there after I finished spraying the clear, but with as much as I put on it will be no problem to wet sand and buff it out. Not too bad for a shade tree body man!
Just started following your thread, very impressive! Makes me want to do more with my 88 Formula. Problem is I don't know how to do most of what you have done bodywise, and some of my paint is chipped off the fiberglass especially around the sunroof, the the hood.
------------------ Go here to see more of my Formula: [URL=http://www.cardomain.com/memberpage/430754[/URL]
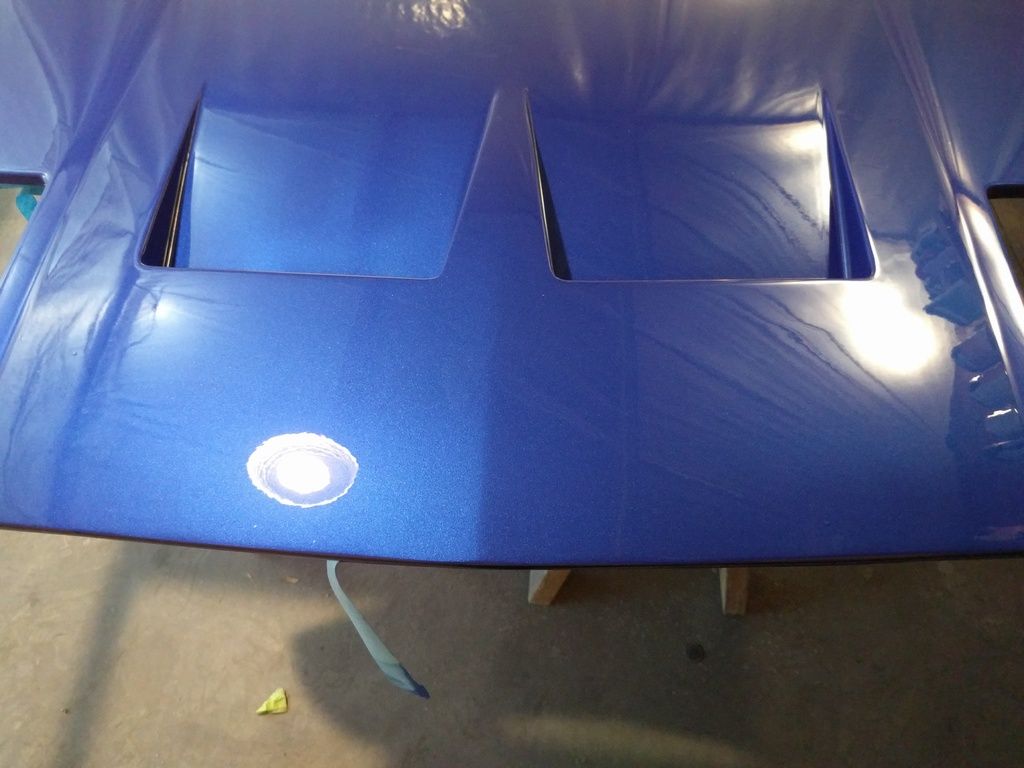
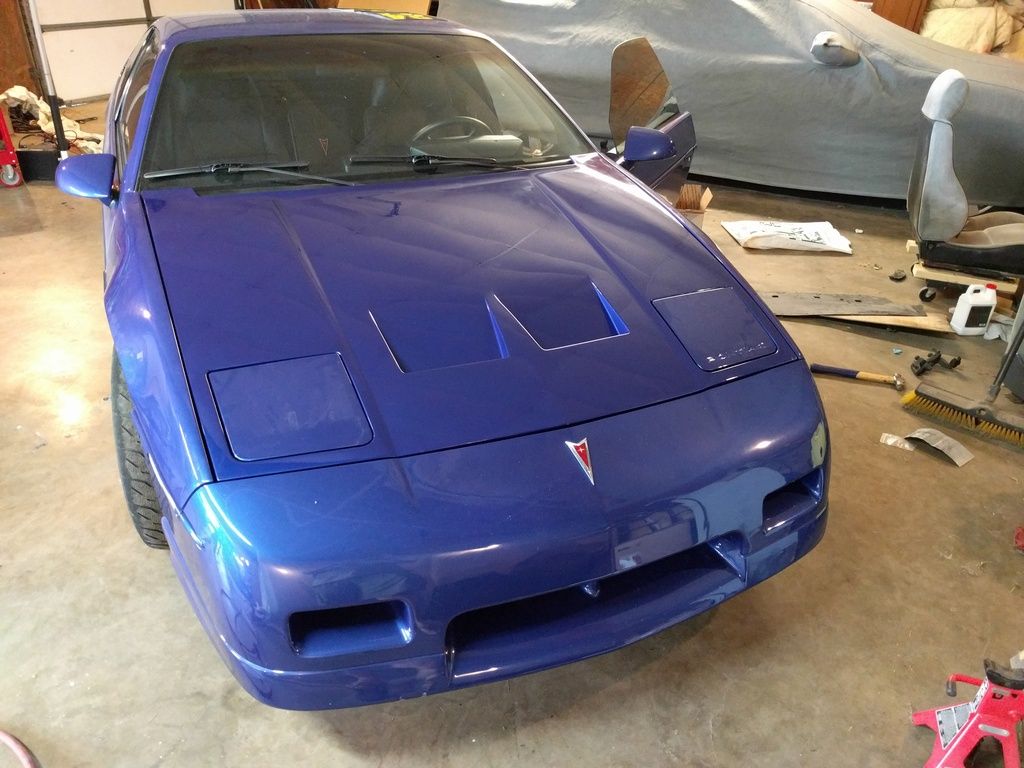
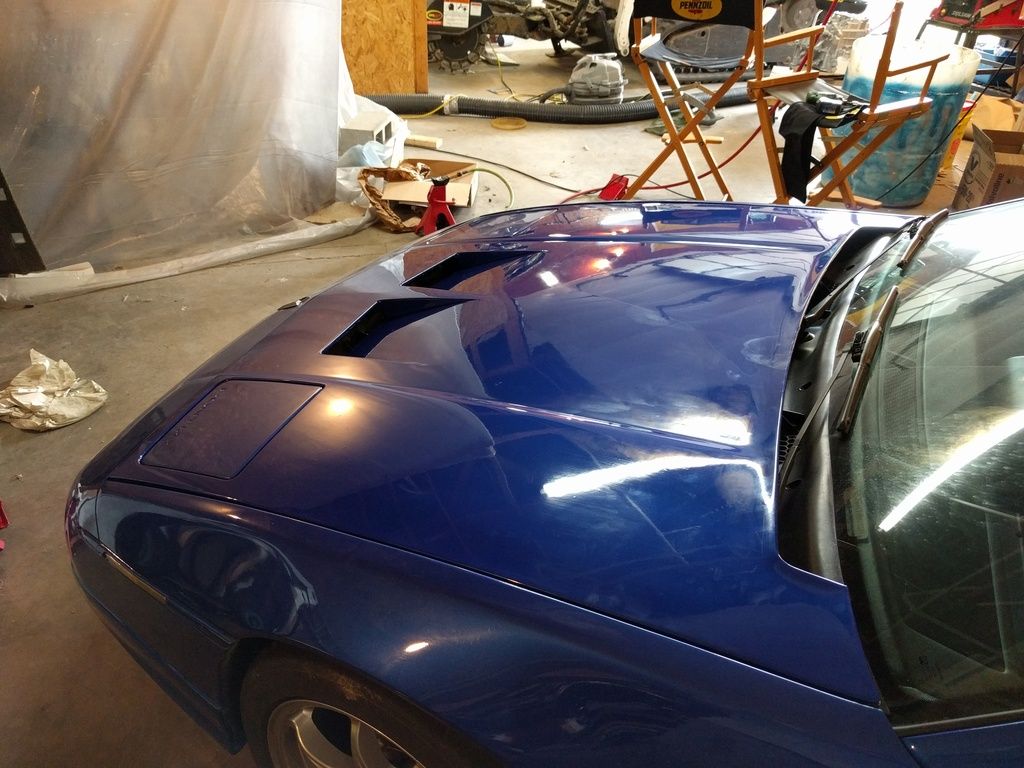
Wet sanded and buffed the hood today, then put it on the car. It looks better than it will function unfortunately. Despite the measurements I took the scoops are a bit far forward to free flow through the radiator. I trimmed the fan shroud a bit to make sure it clears, but I'm going to have to rely on a bit of reverse flow for cooling. Oh well. I'm also not crazy about the taper between the scoops, but overall I'm happy with how it turned out. I think it's going to need more buffing. It looked decent in the booth, but when more light hit it I could still see some of the haze from sanding. Always something. Also the car is absolutely FILTHY. The headlight covers are the same as before, so the dirt on them makes them look like they don't match the new hood, but they do.
More work accomplished. In some way it's little **** , in some ways it's big.
I finally got my mounts. I'm not going to publicize the vendor because he's a controversial figure here. With that said i bought a harness, engine mounts and F23 mounts from this person for cheaper than another vendor charges for just a harness. In addition to this, the mounts are PERFECT and poly bushed, with no additional work required. So keep your 20 page threads.... I'm more than satisfied.
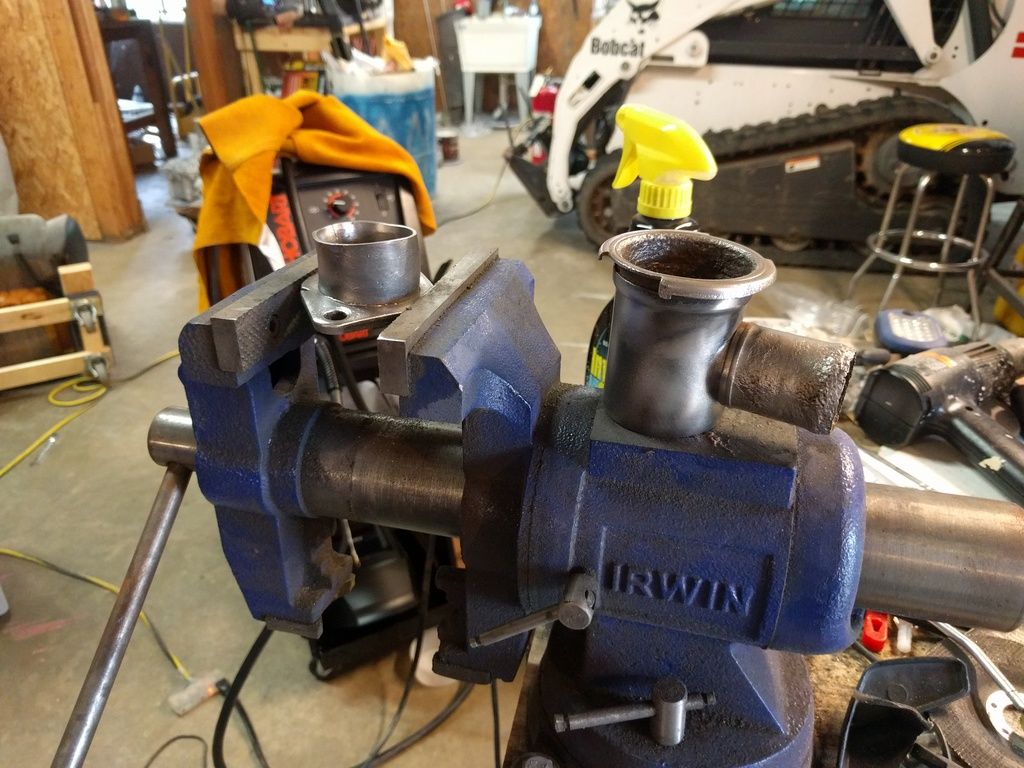
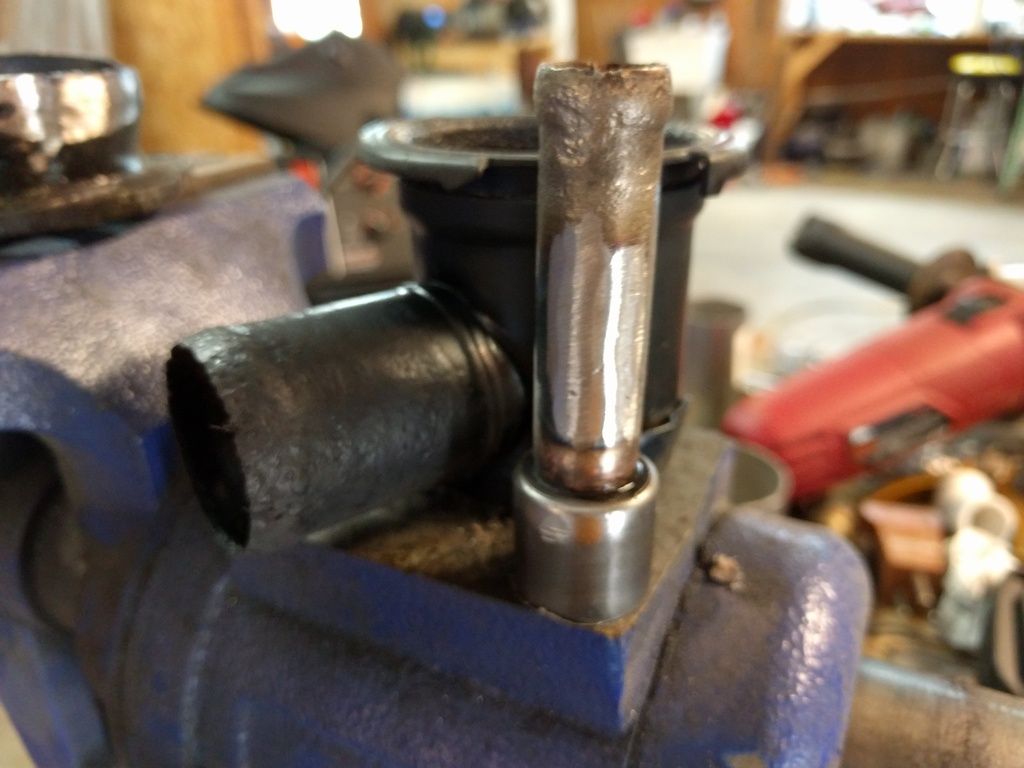
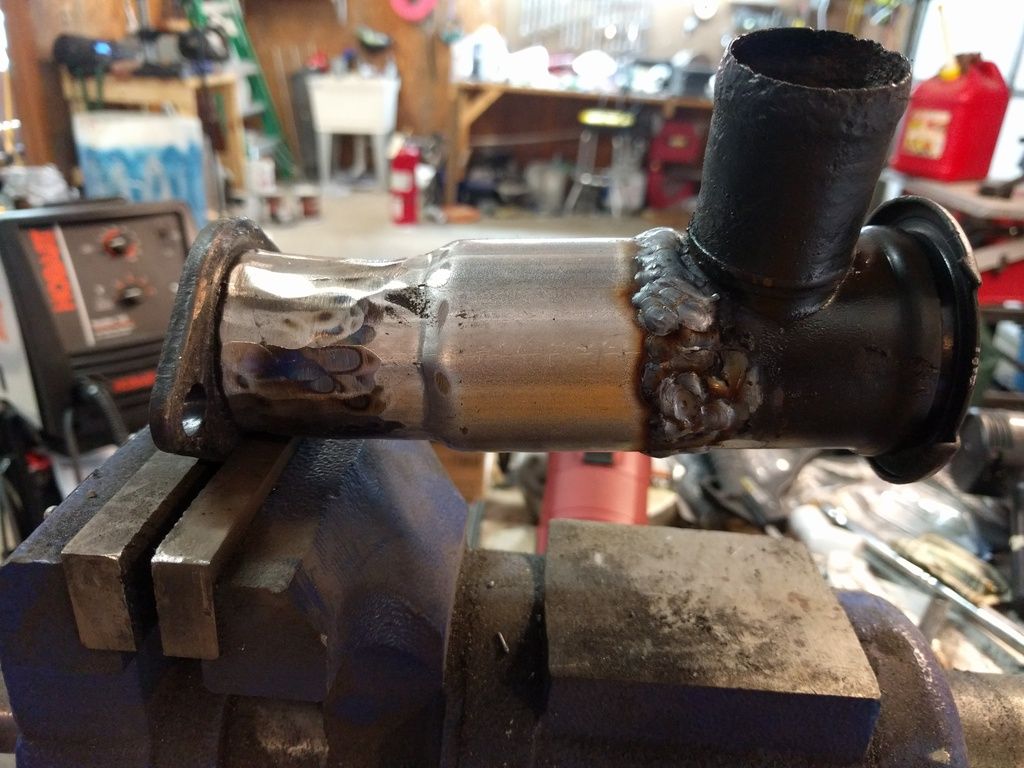
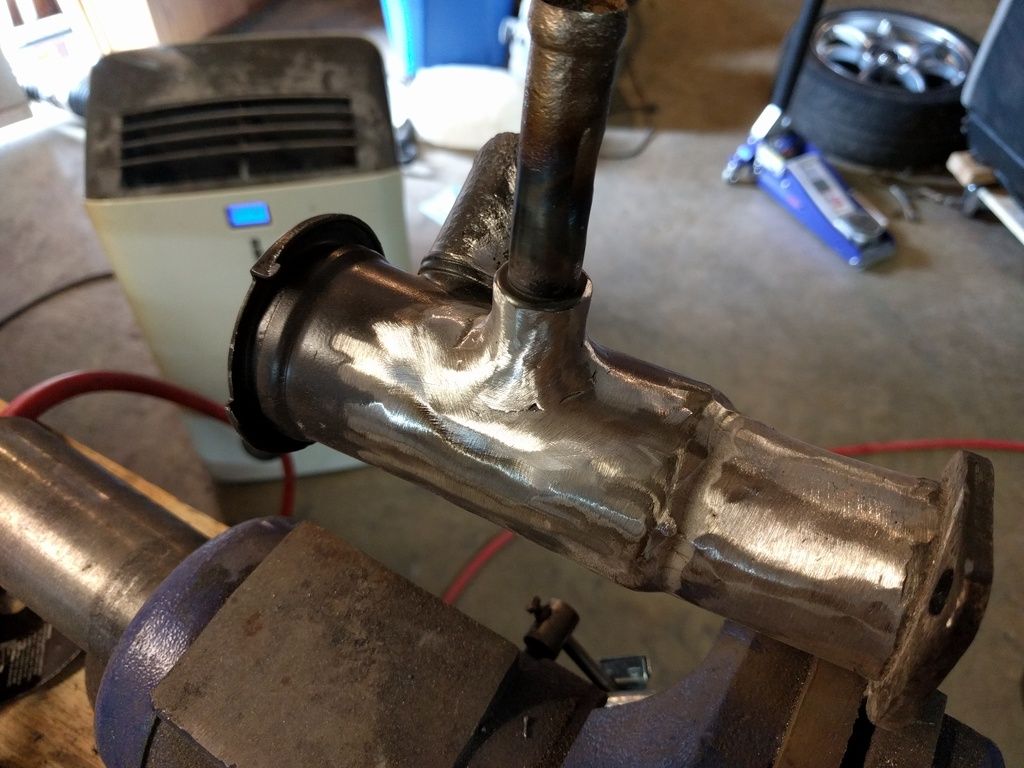
I cut down a filler neck to use for the tstat housing. It went togther great with my new welder!!
I'm a **** welder
But I'm god with a grinder
I was really proud of myself until I realized I forgot the heater core nipple. OK, in all fairness, I didn't remember it, the fact was reported to me by a much smarter person.
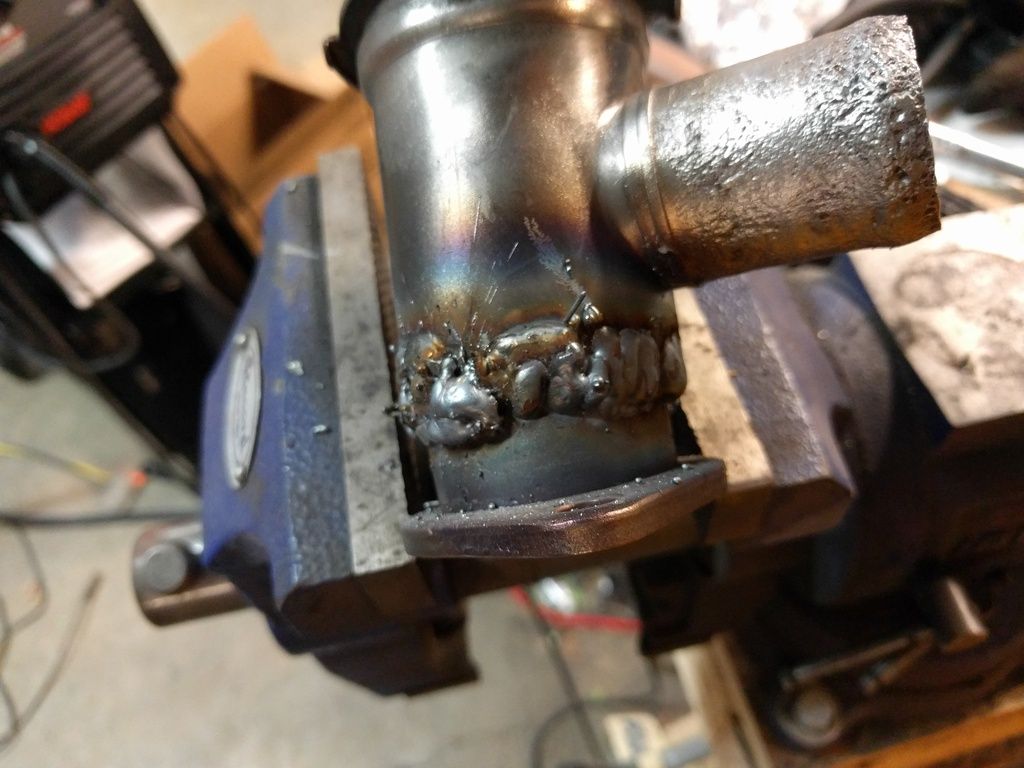
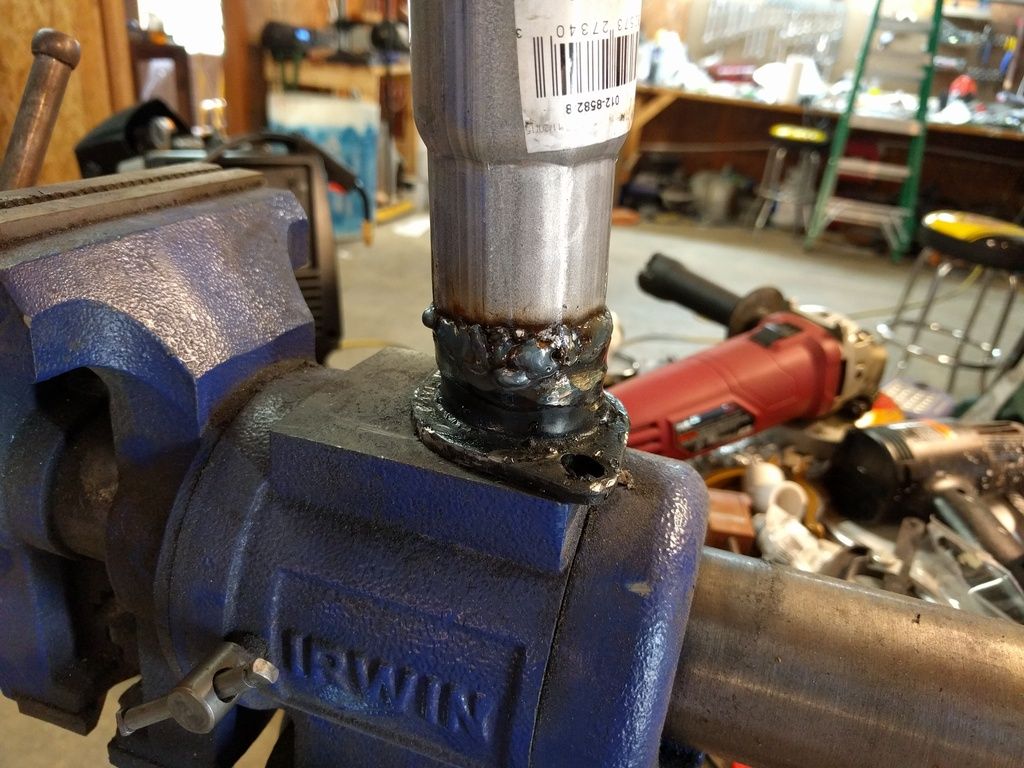
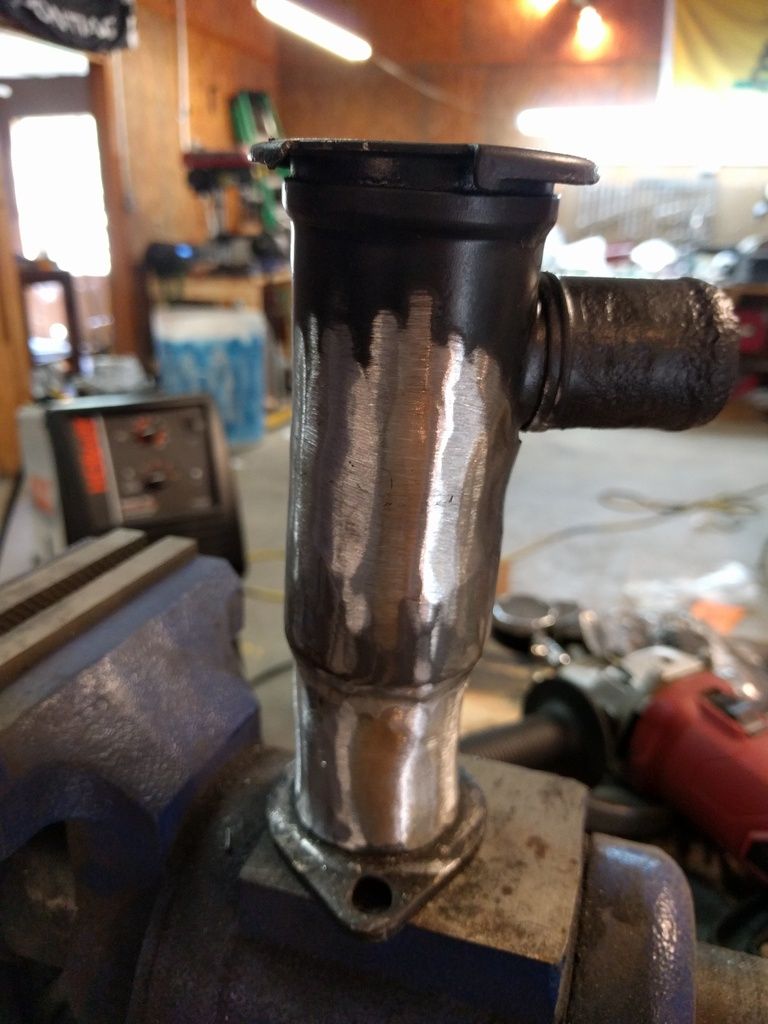
So I had to cut that nice piece apart.
I welded over the small nipple-- it won't be used.
More **** welding
So I'm pretty good with a grinder
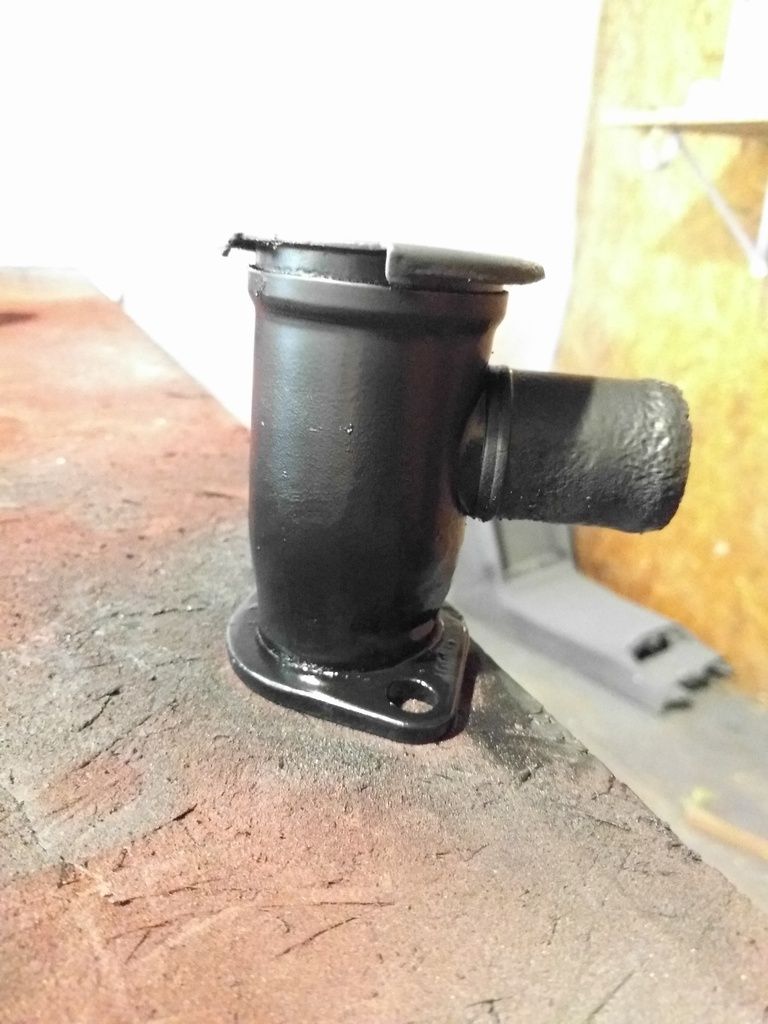
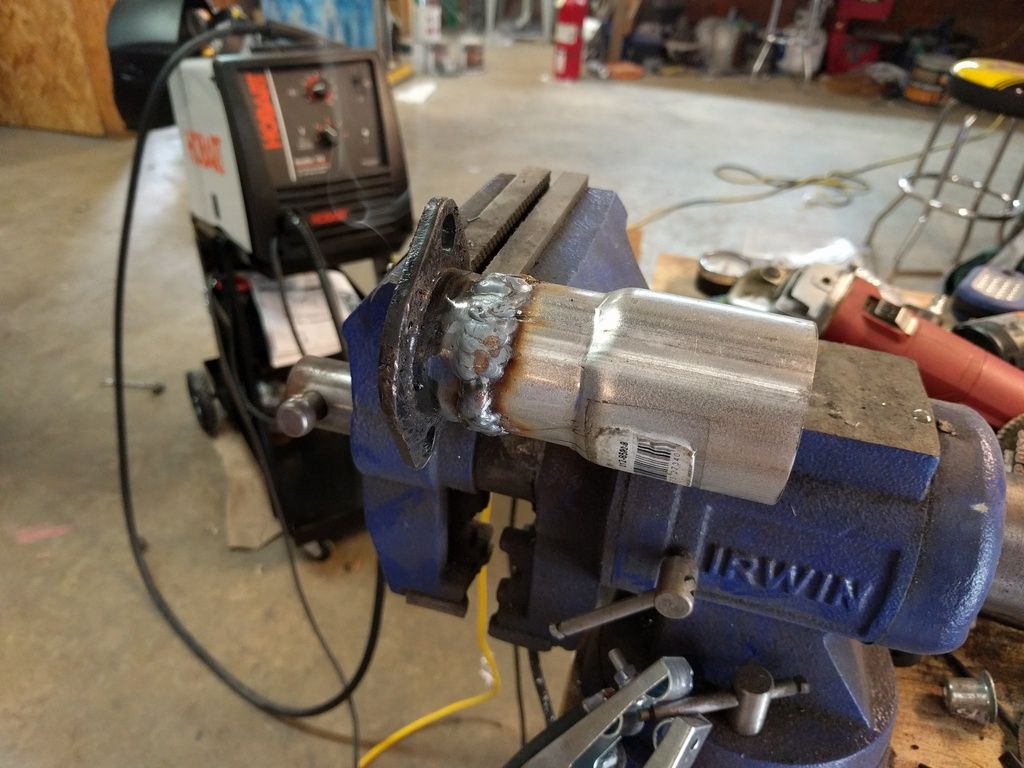
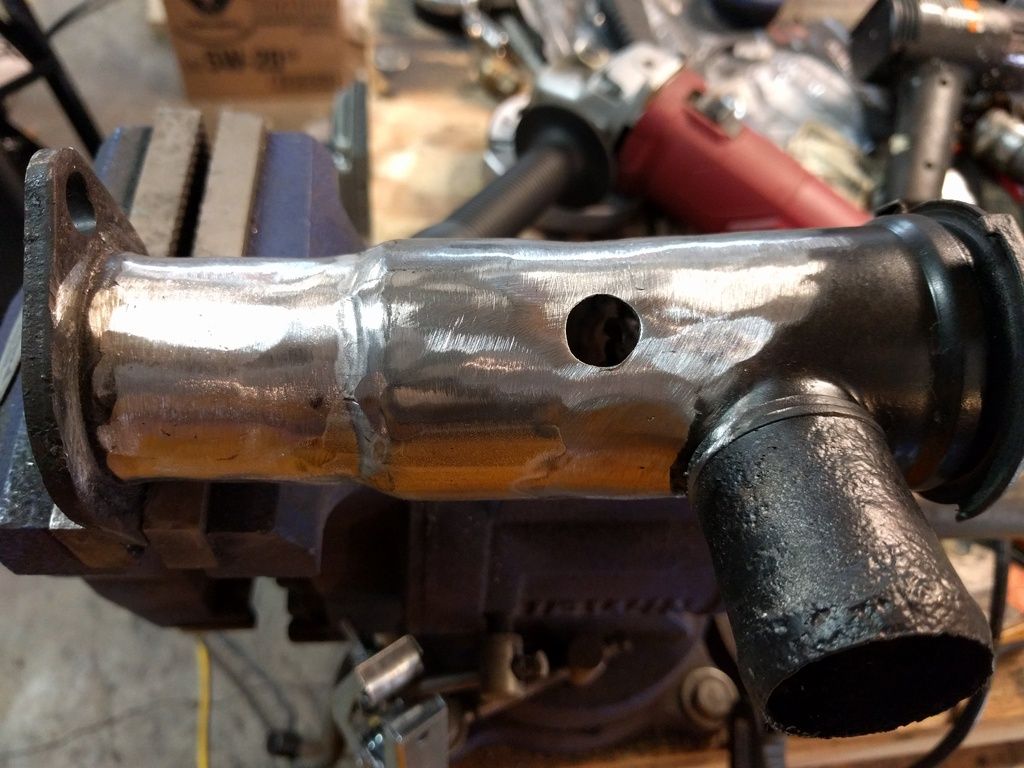
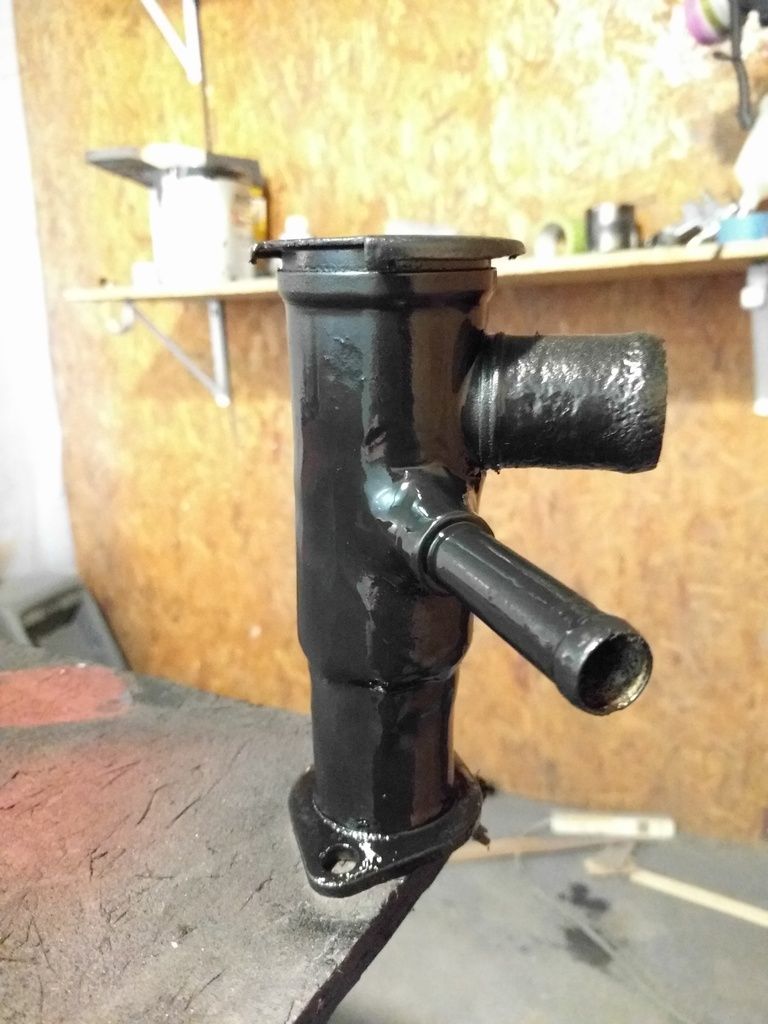
Then I added the top part
More grinder work
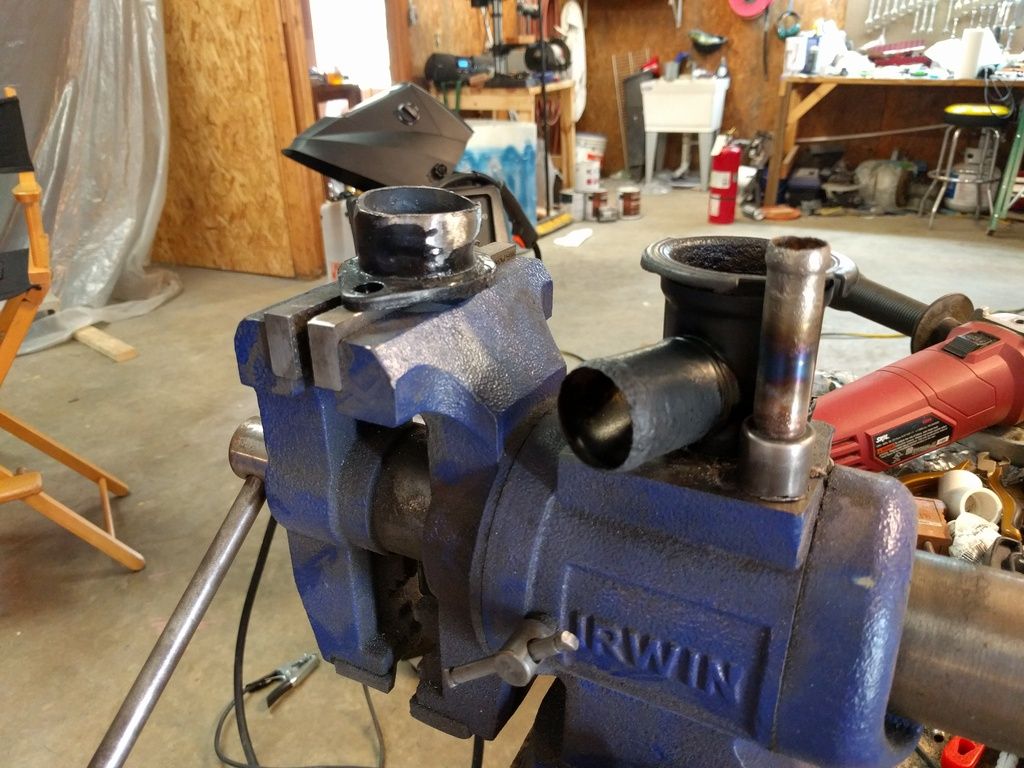
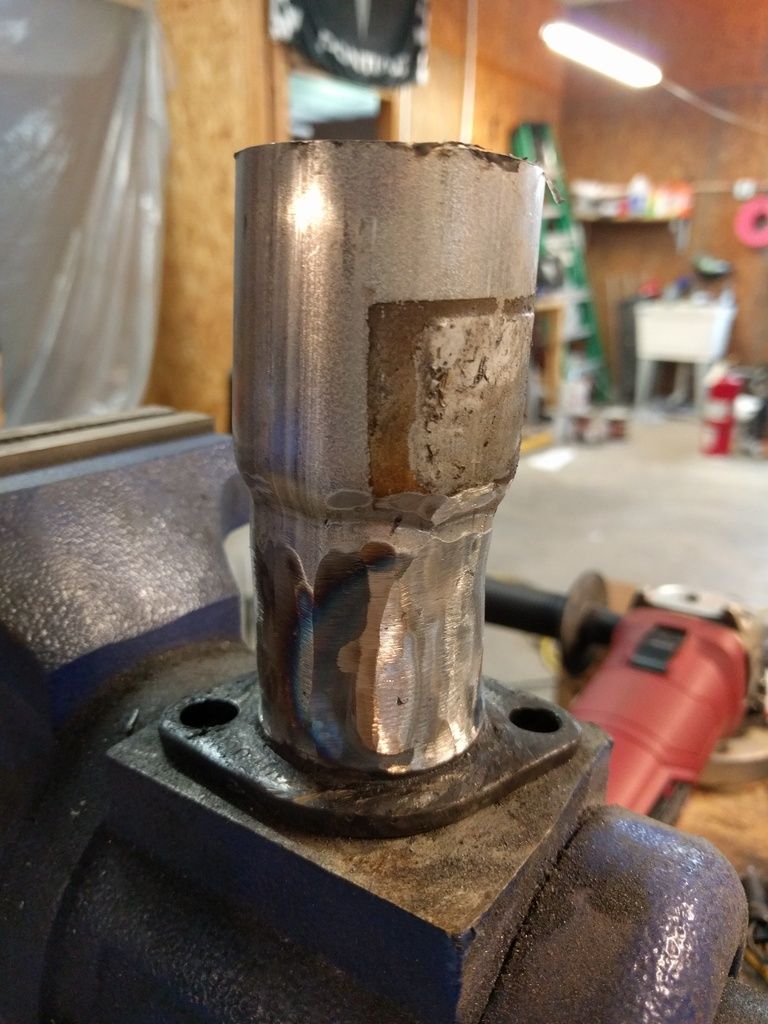
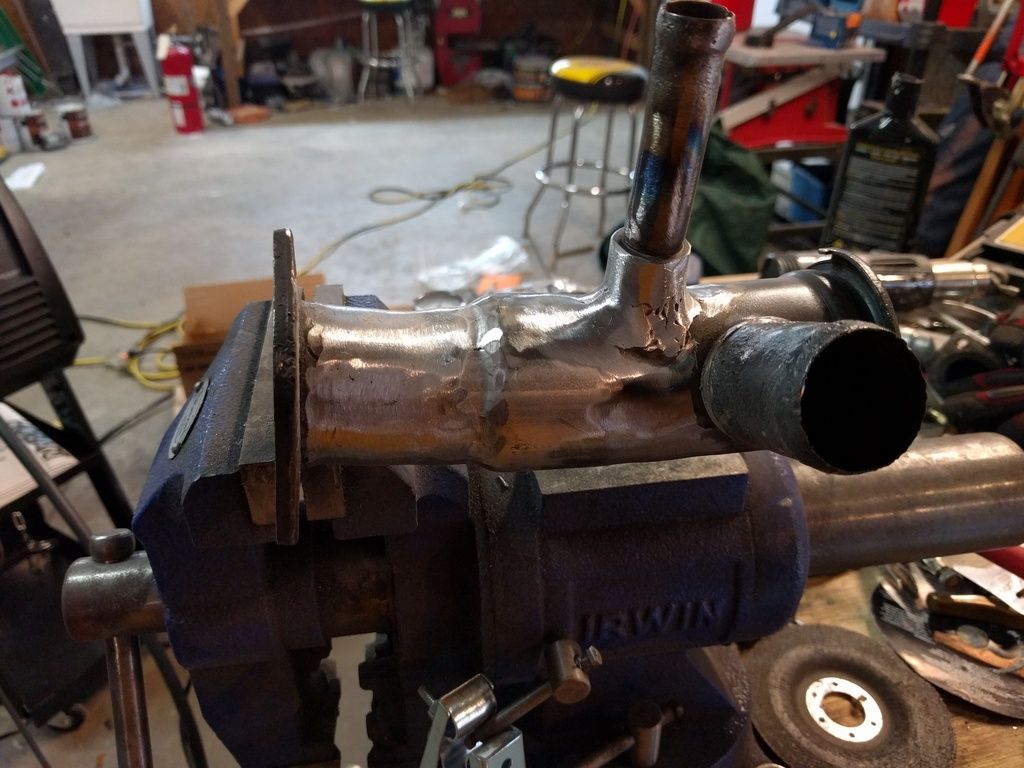
Now to add the part I orginially forgot which caused the entire re-do of the job.
So that's it for now. I'm still waiting for the clutch to come in. Once that comes in I expect a quick progression all the way to installing the engine.
[This message has been edited by Napoleon_Tanerite (edited 08-14-2016).]
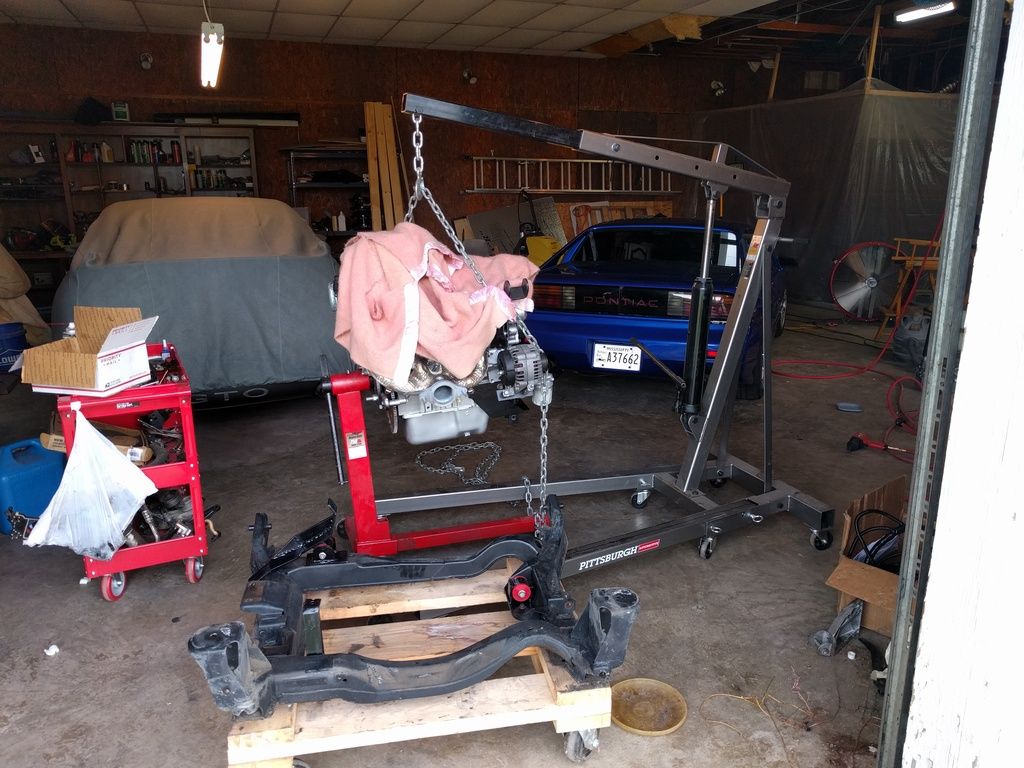
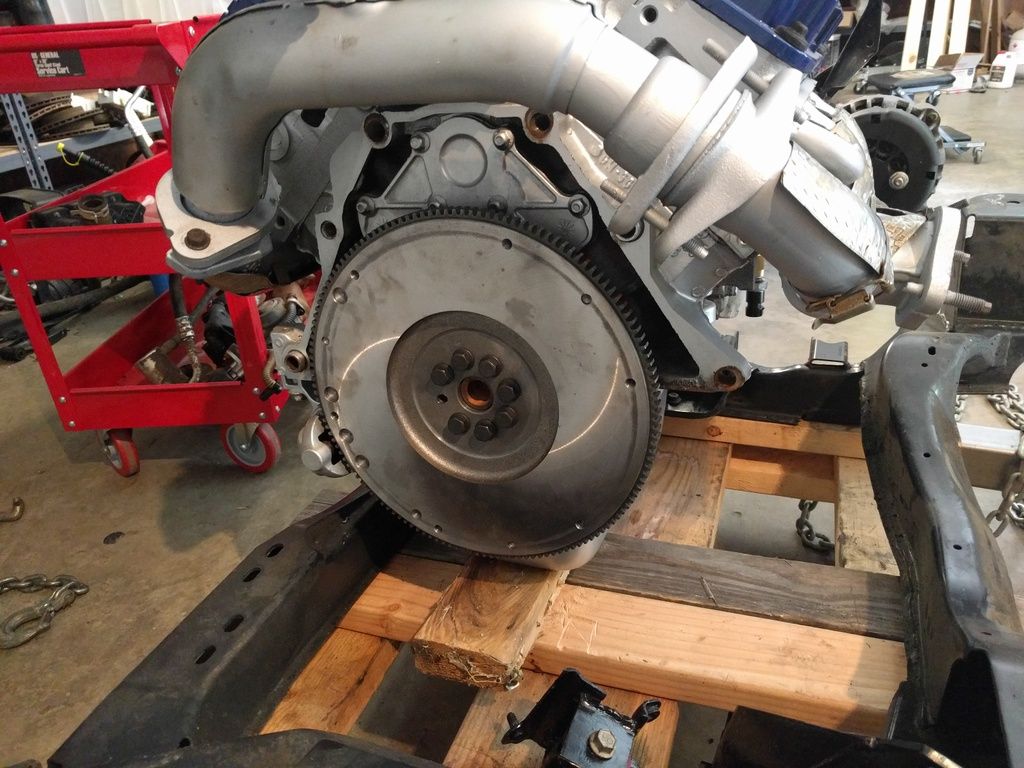
Big milestone today. The engine is on the cradle, mated to the transmission, and the whole assembly is supporting its own weight on the cradle. Here's how I got there.
I got a FieroRog flywheel. It's a quality piece, but I had a HELLUVA time getting it mounted. First I had the wrong spec for the torque to use, so I snapped off two bolts before I discovered I was also using the wrong bolts. After some research I just went to the dealership and ordered the proper bolts at $5/ea. The worst part is the first time they got me the wrong bolts (after waiting a day for them to come in). The first set of bolts they got me was the shorter set for the AT flexplate. So back to the dealership to order the correct bolts and wait another day for them to come in. Well, I finally got it mounted after all of that
My clutch came in. I ordered a Stage 3+
It almost matches. Not like that matters, but hey...
And we begin the mating dance
I came to regret leaving the exhaust crossover on. It was a pain to position the transmission with it on there.
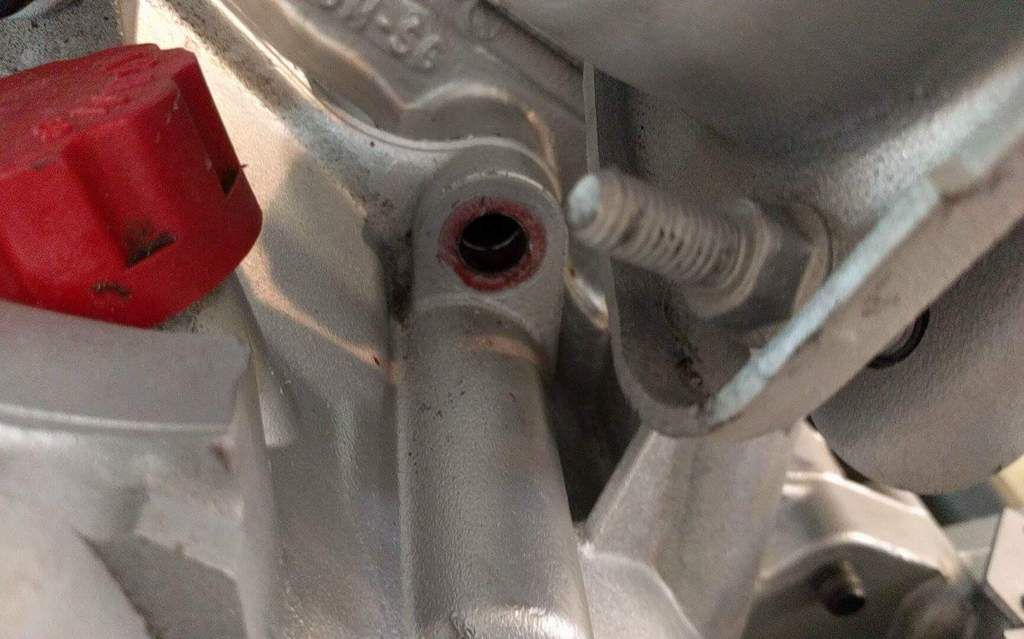
So I got everything lined up and bolted together until I got to the last bolt. No matter what I did, I couldn't get it to go in. After shining a light in the hold my worst fears were confirmed. There was a bolt frozen and broken off in the hole, likely from when the yard removed the original transmission.
I ended up having to take the transmission back COMPLETELY off, along with the exhaust manifold I should have taken off in the first place. Since that bolt hole happened to be the dowel hole as well, that had to go too. I broke an extractor trying to get the bolt out, so I ended up having to completely re-drill and tap the hole. What was supposed to be an afternoon project the day prior had just finished day TWO on a sour note.
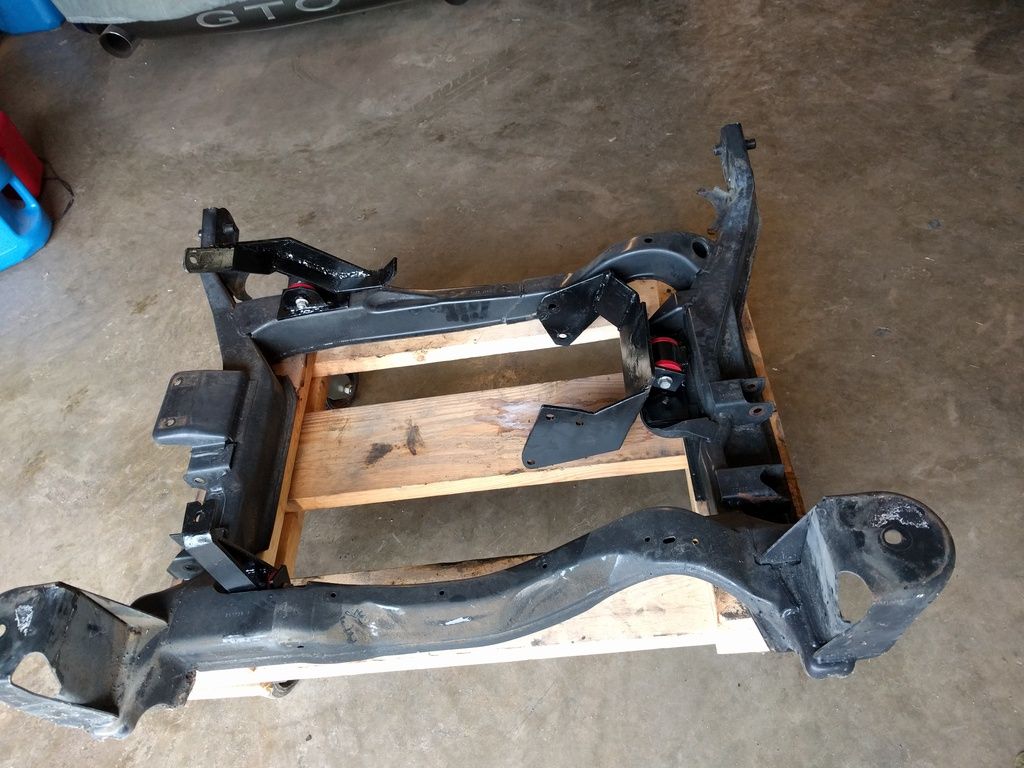
I also realized I needed to remove the mount on the cradle where the auto trans would mount to. Since I am using an F23, I needed the space.
Grinder work and paint
And there you have it. It's all mated up, ready for the next step, once I decide what I want to do next. It's pretty satisfying to see it like this!


 I Just cant ever seem to leave wellenough alone with it. By the I am loving the hood mods.