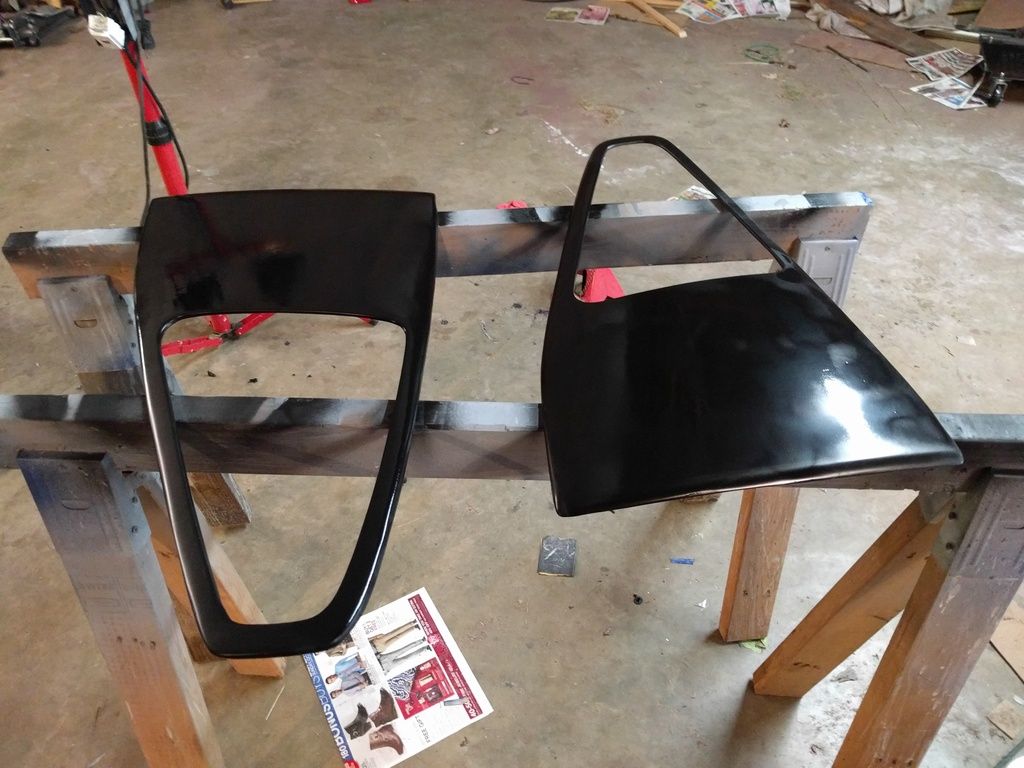
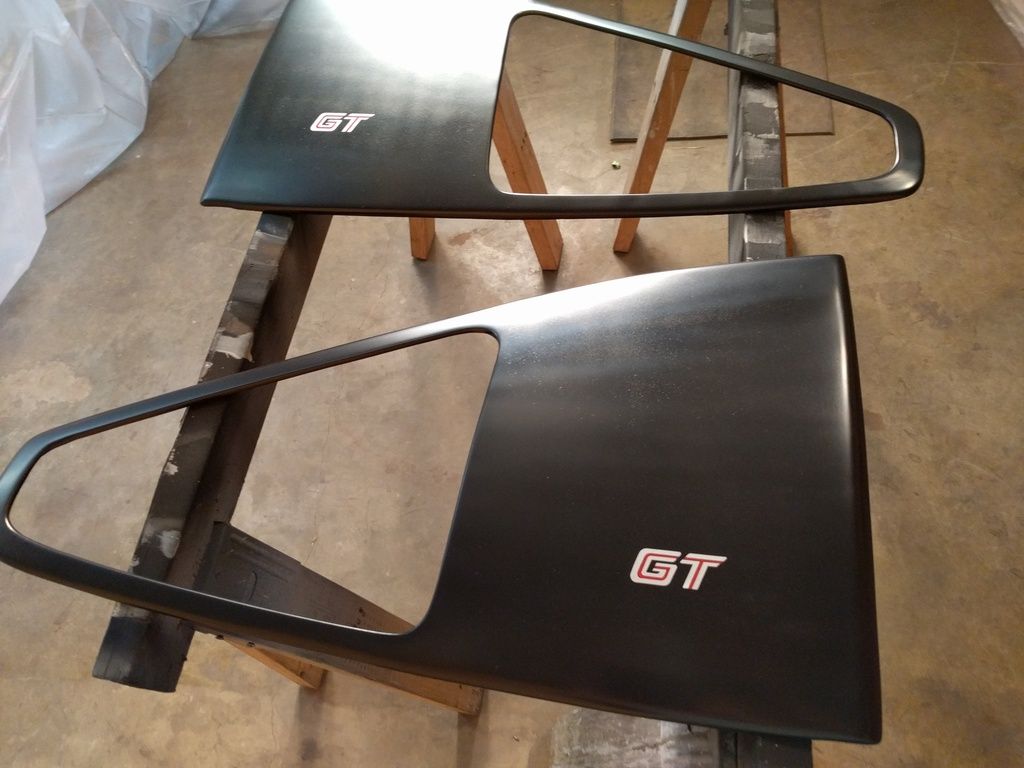
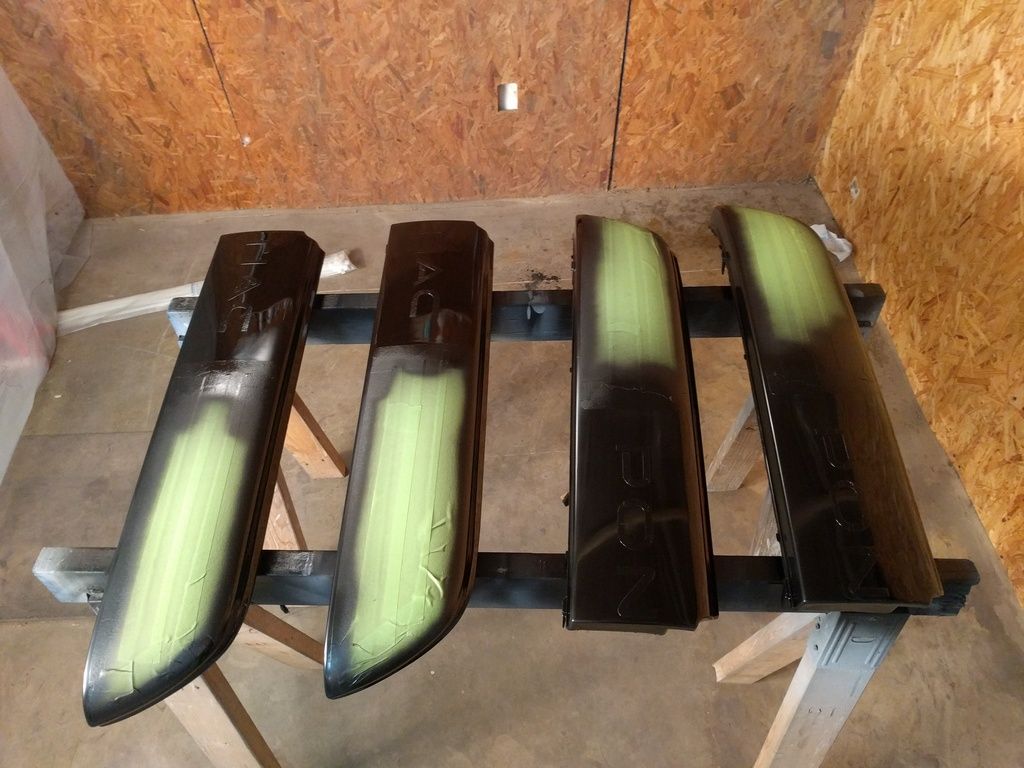
With the car away I haven't had much to do. I decided to spray the quarter windows while I was waiting. Since I had issues on the rear bumper molding using the Marhyde paint over the primer sanded to 320, I took a different approach. This is the same primer, but I used Scotch Brite red scuff pads on it to rough it up.
I then sprayed 4 coats of satin black Marhyde on them.
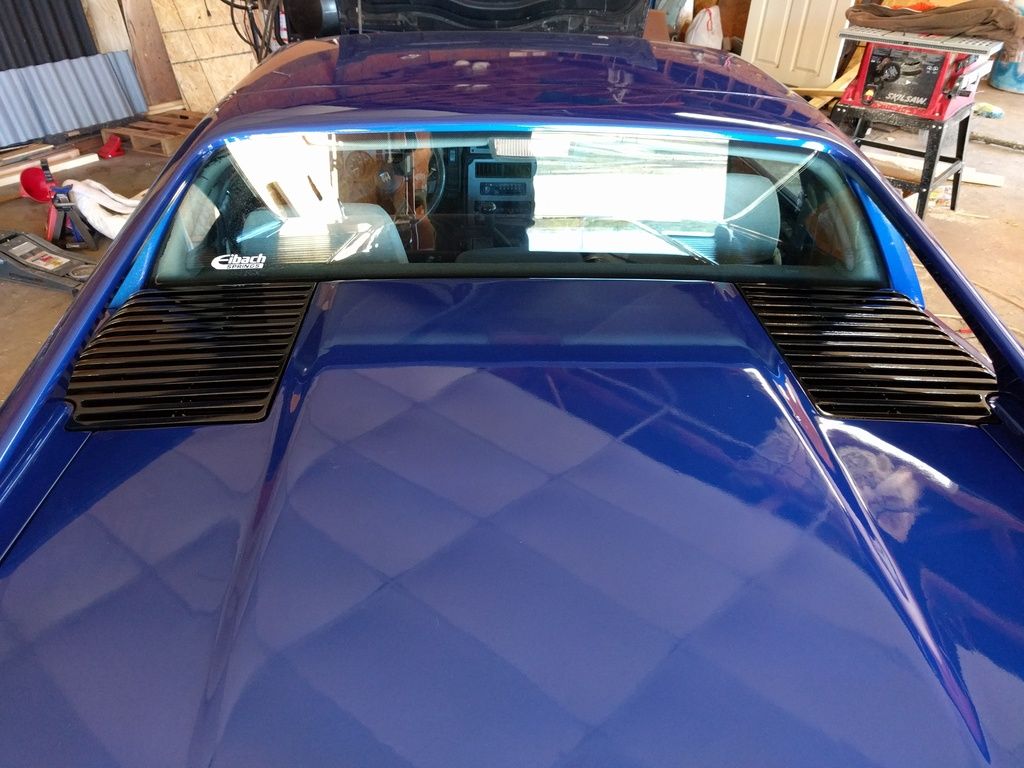
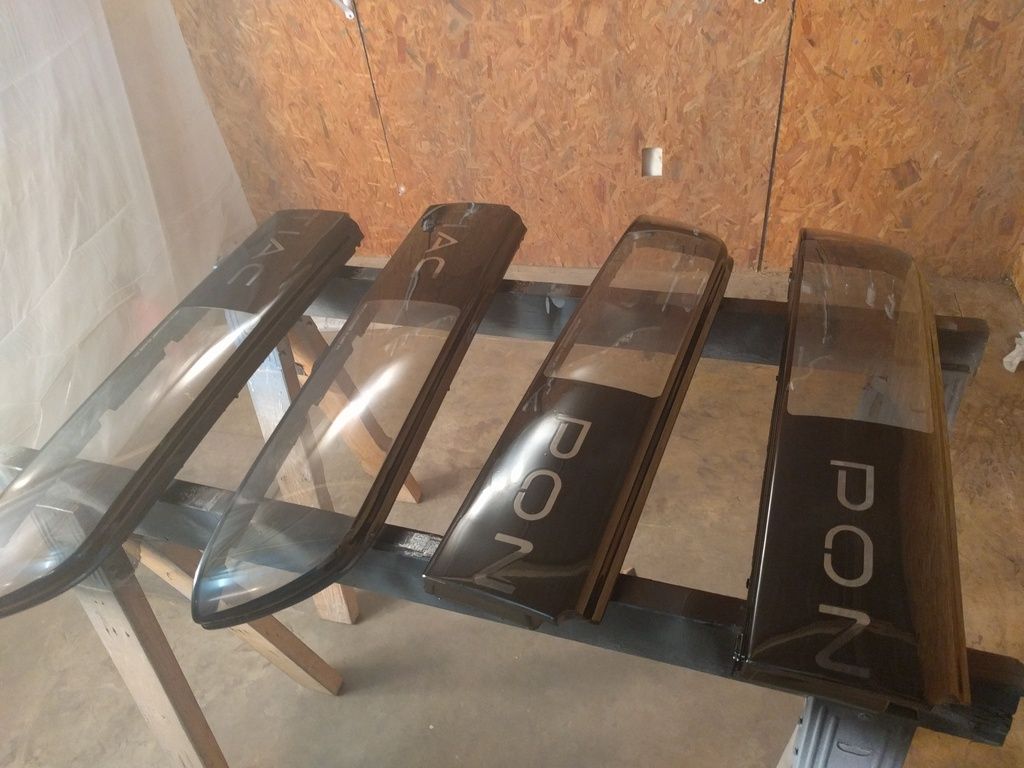
The more I look at them, the more I'm thinking I'm going to clear them. I have the "GT" decals from TFS that I need to apply, and then I think I'm going to clear the whole thing with a few coats. With that said, can anyone give me measurements as to where those decals are applied on OE windows?
I also went and visited the car at the shop today. They needed to order ANOTHER quart of paint for it, so that will be another $150 probably. They took the bumpers, hood, and decklid back off. It was disappointing to see it taken back apart, but I know they're doing a great job on it. He did a bit more filler work on some spots he didn't like, but by and large said I did a good job prepping the car for somone with no experience. I'll take that as a compliment! They're probably going to spray it tomorrow and I should have it back Thurs or Fri. Of course there will be pictures!
I think I'm going to use those same quarter window. Can't wait to see them on your car
Edit: Did you have to do much prep work to get them to fit properly?
I haven't fit them to the car yet aside from a "hold them up there" type fit. I haven't noticed anything to be concerned about though. They were a bit rough when I got them with some pockets in the gelcoat and whatnot. Not a gripe on Fiero Fiberglass, they were very nice parts and the "out of the box" quality was as good or better than you can expect for parts of this type. I think I'm not going to go any further with them until I have the car back. I was thinking I wanted them ready to mount, but now I think I would be pretty upset if I did all the finish work and then had to grind them or something to make them fit perfectly.
More of a long process than anything. Lots of tedious work, but nothing cosmic. I'm a bit of a perfectionist, and spent a lot of time on details. It hurt my pride a bit when the paint guy showed me a few spots that needed attention, but at the same time it wasn't a whole lot, and based on where that car started I think I did decent for a first timer.
Went by the shop yesterday... no progress. They thought they had locked the brakes on the car because the rear wheels wouldn't move. I had to show them that the parking brake handle can be down and still be engaged. Maybe next week to get the car back. This is disappointing, as I will now fail to meet my goal of having the interior done by the time my parents came up to visit for Thanksgiving, they'll be here monday.
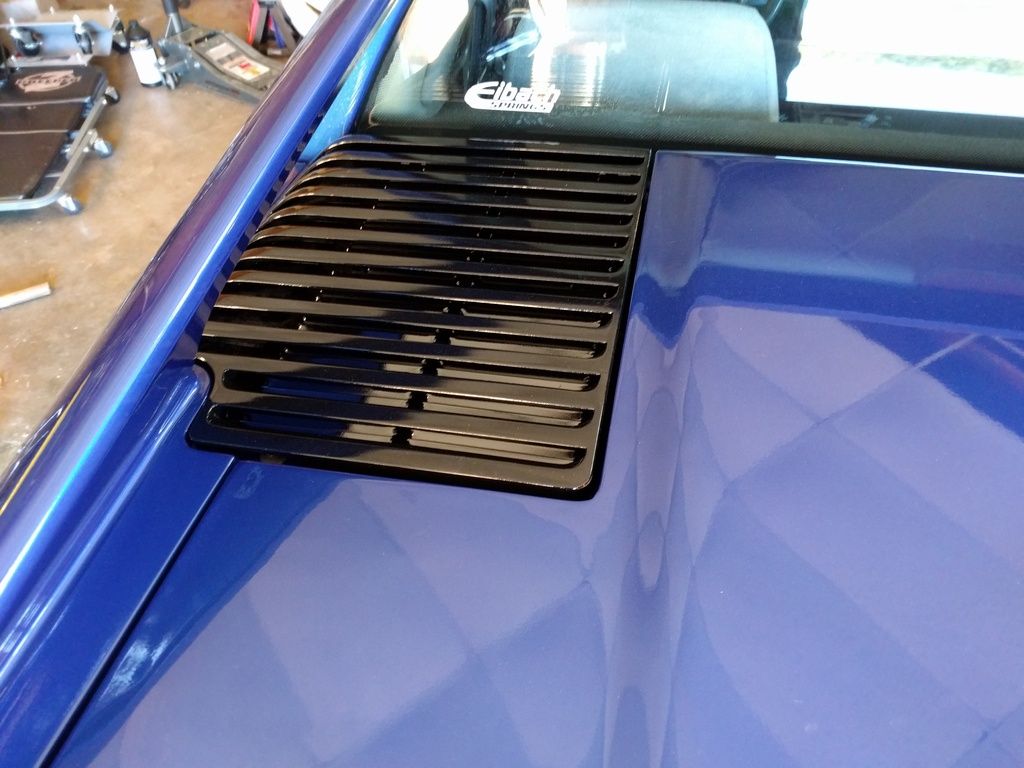
Nothing new. My parents have been in town since last Monday, so I've been working on other projects with my dad. On top of that, the car is STILL at the shop. I stopped by there yesterday and they said Wed or Thurs for pickup. The holiday slowed them down, and I'm not in a huge hurry anyway. I've got some things I can work on anyway. I'm unhappy with where I am on the sail panels, and will be stripping the paint off and doing a LOT more filling on them. The pockets and marks on them were difficult to see in primer, but when I sprayed them black they stood out and need to be addressed. I also need to do the engine vents and side molding. I uncovered the GTO today to so a minor job on it, and got excited about the Fiero because of how much I love that color.
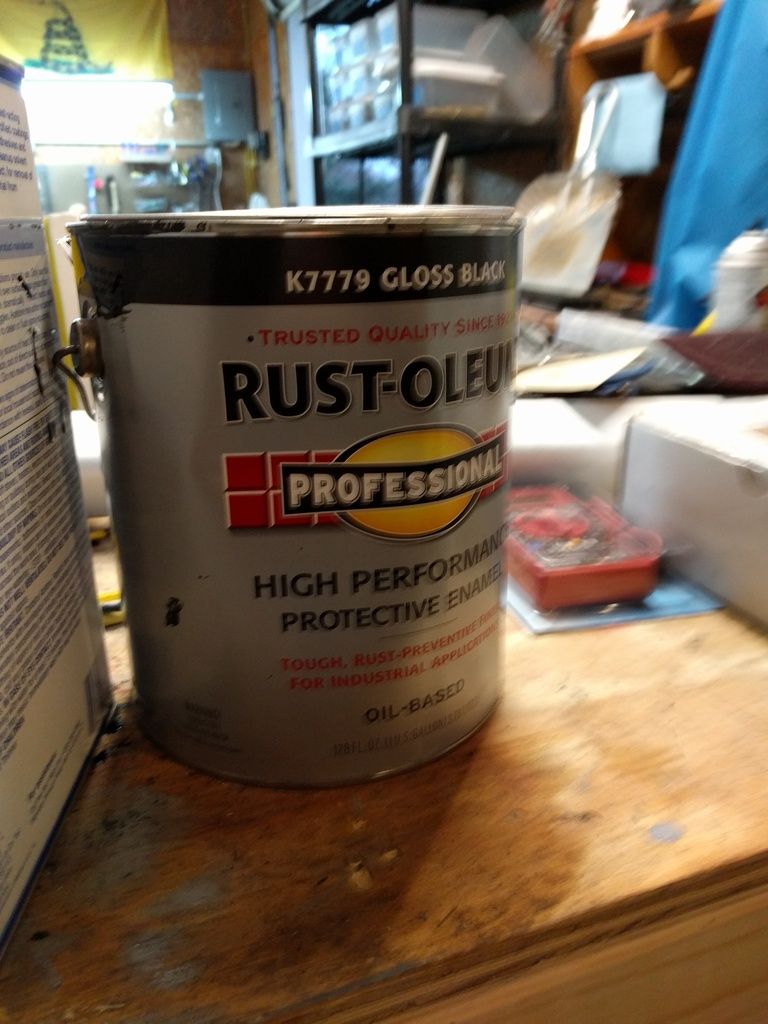
The folks left town today, so I got back to work. Today I turned my attention to the engine vents. They weren't bad, just really sun rotted. I used some Rustoleum enamel, so hopefully it will look nice and hold up. I painted the undersides today to test how it does. It's probably going to take at least a day to dry with the temperature around here. It sure looks nice wet, so hopefully it looks just as nice once it dries.
I also went up to the paint shop and checked on the car. Of course they left the headlights on and killed the battery. It's been sprayed and just needs a bit more work, I should pick it up tomorrow. Then it's on me to wet sand and buff it. I'd be lying if I said I wasn't a little nervous about that.
I'm really thinking I'm going to paint the side molding body color. I was going to leave it black, but after seeing the car and looking at pictures of LOTS of other Fieros, I'm starting to really like how it looks the same color as the body. I wish I had made that decision BEFORE it went to paint, but oh well.
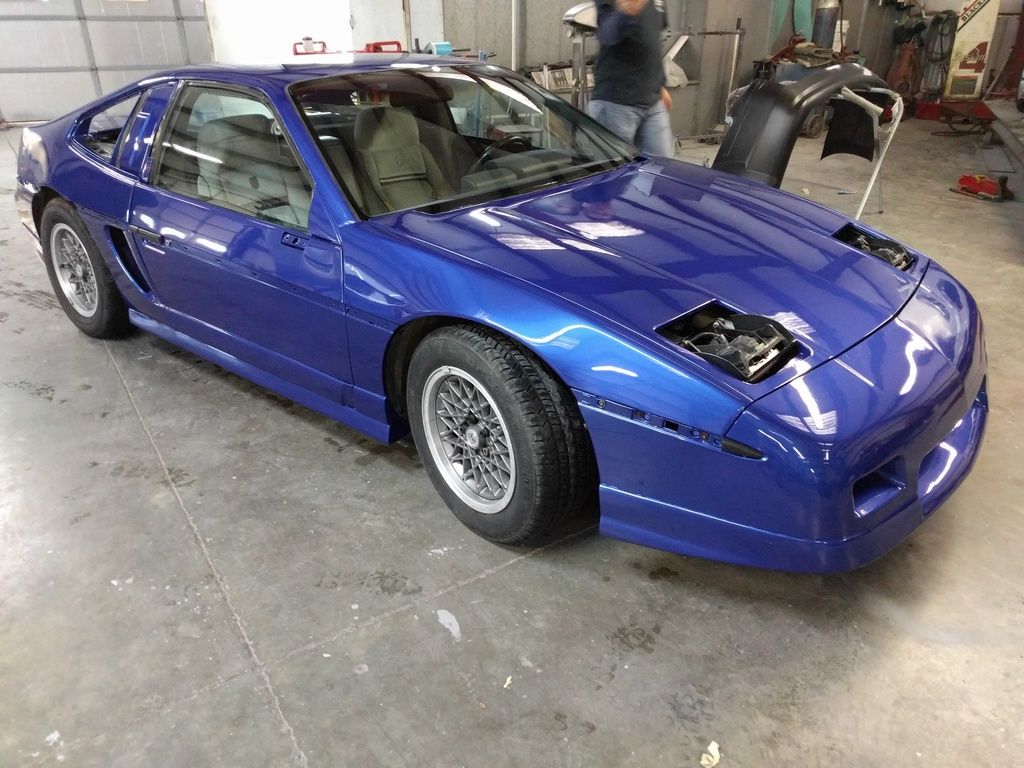
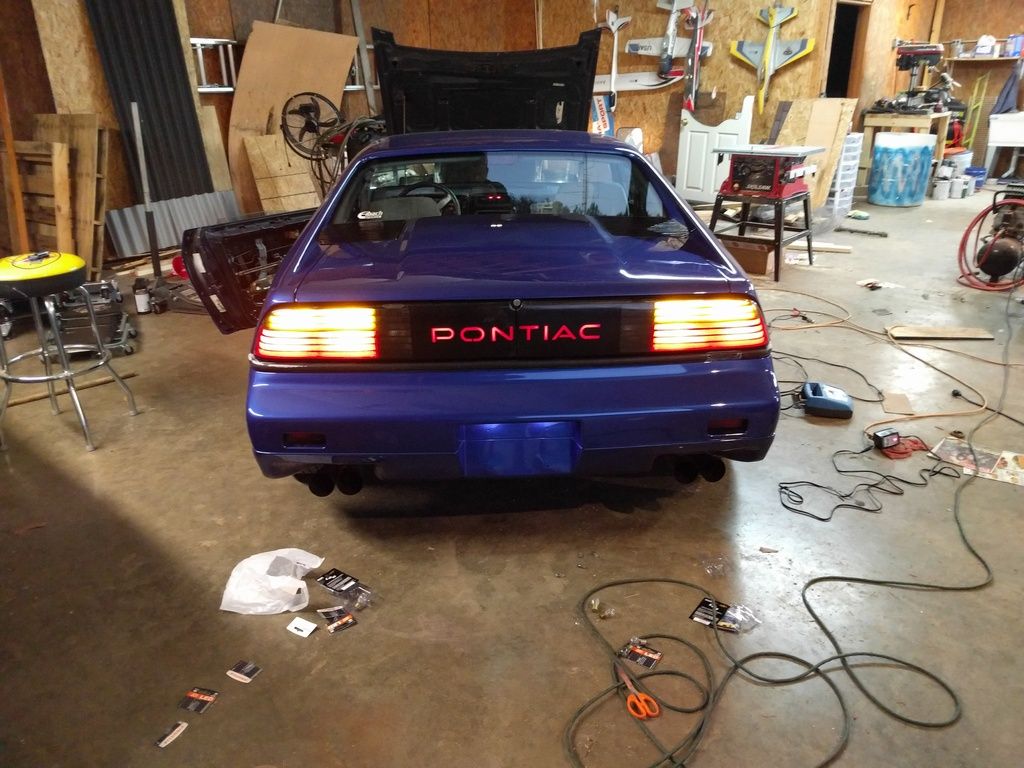
Car came home yesterday, but not without drama. The shop never charged the battery, so instead of it cranking when I picked it up, we had to jump it. Not a huge deal until you combine it with a major clutch issue. Long story short, the clutch wasn't disengaging, and it was almost impossible to get the car into gear, ESPECIALLY first. I managed to limp it most of the way home until I got stopped behind a bus dropping kids off. I was in second gear and decided to try to keep what I had. I was worried if I sat there with the clutch not fully disengaged I was going to burn the clutch up, so I shut the car down to wait for the bus to unload. BIG MISTAKE. Instead of the car starting after a 15 minute drive to charge the battery, it wouldn't crank. So there I am, in the middle of the road, dead. My neighbor was following me home after dropping me off to get the car, so at first we tried to push it the last 100 yards to my driveway (yes, I made it THAT close). MISTAKE #2. In order to push it, I took it out of 2nd gear and we attempted to push it. Too bad we were trying to push it up a hill and that wasn't working out, so he ran home and got a set of jumper cables. The only gear I could get in after cranking it was 3rd, so I roasted the clutch and away I went and got it home. It stunk like clutch, but I made it. I bled the clutch system and it seems to have fixed the problem. The fluid looked like the sludge you find in the bottom of a coffee pot that has been forgotten for a month. If the problem returns I'll replace the slave with one of Rodney's. On to the pictures!
I finished the engine vent covers. I think they turned out great, minus a few bits of debris that got into the paint. It's no big deal, but reinforced the reason I got the car painted professionally.
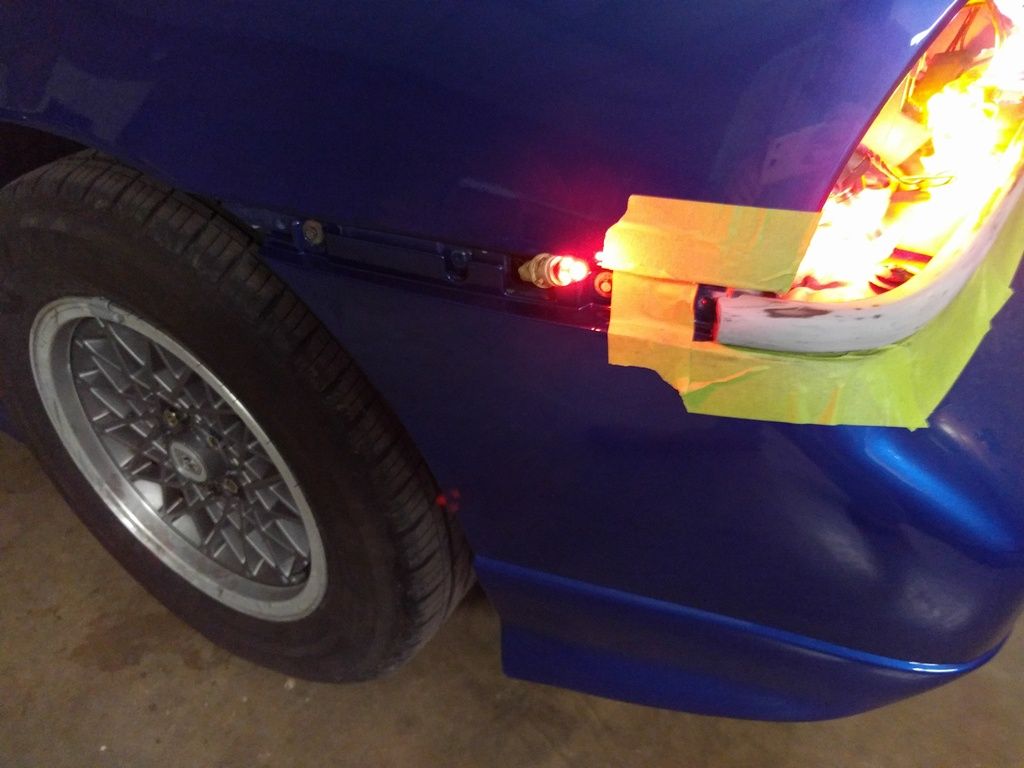
I had told myself I wasn't going to put the tail lights in until I got the molding painted. Well, I lied. I bought a set of LED bulbs from BTR and I just couldn't resist putting it all together.
They will come out again in a few days when I do the molding. I have two sets of tail lights, both in similar condition. Seeing them sitting out on the shop floor they didn't look too bad and I thought I could get away with them for a while, but when I put them on the car the delamination and overall cloudiness really sticks out against the shiny car. They will need to be refinished sooner rather than later.
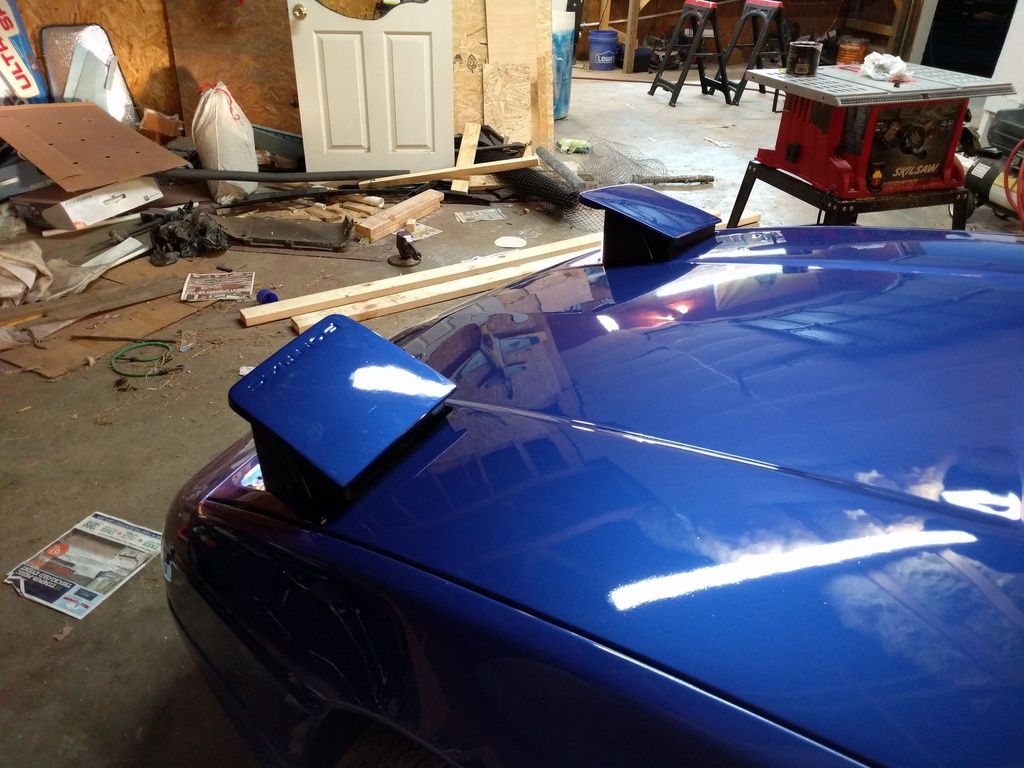
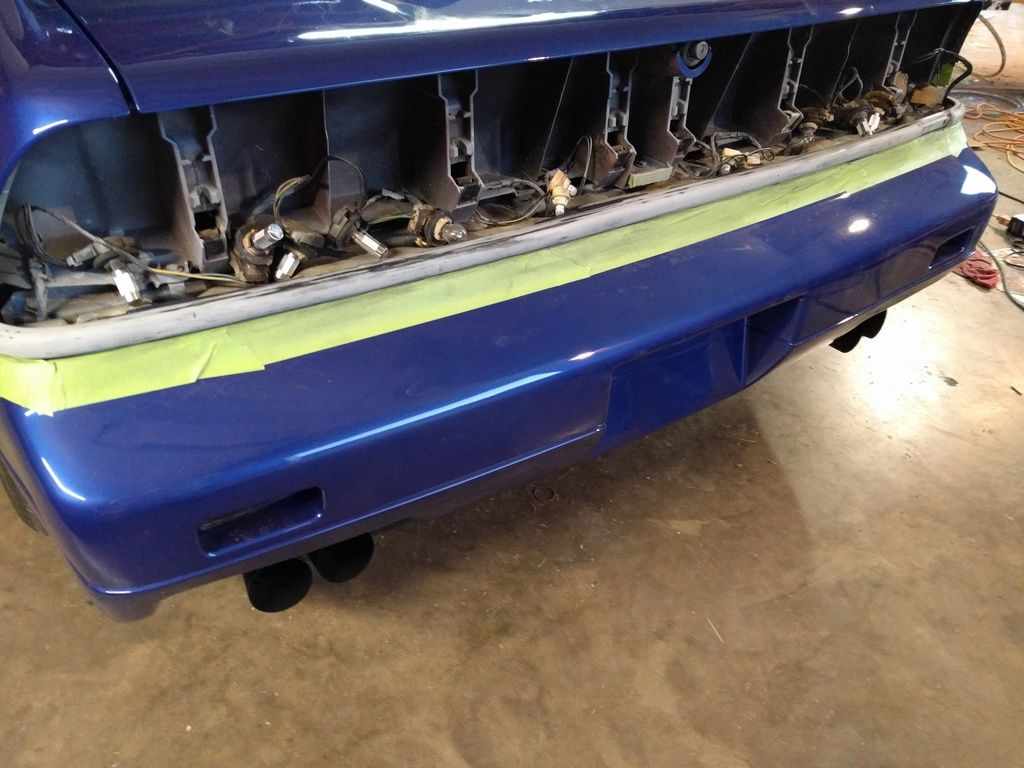
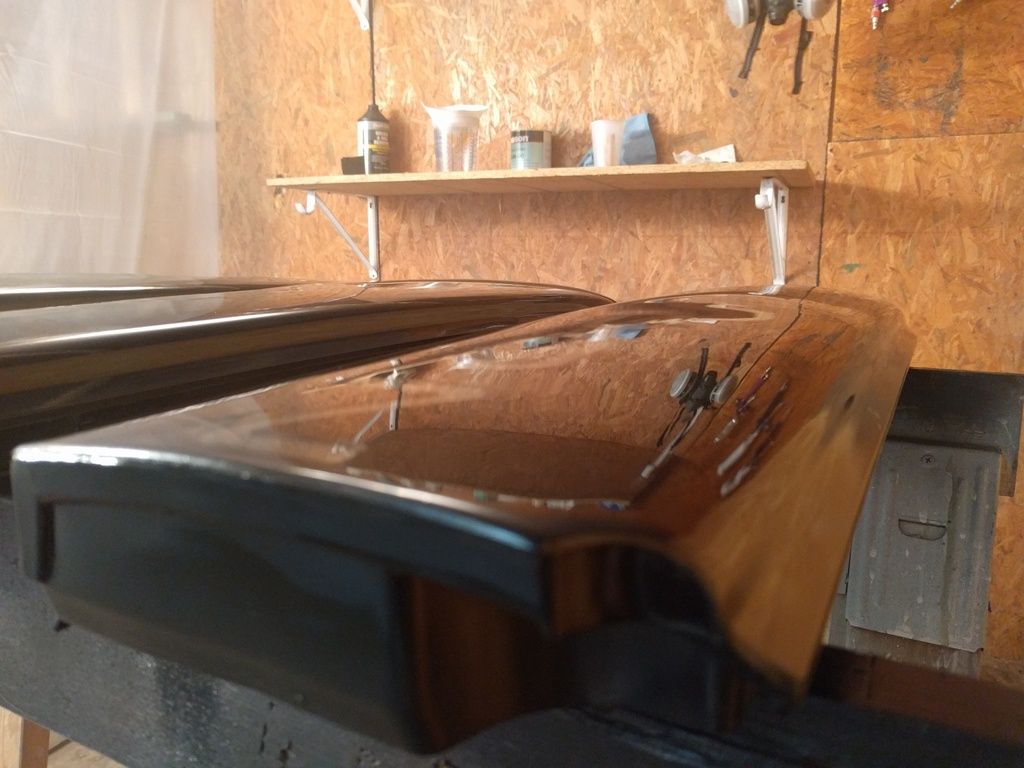
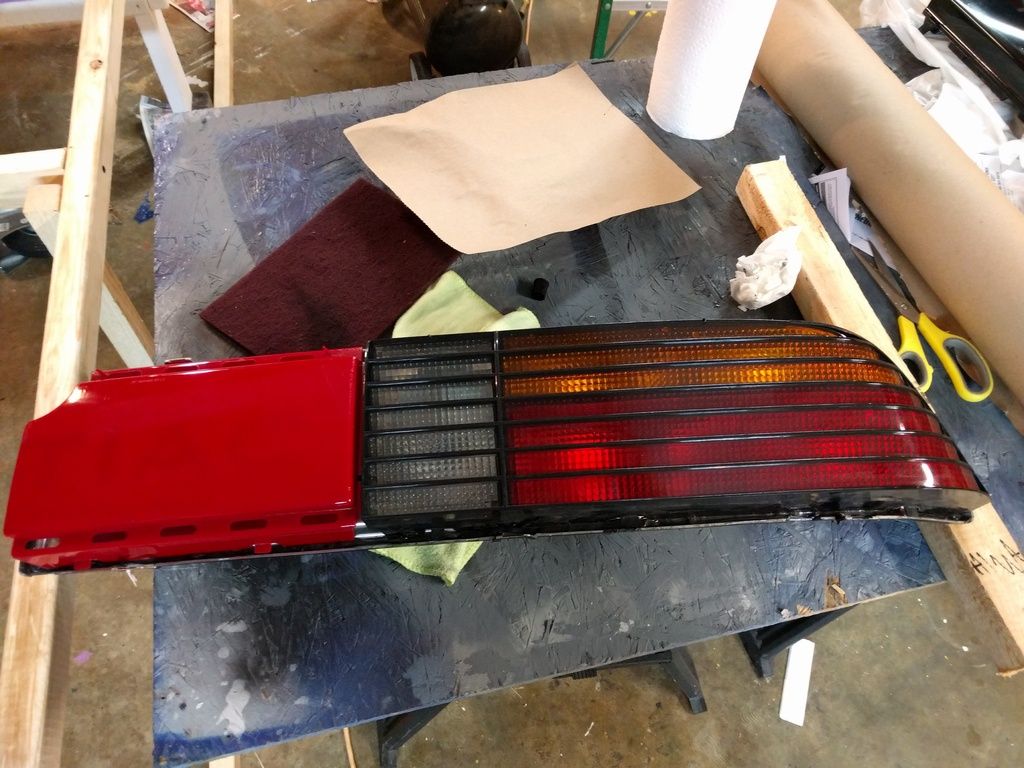
I have decided I am going to go with body color for the molding. This means I will have to mask and spray on the car in a few spots (front bumper, door handles, rear bumper) but if I'm careful it should be no big deal. I will do this BEFORE I wet sand and buff the paint on the car, so that gives me some wiggle room to correct any overspray mistakes. Next up I will finish the quarter windows. I deeply regret painting them, and hope that the leftover Marhyde makes a suitable substrate to prime and paint on top of. I'll sand them the best I can, but there will be some left.
It may be a little presumptuous, but I think I'm going to start referring to this car a The Blue Fiero. Yellowstone had The Yellow Fiero, and my long term goals for this car align closely with what he did.
[This message has been edited by Napoleon_Tanerite (edited 12-04-2015).]
Great looking job! My latest Fiero (after an 11 year break... kids) should be arriving at my house in a week or two and then I get to start my own thread. I'll be moving much slower than you though! Nice work!
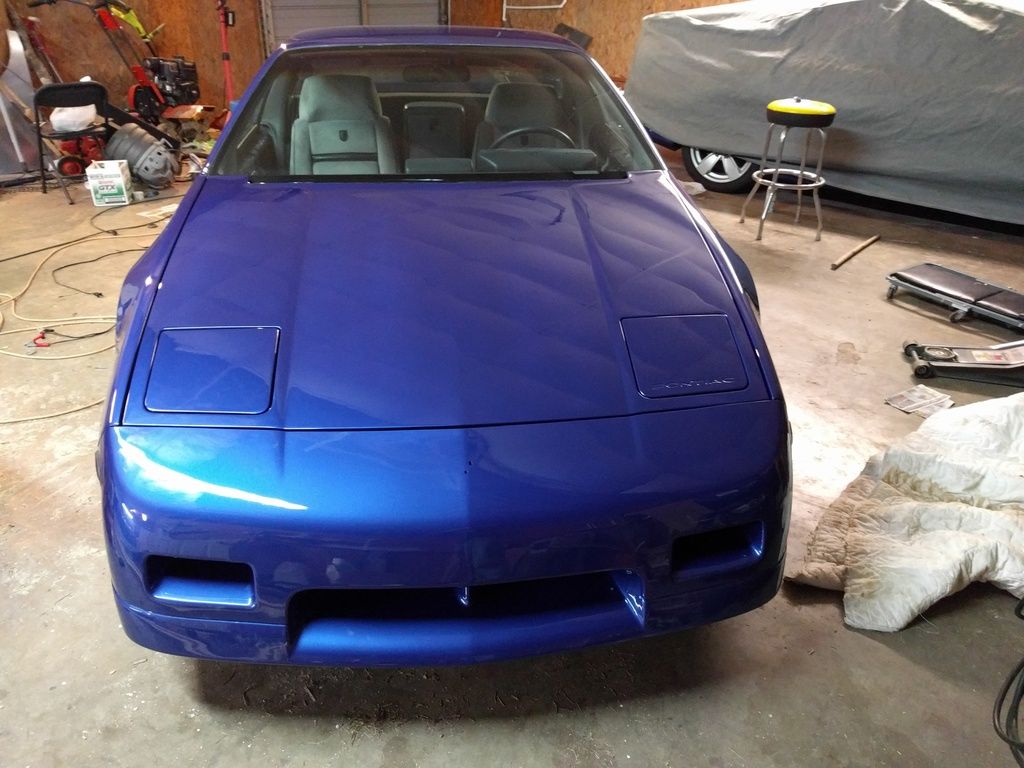
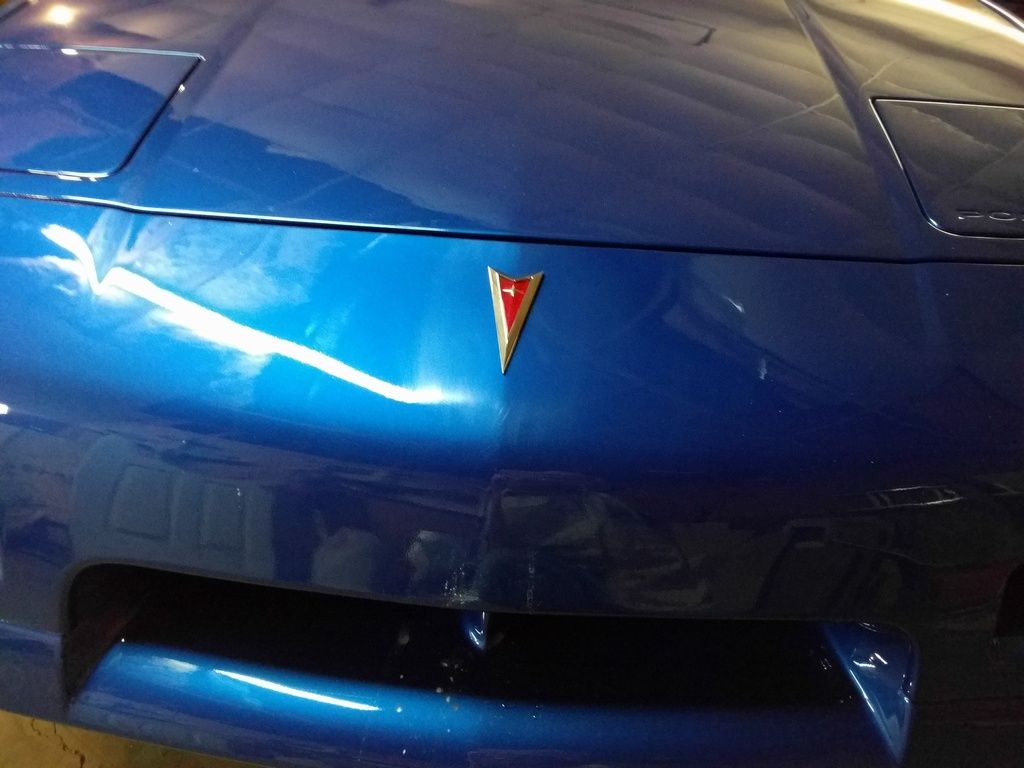
Lots of work done in the past few days. I painted the underside of the headlight covers and reinstalled them. All that's missing from the front now is the G6 arrowhead that I will install once I buff the car.
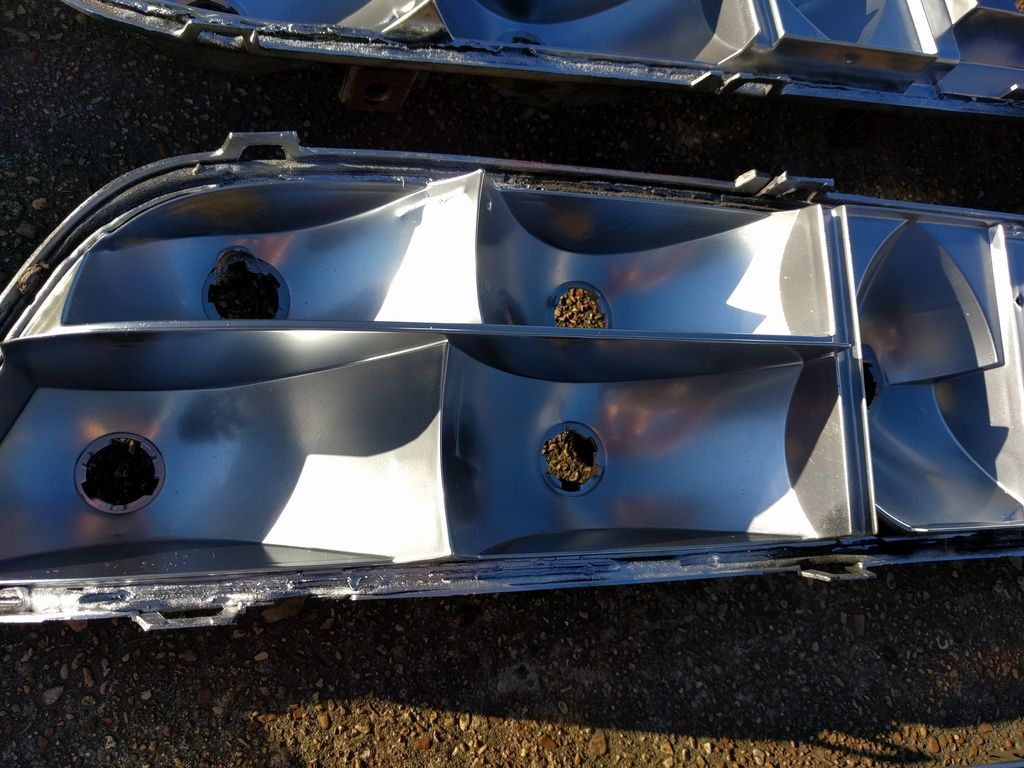
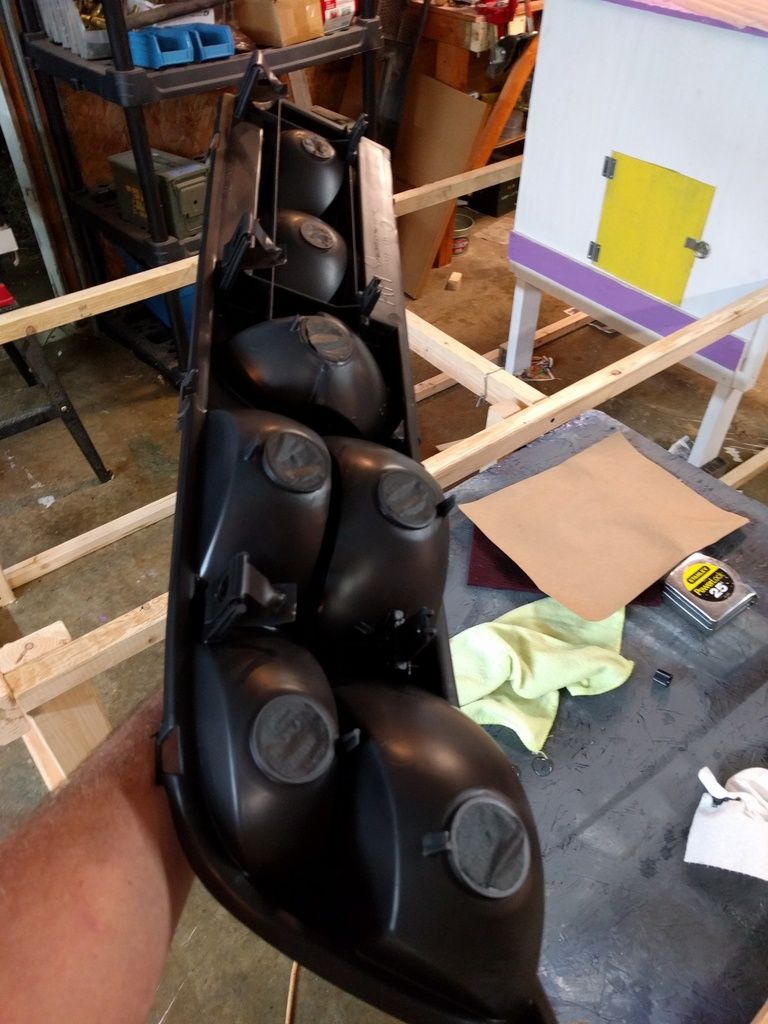
Most of my day today was spent working on tail lights. I disassembled all my tail lights (three pairs) and began to clean and restore them.
I wet sanded the lenses with 600gr paper. I'll be using IMSA GT's method of refinishing these.
Housings are in rough shape. Lots of missing tabs, burn marks, and holes. They'll be getting repainted
I set the lenses out to dry. An astute viewer may notice there are only five lenses but six sets of tail lights. Remember the driver's side lens that came with the car is junk, and not worth my time. I'll be using the cracked passenger side light as practice for the painting. The extra housings will likely get a set of Slammed lenses when she finishes them.
All the internal parts cleaned
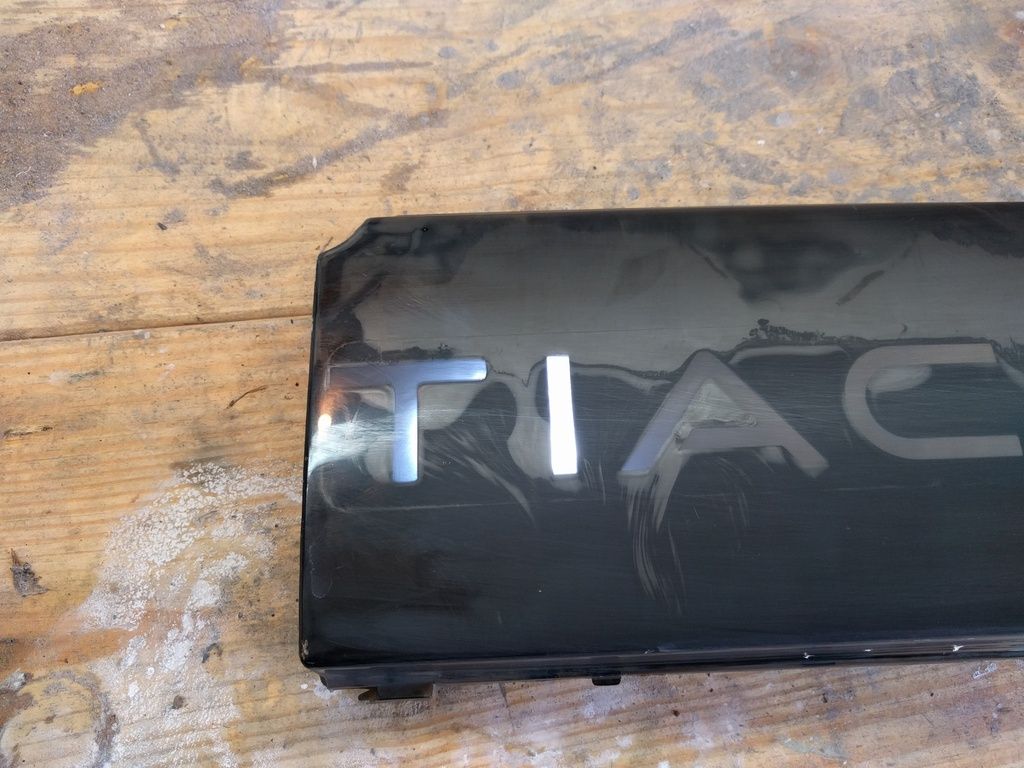
I masked off the practice lens. I used one of those little lights you get for free from Harbor freight
I put that light behind the lens, and laid tape over the lettering. I then used a razor blade to trim the lettering using the light shining through as a guide.
This is now set aside until I get the quarter windows done. I'm having a helluva time getting them primed well. I've rushed it a few times and it's cost me every time. I'm going to need to do more sanding and priming on one before it's ready for paint. This is slowing the tail light lens project up, as I want to shoot the quarter windows and practice lens at the same time since they will be getting the same paint.
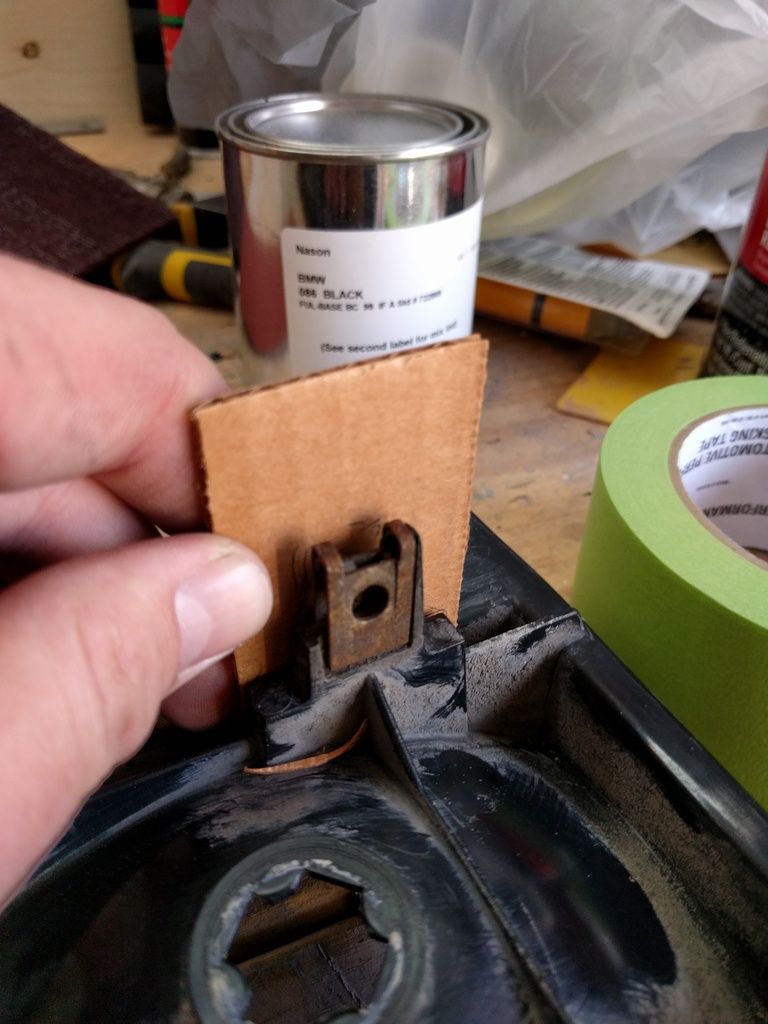
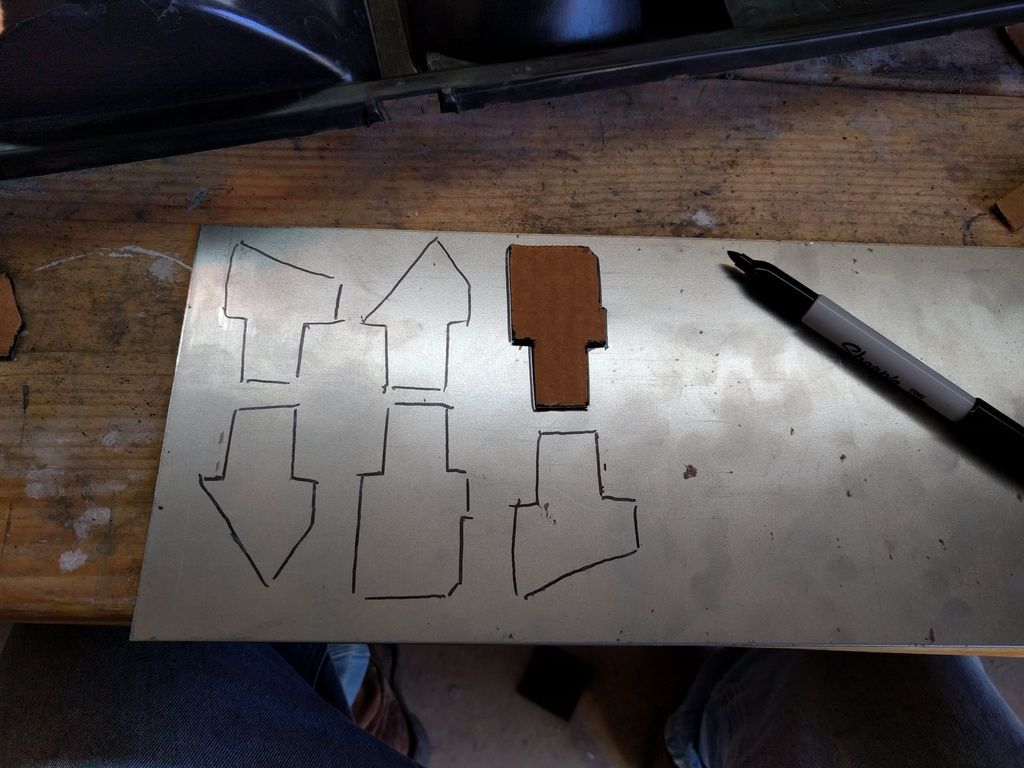
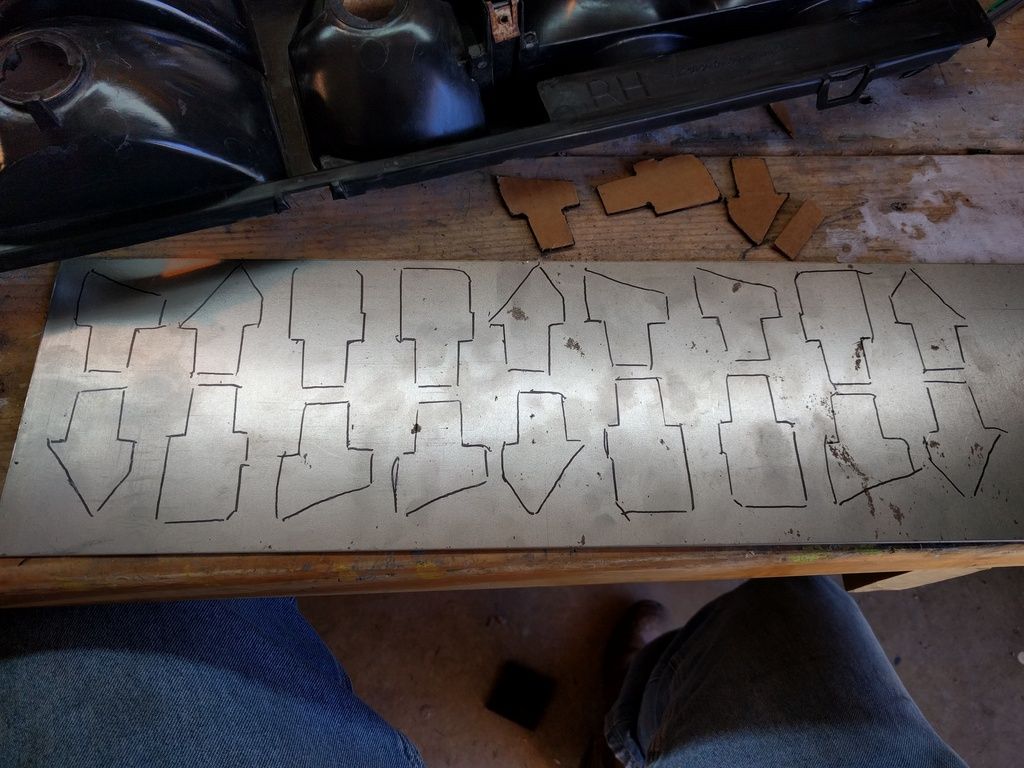
Since the lenses are on hold, I turned my attention to the housings. First thing to do was to fabricate replacement tabs to replace the broken ones. I mocked up some templates out of cardboard. Fortunately I had enough intact tabs I could trace and model my templates off of original tabs. This took a lot of guesswork out of it.
I then used my cardboard templates to trace onto a piece of 16ga sheet metal
I cut them out with an angle grinder, and then fine tuned them on a small belt sander.
Once I had them shaped properly, all I needed to do was drill a few holes and mount them in.
That about did it for my time today. Next up I will finish the tabs on the other lights and hopefully get the quarter windows painted. It's getting close.
Lots of dedicated detail work on lots of parts - nice job! I'm curious about the contour cut on the door below the model airplane collection... seems, well, unusual...
It's from our old house, was the laundry room door. We kept the cat food and litter in that room and made the half door to allow the cat in but keep the dogs out.
Lots to do at work this week, so not a lot of progress on the car. I managed to get the bumper sanded back down to prep it for paint. I was going to have to repaint it anyway due to the black paint scratching off, so I'm going to get the whole belt line painted body color.
I also buffed the nose and put the finishing touch on there. I love how it looks!
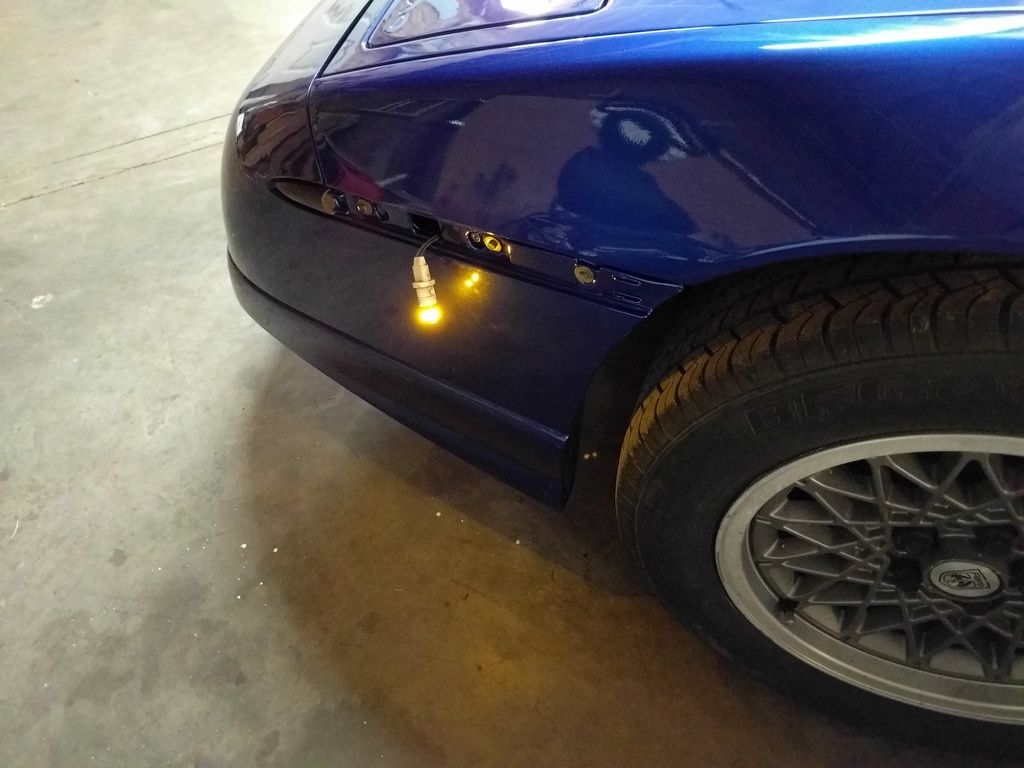
I've almost got the LED conversion done. There are some weird things that I am not sure if they are quirks of the Fiero lighting system (and thus normal) or a function of the LEDs.
When the lights are off, the front marker light works with the turn signal. but the rear marker does not. When the lights are on (running lights or headlights) the front marker light is off, and does not flash with the turn signal, but the rear marker does come on (steady). Is that normal for a Fiero? I didn't put any resistors in the system or change out the turn signal flasher. The front lights are still incandescent bulbs, the rears are LEDs. They flash at the normal rate and seem to have no issue.
There are flashers specifically for LED bulbs; since they take less current, the normal flasher usually acts like there's a bulb out.
The front side marker lights should always blink and the back side marker lights should never blink regardless of the headlight/parking light switch position. If the parking lights are off the front side marker lights blink at the same time as the front lights. If the parking lights are on, the front side marker lights blink on when the front lights blink off.
[This message has been edited by David Hambleton (edited 12-13-2015).]
I re-watched the video from BTR where they show the install and function of the lights, and their car behaves the same way. I'm thinking mine is normal. The weird thing is they say you MUST use a different flasher module along with a resistor to get them to work. My car has neither, but works fine.
When the lights are off, the front marker light works with the turn signal. but the rear marker does not. When the lights are on (running lights or headlights) the front marker light is off, and does not flash with the turn signal, but the rear marker does come on (steady). Is that normal for a Fiero? .
Nope. That's not normal. Here's normal: The front side marker lights should always blink and the back side marker lights should never blink regardless of the headlight/parking light switch position. If the parking lights are off the front side marker lights blink at the same time as the front lights. If the parking lights are on, the front side marker lights blink on when the front lights blink off.
Nope. That's not normal. Here's normal: The front side marker lights should always blink and the back side marker lights should never blink regardless of the headlight/parking light switch position. If the parking lights are off the front side marker lights blink at the same time as the front lights. If the parking lights are on, the front side marker lights blink on when the front lights blink off.
Video of my LED marker install from 6 years ago.
------------------
[This message has been edited by randye (edited 12-14-2015).]
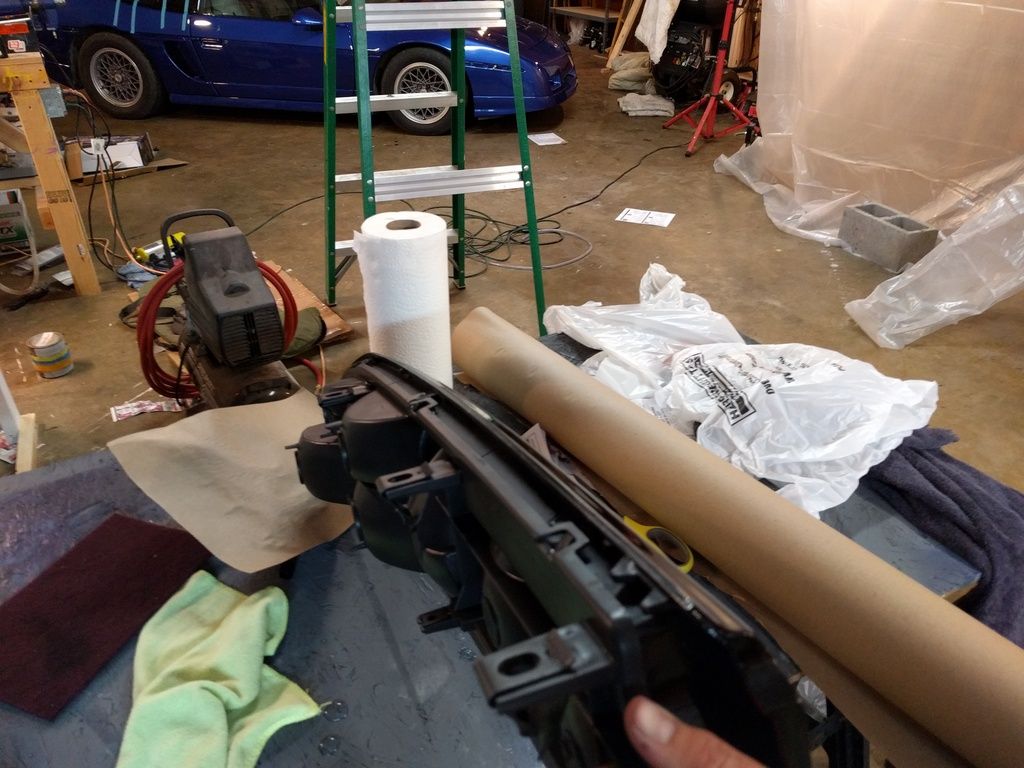
The car has been at the paint shop since monday while they paint the side molding trim. Between that and work I haven't gotten a whole lot done on the car until this weekend. Without the car, I had to do other tasks that needed to be done, so I continued working on the tail lights and quarter windows.
I cleaned and repainted the reflectors. They were dingy and had scorch marks on them. I used just generic rattle can chrome paint, and I think they came out pretty nice. Now I need to carve the old sealant out of them and paint the backs.
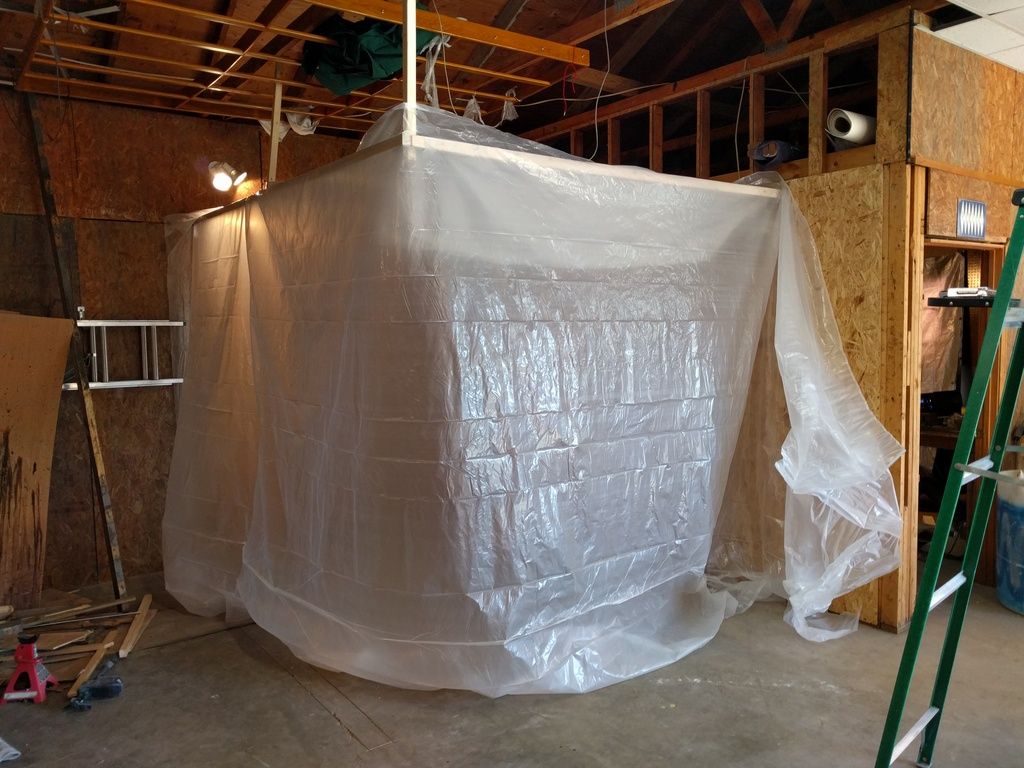
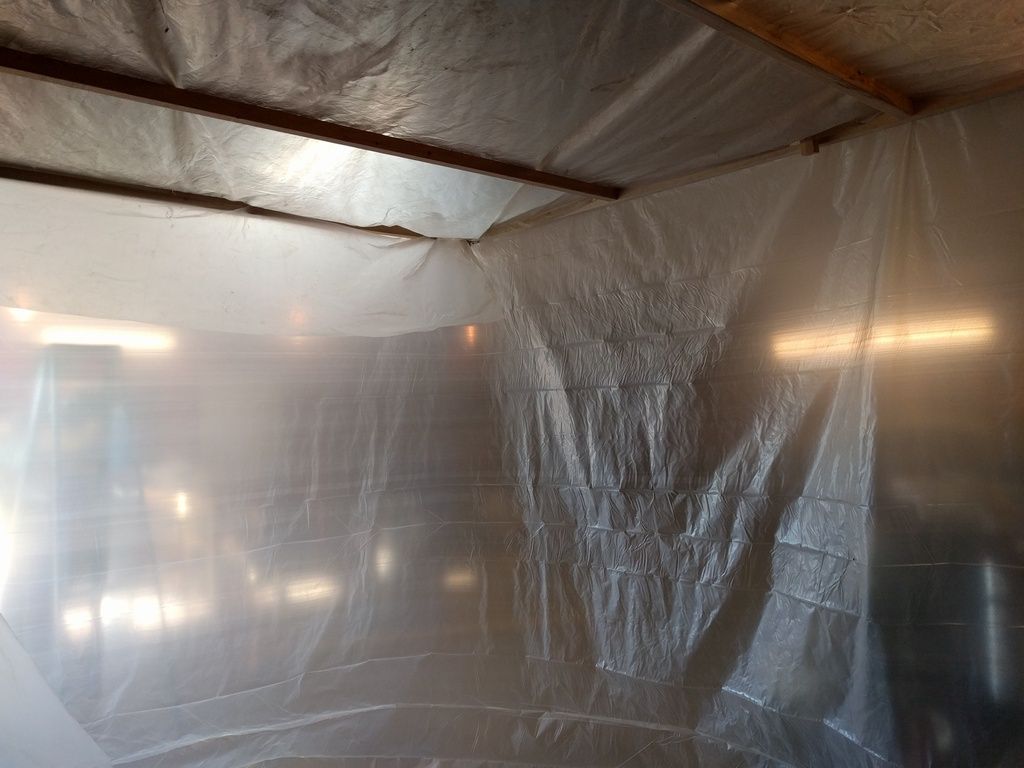
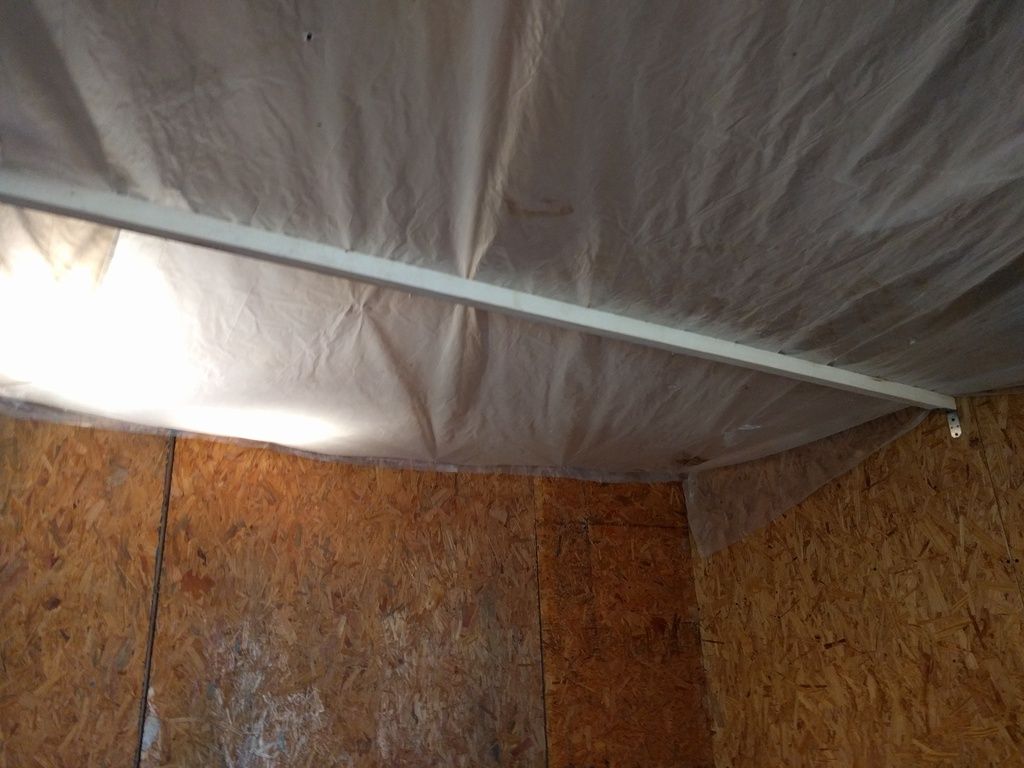
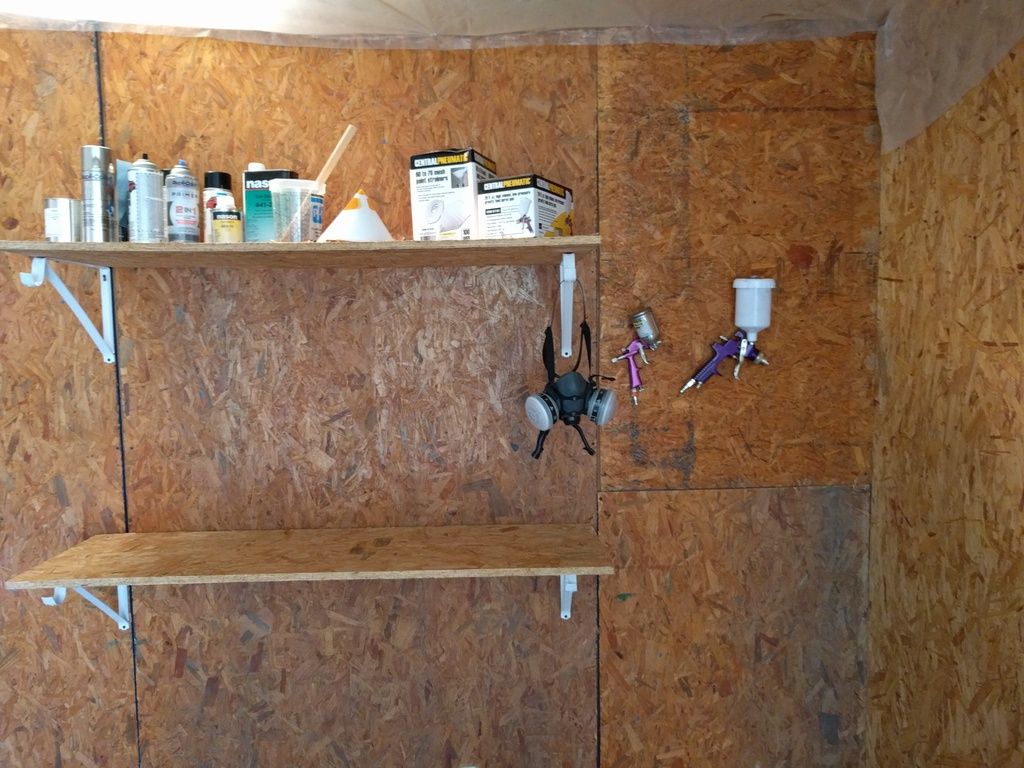
I'm tired of waiting for good weather and calm winds and daylight to all align to get parts painted, so I did something that was long overdue-- I built myself a paint booth. It's just a simple little corner thing, but works pretty well for keeping the dust off of the parts being painted and keeping overspray away from things that aren't getting painted.
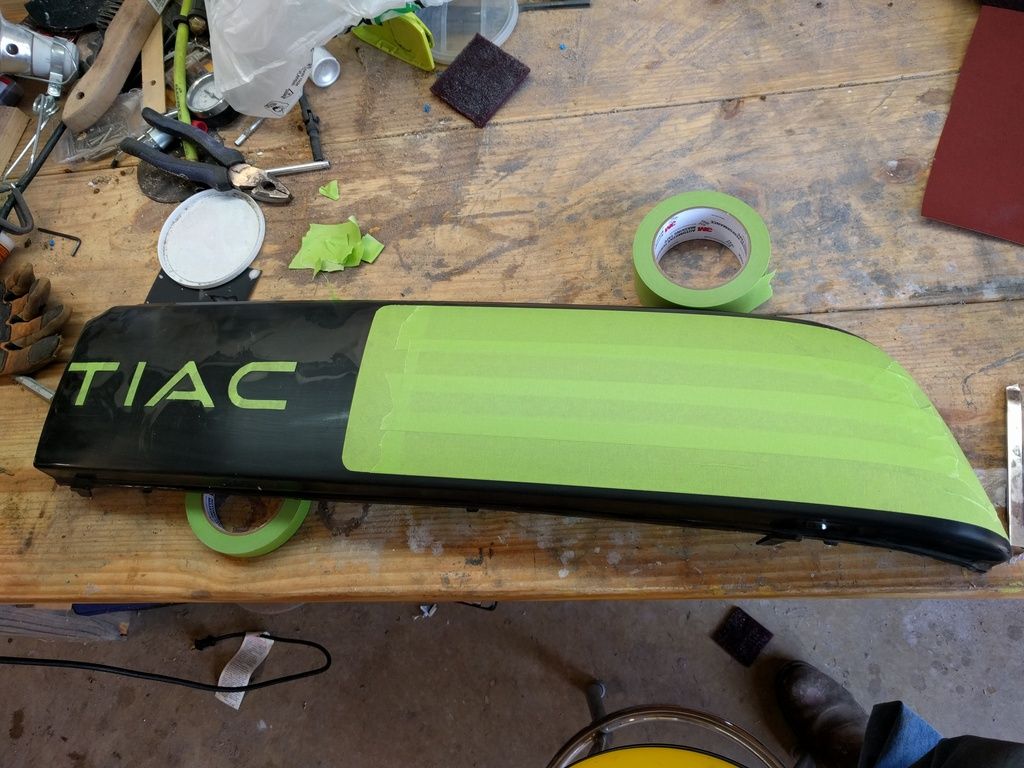
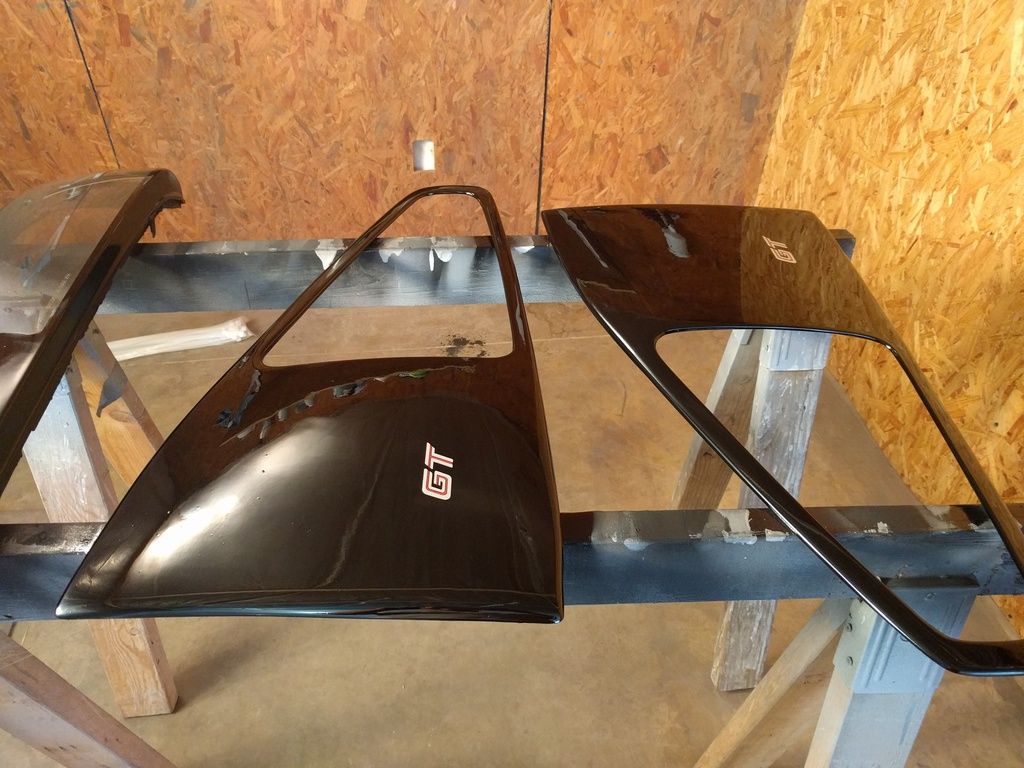
So I turned my attention back to the quarter windows and my test tail light. First I sprayed them with black base coat
After the base coat went on I put the GT decals on them. I used a combination of measurements and eyeballs to position them, so I hope they look right on the car.
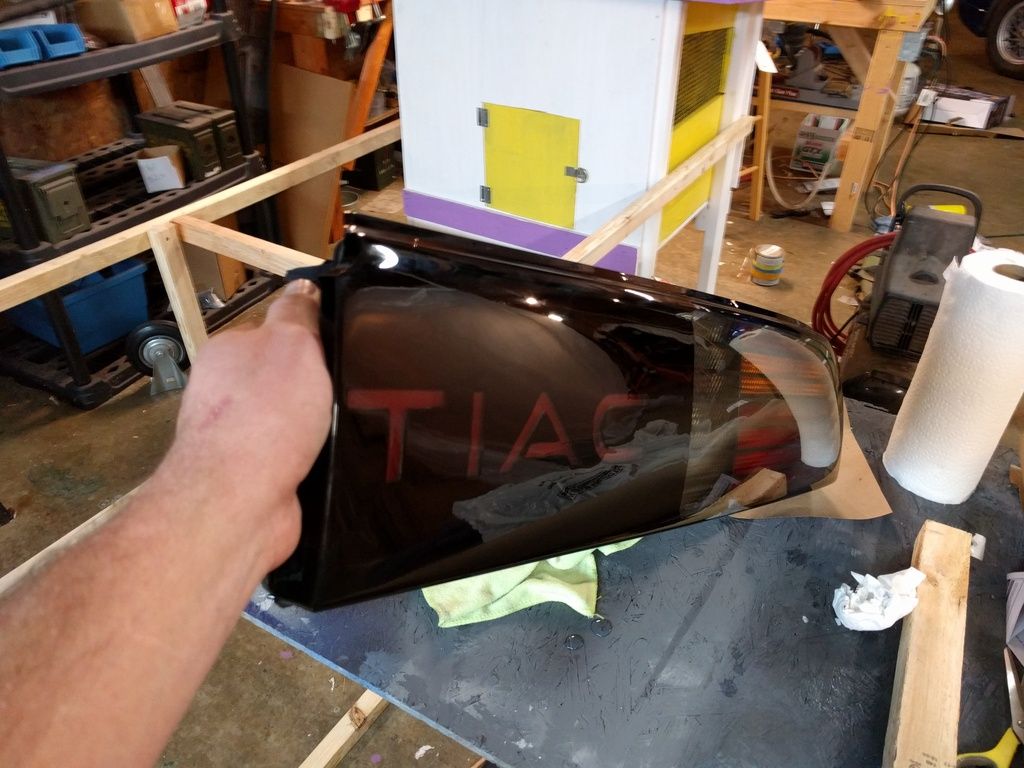
Then a GENEROUS coat of clear, followed by another GENEROUS coat
My test lens turned out great. Only thing I figured out was that I needed to smooth the edges where the tape was before applying clear, so I proceeded to mask up the rest of my lenses and got to work
Once cleared they looked AMAZING
I'm not going to lie and say they could pass for OEM, if for no reason other than you can still see the black plastic through the lens if you look at it at an angle, and some of the masking lines weren't absolutely flawless; however, they look probably 95% as good as new, and I know they will last longer than I will own the car. I still plan on buying a set of Slammed lenses and probably selling one of these sets, but for now I will have one set to mount and another full set for a spare. The car should be back next week and I'll be almost done with the exterior.
Thats one of the key things that makes refinishing them challenging. You have to mask just slightly smaller than the original lettering so you won't see the original laminate at different angles. The good news is that you can sell those for a great price. They came out very nice.
To mount your sail windows. Go to your local hardware store and buy a tube of GE Brand Black Silicone Adhesive. Apply a thick bead everywhere tape would go and use some blue painters tape to hold them in place while the Silicone dries (24 hrs).
To mount your sail windows. Go to your local hardware store and buy a tube of GE Brand Black Silicone Adhesive. Apply a thick bead everywhere tape would go and use some blue painters tape to hold them in place while the Silicone dries (24 hrs).
Thanks. I sent you an email on the subject about 45 minutes ago, not sure if this is the reply, but thanks either way. I'll mount them up when the car gets back later this week.
Got the car back from paint today and did almost all of the remaining work to be done on it.
First off I sanded and buffed my quarter windows
Then I mounted them per Jimmy's instructions
Next I turned my attention to the tail lights, same deal-- wet sand, buff. I also finished refurbishing the housings. I stripped the old sealant out of there, masked them, and painted the backs satin black.
I used black RTV to reseal the casing
Internal parts
Reassembled
Only one good place to store these...
I should have wiped the fingerprints and gunk back off them after I put them back in. I was holding them in place with my thigh and it had some polish residue which I think transferred over to the lens giving it a bit of a dingy look-- trust me, they look great, far better than before.
Next up I reinstall the side molding trim, wet sand and buff the car and the exterior is DONE.
The exterior is pretty much done. Beauty shots will be posted in a few days when I get the new wheels/tires in, and get the windows tinted, but aside from a few small issues in the paint, the exterior is done. Since these pics were taken I have done a few small jobs like reinstall the windshield cowl and wipers, changed the dew wipes, and installed a Rodney slave.
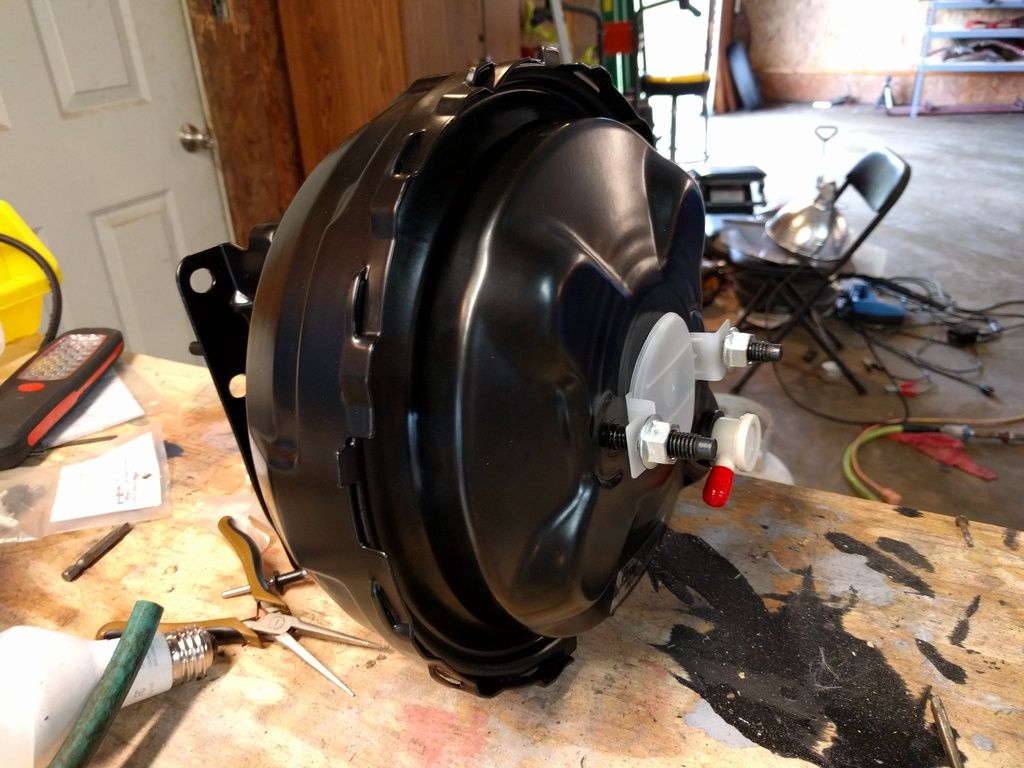
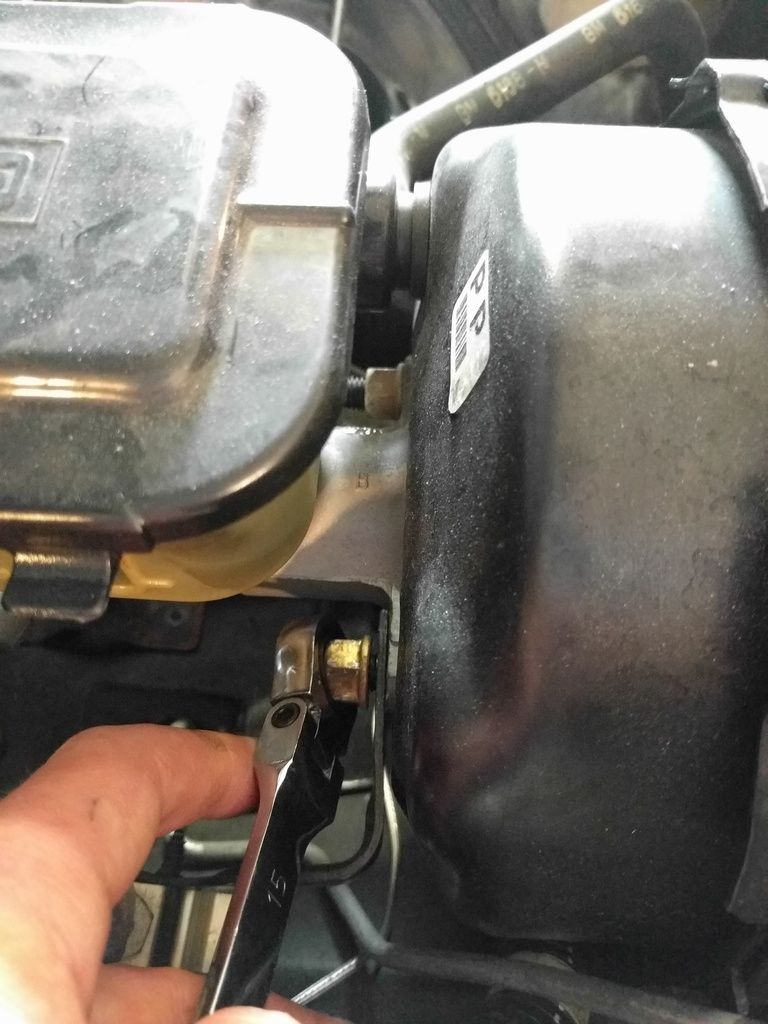
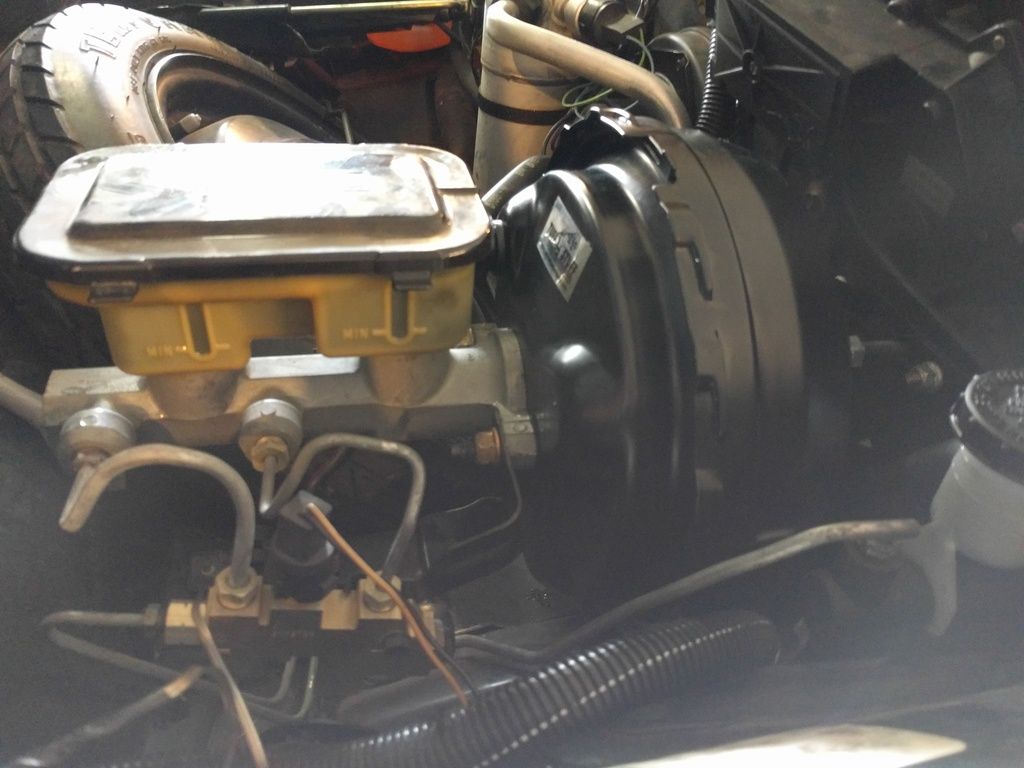
With race season coming up I have shifted my focus from cosmetic restoration to performance improvement. The first real performance improvement I have done is to install the S-10 booster. This was a fairly simple job and went just as described in previous threads.
First step is to disconnect the booster from the brake pedal. This is a simple cotter pin through the pedal.
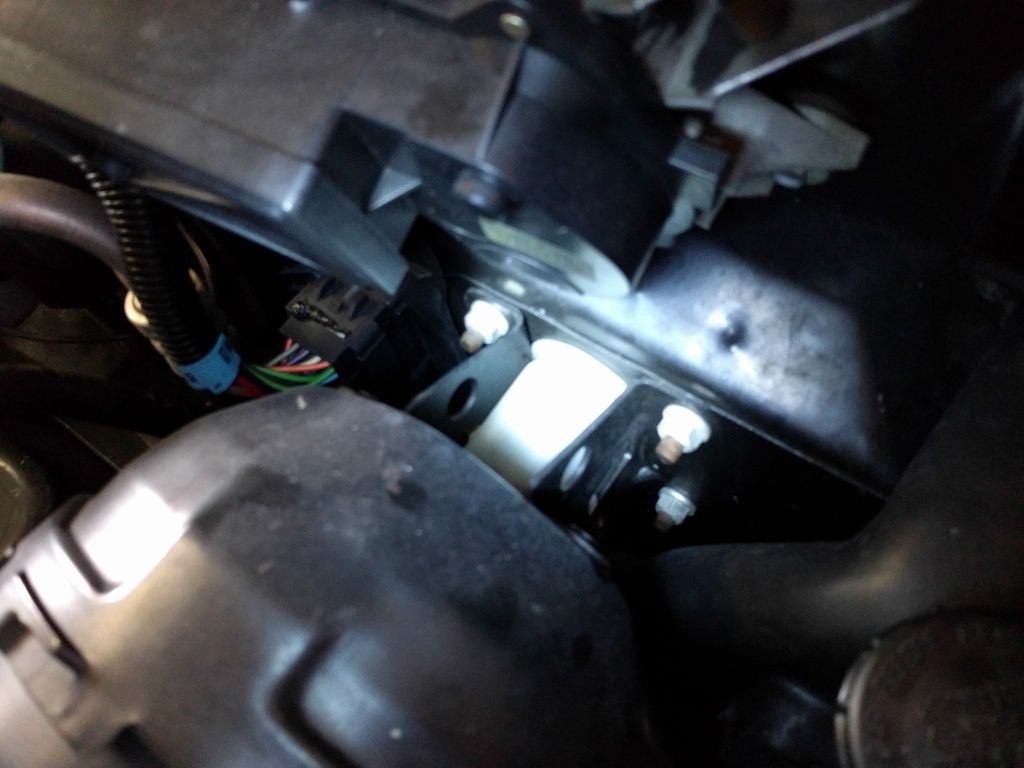
Removing the old booster becomes a simple matter of unbolting the master (no need to do anything with the fluid) and unbolting it from the firewall, six bolts total between the two parts, then just disconnect the vacuum hose and it pulls free.
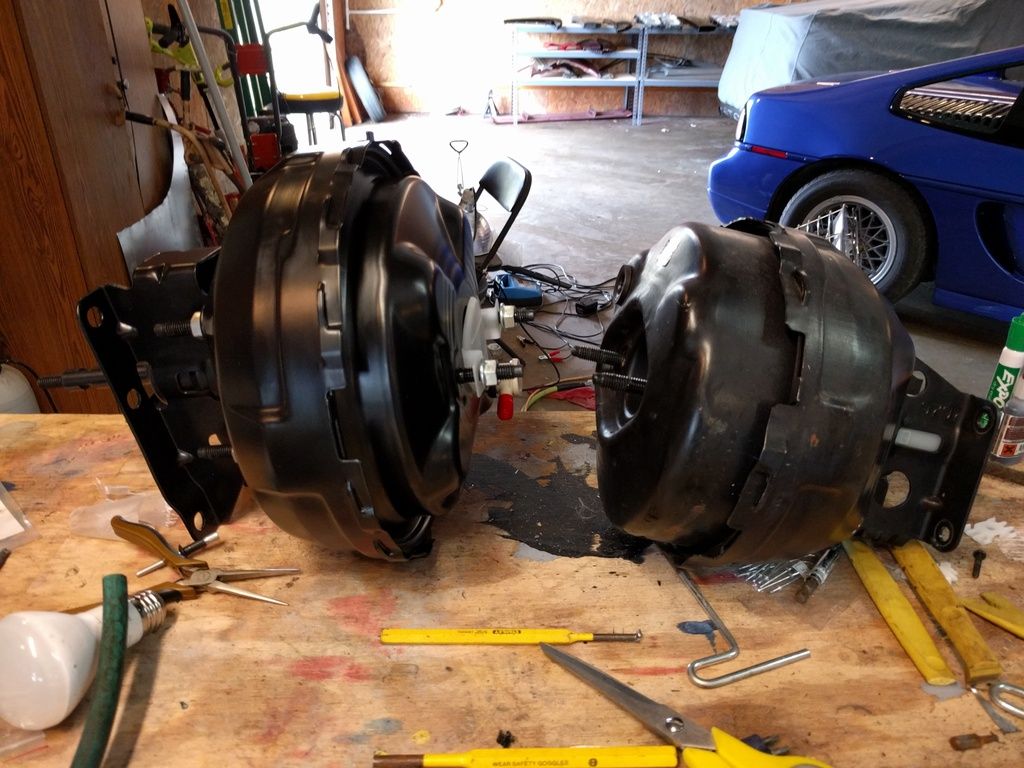
I've read several booster swap threads, and what I haven't seen (maybe I missed it) is a side by side from the old to the new, so here it is.
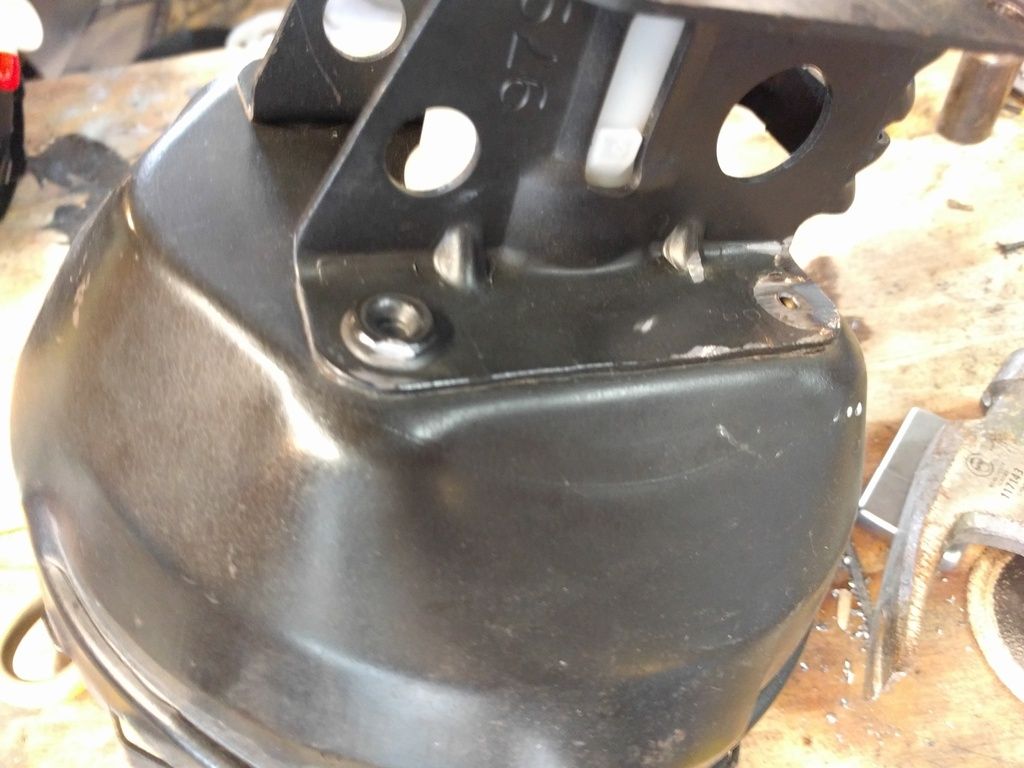
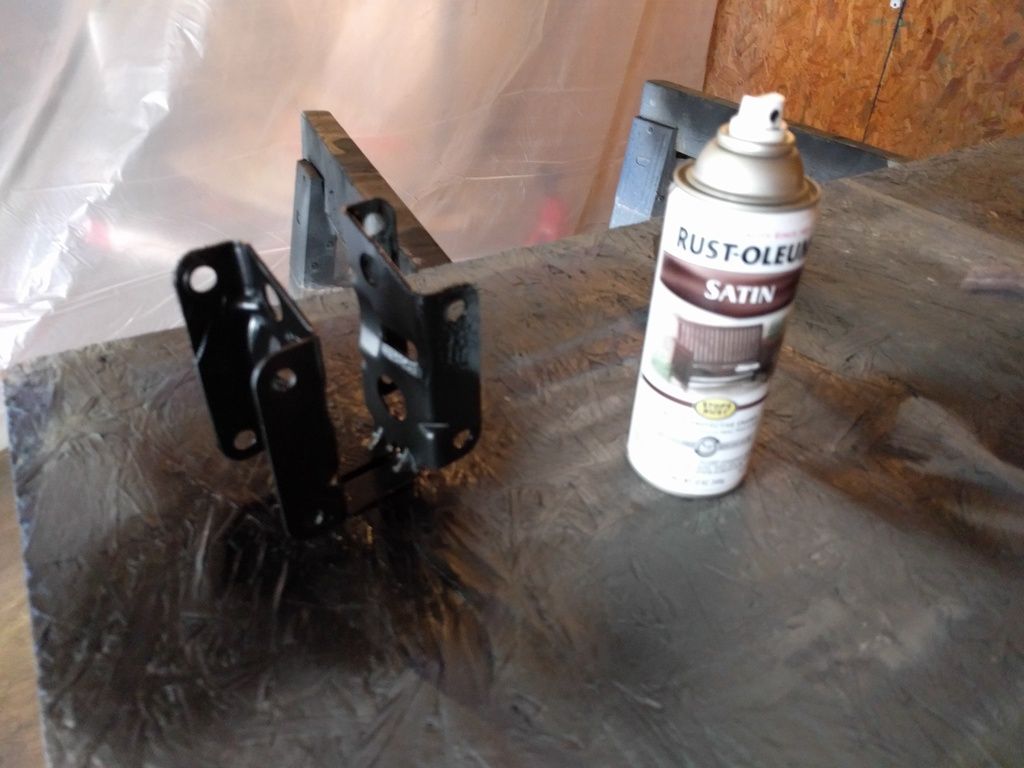
The bracket from the Fiero booster is reused, so it has to be removed from the Fiero booster. This takes a bit of grinder work, but nothing serious.
Quick shot of paint to cover up the grinder marks
Only part of this job I didn't take a picture of was the use of a precision tool to adjust the fender. By this I mean hit it with a big hammer until the new booster fits. After that it's just do all the previous steps in reverse. Only thing I noticed is it is MUCH easier to put the bracket in FIRST and then bolt the booster on as opposed to putting the bracket on the booster and attempting to bolt the whole assembly in.
Performance wise-- It's tough to say. I don't have a whole lot of miles on my car to have a great feel for how the brakes are, and I never really got on them too aggressively. With the new booster I had no problem locking them up though, so I will need to be careful. New tires and brake pads should help me properly drop anchor as opposed to just sliding.
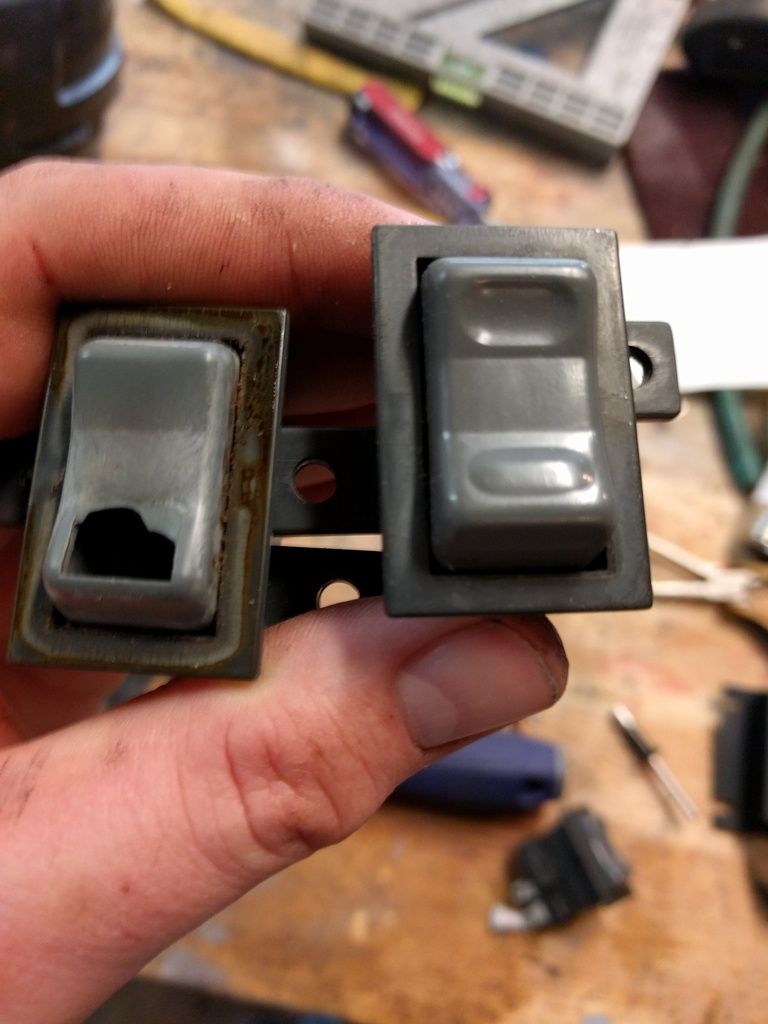
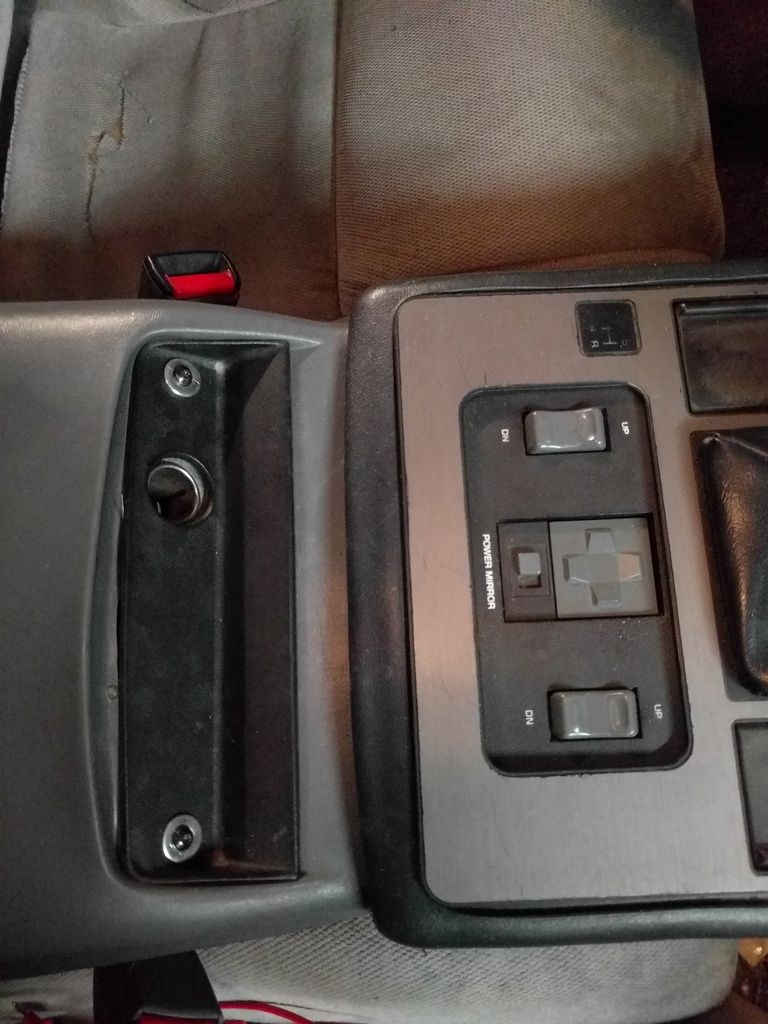
The full interior job is on hold, but I intend to drive the car for a while before I get into it. I decided to do some interior jobs to make the car nice inside (as nice as practical). First was installing the window switches I bought a while ago. My original switches have the typical breaks in them. I hope the new ones hold up better.
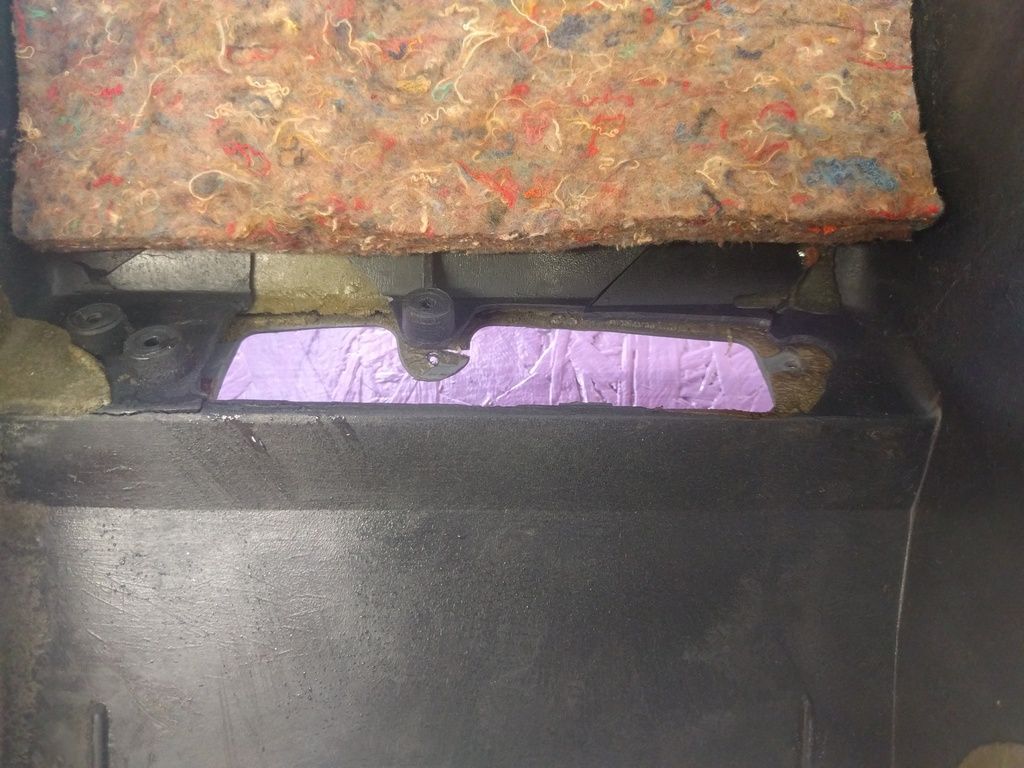
I also rewired the cigarette lighter. The PO jacked with the wiring, so the lighter socket was useless. I ran a hard wire from the battery to the socket, so now I get a STRONG constant 12V that I can use to charge phones or whatever else the kids these days do with 12V accessory power.
This wasn't as simple as running a wire though. There was a bit of damage to the plastic around the end of the arm rest, so I did some glass work to fix/reinforce it. I intend to get a TXGOOD armrest, so I need strength here to properly install it. Before you ask about the color-- it's sitting on a piece of painted OSB that is the roof of a chicken coop we are building.
Reassembled and I'm back in business until I start the proper interior restoration some time in the spring.
I intend to DD the car for a while to sort out and possible bugs, and the first race is on Jan 9th in Jackson MS.
[This message has been edited by Napoleon_Tanerite (edited 12-27-2015).]
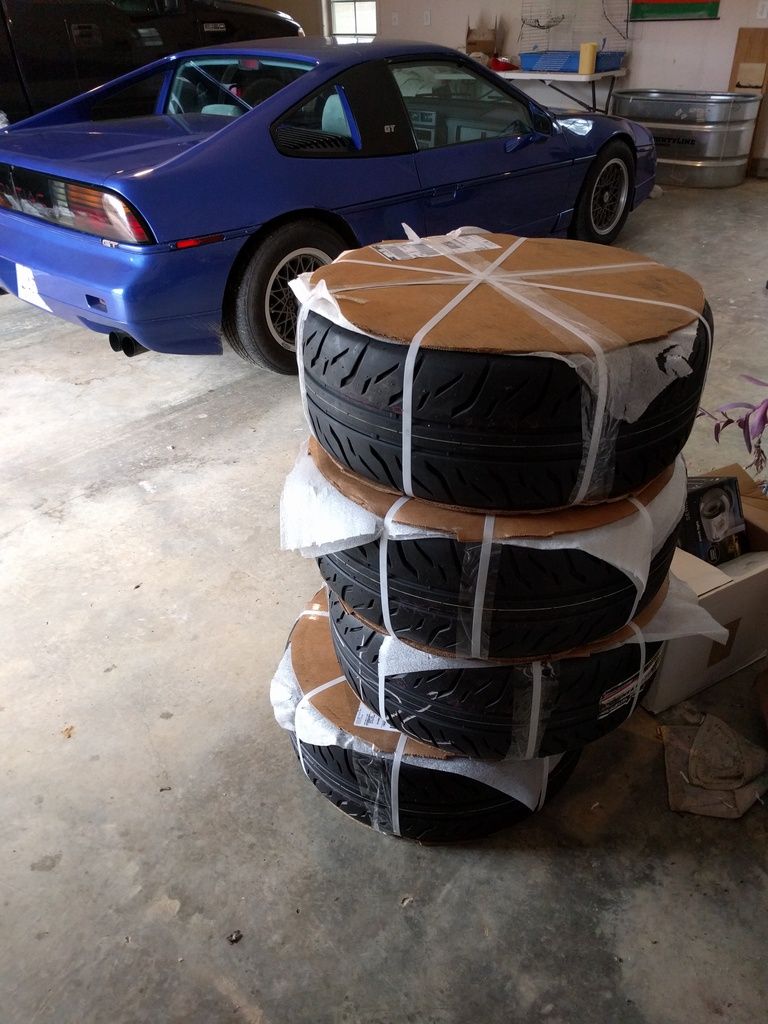
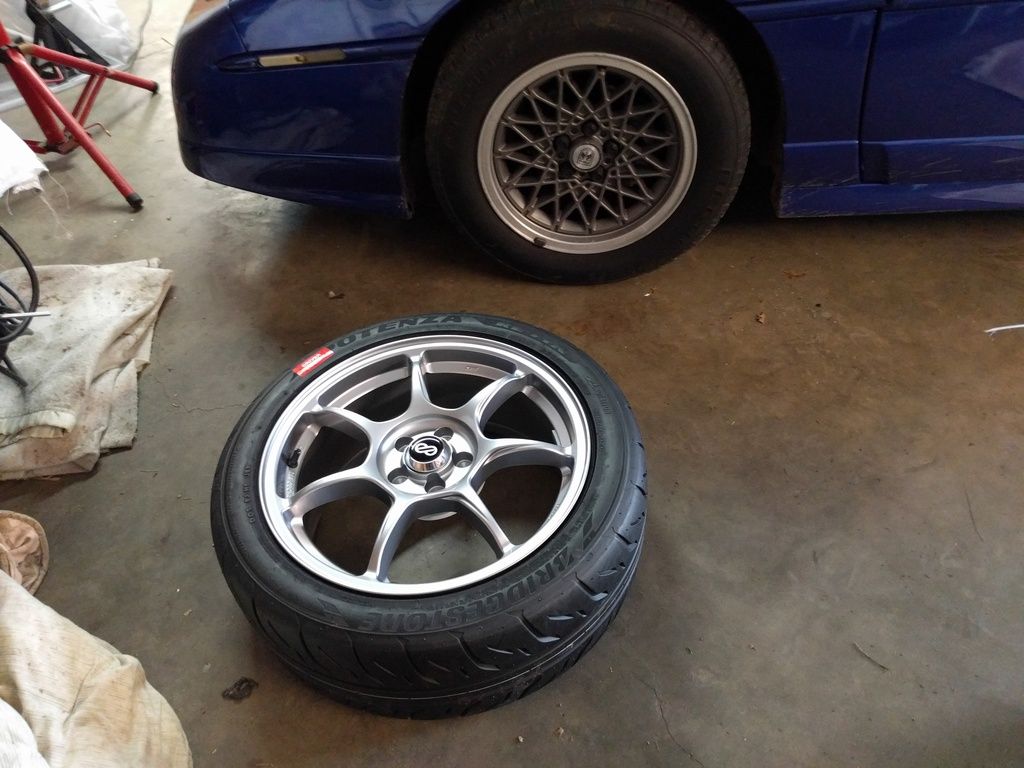
It gets the windows tinted next week, and that should do it for the exterior. I need to wait on the interior. The wheels and tires wiped out the budget I was planning on using the for the interior, but I don't regret it for a second. The car looks AWESOME, and the new tires should stick like glue.
Great job on what is now one of the best looking Fiero's on this Forum. I love the color, wheels, lights, and look forward to seeing the interior when its done. A lot of hard work on your part and it paid off big time!
Ugh..... Got an email this morning that the Jan 9th race is cancelled. Had I known that a week ago I would have held off on the wheels and tires! I don't regret the purchase as they look fantastic, but I would have liked to do the interior first and now don't have the funds to do do. I need to get guys to take me up on my till restoration service to fund the interior build!
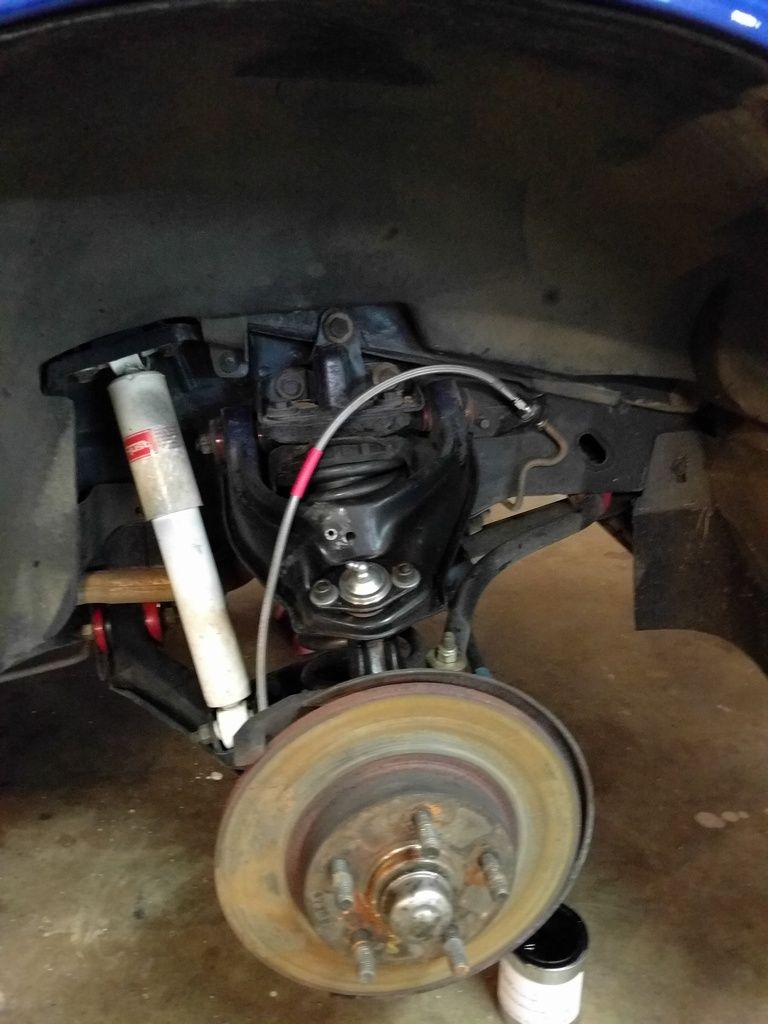
I haven't done much with the car lately as I've been working on other projects and have run out of build money for a while. I started with some work I have been putting off for a while. First up were the brakes. I'm installing stainless lines
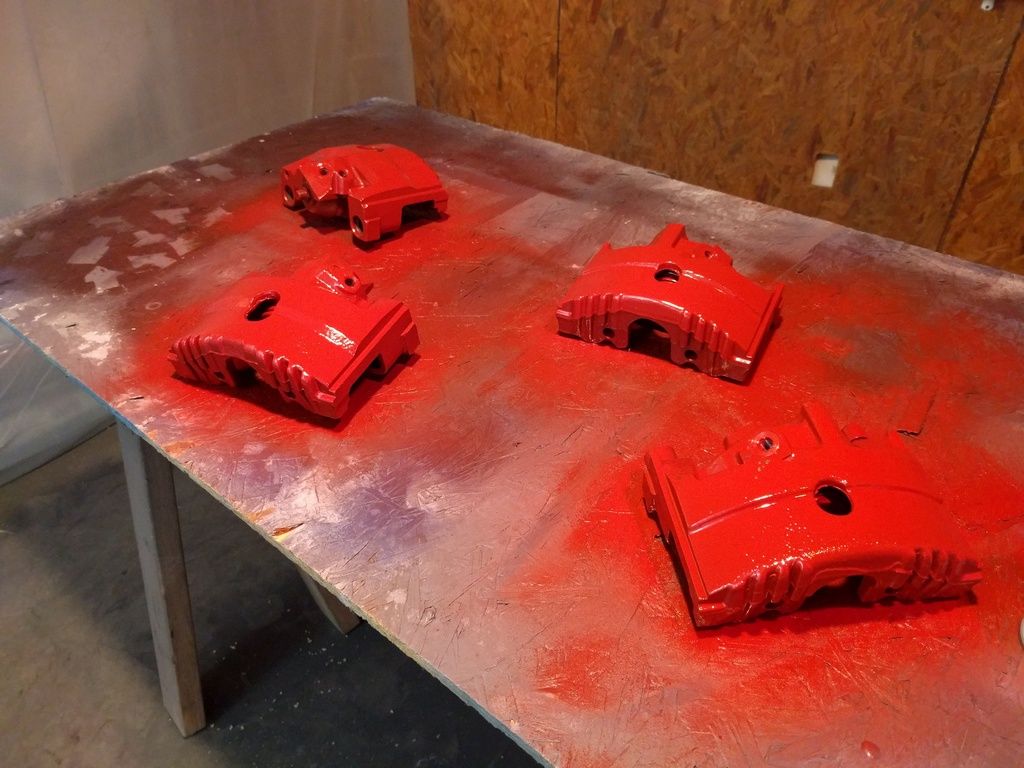
And I also took the calipers off and gave them a paint job. I may need to strip them and re do it. I didn't do as good of a job cleaning them as I thought, and the paint didn't stick to a few areas. I'll see how they look when they dry. If it's an area that won't be visible when the caliper is installed I'm not going to worry about it.
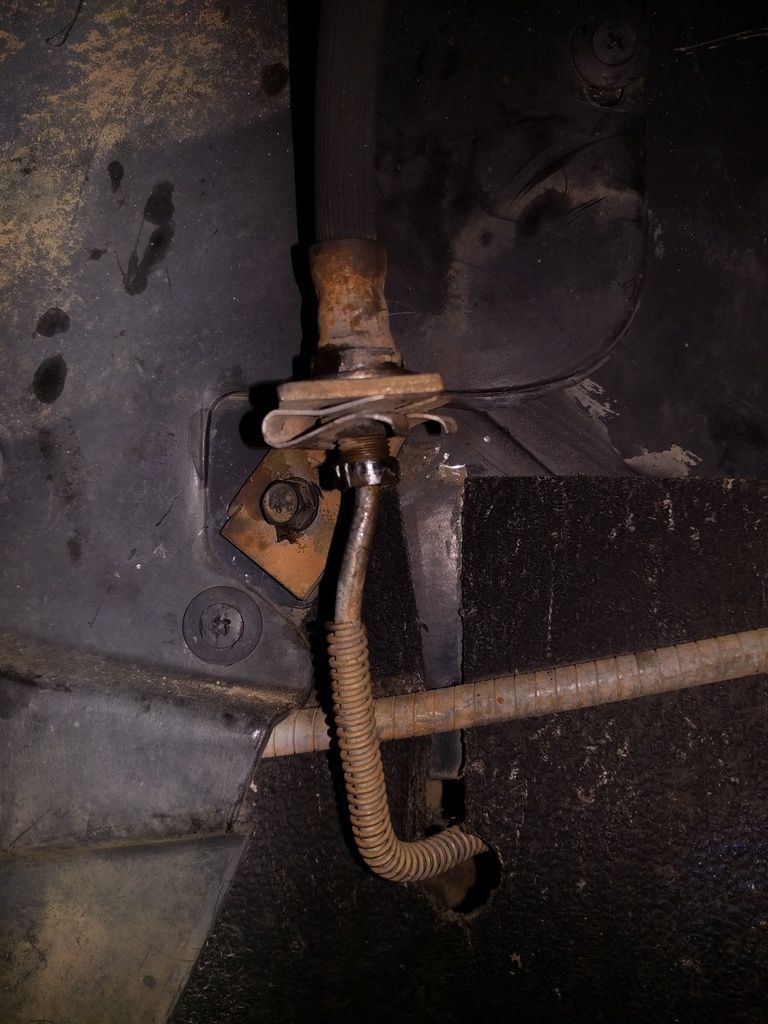
Not sure what it is, but something happened in the driver's side rear wheel well. EVERY threaded surface has been difficult to remove. It's not rust, but I destroyed a bleeder trying to get it out. Then I had a helluva time getting the screw out of the e-brake bracket, and finally I destroyed the nut that connects the brake line to the brake hose. It's STILL stuck on there. I think I'm going to have to replace the line unless someone has any better ideas?
I also got the windows tinted. Once I get everything put back together, I'll get some more pictures, as the exterior of the car will be complete and it will be the final appearance I am planning for the car, at least until I decide to modify the hood from my 88 to have scoops and put it on the blue car.
Not a lot of progress on the car lately due to other commitments, but this weekend I finally got some work done between other projects.
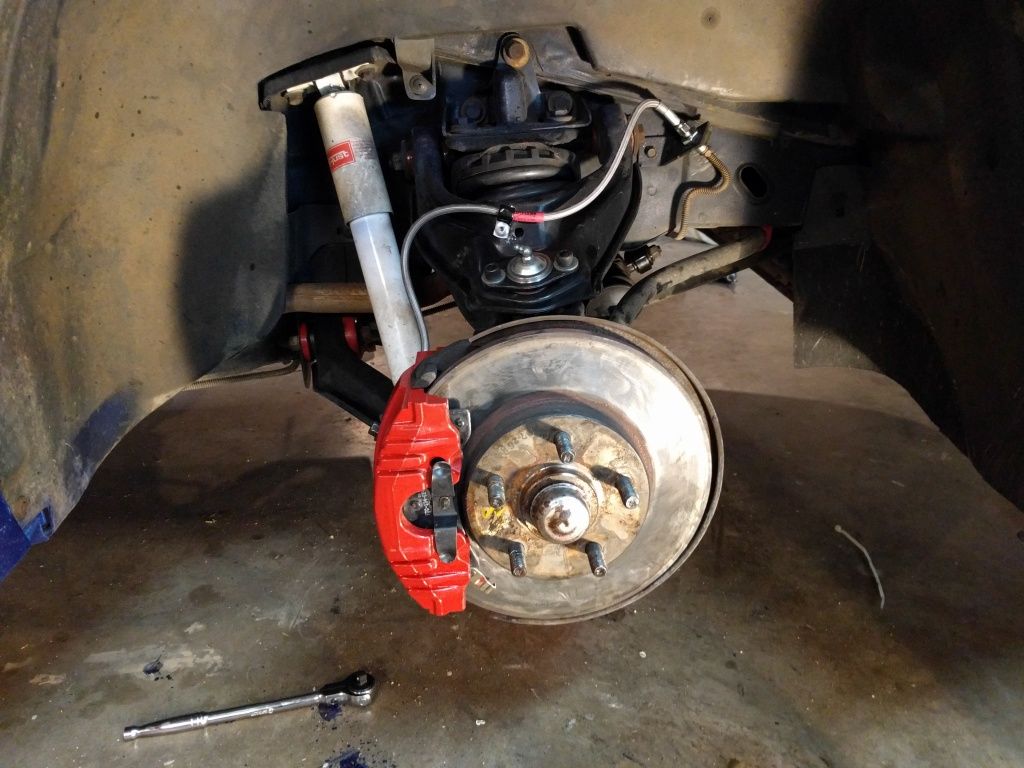
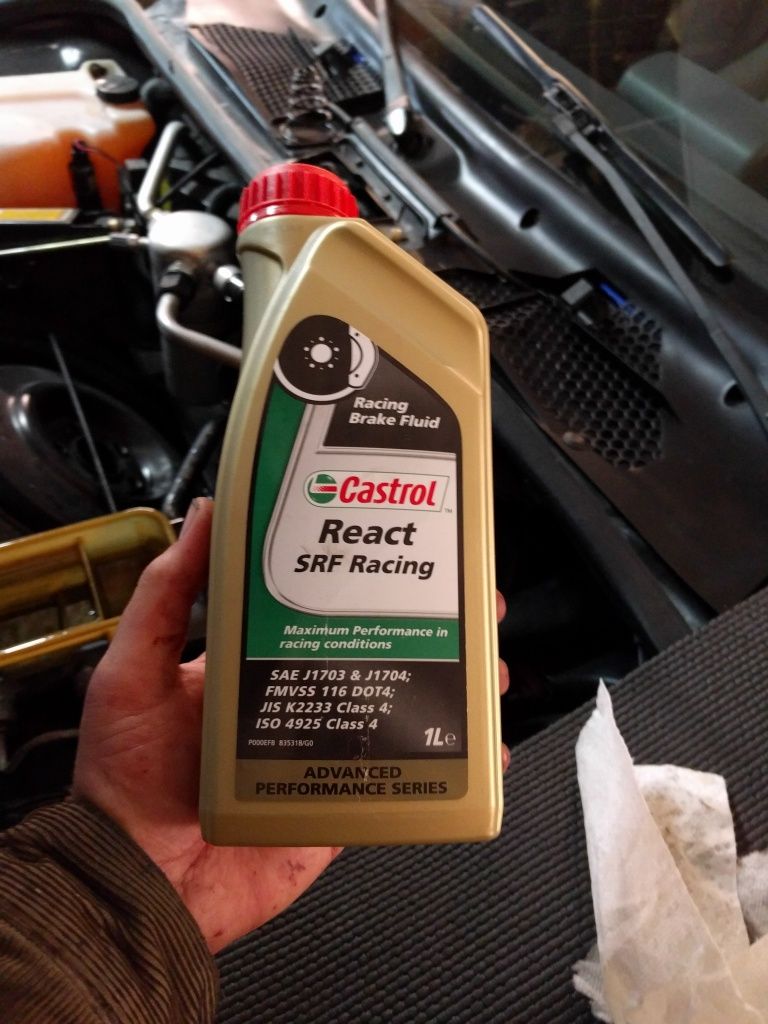
I finished fixing the brakes, and reassembled everything. I didn't get a picture of my fix, but it was just a splice job of a new piece of tube with a union, nothing exciting.
I did NOT play around when it came to the fluid I'm running. If you're unfamiliar-- look this stuff up.
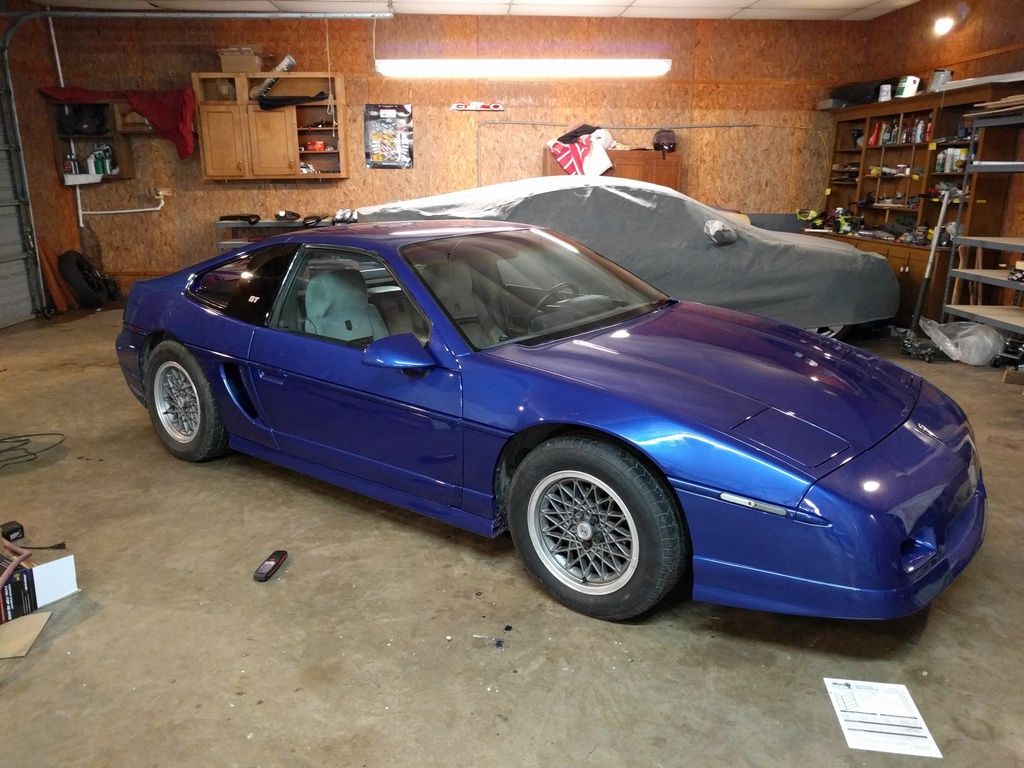
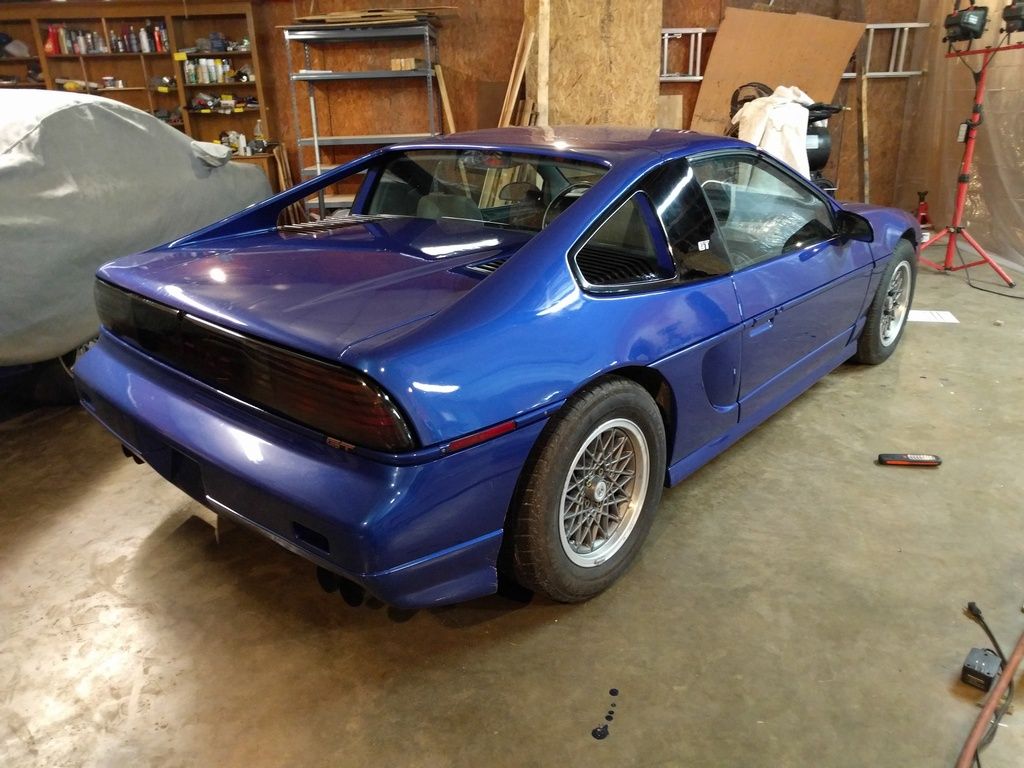
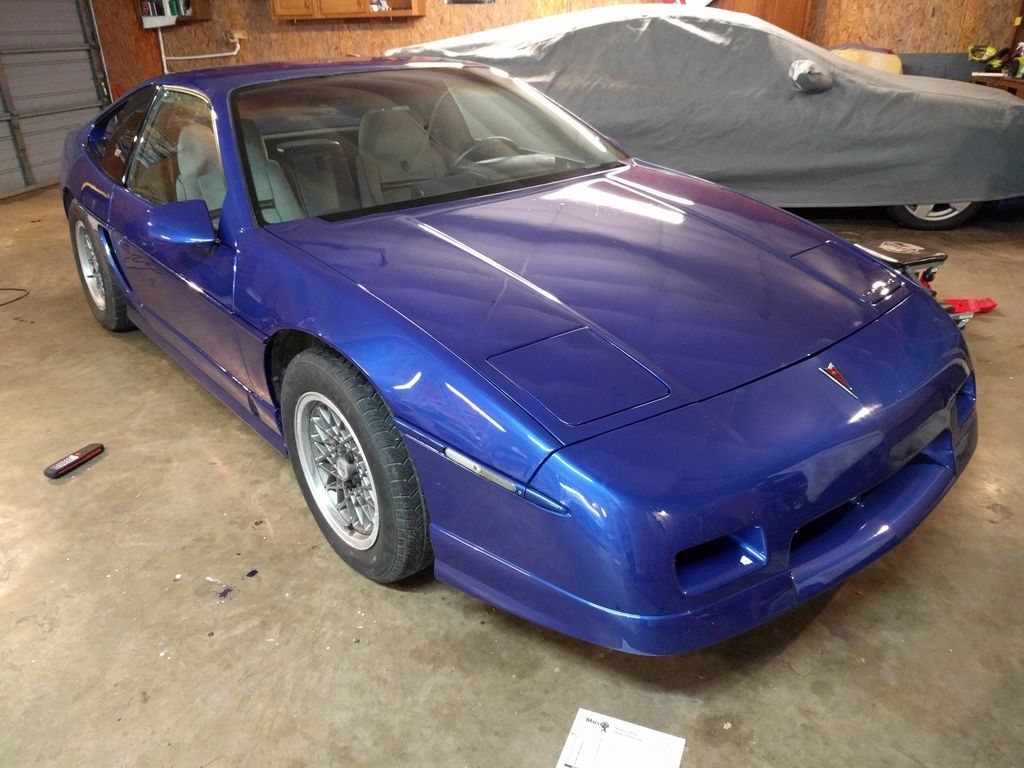
So with the brakes bled it was time to put the wheels on, wash everything up and take some pictures. I have been promising you guys pictures for a LONG time, and it's long past due that I deliver. Hold on to your butts.
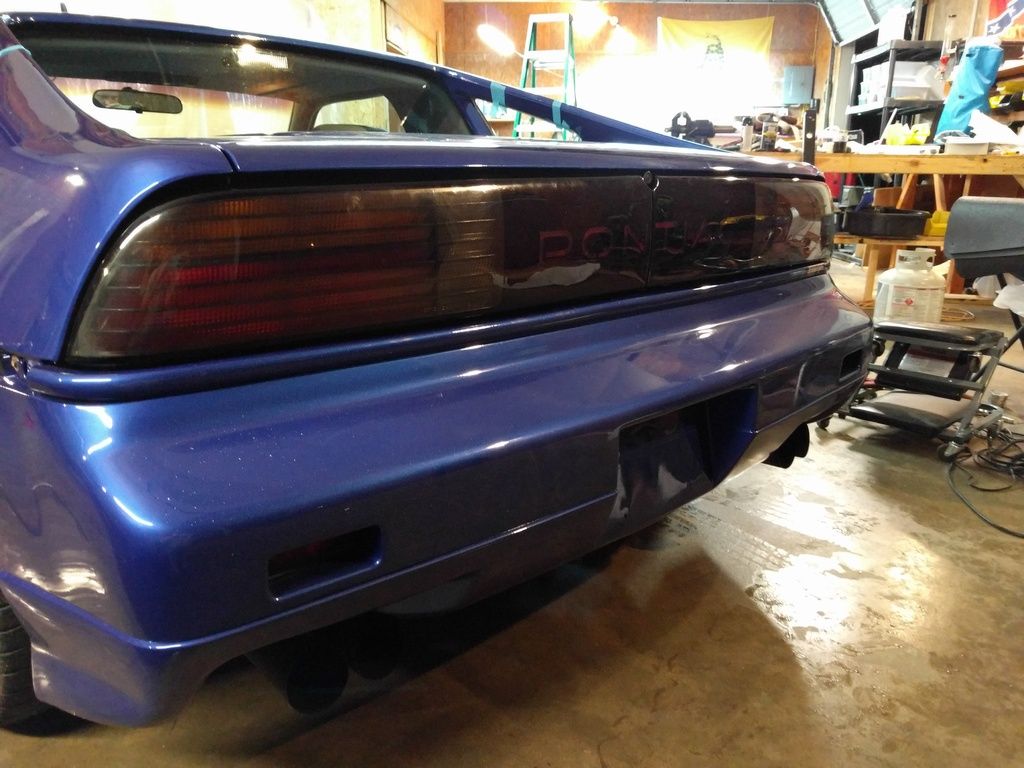
And I had to roll out my other blue Pontiac to take some twinsies pictures!